Noirlime4L (talk | contribs) No edit summary |
No edit summary |
||
| (13 intermediate revisions by 9 users not shown) | |||
| Line 9: | Line 9: | ||
|appearances = ''[[Grand Theft Auto V]]'' {{DLC|"I'm Not a Hipster" Update (Xbox 360 and PlayStation 3 only)}}<br>''[[Grand Theft Auto Online]]'' {{DLC|"I'm Not a Hipster" Update (Xbox 360 and PlayStation 3 only)}} |
|appearances = ''[[Grand Theft Auto V]]'' {{DLC|"I'm Not a Hipster" Update (Xbox 360 and PlayStation 3 only)}}<br>''[[Grand Theft Auto Online]]'' {{DLC|"I'm Not a Hipster" Update (Xbox 360 and PlayStation 3 only)}} |
||
|manufacturer = [[Vulcar]] |
|manufacturer = [[Vulcar]] |
||
| − | |price = $120,000 <small>([[Grand Theft Auto Online|GTA Online]]) ([[Southern San Andreas Super Autos]])</small> |
+ | |price = [[Money|$]]120,000 <small>([[Grand Theft Auto Online|GTA Online]]) ([[Southern San Andreas Super Autos]])</small> |
|related = [[Elegy RH8]]<br>[[Retinue]]<br>[[Savestra]] |
|related = [[Elegy RH8]]<br>[[Retinue]]<br>[[Savestra]] |
||
|makeyear = 1980s |
|makeyear = 1980s |
||
| − | | |
+ | |swankness = |
| + | |dashtype = Dukes <small>(needles)</small>[[File:Dukes-Dials-GTAV.png|thumb|center|170px]]Dominator <small>(dial texture)</small>[[File:Dominator-GTAV-DialSet.png|thumb|center|170px]] |
||
|inttxd = Monroe |
|inttxd = Monroe |
||
| ⚫ | |||
| ⚫ | |||
| ⚫ | |||
| ⚫ | |||
|carcols = |
|carcols = |
||
{{Expand|| |
{{Expand|| |
||
| ⚫ | |||
| − | <center>COLOR SET 1</center> |
||
| − | {{CarColV|0|0|0|156}} |
+ | {{CarColV|no=1|0|0|0|156}} |
| ⚫ | |||
| − | <center>COLOR SET 2</center> |
||
| − | {{CarColV| |
+ | {{CarColV|no=3|2|2|7|156}} |
| ⚫ | |||
| − | <center>COLOR SET 3</center> |
||
| − | {{CarColV| |
+ | {{CarColV|no=5|4|4|111|156}} |
| ⚫ | |||
| − | <center>COLOR SET 4</center> |
||
| − | {{CarColV| |
+ | {{CarColV|no=7|5|5|111|156}} |
| ⚫ | |||
| − | <center>COLOR SET 5</center> |
||
| − | {{CarColV| |
+ | {{CarColV|no=9|34|34|44|156}} |
| ⚫ | |||
| − | <center>COLOR SET 6</center> |
||
| − | {{CarColV| |
+ | {{CarColV|no=11|71|71|74|156}} |
| ⚫ | |||
| − | <center>COLOR SET 7</center> |
||
| − | {{CarColV|5|5|111|156}} |
+ | {{CarColV|no=13|5|5|111|156}} |
| + | {{CarColV|no=14|11|11|6|156}} |
||
| − | <center>COLOR SET 8</center> |
||
| − | {{CarColV| |
+ | {{CarColV|no=15|111|111|0|156}}<br> |
| − | <center>COLOR SET 9</center> |
||
| ⚫ | |||
| − | <center>COLOR SET 10</center> |
||
| ⚫ | |||
| − | <center>COLOR SET 11</center> |
||
| ⚫ | |||
| − | <center>COLOR SET 12</center> |
||
| ⚫ | |||
| − | <center>COLOR SET 13</center> |
||
| ⚫ | |||
| − | <center>COLOR SET 14</center> |
||
| ⚫ | |||
| − | <center>COLOR SET 15</center> |
||
| ⚫ | |||
}} |
}} |
||
|wheeltype = Tuner |
|wheeltype = Tuner |
||
| Line 59: | Line 42: | ||
|handlingname = WARRENER |
|handlingname = WARRENER |
||
|textlabelname = WARRENER |
|textlabelname = WARRENER |
||
| ⚫ | |||
| ⚫ | |||
| ⚫ | |||
| ⚫ | |||
| + | |roadspawnmaxcol = |
||
| + | |roadspawnfreq = |
||
| + | |roadspawntrailer = <!--null--> |
||
| + | |roadspawnidendis = |
||
| + | |roadspawndrivers = |
||
| + | |roadspawngroups = |
||
| + | |roadspawnlicense = |
||
|engineacceleration = |
|engineacceleration = |
||
|exhaustacceleration = |
|exhaustacceleration = |
||
| Line 67: | Line 61: | ||
}} |
}} |
||
{{Quote|The legendary Swedish four door sedan. All the boxy design of a 1980s Vulcar, with none of the reliability. For lovers of tight jeans, micro breweries, and 70s cop shows.|[[Southern San Andreas Super Autos]] description.}} |
{{Quote|The legendary Swedish four door sedan. All the boxy design of a 1980s Vulcar, with none of the reliability. For lovers of tight jeans, micro breweries, and 70s cop shows.|[[Southern San Andreas Super Autos]] description.}} |
||
| ⚫ | |||
| − | |||
| ⚫ | |||
==Design== |
==Design== |
||
===''Grand Theft Auto V''=== |
===''Grand Theft Auto V''=== |
||
| − | The Warrener is implied to have a Swedish origin, but it draws most of its traits from |
+ | The Warrener is implied to have a Swedish origin, but it draws most of its traits from Japanese vehicles. The Warrener is heavily based on the Japanese designs of the {{WP|Nissan Skyline|Nissan Skyline GTR KGC10}}, {{WP|Datsun 510}} (Bluebird), and the first year of the {{URL|http://1.bp.blogspot.com/_PNG6XwvaKQU/SnanKO_8x5I/AAAAAAAAAPo/MlLSji8-wfk/s1600-h/ke70_corolla_at_nikko_002.jpg|Toyota Corolla KE70}}. It also seems to draw some inspiration from the 1960's-70's {{WP|Saab 99}}. The car's front fascia is a heavy mix of those from the {{WP|Peugeot 504}} and Nissan Skyline C10. The chassis brings a mixed resemblance from the Datsun 510 and {{WP|Volvo 140 Series|Volvo 144}}. The sideview mirror placement has a resemblance of the {{WP|Toyota Century|Toyota Century's}}. |
| + | |||
| + | By default, the Warrener spawns in a single-tone color. However, via customization, its secondary color is represented as a wide stripe passing through the hood, roof, trunk and rear end. Its interior and dials are shared with that of muscle cars like the [[Dukes (car)|Dukes]]. |
||
{{Clr}} |
{{Clr}} |
||
| Line 96: | Line 91: | ||
===''Grand Theft Auto V''=== |
===''Grand Theft Auto V''=== |
||
The Warrener has high acceleration and a good top speed for the class. Its potent 6-cylinder engine has the second-highest torque in the class, just behind the [[Super Diamond]], but unfortunately this results in the car being prone to spinouts, requiring careful driving to maintain traction. Otherwise, the handling is responsive and quick due to the car's light weight and excellent braking. Still, addition of the spoiler mod is recommended to keep the car planted. Crash deformation is poor but the engine can take several direct hits before failing. |
The Warrener has high acceleration and a good top speed for the class. Its potent 6-cylinder engine has the second-highest torque in the class, just behind the [[Super Diamond]], but unfortunately this results in the car being prone to spinouts, requiring careful driving to maintain traction. Otherwise, the handling is responsive and quick due to the car's light weight and excellent braking. Still, addition of the spoiler mod is recommended to keep the car planted. Crash deformation is poor but the engine can take several direct hits before failing. |
||
| + | |||
| + | The vehicle is powered by a 6-cylinder engine in a front engine, rear wheel drive layout. True to what the badge suggests, a 5-speed gearbox is fitted, while the interior features an automatic transmission gear lever. It shares the engine sound with the [[Rat-Loader]] and the [[Rusty Rebel]], but with a cleaner tone. |
||
| + | |||
| + | With the "Intercooler" modifications installed, two turbochargers are fitted on a side of the engine. |
||
==== GTA V Overview ==== |
==== GTA V Overview ==== |
||
| Line 106: | Line 105: | ||
|website_acceleration = |
|website_acceleration = |
||
|website_top_speed = |
|website_top_speed = |
||
| − | |website_gears = |
+ | |website_gears = 5 <small>(Badging)</small> |
|website_engine = |
|website_engine = |
||
|website_drivetrain = |
|website_drivetrain = |
||
| Line 113: | Line 112: | ||
|observed_top_speed = 95 / 152 |
|observed_top_speed = 95 / 152 |
||
|observed_gears = 5 |
|observed_gears = 5 |
||
| − | |observed_engine = {{H:title|Front engine, rear wheel drive|FR}} {{H:title|Double Overhead Camshaft|DOHC}} |
+ | |observed_engine = {{H:title|Front engine, rear wheel drive|FR}} {{H:title|Double Overhead Camshaft|DOHC}} Inline-6 <small>(In-game model)</small> |
|observed_drivetrain = RWD |
|observed_drivetrain = RWD |
||
| − | |rsc_image = |
+ | |rsc_image = Warrener-GTAO-RSCStats.png |
| − | |rsc_top_speed = |
+ | |rsc_top_speed = {{PercentBar|75.11718|width=150}} |
| − | |rsc_acceleration = |
+ | |rsc_acceleration = {{PercentBar|61.25|width=150}} |
| − | |rsc_braking = |
+ | |rsc_braking = {{PercentBar|31.666666|width=150}} |
| − | |rsc_traction = |
+ | |rsc_traction = {{PercentBar|65.454552|width=150}} |
}} |
}} |
||
| Line 125: | Line 124: | ||
===''Grand Theft Auto V''=== |
===''Grand Theft Auto V''=== |
||
{| class="wikitable" |
{| class="wikitable" |
||
| + | ! colspan="2" scope="col" |Category |
||
| − | !Type |
||
| + | ! scope="col" |Modification |
||
| − | !Upgrade |
||
| − | !Cost ( |
+ | ! scope="col" |Cost (''GTA V'') |
| − | !Cost ([[Grand Theft Auto Online|Online]]) |
+ | ! scope="col" |Cost ([[Grand Theft Auto Online|''GTA Online'']]) |
| + | ! scope="col" |Image |
||
| + | |- |
||
| ⚫ | |||
| + | |No Armor |
||
| + | | style="text-align: center;" |$325 |
||
| + | | colspan="2" style="text-align: center;" |$1,000 |
||
|- |
|- |
||
| ⚫ | |||
|Armor Upgrade 20% |
|Armor Upgrade 20% |
||
| style="text-align: center;" |$1,625 |
| style="text-align: center;" |$1,625 |
||
| − | | style="text-align: center;" |$ |
+ | | colspan="2" style="text-align: center;" |$7,500 |
|- |
|- |
||
|Armor Upgrade 40% |
|Armor Upgrade 40% |
||
| style="text-align: center;" |$4,062 |
| style="text-align: center;" |$4,062 |
||
| − | | style="text-align: center;" |$ |
+ | | colspan="2" style="text-align: center;" |$12,000 |
|- |
|- |
||
|Armor Upgrade 60% |
|Armor Upgrade 60% |
||
| style="text-align: center;" |$6,500 |
| style="text-align: center;" |$6,500 |
||
| − | | style="text-align: center;" |$ |
+ | | colspan="2" style="text-align: center;" |$20,000 |
|- |
|- |
||
|Armor Upgrade 80% |
|Armor Upgrade 80% |
||
| style="text-align: center;" |$11,375 |
| style="text-align: center;" |$11,375 |
||
| − | | style="text-align: center;" |$ |
+ | | colspan="2" style="text-align: center;" |$35,000 |
|- |
|- |
||
|Armor Upgrade 100% |
|Armor Upgrade 100% |
||
| style="text-align: center;" |$16,250 |
| style="text-align: center;" |$16,250 |
||
| − | | style="text-align: center;" |$ |
+ | | colspan="2" style="text-align: center;" |$50,000 |
| + | |- |
||
| ⚫ | |||
| + | |Stock Brakes |
||
| + | | style="text-align: center;" |$325 |
||
| + | | colspan="2" style="text-align: center;" |$1,000 |
||
|- |
|- |
||
| ⚫ | |||
|Street Brakes |
|Street Brakes |
||
| style="text-align: center;" |$6,500 |
| style="text-align: center;" |$6,500 |
||
| − | | style="text-align: center;" |$ |
+ | | colspan="2" style="text-align: center;" |$20,000 |
|- |
|- |
||
|Sport Brakes |
|Sport Brakes |
||
| style="text-align: center;" |$8,775 |
| style="text-align: center;" |$8,775 |
||
| − | | style="text-align: center;" |$ |
+ | | colspan="2" style="text-align: center;" |$27,000 |
|- |
|- |
||
|Race Brakes |
|Race Brakes |
||
| style="text-align: center;" |$11,375 |
| style="text-align: center;" |$11,375 |
||
| − | | style="text-align: center;" |$ |
+ | | colspan="2" style="text-align: center;" |$35,000 |
| + | |- |
||
| ⚫ | |||
| + | |Stock Front Bumper |
||
| + | | style="text-align: center;" |$750 |
||
| + | | style="text-align: center;" |$2,200 |
||
| + | | |
||
|- |
|- |
||
| ⚫ | |||
|Custom Chin Spoiler |
|Custom Chin Spoiler |
||
| − | | style="text-align: center;" |$ |
+ | | style="text-align: center;" |$1,250 |
| style="text-align: center;" |$4,600 |
| style="text-align: center;" |$4,600 |
||
| + | | |
||
|- |
|- |
||
|Race Splitter & Oil Cooler |
|Race Splitter & Oil Cooler |
||
| − | | style="text-align: center;" |$ |
+ | | style="text-align: center;" |$1,650 |
| style="text-align: center;" |$7,400 |
| style="text-align: center;" |$7,400 |
||
| + | | |
||
|- |
|- |
||
|Grachan Splitter & Oil Cooler |
|Grachan Splitter & Oil Cooler |
||
| − | | style="text-align: center;" |$1, |
+ | | style="text-align: center;" |$1,950 |
| style="text-align: center;" |$11,700 |
| style="text-align: center;" |$11,700 |
||
| + | | |
||
| + | |- |
||
| + | |Stock Rear Bumper |
||
| + | | style="text-align: center;" |$750 |
||
| + | | style="text-align: center;" |$2,200 |
||
| + | | |
||
|- |
|- |
||
|Bumper Delete & Tow Hook |
|Bumper Delete & Tow Hook |
||
| style="text-align: center;" |$500 |
| style="text-align: center;" |$500 |
||
| style="text-align: center;" |$4,600 |
| style="text-align: center;" |$4,600 |
||
| + | | |
||
|- |
|- |
||
|Bumper Delete & Drift Charm |
|Bumper Delete & Drift Charm |
||
| style="text-align: center;" |$750 |
| style="text-align: center;" |$750 |
||
| style="text-align: center;" |$7,500 |
| style="text-align: center;" |$7,500 |
||
| + | | |
||
|- |
|- |
||
| − | |rowspan="4"|Engine |
+ | | colspan="2" rowspan="4" |Engine |
|EMS Upgrade, Level 1 |
|EMS Upgrade, Level 1 |
||
| style="text-align: center;" |$2,925 |
| style="text-align: center;" |$2,925 |
||
| − | | style="text-align: center;" |$ |
+ | | colspan="2" style="text-align: center;" |$9,000 |
|- |
|- |
||
|EMS Upgrade, Level 2 |
|EMS Upgrade, Level 2 |
||
| style="text-align: center;" |$4,062 |
| style="text-align: center;" |$4,062 |
||
| − | | style="text-align: center;" |$ |
+ | | colspan="2" style="text-align: center;" |$12,500 |
|- |
|- |
||
|EMS Upgrade, Level 3 |
|EMS Upgrade, Level 3 |
||
| style="text-align: center;" |$5,850 |
| style="text-align: center;" |$5,850 |
||
| − | | style="text-align: center;" |$ |
+ | | colspan="2" style="text-align: center;" |$18,000 |
|- |
|- |
||
|EMS Upgrade, Level 4 |
|EMS Upgrade, Level 4 |
||
| style="text-align: center;" |$10,887 |
| style="text-align: center;" |$10,887 |
||
| − | | style="text-align: center;" |$ |
+ | | colspan="2" style="text-align: center;" |$33,500 |
| + | |- |
||
| + | | colspan="2" rowspan="5" |Exhausts |
||
| + | |Stock Exhaust |
||
| + | | style="text-align: center;" |$130 |
||
| + | | style="text-align: center;" |$260 |
||
| + | | |
||
|- |
|- |
||
| ⚫ | |||
|Titanium Exhaust |
|Titanium Exhaust |
||
| style="text-align: center;" |$375 |
| style="text-align: center;" |$375 |
||
| style="text-align: center;" |$750 |
| style="text-align: center;" |$750 |
||
| + | | |
||
|- |
|- |
||
|Custom Shotgun Exhaust |
|Custom Shotgun Exhaust |
||
| style="text-align: center;" |$899 |
| style="text-align: center;" |$899 |
||
| style="text-align: center;" |$1,800 |
| style="text-align: center;" |$1,800 |
||
| + | | |
||
|- |
|- |
||
|Race Exhaust |
|Race Exhaust |
||
| style="text-align: center;" |$1,499 |
| style="text-align: center;" |$1,499 |
||
| style="text-align: center;" |$3,000 |
| style="text-align: center;" |$3,000 |
||
| + | | |
||
|- |
|- |
||
|Shakotan Exhaust |
|Shakotan Exhaust |
||
| style="text-align: center;" |$4,770 |
| style="text-align: center;" |$4,770 |
||
| style="text-align: center;" |$9,550 |
| style="text-align: center;" |$9,550 |
||
| + | | |
||
| + | |- |
||
| + | | colspan="2" rowspan="2" |[[Car Bomb|Explosives]] |
||
| + | |Ignition Bomb |
||
| + | | style="text-align: center;" |N/A |
||
| + | | colspan="2" style="text-align: center;" |$5,000 |
||
| + | |- |
||
| + | |Remote Bomb |
||
| + | | style="text-align: center;" |N/A |
||
| + | | colspan="2" style="text-align: center;" |$7,500 |
||
| + | |- |
||
| + | | colspan="2" rowspan="5" |Grilles |
||
| + | |Stock Grille |
||
| + | | style="text-align: center;" |$100 |
||
| + | | style="text-align: center;" |$200 |
||
| + | | |
||
|- |
|- |
||
| ⚫ | |||
|Remove Grille |
|Remove Grille |
||
| style="text-align: center;" |$375 |
| style="text-align: center;" |$375 |
||
| style="text-align: center;" |$750 |
| style="text-align: center;" |$750 |
||
| + | | |
||
|- |
|- |
||
|Chrome Trim Delete |
|Chrome Trim Delete |
||
| style="text-align: center;" |$670 |
| style="text-align: center;" |$670 |
||
| style="text-align: center;" |$1,340 |
| style="text-align: center;" |$1,340 |
||
| + | | |
||
|- |
|- |
||
|Exposed Intercooler |
|Exposed Intercooler |
||
| style="text-align: center;" |$825 |
| style="text-align: center;" |$825 |
||
| style="text-align: center;" |$1,650 |
| style="text-align: center;" |$1,650 |
||
| + | | |
||
|- |
|- |
||
|Trim Delete & Intercooler |
|Trim Delete & Intercooler |
||
| style="text-align: center;" |$1,500 |
| style="text-align: center;" |$1,500 |
||
| style="text-align: center;" |$3,000 |
| style="text-align: center;" |$3,000 |
||
| + | | |
||
| + | |- |
||
| ⚫ | |||
| + | |Stock Headlights |
||
| + | | style="text-align: center;" |$150 |
||
| + | | style="text-align: center;" |$300 |
||
| + | | |
||
|- |
|- |
||
| ⚫ | |||
|Headlight Cover |
|Headlight Cover |
||
| style="text-align: center;" |$450 |
| style="text-align: center;" |$450 |
||
| style="text-align: center;" |$900 |
| style="text-align: center;" |$900 |
||
| + | | |
||
|- |
|- |
||
|Taped Up Headlights |
|Taped Up Headlights |
||
| style="text-align: center;" |$750 |
| style="text-align: center;" |$750 |
||
| style="text-align: center;" |$1,500 |
| style="text-align: center;" |$1,500 |
||
| + | | |
||
| + | |- |
||
| + | | colspan="2" rowspan="3" |Hoods |
||
| + | |Stock Hood |
||
| + | | style="text-align: center;" |$450 |
||
| + | | style="text-align: center;" |$1,600 |
||
| + | | |
||
|- |
|- |
||
| ⚫ | |||
|Carbon Hood |
|Carbon Hood |
||
| − | | style="text-align: center;" |$ |
+ | | style="text-align: center;" |$850 |
| style="text-align: center;" |$3,000 |
| style="text-align: center;" |$3,000 |
||
| + | | |
||
|- |
|- |
||
|Grachan Hood |
|Grachan Hood |
||
| − | | style="text-align: center;" |$ |
+ | | style="text-align: center;" |$1,200 |
| style="text-align: center;" |$5,000 |
| style="text-align: center;" |$5,000 |
||
| + | | |
||
| + | |- |
||
| + | | colspan="2" |Horns |
||
| + | |''Main article: [[Los Santos Customs/Horns]]'' |
||
| + | | style="text-align: center;" | - |
||
| + | | colspan="2" style="text-align: center;" | - |
||
| + | |- |
||
| ⚫ | |||
| ⚫ | |||
| + | |Stock Lights |
||
| + | | style="text-align: center;" |$200 |
||
| + | | colspan="2" style="text-align: center;" |$600 |
||
|- |
|- |
||
| − | |rowspan="2"|Lights |
||
|Xenon Lights |
|Xenon Lights |
||
| − | | style="text-align: center;" |$ |
+ | | style="text-align: center;" |$1,000 |
| − | | style="text-align: center;" |$ |
+ | | colspan="2" style="text-align: center;" |$7,500 |
|- |
|- |
||
| + | |Neon Kits |
||
| − | |<div class="mw-collapsible mw-collapsed" style="width:100%"> |
||
| − | + | |''Main article: [[Los Santos Customs/Lights]]'' |
|
| style="text-align: center;" | - |
| style="text-align: center;" | - |
||
| − | | style="text-align: center;" | - |
+ | | colspan="2" style="text-align: center;" | - |
| − | |||
|- |
|- |
||
| − | |rowspan="2"|Loss/Theft Prevention |
+ | | colspan="2" rowspan="2" |Loss/Theft Prevention |
|Tracker |
|Tracker |
||
| style="text-align: center;" |N/A |
| style="text-align: center;" |N/A |
||
| − | | style="background-color:black;text-align: center;" |Too Hot |
+ | | colspan="2" style="background-color:black;text-align: center;" |Too Hot |
|- |
|- |
||
|Full Coverage |
|Full Coverage |
||
| style="text-align: center;" |N/A |
| style="text-align: center;" |N/A |
||
| − | | style="background-color:black;text-align: center;" |Too Hot |
+ | | colspan="2" style="background-color:black;text-align: center;" |Too Hot |
|- |
|- |
||
| ⚫ | |||
| − | |Respray |
||
| + | |Blue on White 1 |
||
| − | |<div class="mw-collapsible mw-collapsed" style="width:100%"> |
||
| + | | style="text-align: center;" |$50 |
||
| − | <div class="mw-collapsible-content">{{ResprayColorsExpand}}</div></div> |
||
| + | | colspan="2" style="text-align: center;" |$200 |
||
| + | |- |
||
| + | |Blue on White 2 |
||
| + | | style="text-align: center;" |$50 |
||
| + | | colspan="2" style="text-align: center;" |$200 |
||
| + | |- |
||
| + | |Blue on White 3 |
||
| + | | style="text-align: center;" |$50 |
||
| + | | colspan="2" style="text-align: center;" |$200 |
||
| + | |- |
||
| + | |Yellow on Blue |
||
| + | | style="text-align: center;" |$75 |
||
| + | | colspan="2" style="text-align: center;" |$300 |
||
| + | |- |
||
| + | |Yellow on Black |
||
| + | | style="text-align: center;" |$150 |
||
| + | | colspan="2" style="text-align: center;" |$600 |
||
| + | |- |
||
| + | | colspan="2" |Respray |
||
| + | |''Main article: [[Los Santos Customs/Respray Colors]]'' |
||
| style="text-align: center;" | - |
| style="text-align: center;" | - |
||
| − | | style="text-align: center;" | - |
+ | | colspan="2" style="text-align: center;" | - |
| + | |- |
||
| − | |||
| + | | colspan="2" rowspan="2" |Roll Cages |
||
| ⚫ | |||
| + | | style="text-align: center;" |$350 |
||
| + | | style="text-align: center;" |$700 |
||
| + | | |
||
|- |
|- |
||
| ⚫ | |||
|Roll Cage and Chassis Upgrade |
|Roll Cage and Chassis Upgrade |
||
| style="text-align: center;" |$550 |
| style="text-align: center;" |$550 |
||
| style="text-align: center;" |$1,100 |
| style="text-align: center;" |$1,100 |
||
| + | | |
||
|- |
|- |
||
| − | |Sell |
+ | | colspan="2" |Sell |
|Sell Vehicle |
|Sell Vehicle |
||
| style="text-align: center;" |N/A |
| style="text-align: center;" |N/A |
||
| − | | style="background-color:black;text-align: center;" |Too Hot |
+ | | colspan="2" style="background-color:black;text-align: center;" |Too Hot |
| + | |- |
||
| ⚫ | |||
| + | |Stock Skirts |
||
| + | | style="text-align: center;" |$1,250 |
||
| + | | style="text-align: center;" |$2,500 |
||
| + | | |
||
|- |
|- |
||
| ⚫ | |||
|Custom Arch Extensions |
|Custom Arch Extensions |
||
| style="text-align: center;" |$1,500 |
| style="text-align: center;" |$1,500 |
||
| style="text-align: center;" |$5,500 |
| style="text-align: center;" |$5,500 |
||
| + | | |
||
|- |
|- |
||
|Carbon Arch Extensions |
|Carbon Arch Extensions |
||
| style="text-align: center;" |$2,000 |
| style="text-align: center;" |$2,000 |
||
| style="text-align: center;" |$8,000 |
| style="text-align: center;" |$8,000 |
||
| + | | |
||
| + | |- |
||
| + | | colspan="2" rowspan="5" |Spoilers |
||
| + | |None |
||
| + | | style="text-align: center;" |$500 |
||
| + | | style="text-align: center;" |$6,000 |
||
| + | | |
||
|- |
|- |
||
| ⚫ | |||
|Lip Spoiler |
|Lip Spoiler |
||
| style="text-align: center;" |$750 |
| style="text-align: center;" |$750 |
||
| style="text-align: center;" |$7,050 |
| style="text-align: center;" |$7,050 |
||
| + | | |
||
|- |
|- |
||
|Ducktail Spoiler |
|Ducktail Spoiler |
||
| style="text-align: center;" |$950 |
| style="text-align: center;" |$950 |
||
| style="text-align: center;" |$10,000 |
| style="text-align: center;" |$10,000 |
||
| + | | |
||
|- |
|- |
||
|High Level Spoiler |
|High Level Spoiler |
||
| style="text-align: center;" |$1,300 |
| style="text-align: center;" |$1,300 |
||
| style="text-align: center;" |$13,000 |
| style="text-align: center;" |$13,000 |
||
| + | | |
||
|- |
|- |
||
|Stock Car Wing |
|Stock Car Wing |
||
| style="text-align: center;" |$1,750 |
| style="text-align: center;" |$1,750 |
||
| style="text-align: center;" |$14,000 |
| style="text-align: center;" |$14,000 |
||
| + | | |
||
| + | |- |
||
| ⚫ | |||
| + | |Stock Suspension |
||
| + | | style="text-align: center;" |$100 |
||
| + | | colspan="2" style="text-align: center;" |$200 |
||
|- |
|- |
||
| ⚫ | |||
|Lowered Suspension |
|Lowered Suspension |
||
| style="text-align: center;" |$500 |
| style="text-align: center;" |$500 |
||
| − | | style="text-align: center;" |$ |
+ | | colspan="2" style="text-align: center;" |$1,000 |
|- |
|- |
||
|Street Suspension |
|Street Suspension |
||
| style="text-align: center;" |$1,000 |
| style="text-align: center;" |$1,000 |
||
| − | | style="text-align: center;" |$ |
+ | | colspan="2" style="text-align: center;" |$2,000 |
|- |
|- |
||
|Sport Suspension |
|Sport Suspension |
||
| style="text-align: center;" |$1,700 |
| style="text-align: center;" |$1,700 |
||
| − | | style="text-align: center;" |$ |
+ | | colspan="2" style="text-align: center;" |$3,400 |
|- |
|- |
||
|Competition Suspension |
|Competition Suspension |
||
| style="text-align: center;" |$2,200 |
| style="text-align: center;" |$2,200 |
||
| − | | style="text-align: center;" |$ |
+ | | colspan="2" style="text-align: center;" |$4,400 |
| + | |- |
||
| ⚫ | |||
| + | |Stock Transmission |
||
| + | | style="text-align: center;" |$325 |
||
| + | | colspan="2" style="text-align: center;" |$1,000 |
||
|- |
|- |
||
| ⚫ | |||
|Street Transmission |
|Street Transmission |
||
| style="text-align: center;" |$9,587 |
| style="text-align: center;" |$9,587 |
||
| − | | style="text-align: center;" |$ |
+ | | colspan="2" style="text-align: center;" |$29,500 |
|- |
|- |
||
|Sports Transmission |
|Sports Transmission |
||
| style="text-align: center;" |$10,562 |
| style="text-align: center;" |$10,562 |
||
| − | | style="text-align: center;" |$ |
+ | | colspan="2" style="text-align: center;" |$32,500 |
|- |
|- |
||
|Race Transmission |
|Race Transmission |
||
| style="text-align: center;" |$13,000 |
| style="text-align: center;" |$13,000 |
||
| − | | style="text-align: center;" |$ |
+ | | colspan="2" style="text-align: center;" |$40,000 |
| + | |- |
||
| ⚫ | |||
| + | |None |
||
| + | | style="text-align: center;" |$1,625 |
||
| + | | colspan="2" style="text-align: center;" |$5,000 |
||
|- |
|- |
||
| − | |Turbo |
||
|Turbo Tuning |
|Turbo Tuning |
||
| style="text-align: center;" |$8,125 |
| style="text-align: center;" |$8,125 |
||
| − | | style="text-align: center;" |$ |
+ | | colspan="2" style="text-align: center;" |$50,000 |
|- |
|- |
||
| − | |Wheels |
+ | | colspan="2" |Wheels |
| + | |''Main article: [[Los Santos Customs/Wheels]]'' |
||
| − | |<div class="mw-collapsible mw-collapsed" style="width:100%"> |
||
| − | <div class="mw-collapsible-content">{{WheelsExpand}}</div></div> |
||
| style="text-align: center;" | - |
| style="text-align: center;" | - |
||
| − | | style="text-align: center;" | - |
+ | | colspan="2" style="text-align: center;" | - |
| + | |- |
||
| − | |||
| ⚫ | |||
| + | |None |
||
| + | | style="text-align: center;" |$100 |
||
| + | | colspan="2" style="text-align: center;" |$500 |
||
|- |
|- |
||
| ⚫ | |||
|Light Smoke |
|Light Smoke |
||
| style="text-align: center;" |$200 |
| style="text-align: center;" |$200 |
||
| − | | style="text-align: center;" |$ |
+ | | colspan="2" style="text-align: center;" |$1,500 |
|- |
|- |
||
|Dark Smoke |
|Dark Smoke |
||
| style="text-align: center;" |$450 |
| style="text-align: center;" |$450 |
||
| − | | style="text-align: center;" |$ |
+ | | colspan="2" style="text-align: center;" |$3,500 |
|- |
|- |
||
|Limo |
|Limo |
||
| style="text-align: center;" |$700 |
| style="text-align: center;" |$700 |
||
| − | | style="text-align: center;" |$ |
+ | | colspan="2" style="text-align: center;" |$5,000 |
|} |
|} |
||
==Image Gallery== |
==Image Gallery== |
||
| − | <gallery position="center"> |
+ | <gallery position="center" spacing="small" hideaddbutton="true"> |
| − | VulcarWarrener-Front-GTAV.png|Warrener on |
+ | VulcarWarrener-Front-GTAV.png|The '''Warrener''' on the original version of ''GTA V''. <small>([[:Image:VulcarWarrener-Rear-GTAV.png|Rear quarter view]])</small> |
| + | Vulcar Warrener Twinturbo Engine GTAV.jpg|The twin turbochargers fitted on the Warrener with the "Intercooler" modifications. |
||
Warrener-GTAV-SSASA.png|The '''Warrener''' on [[Southern San Andreas Super Autos]]. |
Warrener-GTAV-SSASA.png|The '''Warrener''' on [[Southern San Andreas Super Autos]]. |
||
Warrener-GTAV-RSC.jpg|The '''Warrener''' on [[Rockstar Games Social Club]]. |
Warrener-GTAV-RSC.jpg|The '''Warrener''' on [[Rockstar Games Social Club]]. |
||
| + | Warrener-GTAO-RGSC2.jpg|The '''Warrener''' on the updated [[Rockstar Games Social Club]]. |
||
| + | Warrener-GTAO-RGSC3.jpg|The '''Warrener''' in the cinematic preview on [[Rockstar Games Social Club]]. |
||
</gallery> |
</gallery> |
||
| Line 384: | Line 515: | ||
;Original verison |
;Original verison |
||
*Available in every protagonist's garage in single player. |
*Available in every protagonist's garage in single player. |
||
| + | |||
;Enhanced version |
;Enhanced version |
||
*Can be found in traffic. |
*Can be found in traffic. |
||
| Line 393: | Line 525: | ||
==Trivia== |
==Trivia== |
||
===''Grand Theft Auto V''=== |
===''Grand Theft Auto V''=== |
||
| − | *When turbo is installed in the Warrener, rather than featuring a blow-off valve that creates a distinct "hiss" sound when letting off the accelerator, it will feature compressor surges, creating a fluttering "whistle" sound. Several other classics and tuners in the game also have this feature. |
+ | *When the turbo upgrade is installed in the Warrener, rather than featuring a blow-off valve that creates a distinct "hiss" sound when letting off the accelerator, it will feature compressor surges, creating a fluttering "whistle" sound. Several other classics and tuners in the game also have this feature. |
| − | *Police chatter identifies the car as an [[Annis]] vehicle, when in fact it is manufactured by [[Vulcar]]. This is likely a developer's mistake, although Annis is notably based on |
+ | *Police chatter identifies the car as an [[Annis]] vehicle, when in fact it is manufactured by [[Vulcar]]. This is likely a developer's mistake, although Annis is notably based on {{WP|Nissan}}, who manufactures the {{WP|Nissan Skyline|1970 Nissan 2400GT}} on which the Warrener is based. This is possibly a reference to Nissan's sale of the 210 in the [[United States of America|United States]] under the pseudonym of "Datsun" during the [[1970]]s. |
*Its wheels resemble the famous RS Watanabe eight-spoke wheels, which is again, popular in import culture. The same wheels can be found on the [[Futo]], an AE86-inspired coupe and the [[Youga]]. |
*Its wheels resemble the famous RS Watanabe eight-spoke wheels, which is again, popular in import culture. The same wheels can be found on the [[Futo]], an AE86-inspired coupe and the [[Youga]]. |
||
| − | *The Warrener is also the first vehicle in Grand Theft Auto V to have taped headlights modifications. This modification was popular in the late 1960s and 1970s Japanese race cars, gymkhana and rally cars. |
+ | *The Warrener is also the first vehicle in ''Grand Theft Auto V'' to have taped headlights modifications. This modification was popular in the late 1960s and 1970s Japanese race cars, gymkhana and rally cars. |
| − | **Furthermore, some other modifications that can be applied to this car (such as the Shakotan exhaust and Grachan hood) appear to be inspired by the ''Shakotan |
+ | **Furthermore, some other modifications that can be applied to this car (such as the Shakotan exhaust and Grachan hood) appear to be inspired by the ''Shakotan'' car scene, a car style originating in Japan. |
| − | *The interior features an automatic transmission gear lever. |
||
*The Warrener, like several other vehicles, does not contain reverse lights. |
*The Warrener, like several other vehicles, does not contain reverse lights. |
||
*When installing a Lip or Ducktail spoiler, the "Warrener" badge will become partially covered. |
*When installing a Lip or Ducktail spoiler, the "Warrener" badge will become partially covered. |
||
| ⚫ | |||
| − | *This vehicle shares the engine sound with the [[Rat-Loader]] and the beater [[Rebel]], but with a cleaner tone. |
||
| ⚫ | * |
||
*Strangely, 5 inlet pipes can be seen within the inlet manifold, but 6 exhaust pipes within the exhaust manifold, which is an unbalanced amount of pipes. |
*Strangely, 5 inlet pipes can be seen within the inlet manifold, but 6 exhaust pipes within the exhaust manifold, which is an unbalanced amount of pipes. |
||
*The crew emblem fitted to the Warrener is significantly larger than other vehicles' emblems. |
*The crew emblem fitted to the Warrener is significantly larger than other vehicles' emblems. |
||
*The Warrener has fender-mounted mirrors, which were mandatory in Japan until 1983. Even European and American cars sold in Japan had to have those mirrors. |
*The Warrener has fender-mounted mirrors, which were mandatory in Japan until 1983. Even European and American cars sold in Japan had to have those mirrors. |
||
| − | *The front license plate |
+ | *The front license plate appears to be tilted to one side when viewed head-on. |
| + | *The default radio stations for the Warrener are [[The Lowdown 91.1]] and [[Space 103.2]]. |
||
==Navigation== |
==Navigation== |
||
| Line 414: | Line 545: | ||
{{vehicles|state=collapsed}} |
{{vehicles|state=collapsed}} |
||
{{gtav vehicles|state=collapsed}} |
{{gtav vehicles|state=collapsed}} |
||
| ⚫ | |||
| − | }} |
||
| ⚫ | |||
[[es:Warrener]] |
[[es:Warrener]] |
||
[[pl:Warrener]] |
[[pl:Warrener]] |
||
Revision as of 23:10, 1 April 2020
Template:Infobox vehicles
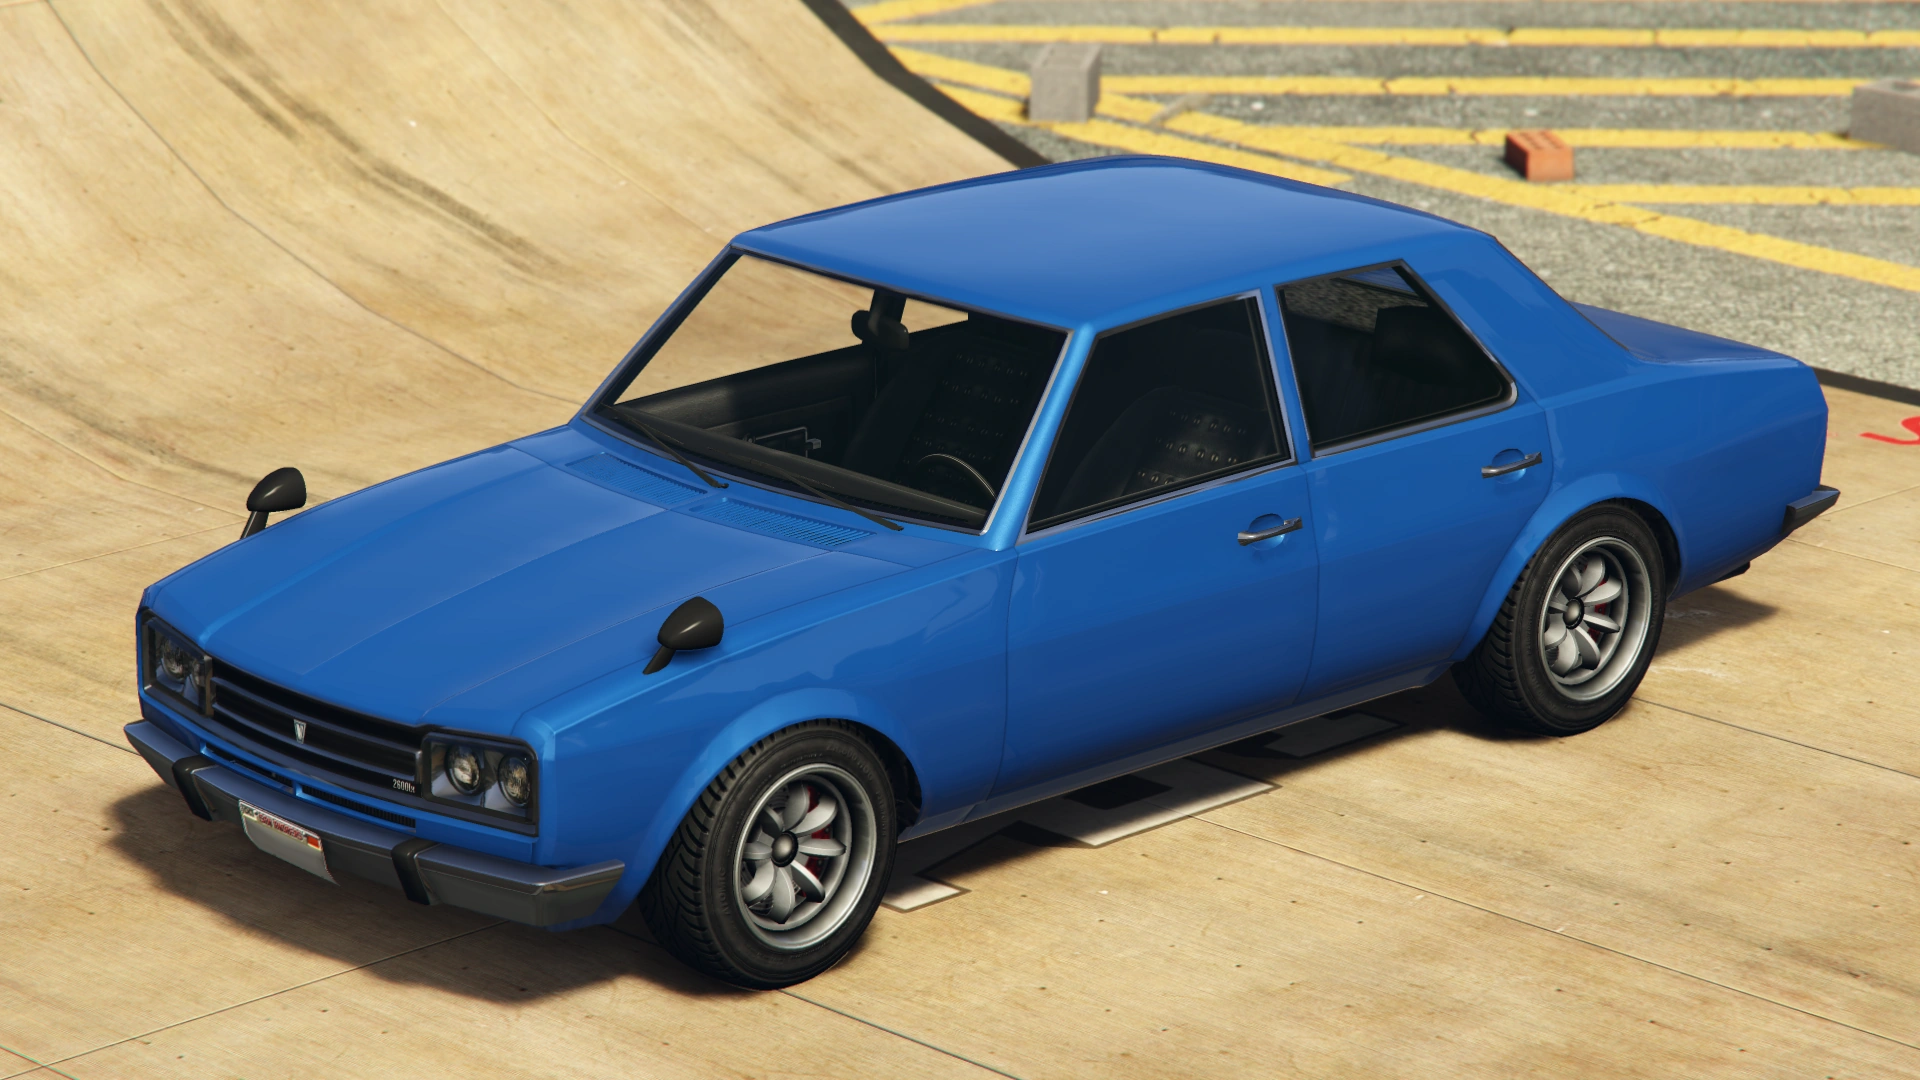
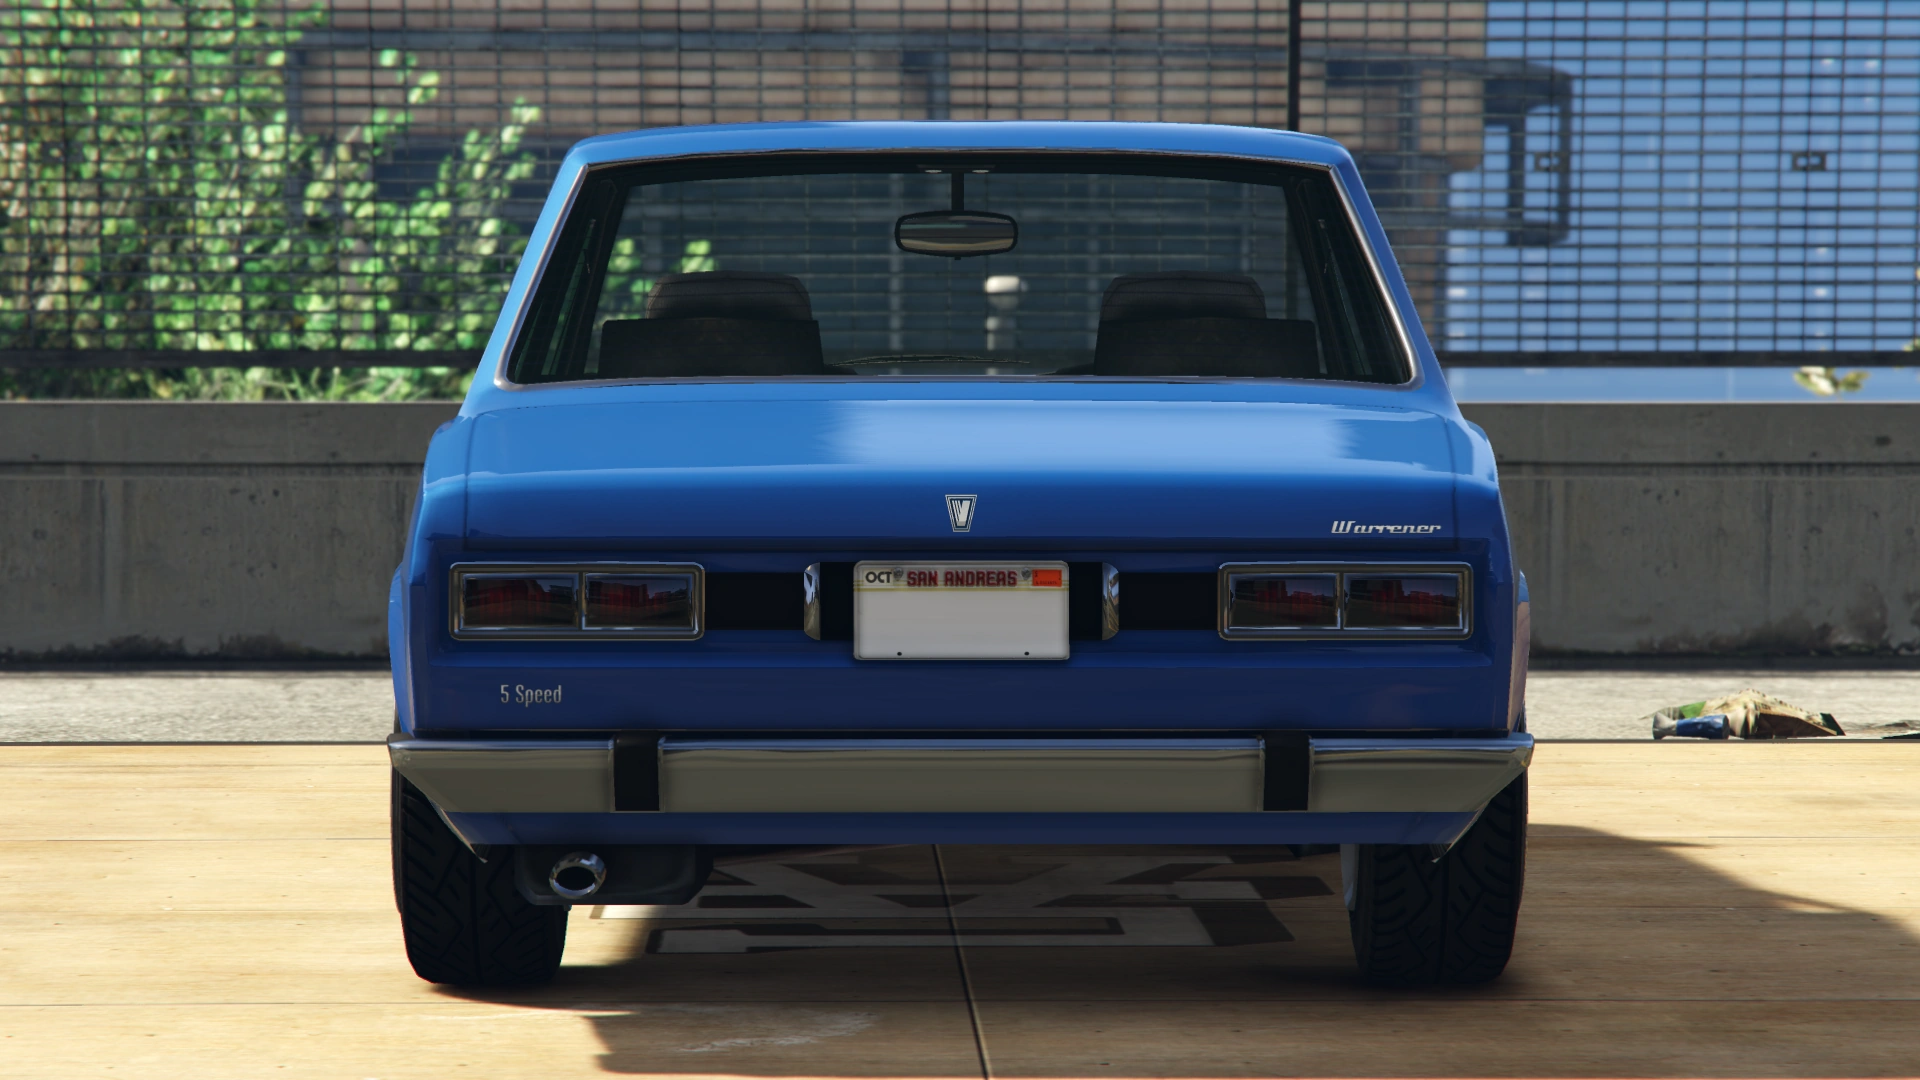
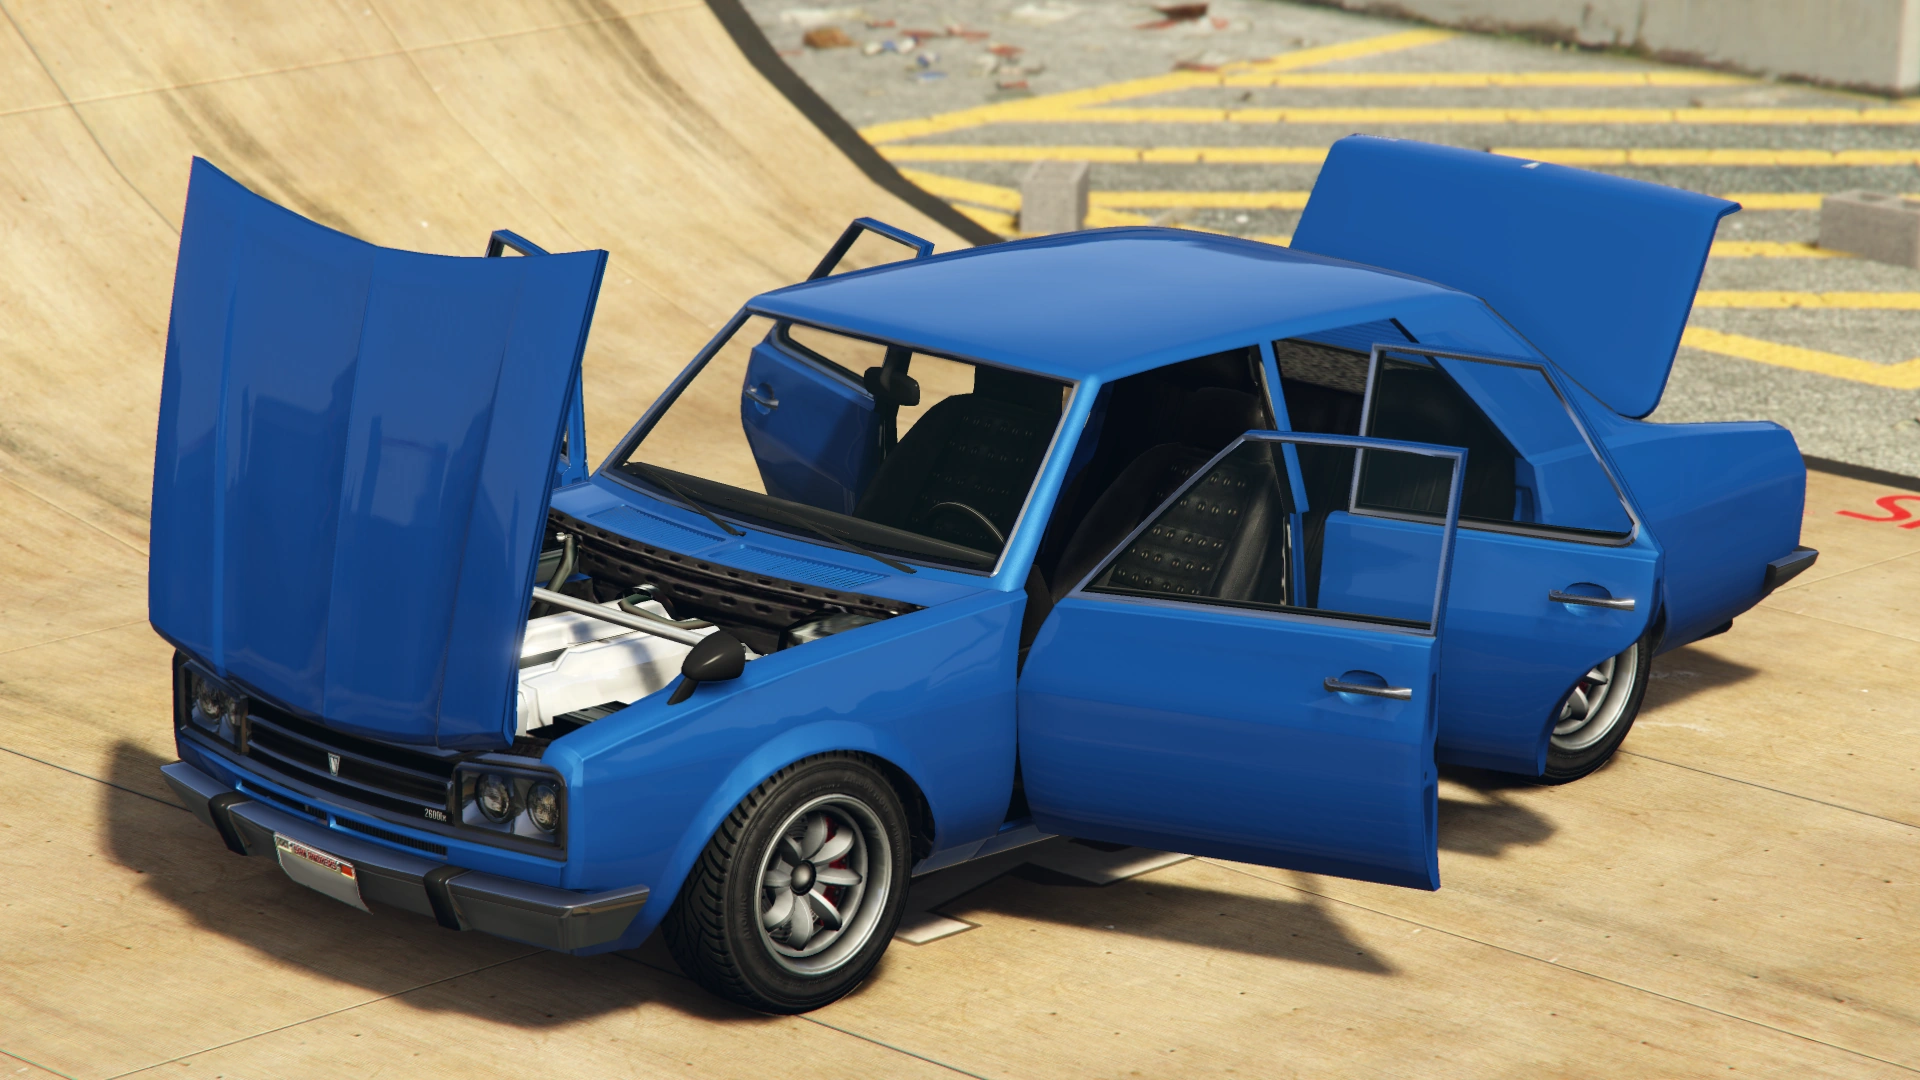
The Vulcar Warrener is a vintage four-door sedan featured in Grand Theft Auto V and Grand Theft Auto Online as part of the "I'm Not a Hipster" Update.
Design
Grand Theft Auto V
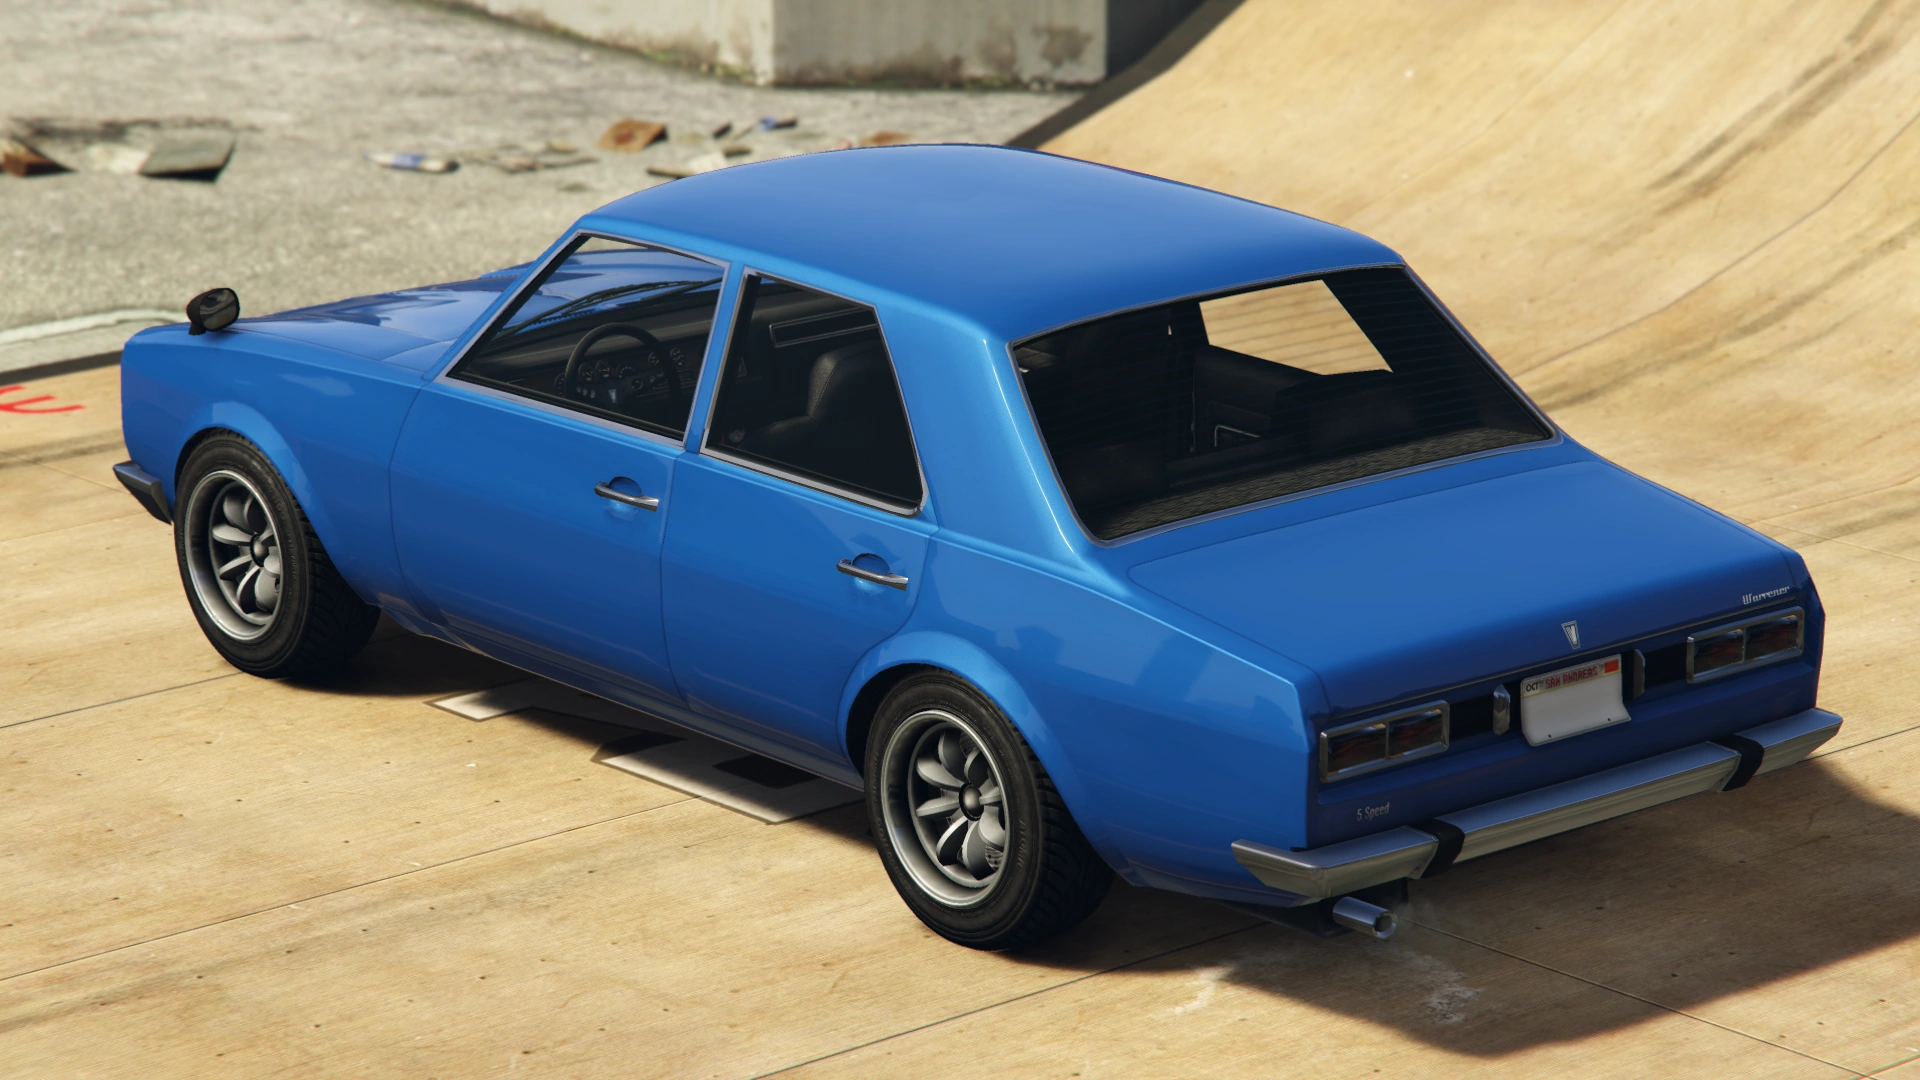
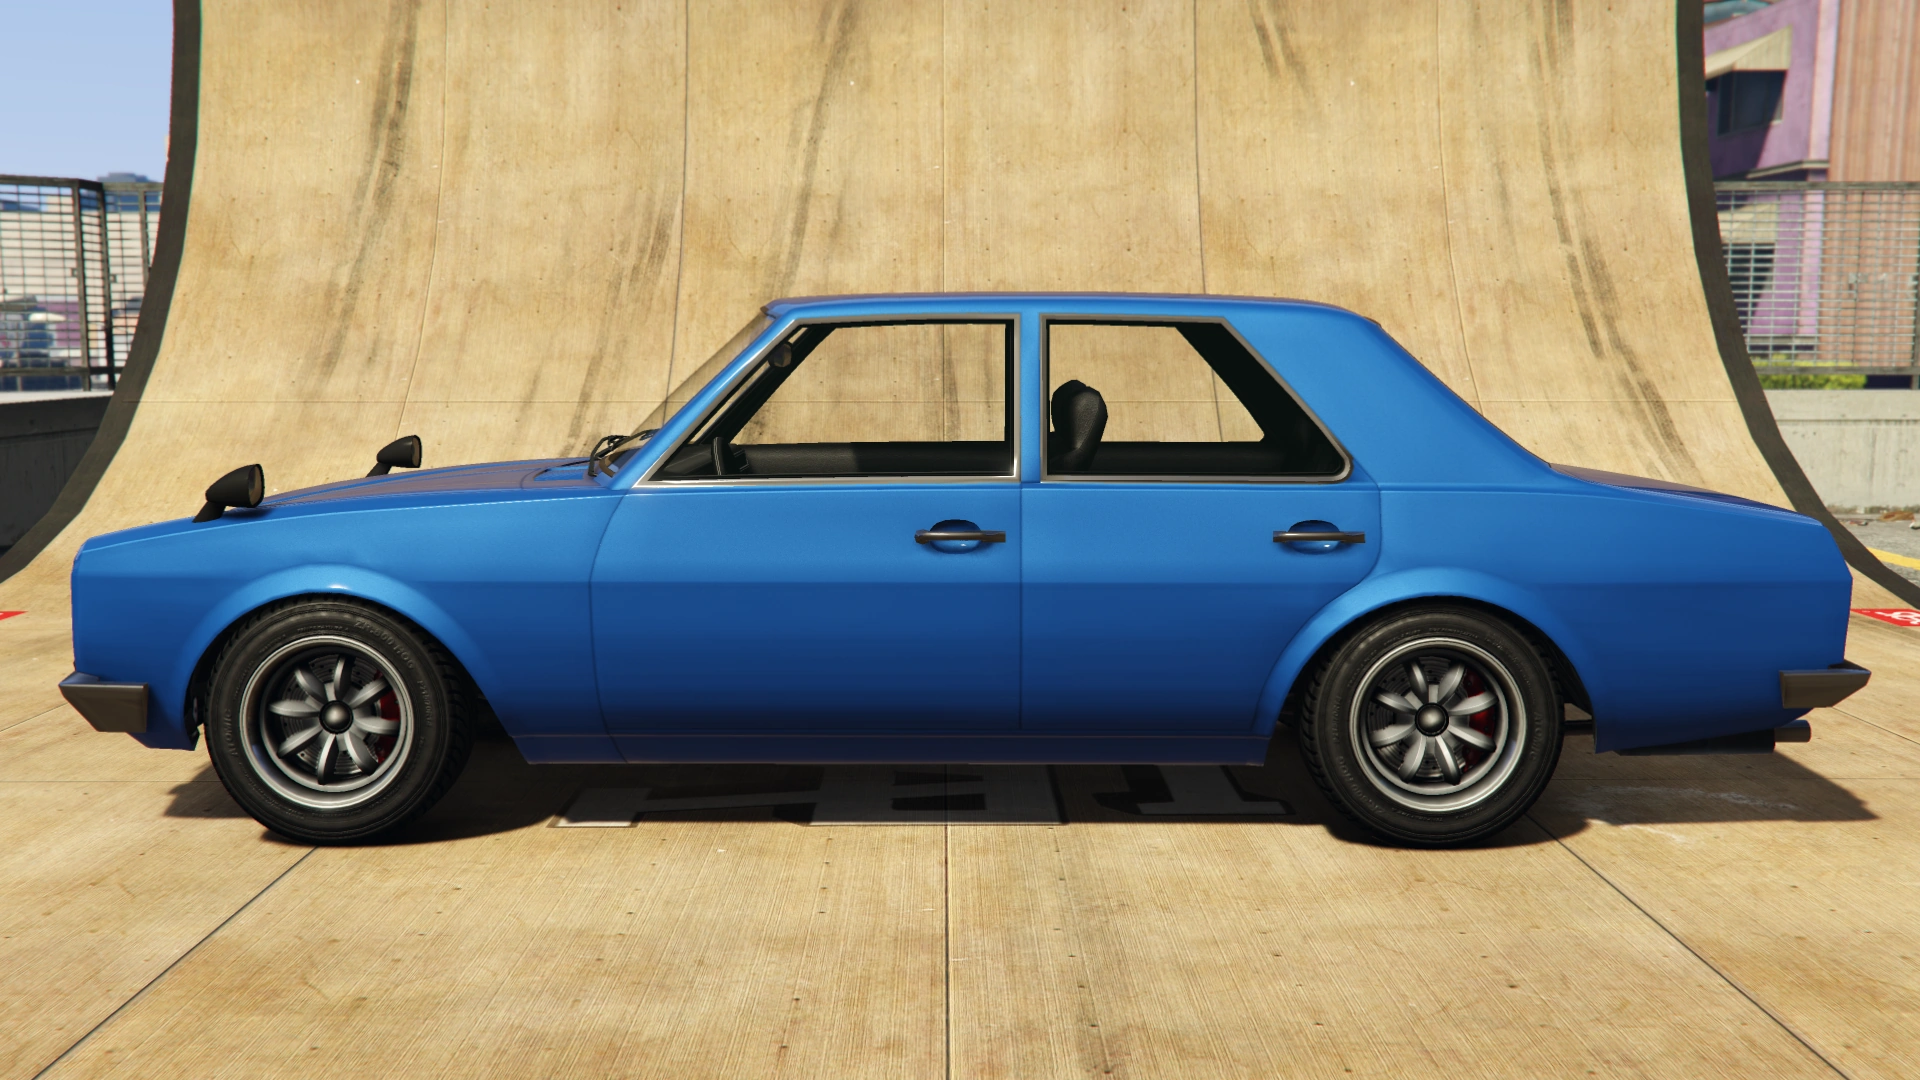
The Warrener is implied to have a Swedish origin, but it draws most of its traits from Japanese vehicles. The Warrener is heavily based on the Japanese designs of the Nissan Skyline GTR KGC10, Datsun 510 (Bluebird), and the first year of the Toyota Corolla KE70. It also seems to draw some inspiration from the 1960's-70's Saab 99. The car's front fascia is a heavy mix of those from the Peugeot 504 and Nissan Skyline C10. The chassis brings a mixed resemblance from the Datsun 510 and Volvo 144. The sideview mirror placement has a resemblance of the Toyota Century's.
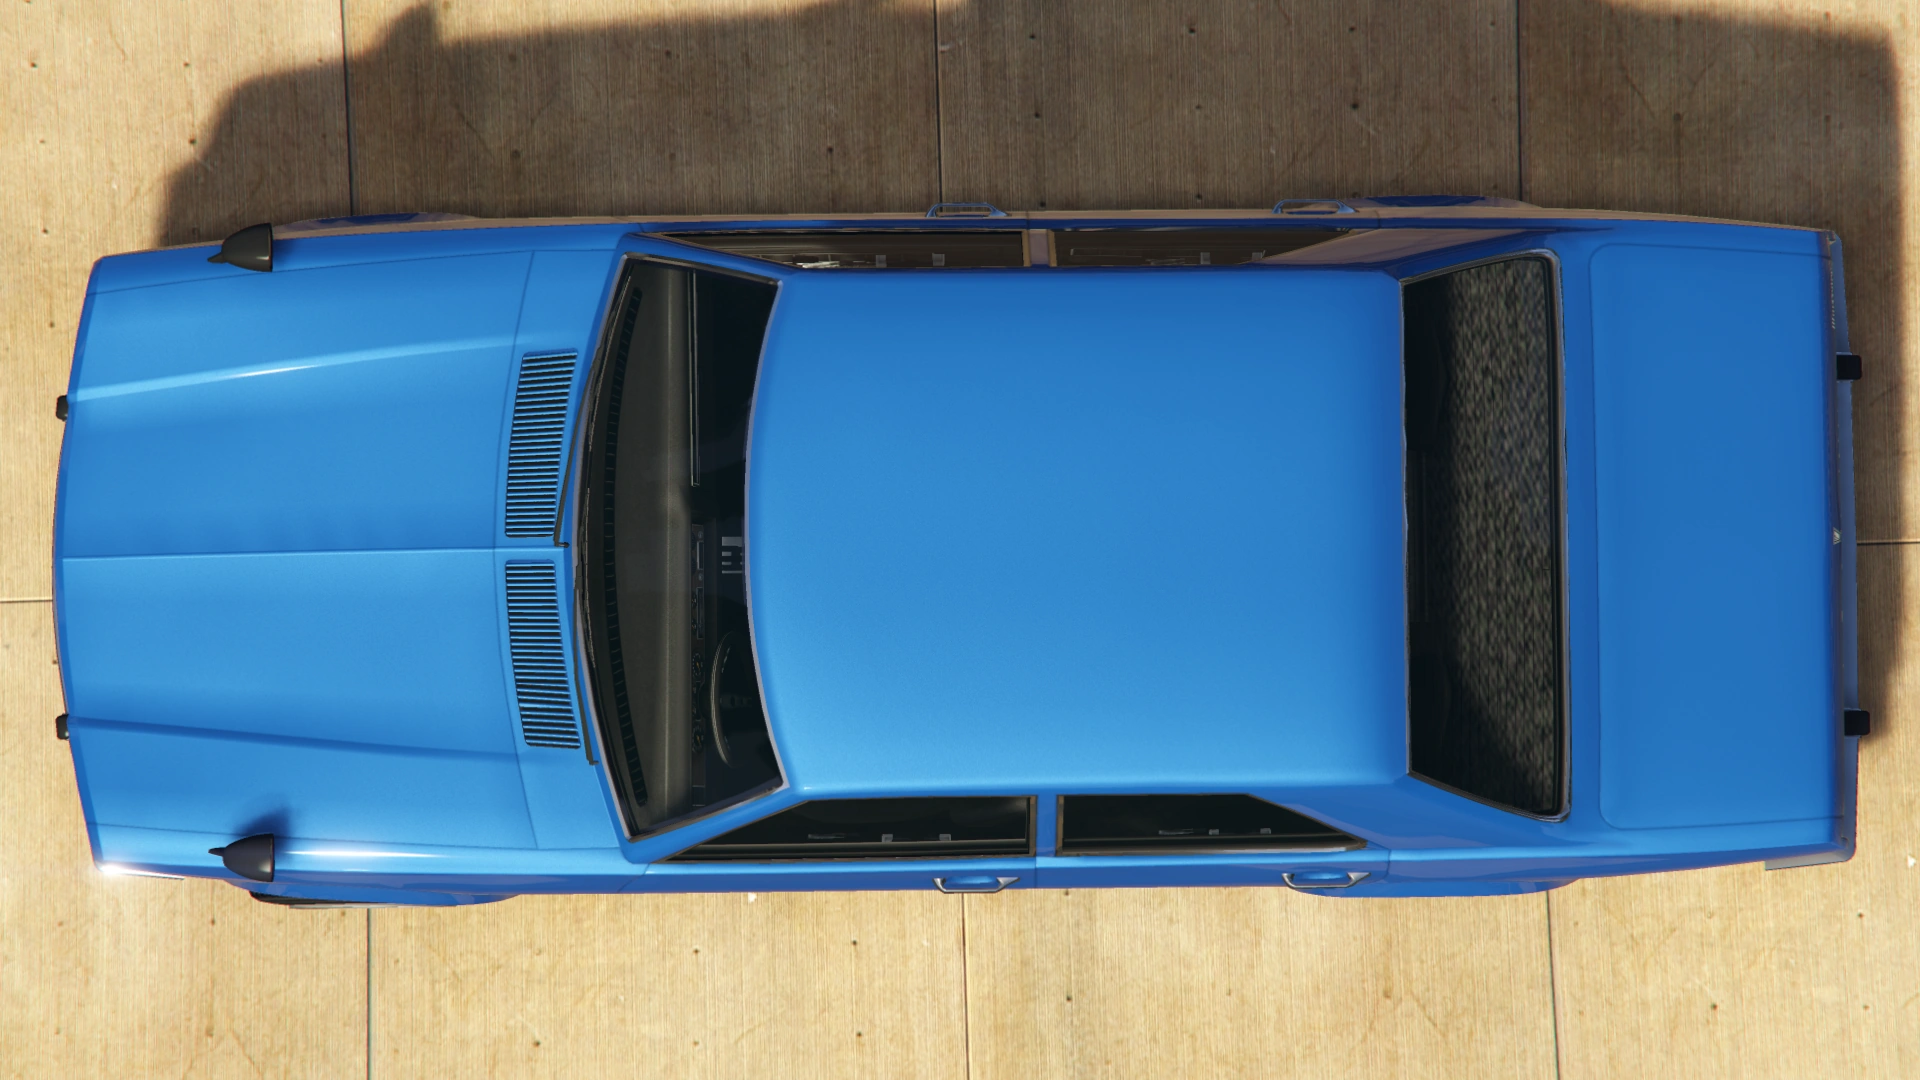
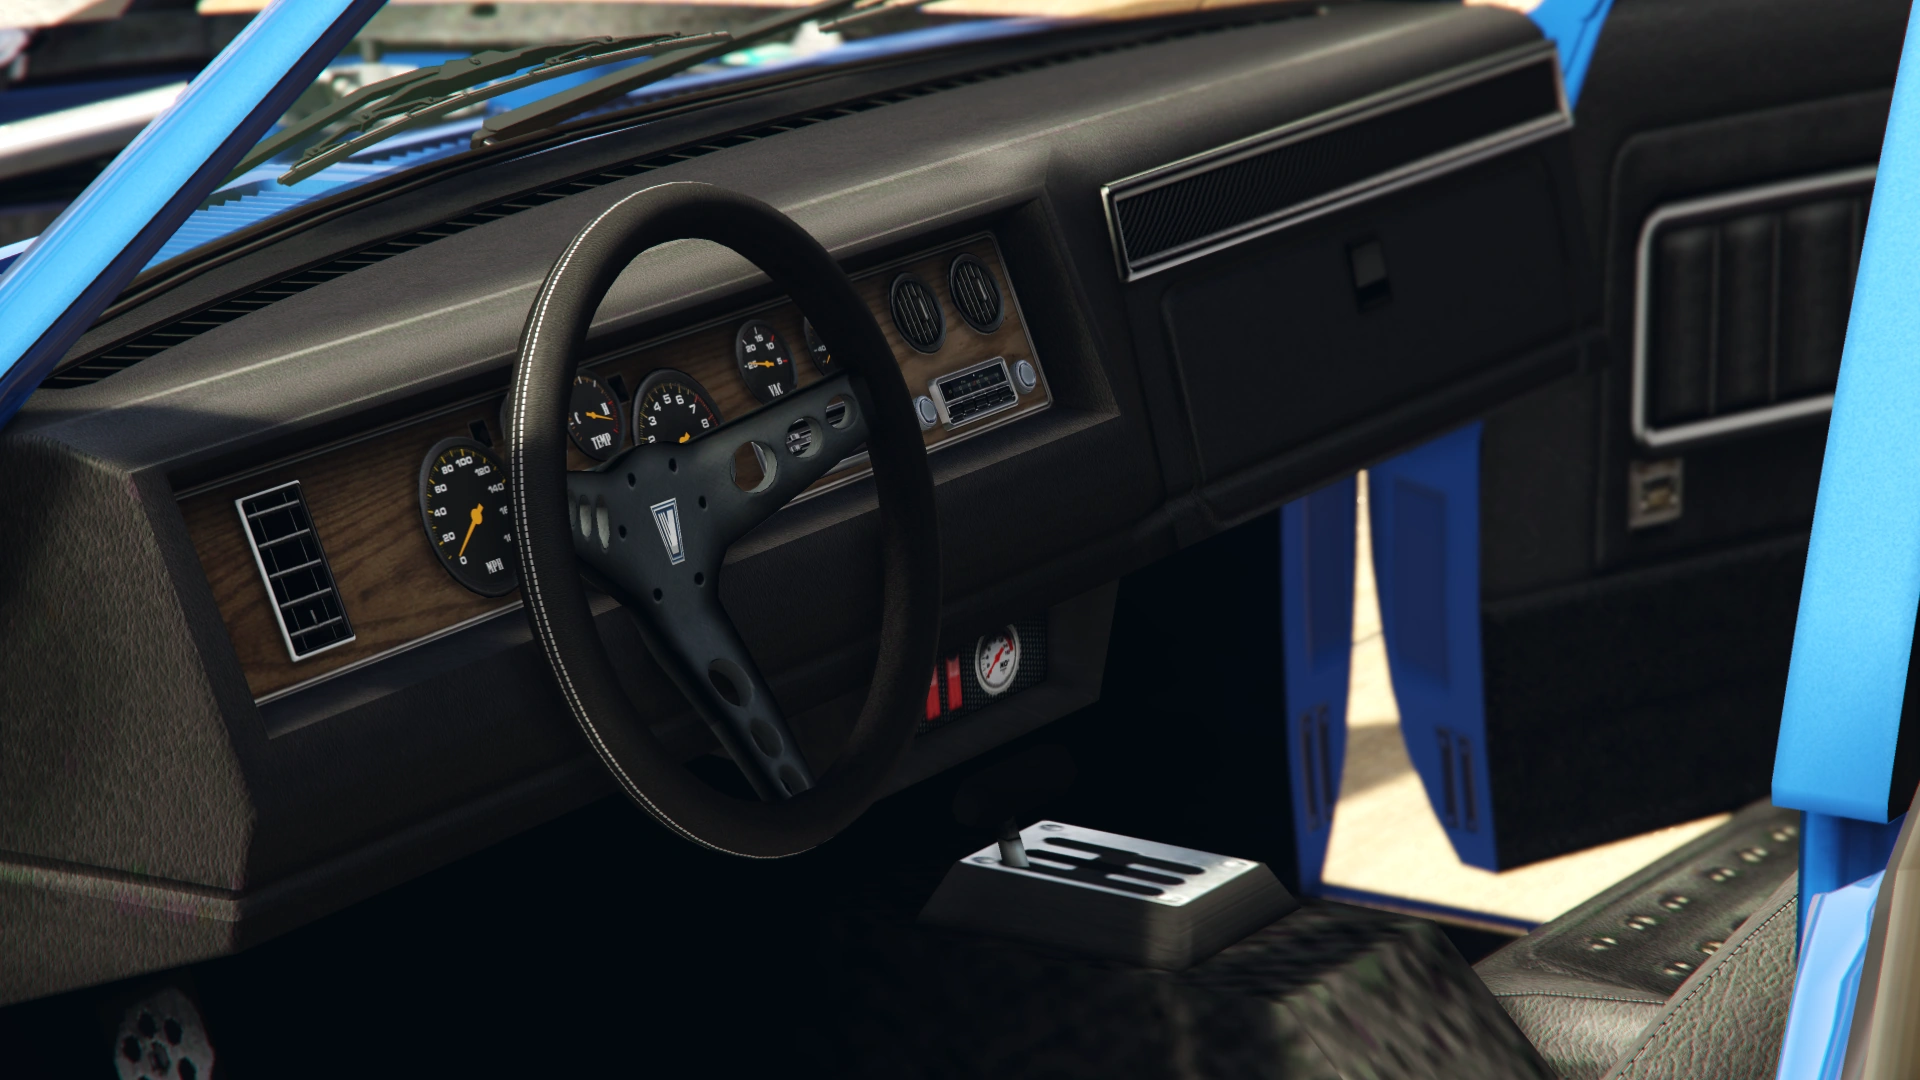
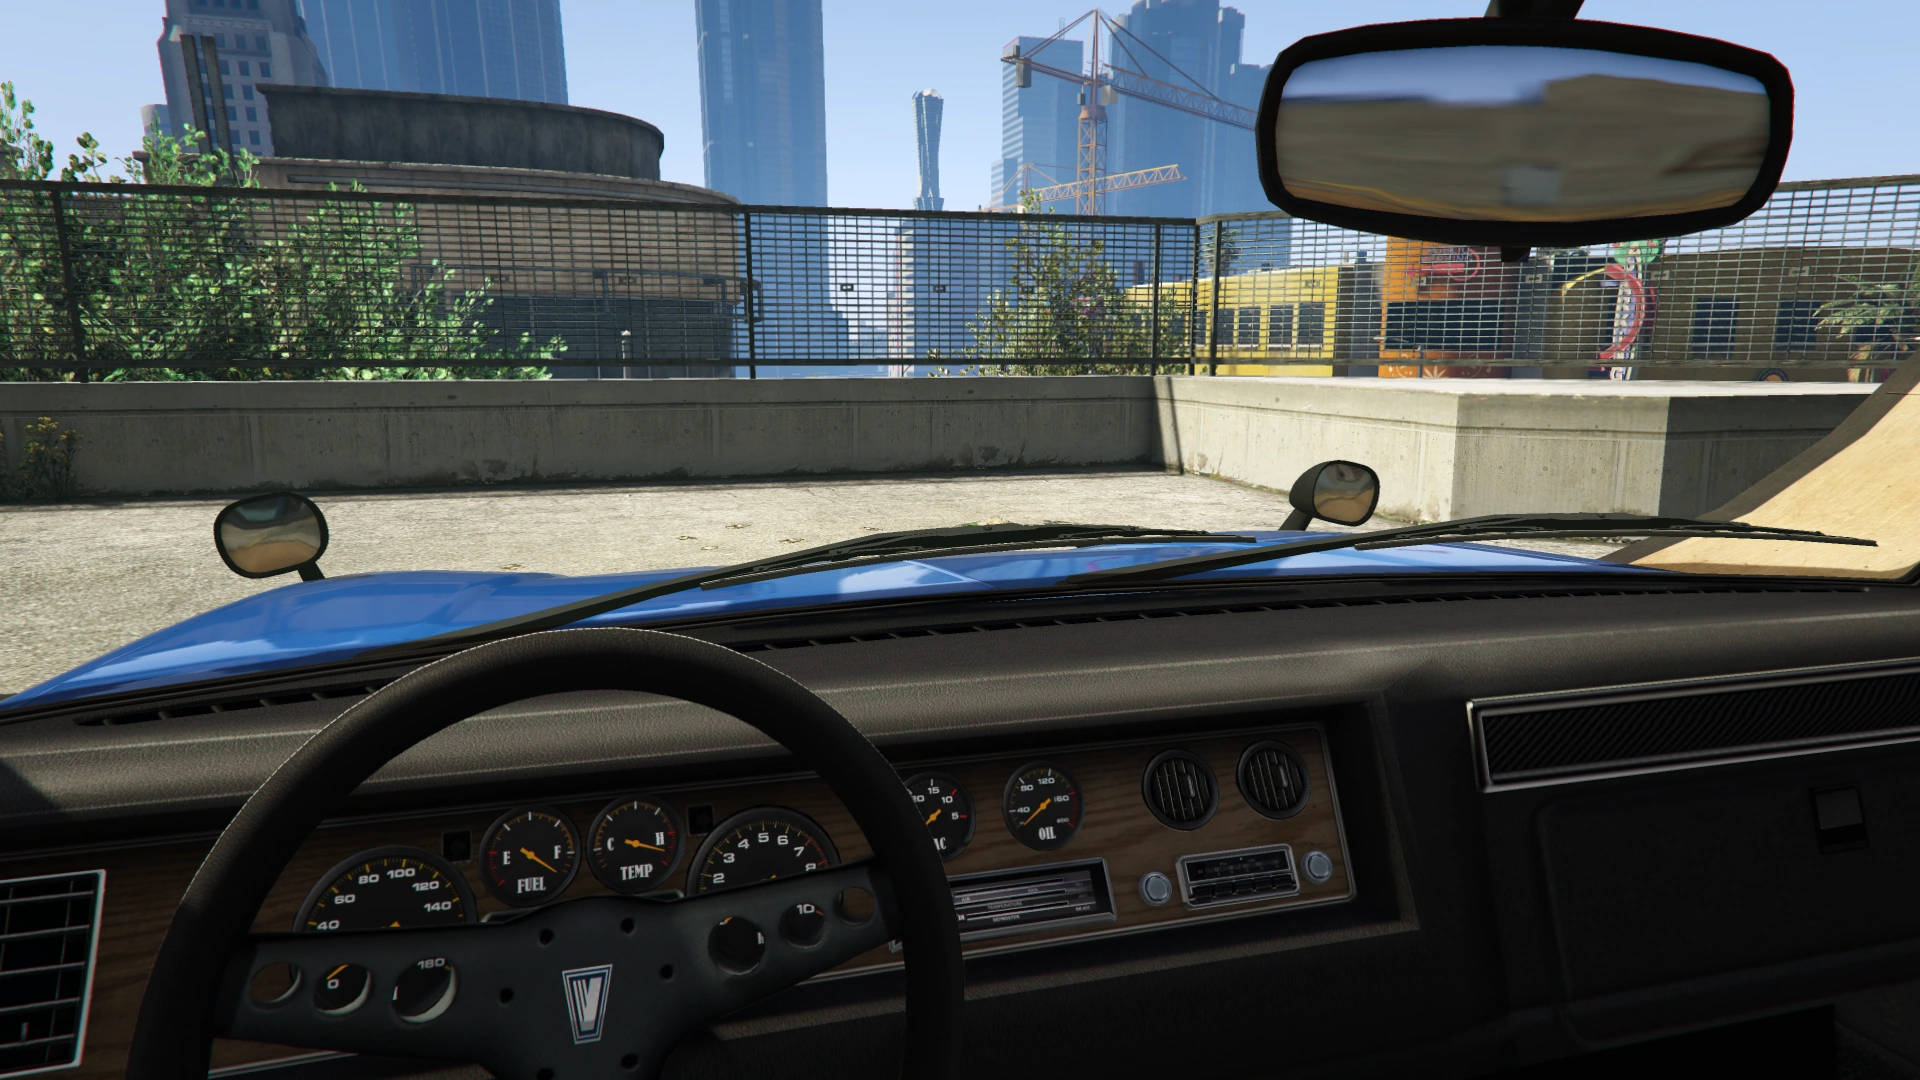
By default, the Warrener spawns in a single-tone color. However, via customization, its secondary color is represented as a wide stripe passing through the hood, roof, trunk and rear end. Its interior and dials are shared with that of muscle cars like the Dukes.
Current Design Gallery


Performance
Grand Theft Auto V
The Warrener has high acceleration and a good top speed for the class. Its potent 6-cylinder engine has the second-highest torque in the class, just behind the Super Diamond, but unfortunately this results in the car being prone to spinouts, requiring careful driving to maintain traction. Otherwise, the handling is responsive and quick due to the car's light weight and excellent braking. Still, addition of the spoiler mod is recommended to keep the car planted. Crash deformation is poor but the engine can take several direct hits before failing.
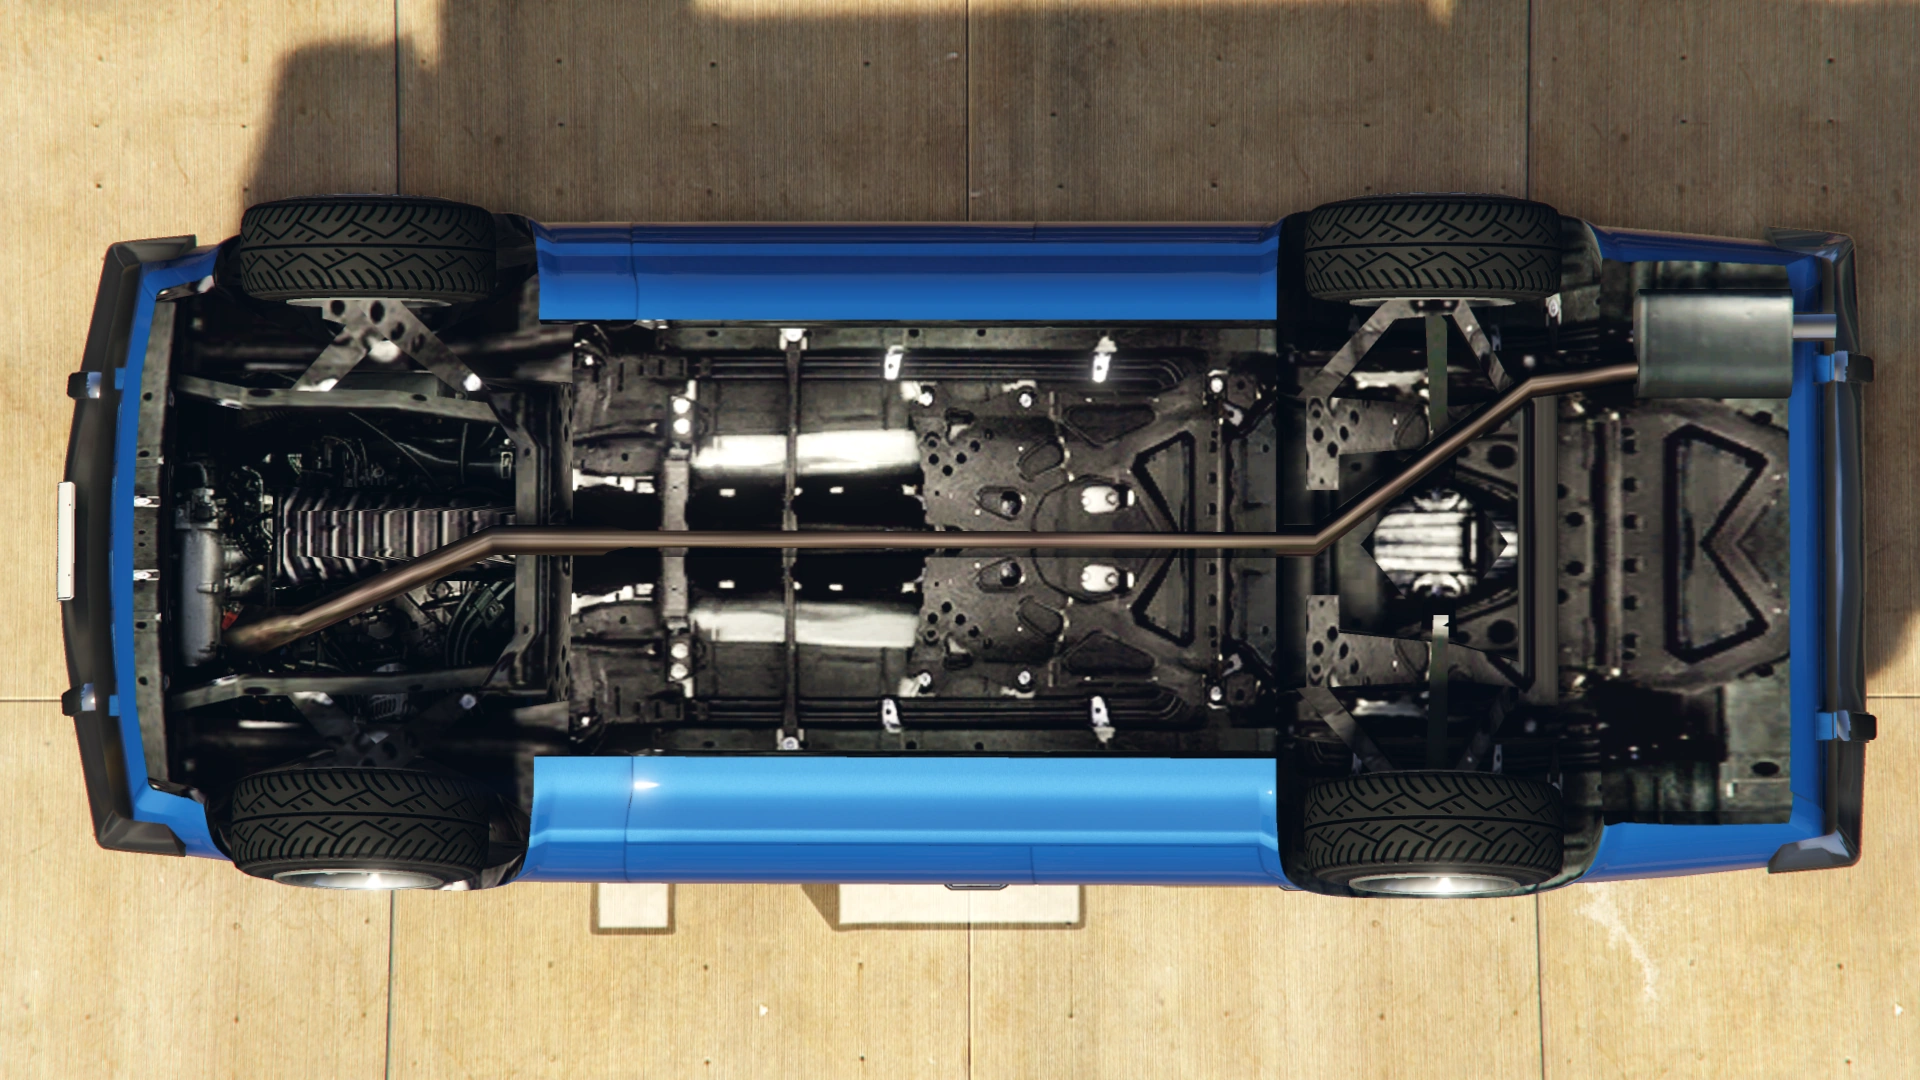
The vehicle is powered by a 6-cylinder engine in a front engine, rear wheel drive layout. True to what the badge suggests, a 5-speed gearbox is fitted, while the interior features an automatic transmission gear lever. It shares the engine sound with the Rat-Loader and the Rusty Rebel, but with a cleaner tone.
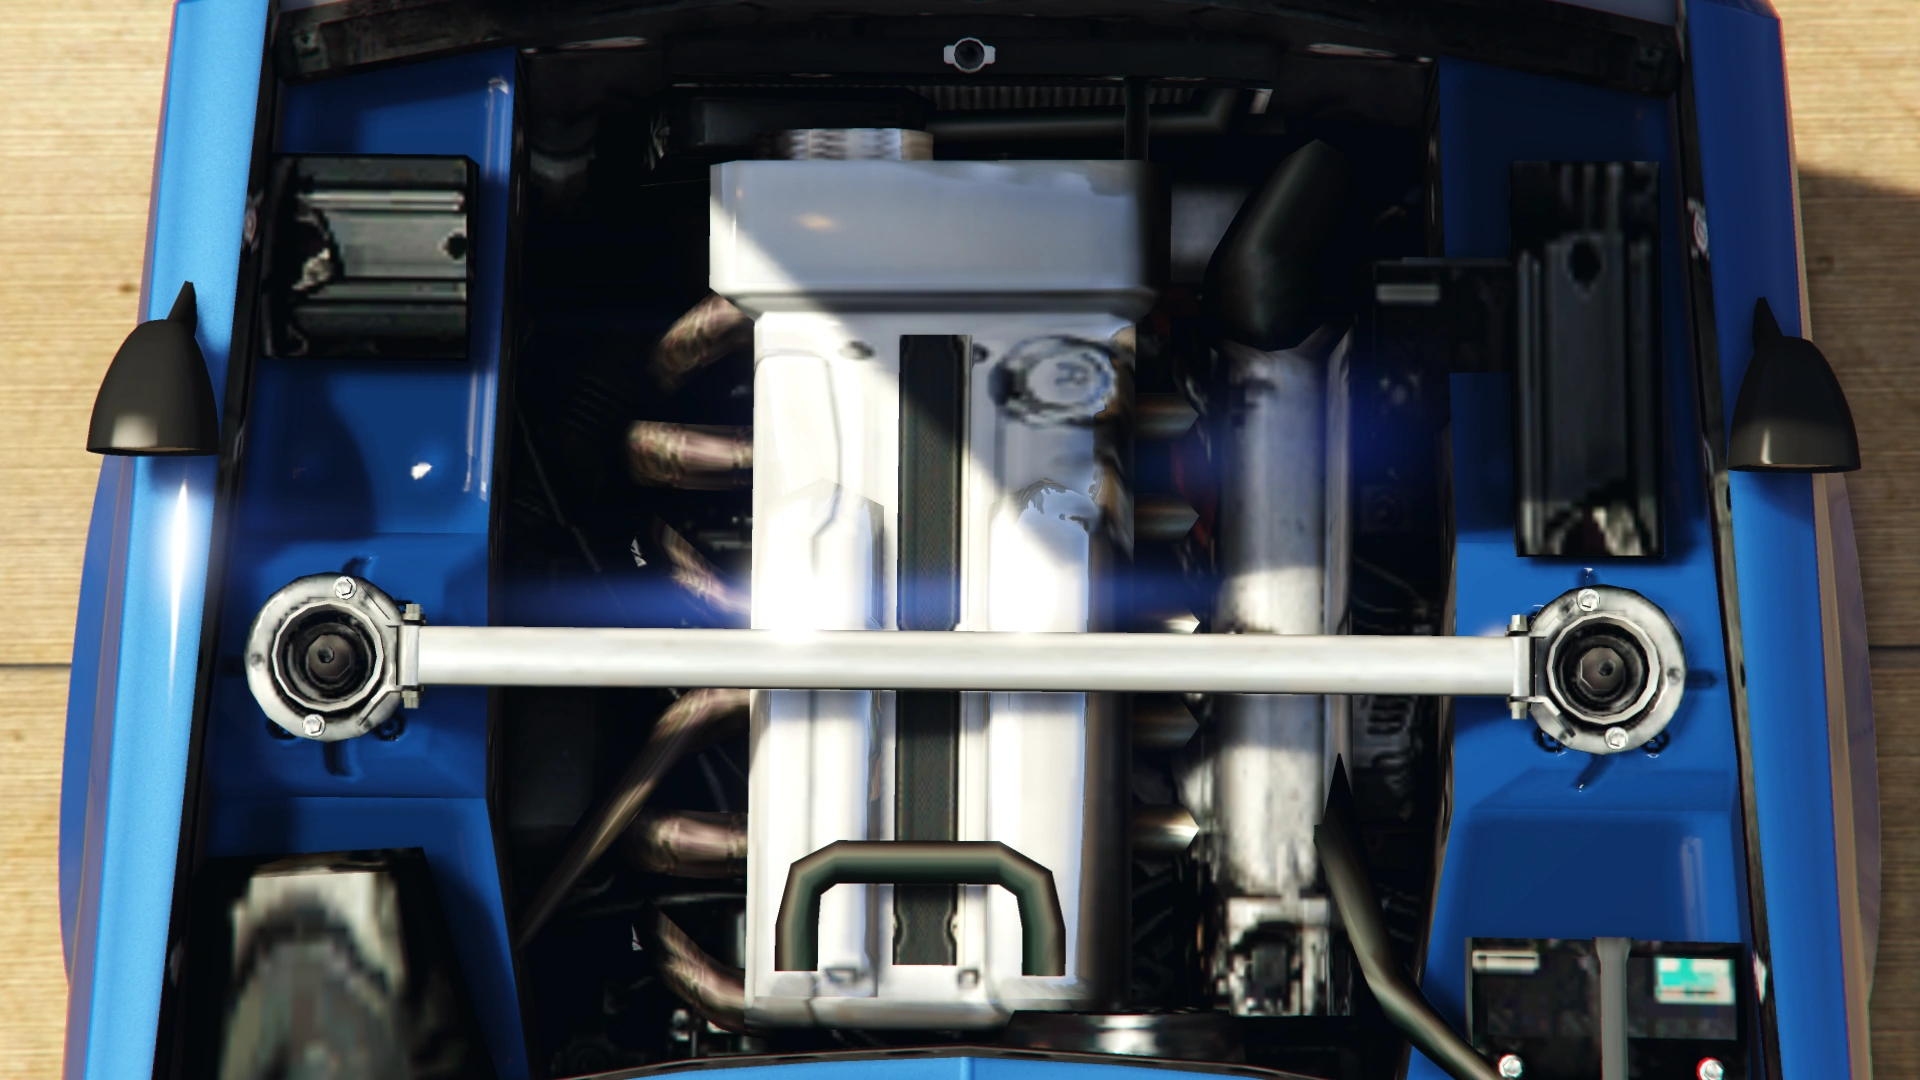
With the "Intercooler" modifications installed, two turbochargers are fitted on a side of the engine.
GTA V Overview
| Acceleration (0-60 mph in Seconds) |
Top Speed (mph / kmh) |
Gears | Engine | Drivetrain (FWD / RWD / AWD) |
Mass (kg / lbs) |
Fuel Tank Size (litres) |
|---|---|---|---|---|---|---|
| N/A | 87 / 140 | 5 | N/A | RWD | 1300 / 2866 | 65 |
| N/A | N/A | 5 (Badging) | N/A | N/A | N/A | N/A |
| 6.1 Seconds | 95 / 152 | 5 | FR DOHC Inline-6 (In-game model) | RWD | Cannot be observed | Cannot be observed |
Modifications
Grand Theft Auto V
| Category | Modification | Cost (GTA V) | Cost (GTA Online) | Image | |
|---|---|---|---|---|---|
| Armor | No Armor | $325 | $1,000 | ||
| Armor Upgrade 20% | $1,625 | $7,500 | |||
| Armor Upgrade 40% | $4,062 | $12,000 | |||
| Armor Upgrade 60% | $6,500 | $20,000 | |||
| Armor Upgrade 80% | $11,375 | $35,000 | |||
| Armor Upgrade 100% | $16,250 | $50,000 | |||
| Brakes | Stock Brakes | $325 | $1,000 | ||
| Street Brakes | $6,500 | $20,000 | |||
| Sport Brakes | $8,775 | $27,000 | |||
| Race Brakes | $11,375 | $35,000 | |||
| Bumpers | Stock Front Bumper | $750 | $2,200 | ||
| Custom Chin Spoiler | $1,250 | $4,600 | |||
| Race Splitter & Oil Cooler | $1,650 | $7,400 | |||
| Grachan Splitter & Oil Cooler | $1,950 | $11,700 | |||
| Stock Rear Bumper | $750 | $2,200 | |||
| Bumper Delete & Tow Hook | $500 | $4,600 | |||
| Bumper Delete & Drift Charm | $750 | $7,500 | |||
| Engine | EMS Upgrade, Level 1 | $2,925 | $9,000 | ||
| EMS Upgrade, Level 2 | $4,062 | $12,500 | |||
| EMS Upgrade, Level 3 | $5,850 | $18,000 | |||
| EMS Upgrade, Level 4 | $10,887 | $33,500 | |||
| Exhausts | Stock Exhaust | $130 | $260 | ||
| Titanium Exhaust | $375 | $750 | |||
| Custom Shotgun Exhaust | $899 | $1,800 | |||
| Race Exhaust | $1,499 | $3,000 | |||
| Shakotan Exhaust | $4,770 | $9,550 | |||
| Explosives | Ignition Bomb | N/A | $5,000 | ||
| Remote Bomb | N/A | $7,500 | |||
| Grilles | Stock Grille | $100 | $200 | ||
| Remove Grille | $375 | $750 | |||
| Chrome Trim Delete | $670 | $1,340 | |||
| Exposed Intercooler | $825 | $1,650 | |||
| Trim Delete & Intercooler | $1,500 | $3,000 | |||
| Headlights | Stock Headlights | $150 | $300 | ||
| Headlight Cover | $450 | $900 | |||
| Taped Up Headlights | $750 | $1,500 | |||
| Hoods | Stock Hood | $450 | $1,600 | ||
| Carbon Hood | $850 | $3,000 | |||
| Grachan Hood | $1,200 | $5,000 | |||
| Horns | Main article: Los Santos Customs/Horns | - | - | ||
| Lights | Headlights | Stock Lights | $200 | $600 | |
| Xenon Lights | $1,000 | $7,500 | |||
| Neon Kits | Main article: Los Santos Customs/Lights | - | - | ||
| Loss/Theft Prevention | Tracker | N/A | Too Hot | ||
| Full Coverage | N/A | Too Hot | |||
| Plates | Blue on White 1 | $50 | $200 | ||
| Blue on White 2 | $50 | $200 | |||
| Blue on White 3 | $50 | $200 | |||
| Yellow on Blue | $75 | $300 | |||
| Yellow on Black | $150 | $600 | |||
| Respray | Main article: Los Santos Customs/Respray Colors | - | - | ||
| Roll Cages | No Roll Cage | $350 | $700 | ||
| Roll Cage and Chassis Upgrade | $550 | $1,100 | |||
| Sell | Sell Vehicle | N/A | Too Hot | ||
| Skirts | Stock Skirts | $1,250 | $2,500 | ||
| Custom Arch Extensions | $1,500 | $5,500 | |||
| Carbon Arch Extensions | $2,000 | $8,000 | |||
| Spoilers | None | $500 | $6,000 | ||
| Lip Spoiler | $750 | $7,050 | |||
| Ducktail Spoiler | $950 | $10,000 | |||
| High Level Spoiler | $1,300 | $13,000 | |||
| Stock Car Wing | $1,750 | $14,000 | |||
| Suspension | Stock Suspension | $100 | $200 | ||
| Lowered Suspension | $500 | $1,000 | |||
| Street Suspension | $1,000 | $2,000 | |||
| Sport Suspension | $1,700 | $3,400 | |||
| Competition Suspension | $2,200 | $4,400 | |||
| Transmission | Stock Transmission | $325 | $1,000 | ||
| Street Transmission | $9,587 | $29,500 | |||
| Sports Transmission | $10,562 | $32,500 | |||
| Race Transmission | $13,000 | $40,000 | |||
| Turbo | None | $1,625 | $5,000 | ||
| Turbo Tuning | $8,125 | $50,000 | |||
| Wheels | Main article: Los Santos Customs/Wheels | - | - | ||
| Windows | None | $100 | $500 | ||
| Light Smoke | $200 | $1,500 | |||
| Dark Smoke | $450 | $3,500 | |||
| Limo | $700 | $5,000 | |||
Image Gallery
")
")
")
Locations
Grand Theft Auto V
- Original verison
- Available in every protagonist's garage in single player.
- Enhanced version
- Can be found in traffic.
Grand Theft Auto Online
- Can be bought online from Southern San Andreas Super Autos for $120,000.
- Can be rarely found in traffic. Stealing one will result the player to be kicked out of the vehicle and thus not being able to get back in.
Trivia
Grand Theft Auto V
- When the turbo upgrade is installed in the Warrener, rather than featuring a blow-off valve that creates a distinct "hiss" sound when letting off the accelerator, it will feature compressor surges, creating a fluttering "whistle" sound. Several other classics and tuners in the game also have this feature.
- Police chatter identifies the car as an Annis vehicle, when in fact it is manufactured by Vulcar. This is likely a developer's mistake, although Annis is notably based on Nissan, who manufactures the 1970 Nissan 2400GT on which the Warrener is based. This is possibly a reference to Nissan's sale of the 210 in the United States under the pseudonym of "Datsun" during the 1970s.
- Its wheels resemble the famous RS Watanabe eight-spoke wheels, which is again, popular in import culture. The same wheels can be found on the Futo, an AE86-inspired coupe and the Youga.
- The Warrener is also the first vehicle in Grand Theft Auto V to have taped headlights modifications. This modification was popular in the late 1960s and 1970s Japanese race cars, gymkhana and rally cars.
- Furthermore, some other modifications that can be applied to this car (such as the Shakotan exhaust and Grachan hood) appear to be inspired by the Shakotan car scene, a car style originating in Japan.
- The Warrener, like several other vehicles, does not contain reverse lights.
- When installing a Lip or Ducktail spoiler, the "Warrener" badge will become partially covered.
- One can customize the car into a folkrace car (a homemade racecar) by removing the bumpers, grille and trim, but installing roll bars. This is most likely because old Volvos, Toyotas and Datsuns (on which the car is based, or at least is a parody of) are very popular vehicles in folkrace.
- Strangely, 5 inlet pipes can be seen within the inlet manifold, but 6 exhaust pipes within the exhaust manifold, which is an unbalanced amount of pipes.
- The crew emblem fitted to the Warrener is significantly larger than other vehicles' emblems.
- The Warrener has fender-mounted mirrors, which were mandatory in Japan until 1983. Even European and American cars sold in Japan had to have those mirrors.
- The front license plate appears to be tilted to one side when viewed head-on.
- The default radio stations for the Warrener are The Lowdown 91.1 and Space 103.2.