No edit summary |
Friedlander (talk | contribs) mNo edit summary Tag: Source edit |
||
| (304 intermediate revisions by more than 100 users not shown) | |||
| Line 1: | Line 1: | ||
| + | {{Spoilers}} |
||
| − | {{Template:Spoiler}}{{Under Construction}} |
||
| + | {{Infobox heist |
||
| − | {{Infobox_mission |
||
| − | | |
+ | |name = The Jewel Store Job |
| + | |image = GTA5-mission-heist-thejewelstorejob-custom.jpg.jpg |
||
| − | | image = TheJewelStoreJob-GTA5.png |
||
| − | | |
+ | |size = 270px |
| − | | |
+ | |caption = Smart (Top) Loud & Dumb (Bottom) |
| − | | |
+ | |game = {{games|V=y}} |
| − | | |
+ | |for = {{For|game=V|heistlestermf}} |
| − | | |
+ | |location = [[Darnell Bros.]], [[La Mesa]] |
| + | |target = [[Vangelico]] |
||
| − | | fail = [[Wasted]]<br>[[Busted]]<br>All BZ Gas cans miss the air vent (Smart Way only) |
||
| + | |fail = • [[Wasted]]<br>• [[Busted]]<br>• The jewelry store has closed<br>• Crew members die <small> (except a bad gunman crashing)</small> <br>• Crew members abandoned <br>• Truck destroyed <br>• Van destroyed <br>• Bikes destroyed<br>• Franklin's bike was abandoned<br>• Michael abandons the heist <br>• Not leaving after the alarm goes off <br>• Not stealing enough jewelry <br>• Franklin loses the crew during the escape <br><br>Smart<br>• Car destroyed<br>• Car abandoned<br>• Franklin abandons the heist<br>• Entering the store before the gas is active<br>• Causing a disturbance before the gas is active<br>• Throwing [[Tear Gas|tear gas]] or [[Grenades|grenades]] at the air vent<br>• All five BZ Gas cans miss the air vent<br>• Franklin throws BZ Gas onto the street<br><br>Loud<br>• Van abandoned <br>• Van destroyed<br>• Entering the store with a wanted level<br>• Security guard escapes <small>(if a bad gunman was chosen)</small><br>• Manager calls the Cops <small>(if a bad gunman was chosen)</small> |
||
| − | | reward = Variable |
||
| + | |reward = Diamond Hard [[Achievements and Trophies in GTA V|Achievement/Trophy]]<br>Lester as a contact for Franklin<br>[[Carbine Rifle]] and [[Tear Gas]] available at [[Ammu-Nation]] |
||
| − | | protagonists = [[Michael De Santa]]<br>[[Franklin Clinton]] |
||
| + | |protagonists = [[Michael De Santa]]<br>[[Franklin Clinton]] |
||
| − | | unlocks = [[Mr. Philips]] |
||
| + | |unlocks = [[Mr. Philips]] |
||
| − | | unlockedby = [[Casing the Jewel Store]]<br>[[The Long Stretch]]<br>[[Daddy's Little Girl]] |
||
| + | |unlockedby = [[Carbine Rifles]] (Loud) or<br>[[Bugstars Equipment]] &<br> [[BZ Gas Grenades]] (Smart)|todo = Smart |
||
| − | }} |
||
| + | *Get in the '''<span style="color: #4ba1cf;">car.</span>'''<small> (Michael)</small> |
||
| + | *Go to the '''<span style="color:#dece71">jewelry store.</span>'''<small> (Michael)</small> |
||
| + | *Go to the '''<span style="color:#dece71">roof.</span>'''<small> (Franklin)</small> |
||
| + | *Throw the BZ Gas into the '''<span style="color:#62ba62">air vent.</span>'''<small> (Franklin)</small> |
||
| + | *Steal the '''<span style="color:#62ba62">jewelry.</span>'''<small> (Michael)</small> |
||
| + | *Follow the '''<span style="color: #4ba1cf;">crew.</span>'''<small> (Franklin)</small> |
||
| + | *Take out the '''<span style="color: #c92423;">cops</span>''' before getting to the '''<span style="color:#dece71">rendezvous point.</span>'''<small> (Michael)</small> |
||
| + | *Go to the '''<span style="color:#dece71">lockup.</span>'''<small> (Michael)</small> |
||
| − | {{Quote|Now ladies and gentlemen, this is your moment! Please, don't make me ruin all the great work your plastic surgeons have been doing.|Michael}} |
||
| + | Loud |
||
| − | '''The Jewel Store Job''' is a mission in ''[[Grand Theft Auto V]]''. This is the first [[heists|heist]] mission in the game, given to [[protagonists]] [[Michael De Santa]] and [[Franklin Clinton]]. |
||
| + | *Get in the '''<span style="color: #4ba1cf;">van.</span>'''<small> (Michael)</small> |
||
| + | *Go to the '''<span style="color:#dece71">jewelry store.</span>'''<small> (Michael)</small> |
||
| + | *Steal the '''<span style="color:#62ba62">jewelry.</span>'''<small> (Michael)</small> |
||
| + | *Follow the '''<span style="color: #4ba1cf;">crew.</span>'''<small> (Franklin)</small> |
||
| + | *Take out the '''<span style="color: #c92423;">cops</span>''' before getting to the '''<span style="color:#dece71">rendezvous point.</span>'''<small> (Michael)</small> |
||
| + | *Go to the '''<span style="color:#dece71">lockup.</span>'''<small> (Michael)</small>}} |
||
| + | {{Quote|In need of money to pay Madrazo, Michael takes down a Rockford Hills Jewel Store with Franklin and a crew.|''GTA V'' description at Rockstar Games Social Club |
||
| + | }} |
||
| + | {{Quote|Ladies and gentlemen, this is your moment! Please, don't make me ruin all the great work your plastic surgeons have been doing. On the floor, now! |Michael De Santa, Loud approach}} |
||
| + | |||
| + | '''The Jewel Store Job''' is a mission in ''[[Grand Theft Auto V]]''. It is the first [[heists|heist]] mission in the game that [[Protagonist|protagonists]] [[Michael De Santa]] and [[Franklin Clinton]] undertake. |
||
==Preparation== |
==Preparation== |
||
| − | In order to perform the heist, |
+ | In order to perform the heist, Michael must perform a couple of side-missions ([[Heist Setups]]) to gain the necessary equipment. The preparation missions vary based on the chosen approach in [[Casing the Jewel Store]]. |
| + | <tabber> |
||
| − | ===Loud=== |
||
| + | Smart= |
||
| − | Only one [[Heist Setups|preparation mission]] has to be performed, namely stealing a set of carbine rifles from one of the [[LSPD (HD Universe)|LSPD's]] tactical team [[FIB Granger|vans]]. |
||
| + | Two preparation missions have to be performed: |
||
| + | *The first one, [[Bugstars Equipment]], involves stealing a [[Bugstars Burrito|van]] from the [[Bugstars]] company. |
||
| − | ===Smart=== |
||
| + | *The second, [[BZ Gas Grenades]], involves stealing gas grenades from a van driving around the city. |
||
| − | Two preparation missions have to be performed. Stealing a [[Burrito|van]] from the [[Bugstars]] company, and stealing the knock-out gas from a courier van. They can be done in any order. |
||
| + | |-| |
||
| − | |||
| + | Loud= |
||
| − | When stealing the Bugstars van, Michael can either go in the front the company's front door, which will cause him to gain a [[Wanted Level in GTA V|wanted level]], or be stealthy by sailing in behind the company's warehouse, and knock out an employee in order to drive undetected out the front. The latter approach is needed for getting gold. |
||
| + | ---- |
||
| + | [[Image:Warning.png|35px|left]] '''Note:''' ''The [[GTA Online: The Diamond Casino Heist]] DLC mission "[[Casino Heist - The Big Con]]" confirms that this is not the canon approach to The Jewel Store Job.'' |
||
| + | ---- |
||
| + | Only one preparation mission, [[Carbine Rifles]], has to be performed, namely stealing a set of carbine rifles from one of the [[Los Santos Police Department (HD Universe)|LSPD's]] tactical team [[FIB Granger|vans]]. |
||
| + | </tabber> |
||
==Mission== |
==Mission== |
||
| − | Depending on the chosen approach in |
+ | Depending on the chosen approach in Casing the Jewel Store, the start of the mission will play out in one of two ways: |
| + | <tabber> |
||
| − | ===Loud=== |
||
| + | Smart= |
||
| − | Franklin drives Michael, the driver and the gunman to the store in a van. Donning helmets, they will enter and tell the hostages to get down. While the gunman holds the hostages, Michael and the driver start ransacking the store while Franklin waits outside with the bikes. |
||
| + | Driving from the garment factory in a [[Primo]], Michael will drop Franklin off at the building site while the driver and gunman park the Bugstars van in front of the jeweler's. Taking control of Franklin, the player must traverse the roofs from around the block, use the vantage point from the recon mission, and throw a can of tear gas into the air vent. The gas will be released into the shop, knocking everybody inside unconscious. |
||
| + | Afterwards, Michael, the driver, and the gunman will enter and start ransacking the store while Franklin goes to get the bikes. The amount of time available before the alarm starts will depend on the picked hacker, but since the gold medal requires the player to steal the jewelry within fifty seconds, any of them will do (in the patched version; in the original console release Rickie Lukens could only hold the alarm off for thirty seconds, while it takes a minimum of 43 seconds in the Smart approach to clear all the jewel cases). A poor gunman ([[Norm Richards]]) will drop some of the jewelry, reducing the take to approximately $4.5 million. |
||
| − | ===Smart=== |
||
| + | |-| |
||
| + | Loud= |
||
| + | ---- |
||
| + | [[Image:Warning.png|35px|left]] '''Note:''' ''The [[GTA Online: The Diamond Casino Heist]] DLC mission "[[Casino Heist - The Big Con]]" confirms that this is not the canon approach to The Jewel Store Job.'' |
||
| + | ---- |
||
| + | Franklin drives Michael, the [[Heist Crew Members in GTA V#Drivers|driver]] and the [[Heist Crew Members in GTA V#Gunmen|gunman]] to the jeweler's in a van. Donning helmets, they will enter and tell the hostages to get down. While the gunman holds the hostages, Michael and the driver start ransacking the store while Franklin waits outside with the bikes. The store manager will try to intervene and a good gunman ([[Gustavo Mota|Gus Mota]] or [[Patrick McReary|Packie McReary]]) will handle it, but if a bad one ([[Norm Richards]]) is chosen, he will do poorly with crowd control and Michael will have to kill the manager, or they'll sound the alarm and fail the mission. The amount of time available before the alarm starts will depend on the selected [[Heist Crew Members in GTA V#Hackers|hacker]], but since the gold medal requires the player to steal the jewelry within fifty seconds, any of them will do (in the enhanced edition; in the original version [[Rickie Lukens]] can only hold the alarm off for thirty seconds, while it takes a minimum of 49 seconds in the Loud approach to clear all the jewel cases). A poor driver ([[Karim Denz]]) will drop some of the jewelry, reducing the take to approximately $4.5 million. |
||
| + | </tabber> |
||
| + | ===Escape=== |
||
| − | Video walkthrough [https://www.youtube.com/watch?v=npfSmFiomak here]. |
||
| + | Both approaches lead to the same escape. Once the robbery has been committed, Franklin escapes on a bike with the driver and gunman. The motorcycle depends on the driver, but won't make much of a difference. Karim Denz, a poor driver, will send panicky and unhelpful radio traffic, rather than the calm and professional directions from pro [[Eddie Toh]], but this really doesn't affect anything either. Follow the crew, evading the cops, and drive into the tunnel to access the sewers. If a low-skilled gunman is chosen, then he, along with his bag of jewels, will crash and fall off his bike before entering the tunnel. If the player picks up the bag, the take will not change, but if not; a significant amount of the takings are lost. There is a casualty expense for the death of the gunman, regardless. If a high-skilled gunman is chosen, none of this happens. |
||
| + | Using the Los Santos sewer network to evade the police, the crew eventually ends up at the [[Los Santos Storm Drain (HD Universe)|Los Santos River]] into a pack of awaiting police cars. In the meantime, Michael and the hacker went to get the [[Benson|delivery truck]] and use it to forcibly push the cops out of the way. |
||
| − | Driving from the garment factory in a primo, Michael will drop Franklin at the construction site while the driver and gunman park the Bugstars van in front of the jewel store. Taking control of Franklin, the player must traverse the roofs from around the block and use the vantage point from the recon mission, throw a can of gas in the air vent. The gas will be pumped into the Store, knocking out all inside. |
||
| + | Once the police attention has been lost, the bikes are loaded onto the truck and are driven to Lester's lockup where the crew splits up. The maximum take for the mission is $4,946,153 if the player smashes all twenty displays and chooses a good gunman (for either approach) or a good driver (for the Loud approach). $2,500,000 will then go to [[Martin Madrazo]] while the rest gets split between the crew members. Note that for this, his first Heist, [[Franklin Clinton|Franklin]] receives a fixed percentage as a hired gunman/driver, rather than splitting the take equally with [[Michael De Santa|Michael]]. |
||
| − | Afterwards, Michael and the driver and gunman will enter and start ransacking the store while Franklin goes to get the bikes. The amount of time available before the alarm starts will depend on the picked hacker, but since the gold medal requires the player to steal the jewelry within 50 seconds, any of them will do. |
||
| − | ===Escape=== |
||
| + | After completing the mission, a [[Switch Scenes|Switch Scene]] with Franklin shows that [[Tanisha Jackson|Tanisha]] was none too thrilled with Franklin's newfound wealth while he is relaxing at the [[Vanilla Unicorn]]. Franklin wanted to take her out on a date, which she refuses as Franklin told her that he had to leave and that he hopes to see her soon. |
||
| − | Both approaches lead to the same escape. Once the raid has been done, Franklin escapes on bike with the driver and gunman. The available motorcycles will depent on the picked driver : |
||
| − | *[[Eddie Toh]] : Maibatsu [[Sanchez]] |
||
| − | *[[Karim Denz]] : Pegassi [[Bati 800|Bati 801RR]] (If Norm was chosen as the gunmen, after he falls off his bike Karim stop's for a few seconds in the tunnels not knowing which way to go.) |
||
| + | == Maximum Revenue == |
||
| − | Using the city sewers to evade the police, the trio eventually ends up at the [[Los Santos River]] into a pack of cops. While the Sanchez seem to be the obvious choice for their speed in the tunnels' mud, there is no downside in picking the Bati 801s in terms actual mission outcome. In the mean time, Michael and the hacker went to get the delivery truck and use it to crash the cops out of the way. |
||
| + | For the largest possible take, choose the Smart approach and hire [[Karim Denz]] as the driver, [[Packie McReary]] as the gunman and [[Rickie Lukens]] as the hacker. This will net Michael $1,223,073 and Franklin $293,539. |
||
| + | '''Maximum gross take''': $4,946,153 |
||
| − | Once the police have been lost, the bike are loaded onto the truck and are driven to Lester's lockup where the crew parts ways. The maximum take for the mission is $4,946,153 if the player smashes all 20 displays and chooses a good gunman. $2,500,000 will then go to [[Martin Madrazo]] while the rest gets split between the crew. |
||
| + | |||
| + | '''Martin Madrazo's payoff''': -$2,500,000 |
||
| + | |||
| + | '''Maximum net take''': $2,446,153 |
||
| + | |||
| + | '''Lester's cut (14%)''': -$342,462 |
||
| + | |||
| + | '''Crew cut (24%)''': -$587,077 |
||
| + | |||
| + | '''Franklin's cut (12%)''': $293,539 |
||
| + | |||
| + | '''Michael's profit (50%)''': $1,223,073 |
||
| + | |||
| + | ==Mission Objectives== |
||
| + | <tabber> |
||
| + | Smart= |
||
| + | *Go to Vangelico Jewel Store. - <small>(Michael)</small> |
||
| + | *Climb to the roof of the jewel store. - <small>(Franklin)</small> |
||
| + | *Throw the [[BZ Gas|Tear Gas]] on the ventilation system. - <small>(Franklin)</small> |
||
| + | *Break the glass cabinets and steal at least $3,300,000. - <small>(Michael)</small> |
||
| + | *Follow your crew into the sewers. - <small>(Franklin)</small> |
||
| + | *(Optional) Pick up the dropped bag. <small>(Only if you selected a bad gunman)</small> - <small>(Franklin)</small> |
||
| + | *Follow your crew through the sewers. - <small>(Franklin)</small> |
||
| + | *Take out the police cars and protect your crew. - <small>(Michael)</small> |
||
| + | *Rendezvous with your crew. - <small>(Michael)</small> |
||
| + | *Go to Lester. - <small>(Michael)</small> |
||
| + | |-| |
||
| + | Loud= |
||
| + | ---- |
||
| + | [[Image:Warning.png|35px|left]] '''Note:''' ''The [[GTA Online: The Diamond Casino Heist]] DLC mission "[[Casino Heist - The Big Con]]" confirms that this is not the canon approach to The Jewel Store Job.'' |
||
| + | ---- |
||
| + | *Go to [[Vangelico|Vangelico Jewel Store]]. - <small>(Michael)</small> |
||
| + | *Break the glass cabinets and steal at least $3,300,000. - <small>(Michael)</small> |
||
| + | *Stop the manager. <small>(Only if you selected a bad gunman)</small> - <small>(Michael)</small> |
||
| + | *Follow your crew into the sewers. - <small>(Franklin)</small> |
||
| + | *(Optional) Pick up the dropped bag. <small>(Only if you selected a bad gunman)</small> - <small>(Franklin)</small> |
||
| + | *Follow your crew through the sewers. - <small>(Franklin)</small> |
||
| + | *Take out the police cars and protect your crew. - <small>(Michael)</small> |
||
| + | *Rendezvous with your crew. - <small>(Michael)</small> |
||
| + | *Go to [[Lester Crest|Lester]]. - <small>(Michael)</small> |
||
| + | </tabber> |
||
==Gold Medal Objectives== |
==Gold Medal Objectives== |
||
| + | ===Loud and Smart=== |
||
| + | *Quick Grab - Steal the jewelry within 50 seconds. |
||
| + | **Note that this is not the same as Clean Sweep: all that is required is that you grab the minimum $3.3 million in jewelry and leave the store within 50 seconds. |
||
| + | **Move as fast as possible with either approach. |
||
| + | **In the Loud approach, hire a good gunman (Gus or Packie), since otherwise dealing with the store manager will cost Michael precious time. |
||
| + | **Using [[First person view]] helps as there is no delay between the character moving and the animation of breaking each of the glass cabinets (PS4, Xbox One and PC only). |
||
| + | **Shooting the glass will remove the breaking animation, making it a bit faster. |
||
| + | **Using Michael's [[Special Ability]] before breaking the cases will also save some time. |
||
| + | **If this is proving difficult, use [[Rickie Lukens]] as the hacker since the alarm will go off after 50 seconds, autofailing the mission and allowing a checkpoint retry. |
||
| + | *Protégé Protected - Protect Franklin during the LS River chase. |
||
| + | **Can simply be done without failing the mission; make sure Franklin isn't killed by the LSPD during the chase. |
||
| + | *Clean Sweep - Steal the jewelry from all 20 glass cabinets. |
||
| + | **Move fast and use [[Patrick McReary]] or [[Gustavo Mota]] as the gunman, and (for Loud only) [[Eddie Toh]] as the driver. |
||
| + | |||
| + | ==Transcripts== |
||
| + | {{Main|The Jewel Store Job (Loud)/Transcript}} |
||
| + | {{Main|The Jewel Store Job (Smart)/Transcript}} |
||
| + | |||
| + | ==Aftermath== |
||
| + | ===[[Vangelico|Vangelico Stock]]=== |
||
| + | Vangelico stock will plummet after this mission, but will partially rebound upon completion of [[Minor Turbulence]] - for an approximate 42.57% return on investment. |
||
| + | |||
| + | ===[[Los Santos Meteor]] Newspaper=== |
||
| + | <tabber> |
||
| + | Smart= |
||
| + | "''The police have turned up new leads in their investigation into the recent robbery of Vangelico jewelers in Rockford Hills. They believe the crime was tied to an attack on a [[Humane Labs and Research]] shipment carrying [[BZ Gas|BZ gas]]. Police also believe the van used by the robbers was recently stolen from a Bugstar Pest Control Warehouse in [[South Los Santos]]. Despite making these connections, investigators are no closer to finding the suspects who cleaned out the store for millions of dollars of jewels, escaped on motorcycles, and evaded police in the [[Los Santos River|LS River]]. The police are not yet close to making an arrest.''" |
||
| + | |-| |
||
| + | Loud= |
||
| + | ---- |
||
| + | [[Image:Warning.png|35px|left]] '''Note:''' ''The [[GTA Online: The Diamond Casino Heist]] DLC mission "[[Casino Heist - The Big Con]]" confirms that this is not the canon approach to The Jewel Store Job.'' |
||
| + | ---- |
||
| + | "''Investigating officers have uncovered a new lead into a daytime robbery at exclusive [[Rockford Hills]] jewel store Vangelico. It is thought that the guns used in the raid on the store were the same carbine rifles stolen from an [[Los Santos Police Department (HD Universe)|LSPD]] swat van earlier this week. The criminals hacked into the store's security network and disabled the alarm system, while they held customers and staff hostage, and emptied cabinets of jewelry worth millions of dollars.''" |
||
| + | </tabber> |
||
| + | |||
| + | ===[[Lifeinvader]] Posts=== |
||
| + | <small>(Michael's Lifeinvader)</small> |
||
| + | *Lester Crest - "''Nice job. A real gem, you might say! Just like the good old days.''" |
||
| + | |||
| + | ===[[Bleeter]] Posts=== |
||
| + | *@sillyjilly28 - "''To the guys who robbed the Vangelico store on [[Portola Drive]] i'll happily swap an alibi for a diamond :)''" |
||
| + | |||
| + | *@cinncinati_philpp - "''no way! got involved in a reallife jewelry heist on portola drive! Guy has a gun on me and tell me to forget a thousand things a day or something. Craziest vacation EVER!''" |
||
| − | === |
+ | ===[[Weazel News]] (Radio)=== |
| + | <tabber> |
||
| − | *Quick Grab - Steal the jewelry within 50 seconds |
||
| + | Smart= |
||
| − | *Protégé Protected - Protect Franklin during the LS River chase |
||
| + | "''More on the Rockford Hills jewelry store robbery.'' ''The police have turned up two new leads in their investigation into the recent robbery of the Vangelico jewelers in Rockford Hills. They believe the crime was tied to an attack on a Humane Labs and Research shipment carrying BZ gas. Police also believe the van used by the robbers was recently stolen from a Bugstar Pest Control warehouse in South Los Santos. We will stay with this story."'' |
||
| − | *Clean Sweep - Steal the jewelry from all 20 glass cabinets |
||
| + | |-| |
||
| + | Loud= |
||
| + | ---- |
||
| + | [[Image:Warning.png|35px|left]] '''Note:''' ''The [[GTA Online: The Diamond Casino Heist]] DLC mission "[[Casino Heist - The Big Con]]" confirms that this is not the canon approach to The Jewel Store Job.'' |
||
| + | ---- |
||
| + | "''Still no leads in the Rockford Hills jewelry store robbery.'' ''Investigating officers have uncovered a new lead into the daytime robbery at exclusive Rockford Hills jewelry store Vangelico. It is thought that the guns used in the raid on the store were the same [[Carbine Rifle]]s stolen from the LSPD swat van earlier this week. We'll stay with the story."'' |
||
| + | </tabber> |
||
| + | == Video Walkthroughs == |
||
| − | ==Videos== |
||
| + | === Loud Approach === |
||
| − | <gallery hideaddbutton="true"> |
||
| + | <gallery hideaddbutton="true" position="center"> |
||
| − | File:GTA 5 Walkthrough Part 13 - HEIST The Jewel Store Job (Smart)|The Jewel Store Job (Smart) Mission Walkthrough |
||
| − | File: |
+ | File:GTA_5_-_Mission_13_-_The_Jewel_Store_Job_(Loud_Approach)_100%25_Gold_Medal_Walkthrough|The Jewel Store Job (Loud Approach) Mission Walkthrough |
| + | File:GTA_5_-_Mission_13_-_The_Jewel_Store_Job_(Loud_Approach)_First_Person_Gold_Medal_Guide_-_PS4|First Person Walkthrough |
||
| + | File:GTA_5_PC_-_Mission_13_-_The_Jewel_Store_Job_(Loud_Approach)_Gold_Medal_Guide_-_1080p_60fps|PC 60FPS Walkthrough |
||
</gallery> |
</gallery> |
||
| + | {{#ev:youtube|lOArUsjH5DQ|275px|center|GTA Series Videos - GTA 5 PS5 - The Jewel Store Job Loud Approach<br>[Gold Medal Guide - 4K 60fps]}} |
||
| + | |||
| + | === Smart Approach === |
||
| + | <gallery hideaddbutton="true" position="center"> |
||
| + | File:GTA_5_-_Mission_16_-_The_Jewel_Store_Job_(Smart_Approach)_100%25_Gold_Medal_Walkthrough|The Jewel Store Job (Smart Approach) Mission Walkthrough |
||
| + | File:GTA_5_-_Mission_16_-_The_Jewel_Store_Job_(Smart_Approach)_First_Person_Gold_Medal_Guide_-_PS4|First Person Walkthrough |
||
| + | File:GTA_5_PC_-_Mission_16_-_The_Jewel_Store_Job_(Smart_Approach)_Gold_Medal_Guide_-_1080p_60fps|PC 60FPS Walkthrough |
||
| + | </gallery> |
||
| + | {{#ev:youtube|E3tE92iLkJw|275px|center|GTA Series Videos - GTA 5 PS5 - The Jewel Store Job Smart Approach<br>[Gold Medal Guide - 4K 60fps]}} |
||
==Gallery== |
==Gallery== |
||
| − | <gallery> |
+ | <gallery position="center"> |
Gameplay-1-choose-what-youre-going-to-do.jpg|The Jewel Store Heist during its planning stage. |
Gameplay-1-choose-what-youre-going-to-do.jpg|The Jewel Store Heist during its planning stage. |
||
| + | |||
</gallery> |
</gallery> |
||
| + | |||
===Smart=== |
===Smart=== |
||
| − | <gallery> |
+ | <gallery position="center"> |
| − | File:Artwork-PestControl-GTAV.jpg|Artwork |
+ | File:Artwork-PestControl-GTAV.jpg|Artwork |
| − | trailer1_029.jpg |
+ | trailer1_029.jpg|Exiting of the van. |
| − | trailer1_030.jpg |
+ | trailer1_030.jpg|Kicking the doors. |
| − | + | RobberyPlan-GTAV.jpg|The planning of 'The Jewel Store Job'. |
|
| − | Pest_Control1.GTAV.jpg |
+ | Pest_Control1.GTAV.jpg|The crew about to ambush. |
| − | Pest_Control2.GTAV.jpg |
+ | Pest_Control2.GTAV.jpg|Breaking the glass. |
| − | Pest_Control3.GTAV.jpg |
+ | Pest_Control3.GTAV.jpg|Robbing the jewels. |
</gallery> |
</gallery> |
||
| + | |||
| − | ===Loud and Dumb=== |
||
| + | ===Loud=== |
||
| − | <gallery> |
||
| + | <gallery position="center"> |
||
| − | Pest-Control-same-job-but-a-differnet-route.jpg|An alternate version of the heist called "Loud and Dumb". |
||
| + | TheJewelStoreJob-GTAV-LoudApproach.jpg|The robbers do it loud. |
||
| − | Gameplay-1-everybody-get-down.jpg|Another "loud and dumb" screencap. |
||
| + | Gameplay-1-everybody-get-down.jpg|'Please don't make me ruin all the great work your plastic surgeons have been doing!' |
||
| + | TheJewelStoreJob-GTAV-LoudApproachEscape.jpg|The escape route as seen in the Next Gen version. |
||
| + | GTA5-Caught.jpg|LSPD arriving at the crime if Michael does not get out of the store in time making him [[Busted|surrender]]. |
||
</gallery> |
</gallery> |
||
| + | |||
| + | ==Soundtracks== |
||
| + | {{Main|The Jewel Store Job/Soundtrack}} |
||
==Trivia== |
==Trivia== |
||
| + | ===Beta=== |
||
| − | *The mission first appeared in a scene in the [[Grand Theft Auto V/Trailer|first trailer]]. It was later depicted in an artwork, almost a year after. It was also the first confirmed mission of ''[[Grand Theft Auto V]]''. |
||
| + | *The mission first appeared in a scene in the [[Grand Theft Auto V/Trailer|first trailer]]. It was later depicted in an artwork piece almost a year later. It was also the first confirmed mission of ''[[Grand Theft Auto V]]''. |
||
| − | *In the beta trailer, the [[Gas Mask|gas masks]] were yellow and covered only the mouth. |
||
| + | **Also, in the artwork of [[Los Santos Storm Drain (HD Universe)|LS Storm Drain]], while hard to see, there's a [[Police Cruiser (Buffalo)|Police Cruiser]] and a [[Police Cruiser]], which was later replaced by the [[Interceptor]]. |
||
| + | *In the version of the mission seen in the first trailer, Michael is seen completing the job with Gustavo Mota, Eddie Toh, and another unknown crew member. It is possible that this crew member is meant to represent Packie due to their similar hairstyles. |
||
| + | **Also, the crew uses the Smart approach equipment: the Bugstar van, uniform, and gas masks. |
||
| + | **In the same trailer, the [[Gas Mask|gas masks]] were yellow and covered only the mouth. |
||
| + | *Also in the beta, balaclavas were used in the Loud approach, but motorbike helmets were used in the final version. |
||
| + | *This mission was going to be named Pest Control in the beta, which is also the name of a [[Pest Control|mission in ''GTA IV'']]. |
||
| + | |||
| + | ===Smart Approach=== |
||
| + | * When Franklin asks about the crew, the conversation will be different depending on the crew members the player hired. |
||
| + | **If the player chooses crew members with high cuts, Michael will talk about their cuts and say, "''I feel like a chump buying myself a score.''" |
||
| + | **If the player chooses all of the cheapest crew members Franklin will say "''Eh, Uhh, so you made savings on the personnel, huh?''" to which Michael replies "''Yeah, well, I figure they're on Lester's list of potentials, they can't be that bad.''" Franklin continues: "''Hey man what could go wrong?''" and Michael's final response is: "''A cheap hacker, a cheap driver, a cheap gunman? Pretty much everything can go wrong.''" |
||
| + | *In the Smart approach, if Franklin has [[Grenade]]s, Michael will notice the grenades and warn Franklin just before he reaches the vantage point not to throw a grenade by mistake. |
||
| + | *In the Smart approach, Michael and his team are with the Bugstars Burrito, but in the Loud approach, they are seen with a different black Burrito. |
||
| + | *This mission is one of the missions other than the [[Lester's Assassinations|assassination missions]] that affects the Stock Market. As soon as the mission is finished, Vangelico stock goes down to the bottom but by the end of the story, they reach around 15% return percentage, if the player wants to have extra money. |
||
| + | *If [[Casino Heist - The Big Con|The Big Con]] with Bugstar disguise approach is chosen during The Diamond Casino Heist, Lester will mention that he's "done something similar to this before, a jewel store", confirming that the Smart Approach is the [[canon]] choice for this mission. |
||
| + | |||
| + | ===Inspiration=== |
||
| + | *The mission, especially in the Loud method, seems to be loosely inspired in the opening scene of the 1987 film [[wp:Beverly Hills Cop II|Beverly Hills Cop 2]], where a crew of robbers hold a jewelry store, doing the same motions as breaking the glass panels and being timed to pick up the jewels. |
||
| + | *The escape route seems to be loosely based in the 2003 film [[wp:The Italian Job (2003 film)|The Italian Job]], as the crew escape through the sewers in [[wp:Mini Cooper|Mini Coopers]], chased by bikers and exiting through the flood control. |
||
| + | *The use of BZ gas and the pest control van could be used in reference to an episode of ''{{WP|NCIS (TV Series)|NCIS}}'', "[http://ncis.wikia.com/wiki/Sharif_Returns_(episode) Sharif Returns]", where the gas was used in a more lethal manner, and pest control vans were mentioned in conjunction during a newscast. |
||
| + | |||
| + | ===General=== |
||
*New ''Red Dead Redemption'' copies are sold with ''GTA V'' promotional cards, with an image of the mission occurring. |
*New ''Red Dead Redemption'' copies are sold with ''GTA V'' promotional cards, with an image of the mission occurring. |
||
| + | *Unlike the later Heists, Franklin is not yet an equal partner and merely gets a 12% cut as a hired driver. |
||
| − | *In the debut trailer, Michael and his team were seen entering the store "loud and dumb" with the pest control suits on. But in the gameplay video they were seen entering "smart". |
||
| + | *Lester mentions the [[GTA Online Protagonist|''GTA Online'' Protagonist]] as a possible contact they could use for the heist, but ultimately decides against it due to their unpredictable nature making them a bad fit for the operation. |
||
| − | *The pest control outfits will not be the only outfit that's available during the mission. As in the gameplay trailer, Michael and his men were also seen entering the store "loud and dumb" while wearing dress suits and motorbike helmets. |
||
| − | *On the corkboard in the gameplay trailer, a to-do list showed 3 out of the 5 tasks were complete, which were |
+ | *On the corkboard in the gameplay trailer, a to-do list showed 3 out of the 5 tasks were complete, which were '''Evaluate The Security''', '''Photograph The Interior''' and lastly, decide which approach the men wanted to go on. |
| + | *It takes, at minimum, 6 seconds longer to clear the jewel cases in the Loud approach compared to the Smart approach, because of the manager's attempt at heroism. |
||
| − | *In the smart control, Michael and his team are with the [[Bugstars]] [[Burrito]], but in the loud and dumb control they were seen with a different Burrito. |
||
| + | *This is one of the few missions where it is impossible to win a Bronze medal since the Protege Protected objective must be completed or the mission fails. |
||
| − | *In the version of the mission seen in the first trailer Michael is seen completing the job with [[Gustavo Mota]] and another unknown crew member. It is possible that this crew member is meant to represent [[Packie]] due to their similar hairstyles but Rockstar didn't want to ruin the surprise of being able to recruit him so early on. |
||
| − | * |
+ | *The [[Albert Stalley|traffic warden]] cannot be shot and killed, as he reappears in the first cutscene of [[Mr. Philips]]. However, he can be killed if the player runs him over. |
| + | *After the crew has come out of the tunnel, it would be technically impossible for Michael and the police officers to have been in the positions they are unless they had either reversed or driven into the river from the sides. |
||
| − | *This mission was going to be named Pest Control in the beta. |
||
| − | *After the crew |
+ | *After the crew loads the bikes into the truck, Michael has to drive the truck to the "lock up" location. If Michael (the player) damages the truck, the back door will open and the player will notice that Franklin and the crew are not actually inside, yet their dialogue is heard, as they simply spawn at the lock up in the cutscene. |
| + | **Also, after this, the radio will set to [[Radio Mirror Park]], with a predetermined song. |
||
| − | *After the crew loads the bikes into the truck, Michael has to drive the truck to the "lock up" location. If Michael (the player) damages the truck, the back door will open and the player will notice that Franklin in the crew are not inside, yet their dialogue is heard, as they simply spawn at the lock up in the cutscene. |
||
| + | *The screenshot on the [[Rockstar Games Social Club]] shows Michael wearing his default gray suit with gloves and a [[balaclava]] for the loud option. |
||
| − | [[Category:Missions]] |
||
| + | *If Michael stays in the store after the timer runs out, a unique cutscene will play, where the police arrives and arrests the crew members. Michael is seen getting handcuffed and at the end escorted to a police vehicle. This will also fail the mission. The video can be found [https://www.youtube.com/watch?v=iz4s3SWb9GE here] at 0:55. |
||
| − | [[Category:Missions in GTA V]] |
||
| + | * When Rickie says ''"Uhh, bros? Just to warn you, we're not the only people waiting for you in the LS River."'', the subtitles say ''"Uhh. Bros, just to warn you, there might be some cops waiting for you in the LS River."'' instead. This was fixed in the enhanced version. |
||
| − | [[Category:Heists]] |
||
| + | *If Franklin waits on the flyover and jumps after the other crew members enter underground, there is a chance that a glitch may cause them to disappear, leaving only the taillights to be seen floating. |
||
| + | *If Norm and Karim are chosen as part of the crew, after Norm crashes into the entrance of the tunnel, Karim will stop halfway into the underground route trying to get his bearings. |
||
| + | *A Bleeter user claimed he was pointed by a gun mentioning Michael's famous quote, however, neither approach had a civilian being pointed with the gun and getting the quote recited at. |
||
| + | *Killing any hostages with a skilled gunman will cause the gunman to berate Michael for killing the hostages. This will not fail the mission, however. |
||
| + | *If Karim Denz is chosen as the driver, the [[Bati 801RR]] used for the getaway features a unique engine sound. |
||
| + | *The player can take the hacker out of the Benson and the mission will continue on as normal. The hacker will teleport back into the Benson after the crew is in the back. |
||
| + | |||
| + | ==Navigation== |
||
| + | {{Navboxes |
||
| + | |title= Navigation |
||
| + | |list1= |
||
| + | {{GTA|state=collapsed}} |
||
| + | {{Gtav missions|state=collapsed}} |
||
| + | }}[[de:Der Juwelenraub]] |
||
| + | [[es:El trabajo de la joyería]] |
||
| + | [[fr:Casse de la bijouterie]] |
||
| + | [[pl:Robótka u jubilera]] |
||
| + | [[pt:O Golpe à Joalheria]] |
||
| + | [[ru:The Jewel Store Job]] |
||
| + | [[Category:Missions in GTA V|Jewel Store Job, The]] |
||
| + | [[Category:Heists|Jewel Store Job, The]] |
||
| + | [[Category:Heists in GTA V]] |
||
Latest revision as of 16:17, 15 April 2024

The Jewel Store Job is a mission in Grand Theft Auto V. It is the first heist mission in the game that protagonists Michael De Santa and Franklin Clinton undertake.
Preparation
In order to perform the heist, Michael must perform a couple of side-missions (Heist Setups) to gain the necessary equipment. The preparation missions vary based on the chosen approach in Casing the Jewel Store.
Two preparation missions have to be performed:
- The first one, Bugstars Equipment, involves stealing a van from the Bugstars company.
- The second, BZ Gas Grenades, involves stealing gas grenades from a van driving around the city.
Note: The GTA Online: The Diamond Casino Heist DLC mission "Casino Heist - The Big Con" confirms that this is not the canon approach to The Jewel Store Job.
Only one preparation mission, Carbine Rifles, has to be performed, namely stealing a set of carbine rifles from one of the LSPD's tactical team vans.
Mission
Depending on the chosen approach in Casing the Jewel Store, the start of the mission will play out in one of two ways:
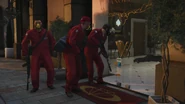
Driving from the garment factory in a Primo, Michael will drop Franklin off at the building site while the driver and gunman park the Bugstars van in front of the jeweler's. Taking control of Franklin, the player must traverse the roofs from around the block, use the vantage point from the recon mission, and throw a can of tear gas into the air vent. The gas will be released into the shop, knocking everybody inside unconscious.
Afterwards, Michael, the driver, and the gunman will enter and start ransacking the store while Franklin goes to get the bikes. The amount of time available before the alarm starts will depend on the picked hacker, but since the gold medal requires the player to steal the jewelry within fifty seconds, any of them will do (in the patched version; in the original console release Rickie Lukens could only hold the alarm off for thirty seconds, while it takes a minimum of 43 seconds in the Smart approach to clear all the jewel cases). A poor gunman (Norm Richards) will drop some of the jewelry, reducing the take to approximately $4.5 million.
Note: The GTA Online: The Diamond Casino Heist DLC mission "Casino Heist - The Big Con" confirms that this is not the canon approach to The Jewel Store Job.
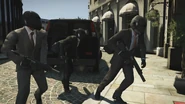
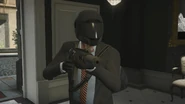
Franklin drives Michael, the driver and the gunman to the jeweler's in a van. Donning helmets, they will enter and tell the hostages to get down. While the gunman holds the hostages, Michael and the driver start ransacking the store while Franklin waits outside with the bikes. The store manager will try to intervene and a good gunman (Gus Mota or Packie McReary) will handle it, but if a bad one (Norm Richards) is chosen, he will do poorly with crowd control and Michael will have to kill the manager, or they'll sound the alarm and fail the mission. The amount of time available before the alarm starts will depend on the selected hacker, but since the gold medal requires the player to steal the jewelry within fifty seconds, any of them will do (in the enhanced edition; in the original version Rickie Lukens can only hold the alarm off for thirty seconds, while it takes a minimum of 49 seconds in the Loud approach to clear all the jewel cases). A poor driver (Karim Denz) will drop some of the jewelry, reducing the take to approximately $4.5 million.
Escape
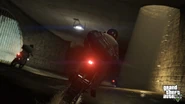
Both approaches lead to the same escape. Once the robbery has been committed, Franklin escapes on a bike with the driver and gunman. The motorcycle depends on the driver, but won't make much of a difference. Karim Denz, a poor driver, will send panicky and unhelpful radio traffic, rather than the calm and professional directions from pro Eddie Toh, but this really doesn't affect anything either. Follow the crew, evading the cops, and drive into the tunnel to access the sewers. If a low-skilled gunman is chosen, then he, along with his bag of jewels, will crash and fall off his bike before entering the tunnel. If the player picks up the bag, the take will not change, but if not; a significant amount of the takings are lost. There is a casualty expense for the death of the gunman, regardless. If a high-skilled gunman is chosen, none of this happens.
Using the Los Santos sewer network to evade the police, the crew eventually ends up at the Los Santos River into a pack of awaiting police cars. In the meantime, Michael and the hacker went to get the delivery truck and use it to forcibly push the cops out of the way.
Once the police attention has been lost, the bikes are loaded onto the truck and are driven to Lester's lockup where the crew splits up. The maximum take for the mission is $4,946,153 if the player smashes all twenty displays and chooses a good gunman (for either approach) or a good driver (for the Loud approach). $2,500,000 will then go to Martin Madrazo while the rest gets split between the crew members. Note that for this, his first Heist, Franklin receives a fixed percentage as a hired gunman/driver, rather than splitting the take equally with Michael.
After completing the mission, a Switch Scene with Franklin shows that Tanisha was none too thrilled with Franklin's newfound wealth while he is relaxing at the Vanilla Unicorn. Franklin wanted to take her out on a date, which she refuses as Franklin told her that he had to leave and that he hopes to see her soon.
Maximum Revenue
For the largest possible take, choose the Smart approach and hire Karim Denz as the driver, Packie McReary as the gunman and Rickie Lukens as the hacker. This will net Michael $1,223,073 and Franklin $293,539.
Maximum gross take: $4,946,153
Martin Madrazo's payoff: -$2,500,000
Maximum net take: $2,446,153
Lester's cut (14%): -$342,462
Crew cut (24%): -$587,077
Franklin's cut (12%): $293,539
Michael's profit (50%): $1,223,073
Mission Objectives
- Go to Vangelico Jewel Store. - (Michael)
- Climb to the roof of the jewel store. - (Franklin)
- Throw the Tear Gas on the ventilation system. - (Franklin)
- Break the glass cabinets and steal at least $3,300,000. - (Michael)
- Follow your crew into the sewers. - (Franklin)
- (Optional) Pick up the dropped bag. (Only if you selected a bad gunman) - (Franklin)
- Follow your crew through the sewers. - (Franklin)
- Take out the police cars and protect your crew. - (Michael)
- Rendezvous with your crew. - (Michael)
- Go to Lester. - (Michael)
Note: The GTA Online: The Diamond Casino Heist DLC mission "Casino Heist - The Big Con" confirms that this is not the canon approach to The Jewel Store Job.
- Go to Vangelico Jewel Store. - (Michael)
- Break the glass cabinets and steal at least $3,300,000. - (Michael)
- Stop the manager. (Only if you selected a bad gunman) - (Michael)
- Follow your crew into the sewers. - (Franklin)
- (Optional) Pick up the dropped bag. (Only if you selected a bad gunman) - (Franklin)
- Follow your crew through the sewers. - (Franklin)
- Take out the police cars and protect your crew. - (Michael)
- Rendezvous with your crew. - (Michael)
- Go to Lester. - (Michael)
Gold Medal Objectives
Loud and Smart
- Quick Grab - Steal the jewelry within 50 seconds.
- Note that this is not the same as Clean Sweep: all that is required is that you grab the minimum $3.3 million in jewelry and leave the store within 50 seconds.
- Move as fast as possible with either approach.
- In the Loud approach, hire a good gunman (Gus or Packie), since otherwise dealing with the store manager will cost Michael precious time.
- Using First person view helps as there is no delay between the character moving and the animation of breaking each of the glass cabinets (PS4, Xbox One and PC only).
- Shooting the glass will remove the breaking animation, making it a bit faster.
- Using Michael's Special Ability before breaking the cases will also save some time.
- If this is proving difficult, use Rickie Lukens as the hacker since the alarm will go off after 50 seconds, autofailing the mission and allowing a checkpoint retry.
- Protégé Protected - Protect Franklin during the LS River chase.
- Can simply be done without failing the mission; make sure Franklin isn't killed by the LSPD during the chase.
- Clean Sweep - Steal the jewelry from all 20 glass cabinets.
- Move fast and use Patrick McReary or Gustavo Mota as the gunman, and (for Loud only) Eddie Toh as the driver.
Transcripts
Main article: The Jewel Store Job (Loud)/Transcript
Main article: The Jewel Store Job (Smart)/Transcript
Aftermath
Vangelico Stock
Vangelico stock will plummet after this mission, but will partially rebound upon completion of Minor Turbulence - for an approximate 42.57% return on investment.
Los Santos Meteor Newspaper
"The police have turned up new leads in their investigation into the recent robbery of Vangelico jewelers in Rockford Hills. They believe the crime was tied to an attack on a Humane Labs and Research shipment carrying BZ gas. Police also believe the van used by the robbers was recently stolen from a Bugstar Pest Control Warehouse in South Los Santos. Despite making these connections, investigators are no closer to finding the suspects who cleaned out the store for millions of dollars of jewels, escaped on motorcycles, and evaded police in the LS River. The police are not yet close to making an arrest."
Note: The GTA Online: The Diamond Casino Heist DLC mission "Casino Heist - The Big Con" confirms that this is not the canon approach to The Jewel Store Job.
"Investigating officers have uncovered a new lead into a daytime robbery at exclusive Rockford Hills jewel store Vangelico. It is thought that the guns used in the raid on the store were the same carbine rifles stolen from an LSPD swat van earlier this week. The criminals hacked into the store's security network and disabled the alarm system, while they held customers and staff hostage, and emptied cabinets of jewelry worth millions of dollars."
Lifeinvader Posts
(Michael's Lifeinvader)
- Lester Crest - "Nice job. A real gem, you might say! Just like the good old days."
Bleeter Posts
- @sillyjilly28 - "To the guys who robbed the Vangelico store on Portola Drive i'll happily swap an alibi for a diamond :)"
- @cinncinati_philpp - "no way! got involved in a reallife jewelry heist on portola drive! Guy has a gun on me and tell me to forget a thousand things a day or something. Craziest vacation EVER!"
Weazel News (Radio)
"More on the Rockford Hills jewelry store robbery. The police have turned up two new leads in their investigation into the recent robbery of the Vangelico jewelers in Rockford Hills. They believe the crime was tied to an attack on a Humane Labs and Research shipment carrying BZ gas. Police also believe the van used by the robbers was recently stolen from a Bugstar Pest Control warehouse in South Los Santos. We will stay with this story."
Note: The GTA Online: The Diamond Casino Heist DLC mission "Casino Heist - The Big Con" confirms that this is not the canon approach to The Jewel Store Job.
"Still no leads in the Rockford Hills jewelry store robbery. Investigating officers have uncovered a new lead into the daytime robbery at exclusive Rockford Hills jewelry store Vangelico. It is thought that the guns used in the raid on the store were the same Carbine Rifles stolen from the LSPD swat van earlier this week. We'll stay with the story."
Video Walkthroughs
Loud Approach
Smart Approach
Gallery
Smart
Loud
Soundtracks
Main article: The Jewel Store Job/Soundtrack
Trivia
Beta
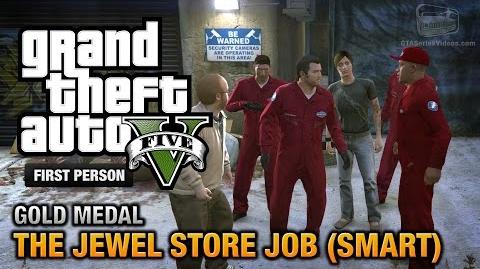
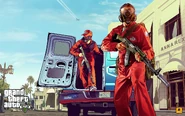
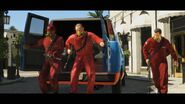
- The mission first appeared in a scene in the first trailer. It was later depicted in an artwork piece almost a year later. It was also the first confirmed mission of Grand Theft Auto V.
- Also, in the artwork of LS Storm Drain, while hard to see, there's a Police Cruiser and a Police Cruiser, which was later replaced by the Interceptor.
- In the version of the mission seen in the first trailer, Michael is seen completing the job with Gustavo Mota, Eddie Toh, and another unknown crew member. It is possible that this crew member is meant to represent Packie due to their similar hairstyles.
- Also, the crew uses the Smart approach equipment: the Bugstar van, uniform, and gas masks.
- In the same trailer, the gas masks were yellow and covered only the mouth.
- Also in the beta, balaclavas were used in the Loud approach, but motorbike helmets were used in the final version.
- This mission was going to be named Pest Control in the beta, which is also the name of a mission in GTA IV.
Smart Approach
- When Franklin asks about the crew, the conversation will be different depending on the crew members the player hired.
- If the player chooses crew members with high cuts, Michael will talk about their cuts and say, "I feel like a chump buying myself a score."
- If the player chooses all of the cheapest crew members Franklin will say "Eh, Uhh, so you made savings on the personnel, huh?" to which Michael replies "Yeah, well, I figure they're on Lester's list of potentials, they can't be that bad." Franklin continues: "Hey man what could go wrong?" and Michael's final response is: "A cheap hacker, a cheap driver, a cheap gunman? Pretty much everything can go wrong."
- In the Smart approach, if Franklin has Grenades, Michael will notice the grenades and warn Franklin just before he reaches the vantage point not to throw a grenade by mistake.
- In the Smart approach, Michael and his team are with the Bugstars Burrito, but in the Loud approach, they are seen with a different black Burrito.
- This mission is one of the missions other than the assassination missions that affects the Stock Market. As soon as the mission is finished, Vangelico stock goes down to the bottom but by the end of the story, they reach around 15% return percentage, if the player wants to have extra money.
- If The Big Con with Bugstar disguise approach is chosen during The Diamond Casino Heist, Lester will mention that he's "done something similar to this before, a jewel store", confirming that the Smart Approach is the canon choice for this mission.
Inspiration
- The mission, especially in the Loud method, seems to be loosely inspired in the opening scene of the 1987 film Beverly Hills Cop 2, where a crew of robbers hold a jewelry store, doing the same motions as breaking the glass panels and being timed to pick up the jewels.
- The escape route seems to be loosely based in the 2003 film The Italian Job, as the crew escape through the sewers in Mini Coopers, chased by bikers and exiting through the flood control.
- The use of BZ gas and the pest control van could be used in reference to an episode of NCIS, "Sharif Returns", where the gas was used in a more lethal manner, and pest control vans were mentioned in conjunction during a newscast.
General
- New Red Dead Redemption copies are sold with GTA V promotional cards, with an image of the mission occurring.
- Unlike the later Heists, Franklin is not yet an equal partner and merely gets a 12% cut as a hired driver.
- Lester mentions the GTA Online Protagonist as a possible contact they could use for the heist, but ultimately decides against it due to their unpredictable nature making them a bad fit for the operation.
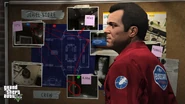
- On the corkboard in the gameplay trailer, a to-do list showed 3 out of the 5 tasks were complete, which were Evaluate The Security, Photograph The Interior and lastly, decide which approach the men wanted to go on.
- It takes, at minimum, 6 seconds longer to clear the jewel cases in the Loud approach compared to the Smart approach, because of the manager's attempt at heroism.
- This is one of the few missions where it is impossible to win a Bronze medal since the Protege Protected objective must be completed or the mission fails.
- The traffic warden cannot be shot and killed, as he reappears in the first cutscene of Mr. Philips. However, he can be killed if the player runs him over.
- After the crew has come out of the tunnel, it would be technically impossible for Michael and the police officers to have been in the positions they are unless they had either reversed or driven into the river from the sides.
- After the crew loads the bikes into the truck, Michael has to drive the truck to the "lock up" location. If Michael (the player) damages the truck, the back door will open and the player will notice that Franklin and the crew are not actually inside, yet their dialogue is heard, as they simply spawn at the lock up in the cutscene.
- Also, after this, the radio will set to Radio Mirror Park, with a predetermined song.
- The screenshot on the Rockstar Games Social Club shows Michael wearing his default gray suit with gloves and a balaclava for the loud option.
- If Michael stays in the store after the timer runs out, a unique cutscene will play, where the police arrives and arrests the crew members. Michael is seen getting handcuffed and at the end escorted to a police vehicle. This will also fail the mission. The video can be found here at 0:55.
- When Rickie says "Uhh, bros? Just to warn you, we're not the only people waiting for you in the LS River.", the subtitles say "Uhh. Bros, just to warn you, there might be some cops waiting for you in the LS River." instead. This was fixed in the enhanced version.
- If Franklin waits on the flyover and jumps after the other crew members enter underground, there is a chance that a glitch may cause them to disappear, leaving only the taillights to be seen floating.
- If Norm and Karim are chosen as part of the crew, after Norm crashes into the entrance of the tunnel, Karim will stop halfway into the underground route trying to get his bearings.
- A Bleeter user claimed he was pointed by a gun mentioning Michael's famous quote, however, neither approach had a civilian being pointed with the gun and getting the quote recited at.
- Killing any hostages with a skilled gunman will cause the gunman to berate Michael for killing the hostages. This will not fail the mission, however.
- If Karim Denz is chosen as the driver, the Bati 801RR used for the getaway features a unique engine sound.
- The player can take the hacker out of the Benson and the mission will continue on as normal. The hacker will teleport back into the Benson after the crew is in the back.


