MonkeyBot188 (talk | contribs) (→Current Design Gallery: Adding hidden Current Design Gallery notice) |
Blissful690 (talk | contribs) (→Trivia: It's not a British word, Americans use it too, you know) |
||
| (37 intermediate revisions by 17 users not shown) | |||
| Line 1: | Line 1: | ||
| − | {{Images|cdg=y|Modified Tailgater given after "Monkey Business" in Grand Theft Auto V.}} |
||
{{Infobox vehicles |
{{Infobox vehicles |
||
|name = Tailgater |
|name = Tailgater |
||
| Line 21: | Line 20: | ||
|carcols = |
|carcols = |
||
{{Expand|| |
{{Expand|| |
||
| + | {{CarColV/Title}} |
||
| − | <center>COLOR SET 1</center> |
||
| − | {{CarColV|0|0|10|156}} |
+ | {{CarColV|no=1|0|0|10|156}} |
| + | {{CarColV|no=2|1|1|10|156}} |
||
| − | <center>COLOR SET 2</center> |
||
| − | {{CarColV| |
+ | {{CarColV|no=3|2|2|7|156}} |
| + | {{CarColV|no=4|3|3|5|156}} |
||
| − | <center>COLOR SET 3</center> |
||
| − | {{CarColV| |
+ | {{CarColV|no=5|6|6|111|156}} |
| + | {{CarColV|no=6|111|111|111|156}} |
||
| − | <center>COLOR SET 4</center> |
||
| − | {{CarColV| |
+ | {{CarColV|no=7|4|4|111|156}} |
| + | {{CarColV|no=8|61|61|67|156}} |
||
| − | <center>COLOR SET 5</center> |
||
| − | {{CarColV| |
+ | {{CarColV|no=9|32|32|28|156}} |
| + | {{CarColV|no=10|27|27|36|156}} |
||
| − | <center>COLOR SET 6</center> |
||
| − | {{CarColV| |
+ | {{CarColV|no=11|64|64|54|156}} |
| + | {{CarColV|no=12|5|5|111|156}} |
||
| − | <center>COLOR SET 7</center> |
||
| − | {{CarColV| |
+ | {{CarColV|no=13|6|6|111|156}}<br> |
| − | <center>COLOR SET 8</center> |
||
| − | {{CarColV|61|61|67|156}}<br> |
||
| − | <center>COLOR SET 9</center> |
||
| − | {{CarColV|32|32|28|156}}<br> |
||
| − | <center>COLOR SET 10</center> |
||
| − | {{CarColV|27|27|36|156}}<br> |
||
| − | <center>COLOR SET 11</center> |
||
| − | {{CarColV|64|64|54|156}}<br> |
||
| − | <center>COLOR SET 12</center> |
||
| − | {{CarColV|5|5|111|156}}<br> |
||
| − | <center>COLOR SET 13</center> |
||
| − | {{CarColV|6|6|111|156}}<br> |
||
}} |
}} |
||
|wheeltype = Sport |
|wheeltype = Sport |
||
| Line 81: | Line 68: | ||
==Design== |
==Design== |
||
| − | === |
+ | ===''Grand Theft Auto V''=== |
| − | {{quote|Look at this car and ask yourself what price would you place on style, status and sophistication? Then forget that price because I offer flexible payment schedules to suit any budget. Don’t let society and banks tell you what you can and can’t afford. No credit? No problem! You’re approved! I want everyone to live the American dream just like me.|[[Simeon Yetarian]]}} |
+ | {{quote|Look at this car and ask yourself what price would you place on style, status and sophistication? Then forget that price because I offer flexible payment schedules to suit any budget. Don’t let society and banks tell you what you can and can’t afford. No credit? No problem! You’re approved! I want everyone to live the American dream just like me.|[[Simeon Yetarian]].}}The Tailgater car features styling elements that have been inspired by the {{WP|Audi A6#C6|Audi A6 (C6)}} for the overall body design, and the {{WP|Audi A8|Audi A8 (D4)}} for the grille, lower body bulge, and ten-spoke wheels. However, the quarter panel bulges appear to have been inspired by the {{WP|Audi RS 6#C6 (Typ 4F, 2008–2010)|Audi RS6 (C6)}}. The headlights are very similar to ones on the {{WP|Holden Commodore (VZ)}} with projector headlight housing. The rear end of the vehicle mostly draws its inspiration from the {{WP|Audi A4|Audi A4 (B7)}}. The tail light units are inspired by the {{WP|Ford Falcon (Australia)#FG X|Ford Falcon FG X}}. |
| − | The Tailgater car features styling elements that have been inspired by the {{WP|Audi A6#C6|Audi A6 (C6)}} for the overall body design, and the {{WP|Audi A8|Audi A8 (D4)}} for the headlamp units, grille, lower body bulge and ten-spoke wheels. However, the quarter panel bulges appeared to have been inspired by the {{WP|Mitsubishi Lancer Evolution|Mitsubishi Lancer Evolution X}}, and The rear end of the vehicle mostly draws its inspiration from the {{WP|Audi A4|Audi A4 (B7)}}. The taillight units are inspired by the {{WP|Ford Falcon (Australia)|Ford Falcon FG}}. |
||
| − | The front end of the car features a dominant grille which decreases in width as it gets closer to the lower edge of the bumper. |
+ | The front end of the car features a dominant grille, which decreases in width as it gets closer to the lower edge of the bumper. This grille only occupies the upper half of the front face, and features rounded chrome edges with two horizontal chrome strips. Directly below the grille are two ducts which have non-functional circular fog-lamps. |
| − | The main body area features a variety of curves. Close to the base of the body there is a large bulge that spans almost the entire wheelbase. Above that, at around mid-body height, a straight line connects the front quarter bulge to the rear quarter bulge. The greenhouse features very thin {{WP|Pillar(automobile)|B and C pillars}}, which appear to be covered by a polymer. The D pillars of the car are very long, with the intention of creating an elegant appearance. |
+ | The main body area features a variety of curves. Close to the base of the body there is a large bulge that spans almost the entire wheelbase. Above that, at around mid-body height, a straight line connects the front quarter bulge to the rear quarter bulge. The greenhouse features very thin {{WP|Pillar (automobile)|B and C pillars}}, which appear to be covered by a polymer. The D pillars of the car are very long, with the intention of creating an elegant appearance. |
{{Clr}} |
{{Clr}} |
||
===Current Design Gallery=== |
===Current Design Gallery=== |
||
| − | <!--Please ensure you have read the Manual of Style [GTA_Wiki:Manual_of_Style/Vehicles/Design_Galleries] before uploading and adding images to the Current Design Gallery. Failure to meet these guidelines will result in the images being removed and deleted, and repeated offences may result in a warning.--> |
+ | <!--Please ensure you have read the Manual of Style [GTA_Wiki:Manual_of_Style/Vehicles/Design_Galleries] before uploading and adding images to the Current Design Gallery. Failure to meet these guidelines will result in the images being removed and deleted, and repeated offences may result in a warning.--> |
| + | |||
| − | |front_quarter_image = Tailgater-GTAV-front.png |
||
| + | {{Current Design Gallery |
||
| − | |top_image = |
||
| − | | |
+ | |front_quarter_image = Tailgater-GTAV-FrontQuarter.png |
| − | | |
+ | |top_image = Tailgater-GTAV-Top.png |
| + | |rear_quarter_image = Tailgater-GTAV-RearQuarter.png |
||
| − | |side_image = |
||
| − | | |
+ | |front_image = Tailgater-GTAV-Front.png |
| − | | |
+ | |side_image = Tailgater-GTAV-Side.png |
| + | |rear_image = Tailgater-GTAV-Rear.png |
||
| − | |underside_image = |
||
| − | | |
+ | |engine_image = Tailgater-GTAV-Engine.png |
| + | |underside_image = Tailgater-GTAV-Underside.png |
||
| − | |detail_image = |
||
| + | |inside_image = Tailgater-GTAV-Inside.png |
||
| − | |open_other_image = |
||
| − | | |
+ | |detail_image = Tailgater-GTAV-Badges.png |
| + | |open_other_image = Tailgater-GTAV-Other.png |
||
| + | |dashboard_image = Tailgater-GTAV-Dashboard.png |
||
}} |
}} |
||
==Performance== |
==Performance== |
||
| − | === |
+ | ===''Grand Theft Auto V''=== |
Surprising for a sedan, the Tailgater has performance that is on par with most sports cars. Acceleration and top speed are both above average, able to hold ground against sportier vehicles such as the [[Exemplar]] or [[F620]]. It has decent grip at low to moderate speeds, but can understandably begin to understeer without use of the brakes. It is fairly durable, even in regard to deformation damage. It takes several hard blows to the engine to begin drawing smoke, and can take numerous hits before any wheels become stuck. |
Surprising for a sedan, the Tailgater has performance that is on par with most sports cars. Acceleration and top speed are both above average, able to hold ground against sportier vehicles such as the [[Exemplar]] or [[F620]]. It has decent grip at low to moderate speeds, but can understandably begin to understeer without use of the brakes. It is fairly durable, even in regard to deformation damage. It takes several hard blows to the engine to begin drawing smoke, and can take numerous hits before any wheels become stuck. |
||
The Tailgater shares its engine sound with the [[Sentinel]], [[Gresley]], [[Surano]] and [[Schafter]]. |
The Tailgater shares its engine sound with the [[Sentinel]], [[Gresley]], [[Surano]] and [[Schafter]]. |
||
| − | ==== |
+ | ====GTA V Overview==== |
{{Vehiclestats-gtav |
{{Vehiclestats-gtav |
||
|handling_top_speed = 90 / 145 |
|handling_top_speed = 90 / 145 |
||
| Line 129: | Line 117: | ||
|observed_gears = 5 |
|observed_gears = 5 |
||
|observed_engine = {{H:title|Front engine, rear wheel drive|FR}} V8 <small>(Cover)</small> |
|observed_engine = {{H:title|Front engine, rear wheel drive|FR}} V8 <small>(Cover)</small> |
||
| + | |||
| + | V6 (sound) |
||
|observed_drivetrain = RWD |
|observed_drivetrain = RWD |
||
| − | |rsc_image =Tailgater-GTAV-RSCStats.JPG |
+ | |rsc_image = Tailgater-GTAV-RSCStats.JPG |
| − | |rsc_top_speed ={{PercentBar|77.799942|width=150}} |
+ | |rsc_top_speed = {{PercentBar|77.799942|width=150}} |
| − | |rsc_acceleration ={{PercentBar|50|width=150}} |
+ | |rsc_acceleration = {{PercentBar|50|width=150}} |
| − | |rsc_braking ={{PercentBar|29.999998|width=150}} |
+ | |rsc_braking = {{PercentBar|29.999998|width=150}} |
| − | |rsc_traction ={{PercentBar|77.272728|width=150}} |
+ | |rsc_traction = {{PercentBar|77.272728|width=150}} |
}} |
}} |
||
| Line 140: | Line 130: | ||
===''Grand Theft Auto V''=== |
===''Grand Theft Auto V''=== |
||
{| class="wikitable" |
{| class="wikitable" |
||
| + | ! colspan="2" scope="col" |Category |
||
| − | !Type |
||
| + | ! scope="col" |Modification |
||
| − | !Upgrade |
||
| − | !Cost ( |
+ | ! scope="col" |Cost (''GTA V'') |
| − | !Cost ([[Grand Theft Auto Online|Online]]) |
+ | ! scope="col" |Cost ([[Grand Theft Auto Online|''GTA Online'']]) |
| + | ! scope="col" |Image |
||
| + | |- |
||
| + | | colspan="2" rowspan="6" |Armor |
||
| + | |No Armor |
||
| + | | style="text-align: center;" |$100 |
||
| + | | colspan="2" style="text-align: center;" |$200 |
||
|- |
|- |
||
| − | |rowspan="5"|Armor |
||
|Armor Upgrade 20% |
|Armor Upgrade 20% |
||
| style="text-align: center;" |$500 |
| style="text-align: center;" |$500 |
||
| + | | colspan="2" style="text-align: center;" |$4,500 |
||
| − | | |
||
|- |
|- |
||
|Armor Upgrade 40% |
|Armor Upgrade 40% |
||
| style="text-align: center;" |$1,250 |
| style="text-align: center;" |$1,250 |
||
| + | | colspan="2" style="text-align: center;" |$7,500 |
||
| − | | |
||
|- |
|- |
||
|Armor Upgrade 60% |
|Armor Upgrade 60% |
||
| style="text-align: center;" |$2,000 |
| style="text-align: center;" |$2,000 |
||
| + | | colspan="2" style="text-align: center;" |$12,000 |
||
| − | | |
||
|- |
|- |
||
|Armor Upgrade 80% |
|Armor Upgrade 80% |
||
| style="text-align: center;" |$3,500 |
| style="text-align: center;" |$3,500 |
||
| + | | colspan="2" style="text-align: center;" |$21,000 |
||
| − | | |
||
|- |
|- |
||
|Armor Upgrade 100% |
|Armor Upgrade 100% |
||
| style="text-align: center;" |$5,000 |
| style="text-align: center;" |$5,000 |
||
| + | | colspan="2" style="text-align: center;" |$30,000 |
||
| − | | |
||
| + | |- |
||
| + | | colspan="2" rowspan="4" |Brakes |
||
| + | |Stock Brakes |
||
| + | | style="text-align: center;" |$100 |
||
| + | | colspan="2" style="text-align: center;" |$200 |
||
|- |
|- |
||
| − | |rowspan="3"|Brakes |
||
|Street Brakes |
|Street Brakes |
||
| style="text-align: center;" |$2,000 |
| style="text-align: center;" |$2,000 |
||
| − | | style="text-align: center;" |$ |
+ | | colspan="2" style="text-align: center;" |$4,000 |
|- |
|- |
||
|Sport Brakes |
|Sport Brakes |
||
| style="text-align: center;" |$2,700 |
| style="text-align: center;" |$2,700 |
||
| − | | style="text-align: center;" |$ |
+ | | colspan="2" style="text-align: center;" |$5,400 |
|- |
|- |
||
|Race Brakes |
|Race Brakes |
||
| style="text-align: center;" |$3,500 |
| style="text-align: center;" |$3,500 |
||
| − | | style="text-align: center;" |$ |
+ | | colspan="2" style="text-align: center;" |$7,000 |
| + | |- |
||
| + | | colspan="2" rowspan="10" |Bumpers |
||
| + | |Stock Front Bumper |
||
| + | | style="text-align: center;" |$250 |
||
| + | | style="text-align: center;" |$500 |
||
| + | | |
||
|- |
|- |
||
| − | | rowspan="8" |Bumpers |
||
|Painted Front Splitter |
|Painted Front Splitter |
||
| style="text-align: center;" |$500 |
| style="text-align: center;" |$500 |
||
| style="text-align: center;" |$1,000 |
| style="text-align: center;" |$1,000 |
||
| + | | |
||
|- |
|- |
||
|Custom Front Splitter |
|Custom Front Splitter |
||
| style="text-align: center;" |$750 |
| style="text-align: center;" |$750 |
||
| style="text-align: center;" |$1,500 |
| style="text-align: center;" |$1,500 |
||
| + | | |
||
|- |
|- |
||
|Painted Bumper & Splitter |
|Painted Bumper & Splitter |
||
| style="text-align: center;" |$1,000 |
| style="text-align: center;" |$1,000 |
||
| style="text-align: center;" |$2,000 |
| style="text-align: center;" |$2,000 |
||
| + | | |
||
|- |
|- |
||
|Custom Splitter & Intercooler |
|Custom Splitter & Intercooler |
||
| style="text-align: center;" |$1,300 |
| style="text-align: center;" |$1,300 |
||
| style="text-align: center;" |$2,600 |
| style="text-align: center;" |$2,600 |
||
| + | | |
||
| + | |- |
||
| + | |Stock Rear Bumper |
||
| + | | style="text-align: center;" |$250 |
||
| + | | style="text-align: center;" |$500 |
||
| + | | |
||
|- |
|- |
||
|Carbon Rear Diffuser |
|Carbon Rear Diffuser |
||
| style="text-align: center;" |$500 |
| style="text-align: center;" |$500 |
||
| style="text-align: center;" |$1,000 |
| style="text-align: center;" |$1,000 |
||
| + | | |
||
|- |
|- |
||
|Painted Rear Bumper |
|Painted Rear Bumper |
||
| style="text-align: center;" |$750 |
| style="text-align: center;" |$750 |
||
| style="text-align: center;" |$1,500 |
| style="text-align: center;" |$1,500 |
||
| + | | |
||
|- |
|- |
||
|Sports Rear Bumper |
|Sports Rear Bumper |
||
| style="text-align: center;" |$1,000 |
| style="text-align: center;" |$1,000 |
||
| style="text-align: center;" |$2,000 |
| style="text-align: center;" |$2,000 |
||
| + | | |
||
|- |
|- |
||
|Painted Bumper & Diffuser |
|Painted Bumper & Diffuser |
||
| style="text-align: center;" |$1,300 |
| style="text-align: center;" |$1,300 |
||
| style="text-align: center;" |$2,600 |
| style="text-align: center;" |$2,600 |
||
| + | | |
||
|- |
|- |
||
| − | |rowspan="4"|Engine |
+ | | colspan="2" rowspan="4" |Engine |
|EMS Upgrade, Level 1 |
|EMS Upgrade, Level 1 |
||
| style="text-align: center;" |$900 |
| style="text-align: center;" |$900 |
||
| − | | style="text-align: center;" |$ |
+ | | colspan="2" style="text-align: center;" |$1,800 |
|- |
|- |
||
|EMS Upgrade, Level 2 |
|EMS Upgrade, Level 2 |
||
| style="text-align: center;" |$1,250 |
| style="text-align: center;" |$1,250 |
||
| − | | style="text-align: center;" |$ |
+ | | colspan="2" style="text-align: center;" |$2,500 |
|- |
|- |
||
|EMS Upgrade, Level 3 |
|EMS Upgrade, Level 3 |
||
| style="text-align: center;" |$1,800 |
| style="text-align: center;" |$1,800 |
||
| − | | style="text-align: center;" |$ |
+ | | colspan="2" style="text-align: center;" |$3,600 |
|- |
|- |
||
|EMS Upgrade, Level 4 |
|EMS Upgrade, Level 4 |
||
| style="text-align: center;" |$3,350 |
| style="text-align: center;" |$3,350 |
||
| − | | style="text-align: center;" |$ |
+ | | colspan="2" style="text-align: center;" |$6,700 |
| + | |- |
||
| + | | colspan="2" rowspan="5" |Exhausts |
||
| + | |Stock Exhaust |
||
| + | | style="text-align: center;" |$130 |
||
| + | | style="text-align: center;" |$260 |
||
| + | | |
||
|- |
|- |
||
| − | | rowspan="4" |Exhaust |
||
|Titanium Exhaust |
|Titanium Exhaust |
||
| style="text-align: center;" |$375 |
| style="text-align: center;" |$375 |
||
| style="text-align: center;" |$750 |
| style="text-align: center;" |$750 |
||
| + | | |
||
|- |
|- |
||
|Dual Titanium Exhaust |
|Dual Titanium Exhaust |
||
| style="text-align: center;" |$899 |
| style="text-align: center;" |$899 |
||
| style="text-align: center;" |$1,800 |
| style="text-align: center;" |$1,800 |
||
| + | | |
||
|- |
|- |
||
|Chrome Tip Exhaust |
|Chrome Tip Exhaust |
||
| style="text-align: center;" |$1,499 |
| style="text-align: center;" |$1,499 |
||
| style="text-align: center;" |$3,000 |
| style="text-align: center;" |$3,000 |
||
| + | | |
||
|- |
|- |
||
|Dual Exit Exhaust |
|Dual Exit Exhaust |
||
| style="text-align: center;" |$4,770 |
| style="text-align: center;" |$4,770 |
||
| style="text-align: center;" |$9,550 |
| style="text-align: center;" |$9,550 |
||
| + | | |
||
| + | |- |
||
| + | | colspan="2" rowspan="2" |[[Car Bomb|Explosives]] |
||
| + | |Ignition Bomb |
||
| + | | style="text-align: center;" |N/A |
||
| + | | colspan="2" style="text-align: center;" |$5,000 |
||
| + | |- |
||
| + | |Remote Bomb |
||
| + | | style="text-align: center;" |N/A |
||
| + | | colspan="2" style="text-align: center;" |$7,500 |
||
| + | |- |
||
| + | | colspan="2" rowspan="3" |Fenders |
||
| + | |Stock Fenders |
||
| + | | style="text-align: center;" |$150 |
||
| + | | style="text-align: center;" |$300 |
||
| + | | |
||
|- |
|- |
||
| − | | rowspan="2" |Fenders |
||
|Arch Extensions |
|Arch Extensions |
||
| style="text-align: center;" |$450 |
| style="text-align: center;" |$450 |
||
| style="text-align: center;" |$900 |
| style="text-align: center;" |$900 |
||
| + | | |
||
|- |
|- |
||
|Chrome Arch Trim |
|Chrome Arch Trim |
||
| style="text-align: center;" |$750 |
| style="text-align: center;" |$750 |
||
| style="text-align: center;" |$1,500 |
| style="text-align: center;" |$1,500 |
||
| + | | |
||
| + | |- |
||
| + | | colspan="2" rowspan="6" |Grilles |
||
| + | |Stock Grille |
||
| + | | style="text-align: center;" |$100 |
||
| + | | style="text-align: center;" |$200 |
||
| + | | |
||
|- |
|- |
||
| − | | rowspan="5" |Grille |
||
|Black Grille |
|Black Grille |
||
| style="text-align: center;" |$375 |
| style="text-align: center;" |$375 |
||
| style="text-align: center;" |$750 |
| style="text-align: center;" |$750 |
||
| + | | |
||
|- |
|- |
||
|Chrome Grille |
|Chrome Grille |
||
| style="text-align: center;" |$670 |
| style="text-align: center;" |$670 |
||
| style="text-align: center;" |$1,340 |
| style="text-align: center;" |$1,340 |
||
| + | | |
||
|- |
|- |
||
|Mesh Grille |
|Mesh Grille |
||
| style="text-align: center;" |$825 |
| style="text-align: center;" |$825 |
||
| style="text-align: center;" |$1,650 |
| style="text-align: center;" |$1,650 |
||
| + | | |
||
|- |
|- |
||
|Split Mesh Grille |
|Split Mesh Grille |
||
| style="text-align: center;" |$1,500 |
| style="text-align: center;" |$1,500 |
||
| style="text-align: center;" |$3,000 |
| style="text-align: center;" |$3,000 |
||
| + | | |
||
|- |
|- |
||
|Sports Grille |
|Sports Grille |
||
| style="text-align: center;" |$1,600 |
| style="text-align: center;" |$1,600 |
||
| style="text-align: center;" |$3,200 |
| style="text-align: center;" |$3,200 |
||
| + | | |
||
| + | |- |
||
| + | | colspan="2" rowspan="7" |Hoods |
||
| + | |Stock Hood |
||
| + | | style="text-align: center;" |$150 |
||
| + | | style="text-align: center;" |$300 |
||
| + | | |
||
|- |
|- |
||
| − | | rowspan="6" |Hood |
||
|Scooped Hood |
|Scooped Hood |
||
| style="text-align: center;" |$325 |
| style="text-align: center;" |$325 |
||
| style="text-align: center;" |$650 |
| style="text-align: center;" |$650 |
||
| + | | |
||
|- |
|- |
||
|Carbon Hood |
|Carbon Hood |
||
| style="text-align: center;" |$750 |
| style="text-align: center;" |$750 |
||
| style="text-align: center;" |$1,500 |
| style="text-align: center;" |$1,500 |
||
| + | | |
||
|- |
|- |
||
|Carbon Scooped Hood |
|Carbon Scooped Hood |
||
| style="text-align: center;" |$875 |
| style="text-align: center;" |$875 |
||
| style="text-align: center;" |$1,750 |
| style="text-align: center;" |$1,750 |
||
| + | | |
||
|- |
|- |
||
|Performance Hood |
|Performance Hood |
||
| style="text-align: center;" |$1,000 |
| style="text-align: center;" |$1,000 |
||
| style="text-align: center;" |$2,000 |
| style="text-align: center;" |$2,000 |
||
| + | | |
||
|- |
|- |
||
|Vented Hood |
|Vented Hood |
||
| style="text-align: center;" |$1,200 |
| style="text-align: center;" |$1,200 |
||
| style="text-align: center;" |$2,400 |
| style="text-align: center;" |$2,400 |
||
| + | | |
||
|- |
|- |
||
|Double Vented Hood |
|Double Vented Hood |
||
| style="text-align: center;" |$1,450 |
| style="text-align: center;" |$1,450 |
||
| style="text-align: center;" |$2,900 |
| style="text-align: center;" |$2,900 |
||
| + | | |
||
| + | |- |
||
| + | | colspan="2" |Horns |
||
| + | |''Main article: [[Los Santos Customs/Horns]]'' |
||
| + | | style="text-align: center;" | - |
||
| + | | colspan="2" style="text-align: center;" | - |
||
| + | |- |
||
| + | | rowspan="3" |Lights |
||
| + | | rowspan="2" |Headlights |
||
| + | |Stock Lights |
||
| + | | style="text-align: center;" |$100 |
||
| + | | colspan="2" style="text-align: center;" |$200 |
||
|- |
|- |
||
| − | |rowspan="2"|Lights |
||
|Xenon Lights |
|Xenon Lights |
||
| style="text-align: center;" |$300 |
| style="text-align: center;" |$300 |
||
| − | | style="text-align: center;" |$ |
+ | | colspan="2" style="text-align: center;" |$3,000 |
|- |
|- |
||
| + | |Neon Kits |
||
| − | |<div class="mw-collapsible mw-collapsed" style="width:100%"> |
||
| + | |''Main article: [[Los Santos Customs/Lights]]'' |
||
| − | <div class="mw-collapsible-content"> |
||
| − | {{Main|Los Santos Customs/Lights}} |
||
| − | </div> |
||
| − | </div> |
||
| − | | style="text-align: center;" | - |
||
| style="text-align: center;" | - |
| style="text-align: center;" | - |
||
| + | | colspan="2" style="text-align: center;" | - |
||
|- |
|- |
||
| − | |rowspan="2"|Loss/Theft Prevention |
+ | | colspan="2" rowspan="2" |Loss/Theft Prevention |
|Tracker |
|Tracker |
||
| style="text-align: center;" |N/A |
| style="text-align: center;" |N/A |
||
| − | | style="text-align: center;" |$2,000 |
+ | | colspan="2" style="text-align: center;" |$2,000 |
|- |
|- |
||
|Full Coverage |
|Full Coverage |
||
| style="text-align: center;" |N/A |
| style="text-align: center;" |N/A |
||
| − | | style="text-align: center;" |$ |
+ | | colspan="2" style="text-align: center;" |$6,875 |
|- |
|- |
||
| + | | colspan="2" rowspan="5" |Plates |
||
| − | |Respray |
||
| + | |Blue on White 1 |
||
| − | |<div class="mw-collapsible mw-collapsed" style="width:100%"> |
||
| + | | style="text-align: center;" |$50 |
||
| − | <div class="mw-collapsible-content"> |
||
| + | | colspan="2" style="text-align: center;" |$200 |
||
| − | {{ResprayColorsExpand}} |
||
| + | |- |
||
| − | </div> |
||
| + | |Blue on White 2 |
||
| − | </div> |
||
| − | | style="text-align: center;" | |
+ | | style="text-align: center;" |$50 |
| + | | colspan="2" style="text-align: center;" |$200 |
||
| + | |- |
||
| + | |Blue on White 3 |
||
| + | | style="text-align: center;" |$50 |
||
| + | | colspan="2" style="text-align: center;" |$200 |
||
| + | |- |
||
| + | |Yellow on Blue |
||
| + | | style="text-align: center;" |$75 |
||
| + | | colspan="2" style="text-align: center;" |$300 |
||
| + | |- |
||
| + | |Yellow on Black |
||
| + | | style="text-align: center;" |$150 |
||
| + | | colspan="2" style="text-align: center;" |$600 |
||
| + | |- |
||
| + | | colspan="2" |Respray |
||
| + | |''Main article: [[Los Santos Customs/Respray Colors]]'' |
||
| style="text-align: center;" | - |
| style="text-align: center;" | - |
||
| + | | colspan="2" style="text-align: center;" | - |
||
| + | |- |
||
| + | | colspan="2" rowspan="3" |Roofs |
||
| + | |Stock Roof |
||
| + | | style="text-align: center;" |$100 |
||
| + | | style="text-align: center;" |$200 |
||
| + | | |
||
|- |
|- |
||
| − | | rowspan="2" |Roof |
||
|Carbon Roof |
|Carbon Roof |
||
| style="text-align: center;" |$350 |
| style="text-align: center;" |$350 |
||
| style="text-align: center;" |$700 |
| style="text-align: center;" |$700 |
||
| + | | |
||
|- |
|- |
||
|Roof Rack |
|Roof Rack |
||
| style="text-align: center;" |$575 |
| style="text-align: center;" |$575 |
||
| style="text-align: center;" |$1,150 |
| style="text-align: center;" |$1,150 |
||
| + | | |
||
| + | |- |
||
| + | | colspan="2" |Sell |
||
| + | |Sell Vehicle |
||
| + | | style="text-align: center;" |N/A |
||
| + | | colspan="2" style="text-align: center;" |$5,500 |
||
| + | |- |
||
| + | | colspan="2" rowspan="5" |Skirts |
||
| + | |Stock Skirts |
||
| + | | style="text-align: center;" |$300 |
||
| + | | style="text-align: center;" |$600 |
||
| + | | |
||
|- |
|- |
||
| − | | rowspan="4" |Skirts |
||
|Custom Skirts |
|Custom Skirts |
||
| style="text-align: center;" |$415 |
| style="text-align: center;" |$415 |
||
| style="text-align: center;" |$830 |
| style="text-align: center;" |$830 |
||
| + | | |
||
|- |
|- |
||
|Low Skirts |
|Low Skirts |
||
| style="text-align: center;" |$500 |
| style="text-align: center;" |$500 |
||
| style="text-align: center;" |$1,000 |
| style="text-align: center;" |$1,000 |
||
| + | | |
||
|- |
|- |
||
|Street Skirts |
|Street Skirts |
||
| style="text-align: center;" |$750 |
| style="text-align: center;" |$750 |
||
| style="text-align: center;" |$1,500 |
| style="text-align: center;" |$1,500 |
||
| + | | |
||
|- |
|- |
||
|Sport Skirts |
|Sport Skirts |
||
| style="text-align: center;" |$1,000 |
| style="text-align: center;" |$1,000 |
||
| style="text-align: center;" |$2,000 |
| style="text-align: center;" |$2,000 |
||
| + | | |
||
| + | |- |
||
| + | | colspan="2" rowspan="6" |Spoilers |
||
| + | |None |
||
| + | | style="text-align: center;" |$150 |
||
| + | | style="text-align: center;" |$300 |
||
| + | | |
||
|- |
|- |
||
| − | | rowspan="5" |Spoiler |
||
|Lip Spoiler |
|Lip Spoiler |
||
| style="text-align: center;" |$275 |
| style="text-align: center;" |$275 |
||
| style="text-align: center;" |$550 |
| style="text-align: center;" |$550 |
||
| + | | |
||
|- |
|- |
||
|Low Level Spoiler |
|Low Level Spoiler |
||
| style="text-align: center;" |$350 |
| style="text-align: center;" |$350 |
||
| style="text-align: center;" |$700 |
| style="text-align: center;" |$700 |
||
| + | | |
||
|- |
|- |
||
|Mid Level Spoiler |
|Mid Level Spoiler |
||
| style="text-align: center;" |$525 |
| style="text-align: center;" |$525 |
||
| style="text-align: center;" |$1,050 |
| style="text-align: center;" |$1,050 |
||
| + | | |
||
|- |
|- |
||
|High Level Spoiler |
|High Level Spoiler |
||
| style="text-align: center;" |$750 |
| style="text-align: center;" |$750 |
||
| style="text-align: center;" |$1,500 |
| style="text-align: center;" |$1,500 |
||
| + | | |
||
|- |
|- |
||
|Carbon Wing |
|Carbon Wing |
||
| style="text-align: center;" |$1,000 |
| style="text-align: center;" |$1,000 |
||
| style="text-align: center;" |$2,000 |
| style="text-align: center;" |$2,000 |
||
| + | | |
||
| + | |- |
||
| + | | colspan="2" rowspan="5" |Suspension |
||
| + | |Stock Suspension |
||
| + | | style="text-align: center;" |$100 |
||
| + | | colspan="2" style="text-align: center;" |$200 |
||
|- |
|- |
||
| − | |rowspan="4"|Suspension |
||
|Lowered Suspension |
|Lowered Suspension |
||
| style="text-align: center;" |$500 |
| style="text-align: center;" |$500 |
||
| − | | style="text-align: center;" |$ |
+ | | colspan="2" style="text-align: center;" |$1,000 |
|- |
|- |
||
|Street Suspension |
|Street Suspension |
||
| style="text-align: center;" |$1,000 |
| style="text-align: center;" |$1,000 |
||
| − | | style="text-align: center;" |$ |
+ | | colspan="2" style="text-align: center;" |$2,000 |
|- |
|- |
||
|Sport Suspension |
|Sport Suspension |
||
| style="text-align: center;" |$1,700 |
| style="text-align: center;" |$1,700 |
||
| − | | style="text-align: center;" |$ |
+ | | colspan="2" style="text-align: center;" |$3,400 |
|- |
|- |
||
|Competition Suspension |
|Competition Suspension |
||
| style="text-align: center;" |$2,200 |
| style="text-align: center;" |$2,200 |
||
| − | | style="text-align: center;" |$ |
+ | | colspan="2" style="text-align: center;" |$4,400 |
| + | |- |
||
| + | | colspan="2" rowspan="4" |Transmission |
||
| + | |Stock Transmission |
||
| + | | style="text-align: center;" |$100 |
||
| + | | colspan="2" style="text-align: center;" |$200 |
||
|- |
|- |
||
| − | |rowspan="3"|Transmission |
||
|Street Transmission |
|Street Transmission |
||
| style="text-align: center;" |$2,950 |
| style="text-align: center;" |$2,950 |
||
| − | | style="text-align: center;" |$ |
+ | | colspan="2" style="text-align: center;" |$5,900 |
|- |
|- |
||
|Sports Transmission |
|Sports Transmission |
||
| style="text-align: center;" |$3,250 |
| style="text-align: center;" |$3,250 |
||
| − | | style="text-align: center;" |$ |
+ | | colspan="2" style="text-align: center;" |$6,500 |
|- |
|- |
||
|Race Transmission |
|Race Transmission |
||
| style="text-align: center;" |$4,000 |
| style="text-align: center;" |$4,000 |
||
| − | | style="text-align: center;" |$ |
+ | | colspan="2" style="text-align: center;" |$8,000 |
| + | |- |
||
| + | | colspan="2" rowspan="2" |Turbo |
||
| + | |None |
||
| + | | style="text-align: center;" |$500 |
||
| + | | colspan="2" style="text-align: center;" |$1,000 |
||
|- |
|- |
||
| − | |Turbo |
||
|Turbo Tuning |
|Turbo Tuning |
||
| style="text-align: center;" |$2,500 |
| style="text-align: center;" |$2,500 |
||
| − | | style="text-align: center;" |$ |
+ | | colspan="2" style="text-align: center;" |$30,000 |
|- |
|- |
||
| − | |Wheels |
+ | | colspan="2" |Wheels |
| + | |''Main article: [[Los Santos Customs/Wheels]]'' |
||
| − | |<div class="mw-collapsible mw-collapsed" style="width:100%"> |
||
| − | <div class="mw-collapsible-content"> |
||
| − | {{WheelsExpand}} |
||
| − | </div> |
||
| − | </div> |
||
| − | | style="text-align: center;" | - |
||
| style="text-align: center;" | - |
| style="text-align: center;" | - |
||
| + | | colspan="2" style="text-align: center;" | - |
||
| + | |- |
||
| + | | colspan="2" rowspan="4" |Windows |
||
| + | |None |
||
| + | | style="text-align: center;" |$100 |
||
| + | | colspan="2" style="text-align: center;" |$500 |
||
|- |
|- |
||
| − | |rowspan="3"|Windows |
||
|Light Smoke |
|Light Smoke |
||
| style="text-align: center;" |$200 |
| style="text-align: center;" |$200 |
||
| − | | style="text-align: center;" |$ |
+ | | colspan="2" style="text-align: center;" |$1,500 |
|- |
|- |
||
|Dark Smoke |
|Dark Smoke |
||
| style="text-align: center;" |$450 |
| style="text-align: center;" |$450 |
||
| − | | style="text-align: center;" |$ |
+ | | colspan="2" style="text-align: center;" |$3,500 |
|- |
|- |
||
|Limo |
|Limo |
||
| style="text-align: center;" |$700 |
| style="text-align: center;" |$700 |
||
| − | | style="text-align: center;" |$ |
+ | | colspan="2" style="text-align: center;" |$5,000 |
|} |
|} |
||
| − | == |
+ | ==Image Gallery== |
| − | <gallery position="center"> |
+ | <gallery position="center" spacing="small" hideaddbutton="true"> |
| − | Tailgater- |
+ | Tailgater-GTAV-OfficialSite360.gif|A 360° view of the '''Tailgater''' on the ''GTA V'' Official Website. |
| + | Obey-Poster-ad-GTAV.png|'''Tailgater''' poster. |
||
| − | Tailgater-GTAV-SSSA.png|The Tailgater on the [[Southern San Andreas Super Autos]] website in the enhanced version of GTA V. |
||
| − | Tailgater-GTAV- |
+ | Tailgater-GTAV-SSSA.png|The '''Tailgater''' on [[Southern San Andreas Super Autos]] in the enhanced version of ''GTA V''. |
| − | + | Tailgater-GTAV-RSC.png|The '''Tailgater''' on [[Rockstar Games Social Club]]. |
|
| − | Tailgater- |
+ | Tailgater-GTAO-RGSC2.jpg|The '''Tailgater''' on the updated [[Rockstar Games Social Club]]. |
| + | Tailgater-GTAO-RGSC3.jpg|The '''Tailgater''' in the cinematic preview on [[Rockstar Games Social Club]]. |
||
| + | Tailgater-LightsBeta-GTAV.png|The '''Tailgater'''<nowiki>'</nowiki>s unused beta lights texture found in the files for the [[Sentinel]]. |
||
</gallery> |
</gallery> |
||
| Line 460: | Line 592: | ||
</pre> |
</pre> |
||
</ref> |
</ref> |
||
| + | |||
{{ModelSet |
{{ModelSet |
||
|modelset_name = K1FFL0M |
|modelset_name = K1FFL0M |
||
| Line 468: | Line 601: | ||
}} |
}} |
||
| − | <gallery position=center widths=" |
+ | <gallery position="center" spacing="small" widths="270px" hideaddbutton="true"> |
Tailgater-GTAV-Kifflom-front.png|The [[Epsilon Program]] variant of the '''Tailgater'''. (<small>[[:Image:Tailgater-GTAV-Kifflom-rear.png|Rear quarter view]]</small>) |
Tailgater-GTAV-Kifflom-front.png|The [[Epsilon Program]] variant of the '''Tailgater'''. (<small>[[:Image:Tailgater-GTAV-Kifflom-rear.png|Rear quarter view]]</small>) |
||
</gallery> |
</gallery> |
||
| − | == |
+ | ==Notable Owners== |
| − | *[[Michael De Santa]] owns a black Tailgater throughout most of the game. However, following a series of incidents culminating with him being drugged, Michael's family [[Did Somebody Say Yoga?|leaves him]], and Jimmy takes his car with him |
+ | *[[Michael De Santa]] owns a black Tailgater throughout most of the game. However, following a series of incidents culminating with him being drugged, Michael's family [[Did Somebody Say Yoga?|leaves him]], and Jimmy takes his car with him. It is [[Monkey Business|returned]] to Michael later in the game by Jimmy, though customized with the following modifications: |
| + | #Race Brakes |
||
| − | *[[Devin Weston]] most likely owns two Tailgaters, one black and the other grey, as seen in the mission [[Eye In The Sky]]. |
||
| + | #Rear Painted Bumper & Diffuser |
||
| + | #EMS upgrade level 3 |
||
| + | #Dual Exit Exhaust |
||
| + | #Chrome Grille |
||
| + | #Double Vented Hood |
||
| + | #Musical Horn 5 |
||
| + | #Xenon Lights |
||
| + | #Sports Skirts |
||
| + | #Lip Spoiler |
||
| + | #Sports Transmission |
||
| + | #Black Dollar Lowrider wheels |
||
| + | #Dark Smoke window tint |
||
| + | Like all other [[Personal Vehicles]], the player can customize Michael's car and it will retain these modifications whenever it respawns. |
||
| + | |||
| + | <gallery position="center" spacing="small" widths="270px" hideaddbutton="true"> |
||
| + | Tailgater-GTAV-front-5MDS003.png|Michael's '''Tailgater'''. (Original design) <small>([[:File:Tailgater-GTAV-rear-5MDS003.png|Rear quarter view]])</small> |
||
| + | Tailgater-GTAV-front-5MDS003-JimmyModded.png|Michael's '''Tailgater'''. (Post [[Monkey Business]]) <small>([[:File:Tailgater-GTAV-rear-5MDS003-JimmyModded.png|Rear quarter view]])</small> |
||
| + | </gallery> |
||
| + | |||
| + | *[[Devin Weston]] most likely owns two Tailgaters, one black and the other grey, as seen in mission [[Eye In The Sky]]. |
||
==Locations== |
==Locations== |
||
===''Grand Theft Auto V''=== |
===''Grand Theft Auto V''=== |
||
| − | *Parked in front of the [[De Santa Residence]] in [[Rockford Hills]] as this is Michael's own vehicle (unavailable between [[Did Somebody Say Yoga?]] and [[Monkey Business]] mission, as [[Michael De Santa|Michael]] was drugged and [[Jimmy De Santa|Jimmy]] takes the car). Michael's Tailgater will be parked nearby every time the player switches to Michael, too. |
||
| − | **It is not directly available after Fresh Meat but if the player drives away from Michael's house and back then it will spawn again. |
||
| − | *At the end of [[Eye in the Sky]], two Tailgaters will be left in the hangar, Franklin is instructed to take any of them, to drive away from the [[Los Santos International Airport (HD Universe)|airport]]. |
||
| − | *[[Franklin Clinton|Franklin]], may be seen driving a red Tailgater after [[The Big Score (GTA V)|The Big Score]] is completed. (Obvious) |
||
*After completing the mission [[Complications]], the player can take one of the Tailgaters parked in the [[Premium Deluxe Motorsport]] shop and drive it. |
*After completing the mission [[Complications]], the player can take one of the Tailgaters parked in the [[Premium Deluxe Motorsport]] shop and drive it. |
||
| + | *At the end of [[Eye in the Sky]], two Tailgaters will be left in the hangar, Franklin is instructed to take any of them, to drive away from the [[Los Santos International Airport (HD Universe)|airport]]. |
||
| + | *[[Franklin Clinton|Franklin]] may be seen driving a red Tailgater after [[The Big Score (GTA V)|The Big Score]] is completed. (Obvious) |
||
*In the [[Strangers and Freaks]] mission [[Unknowing the Truth]], there's a unique Tailgater painted on the [[Epsilon Program in HD Universe|Epsilon Program]] baby blue color and with the custom plates K1FFLOM. It is obtainable after completing the mission, if the player chooses not to deliver the money. |
*In the [[Strangers and Freaks]] mission [[Unknowing the Truth]], there's a unique Tailgater painted on the [[Epsilon Program in HD Universe|Epsilon Program]] baby blue color and with the custom plates K1FFLOM. It is obtainable after completing the mission, if the player chooses not to deliver the money. |
||
| + | *Appears in the towing side missions as a car to be towed after purchasing the [[LSPD Auto Impound]]. Can be obtained by entering the car and performing the character switch trick. |
||
| − | *Found at [[Sandy Shores Airfield]] between [[Bury the Hatchet]] and [[Fresh Meat]] (unless it is moved). |
||
| − | *Appears in the towing side missions as a car to be towed after purchasing the LSPD Auto Impound. Can be obtained by entering the car and performing the character switch trick. |
||
===''Grand Theft Auto Online''=== |
===''Grand Theft Auto Online''=== |
||
| − | Similar to story mode, the Tailgater does not appear driven on the road, despite its road-worthy appearance. Unlike story-mode, however, Online has certain fixed spawn locations which are not |
+ | Similar to story mode, the Tailgater does not appear driven on the road, despite its road-worthy appearance. Unlike story-mode, however, Online has certain fixed spawn locations which are not affected by game progress. |
| + | *Available for purchase from [[Southern San Andreas Super Autos]] for [[Money|$]]55,000. |
||
*Offered as a choice of starting car. |
*Offered as a choice of starting car. |
||
*Can appear on [[Simeon Yetarian|Simeon]]'s SMS list for [[Simeon Car Export Requests|export]] which will result in it spawning (commonly at the [[Los Santos Golf Club|Golf Club]] or [[Galileo Observatory|Observatory]]) and it will be able to be stored in the player's garage as a [[Personal Vehicles|personal vehicle]]. |
*Can appear on [[Simeon Yetarian|Simeon]]'s SMS list for [[Simeon Car Export Requests|export]] which will result in it spawning (commonly at the [[Los Santos Golf Club|Golf Club]] or [[Galileo Observatory|Observatory]]) and it will be able to be stored in the player's garage as a [[Personal Vehicles|personal vehicle]]. |
||
| Line 494: | Line 645: | ||
*Rarely spawns in the [[Los Santos Golf Club]]'s parking lot. |
*Rarely spawns in the [[Los Santos Golf Club]]'s parking lot. |
||
*Rarely spawns parked in [[Galileo Observatory]]. |
*Rarely spawns parked in [[Galileo Observatory]]. |
||
| + | *Occasionally spawns in [[Maze Bank Arena]]. |
||
*Sometimes spawns parked in the taxi zones on the upper U-shaped road in [[Los Santos International Airport]]. |
*Sometimes spawns parked in the taxi zones on the upper U-shaped road in [[Los Santos International Airport]]. |
||
| − | *Can be bought from [[Southern San Andreas Super Autos]] for [[Money|$]]55,000 in the [[I'm Not a Hipster Update]], thus no longer making it a rare vehicle. |
||
*Can be spotted in the parking lot of [[Backlot City]], usually in metallic black. |
*Can be spotted in the parking lot of [[Backlot City]], usually in metallic black. |
||
*Spawns behind the tennis courts at [[Vespucci Beach]] when wanted by Simeon. |
*Spawns behind the tennis courts at [[Vespucci Beach]] when wanted by Simeon. |
||
| Line 502: | Line 653: | ||
==Trivia== |
==Trivia== |
||
===General=== |
===General=== |
||
| + | *The default radio stations for the Tailgater are [[Los Santos Rock Radio]], [[Vinewood Boulevard Radio]] and [[Radio Mirror Park]]. |
||
| − | *The name ''Tailgater'' is a reference to {{WP|Tailgating|tailgating}}, a British word for the practice of aggressively driving too close to the rear end (or Tailgate) of the car in front. This could be a reference to the stereotype that Audi owners are impatient, pretentious people. |
||
| + | *The name ''Tailgater'' is a reference to {{WP|tailgating}}, a word for the practice of aggressively driving too close to the rear end (or Tailgate) of the car in front. This could be a reference to the stereotype that Audi owners are impatient, pretentious people. |
||
===''Grand Theft Auto V''=== |
===''Grand Theft Auto V''=== |
||
| − | *The Tailgater is one of many cars in GTA V that has the "[[Door ajar chime]]". |
+ | *The Tailgater is one of many cars in ''GTA V'' that has the "[[Door ajar chime]]". |
**In addition to this, the player can hear a unlocking noise when first entering the vehicle, similar to Franklin's [[Buffalo S]]. This would suggest that the vehicle is unlocked with a remote control, like many modern cars. |
**In addition to this, the player can hear a unlocking noise when first entering the vehicle, similar to Franklin's [[Buffalo S]]. This would suggest that the vehicle is unlocked with a remote control, like many modern cars. |
||
| − | *The [[GPS]] in the middle of the console shows a map of [[Liberty City |
+ | *The [[GPS]] in the middle of the console shows a map of [[Liberty City (HD Universe)|Liberty City]]. This is because the interior model has been reused and modified from ''[[Grand Theft Auto IV]]''. |
| − | *If the player modifies Michael's Tailgater, it will respawn still modified. This happens with Franklin's [[Buffalo S]] and [[Bagger]], [[Trevor Philips|Trevor]]'s [[Bodhi]], [[Tracey De Santa|Tracey]]'s [[Issi]], and [[Amanda De Santa|Amanda]]'s [[Sentinel]]. |
||
| − | *The default radio stations for the Tailgater are: [[Los Santos Rock Radio]], [[Vinewood Boulevard Radio]] or [[Radio Mirror Park]]. |
||
| − | *Although Jimmy modifies the transmission, engine and brakes on Michael's Tailgater before he returns it to Michael after [[Monkey Business]], he does not give it the maximum upgrades possible. He adds a EMS upgrade level 3, race transmission, and race brakes. He also adds a chrome grille, lip spoiler and Dollar wheels. |
||
| − | **It is important to note that the car will ''always'' have these modifications when Jimmy returns it to Michael, and ''only'' these modifications. In other words, any alternative/additional modifications purchased by the player prior to [[Did Somebody Say Yoga?]] will be removed and will reappear in Los Santos Customs as though they were never purchased. Once the car is returned to Michael, these modifications will have to be purchased again. |
||
*Even though the car lacks B pillars, its passenger seatbelt anchors will appear mounted on the space between the doors. |
*Even though the car lacks B pillars, its passenger seatbelt anchors will appear mounted on the space between the doors. |
||
| + | *The Tailgater always uses the same "Stock" horn sound. |
||
| − | *As seen in the second GTA V trailer, Michael's Tailgater was originally a metallic dark grey colour, rather than the gloss black seen in the final version. |
||
*Two variants of the Tailgater appears in the handling files, both appearing as "TAILGATE" and featuring almost identical handling lines. One appears to be unused. |
*Two variants of the Tailgater appears in the handling files, both appearing as "TAILGATE" and featuring almost identical handling lines. One appears to be unused. |
||
| + | *The Tailgater's beta tail light unit resembles the {{WP|Audi A6#C5 (Typ 4B, 1997–2004)|A6 (C5)}} unit, with a piece added on the boot lid. |
||
==See Also== |
==See Also== |
||
| Line 520: | Line 669: | ||
*[[Sentinel]] - A potential [[3D Universe]] counterpart. |
*[[Sentinel]] - A potential [[3D Universe]] counterpart. |
||
*[[Presidente]] - Another sedan which fills a similar role in ''[[Grand Theft Auto IV]]''. |
*[[Presidente]] - Another sedan which fills a similar role in ''[[Grand Theft Auto IV]]''. |
||
| + | |||
| + | ==References== |
||
| + | {{Reflist}} |
||
==Navigation== |
==Navigation== |
||
| Line 527: | Line 679: | ||
{{vehicles|state=collapsed}} |
{{vehicles|state=collapsed}} |
||
{{gtav vehicles|state=collapsed}} |
{{gtav vehicles|state=collapsed}} |
||
| + | }}[[de:Tailgater (V)]] |
||
| − | }} |
||
| − | |||
| − | ==References== |
||
| − | {{Reflist}} |
||
| − | |||
| − | [[de:Tailgater (V)]] |
||
[[ru:Tailgater]] |
[[ru:Tailgater]] |
||
[[es:Tailgater]] |
[[es:Tailgater]] |
||
Revision as of 09:46, 5 June 2020
Template:Infobox vehicles
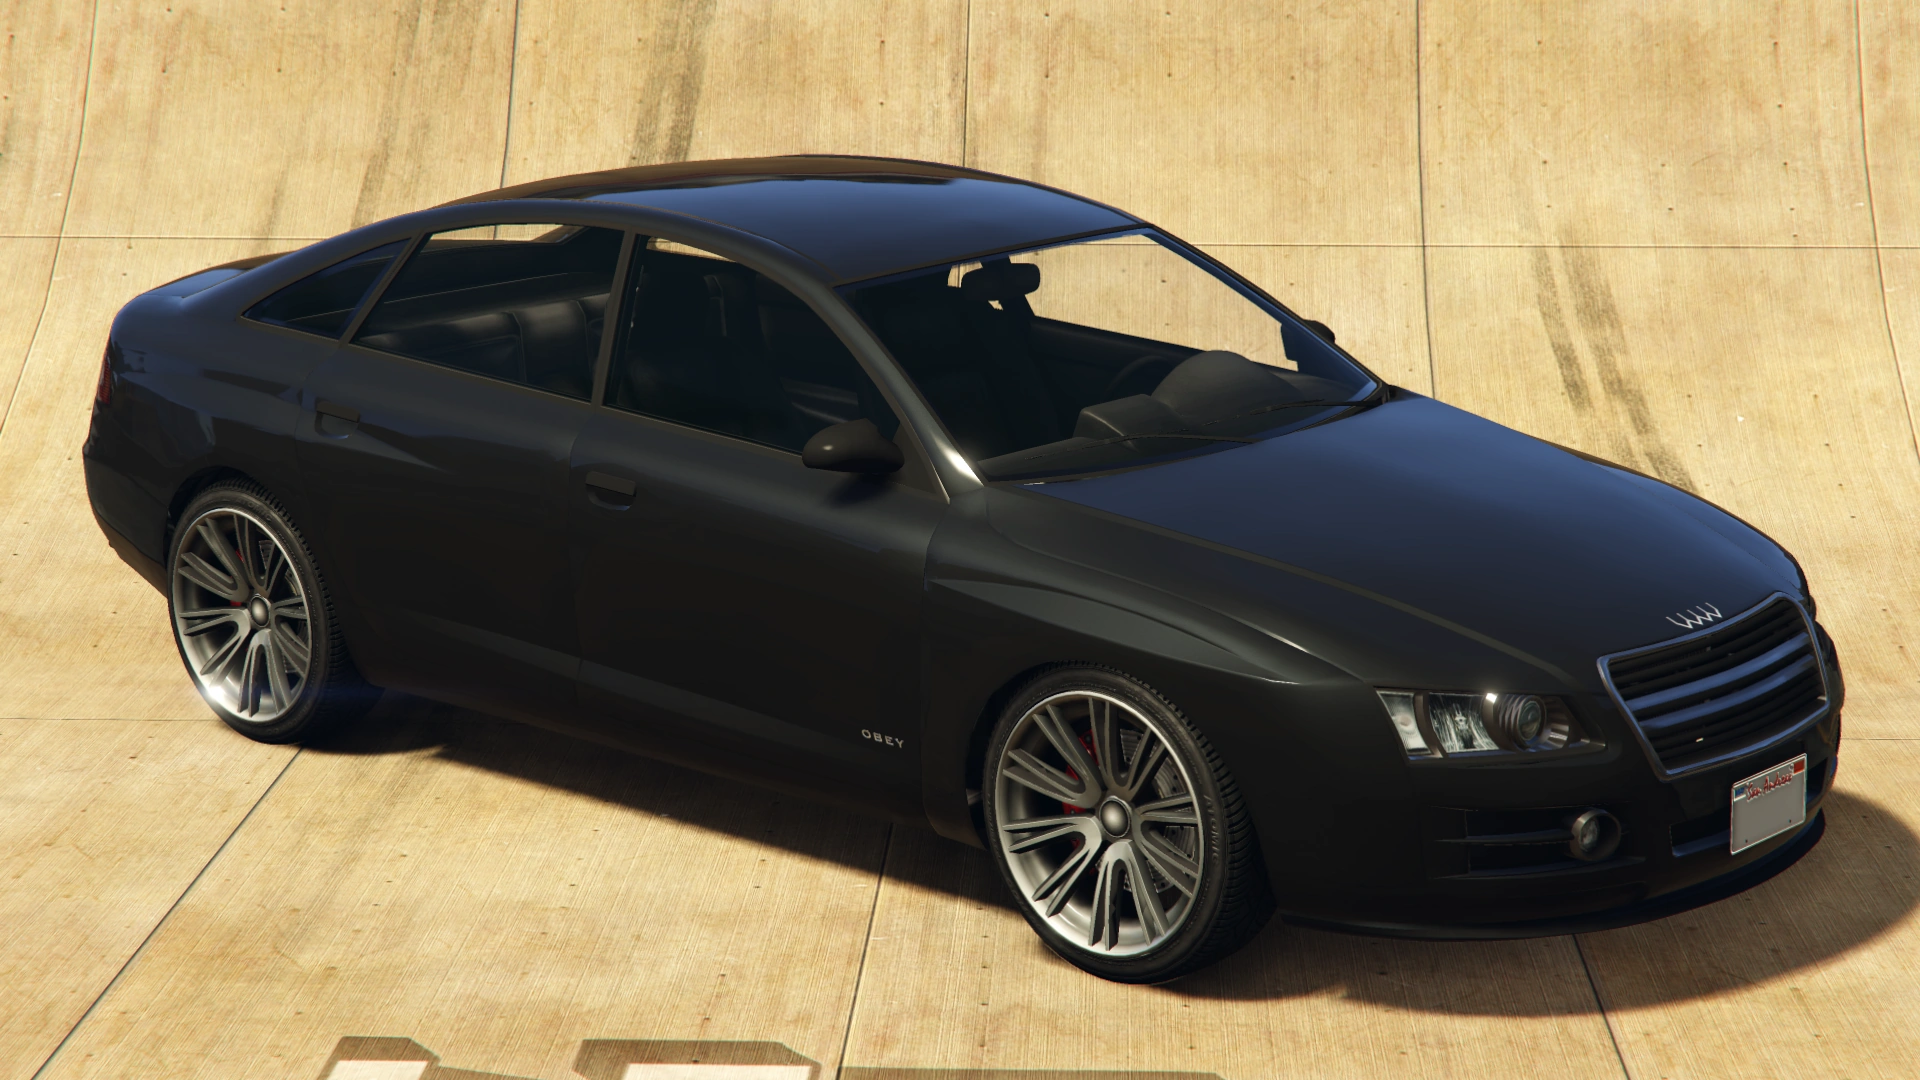
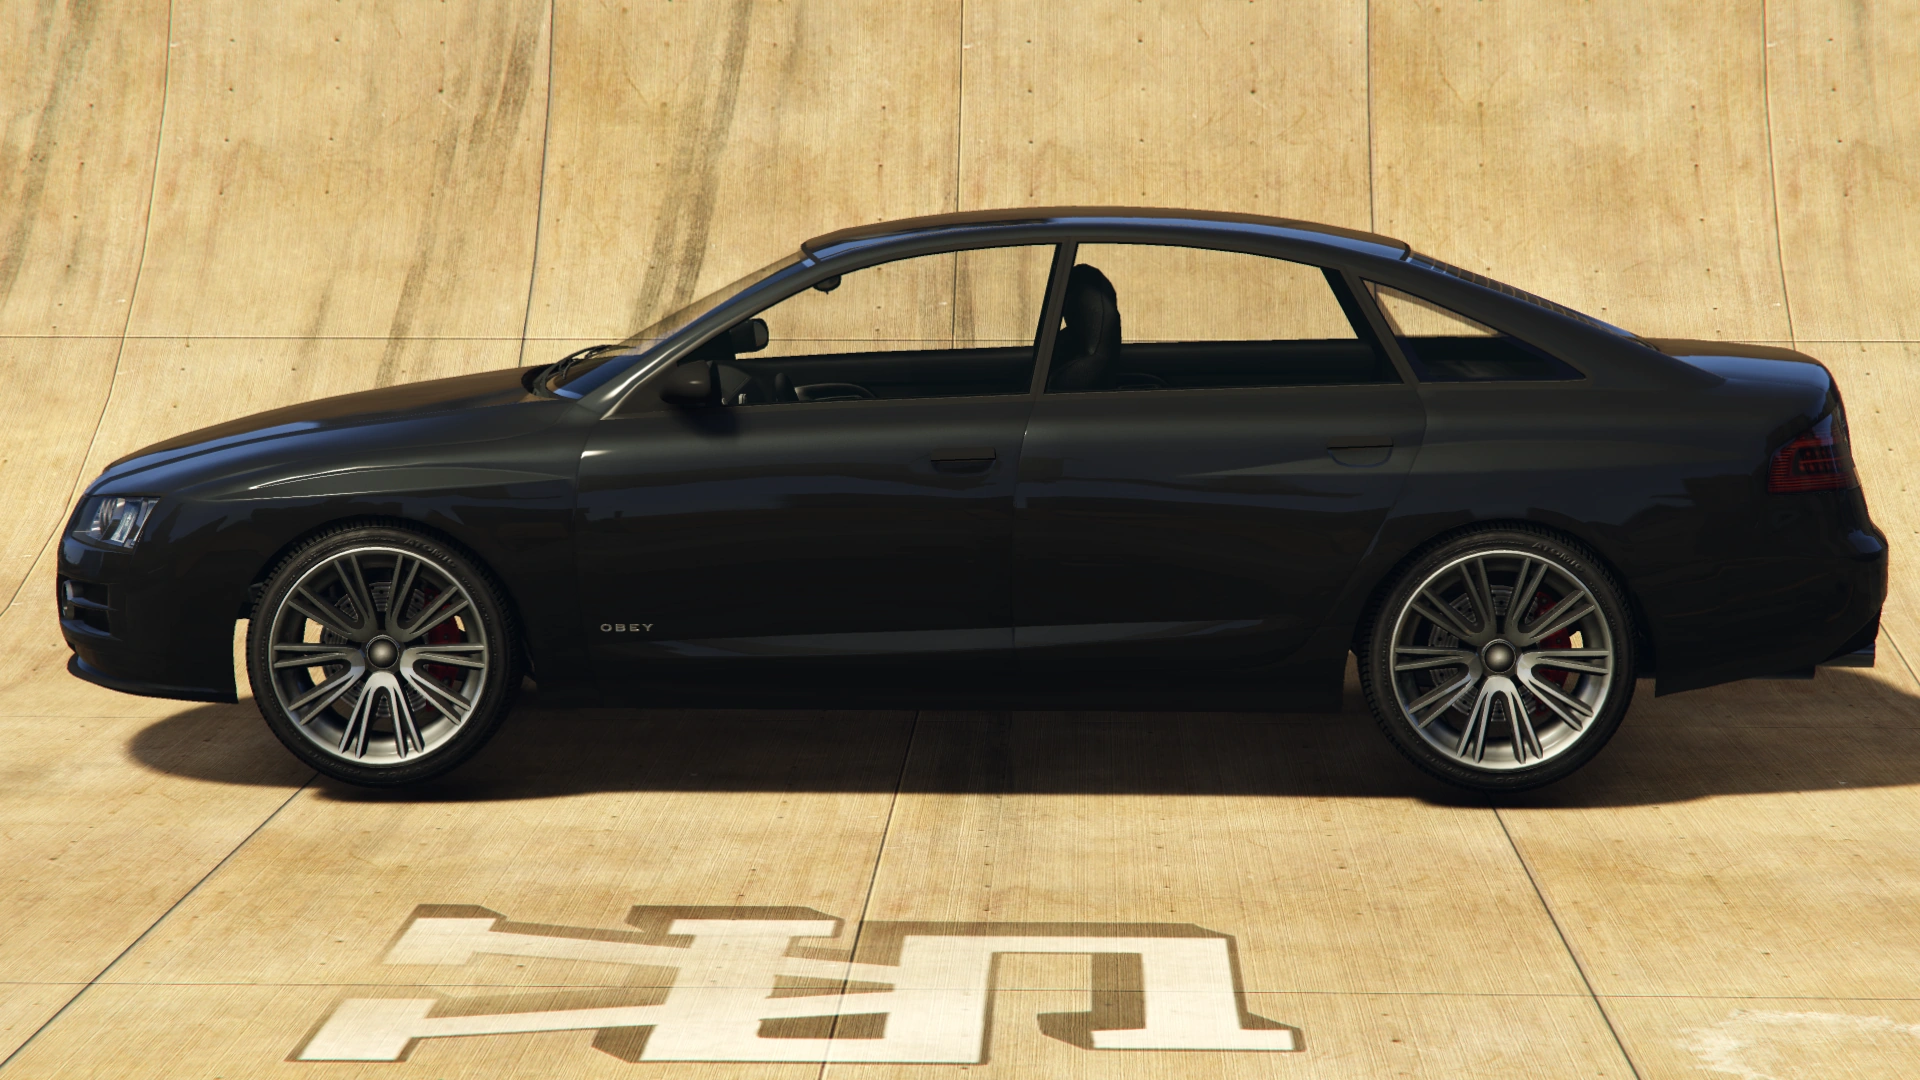
The Obey Tailgater is a four-door, mid-size executive saloon/sedan in Grand Theft Auto V and Grand Theft Auto Online.
Design
Grand Theft Auto V
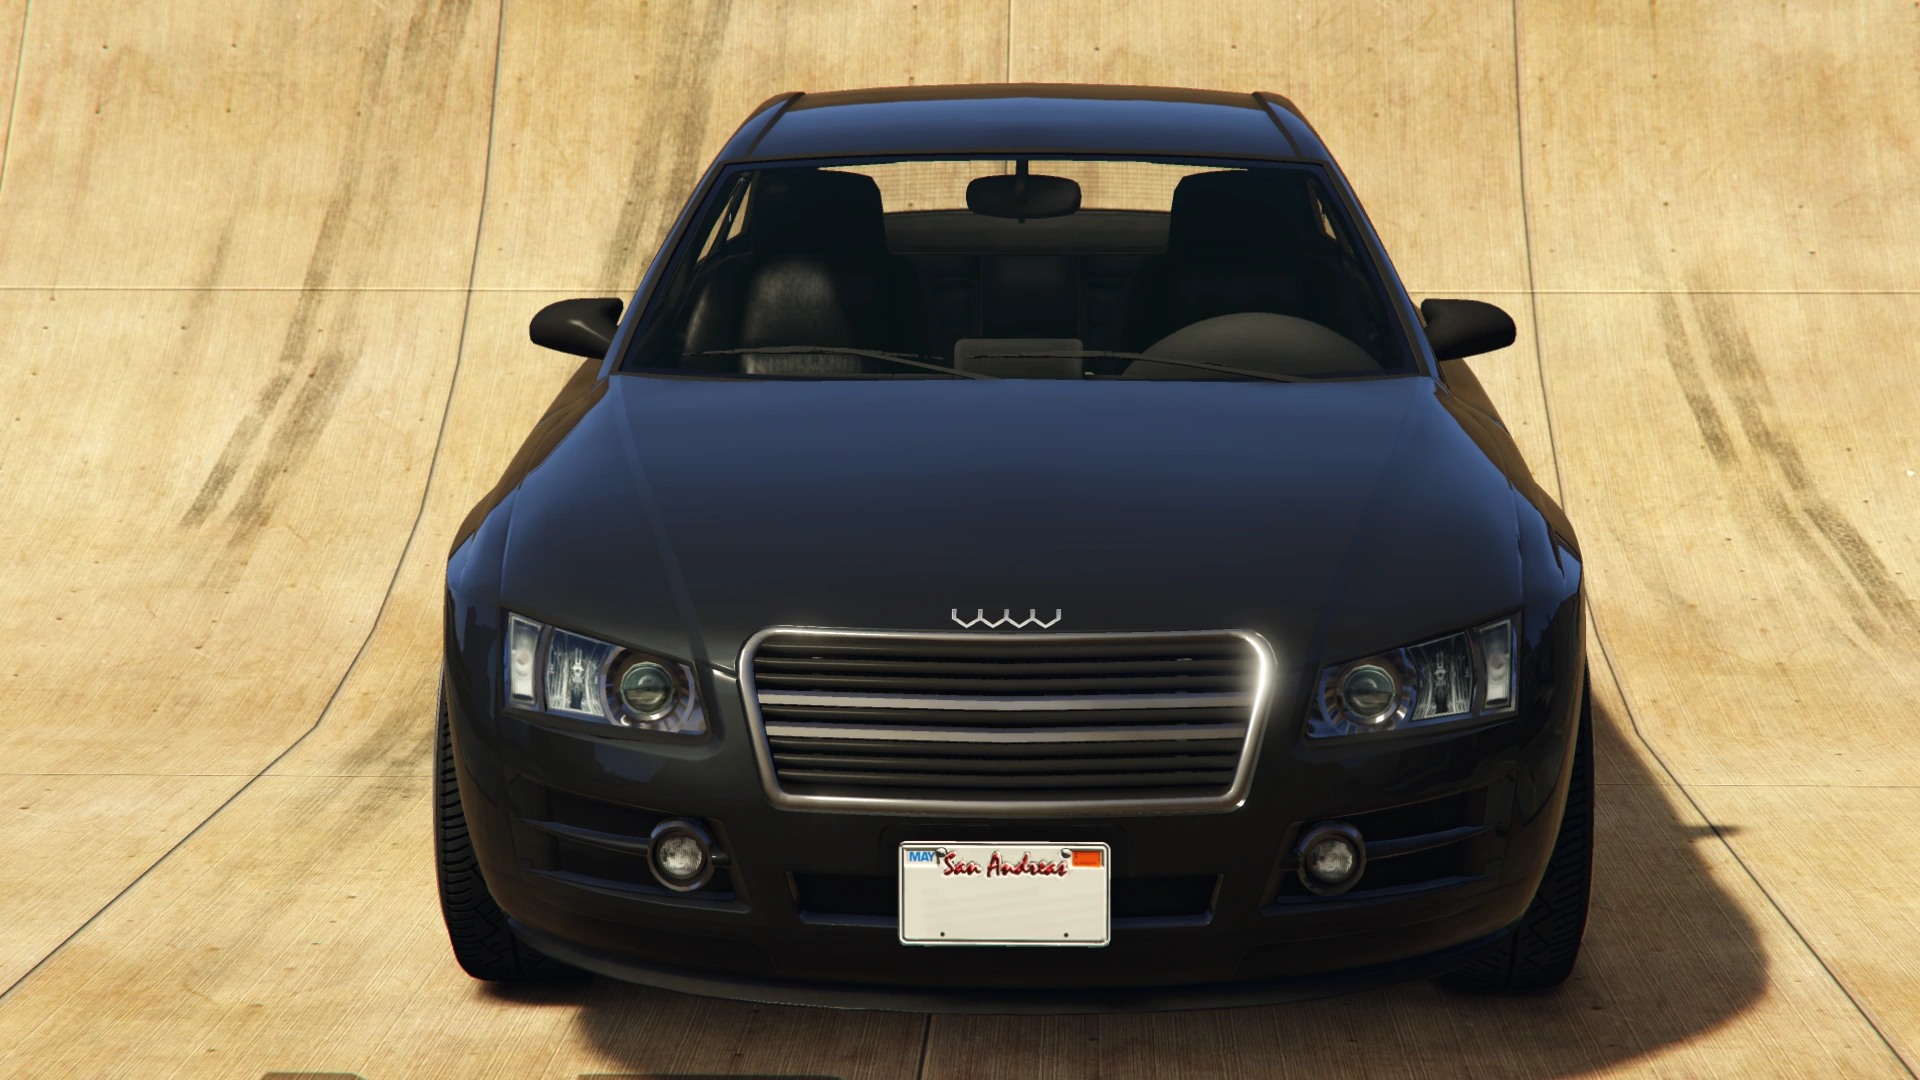
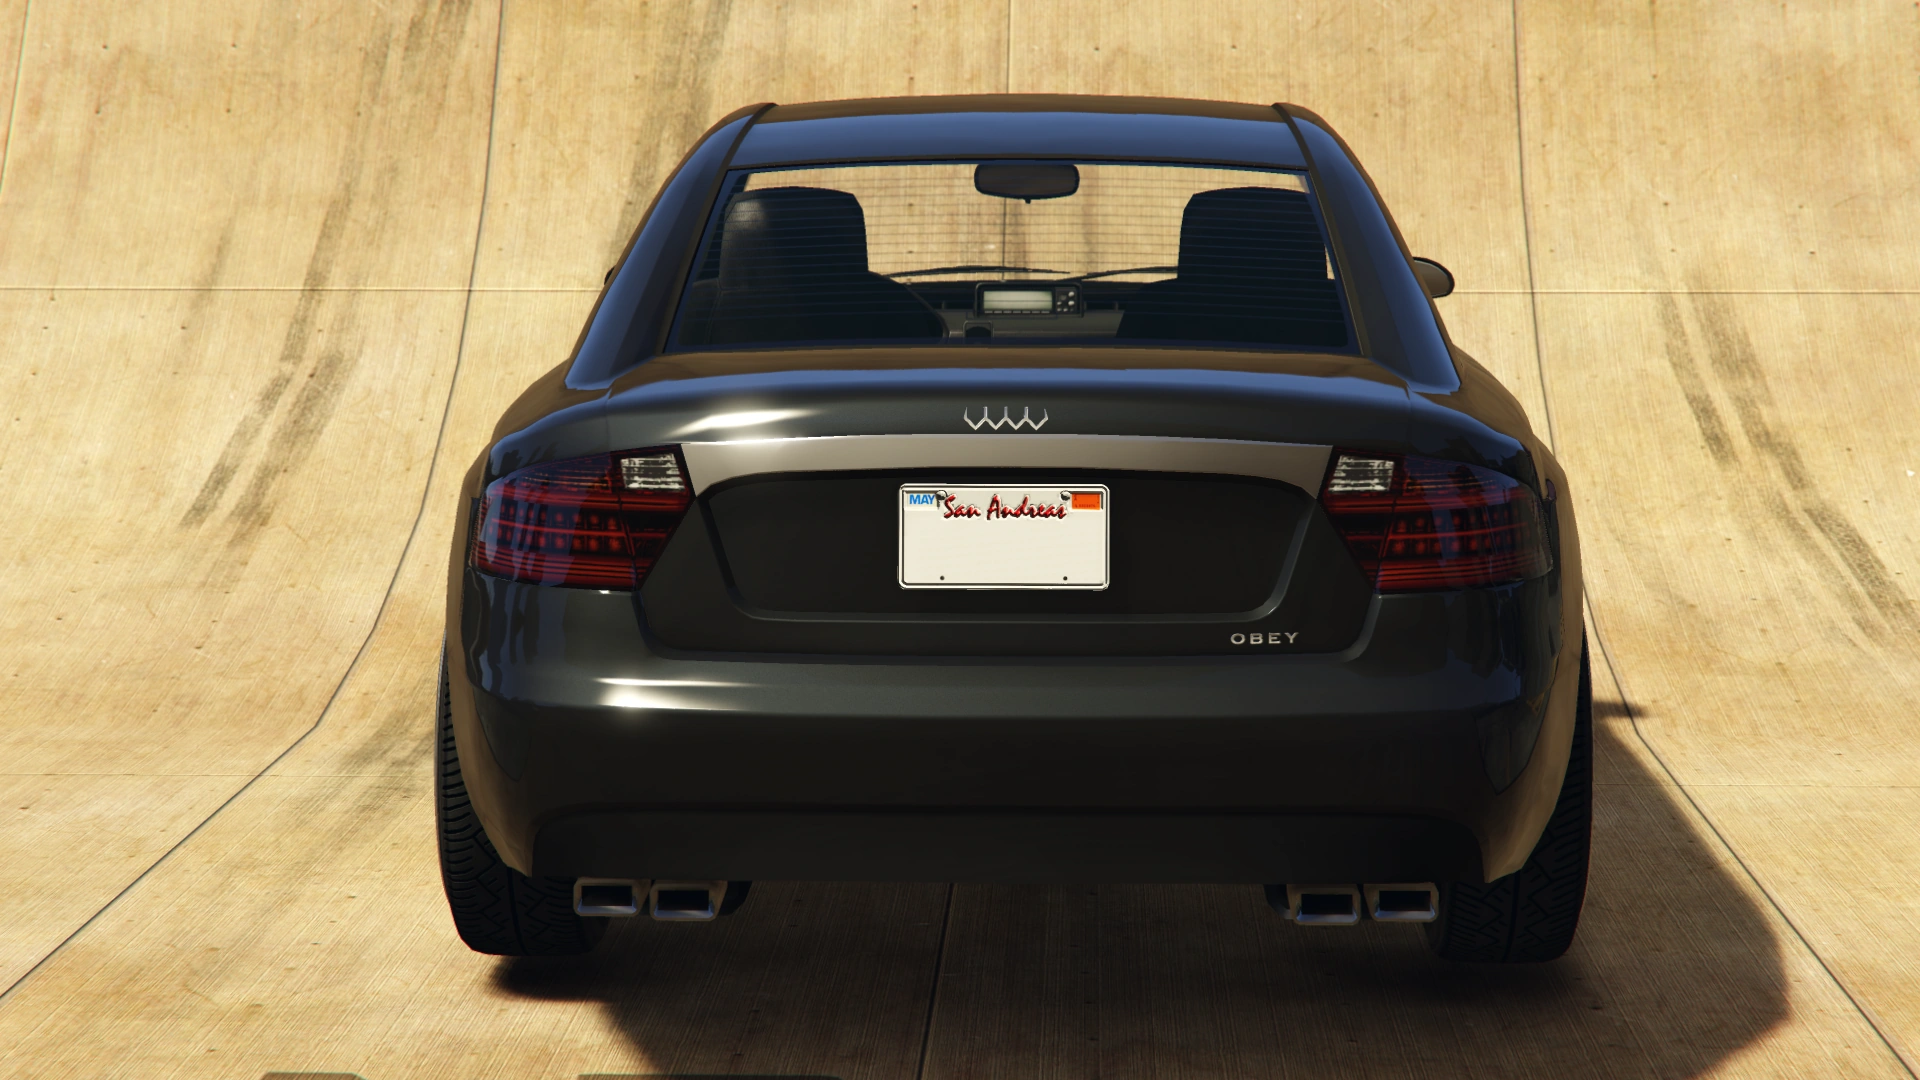
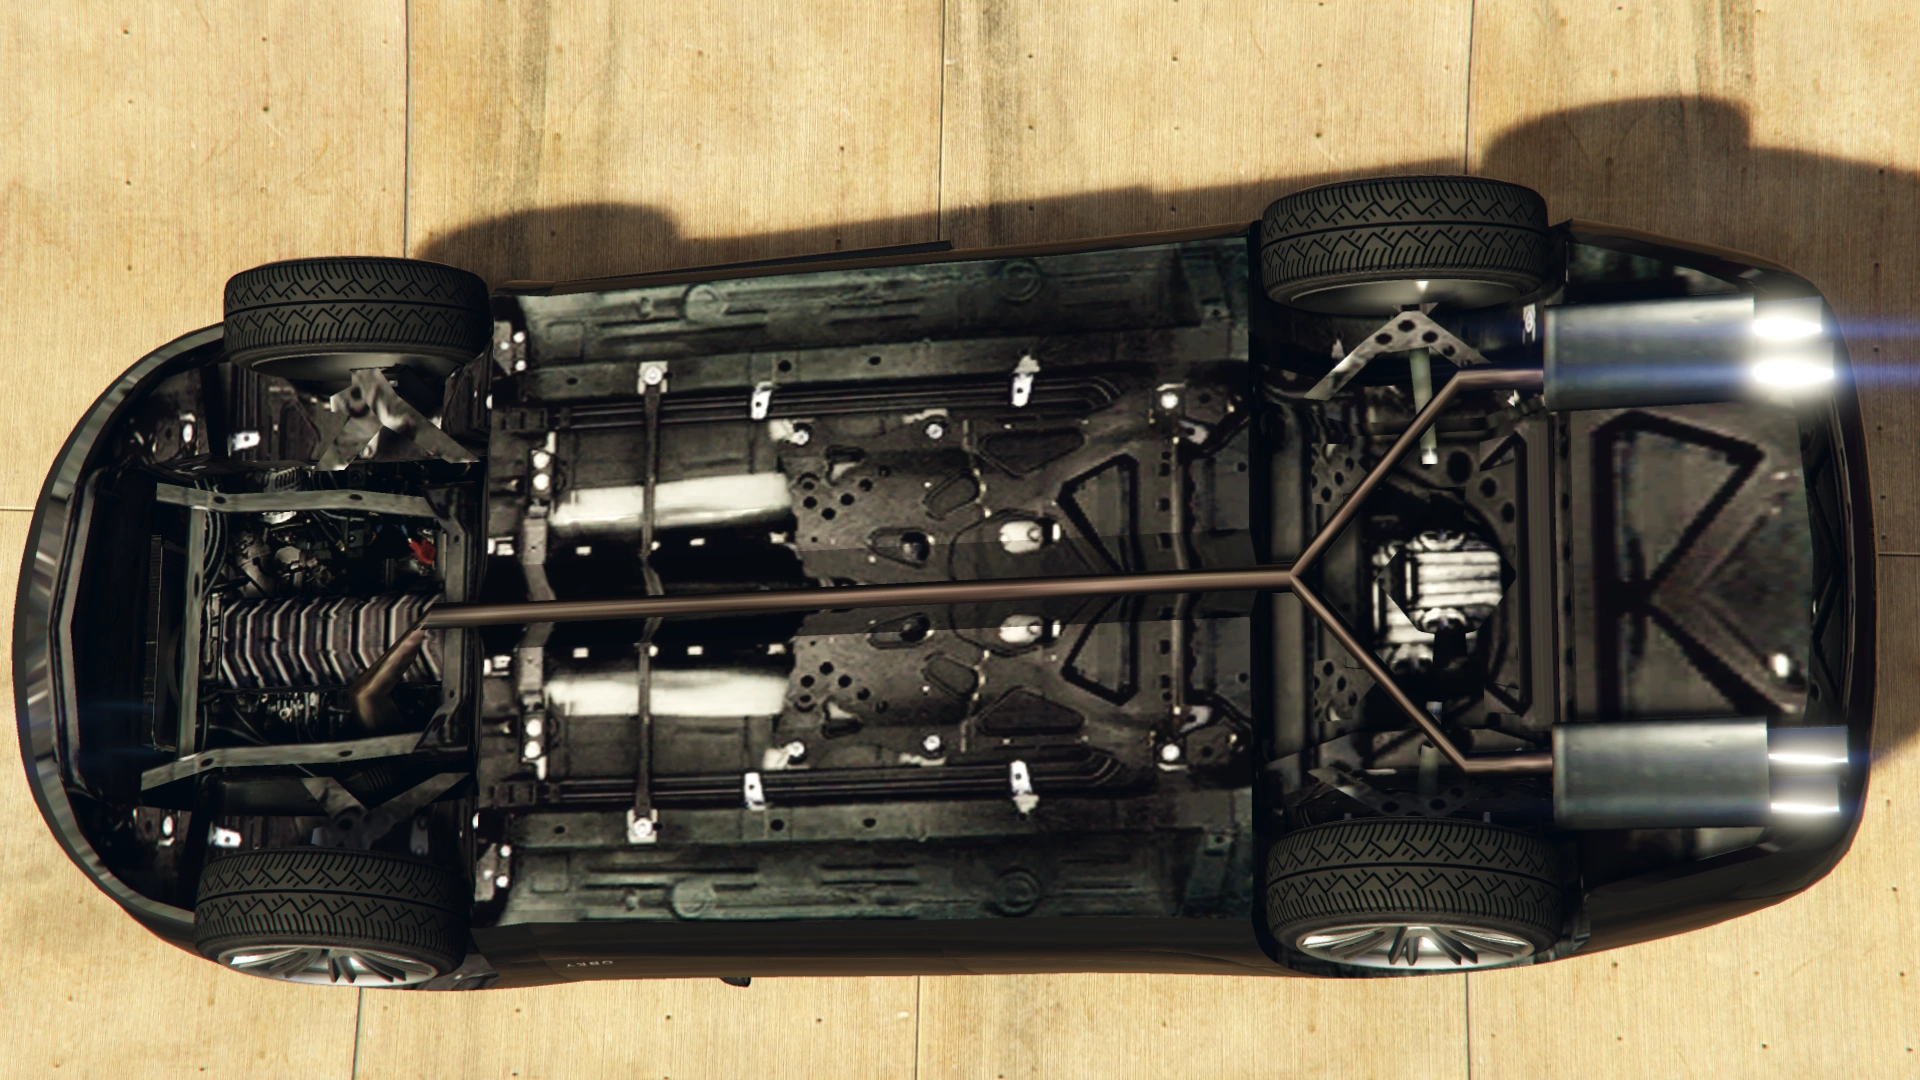
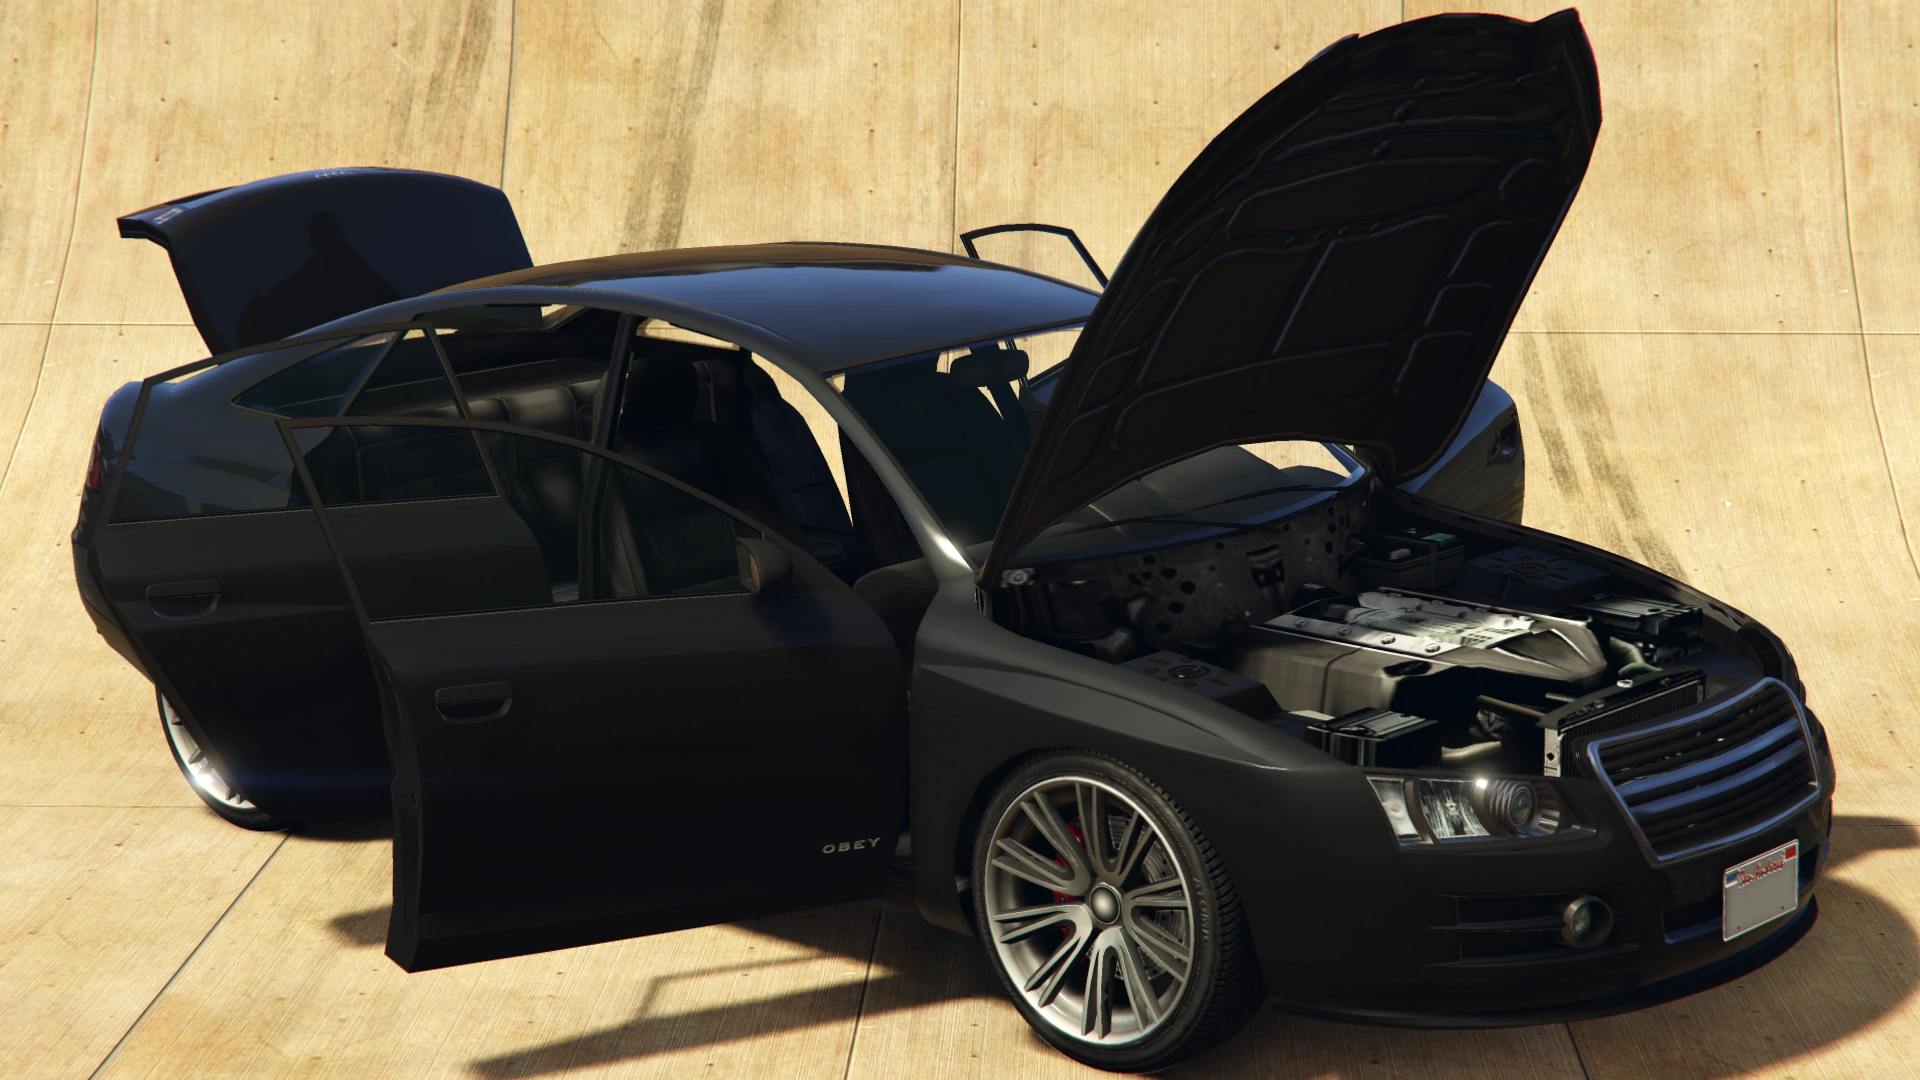
The Tailgater car features styling elements that have been inspired by the Audi A6 (C6) for the overall body design, and the Audi A8 (D4) for the grille, lower body bulge, and ten-spoke wheels. However, the quarter panel bulges appear to have been inspired by the Audi RS6 (C6). The headlights are very similar to ones on the Holden Commodore (VZ) with projector headlight housing. The rear end of the vehicle mostly draws its inspiration from the Audi A4 (B7). The tail light units are inspired by the Ford Falcon FG X.
The front end of the car features a dominant grille, which decreases in width as it gets closer to the lower edge of the bumper. This grille only occupies the upper half of the front face, and features rounded chrome edges with two horizontal chrome strips. Directly below the grille are two ducts which have non-functional circular fog-lamps.
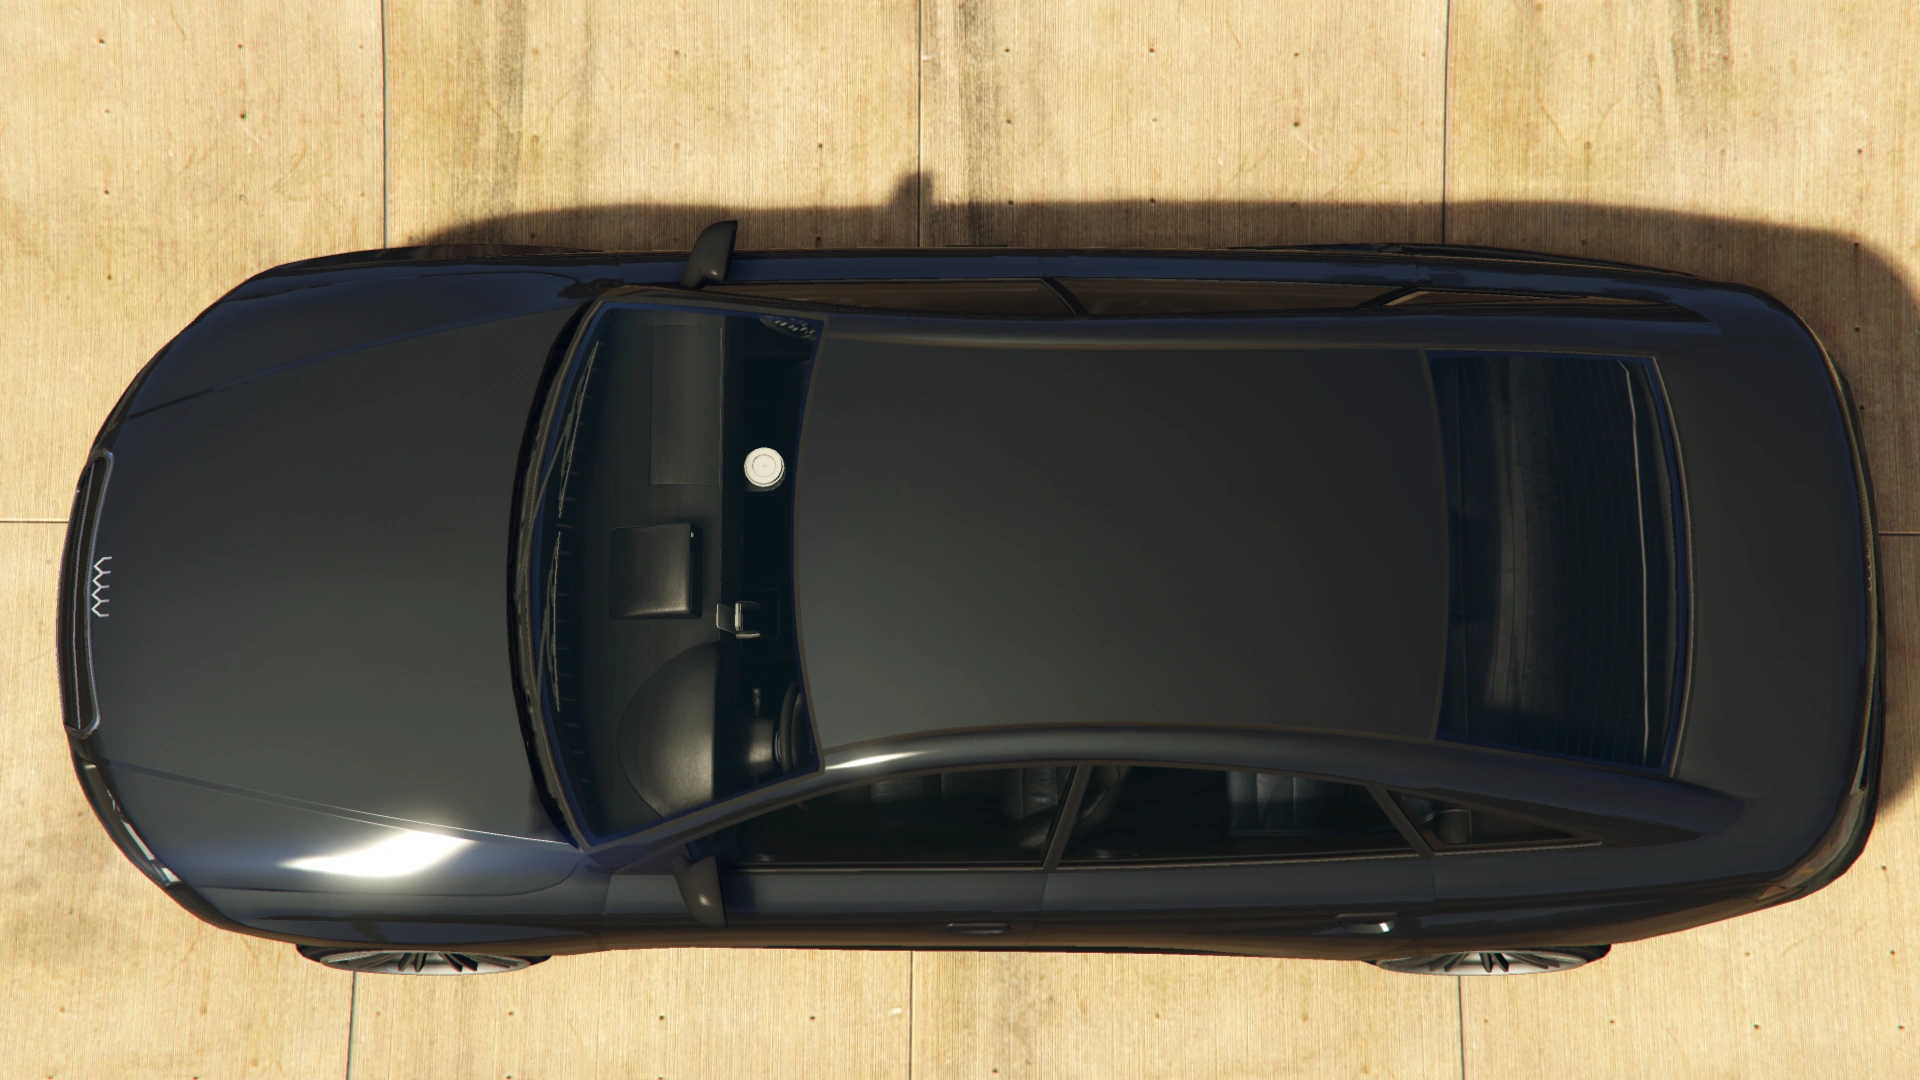
The main body area features a variety of curves. Close to the base of the body there is a large bulge that spans almost the entire wheelbase. Above that, at around mid-body height, a straight line connects the front quarter bulge to the rear quarter bulge. The greenhouse features very thin B and C pillars, which appear to be covered by a polymer. The D pillars of the car are very long, with the intention of creating an elegant appearance.
Current Design Gallery


Performance
Grand Theft Auto V
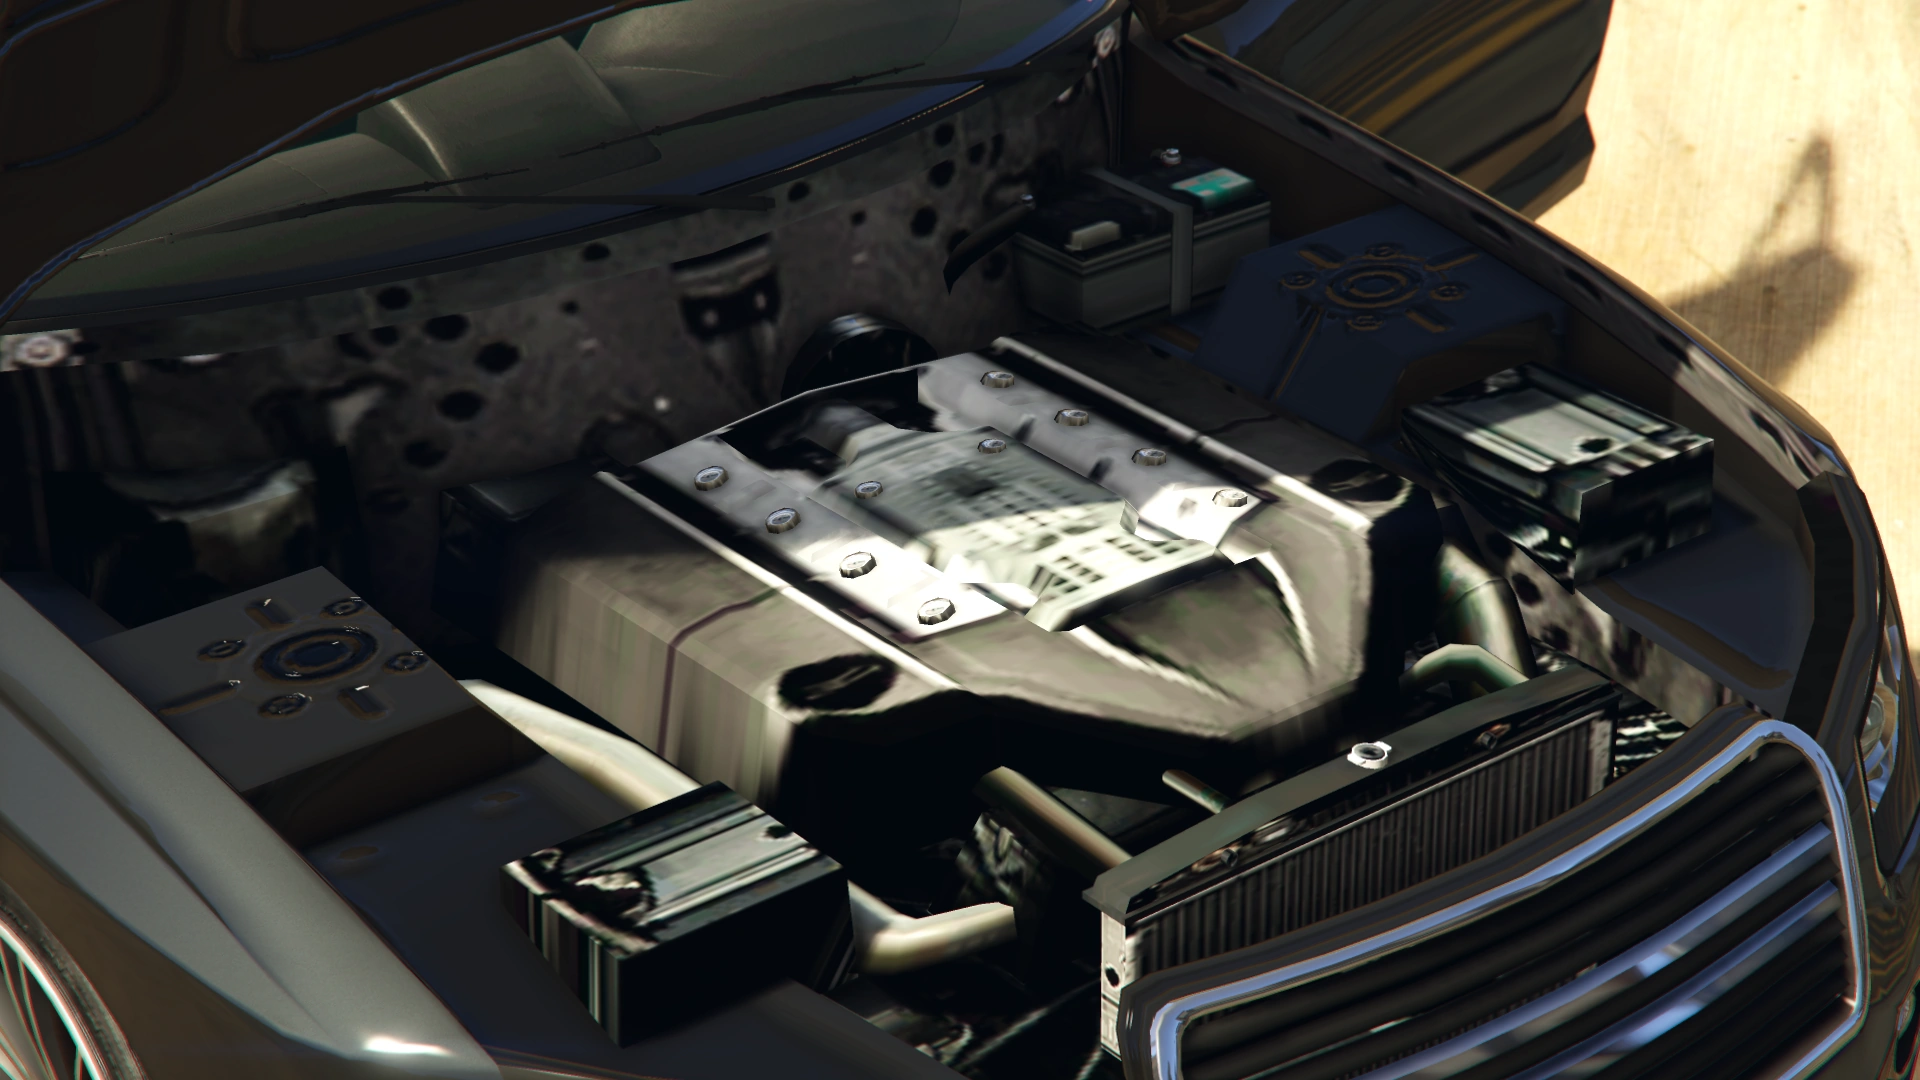
Surprising for a sedan, the Tailgater has performance that is on par with most sports cars. Acceleration and top speed are both above average, able to hold ground against sportier vehicles such as the Exemplar or F620. It has decent grip at low to moderate speeds, but can understandably begin to understeer without use of the brakes. It is fairly durable, even in regard to deformation damage. It takes several hard blows to the engine to begin drawing smoke, and can take numerous hits before any wheels become stuck.
The Tailgater shares its engine sound with the Sentinel, Gresley, Surano and Schafter.
GTA V Overview
| Acceleration (0-60 mph in Seconds) |
Top Speed (mph / kmh) |
Gears | Engine | Drivetrain (FWD / RWD / AWD) |
Mass (kg / lbs) |
Fuel Tank Size (litres) |
|---|---|---|---|---|---|---|
| N/A | 90 / 145 | 5 | N/A | RWD | 1400 / 3086 | 65 |
| N/A | 145 / 233 | 5 | N/A | RWD | 1400 / 3086 | N/A |
| 8.2 Seconds | 94 / 151 | 5 | FR V8 (Cover)
V6 (sound) |
RWD | Cannot be observed | Cannot be observed |
Modifications
Grand Theft Auto V
| Category | Modification | Cost (GTA V) | Cost (GTA Online) | Image | |
|---|---|---|---|---|---|
| Armor | No Armor | $100 | $200 | ||
| Armor Upgrade 20% | $500 | $4,500 | |||
| Armor Upgrade 40% | $1,250 | $7,500 | |||
| Armor Upgrade 60% | $2,000 | $12,000 | |||
| Armor Upgrade 80% | $3,500 | $21,000 | |||
| Armor Upgrade 100% | $5,000 | $30,000 | |||
| Brakes | Stock Brakes | $100 | $200 | ||
| Street Brakes | $2,000 | $4,000 | |||
| Sport Brakes | $2,700 | $5,400 | |||
| Race Brakes | $3,500 | $7,000 | |||
| Bumpers | Stock Front Bumper | $250 | $500 | ||
| Painted Front Splitter | $500 | $1,000 | |||
| Custom Front Splitter | $750 | $1,500 | |||
| Painted Bumper & Splitter | $1,000 | $2,000 | |||
| Custom Splitter & Intercooler | $1,300 | $2,600 | |||
| Stock Rear Bumper | $250 | $500 | |||
| Carbon Rear Diffuser | $500 | $1,000 | |||
| Painted Rear Bumper | $750 | $1,500 | |||
| Sports Rear Bumper | $1,000 | $2,000 | |||
| Painted Bumper & Diffuser | $1,300 | $2,600 | |||
| Engine | EMS Upgrade, Level 1 | $900 | $1,800 | ||
| EMS Upgrade, Level 2 | $1,250 | $2,500 | |||
| EMS Upgrade, Level 3 | $1,800 | $3,600 | |||
| EMS Upgrade, Level 4 | $3,350 | $6,700 | |||
| Exhausts | Stock Exhaust | $130 | $260 | ||
| Titanium Exhaust | $375 | $750 | |||
| Dual Titanium Exhaust | $899 | $1,800 | |||
| Chrome Tip Exhaust | $1,499 | $3,000 | |||
| Dual Exit Exhaust | $4,770 | $9,550 | |||
| Explosives | Ignition Bomb | N/A | $5,000 | ||
| Remote Bomb | N/A | $7,500 | |||
| Fenders | Stock Fenders | $150 | $300 | ||
| Arch Extensions | $450 | $900 | |||
| Chrome Arch Trim | $750 | $1,500 | |||
| Grilles | Stock Grille | $100 | $200 | ||
| Black Grille | $375 | $750 | |||
| Chrome Grille | $670 | $1,340 | |||
| Mesh Grille | $825 | $1,650 | |||
| Split Mesh Grille | $1,500 | $3,000 | |||
| Sports Grille | $1,600 | $3,200 | |||
| Hoods | Stock Hood | $150 | $300 | ||
| Scooped Hood | $325 | $650 | |||
| Carbon Hood | $750 | $1,500 | |||
| Carbon Scooped Hood | $875 | $1,750 | |||
| Performance Hood | $1,000 | $2,000 | |||
| Vented Hood | $1,200 | $2,400 | |||
| Double Vented Hood | $1,450 | $2,900 | |||
| Horns | Main article: Los Santos Customs/Horns | - | - | ||
| Lights | Headlights | Stock Lights | $100 | $200 | |
| Xenon Lights | $300 | $3,000 | |||
| Neon Kits | Main article: Los Santos Customs/Lights | - | - | ||
| Loss/Theft Prevention | Tracker | N/A | $2,000 | ||
| Full Coverage | N/A | $6,875 | |||
| Plates | Blue on White 1 | $50 | $200 | ||
| Blue on White 2 | $50 | $200 | |||
| Blue on White 3 | $50 | $200 | |||
| Yellow on Blue | $75 | $300 | |||
| Yellow on Black | $150 | $600 | |||
| Respray | Main article: Los Santos Customs/Respray Colors | - | - | ||
| Roofs | Stock Roof | $100 | $200 | ||
| Carbon Roof | $350 | $700 | |||
| Roof Rack | $575 | $1,150 | |||
| Sell | Sell Vehicle | N/A | $5,500 | ||
| Skirts | Stock Skirts | $300 | $600 | ||
| Custom Skirts | $415 | $830 | |||
| Low Skirts | $500 | $1,000 | |||
| Street Skirts | $750 | $1,500 | |||
| Sport Skirts | $1,000 | $2,000 | |||
| Spoilers | None | $150 | $300 | ||
| Lip Spoiler | $275 | $550 | |||
| Low Level Spoiler | $350 | $700 | |||
| Mid Level Spoiler | $525 | $1,050 | |||
| High Level Spoiler | $750 | $1,500 | |||
| Carbon Wing | $1,000 | $2,000 | |||
| Suspension | Stock Suspension | $100 | $200 | ||
| Lowered Suspension | $500 | $1,000 | |||
| Street Suspension | $1,000 | $2,000 | |||
| Sport Suspension | $1,700 | $3,400 | |||
| Competition Suspension | $2,200 | $4,400 | |||
| Transmission | Stock Transmission | $100 | $200 | ||
| Street Transmission | $2,950 | $5,900 | |||
| Sports Transmission | $3,250 | $6,500 | |||
| Race Transmission | $4,000 | $8,000 | |||
| Turbo | None | $500 | $1,000 | ||
| Turbo Tuning | $2,500 | $30,000 | |||
| Wheels | Main article: Los Santos Customs/Wheels | - | - | ||
| Windows | None | $100 | $500 | ||
| Light Smoke | $200 | $1,500 | |||
| Dark Smoke | $450 | $3,500 | |||
| Limo | $700 | $5,000 | |||
Image Gallery
")
")
")
")
Special Vehicles
A unique Epislon Blue Tailgater appears in the mission Unknowing the Truth. It appears with a unique license plate, K1FFL0M.[1]
| File | Color Set | Window Tint? | Livery? | Mod Kit | |||||
|---|---|---|---|---|---|---|---|---|---|
|
No | No | N/A | ||||||
")
Notable Owners
- Michael De Santa owns a black Tailgater throughout most of the game. However, following a series of incidents culminating with him being drugged, Michael's family leaves him, and Jimmy takes his car with him. It is returned to Michael later in the game by Jimmy, though customized with the following modifications:
- Race Brakes
- Rear Painted Bumper & Diffuser
- EMS upgrade level 3
- Dual Exit Exhaust
- Chrome Grille
- Double Vented Hood
- Musical Horn 5
- Xenon Lights
- Sports Skirts
- Lip Spoiler
- Sports Transmission
- Black Dollar Lowrider wheels
- Dark Smoke window tint
Like all other Personal Vehicles, the player can customize Michael's car and it will retain these modifications whenever it respawns.
")
")
- Devin Weston most likely owns two Tailgaters, one black and the other grey, as seen in mission Eye In The Sky.
Locations
Grand Theft Auto V
- After completing the mission Complications, the player can take one of the Tailgaters parked in the Premium Deluxe Motorsport shop and drive it.
- At the end of Eye in the Sky, two Tailgaters will be left in the hangar, Franklin is instructed to take any of them, to drive away from the airport.
- Franklin may be seen driving a red Tailgater after The Big Score is completed. (Obvious)
- In the Strangers and Freaks mission Unknowing the Truth, there's a unique Tailgater painted on the Epsilon Program baby blue color and with the custom plates K1FFLOM. It is obtainable after completing the mission, if the player chooses not to deliver the money.
- Appears in the towing side missions as a car to be towed after purchasing the LSPD Auto Impound. Can be obtained by entering the car and performing the character switch trick.
Grand Theft Auto Online
Similar to story mode, the Tailgater does not appear driven on the road, despite its road-worthy appearance. Unlike story-mode, however, Online has certain fixed spawn locations which are not affected by game progress.
- Available for purchase from Southern San Andreas Super Autos for $55,000.
- Offered as a choice of starting car.
- Can appear on Simeon's SMS list for export which will result in it spawning (commonly at the Golf Club or Observatory) and it will be able to be stored in the player's garage as a personal vehicle.
- May be a High Priority Car for Simeon Yetarian's Import/Export Garage but cannot be stored in player's garages.
- Rarely spawns in the Los Santos Golf Club's parking lot.
- Rarely spawns parked in Galileo Observatory.
- Occasionally spawns in Maze Bank Arena.
- Sometimes spawns parked in the taxi zones on the upper U-shaped road in Los Santos International Airport.
- Can be spotted in the parking lot of Backlot City, usually in metallic black.
- Spawns behind the tennis courts at Vespucci Beach when wanted by Simeon.
- After patch 1.14 it will no longer spawn. It, however, spawns in La Puerta, most likely in the marina parking lot.
Trivia
General
- The default radio stations for the Tailgater are Los Santos Rock Radio, Vinewood Boulevard Radio and Radio Mirror Park.
- The name Tailgater is a reference to tailgating, a word for the practice of aggressively driving too close to the rear end (or Tailgate) of the car in front. This could be a reference to the stereotype that Audi owners are impatient, pretentious people.
Grand Theft Auto V
- The Tailgater is one of many cars in GTA V that has the "Door ajar chime".
- In addition to this, the player can hear a unlocking noise when first entering the vehicle, similar to Franklin's Buffalo S. This would suggest that the vehicle is unlocked with a remote control, like many modern cars.
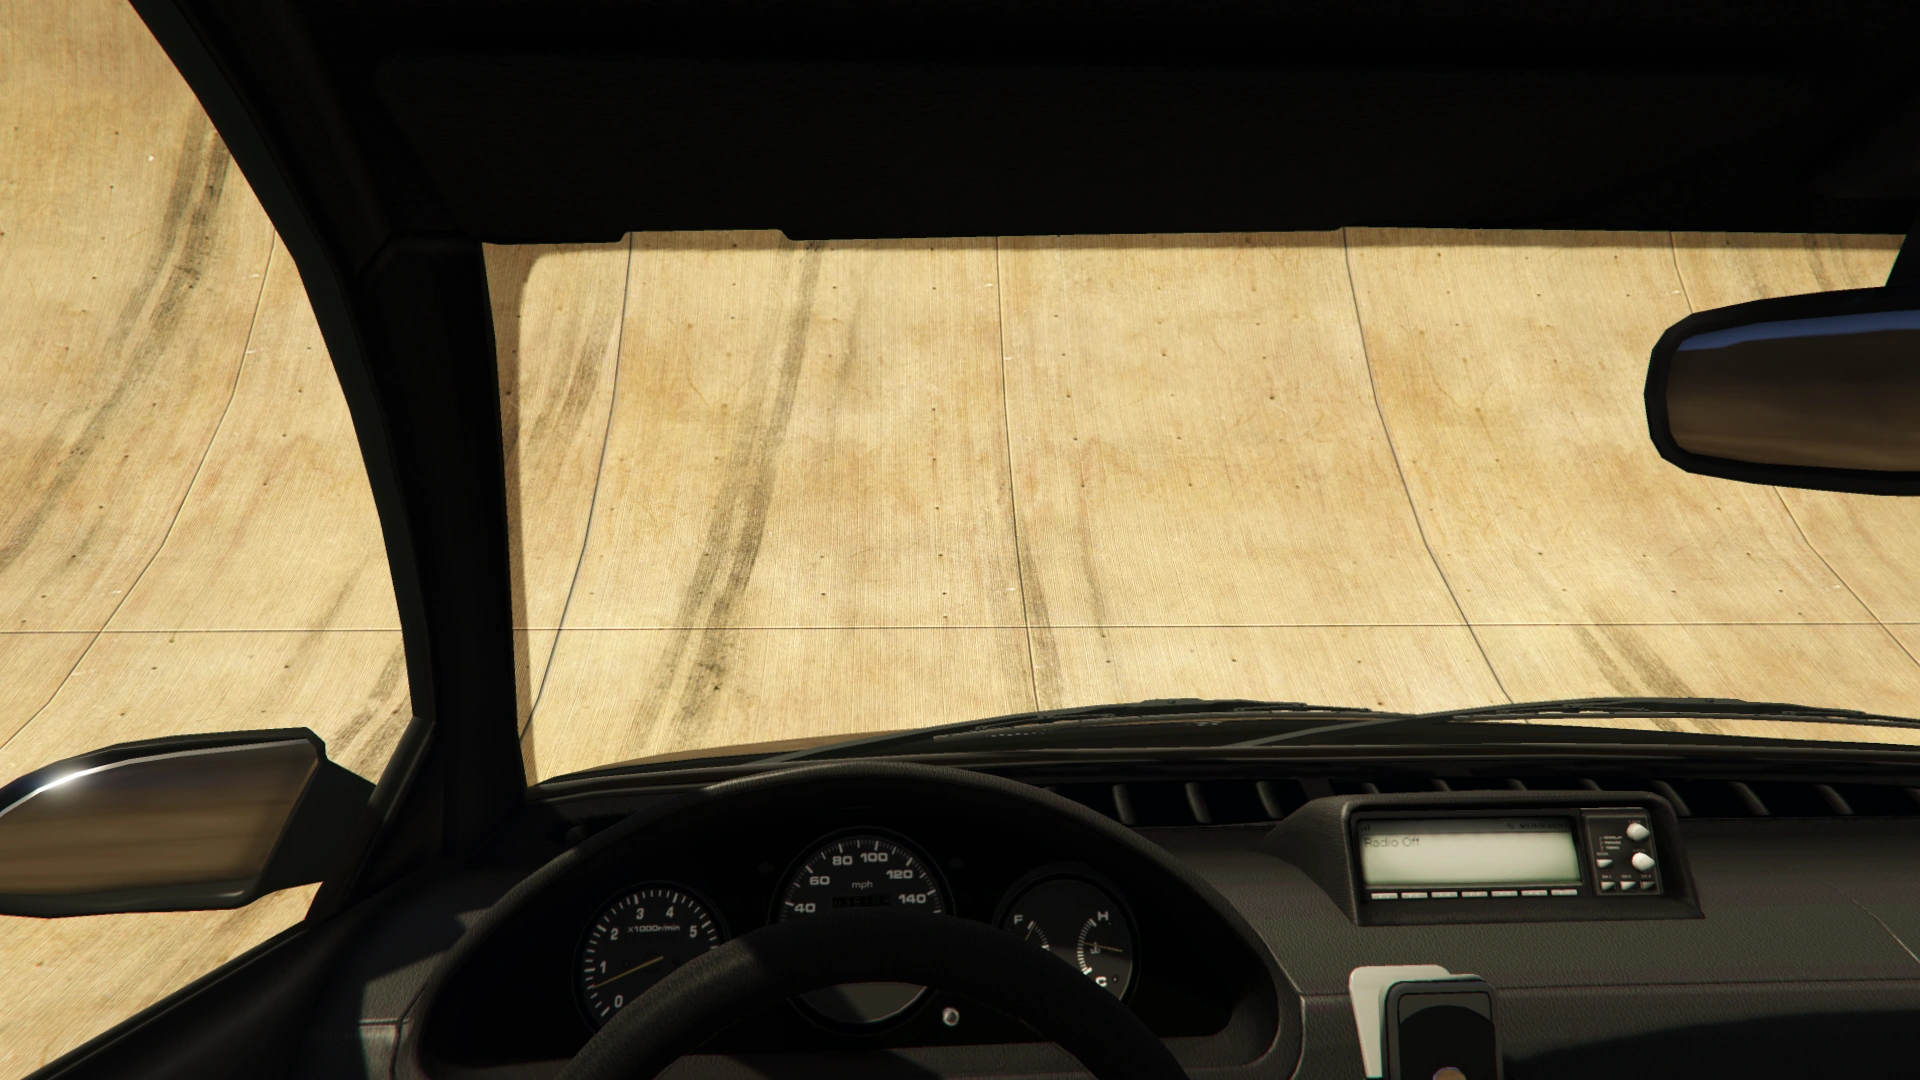
- The GPS in the middle of the console shows a map of Liberty City. This is because the interior model has been reused and modified from Grand Theft Auto IV.
- Even though the car lacks B pillars, its passenger seatbelt anchors will appear mounted on the space between the doors.
- The Tailgater always uses the same "Stock" horn sound.
- Two variants of the Tailgater appears in the handling files, both appearing as "TAILGATE" and featuring almost identical handling lines. One appears to be unused.
- The Tailgater's beta tail light unit resembles the A6 (C5) unit, with a piece added on the boot lid.
See Also
- 9F and 9F Cabrio - Two Obey vehicles with a similar design.
- Sentinel - A potential 3D Universe counterpart.
- Presidente - Another sedan which fills a similar role in Grand Theft Auto IV.
References
- ↑ epislon8 script:
The following is a snipet of script from the mission Unknowing the Truth.

if (!entity::does_entity_exist(iLocal_632))
	{
		iLocal_632 = vehicle::create_vehicle(joaat("tailgater"), vLocal_212, fLocal_251, 1, true);
		func_305(iLocal_632, 0);
		vehicle::set_vehicle_colours(iLocal_632, iLocal_161, iLocal_161);
		vehicle::set_vehicle_extra_colours(iLocal_632, 0, 0);
		vehicle::set_vehicle_number_plate_text_index(iLocal_632, 0);
		vehicle::set_vehicle_number_plate_text(iLocal_632, "K1FFL0M");
	}