MGgames100 (talk | contribs) No edit summary |
No edit summary |
||
| Line 107: | Line 107: | ||
==Modifications== |
==Modifications== |
||
===''Grand Theft Auto Online''=== |
===''Grand Theft Auto Online''=== |
||
| + | ==Modifications== |
||
| − | |||
| − | ==Locations== |
||
===''Grand Theft Auto Online''=== |
===''Grand Theft Auto Online''=== |
||
| + | {| class="wikitable" style="vertical-align:top;" valign="top" |
||
| − | *Will be available for purchase from [[Southern San Andreas Super Autos]] for [[Money|$]]1,224,000 or for $918,000 after completing The Diamond Casino Heist as the Heist Leader and using the Sugoi as a getaway vehicle. |
||
| + | |- |
||
| − | |||
| + | ! colspan="2" scope="col" |Category |
||
| − | ==Prominent Appearances in Missions== |
||
| + | ! scope="col" |Modification |
||
| − | *Two Sugois can be chosen as getaway vehicles if the player decides to steal them for the Diamond Casino Heist. |
||
| + | ! scope="col" |Price |
||
| − | |||
| + | ! scope="col" |Image |
||
| + | |- |
||
| + | | colspan="2" rowspan="6" |Armor |
||
| + | |No Armor |
||
| + | | colspan="2" style="text-align: center;" |$1,000 |
||
| + | |- |
||
| + | |Armor Upgrade 20% |
||
| + | | colspan="2" style="text-align: center;" |$7,500 |
||
| + | |- |
||
| + | |Armor Upgrade 40% |
||
| + | | colspan="2" style="text-align: center;" |$12,000 |
||
| + | |- |
||
| + | |Armor Upgrade 60% |
||
| + | | colspan="2" style="text-align: center;" |$20,000 |
||
| + | |- |
||
| + | |Armor Upgrade 80% |
||
| + | | colspan="2" style="text-align: center;" |$35,000 |
||
| + | |- |
||
| + | |Armor Upgrade 100% |
||
| + | | colspan="2" style="text-align: center;" |$50,000 |
||
| + | |- |
||
| + | | colspan="2" rowspan="4" |Brakes |
||
| + | |Stock Brakes |
||
| + | | colspan="2" style="text-align: center;" |$1,000 |
||
| + | |- |
||
| + | |Street Brakes |
||
| + | | colspan="2" style="text-align: center;" |$20,000 |
||
| + | |- |
||
| + | |Sport Brakes |
||
| + | | colspan="2" style="text-align: center;" |$27,000 |
||
| + | |- |
||
| + | |Race Brakes |
||
| + | | colspan="2" style="text-align: center;" |$35,000 |
||
| + | |- |
||
| + | | rowspan="23" |Bumpers |
||
| + | | rowspan="15" |Front Diffusers |
||
| + | |Stock Front Diffuser |
||
| + | | style="text-align: center;" |$2,200 |
||
| + | | |
||
| + | |- |
||
| + | |Stock w/ Canards |
||
| + | | style="text-align: center;" |$4,600 |
||
| + | | |
||
| + | |- |
||
| + | |Racer Diffuser |
||
| + | | style="text-align: center;" |$7,400 |
||
| + | | |
||
| + | |- |
||
| + | |Racer Diffuser w/ Canards |
||
| + | | style="text-align: center;" |$11,700 |
||
| + | | |
||
| + | |- |
||
| + | |Sweep Diffuser |
||
| + | | style="text-align: center;" |$14,500 |
||
| + | | |
||
| + | |- |
||
| + | |Carbon Sweep Diffuser |
||
| + | | style="text-align: center;" |$14,700 |
||
| + | | |
||
| + | |- |
||
| + | |Primary Sweep Diffuser |
||
| + | | style="text-align: center;" |$14,900 |
||
| + | | |
||
| + | |- |
||
| + | |Arc Diffuser |
||
| + | | style="text-align: center;" |$15,100 |
||
| + | | |
||
| + | |- |
||
| + | |Carbon Arc Diffuser |
||
| + | | style="text-align: center;" |$15,300 |
||
| + | | |
||
| + | |- |
||
| + | |Primary Arc Racer Diffuser |
||
| + | | style="text-align: center;" |$15,500 |
||
| + | | |
||
| + | |- |
||
| + | |GT Diffuser |
||
| + | | style="text-align: center;" |$15,700 |
||
| + | | |
||
| + | |- |
||
| + | |Carbon GT Diffuser |
||
| + | | style="text-align: center;" |$15,900 |
||
| + | | |
||
| + | |- |
||
| + | |Primary GT Diffuser w/ Canards |
||
| + | | style="text-align: center;" |$16,100 |
||
| + | | |
||
| + | |- |
||
| + | |Carbon Downforce Diffuser |
||
| + | | style="text-align: center;" |$16,300 |
||
| + | | |
||
| + | |- |
||
| + | |Primary Downforce Diffuser |
||
| + | | style="text-align: center;" |$16,500 |
||
| + | | |
||
| + | |- |
||
| + | | rowspan="8" |Rear Diffusers |
||
| + | |Stock Rear Diffuser |
||
| + | | style="text-align: center;" |$2,200 |
||
| + | | |
||
| + | |- |
||
| + | |Racer Diffuser |
||
| + | | style="text-align: center;" |$4,600 |
||
| + | | |
||
| + | |- |
||
| + | |Performance Diffuser |
||
| + | | style="text-align: center;" |$7,400 |
||
| + | | |
||
| + | |- |
||
| + | |Sweep Diffuser |
||
| + | | style="text-align: center;" |$11,700 |
||
| + | | |
||
| + | |- |
||
| + | |GT Diffuser |
||
| + | | style="text-align: center;" |$14,500 |
||
| + | | |
||
| + | |- |
||
| + | |Speed Diffuser |
||
| + | | style="text-align: center;" |$14,700 |
||
| + | | |
||
| + | |- |
||
| + | |Turbo Diffuser |
||
| + | | style="text-align: center;" |$14,900 |
||
| + | | |
||
| + | |- |
||
| + | |Carbon Downforce Diffuser |
||
| + | | style="text-align: center;" |$15,100 |
||
| + | | |
||
| + | |- |
||
| + | | colspan="2" rowspan="4" |Engine |
||
| + | |EMS Upgrade, Level 1 |
||
| + | | colspan="2" style="text-align: center;" |$9,000 |
||
| + | |- |
||
| + | |EMS Upgrade, Level 2 |
||
| + | | colspan="2" style="text-align: center;" |$12,500 |
||
| + | |- |
||
| + | |EMS Upgrade, Level 3 |
||
| + | | colspan="2" style="text-align: center;" |$18,000 |
||
| + | |- |
||
| + | |EMS Upgrade, Level 4 |
||
| + | | colspan="2" style="text-align: center;" |$33,500 |
||
| + | |- |
||
| + | | colspan="2" rowspan="8" |Exhausts |
||
| + | |Stock Exhaust |
||
| + | | style="text-align: center;" |$260 |
||
| + | | |
||
| + | |- |
||
| + | |Round Exhaust |
||
| + | | style="text-align: center;" |$750 |
||
| + | | |
||
| + | |- |
||
| + | |Oval Exhaust |
||
| + | | style="text-align: center;" |$1,800 |
||
| + | | |
||
| + | |- |
||
| + | |Round Cluster Exhaust |
||
| + | | style="text-align: center;" |$3,000 |
||
| + | | |
||
| + | |- |
||
| + | |Sports Exhaust |
||
| + | | style="text-align: center;" |$9,550 |
||
| + | | |
||
| + | |- |
||
| + | |Split Exhaust |
||
| + | | style="text-align: center;" |$9,750 |
||
| + | | |
||
| + | |- |
||
| + | |Square Cluster Exhaust |
||
| + | | style="text-align: center;" |$10,500 |
||
| + | | |
||
| + | |- |
||
| + | |Angled Square Exhaust |
||
| + | | style="text-align: center;" |$12,000 |
||
| + | | |
||
| + | |- |
||
| + | | colspan="2" rowspan="2" |[[Car Bomb|Explosives]] |
||
| + | |Ignition Bomb |
||
| + | | colspan="2" style="text-align: center;" |$5,000 |
||
| + | |- |
||
| + | |Remote Bomb |
||
| + | | colspan="2" style="text-align: center;" |$7,500 |
||
| + | |- |
||
| + | | colspan="2" rowspan="8" |Grilles |
||
| + | |Stock Grille |
||
| + | | style="text-align: center;" |$200 |
||
| + | | |
||
| + | |- |
||
| + | |Top Trim Grille |
||
| + | | style="text-align: center;" |$750 |
||
| + | | |
||
| + | |- |
||
| + | |Rally Grille |
||
| + | | style="text-align: center;" |$1,340 |
||
| + | | |
||
| + | |- |
||
| + | |Rally w/ Top Trim Grille |
||
| + | | style="text-align: center;" |$1,650 |
||
| + | | |
||
| + | |- |
||
| + | |Track Grille |
||
| + | | style="text-align: center;" |$3,000 |
||
| + | | |
||
| + | |- |
||
| + | |Track w/ Top Trim Grille |
||
| + | | style="text-align: center;" |$3,200 |
||
| + | | |
||
| + | |- |
||
| + | |GT Grille |
||
| + | | style="text-align: center;" |$3,650 |
||
| + | | |
||
| + | |- |
||
| + | |GT w/ Top Trim Grille |
||
| + | | style="text-align: center;" |$4,100 |
||
| + | | |
||
| + | |- |
||
| + | | colspan="2" rowspan="13" |Hoods |
||
| + | |Stock Hood |
||
| + | | style="text-align: center;" |$1,600 |
||
| + | | |
||
| + | |- |
||
| + | |Carbon Stock Hood |
||
| + | | style="text-align: center;" |$3,000 |
||
| + | | |
||
| + | |- |
||
| + | |Primary Hood |
||
| + | | style="text-align: center;" |$5,000 |
||
| + | | |
||
| + | |- |
||
| + | |Carbon Hood |
||
| + | | style="text-align: center;" |$8,000 |
||
| + | | |
||
| + | |- |
||
| + | |Vented Hood |
||
| + | | style="text-align: center;" |$9,600 |
||
| + | | |
||
| + | |- |
||
| + | |Carbon Vented Hood |
||
| + | | style="text-align: center;" |$11,000 |
||
| + | | |
||
| + | |- |
||
| + | |Vented Catch Hood |
||
| + | | style="text-align: center;" |$11,600 |
||
| + | | |
||
| + | |- |
||
| + | |Street Vented Hood |
||
| + | | style="text-align: center;" |$12,000 |
||
| + | | |
||
| + | |- |
||
| + | |Rally Hood |
||
| + | | style="text-align: center;" |$12,400 |
||
| + | | |
||
| + | |- |
||
| + | |Sports Hood |
||
| + | | style="text-align: center;" |$12,400 |
||
| + | | |
||
| + | |- |
||
| + | |Dual Vented Hood |
||
| + | | style="text-align: center;" |$12,500 |
||
| + | | |
||
| + | |- |
||
| + | |Performance Hood |
||
| + | | style="text-align: center;" |$12,900 |
||
| + | | |
||
| + | |- |
||
| + | |Carbon Performance Hood |
||
| + | | style="text-align: center;" |$13,250 |
||
| + | | |
||
| + | |- |
||
| + | | colspan="2" |Horns |
||
| + | |''Main article: [[Los Santos Customs/Horns]]'' |
||
| + | | colspan="2" style="text-align: center;" | - |
||
| + | |- |
||
| + | | rowspan="3" |Lights |
||
| + | | rowspan="2" |Headlights |
||
| + | |Stock Lights |
||
| + | | colspan="2" style="text-align: center;" |$600 |
||
| + | |- |
||
| + | |Xenon Lights |
||
| + | | colspan="2" style="text-align: center;" |$7,500 |
||
| + | |- |
||
| + | |Neon Kits |
||
| + | |''Main article: [[Los Santos Customs/Lights]]'' |
||
| + | | colspan="2" style="text-align: center;" | - |
||
| + | |- |
||
| + | | colspan="2" rowspan="11" |Livery |
||
| + | |None |
||
| + | | style="text-align: center;" |$11,400 |
||
| + | | |
||
| + | |- |
||
| + | |Red Stripes |
||
| + | | style="text-align: center;" |$18,240 |
||
| + | | |
||
| + | |- |
||
| + | |Checker Stripes |
||
| + | | style="text-align: center;" |$19,380 |
||
| + | | |
||
| + | |- |
||
| + | |Sugoi Stripes |
||
| + | | style="text-align: center;" |$20,520 |
||
| + | | |
||
| + | |- |
||
| + | |Wave |
||
| + | | style="text-align: center;" |$21,660 |
||
| + | | |
||
| + | |- |
||
| + | |Racer 23 |
||
| + | | style="text-align: center;" |$22,800 |
||
| + | | |
||
| + | |- |
||
| + | |Racer 29 |
||
| + | | style="text-align: center;" |$23,370 |
||
| + | | |
||
| + | |- |
||
| + | |Racer 99 |
||
| + | | style="text-align: center;" |$23,939 |
||
| + | | |
||
| + | |- |
||
| + | |[[Jackal Racing]] |
||
| + | | style="text-align: center;" |$24,510 |
||
| + | | |
||
| + | |- |
||
| + | |[[Princess Robot Bubblegum|Wasabi Kitty]] |
||
| + | | style="text-align: center;" |$25,080 |
||
| + | | |
||
| + | |- |
||
| + | |Red Warrior |
||
| + | | style="text-align: center;" |$25,650 |
||
| + | | |
||
| + | |- |
||
| + | | colspan="2" rowspan="2" |Loss/Theft Prevention |
||
| + | |Tracker |
||
| + | | colspan="2" style="text-align: center;" | |
||
| + | |- |
||
| + | |Full Coverage |
||
| + | | colspan="2" style="text-align: center;" | |
||
| + | |- |
||
| + | | colspan="2" rowspan="5" |Mirrors |
||
| + | |Stock Mirrors |
||
| + | | style="text-align: center;" |$300 |
||
| + | | |
||
| + | |- |
||
| + | |Secondary Frame |
||
| + | | style="text-align: center;" |$900 |
||
| + | | |
||
| + | |- |
||
| + | |Carbon Frame |
||
| + | | style="text-align: center;" |$1,500 |
||
| + | | |
||
| + | |- |
||
| + | |Primary Carbon Frame |
||
| + | | style="text-align: center;" |$1,700 |
||
| + | | |
||
| + | |- |
||
| + | |Secondary Carbon Frame |
||
| + | | style="text-align: center;" |$2,000 |
||
| + | | |
||
| + | |- |
||
| + | | colspan="2" rowspan="5" |Plates |
||
| + | |Blue on White 1 |
||
| + | | colspan="2" style="text-align: center;" |$200 |
||
| + | |- |
||
| + | |Blue on White 2 |
||
| + | | colspan="2" style="text-align: center;" |$200 |
||
| + | |- |
||
| + | |Blue on White 3 |
||
| + | | colspan="2" style="text-align: center;" |$200 |
||
| + | |- |
||
| + | |Yellow on Blue |
||
| + | | colspan="2" style="text-align: center;" |$300 |
||
| + | |- |
||
| + | |Yellow on Black |
||
| + | | colspan="2" style="text-align: center;" |$600 |
||
| + | |- |
||
| + | | colspan="2" |Respray |
||
| + | |''Main article: [[Los Santos Customs/Respray Colors]]'' |
||
| + | | colspan="2" style="text-align: center;" | - |
||
| + | |- |
||
| + | | colspan="2" rowspan="7" |Roofs |
||
| + | |Stock Roof |
||
| + | | style="text-align: center;" |$200 |
||
| + | | |
||
| + | |- |
||
| + | |Rally Scoop & Primary Fin |
||
| + | | style="text-align: center;" |$700 |
||
| + | | |
||
| + | |- |
||
| + | |Track Scoop & Carbon Fin |
||
| + | | style="text-align: center;" |$1,150 |
||
| + | | |
||
| + | |- |
||
| + | |Air Scoop & Carbon Antenna |
||
| + | | style="text-align: center;" |$1,600 |
||
| + | | |
||
| + | |- |
||
| + | |Square Scoop & Primary Fin |
||
| + | | style="text-align: center;" |$1,950 |
||
| + | | |
||
| + | |- |
||
| + | |GT Scoop & Rally Antennas |
||
| + | | style="text-align: center;" |$2,400 |
||
| + | | |
||
| + | |- |
||
| + | |Sports Scoop & Rally Antennas |
||
| + | | style="text-align: center;" |$2,500 |
||
| + | | |
||
| + | |- |
||
| + | | colspan="2" |Sell |
||
| + | |Sell Vehicle |
||
| + | | colspan="2" style="text-align: center;" | |
||
| + | |- |
||
| + | | colspan="2" rowspan="10" |Skirts |
||
| + | |Stock Skirts |
||
| + | | style="text-align: center;" |$2,500 |
||
| + | | |
||
| + | |- |
||
| + | |Carbon Skirt |
||
| + | | style="text-align: center;" |$5,500 |
||
| + | | |
||
| + | |- |
||
| + | |Street Skirt |
||
| + | | style="text-align: center;" |$8,000 |
||
| + | | |
||
| + | |- |
||
| + | |Carbon Street Skirt |
||
| + | | style="text-align: center;" |$10,500 |
||
| + | | |
||
| + | |- |
||
| + | |Racer Skirt |
||
| + | | style="text-align: center;" |$14,000 |
||
| + | | |
||
| + | |- |
||
| + | |Carbon Racer Skirt |
||
| + | | style="text-align: center;" |$14,500 |
||
| + | | |
||
| + | |- |
||
| + | |Jet Skirt |
||
| + | | style="text-align: center;" |$15,000 |
||
| + | | |
||
| + | |- |
||
| + | |Carbon Jet Skirt |
||
| + | | style="text-align: center;" |$15,500 |
||
| + | | |
||
| + | |- |
||
| + | |Rally Skirt |
||
| + | | style="text-align: center;" |$16,000 |
||
| + | | |
||
| + | |- |
||
| + | |Carbon Rally Skirt |
||
| + | | style="text-align: center;" |$16,500 |
||
| + | | |
||
| + | |- |
||
| + | | colspan="2" rowspan="15" |Spoilers |
||
| + | |None |
||
| + | | style="text-align: center;" |$6,000 |
||
| + | | |
||
| + | |- |
||
| + | |Fin Tail Spoiler |
||
| + | | style="text-align: center;" |$7,050 |
||
| + | | |
||
| + | |- |
||
| + | |Racer Tail Spoiler |
||
| + | | style="text-align: center;" |$10,000 |
||
| + | | |
||
| + | |- |
||
| + | |Primary Street Spoiler |
||
| + | | style="text-align: center;" |$13,000 |
||
| + | | |
||
| + | |- |
||
| + | |Secondary Street Spoiler |
||
| + | | style="text-align: center;" |$14,000 |
||
| + | | |
||
| + | |- |
||
| + | |Carbon Street Spoiler |
||
| + | | style="text-align: center;" |$16,000 |
||
| + | | |
||
| + | |- |
||
| + | |Arrow Spoiler |
||
| + | | style="text-align: center;" |$16,500 |
||
| + | | |
||
| + | |- |
||
| + | |Carbon Arrow Spoiler |
||
| + | | style="text-align: center;" |$17,000 |
||
| + | | |
||
| + | |- |
||
| + | |GT Spoiler |
||
| + | | style="text-align: center;" |$17,500 |
||
| + | | |
||
| + | |- |
||
| + | |Carbon Track Spoiler |
||
| + | | style="text-align: center;" |$18,000 |
||
| + | | |
||
| + | |- |
||
| + | |Track MK2 Spoiler |
||
| + | | style="text-align: center;" |$18,500 |
||
| + | | |
||
| + | |- |
||
| + | |Carbon Drag Spoiler |
||
| + | | style="text-align: center;" |$19,000 |
||
| + | | |
||
| + | |- |
||
| + | |Secondary Drag Spoiler |
||
| + | | style="text-align: center;" |$19,500 |
||
| + | | |
||
| + | |- |
||
| + | |Sports Spoiler |
||
| + | | style="text-align: center;" |$20,000 |
||
| + | | |
||
| + | |- |
||
| + | |Sprint Spoiler |
||
| + | | style="text-align: center;" |$20,500 |
||
| + | | |
||
| + | |- |
||
| + | | colspan="2" rowspan="6" |Suspension |
||
| + | |Stock Suspension |
||
| + | | colspan="2" style="text-align: center;" |$200 |
||
| + | |- |
||
| + | |Lowered Suspension |
||
| + | | colspan="2" style="text-align: center;" |$1,000 |
||
| + | |- |
||
| + | |Street Suspension |
||
| + | | colspan="2" style="text-align: center;" |$2,000 |
||
| + | |- |
||
| + | |Sport Suspension |
||
| + | | colspan="2" style="text-align: center;" |$3,400 |
||
| + | |- |
||
| + | |Competition Suspension |
||
| + | | colspan="2" style="text-align: center;" |$4,400 |
||
| + | |- |
||
| + | |Race Suspension |
||
| + | | colspan="2" style="text-align: center;" |$4,600 |
||
| + | |- |
||
| + | | colspan="2" rowspan="4" |Transmission |
||
| + | |Stock Transmission |
||
| + | | colspan="2" style="text-align: center;" |$1,000 |
||
| + | |- |
||
| + | |Street Transmission |
||
| + | | colspan="2" style="text-align: center;" |$29,500 |
||
| + | |- |
||
| + | |Sports Transmission |
||
| + | | colspan="2" style="text-align: center;" |$32,500 |
||
| + | |- |
||
| + | |Race Transmission |
||
| + | | colspan="2" style="text-align: center;" |$40,000 |
||
| + | |- |
||
| + | | colspan="2" rowspan="2" |Turbo |
||
| + | |None |
||
| + | | colspan="2" style="text-align: center;" |$5,000 |
||
| + | |- |
||
| + | |Turbo Tuning |
||
| + | | colspan="2" style="text-align: center;" |$50,000 |
||
| + | |- |
||
| + | | colspan="2" |Wheels |
||
| + | |''Main article: [[Los Santos Customs/Wheels]]'' |
||
| + | | colspan="2" style="text-align: center;" | - |
||
| + | |- |
||
| + | | colspan="2" rowspan="4" |Windows |
||
| + | |None |
||
| + | | colspan="2" style="text-align: center;" |$500 |
||
| + | |- |
||
| + | |Light Smoke |
||
| + | | colspan="2" style="text-align: center;" |$1,500 |
||
| + | |- |
||
| + | |Dark Smoke |
||
| + | | colspan="2" style="text-align: center;" |$3,500 |
||
| + | |- |
||
| + | |Limo |
||
| + | | colspan="2" style="text-align: center;" |$5,000 |
||
| + | |} |
||
==Image Gallery== |
==Image Gallery== |
||
| Line 121: | Line 688: | ||
Sugoi-GTAO-SSASA.png|The '''Sugoi''' on [[Southern San Andreas Super Autos]]. |
Sugoi-GTAO-SSASA.png|The '''Sugoi''' on [[Southern San Andreas Super Autos]]. |
||
</gallery> |
</gallery> |
||
| + | |||
| + | ==Prominent Appearances in Missions== |
||
| + | *Two Sugois can be chosen as getaway vehicles if the player decides to steal them for the Diamond Casino Heist. |
||
| + | |||
| + | ==Locations== |
||
| + | ===''Grand Theft Auto Online''=== |
||
| + | *Will be available for purchase from [[Southern San Andreas Super Autos]] for [[Money|$]]1,224,000 or for $918,000 after completing The Diamond Casino Heist as the Heist Leader and using the Sugoi as a getaway vehicle. |
||
==See Also== |
==See Also== |
||
Revision as of 00:07, 27 December 2019
Template:Next-Gen
This article or section contains information about a subject scheduled to be featured in upcoming Grand Theft Auto Online content.
Please do not add unconfirmed or speculative content unless it can be confirmed by its release or by Rockstar Games.
This article has just been born! It is currently Under Construction.
The following content may be incomplete and/or not verified.
Template:Infobox vehicles
“
How do you let people know you're interesting and exciting without engaging in conversation, or even making eye contact? The Dinka Sugoi has as much finish and flash as the elaborate mating ritual of a bird of paradise. Just paint it bright, beam the lights and powerslide your way round town to lure the admiration and friendship that you alone could not.
”
— Southern San Andreas Super Autos description.
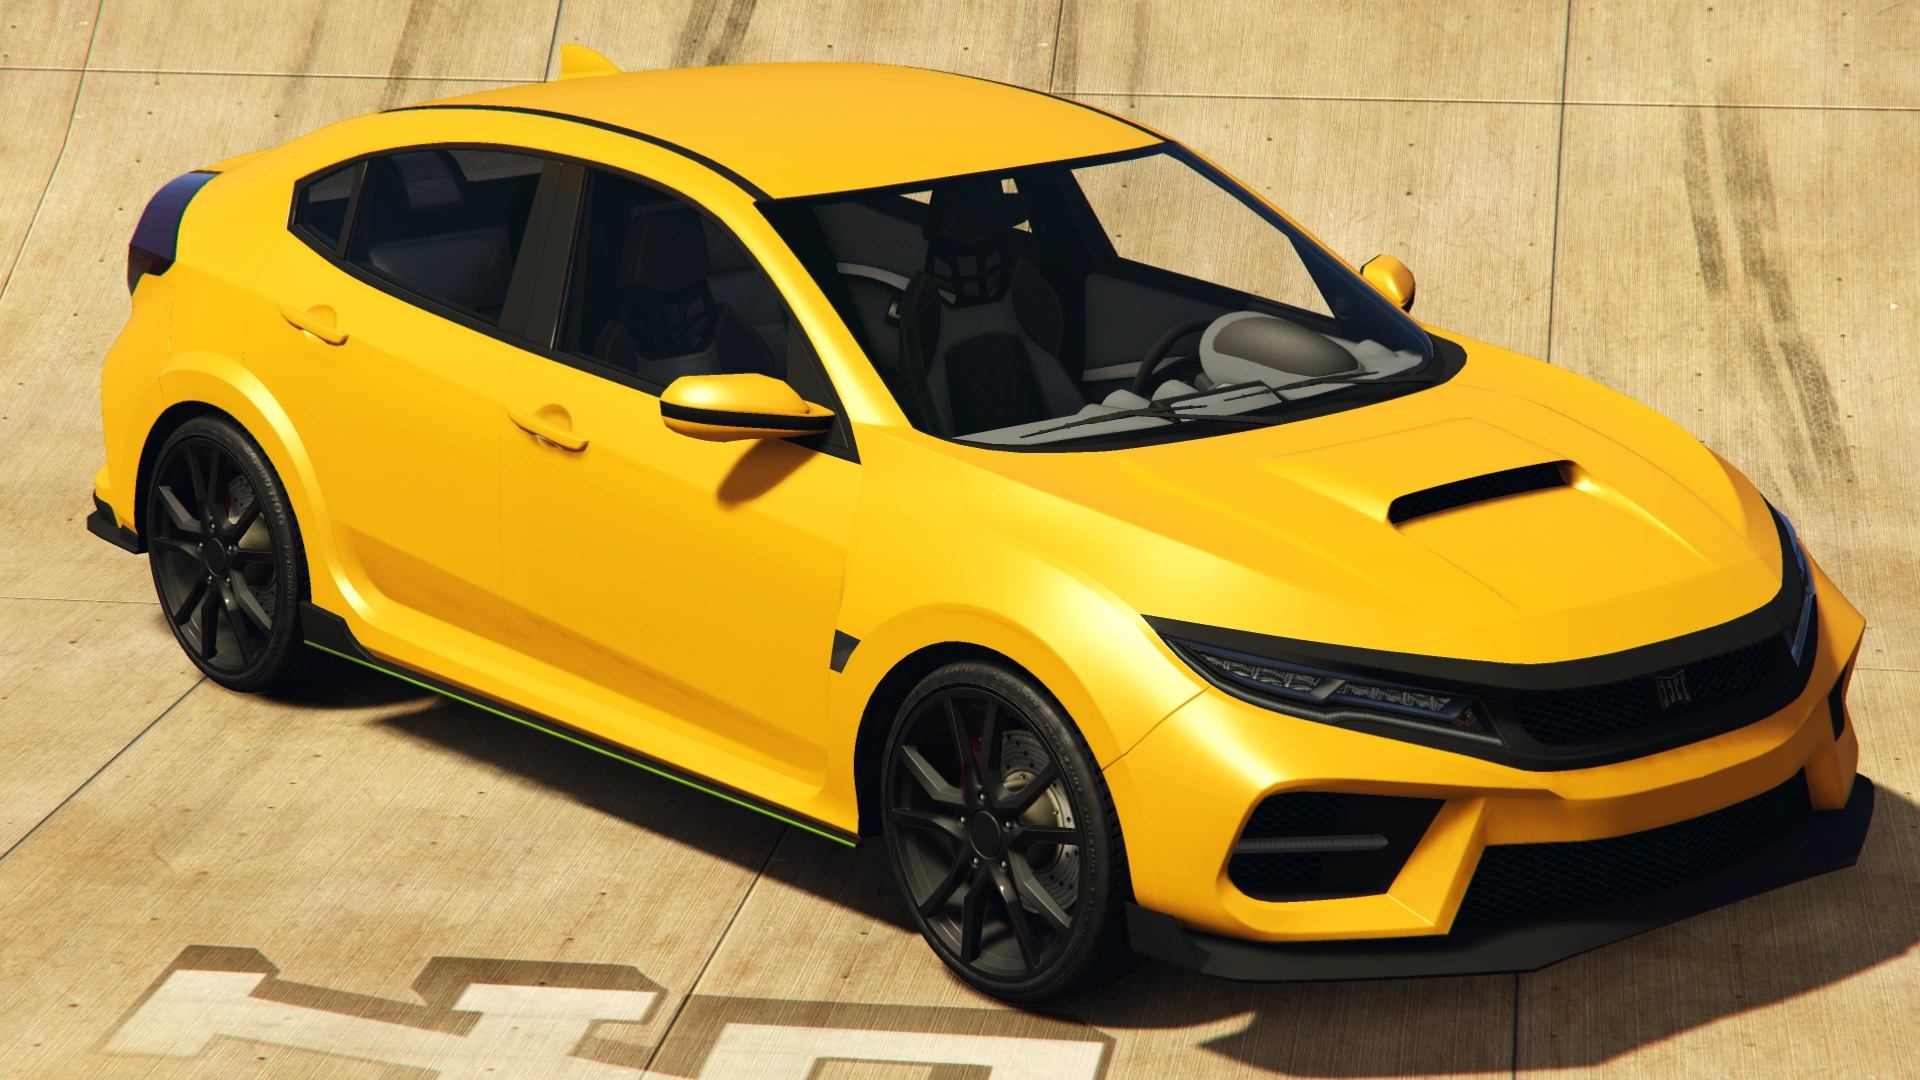
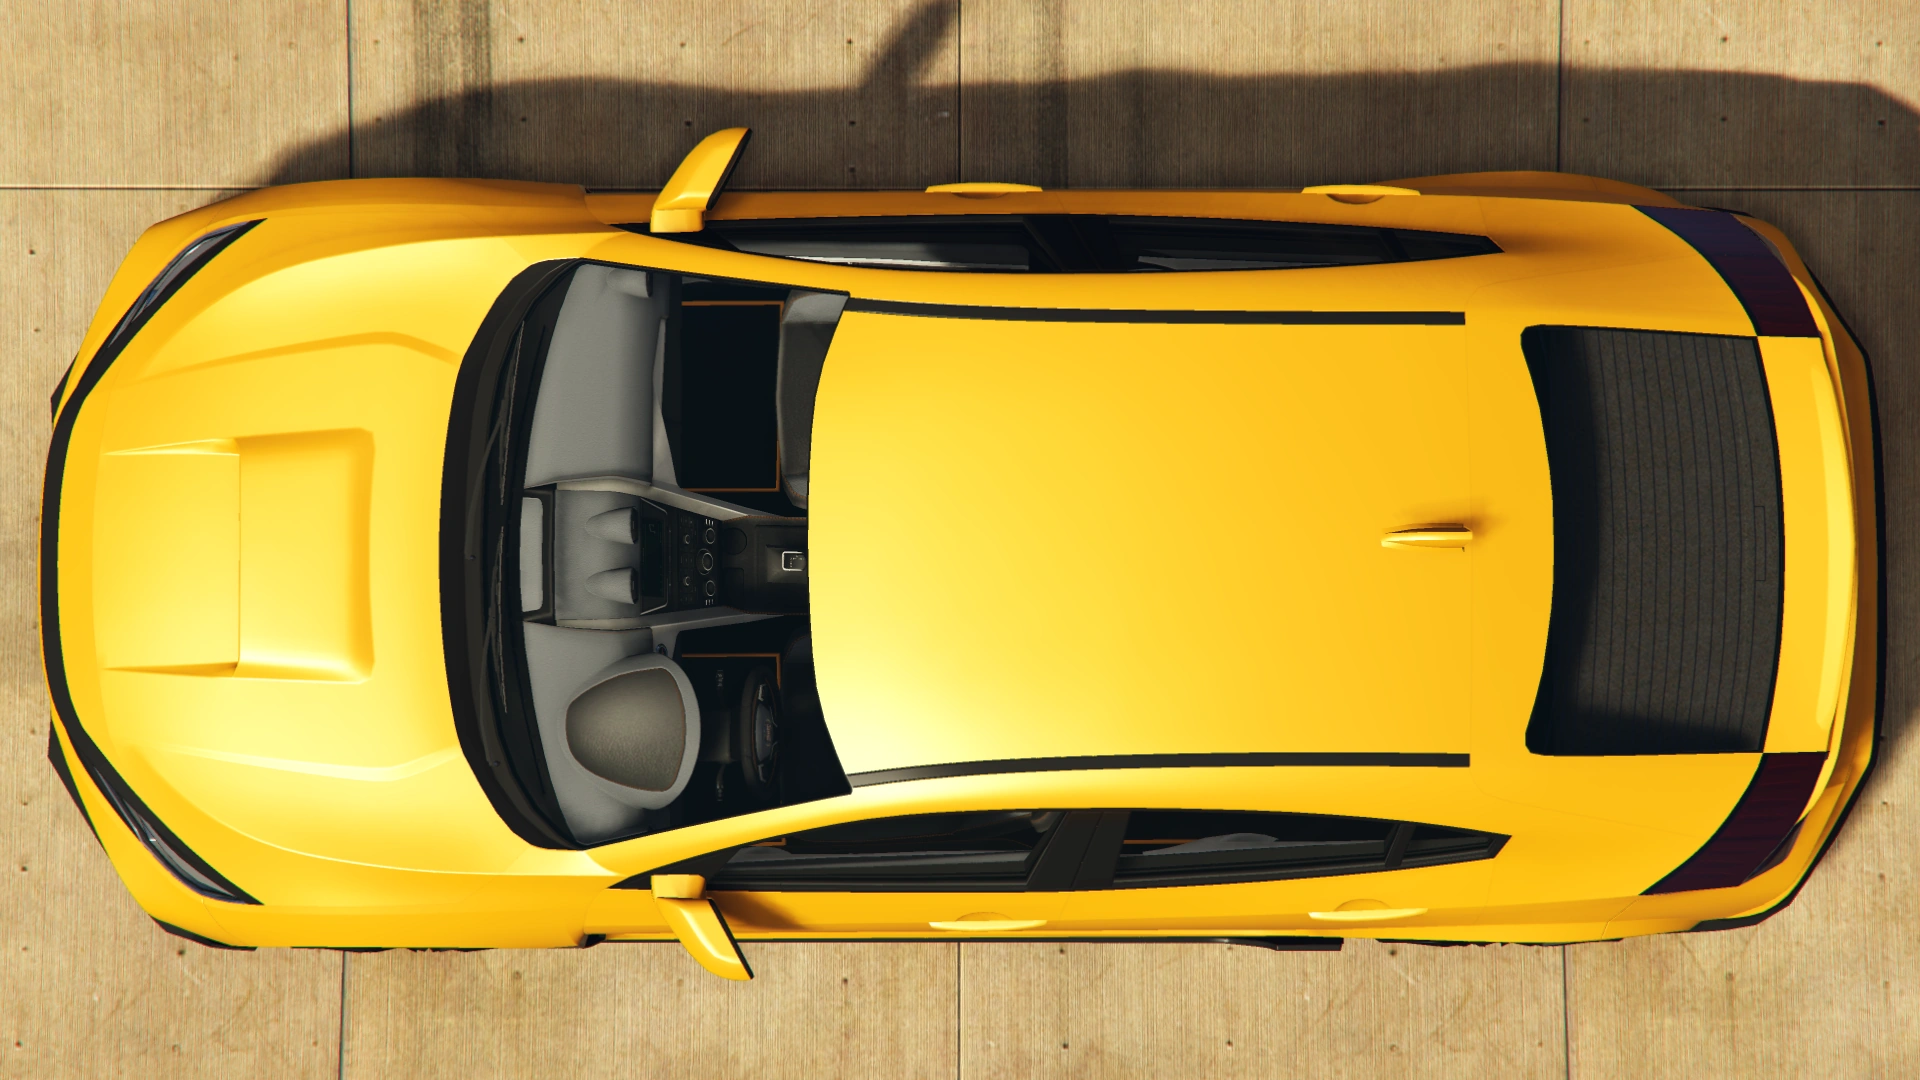
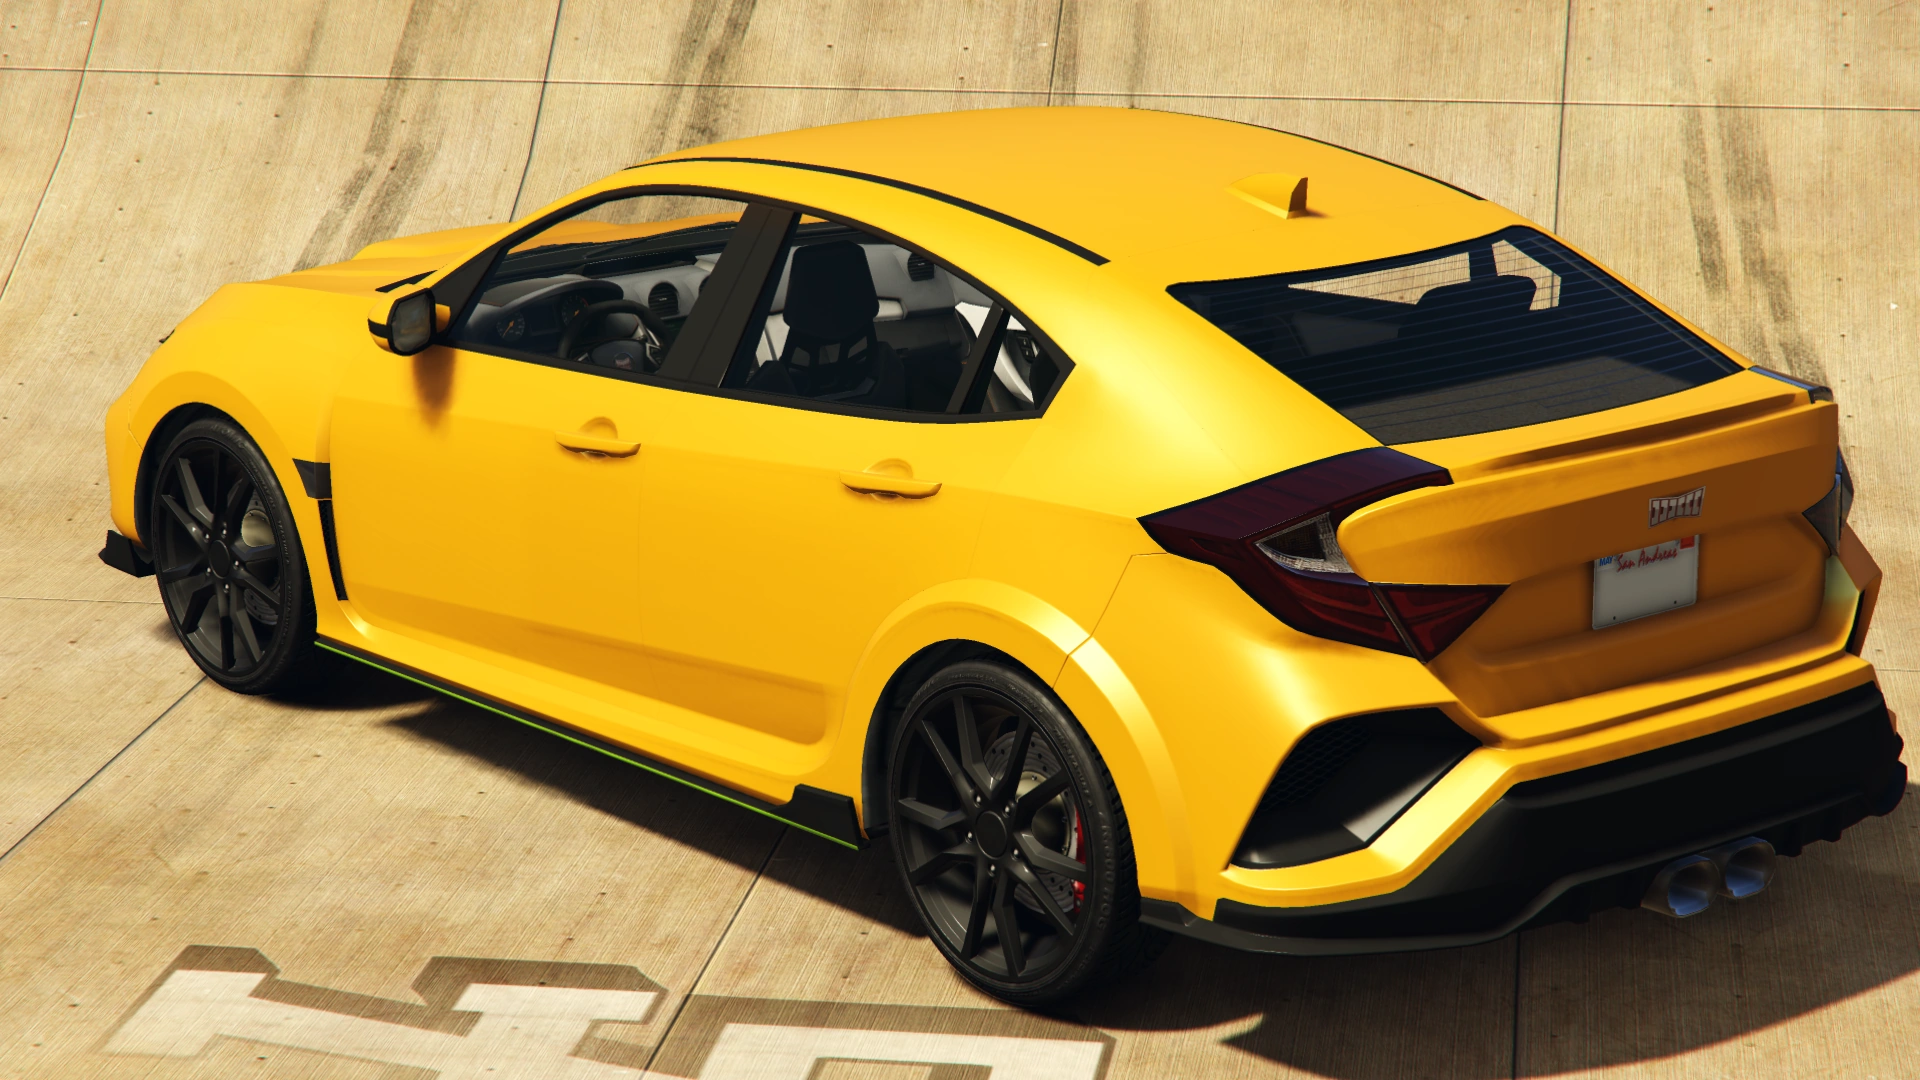
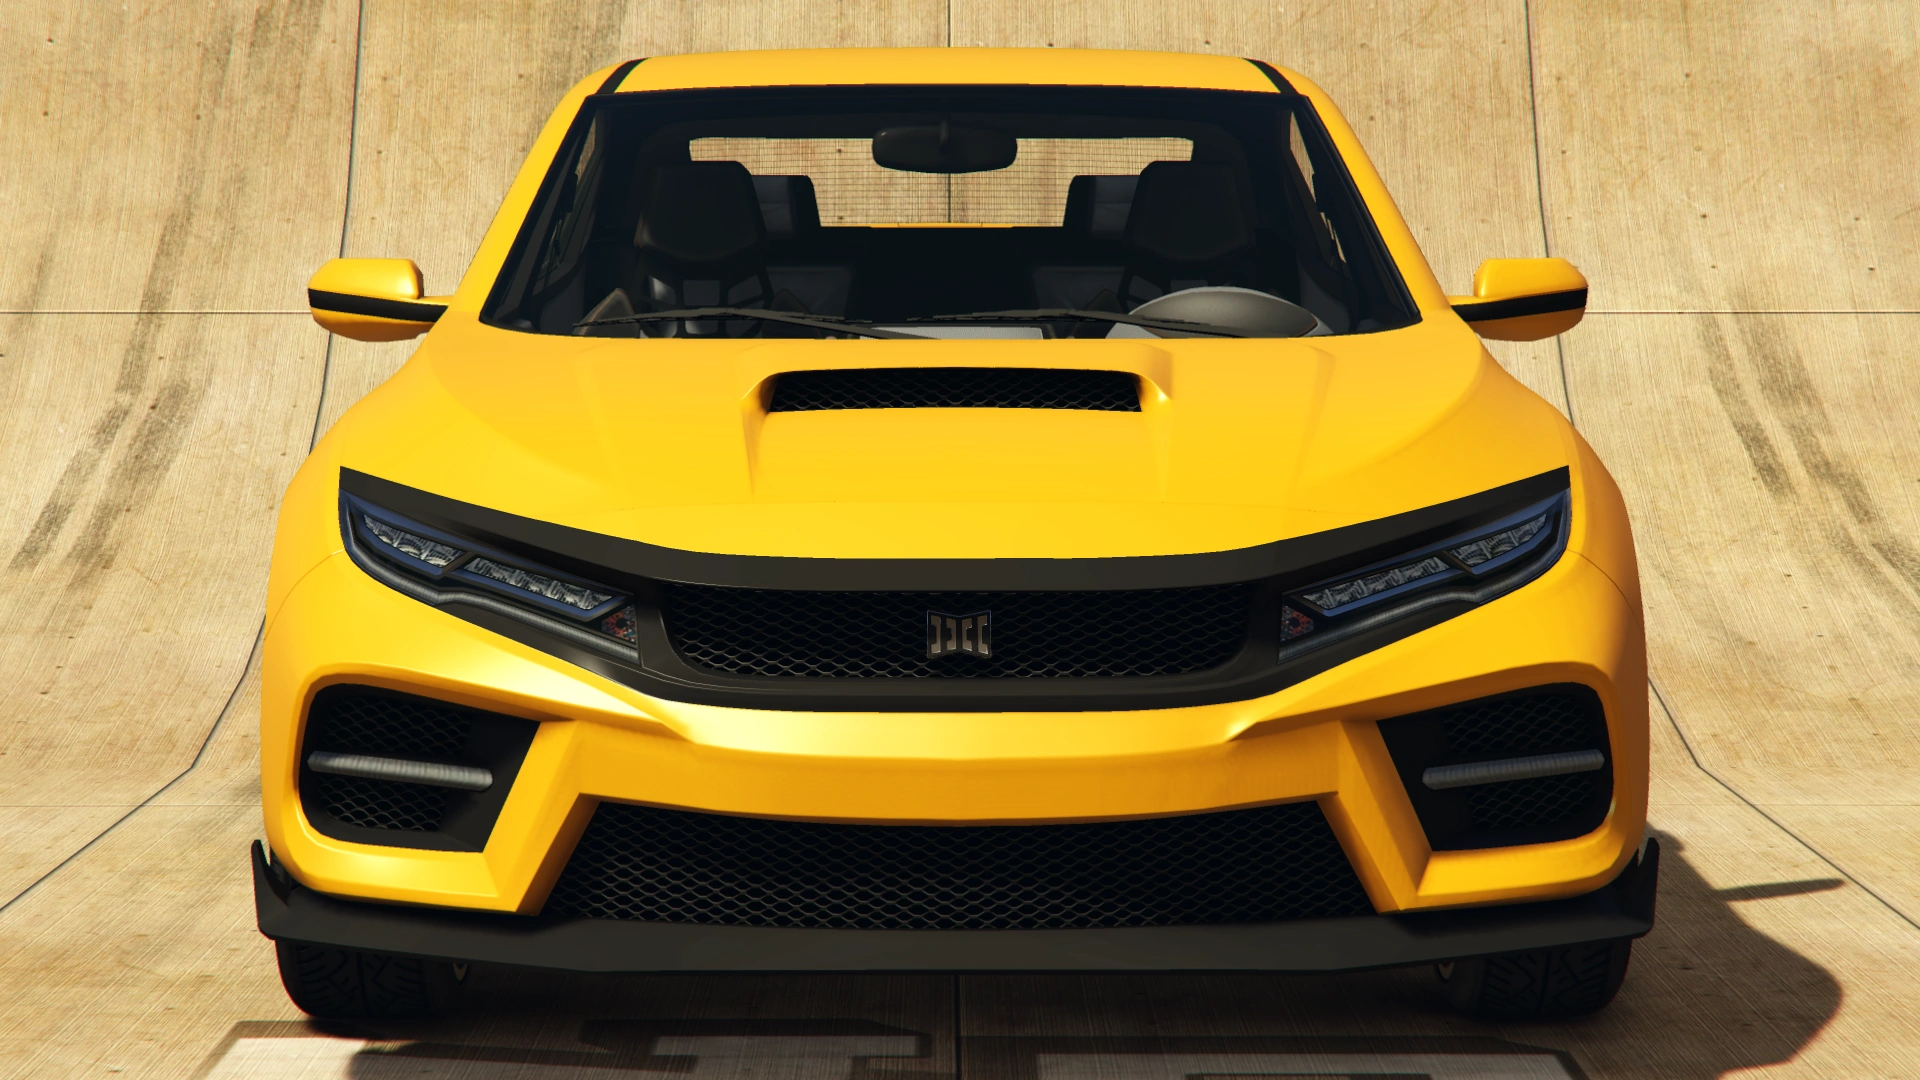
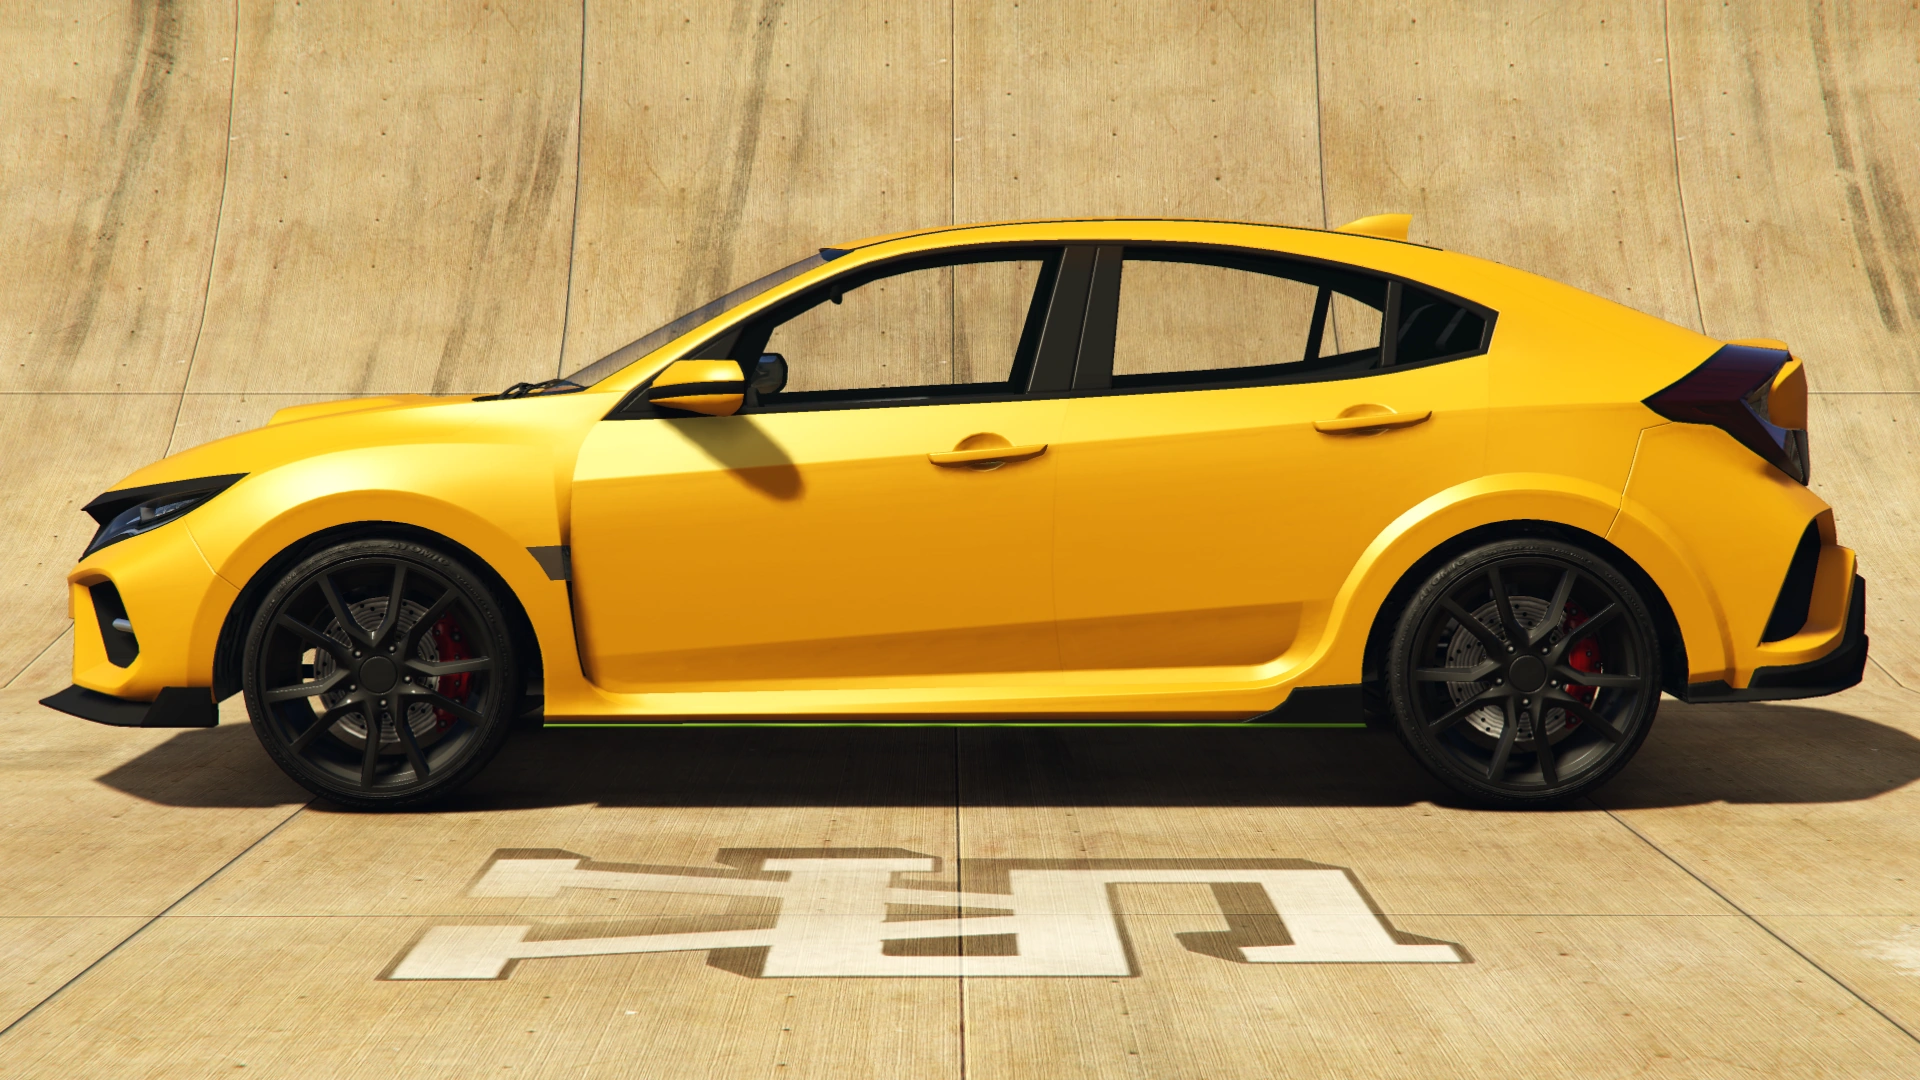
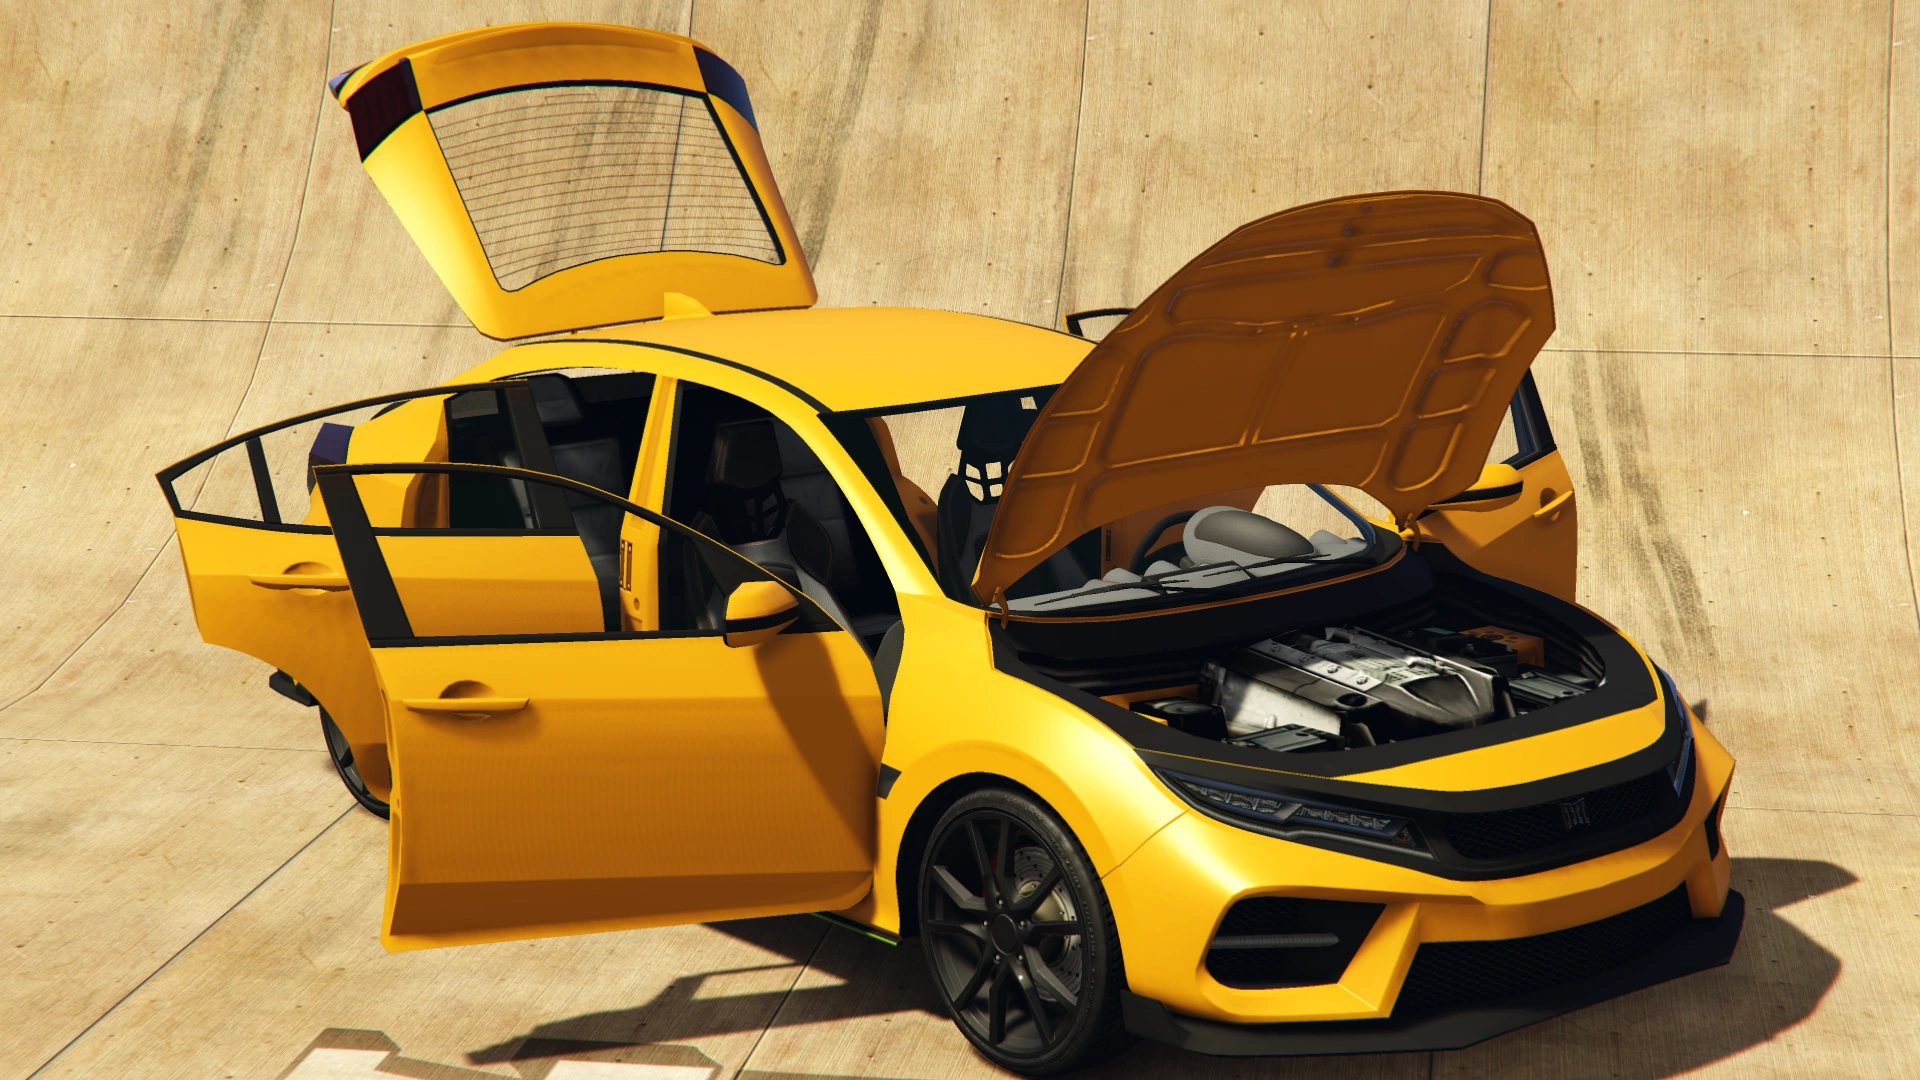
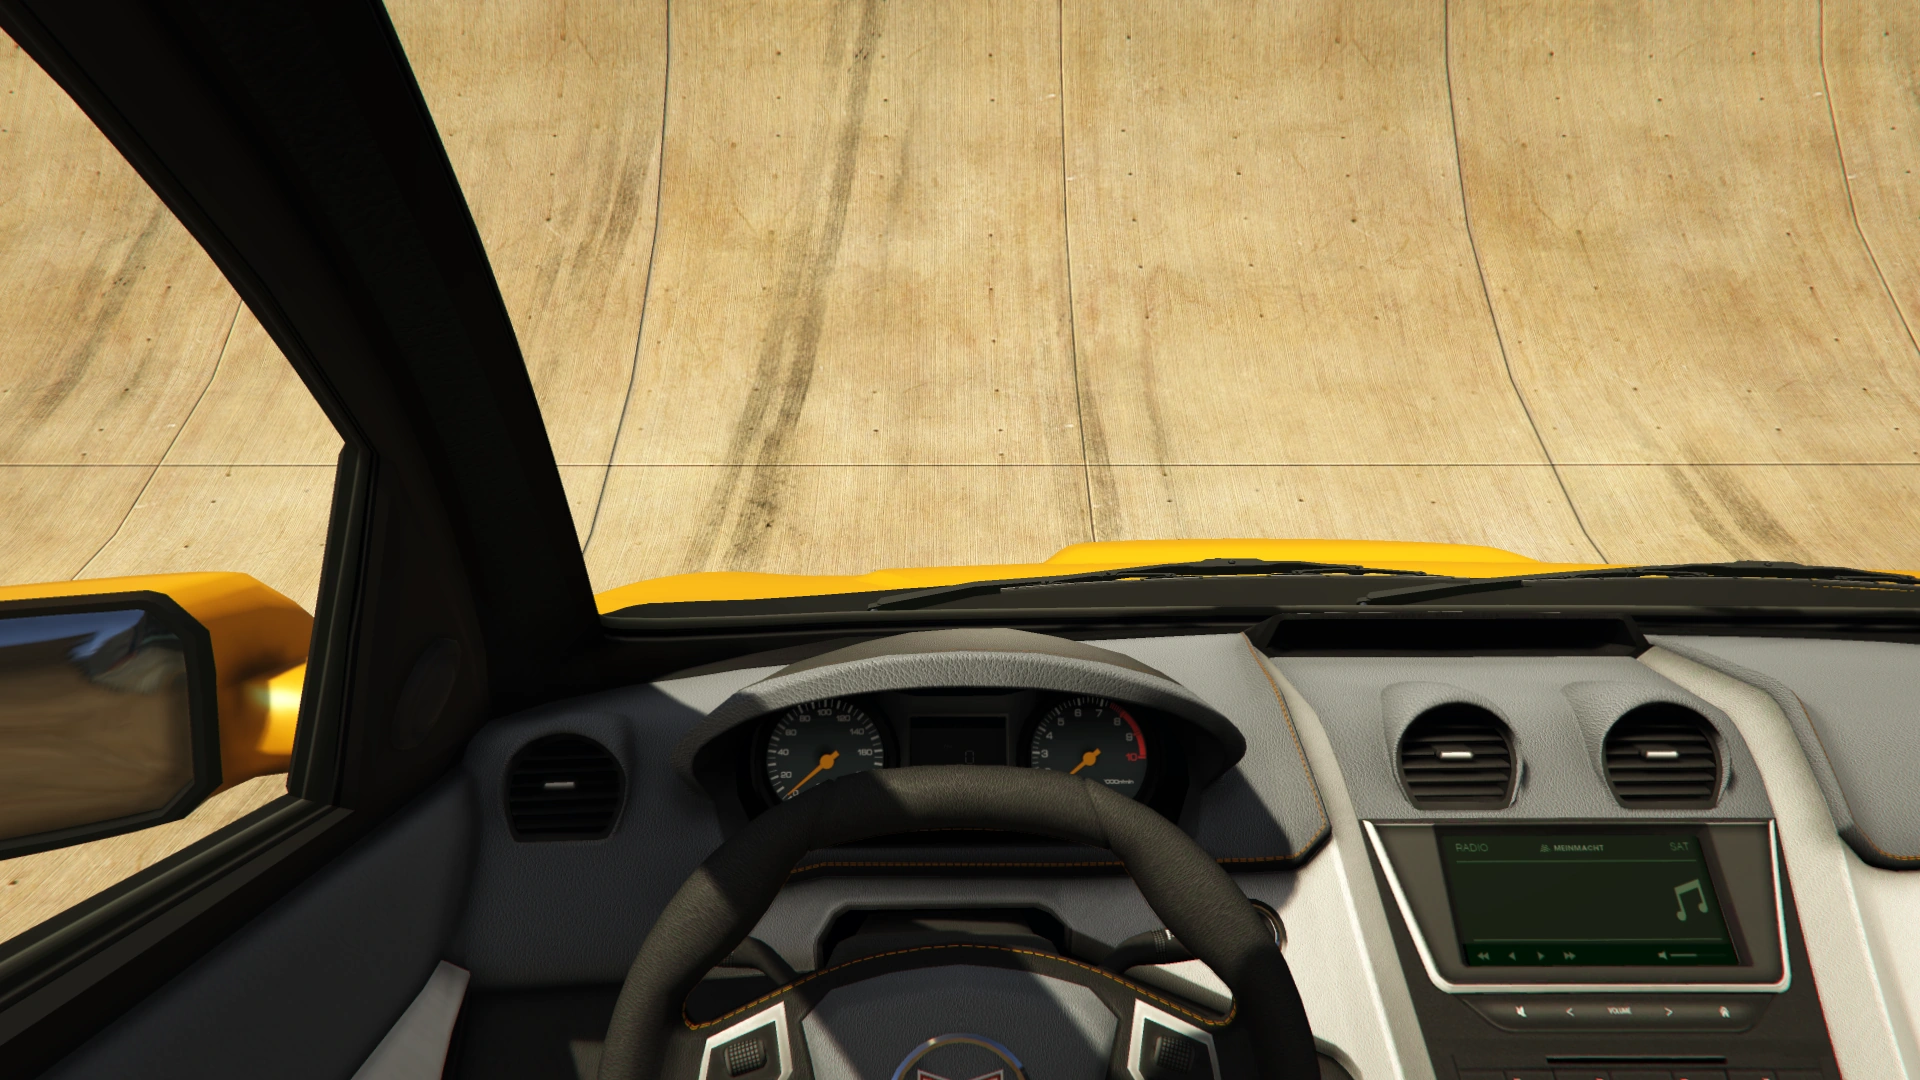
The Dinka Sugoi (Japanese: スゴイ, lit. "Awesome") is a five-door hatchback to be featured in Grand Theft Auto Online as part of the continuation of the The Diamond Casino Heist update.
Design
Grand Theft Auto Online
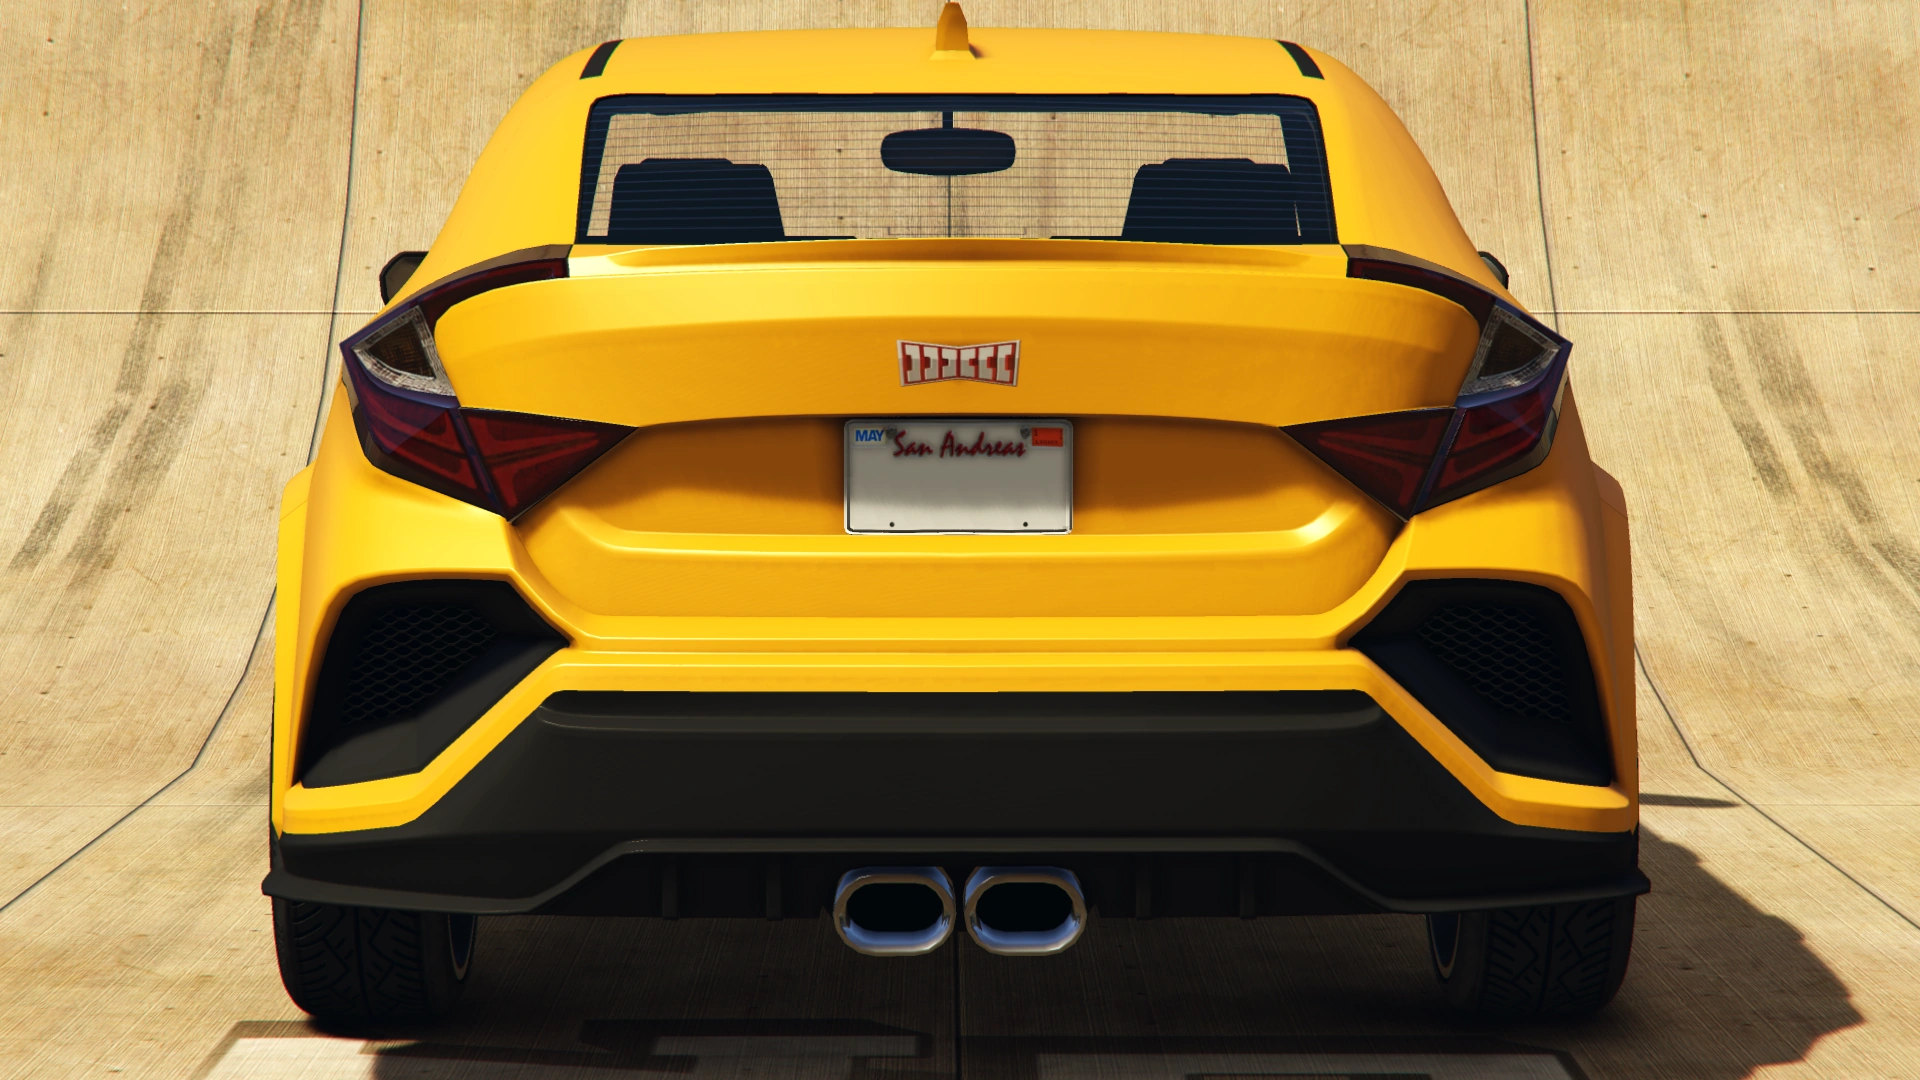
The Sugoi is based on the Honda Civic Type R FK8, with a lot of influence taken from the fourth generation Subaru WRX STI as seen in a hood, front bumper and side view. The shape of the tail lights seems to be reminiscent of the second generation Chevrolet Volt.
Current Design Gallery


Performance
Grand Theft Auto Online
GTA Online Overview
| Acceleration (0-60 mph in Seconds) |
Top Speed (mph / kmh) |
Gears | Engine | Drivetrain (FWD / RWD / AWD) |
Mass (kg / lbs) |
Fuel Tank Size (litres) |
|---|---|---|---|---|---|---|
| N/A | N/A | N/A | N/A | N/A | N/A | N/A |
| N/A | N/A | N/A | N/A | N/A | N/A | N/A |
| N/A | N/A | N/A | N/A | N/A | Cannot be observed | Cannot be observed |
Modifications
Grand Theft Auto Online
Modifications
Grand Theft Auto Online
| Category | Modification | Price | Image | |
|---|---|---|---|---|
| Armor | No Armor | $1,000 | ||
| Armor Upgrade 20% | $7,500 | |||
| Armor Upgrade 40% | $12,000 | |||
| Armor Upgrade 60% | $20,000 | |||
| Armor Upgrade 80% | $35,000 | |||
| Armor Upgrade 100% | $50,000 | |||
| Brakes | Stock Brakes | $1,000 | ||
| Street Brakes | $20,000 | |||
| Sport Brakes | $27,000 | |||
| Race Brakes | $35,000 | |||
| Bumpers | Front Diffusers | Stock Front Diffuser | $2,200 | |
| Stock w/ Canards | $4,600 | |||
| Racer Diffuser | $7,400 | |||
| Racer Diffuser w/ Canards | $11,700 | |||
| Sweep Diffuser | $14,500 | |||
| Carbon Sweep Diffuser | $14,700 | |||
| Primary Sweep Diffuser | $14,900 | |||
| Arc Diffuser | $15,100 | |||
| Carbon Arc Diffuser | $15,300 | |||
| Primary Arc Racer Diffuser | $15,500 | |||
| GT Diffuser | $15,700 | |||
| Carbon GT Diffuser | $15,900 | |||
| Primary GT Diffuser w/ Canards | $16,100 | |||
| Carbon Downforce Diffuser | $16,300 | |||
| Primary Downforce Diffuser | $16,500 | |||
| Rear Diffusers | Stock Rear Diffuser | $2,200 | ||
| Racer Diffuser | $4,600 | |||
| Performance Diffuser | $7,400 | |||
| Sweep Diffuser | $11,700 | |||
| GT Diffuser | $14,500 | |||
| Speed Diffuser | $14,700 | |||
| Turbo Diffuser | $14,900 | |||
| Carbon Downforce Diffuser | $15,100 | |||
| Engine | EMS Upgrade, Level 1 | $9,000 | ||
| EMS Upgrade, Level 2 | $12,500 | |||
| EMS Upgrade, Level 3 | $18,000 | |||
| EMS Upgrade, Level 4 | $33,500 | |||
| Exhausts | Stock Exhaust | $260 | ||
| Round Exhaust | $750 | |||
| Oval Exhaust | $1,800 | |||
| Round Cluster Exhaust | $3,000 | |||
| Sports Exhaust | $9,550 | |||
| Split Exhaust | $9,750 | |||
| Square Cluster Exhaust | $10,500 | |||
| Angled Square Exhaust | $12,000 | |||
| Explosives | Ignition Bomb | $5,000 | ||
| Remote Bomb | $7,500 | |||
| Grilles | Stock Grille | $200 | ||
| Top Trim Grille | $750 | |||
| Rally Grille | $1,340 | |||
| Rally w/ Top Trim Grille | $1,650 | |||
| Track Grille | $3,000 | |||
| Track w/ Top Trim Grille | $3,200 | |||
| GT Grille | $3,650 | |||
| GT w/ Top Trim Grille | $4,100 | |||
| Hoods | Stock Hood | $1,600 | ||
| Carbon Stock Hood | $3,000 | |||
| Primary Hood | $5,000 | |||
| Carbon Hood | $8,000 | |||
| Vented Hood | $9,600 | |||
| Carbon Vented Hood | $11,000 | |||
| Vented Catch Hood | $11,600 | |||
| Street Vented Hood | $12,000 | |||
| Rally Hood | $12,400 | |||
| Sports Hood | $12,400 | |||
| Dual Vented Hood | $12,500 | |||
| Performance Hood | $12,900 | |||
| Carbon Performance Hood | $13,250 | |||
| Horns | Main article: Los Santos Customs/Horns | - | ||
| Lights | Headlights | Stock Lights | $600 | |
| Xenon Lights | $7,500 | |||
| Neon Kits | Main article: Los Santos Customs/Lights | - | ||
| Livery | None | $11,400 | ||
| Red Stripes | $18,240 | |||
| Checker Stripes | $19,380 | |||
| Sugoi Stripes | $20,520 | |||
| Wave | $21,660 | |||
| Racer 23 | $22,800 | |||
| Racer 29 | $23,370 | |||
| Racer 99 | $23,939 | |||
| Jackal Racing | $24,510 | |||
| Wasabi Kitty | $25,080 | |||
| Red Warrior | $25,650 | |||
| Loss/Theft Prevention | Tracker | |||
| Full Coverage | ||||
| Mirrors | Stock Mirrors | $300 | ||
| Secondary Frame | $900 | |||
| Carbon Frame | $1,500 | |||
| Primary Carbon Frame | $1,700 | |||
| Secondary Carbon Frame | $2,000 | |||
| Plates | Blue on White 1 | $200 | ||
| Blue on White 2 | $200 | |||
| Blue on White 3 | $200 | |||
| Yellow on Blue | $300 | |||
| Yellow on Black | $600 | |||
| Respray | Main article: Los Santos Customs/Respray Colors | - | ||
| Roofs | Stock Roof | $200 | ||
| Rally Scoop & Primary Fin | $700 | |||
| Track Scoop & Carbon Fin | $1,150 | |||
| Air Scoop & Carbon Antenna | $1,600 | |||
| Square Scoop & Primary Fin | $1,950 | |||
| GT Scoop & Rally Antennas | $2,400 | |||
| Sports Scoop & Rally Antennas | $2,500 | |||
| Sell | Sell Vehicle | |||
| Skirts | Stock Skirts | $2,500 | ||
| Carbon Skirt | $5,500 | |||
| Street Skirt | $8,000 | |||
| Carbon Street Skirt | $10,500 | |||
| Racer Skirt | $14,000 | |||
| Carbon Racer Skirt | $14,500 | |||
| Jet Skirt | $15,000 | |||
| Carbon Jet Skirt | $15,500 | |||
| Rally Skirt | $16,000 | |||
| Carbon Rally Skirt | $16,500 | |||
| Spoilers | None | $6,000 | ||
| Fin Tail Spoiler | $7,050 | |||
| Racer Tail Spoiler | $10,000 | |||
| Primary Street Spoiler | $13,000 | |||
| Secondary Street Spoiler | $14,000 | |||
| Carbon Street Spoiler | $16,000 | |||
| Arrow Spoiler | $16,500 | |||
| Carbon Arrow Spoiler | $17,000 | |||
| GT Spoiler | $17,500 | |||
| Carbon Track Spoiler | $18,000 | |||
| Track MK2 Spoiler | $18,500 | |||
| Carbon Drag Spoiler | $19,000 | |||
| Secondary Drag Spoiler | $19,500 | |||
| Sports Spoiler | $20,000 | |||
| Sprint Spoiler | $20,500 | |||
| Suspension | Stock Suspension | $200 | ||
| Lowered Suspension | $1,000 | |||
| Street Suspension | $2,000 | |||
| Sport Suspension | $3,400 | |||
| Competition Suspension | $4,400 | |||
| Race Suspension | $4,600 | |||
| Transmission | Stock Transmission | $1,000 | ||
| Street Transmission | $29,500 | |||
| Sports Transmission | $32,500 | |||
| Race Transmission | $40,000 | |||
| Turbo | None | $5,000 | ||
| Turbo Tuning | $50,000 | |||
| Wheels | Main article: Los Santos Customs/Wheels | - | ||
| Windows | None | $500 | ||
| Light Smoke | $1,500 | |||
| Dark Smoke | $3,500 | |||
| Limo | $5,000 | |||
Image Gallery
Grand Theft Auto Online
")
The Sugoi on Southern San Andreas Super Autos.
Prominent Appearances in Missions
- Two Sugois can be chosen as getaway vehicles if the player decides to steal them for the Diamond Casino Heist.
Locations
Grand Theft Auto Online
- Will be available for purchase from Southern San Andreas Super Autos for $1,224,000 or for $918,000 after completing The Diamond Casino Heist as the Heist Leader and using the Sugoi as a getaway vehicle.