Tag: Visual edit |
No edit summary |
||
| (18 intermediate revisions by 12 users not shown) | |||
| Line 1: | Line 1: | ||
| − | {{Images|cdg=y}} |
||
{{Infobox vehicles |
{{Infobox vehicles |
||
|name = Stratum |
|name = Stratum |
||
| Line 21: | Line 20: | ||
|carcols = |
|carcols = |
||
{{Expand|'''GTA San Andreas'''| |
{{Expand|'''GTA San Andreas'''| |
||
| ⚫ | |||
| − | <center>COLOR SET 1</center> |
||
| − | {{CarColSA|57|8}} |
+ | {{CarColSA|no=1|57|8}} |
| ⚫ | |||
| − | <center>COLOR SET 2</center> |
||
| − | {{CarColSA| |
+ | {{CarColSA|no=3|43|21}} |
| ⚫ | |||
| − | <center>COLOR SET 3</center> |
||
| − | {{CarColSA| |
+ | {{CarColSA|no=5|67|8}} |
| ⚫ | |||
| − | <center>COLOR SET 4</center> |
||
| − | {{CarColSA| |
+ | {{CarColSA|no=7|65|79}} |
| ⚫ | |||
| − | <center>COLOR SET 5</center> |
||
| ⚫ | |||
| − | <center>COLOR SET 6</center> |
||
| ⚫ | |||
| − | <center>COLOR SET 7</center> |
||
| ⚫ | |||
| − | <center>COLOR SET 8</center> |
||
| ⚫ | |||
}} |
}} |
||
---- |
---- |
||
{{Expand|'''GTA IV'''| |
{{Expand|'''GTA IV'''| |
||
| ⚫ | |||
| − | <center>COLOR SET 1</center> |
||
| − | {{CarColIV|0|6|0}} |
+ | {{CarColIV|no=1|0|6|0}} |
| ⚫ | |||
| − | <center>COLOR SET 2</center> |
||
| − | {{CarColIV| |
+ | {{CarColIV|no=3|4|112|12}} |
| ⚫ | |||
| − | <center>COLOR SET 3</center> |
||
| − | {{CarColIV| |
+ | {{CarColIV|no=5|10|112|12}} |
| ⚫ | |||
| − | <center>COLOR SET 4</center> |
||
| − | {{CarColIV| |
+ | {{CarColIV|no=7|23|112|12}} |
| ⚫ | |||
| − | <center>COLOR SET 5</center> |
||
| − | {{CarColIV| |
+ | {{CarColIV|no=9|33|112|35}} |
| ⚫ | |||
| − | <center>COLOR SET 6</center> |
||
| − | {{CarColIV| |
+ | {{CarColIV|no=11|47|112|35}} |
| ⚫ | |||
| − | <center>COLOR SET 7</center> |
||
| − | {{CarColIV| |
+ | {{CarColIV|no=13|52|112|56}} |
| ⚫ | |||
| − | <center>COLOR SET 8</center> |
||
| − | {{CarColIV| |
+ | {{CarColIV|no=15|65|112|63}} |
| + | {{CarColIV|no=16|67|112|118}} |
||
| − | <center>COLOR SET 9</center> |
||
| − | {{CarColIV| |
+ | {{CarColIV|no=17|70|112|65}} |
| + | {{CarColIV|no=18|98|112|90}}<br> |
||
| − | <center>COLOR SET 10</center> |
||
| ⚫ | |||
| − | <center>COLOR SET 11</center> |
||
| ⚫ | |||
| − | <center>COLOR SET 12</center> |
||
| ⚫ | |||
| − | <center>COLOR SET 13</center> |
||
| ⚫ | |||
| − | <center>COLOR SET 14</center> |
||
| ⚫ | |||
| − | <center>COLOR SET 15</center> |
||
| ⚫ | |||
| − | <center>COLOR SET 16</center> |
||
| ⚫ | |||
| − | <center>COLOR SET 17</center> |
||
| ⚫ | |||
| − | <center>COLOR SET 18</center> |
||
| ⚫ | |||
}} |
}} |
||
---- |
---- |
||
{{Expand|'''GTA V'''| |
{{Expand|'''GTA V'''| |
||
| ⚫ | |||
| − | <center>COLOR SET 1</center> |
||
| − | {{CarColV|0|0|10|156}} |
+ | {{CarColV|no=1|0|0|10|156}} |
| ⚫ | |||
| − | <center>COLOR SET 2</center> |
||
| − | {{CarColV| |
+ | {{CarColV|no=3|2|2|18|156}} |
| ⚫ | |||
| − | <center>COLOR SET 3</center> |
||
| − | {{CarColV| |
+ | {{CarColV|no=5|6|6|111|156}} |
| ⚫ | |||
| − | <center>COLOR SET 4</center> |
||
| − | {{CarColV| |
+ | {{CarColV|no=7|5|0|111|156}} |
| ⚫ | |||
| − | <center>COLOR SET 5</center> |
||
| − | {{CarColV| |
+ | {{CarColV|no=9|34|22|33|156}} |
| ⚫ | |||
| − | <center>COLOR SET 6</center> |
||
| − | {{CarColV| |
+ | {{CarColV|no=11|62|77|75|156}} |
| + | {{CarColV|no=12|6|0|111|156}} |
||
| − | <center>COLOR SET 7</center> |
||
| − | {{CarColV| |
+ | {{CarColV|no=13|50|68|50|156}}<br> |
| − | <center>COLOR SET 8</center> |
||
| ⚫ | |||
| − | <center>COLOR SET 9</center> |
||
| ⚫ | |||
| − | <center>COLOR SET 10</center> |
||
| ⚫ | |||
| − | <center>COLOR SET 11</center> |
||
| ⚫ | |||
| − | <center>COLOR SET 12</center> |
||
| ⚫ | |||
| − | <center>COLOR SET 13</center> |
||
| ⚫ | |||
}} |
}} |
||
|wheeltype = Tuner |
|wheeltype = Tuner |
||
| Line 158: | Line 121: | ||
}} |
}} |
||
{{Quote|Don't miss this opportunity to snap up a Classic Stratum station wagon at a bargain price. A short-lived Zirconium model that was plagued with bad reviews... Or as we like to call it, Limited Edition!|[[Southern San Andreas Super Autos]] description.}} |
{{Quote|Don't miss this opportunity to snap up a Classic Stratum station wagon at a bargain price. A short-lived Zirconium model that was plagued with bad reviews... Or as we like to call it, Limited Edition!|[[Southern San Andreas Super Autos]] description.}} |
||
| − | The '''Stratum''' is a mid-sized four-door station wagon featured in ''[[Grand Theft Auto: San Andreas]]'', ''[[Grand Theft Auto IV]]'', ''[[Grand Theft Auto V]]'' and ''[[Grand Theft Auto Online]]''. It is manufactured by [[Zirconium]] in the [[HD Universe]]. |
+ | The '''Stratum''' is a mid-sized four-door station wagon featured in ''[[Grand Theft Auto: San Andreas]]'', ''[[Grand Theft Auto IV]]'', ''[[Grand Theft Auto V]]'' and ''[[Grand Theft Auto Online]]''. It is manufactured by [[Zirconium]] in the [[HD Universe]]. |
==Design== |
==Design== |
||
| Line 164: | Line 127: | ||
===''Grand Theft Auto: San Andreas''=== |
===''Grand Theft Auto: San Andreas''=== |
||
| − | The Stratum's design is taken from the {{WP|Honda Accord|fifth generation (1994–1997) Honda Accord wagon}}, however D-pillars have been added. The car's real-life counterpart also fails to fit in the game's time setting of 1992. It could also be based on the {{WP|Saturn S-Series|Saturn |
+ | The Stratum's design is taken from the {{WP|Honda Accord|fifth generation (1994–1997) Honda Accord wagon}}, however D-pillars have been added. The car's real-life counterpart also fails to fit in the game's time setting of 1992. It could also be based on the {{WP|Saturn S-Series|Saturn SW}}, which sports a similar design and a fitting manufacturing year. |
The car is one of the gang cars used by the [[San Fierro Triads]]. |
The car is one of the gang cars used by the [[San Fierro Triads]]. |
||
===''Grand Theft Auto IV''=== |
===''Grand Theft Auto IV''=== |
||
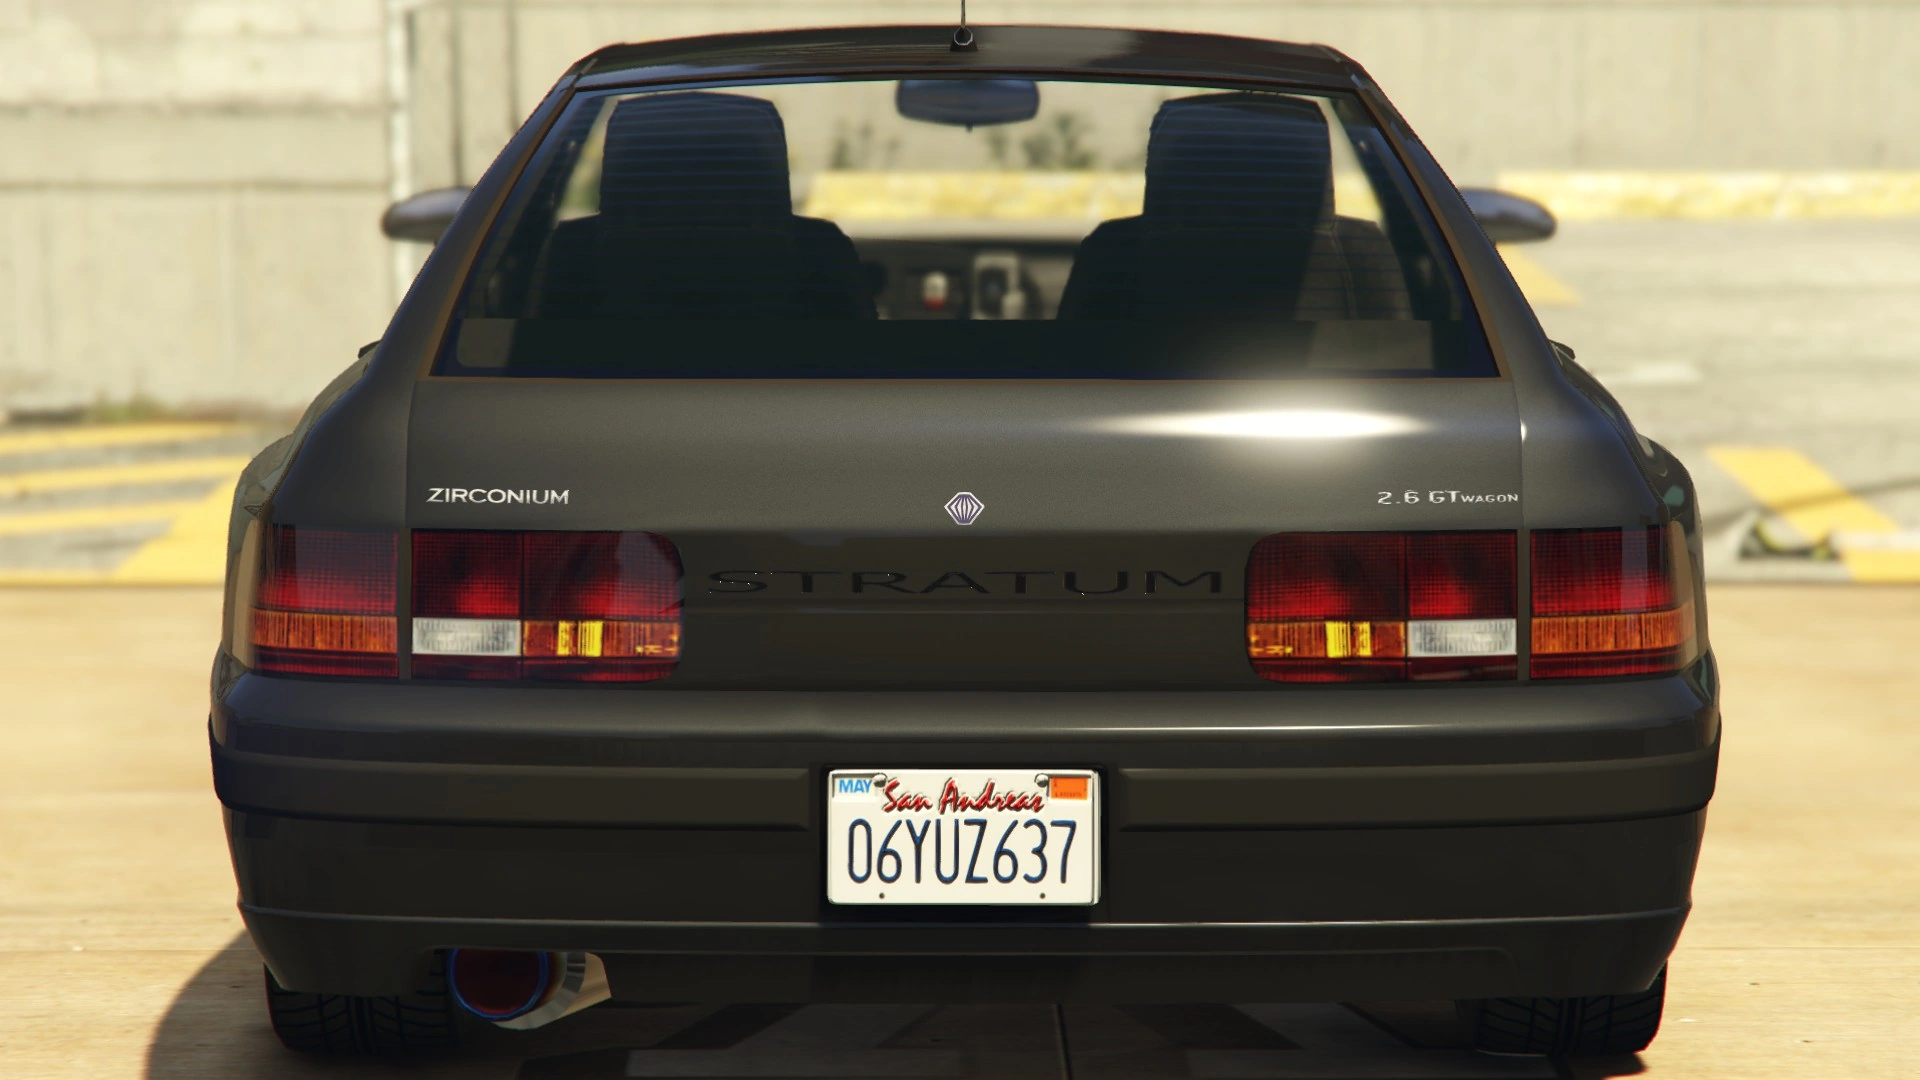
| − | The [[Zirconium]] Stratum '''2.6GT''' carries over a very similar design in ''GTA IV'', with its primary inspiration taken from the |
+ | The [[Zirconium]] Stratum '''2.6GT''' carries over a very similar design in ''GTA IV'', with its primary inspiration taken from the {{WP|Honda Accord|fifth generation Honda Accord station wagon}} or {{WP|Saturn S series|Saturn SW}} (with the same added pillars as the previous rendition), albeit with a front end derived from the {{WP|Nissan Skyline|S3-R31 and R32 Nissan Skyline}}, as seen in the hood, hood badge and grill (R31) and headlight design (R32). The rear end greatly resembles the {{WP|Subaru Impreza|first generation Subaru Impreza station wagon}} along with taillights and the Stratum lettering resembling a {{WP|Isuzu Piazza|first generation Isuzu Impulse}}, although much longer and C-pillars which may be derived from the {{WP|Toyota Camry|1996-2001 Toyota Camry wagon}}. The bodywork and rear headlights also has a very large resemblance to the {{WP|Ford Falcon (EF)|Ford EF Falcon}} Wagons or the {{WP|Ford Sierra|Mk III Ford Sierra}} Estate. |
| − | |||
| − | The bodywork and rear headlights also has a very large resemblance to the {{WP|Ford Falcon (EF)|Ford EF Falcon}} Wagons or the {{WP|Ford Sierra|Mk III Ford Sierra}} Estate. |
||
The Stratum is equipped with a [[GPS]] system with a male voice, but only if the player leaves the "selected cars" (default) option in the audio menu. |
The Stratum is equipped with a [[GPS]] system with a male voice, but only if the player leaves the "selected cars" (default) option in the audio menu. |
||
===''Grand Theft Auto V''=== |
===''Grand Theft Auto V''=== |
||
| − | In '' |
+ | In ''[[Grand Theft Auto V]]'', the Stratum's design remains unchanged, although the car's grille is now much shorter. The car also gains an updated interior in the enhanced version. |
{{Clr}} |
{{Clr}} |
||
| Line 184: | Line 145: | ||
|top_image = Stratum-GTAV-top.png |
|top_image = Stratum-GTAV-top.png |
||
|rear_quarter_image = Stratum-GTAV-rearquarter.png |
|rear_quarter_image = Stratum-GTAV-rearquarter.png |
||
| − | |front_image = Stratum-GTAV- |
+ | |front_image = Stratum-GTAV-Front.png |
|side_image = Stratum-GTAV-side.png |
|side_image = Stratum-GTAV-side.png |
||
| − | |rear_image = Stratum-GTAV- |
+ | |rear_image = Stratum-GTAV-Rear.png |
|engine_image = Stratum-GTAV-engine.png |
|engine_image = Stratum-GTAV-engine.png |
||
| − | |underside_image = |
+ | |underside_image = Stratum-GTAV-Underside.png |
|inside_image = Stratum-GTAV-inside.png |
|inside_image = Stratum-GTAV-inside.png |
||
|detail_image = Stratum-GTAIV-Badges.png |
|detail_image = Stratum-GTAIV-Badges.png |
||
|open_other_image = Stratum-GTAV-other.png |
|open_other_image = Stratum-GTAV-other.png |
||
| − | |dashboard_image = Stratum-GTAV-Dashboard. |
+ | |dashboard_image = Stratum-GTAV-Dashboard.png |
}} |
}} |
||
| Line 217: | Line 178: | ||
|observed_top_speed = |
|observed_top_speed = |
||
|observed_gears = |
|observed_gears = |
||
| − | |observed_engine = |
+ | |observed_engine = Inline-4 |
|observed_drivetrain = RWD |
|observed_drivetrain = RWD |
||
}} |
}} |
||
| Line 277: | Line 238: | ||
== Modifications == |
== Modifications == |
||
===''Grand Theft Auto: San Andreas''=== |
===''Grand Theft Auto: San Andreas''=== |
||
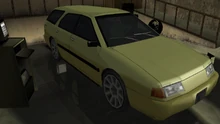
| − | [[File:Stratum-GTASA-modified-front.jpg|thumb|Possible combinations of modifications that can be given to the '''Stratum''' at [[Wheel Arch Angels]] in ''GTA San Andreas''.]] |
+ | [[File:Stratum-GTASA-modified-front.jpg|thumb|Possible combinations of modifications that can be given to the '''Stratum''' at [[Wheel Arch Angels]] in ''GTA San Andreas''.|333x333px]] |
The Stratum is considered a tuner, and can be upgraded at [[Wheel Arch Angels]] in [[Ocean Flats]], [[San Fierro]]. |
The Stratum is considered a tuner, and can be upgraded at [[Wheel Arch Angels]] in [[Ocean Flats]], [[San Fierro]]. |
||
| Line 284: | Line 245: | ||
!Upgrade |
!Upgrade |
||
!Cost |
!Cost |
||
| + | !Image |
||
|- |
|- |
||
| rowspan="3" |Paint Jobs |
| rowspan="3" |Paint Jobs |
||
|Paintjob 1 |
|Paintjob 1 |
||
|$500 |
|$500 |
||
| + | |[[File:Stratum-GTASA-Paintjob1.png|thumb|220x220px]] |
||
|- |
|- |
||
|Paintjob 2 |
|Paintjob 2 |
||
|$500 |
|$500 |
||
| + | |[[File:Stratum-GTASA-Paintjob2.png|thumb|220x220px]] |
||
|- |
|- |
||
|Paintjob 3 |
|Paintjob 3 |
||
|$500 |
|$500 |
||
| + | |[[File:Stratum-GTASA-Paintjob3.png|thumb|220x220px]] |
||
|- |
|- |
||
|Colors |
|Colors |
||
|Car Color 1 (64 different colors) |
|Car Color 1 (64 different colors) |
||
|$150 |
|$150 |
||
| + | |[[File:Stratum-GTASA-Colors.png|thumb|220x220px]] |
||
|- |
|- |
||
| rowspan="2" |Exhausts |
| rowspan="2" |Exhausts |
||
|Alien Exhaust |
|Alien Exhaust |
||
|$830 |
|$830 |
||
| + | |[[File:Stratum-GTASA-AlienExhaust.png|thumb|220x220px]] |
||
|- |
|- |
||
|X-Flow Exhaust |
|X-Flow Exhaust |
||
|$720 |
|$720 |
||
| + | |[[File:Stratum-GTASA-XflowExhaust.png|thumb|220x220px]] |
||
|- |
|- |
||
| rowspan="2" |Front Bumper |
| rowspan="2" |Front Bumper |
||
|Alien Front Bumper |
|Alien Front Bumper |
||
|$1030 |
|$1030 |
||
| + | |[[File:Stratum-GTASA-AlienFrontBumper.png|thumb|220x220px]] |
||
|- |
|- |
||
|X-Flow Front Bumper |
|X-Flow Front Bumper |
||
|$930 |
|$930 |
||
| + | |[[File:Stratum-GTASA-XflowFrontBumper.png|thumb|220x220px]] |
||
|- |
|- |
||
| rowspan="2" |Rear Bumper |
| rowspan="2" |Rear Bumper |
||
|Alien Rear Bumper |
|Alien Rear Bumper |
||
|$1030 |
|$1030 |
||
| + | |[[File:Stratum-GTASA-AlienRearBumper.png|thumb|220x220px]] |
||
|- |
|- |
||
|X-Flow Rear Bumper |
|X-Flow Rear Bumper |
||
|$920 |
|$920 |
||
| + | |[[File:Stratum-GTASA-XflowRearBumper.png|thumb|220x220px]] |
||
|- |
|- |
||
| rowspan="2" |Roof |
| rowspan="2" |Roof |
||
|Alien Roof Vent |
|Alien Roof Vent |
||
|$230 |
|$230 |
||
| + | |[[File:AlienRoofVents-2.png|thumb|220x220px]] |
||
|- |
|- |
||
|X-Flow Roof Vent |
|X-Flow Roof Vent |
||
|$180 |
|$180 |
||
| + | |[[File:XflowRoofVents-2.png|thumb|220x220px]] |
||
|- |
|- |
||
| rowspan="2" |Spoilers |
| rowspan="2" |Spoilers |
||
|Alien Spoiler |
|Alien Spoiler |
||
|$620 |
|$620 |
||
| + | |[[File:AlienSpoiler-2.png|thumb|220x220px]] |
||
|- |
|- |
||
|X-Flow Spoiler |
|X-Flow Spoiler |
||
|$530 |
|$530 |
||
| + | |[[File:XflowSpoiler-2.png|thumb|220x220px]] |
||
|- |
|- |
||
| rowspan="2" |Side Skirts |
| rowspan="2" |Side Skirts |
||
|Alien Side Skirts |
|Alien Side Skirts |
||
|$520 |
|$520 |
||
| + | |[[File:AlienSideSkirts-2.png|thumb|220x220px]] |
||
|- |
|- |
||
|X-Flow Side Skirts |
|X-Flow Side Skirts |
||
|$430 |
|$430 |
||
| + | |[[File:XflowSideSkirts-1.png|thumb|220x220px]] |
||
|- |
|- |
||
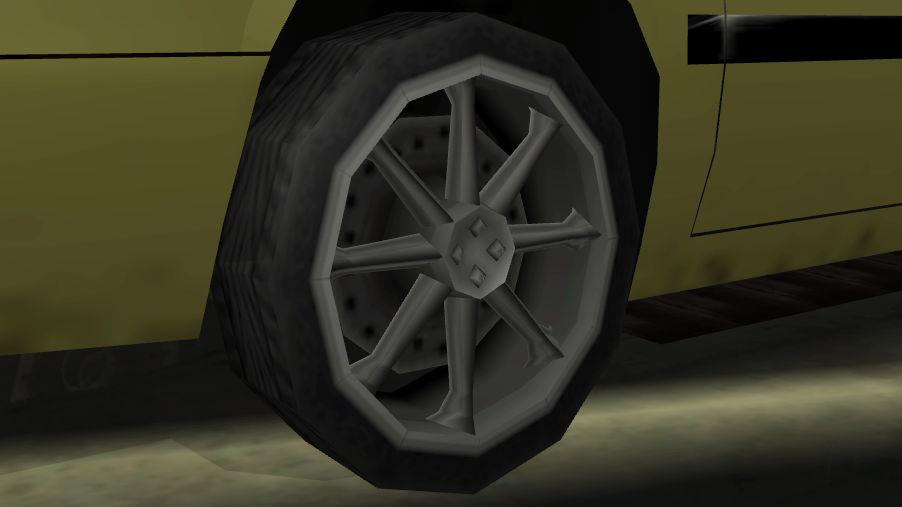
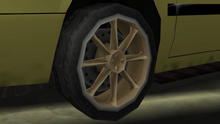
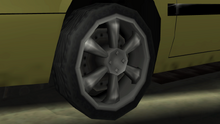
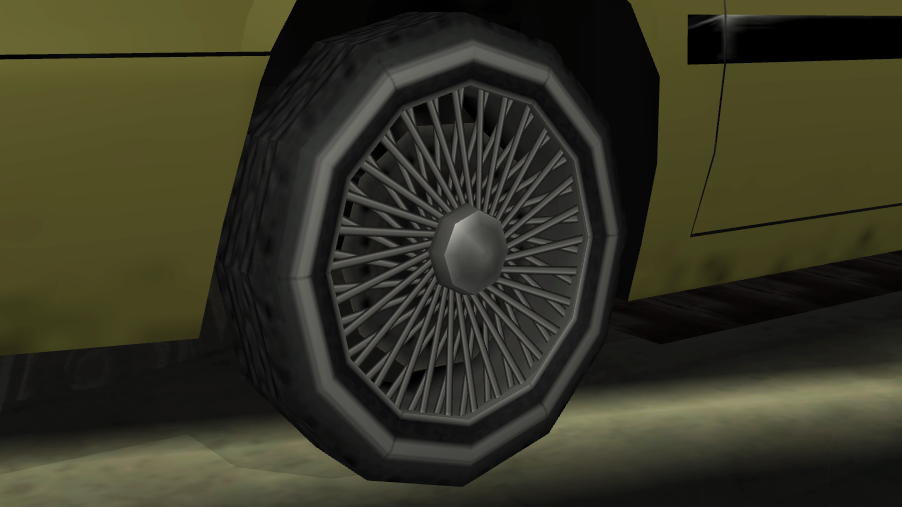
| rowspan="10" |Wheels |
| rowspan="10" |Wheels |
||
|Cutter |
|Cutter |
||
|$1030 |
|$1030 |
||
| + | |[[File:Stratum-GTASA-Cutter.png|thumb|220x220px]] |
||
|- |
|- |
||
|Rimshine |
|Rimshine |
||
|$980 |
|$980 |
||
| + | |[[File:Stratum-GTASA-Rimshine.png|thumb|220x220px]] |
||
|- |
|- |
||
|Mega |
|Mega |
||
|$1030 |
|$1030 |
||
| + | |[[File:Stratum-GTASA-Mega.png|thumb|220x220px]] |
||
|- |
|- |
||
|Grove |
|Grove |
||
|$1230 |
|$1230 |
||
| + | |[[File:Stratum-GTASA-Grove.png|thumb|220x220px]] |
||
|- |
|- |
||
|Switch |
|Switch |
||
|$900 |
|$900 |
||
| + | |[[File:Stratum-GTASA-Switch.png|thumb|220x220px]] |
||
|- |
|- |
||
|Shadow |
|Shadow |
||
|$1100 |
|$1100 |
||
| + | |[[File:Stratum-GTASA-Shadow.png|thumb|220x220px]] |
||
|- |
|- |
||
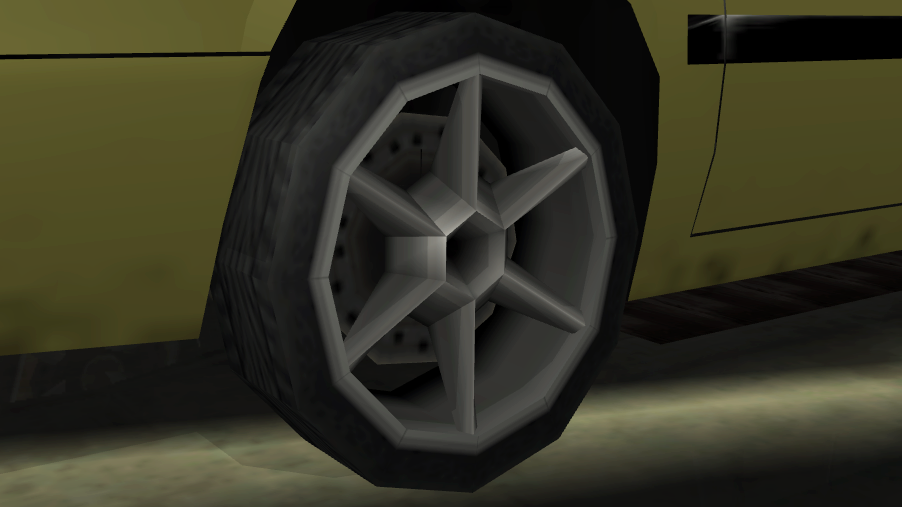
|Classic |
|Classic |
||
|$1620 |
|$1620 |
||
| + | |[[File:Stratum-GTASA-Classic.png|thumb|220x220px]] |
||
|- |
|- |
||
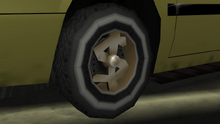
|Dollar |
|Dollar |
||
|$1560 |
|$1560 |
||
| + | |[[File:Stratum-GTASA-Dollar.png|thumb|220x220px]] |
||
|- |
|- |
||
|Import |
|Import |
||
|$820 |
|$820 |
||
| + | |[[File:Stratum-GTASA-Import.png|thumb|220x220px]] |
||
|- |
|- |
||
|Atomic |
|Atomic |
||
|$770 |
|$770 |
||
| + | |[[File:Stratum-GTASA-Atomic.png|thumb|220x220px]] |
||
|- |
|- |
||
|Car Stereo |
|Car Stereo |
||
|Bass Boost |
|Bass Boost |
||
|$100 |
|$100 |
||
| ⚫ | |||
|- |
|- |
||
|Hydraulics |
|Hydraulics |
||
|Hydraulics |
|Hydraulics |
||
|$1500 |
|$1500 |
||
| + | |[[File:Stratum-GTASA-Hydraulics.png|thumb|220x220px]] |
||
|- |
|- |
||
| rowspan="3" |Nitro |
| rowspan="3" |Nitro |
||
|2x Nitrous |
|2x Nitrous |
||
|$200 |
|$200 |
||
| + | |[[File:Stratum-GTASA-NitroX2.png|thumb|220x220px]] |
||
|- |
|- |
||
|5x Nitrous |
|5x Nitrous |
||
|$500 |
|$500 |
||
| + | |[[File:Stratum-GTASA-NitroX5.png|thumb|220x220px]] |
||
|- |
|- |
||
|10x Nitrous |
|10x Nitrous |
||
|$1000 |
|$1000 |
||
| + | |[[File:Stratum-GTASA-NitroX10.png|thumb|220x220px]] |
||
|} |
|} |
||
===''Grand Theft Auto V''=== |
===''Grand Theft Auto V''=== |
||
{| class="wikitable" |
{| class="wikitable" |
||
| + | ! colspan="2" scope="col" |Category |
||
| − | !Type |
||
| + | ! scope="col" |Modification |
||
| − | !Upgrade |
||
| − | !Cost ( |
+ | ! scope="col" |Cost (''GTA V'') |
| − | !Cost ([[Grand Theft Auto Online|Online]]) |
+ | ! scope="col" |Cost ([[Grand Theft Auto Online|''GTA Online'']]) |
| + | |- |
||
| ⚫ | |||
| + | |No Armor |
||
| ⚫ | |||
| ⚫ | |||
|- |
|- |
||
| ⚫ | |||
|Armor Upgrade 20% |
|Armor Upgrade 20% |
||
| style="text-align: center;" |$500 |
| style="text-align: center;" |$500 |
||
| Line 419: | Line 416: | ||
| style="text-align: center;" |$30,000 |
| style="text-align: center;" |$30,000 |
||
|- |
|- |
||
| − | | rowspan=" |
+ | | colspan="2" rowspan="4" |Brakes |
| + | |Stock Brakes |
||
| + | | style="text-align: center;" |$100 |
||
| + | | style="text-align: center;" |$200 |
||
| + | |- |
||
|Street Brakes |
|Street Brakes |
||
| style="text-align: center;" |$2,000 |
| style="text-align: center;" |$2,000 |
||
| Line 432: | Line 433: | ||
| style="text-align: center;" |$7,000 |
| style="text-align: center;" |$7,000 |
||
|- |
|- |
||
| − | | rowspan="4" |Engine |
+ | | colspan="2" rowspan="4" |Engine |
|EMS Upgrade, Level 1 |
|EMS Upgrade, Level 1 |
||
| style="text-align: center;" |$900 |
| style="text-align: center;" |$900 |
||
| Line 449: | Line 450: | ||
| style="text-align: center;" |$6,700 |
| style="text-align: center;" |$6,700 |
||
|- |
|- |
||
| − | | rowspan="2" | |
+ | | colspan="2" rowspan="2" |[[Car Bomb|Explosives]] |
| + | |Ignition Bomb |
||
| + | | style="text-align: center;" |N/A |
||
| + | | style="text-align: center;" |$5,000 |
||
| + | |- |
||
| + | |Remote Bomb |
||
| + | | style="text-align: center;" |N/A |
||
| + | | style="text-align: center;" |$7,500 |
||
| + | |- |
||
| + | | colspan="2" |Horns |
||
| + | |''Main article: [[Los Santos Customs/Horns]]'' |
||
| + | | style="text-align: center;" | - |
||
| + | | style="text-align: center;" | - |
||
| + | |- |
||
| + | | rowspan="3" |Lights |
||
| + | | rowspan="2" |Headlights |
||
| + | |Stock Lights |
||
| + | | style="text-align: center;" |$100 |
||
| + | | style="text-align: center;" |$200 |
||
| + | |- |
||
|Xenon Lights |
|Xenon Lights |
||
| style="text-align: center;" |$300 |
| style="text-align: center;" |$300 |
||
| style="text-align: center;" |$3,000 |
| style="text-align: center;" |$3,000 |
||
|- |
|- |
||
| + | |Neon Kits |
||
| − | |<div class="mw-collapsible mw-collapsed" style="width:100%"> |
||
| ⚫ | |||
| − | <div class="mw-collapsible-content"> |
||
| ⚫ | |||
| − | </div> |
||
| − | </div> |
||
| style="text-align: center;" | - |
| style="text-align: center;" | - |
||
| style="text-align: center;" | - |
| style="text-align: center;" | - |
||
|- |
|- |
||
| − | | rowspan="2" |Loss/Theft Prevention |
+ | | colspan="2" rowspan="2" |Loss/Theft Prevention |
|Tracker |
|Tracker |
||
| style="text-align: center;" |N/A |
| style="text-align: center;" |N/A |
||
| Line 471: | Line 488: | ||
| style="text-align: center;" |$1,250 |
| style="text-align: center;" |$1,250 |
||
|- |
|- |
||
| − | | |
+ | | colspan="2" rowspan="5" |Plates |
| + | |Blue on White 1 |
||
| − | |<div class="mw-collapsible mw-collapsed" style="width:100%"> |
||
| + | | style="text-align: center;" |$50 |
||
| − | <div class="mw-collapsible-content"> |
||
| + | | style="text-align: center;" |$200 |
||
| − | {{ResprayColorsExpand}} |
||
| + | |- |
||
| − | </div> |
||
| + | |Blue on White 2 |
||
| − | </div> |
||
| + | | style="text-align: center;" |$50 |
||
| + | | style="text-align: center;" |$200 |
||
| + | |- |
||
| + | |Blue on White 3 |
||
| + | | style="text-align: center;" |$50 |
||
| + | | style="text-align: center;" |$200 |
||
| + | |- |
||
| + | |Yellow on Blue |
||
| + | | style="text-align: center;" |$75 |
||
| + | | style="text-align: center;" |$300 |
||
| + | |- |
||
| + | |Yellow on Black |
||
| + | | style="text-align: center;" |$150 |
||
| + | | style="text-align: center;" |$600 |
||
| + | |- |
||
| + | | colspan="2" |Respray |
||
| + | |''Main article: [[Los Santos Customs/Respray Colors]]'' |
||
| style="text-align: center;" | - |
| style="text-align: center;" | - |
||
| style="text-align: center;" | - |
| style="text-align: center;" | - |
||
|- |
|- |
||
| + | | colspan="2" |Sell |
||
| − | |Crew Emblem |
||
| ⚫ | |||
| ⚫ | |||
| ⚫ | |||
| − | |Sell |
||
|Sell Vehicle |
|Sell Vehicle |
||
| style="text-align: center;" |N/A |
| style="text-align: center;" |N/A |
||
| style="text-align: center;" |$1,000 |
| style="text-align: center;" |$1,000 |
||
|- |
|- |
||
| − | | rowspan=" |
+ | | colspan="2" rowspan="5" |Suspension |
| + | |Stock Suspension |
||
| + | | style="text-align: center;" |$100 |
||
| + | | style="text-align: center;" |$200 |
||
| + | |- |
||
|Lowered Suspension |
|Lowered Suspension |
||
| style="text-align: center;" |$500 |
| style="text-align: center;" |$500 |
||
| Line 506: | Line 540: | ||
| style="text-align: center;" |$4,400 |
| style="text-align: center;" |$4,400 |
||
|- |
|- |
||
| − | | rowspan=" |
+ | | colspan="2" rowspan="4" |Transmission |
| + | |Stock Transmission |
||
| + | | style="text-align: center;" |$100 |
||
| + | | style="text-align: center;" |$200 |
||
| + | |- |
||
|Street Transmission |
|Street Transmission |
||
| style="text-align: center;" |$2,950 |
| style="text-align: center;" |$2,950 |
||
| Line 519: | Line 557: | ||
| style="text-align: center;" |$8,000 |
| style="text-align: center;" |$8,000 |
||
|- |
|- |
||
| + | | colspan="2" rowspan="2" |Turbo |
||
| − | |Turbo |
||
| + | |None |
||
| + | | style="text-align: center;" |$500 |
||
| + | | style="text-align: center;" |$1,000 |
||
| + | |- |
||
|Turbo Tuning |
|Turbo Tuning |
||
| style="text-align: center;" |$2,500 |
| style="text-align: center;" |$2,500 |
||
| style="text-align: center;" |$30,000 |
| style="text-align: center;" |$30,000 |
||
|- |
|- |
||
| − | |Wheels |
+ | | colspan="2" |Wheels |
| + | |''Main article: [[Los Santos Customs/Wheels]]'' |
||
| − | |<div class="mw-collapsible mw-collapsed" style="width:100%"> |
||
| − | <div class="mw-collapsible-content"> |
||
| − | {{WheelsExpand}} |
||
| − | </div> |
||
| − | </div> |
||
| style="text-align: center;" | - |
| style="text-align: center;" | - |
||
| style="text-align: center;" | - |
| style="text-align: center;" | - |
||
|- |
|- |
||
| − | | rowspan=" |
+ | | colspan="2" rowspan="4" |Windows |
| + | |None |
||
| + | | style="text-align: center;" |$100 |
||
| + | | style="text-align: center;" |$500 |
||
| + | |- |
||
|Light Smoke |
|Light Smoke |
||
| style="text-align: center;" |$200 |
| style="text-align: center;" |$200 |
||
| Line 548: | Line 590: | ||
==Image Gallery== |
==Image Gallery== |
||
| + | <gallery position="center" spacing="small" widths="270px" hideaddbutton="true"> |
||
| − | ===''Grand Theft Auto V''=== |
||
| − | <gallery position="center"> |
||
Stratum-front-view-roof-rack-gtav.png|A '''Stratum''' with roof rack and open sun roof. (<small>[[:Image:Stratum-back-view-roof-rack-gtav.png|Rear quarter view]]</small>) |
Stratum-front-view-roof-rack-gtav.png|A '''Stratum''' with roof rack and open sun roof. (<small>[[:Image:Stratum-back-view-roof-rack-gtav.png|Rear quarter view]]</small>) |
||
| − | Stratum-GTAV- |
+ | Stratum-GTAV-SSASA.png|The '''Stratum''' on [[Southern San Andreas Super Autos]]. |
| + | Stratum-GTAV-RSC.jpg|The '''Stratum''' on [[Rockstar Games Social Club]]. |
||
| + | Stratum-GTAO-RGSC2.jpg|The '''Stratum''' on the updated [[Rockstar Games Social Club]]. |
||
| + | Stratum-GTAO-RGSC3.jpg|The '''Stratum''' in the cinematic preview on [[Rockstar Games Social Club]]. |
||
</gallery> |
</gallery> |
||
| − | ==Special Variants |
+ | ==Special Variants== |
=== ''Grand Theft Auto IV and Grand Theft Auto V'' === |
=== ''Grand Theft Auto IV and Grand Theft Auto V'' === |
||
| − | In both games, the Stratum can spawn as one of four variants, with some variants featuring unique modifications that cannot be applied at Los Santos Customs in GTA V. These variants are as follows: |
+ | In both games, the Stratum can spawn as one of four variants, with some variants featuring unique modifications that cannot be applied at Los Santos Customs in ''GTA V''. These variants are as follows: |
| − | * |
+ | *Stock variant. Completely stock with the sun roof closed. |
| − | * |
+ | *Roof rack variant. Has roof racks and an open sun roof. |
| − | * |
+ | *Front bumper variant. Has a custom front bumper and a closed sun roof. |
| − | * |
+ | *Twin Turbo variant. This variant features a roof spoiler, a "Twin Turbo" badge on the back, and an open sun roof. This variant of the Stratum seems to be rarer than the other three. |
| − | <gallery position="center"> |
+ | <gallery position="center" spacing="small" widths="270px" hideaddbutton="true"> |
Stratum-GTA4-TwinTurbo-front.jpg|'''Stratum''', Twin Turbo variant in GTA IV. (<small>[[:File:Stratum-GTA4-TwinTurbo-rear.jpg|Rear quarter view, featuring an additional spoiler]]</small>) |
Stratum-GTA4-TwinTurbo-front.jpg|'''Stratum''', Twin Turbo variant in GTA IV. (<small>[[:File:Stratum-GTA4-TwinTurbo-rear.jpg|Rear quarter view, featuring an additional spoiler]]</small>) |
||
</gallery> |
</gallery> |
||
| Line 578: | Line 622: | ||
*Commonly spawns in and around [[San Fierro Triads]] territory in [[Chinatown, San Fierro|Chinatown]] and [[Calton Heights]], San Fierro. |
*Commonly spawns in and around [[San Fierro Triads]] territory in [[Chinatown, San Fierro|Chinatown]] and [[Calton Heights]], San Fierro. |
||
*Spawns near the [[Four Dragons Casino]] in [[Las Venturas (3D Universe)|Las Venturas]]. |
*Spawns near the [[Four Dragons Casino]] in [[Las Venturas (3D Universe)|Las Venturas]]. |
||
| − | *In the compound of a plastic factory during the mission [[You've Had Your Chips]]. |
||
===''Grand Theft Auto IV''=== |
===''Grand Theft Auto IV''=== |
||
| Line 588: | Line 631: | ||
*Seen commonly around [[Sandy Shores]] and the [[Grand Senora Desert]]. |
*Seen commonly around [[Sandy Shores]] and the [[Grand Senora Desert]]. |
||
*Sometimes seen around [[Vinewood Hills]]. |
*Sometimes seen around [[Vinewood Hills]]. |
||
| + | |||
| + | ;[[Vehicles in GTA V/Scenarios|Scenarios]] |
||
| + | The Stratum is part of two <code>vehiclemodelsets</code>, "<code>CARS_STATION_WAGON</code>" and "<code>CARS_TOURIST</code>". The first set of cars is exclusive to the Stratum, [[Regina]] and [[Ingot]]. It isn't very common, but does appear in specific locations which guarantees a 1/3 chance of the Stratum spawning. The Tourist selection of cars is a collection of several low-medium end cars such as the [[BeeJay XL]] and [[Camper]], which spawn in specific "tourist" locations. |
||
| + | |||
| + | {{Scenarios|cars_station_wagon}} |
||
| + | {{Scenarios|cars_tourist}} |
||
==Rewards== |
==Rewards== |
||
| Line 621: | Line 670: | ||
{{Navboxes |
{{Navboxes |
||
|title= Navigation |
|title= Navigation |
||
| + | |list1= |
||
| − | + | {{vehicles|state=collapsed}} |
|
{{gtasa vehicles|state=collapsed}} |
{{gtasa vehicles|state=collapsed}} |
||
{{gtaiv vehicles|state=collapsed}} |
{{gtaiv vehicles|state=collapsed}} |
||
{{gtav vehicles|state=collapsed}} |
{{gtav vehicles|state=collapsed}} |
||
| ⚫ | |||
| − | }} |
||
| − | |||
| ⚫ | |||
[[es:Stratum]] |
[[es:Stratum]] |
||
[[ru:Stratum]] |
[[ru:Stratum]] |
||
Revision as of 22:59, 1 April 2020
Template:Infobox vehicles
The Stratum is a mid-sized four-door station wagon featured in Grand Theft Auto: San Andreas, Grand Theft Auto IV, Grand Theft Auto V and Grand Theft Auto Online. It is manufactured by Zirconium in the HD Universe.
Design
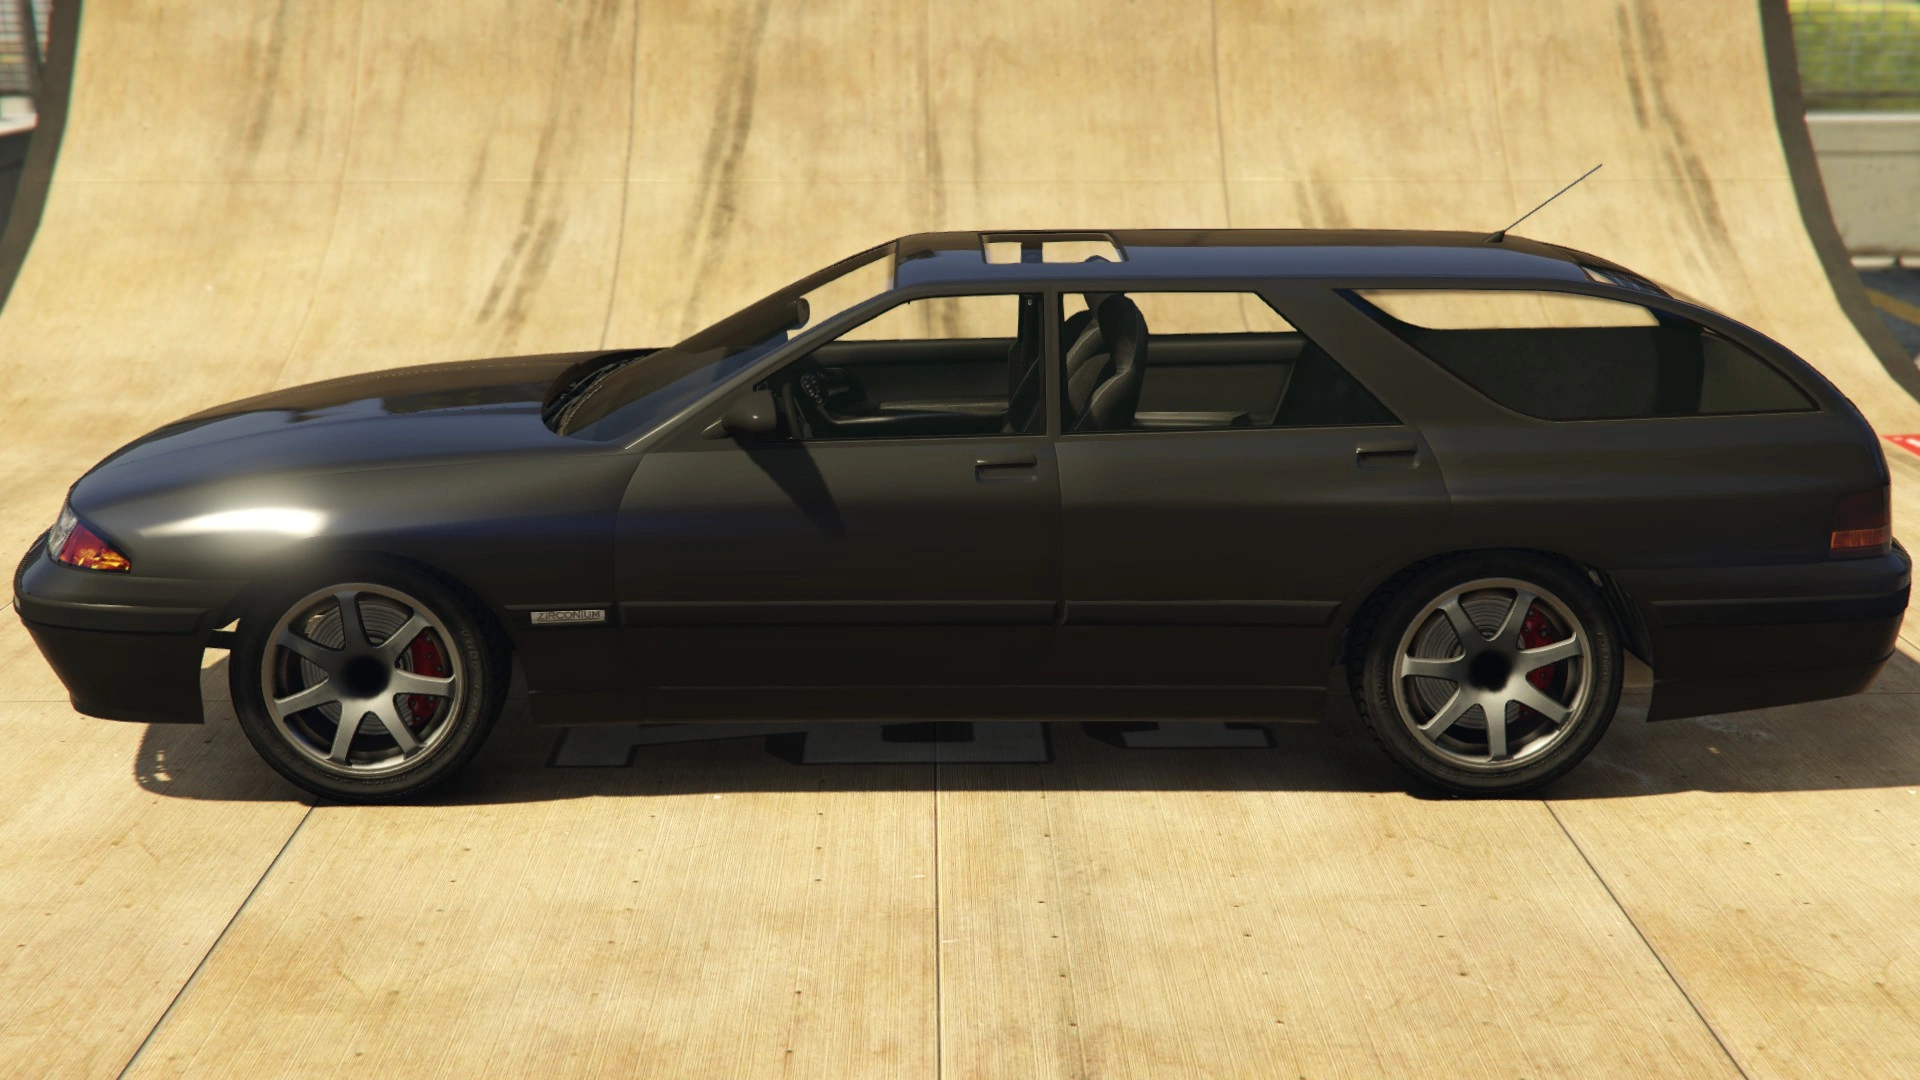
The Stratum is generally depicted as a conventional station wagon, however, it has a more streamlined design than other station wagons in the series.
Grand Theft Auto: San Andreas
The Stratum's design is taken from the fifth generation (1994–1997) Honda Accord wagon, however D-pillars have been added. The car's real-life counterpart also fails to fit in the game's time setting of 1992. It could also be based on the Saturn SW, which sports a similar design and a fitting manufacturing year.
The car is one of the gang cars used by the San Fierro Triads.
Grand Theft Auto IV
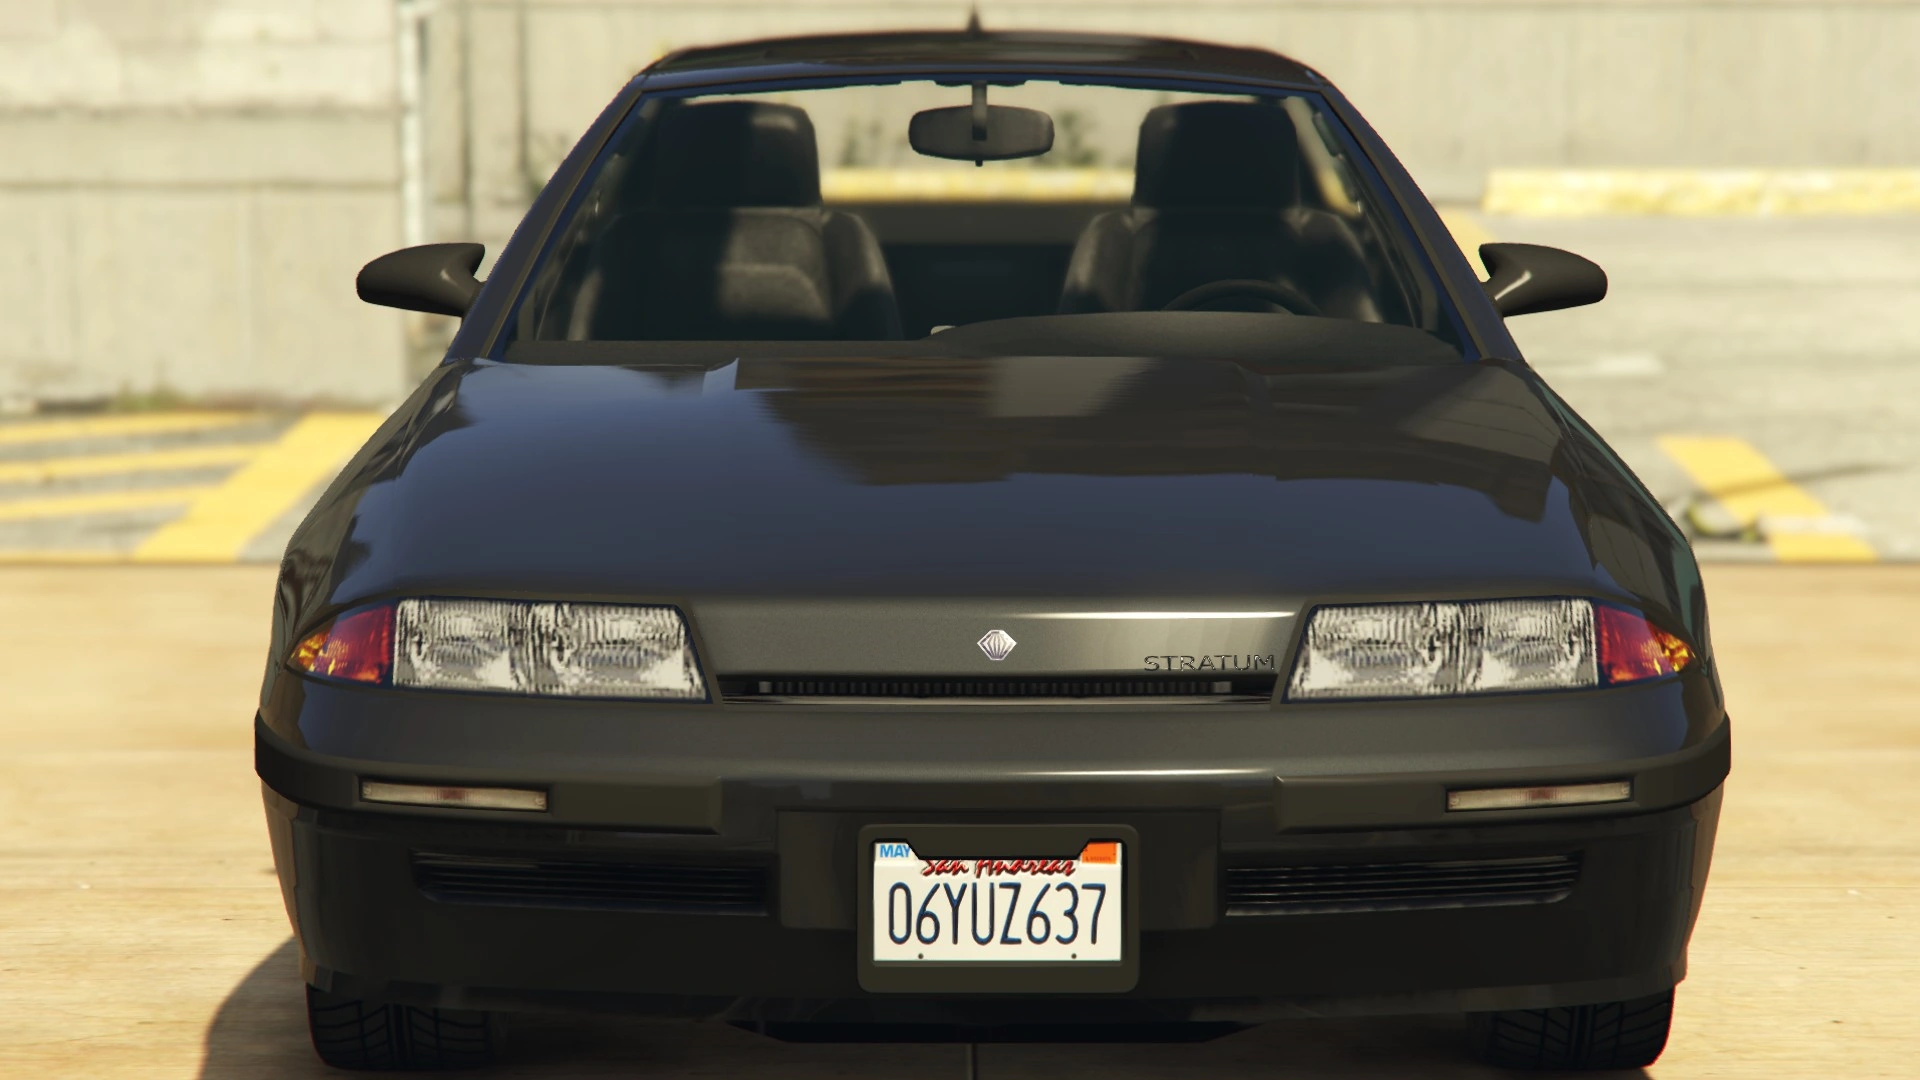
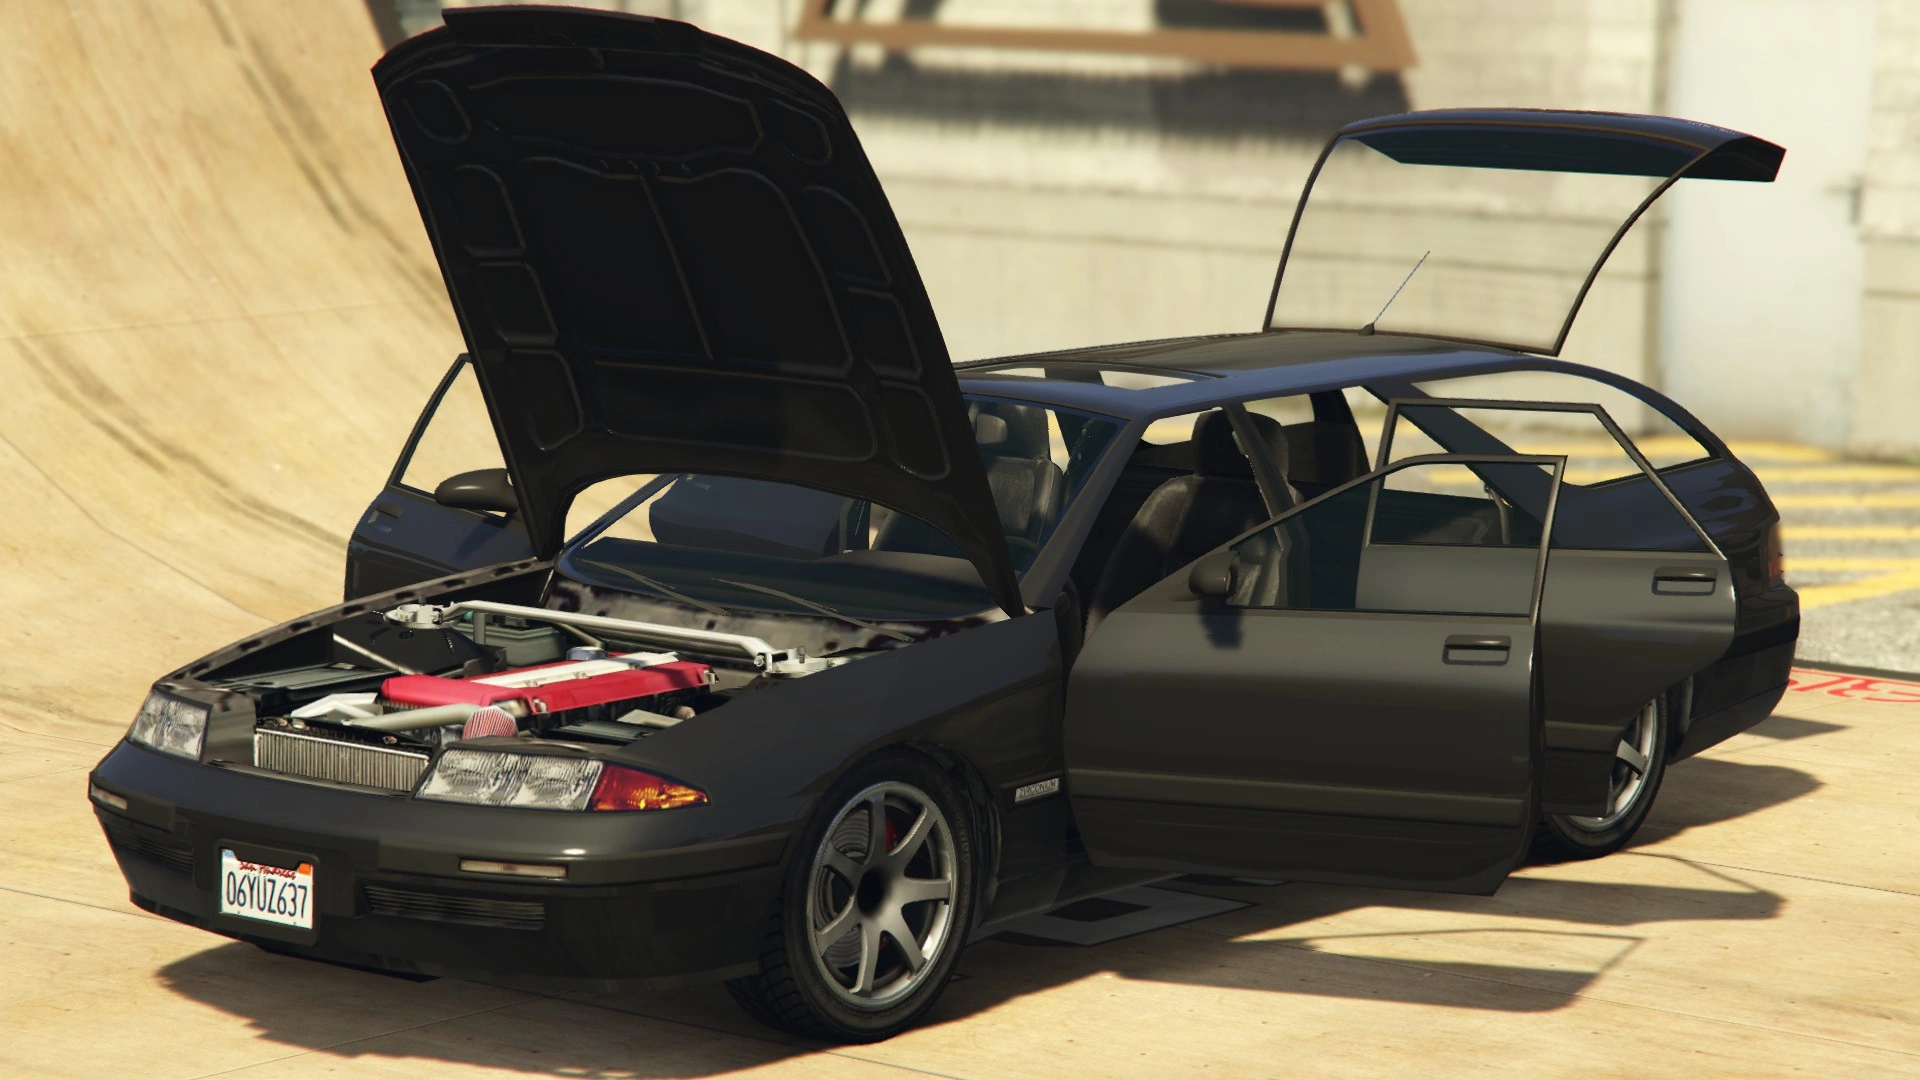
The Zirconium Stratum 2.6GT carries over a very similar design in GTA IV, with its primary inspiration taken from the fifth generation Honda Accord station wagon or Saturn SW (with the same added pillars as the previous rendition), albeit with a front end derived from the S3-R31 and R32 Nissan Skyline, as seen in the hood, hood badge and grill (R31) and headlight design (R32). The rear end greatly resembles the first generation Subaru Impreza station wagon along with taillights and the Stratum lettering resembling a first generation Isuzu Impulse, although much longer and C-pillars which may be derived from the 1996-2001 Toyota Camry wagon. The bodywork and rear headlights also has a very large resemblance to the Ford EF Falcon Wagons or the Mk III Ford Sierra Estate.
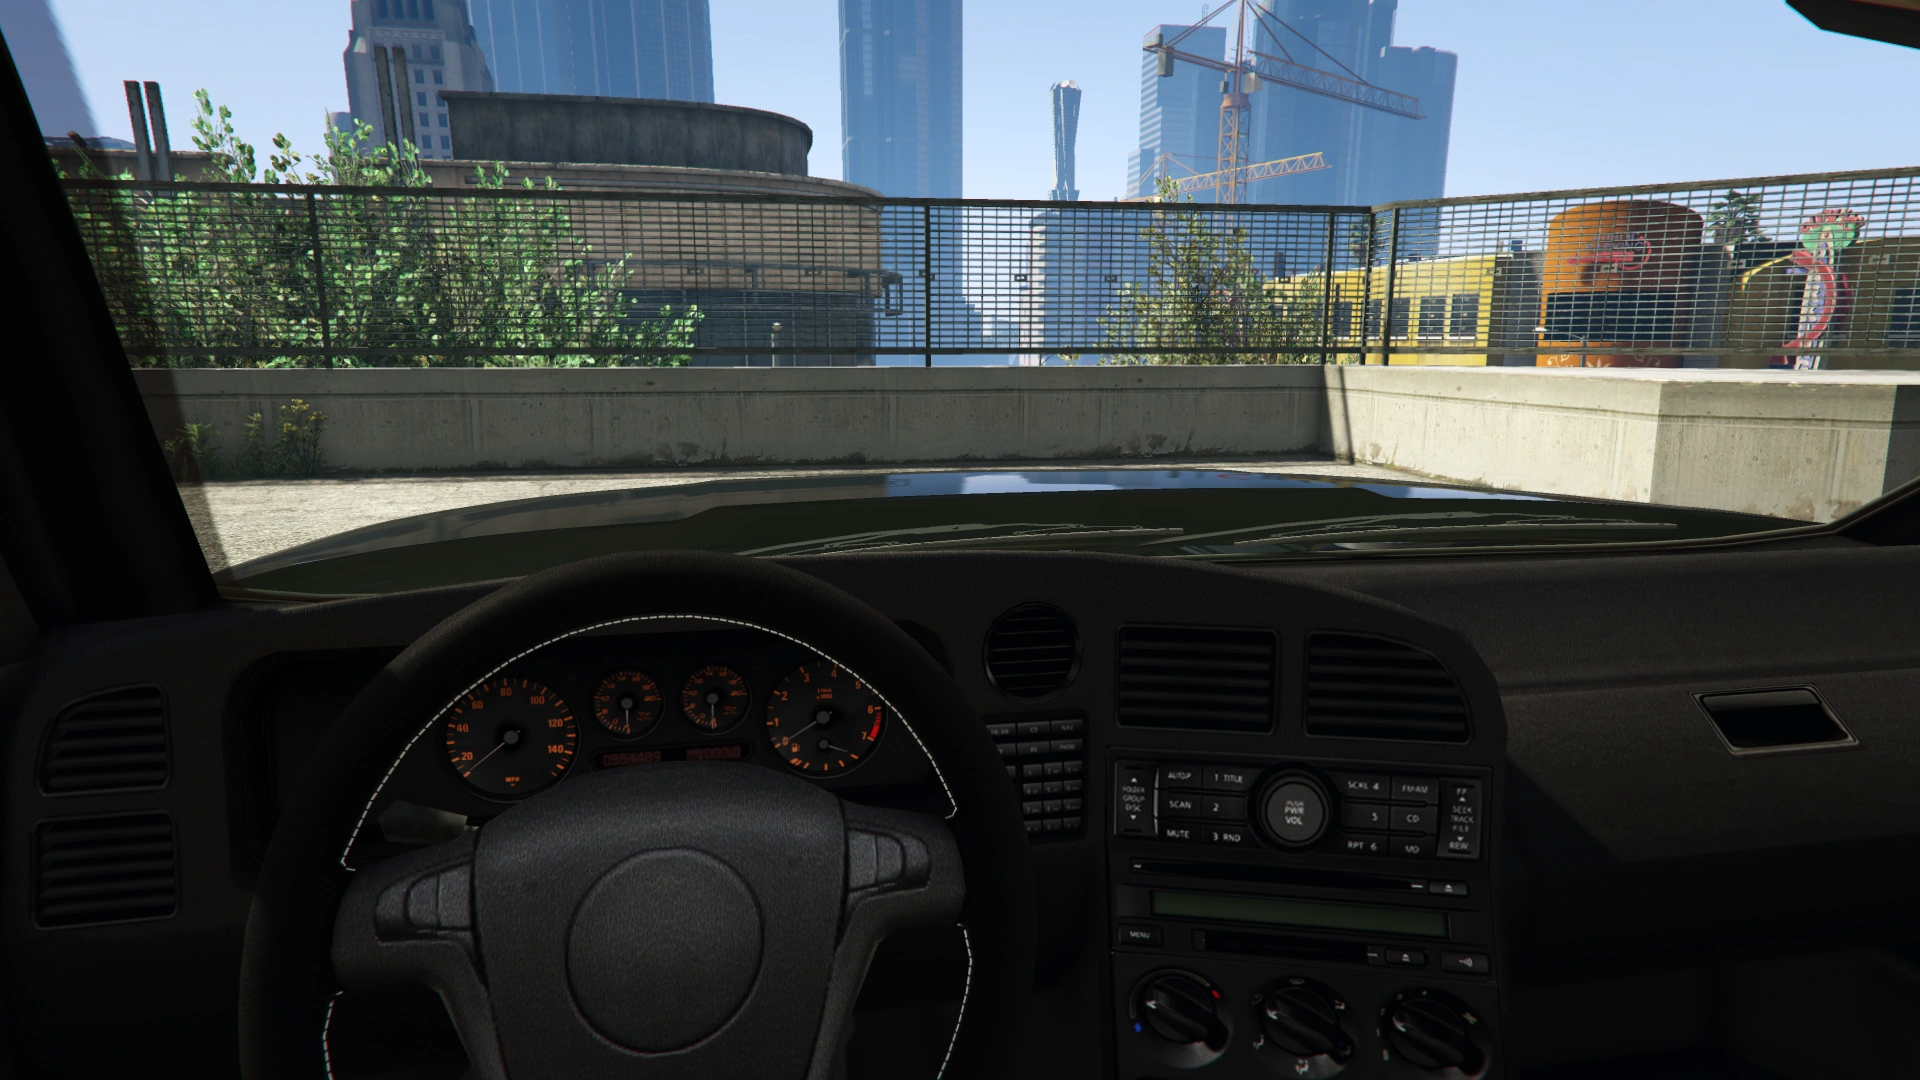
The Stratum is equipped with a GPS system with a male voice, but only if the player leaves the "selected cars" (default) option in the audio menu.
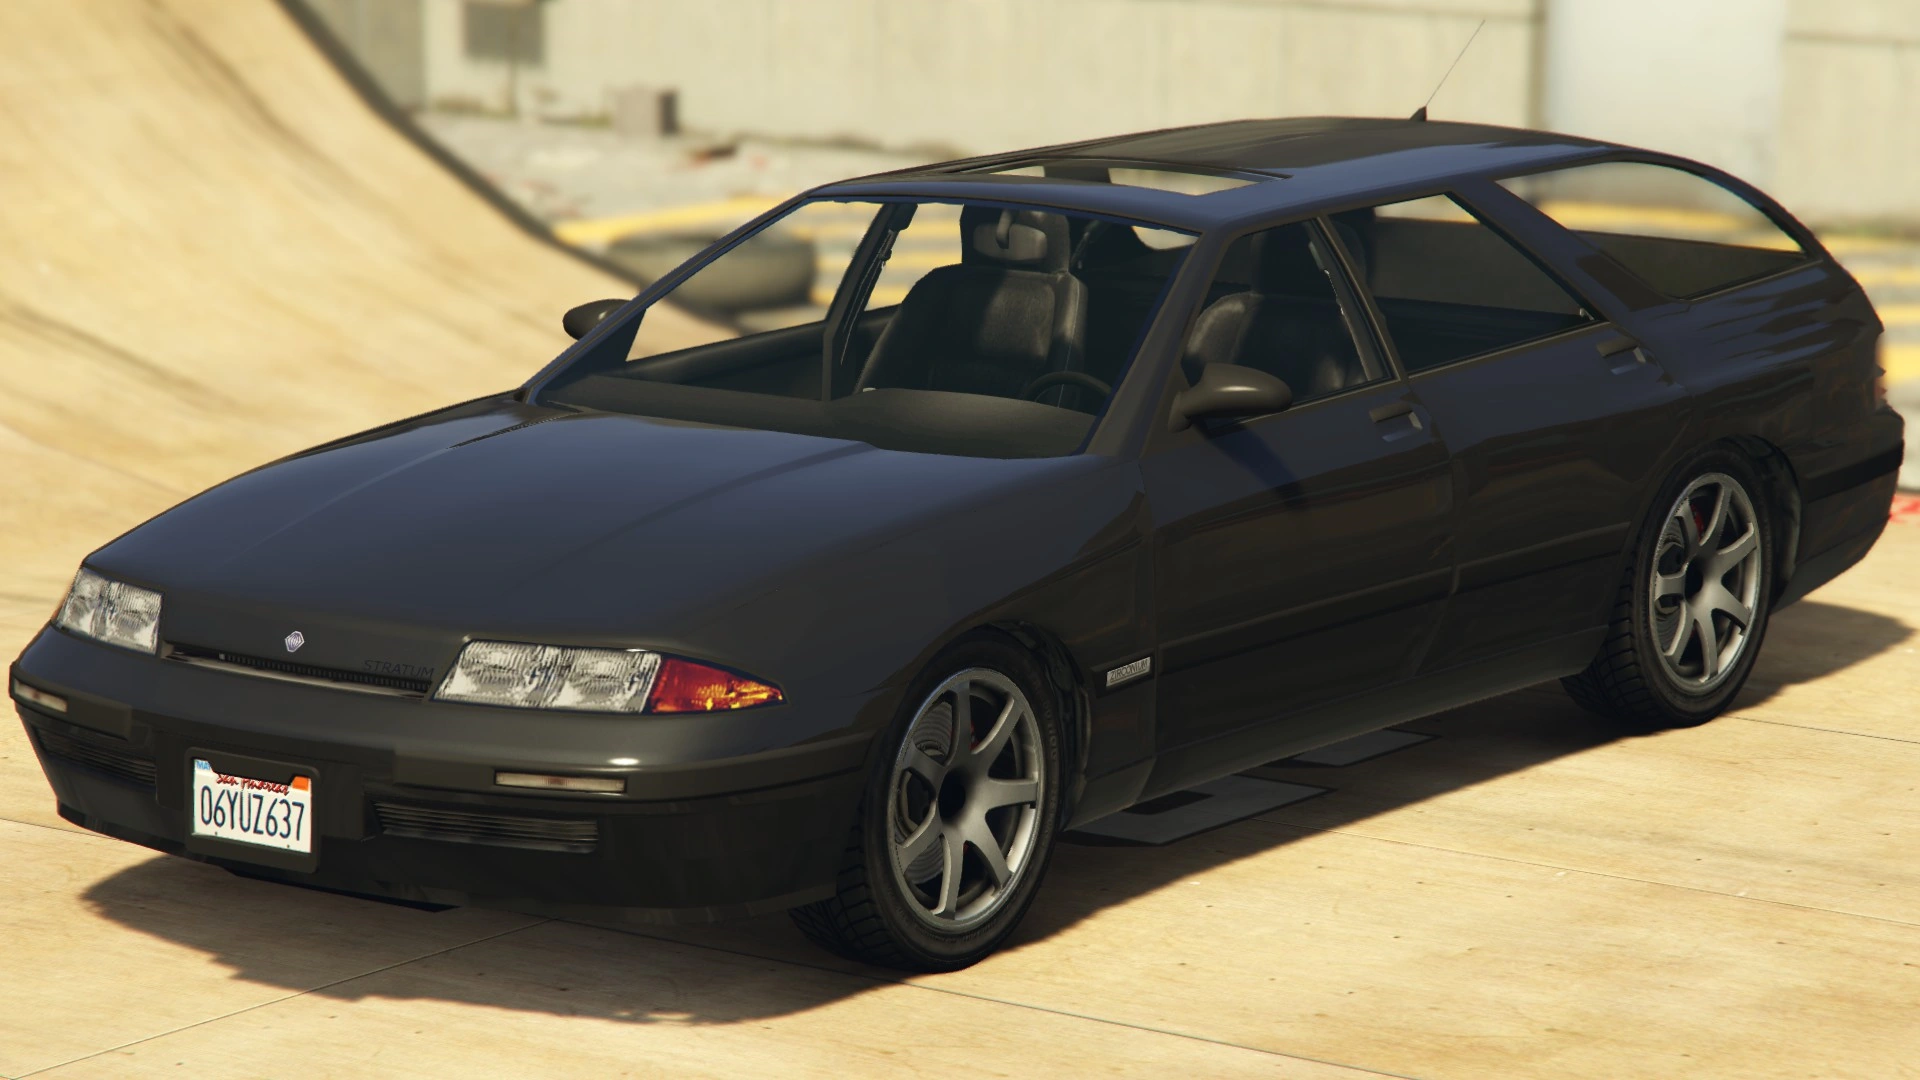
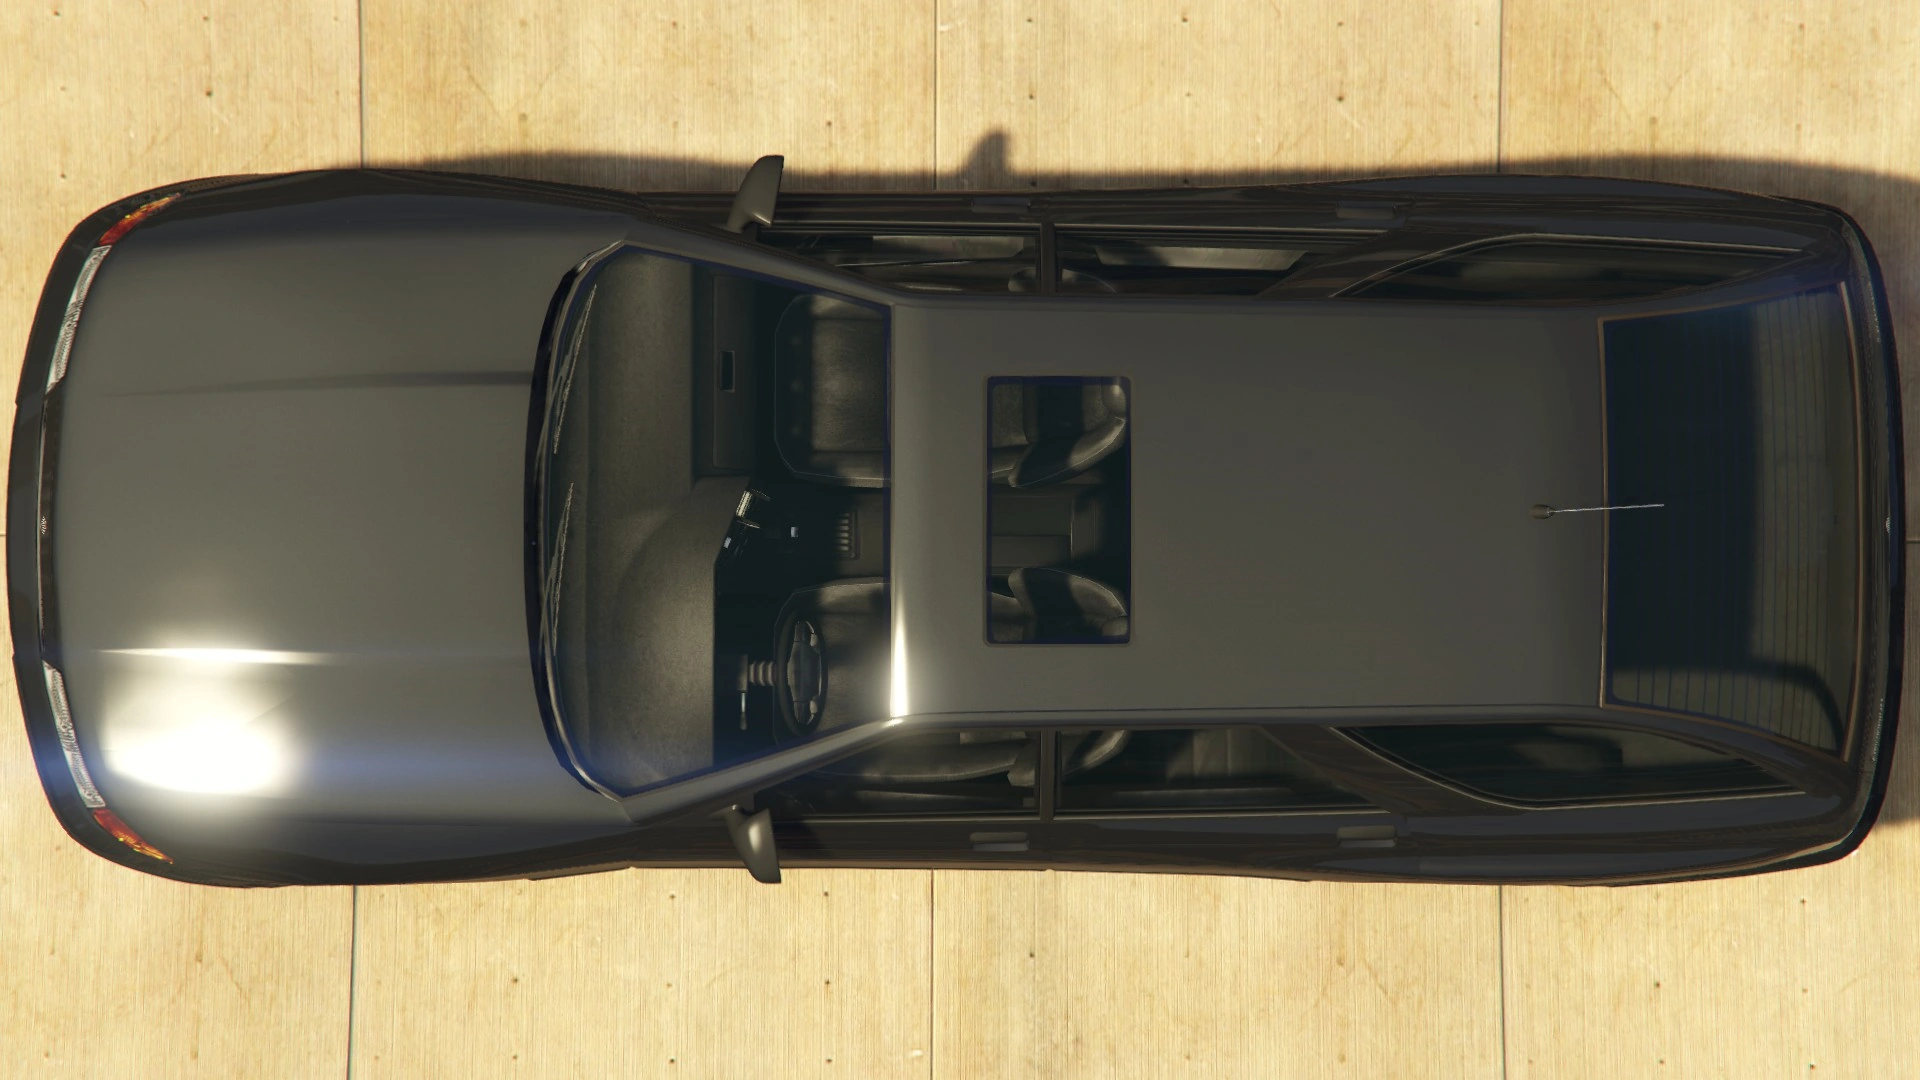
Grand Theft Auto V
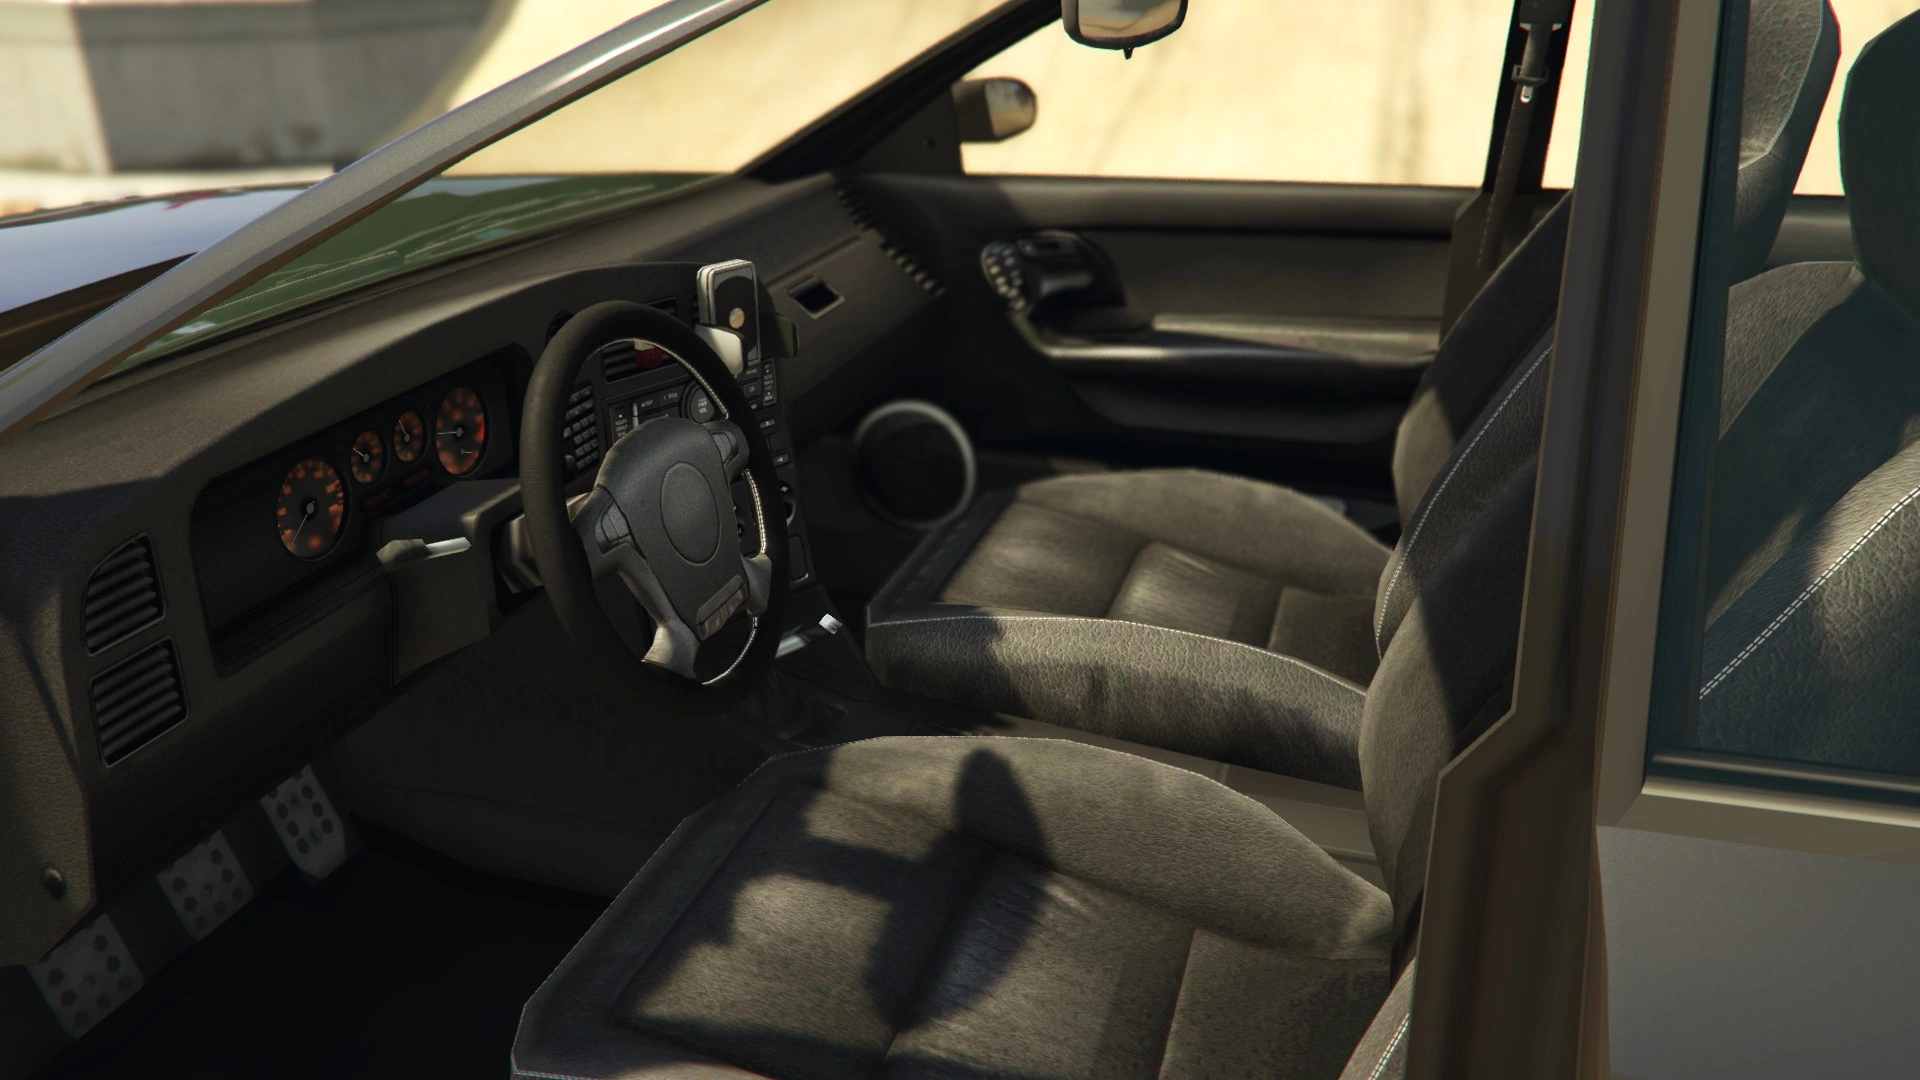
In Grand Theft Auto V, the Stratum's design remains unchanged, although the car's grille is now much shorter. The car also gains an updated interior in the enhanced version.
Current Design Gallery


Version History Gallery
")
")
Performance
Grand Theft Auto: San Andreas
Acceleration and speed are surprisingly good, considering the Stratum’s size. The drivetrain is front-engine, rear-drive, making the Stratum a good selection as a drive-by vehicle. The body is weak, however, making the car susceptible to intense damage from high-speed impacts and heavy gunfire.
GTA San Andreas Overview
| Acceleration (0-60 mph in Seconds) |
Top Speed (mph / kmh) |
Gears | Engine | Drivetrain (FWD / RWD / AWD) |
Mass (kg / lbs) |
|---|---|---|---|---|---|
| N/A | 124 / 200 | 5 | Petrol | RWD | 1800 / 3968 |
| N/A | N/A | N/A | Inline-4 | RWD | Cannot be observed |
Grand Theft Auto IV
The Stratum's handling is quite good, though oversteer can be dramatic at times, and its suspension evens out bumps without being excessively soft. Braking is acceptable, giving the car a good braking time which is helped by its low ride height and small weight. Crash deformation is very good, with the Stratum keeping most of its shape in a collision; engine build quality, however, is less desirable, with the Stratum often left disabled after only a few impacts. Acceleration is rather decent, and has a high top speed, overtaking some other sedans and cars of similar design.
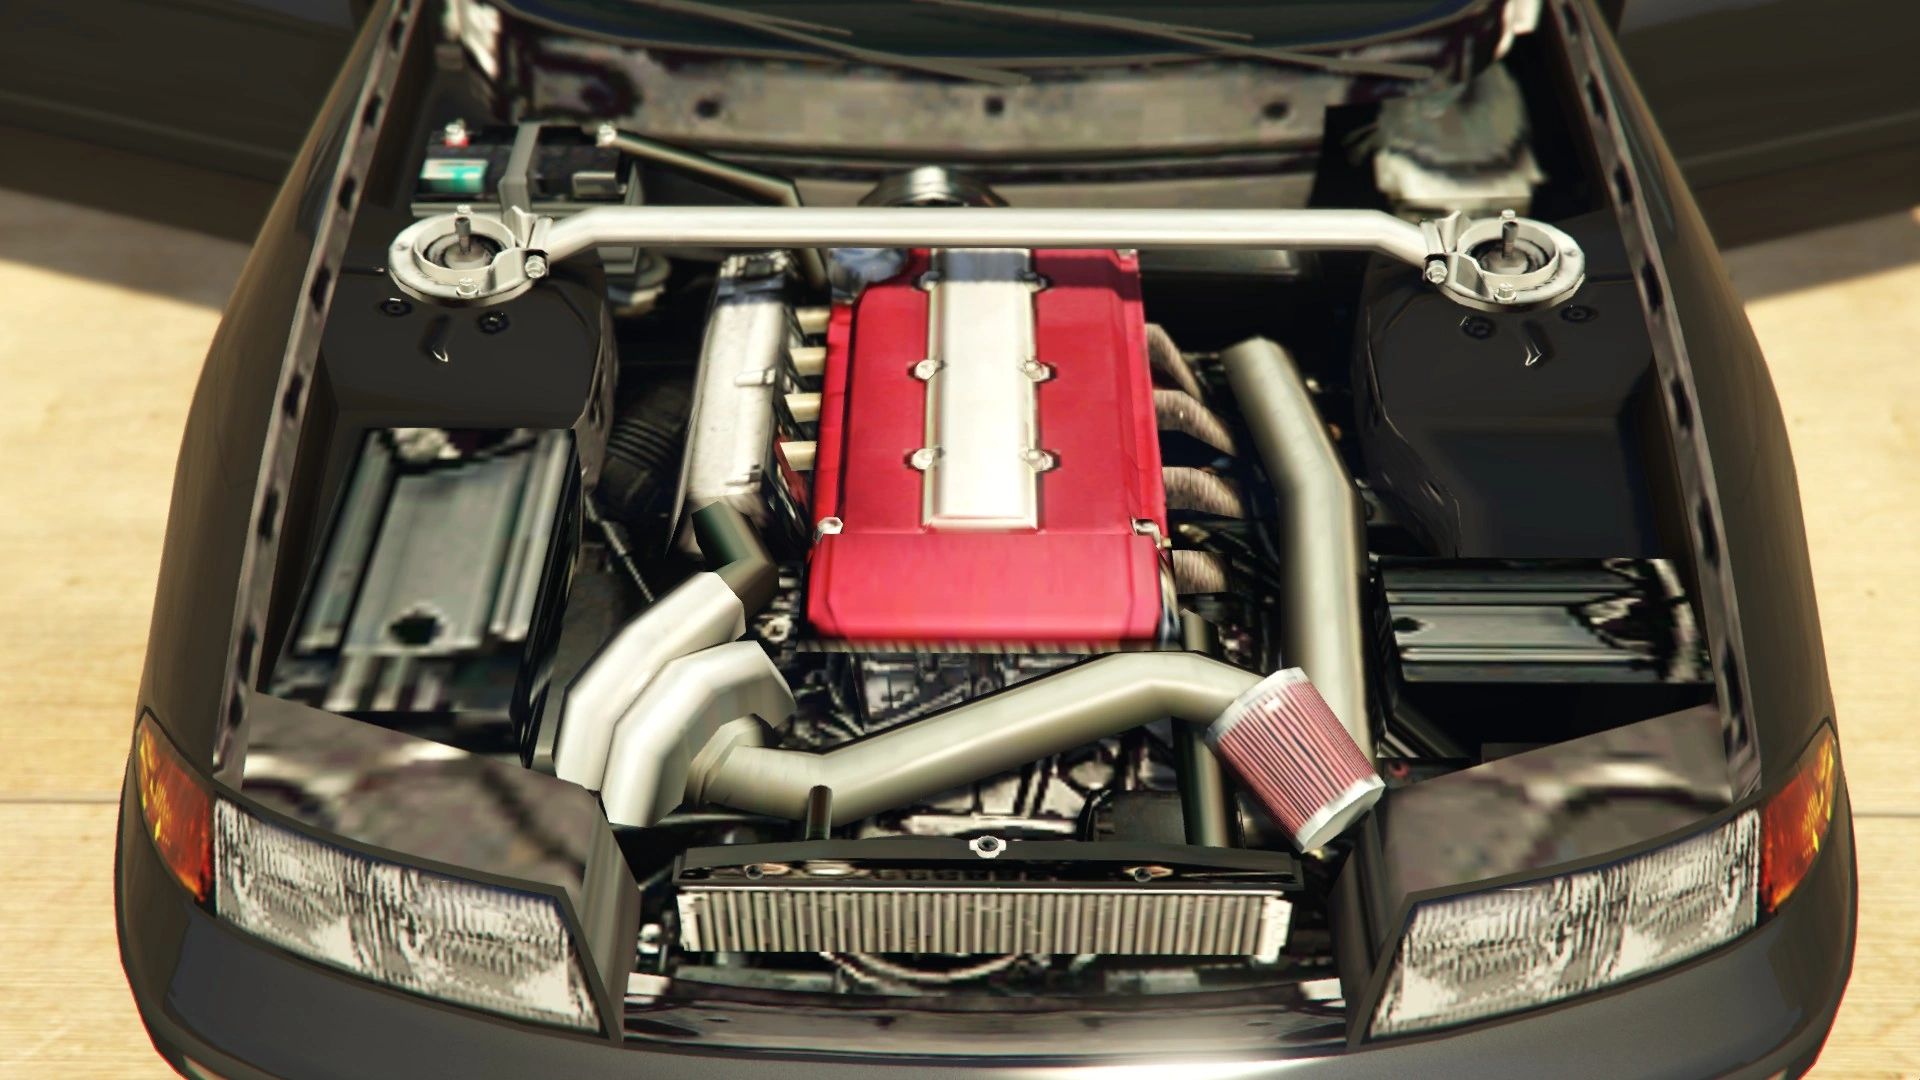
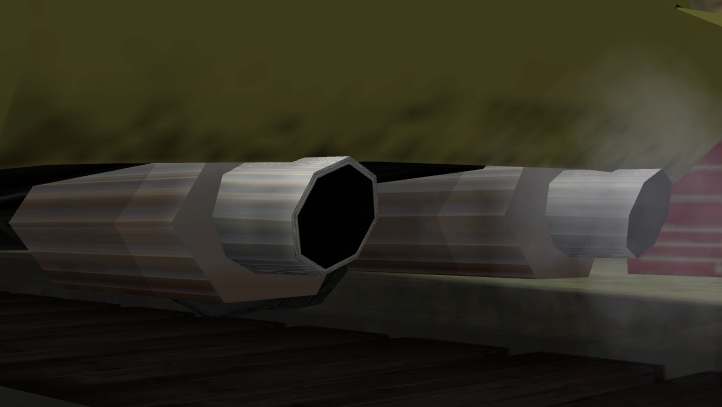
The Stratum appears to be powered by an inline-4 with a single turbo fitted (contrary to the "twin turbo" badging), alongside the turbocharger's air filter (seen at the bottom right). This is coupled to a 5-speed gearbox in a RWD configuration. The engine sound is smooth, comparable to that of the Solair and the Ingot, which are also station wagons.
GTA IV Overview
| Acceleration (0-60 mph in Seconds) |
Top Speed (mph / kmh) |
Gears | Engines | Drivetrain (FWD / RWD / AWD) |
Mass (kg / lbs) |
|---|---|---|---|---|---|
| N/A | 84 / 135 | 5 | N/A | RWD | 1900 / 4189 |
| N/A | N/A | N/A | 2.6L Twin Turbo (Badging) | N/A | N/A |
| N/A | N/A | 5 | FR DOHC Turbocharged Inline-4 (In-game model) | RWD | Cannot be observed |
Grand Theft Auto V
In GTA V, the Stratum performs better thanks to its AWD (40% - 60%, front to rear torque distribution) layout. It also gains more responsive handling, and braking is improved further, although this is still relatively poor compared to other cars in its class. The vehicle is noticeably slightly lighter, as it now seems to glide around corners with little understeer. The steering itself however, feels somewhat heavy and can serve as a handicap to an inexperienced driver.
Again, the engine is the same turbocharged inline-4, now coupled to a 5-speed gearbox in a front engine, all wheel drive layout.
GTA V Overview
| Acceleration (0-60 mph in Seconds) |
Top Speed (mph / kmh) |
Gears | Engine | Drivetrain (FWD / RWD / AWD) |
Mass (kg / lbs) |
Fuel Tank Size (litres) |
|---|---|---|---|---|---|---|
| N/A | 84 / 135 | 5 | N/A | AWD 40% FWD 60% RWD |
1800 / 3968 | 65 |
| N/A | N/A | N/A | 2.6L Twin Turbo (Badging) | N/A | N/A | N/A |
| 15.6 Seconds | 95 / 152 | 5 | F4 DOHC Turbocharged Inline-4 (In-game model) | AWD | Cannot be observed | Cannot be observed |
Modifications
Grand Theft Auto: San Andreas
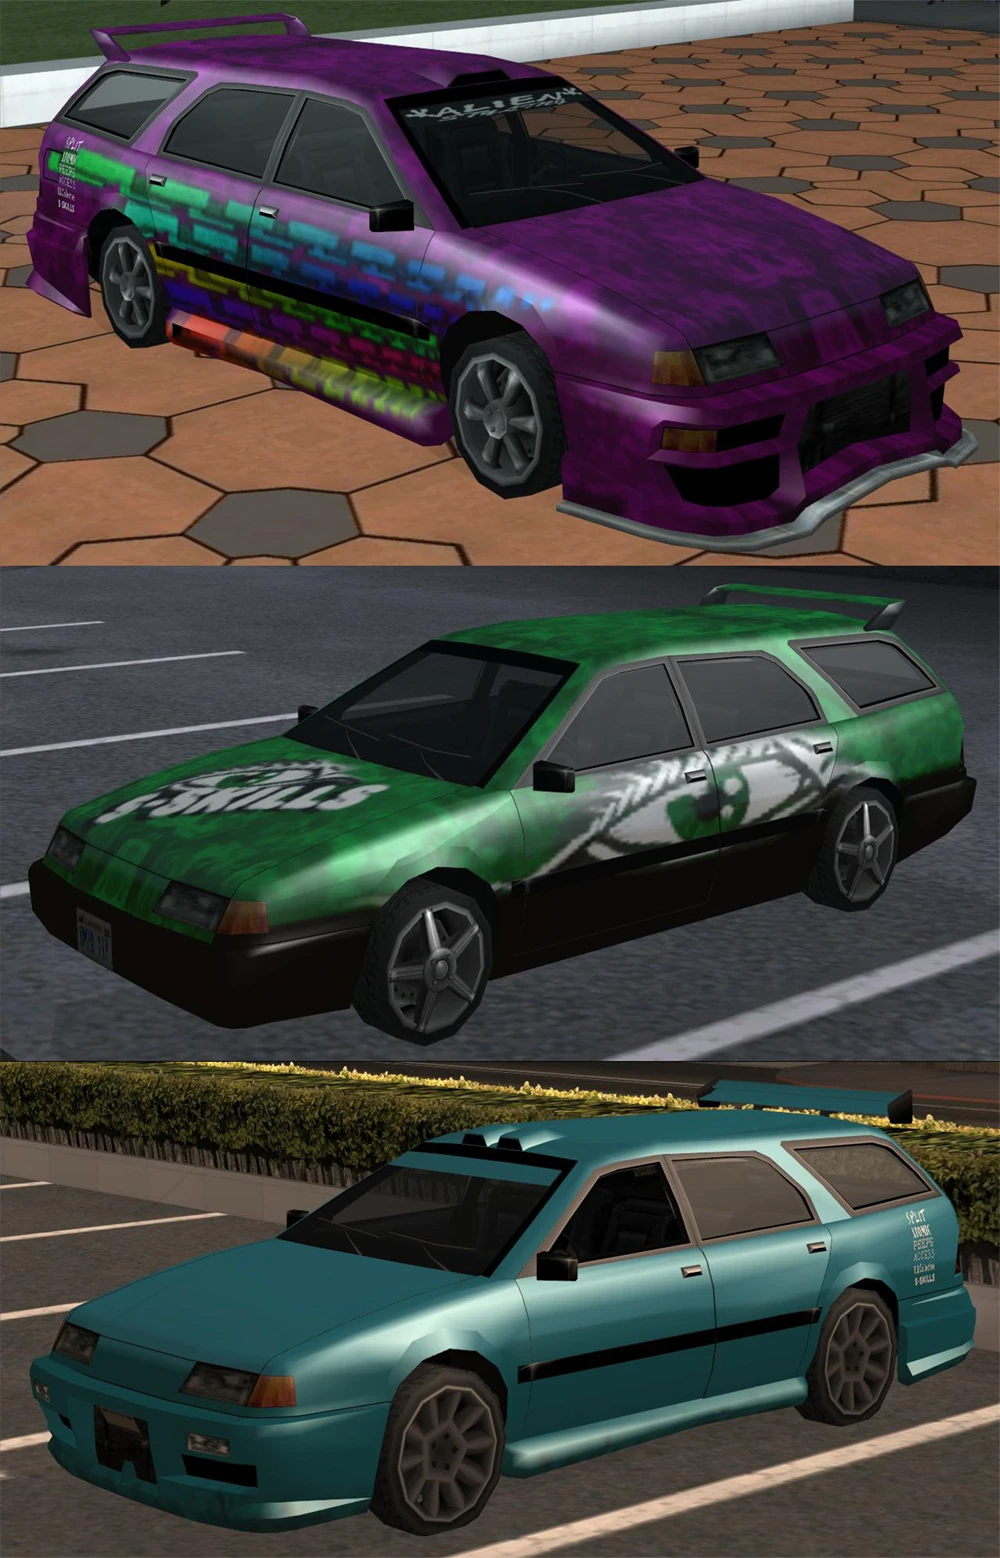
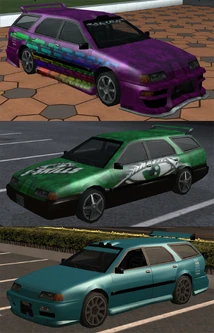
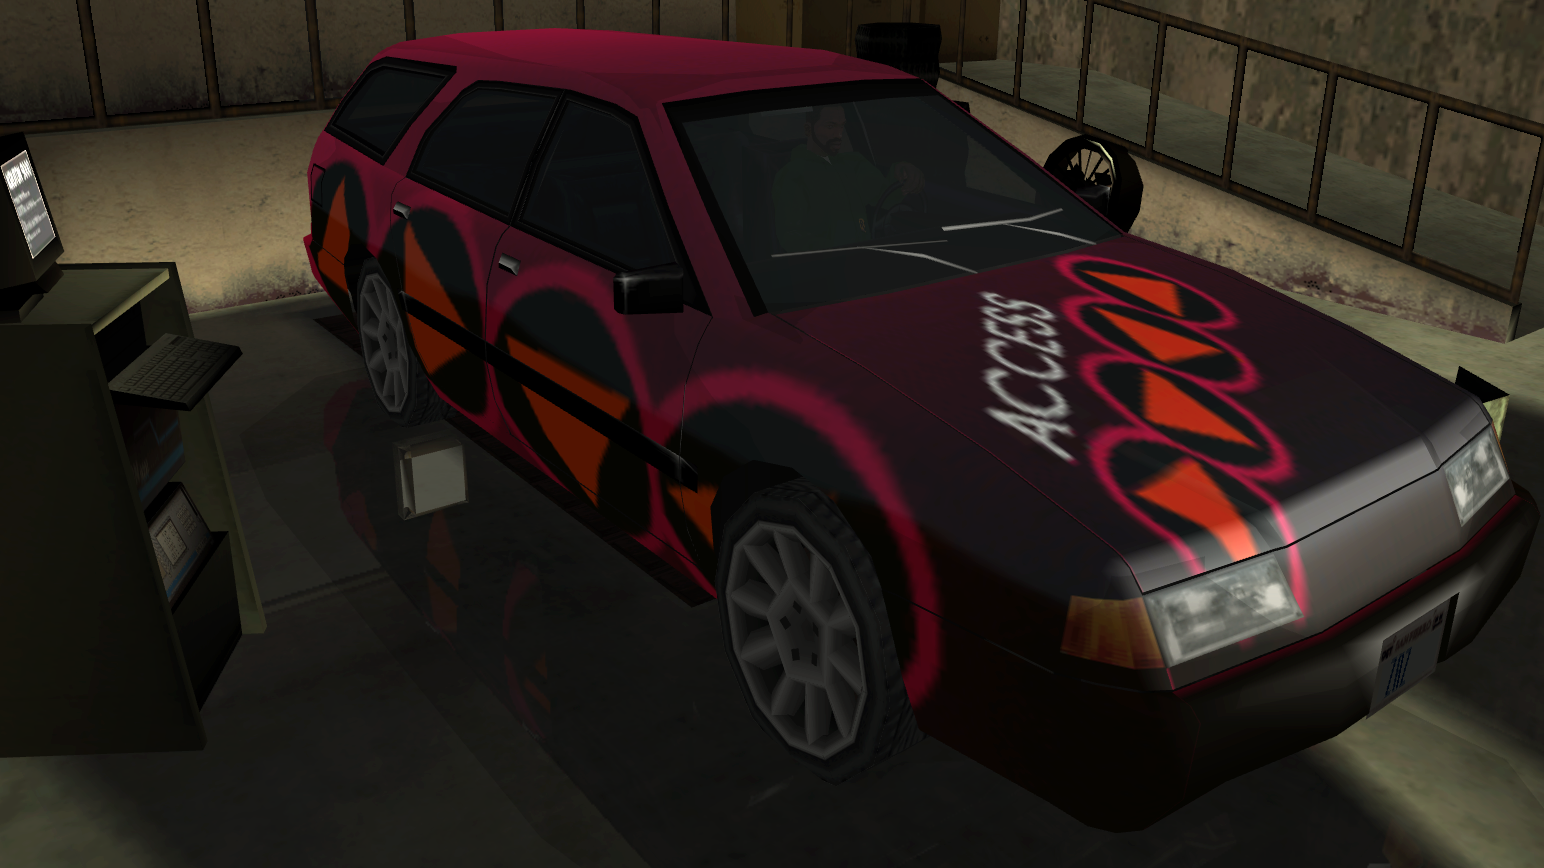
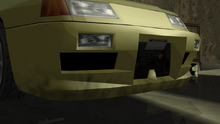
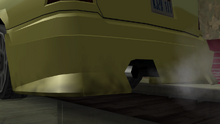
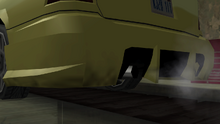
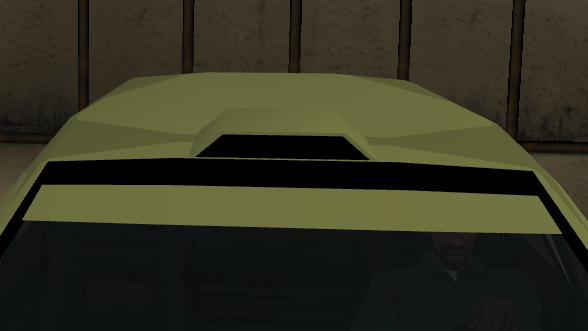
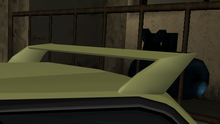
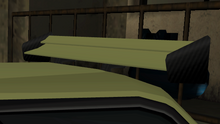
Possible combinations of modifications that can be given to the Stratum at Wheel Arch Angels in GTA San Andreas.
The Stratum is considered a tuner, and can be upgraded at Wheel Arch Angels in Ocean Flats, San Fierro.


Grand Theft Auto V
| Category | Modification | Cost (GTA V) | Cost (GTA Online) | |
|---|---|---|---|---|
| Armor | No Armor | $100 | $200 | |
| Armor Upgrade 20% | $500 | $4,500 | ||
| Armor Upgrade 40% | $1,250 | $7,500 | ||
| Armor Upgrade 60% | $2,000 | $12,000 | ||
| Armor Upgrade 80% | $3,500 | $21,000 | ||
| Armor Upgrade 100% | $5,000 | $30,000 | ||
| Brakes | Stock Brakes | $100 | $200 | |
| Street Brakes | $2,000 | $4,000 | ||
| Sport Brakes | $2,700 | $5,400 | ||
| Race Brakes | $3,500 | $7,000 | ||
| Engine | EMS Upgrade, Level 1 | $900 | $1,800 | |
| EMS Upgrade, Level 2 | $1,250 | $2,500 | ||
| EMS Upgrade, Level 3 | $1,800 | $3,600 | ||
| EMS Upgrade, Level 4 | $3,350 | $6,700 | ||
| Explosives | Ignition Bomb | N/A | $5,000 | |
| Remote Bomb | N/A | $7,500 | ||
| Horns | Main article: Los Santos Customs/Horns | - | - | |
| Lights | Headlights | Stock Lights | $100 | $200 |
| Xenon Lights | $300 | $3,000 | ||
| Neon Kits | Main article: Los Santos Customs/Lights | - | - | |
| Loss/Theft Prevention | Tracker | N/A | $2,000 | |
| Full Coverage | N/A | $1,250 | ||
| Plates | Blue on White 1 | $50 | $200 | |
| Blue on White 2 | $50 | $200 | ||
| Blue on White 3 | $50 | $200 | ||
| Yellow on Blue | $75 | $300 | ||
| Yellow on Black | $150 | $600 | ||
| Respray | Main article: Los Santos Customs/Respray Colors | - | - | |
| Sell | Sell Vehicle | N/A | $1,000 | |
| Suspension | Stock Suspension | $100 | $200 | |
| Lowered Suspension | $500 | $1,000 | ||
| Street Suspension | $1,000 | $2,000 | ||
| Sport Suspension | $1,700 | $3,400 | ||
| Competition Suspension | $2,200 | $4,400 | ||
| Transmission | Stock Transmission | $100 | $200 | |
| Street Transmission | $2,950 | $5,900 | ||
| Sports Transmission | $3,250 | $6,500 | ||
| Race Transmission | $4,000 | $8,000 | ||
| Turbo | None | $500 | $1,000 | |
| Turbo Tuning | $2,500 | $30,000 | ||
| Wheels | Main article: Los Santos Customs/Wheels | - | - | |
| Windows | None | $100 | $500 | |
| Light Smoke | $200 | $1,500 | ||
| Dark Smoke | $450 | $3,500 | ||
| Limo | $700 | $5,000 | ||
Image Gallery
")
")
")
")
")
Special Variants
Grand Theft Auto IV and Grand Theft Auto V
In both games, the Stratum can spawn as one of four variants, with some variants featuring unique modifications that cannot be applied at Los Santos Customs in GTA V. These variants are as follows:
- Stock variant. Completely stock with the sun roof closed.
- Roof rack variant. Has roof racks and an open sun roof.
- Front bumper variant. Has a custom front bumper and a closed sun roof.
- Twin Turbo variant. This variant features a roof spoiler, a "Twin Turbo" badge on the back, and an open sun roof. This variant of the Stratum seems to be rarer than the other three.
")
Prominent Appearances in Missions
Grand Theft Auto: San Andreas
- Puncture Wounds - CJ has to burst the tires of the Stratum driven by a woman, toward the countryside, with one of three spike strips available, as CJ and Cesar need a Stratum to complete Wang Cars' list.
Notable Owners
Grand Theft Auto: San Andreas
Locations
Grand Theft Auto: San Andreas
- Spawns in the Wang Cars showroom in San Fierro after completing Puncture Wounds.
- Commonly spawns in and around San Fierro Triads territory in Chinatown and Calton Heights, San Fierro.
- Spawns near the Four Dragons Casino in Las Venturas.
Grand Theft Auto IV
- Spawns all around Broker, South Bohan as well as in Easton and The Triangle in Algonquin.
- Spawns in traffic in multiplayer modes in GTA IV, but is unavailable in counterparts in The Lost and Damned and The Ballad of Gay Tony.
Grand Theft Auto V
- On Nowhere Road in Sandy Shores, Blaine County.
- Seen commonly around Sandy Shores and the Grand Senora Desert.
- Sometimes seen around Vinewood Hills.
The Stratum is part of two vehiclemodelsets, "CARS_STATION_WAGON" and "CARS_TOURIST". The first set of cars is exclusive to the Stratum, Regina and Ingot. It isn't very common, but does appear in specific locations which guarantees a 1/3 chance of the Stratum spawning. The Tourist selection of cars is a collection of several low-medium end cars such as the BeeJay XL and Camper, which spawn in specific "tourist" locations.
- May be seen parked outside the Paleto Forest Sawmill between 11:00 am and 18:00 pm (marker)[1].
- May be seen parked at the end of the dirt road at the Sonar Collections Dock at Paleto Cove, between 07:00 am and 18:00 pm (marker)[2].
- May be seen driving south out of the 24/7 parking lot in Chumash, between 07:00 am and 15:00 pm (marker)[3].
- May be seen parked at a lookout point on Route 68 over the Lago Zancudo between 11:00 am and 18:00 pm (marker)[4].
- May be seen parked at the side of the road on Route 68, opposite the Buen Vino Road intersection looking out onto Lago Zancudo between 15:00 pm and 18:00 pm (marker)[5].
- May be seen parked at the side of the road on Route 68 just west of the Zancudo Road intersection near the bridge between 11:00 am and 15:00 pm (marker)[6].
- May be seen driving south along a dirt road in Harmony just off Route 68, before turning east and parking outside a blue wooden house, west of the Route 68 24/7 store, between 16:00 pm and 20:00 pm (marker)[7].
- May be seen driving out of the Harmony Plaza shopping mall in Harmony, west onto Route 68 between 07:00 am and 11:00 am (marker)[8].
Rewards
Grand Theft Auto IV
- In GTA IV, after completing Stevie's text message car thefts, the Stratum may be sold in his garage for $1,800.
Grand Theft Auto Online
- The Stratum sells for $1,000 at Los Santos Customs.
Trivia
General
- The Stratum plays the following radio stations by default when entered:
- GTA San Andreas: Bounce FM or SF-UR if you steal it from a Triad member.
- GTA IV: Integrity 2.0, WKTT Radio or PLR.
- Episodes from Liberty City: Integrity 2.0 or WKTT Radio.
- GTA V: Lowdown FM or Space 103.2.
Grand Theft Auto: San Andreas
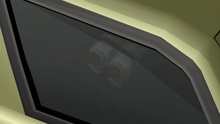
- In the beta version of GTA San Andreas, the Stratum had an emblem on the hood.[9]
- In GTA San Andreas, it is one of the gang cars used by the San Fierro Triads, the other two being the Elegy and the Sultan; it heavily increases CJ's sex appeal.
Grand Theft Auto IV
- The Stratum's front turning lights will not light up. However, only the light reflection on the ground is visible. This is most likely a minor cosmetic glitch.
Glitches
Grand Theft Auto: San Andreas
- If the player fits an X-Flow front bumper to it, it will show a mirrored license plate without the registration number.
References
- ↑ Ymap:
WORLD_VEHICLE_EMPTY: CARS_STATION_WAGON: 11:00 - 18:00

X:-860.2646 Y:5415.543 Z:34.07481
- ↑ Ymap:
WORLD_VEHICLE_EMPTY: CARS_STATION_WAGON: 07:00 - 18:00

X:-1576.564 Y:5169.184 Z:18.56492
- ↑ Ymap:
WORLD_VEHICLE_DRIVE_PASSENGERS: CARS_STATION_WAGON: 07:00 - 15:00

X:-3053.846 Y:602.632 Z:6.292069
- ↑ Ymap:
WORLD_VEHICLE_EMPTY: CARS_STATION_WAGON: 11:00 - 18:00

X:-2223.854 Y:2310.412 Z:31.47279
- ↑ Ymap:
WORLD_VEHICLE_EMPTY: CARS_STATION_WAGON: 15:00 - 18:00

X:-1689.17 Y:2448.914 Z:29.05935
- ↑ Ymap:
WORLD_VEHICLE_EMPTY: CARS_STATION_WAGON: 11:00 - 15:00

X:-1419.751 Y:2427.055 Z:26.46448
- ↑ Ymap:
WORLD_VEHICLE_DRIVE_SOLO: CARS_STATION_WAGON: 16:00 - 20:00

X:424.2781 Y:2653.066 Z:42.91031
- ↑ Ymap:
WORLD_VEHICLE_DRIVE_SOLO: CARS_STATION_WAGON: 07:00 - 11:00

X:591.2456 Y:2720.973 Z:40.97786
- ↑ Beta Stratum