No edit summary |
|||
| (36 intermediate revisions by 24 users not shown) | |||
| Line 1: | Line 1: | ||
{{Infobox mission |
{{Infobox mission |
||
| + | |sidemission = y |
||
|name = Stevie's Car Thefts |
|name = Stevie's Car Thefts |
||
|image = SteviesCarThefts-GTAIV-GarageEntrance.jpg |
|image = SteviesCarThefts-GTAIV-GarageEntrance.jpg |
||
| − | |caption = |
||
|game = IV |
|game = IV |
||
|for = [[Stevie]] |
|for = [[Stevie]] |
||
| − | |location = |
+ | |location = [[S&M Auto Sales]] |
| − | |target = |
+ | |target = Random Vehicles |
| + | |fail = [[Wasted]]<br>[[Busted]]<br>Car Destroyed |
||
| − | |fail = |
||
| + | |unlocks = [[Achievements and Trophies (GTA IV)|''You Got the Message'']] (20{{G}}/[[image:Trophy_Bronze.png|16px]]) |
||
| − | |reward = |
||
| ⚫ | |||
| − | |unlocks = |
||
| + | |reward = [[Money|$]]398,970 (see table for individual rewards) |
||
| ⚫ | |||
| ⚫ | |||
| − | }} |
||
| ⚫ | |||
| ⚫ | |||
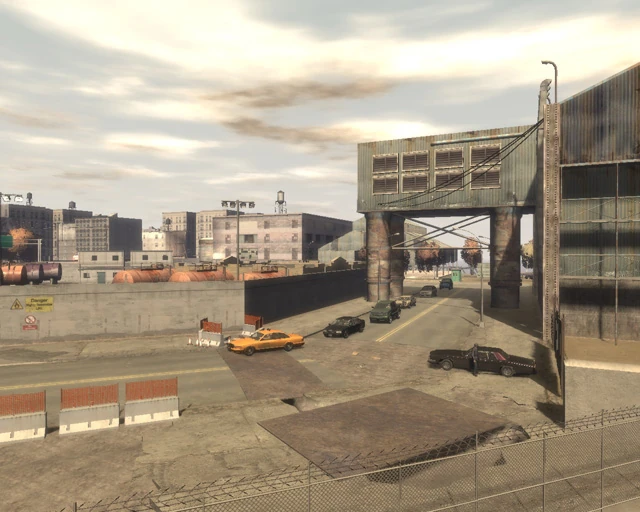
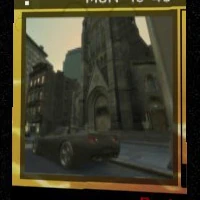
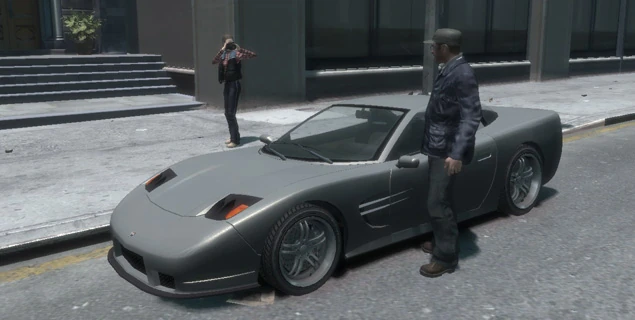
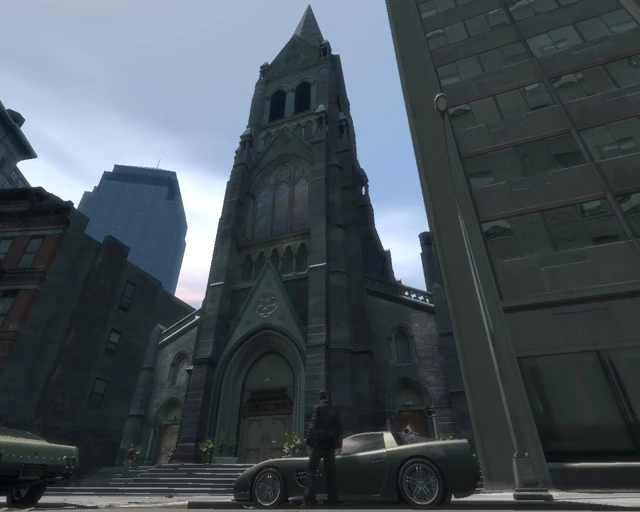
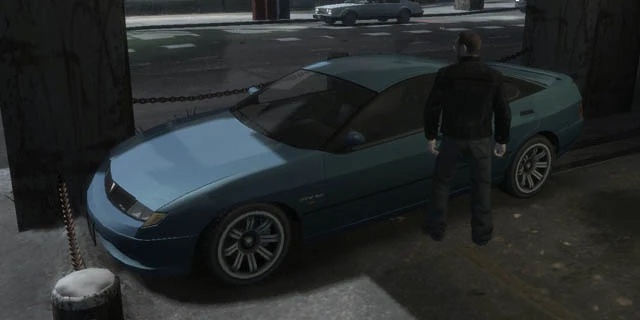
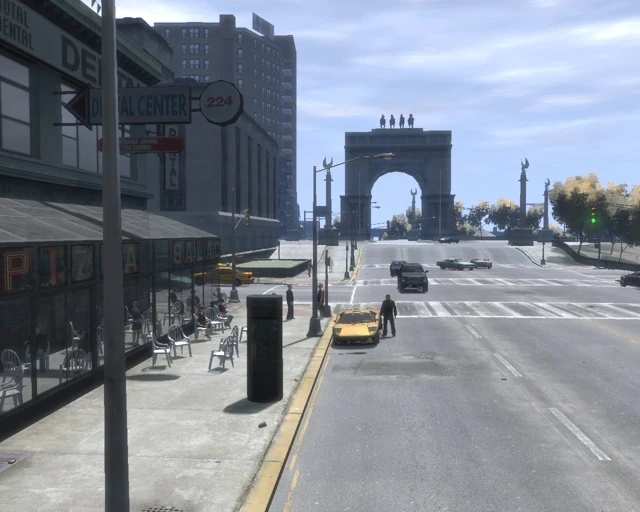
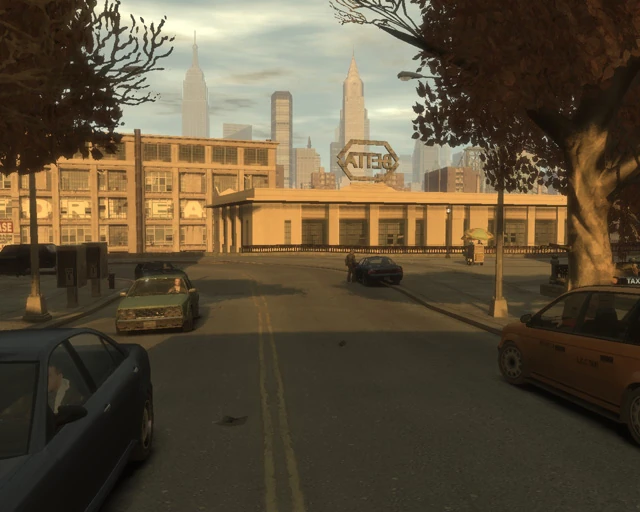
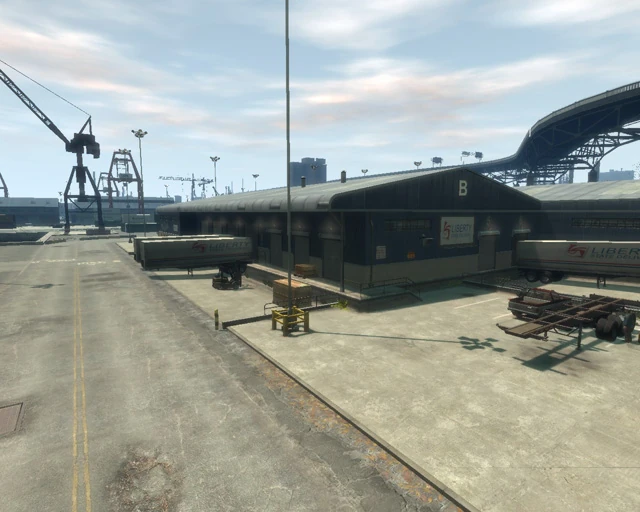
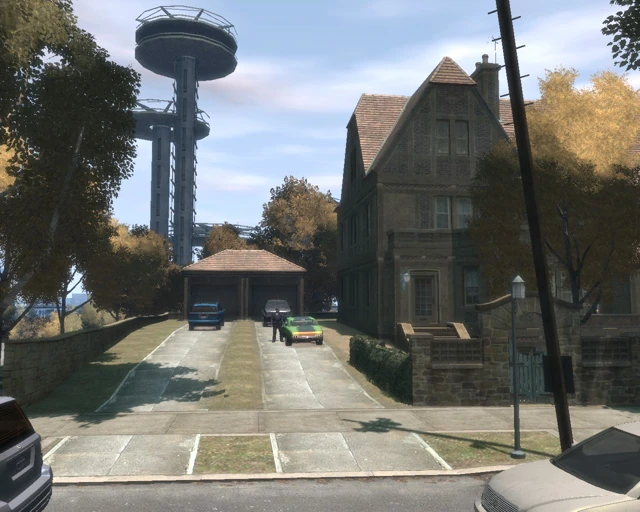
| + | Stevie's Car Thefts are available once the player unlocks the [[Alderney]] [[Alderney City Safehouse|safehouse]] and completes the missions "[[Smackdown (GTA IV)|Smackdown]]" for [[Derrick McReary]] and "[[No. 1]]" for [[Brucie Kibbutz]]. The latter will call [[Niko Bellic]] regarding working with his friend, a car dealer named [[Stevie]]. Shortly afterwards, Stevie will begin sending Niko text messages, asking him to deliver thirty different vehicles - scattered all across [[Liberty City (HD Universe)|Liberty City]] and [[Alderney]] - to [[S&M Auto Sales]], Stevie's garage in [[Chase Point]], [[Bohan]]. |
||
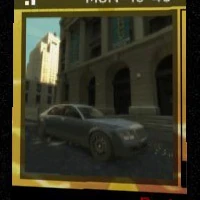
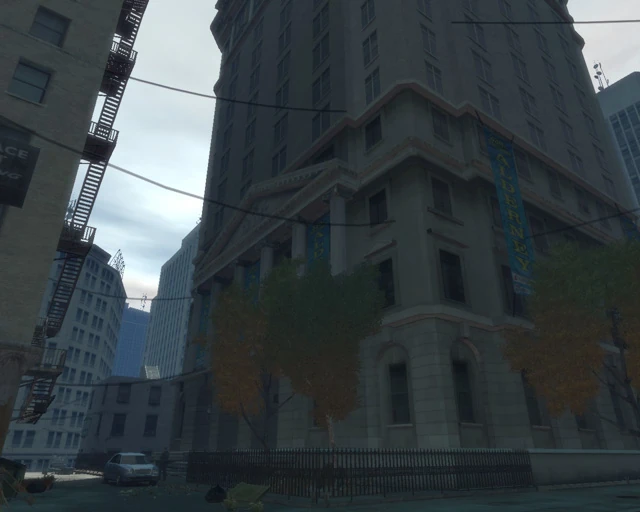
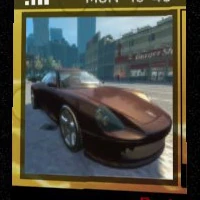
| ⚫ | In his text messages, Stevie provides some hints of the vehicle's location, with the information in the text, and the image attached is the exact view of where the vehicle is parked at. The range of searching is usually less than a block. If the player finds and get in the right vehicle, the game shows a message saying, "You've found the vehicle Stevie is looking for." |
||
| ⚫ | |||
| − | ===Missions Unlock=== |
||
| − | Stevie's Car Thefts are available after the player has opened up the [[Alderney City Safehouse|Alderney Safehouse]] and completed [[Smackdown (GTA IV)|Smackdown]] and [[No. 1]]. [[Niko Bellic]] will first receive a call from Brucie and, shortly afterwards, a text message from [[Brucie Kibbutz|Brucie's]] friend [[Stevie]]. He needs some cars (30 total) that [[Niko Bellic]] will need to find across [[Liberty City in GTA IV|Liberty City]] and deliver to [[S&M Auto Sales]]. |
||
| + | If the delivered vehicles are in perfect condition, the player will receive the maximum price. Minor damages such barely noticeable scratches will not cause a decrease in the vehicle's price. Serious damages such as broken headlights and deformations will significantly reduce the price, however. |
||
| − | ===Search for Vehicle=== |
||
| − | This is a set of missions about searching specific vehicles and its locations. You don't need to remember what the vehicles looks like, just look for the locations of the cars. |
||
| ⚫ | |||
| ⚫ | |||
| ⚫ | |||
| − | If the player finds and get in the right vehicle, the game shows a message saying, "You've found the vehicle Stevie is looking for." The player then needs to drive the car to Stevie's [[S&M Auto Sales|garage]] in [[Bohan]]; no message is given about this destination in-game but the garage appears on the map so it may be manually entered into the GPS. |
||
| ⚫ | |||
| − | ===Comparing with Brucie's Exotic Exports=== |
||
| − | It is similar to Brucie's [[Exotic Exports]] (email cars), except the cars are always parked and are not indicated on the map or guarded by the owner. In addition, Stevie pays much more for these cars when they're in good condition than Brucie does. Just like stealing any car, if [[Liberty City Police Department (HD Universe)|police]] witness a car theft, the player receives a one star [[Wanted Level in GTA IV|wanted level]]. Occasionally, the cars have alarms. |
||
| − | |||
| − | ===Price & Condition of the vehicle=== |
||
| − | Even though you have to smash a window to steal a car, all vehicles still are in perfect condition, so it is not necessary to visit a [[Pay 'n' Spray]] if driven carefully enough. Even with some additional damages, if they are minor (barely noticeable scratches, etc.), the vehicle is considered as in perfect condition by the garage, so you will receive the maximum price. Only serious damages (broken headlights, deformations, etc) will significantly reduce your prize, so if you don't want to lose some time it's not necessary to repair the vehicle for every single scratch. Strangely, minor scratches will increase the value. |
||
| − | |||
| − | The condition of the vehicle determines how much money the player receives. Taking the car to a Pay 'n' Spray helps restore its value if the car is damaged. However, as there are no Pay 'n' Sprays in [[Bohan]], it is difficult to reach the garage without damage, unless you are very careful. |
||
| − | |||
| − | ===Respawn of the vehicles=== |
||
| ⚫ | The player can |
||
| − | |||
| − | The only incentive for storing the vehicles is their unique body colors, which are otherwise unavailable in other parts of the game; the vehicles are also otherwise similar in the range of accessories it may include; as is the case with the [[Rancher]], [[Dukes (car)|Dukes]] and the [[DF8-90]]. Interestingly, the cars will not lose their unique colors even after resprays at [[Pay 'n' Spray]], but motorbikes do lose their colors, which Stevie's garage might reject, in which case you'll have to retrieve another copy. Therefore, it is recommended that you carefully drive these bikes straight to the garage. |
||
| − | |||
| − | ===Afterward=== |
||
| ⚫ | Once all |
||
| − | |||
| ⚫ | |||
==Alternative Walkthrough== |
==Alternative Walkthrough== |
||
| − | * |
+ | *Players can save the vehicle and game at the [[South Bohan Safehouse]] which is about one block away from [[S&M Auto Sales]]. If the player then loads their latest saved game they'll have a repaired or new version of the car ready to be delivered and a much smaller distance to traverse. |
| − | * PC users could use a compatible controller with triggers or a steering wheel/pedals, which gives the player more precise and variable control of the vehicle, which just using a keyboard only allows full speed and full steering, making the player have less control and increasing the risk of damage. Another way of repairing the vehicle is by parking the requested car in a safehouse parking space, then driving or running a block or two before returning. |
+ | *[[Personal Computer|PC]] users could use a compatible controller with triggers or a steering wheel/pedals, which gives the player more precise and variable control of the vehicle, which just using a keyboard only allows full speed and full steering, making the player have less control and increasing the risk of damage. Another way of repairing the vehicle is by parking the requested car in a safehouse parking space, then driving or running a block or two before returning. |
| − | * |
+ | *If a player wishes to complete these thefts quickly, it is recommended either that they save the game repeatedly at the nearby [[safehouse]] in [[Bohan]], or repeatedly use a [[Pay 'n' Spray]] until they receive a text. These methods advance the time, which means Stevie will send a text in a matter of minutes after delivering a vehicle, instead of hours. The player can view the amount of vehicles stolen under "Cars Sold to Stevie" in the Score section of the Stats in the [[Pause Menu|pause menu]]. |
| + | *As most of these vehicles are required to be stolen, smashing the window to hijack the car does '''not''' count as damage. Therefore, the player can simply steal the car and take to the marked garage directly. |
||
| − | |||
| ⚫ | |||
| ⚫ | |||
| − | {| width= |
+ | {| width="100%" style="font-size: 75%; background-color:#888888;" |
|- style="background:#444444" |
|- style="background:#444444" |
||
| − | !rowspan=2 width=100|Vehicle |
+ | ! rowspan="2" width="100" |Vehicle |
| − | !rowspan=2 width=260px|Image |
+ | ! rowspan="2" width="260px" |Image |
| − | !colspan=2|Location |
+ | ! colspan="2" |Location |
| + | ! rowspan="2" |Max value |
||
| − | !rowspan=2|Highest value<ref name="Brady">BradyGames' Grand Theft Auto IV Signature Series Guide</ref> |
||
|- style="background:#444444" |
|- style="background:#444444" |
||
| − | !width= |
+ | ! width="150" |Keywords of the hints |
| − | !Location address |
+ | ! width="100" |Location address |
| − | |- valign=top style="background:#222222" |
+ | |- valign="top" style="background:#222222" |
| − | |align=center|[[File:SteviesCarThefts-GTAIV-BansheePhoto.jpg|100px]][[Banshee]] |
+ | | align="center" |[[File:SteviesCarThefts-GTAIV-BansheePhoto.jpg|100px]][[Banshee]] |
| [[File:SteviesCarThefts-GTAIV-Banshee.jpg|160px]][[File:SteviesCarThefts-GTAIV-BansheeLocation.jpg|100px]] |
| [[File:SteviesCarThefts-GTAIV-Banshee.jpg|160px]][[File:SteviesCarThefts-GTAIV-BansheeLocation.jpg|100px]] |
||
| |
| |
||
{| |
{| |
||
| − | |valign=top|District:|| |
+ | | valign="top" |'''District''':|| [[Middle Park West]] |
|- |
|- |
||
| − | |valign=top|Street:|| [[Galveston Avenue]] |
+ | | valign="top" |'''Street''':|| [[Galveston Avenue]] |
|- |
|- |
||
| − | |valign=top|Landmark:|| |
+ | | valign="top" |'''Landmark''':|| [[Randolf Art Center]] |
|- |
|- |
||
| − | |valign=top|Pic:|| [[Randolf Art Center]] |
+ | | valign="top" |'''Pic''':|| [[Randolf Art Center]] |
|} |
|} |
||
| Across the road from [[Randolf Art Center]], [[Galveston Avenue]], [[Middle Park West]], [[Algonquin]]. |
| Across the road from [[Randolf Art Center]], [[Galveston Avenue]], [[Middle Park West]], [[Algonquin]]. |
||
| $26,400 |
| $26,400 |
||
| − | |- valign=top |
+ | |- valign="top" style="background:#222222" |
| − | |align=center|[[File:SteviesCarThefts-GTAIV-BobcatPhoto.jpg|100px]][[Bobcat]] |
+ | | align="center" |[[File:SteviesCarThefts-GTAIV-BobcatPhoto.jpg|100px]][[Bobcat]] |
| [[File:SteviesCarThefts-GTAIV-Bobcat.jpg|160px]][[File:SteviesCarThefts-GTAIV-BobcatLocation.jpg|100px]] |
| [[File:SteviesCarThefts-GTAIV-Bobcat.jpg|160px]][[File:SteviesCarThefts-GTAIV-BobcatLocation.jpg|100px]] |
||
| |
| |
||
{| |
{| |
||
| − | |valign=top|District:|| |
+ | | valign="top" |'''District''':|| [[Francis International Airport, Dukes]] |
|- |
|- |
||
| − | |valign=top|Street:|| |
+ | | valign="top" |'''Street''':|| [[Algonquin-Dukes Expressway]] |
|- |
|- |
||
| − | |valign=top|Landmark:|| |
+ | | valign="top" |'''Landmark''':|| Top floor of the [[Francis International Airport, Dukes|airport]] car park |
|- |
|- |
||
| − | |valign=top|Pic:|| a large satellite dish |
+ | | valign="top" |'''Pic''':|| a large satellite dish |
|} |
|} |
||
| Rooftop of the multistory parking lot, [[Francis International Airport, Dukes|Francis International Airport]], [[Dukes]]. |
| Rooftop of the multistory parking lot, [[Francis International Airport, Dukes|Francis International Airport]], [[Dukes]]. |
||
| $8,250 |
| $8,250 |
||
| − | |- valign=top style="background:#222222" |
+ | |- valign="top" style="background:#222222" |
| − | |align=center|[[File:SteviesCarThefts-GTAIV-BuccaneerPhoto.jpg|100px]][[Buccaneer]] |
+ | | align="center" |[[File:SteviesCarThefts-GTAIV-BuccaneerPhoto.jpg|100px]][[Buccaneer]] |
| [[File:SteviesCarThefts-GTAIV-Buccaneer.jpg|160px]][[File:SteviesCarThefts-GTAIV-BuccaneerLocation.jpg|100px]] |
| [[File:SteviesCarThefts-GTAIV-Buccaneer.jpg|160px]][[File:SteviesCarThefts-GTAIV-BuccaneerLocation.jpg|100px]] |
||
| |
| |
||
{| |
{| |
||
| − | |valign=top|District:|| [[Industrial |
+ | | valign="top" |'''District''':|| [[Industrial (GTA IV)|Industrial District]] |
|- |
|- |
||
| − | |valign=top|Street:|| |
+ | | valign="top" |'''Street''':|| [[Lompoc Avenue]] |
|- |
|- |
||
| − | |valign=top|Landmark:|| |
+ | | valign="top" |'''Landmark''':|| |
|- |
|- |
||
| − | |valign=top|Pic:|| a building with two large pillars below |
+ | | valign="top" |'''Pic''':|| a building with two large pillars below |
|} |
|} |
||
| − | | Near the warehouse off [[Lompoc Avenue]] (the one from [[Hostile Negotiation]]), [[Industrial |
+ | | Near the [[Lompoc Avenue Warehouse|warehouse]] off [[Lompoc Avenue]] (the one from [[Hostile Negotiation]]), [[Industrial (GTA IV)|Industrial]]. |
| $5,940 |
| $5,940 |
||
| − | |- valign=top style="background:#222222" |
+ | |- valign="top" style="background:#222222" |
| − | |align=center|[[File:SteviesCarThefts-GTAIV-CavalcadePhoto.jpg|100px]][[Cavalcade]] |
+ | | align="center" |[[File:SteviesCarThefts-GTAIV-CavalcadePhoto.jpg|100px]][[Cavalcade]] |
| [[File:SteviesCarThefts-GTAIV-Cavalcade.jpg|160px]][[File:SteviesCarThefts-GTAIV-CavalcadeLocation.jpg|100px]] |
| [[File:SteviesCarThefts-GTAIV-Cavalcade.jpg|160px]][[File:SteviesCarThefts-GTAIV-CavalcadeLocation.jpg|100px]] |
||
| |
| |
||
{| |
{| |
||
| − | |valign=top|District:|| [[Leftwood]] |
+ | | valign="top" |'''District''':|| [[Leftwood]] |
|- |
|- |
||
| − | |valign=top|Street:|| |
+ | | valign="top" |'''Street''':|| [[Manzano Road]] |
|- |
|- |
||
| − | |valign=top|Landmark:|| |
+ | | valign="top" |'''Landmark''':|| [[Westdyke Memorial Hospital]] |
|- |
|- |
||
| − | |valign=top|Pic:|| (The red neon sign of the hospital) |
+ | | valign="top" |'''Pic''':|| (The red neon sign of the hospital) |
|} |
|} |
||
| − | | In a driveway north of the corner where [[Long John Ave]] meets [[Manzano Road]] (just north of the [[Westdyke Memorial Hospital]]), [[Leftwood]], [[Alderney]]. |
+ | | In a driveway north of the corner where [[Long John Ave]]nue meets [[Manzano Road]] (just north of the [[Westdyke Memorial Hospital]]), [[Leftwood]], [[Alderney]]. |
| $23,100 |
| $23,100 |
||
| − | |- valign=top style="background:#222222" |
+ | |- valign="top" style="background:#222222" |
| − | |align=center|[[File:SteviesCarThefts-GTAIV-CognoscentiPhoto.jpg|100px]][[Cognoscenti]] |
+ | | align="center" |[[File:SteviesCarThefts-GTAIV-CognoscentiPhoto.jpg|100px]][[Cognoscenti]] |
| [[File:SteviesCarThefts-GTAIV-Cognoscenti.jpg|160px]][[File:SteviesCarThefts-GTAIV-CognoscentiLocation.jpg|100px]] |
| [[File:SteviesCarThefts-GTAIV-Cognoscenti.jpg|160px]][[File:SteviesCarThefts-GTAIV-CognoscentiLocation.jpg|100px]] |
||
| |
| |
||
{| |
{| |
||
| − | |valign=top|District:|| [[Alderney City]] |
+ | | valign="top" |'''District''':|| [[Alderney City]] |
|- |
|- |
||
| − | |valign=top|Street:|| |
+ | | valign="top" |'''Street''':|| [[Lyndon Avenue]] |
|- |
|- |
||
| − | |valign=top|Landmark:|| n/a |
+ | | valign="top" |'''Landmark''':|| n/a |
|- |
|- |
||
| − | |valign=top|Pic:|| [[Alderney Museum]] |
+ | | valign="top" |'''Pic''':|| [[Alderney Museum]] |
|} |
|} |
||
| In a corner alley where [[Boyden Ave]]nue meets the east end of [[Lyndon Avenue]], [[Alderney City]], Alderney. |
| In a corner alley where [[Boyden Ave]]nue meets the east end of [[Lyndon Avenue]], [[Alderney City]], Alderney. |
||
| $29,700 |
| $29,700 |
||
| − | |- valign=top style="background:#222222" |
+ | |- valign="top" style="background:#222222" |
| − | |align=center|[[File:SteviesCarThefts-GTAIV-CometPhoto.jpg|100px]][[Comet]] |
+ | | align="center" |[[File:SteviesCarThefts-GTAIV-CometPhoto.jpg|100px]][[Comet]] |
| [[File:SteviesCarThefts-GTAIV-Comet.jpg|160px]][[File:SteviesCarThefts-GTAIV-CometLocation.jpg|100px]] |
| [[File:SteviesCarThefts-GTAIV-Comet.jpg|160px]][[File:SteviesCarThefts-GTAIV-CometLocation.jpg|100px]] |
||
| |
| |
||
{| |
{| |
||
| − | |valign=top|District:|| |
+ | | valign="top" |'''District''':|| [[Westminster]] |
|- |
|- |
||
| − | |valign=top|Street:|| n/a |
+ | | valign="top" |'''Street''':|| n/a |
|- |
|- |
||
| − | |valign=top|Landmark:|| near the Swingers golf club |
+ | | valign="top" |'''Landmark''':|| near the [[Golden Pier Swingers Golf Club|Swingers golf club]] |
|- |
|- |
||
| − | |valign=top|Pic:|| [[Burger Shot]] and the large parking lot at front |
+ | | valign="top" |'''Pic''':|| [[Burger Shot]] and the large parking lot at front |
|} |
|} |
||
| [[Golden Pier]] parking lot, [[Westminster]], Algonquin. |
| [[Golden Pier]] parking lot, [[Westminster]], Algonquin. |
||
| $19,800 |
| $19,800 |
||
| − | |- valign=top style="background:#222222" |
+ | |- valign="top" style="background:#222222" |
| − | |align=center|[[File:SteviesCarThefts-GTAIV-ContenderPhoto.jpg|100px]][[Contender]] |
+ | | align="center" |[[File:SteviesCarThefts-GTAIV-ContenderPhoto.jpg|100px]][[Contender]] |
| [[File:SteviesCarThefts-GTAIV-Contender.jpg|160px]][[File:SteviesCarThefts-GTAIV-ContenderLocation.jpg|100px]] |
| [[File:SteviesCarThefts-GTAIV-Contender.jpg|160px]][[File:SteviesCarThefts-GTAIV-ContenderLocation.jpg|100px]] |
||
| |
| |
||
{| |
{| |
||
| − | |valign=top|District:|| [[BOABO |
+ | | valign="top" |'''District''':|| [[BOABO]] |
|- |
|- |
||
| − | |valign=top|Street:|| |
+ | | valign="top" |'''Street''':|| [[Creek Street]] |
|- |
|- |
||
| − | |valign=top|Landmark:|| [[Twitchin's Sugar Factory|Twitchin's]] |
+ | | valign="top" |'''Landmark''':|| [[Twitchin's Sugar Factory|Twitchin's]] |
|- |
|- |
||
| − | |valign=top|Pic:|| part of the [[Twitchin's Sugar Factory]]'s building |
+ | | valign="top" |'''Pic''':|| part of the [[Twitchin's Sugar Factory]]'s building |
|} |
|} |
||
| − | | In the [[Twitchin's Sugar Factory|Twitchin's Sugar |
+ | | In the [[Twitchin's Sugar Factory|Twitchin's Sugar Factory compound]], [[Creek Street]], [[BOABO]], [[Broker]]. |
| $8,250 |
| $8,250 |
||
| − | |- valign=top style="background:#222222" |
+ | |- valign="top" style="background:#222222" |
| − | |align=center|[[File:SteviesCarThefts-GTAIV-CoquettePhoto.jpg|100px]][[Coquette]] |
+ | | align="center" |[[File:SteviesCarThefts-GTAIV-CoquettePhoto.jpg|100px]][[Coquette]] |
| [[File:SteviesCarThefts-GTAIV-Coquette.jpg|160px]][[File:SteviesCarThefts-GTAIV-CoquetteLocation.jpg|100px]] |
| [[File:SteviesCarThefts-GTAIV-Coquette.jpg|160px]][[File:SteviesCarThefts-GTAIV-CoquetteLocation.jpg|100px]] |
||
| |
| |
||
{| |
{| |
||
| − | |valign=top|District:|| [[Suffolk]] |
+ | | valign="top" |'''District''':|| [[Suffolk]] |
|- |
|- |
||
| − | |valign=top|Street:|| |
+ | | valign="top" |'''Street''':|| [[Liberty Lane]] |
|- |
|- |
||
| − | |valign=top|Landmark:|| [[Suffolk Church|Suffolk church]] (by "A fuckin' priest") |
+ | | valign="top" |'''Landmark''':|| [[Suffolk Church|Suffolk church]] (by "A fuckin' priest") |
|- |
|- |
||
| − | |valign=top|Pic:|| [[Suffolk Church]] |
+ | | valign="top" |'''Pic''':|| [[Suffolk Church]] |
|} |
|} |
||
| In front of the [[Suffolk Church|Suffolk church]], [[Liberty Lane]], [[Suffolk]], Algonquin. |
| In front of the [[Suffolk Church|Suffolk church]], [[Liberty Lane]], [[Suffolk]], Algonquin. |
||
| $13,530 |
| $13,530 |
||
| − | |- valign=top style="background:#222222" |
+ | |- valign="top" style="background:#222222" |
| − | |align=center|[[File:SteviesCarThefts-GTAIV-DF8-90Photo.jpg|100px]][[DF8-90]] |
+ | | align="center" |[[File:SteviesCarThefts-GTAIV-DF8-90Photo.jpg|100px]][[DF8-90]] |
| [[File:SteviesCarThefts-GTAIV-DF8-90.jpg|160px]][[File:SteviesCarThefts-GTAIV-DF8-90Location.jpg|100px]] |
| [[File:SteviesCarThefts-GTAIV-DF8-90.jpg|160px]][[File:SteviesCarThefts-GTAIV-DF8-90Location.jpg|100px]] |
||
| |
| |
||
{| |
{| |
||
| − | |valign=top|District:|| |
+ | | valign="top" |'''District''':|| [[Hove Beach]] |
|- |
|- |
||
| − | |valign=top|Street:|| |
+ | | valign="top" |'''Street''':|| [[Crockett Avenue]] |
|- |
|- |
||
| − | |valign=top|Landmark:|| car park under the [[Hove Beach LTA|station]] by the [[Funland|amusement park]] |
+ | | valign="top" |'''Landmark''':|| car park under the [[Hove Beach LTA|station]] by the [[Funland|amusement park]] |
|- |
|- |
||
| − | |valign=top|Pic:|| under a building with amusement park as background |
+ | | valign="top" |'''Pic''':|| under a [[Hove Beach LTA|building]] with [[Funland|amusement park]] as background |
|} |
|} |
||
| − | | Underneath [[Hove Beach LTA|Hove Beach station]], [[Crockett Avenue]], [[Hove Beach]], Broker. |
+ | | Underneath [[Hove Beach LTA|Hove Beach station]], [[Crockett Avenue]], [[Hove Beach]], [[Broker]]. |
| $5,940 |
| $5,940 |
||
| − | |- valign=top style="background:#222222" |
+ | |- valign="top" style="background:#222222" |
| − | |align=center|[[File:SteviesCarThefts-GTAIV-DilettantePhoto.jpg|100px]][[Dilettante]] |
+ | | align="center" |[[File:SteviesCarThefts-GTAIV-DilettantePhoto.jpg|100px]][[Dilettante]] |
| [[File:SteviesCarThefts-GTAIV-Dilettante.jpg|160px]][[File:SteviesCarThefts-GTAIV-DilettanteLocation.jpg|100px]] |
| [[File:SteviesCarThefts-GTAIV-Dilettante.jpg|160px]][[File:SteviesCarThefts-GTAIV-DilettanteLocation.jpg|100px]] |
||
| |
| |
||
{| |
{| |
||
| − | |valign=top|District:|| [[Willis]] |
+ | | valign="top" |'''District''':|| [[Willis]] |
|- |
|- |
||
| − | |valign=top|Street:|| |
+ | | valign="top" |'''Street''':|| [[Carrollton Street]] and [[Saratoga Avenue]] |
|- |
|- |
||
| − | |valign=top|Landmark:|| in front of the |
+ | | valign="top" |'''Landmark''':|| in front of the store |
|- |
|- |
||
| − | |valign=top|Pic:|| [[Big Willis Mall]] at the back |
+ | | valign="top" |'''Pic''':|| [[Big Willis Mall]] at the back |
|} |
|} |
||
| − | | Across the street from [[Big Willis Mall]], [[Carrollton Street]] and [[Saratoga Avenue]], [[Willis]], Dukes. |
+ | | Across the street from [[Big Willis Mall]], [[Carrollton Street]] and [[Saratoga Avenue]], [[Willis]], Dukes. |
| − | Actually it is not in front of the Canyon Megaplex. |
||
| $6,600 |
| $6,600 |
||
| − | |- valign=top style="background:#222222" |
+ | |- valign="top" style="background:#222222" |
| − | |align=center|[[File:SteviesCarThefts-GTAIV-DukesPhoto.jpg|100px]][[Dukes (car)|Dukes]] |
+ | | align="center" |[[File:SteviesCarThefts-GTAIV-DukesPhoto.jpg|100px]][[Dukes (car)|Dukes]] |
| [[File:SteviesCarThefts-GTAIV-Dukes.jpg|160px]][[File:SteviesCarThefts-GTAIV-DukesLocation.jpg|100px]] |
| [[File:SteviesCarThefts-GTAIV-Dukes.jpg|160px]][[File:SteviesCarThefts-GTAIV-DukesLocation.jpg|100px]] |
||
| |
| |
||
{| |
{| |
||
| − | |valign=top|District:|| [[East Holland]] |
+ | | valign="top" |'''District''':|| [[East Holland]] |
|- |
|- |
||
| − | |valign=top|Street:|| [[Vauxite St]]reet |
+ | | valign="top" |'''Street''':|| [[Vauxite St]]reet |
|- |
|- |
||
| − | |valign=top|Landmark:|| n/a |
+ | | valign="top" |'''Landmark''':|| n/a |
|- |
|- |
||
| − | |valign=top|Pic:|| [[Modo]] |
+ | | valign="top" |'''Pic''':|| [[Modo]] |
|} |
|} |
||
| − | | [[Vauxite St]]reet (across the intersection from [[Modo]]), [[East Holland]], Algonquin. |
+ | | [[Vauxite St]]reet (across the intersection from [[Modo]]), [[East Holland]], [[Algonquin]]. |
| $7,260 |
| $7,260 |
||
| − | |- valign=top style="background:#222222" |
+ | |- valign="top" style="background:#222222" |
| − | |align=center|[[File:SteviesCarThefts-GTAIV-FaggioPhoto.jpg|100px]][[Faggio]] |
+ | | align="center" |[[File:SteviesCarThefts-GTAIV-FaggioPhoto.jpg|100px]][[Faggio Sport|Faggio]] |
| [[File:SteviesCarThefts-GTAIV-Faggio.jpg|160px]][[File:SteviesCarThefts-GTAIV-FaggioLocation.jpg|100px]] |
| [[File:SteviesCarThefts-GTAIV-Faggio.jpg|160px]][[File:SteviesCarThefts-GTAIV-FaggioLocation.jpg|100px]] |
||
| |
| |
||
{| |
{| |
||
| − | |valign=top|District:|| [[Chinatown, Algonquin|Chinatown]] |
+ | | valign="top" |'''District''':|| [[Chinatown, Algonquin|Chinatown]] |
|- |
|- |
||
| − | |valign=top|Street:|| [[Diamond Street]] |
+ | | valign="top" |'''Street''':|| [[Diamond Street]] |
|- |
|- |
||
| − | |valign=top|Landmark:|| [[Dragon Heart Plaza]] |
+ | | valign="top" |'''Landmark''':|| [[Dragon Heart Plaza]] |
|- |
|- |
||
| − | |valign=top|Pic:|| [[Dragon Heart Plaza]] |
+ | | valign="top" |'''Pic''':|| [[Dragon Heart Plaza]] |
|} |
|} |
||
| − | | Across the street from [[Dragon Heart Plaza]], [[Diamond Street]], [[Chinatown, Algonquin |
+ | | Across the street from [[Dragon Heart Plaza]], [[Diamond Street]], [[Chinatown, Algonquin]]. |
| $2,310 |
| $2,310 |
||
| − | |- valign=top style="background:#222222" |
+ | |- valign="top" style="background:#222222" |
| − | |align=center|[[File:SteviesCarThefts-GTAIV-FreewayPhoto.jpg|100px]][[Freeway]] |
+ | | align="center" |[[File:SteviesCarThefts-GTAIV-FreewayPhoto.jpg|100px]][[Freeway]] |
| [[File:SteviesCarThefts-GTAIV-Freeway.jpg|160px]][[File:SteviesCarThefts-GTAIV-FreewayLocation.jpg|100px]] |
| [[File:SteviesCarThefts-GTAIV-Freeway.jpg|160px]][[File:SteviesCarThefts-GTAIV-FreewayLocation.jpg|100px]] |
||
| |
| |
||
{| |
{| |
||
| − | |valign=top|District:|| |
+ | | valign="top" |'''District''':|| [[Willis]] |
|- |
|- |
||
| − | |valign=top|Street:|| |
+ | | valign="top" |'''Street''':|| [[Saratoga Avenue]] |
|- |
|- |
||
| − | |valign=top|Landmark:|| [[Willis Wash and Lube]] |
+ | | valign="top" |'''Landmark''':|| [[Willis Wash and Lube]] |
|- |
|- |
||
| − | |valign=top|Pic:|| [[Willis Wash and Lube]] |
+ | | valign="top" |'''Pic''':|| [[Willis Wash and Lube]] |
|} |
|} |
||
| − | | In front of the [[Willis Wash and Lube]], Saratoga Avenue, [[Willis]], [[Dukes]]. |
+ | | In front of the [[Willis Wash and Lube]], [[Saratoga Avenue]], [[Willis]], [[Dukes]]. |
| $6,600 |
| $6,600 |
||
| − | |- valign=top style="background:#222222" |
+ | |- valign="top" style="background:#222222" |
| − | |align=center|[[File:SteviesCarThefts-GTAIV-HuntleySportPhoto.jpg|100px]][[Huntley Sport]] |
+ | | align="center" |[[File:SteviesCarThefts-GTAIV-HuntleySportPhoto.jpg|100px]][[Huntley Sport]] |
| [[File:SteviesCarThefts-GTAIV-HuntleySport.jpg|160px]][[File:SteviesCarThefts-GTAIV-HuntleySportLocation.jpg|100px]] |
| [[File:SteviesCarThefts-GTAIV-HuntleySport.jpg|160px]][[File:SteviesCarThefts-GTAIV-HuntleySportLocation.jpg|100px]] |
||
| |
| |
||
{| |
{| |
||
| − | |valign=top|District:|| [[Northern Gardens]] |
+ | | valign="top" |'''District''':|| [[Northern Gardens]] |
|- |
|- |
||
| − | |valign=top|Street:|| |
+ | | valign="top" |'''Street''':|| [[Leavenworth Avenue]] |
|- |
|- |
||
| − | |valign=top|Landmark:|| [[Northern Gardens LCPD Station|LCPD station]] |
+ | | valign="top" |'''Landmark''':|| [[Northern Gardens LCPD Station|LCPD station]] |
|- |
|- |
||
| − | |valign=top|Pic:|| parking lot of the [[Northern Gardens LCPD Station]] |
+ | | valign="top" |'''Pic''':|| parking lot of the [[Northern Gardens LCPD Station]] |
|} |
|} |
||
| Next to the [[Northern Gardens LCPD Station]] (attached to the [[Bohan Medical & Dental Center]]), [[Leavenworth Avenue]], [[Northern Gardens]], Bohan. |
| Next to the [[Northern Gardens LCPD Station]] (attached to the [[Bohan Medical & Dental Center]]), [[Leavenworth Avenue]], [[Northern Gardens]], Bohan. |
||
| $13,200 |
| $13,200 |
||
| − | |- valign=top style="background:#222222" |
+ | |- valign="top" style="background:#222222" |
| − | |align=center|[[File:SteviesCarThefts-GTAIV-InfernusPhoto.jpg|100px]][[Infernus]] |
+ | | align="center" |[[File:SteviesCarThefts-GTAIV-InfernusPhoto.jpg|100px]][[Infernus]] |
| [[File:SteviesCarThefts-GTAIV-Infernus.jpg|160px]][[File:SteviesCarThefts-GTAIV-InfernusLocation.jpg|100px]] |
| [[File:SteviesCarThefts-GTAIV-Infernus.jpg|160px]][[File:SteviesCarThefts-GTAIV-InfernusLocation.jpg|100px]] |
||
| |
| |
||
{| |
{| |
||
| − | |valign=top|District:|| |
+ | | valign="top" |'''District''':|| [[Downtown Broker]] |
|- |
|- |
||
| − | |valign=top|Street:|| |
+ | | valign="top" |'''Street''':|| [[Montauk Ave]]nue and [[Earp Street]] |
|- |
|- |
||
| − | |valign=top|Landmark:|| near [[Outlook Park]] |
+ | | valign="top" |'''Landmark''':|| near [[Outlook Park]] |
|- |
|- |
||
| − | |valign=top|Pic:|| the arch of Soldiers Plaza |
+ | | valign="top" |'''Pic''':|| the arch of [[Soldiers Plaza]] |
|} |
|} |
||
| − | | On the corner of [[Montauk Ave]] and [[Earp Street]] (east), [[Downtown Broker]]. |
+ | | On the corner of [[Montauk Ave]]nue and [[Earp Street]] (east), [[Downtown Broker]]. |
| $33,000 |
| $33,000 |
||
| − | |- valign=top style="background:#222222" |
+ | |- valign="top" style="background:#222222" |
| − | |align=center|[[File:SteviesCarThefts-GTAIV-IntruderPhoto.jpg|100px]][[Intruder]] |
+ | | align="center" |[[File:SteviesCarThefts-GTAIV-IntruderPhoto.jpg|100px]][[Intruder]] |
| [[File:SteviesCarThefts-GTAIV-Intruder.jpg|160px]][[File:SteviesCarThefts-GTAIV-IntruderLocation.jpg|100px]] |
| [[File:SteviesCarThefts-GTAIV-Intruder.jpg|160px]][[File:SteviesCarThefts-GTAIV-IntruderLocation.jpg|100px]] |
||
| |
| |
||
{| |
{| |
||
| − | |valign=top|District:|| [[Rotterdam Hill]] |
+ | | valign="top" |'''District''':|| [[Rotterdam Hill]] |
|- |
|- |
||
| − | |valign=top|Street:|| |
+ | | valign="top" |'''Street''':|| [[Asparagus Avenue]] |
|- |
|- |
||
| − | |valign=top|Landmark:|| near the Liberty Transport Authority building |
+ | | valign="top" |'''Landmark''':|| near the [[Liberty Transport Authority]] building |
|- |
|- |
||
| − | |valign=top|Pic:|| the reversed "[[Betta Pharmaceuticals|BETTA]]" sign |
+ | | valign="top" |'''Pic''':|| the reversed "[[Betta Pharmaceuticals|BETTA]]" sign |
|} |
|} |
||
| − | | On the southern end of the pedestrian promenade, [[Asparagus Avenue]], [[Rotterdam Hill]], Broker. |
+ | | On the southern end of the [[pedestrian]] promenade, [[Asparagus Avenue]], [[Rotterdam Hill]], Broker. |
| $8,250 |
| $8,250 |
||
| − | |- valign=top style="background:#222222" |
+ | |- valign="top" style="background:#222222" |
| − | |align=center|[[File:SteviesCarThefts-GTAIV-MananaPhoto.jpg|100px]][[Manana]] |
+ | | align="center" |[[File:SteviesCarThefts-GTAIV-MananaPhoto.jpg|100px]][[Manana]] |
| [[File:SteviesCarThefts-GTAIV-Manana.jpg|160px]][[File:SteviesCarThefts-GTAIV-MananaLocation.jpg|100px]] |
| [[File:SteviesCarThefts-GTAIV-Manana.jpg|160px]][[File:SteviesCarThefts-GTAIV-MananaLocation.jpg|100px]] |
||
| |
| |
||
{| |
{| |
||
| − | |valign=top|District:|| |
+ | | valign="top" |'''District''':|| [[Cerveza Heights]] |
|- |
|- |
||
| − | |valign=top|Street:|| |
+ | | valign="top" |'''Street''':|| [[Thornton Street]] |
|- |
|- |
||
| − | |valign=top|Landmark:|| (behind) old Burger Shot, [[Huntington Street LTA|Huntington St station]] |
+ | | valign="top" |'''Landmark''':|| (behind) old [[Burger Shot]], [[Huntington Street LTA|Huntington St station]] |
|- |
|- |
||
| − | |valign=top|Pic:|| n/a |
+ | | valign="top" |'''Pic''':|| n/a |
|} |
|} |
||
| Car park next to a closed [[Burger Shot]], [[Thornton Street]], [[Cerveza Heights]], Dukes. |
| Car park next to a closed [[Burger Shot]], [[Thornton Street]], [[Cerveza Heights]], Dukes. |
||
| $3,960 |
| $3,960 |
||
| − | |- valign=top style="background:#222222" |
+ | |- valign="top" style="background:#222222" |
| − | |align=center|[[File:SteviesCarThefts-GTAIV-MoonbeamPhoto.jpg|100px]][[Moonbeam]] |
+ | | align="center" |[[File:SteviesCarThefts-GTAIV-MoonbeamPhoto.jpg|100px]][[Moonbeam]] |
| [[File:SteviesCarThefts-GTAIV-Moonbeam.jpg|160px]][[File:SteviesCarThefts-GTAIV-MoonbeamLocation.jpg|100px]] |
| [[File:SteviesCarThefts-GTAIV-Moonbeam.jpg|160px]][[File:SteviesCarThefts-GTAIV-MoonbeamLocation.jpg|100px]] |
||
| |
| |
||
{| |
{| |
||
| − | |valign=top|District:|| [[Charge Island]] |
+ | | valign="top" |'''District''':|| [[Charge Island]] |
|- |
|- |
||
| − | |valign=top|Street:|| n/a |
+ | | valign="top" |'''Street''':|| n/a |
|- |
|- |
||
| − | |valign=top|Landmark:|| n/a |
+ | | valign="top" |'''Landmark''':|| n/a |
|- |
|- |
||
| − | |valign=top|Pic:|| a spherical storage tank behind a parking lot |
+ | | valign="top" |'''Pic''':|| a spherical storage tank behind a parking lot |
|} |
|} |
||
| Parking lot just north of the water treatment plant in [[Charge Island]]. |
| Parking lot just north of the water treatment plant in [[Charge Island]]. |
||
| $7,260 |
| $7,260 |
||
| − | |- valign=top style="background:#222222" |
+ | |- valign="top" style="background:#222222" |
| − | |align=center|[[File:SteviesCarThefts-GTAIV-NRG900Photo.jpg|100px]][[NRG 900]] |
+ | | align="center" |[[File:SteviesCarThefts-GTAIV-NRG900Photo.jpg|100px]][[NRG 900]] |
| [[File:SteviesCarThefts-GTAIV-NRG900.jpg|160px]][[File:SteviesCarThefts-GTAIV-NRG900Location.jpg|100px]] |
| [[File:SteviesCarThefts-GTAIV-NRG900.jpg|160px]][[File:SteviesCarThefts-GTAIV-NRG900Location.jpg|100px]] |
||
| |
| |
||
{| |
{| |
||
| − | |valign=top|District:|| [[Lancaster]] |
+ | | valign="top" |'''District''':|| [[Lancaster]] |
|- |
|- |
||
| − | |valign=top|Street:|| [[Bismarck Avenue]] and [[Topaz Street]] |
+ | | valign="top" |'''Street''':|| [[Bismarck Avenue]] and [[Topaz Street]] |
|- |
|- |
||
| − | |valign=top|Landmark:|| n/a |
+ | | valign="top" |'''Landmark''':|| n/a |
|- |
|- |
||
| − | |valign=top|Pic:|| n/a |
+ | | valign="top" |'''Pic''':|| n/a |
|} |
|} |
||
| On the corner of [[Bismarck Avenue]] and [[Topaz Street]], [[Lancaster]], Algonquin. |
| On the corner of [[Bismarck Avenue]] and [[Topaz Street]], [[Lancaster]], Algonquin. |
||
| $8,250 |
| $8,250 |
||
| − | |- valign=top style="background:#222222" |
+ | |- valign="top" style="background:#222222" |
| − | |align=center|[[File:SteviesCarThefts-GTAIV-PatriotPhoto.jpg|100px]][[Patriot]] |
+ | | align="center" |[[File:SteviesCarThefts-GTAIV-PatriotPhoto.jpg|100px]][[Patriot]] |
| [[File:SteviesCarThefts-GTAIV-Patriot.jpg|160px]][[File:SteviesCarThefts-GTAIV-PatriotLocation.jpg|100px]] |
| [[File:SteviesCarThefts-GTAIV-Patriot.jpg|160px]][[File:SteviesCarThefts-GTAIV-PatriotLocation.jpg|100px]] |
||
| |
| |
||
{| |
{| |
||
| − | |valign=top|District:|| [[Castle Gardens]] |
+ | | valign="top" |'''District''':|| [[Castle Gardens]] |
|- |
|- |
||
| − | |valign=top|Street:|| |
+ | | valign="top" |'''Street''':|| [[South Parkway]] |
|- |
|- |
||
| − | |valign=top|Landmark:|| two joined towers |
+ | | valign="top" |'''Landmark''':|| two joined towers |
|- |
|- |
||
| − | |valign=top|Pic:|| two joined towers |
+ | | valign="top" |'''Pic''':|| two joined towers |
|} |
|} |
||
| − | | In front of a glass clad tower (connected to another tower via a skyway), [[South Parkway]], [[The Exchange]], Algonquin. |
+ | | In front of a glass clad tower (connected to another tower via a skyway), [[South Parkway]], [[The Exchange (GTA IV)|The Exchange]], Algonquin. |
| $16,500 |
| $16,500 |
||
| − | |- valign=top style="background:#222222" |
+ | |- valign="top" style="background:#222222" |
| − | |align=center|[[File:SteviesCarThefts-GTAIV-PMP600Photo.jpg|100px]][[PMP 600]] |
+ | | align="center" |[[File:SteviesCarThefts-GTAIV-PMP600Photo.jpg|100px]][[PMP 600]] |
| [[File:SteviesCarThefts-GTAIV-PMP600.jpg|160px]][[File:SteviesCarThefts-GTAIV-PMP600Location.jpg|100px]] |
| [[File:SteviesCarThefts-GTAIV-PMP600.jpg|160px]][[File:SteviesCarThefts-GTAIV-PMP600Location.jpg|100px]] |
||
| |
| |
||
{| |
{| |
||
| − | |valign=top|District:|| [[The Exchange (GTA IV)|The Exchange]] |
+ | | valign="top" |'''District''':|| [[The Exchange (GTA IV)|The Exchange]] |
|- |
|- |
||
| − | |valign=top|Street:|| n/a |
+ | | valign="top" |'''Street''':|| n/a |
|- |
|- |
||
| − | |valign=top|Landmark:|| down a lane |
+ | | valign="top" |'''Landmark''':|| down a lane |
|- |
|- |
||
| − | |valign=top|Pic:|| n/a |
+ | | valign="top" |'''Pic''':|| n/a |
|} |
|} |
||
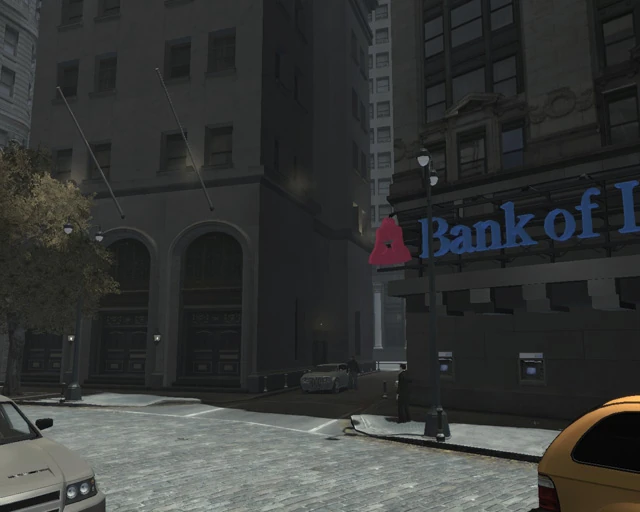
| Behind the [[Liberty City Stock Exchange]] (in an alley next to [[Bank of Liberty]]), [[Amsterdam Lane]], [[The Exchange (GTA IV)|The Exchange]], Algonquin. |
| Behind the [[Liberty City Stock Exchange]] (in an alley next to [[Bank of Liberty]]), [[Amsterdam Lane]], [[The Exchange (GTA IV)|The Exchange]], Algonquin. |
||
| $10,560 |
| $10,560 |
||
| − | |- valign=top style="background:#222222" |
+ | |- valign="top" style="background:#222222" |
| − | |align=center|[[File:SteviesCarThefts-GTAIV-RancherPhoto.jpg|100px]][[Rancher]] |
+ | | align="center" |[[File:SteviesCarThefts-GTAIV-RancherPhoto.jpg|100px]][[Rancher]] |
| [[File:SteviesCarThefts-GTAIV-Rancher.jpg|160px]][[File:SteviesCarThefts-GTAIV-RancherLocation.jpg|100px]] |
| [[File:SteviesCarThefts-GTAIV-Rancher.jpg|160px]][[File:SteviesCarThefts-GTAIV-RancherLocation.jpg|100px]] |
||
| |
| |
||
{| |
{| |
||
| − | |valign=top|District:|| [[Port Tudor]] |
+ | | valign="top" |'''District''':|| [[Port Tudor]] |
|- |
|- |
||
| − | |valign=top|Street:|| |
+ | | valign="top" |'''Street''':|| [[Strower Avenue]] |
|- |
|- |
||
| − | |valign=top|Landmark:|| [[Liberty State Delivery]] by the docks |
+ | | valign="top" |'''Landmark''':|| [[Liberty State Delivery]] by the docks |
|- |
|- |
||
| − | |valign=top|Pic:|| several harbor cranes behind |
+ | | valign="top" |'''Pic''':|| several harbor cranes behind |
|} |
|} |
||
| Parked behind a trailer in [[Strower Avenue]], [[Port Tudor]], Alderney. |
| Parked behind a trailer in [[Strower Avenue]], [[Port Tudor]], Alderney. |
||
| $8,250 |
| $8,250 |
||
| − | |- valign=top style="background:#222222" |
+ | |- valign="top" style="background:#222222" |
| − | |align=center|[[File:SteviesCarThefts-GTAIV-ReblaPhoto.jpg|100px]][[Rebla]] |
+ | | align="center" |[[File:SteviesCarThefts-GTAIV-ReblaPhoto.jpg|100px]][[Rebla]] |
| [[File:SteviesCarThefts-GTAIV-Rebla.jpg|160px]][[File:SteviesCarThefts-GTAIV-ReblaLocation.jpg|100px]] |
| [[File:SteviesCarThefts-GTAIV-Rebla.jpg|160px]][[File:SteviesCarThefts-GTAIV-ReblaLocation.jpg|100px]] |
||
| |
| |
||
{| |
{| |
||
| − | |valign=top|District:|| |
+ | | valign="top" |'''District''':|| [[Easton]] |
|- |
|- |
||
| − | |valign=top|Street:|| |
+ | | valign="top" |'''Street''':|| [[Columbus Avenue]] |
|- |
|- |
||
| − | |valign=top|Landmark:|| [[Fanny Crab's]], [[Grand Easton Terminal|Grand Easton station]] |
+ | | valign="top" |'''Landmark''':|| [[Fanny Crab's]], [[Grand Easton Terminal|Grand Easton station]] |
|- |
|- |
||
| − | |valign=top|Pic:|| [[Fanny Crab's]] |
+ | | valign="top" |'''Pic''':|| [[Fanny Crab's]] |
|} |
|} |
||
| In front of the Colonnade Row replica ([[Fanny Crab's]] restaurant), [[Columbus Avenue]], [[Easton]], Algonquin. |
| In front of the Colonnade Row replica ([[Fanny Crab's]] restaurant), [[Columbus Avenue]], [[Easton]], Algonquin. |
||
| $11,550 |
| $11,550 |
||
| − | |- valign=top style="background:#222222" |
+ | |- valign="top" style="background:#222222" |
| − | |align=center|[[File:SteviesCarThefts-GTAIV-SabreGTPhoto.jpg|100px]][[Sabre GT]] |
+ | | align="center" |[[File:SteviesCarThefts-GTAIV-SabreGTPhoto.jpg|100px]][[Sabre GT]] |
| [[File:SteviesCarThefts-GTAIV-SabreGT.jpg|160px]][[File:SteviesCarThefts-GTAIV-SabreGTLocation.jpg|100px]] |
| [[File:SteviesCarThefts-GTAIV-SabreGT.jpg|160px]][[File:SteviesCarThefts-GTAIV-SabreGTLocation.jpg|100px]] |
||
| |
| |
||
{| |
{| |
||
| − | |valign=top|District:|| |
+ | | valign="top" |'''District''':|| [[Meadow Hills]] |
|- |
|- |
||
| − | |valign=top|Street:|| |
+ | | valign="top" |'''Street''':|| [[Tudor St]]reet |
|- |
|- |
||
| − | |valign=top|Landmark:|| near the [[Liberty State Pavilion Towers|Meadows Park towers]] |
+ | | valign="top" |'''Landmark''':|| near the [[Liberty State Pavilion Towers|Meadows Park towers]] |
|- |
|- |
||
| − | |valign=top|Pic:|| Meadows Park towers |
+ | | valign="top" |'''Pic''':|| Meadows Park towers |
|} |
|} |
||
| On a driveway of a house at [[Tudor St]]reet, [[Meadow Hills]], Dukes |
| On a driveway of a house at [[Tudor St]]reet, [[Meadow Hills]], Dukes |
||
| $8,250 |
| $8,250 |
||
| − | |- valign=top style="background:#222222" |
+ | |- valign="top" style="background:#222222" |
| − | |align=center|[[File:SteviesCarThefts-GTAIV-SentinelPhoto.jpg|100px]][[Sentinel]] |
+ | | align="center" |[[File:SteviesCarThefts-GTAIV-SentinelPhoto.jpg|100px]][[Sentinel]] |
| [[File:SteviesCarThefts-GTAIV-Sentinel.jpg|160px]][[File:SteviesCarThefts-GTAIV-SentinelLocation.jpg|100px]] |
| [[File:SteviesCarThefts-GTAIV-Sentinel.jpg|160px]][[File:SteviesCarThefts-GTAIV-SentinelLocation.jpg|100px]] |
||
| |
| |
||
{| |
{| |
||
| − | |valign=top|District:|| Normandy |
+ | | valign="top" |'''District''':|| Normandy |
|- |
|- |
||
| − | |valign=top|Street:|| |
+ | | valign="top" |'''Street''':|| [[Roebuck Road]] |
|- |
|- |
||
| − | |valign=top|Landmark:|| docks |
+ | | valign="top" |'''Landmark''':|| docks |
|- |
|- |
||
| − | |valign=top|Pic:|| some cylindrical fuel storage tank behind a parking lot |
+ | | valign="top" |'''Pic''':|| some cylindrical fuel storage tank behind a parking lot |
|} |
|} |
||
| In a car park outside the [[Port Tudor]] gated entrance, [[Roebuck Road]], [[Normandy]], Alderney |
| In a car park outside the [[Port Tudor]] gated entrance, [[Roebuck Road]], [[Normandy]], Alderney |
||
| $8,250 |
| $8,250 |
||
| − | |- valign=top style="background:#222222" |
+ | |- valign="top" style="background:#222222" |
| − | |align=center|[[File:SteviesCarThefts-GTAIV-SultanPhoto.jpg|100px]][[Sultan]] |
+ | | align="center" |[[File:SteviesCarThefts-GTAIV-SultanPhoto.jpg|100px]][[Sultan]] |
| [[File:SteviesCarThefts-GTAIV-Sultan.jpg|160px]][[File:SteviesCarThefts-GTAIV-SultanLocation.jpg|100px]] |
| [[File:SteviesCarThefts-GTAIV-Sultan.jpg|160px]][[File:SteviesCarThefts-GTAIV-SultanLocation.jpg|100px]] |
||
| |
| |
||
{| |
{| |
||
| − | |valign=top|District:|| [[Berchem]] |
+ | | valign="top" |'''District''':|| [[Berchem]] |
|- |
|- |
||
| − | |valign=top|Street:|| |
+ | | valign="top" |'''Street''':|| [[Aspdin Drive]] |
|- |
|- |
||
| − | |valign=top|Landmark:|| drive-way of a big green house |
+ | | valign="top" |'''Landmark''':|| drive-way of a big green house |
|- |
|- |
||
| − | |valign=top|Pic:|| n/a |
+ | | valign="top" |'''Pic''':|| n/a |
|} |
|} |
||
| On the driveway of a house at [[Aspdin Drive]], [[Berchem]], Alderney. |
| On the driveway of a house at [[Aspdin Drive]], [[Berchem]], Alderney. |
||
| $11,550 |
| $11,550 |
||
| − | |- valign=top style="background:#222222" |
+ | |- valign="top" style="background:#222222" |
| − | |align=center|[[File:SteviesCarThefts-GTAIV-SuperGTPhoto.jpg|100px]][[Super GT|SuperGT]] |
+ | | align="center" |[[File:SteviesCarThefts-GTAIV-SuperGTPhoto.jpg|100px]][[Super GT|SuperGT]] |
| [[File:SteviesCarThefts-GTAIV-SuperGT.jpg|160px]][[File:SteviesCarThefts-GTAIV-SuperGTLocation.jpg|100px]] |
| [[File:SteviesCarThefts-GTAIV-SuperGT.jpg|160px]][[File:SteviesCarThefts-GTAIV-SuperGTLocation.jpg|100px]] |
||
| |
| |
||
{| |
{| |
||
| − | |valign=top|District:|| |
+ | | valign="top" |'''District''':|| [[Chinatown, Algonquin|Chinatown]] |
|- |
|- |
||
| − | |valign=top|Street:|| [[Calcium Street]] |
+ | | valign="top" |'''Street''':|| [[Calcium Street]] |
|- |
|- |
||
| − | |valign=top|Landmark:|| 69 Exchange |
+ | | valign="top" |'''Landmark''':|| 69 Exchange |
|- |
|- |
||
| − | |valign=top|Pic:|| [[Bank of Liberty]]'s sign |
+ | | valign="top" |'''Pic''':|| [[Bank of Liberty]]'s sign |
|} |
|} |
||
| − | | In front of |
+ | | In front of 69 Exchange, [[Calcium Street]], [[Chinatown, Algonquin]] |
| $36,300 |
| $36,300 |
||
| − | |- valign=top style="background:#222222" |
+ | |- valign="top" style="background:#222222" |
| − | |align=center|[[File:SteviesCarThefts-GTAIV-TurismoPhoto.jpg|100px]][[Turismo]] |
+ | | align="center" |[[File:SteviesCarThefts-GTAIV-TurismoPhoto.jpg|100px]][[Turismo]] |
| [[File:SteviesCarThefts-GTAIV-Turismo.jpg|160px]][[File:SteviesCarThefts-GTAIV-TurismoLocation.jpg|100px]] |
| [[File:SteviesCarThefts-GTAIV-Turismo.jpg|160px]][[File:SteviesCarThefts-GTAIV-TurismoLocation.jpg|100px]] |
||
| |
| |
||
{| |
{| |
||
| − | |valign=top|District:|| [[Westdyke]] |
+ | | valign="top" |'''District''':|| [[Westdyke]] |
|- |
|- |
||
| − | |valign=top|Street:|| [[Owl Creek Avenue |
+ | | valign="top" |'''Street''':|| [[Owl Creek Avenue]] |
|- |
|- |
||
| − | |valign=top|Landmark:|| large mansion (by "[[Bryce Dawkins|The rich fuck]] who owns this Turismo") |
+ | | valign="top" |'''Landmark''':|| large mansion (by "[[Bryce Dawkins|The rich fuck]] who owns this Turismo") |
|- |
|- |
||
| − | |valign=top|Pic:|| n/a |
+ | | valign="top" |'''Pic''':|| n/a |
|} |
|} |
||
| On a driveway of a mansion at [[Owl Creek Avenue]], [[Westdyke]], Alderney. |
| On a driveway of a mansion at [[Owl Creek Avenue]], [[Westdyke]], Alderney. |
||
| $36,300 |
| $36,300 |
||
| − | |- valign=top style="background:#222222" |
+ | |- valign="top" style="background:#222222" |
| − | |align=center|[[File:SteviesCarThefts-GTAIV-VoodooPhoto.jpg|100px]][[Voodoo]] |
+ | | align="center" |[[File:SteviesCarThefts-GTAIV-VoodooPhoto.jpg|100px]][[Voodoo]] |
| [[File:SteviesCarThefts-GTAIV-Voodoo.jpg|160px]][[File:SteviesCarThefts-GTAIV-VoodooLocation.jpg|100px]] |
| [[File:SteviesCarThefts-GTAIV-Voodoo.jpg|160px]][[File:SteviesCarThefts-GTAIV-VoodooLocation.jpg|100px]] |
||
| |
| |
||
{| |
{| |
||
| − | |valign=top|District:|| [[East Island City]] |
+ | | valign="top" |'''District''':|| [[East Island City]] |
|- |
|- |
||
| − | |valign=top|Street:|| |
+ | | valign="top" |'''Street''':|| [[Bunker Hill Avenue]] |
|- |
|- |
||
| − | |valign=top|Landmark:|| [[LC24 Tower]] |
+ | | valign="top" |'''Landmark''':|| [[LC24 Tower]] |
|- |
|- |
||
| − | |valign=top|Pic:|| [[LC24 Tower]] |
+ | | valign="top" |'''Pic''':|| [[LC24 Tower]] |
|} |
|} |
||
| In front of the [[LC24 Tower]] at [[Bunker Hill Avenue]], [[East Island City]], Dukes. |
| In front of the [[LC24 Tower]] at [[Bunker Hill Avenue]], [[East Island City]], Dukes. |
||
| $6,600 |
| $6,600 |
||
| − | |- valign=top style="background:#222222" |
+ | |- valign="top" style="background:#222222" |
| − | |align=center|[[File:SteviesCarThefts-GTAIV-WashingtonPhoto.jpg|100px]][[Washington]] |
+ | | align="center" |[[File:SteviesCarThefts-GTAIV-WashingtonPhoto.jpg|100px]][[Washington]] |
| [[File:SteviesCarThefts-GTAIV-Washington.jpg|160px]][[File:SteviesCarThefts-GTAIV-WashingtonLocation.jpg|100px]] |
| [[File:SteviesCarThefts-GTAIV-Washington.jpg|160px]][[File:SteviesCarThefts-GTAIV-WashingtonLocation.jpg|100px]] |
||
| |
| |
||
{| |
{| |
||
| − | |valign=top|District:|| [[Steinway]] |
+ | | valign="top" |'''District''':|| [[Steinway]] |
|- |
|- |
||
| − | |valign=top|Street:|| |
+ | | valign="top" |'''Street''':|| [[Franklin Street (Dukes)|Franklin Street]] |
|- |
|- |
||
| − | |valign=top|Landmark:|| outdoor pool |
+ | | valign="top" |'''Landmark''':|| outdoor pool |
|- |
|- |
||
| − | |valign=top|Pic:|| the building of the outdoor pool |
+ | | valign="top" |'''Pic''':|| the building of the outdoor pool |
|} |
|} |
||
| − | | In front of [[Steinway Park]], [[Franklin Street]], [[Steinway]], Dukes. |
+ | | In front of [[Steinway Park]], [[Franklin Street (Dukes)|Franklin Street]], [[Steinway]], Dukes. |
| $7,260 |
| $7,260 |
||
|} |
|} |
||
| Line 521: | Line 502: | ||
| |
| |
||
{| class="wikitable" style="font-size:11px;" |
{| class="wikitable" style="font-size:11px;" |
||
| − | ! scope="col"|Vehicle |
+ | ! scope="col" |Vehicle |
| − | ! scope="col"|Max Value ($) |
+ | ! scope="col" |Max Value ($) |
|- |
|- |
||
|[[Admiral]] |
|[[Admiral]] |
||
| Line 571: | Line 552: | ||
| |
| |
||
{| class="wikitable" style="font-size:11px;" |
{| class="wikitable" style="font-size:11px;" |
||
| − | ! scope="col"|Vehicle |
+ | ! scope="col" |Vehicle |
| − | ! scope="col"|Max Value ($) |
+ | ! scope="col" |Max Value ($) |
|- |
|- |
||
|[[Chavos]] |
|[[Chavos]] |
||
| Line 621: | Line 602: | ||
| |
| |
||
{| class="wikitable" style="font-size:11px;" |
{| class="wikitable" style="font-size:11px;" |
||
| − | ! scope="col"|Vehicle |
+ | ! scope="col" |Vehicle |
| − | ! scope="col"|Max Value ($) |
+ | ! scope="col" |Max Value ($) |
|- |
|- |
||
|[[Esperanto]] ([[Roman's Taxi]]) |
|[[Esperanto]] ([[Roman's Taxi]]) |
||
| Line 642: | Line 623: | ||
|1800 |
|1800 |
||
|- |
|- |
||
| − | |[[Feroci]] ([[Liberty City Triads ( |
+ | |[[Feroci]] ([[Liberty City Triads (HD Universe)|Triads]]) |
|1800 |
|1800 |
||
|- |
|- |
||
| Line 660: | Line 641: | ||
|1400 |
|1400 |
||
|- |
|- |
||
| − | |[[Futo |
+ | |[[Futo GT|Futo GT]] |
|1400 |
|1400 |
||
|- |
|- |
||
| Line 673: | Line 654: | ||
| |
| |
||
{| class="wikitable" style="font-size:11px;" |
{| class="wikitable" style="font-size:11px;" |
||
| − | ! scope="col"|Vehicle |
+ | ! scope="col" |Vehicle |
| − | ! scope="col"|Max Value ($) |
+ | ! scope="col" |Max Value ($) |
|- |
|- |
||
|[[Hellfury]] |
|[[Hellfury]] |
||
| Line 682: | Line 663: | ||
|4000 |
|4000 |
||
|- |
|- |
||
| − | |[[Huntley Sport]] ([[ |
+ | |[[Huntley Sport]] ([[Hillside Posse|Jamaican Yardies]]) |
|4000 |
|4000 |
||
|- |
|- |
||
| Line 723: | Line 704: | ||
| |
| |
||
{| class="wikitable" style="font-size:11px;" |
{| class="wikitable" style="font-size:11px;" |
||
| − | ! scope="col"|Vehicle |
+ | ! scope="col" |Vehicle |
| − | ! scope="col"|Max Value ($) |
+ | ! scope="col" |Max Value ($) |
|- |
|- |
||
|[[Mule]]* |
|[[Mule]]* |
||
| Line 773: | Line 754: | ||
| |
| |
||
{| class="wikitable" style="font-size:11px;" |
{| class="wikitable" style="font-size:11px;" |
||
| − | ! scope="col"|Vehicle |
+ | ! scope="col" |Vehicle |
| − | ! scope="col"|Max Value ($) |
+ | ! scope="col" |Max Value ($) |
|- |
|- |
||
|[[Presidente]] |
|[[Presidente]] |
||
| Line 825: | Line 806: | ||
| |
| |
||
{| class="wikitable" style="font-size:11px;" |
{| class="wikitable" style="font-size:11px;" |
||
| − | ! scope="col"|Vehicle |
+ | ! scope="col" |Vehicle |
| − | ! scope="col"|Max Value ($) |
+ | ! scope="col" |Max Value ($) |
|- |
|- |
||
|[[Solair]] |
|[[Solair]] |
||
| Line 873: | Line 854: | ||
|2000 |
|2000 |
||
|} |
|} |
||
| − | | style="vertical-align:top;"| |
+ | | style="vertical-align:top;" | |
{| class="wikitable" style="font-size:11px;" |
{| class="wikitable" style="font-size:11px;" |
||
| − | ! scope="col"|Vehicle |
+ | ! scope="col" |Vehicle |
| − | ! scope="col"|Max Value ($) |
+ | ! scope="col" |Max Value ($) |
|- |
|- |
||
|[[Vigero]] |
|[[Vigero]] |
||
| Line 908: | Line 889: | ||
==Glitch== |
==Glitch== |
||
| − | If the player puts their [[Mobile Phone|phone]] on sleep mode at any point after completing [[Brucie Kibbutz|Brucie's]] [[Exotic Exports]], they may never receive [[Stevie]]'s first text. |
+ | *If the player puts their [[Mobile Phone|phone]] on sleep mode at any point after completing [[Brucie Kibbutz|Brucie's]] [[Exotic Exports]], they may never receive [[Stevie]]'s first text. |
| − | Stevie's garage will appear on the map, but he will not contact you, and none of the cars will be in the listed locations. This glitch effectively prevents the player from being able to achieve [[100% Completion in GTA IV|100% Completion]]. |
+ | **Stevie's garage will appear on the map, but he will not contact you, and none of the cars will be in the listed locations. This glitch effectively prevents the player from being able to achieve [[100% Completion in GTA IV|100% Completion]]. |
| + | *Some of the cars that had been delivered may still spawn at their respective location. |
||
==Video walkthrough== |
==Video walkthrough== |
||
| − | [[File:GTA 4 - Stevie's Car Thefts You Got The Message Achievement Trophy (1080p)| |
+ | [[File:GTA 4 - Stevie's Car Thefts You Got The Message Achievement Trophy (1080p)|center|640x640px]] |
==Gallery== |
==Gallery== |
||
| Line 919: | Line 901: | ||
</gallery> |
</gallery> |
||
| − | == See |
+ | == See Also == |
| + | *[[Import/Export]] ([[Grand Theft Auto III|GTA III]]) |
||
| − | * [[Exotic Exports]] |
||
| + | *[[Sunshine Autos Import Garage]] ([[Grand Theft Auto: Vice City|GTA VC]]) |
||
| ⚫ | |||
| + | *[[Exports and Imports]] ([[Grand Theft Auto: San Andreas|GTA SA]]) |
||
| − | |||
| + | *[[Car-azy Car Give Away]] ([[Grand Theft Auto: Liberty City Stories|GTA LCS]]) |
||
| − | ==Reference== |
||
| + | *[[Civil Asset Forfeiture Impound]] ([[Grand Theft Auto: Vice City Stories|GTA VCS]]) |
||
| − | <references /> |
||
| + | *[[Exotic Exports]] ([[Grand Theft Auto IV|GTA IV]]) |
||
| ⚫ | |||
| + | *[[Simeon Car Export Requests]] ([[Grand Theft Auto Online|GTA Online]]) |
||
| + | *[[GTA Online: Import/Export]] ([[Grand Theft Auto Online|GTA Online]]) |
||
==External link== |
==External link== |
||
*[http://gta4onlineguide.com/stevies-vehicles/ gta4onlineguide.com] - List of vehicles for Stevie |
*[http://gta4onlineguide.com/stevies-vehicles/ gta4onlineguide.com] - List of vehicles for Stevie |
||
| + | |||
| + | ==Navigation== |
||
| + | {{Gtaiv missions}}[[ru:Угон автомобилей для Стиви]] |
||
| + | [[de:Stevies Autoklau-SMS]] |
||
| + | [[es:Garaje de Stevie]] |
||
| + | [[fr:Vols de voitures de Stevie]] |
||
| + | [[pt:Stevie's Car Thefts]] |
||
| + | [[Category:Missions]] |
||
[[Category:Missions in GTA IV]] |
[[Category:Missions in GTA IV]] |
||
[[Category:Side Missions]] |
[[Category:Side Missions]] |
||
Revision as of 12:55, 9 November 2019
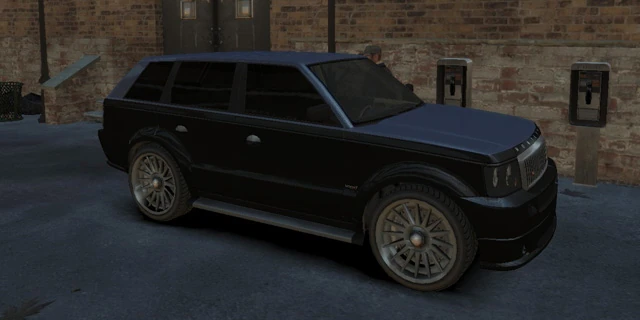
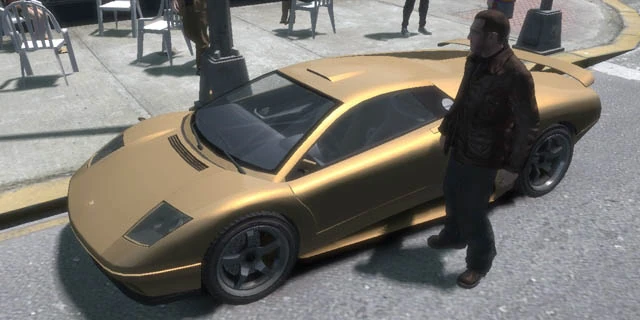
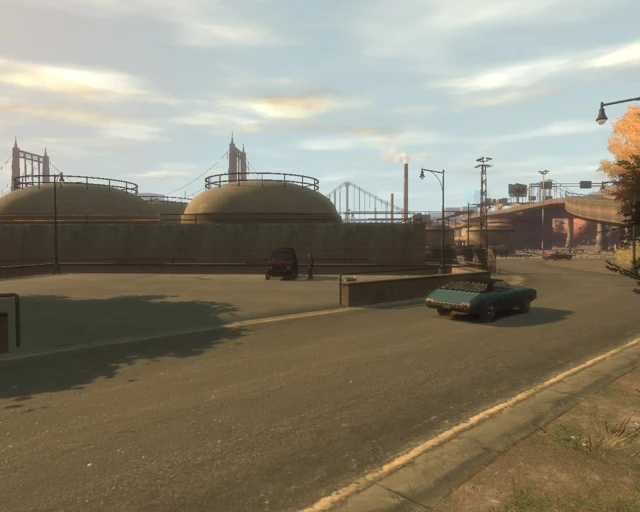
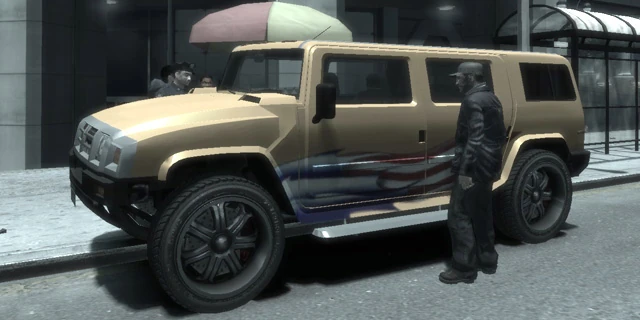
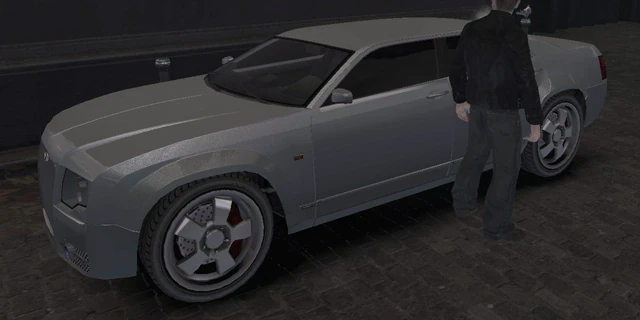
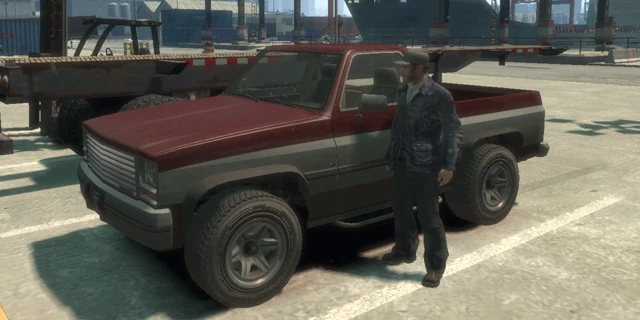
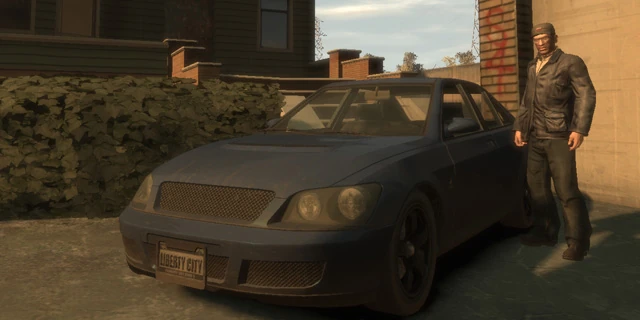
Stevie's Car Thefts is a side mission in Grand Theft Auto IV involving the theft of thirty road vehicles for Stevie.
Description
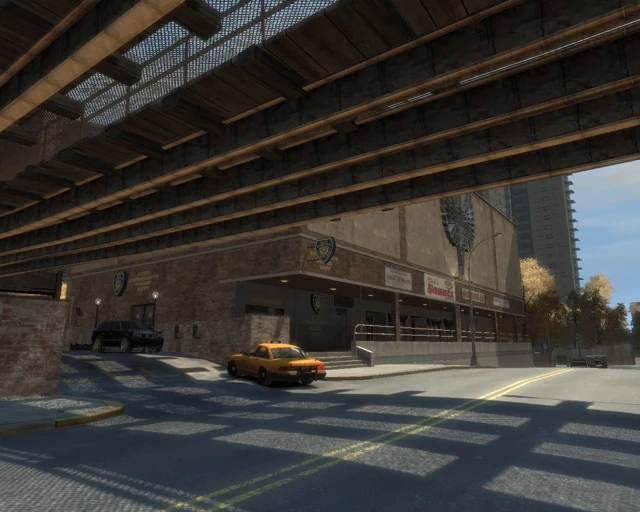
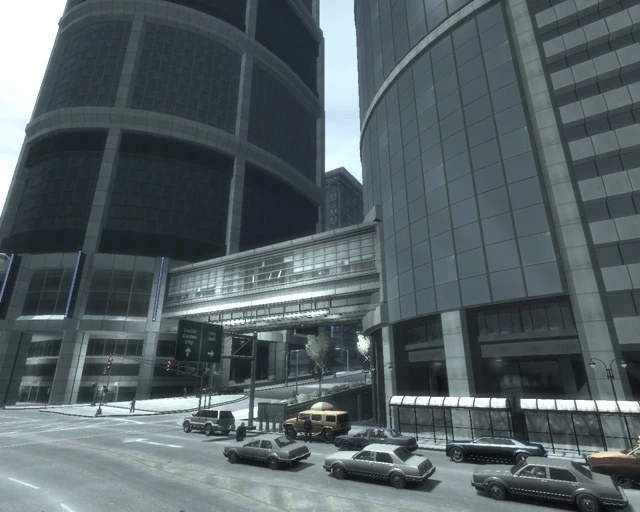
Stevie's Car Thefts are available once the player unlocks the Alderney safehouse and completes the missions "Smackdown" for Derrick McReary and "No. 1" for Brucie Kibbutz. The latter will call Niko Bellic regarding working with his friend, a car dealer named Stevie. Shortly afterwards, Stevie will begin sending Niko text messages, asking him to deliver thirty different vehicles - scattered all across Liberty City and Alderney - to S&M Auto Sales, Stevie's garage in Chase Point, Bohan.
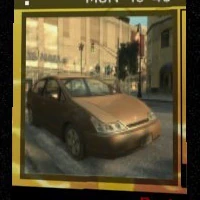
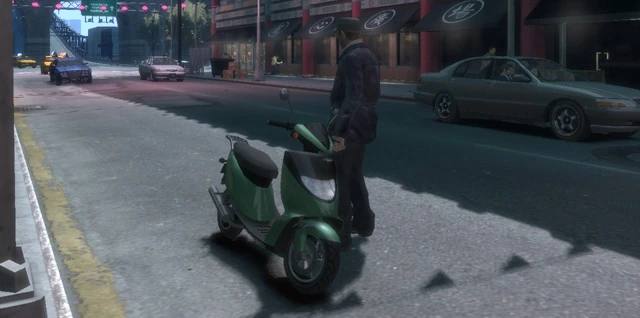
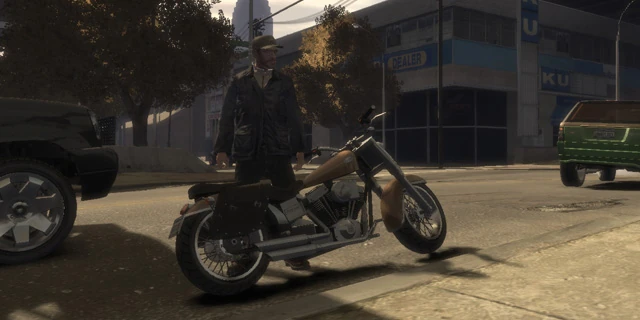
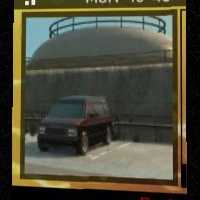
In his text messages, Stevie provides some hints of the vehicle's location, with the information in the text, and the image attached is the exact view of where the vehicle is parked at. The range of searching is usually less than a block. If the player finds and get in the right vehicle, the game shows a message saying, "You've found the vehicle Stevie is looking for."
If the delivered vehicles are in perfect condition, the player will receive the maximum price. Minor damages such barely noticeable scratches will not cause a decrease in the vehicle's price. Serious damages such as broken headlights and deformations will significantly reduce the price, however.
The player can also keep the vehicles for themselves by parking them at the parking spaces, as the vehicle will be respawned at the original location as long as the vehicle is not delivered.
Once all thirty cars are delivered, the player can make some extra cash by bringing in any vehicle they want, at varying prices depending on model and condition, much like the original missions. In addition, these prices can reduce if the same model is regularly sold.
The player also earns the achievement/trophy You Got The Message for delivering all thirty vehicles.
Alternative Walkthrough
- Players can save the vehicle and game at the South Bohan Safehouse which is about one block away from S&M Auto Sales. If the player then loads their latest saved game they'll have a repaired or new version of the car ready to be delivered and a much smaller distance to traverse.
- PC users could use a compatible controller with triggers or a steering wheel/pedals, which gives the player more precise and variable control of the vehicle, which just using a keyboard only allows full speed and full steering, making the player have less control and increasing the risk of damage. Another way of repairing the vehicle is by parking the requested car in a safehouse parking space, then driving or running a block or two before returning.
- If a player wishes to complete these thefts quickly, it is recommended either that they save the game repeatedly at the nearby safehouse in Bohan, or repeatedly use a Pay 'n' Spray until they receive a text. These methods advance the time, which means Stevie will send a text in a matter of minutes after delivering a vehicle, instead of hours. The player can view the amount of vehicles stolen under "Cars Sold to Stevie" in the Score section of the Stats in the pause menu.
- As most of these vehicles are required to be stolen, smashing the window to hijack the car does not count as damage. Therefore, the player can simply steal the car and take to the marked garage directly.
List of vehicle requests
| Vehicle | Image | Location | Max value | |||||||||
|---|---|---|---|---|---|---|---|---|---|---|---|---|
| Keywords of the hints | Location address | |||||||||||
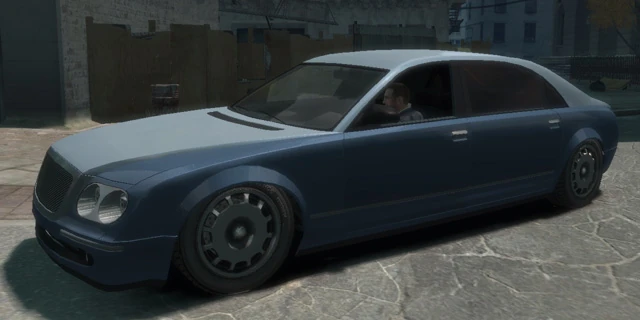
 Banshee Banshee
|
|
|
Across the road from Randolf Art Center, Galveston Avenue, Middle Park West, Algonquin. | $26,400 | ||||||||
 Bobcat Bobcat
|
|
|
Rooftop of the multistory parking lot, Francis International Airport, Dukes. | $8,250 | ||||||||
 Buccaneer Buccaneer
|
|
|
Near the warehouse off Lompoc Avenue (the one from Hostile Negotiation), Industrial. | $5,940 | ||||||||
 Cavalcade Cavalcade
|
|
|
In a driveway north of the corner where Long John Avenue meets Manzano Road (just north of the Westdyke Memorial Hospital), Leftwood, Alderney. | $23,100 | ||||||||
 Cognoscenti Cognoscenti
|
|
|
In a corner alley where Boyden Avenue meets the east end of Lyndon Avenue, Alderney City, Alderney. | $29,700 | ||||||||
 Comet Comet
|
|
|
Golden Pier parking lot, Westminster, Algonquin. | $19,800 | ||||||||
 Contender Contender
|
|
|
In the Twitchin's Sugar Factory compound, Creek Street, BOABO, Broker. | $8,250 | ||||||||
 Coquette Coquette
|
|
|
In front of the Suffolk church, Liberty Lane, Suffolk, Algonquin. | $13,530 | ||||||||
 DF8-90 DF8-90
|
|
|
Underneath Hove Beach station, Crockett Avenue, Hove Beach, Broker. | $5,940 | ||||||||
 Dilettante Dilettante
|
|
|
Across the street from Big Willis Mall, Carrollton Street and Saratoga Avenue, Willis, Dukes. | $6,600 | ||||||||
 Dukes Dukes
|
|
|
Vauxite Street (across the intersection from Modo), East Holland, Algonquin. | $7,260 | ||||||||
 Faggio Faggio
|
|
|
Across the street from Dragon Heart Plaza, Diamond Street, Chinatown, Algonquin. | $2,310 | ||||||||
 Freeway Freeway
|
|
|
In front of the Willis Wash and Lube, Saratoga Avenue, Willis, Dukes. | $6,600 | ||||||||
 Huntley Sport Huntley Sport
|
|
|
Next to the Northern Gardens LCPD Station (attached to the Bohan Medical & Dental Center), Leavenworth Avenue, Northern Gardens, Bohan. | $13,200 | ||||||||
 Infernus Infernus
|
|
|
On the corner of Montauk Avenue and Earp Street (east), Downtown Broker. | $33,000 | ||||||||
 Intruder Intruder
|
|
|
On the southern end of the pedestrian promenade, Asparagus Avenue, Rotterdam Hill, Broker. | $8,250 | ||||||||
 Manana Manana
|
|
|
Car park next to a closed Burger Shot, Thornton Street, Cerveza Heights, Dukes. | $3,960 | ||||||||
 Moonbeam Moonbeam
|
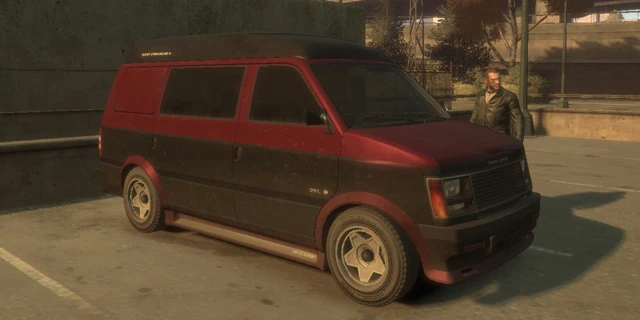 
|
|
Parking lot just north of the water treatment plant in Charge Island. | $7,260 | ||||||||
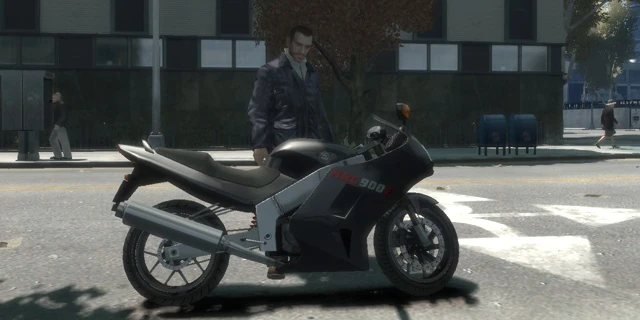
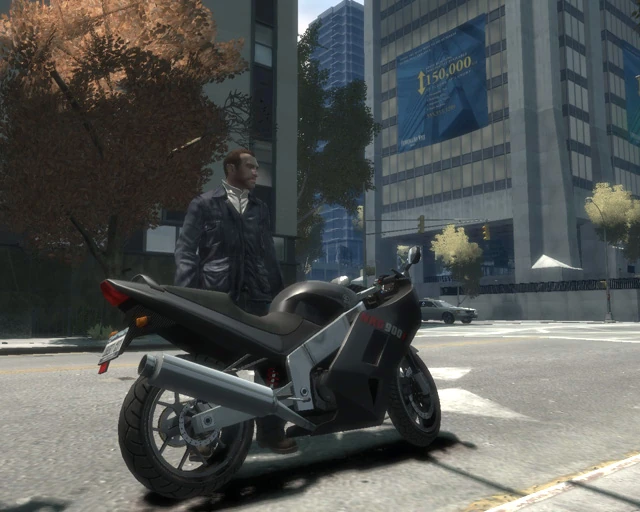
 NRG 900 NRG 900
|
|
|
On the corner of Bismarck Avenue and Topaz Street, Lancaster, Algonquin. | $8,250 | ||||||||
 Patriot Patriot
|
|
|
In front of a glass clad tower (connected to another tower via a skyway), South Parkway, The Exchange, Algonquin. | $16,500 | ||||||||
 PMP 600 PMP 600
|
|
|
Behind the Liberty City Stock Exchange (in an alley next to Bank of Liberty), Amsterdam Lane, The Exchange, Algonquin. | $10,560 | ||||||||
 Rancher Rancher
|
|
|
Parked behind a trailer in Strower Avenue, Port Tudor, Alderney. | $8,250 | ||||||||
 Rebla Rebla
|
|
|
In front of the Colonnade Row replica (Fanny Crab's restaurant), Columbus Avenue, Easton, Algonquin. | $11,550 | ||||||||
 Sabre GT Sabre GT
|
|
|
On a driveway of a house at Tudor Street, Meadow Hills, Dukes | $8,250 | ||||||||
 Sentinel Sentinel
|
|
|
In a car park outside the Port Tudor gated entrance, Roebuck Road, Normandy, Alderney | $8,250 | ||||||||
 Sultan Sultan
|
|
|
On the driveway of a house at Aspdin Drive, Berchem, Alderney. | $11,550 | ||||||||
 SuperGT SuperGT
|
|
|
In front of 69 Exchange, Calcium Street, Chinatown, Algonquin | $36,300 | ||||||||
 Turismo Turismo
|
|
|
On a driveway of a mansion at Owl Creek Avenue, Westdyke, Alderney. | $36,300 | ||||||||
 Voodoo Voodoo
|
|
|
In front of the LC24 Tower at Bunker Hill Avenue, East Island City, Dukes. | $6,600 | ||||||||
 Washington Washington
|
|
|
In front of Steinway Park, Franklin Street, Steinway, Dukes. | $7,260 | ||||||||
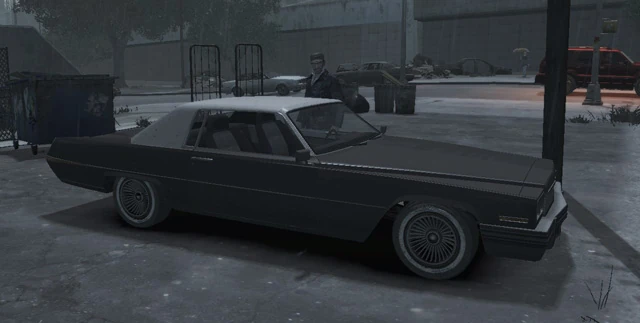
Post-completion vehicle values
This table shows the maximum value of any vehicle delivered after completing all requests.
|
Glitch
- If the player puts their phone on sleep mode at any point after completing Brucie's Exotic Exports, they may never receive Stevie's first text.
- Stevie's garage will appear on the map, but he will not contact you, and none of the cars will be in the listed locations. This glitch effectively prevents the player from being able to achieve 100% Completion.
- Some of the cars that had been delivered may still spawn at their respective location.
Video walkthrough

Gallery
See Also
- Import/Export (GTA III)
- Sunshine Autos Import Garage (GTA VC)
- Exports and Imports (GTA SA)
- Car-azy Car Give Away (GTA LCS)
- Civil Asset Forfeiture Impound (GTA VCS)
- Exotic Exports (GTA IV)
- Angus' Bike Thefts (The Lost and Damned).
- Simeon Car Export Requests (GTA Online)
- GTA Online: Import/Export (GTA Online)
External link
- gta4onlineguide.com - List of vehicles for Stevie