MonkeyBot188 (talk | contribs) (→Current Design Gallery: updating template params) Tag: apiedit |
No edit summary |
||
| (25 intermediate revisions by 9 users not shown) | |||
| Line 10: | Line 10: | ||
|manufacturer = [[Vapid]] <small>([[HD Universe]])</small> |
|manufacturer = [[Vapid]] <small>([[HD Universe]])</small> |
||
|price = |
|price = |
||
| − | [[Money|$]]15,200 <small>([[GTA San Andreas]]) ([[Exports and Imports]])</small><br> |
+ | {{BP}}[[Money|$]]15,200 <small>([[GTA San Andreas]]) ([[Exports and Imports]])</small><br> |
| − | $49,500 <small>([[Grand Theft Auto Online|GTA Online]]) ([[Southern San Andreas Super Autos]])</small><br> |
+ | {{BP}}$49,500 <small>(GTA V, Enhanced Version and [[Grand Theft Auto Online|GTA Online]]) ([[Southern San Andreas Super Autos]])</small><br> |
| − | $49,500 <small>(GTA Online) ([[Benny's Original Motor Works]] [Enhanced version only])</small> |
+ | {{BP}}$49,500 <small>(GTA Online) ([[Benny's Original Motor Works]] [Enhanced version only])</small> |
| + | {{BP}}$49,500 <small>(GTA Online) ([[Arenawar|Arena War]] [Enhanced version only])</small> |
||
| − | |appearances = ''[[Grand Theft Auto: San Andreas]]''<br>''[[Grand Theft Auto V]]'' {{DLC|Festive Surprise Update}}<br>''[[Grand Theft Auto Online]]'' {{DLC|Festive Surprise Update}} |
||
| + | {{BP}}$37,125 <small>(trade price; Arena War only)</small> |
||
| − | |variants = [[Lost Slamvan]]<br>[[Slamvan Custom]] |
||
| + | |appearances = ''[[Grand Theft Auto: San Andreas]]<br>[[Grand Theft Auto V]]'' {{DLC|Festive Surprise update}}<br>''[[Grand Theft Auto Online]]'' {{DLC|Festive Surprise update}} |
||
| − | |related = [[Bobcat]]<br>[[Tow Truck]]<br>[[Rat-Loader]] |
||
| + | |variants = [[Lost Slamvan]]<br>[[Slamvan Custom]]<br>[[Apocalypse Slamvan]]<br>[[Future Shock Slamvan]]<br>[[Nightmare Slamvan]] |
||
| + | |related = [[Bobcat]]<br>[[Tow Truck]]<br>[[Rat-Loader]]<br>[[Rat-Truck]] |
||
|makeyear = 1950s |
|makeyear = 1950s |
||
| − | | |
+ | |swankness = |
| + | |dashtype = Bobcat <small>(needles)</small>[[File:Bobcat-Dials-GTAV.png|thumb|center|170px]]<br>Bobcat <small>(dial texture)</small>[[File:Bobcat-GTAV-DialSet.png|thumb|center|170px]] |
||
|inttxd = |
|inttxd = |
||
{{BP}}Generic <small>(GTA SA)</small><br> |
{{BP}}Generic <small>(GTA SA)</small><br> |
||
{{BP}}Bobcat <small>(GTA V)</small> |
{{BP}}Bobcat <small>(GTA V)</small> |
||
| − | |roadspawn = |
||
| − | {{BP}}Yes <small>(GTA SA)</small><br> |
||
| − | {{BP}}No <small>(GTA V)</small> |
||
|carcols = |
|carcols = |
||
{{Expand|'''GTA San Andreas'''| |
{{Expand|'''GTA San Andreas'''| |
||
| + | {{CarColSA/Title}} |
||
| − | <center>COLOR SET 1</center> |
||
| − | {{CarColSA|3|1}} |
+ | {{CarColSA|no=1|3|1}} |
| + | {{CarColSA|no=2|28|1}} |
||
| − | <center>COLOR SET 2</center> |
||
| − | {{CarColSA| |
+ | {{CarColSA|no=3|31|1}} |
| + | {{CarColSA|no=4|55|1}} |
||
| − | <center>COLOR SET 3</center> |
||
| − | {{CarColSA| |
+ | {{CarColSA|no=5|66|1}} |
| + | {{CarColSA|no=6|97|1}} |
||
| − | <center>COLOR SET 4</center> |
||
| − | {{CarColSA| |
+ | {{CarColSA|no=7|123|1}} |
| + | {{CarColSA|no=8|118|1}}<br> |
||
| − | <center>COLOR SET 5</center> |
||
| − | {{CarColSA|66|1}}<br> |
||
| − | <center>COLOR SET 6</center> |
||
| − | {{CarColSA|97|1}}<br> |
||
| − | <center>COLOR SET 7</center> |
||
| − | {{CarColSA|123|1}}<br> |
||
| − | <center>COLOR SET 8</center> |
||
| − | {{CarColSA|118|1}}<br> |
||
}} |
}} |
||
---- |
---- |
||
{{Expand|'''GTA V'''| |
{{Expand|'''GTA V'''| |
||
| + | {{CarColV/Title}} |
||
| − | <center>COLOR SET 1</center> |
||
| − | {{CarColV|0|0|20|156}} |
+ | {{CarColV|no=1|0|0|20|156}} |
| + | {{CarColV|no=2|12|13|20|156}} |
||
| − | <center>COLOR SET 2</center> |
||
| − | {{CarColV| |
+ | {{CarColV|no=3|22|23|20|156}} |
| + | {{CarColV|no=4|26|26|20|156}} |
||
| − | <center>COLOR SET 3</center> |
||
| − | {{CarColV| |
+ | {{CarColV|no=5|29|29|29|156}} |
| + | {{CarColV|no=6|34|34|29|156}} |
||
| − | <center>COLOR SET 4</center> |
||
| − | {{CarColV| |
+ | {{CarColV|no=7|62|62|63|156}} |
| + | {{CarColV|no=8|66|66|63|156}} |
||
| − | <center>COLOR SET 5</center> |
||
| − | {{CarColV| |
+ | {{CarColV|no=9|88|66|63|156}} |
| + | {{CarColV|no=10|99|95|20|156}} |
||
| − | <center>COLOR SET 6</center> |
||
| − | {{CarColV| |
+ | {{CarColV|no=11|106|107|20|156}} |
| + | {{CarColV|no=12|113|116|20|156}}<br> |
||
| − | <center>COLOR SET 7</center> |
||
| − | {{CarColV|62|62|63|156}}<br> |
||
| − | <center>COLOR SET 8</center> |
||
| − | {{CarColV|66|66|63|156}}<br> |
||
| − | <center>COLOR SET 9</center> |
||
| − | {{CarColV|88|66|63|156}}<br> |
||
| − | <center>COLOR SET 10</center> |
||
| − | {{CarColV|99|95|20|156}}<br> |
||
| − | <center>COLOR SET 11</center> |
||
| − | {{CarColV|106|107|20|156}}<br> |
||
| − | <center>COLOR SET 12</center> |
||
| − | {{CarColV|113|116|20|156}}<br> |
||
}} |
}} |
||
|wheeltype = Muscle |
|wheeltype = Muscle |
||
| − | |flags = |
+ | |flags = {{Flags|FLAG_USE_STRICTER_EXIT_COLLISION_TESTS}} |
| + | |modelsets = |
||
| − | {{Expand|'''GTA V'''| |
||
| − | {{Flags|FLAG_USE_STRICTER_EXIT_COLLISION_TESTS}}<br> |
||
| − | }} |
||
|modelname = slamvan <small>(All games)</small> |
|modelname = slamvan <small>(All games)</small> |
||
|handlingname = SLAMVAN <small>(All games)</small> |
|handlingname = SLAMVAN <small>(All games)</small> |
||
|textlabelname = SLAMVAN <small>(All games)</small> |
|textlabelname = SLAMVAN <small>(All games)</small> |
||
| + | |roadspawn = |
||
| + | {{BP}}Yes <small>(GTA SA)</small><br> |
||
| + | {{BP}}No <small>(GTA V)</small> |
||
| + | |roadspawnmaxcol = |
||
| + | |roadspawnfreq = |
||
| + | |roadspawntrailer = <!--null--> |
||
| + | |roadspawnidendis = |
||
| + | |roadspawndrivers = |
||
| + | |roadspawngroups = |
||
| + | |roadspawnlicense = |
||
|engineacceleration = |
|engineacceleration = |
||
|exhaustacceleration = |
|exhaustacceleration = |
||
| Line 87: | Line 77: | ||
{{Disambiglink|Not to be confused with [[Lost Slamvan]], a variant of the Slamvan also named "Slamvan" pre-GTA Online.}} |
{{Disambiglink|Not to be confused with [[Lost Slamvan]], a variant of the Slamvan also named "Slamvan" pre-GTA Online.}} |
||
{{Quote|Favorite 50's pickup of San Andreas Lowriders and Liberty City bikers. Smooth lines, chrome details, and shiny paintwork have made the Vapid Slamvan the toy of choice for idiots who won't grow up everywhere.|[[Southern San Andreas Super Autos]] description.}} |
{{Quote|Favorite 50's pickup of San Andreas Lowriders and Liberty City bikers. Smooth lines, chrome details, and shiny paintwork have made the Vapid Slamvan the toy of choice for idiots who won't grow up everywhere.|[[Southern San Andreas Super Autos]] description.}} |
||
| − | The '''Slamvan''' is a pickup truck featured in ''[[Grand Theft Auto: San Andreas]]'', ''[[Grand Theft Auto V]] |
+ | The '''Slamvan''' is a pickup truck featured in ''[[Grand Theft Auto: San Andreas]]'', ''[[Grand Theft Auto V]]'' and ''[[Grand Theft Auto Online]]'' as part of the [[Festive Surprise]] update. It is manufactured by [[Vapid]] in the [[HD Universe]]. |
==Design== |
==Design== |
||
===''Grand Theft Auto: San Andreas''=== |
===''Grand Theft Auto: San Andreas''=== |
||
| − | + | The Slamvan resembles a heavily customized {{WP|Chevrolet C/K|second generation Chevrolet GMC C/K}} with a chopped roof and custom suspension, while the front of the vehicle is similar to the {{WP|Dodge Sidewinder|Dodge Sidewinder}} (with the exception of the headlights). |
|
| + | Naturally, it is a two door and can only seat two people. Sometimes the Slamvan will spawn with a custom chain steering wheel. |
||
| − | In the beta version, Slamvans had a different wheel design and had a different paint job not seen in the final version. |
||
| + | |||
| + | In the beta version, the Slamvan had a different wheel design and paint job not seen in the final version. |
||
===''Grand Theft Auto V''=== |
===''Grand Theft Auto V''=== |
||
| + | {{Quote|The quintessential 50's flatbed.|[[Arenawar|Arena War]] description.}}The Slamvan resembles a {{WP|Rat Rod|Rat Rodded}} {{WP|Ford F-Series|1953–1956 Ford F-Series}} Pickup. It appears that the top half of the cab is from a 67-72 {{WP|Ford F Series}}. The vehicle appears as a 2-door pickup with a wooden bed floor in a step side bed. |
||
| − | {{Quote|Favorite 50's pickup of San Andreas Lowriders and Liberty City bikers. Smooth lines, chrome details, and shiny paintwork have made the Vapid Slamvan the toy of choice for idiots who won't grow up everywhere.|[[Southern San Andreas Super Autos]] description.}} |
||
| − | The [[Vapid]] Slamvan resembles a [[wp:Rat Rod|Rat Rodded]] [[wp:Ford F-Series|1953–1956 Ford F-Series]] Pickup. It appears that the top half of the cab is from a 67-72 [[wp:Ford F Series|Ford F-Series]]. The vehicle appears as a 2-door pickup with a wooden bed floor in a step side bed. It has no visual modifications available so it is best to be upgraded to the [[Slamvan Custom]]. |
||
| + | The vehicle shares the same design as its [[Lost Slamvan|older iteration]] (now present with a different name), but features an open truck bed and the rear end has the same bumper and tail lights as the [[Tow Truck|Towtruck]] (another vehicle that shares many similarities in terms of design), only cleaner in appearance. |
||
| − | {{Clr}} |
||
| + | {{Clr}} |
||
===Current Design Gallery=== |
===Current Design Gallery=== |
||
| + | <!--Please ensure you have read the Manual of Style [GTA_Wiki:Manual_of_Style/Vehicles/Design_Galleries] before uploading and adding images to the Current Design Gallery. Failure to meet these guidelines will result in the images being removed and deleted, and repeated offences may result in a warning.--> |
||
| + | |||
{{Current Design Gallery |
{{Current Design Gallery |
||
| − | | |
+ | |front_quarter_image = Slamvan-GTAV-FrontQuarter.jpg |
| − | | |
+ | |top_image = Slamvan-GTAV-Top.jpg |
| − | | |
+ | |rear_quarter_image = Slamvan-GTAV-RearQuarter.jpg |
| − | | |
+ | |front_image = Slamvan-GTAV-Front.jpg |
| − | | |
+ | |side_image = Slamvan-GTAV-Side.jpg |
| − | | |
+ | |rear_image = Slamvan-GTAV-Rear.jpg |
| − | | |
+ | |engine_image = Slamvan-GTAV-Engine.jpg |
| − | | |
+ | |underside_image = Slamvan-GTAV-Underside.jpg |
| − | | |
+ | |inside_image = Slamvan-GTAV-Inside.jpg |
| − | | |
+ | |detail_image = Slamvan-GTAV-Badge.png |
| − | | |
+ | |open_other_image = Slamvan-GTAV-Open.jpg |
| − | | |
+ | |dashboard_image = Slamvan-GTAV-Dashboard.jpg |
}} |
}} |
||
===Version History Gallery=== |
===Version History Gallery=== |
||
{{Vehicle Design History Gallery |
{{Vehicle Design History Gallery |
||
| − | | |
+ | |GTASA_Front_imagename = Slamvan-GTASA-front.jpg |
| − | | |
+ | |GTASA_Rear_imagename = Slamvan-GTASA-rear.jpg |
}} |
}} |
||
==Performance== |
==Performance== |
||
===''Grand Theft Auto: San Andreas''=== |
===''Grand Theft Auto: San Andreas''=== |
||
| − | The Slamvan is quite nimble and comfortable to drive due to its supercharged V8 and upgraded suspension |
+ | The Slamvan is quite nimble and comfortable to drive due to its supercharged V8 and upgraded suspension. It possesses good acceleration and average top speed. Its brakes are also strong, being capable of quickly stopping from top speed to zero; its downsides however, is the arguably poor durability and stability, and despite its low height, it can still rollover easily. |
====GTA San Andreas Overview==== |
====GTA San Andreas Overview==== |
||
| Line 136: | Line 130: | ||
|observed_acceleration = |
|observed_acceleration = |
||
|observed_top_speed = |
|observed_top_speed = |
||
| − | |observed_gears = |
+ | |observed_gears = 5 |
|observed_engine = |
|observed_engine = |
||
| − | |observed_drivetrain = |
+ | |observed_drivetrain = RWD |
}} |
}} |
||
===''Grand Theft Auto V''=== |
===''Grand Theft Auto V''=== |
||
| − | The Slamvan has a customized V8 with 4 double-barrel carburetors, which sounds similar to the [[Duke O'Death]], [[The Liberator]], and [[Marshall]]. In |
+ | The Slamvan has a customized V8 with 4 double-barrel carburetors, which sounds similar to the [[Duke O'Death]], [[The Liberator]], and [[Marshall]]. In-game stat bars and testing has shown it has the same performance as the [[Rat-Loader]] and its clean variant, the [[Rat-Truck]]. Thus, it has average acceleration and top speed, matched with very poor brakes and traction. [[The Lost MC|The Lost]] Slamvan features similar engine as the pick-up variant but has an improved acceleration. Traction is also enhanced and braking is strengthened. |
====GTA V Overview ==== |
====GTA V Overview ==== |
||
| Line 274: | Line 268: | ||
===''Grand Theft Auto V''=== |
===''Grand Theft Auto V''=== |
||
{| class="wikitable" |
{| class="wikitable" |
||
| + | ! colspan="2" scope="col" |Category |
||
| − | !Type |
||
| + | ! scope="col" |Modification |
||
| − | !Upgrade |
||
| − | !Cost ( |
+ | ! scope="col" |Cost (''GTA V'') |
| − | !Cost ([[Grand Theft Auto Online|Online]]) |
+ | ! scope="col" |Cost ([[Grand Theft Auto Online|''GTA Online'']]) |
| + | ! scope="col" |Image |
||
| + | |- |
||
| + | | colspan="2" rowspan="3" |Upgrade: Arena War<sup>A</sup> |
||
| + | |[[Apocalypse Slamvan]] |
||
| + | | style="text-align: center;" |N/A |
||
| + | | style="text-align: center;" |$1,321,875 |
||
| + | |[[File:ApocalypseSlamvan-GTAO-front.png|thumb|center|220px|<small>([[:File:ApocalypseSlamvan-GTAO-rear.png|Rear quarter view]])</small>]] |
||
| + | |- |
||
| + | |[[Future Shock Slamvan]] |
||
| + | | style="text-align: center;" |N/A |
||
| + | | style="text-align: center;" |$1,321,875 |
||
| + | |[[File:FutureShockSlamvan-GTAO-front.png|thumb|center|220px|<small>([[:File:FutureShockSlamvan-GTAO-rear.png|Rear quarter view]])</small>]] |
||
| + | |- |
||
| + | |[[Nightmare Slamvan]] |
||
| + | | style="text-align: center;" |N/A |
||
| + | | style="text-align: center;" |$1,321,875 |
||
| + | |[[File:NightmareSlamvan-GTAO-front.png|thumb|center|220px|<small>([[:File:NightmareSlamvan-GTAO-rear.png|Rear quarter view]])</small>]] |
||
| + | |- |
||
| + | | colspan="2" |Upgrade: Benny's Original Motor Works<sup>B</sup> |
||
| + | |[[Slamvan Custom]] |
||
| + | | style="text-align: center;" |N/A |
||
| + | | style="text-align: center;" |$415,000 |
||
| + | |[[File:SlamvanCustom-GTAO-front.png|thumb|center|220px|<small>([[:File:SlamvanCustom-GTAO-rear.png|Rear quarter view]])</small>]] |
||
| + | |- |
||
| + | | colspan="2" rowspan="6" |Armor |
||
| + | |No Armor |
||
| + | | style="text-align: center;" |$100 |
||
| + | | colspan="2" style="text-align: center;" |$200 |
||
|- |
|- |
||
| − | | rowspan="5" |Armor |
||
|Armor Upgrade 20% |
|Armor Upgrade 20% |
||
| style="text-align: center;" |$500 |
| style="text-align: center;" |$500 |
||
| − | | style="text-align: center;" |$4,500 |
+ | | colspan="2" style="text-align: center;" |$4,500 |
|- |
|- |
||
|Armor Upgrade 40% |
|Armor Upgrade 40% |
||
| style="text-align: center;" |$1,250 |
| style="text-align: center;" |$1,250 |
||
| − | | style="text-align: center;" |$7,500 |
+ | | colspan="2" style="text-align: center;" |$7,500 |
|- |
|- |
||
|Armor Upgrade 60% |
|Armor Upgrade 60% |
||
| style="text-align: center;" |$2,000 |
| style="text-align: center;" |$2,000 |
||
| − | | style="text-align: center;" |$12,000 |
+ | | colspan="2" style="text-align: center;" |$12,000 |
|- |
|- |
||
|Armor Upgrade 80% |
|Armor Upgrade 80% |
||
| style="text-align: center;" |$3,500 |
| style="text-align: center;" |$3,500 |
||
| − | | style="text-align: center;" |$21,000 |
+ | | colspan="2" style="text-align: center;" |$21,000 |
|- |
|- |
||
|Armor Upgrade 100% |
|Armor Upgrade 100% |
||
| style="text-align: center;" |$5,000 |
| style="text-align: center;" |$5,000 |
||
| − | | style="text-align: center;" |$30,000 |
+ | | colspan="2" style="text-align: center;" |$30,000 |
| + | |- |
||
| + | | colspan="2" rowspan="4" |Brakes |
||
| + | |Stock Brakes |
||
| + | | style="text-align: center;" |$100 |
||
| + | | colspan="2" style="text-align: center;" |$200 |
||
|- |
|- |
||
| − | | rowspan="3" |Brakes |
||
|Street Brakes |
|Street Brakes |
||
| style="text-align: center;" |$2,000 |
| style="text-align: center;" |$2,000 |
||
| − | | style="text-align: center;" |$4,000 |
+ | | colspan="2" style="text-align: center;" |$4,000 |
|- |
|- |
||
|Sport Brakes |
|Sport Brakes |
||
| style="text-align: center;" |$2,700 |
| style="text-align: center;" |$2,700 |
||
| − | | style="text-align: center;" |$5,400 |
+ | | colspan="2" style="text-align: center;" |$5,400 |
|- |
|- |
||
|Race Brakes |
|Race Brakes |
||
| style="text-align: center;" |$3,500 |
| style="text-align: center;" |$3,500 |
||
| − | | style="text-align: center;" |$7,000 |
+ | | colspan="2" style="text-align: center;" |$7,000 |
|- |
|- |
||
| − | | rowspan="4" |Engine |
+ | | colspan="2" rowspan="4" |Engine |
|EMS Upgrade, Level 1 |
|EMS Upgrade, Level 1 |
||
| style="text-align: center;" |$900 |
| style="text-align: center;" |$900 |
||
| − | | style="text-align: center;" |$1,800 |
+ | | colspan="2" style="text-align: center;" |$1,800 |
|- |
|- |
||
|EMS Upgrade, Level 2 |
|EMS Upgrade, Level 2 |
||
| style="text-align: center;" |$1,250 |
| style="text-align: center;" |$1,250 |
||
| − | | style="text-align: center;" |$2,500 |
+ | | colspan="2" style="text-align: center;" |$2,500 |
|- |
|- |
||
|EMS Upgrade, Level 3 |
|EMS Upgrade, Level 3 |
||
| style="text-align: center;" |$1,800 |
| style="text-align: center;" |$1,800 |
||
| − | | style="text-align: center;" |$3,600 |
+ | | colspan="2" style="text-align: center;" |$3,600 |
|- |
|- |
||
|EMS Upgrade, Level 4 |
|EMS Upgrade, Level 4 |
||
| style="text-align: center;" |$3,350 |
| style="text-align: center;" |$3,350 |
||
| − | | style="text-align: center;" |$6,700 |
+ | | colspan="2" style="text-align: center;" |$6,700 |
| + | |- |
||
| + | | colspan="2" rowspan="2" |[[Car Bomb|Explosives]] |
||
| + | |Ignition Bomb |
||
| + | | style="text-align: center;" |N/A |
||
| + | | colspan="2" style="text-align: center;" |$5,000 |
||
| + | |- |
||
| + | |Remote Bomb |
||
| + | | style="text-align: center;" |N/A |
||
| + | | colspan="2" style="text-align: center;" |$7,500 |
||
| + | |- |
||
| + | | colspan="2" |Horns |
||
| + | |''Main article: [[Los Santos Customs/Horns]]'' |
||
| + | | style="text-align: center;" | - |
||
| + | | colspan="2" style="text-align: center;" | - |
||
| + | |- |
||
| + | | rowspan="3" |Lights |
||
| + | | rowspan="2" |Headlights |
||
| + | |Stock Lights |
||
| + | | style="text-align: center;" |$100 |
||
| + | | colspan="2" style="text-align: center;" |$200 |
||
|- |
|- |
||
| − | | rowspan="2" |Lights |
||
|Xenon Lights |
|Xenon Lights |
||
| style="text-align: center;" |$300 |
| style="text-align: center;" |$300 |
||
| − | | style="text-align: center;" |$3,000 |
+ | | colspan="2" style="text-align: center;" |$3,000 |
|- |
|- |
||
| + | |Neon Kits |
||
| − | |<div class="mw-collapsible mw-collapsed" style="width:100%"> |
||
| + | |''Main article: [[Los Santos Customs/Lights]]'' |
||
| − | <div class="mw-collapsible-content"> |
||
| − | {{Main|Los Santos Customs/Lights}} |
||
| − | </div> |
||
| − | </div> |
||
| − | | style="text-align: center;" | - |
||
| style="text-align: center;" | - |
| style="text-align: center;" | - |
||
| + | | colspan="2" style="text-align: center;" | - |
||
|- |
|- |
||
| − | | rowspan="2" |Loss/Theft Prevention |
+ | | colspan="2" rowspan="2" |Loss/Theft Prevention |
|Tracker |
|Tracker |
||
| style="text-align: center;" |N/A |
| style="text-align: center;" |N/A |
||
| − | | style="text-align: center;" |$2,000 |
+ | | colspan="2" style="text-align: center;" |$2,000 |
|- |
|- |
||
|Full Coverage |
|Full Coverage |
||
| style="text-align: center;" |N/A |
| style="text-align: center;" |N/A |
||
| − | | style="text-align: center;" |$ |
+ | | colspan="2" style="text-align: center;" |$ |
|- |
|- |
||
| + | | colspan="2" rowspan="5" |Plates |
||
| − | |Respray |
||
| + | |Blue on White 1 |
||
| − | |<div class="mw-collapsible mw-collapsed" style="width:100%"> |
||
| + | | style="text-align: center;" |$50 |
||
| − | <div class="mw-collapsible-content"> |
||
| + | | colspan="2" style="text-align: center;" |$200 |
||
| − | {{ResprayColorsExpand}} |
||
| + | |- |
||
| − | </div> |
||
| + | |Blue on White 2 |
||
| − | </div> |
||
| − | | style="text-align: center;" | |
+ | | style="text-align: center;" |$50 |
| + | | colspan="2" style="text-align: center;" |$200 |
||
| + | |- |
||
| + | |Blue on White 3 |
||
| + | | style="text-align: center;" |$50 |
||
| + | | colspan="2" style="text-align: center;" |$200 |
||
| + | |- |
||
| + | |Yellow on Blue |
||
| + | | style="text-align: center;" |$75 |
||
| + | | colspan="2" style="text-align: center;" |$300 |
||
| + | |- |
||
| + | |Yellow on Black |
||
| + | | style="text-align: center;" |$150 |
||
| + | | colspan="2" style="text-align: center;" |$600 |
||
| + | |- |
||
| + | | colspan="2" |Respray |
||
| + | |''Main article: [[Los Santos Customs/Respray Colors]]'' |
||
| style="text-align: center;" | - |
| style="text-align: center;" | - |
||
| + | | colspan="2" style="text-align: center;" | - |
||
|- |
|- |
||
| − | |Sell |
+ | | colspan="2" |Sell |
|Sell Vehicle |
|Sell Vehicle |
||
| style="text-align: center;" |N/A |
| style="text-align: center;" |N/A |
||
| − | | style="text-align: center;" |$ |
+ | | colspan="2" style="text-align: center;" |$ |
| + | |- |
||
| + | | colspan="2" rowspan="5" |Suspension |
||
| + | |Stock Suspension |
||
| + | | style="text-align: center;" |$100 |
||
| + | | colspan="2" style="text-align: center;" |$200 |
||
|- |
|- |
||
| − | | rowspan="4" |Suspension |
||
|Lowered Suspension |
|Lowered Suspension |
||
| style="text-align: center;" |$500 |
| style="text-align: center;" |$500 |
||
| − | | style="text-align: center;" |$1,000 |
+ | | colspan="2" style="text-align: center;" |$1,000 |
|- |
|- |
||
|Street Suspension |
|Street Suspension |
||
| style="text-align: center;" |$1,000 |
| style="text-align: center;" |$1,000 |
||
| − | | style="text-align: center;" |$2,000 |
+ | | colspan="2" style="text-align: center;" |$2,000 |
|- |
|- |
||
|Sport Suspension |
|Sport Suspension |
||
| style="text-align: center;" |$1,700 |
| style="text-align: center;" |$1,700 |
||
| − | | style="text-align: center;" |$3,400 |
+ | | colspan="2" style="text-align: center;" |$3,400 |
|- |
|- |
||
|Competition Suspension |
|Competition Suspension |
||
| style="text-align: center;" |$2,200 |
| style="text-align: center;" |$2,200 |
||
| − | | style="text-align: center;" |$4,400 |
+ | | colspan="2" style="text-align: center;" |$4,400 |
| + | |- |
||
| + | | colspan="2" rowspan="4" |Transmission |
||
| + | |Stock Transmission |
||
| + | | style="text-align: center;" |$100 |
||
| + | | colspan="2" style="text-align: center;" |$200 |
||
|- |
|- |
||
| − | | rowspan="3" |Transmission |
||
|Street Transmission |
|Street Transmission |
||
| style="text-align: center;" |$2,950 |
| style="text-align: center;" |$2,950 |
||
| − | | style="text-align: center;" |$5,900 |
+ | | colspan="2" style="text-align: center;" |$5,900 |
|- |
|- |
||
|Sports Transmission |
|Sports Transmission |
||
| style="text-align: center;" |$3,250 |
| style="text-align: center;" |$3,250 |
||
| − | | style="text-align: center;" |$6,500 |
+ | | colspan="2" style="text-align: center;" |$6,500 |
|- |
|- |
||
|Race Transmission |
|Race Transmission |
||
| style="text-align: center;" |$4,000 |
| style="text-align: center;" |$4,000 |
||
| − | | style="text-align: center;" |$8,000 |
+ | | colspan="2" style="text-align: center;" |$8,000 |
| + | |- |
||
| + | | colspan="2" rowspan="2" |Turbo |
||
| + | |None |
||
| + | | style="text-align: center;" |$500 |
||
| + | | colspan="2" style="text-align: center;" |$1,000 |
||
|- |
|- |
||
| − | |Turbo |
||
|Turbo Tuning |
|Turbo Tuning |
||
| style="text-align: center;" |$2,500 |
| style="text-align: center;" |$2,500 |
||
| − | | style="text-align: center;" |$30,000 |
+ | | colspan="2" style="text-align: center;" |$30,000 |
|- |
|- |
||
| − | |Wheels |
+ | | colspan="2" |Wheels |
| + | |''Main article: [[Los Santos Customs/Wheels]]'' |
||
| − | |<div class="mw-collapsible mw-collapsed" style="width:100%"> |
||
| − | <div class="mw-collapsible-content"> |
||
| − | {{WheelsExpand}} |
||
| − | </div> |
||
| − | </div> |
||
| − | | style="text-align: center;" | - |
||
| style="text-align: center;" | - |
| style="text-align: center;" | - |
||
| + | | colspan="2" style="text-align: center;" | - |
||
| + | |- |
||
| + | | colspan="2" rowspan="4" |Windows |
||
| + | |None |
||
| + | | style="text-align: center;" |$100 |
||
| + | | colspan="2" style="text-align: center;" |$500 |
||
|- |
|- |
||
| − | | rowspan="3" |Windows |
||
|Light Smoke |
|Light Smoke |
||
| style="text-align: center;" |$200 |
| style="text-align: center;" |$200 |
||
| − | | style="text-align: center;" |$1,500 |
+ | | colspan="2" style="text-align: center;" |$1,500 |
|- |
|- |
||
|Dark Smoke |
|Dark Smoke |
||
| style="text-align: center;" |$450 |
| style="text-align: center;" |$450 |
||
| − | | style="text-align: center;" |$3,500 |
+ | | colspan="2" style="text-align: center;" |$3,500 |
|- |
|- |
||
|Limo |
|Limo |
||
| style="text-align: center;" |$700 |
| style="text-align: center;" |$700 |
||
| − | | style="text-align: center;" |$5,000 |
+ | | colspan="2" style="text-align: center;" |$5,000 |
|} |
|} |
||
| + | :<sup>A</sup> Only available at the [[Arena Workshop]] (enhanced version). |
||
| + | :<sup>B</sup> Only available at [[Benny's Original Motor Works]] (enhanced version). |
||
==Image Gallery== |
==Image Gallery== |
||
| + | ===''Grand Theft Auto: San Andreas''=== |
||
| − | <gallery position="center"> |
||
| + | <gallery position="center" spacing="small" widths="270px" hideaddbutton="true"> |
||
| − | Slamvan-GTASA-Picture.jpg|The Slamvan picture in the Driving School. |
||
| + | Slamvan-GTASA-Picture.jpg|The '''Slamvan picture''' in the Driving School. |
||
| + | </gallery> |
||
| + | |||
| + | ===''Grand Theft Auto V''=== |
||
| + | <gallery position="center" spacing="small" widths="270px" hideaddbutton="true"> |
||
| + | Slamvan_GTAVe_Front_Quarter.jpg|A '''Slamvan''' in ''GTA V'' - Enhanced version (<small>[[:File:Slamvan_GTAVe_Rear_Quarter.jpg|Rear quarter view]]</small>). |
||
Slamvan-GTAV-RSC.jpg|The '''Slamvan''' on the [[Rockstar Games Social Club]]. |
Slamvan-GTAV-RSC.jpg|The '''Slamvan''' on the [[Rockstar Games Social Club]]. |
||
| − | Slamvan-GTAV- |
+ | Slamvan-GTAV-SSASA.png|The '''Slamvan''' on [[Southern San Andreas Super Autos]]. |
| + | ArenaWar-GTAO-Slamvan.png|The '''Slamvan''' on the [[Arenawar|Arena War]] website. |
||
| − | Slamvan_GTAVe_Front_Quarter.jpg|A Slamvan in GTA V - Enhanced version (<small>[[:File:Slamvan_GTAVe_Rear_Quarter.jpg|Rear quarter view]]</small>). |
||
</gallery> |
</gallery> |
||
| Line 450: | Line 528: | ||
|front_image = LostSlamvan2-GTAO-front.png |
|front_image = LostSlamvan2-GTAO-front.png |
||
|rear_image = LostSlamvan2-GTAO-rear.png |
|rear_image = LostSlamvan2-GTAO-rear.png |
||
| − | |caption = The ''' |
+ | |caption = The '''Lost Slamvan''' in ''[[Grand Theft Auto Online]]''. |
|description = [[The Lost]] and [[Angels of Death]] use improvised van-variants of the Slamvan that feature rear bed covers converted into a van. The vans were originally named simply "''Slamvan''" in ''[[Grand Theft Auto: Episodes from Liberty City]]'', however they return to ''[[Grand Theft Auto Online]]'' named "''Lost Slamvan''". |
|description = [[The Lost]] and [[Angels of Death]] use improvised van-variants of the Slamvan that feature rear bed covers converted into a van. The vans were originally named simply "''Slamvan''" in ''[[Grand Theft Auto: Episodes from Liberty City]]'', however they return to ''[[Grand Theft Auto Online]]'' named "''Lost Slamvan''". |
||
| + | }} |
||
| + | {{VariantTriple |
||
| + | |float = center |
||
| + | |title = Arena Slamvan |
||
| + | |games = Grand Theft Auto Online |
||
| + | |article_link = Apocalypse Slamvan |
||
| + | |article_link2 = Future Shock Slamvan |
||
| + | |article_link3 = Nightmare Slamvan |
||
| + | |front_image = ApocalypseSlamvan-GTAO-front.png |
||
| + | |rear_image = ApocalypseSlamvan-GTAO-rear.png |
||
| + | |front_image2 = FutureShockSlamvan-GTAO-front.png |
||
| + | |rear_image2 = FutureShockSlamvan-GTAO-rear.png |
||
| + | |front_image3 = NightmareSlamvan-GTAO-front.png |
||
| + | |rear_image3 = NightmareSlamvan-GTAO-rear.png |
||
| + | |caption = The '''Apocalypse Slamvan''' in ''Grand Theft Auto Online''. |
||
| + | |caption2 = The '''Future Shock Slamvan''' in ''Grand Theft Auto Online''. |
||
| + | |caption3 = The '''Nightmare Slamvan''' in ''Grand Theft Auto Online''. |
||
| + | |description = The Slamvan can be converted into a custom "Arena" variant, which is basically a dragster version of the vehicle with a stripped down rear and a big-block engine behind the cabin. It is available in three different versions: '''Apocalypse''', '''Future Shock''' and '''Nightmare'''. |
||
}} |
}} |
||
{{Clr}} |
{{Clr}} |
||
| + | |||
| + | ==Prominence Appearances in Missions== |
||
| + | ===Grand Theft Auto: San Andreas=== |
||
| + | * [[Exports and Imports]] - The Slamvan is one of the 30 vehicles wanted for the side-mission. Placed on the second list. |
||
==Locations== |
==Locations== |
||
===''Grand Theft Auto: San Andreas''=== |
===''Grand Theft Auto: San Andreas''=== |
||
*Parked at the rear entrance of the sex shop in [[El Corona]], [[Los Santos (3D Universe)|Los Santos]]. It is alarmed 50% of the time and locked 10% of the time. It is only spawned when wanted for [[Exports and Imports|export]]. |
*Parked at the rear entrance of the sex shop in [[El Corona]], [[Los Santos (3D Universe)|Los Santos]]. It is alarmed 50% of the time and locked 10% of the time. It is only spawned when wanted for [[Exports and Imports|export]]. |
||
| − | * |
+ | *Can be imported on Mondays for $15,200. In [[Easter Basin]] ([[San Fierro (3D Universe)|San Fierro]]) after the completing export lists. |
*Can be seen driving around [[The Strip]], [[Las Venturas (3D Universe)|Las Venturas]] and around [[Downtown Los Santos (3D Universe)|Downtown Los Santos]]. |
*Can be seen driving around [[The Strip]], [[Las Venturas (3D Universe)|Las Venturas]] and around [[Downtown Los Santos (3D Universe)|Downtown Los Santos]]. |
||
*[[Prickle Pine]], as with other "affluent" cars. |
*[[Prickle Pine]], as with other "affluent" cars. |
||
| Line 465: | Line 565: | ||
===''Grand Theft Auto V''=== |
===''Grand Theft Auto V''=== |
||
| + | ;Original version |
||
| − | *Available in each [[protagonist|protagonist's]] garage. <small>(original version)</small> |
||
| + | *Available in each [[protagonist|protagonist's]] garage. |
||
| − | *Available from [[Southern San Andreas Super Autos]] for $49,500. <small>(enhanced version)</small> |
||
| + | ;Enhanced version |
||
| + | *Available from [[Southern San Andreas Super Autos]] for [[Money|$]]49,500. |
||
===''Grand Theft Auto Online''=== |
===''Grand Theft Auto Online''=== |
||
| − | *Available from |
+ | *Available from Southern San Andreas Super Autos for $49,500. |
| − | *Can be requested by the Road Captain of a [[Motorcycle Club]] for club use in free mode for $ |
+ | *Can be requested by the Road Captain of a [[Motorcycle Clubs|Motorcycle Club]] for club use in free mode for $1,000. This vehicle is black and comes with bullet-proof tires and a bullet-resistant windshield. |
| + | *Available from [[Benny's Original Motor Works]] for $49,500 (enhanced version only). |
||
| + | *Available from [[Arenawar|Arena War]] for $49,500 or for $37,125 (trade price as a Sponsorship Tier reward in the Arena War Career, only in the enhanced version). |
||
==Trivia== |
==Trivia== |
||
| Line 481: | Line 585: | ||
*[[Lost Slamvan]] - A gang variant of the Slamvan formerly known as "''Slamvan''". |
*[[Lost Slamvan]] - A gang variant of the Slamvan formerly known as "''Slamvan''". |
||
*[[Slamvan Custom]] - Custom variant. |
*[[Slamvan Custom]] - Custom variant. |
||
| + | *[[Tow Truck]] - A tow truck that shares similarities with the vehicle in the [[HD Universe]]. |
||
==Navigation== |
==Navigation== |
||
| Line 489: | Line 594: | ||
{{gtasa vehicles|state=collapsed}} |
{{gtasa vehicles|state=collapsed}} |
||
{{gtav vehicles|state=collapsed}} |
{{gtav vehicles|state=collapsed}} |
||
| + | }}[[de:Slamvan]] |
||
| − | }} |
||
| − | |||
| − | [[de:Slamvan]] |
||
[[es:Slamvan]] |
[[es:Slamvan]] |
||
[[fr:Slamvan]] |
[[fr:Slamvan]] |
||
| Line 511: | Line 614: | ||
[[Category:SUTs]] |
[[Category:SUTs]] |
||
[[Category:Cars with Hydraulics]] |
[[Category:Cars with Hydraulics]] |
||
| + | [[Category:DLC Vehicles in GTA Online]] |
||
| + | [[Category:Vehicles in Festive Surprise]] |
||
| + | [[Category:DLC Vehicles]] |
||
Revision as of 16:31, 11 March 2020
Template:Infobox vehicles
Not to be confused with Lost Slamvan, a variant of the Slamvan also named "Slamvan" pre-GTA Online.
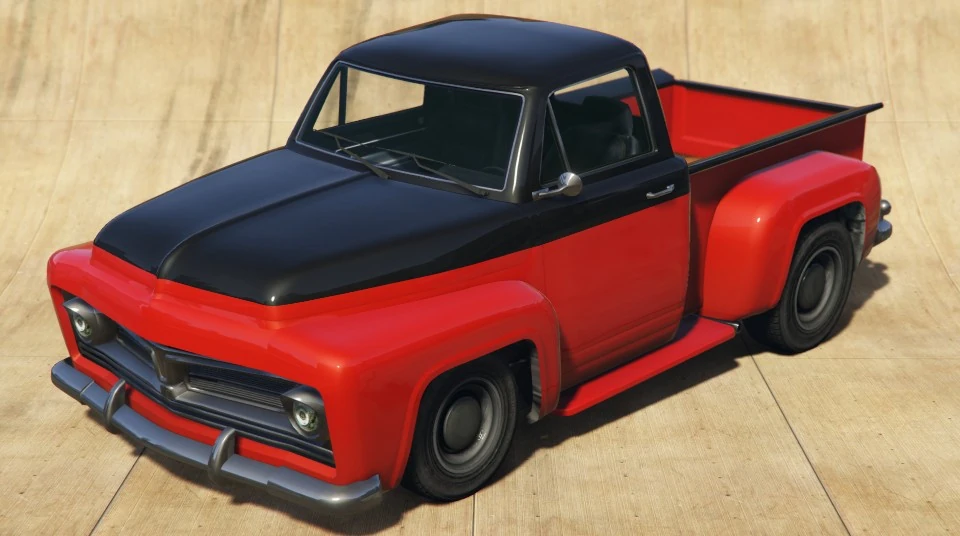
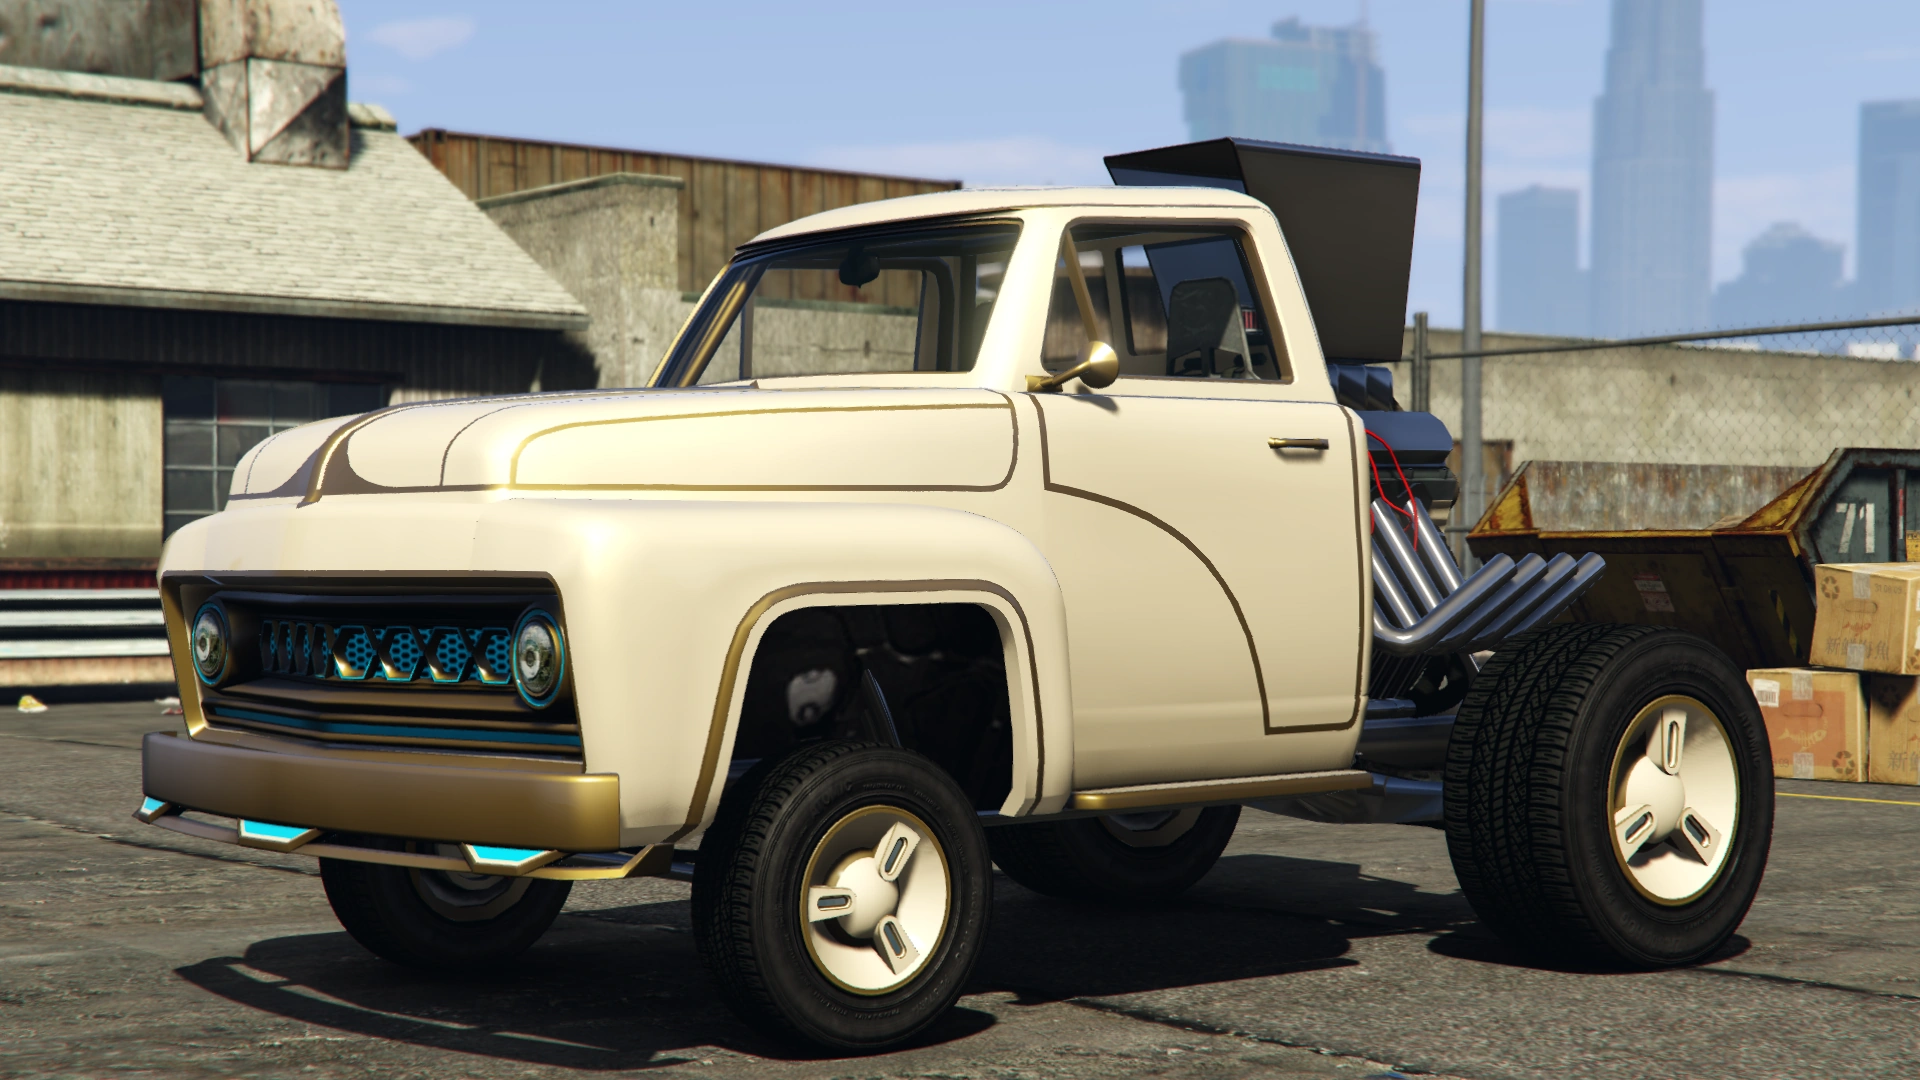
The Slamvan is a pickup truck featured in Grand Theft Auto: San Andreas, Grand Theft Auto V and Grand Theft Auto Online as part of the Festive Surprise update. It is manufactured by Vapid in the HD Universe.
Design
Grand Theft Auto: San Andreas
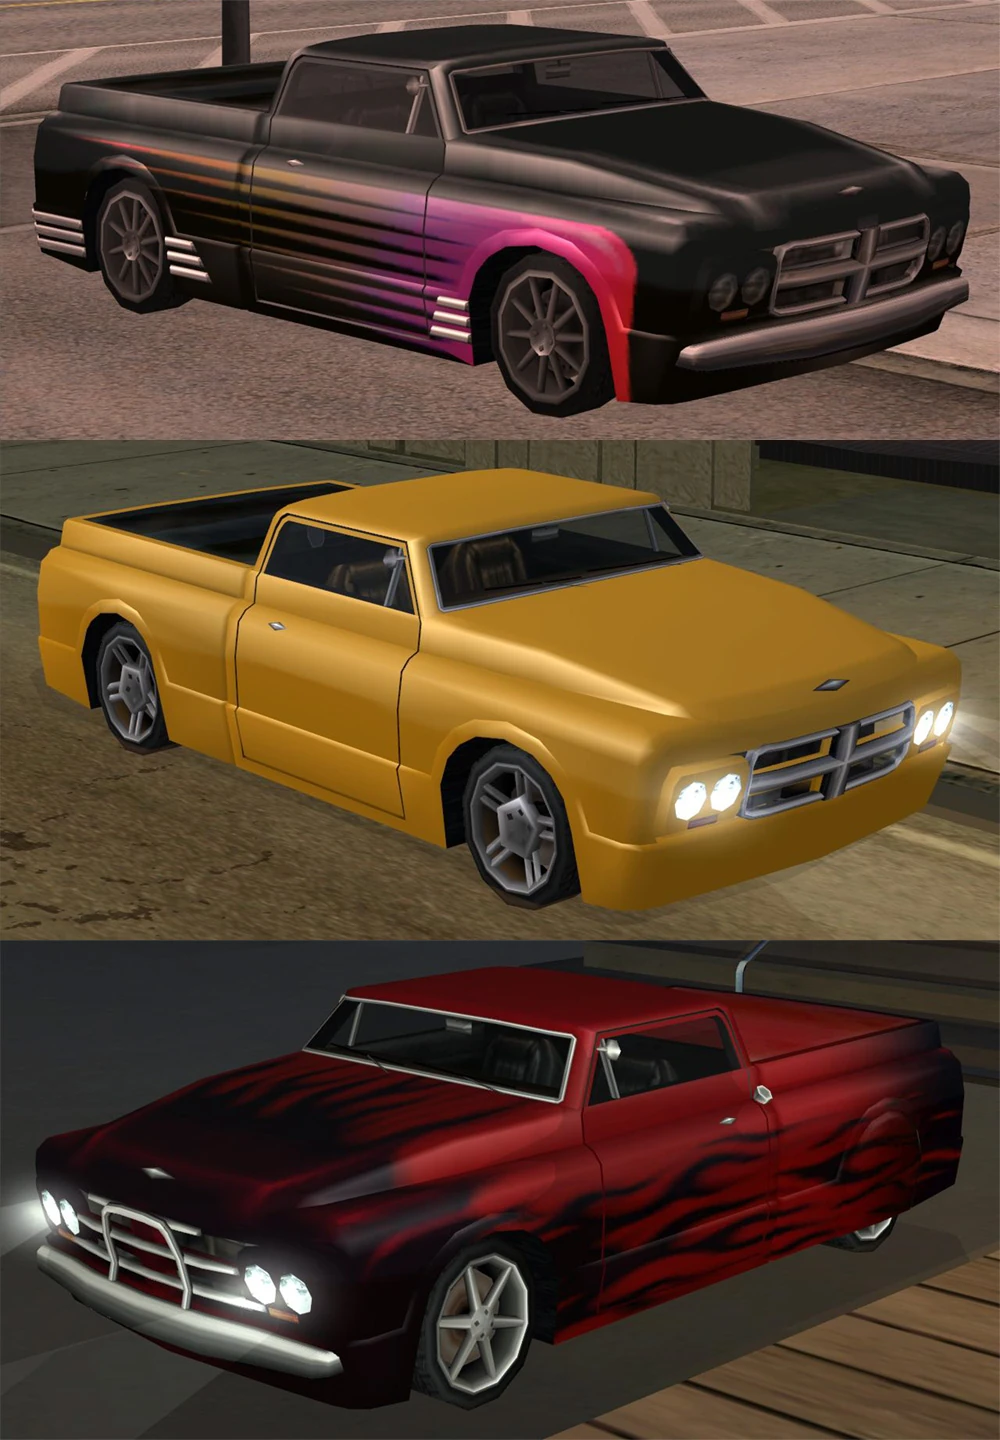
The Slamvan resembles a heavily customized second generation Chevrolet GMC C/K with a chopped roof and custom suspension, while the front of the vehicle is similar to the Dodge Sidewinder (with the exception of the headlights).
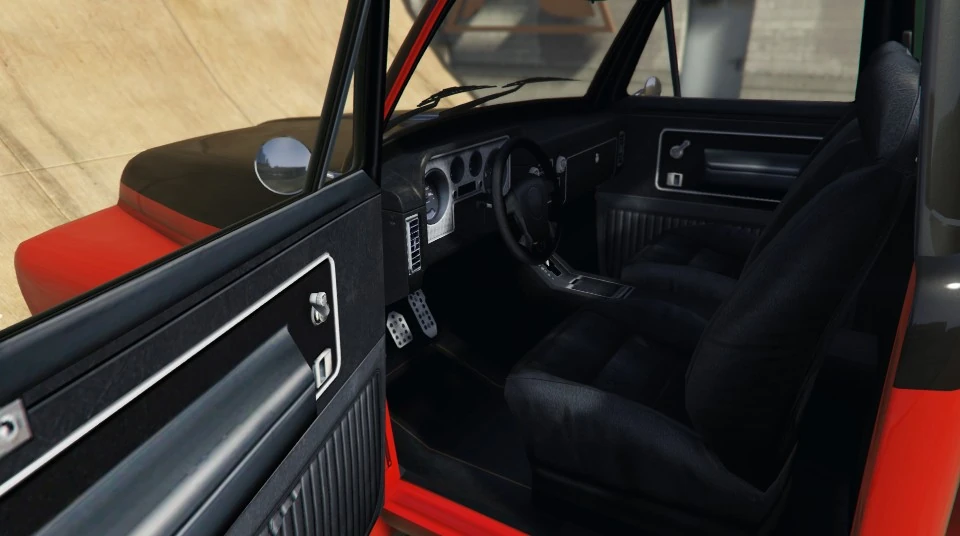
Naturally, it is a two door and can only seat two people. Sometimes the Slamvan will spawn with a custom chain steering wheel.
In the beta version, the Slamvan had a different wheel design and paint job not seen in the final version.
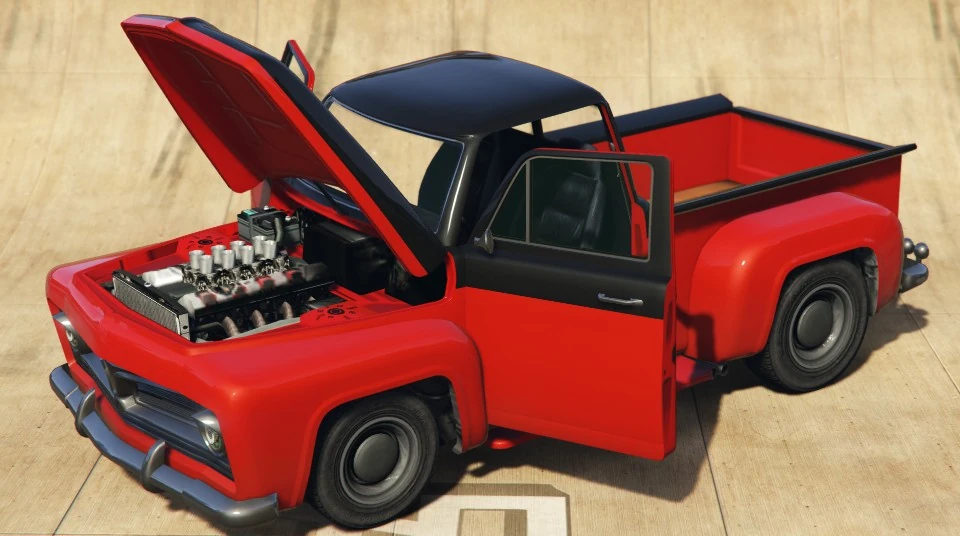
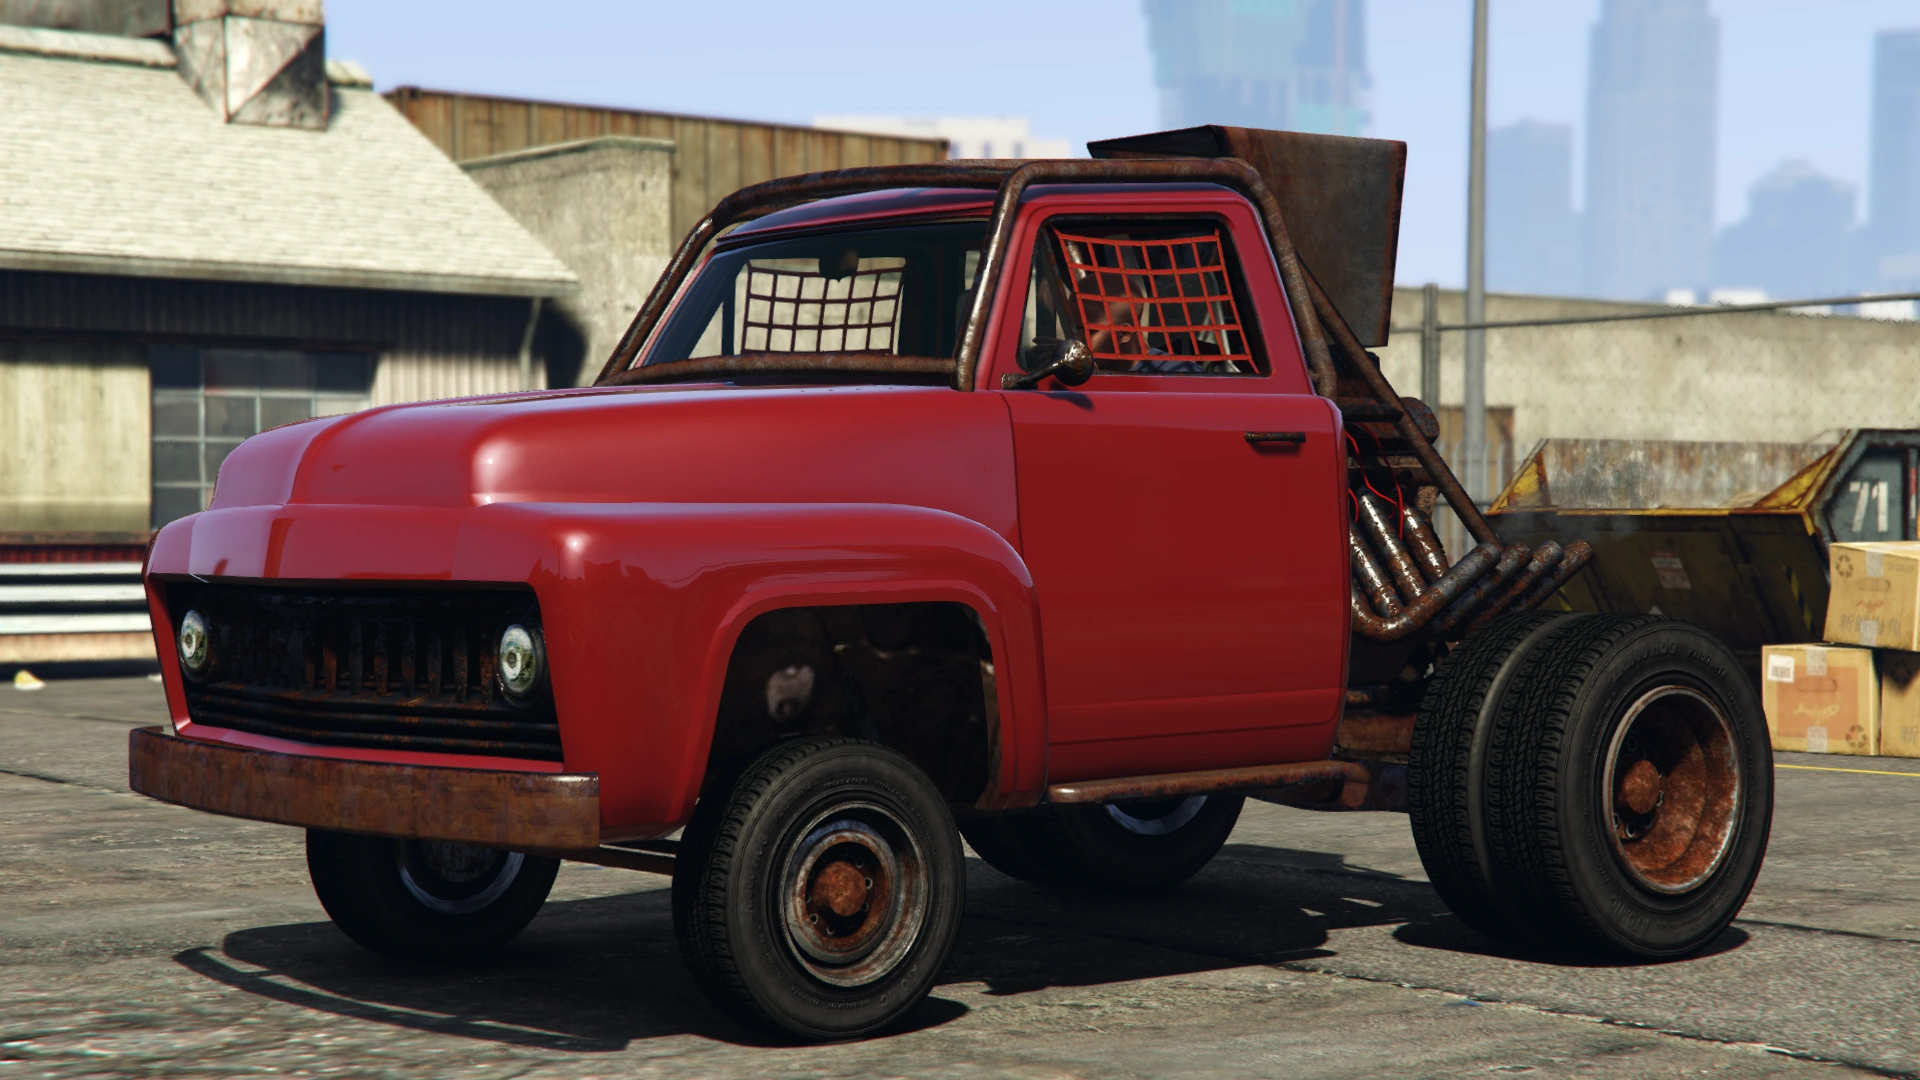
Grand Theft Auto V
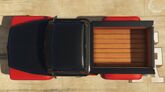
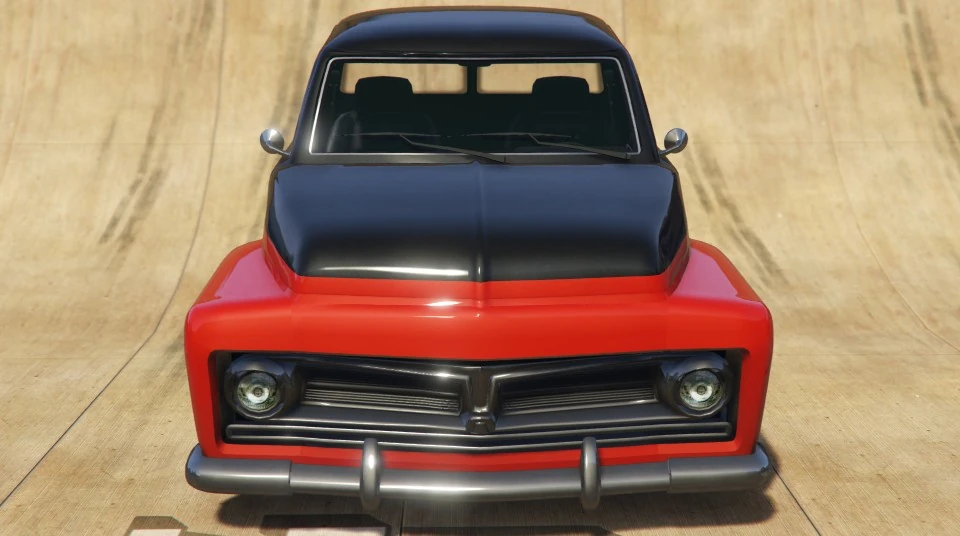
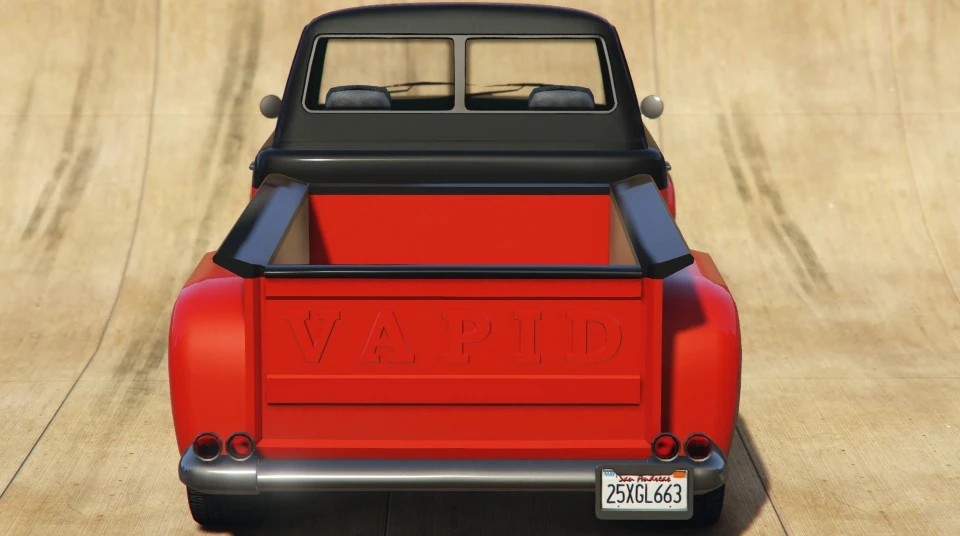
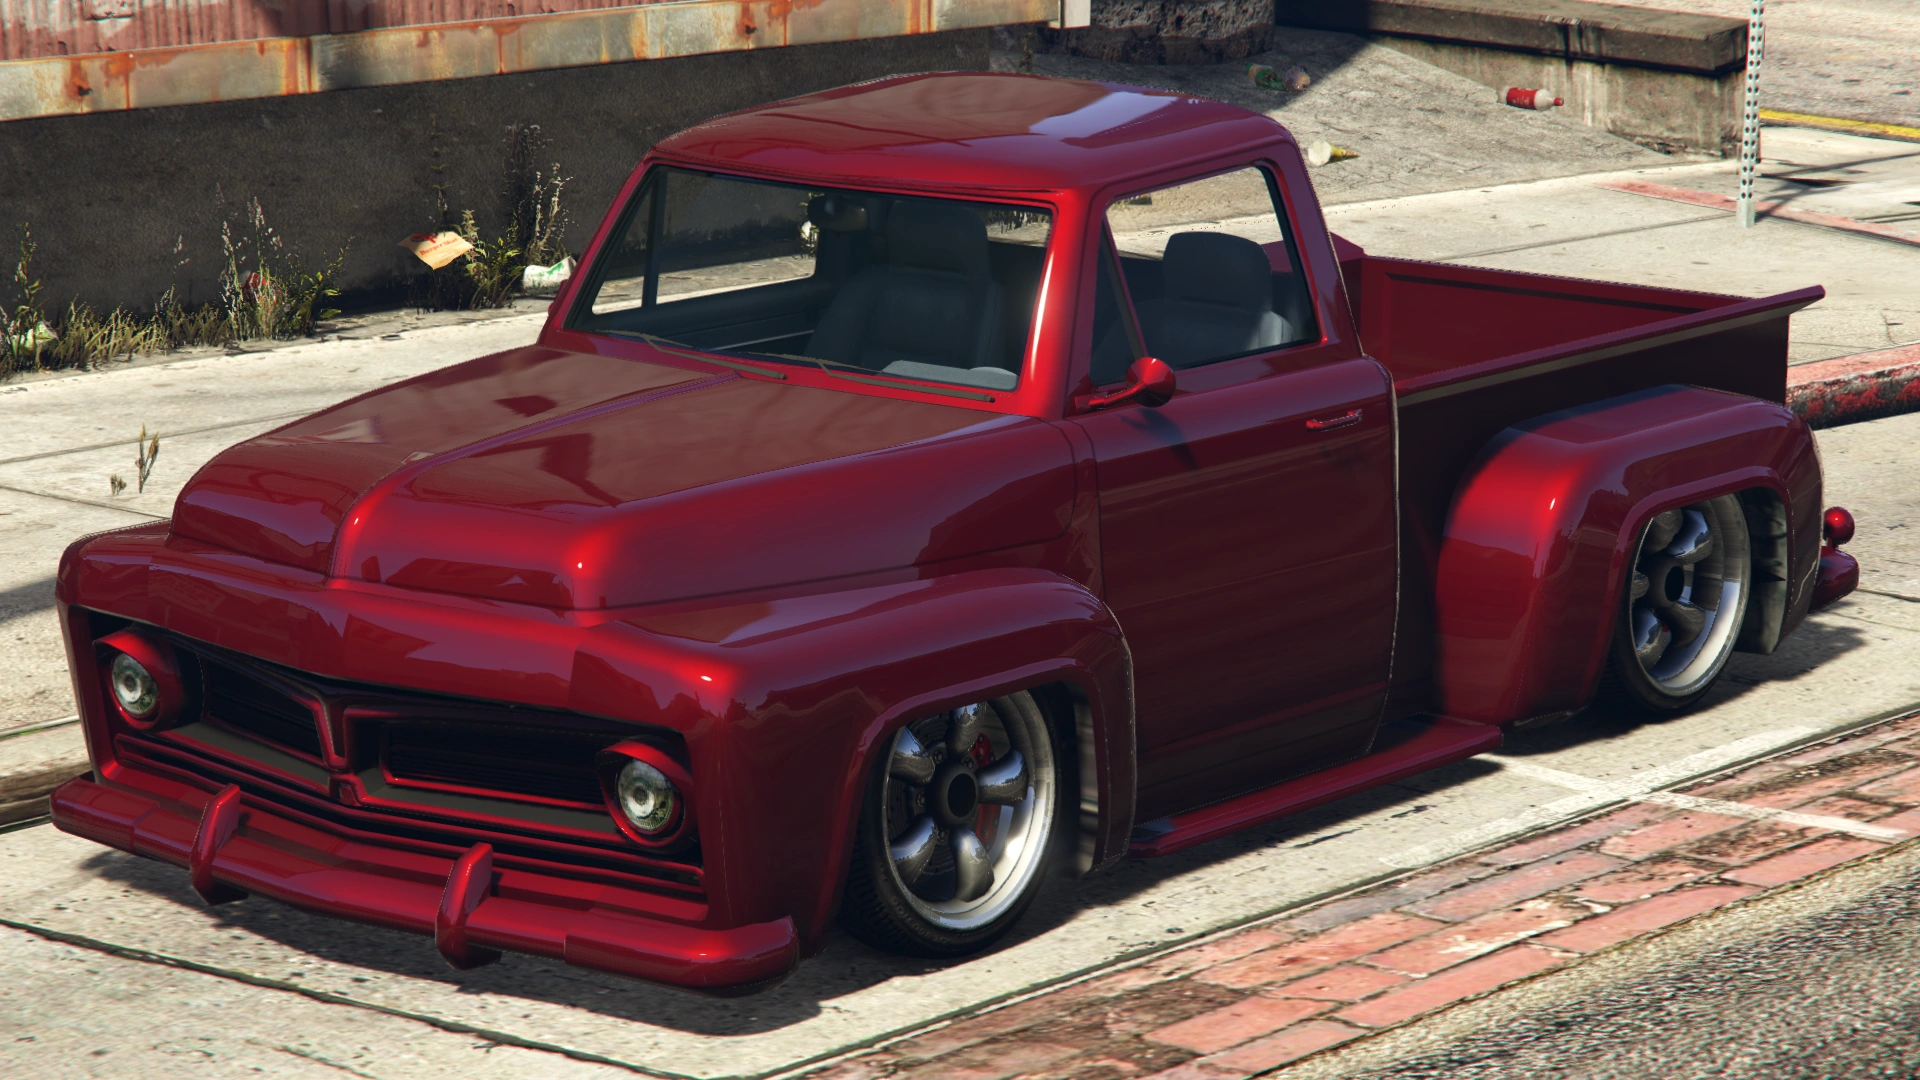
The Slamvan resembles a Rat Rodded 1953–1956 Ford F-Series Pickup. It appears that the top half of the cab is from a 67-72 Ford F Series. The vehicle appears as a 2-door pickup with a wooden bed floor in a step side bed.
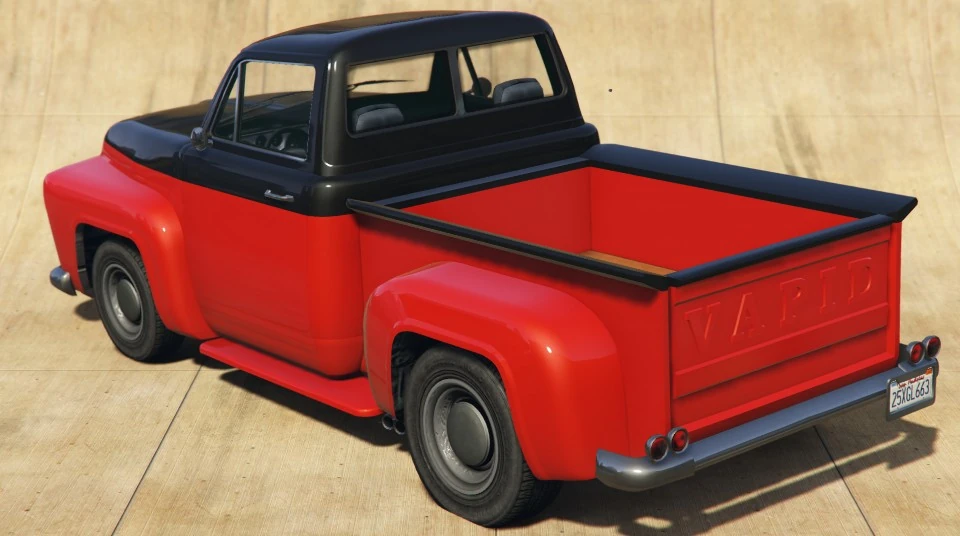
The vehicle shares the same design as its older iteration (now present with a different name), but features an open truck bed and the rear end has the same bumper and tail lights as the Towtruck (another vehicle that shares many similarities in terms of design), only cleaner in appearance.
Current Design Gallery


Version History Gallery
")
Performance
Grand Theft Auto: San Andreas
The Slamvan is quite nimble and comfortable to drive due to its supercharged V8 and upgraded suspension. It possesses good acceleration and average top speed. Its brakes are also strong, being capable of quickly stopping from top speed to zero; its downsides however, is the arguably poor durability and stability, and despite its low height, it can still rollover easily.
GTA San Andreas Overview
| Acceleration (0-60 mph in Seconds) |
Top Speed (mph / kmh) |
Gears | Engine | Drivetrain (FWD / RWD / AWD) |
Mass (kg / lbs) |
|---|---|---|---|---|---|
| N/A | 99 / 160 | 5 | Petrol | RWD | 1950 / 4299 |
| N/A | N/A | 5 | N/A | RWD | Cannot be observed |
Grand Theft Auto V
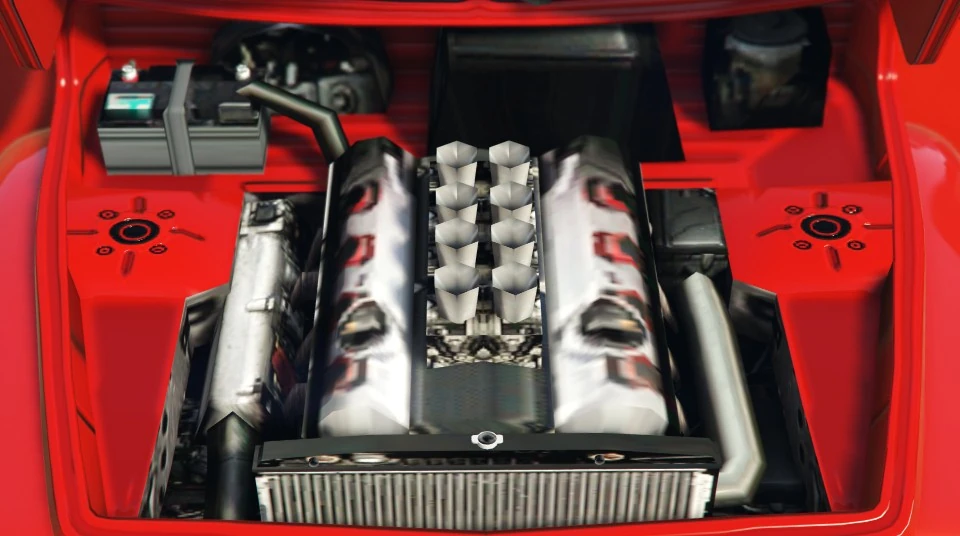
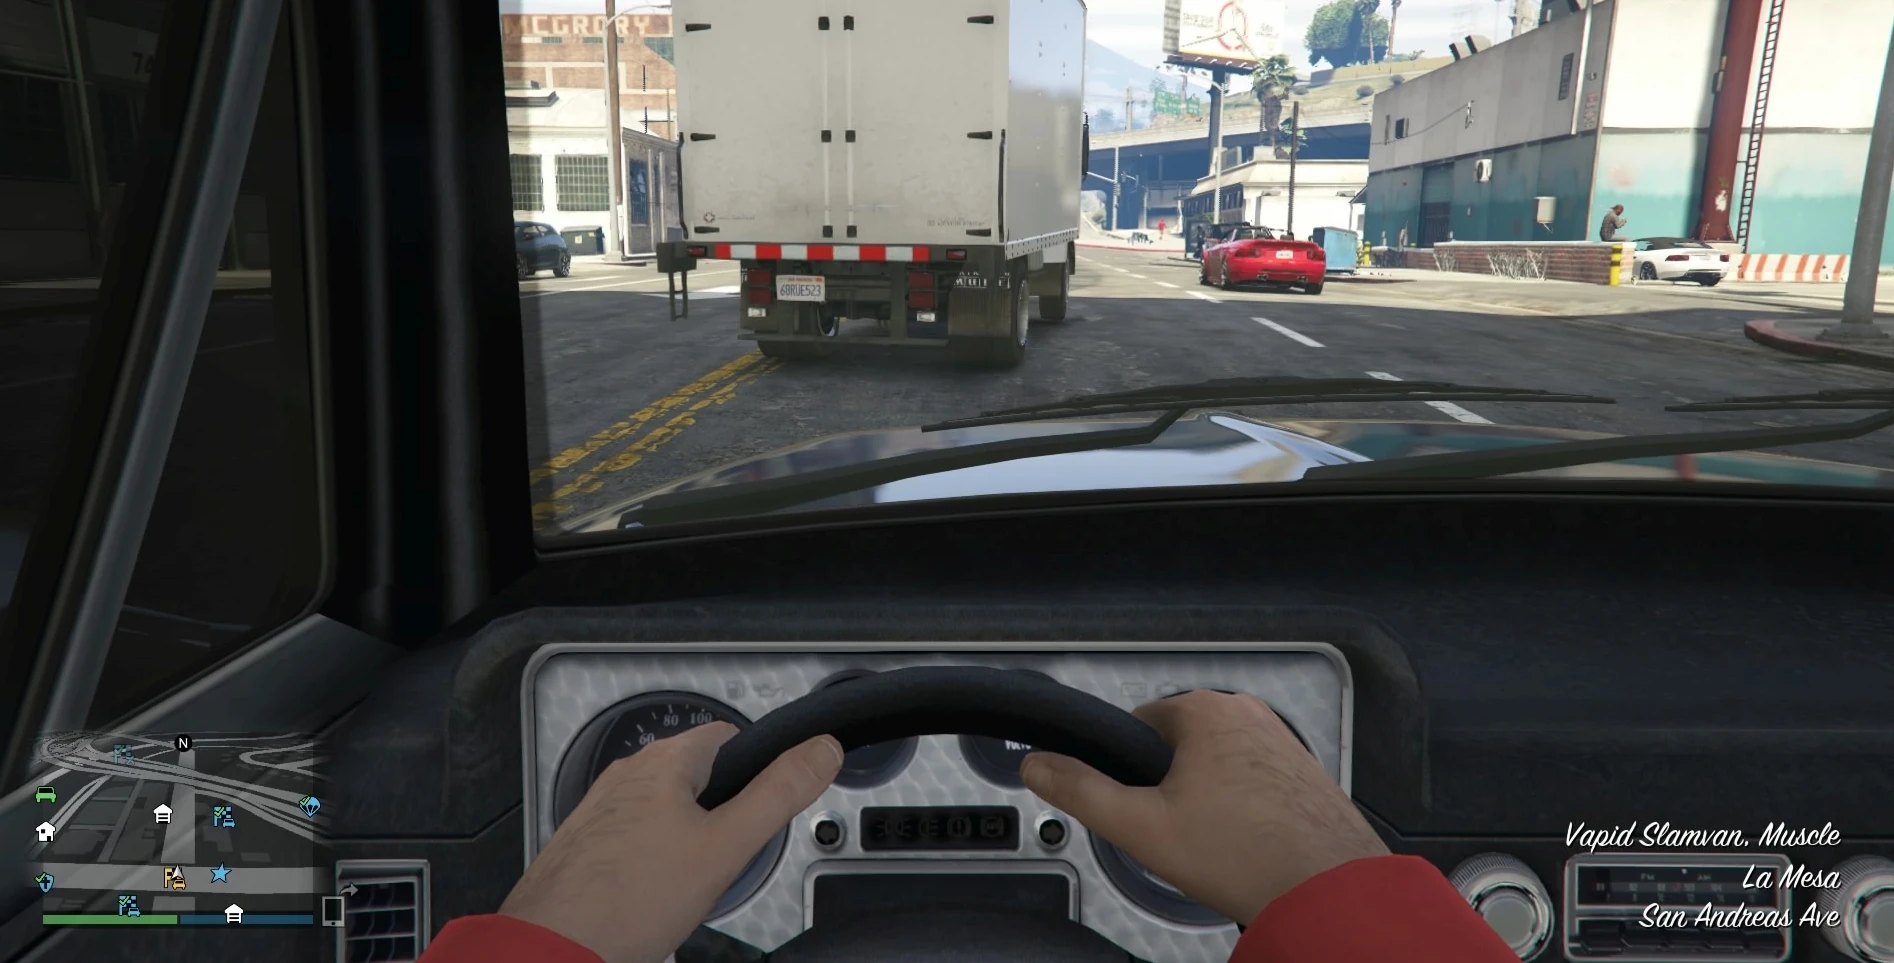
The Slamvan has a customized V8 with 4 double-barrel carburetors, which sounds similar to the Duke O'Death, The Liberator, and Marshall. In-game stat bars and testing has shown it has the same performance as the Rat-Loader and its clean variant, the Rat-Truck. Thus, it has average acceleration and top speed, matched with very poor brakes and traction. The Lost Slamvan features similar engine as the pick-up variant but has an improved acceleration. Traction is also enhanced and braking is strengthened.
GTA V Overview
| Acceleration (0-60 mph in Seconds) |
Top Speed (mph / kmh) |
Gears | Engine | Drivetrain (FWD / RWD / AWD) |
Mass (kg / lbs) |
Fuel Tank Size (litres) |
|---|---|---|---|---|---|---|
| N/A | 84 / 135 | 4 | N/A | RWD | 1200 / 2645 | 65 |
| N/A | 135 / 217 | 4 | N/A | RWD | 1200 / 2646 | N/A |
| 9.5 Seconds | 85 / 136 | 5 | FR SOHC V8 w/ 4 Double Barrel Carburettors (In-game model) | RWD | Cannot be observed | Cannot be observed |
Modifications
Grand Theft Auto: San Andreas

Combinations of ways the Slamvan can be modified at Loco Low Co. in GTA San Andreas.
The Slamvan can only be modified at Loco Low Co. As such, the Slamvan is capable of participating in the Lowrider Challenge.
| Type | Upgrades | Cost |
|---|---|---|
| Paint Jobs | Paintjob 1 | $ 500 |
| Paintjob 2 | $ 500 | |
| Paintjob 3 | $ 500 | |
| Colors | Car Color 1 | $ 150 |
| Exhausts | Chromer Exhaust | $ 3340 |
| Slamin Exhaust | $ 3250 | |
| Front Bumper | Chromer Bumper | $ 2040 |
| Front bullbars | Chromer Bullbar | $ 2130 |
| Slamin Bullbar | $ 2050 | |
| Rear bullbars | Chromer Bullbar | $ 1610 |
| Slamin Bullbar | $ 1540 | |
| Side Skirts | Chrome Trim | $ 780 |
| Wheelcovers | $ 940 | |
| Wheels | Classic | $ 1620 |
| Dollar | $ 1560 | |
| Twist | $ 1200 | |
| Wires | $ 1560 | |
| Trance | $ 1350 | |
| Cutter | $ 1030 | |
| Rimshine | $ 980 | |
| Virtual | $ 620 | |
| Access | $ 1140 | |
| Car Stereo | Bass Boost | $ 100 |
| Hydraulics | Hydraulics | $ 1500 |
| Nitro | 2x Nitrous | $ 200 |
| 5x Nitrous | $ 500 | |
| 10x Nitrous | $ 1000 |
Grand Theft Auto V
| Category | Modification | Cost (GTA V) | Cost (GTA Online) | Image | |
|---|---|---|---|---|---|
| Upgrade: Arena WarA | Apocalypse Slamvan | N/A | $1,321,875 | ||
| Future Shock Slamvan | N/A | $1,321,875 | |||
| Nightmare Slamvan | N/A | $1,321,875 | |||
| Upgrade: Benny's Original Motor WorksB | Slamvan Custom | N/A | $415,000 | ||
| Armor | No Armor | $100 | $200 | ||
| Armor Upgrade 20% | $500 | $4,500 | |||
| Armor Upgrade 40% | $1,250 | $7,500 | |||
| Armor Upgrade 60% | $2,000 | $12,000 | |||
| Armor Upgrade 80% | $3,500 | $21,000 | |||
| Armor Upgrade 100% | $5,000 | $30,000 | |||
| Brakes | Stock Brakes | $100 | $200 | ||
| Street Brakes | $2,000 | $4,000 | |||
| Sport Brakes | $2,700 | $5,400 | |||
| Race Brakes | $3,500 | $7,000 | |||
| Engine | EMS Upgrade, Level 1 | $900 | $1,800 | ||
| EMS Upgrade, Level 2 | $1,250 | $2,500 | |||
| EMS Upgrade, Level 3 | $1,800 | $3,600 | |||
| EMS Upgrade, Level 4 | $3,350 | $6,700 | |||
| Explosives | Ignition Bomb | N/A | $5,000 | ||
| Remote Bomb | N/A | $7,500 | |||
| Horns | Main article: Los Santos Customs/Horns | - | - | ||
| Lights | Headlights | Stock Lights | $100 | $200 | |
| Xenon Lights | $300 | $3,000 | |||
| Neon Kits | Main article: Los Santos Customs/Lights | - | - | ||
| Loss/Theft Prevention | Tracker | N/A | $2,000 | ||
| Full Coverage | N/A | $ | |||
| Plates | Blue on White 1 | $50 | $200 | ||
| Blue on White 2 | $50 | $200 | |||
| Blue on White 3 | $50 | $200 | |||
| Yellow on Blue | $75 | $300 | |||
| Yellow on Black | $150 | $600 | |||
| Respray | Main article: Los Santos Customs/Respray Colors | - | - | ||
| Sell | Sell Vehicle | N/A | $ | ||
| Suspension | Stock Suspension | $100 | $200 | ||
| Lowered Suspension | $500 | $1,000 | |||
| Street Suspension | $1,000 | $2,000 | |||
| Sport Suspension | $1,700 | $3,400 | |||
| Competition Suspension | $2,200 | $4,400 | |||
| Transmission | Stock Transmission | $100 | $200 | ||
| Street Transmission | $2,950 | $5,900 | |||
| Sports Transmission | $3,250 | $6,500 | |||
| Race Transmission | $4,000 | $8,000 | |||
| Turbo | None | $500 | $1,000 | ||
| Turbo Tuning | $2,500 | $30,000 | |||
| Wheels | Main article: Los Santos Customs/Wheels | - | - | ||
| Windows | None | $100 | $500 | ||
| Light Smoke | $200 | $1,500 | |||
| Dark Smoke | $450 | $3,500 | |||
| Limo | $700 | $5,000 | |||


- A Only available at the Arena Workshop (enhanced version).
- B Only available at Benny's Original Motor Works (enhanced version).
Image Gallery
Grand Theft Auto: San Andreas
")
Grand Theft Auto V
")
")
")
")
Variants
Slamvan CustomGrand Theft Auto Online |
 (Rear quarter view) |
A heavily-modified version of Slamvan, the Slamvan Custom, was added in Grand Theft Auto Online, as part of the Lowriders: Custom Classics update. |
Lost SlamvanHD Universe |
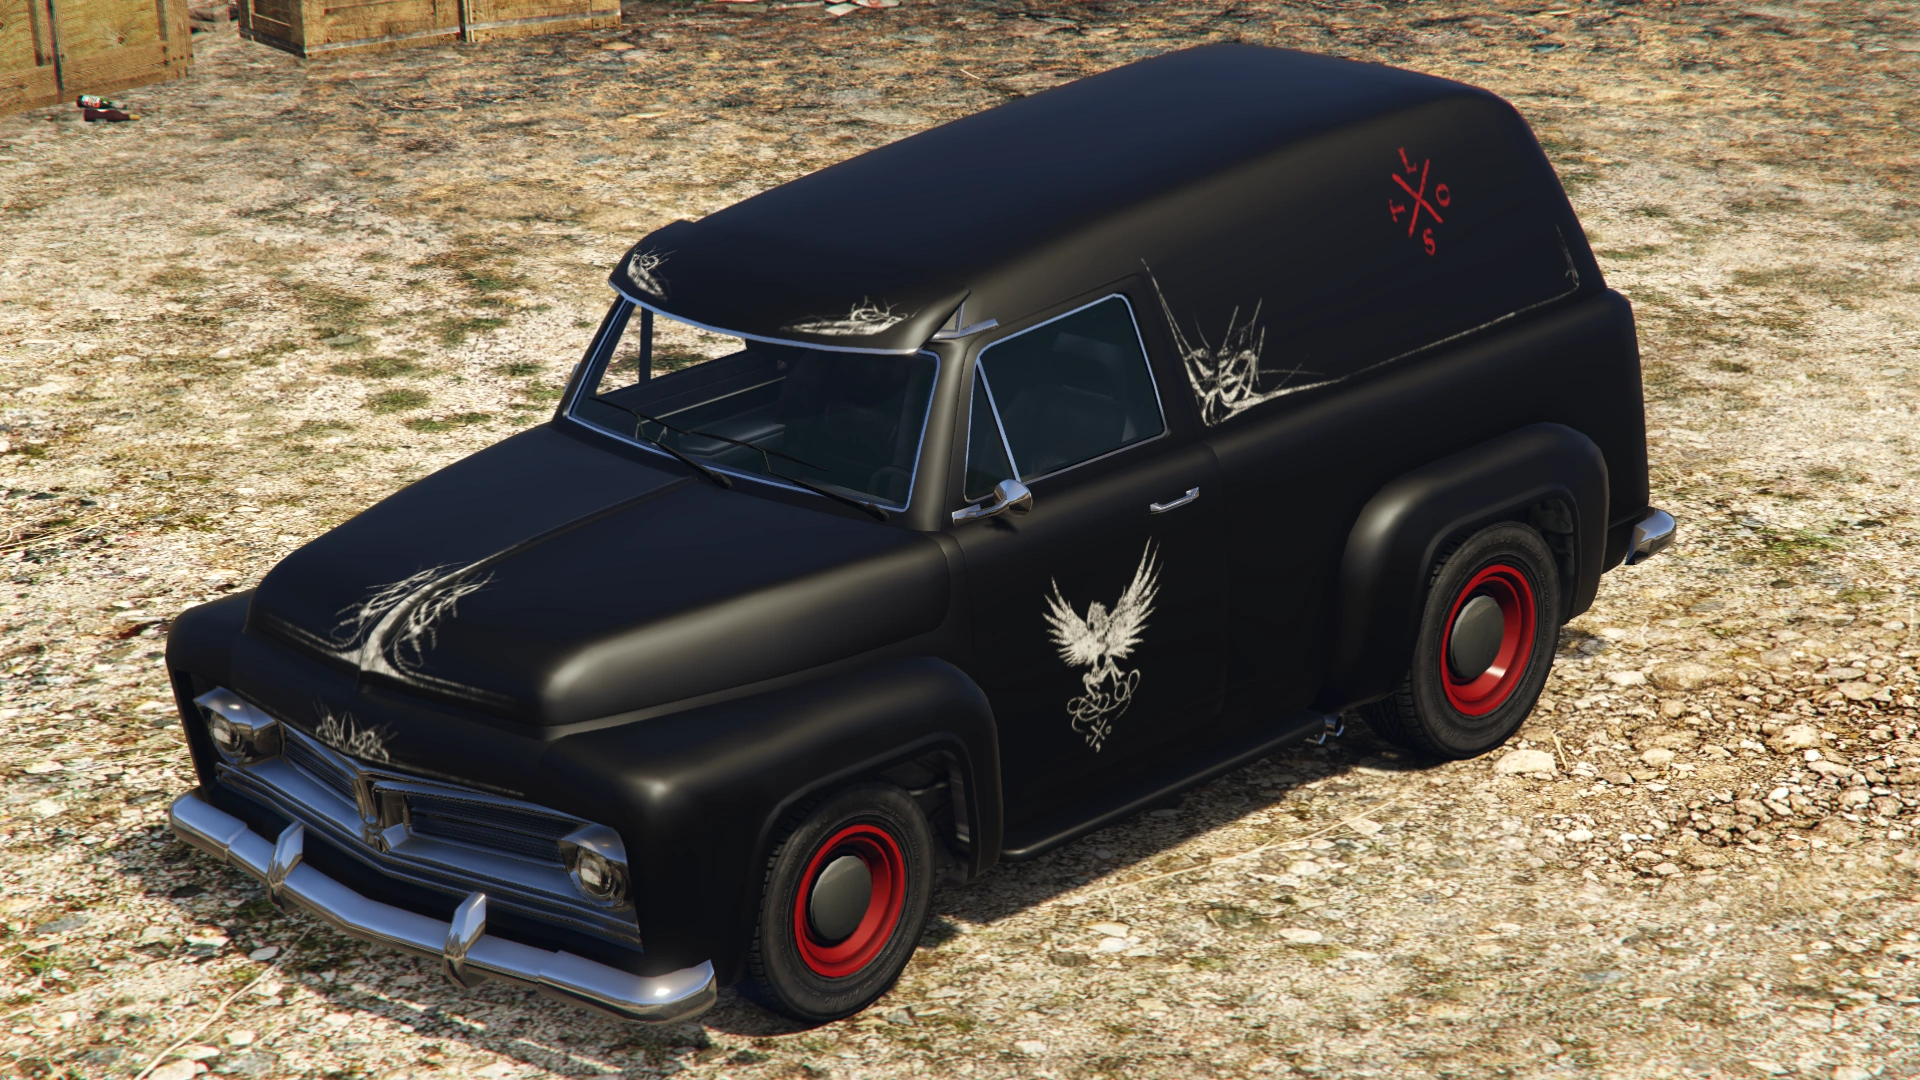 (Rear quarter view) |
The Lost and Angels of Death use improvised van-variants of the Slamvan that feature rear bed covers converted into a van. The vans were originally named simply "Slamvan" in Grand Theft Auto: Episodes from Liberty City, however they return to Grand Theft Auto Online named "Lost Slamvan". |
Template:VariantTriple
Prominence Appearances in Missions
Grand Theft Auto: San Andreas
- Exports and Imports - The Slamvan is one of the 30 vehicles wanted for the side-mission. Placed on the second list.
Locations
Grand Theft Auto: San Andreas
- Parked at the rear entrance of the sex shop in El Corona, Los Santos. It is alarmed 50% of the time and locked 10% of the time. It is only spawned when wanted for export.
- Can be imported on Mondays for $15,200. In Easter Basin (San Fierro) after the completing export lists.
- Can be seen driving around The Strip, Las Venturas and around Downtown Los Santos.
- Prickle Pine, as with other "affluent" cars.
- Often seen driving in Market, usually by Jim's Sticky Ring.
- Sometimes seen driving in Paradiso, San Fierro.
Grand Theft Auto V
- Original version
- Available in each protagonist's garage.
- Enhanced version
- Available from Southern San Andreas Super Autos for $49,500.
Grand Theft Auto Online
- Available from Southern San Andreas Super Autos for $49,500.
- Can be requested by the Road Captain of a Motorcycle Club for club use in free mode for $1,000. This vehicle is black and comes with bullet-proof tires and a bullet-resistant windshield.
- Available from Benny's Original Motor Works for $49,500 (enhanced version only).
- Available from Arena War for $49,500 or for $37,125 (trade price as a Sponsorship Tier reward in the Arena War Career, only in the enhanced version).
Trivia
General
- The Slamvan plays the following radio stations by default when entered:
- GTA San Andreas: Playback FM.
- GTA V: Rebel Radio.
See Also
- Lost Slamvan - A gang variant of the Slamvan formerly known as "Slamvan".
- Slamvan Custom - Custom variant.
- Tow Truck - A tow truck that shares similarities with the vehicle in the HD Universe.