No edit summary Tags: Visual edit apiedit |
No edit summary |
||
| (20 intermediate revisions by 16 users not shown) | |||
| Line 1: | Line 1: | ||
| ⚫ | |||
{{infobox mission |
{{infobox mission |
||
|name = S.A.M. |
|name = S.A.M. |
||
| − | |image = S.A.M |
+ | |image = S.A.M-GTAIII-Intro.png |
|size = 300px |
|size = 300px |
||
| + | |caption = |
||
| − | |caption = [[Asuka Kasen]] and [[Maria Latore]] torturing [[Miguel]] |
||
|game = III |
|game = III |
||
|for = [[File:Radar-AsukaIcon-GTAIII.png|24px|link=Asuka Kasen]] [[Asuka Kasen]] |
|for = [[File:Radar-AsukaIcon-GTAIII.png|24px|link=Asuka Kasen]] [[Asuka Kasen]] |
||
| Line 10: | Line 9: | ||
|location = [[Panlantic Construction Site]], [[Fort Staunton]] |
|location = [[Panlantic Construction Site]], [[Fort Staunton]] |
||
|fail = [[Wasted]]<br>[[Busted]]<br>[[Reefer]] destroyed<br>[[DeadDodo]] reaches [[Francis International Airport|airport]] |
|fail = [[Wasted]]<br>[[Busted]]<br>[[Reefer]] destroyed<br>[[DeadDodo]] reaches [[Francis International Airport|airport]] |
||
| − | |reward = [[ |
+ | |reward = [[Money|$]]45.000 |
|unlocks = [[Ransom (GTA III)|Ransom]] |
|unlocks = [[Ransom (GTA III)|Ransom]] |
||
|unlockedby = [[Espresso-2-Go!]] |
|unlockedby = [[Espresso-2-Go!]] |
||
| + | |todo = |
||
| + | {{BP}}'''''<span style="color:#578665">Find the</span>''''' '''''<span style="color:#5C394B">boat</span>''''' '''''<span style="color:#578665">and get to the</span>''''' '''''<span style="color:#7B92CC">marker buoy!</span>''''' |
||
| + | {{BP}}'''''<span style="color:#7B92CC">Get to the runway marker buoys!</span>''''' '''''<span style="color:#AAA15E">The plane is on its final approach!!</span>''''' |
||
| + | {{BP}}'''''<span style="color:#578665">Collect the cargo!</span>''''' |
||
| + | {{BP}}'''''<span style="color:#578665">1 OF 8</span>''''' |
||
| + | {{BP}}'''''<span style="color:#578665">2 OF 8</span>''''' |
||
| + | {{BP}}'''''<span style="color:#578665">3 OF 8</span>''''' |
||
| + | {{BP}}'''''<span style="color:#578665">4 OF 8</span>''''' |
||
| + | {{BP}}'''''<span style="color:#578665">5 OF 8</span>''''' |
||
| + | {{BP}}'''''<span style="color:#578665">6 OF 8</span>''''' |
||
| + | {{BP}}'''''<span style="color:#578665">7 OF 8</span>''''' |
||
| + | {{BP}}'''''<span style="color:#578665">Stash the SPANK back at the</span>''''' '''''<span style="color:#9D82D6">construction site!</span>''''' |
||
}} |
}} |
||
| ⚫ | |||
| − | |||
{{Quote|There's a plane coming into Francis International in two hour's time. It is full of Catalina's poison. You can avoid airport security by a boat out to the runway light buoys and shooting the plane down on its approach.| [[Asuka Kasen]]}} |
{{Quote|There's a plane coming into Francis International in two hour's time. It is full of Catalina's poison. You can avoid airport security by a boat out to the runway light buoys and shooting the plane down on its approach.| [[Asuka Kasen]]}} |
||
| Line 24: | Line 35: | ||
After the plane is destroyed, Claude retrieves the packages before the police arrive. After escaping from the police, Claude leaves the airport and travels back to the construction site with the drugs. |
After the plane is destroyed, Claude retrieves the packages before the police arrive. After escaping from the police, Claude leaves the airport and travels back to the construction site with the drugs. |
||
| − | ==Mission |
+ | ==Mission Objectives== |
In order to complete the mission the player must: |
In order to complete the mission the player must: |
||
| − | *Find the marker boat and get to the marker buoy |
+ | *Find the marker boat and get to the marker buoy. |
| − | *Get to the runway marker buoys! The plane is on it's final approach |
+ | *Get to the runway marker buoys! The plane is on it's final approach. |
| − | *Collect the cargo |
+ | *Collect the cargo. |
| − | *Stash the SPANK back at the construction site |
+ | *Stash the SPANK back at the construction site. |
| − | == |
+ | ==Deaths== |
| − | * |
+ | *Numerous members of the [[Colombian Cartel]] - Killed by [[Claude]] for getting in his way of intercepting and destroying the [[DeadDodo]] containing a number of [[SPANK]] drug packages. |
| − | * |
+ | *Pilot of the [[DeadDodo]] - Killed by [[Claude]] in order to collect the [[SPANK]] that was contained in the [[DeadDodo]]. |
| + | *Asuka Kasen - Killed off-screen, possibly by [[Catalina]], in order to kidnap Maria and for disrupting Cartel activities. |
||
| + | *Miguel - Killed off-screen, possibly by Catalina, for revealing Cartel secrets to Asuka. |
||
==Reward== |
==Reward== |
||
The reward for this mission is $45,000 and the next and penultimate mission, [[Ransom (GTA III)|Ransom]], is automatically unlocked. |
The reward for this mission is $45,000 and the next and penultimate mission, [[Ransom (GTA III)|Ransom]], is automatically unlocked. |
||
| − | |||
| − | ==Tips and Tricks== |
||
| − | *This mission is easily one of the hardest in GTA III. If you stay true to the mission's name (S.A.M.), that is, trying to intercept the plane while it's still airborne (from the back of the boat or on shore), it will be very demanding for your accuracy. If you miss one (at most two) shot, the mission is almost surely to fail as response time is not enough to chase the plane. Rockets have delays so you must understand a bit about the concept of deflection shots[https://en.wikipedia.org/wiki/Deflection_(ballistics)]. |
||
| − | *If the plane is destroyed above the sea, there is a chance that packages will be dropped over the sea, then you must pick them up by boat. |
||
| − | *It is much safer to intercept the plane from the runway on its touchdown. To do this, it is advised to clear out the guarding 3 Cartel members on the ramp with a sniper rifle, then run to the runway and fire the rocket at the plane - almost sure kill. |
||
| − | *Be sure to equip yourself with full armor before the mission. Because of the police helicopters, it is for sure you WILL take serious hits. Generally there are 2 ways to escape, on land and over the sea. If you take the land way, the distance is great and you have to fight your way through multiple Cartel checkpoints and to deal with your (at least) 4-star wanted level. By taking the seaway, it is generally easier as you can bypass many M16-equipped Cartels. |
||
| − | *You can shoot police helis down with your rocket, but it's not recommended because it will rise wanted level to a terrifying 5/6 stars. So, tolerate some rounds, get back to Stauton with the boat and drive a fast car. The car you left at Stauton dock will not be erased so prepare a fast car at the beginning. At 4-star, the chase will be manageable for a skilled driver, who can rush back to construction yard safely without spray/bribe. |
||
| − | *Alternatively, as mentioned in "trivia", it is possible to 'storm' the airfield with bulletproof car or a tank. This could be the intentional loophole left by the developers to lower difficulty, however this method is somehow like cheating and deprives the pleasure of tackling a real challenge. |
||
| − | *There could be more creative ways to complete the mission and feel free to develop/explore. |
||
==Gallery== |
==Gallery== |
||
| − | <gallery |
+ | <gallery position="center"> |
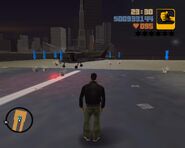
S.A.M.-GTAIII2.jpg|[[Claude]] about to collect the packages from the destroyed [[DeadDodo]] at [[Francis International Airport, Shoreside Vale|Francis International Airport]]. |
S.A.M.-GTAIII2.jpg|[[Claude]] about to collect the packages from the destroyed [[DeadDodo]] at [[Francis International Airport, Shoreside Vale|Francis International Airport]]. |
||
| + | </gallery> |
||
| + | |||
| + | ===Walkthrough=== |
||
| + | <gallery position="center" hideaddbutton="true" spacing="small" widths="270px" bordersize="small"> |
||
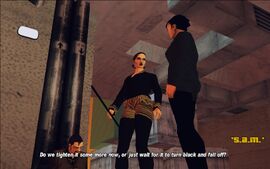
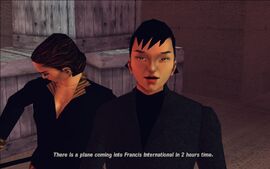
| + | SAM-GTAIII-SS1.jpg|[[Claude]] arrives at the [[Panlantic Construction Company|Panlantic]] [[Staunton Plaza|construction site]] in [[Fort Staunton]] to find [[Asuka Kasen|Asuka]] torturing [[Miguel]], this time joined by [[Maria Latore|Maria]]. They thing they are discussing is possibly one of Miguel's infected limbs he got from being wounded and not getting treated properly. |
||
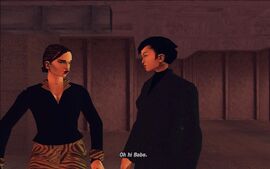
| + | SAM-GTAIII-SS2.jpg|Maria notices Claude and excitedly welcomes him. |
||
| + | SAM-GTAIII-SS3.jpg|Maria tells Claude that she was bored so she decided to come and help Asuka torture Miguel. |
||
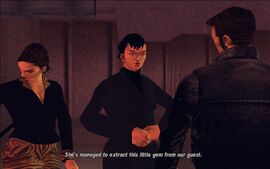
| + | SAM-GTAIII-SS4.jpg|Asuka tells Claude that Maria did really well on the torture and managed to get some useful information from Miguel that Asuka was not able to get herself. |
||
| + | SAM-GTAIII-SS5.jpg|Asuka tells Claude that Miguel revealed about a [[DeadDodo|plane]] flying into [[Francis International Airport (3D Universe)|Francis International Airport]] later that day, which carries some packages of [[Catalina|Catalina's]] [[SPANK|poison]]. |
||
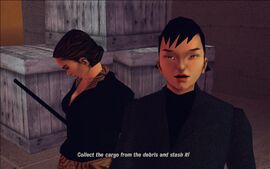
| + | SAM-GTAIII-SS6.jpg|Asuka tells Claude that he can use a boat to approach the airport without getting intercepted by airport security. |
||
| + | SAM-GTAIII-SS7.jpg|Asuka tells Claude to go to the airport and retrieve the SPANK being delivered. |
||
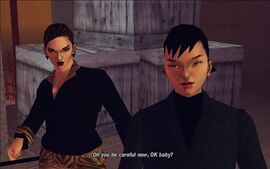
| + | SAM-GTAIII-SS8.jpg|Before Claude goes, Maria asks him to be careful and not get hurt. |
||
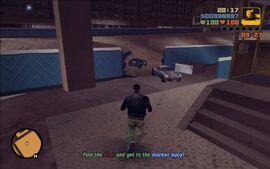
| + | SAM-GTAIII-SS9.jpg|Claude running back to his vehicle. |
||
| + | SAM-GTAIII-SS10.jpg|Claude on his way to the airport in [[Shoreside Vale]]. |
||
| + | SAM-GTAIII-SS11.jpg|Claude arriving at the airport terminal. |
||
| + | SAM-GTAIII-SS12.jpg|The airport security Asuka mentioned turns out to be three squads of well-armed members of the [[Colombian Cartel]] waiting for the airplane to arrive near the runways. |
||
| + | SAM-GTAIII-SS13.jpg|Claude destroying the first Cartel car near the south-western runway. |
||
| + | SAM-GTAIII-SS14.jpg|Claude destroying the second Cartel car near the eastern runway. |
||
| + | SAM-GTAIII-SS15.jpg|Claude picking up a [[Rocket Launcher|rocket launcher]] that one of the killed Cartel gangsters was carrying. |
||
| + | SAM-GTAIII-SS16.jpg|Claude waiting for the plane to arrive. |
||
| + | SAM-GTAIII-SS17.jpg|Claude shooting the landing plane with a rocket launcher. |
||
| + | SAM-GTAIII-SS18.jpg|After getting shot with the rocket launcher, the plane explodes. |
||
| + | SAM-GTAIII-SS19.jpg|After destroying the plane, Claude has to collect the eight dropped SPANK packages. |
||
| + | SAM-GTAIII-SS20.jpg|Claude, after collecting half of the packages. |
||
| + | SAM-GTAIII-SS21.jpg|Claude, about to collect the final package. |
||
| + | SAM-GTAIII-SS22.jpg|After Claude collects all of the packages, he has to take them back to the construction site. |
||
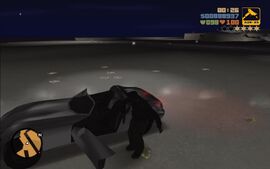
| + | SAM-GTAIII-SS23.jpg|Claude getting back into his vehicle. |
||
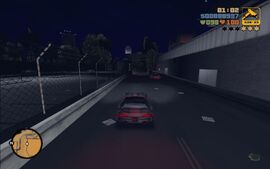
| + | SAM-GTAIII-SS24.jpg|Claude escaping from the airport terminal and the cops he attracted after he destroyed the approaching plane. |
||
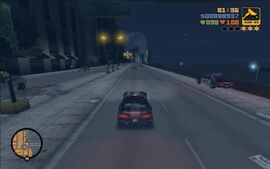
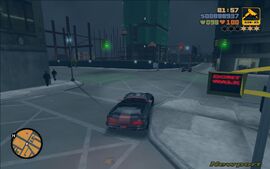
| + | SAM-GTAIII-SS25.jpg|Claude returning to [[Staunton Island]]. |
||
| + | SAM-GTAIII-SS26.jpg|Claude approaching the construction site. |
||
| + | SAM-GTAIII-SS27.jpg|Claude, about to take the elevator up to Asuka. |
||
| + | SAM-GTAIII-SS28.jpg|Mission passed... |
||
</gallery> |
</gallery> |
||
==Trivia== |
==Trivia== |
||
*After the DeadDodo is destroyed, its wreck bears the form of a standard Dodo, with the plane's wings becoming short and stubby. |
*After the DeadDodo is destroyed, its wreck bears the form of a standard Dodo, with the plane's wings becoming short and stubby. |
||
| − | *Despite the fact that [[Asuka Kasen|Asuka]] says |
+ | *Despite the fact that [[Asuka Kasen|Asuka]] says "''You can avoid airport security by a boat out to the runway light buoys and shooting the plane down on its approach''", going into the airport the normal way will not fail the mission and there will be no airport security to speak of and the player can save time. However going this way will leave Claude more open to attacks, as the Cartel members on the runway are all heavily armed and there is almost nowhere to hide on the runway. |
| − | *This is the only mission in GTA III where an NPC is armed with a [[Rocket Launcher]]. |
+ | *This is the only mission in ''GTA III'' where an NPC is armed with a [[Rocket Launcher]]. |
| + | *The Cartel will also be dressed with Body Armor, as it will take two shots from a Sniper Rifle to take them down, instead of the normal one-shot kill. |
||
*The mission name '''S.A.M.''' stands for "surface-to-air missile". |
*The mission name '''S.A.M.''' stands for "surface-to-air missile". |
||
| − | ==Video |
+ | ==Video Walkthroughs== |
<center> |
<center> |
||
| Line 78: | Line 115: | ||
{{GTA|state=collapsed}} |
{{GTA|state=collapsed}} |
||
{{Gtaiii missions|state=collapsed}} |
{{Gtaiii missions|state=collapsed}} |
||
| ⚫ | |||
| − | }} |
||
| ⚫ | |||
[[es:S.A.M]] |
[[es:S.A.M]] |
||
[[Category:Missions]] |
[[Category:Missions]] |
||
Revision as of 07:02, 10 February 2020
"S.A.M." redirects here. For the weapon, see Surface-to-Air Missile.
S.A.M. is the final mission in Grand Theft Auto III given to protagonist Claude by Yakuza leader Asuka Kasen from a Panlantic Construction Company construction site in Fort Staunton, Staunton Island, Liberty City.
Mission
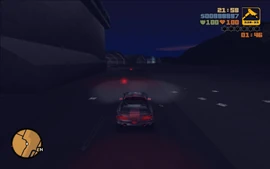
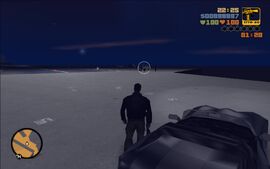
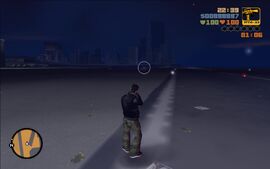
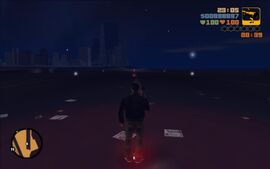
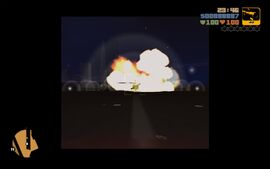
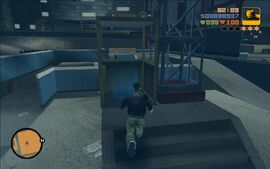
Claude visits Asuka and Maria Latore at the construction site in Fort Staunton. Asuka informs Claude that a plane containing a number of SPANK drug packages is arriving at Francis International Airport in Shoreside Vale. Asuka advises Claude to travel to the airport by boat to avoid the airport security, so Claude drives over to a jetty in Bedford Point. He picks up a rocket launcher on the jetty and takes a boat to sail over to the southern end of the airport. He kills the Colombian Cartel gang members guarding the exit of the airport. A short time later, the plane containing the drugs lands at the airport. Claude destroys the plane with the rocket launcher, scattering the drugs all over the runway.
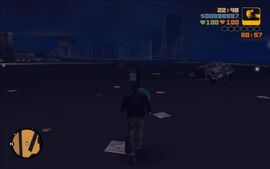
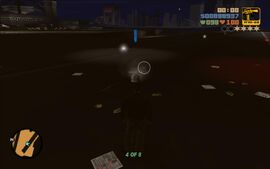
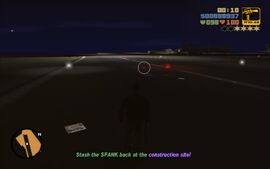
After the plane is destroyed, Claude retrieves the packages before the police arrive. After escaping from the police, Claude leaves the airport and travels back to the construction site with the drugs.
Mission Objectives
In order to complete the mission the player must:
- Find the marker boat and get to the marker buoy.
- Get to the runway marker buoys! The plane is on it's final approach.
- Collect the cargo.
- Stash the SPANK back at the construction site.
Deaths
- Numerous members of the Colombian Cartel - Killed by Claude for getting in his way of intercepting and destroying the DeadDodo containing a number of SPANK drug packages.
- Pilot of the DeadDodo - Killed by Claude in order to collect the SPANK that was contained in the DeadDodo.
- Asuka Kasen - Killed off-screen, possibly by Catalina, in order to kidnap Maria and for disrupting Cartel activities.
- Miguel - Killed off-screen, possibly by Catalina, for revealing Cartel secrets to Asuka.
Reward
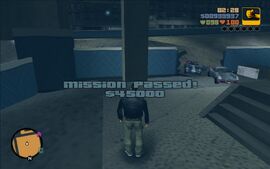
The reward for this mission is $45,000 and the next and penultimate mission, Ransom, is automatically unlocked.
Gallery
Walkthrough
Trivia
- After the DeadDodo is destroyed, its wreck bears the form of a standard Dodo, with the plane's wings becoming short and stubby.
- Despite the fact that Asuka says "You can avoid airport security by a boat out to the runway light buoys and shooting the plane down on its approach", going into the airport the normal way will not fail the mission and there will be no airport security to speak of and the player can save time. However going this way will leave Claude more open to attacks, as the Cartel members on the runway are all heavily armed and there is almost nowhere to hide on the runway.
- This is the only mission in GTA III where an NPC is armed with a Rocket Launcher.
- The Cartel will also be dressed with Body Armor, as it will take two shots from a Sniper Rifle to take them down, instead of the normal one-shot kill.
- The mission name S.A.M. stands for "surface-to-air missile".
Video Walkthroughs
| iPad Version |
|---|

|
| PC Version |

|

