m (→Trivia) Tag: Visual edit |
No edit summary |
||
| (24 intermediate revisions by 17 users not shown) | |||
| Line 8: | Line 8: | ||
|location = [[Ryder's House]], [[Ganton]] |
|location = [[Ryder's House]], [[Ganton]] |
||
|target = [[National Guard Depot]] |
|target = [[National Guard Depot]] |
||
| − | |fail = [[Wasted]]<br>[[Busted]]<br>[[Ryder]] dies<br>[[Mule]] |
+ | |fail = [[Wasted]]<br>[[Busted]]<br>[[Ryder]] dies<br>[[Mule]] or [[Forklift]] destroyed<br>Too many crates destroyed |
|reward = [[Respect]] |
|reward = [[Respect]] |
||
|unlockedby = [[Catalyst]] |
|unlockedby = [[Catalyst]] |
||
|unlocks = [[Reuniting the Families]] |
|unlocks = [[Reuniting the Families]] |
||
| + | |todo = |
||
| ⚫ | |||
| − | {{BP}} |
+ | {{BP}}Get in the '''<span style="color:#484576">van</span>''' with Ryder. |
| − | {{BP}} |
+ | {{BP}}Drive down to the compound at '''<span style="color:#D1BC86">Ocean Docks</span>'''. |
| − | {{BP}} |
+ | {{BP}}Open the front gate by shooting the '''<span style="color:#AB3736">switch</span>''' on the other side of the wall. |
| − | {{BP}} |
+ | {{BP}}Shoot the '''<span style="color:#AB3736">switch</span>''' to open the front gate. |
| − | {{BP}} |
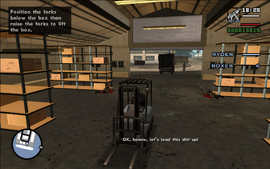
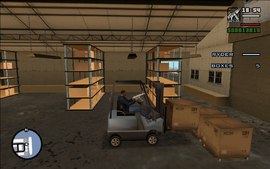
+ | {{BP}}Get in the '''<span style="color:#484576">forklift</span>''' truck. <small>{{H:title|Appears if the player gets out of the forklift while filling the Mule with boxes|[?]}}</small> |
| ⚫ | |||
| + | {{BP}}Head to the lockup in '''<span style="color:#D1BC86">Willowfield</span>'''. |
||
}} |
}} |
||
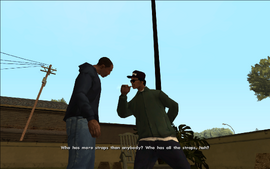
| − | {{Quote|Who has more straps than anybody? Who has all the straps, huh?!|[[Ryder]]}} |
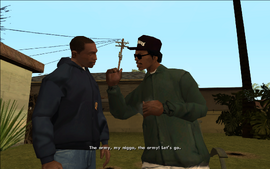
+ | {{Quote|Who has more straps than anybody? Who has all the straps, huh?!<br>A man with a lot of guns? Shit, I give up!<br>The Army, my ni**a! The Army! Let's go!|[[Ryder]] and [[Carl]]|sound=RobbingUncleSam-GTASA-Quote.ogg}} |
| − | |||
| − | {{Template:Quote|A man with a lot of guns? Shit, I give up!|[[Carl]]}} |
||
| − | |||
| − | {{Template:Quote|The Army, my nigga! The Army! Let's go!|[[Ryder]]}} |
||
'''Robbing Uncle Sam''' is the last mission in ''[[Grand Theft Auto: San Andreas]]'' given to [[protagonist]] [[Carl Johnson]] by fellow [[Grove Street Families in 3D Universe|Grove Street Families]] member [[Ryder]] from [[Ryder's House|his house]]. |
'''Robbing Uncle Sam''' is the last mission in ''[[Grand Theft Auto: San Andreas]]'' given to [[protagonist]] [[Carl Johnson]] by fellow [[Grove Street Families in 3D Universe|Grove Street Families]] member [[Ryder]] from [[Ryder's House|his house]]. |
||
| − | == |
+ | ==Mission== |
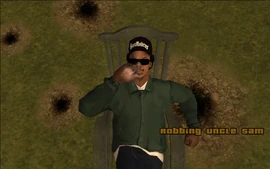
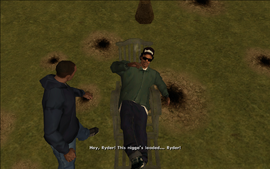
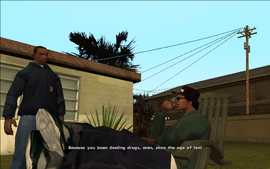
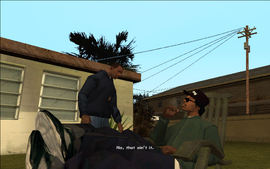
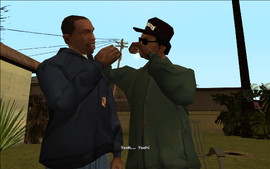
Carl goes to see Ryder in his back yard, who is smoking. He asks Carl why he, himself, didn't finish high school. After Carl asks if it was because he dealt drugs since the age of ten, or if it was because he attacked a teacher for wearing Ballas colors, Ryder responds that it's because he is too intelligent. After asking Carl where they can attain guns, Ryder informs him that the [[Military|army]] has all of the guns. |
Carl goes to see Ryder in his back yard, who is smoking. He asks Carl why he, himself, didn't finish high school. After Carl asks if it was because he dealt drugs since the age of ten, or if it was because he attacked a teacher for wearing Ballas colors, Ryder responds that it's because he is too intelligent. After asking Carl where they can attain guns, Ryder informs him that the [[Military|army]] has all of the guns. |
||
| − | Carl and Ryder get inside of a |
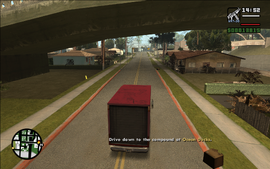
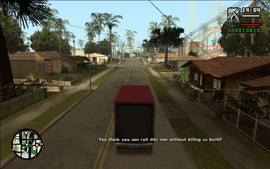
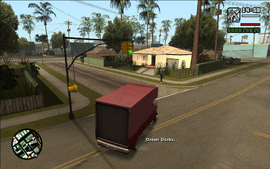
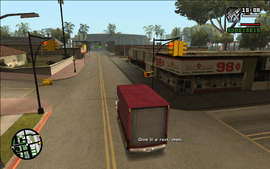
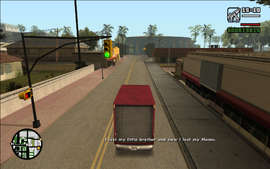
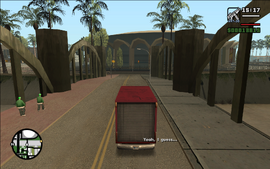
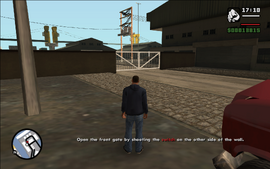
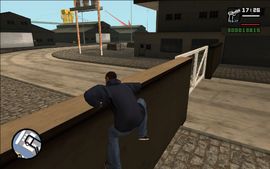
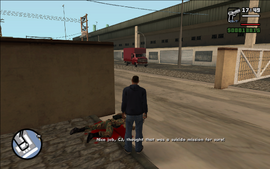
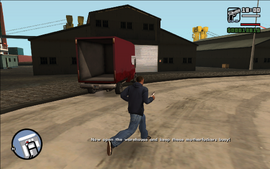
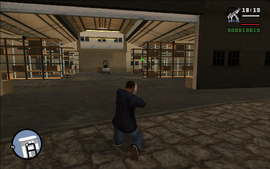
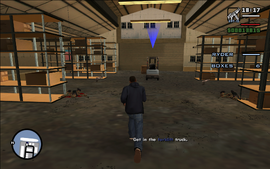
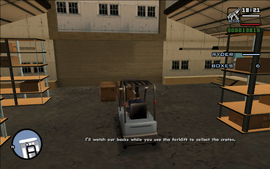
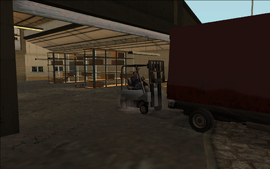
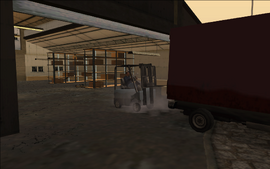
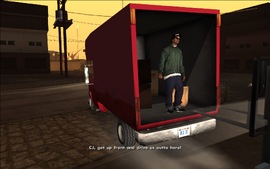
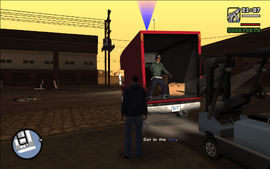
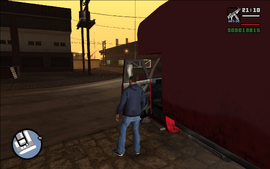
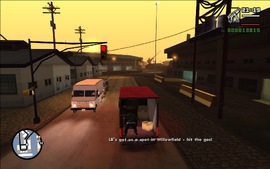
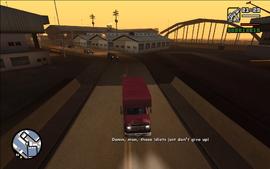
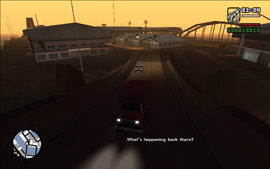
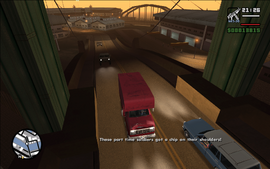
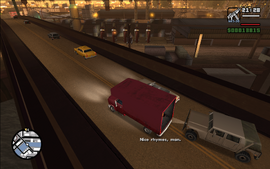
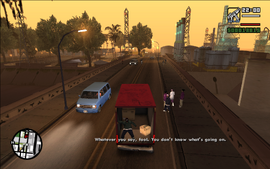
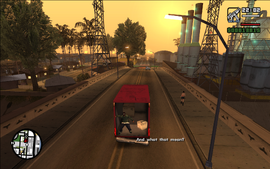
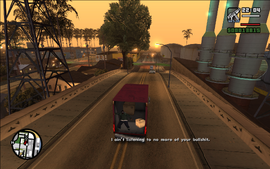
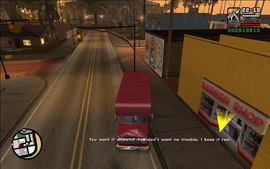
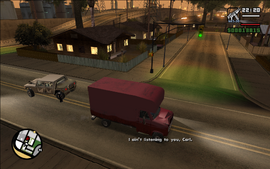
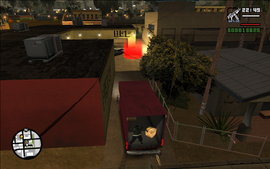
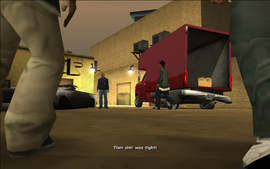
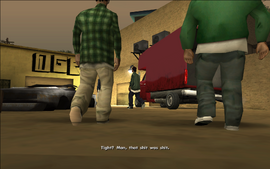
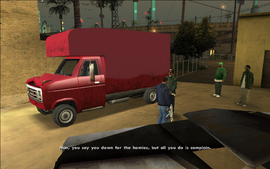
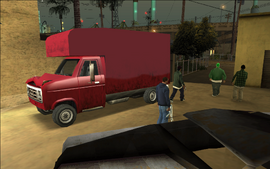
+ | Carl and Ryder get inside of a [[Mule]] (delivered by [[LB]]), and drive to the [[Los Santos National Guard Depot|National Guard Depot]] at the [[Ocean Docks]]. Once they arrive, they notice that the gate is closed. Carl climbs over the wall and shoots the switch to open the gate. Ryder drives the Mule to a weapon's warehouse, where Carl shoots the switch to open the door. Ryder stands guard as Carl collects six crates of weaponry inside and around the warehouse using a [[forklift]]. Once six crates have been collected, Carl and Ryder escape from the [[National Guard Depot|National Guard]], who pursue them in 2 [[Patriot]]s. They then drive back to [[LB's Garage|LB's lockup]] in [[Willowfield]]. |
| − | ==Mission |
+ | ==Mission Objectives== |
In order to complete the mission the player must: |
In order to complete the mission the player must: |
||
*Get in the van with Ryder. |
*Get in the van with Ryder. |
||
| Line 45: | Line 43: | ||
*Head to the lock up in Willowfield. |
*Head to the lock up in Willowfield. |
||
| − | == |
+ | ==Reward== |
| − | The reward for completing this mission is increased [[respect]], and the [[Grove Street Families|Grove Street families]] will start to carry [[Tec-9]] (unless the player already sprayed all [[tags]]). |
+ | The reward for completing this mission is increased [[respect]], and the [[Grove Street Families|Grove Street families]] will start to carry [[Tec-9]] (unless the player has already sprayed all [[tags]]). |
| − | |||
| − | ==Tips and Tricks== |
||
| − | *An easier but slightly lengthy method is to get the crates into a more favorable line-up before opening the first gate for Ryder. Collecting all the crates to the warehouse doorway allows the player to load them into the truck more quickly once it has driven through. |
||
| − | *While lifting the crates into the Mule, don't forget to protect Ryder. The player needs to keep an eye on the soldiers coming towards Ryder nearby and the crates can be waited. |
||
| − | *It is possible to destroy any excess crates. Each crate has a different item inside them, ranging from a simple pistol to a health pickup to body armor. |
||
| − | *It is possible to carry two crates at the same time with the forklift. However, the player has to aim the crate into the van one by one to be released. Combined with the tip of lining up the crates before opening the gates, putting everything in the van will be rather quick and with less time to deal with the spawning soldiers shooting at Ryder. |
||
| − | *Never care if the Forklift truck is destroyed. It's bullet-proof and therefore soldiers shooting it were doing futile work. |
||
| − | *This mission is difficult because of the Mule being pretty slow and Patriots being really fast. Ryder will toss some explosives if Carl activates the truck's horn, they can be used to eliminate the pursuers and thus making the remainder of the mission easier. Just make sure that the truck doesn't flip or an explosion occurs right behind the truck or else Ryder can be killed. |
||
==Transcript== |
==Transcript== |
||
{{/Transcript}} |
{{/Transcript}} |
||
| ⚫ | |||
| ⚫ | |||
| + | ===Walkthrough=== |
||
| + | <gallery position="center" hideaddbutton="true" spacing="small" widths="270px" bordersize="small"> |
||
| + | RobbingUncleSam-GTASA-SS1.png|[[Ryder]] is smoking [[weed]] in his backyard. |
||
| + | RobbingUncleSam-GTASA-SS2.png|[[CJ]] comes over and tries talking to him, but Ryder is so high he doesn't even realize CJ has arrived. |
||
| + | RobbingUncleSam-GTASA-SS3.png|Finally, Ryder realizes CJ is here and greets him. He then asks him why he never finished high school. |
||
| + | RobbingUncleSam-GTASA-SS4.png|CJ suggests that it was because Ryder has been a drug dealer since he was 10 years old. |
||
| + | RobbingUncleSam-GTASA-SS5.png|Ryder says that that's not the reason. |
||
| + | RobbingUncleSam-GTASA-SS6.png|CJ suggests that it was because Ryder beat up a teacher for wearing clothing that followed the color scheme of the [[Ballas (3D Universe)|Ballas]]. |
||
| + | RobbingUncleSam-GTASA-SS7.png|The two shake each other's hands, but Ryder says that that isn't the reason why neither. |
||
| + | RobbingUncleSam-GTASA-SS8.png|Ryder stands up on his chair and says that he never finished high school because he's too intelligent for it. |
||
| + | RobbingUncleSam-GTASA-SS9.png|Ryder continues boasting and calls himself a genius. |
||
| + | RobbingUncleSam-GTASA-SS10.png|Ryder asks CJ who has more weaponry than any other person. |
||
| + | RobbingUncleSam-GTASA-SS11.png|CJ says that he doesn't know. |
||
| + | RobbingUncleSam-GTASA-SS12.png|Ryder says that he was talking about the [[Military|army]]. |
||
| + | RobbingUncleSam-GTASA-SS13.png|As the two begin walking away, Ryder inhales a large amount of weed. |
||
| + | RobbingUncleSam-GTASA-SS14.png|Ryder then tries to force CJ smoke some weed too, but CJ tries to fight Ryder off. |
||
| + | RobbingUncleSam-GTASA-SS15.png|CJ pushes Ryder off and refuses to use drugs. |
||
| + | RobbingUncleSam-GTASA-SS16.png|CJ must now get into a nearby [[Mule]] with Ryder. |
||
| + | RobbingUncleSam-GTASA-SS17.png|CJ getting into the Mule. |
||
| + | RobbingUncleSam-GTASA-SS18.png|CJ and Ryder's next objective is to drive to the [[Los Santos National Guard Depot|army compound]] in [[Ocean Docks]]. |
||
| + | RobbingUncleSam-GTASA-SS19.png|As CJ and Ryder leave [[Grove Street (3D Universe)|Grove Street]], Ryder once again starts making fun of CJ's driving. |
||
| + | RobbingUncleSam-GTASA-SS20.png|CJ ignores Ryder's attempts to start a fight and asks him where they're going. |
||
| + | RobbingUncleSam-GTASA-SS21.png|Ryder tells CJ to drive to Ocean Docks. |
||
| + | RobbingUncleSam-GTASA-SS22.png|CJ asks Ryder where the Mule they're driving in came from, as it wasn't parked outside Ryder's [[Ryder's House|house]] when CJ came through. |
||
| + | RobbingUncleSam-GTASA-SS23.png|Ryder says that his friend [[LB]] delivered the truck. He also says that LB is like a ninja and someone one can trust, unlike some certain others. |
||
| + | RobbingUncleSam-GTASA-SS25.png|CJ tells Ryder to stop giving him a hard time. |
||
| + | RobbingUncleSam-GTASA-SS26.png|CJ tells Ryder that he lost his [[Brian Johnson|brother]] and his [[Beverly Johnson|mother]] and thus deserves at least some peace. |
||
| + | RobbingUncleSam-GTASA-SS27.png|Ryder tells CJ that no matter what he has going against him, he must always stick close to his friends. |
||
| + | RobbingUncleSam-GTASA-SS28.png|CJ agrees. |
||
| + | RobbingUncleSam-GTASA-SS29.png|CJ and Ryder heading to the compound in Ocean Docks. |
||
| + | RobbingUncleSam-GTASA-SS30.png|CJ and Ryder arriving at the compound in Ocean Docks. |
||
| + | RobbingUncleSam-GTASA-SS31.png|As CJ parks by the compound, Ryder tells him that they have arrived. |
||
| + | RobbingUncleSam-GTASA-SS32.png|CJ says that the compound doesn't look like it'll be easy to penetrate. |
||
| + | RobbingUncleSam-GTASA-SS33.png|CJ asks Ryder if he's sure they could handle taking on it. |
||
| + | RobbingUncleSam-GTASA-SS34.png|Ryder tells CJ that the only other people at the compound are National Guard and calls them 'weekend soldiers'. |
||
| + | RobbingUncleSam-GTASA-SS35.png|Ryder says that the National Guard are no match for gangsters like CJ and Ryder. |
||
| + | RobbingUncleSam-GTASA-SS36.png|CJ must now get into the compound and open the main gate so that Ryder can drive in with the truck. |
||
| + | RobbingUncleSam-GTASA-SS37.png|CJ climbing the wall next to the entrance gate. |
||
| + | RobbingUncleSam-GTASA-SS38.png|CJ taking care of the soldier guarding the entrance switch. |
||
| + | RobbingUncleSam-GTASA-SS39.png|CJ, about to shoot the switch and open the gate for Ryder. |
||
| + | RobbingUncleSam-GTASA-SS40.png|Ryder compliments CJ's work. |
||
| + | RobbingUncleSam-GTASA-SS41.png|After Ryder safely parks in the compound CJ must shoot out the switch to one of the warehouses to open it. |
||
| + | RobbingUncleSam-GTASA-SS42.png|Ryder tells CJ to open a warehouse and steal the guns from it. |
||
| + | RobbingUncleSam-GTASA-SS43.png|CJ, about to shoot the switch and open the door to the warehouse. |
||
| + | RobbingUncleSam-GTASA-SS44.png|CJ clearing out soldiers guarding the guns in the warehouse. |
||
| + | RobbingUncleSam-GTASA-SS45.png|After taking care of the guards, CJ must use a forklift left in the warehouse to collect all weapon boxes and drop them into the Mule that he and Ryder drove there with. |
||
| + | RobbingUncleSam-GTASA-SS46.png|Ryder tells CJ to start collecting while he keeps watch. |
||
| + | RobbingUncleSam-GTASA-SS48.png|Ryder tells CJ that the truck is ready. |
||
| + | RobbingUncleSam-GTASA-SS49.png|CJ picking up the first box. |
||
| + | RobbingUncleSam-GTASA-SS50.png|CJ placing the first box in the truck. |
||
| + | RobbingUncleSam-GTASA-SS51.png|CJ picking up the second box. |
||
| + | RobbingUncleSam-GTASA-SS52.png|CJ placing the second box in the truck. |
||
| + | RobbingUncleSam-GTASA-SS53.png|CJ picking up the third box. |
||
| + | RobbingUncleSam-GTASA-SS54.png|CJ placing the third box in the truck. |
||
| + | RobbingUncleSam-GTASA-SS55.png|CJ picking up the fourth box. |
||
| + | RobbingUncleSam-GTASA-SS56.png|CJ placing the fourth box in the truck. |
||
| + | RobbingUncleSam-GTASA-SS57.png|CJ picking up the fifth box. |
||
| + | RobbingUncleSam-GTASA-SS58.png|CJ placing the fifth box in the truck. |
||
| + | RobbingUncleSam-GTASA-SS59.png|CJ picking up the sixth box. |
||
| + | RobbingUncleSam-GTASA-SS60.png|CJ placing the sixth box in the truck. |
||
| + | RobbingUncleSam-GTASA-SS61.png|After CJ collects six boxes of weapons, Ryder tells him that they've got enough. |
||
| + | RobbingUncleSam-GTASA-SS62.png|Ryder gets into the back of the truck and tells CJ to get in and drive them away. |
||
| + | RobbingUncleSam-GTASA-SS63.png|CJ must get into the truck. |
||
| + | RobbingUncleSam-GTASA-SS64.png|CJ getting into the truck. |
||
| + | RobbingUncleSam-GTASA-SS65.png|CJ must now drive himself and Ryder out of Ocean Docks and to the lockup in [[Willowfield]]. |
||
| + | RobbingUncleSam-GTASA-SS66.png|Ryder tells CJ about LB's lockup in Willowfield and tells him to hurry up. |
||
| + | RobbingUncleSam-GTASA-SS67.png|Short ways from the compound, Ryder notices that the duo have a tail. |
||
| + | RobbingUncleSam-GTASA-SS68.png|CJ asks Ryder what's going on. |
||
| + | RobbingUncleSam-GTASA-SS69.png|Ryder tells CJ that the National Guard are coming after them. |
||
| + | RobbingUncleSam-GTASA-SS70.png|CJ compliments Ryder's accidental rhyming. |
||
| + | RobbingUncleSam-GTASA-SS71.png|After a short while, CJ decides that the truck is too heavy and tells Ryder to toss out some of the boxes CJ collected. |
||
| + | RobbingUncleSam-GTASA-SS72.png|Ryder tells CJ to sound the horn whenever he wants Ryder to throw a box out. |
||
| + | RobbingUncleSam-GTASA-SS73.png|Ryder throwing boxes at the pursuing soldiers while CJ drives to the lockup in Willowfield. |
||
| + | RobbingUncleSam-GTASA-SS74.png|The boxes appear to have explosives in them. |
||
| + | RobbingUncleSam-GTASA-SS75.png|Frustrated at the situation he's gotten into, CJ tells Ryder that he won't hang with him until he stops using drugs and coming up with dangerous plans like this one. |
||
| + | RobbingUncleSam-GTASA-SS76.png|Ryder tells CJ that he doesn't care and tells CJ that he "doesn't know what's going on". |
||
| + | RobbingUncleSam-GTASA-SS77.png|CJ asks Ryder what that was supposed to mean. |
||
| + | RobbingUncleSam-GTASA-SS78.png|Ryder tells CJ that he won't listen to CJ anymore. |
||
| + | RobbingUncleSam-GTASA-SS79.png|Ryder says that they got what they came for, so that's good enough in his mind. |
||
| + | RobbingUncleSam-GTASA-SS80.png|Ryder asks CJ how he can expect there to not be any danger in the life they've chosen and says that unlike CJ, Ryder "keeps it real". |
||
| + | RobbingUncleSam-GTASA-SS81.png|CJ says that Ryder wouldn't know "real" even if it hit him. |
||
| + | RobbingUncleSam-GTASA-SS82.png|Ryder assures CJ that he's not listening. |
||
| + | RobbingUncleSam-GTASA-SS83.png|CJ and Ryder arriving at the supposed lockup at [[Emmet's]]. |
||
| + | RobbingUncleSam-GTASA-SS84.png|CJ parking the truck. |
||
| + | RobbingUncleSam-GTASA-SS85.png|Ryder says that they did alright. |
||
| + | RobbingUncleSam-GTASA-SS86.png|CJ disagrees. |
||
| + | RobbingUncleSam-GTASA-SS87.png|Ryder says that CJ claims to be down with [[Grove Street Families]], yet all he contributes to the gang is complaining. |
||
| + | RobbingUncleSam-GTASA-SS88.png|Ryder and the GSF members that were waiting at the lockup walk off. |
||
| + | RobbingUncleSam-GTASA-SS89.png|Mission passed. |
||
| + | </gallery> |
||
| ⚫ | |||
| − | <center> |
||
| + | <gallery hideaddbutton="true" position="center"> |
||
| − | {| class="wikitable" |
||
| ⚫ | |||
| − | |- |
||
| ⚫ | |||
| − | !PC Version |
||
| + | GTA San Andreas Remastered - Mission 12 - Robbing Uncle Sam (Xbox 360 PS3)|Remastered Version |
||
| − | |- |
||
| + | </gallery> |
||
| − | | |
||
| ⚫ | |||
| − | |- |
||
| − | !IPad Version |
||
| − | |- |
||
| − | | |
||
| ⚫ | |||
| − | |} |
||
| − | </center> |
||
| − | == |
+ | ==Trivia== |
| − | * In the beta, after this mission there |
+ | * In the beta, after this mission there would be an [[AK-47]] available at [[Emmet's]].{{Fact}} |
| + | * Outside of this mission, the player can discover that the National Guard Depot does not have a gate, and is surprisingly unprotected for a national guard depot. The warehouse door is fully opened as well. |
||
| ⚫ | |||
| + | ** Similarly to the Depot, many locations across San Andreas will not be populated outside of missions. These include [[Area 69]] ([[Black Project]]) and the [[Loco Syndicate Crack Factory]] ([[Yay Ka-Boom-Boom]]). |
||
| ⚫ | |||
| ⚫ | |||
| ⚫ | ** The Mesa can be obtained by the player. After Carl kills the guards at the gate and eliminates the soldiers in the warehouse, the player can steal the Military Mesa, and then drive back to a safehouse garage. Return to the depot in order to complete or fail the mission, then check the car in the garage. |
||
| ⚫ | |||
| ⚫ | *** |
||
| ⚫ | ** The Mesa can be obtained by the player. After Carl kills the guards at the gate and eliminates the soldiers in the warehouse, the player can steal the Military Mesa, and then drive back to a safehouse garage. Return to the depot in order to complete or fail the mission, then check the car in the garage. |
||
| ⚫ | |||
| ⚫ | *** Sometimes, when the player saves the Mesa in the garage and returns to the depot, Ryder will almost be killed during the progress and his life bar will decrease on the way back to the [[Mule]], causing the mission to fail, thus forcing the player to restart the mission. Even reloading the game after several minutes will not fix this situation. This is most likely a glitch. It is not known what kind of in-game factor leads to this, however it may not always happen. This situation is reported in the mobile version, mostly on the [[Android OS|Android]] device. Other versions still remain unknown. |
||
| + | **** However, finishing loading the crates will cause Ryder to enter the truck, and the soldiers will stop spawning for a while before entering the truck and escaping, thus avoiding the glitch. |
||
| + | **** If the player chooses to obtain the Mesa by completing the mission, they must return to the garage, open and close the door again, or else the Mesa will not be saved. |
||
| ⚫ | |||
* This mission is the only occasion where the army uses [[pistol]]s and not [[M4]]s. This may have been done because it's an early mission and the player doesn't have any powerful weapons yet. |
* This mission is the only occasion where the army uses [[pistol]]s and not [[M4]]s. This may have been done because it's an early mission and the player doesn't have any powerful weapons yet. |
||
| ⚫ | |||
| − | ** From a realism point of view, pistols are actually fairly rare in the army. Only officers and special forces operatives are issued one. |
||
| ⚫ | |||
| ⚫ | |||
| ⚫ | * The forklift is bulletproof, this is likely done for balancing reasons, although Carl can destroy it by either dumping it in the water, incinerating it with [[Molotov Cocktails|Molotov cocktails]] or a [[flamethrower]] or exploding it with an [[Rocket Launcher|RPG]] or [[grenades]]. The mission will fail and the game will say "''The Forklift Truck is history''". |
||
| ⚫ | |||
| ⚫ | |||
| ⚫ | |||
| ⚫ | |||
** The vehicle can be obtained in a similar fashion to the Mesa. |
** The vehicle can be obtained in a similar fashion to the Mesa. |
||
| − | * The crates can be destroyed by shooting, attacking, or running over them. They may contain [[ |
+ | * The crates can be destroyed by shooting, attacking, or running over them. They may contain [[pistol]]s, [[micro-SMG]]s, [[Pump Action Shotgun|shotguns]], [[grenades]], [[health]], or [[Body Armor|armor]]. However, if the player destroys too many of the crates, the mission will fail with the game saying Carl and Ryder should need more crates, unless Carl has already loaded up six crates. |
| + | * Depending on the angle of the [[Mule]], Ryder will make different movements. For example: if the Mule bows, Ryder wobbles and if the Mule overturns, Ryder will fall. |
||
| − | * The game pokes fun at itself during Carl and Ryder's conversation after the opening cutscene, when Carl wonders how the truck suddenly appeared outside Ryder's house (as throughout the game, vehicles used in missions suddenly appear in a similar fashion after the mission-assignment cutscene). |
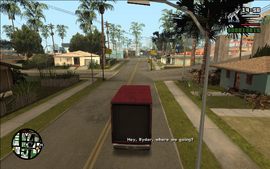
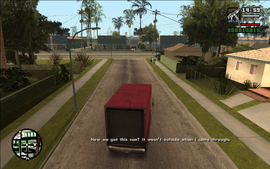
+ | * The game pokes fun at itself during Carl and Ryder's conversation after the opening cutscene, when Carl wonders how the truck suddenly appeared outside Ryder's house (as throughout the game, vehicles used in missions suddenly appear in a similar fashion after the mission-assignment cutscene).<ref>''"How we get this van? It wasn't outside when I came through."''<br>''"My homie LB, he's like a clockwork ninja! Real dependable. Unlike some of you motherfuckers..."''</ref> |
| − | * The Patriot are temporarily invincible and heavy the moment they exit their garages to chase Carl and Ryder. |
||
| + | * The Patriot are temporarily invincible and heavy the moment they exit their garages to chase Carl and Ryder for balancing reasons, so they can't be bypassed. This can be proven using cheats, for example, spawning a Rhino and block off the exits. After Carl enters the truck and drives away, the tanks will immediately be pushed away. |
||
| − | * If the player has the [[Cheats in GTA San Andreas|cheat ]]"all cars have nitro" activated, the [[Patriot]] driver will flip his car. |
||
| + | ** Do note that the invincibility is not always present. It is possible for the Patriots to catch on fire the moment they collide with the Rhino, even if they were parked closely to the door- |
||
| − | * A bug will occur if the player shoots the two drivers who are in the |
+ | * A bug will occur if the player shoots the two drivers who are in the Patriots in the head before driving the truck. The Patriot will not move because of the dead drivers, but when they are out of view from the camera and then pointed back to, the car will start teleporting near the player and begin to follow until arriving at the drop off location. This works on the PS2 and PC. Xbox is still unconfirmed. A similar consequence can be seen in the mission [[Jizzy (mission)|Jizzy]] - If the player kills the Stretch's driver and starts driving it around, the Huntley will also begin to teleport to the Stretch. |
** If the player kills the co-passengers as well, steals one of the Patriots and parks them in a safehouse garage; the Patriot will vanish as soon as the door closes. If the player goes back to Ocean Docks to retrieve Ryder, the stolen Patriot will have teleported right back to the National Guard Depot. |
** If the player kills the co-passengers as well, steals one of the Patriots and parks them in a safehouse garage; the Patriot will vanish as soon as the door closes. If the player goes back to Ocean Docks to retrieve Ryder, the stolen Patriot will have teleported right back to the National Guard Depot. |
||
| − | ** The National Guard's Patriot can be kept after the mission by killing the driver or the passenger, then destroying the Mule with a sub-machine gun while still in the Patriot, causing the mission to |
+ | ** The National Guard's Patriot can be kept after the mission by killing the driver or the passenger, then destroying the Mule with a sub-machine gun while still in the Patriot, causing the mission to fail. After doing so, drive the Patriot straight to a safehouse garage, save the game and the Patriot will be kept. Note that the saved Patriot won't have any special features. |
| − | * '''Uncle Sam''' (initials U.S.) is a common [[wp:National personification|national personification]] of the [[wp:American government|American government]]. |
+ | * '''Uncle Sam''' (initials U.S.) is a common [[wp:National personification|national personification]] of the [[wp:American government|American government]] since the 1700s. |
| + | <references /> |
||
| ⚫ | |||
| + | |||
| + | ==Gallery== |
||
<gallery position="center"> |
<gallery position="center"> |
||
RobbingUncleSam-GTASA2.jpg|The [[National Guard Depot]] in [[Ocean Docks]] |
RobbingUncleSam-GTASA2.jpg|The [[National Guard Depot]] in [[Ocean Docks]] |
||
| Line 112: | Line 190: | ||
{{GTA|state=collapsed}} |
{{GTA|state=collapsed}} |
||
{{Gtasa missions|state=collapsed}} |
{{Gtasa missions|state=collapsed}} |
||
| ⚫ | |||
| − | }} |
||
| − | |||
| ⚫ | |||
[[Category:Missions]] |
[[Category:Missions]] |
||
[[Category:Missions in GTA San Andreas]] |
[[Category:Missions in GTA San Andreas]] |
||
Revision as of 07:32, 10 February 2020
A man with a lot of guns? Shit, I give up!
The Army, my ni**a! The Army! Let's go!
Robbing Uncle Sam is the last mission in Grand Theft Auto: San Andreas given to protagonist Carl Johnson by fellow Grove Street Families member Ryder from his house.
Mission
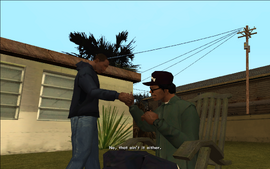
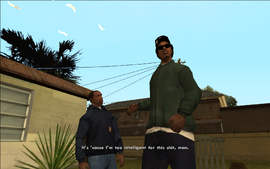
Carl goes to see Ryder in his back yard, who is smoking. He asks Carl why he, himself, didn't finish high school. After Carl asks if it was because he dealt drugs since the age of ten, or if it was because he attacked a teacher for wearing Ballas colors, Ryder responds that it's because he is too intelligent. After asking Carl where they can attain guns, Ryder informs him that the army has all of the guns.
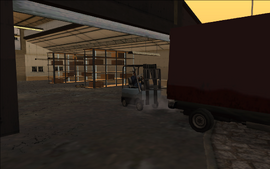
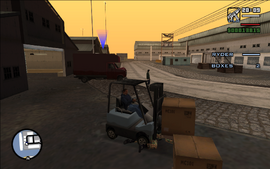
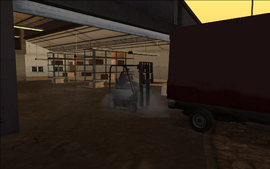
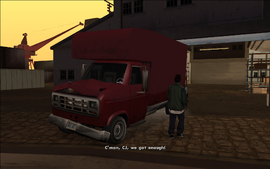
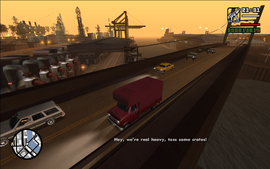
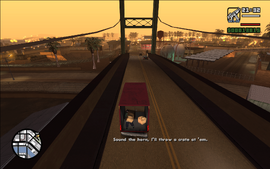
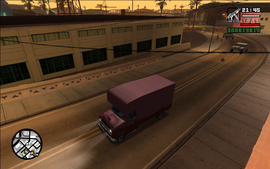
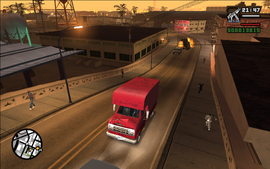
Carl and Ryder get inside of a Mule (delivered by LB), and drive to the National Guard Depot at the Ocean Docks. Once they arrive, they notice that the gate is closed. Carl climbs over the wall and shoots the switch to open the gate. Ryder drives the Mule to a weapon's warehouse, where Carl shoots the switch to open the door. Ryder stands guard as Carl collects six crates of weaponry inside and around the warehouse using a forklift. Once six crates have been collected, Carl and Ryder escape from the National Guard, who pursue them in 2 Patriots. They then drive back to LB's lockup in Willowfield.
Mission Objectives
In order to complete the mission the player must:
- Get in the van with Ryder.
- Drive down to the compound at Ocean Docks.
- Open the front gate by shooting the switch on the other side of the wall.
- Shoot the switch to open the front gate.
- Open the warehouse door by shooting the switch on the far side of the wall.
- Shoot the switch to open the warehouse door.
- Get in the forklift truck.
- Load the crates onto the van.
- Get in the van.
- Head to the lock up in Willowfield.
Reward
The reward for completing this mission is increased respect, and the Grove Street families will start to carry Tec-9 (unless the player has already sprayed all tags).
Transcript
| Transcript | |||||||||||||||||||||||||||||||||||||||||||||||||||||||||||||||||||||||||||||||||||||||||||||||||||||
|---|---|---|---|---|---|---|---|---|---|---|---|---|---|---|---|---|---|---|---|---|---|---|---|---|---|---|---|---|---|---|---|---|---|---|---|---|---|---|---|---|---|---|---|---|---|---|---|---|---|---|---|---|---|---|---|---|---|---|---|---|---|---|---|---|---|---|---|---|---|---|---|---|---|---|---|---|---|---|---|---|---|---|---|---|---|---|---|---|---|---|---|---|---|---|---|---|---|---|---|---|---|
|
Gallery
Walkthrough
Video Walkthroughs
Trivia
- In the beta, after this mission there would be an AK-47 available at Emmet's.[citation/verification needed]
- Outside of this mission, the player can discover that the National Guard Depot does not have a gate, and is surprisingly unprotected for a national guard depot. The warehouse door is fully opened as well.
- Similarly to the Depot, many locations across San Andreas will not be populated outside of missions. These include Area 69 (Black Project) and the Loco Syndicate Crack Factory (Yay Ka-Boom-Boom).
- The song heard in opening cutscene is "It Was A Good Day" by Ice Cube. This song can also be heard on Radio Los Santos, however the cutscene utilizes the song's clean variation.
- During the small cutscene of Ryder and Carl at the gate, a soldier is seen driving a Mesa with a unique color. Like in the free roam, the Mesa can appear in two different variants.
- The Mesa can be obtained by the player. After Carl kills the guards at the gate and eliminates the soldiers in the warehouse, the player can steal the Military Mesa, and then drive back to a safehouse garage. Return to the depot in order to complete or fail the mission, then check the car in the garage.
- Sometimes, when the player saves the Mesa in the garage and returns to the depot, Ryder will almost be killed during the progress and his life bar will decrease on the way back to the Mule, causing the mission to fail, thus forcing the player to restart the mission. Even reloading the game after several minutes will not fix this situation. This is most likely a glitch. It is not known what kind of in-game factor leads to this, however it may not always happen. This situation is reported in the mobile version, mostly on the Android device. Other versions still remain unknown.
- However, finishing loading the crates will cause Ryder to enter the truck, and the soldiers will stop spawning for a while before entering the truck and escaping, thus avoiding the glitch.
- If the player chooses to obtain the Mesa by completing the mission, they must return to the garage, open and close the door again, or else the Mesa will not be saved.
- The color of the Mesa cannot be found at the mod garage since any of the colors avaliable can be applied (if the player has completed Cesar Vialpando before triggering the mission), proving that the military green paint job is unique in the game.
- Sometimes, when the player saves the Mesa in the garage and returns to the depot, Ryder will almost be killed during the progress and his life bar will decrease on the way back to the Mule, causing the mission to fail, thus forcing the player to restart the mission. Even reloading the game after several minutes will not fix this situation. This is most likely a glitch. It is not known what kind of in-game factor leads to this, however it may not always happen. This situation is reported in the mobile version, mostly on the Android device. Other versions still remain unknown.
- The Mesa can be obtained by the player. After Carl kills the guards at the gate and eliminates the soldiers in the warehouse, the player can steal the Military Mesa, and then drive back to a safehouse garage. Return to the depot in order to complete or fail the mission, then check the car in the garage.
- This mission is the only occasion where the army uses pistols and not M4s. This may have been done because it's an early mission and the player doesn't have any powerful weapons yet.
- This can also happen to soldiers that spawn on a six-star wanted level, but the frequency of them having a pistol is rare.
- Once the chase phase begins, the Mule will be explosion proof, likely to prevent the player from blowing it up with the crates during the chase. It's unlocked and free to take, and it will still retain its feature.
- The forklift is bulletproof, this is likely done for balancing reasons, although Carl can destroy it by either dumping it in the water, incinerating it with Molotov cocktails or a flamethrower or exploding it with an RPG or grenades. The mission will fail and the game will say "The Forklift Truck is history".
- The mission will fail if the forklift is destroyed even after loading up all the six required crates.
- The vehicle can be obtained in a similar fashion to the Mesa.
- The crates can be destroyed by shooting, attacking, or running over them. They may contain pistols, micro-SMGs, shotguns, grenades, health, or armor. However, if the player destroys too many of the crates, the mission will fail with the game saying Carl and Ryder should need more crates, unless Carl has already loaded up six crates.
- Depending on the angle of the Mule, Ryder will make different movements. For example: if the Mule bows, Ryder wobbles and if the Mule overturns, Ryder will fall.
- The game pokes fun at itself during Carl and Ryder's conversation after the opening cutscene, when Carl wonders how the truck suddenly appeared outside Ryder's house (as throughout the game, vehicles used in missions suddenly appear in a similar fashion after the mission-assignment cutscene).[1]
- The Patriot are temporarily invincible and heavy the moment they exit their garages to chase Carl and Ryder for balancing reasons, so they can't be bypassed. This can be proven using cheats, for example, spawning a Rhino and block off the exits. After Carl enters the truck and drives away, the tanks will immediately be pushed away.
- Do note that the invincibility is not always present. It is possible for the Patriots to catch on fire the moment they collide with the Rhino, even if they were parked closely to the door-
- A bug will occur if the player shoots the two drivers who are in the Patriots in the head before driving the truck. The Patriot will not move because of the dead drivers, but when they are out of view from the camera and then pointed back to, the car will start teleporting near the player and begin to follow until arriving at the drop off location. This works on the PS2 and PC. Xbox is still unconfirmed. A similar consequence can be seen in the mission Jizzy - If the player kills the Stretch's driver and starts driving it around, the Huntley will also begin to teleport to the Stretch.
- If the player kills the co-passengers as well, steals one of the Patriots and parks them in a safehouse garage; the Patriot will vanish as soon as the door closes. If the player goes back to Ocean Docks to retrieve Ryder, the stolen Patriot will have teleported right back to the National Guard Depot.
- The National Guard's Patriot can be kept after the mission by killing the driver or the passenger, then destroying the Mule with a sub-machine gun while still in the Patriot, causing the mission to fail. After doing so, drive the Patriot straight to a safehouse garage, save the game and the Patriot will be kept. Note that the saved Patriot won't have any special features.
- Uncle Sam (initials U.S.) is a common national personification of the American government since the 1700s.
- ↑ "How we get this van? It wasn't outside when I came through."
"My homie LB, he's like a clockwork ninja! Real dependable. Unlike some of you motherfuckers..."

