GTA Wiki

Help required: categories

Hi everyone, please help us by filling out this form!


We are determining how players best define and/or differentiate the terms "game modes", "missions" and "activities". This will be used to help us develop a clear and logical category tree to house articles related to this type of content.


Thank you in advance for help!

READ MORE

GTA Wiki
GTA Wiki
19,871
pages
No edit summary
Tag: Visual edit
No edit summary
(6 intermediate revisions by 5 users not shown)
Line 1: Line 1:
 
{{DISPLAYTITLE: Rigged to Blow}}
 
{{DISPLAYTITLE: Rigged to Blow}}
   
{{Disambiglink|For the mission with the same name in [[Grand Theft Auto IV]], see [[Rigged to Blow (GTA IV)]].}}
 
 
{{infobox mission
 
{{infobox mission
 
|name = Rigged To Blow
 
|name = Rigged To Blow
|image = Rigged To Blow_GTAIII.jpg
+
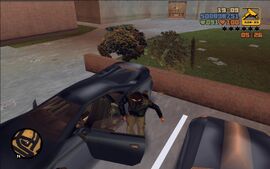
|image = RiggedToBlow-GTAIII-Intro.png
 
|game = III
 
|game = III
 
|for = [[File:Radar-DiceIcon-GTAIII.png|24px|link=D-Ice]] [[D-Ice]]
 
|for = [[File:Radar-DiceIcon-GTAIII.png|24px|link=D-Ice]] [[D-Ice]]
 
|location = [[Wichita Gardens]], [[Shoreside Vale]], [[Liberty City (3D Universe)|Liberty City]]
 
|location = [[Wichita Gardens]], [[Shoreside Vale]], [[Liberty City (3D Universe)|Liberty City]]
|fail = [[Wasted]]<br>[[Busted]]<br>[[Infernus]] destroyed
+
|fail = [[Wasted]]<br>[[Busted]]<br>[[Infernus]] destroyed<br>Infernus flipped upside down
 
|reward = [[Money|$]]20,000
 
|reward = [[Money|$]]20,000
 
|unlocks = [[Bullion Run]]
 
|unlocks = [[Bullion Run]]
 
|unlockedby = [[Toyminator]]
 
|unlockedby = [[Toyminator]]
  +
|todo =
  +
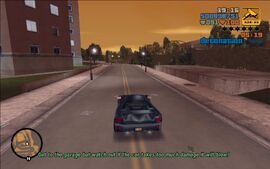
{{BP}}'''''<span style="color:#578665">Get to the garage but watch out if the car takes too much damage it will blow!</span>'''''
  +
{{BP}}'''''<span style="color:#578665">Get the car repaired!</span>'''''
  +
{{BP}}'''''<span style="color:#578665">Take the car back it has to be in perfect condition - no damage!</span>'''''
  +
{{BP}}'''''<span style="color:#578665">Get out of the vehicle!</span>'''''
 
}}
 
}}
 
{{Disambiglink|For the mission with the same name in [[Grand Theft Auto IV]], see [[Rigged to Blow (GTA IV)]].}}
 
{{Quote|Some effa bass wired my wheels to blow. If I lose those wheels, my rep on the street will be dead. Pick up my car and take it to the garage on Saint Mark's. Let them diffuse that. Let them take care of that bomb. The clock's ticking and the wiring is messed up. One pot hole too many and that thing could blow. Now move it!|[[D-Ice]]}}
 
{{Quote|Some effa bass wired my wheels to blow. If I lose those wheels, my rep on the street will be dead. Pick up my car and take it to the garage on Saint Mark's. Let them diffuse that. Let them take care of that bomb. The clock's ticking and the wiring is messed up. One pot hole too many and that thing could blow. Now move it!|[[D-Ice]]}}
   
Line 21: Line 26:
 
==Mission==
 
==Mission==
 
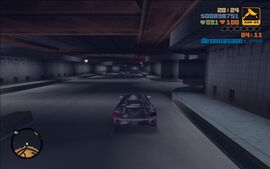
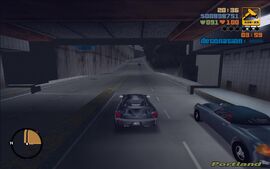
D-Ice's [[Infernus]] is rigged with a timed explosive. He instructs Claude to drive the car to a garage in [[Saint Mark's]], [[Portland Island]] to defuse the bomb. The bomb is sensitive, so too much damage to the car will detonate the bomb. After the bomb has been defused, the car is returned in perfect condition to the original parking spot.
 
D-Ice's [[Infernus]] is rigged with a timed explosive. He instructs Claude to drive the car to a garage in [[Saint Mark's]], [[Portland Island]] to defuse the bomb. The bomb is sensitive, so too much damage to the car will detonate the bomb. After the bomb has been defused, the car is returned in perfect condition to the original parking spot.
 
During this mission, the player will not be attacked by any hostile gangs.


==Mission Objectives==
 
==Mission Objectives==
 
In order to complete the mission the player must:
 
In order to complete the mission the player must:
*Get in D-Ice's car
+
*Get in D-Ice's car.
*Get to the garage but watch out if the car takes too much damage it will blow
+
*Get to the garage but watch out if the car takes too much damage it will blow.
*Take the car back it has to be in perfect condition - no damage
+
*Take the car back it has to be in perfect condition - no damage.
*Get out of the vehicle
+
*Get out of the vehicle.
 
==Tips==
 
* This is one of the hardest missions in the game, as you have to drive to the farthest island all while navigating enclosed tunnels chock-full of cars, with a very fragile car that will explode if you crash just once.
 
* Luckily, gangs that have become hostile towards Claude won't fire at him in this mission (otherwhise the [[shotgun]]-toting mobsters in [[Portland]] a would render this mission nearly impossible).
 
* You may take advantage of this situation and collect [[Hidden Packages]] in areas where enemy gangsters would normally fire at Claude.
 
* Once you defuse the bomb the mission becomes significantly easier. Just drive as normalnd go to the [[Pay 'n' Spray]] if you hit something.


==Reward==
 
==Reward==

Revision as of 07:02, 10 February 2020


For the mission with the same name in Grand Theft Auto IV, see Rigged to Blow (GTA IV).

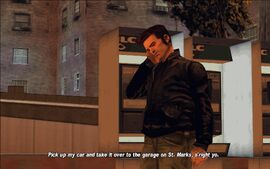
Some effa bass wired my wheels to blow. If I lose those wheels, my rep on the street will be dead. Pick up my car and take it to the garage on Saint Mark's. Let them diffuse that. Let them take care of that bomb. The clock's ticking and the wiring is messed up. One pot hole too many and that thing could blow. Now move it!
D-Ice

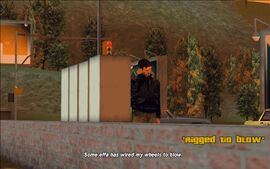
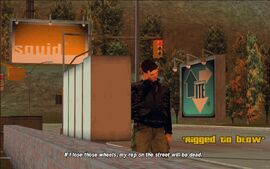
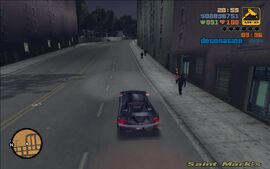
Rigged to Blow is a mission in Grand Theft Auto III given to protagonist Claude by Red Jacks leader D-Ice from a public phone booth in the Wichita Gardens district of Shoreside Vale, Liberty City.

If the player has completed Rumble prior, this mission becomes the only repeatable mission the player will receive from D-Ice. It is one of 3 missions repeatable in this game.

Mission

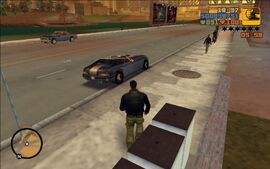
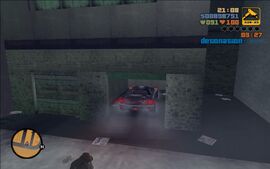
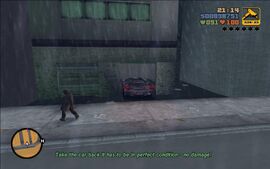
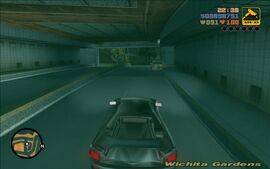
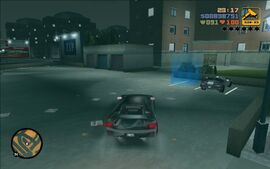
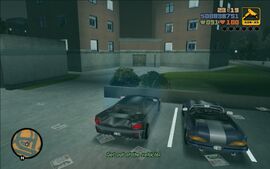
D-Ice's Infernus is rigged with a timed explosive. He instructs Claude to drive the car to a garage in Saint Mark's, Portland Island to defuse the bomb. The bomb is sensitive, so too much damage to the car will detonate the bomb. After the bomb has been defused, the car is returned in perfect condition to the original parking spot.

Mission Objectives

In order to complete the mission the player must:

  • Get in D-Ice's car.
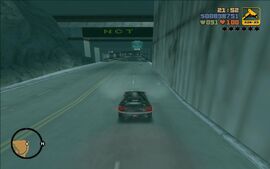
  • Get to the garage but watch out if the car takes too much damage it will blow.
  • Take the car back it has to be in perfect condition - no damage.
  • Get out of the vehicle.

Reward

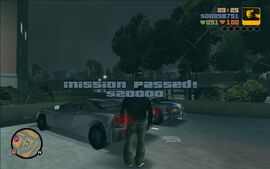
The reward for completing the mission is $20,000. Completing the mission for the first time unlocks Bullion Run.

Gallery

Walkthrough

Video Walkthroughs

iPad Version
GTA_3_-_iPad_Walkthrough_-_Mission_60_-_Rigged_to_Blow
PC Version
GTA_3_-_Walkthrough_-_Mission_60_-_Rigged_to_Blow_(HD)

Navigation

Navigation
[ ve ]Grand Theft Auto series
Grand Theft AutoProtagonists | Liberty City (and New Guernsey) | San Andreas | Vice City | Characters | Missions | Vehicles | Weapons | Radio stations | Cheats
Grand Theft Auto: London
London 1969Protagonists | London | Characters | Missions | Vehicles | Weapons | Radio stations | Cheats
London 1961Protagonists | London | Manchester | Characters | Missions | Vehicles | Weapons | Radio stations | Cheats
Grand Theft Auto 2Claude Speed/GBC Protagonists | Anywhere City (Downtown | Residential | Industrial) | Characters | Gangs | Missions | Vehicles | Weapons | Radio stations | Cheats
Grand Theft Auto IIIClaude | Liberty City | Characters | Gangs | Missions | Vehicles | Weapons | Radio stations | Achievements/Trophies | Cheats
Grand Theft Auto: Vice CityTommy Vercetti | Vice City | Characters | Missions | Vehicles | Weapons | Radio stations | Achievements/Trophies | Cheats
Grand Theft Auto: San AndreasCarl Johnson | State of San Andreas (Los SantosSan FierroLas VenturasRed CountyFlint CountyWhetstoneBone CountyTierra Robada) | Characters | Missions | Gangs | Vehicles | Weapons | Radio stations | Achievements/Trophies | Cheats
Grand Theft Auto AdvanceMike | Liberty City | Characters | Gangs | Missions | Vehicles | Weapons | Soundtrack | Cheats
Grand Theft Auto: Liberty City StoriesToni Cipriani | Liberty City | Characters | Gangs | Missions | Vehicles | Weapons | Radio stations | Cheats
Grand Theft Auto: Vice City StoriesVictor Vance | Vice City | Characters | Gangs | Missions | Vehicles | Weapons | Radio stations | Cheats
Grand Theft Auto IVNiko Bellic | Liberty City | Alderney | Characters | Gangs | Missions | Vehicles | Weapons | Radio stations | Achievements/Trophies | Cheats
Episodes from Liberty City
The Lost and DamnedJohnny Klebitz | Liberty City | Alderney | Characters | Gangs | Missions | Vehicles | Weapons | Radio stations | Achievements/Trophies | Cheats
The Ballad of Gay TonyLuis Fernando Lopez | Liberty City | Alderney | Characters | Gangs | Missions | Vehicles | Weapons | Radio stations | Achievements/Trophies | Cheats
Grand Theft Auto: Chinatown WarsHuang Lee | Liberty City | Characters | Gangs | Missions | Vehicles | Weapons | Radio stations | Cheats
Grand Theft Auto VMichael De Santa | Trevor Philips | Franklin Clinton | Southern San Andreas (Los Santos (County) | Blaine County) | State of North Yankton (Ludendorff) | Characters | Gangs | Missions | Weapons | Vehicles | Radio stations | Achievements/Trophies | Cheats
Grand Theft Auto OnlineGTA Online Protagonist (Crews | Organizations | Motorcycle Clubs) | Southern San Andreas (Los Santos (County) | Blaine County) | The Caribbean (Cayo Perico) | Missions | Jobs | Gangs | Vehicles | Weapons | Radio stations | Reputation (Arena Points | LS Car Meet) | Content Updates | Events | Achievements/Trophies | Awards
Grand Theft Auto VILucia | Unnamed male accomplice | State of Leonida (Vice-Dale County | Kelly County | Leonard County) | Characters | Missions | Vehicles | Weapons | Radio stations | Achievements/Trophies | Cheats
Collectibles | Multiplayer | Modifications | Controversy
[ ve ]Missions in Grand Theft Auto III
IntroductionIntroduction | Give Me Liberty
Luigi Goterelli Radar-LuigiIcon-GTAIIILuigi's Girls | Don't Spank Ma Bitch Up | Drive Misty For Me | Pump-Action Pimp | The Fuzz Ball
Joey Leone Radar-JoeyIcon-GTAIIIMike Lips Last Lunch | Farewell 'Chunky' Lee Chong | Van Heist | Cipriani's Chauffeur | Dead Skunk in the Trunk | The Getaway
Toni Cipriani Radar-ToniIcon-GTAIII
Part 1Taking Out the Laundry | The Pick-Up | Salvatore's Called a Meeting
Part 2Triads and Tribulations | Blow Fish
Salvatore Leone Radar-SalIcon-GTAIII
Part 1Chaperone | Cutting the Grass
Part 2Bomb Da Base: Act I
Part 3Last Requests
8-Ball Radar-8BallIcon-GTAIIIBomb Da Base: Act II
Asuka Kasen Radar-AsukaIcon-GTAIII
Part 1Sayonara Salvatore | Under Surveillance (PS2 Version) | Paparazzi Purge | Payday For Ray | Two-Faced Tanner
Part 2Bait | Espresso-2-Go! | S.A.M.
Kenji Kasen Radar-KenjiIcon-GTAIIIKanbu Bust-out | Grand Theft Auto | Deal Steal | Shima | Smack Down
Ray Machowski Radar-RayIcon-GTAIII
Part 1Silence the Sneak | Arms Shortage | Evidence Dash | Gone Fishing | Plaster Blaster
Part 2Marked Man
Donald Love Radar-DonaldIcon-GTAIIILiberator | Waka-Gashira Wipeout! | A Drop in the Ocean | Grand Theft Aero | Escort Service | Decoy | Love's Disappearance
Phone Missions
El Burro Radar-ElBurroIcon-GTAIIITurismo | I Scream, You Scream | Trial By Fire | Big'n'Veiny
Marty ChonksThe Crook | The Thieves | The Wife | Her Lover
King Courtney Radar-KingCourtneyIcon-GTAIIIBling-bling Scramble | Uzi Rider | Gangcar Round-up | Kingdom Come
D-Ice Radar-DiceIcon-GTAIIIUzi Money | Toyminator | Rigged To Blow | Bullion Run | Rumble
Catalina Radar-CatalinaIcon-GTAIIIRansom | The Exchange*
Side MissionsParamedic | Firefighter | Vigilante | Taxi Driver | Patriot Playground | A Ride in the Park | Multistorey Mayhem | Gripped! | Diablo Destruction | Mafia Massacre | Casino Calamity | Rumpo Rampage
Missions in GTA III (Category) | Missions | Beta Missions | Side Missions (Category)
* denotes the final story mission.