(Added Hungarian page) |
No edit summary |
||
| (17 intermediate revisions by 11 users not shown) | |||
| Line 9: | Line 9: | ||
|capacity = 2 <small>(driver and passenger)</small> |
|capacity = 2 <small>(driver and passenger)</small> |
||
|manufacturer = [[Declasse]] |
|manufacturer = [[Declasse]] |
||
| − | |price = [[Money|$]]140,000 <small>([[Grand Theft Auto Online|GTA Online]]) ([[Southern San Andreas Super Autos]])</small> |
+ | |price = [[Money|$]]140,000 <small>(''[[Grand Theft Auto Online|GTA Online]]'') ([[Southern San Andreas Super Autos]])</small> |
| − | |appearances = ''[[The Lost and Damned]]<br>[[Grand Theft Auto V]]'' {{DLC|I'm Not A Hipster Update |
+ | |appearances = ''[[The Lost and Damned]]<br>[[Grand Theft Auto V]]'' {{DLC|I'm Not A Hipster Update}}<br>''[[Grand Theft Auto Online]]'' {{DLC|I'm Not A Hipster Update}} |
|related = |
|related = |
||
|makeyear = |
|makeyear = |
||
|swankness = |
|swankness = |
||
| − | {{BP}}5/5 <small>(TLAD)</small> |
+ | {{BP}}5/5 <small>(''TLAD'')</small> |
| − | {{BP}}2/5 <small>(GTA V)</small> |
+ | {{BP}}2/5 <small>(''GTA V'')</small> |
|dashtype = Dukes <small>(needles)</small>[[File:Dukes-Dials-GTAV.png|thumb|center|170px]]Monroe <small>(dial texture)</small>[[File:Monroe-GTAV-DialSet.png|thumb|center|170px]] |
|dashtype = Dukes <small>(needles)</small>[[File:Dukes-Dials-GTAV.png|thumb|center|170px]]Monroe <small>(dial texture)</small>[[File:Monroe-GTAV-DialSet.png|thumb|center|170px]] |
||
|inttxd = |
|inttxd = |
||
| − | {{BP}}Rhapsody <small>(TLAD)</small> |
+ | {{BP}}Rhapsody <small>(''TLAD'')</small> |
| − | {{BP}}Monroe <small>(GTA V)</small> |
+ | {{BP}}Monroe <small>(''GTA V'')</small> |
|carcols = |
|carcols = |
||
{{Expand|'''TLAD'''| |
{{Expand|'''TLAD'''| |
||
| ⚫ | |||
| − | <center>COLOR SET 1</center> |
||
| − | {{CarColIV|0|0|33}} |
+ | {{CarColIV|no=1|0|0|33}} |
| ⚫ | |||
| − | <center>COLOR SET 2</center> |
||
| − | {{CarColIV| |
+ | {{CarColIV|no=3|10|10|8}} |
| ⚫ | |||
| − | <center>COLOR SET 3</center> |
||
| − | {{CarColIV| |
+ | {{CarColIV|no=5|57|57|56}} |
| ⚫ | |||
| − | <center>COLOR SET 4</center> |
||
| − | {{CarColIV| |
+ | {{CarColIV|no=7|66|66|66}} |
| ⚫ | |||
| − | <center>COLOR SET 5</center> |
||
| − | {{CarColIV| |
+ | {{CarColIV|no=9|78|78|78}} |
| ⚫ | |||
| − | <center>COLOR SET 6</center> |
||
| − | {{CarColIV| |
+ | {{CarColIV|no=11|104|104|104}} |
| ⚫ | |||
| − | <center>COLOR SET 7</center> |
||
| − | {{CarColIV| |
+ | {{CarColIV|no=13|2|2|63}} |
| ⚫ | |||
| − | <center>COLOR SET 8</center> |
||
| − | {{CarColIV| |
+ | {{CarColIV|no=15|22|22|72}} |
| + | {{CarColIV|no=16|13|11|91}} |
||
| − | <center>COLOR SET 9</center> |
||
| − | {{CarColIV| |
+ | {{CarColIV|no=17|19|19|93}}<br> |
| − | <center>COLOR SET 10</center> |
||
| ⚫ | |||
| − | <center>COLOR SET 11</center> |
||
| ⚫ | |||
| − | <center>COLOR SET 12</center> |
||
| ⚫ | |||
| − | <center>COLOR SET 13</center> |
||
| ⚫ | |||
| − | <center>COLOR SET 14</center> |
||
| ⚫ | |||
| − | <center>COLOR SET 15</center> |
||
| ⚫ | |||
| − | <center>COLOR SET 16</center> |
||
| ⚫ | |||
| − | <center>COLOR SET 17</center> |
||
| ⚫ | |||
}} |
}} |
||
---- |
---- |
||
| Line 124: | Line 108: | ||
|gensucced = |
|gensucced = |
||
}} |
}} |
||
| − | {{Quote|Nothing says post-irony like a retro futuristic American jelly bean car. Small with a wide glass ass to showcase your samurai bun and allow for 360 degree Snapmatic photography.| |
+ | {{Quote|Nothing says post-irony like a retro futuristic American jelly bean car. Small with a wide glass ass to showcase your samurai bun and allow for 360 degree Snapmatic photography.|[[Southern San Andreas Super Autos]] description.}} |
The [[Declasse]] '''Rhapsody''' is a two-door hatchback featured in ''[[The Lost and Damned]]'', ''[[Grand Theft Auto V]]'', and ''[[Grand Theft Auto Online]]'' as part of the [["I'm Not a Hipster" Update]]. |
The [[Declasse]] '''Rhapsody''' is a two-door hatchback featured in ''[[The Lost and Damned]]'', ''[[Grand Theft Auto V]]'', and ''[[Grand Theft Auto Online]]'' as part of the [["I'm Not a Hipster" Update]]. |
||
| Line 163: | Line 147: | ||
The car handles similarly to the [[Blista Compact]], although the Rhapsody is an FR layout vehicle, (as opposed to the Blista Compact's FF layout) with more reasonable torque, and lower top speed. Its handling is very good, as its light weight and stiff suspension allow it to take turns at a high speed with almost no oversteer. However, crash deformation is poor, and as expected from a vehicle of this size and weight, its engine will fail after 3-4 head-on crashes. It is, however, '''very''' back-heavy and is prone to spinouts, but this trait can be good for drifting in the hands of experienced drivers. |
The car handles similarly to the [[Blista Compact]], although the Rhapsody is an FR layout vehicle, (as opposed to the Blista Compact's FF layout) with more reasonable torque, and lower top speed. Its handling is very good, as its light weight and stiff suspension allow it to take turns at a high speed with almost no oversteer. However, crash deformation is poor, and as expected from a vehicle of this size and weight, its engine will fail after 3-4 head-on crashes. It is, however, '''very''' back-heavy and is prone to spinouts, but this trait can be good for drifting in the hands of experienced drivers. |
||
| − | ==== |
+ | ====TLAD Overview==== |
{{Vehiclestats-gtaiv |
{{Vehiclestats-gtaiv |
||
|handling_top_speed = 81 / 130 |
|handling_top_speed = 81 / 130 |
||
| Line 183: | Line 167: | ||
===''Grand Theft Auto V''=== |
===''Grand Theft Auto V''=== |
||
| − | The Rhapsody's performance virtually is unchanged in ''GTA V'', with only minor alterations to the vehicle's rigidity and nimble-feeling, where it now feels more stiff and stable, as oppose to TLAD's rendition where the car felt slightly more loosely suspended. |
+ | The Rhapsody's performance virtually is unchanged in ''GTA V'', with only minor alterations to the vehicle's rigidity and nimble-feeling, where it now feels more stiff and stable, as oppose to ''TLAD''<nowiki>'</nowiki>s rendition where the car felt slightly more loosely suspended. |
====GTA V Overview==== |
====GTA V Overview==== |
||
| Line 213: | Line 197: | ||
===''Grand Theft Auto V''=== |
===''Grand Theft Auto V''=== |
||
{| class="wikitable" |
{| class="wikitable" |
||
| + | ! colspan="2" scope="col" |Category |
||
| − | !Type |
||
| + | ! scope="col" |Modification |
||
| − | !Upgrade |
||
| − | !Cost ( |
+ | ! scope="col" |Cost (''GTA V'') |
| − | !Cost ([[Grand Theft Auto Online|Online]]) |
+ | ! scope="col" |Cost ([[Grand Theft Auto Online|''GTA Online'']]) |
| + | ! scope="col" |Image |
||
| + | |- |
||
| ⚫ | |||
| + | |No Armor |
||
| ⚫ | |||
| + | | colspan="2" style="text-align: center;" |$1,000 |
||
|- |
|- |
||
| ⚫ | |||
|Armor Upgrade 20% |
|Armor Upgrade 20% |
||
| style="text-align: center;" |$500 |
| style="text-align: center;" |$500 |
||
| − | | style="text-align: center;" |$7,500 |
+ | | colspan="2" style="text-align: center;" |$7,500 |
|- |
|- |
||
|Armor Upgrade 40% |
|Armor Upgrade 40% |
||
| style="text-align: center;" |$1,250 |
| style="text-align: center;" |$1,250 |
||
| − | | style="text-align: center;" |$12,000 |
+ | | colspan="2" style="text-align: center;" |$12,000 |
|- |
|- |
||
|Armor Upgrade 60% |
|Armor Upgrade 60% |
||
| style="text-align: center;" |$2,000 |
| style="text-align: center;" |$2,000 |
||
| − | | style="text-align: center;" |$20,000 |
+ | | colspan="2" style="text-align: center;" |$20,000 |
|- |
|- |
||
|Armor Upgrade 80% |
|Armor Upgrade 80% |
||
| style="text-align: center;" |$3,500 |
| style="text-align: center;" |$3,500 |
||
| − | | style="text-align: center;" |$35,000 |
+ | | colspan="2" style="text-align: center;" |$35,000 |
|- |
|- |
||
|Armor Upgrade 100% |
|Armor Upgrade 100% |
||
| style="text-align: center;" |$5,000 |
| style="text-align: center;" |$5,000 |
||
| − | | style="text-align: center;" |$50,000 |
+ | | colspan="2" style="text-align: center;" |$50,000 |
| + | |- |
||
| ⚫ | |||
| + | |Stock Brakes |
||
| + | | style="text-align: center;" |$100 |
||
| + | | colspan="2" style="text-align: center;" |$1,000 |
||
|- |
|- |
||
| ⚫ | |||
|Street Brakes |
|Street Brakes |
||
| style="text-align: center;" |$2,000 |
| style="text-align: center;" |$2,000 |
||
| − | | style="text-align: center;" |$20,000 |
+ | | colspan="2" style="text-align: center;" |$20,000 |
|- |
|- |
||
|Sport Brakes |
|Sport Brakes |
||
| style="text-align: center;" |$2,700 |
| style="text-align: center;" |$2,700 |
||
| − | | style="text-align: center;" |$27,000 |
+ | | colspan="2" style="text-align: center;" |$27,000 |
|- |
|- |
||
|Race Brakes |
|Race Brakes |
||
| style="text-align: center;" |$3,500 |
| style="text-align: center;" |$3,500 |
||
| − | | style="text-align: center;" |$35,000 |
+ | | colspan="2" style="text-align: center;" |$35,000 |
| + | |- |
||
| + | | colspan="2" rowspan="2" |Bumpers |
||
| + | |Stock Front Bumper |
||
| + | | style="text-align: center;" |$250 |
||
| + | | style="text-align: center;" |$2,200 |
||
| + | | |
||
|- |
|- |
||
| − | |Bumpers |
||
|Custom Front Splitter |
|Custom Front Splitter |
||
| style="text-align: center;" |$500 |
| style="text-align: center;" |$500 |
||
| style="text-align: center;" |$4,600 |
| style="text-align: center;" |$4,600 |
||
| + | | |
||
|- |
|- |
||
| − | |rowspan="4"|Engine |
+ | | colspan="2" rowspan="4" |Engine |
|EMS Upgrade, Level 1 |
|EMS Upgrade, Level 1 |
||
| style="text-align: center;" |$900 |
| style="text-align: center;" |$900 |
||
| − | | style="text-align: center;" |$9,000 |
+ | | colspan="2" style="text-align: center;" |$9,000 |
|- |
|- |
||
|EMS Upgrade, Level 2 |
|EMS Upgrade, Level 2 |
||
| style="text-align: center;" |$1,250 |
| style="text-align: center;" |$1,250 |
||
| − | | style="text-align: center;" |$12,500 |
+ | | colspan="2" style="text-align: center;" |$12,500 |
|- |
|- |
||
|EMS Upgrade, Level 3 |
|EMS Upgrade, Level 3 |
||
| style="text-align: center;" |$1,800 |
| style="text-align: center;" |$1,800 |
||
| − | | style="text-align: center;" |$18,000 |
+ | | colspan="2" style="text-align: center;" |$18,000 |
|- |
|- |
||
|EMS Upgrade, Level 4 |
|EMS Upgrade, Level 4 |
||
| style="text-align: center;" |$3,350 |
| style="text-align: center;" |$3,350 |
||
| − | | style="text-align: center;" |$33,500 |
+ | | colspan="2" style="text-align: center;" |$33,500 |
| + | |- |
||
| + | | colspan="2" rowspan="4" |Exhausts |
||
| + | |Stock Exhaust |
||
| + | | style="text-align: center;" |$130 |
||
| + | | style="text-align: center;" |$260 |
||
| + | | |
||
|- |
|- |
||
| ⚫ | |||
|Dual Exit Exhaust |
|Dual Exit Exhaust |
||
| style="text-align: center;" |$375 |
| style="text-align: center;" |$375 |
||
| style="text-align: center;" |$750 |
| style="text-align: center;" |$750 |
||
| + | | |
||
|- |
|- |
||
|Dual Shotgun Exhaust |
|Dual Shotgun Exhaust |
||
| style="text-align: center;" |$899 |
| style="text-align: center;" |$899 |
||
| style="text-align: center;" |$1,800 |
| style="text-align: center;" |$1,800 |
||
| + | | |
||
|- |
|- |
||
|Long Twin Exhaust |
|Long Twin Exhaust |
||
| style="text-align: center;" |$1,499 |
| style="text-align: center;" |$1,499 |
||
| style="text-align: center;" |$3,000 |
| style="text-align: center;" |$3,000 |
||
| + | | |
||
| + | |- |
||
| + | | colspan="2" rowspan="2" |[[Car Bomb|Explosives]] |
||
| + | |Ignition Bomb |
||
| + | | style="text-align: center;" |N/A |
||
| + | | colspan="2" style="text-align: center;" |$5,000 |
||
| + | |- |
||
| + | |Remote Bomb |
||
| + | | style="text-align: center;" |N/A |
||
| + | | colspan="2" style="text-align: center;" |$7,500 |
||
| + | |- |
||
| ⚫ | |||
| + | |Stock Fenders |
||
| + | | style="text-align: center;" |$150 |
||
| + | | style="text-align: center;" |$300 |
||
| + | | |
||
|- |
|- |
||
| ⚫ | |||
|Flared Arches |
|Flared Arches |
||
| style="text-align: center;" |$450 |
| style="text-align: center;" |$450 |
||
| style="text-align: center;" |$900 |
| style="text-align: center;" |$900 |
||
| + | | |
||
|- |
|- |
||
|Side Flames |
|Side Flames |
||
| style="text-align: center;" |$750 |
| style="text-align: center;" |$750 |
||
| style="text-align: center;" |$1,500 |
| style="text-align: center;" |$1,500 |
||
| + | | |
||
|- |
|- |
||
|Flared Arches & Side Flames |
|Flared Arches & Side Flames |
||
| style="text-align: center;" |$850 |
| style="text-align: center;" |$850 |
||
| style="text-align: center;" |$1,700 |
| style="text-align: center;" |$1,700 |
||
| + | | |
||
| + | |- |
||
| + | | colspan="2" rowspan="4" |Hoods |
||
| + | |Stock Hood |
||
| + | | style="text-align: center;" |$150 |
||
| + | | style="text-align: center;" |$1,600 |
||
| + | | |
||
|- |
|- |
||
| ⚫ | |||
|Go Fast Hood |
|Go Fast Hood |
||
| style="text-align: center;" |$325 |
| style="text-align: center;" |$325 |
||
| style="text-align: center;" |$3,000 |
| style="text-align: center;" |$3,000 |
||
| + | | |
||
|- |
|- |
||
|Triple Intake Bug Catcher |
|Triple Intake Bug Catcher |
||
| style="text-align: center;" |$750 |
| style="text-align: center;" |$750 |
||
| style="text-align: center;" |$5,000 |
| style="text-align: center;" |$5,000 |
||
| + | | |
||
|- |
|- |
||
|Single Intake Bug Catcher |
|Single Intake Bug Catcher |
||
| style="text-align: center;" |$875 |
| style="text-align: center;" |$875 |
||
| style="text-align: center;" |$8,000 |
| style="text-align: center;" |$8,000 |
||
| + | | |
||
| + | |- |
||
| + | | colspan="2" |Horns |
||
| + | |''Main article: [[Los Santos Customs/Horns]]'' |
||
| + | | style="text-align: center;" | - |
||
| + | | colspan="2" style="text-align: center;" | - |
||
| + | |- |
||
| ⚫ | |||
| ⚫ | |||
| + | |Stock Lights |
||
| + | | style="text-align: center;" |$100 |
||
| + | | colspan="2" style="text-align: center;" |$600 |
||
|- |
|- |
||
| − | |rowspan="2"|Lights |
||
|Xenon Lights |
|Xenon Lights |
||
| style="text-align: center;" |$300 |
| style="text-align: center;" |$300 |
||
| − | | style="text-align: center;" |$7,500 |
+ | | colspan="2" style="text-align: center;" |$7,500 |
|- |
|- |
||
| + | |Neon Kits |
||
| − | |<div class="mw-collapsible mw-collapsed" style="width:100%"> |
||
| − | + | |''Main article: [[Los Santos Customs/Lights]]'' |
|
| style="text-align: center;" | - |
| style="text-align: center;" | - |
||
| − | | style="text-align: center;" | - |
+ | | colspan="2" style="text-align: center;" | - |
| − | |||
|- |
|- |
||
| − | |rowspan="2"|Loss/Theft Prevention |
+ | | colspan="2" rowspan="2" |Loss/Theft Prevention |
|Tracker |
|Tracker |
||
| style="text-align: center;" |N/A |
| style="text-align: center;" |N/A |
||
| − | | style="background-color:black;text-align: center;" |Too Hot |
+ | | colspan="2" style="background-color:black;text-align: center;" |Too Hot |
|- |
|- |
||
|Full Coverage |
|Full Coverage |
||
| style="text-align: center;" |N/A |
| style="text-align: center;" |N/A |
||
| − | | style="background-color:black;text-align: center;" |Too Hot |
+ | | colspan="2" style="background-color:black;text-align: center;" |Too Hot |
|- |
|- |
||
| + | | colspan="2" rowspan="5" |Plates |
||
| ⚫ | |||
| + | |Blue on White 1 |
||
| − | |<div class="mw-collapsible mw-collapsed" style="width:100%"> |
||
| + | | style="text-align: center;" |$50 |
||
| − | <div class="mw-collapsible-content">{{ResprayColorsExpand}}</div></div> |
||
| − | | style="text-align: center;" | |
+ | | colspan="2" style="text-align: center;" |$200 |
| ⚫ | |||
| − | |||
|- |
|- |
||
| + | |Blue on White 2 |
||
| − | |Crew Emblem |
||
| − | | style="text-align: center;" | |
+ | | style="text-align: center;" |$50 |
| − | | style="text-align: center;" |$ |
+ | | colspan="2" style="text-align: center;" |$200 |
| + | |- |
||
| + | |Blue on White 3 |
||
| + | | style="text-align: center;" |$50 |
||
| + | | colspan="2" style="text-align: center;" |$200 |
||
| + | |- |
||
| + | |Yellow on Blue |
||
| + | | style="text-align: center;" |$75 |
||
| + | | colspan="2" style="text-align: center;" |$300 |
||
| + | |- |
||
| + | |Yellow on Black |
||
| + | | style="text-align: center;" |$150 |
||
| + | | colspan="2" style="text-align: center;" |$600 |
||
| + | |- |
||
| ⚫ | |||
| + | |''Main article: [[Los Santos Customs/Respray Colors]]'' |
||
| + | | style="text-align: center;" | - |
||
| + | | colspan="2" style="text-align: center;" | - |
||
|- |
|- |
||
| − | |Sell |
+ | | colspan="2" |Sell |
|Sell Vehicle |
|Sell Vehicle |
||
| style="text-align: center;" |N/A |
| style="text-align: center;" |N/A |
||
| − | | style="background-color:black;text-align: center;" |Too Hot |
+ | | colspan="2" style="background-color:black;text-align: center;" |Too Hot |
| + | |- |
||
| + | | colspan="2" rowspan="2" |Spoilers |
||
| + | |None |
||
| + | | style="text-align: center;" |$150 |
||
| + | | style="text-align: center;" |$6,000 |
||
| + | | |
||
|- |
|- |
||
| − | |Spoiler |
||
|Ducktail Spoiler |
|Ducktail Spoiler |
||
| style="text-align: center;" |$275 |
| style="text-align: center;" |$275 |
||
| style="text-align: center;" |$7,050 |
| style="text-align: center;" |$7,050 |
||
| + | | |
||
| + | |- |
||
| ⚫ | |||
| + | |Stock Suspension |
||
| + | | style="text-align: center;" |$100 |
||
| + | | colspan="2" style="text-align: center;" |$200 |
||
|- |
|- |
||
| ⚫ | |||
|Lowered Suspension |
|Lowered Suspension |
||
| style="text-align: center;" |$500 |
| style="text-align: center;" |$500 |
||
| − | | style="text-align: center;" |$1,000 |
+ | | colspan="2" style="text-align: center;" |$1,000 |
|- |
|- |
||
|Street Suspension |
|Street Suspension |
||
| style="text-align: center;" |$1,000 |
| style="text-align: center;" |$1,000 |
||
| − | | style="text-align: center;" |$2,000 |
+ | | colspan="2" style="text-align: center;" |$2,000 |
|- |
|- |
||
|Sport Suspension |
|Sport Suspension |
||
| style="text-align: center;" |$1,700 |
| style="text-align: center;" |$1,700 |
||
| − | | style="text-align: center;" |$3,400 |
+ | | colspan="2" style="text-align: center;" |$3,400 |
|- |
|- |
||
|Competition Suspension |
|Competition Suspension |
||
| style="text-align: center;" |$2,200 |
| style="text-align: center;" |$2,200 |
||
| − | | style="text-align: center;" |$4,400 |
+ | | colspan="2" style="text-align: center;" |$4,400 |
| + | |- |
||
| ⚫ | |||
| + | |Stock Transmission |
||
| + | | style="text-align: center;" |$100 |
||
| + | | colspan="2" style="text-align: center;" |$1,000 |
||
|- |
|- |
||
| ⚫ | |||
|Street Transmission |
|Street Transmission |
||
| style="text-align: center;" |$2,950 |
| style="text-align: center;" |$2,950 |
||
| − | | style="text-align: center;" |$29,500 |
+ | | colspan="2" style="text-align: center;" |$29,500 |
|- |
|- |
||
|Sports Transmission |
|Sports Transmission |
||
| style="text-align: center;" |$3,250 |
| style="text-align: center;" |$3,250 |
||
| − | | style="text-align: center;" |$32,500 |
+ | | colspan="2" style="text-align: center;" |$32,500 |
|- |
|- |
||
|Race Transmission |
|Race Transmission |
||
| style="text-align: center;" |$4,000 |
| style="text-align: center;" |$4,000 |
||
| − | | style="text-align: center;" |$40,000 |
+ | | colspan="2" style="text-align: center;" |$40,000 |
| + | |- |
||
| + | | colspan="2" rowspan="2" |Turbo |
||
| + | |None |
||
| + | | style="text-align: center;" |$500 |
||
| + | | colspan="2" style="text-align: center;" |$5,000 |
||
|- |
|- |
||
| − | |Turbo |
||
|Turbo Tuning |
|Turbo Tuning |
||
| style="text-align: center;" |$2,500 |
| style="text-align: center;" |$2,500 |
||
| − | | style="text-align: center;" |$50,000 |
+ | | colspan="2" style="text-align: center;" |$50,000 |
|- |
|- |
||
| − | |Wheels |
+ | | colspan="2" |Wheels |
| + | |''Main article: [[Los Santos Customs/Wheels]]'' |
||
| − | |<div class="mw-collapsible mw-collapsed" style="width:100%"> |
||
| − | <div class="mw-collapsible-content">{{WheelsExpand}}</div></div> |
||
| style="text-align: center;" | - |
| style="text-align: center;" | - |
||
| − | | style="text-align: center;" | - |
+ | | colspan="2" style="text-align: center;" | - |
| + | |- |
||
| − | |||
| ⚫ | |||
| + | |None |
||
| + | | style="text-align: center;" |$100 |
||
| + | | colspan="2" style="text-align: center;" |$500 |
||
|- |
|- |
||
| ⚫ | |||
|Light Smoke |
|Light Smoke |
||
| style="text-align: center;" |$200 |
| style="text-align: center;" |$200 |
||
| − | | style="text-align: center;" |$1,500 |
+ | | colspan="2" style="text-align: center;" |$1,500 |
|- |
|- |
||
|Dark Smoke |
|Dark Smoke |
||
| style="text-align: center;" |$450 |
| style="text-align: center;" |$450 |
||
| − | | style="text-align: center;" |$3,500 |
+ | | colspan="2" style="text-align: center;" |$3,500 |
|- |
|- |
||
|Limo |
|Limo |
||
| style="text-align: center;" |$700 |
| style="text-align: center;" |$700 |
||
| − | | style="text-align: center;" |$5,000 |
+ | | colspan="2" style="text-align: center;" |$5,000 |
|} |
|} |
||
==Image Gallery== |
==Image Gallery== |
||
| + | ===''The Lost and Damned''=== |
||
| − | <gallery position="center"> |
+ | <gallery position="center" spacing="small" hideaddbutton="true"> |
| − | Rhapsody-TLAD-Interior.jpg|Rhapsody's interior. |
+ | Rhapsody-TLAD-Interior.jpg|'''Rhapsody''''s interior. |
Rhapsody-TLAD-InteriorDashboard.jpg|Close-up of the Wayne's World easter-egg in the dashboard. |
Rhapsody-TLAD-InteriorDashboard.jpg|Close-up of the Wayne's World easter-egg in the dashboard. |
||
Rhapsody_Photo.PNG|The texture of the photograph found in the interior. The picture shows Waynes World characters Wayne Campbell and Garth Algar. |
Rhapsody_Photo.PNG|The texture of the photograph found in the interior. The picture shows Waynes World characters Wayne Campbell and Garth Algar. |
||
| + | </gallery> |
||
| ⚫ | |||
| + | |||
| ⚫ | |||
| + | ===''Grand Theft Auto V''=== |
||
| + | <gallery position="center" spacing="small" hideaddbutton="true"> |
||
| ⚫ | |||
| + | Rhapsody-GTAV-SSASA.png|The '''Rhapsody''' on [[Southern San Andreas Super Autos]]. |
||
| ⚫ | |||
| + | Rhapsody-GTAO-RGSC2.jpg|The '''Rhapsody''' on the updated Rockstar Games Social Club. |
||
| + | Rhapsody-GTAV-RGSC.jpg|The '''Rhapsody''' in the cinematic preview on ''GTA V'' Rockstar Games Social Club. |
||
| + | Rhapsody-GTAO-RGSC3.jpg|The '''Rhapsody''' in the cinematic preview on ''GTA Online'' Rockstar Games Social Club. |
||
</gallery> |
</gallery> |
||
| Line 423: | Line 508: | ||
In ''TLAD'', there is a robin egg blue Rhapsody in the mission [[Off Route]]. The car is across the street from the player after the starting cutscene. The player can obtain this uniquely colored vehicle by parking it at any safehouse without harming the completion of the mission. A tip to obtain this is to park it outside the [[Middle Park East Safehouse|Bellic Penthouse]] on [[Albany Avenue]]. |
In ''TLAD'', there is a robin egg blue Rhapsody in the mission [[Off Route]]. The car is across the street from the player after the starting cutscene. The player can obtain this uniquely colored vehicle by parking it at any safehouse without harming the completion of the mission. A tip to obtain this is to park it outside the [[Middle Park East Safehouse|Bellic Penthouse]] on [[Albany Avenue]]. |
||
| − | <gallery position="center"> |
+ | <gallery position="center" spacing="small" widths="270px" hideaddbutton="true"> |
Rhapsody-TLAD-OffRoute.jpg|The unique Robin Egg Blue Rhapsody found during the mission [[Off Route]]. |
Rhapsody-TLAD-OffRoute.jpg|The unique Robin Egg Blue Rhapsody found during the mission [[Off Route]]. |
||
</gallery> |
</gallery> |
||
| Line 491: | Line 576: | ||
{{BP}}Spoiler: Ducktail Spoiler |
{{BP}}Spoiler: Ducktail Spoiler |
||
}} |
}} |
||
| + | |||
| + | <gallery position="center" columns="2" spacing="small" widths="270"> |
||
| + | Rhapsody-GTAV-front-HipsterDLCModded1.PNG|The NPC-modified '''Rhapsody''' in the enhanced version of ''GTA V''. <small>([[:File:Rhapsody-GTAV-rear-HipsterDLCModded1.PNG|rear quarter view]])</small> |
||
| + | Rhapsody-GTAV-front-HipsterDLCModded2.png|The NPC-modified '''Rhapsody''' in the enhanced version of ''GTA V''. <small>([[:File:Rhapsody-GTAV-rear-HipsterDLCModded2.png|rear quarter view]])</small> |
||
| + | </gallery> |
||
| + | |||
| + | ==Prominent Appearances in Missions== |
||
| + | ===''Grand Theft Auto Online''=== |
||
| + | *Can appear in the "[[Bargaining Chips]]" [[Casino Work]], where a parked one must be found in [[Mirror Park]]. |
||
==Locations== |
==Locations== |
||
| Line 500: | Line 594: | ||
===''Grand Theft Auto V''=== |
===''Grand Theft Auto V''=== |
||
;Original version |
;Original version |
||
| − | * |
+ | *Found in each protagonist's garage in single player. |
;Enhanced version |
;Enhanced version |
||
*Spawns in traffic, commonly around [[Burton]], [[East Vinewood|Vinewood]] and [[Pillbox Hill]]. |
*Spawns in traffic, commonly around [[Burton]], [[East Vinewood|Vinewood]] and [[Pillbox Hill]]. |
||
| − | * |
+ | *Can be bought from [[Southern San Andreas Super Autos]] for [[Money|$]]140,000. |
| − | === |
+ | ===''Grand Theft Auto Online''=== |
*Can be bought from Southern San Andreas Super Autos for $140,000. |
*Can be bought from Southern San Andreas Super Autos for $140,000. |
||
*Rarely seen in traffic in the enhanced version. |
*Rarely seen in traffic in the enhanced version. |
||
| Line 512: | Line 606: | ||
==Trivia== |
==Trivia== |
||
===General=== |
===General=== |
||
| − | *The Rhapsody's name is a reference to the 1992 film {{WP|Wayne's World (film)| |
+ | *The Rhapsody's name is a reference to the 1992 film ''{{WP|Wayne's World (film)|Wayne's World}}'', specifically the famous scene where the two lead characters, Wayne and Garth, sing along to the song "{{WP|Bohemian Rhapsody}}" by {{WP|Queen (band)|Queen}} while driving in the "Mirthmobile" (an AMC Pacer). A photograph can be seen within the Rhapsody depicting Wayne and Garth. Furthermore, a "'''W'''" (as in "'''W'''ayne's '''W'''orld") is seen badged inside and outside the car, also the photo says "Schwing", one of the catch phases used by Wayne and Garth in the movie. |
| − | **In ''GTA V'', the sticker in the Rhapsody has been removed. |
||
*The default radio stations for the Rhapsody are: |
*The default radio stations for the Rhapsody are: |
||
| − | **''The Lost and Damned |
+ | **'''''The Lost and Damned''''': [[The Beat 102.7]]. |
| − | **''GTA V |
+ | **'''''GTA V''''': [[WorldWide FM]]. |
| − | *The Rhapsody looks similar to a vehicle featured in the [[2006]] {{WP|Atari|Atari}} game ''{{WC|dpl|Driver: Parallel Lines}}'', which was also called the {{WC|dpl|Rhapsody}}. |
||
| − | ==='' |
+ | ===''The Lost and Damned''=== |
*The Rhapsody shares its interior with the [[Stallion]], like the [[Regina]], with the Rhapsody badge stamped on the dashboard and doors. As such, the steering wheel on the Rhapsody bears a [[Classique]] logo rather than a [[Declasse]] logo. |
*The Rhapsody shares its interior with the [[Stallion]], like the [[Regina]], with the Rhapsody badge stamped on the dashboard and doors. As such, the steering wheel on the Rhapsody bears a [[Classique]] logo rather than a [[Declasse]] logo. |
||
| + | |||
| ⚫ | |||
| + | ===''Grand Theft Auto V''=== |
||
| ⚫ | |||
<Item type="CHandlingData"> |
<Item type="CHandlingData"> |
||
<handlingName>RHAPSODY</handlingName> |
<handlingName>RHAPSODY</handlingName> |
||
| Line 583: | Line 677: | ||
</SubHandlingData> |
</SubHandlingData> |
||
</Item></pre></ref> |
</Item></pre></ref> |
||
| − | * |
+ | *Through customization, it is possible to make the Rhapsody resemble the Pacer used in the film ''{{WP|Wayne's World (film)|Wayne's World}}''. |
==References== |
==References== |
||
Revision as of 13:47, 8 May 2020
Template:Infobox vehicles
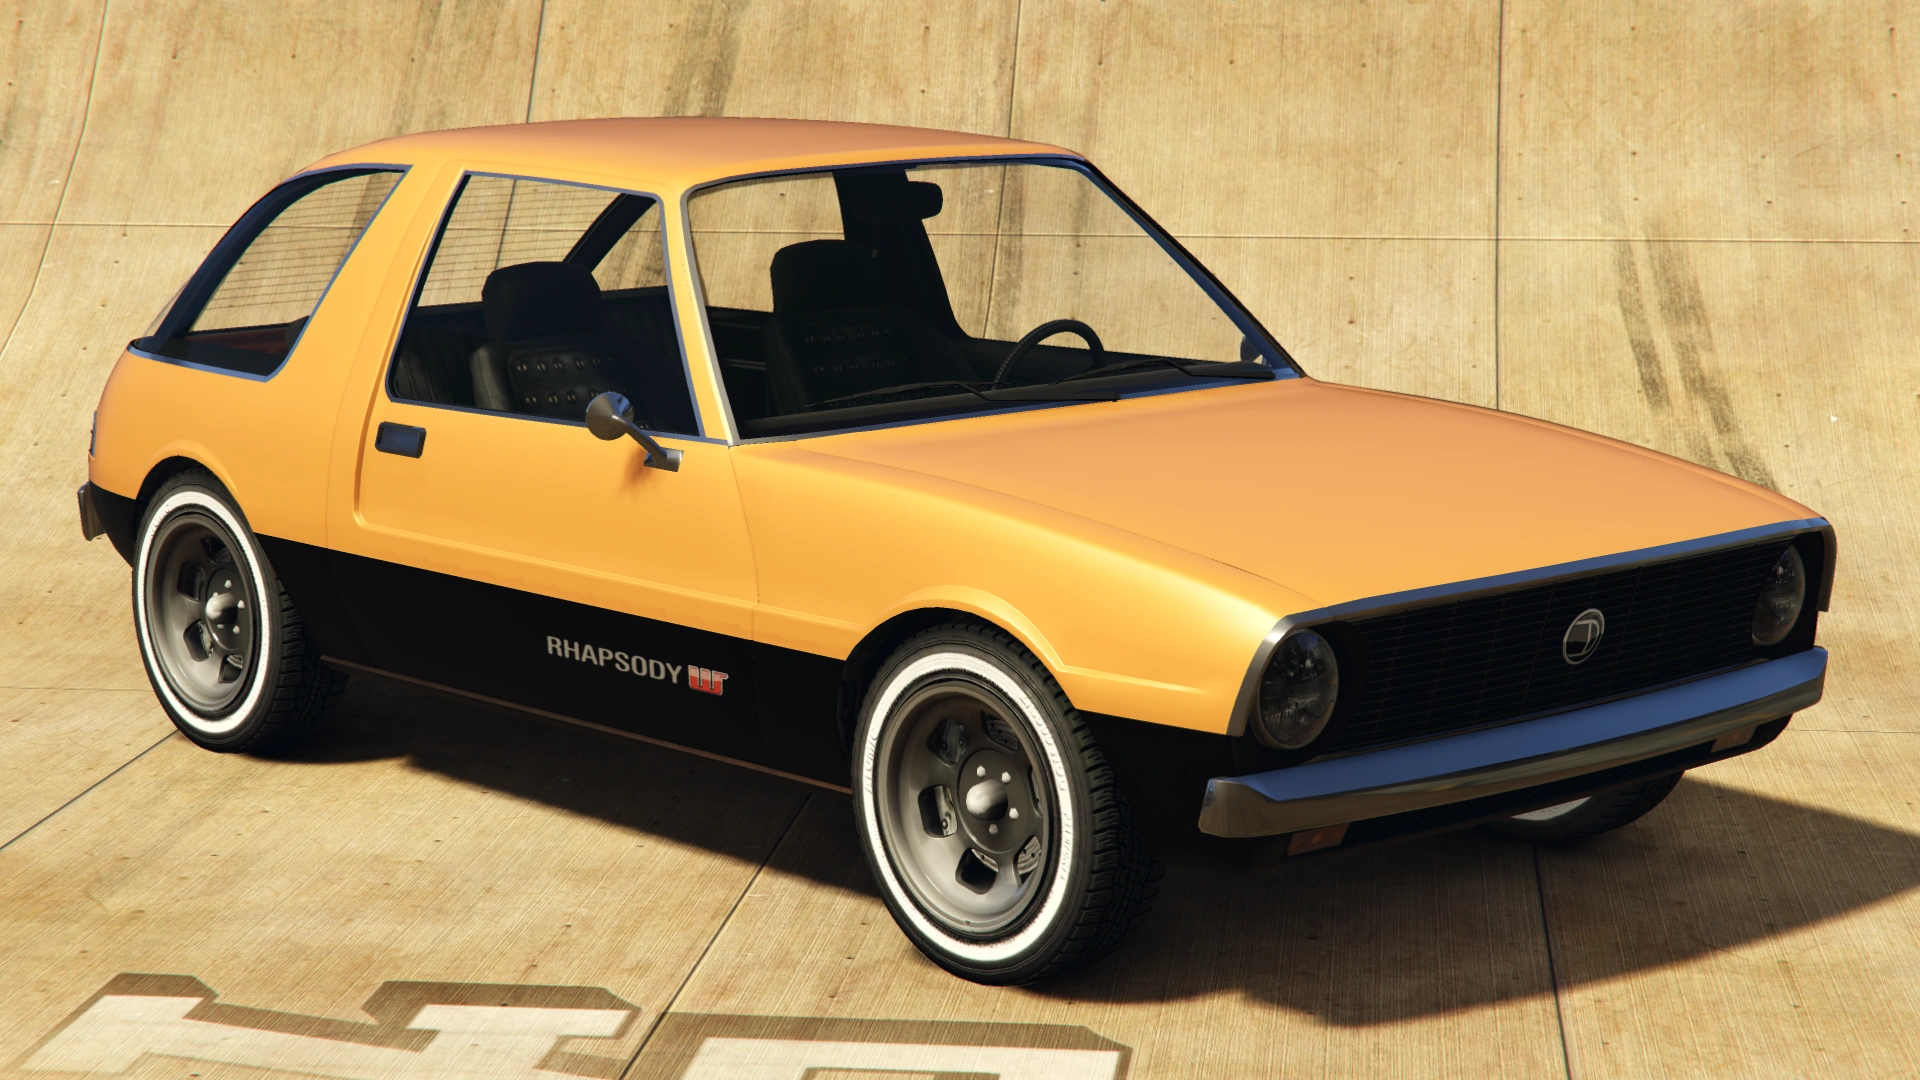
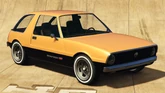
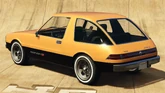
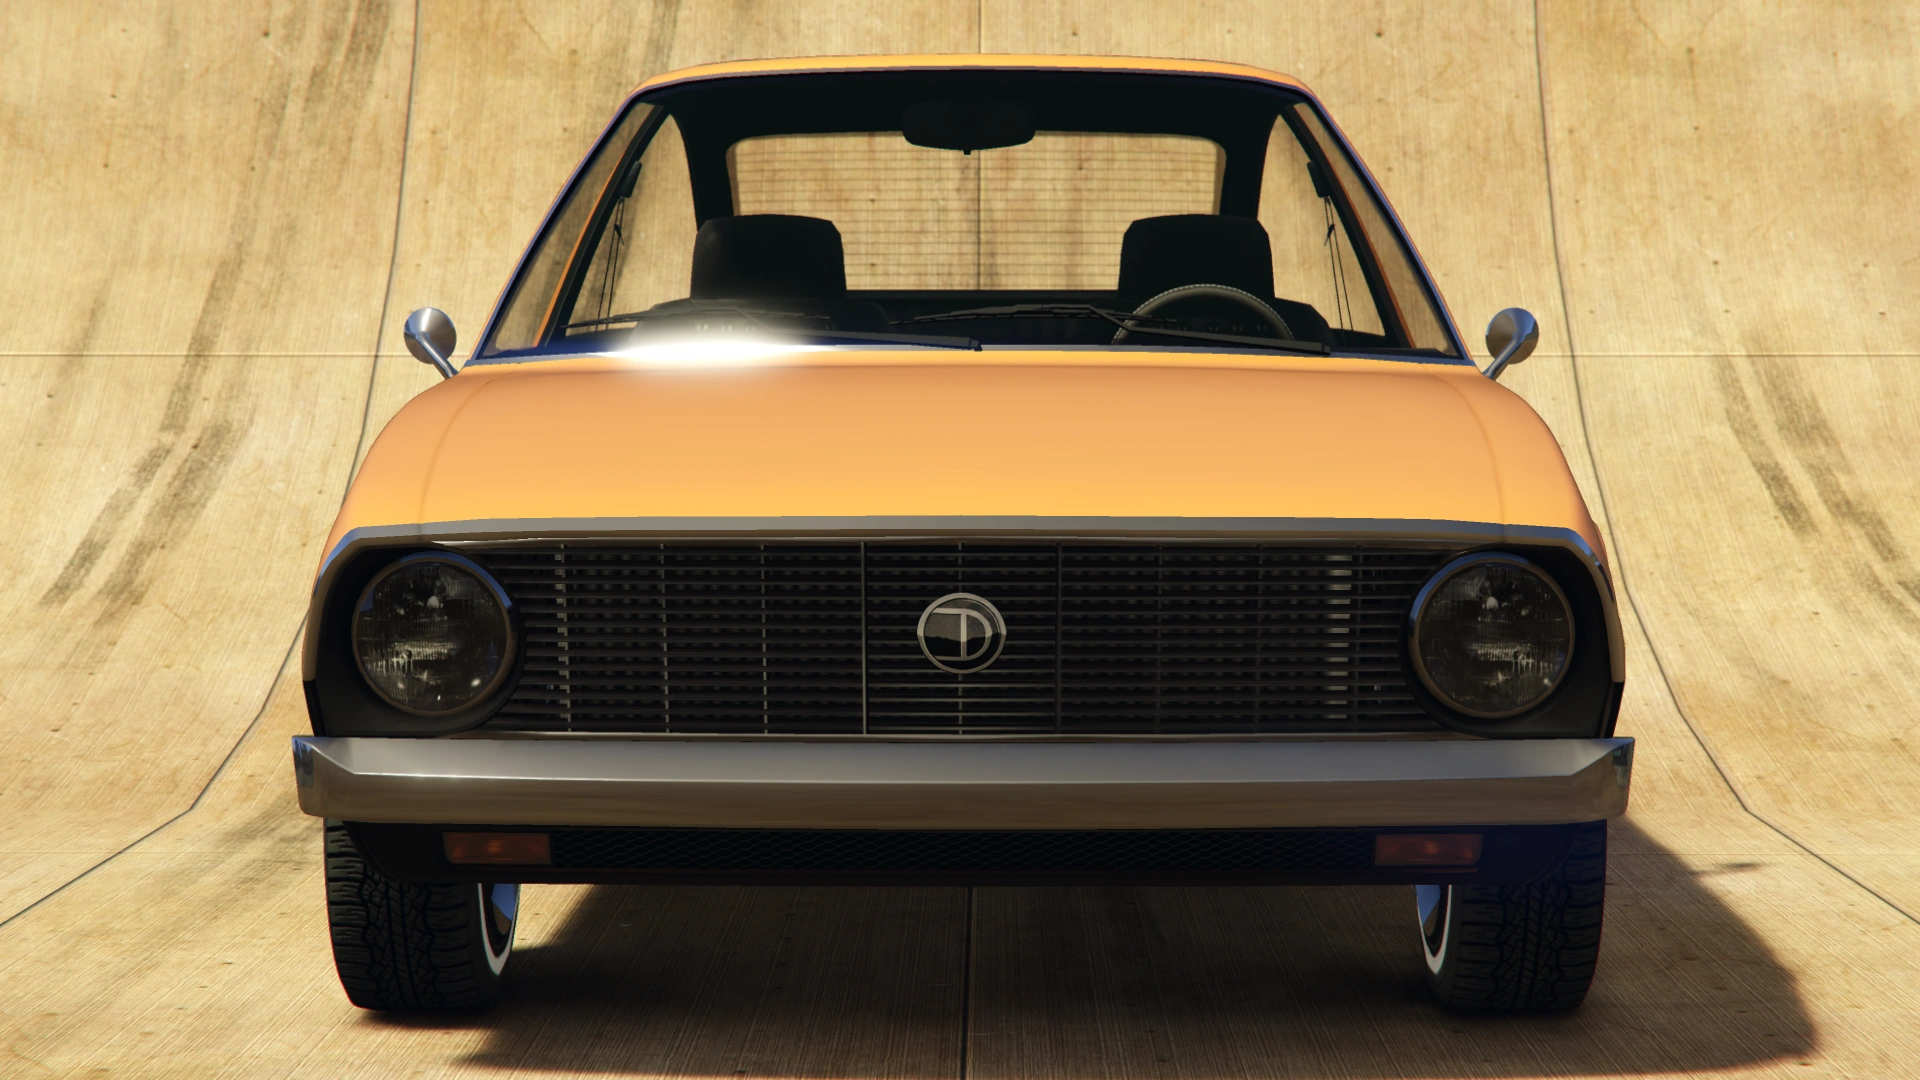
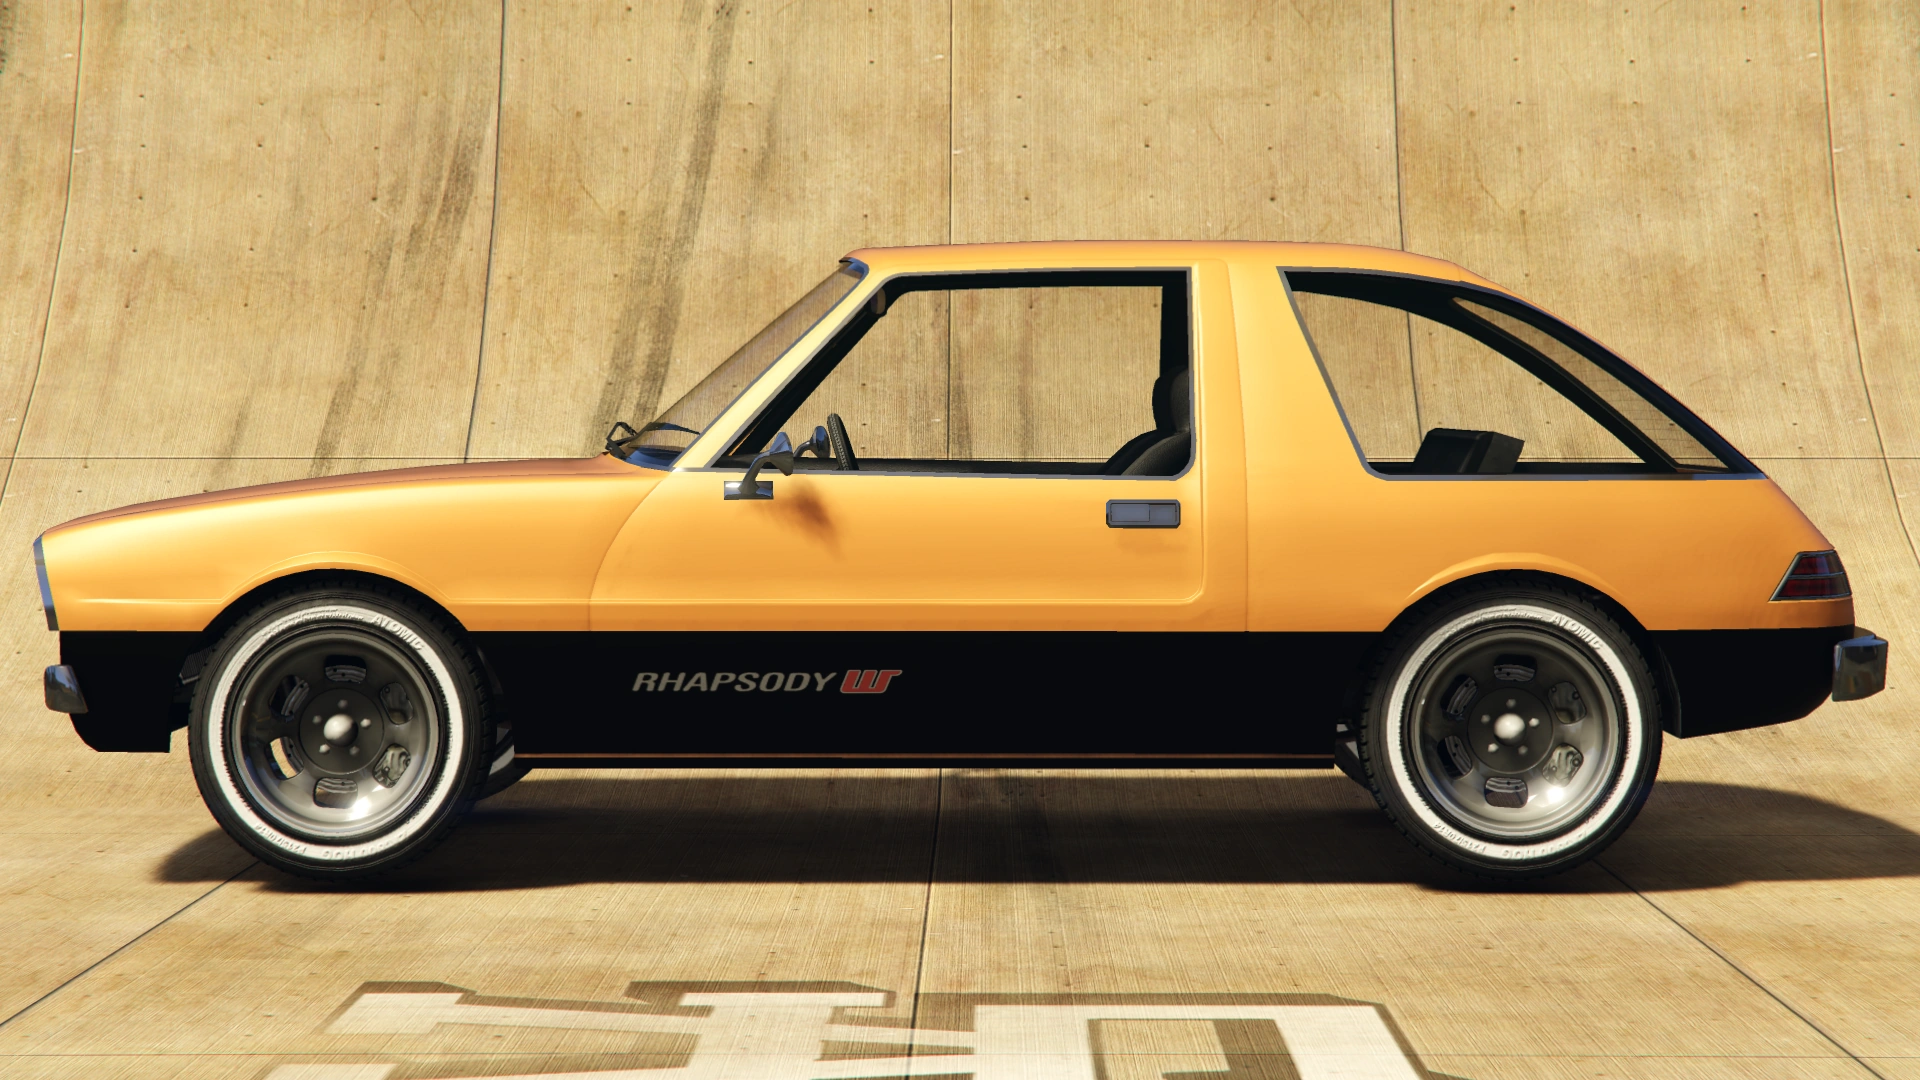
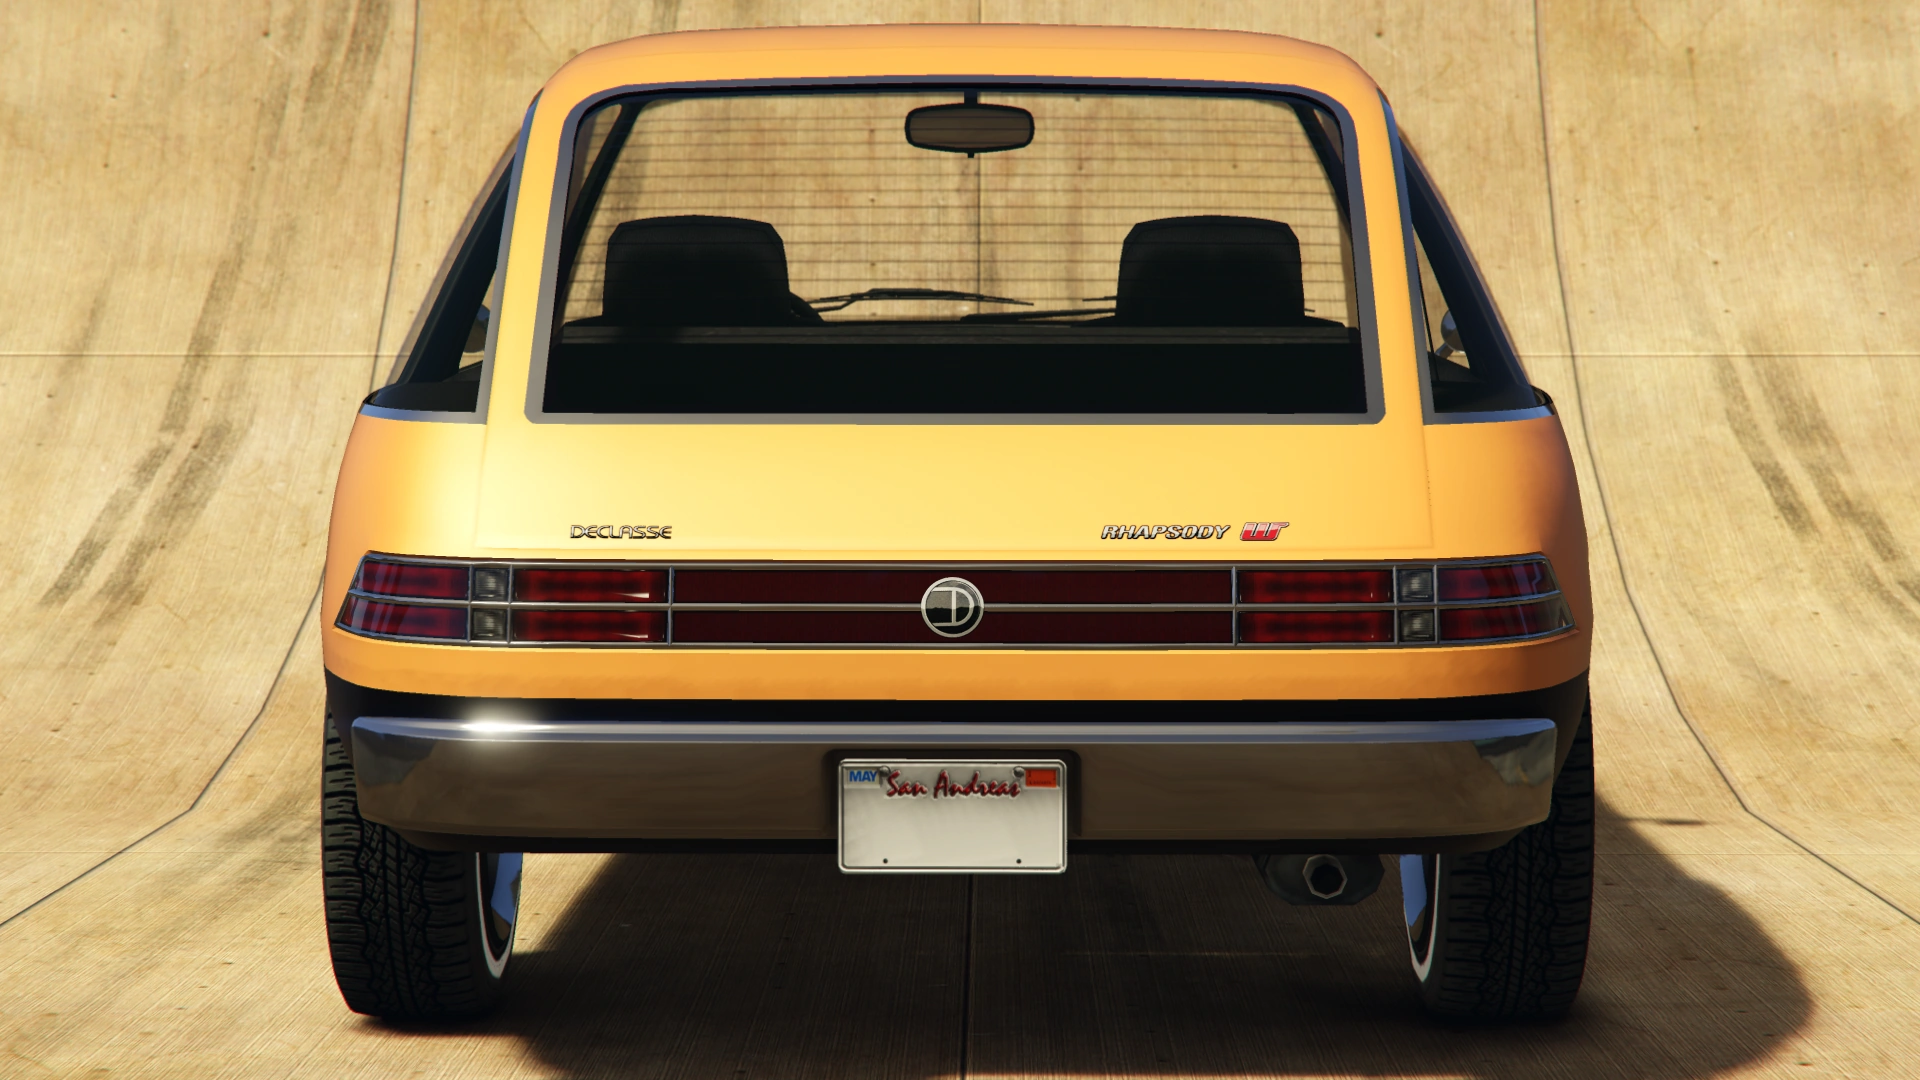
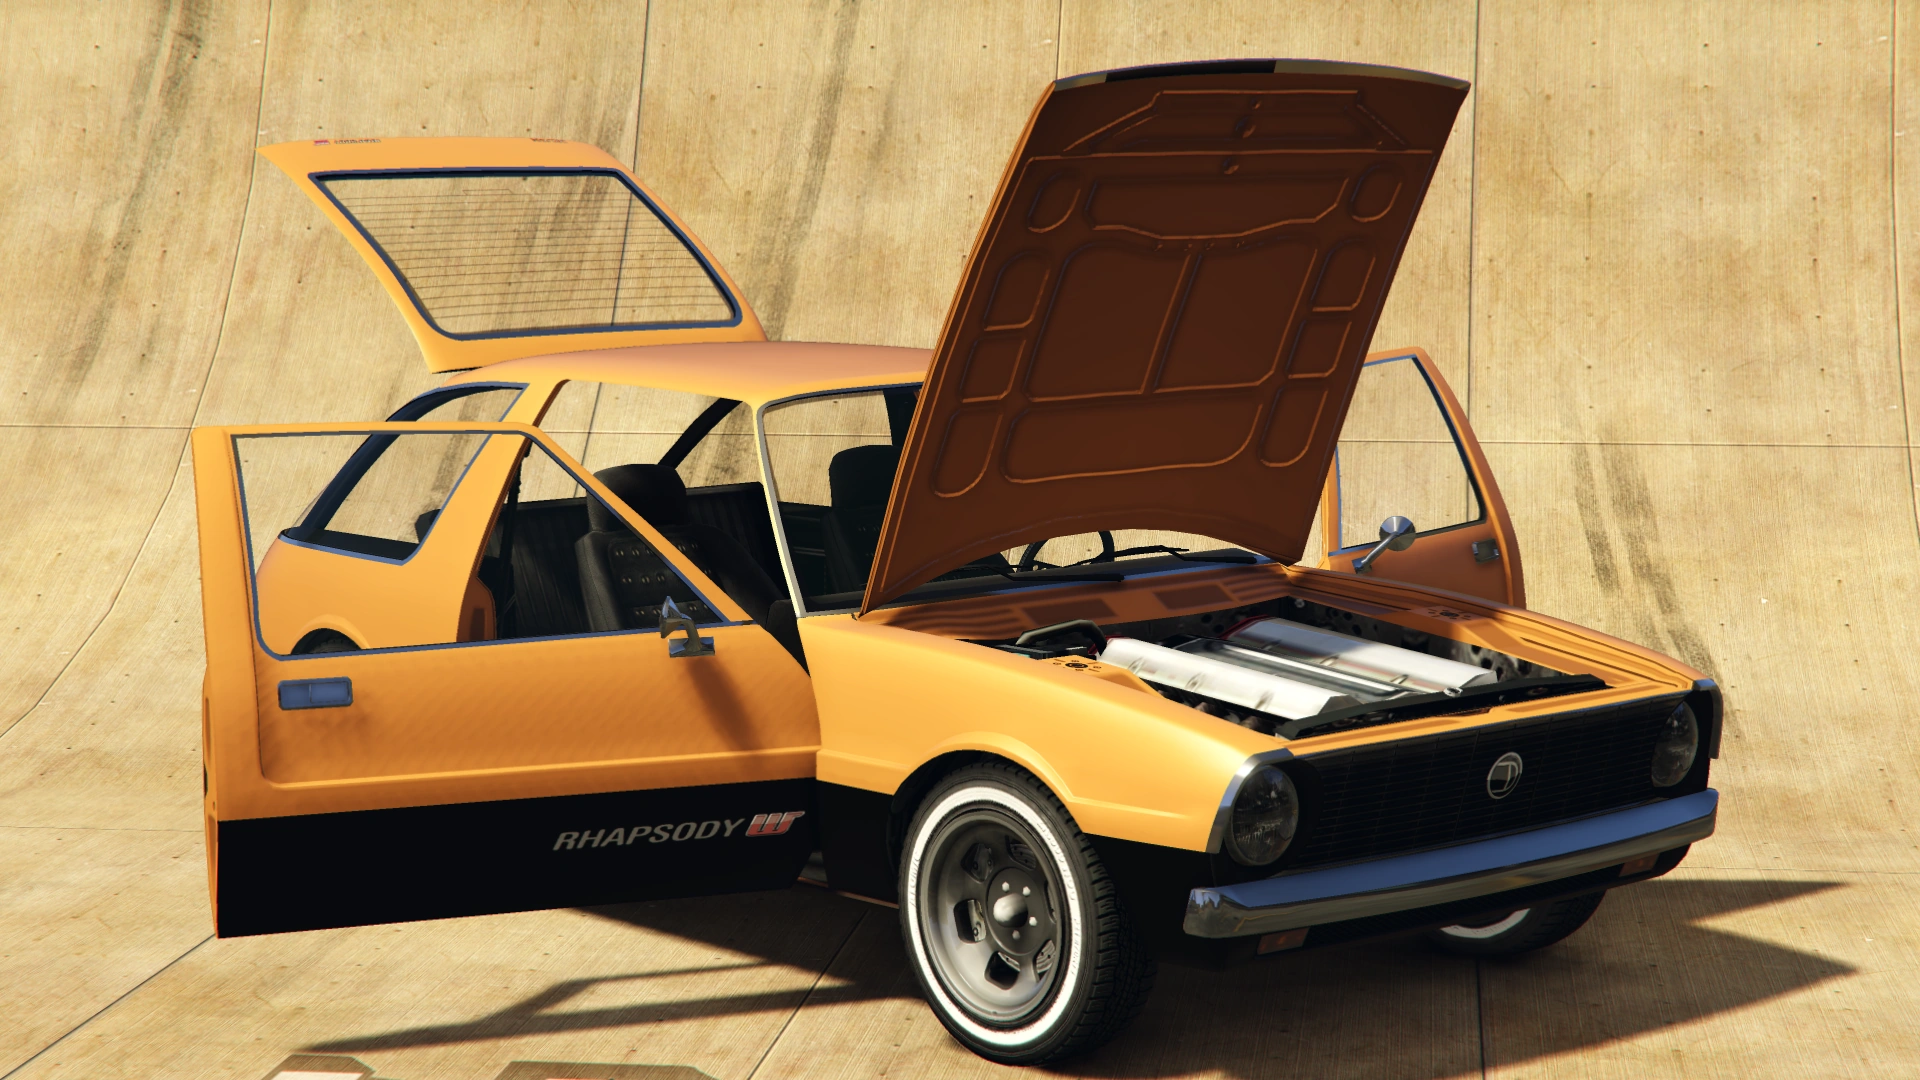
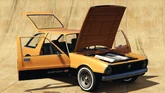
The Declasse Rhapsody is a two-door hatchback featured in The Lost and Damned, Grand Theft Auto V, and Grand Theft Auto Online as part of the "I'm Not a Hipster" Update.
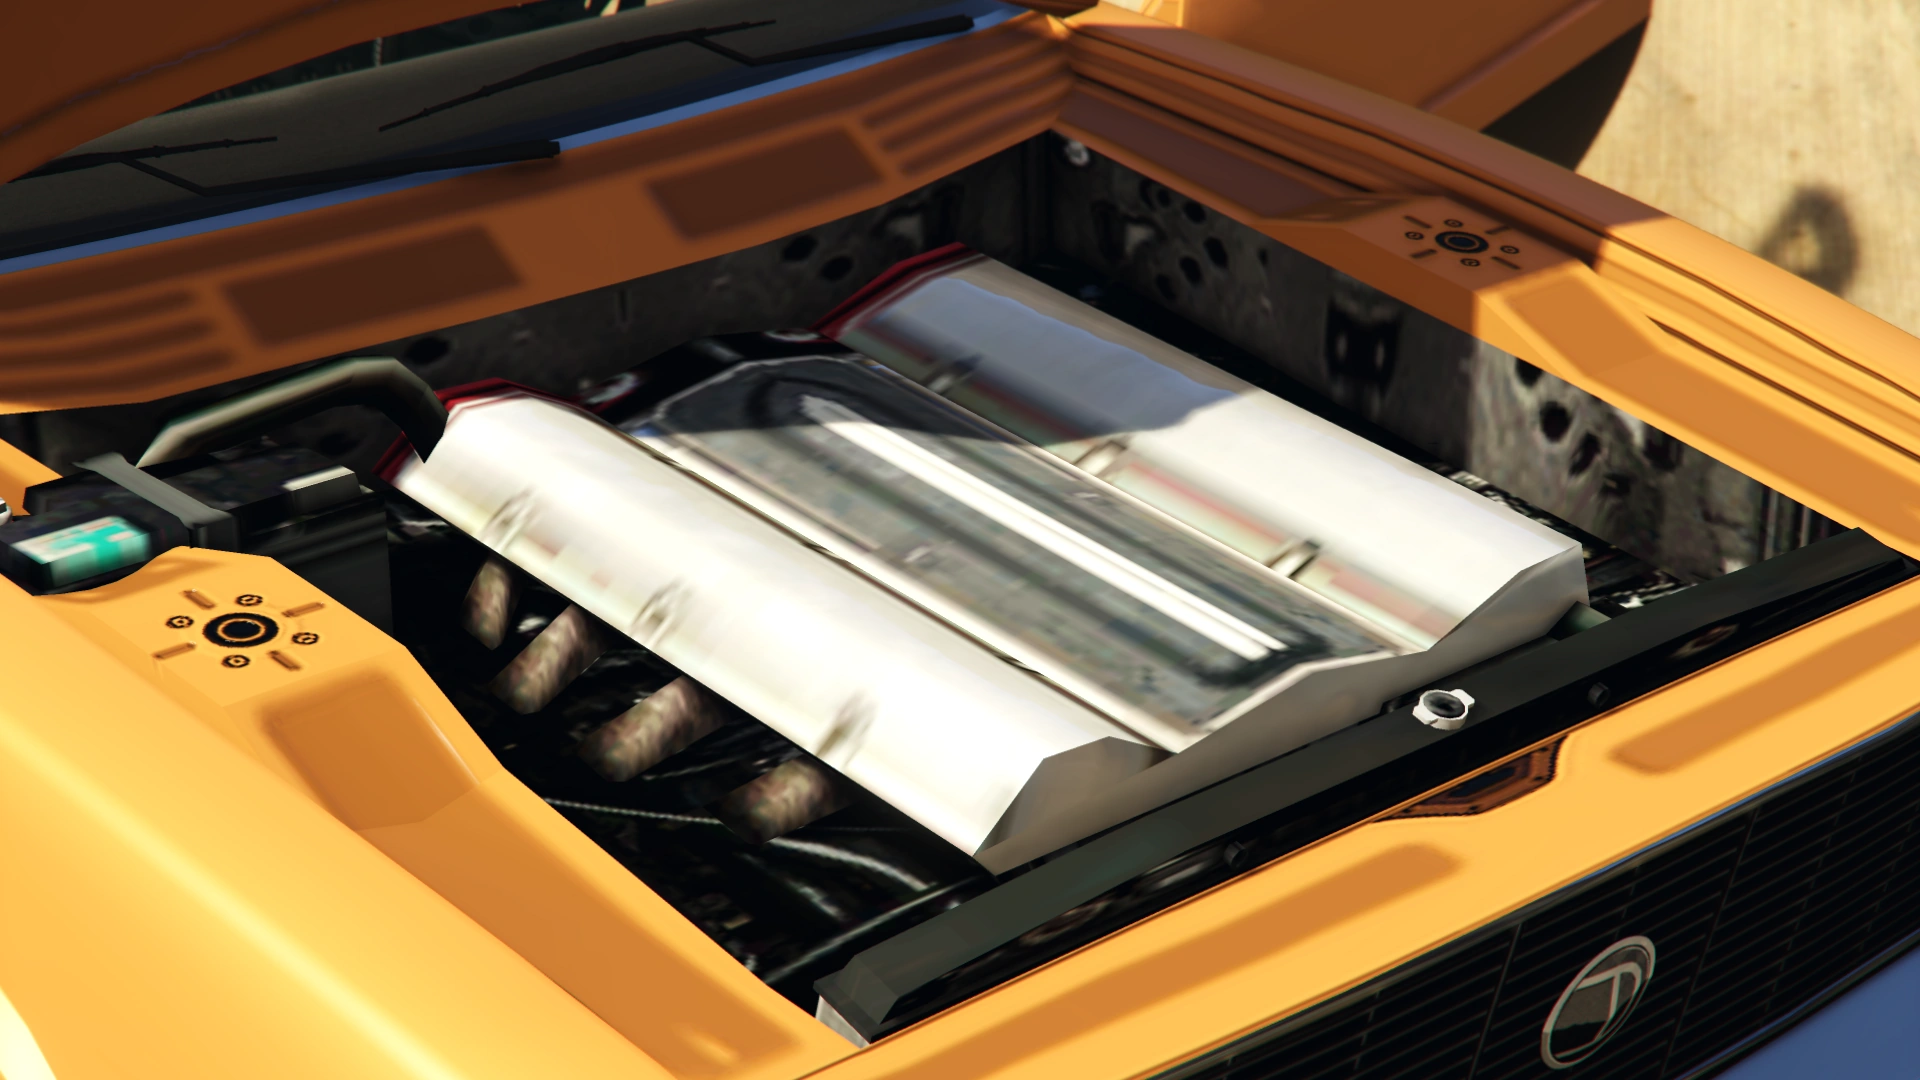
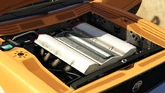
Design
The Lost and Damned
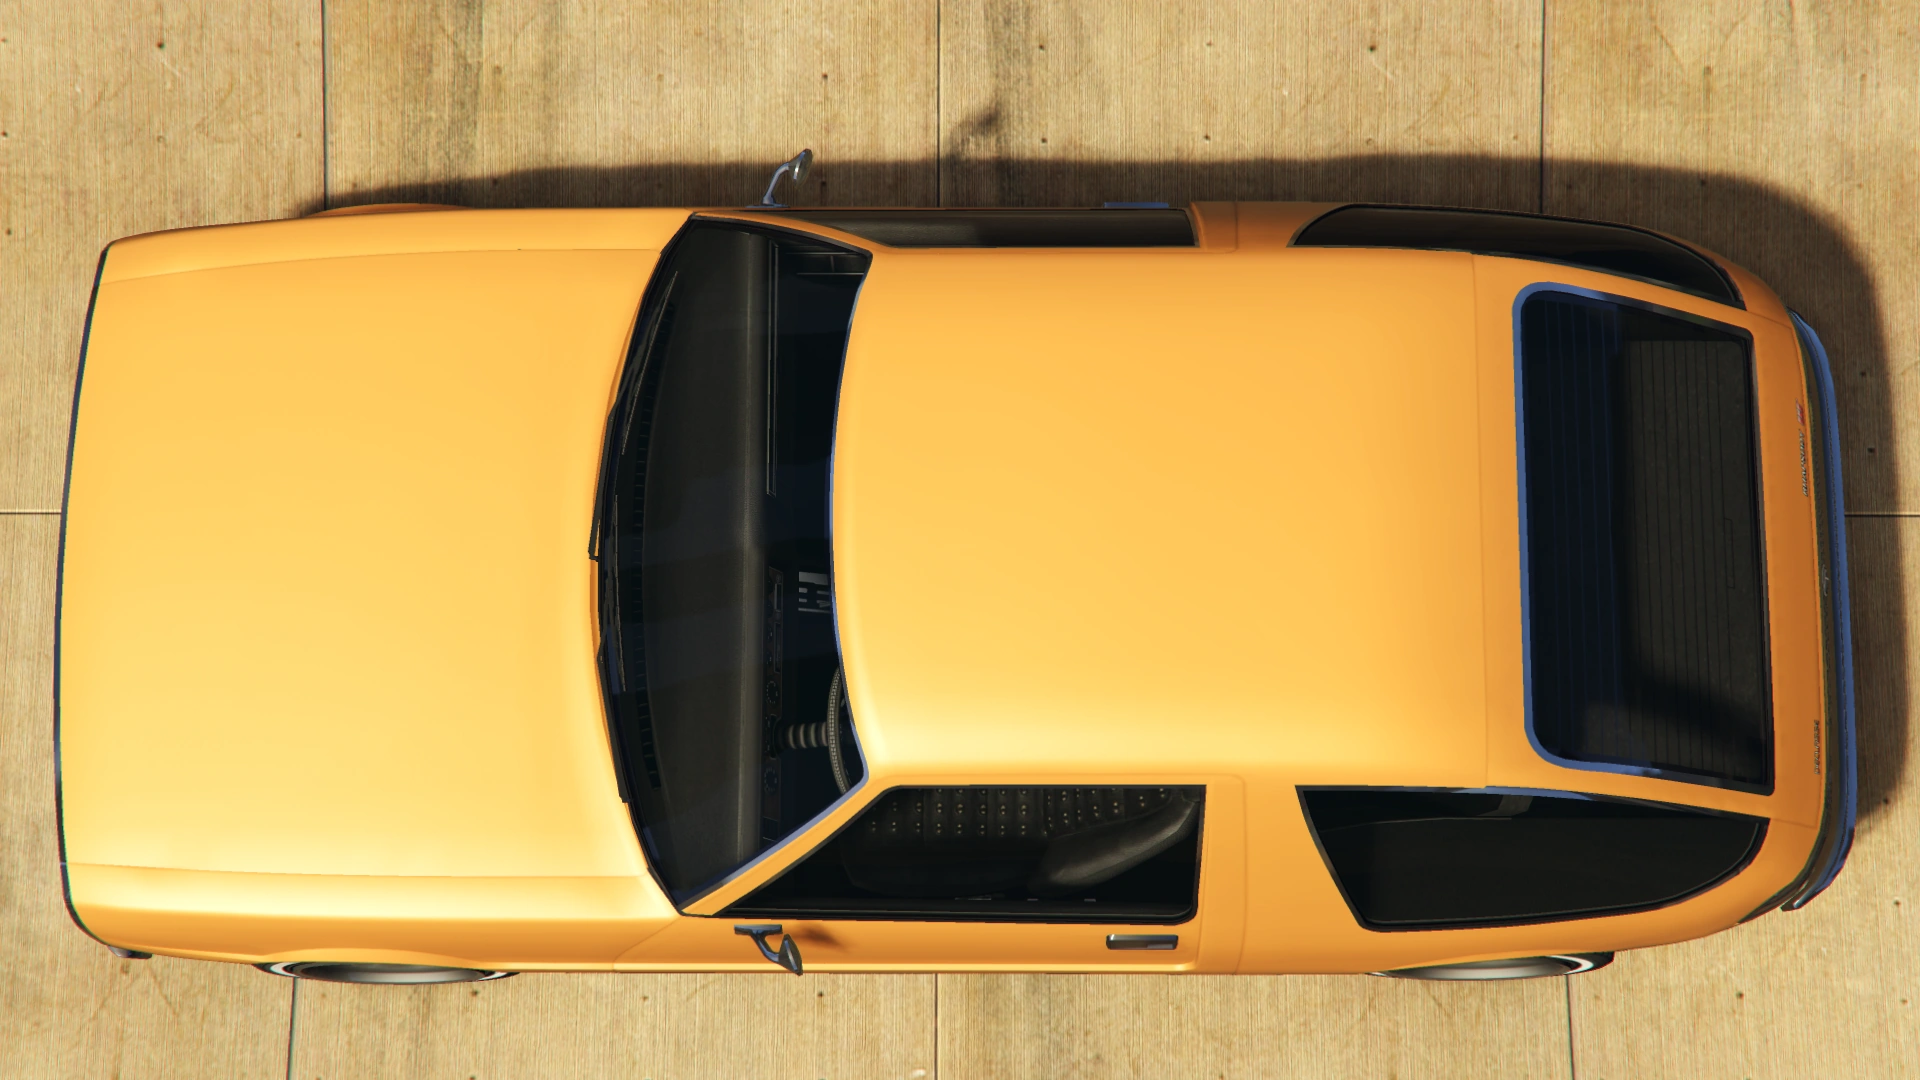
The car is based on the infamous AMC Pacer manufactured from 1970–75, while the front is designed after the Volkswagen Golf Mk1. The wheels appear to be aftermarket, bearing a resemblance to American Racing Ansen Sprint mag wheels.
Grand Theft Auto V
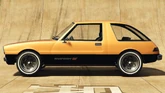
Its appearance in Grand Theft Auto V is mostly unchanged, with the exception of whitewall tires added by default, and the optional customization features in Los Santos Customs. New body modification options include a ducktail spoiler, fender flares, and a bumper lip, a reference to the original Volkswagen Golf GTI.
Current Design Gallery


Version History Gallery
")
Performance
The Lost and Damned
The car handles similarly to the Blista Compact, although the Rhapsody is an FR layout vehicle, (as opposed to the Blista Compact's FF layout) with more reasonable torque, and lower top speed. Its handling is very good, as its light weight and stiff suspension allow it to take turns at a high speed with almost no oversteer. However, crash deformation is poor, and as expected from a vehicle of this size and weight, its engine will fail after 3-4 head-on crashes. It is, however, very back-heavy and is prone to spinouts, but this trait can be good for drifting in the hands of experienced drivers.
TLAD Overview
| Acceleration (0-60 mph in Seconds) |
Top Speed (mph / kmh) |
Gears | Engines | Drivetrain (FWD / RWD / AWD) |
Mass (kg / lbs) |
|---|---|---|---|---|---|
| N/A | 81 / 130 | 5 | N/A | RWD | 1400 / 3086 |
| N/A | N/A | N/A | N/A | N/A | N/A |
| N/A | N/A | 5 | FR SOHC V8 (In-game model) | RWD | Cannot be observed |
Grand Theft Auto V
The Rhapsody's performance virtually is unchanged in GTA V, with only minor alterations to the vehicle's rigidity and nimble-feeling, where it now feels more stiff and stable, as oppose to TLAD's rendition where the car felt slightly more loosely suspended.
GTA V Overview
| Acceleration (0-60 mph in Seconds) |
Top Speed (mph / kmh) |
Gears | Engine | Drivetrain (FWD / RWD / AWD) |
Mass (kg / lbs) |
Fuel Tank Size (litres) |
|---|---|---|---|---|---|---|
| N/A | 83 / 133 | 5 | N/A | RWD | 1350 / 2976 | 65 |
| N/A | N/A | N/A | N/A | N/A | N/A | N/A |
| N/A | N/A | 5 | FR SOHC V8 (In-game model) | RWD | Cannot be observed | Cannot be observed |
Modifications
Grand Theft Auto V
| Category | Modification | Cost (GTA V) | Cost (GTA Online) | Image | |
|---|---|---|---|---|---|
| Armor | No Armor | $100 | $1,000 | ||
| Armor Upgrade 20% | $500 | $7,500 | |||
| Armor Upgrade 40% | $1,250 | $12,000 | |||
| Armor Upgrade 60% | $2,000 | $20,000 | |||
| Armor Upgrade 80% | $3,500 | $35,000 | |||
| Armor Upgrade 100% | $5,000 | $50,000 | |||
| Brakes | Stock Brakes | $100 | $1,000 | ||
| Street Brakes | $2,000 | $20,000 | |||
| Sport Brakes | $2,700 | $27,000 | |||
| Race Brakes | $3,500 | $35,000 | |||
| Bumpers | Stock Front Bumper | $250 | $2,200 | ||
| Custom Front Splitter | $500 | $4,600 | |||
| Engine | EMS Upgrade, Level 1 | $900 | $9,000 | ||
| EMS Upgrade, Level 2 | $1,250 | $12,500 | |||
| EMS Upgrade, Level 3 | $1,800 | $18,000 | |||
| EMS Upgrade, Level 4 | $3,350 | $33,500 | |||
| Exhausts | Stock Exhaust | $130 | $260 | ||
| Dual Exit Exhaust | $375 | $750 | |||
| Dual Shotgun Exhaust | $899 | $1,800 | |||
| Long Twin Exhaust | $1,499 | $3,000 | |||
| Explosives | Ignition Bomb | N/A | $5,000 | ||
| Remote Bomb | N/A | $7,500 | |||
| Fenders | Stock Fenders | $150 | $300 | ||
| Flared Arches | $450 | $900 | |||
| Side Flames | $750 | $1,500 | |||
| Flared Arches & Side Flames | $850 | $1,700 | |||
| Hoods | Stock Hood | $150 | $1,600 | ||
| Go Fast Hood | $325 | $3,000 | |||
| Triple Intake Bug Catcher | $750 | $5,000 | |||
| Single Intake Bug Catcher | $875 | $8,000 | |||
| Horns | Main article: Los Santos Customs/Horns | - | - | ||
| Lights | Headlights | Stock Lights | $100 | $600 | |
| Xenon Lights | $300 | $7,500 | |||
| Neon Kits | Main article: Los Santos Customs/Lights | - | - | ||
| Loss/Theft Prevention | Tracker | N/A | Too Hot | ||
| Full Coverage | N/A | Too Hot | |||
| Plates | Blue on White 1 | $50 | $200 | ||
| Blue on White 2 | $50 | $200 | |||
| Blue on White 3 | $50 | $200 | |||
| Yellow on Blue | $75 | $300 | |||
| Yellow on Black | $150 | $600 | |||
| Respray | Main article: Los Santos Customs/Respray Colors | - | - | ||
| Sell | Sell Vehicle | N/A | Too Hot | ||
| Spoilers | None | $150 | $6,000 | ||
| Ducktail Spoiler | $275 | $7,050 | |||
| Suspension | Stock Suspension | $100 | $200 | ||
| Lowered Suspension | $500 | $1,000 | |||
| Street Suspension | $1,000 | $2,000 | |||
| Sport Suspension | $1,700 | $3,400 | |||
| Competition Suspension | $2,200 | $4,400 | |||
| Transmission | Stock Transmission | $100 | $1,000 | ||
| Street Transmission | $2,950 | $29,500 | |||
| Sports Transmission | $3,250 | $32,500 | |||
| Race Transmission | $4,000 | $40,000 | |||
| Turbo | None | $500 | $5,000 | ||
| Turbo Tuning | $2,500 | $50,000 | |||
| Wheels | Main article: Los Santos Customs/Wheels | - | - | ||
| Windows | None | $100 | $500 | ||
| Light Smoke | $200 | $1,500 | |||
| Dark Smoke | $450 | $3,500 | |||
| Limo | $700 | $5,000 | |||
Image Gallery
The Lost and Damned
")
")
")
Grand Theft Auto V
")
")
")
")
")
")
Special Variants
The Lost and Damned
In TLAD, there is a robin egg blue Rhapsody in the mission Off Route. The car is across the street from the player after the starting cutscene. The player can obtain this uniquely colored vehicle by parking it at any safehouse without harming the completion of the mission. A tip to obtain this is to park it outside the Bellic Penthouse on Albany Avenue.
")
Grand Theft Auto V
Pre-modified variants of the Rhapsody can be seen driving around Los Santos randomly. The following two sets may spawn only in story mode. The vehicles appear in set color sets with custom front bumper, bug catcher, lowered suspension and spoiler.
Hipster DLC Modded
DLC_ MODDED_ 1 | |||||||||
|---|---|---|---|---|---|---|---|---|---|
| File | Color Set | Window Tint? | Livery? | Mod Kit | |||||
|
No | No | Template:BPFront Bumper: Custom Front Splitter
Template:BPExhaust: Long Twin Exhaust Template:BPSuspension: Lowered Suspension Template:BPHood: Single Intake Bug Catcher Template:BPSpoiler: Ducktail Spoiler | ||||||
DLC_ MODDED_ 2 | |||||||||
|---|---|---|---|---|---|---|---|---|---|
| File | Color Set | Window Tint? | Livery? | Mod Kit | |||||
|
N/A | No | Template:BPFront Bumper: Custom Front Splitter
Template:BPExhaust: Dual Shotgun Exhaust Template:BPWheels: Mecha Template:BPSuspension: Lowered Suspension Template:BPHood: Triple Intake Bug Catcher Template:BPSpoiler: Ducktail Spoiler | ||||||
Los Santos Customs Modded Single Player
Like the randomly spawning modified Rhapsodys, two sets of Rhapsodys may spawn outside Los Santos Customs, pre-modified. These only spawn in single player. The vehicles appear in set color sets with the same modifications. They will not spawn with any of the default extra components.
CUSTOMS_ MODDED_ SP | |||||||||
|---|---|---|---|---|---|---|---|---|---|
| File | Color Set | Window Tint? | Livery? | Mod Kit | |||||
|
No | No | Template:BPFront Bumper: Custom Front Splitter
Template:BPExhaust: Long Twin Exhaust Template:BPSuspension: Lowered Suspension Template:BPHood: Single Intake Bug Catcher Template:BPSpoiler: Ducktail Spoiler | ||||||
CUSTOMS_ MODDED_ SP | |||||||||
|---|---|---|---|---|---|---|---|---|---|
| File | Color Set | Window Tint? | Livery? | Mod Kit | |||||
|
N/A | No | Template:BPFront Bumper: Custom Front Splitter
Template:BPExhaust: Dual Shotgun Exhaust Template:BPWheels: Mecha Template:BPSuspension: Lowered Suspension Template:BPHood: Triple Intake Bug Catcher Template:BPSpoiler: Ducktail Spoiler | ||||||
")
")
Prominent Appearances in Missions
Grand Theft Auto Online
- Can appear in the "Bargaining Chips" Casino Work, where a parked one must be found in Mirror Park.
Locations
The Lost and Damned
- It can be regularly found in Northwood, Algonquin, and south Alderney.
- Rarely spawns in Star Junction.
- Provided in the missions Off Route and Was It Worth It?. Both are across the street of the mission starting point.
Grand Theft Auto V
- Original version
- Found in each protagonist's garage in single player.
- Enhanced version
- Spawns in traffic, commonly around Burton, Vinewood and Pillbox Hill.
- Can be bought from Southern San Andreas Super Autos for $140,000.
Grand Theft Auto Online
- Can be bought from Southern San Andreas Super Autos for $140,000.
- Rarely seen in traffic in the enhanced version.
Trivia
General
- The Rhapsody's name is a reference to the 1992 film Wayne's World, specifically the famous scene where the two lead characters, Wayne and Garth, sing along to the song "Bohemian Rhapsody" by Queen while driving in the "Mirthmobile" (an AMC Pacer). A photograph can be seen within the Rhapsody depicting Wayne and Garth. Furthermore, a "W" (as in "Wayne's World") is seen badged inside and outside the car, also the photo says "Schwing", one of the catch phases used by Wayne and Garth in the movie.
- The default radio stations for the Rhapsody are:
- The Lost and Damned: The Beat 102.7.
- GTA V: WorldWide FM.
The Lost and Damned
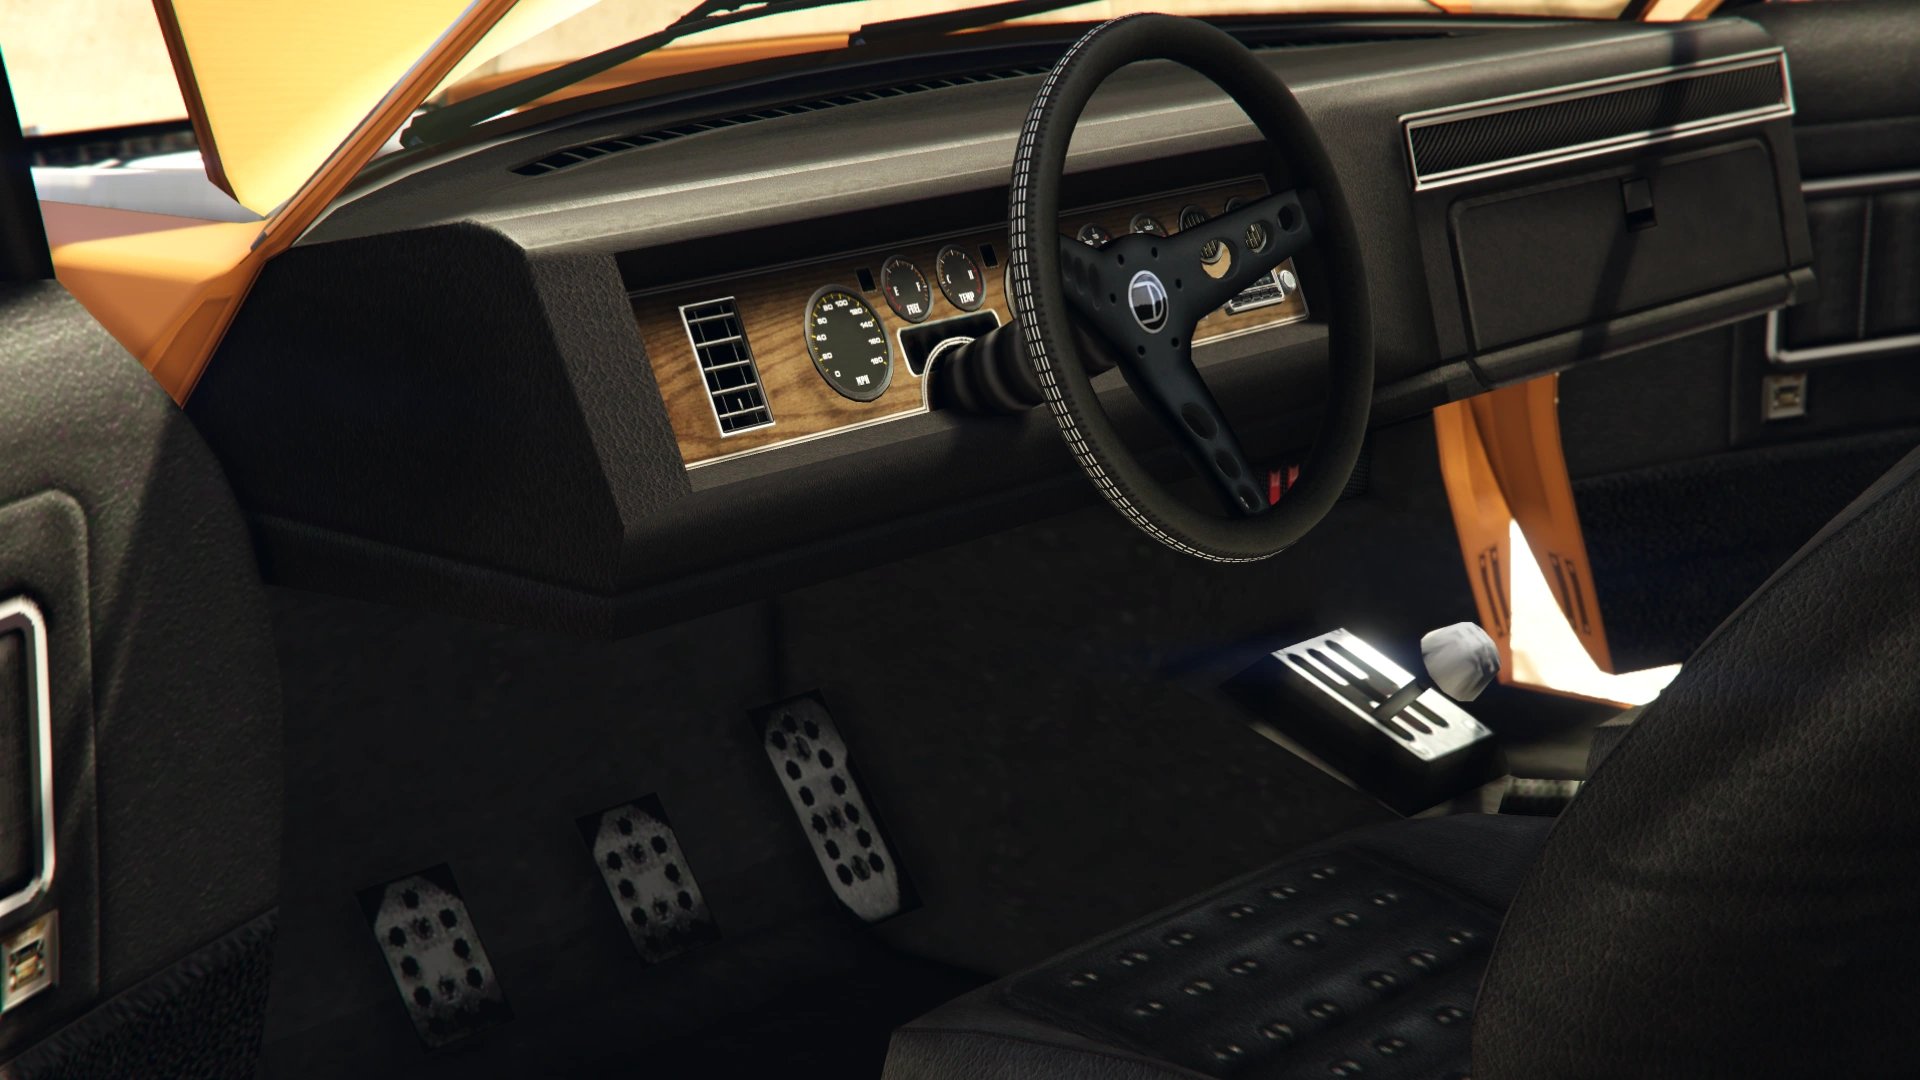
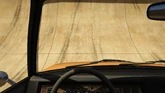
- The Rhapsody shares its interior with the Stallion, like the Regina, with the Rhapsody badge stamped on the dashboard and doors. As such, the steering wheel on the Rhapsody bears a Classique logo rather than a Declasse logo.
Grand Theft Auto V
- The Rhapsody is listed in the original handling file, but it did not appear in-game until the I'm Not a Hipster Update. It seemed to originally be an AWD vehicle with a slightly heavier mass and higher speed. [1]
- Through customization, it is possible to make the Rhapsody resemble the Pacer used in the film Wayne's World.
References
- ↑
<Item type="CHandlingData">
      <handlingName>RHAPSODY</handlingName>
      <fMass value="1400.000000" />
      <fInitialDragCoeff value="8.000000" />
      <fPercentSubmerged value="85.000000" />
      <vecCentreOfMassOffset x="0.000000" y="0.000000" z="0.000000" />
      <vecInertiaMultiplier x="1.000000" y="1.000000" z="1.000000" />
      <fDriveBiasFront value="0.400000" />
      <nInitialDriveGears value="5" />
      <fInitialDriveForce value="0.220000" />
      <fDriveInertia value="1.000000" />
      <fClutchChangeRateScaleUpShift value="1.300000" />
      <fClutchChangeRateScaleDownShift value="1.300000" />
      <fInitialDriveMaxFlatVel value="145.000000" />
      <fBrakeForce value="0.400000" />
      <fBrakeBiasFront value="0.650000" />
      <fHandBrakeForce value="0.700000" />
      <fSteeringLock value="35.000000" />
      <fTractionCurveMax value="1.650000" />
      <fTractionCurveMin value="1.250000" />
      <fTractionCurveLateral value="14.500000" />
      <fTractionSpringDeltaMax value="0.150000" />
      <fLowSpeedTractionLossMult value="1.000000" />
      <fCamberStiffnesss value="0.000000" />
      <fTractionBiasFront value="0.490000" />
      <fTractionLossMult value="1.000000" />
      <fSuspensionForce value="1.800000" />
      <fSuspensionCompDamp value="0.800000" />
      <fSuspensionReboundDamp value="1.100000" />
      <fSuspensionUpperLimit value="0.150000" />
      <fSuspensionLowerLimit value="-0.140000" />
      <fSuspensionRaise value="0.000000" />
      <fSuspensionBiasFront value="0.500000" />
      <fAntiRollBarForce value="0.000000" />
      <fAntiRollBarBiasFront value="0.000000" />
      <fRollCentreHeightFront value="0.100000" />
      <fRollCentreHeightRear value="0.100000" />
      <fCollisionDamageMult value="0.700000" />
      <fWeaponDamageMult value="1.000000" />
      <fDeformationDamageMult value="0.700000" />
      <fEngineDamageMult value="1.500000" />
      <fPetrolTankVolume value="65.000000" />
      <fOilVolume value="5.000000" />
      <fSeatOffsetDistX value="0.000000" />
      <fSeatOffsetDistY value="0.000000" />
      <fSeatOffsetDistZ value="0.000000" />
      <nMonetaryValue value="35000" />
      <strModelFlags>440010</strModelFlags>
      <strHandlingFlags>0</strHandlingFlags>
      <strDamageFlags>0</strDamageFlags>
      <AIHandling>AVERAGE</AIHandling>
      <SubHandlingData>
        <Item type="CCarHandlingData">
          <fBackEndPopUpCarImpulseMult value="0.100000" />
          <fBackEndPopUpBuildingImpulseMult value="0.030000" />
          <fBackEndPopUpMaxDeltaSpeed value="0.600000" />
        </Item>
        <Item type="NULL" />
        <Item type="NULL" />
      </SubHandlingData>
    </Item>