(Undo revision 1027945 by Nonstopmaximum (talk) See User_talk:IW-33#Picador) |
MonkeyBot188 (talk | contribs) m (→Navigation: category update) |
||
| (88 intermediate revisions by 27 users not shown) | |||
| Line 1: | Line 1: | ||
| + | {{Infobox vehicle |
||
| − | {{Images|Current Design Gallery.}} |
||
| + | |name = Picador |
||
| − | {{Infobox vehicles |
||
| − | | |
+ | |front_image = Picador-GTAVe-front.png |
| − | | |
+ | |rear_image = Picador-GTAVe-rear.png |
| − | | |
+ | |caption = A '''Picador''' in ''[[Grand Theft Auto V]]''. |
| + | |class = [[:Category:Muscle class|Muscle]] <small>(''GTA V'' & ''GTA Online'')</small> |
||
| − | |caption = A '''Picador''' in ''[[Grand Theft Auto V]]''. |
||
| − | | |
+ | |type = Civilian car |
| + | |body_style = [[:Category:Coupe utilities|Two-door coupé utility]] |
||
| − | |vehicle_type = Civilian car |
||
| + | |capacity = 2 <small>(driver and passenger)</small> |
||
| − | |body_style = Coupé utility pickup truck |
||
| − | | |
+ | |manufacturer = [[Cheval]] <small>([[HD Universe]])</small> |
| − | | |
+ | |price = [[Money|$]]9,000 <small>(''GTA Online'') ([[Southern San Andreas Super Autos]]; [[#Locations|no longer available]])</small> |
| + | |games = {{Games|SA=y|V=y|O=y}} |
||
| − | |price = [[Money|$]]9,000 <small>([[GTA Online]]) ([[Southern San Andreas Super Autos]])</small> |
||
| − | | |
+ | |related = [[Boor]]<br>[[Yosemite]] <small>(''[[Grand Theft Auto Online|GTA Online]]'')</small><br>[[Buccaneer]] <small>(''[[Grand Theft Auto: San Andreas|GTA San Andreas]]'')</small> |
| + | |variants = [[Marshall]] |
||
| − | |related = [[Buccaneer]] <small>([[GTA San Andreas]])</small> |
||
| − | | |
+ | |makeyear = 1960s |
| − | | |
+ | |swankness = |
| + | |dashtype = Bobcat <small>(needle)</small><br>[[File:Bobcat-Dials-GTAV.png|thumb|center|170px]]Bobcat <small>(dial texture)</small><br>[[File:Bobcat-GTAV-DialSet.png|thumb|center|170px]] |
||
| − | |dashtype = |
||
| − | |inttxd = |
+ | |inttxd = *Generic <small>(''GTA San Andreas'')</small> |
| + | *Bobcat <small>(HD Universe)</small> |
||
| − | |roadspawn = |
||
| − | {{BP}}Yes <small>(All games)</small> |
||
| − | {{BP}}{{H:title|May spawn even when traffic is restricted/disabled (using trainer), for example, pulling out of alleyways or car parks|Scenario}} <small>(GTA V)</small> |
||
|carcols = |
|carcols = |
||
{{Expand|'''GTA San Andreas'''| |
{{Expand|'''GTA San Andreas'''| |
||
| + | {{CarColSA/Title}} |
||
| − | <center>COLOR SET 1</center> |
||
| − | {{CarColSA|81|8}} |
+ | {{CarColSA|no=1|81|8}} |
| + | {{CarColSA|no=2|32|8}} |
||
| − | <center>COLOR SET 2</center> |
||
| − | {{CarColSA| |
+ | {{CarColSA|no=3|43|8}} |
| + | {{CarColSA|no=4|67|8}} |
||
| − | <center>COLOR SET 3</center> |
||
| − | {{CarColSA| |
+ | {{CarColSA|no=5|11|11}} |
| + | {{CarColSA|no=6|8|90}} |
||
| − | <center>COLOR SET 4</center> |
||
| − | {{CarColSA| |
+ | {{CarColSA|no=7|2|2}} |
| + | {{CarColSA|no=8|83|13}}<br> |
||
| − | <center>COLOR SET 5</center> |
||
| − | {{CarColSA|11|11}}<br> |
||
| − | <center>COLOR SET 6</center> |
||
| − | {{CarColSA|8|90}}<br> |
||
| − | <center>COLOR SET 7</center> |
||
| − | {{CarColSA|2|2}}<br> |
||
| − | <center>COLOR SET 8</center> |
||
| − | {{CarColSA|83|13}}<br> |
||
}} |
}} |
||
---- |
---- |
||
| + | {{Expand|'''GTA V'''| |
||
| + | {{CarColV/Title}} |
||
| + | {{CarColV|no=1|0|0|6|156}} |
||
| + | {{CarColV|no=2|1|0|6|156}} |
||
| + | {{CarColV|no=3|2|0|4|156}} |
||
| + | {{CarColV|no=4|32|0|33|156}} |
||
| + | {{CarColV|no=5|51|0|52|156}} |
||
| + | {{CarColV|no=6|68|0|0|156}} |
||
| + | {{CarColV|no=7|112|0|5|156}} |
||
| + | {{CarColV|no=8|4|0|67|156}} |
||
| + | {{CarColV|no=9|5|0|111|156}} |
||
| + | {{CarColV|no=10|102|0|0|156}} |
||
| + | {{CarColV|no=11|37|0|106|156}} |
||
| + | {{CarColV|no=12|54|0|0|156}} |
||
| + | {{CarColV|no=13|7|0|4|156}} |
||
| + | {{CarColV|no=14|35|0|0|156}} |
||
| + | {{CarColV|no=15|38|0|0|156}} |
||
| + | }} |
||
|wheeltype = |
|wheeltype = |
||
|flags = |
|flags = |
||
| + | {{Expand|'''GTA V'''| |
||
| − | |modelname = picador <small>(All games)</small> |
||
| + | {{Flags|FLAG_AVERAGE_CAR}} |
||
| − | |handlingname = PICADOR <small>(All games)</small> |
||
| + | {{Flags|FLAG_HAS_INTERIOR_EXTRAS}} |
||
| − | |textlabelname = PICADOR <small>(All games)</small> |
||
| + | }} |
||
| + | |modelsets = |
||
| + | |modelname = picador <small>(all games)</small> |
||
| + | |handlingname = PICADOR <small>(all games)</small> |
||
| + | |textlabelname = PICADOR <small>(all games)</small> |
||
| + | |roadspawn = |
||
| + | *Yes <small>(all games)</small> |
||
| + | *Parked <small>(all games)</small> |
||
| + | *{{H:title|May spawn even when traffic is restricted/disabled (using trainer), for example, pulling out of alleyways or car parks|Scenario}} <small>(''GTA V'')</small> |
||
| + | |roadspawnmaxcol = |
||
| + | |roadspawnfreq = |
||
| + | |roadspawntrailer = <!--null--> |
||
| + | |roadspawnidendis = |
||
| + | |roadspawndrivers = |
||
| + | |roadspawngroups = |
||
| + | |roadspawnlicense = |
||
|engineacceleration = |
|engineacceleration = |
||
|exhaustacceleration = |
|exhaustacceleration = |
||
| Line 53: | Line 78: | ||
}} |
}} |
||
{{Quote|1960's entry in a long, esteemed line of Cheval coupé utility vehicles. Combining all the style of a two-door hardtop with the practicality of an integrated cargo tray, this most certainly isn't a jack of all trades and a master of none.|[[Southern San Andreas Super Autos]] description.}} |
{{Quote|1960's entry in a long, esteemed line of Cheval coupé utility vehicles. Combining all the style of a two-door hardtop with the practicality of an integrated cargo tray, this most certainly isn't a jack of all trades and a master of none.|[[Southern San Andreas Super Autos]] description.}} |
||
| − | The '''Picador''' is a |
+ | The '''Picador''' is a {{WP|coupé utility}} featured in ''[[Grand Theft Auto: San Andreas]]'', ''[[Grand Theft Auto V]]'' and ''[[Grand Theft Auto Online]]''. It is manufactured by [[Cheval]] in the [[HD Universe]]. |
==Design== |
==Design== |
||
===''Grand Theft Auto: San Andreas''=== |
===''Grand Theft Auto: San Andreas''=== |
||
| − | + | The Picador is based on the {{WP|Chevrolet El Camino|1971–1972 Chevrolet El Camino}}, which happens to share similar design cues with the {{WP|Chevrolet Monte Carlo|1970–1972 Chevrolet Monte Carlo}} (a car which the [[Buccaneer]] shares a likeness to). As a result, the Picador is implied to be a ute variant of the Buccaneer, which shares a similar grille and headlight design. |
|
| − | + | The Picador may occasionally be depicted with different items on its bed as two separate extras, the first one being two planks and the second one several [[Sprunk]] cans. The vehicle is seen in a variety of primary colors on the body, as well as secondary colors on the inner bed walls and wheel wells (though this color cannot be changed through a mod shop). |
|
| − | ===''Grand Theft Auto V''=== |
+ | ===''Grand Theft Auto V'' and ''Online''=== |
| − | In ''[[Grand Theft Auto V]]'', the Picador retains the essential design, |
+ | In ''[[Grand Theft Auto V]]'' and ''[[Grand Theft Auto Online]]'', the Picador retains the essential ute design, taking design cues from the {{WP|Holden HJ|}}<ref>[http://starcarsagency.com.au/wp-content/uploads/2016/01/003.jpg HJ Ute Overview]</ref>, {{WP|Holden HK|}}<ref>[http://3.bp.blogspot.com/-9j_B8f5Us7s/Ur4U9HIkeOI/AAAAAAAAIc4/Ofnf0KaZaM0/s1600/IMG_8297.JPG HK Ute overview]</ref> and {{WP|Chevrolet El Camino}} utilities in keeping with [[Cheval]] being primarily based on GM-Holden. The rear fascia and tail light design is almost identical to that of the 1969 El Camino<ref>[https://commons.wikimedia.org/wiki/File:1969_Chevrolet_El_Camino_SS_(24298674349).jpg 69 El Camino Rear]</ref>, while retaining the overall shape and size of the later model Holden. The front end has references to the {{WP|Chevrolet El Camino#Second generation (1964-1967)|1967 El Camino}} in the headlight and grille assembly<ref>[http://alamedarides.com/images/chevy-elcamino1967/Chevy-ElCamino1967.jpg 67 El Camino grille]</ref>, with some similarity to the the rarer dual headlight version of the HK Holden<ref>[https://fixedgearlondon.files.wordpress.com/2011/01/l_e110054723eb99fda26c34c819766b70.jpg HK Grille]</ref>. |
| + | The Picador's design is generally narrower than the ''GTA San Andreas'' iteration, featuring a silver front bumper with a wide vented section holding two square amber signals on the edges and a plate holder on the center. The upper area consist of a grilled section with a wide divider on the middle and the Cheval emblem on the center, along with four circular headlamps on the outer edges. The bonnet has a slightly bulged profile and features a vented section near the windshield. |
||
| + | |||
| + | The sides of the vehicle are very simple in design, featuring small flares around the upper sides of the wheel arches and inset/ridged details on the skirting area, as well as horizontal door handles and circular rear-view mirrors near the A-pillars of the cabin. The cabin area is relatively small, featuring silver trimming around the windshield and rear window, while the sides appear to use dual trimming; thinner trim around the window glass and wider around the actual door frame, seen in the small gaps next to the door windows. The area behind the cabin is occupied by a small truck bed with the wheel wells on either side. |
||
| + | |||
| + | The rear end of the car mostly consists of the tailgate, which has a black panel with silver upper and lower borders and a plastic middle strip, as well as the Cheval badges on the center. The rear quarters of the vehicle are occupied by square-shaped red marker lamps, which also have silver trimming around. The rear bumper is finished in silver and houses two rectangular brake lamps near the edges and the license plate on the center, while two exhaust tubes can be seen below. In the enhanced version, the car uses the same interior as the [[Bobcat XL]]. |
||
| + | |||
| + | The vehicle only has a primary color, which is applied on the entire bodywork. It also uses a set of five-spoke rims wrapped in low-profile tires, which is unique in design compared to certain muscle rims seen in [[Los Santos Customs]] and other mod shops. |
||
| + | |||
| + | As of [[GTA Online: The Criminal Enterprises|The Criminal Enterprises]] update for the enhanced version of ''[[Grand Theft Auto Online]]'', the vehicle gains visual modifications and the option to apply a secondary color for applicable modifications and a trim color for the paddings of the "Padded Full Cage" option. |
||
{{Clr}} |
{{Clr}} |
||
===Current Design Gallery=== |
===Current Design Gallery=== |
||
| + | <!--Please ensure you have read the Manual of Style [GTA_Wiki:Manual_of_Style/Vehicles/Design_Galleries] before uploading and adding images to the Current Design Gallery. Failure to meet these guidelines will result in the images being removed and deleted, and repeated offences may result in a warning.--> |
||
| + | |||
{{Current Design Gallery |
{{Current Design Gallery |
||
| − | |front_quarter_image = Picador-GTAV- |
+ | |front_quarter_image = Picador-GTAV-FrontQuarter.png |
| − | |top_image = |
+ | |top_image = Picador-GTAV-Top.png |
| − | |rear_quarter_image = Picador-GTAV- |
+ | |rear_quarter_image = Picador-GTAV-RearQuarter.png |
| − | |front_image = |
+ | |front_image = Picador-GTAV-Front.png |
| − | |side_image = |
+ | |side_image = Picador-GTAV-Side.png |
| − | |rear_image = |
+ | |rear_image = Picador-GTAV-Rear.png |
| − | |engine_image = |
+ | |engine_image = Picador-GTAV-Engine.png |
| − | |underside_image = |
+ | |underside_image = Picador-GTAV-Underside.png |
| − | |inside_image = |
+ | |inside_image = Picador-GTAV-Inside.png |
| − | |detail_image = |
+ | |detail_image = Logo-cheval.png |
| − | |open_other_image = |
+ | |open_other_image = Picador-GTAV-Other.png |
| − | |dashboard_image = Picador-GTAV-Dashboard. |
+ | |dashboard_image = Picador-GTAV-Dashboard.png |
}} |
}} |
||
| Line 89: | Line 125: | ||
==Performance== |
==Performance== |
||
===''Grand Theft Auto: San Andreas''=== |
===''Grand Theft Auto: San Andreas''=== |
||
| − | The Picador has the highest top speed and acceleration for any pickup in the game, possibly due to the large V8 engine. However, it is also the lightest and lacks the torque of the stronger trucks; its cornering is also a little unstable, owing to its rear |
+ | The Picador has the highest top speed and acceleration for any pickup in the game, possibly due to the large V8 diesel engine. However, it is also the lightest and lacks the torque of the stronger trucks; its cornering is also a little unstable, owing to its rear-wheel-drive layout. The Picador can only carry two in the cab. |
| + | |||
| + | The vehicle uses a low-revving and noisy engine from cars such as the [[Romero's Hearse|Romero]], the [[Perennial]] and the [[Greenwood]]. |
||
| − | ====GTA San Andreas Overview==== |
+ | ====''GTA San Andreas'' Overview==== |
{{Vehiclestats-3d |
{{Vehiclestats-3d |
||
|handling_top_speed = 103 / 165 |
|handling_top_speed = 103 / 165 |
||
| Line 100: | Line 138: | ||
|observed_acceleration = |
|observed_acceleration = |
||
|observed_top_speed = |
|observed_top_speed = |
||
| − | |observed_gears = |
+ | |observed_gears = 5 |
|observed_engine = {{H:title|Front engine, rear wheel drive|FR}} V8 <small>(In-game model)</small> |
|observed_engine = {{H:title|Front engine, rear wheel drive|FR}} V8 <small>(In-game model)</small> |
||
|observed_drivetrain = RWD |
|observed_drivetrain = RWD |
||
}} |
}} |
||
| − | ===''Grand Theft Auto V''=== |
+ | ===''Grand Theft Auto V'' and ''Online''=== |
| − | The Picador |
+ | The Picador's speed and acceleration are good in comparison to most street cars, especially when upgraded, but it is heavily outclassed by other muscle cars. Its handling is at odds with more conventional muscle cars, since its four-wheel-drive system gives it excellent traction and launch speed. This, combined with its soft suspension, makes the Picador one of the best muscle cars for offroading, though one must be wary of body roll. Crash deformation is poor and bullet resistance is only average. |
| + | |||
| + | The Picador is powered by a large displacement V8 and is mated to a 5-speed gearbox, powering all rear wheels with a torque distribution of 40% to the front wheels and 60% to the rear wheels. It shares its engine sound with the [[Sabre Turbo]], [[Fugitive]] and [[Gauntlet]]. |
||
| − | ==== |
+ | ====''GTA V'' and ''Online'' Overview==== |
{{Vehiclestats-gtav |
{{Vehiclestats-gtav |
||
| + | |&online = y |
||
|handling_top_speed = 84 / 135 |
|handling_top_speed = 84 / 135 |
||
|handling_gears = 5 |
|handling_gears = 5 |
||
| Line 124: | Line 165: | ||
|observed_top_speed = 100 / 160 |
|observed_top_speed = 100 / 160 |
||
|observed_gears = 5 |
|observed_gears = 5 |
||
| − | |observed_engine = {{H:title|Front engine, all wheel drive|F4}} {{H:title|Single Overhead Camshaft|SOHC}} V8 |
+ | |observed_engine = {{H:title|Front engine, all wheel drive|F4}} {{H:title|Single Overhead Camshaft|SOHC}} V8 <small>(In-game model)</small> |
|observed_drivetrain = AWD |
|observed_drivetrain = AWD |
||
|rsc_image = |
|rsc_image = |
||
| − | |rsc_top_speed = |
+ | |rsc_top_speed = {{PercentBar|72.434425|width=150}} |
| − | |rsc_acceleration = |
+ | |rsc_acceleration = {{PercentBar|55|width=150}} |
| − | |rsc_braking = |
+ | |rsc_braking = {{PercentBar|26.666668|width=150}} |
| − | |rsc_traction = |
+ | |rsc_traction = {{PercentBar|62.121212|width=150}} |
}} |
}} |
||
| Line 223: | Line 264: | ||
|$ 1500 |
|$ 1500 |
||
|} |
|} |
||
| − | *The Transfender in [[Las Venturas (3D Universe)|Las Venturas]] |
+ | *The Transfender in [[Las Venturas (3D Universe)|Las Venturas]] charges 20% more for each modification except colours. |
| + | |||
| + | ===''Grand Theft Auto V'' and ''Online''=== |
||
| + | *Options marked <small><sup>E</sup></small> are exclusive to the enhanced versions of ''[[Grand Theft Auto V]]'' and ''[[Grand Theft Auto Online]]'', and were added as part of [[GTA Online: The Criminal Enterprises|The Criminal Enterprises]] update. |
||
| − | ===''Grand Theft Auto V''=== |
||
{| class="wikitable" |
{| class="wikitable" |
||
| + | ! colspan="2" scope="col" |Category |
||
| − | !Type |
||
| + | ! scope="col" |Modification |
||
| − | !Upgrade |
||
| − | !Cost ( |
+ | ! scope="col" |Cost (''GTA V'') |
| − | !Cost ([[Grand Theft Auto Online|Online]]) |
+ | ! scope="col" |Cost ([[Grand Theft Auto Online|''GTA Online'']]) |
| + | ! scope="col" |Image |
||
| + | |- |
||
| + | | colspan="2" rowspan="6" |Armor |
||
| + | |No Armor |
||
| + | | style="text-align: center;" |$100 |
||
| + | | colspan="2" style="text-align: center;" |$200 |
||
|- |
|- |
||
| − | |rowspan="5"|Armor |
||
|Armor Upgrade 20% |
|Armor Upgrade 20% |
||
| style="text-align: center;" |$500 |
| style="text-align: center;" |$500 |
||
| − | | style="text-align: center;" |$4,500 |
+ | | colspan="2" style="text-align: center;" |$4,500 |
|- |
|- |
||
|Armor Upgrade 40% |
|Armor Upgrade 40% |
||
| style="text-align: center;" |$1,250 |
| style="text-align: center;" |$1,250 |
||
| − | | style="text-align: center;" |$7,500 |
+ | | colspan="2" style="text-align: center;" |$7,500 |
|- |
|- |
||
|Armor Upgrade 60% |
|Armor Upgrade 60% |
||
| style="text-align: center;" |$2,000 |
| style="text-align: center;" |$2,000 |
||
| − | | style="text-align: center;" |$12,000 |
+ | | colspan="2" style="text-align: center;" |$12,000 |
|- |
|- |
||
|Armor Upgrade 80% |
|Armor Upgrade 80% |
||
| style="text-align: center;" |$3,500 |
| style="text-align: center;" |$3,500 |
||
| − | | style="text-align: center;" |$21,000 |
+ | | colspan="2" style="text-align: center;" |$21,000 |
|- |
|- |
||
|Armor Upgrade 100% |
|Armor Upgrade 100% |
||
| style="text-align: center;" |$5,000 |
| style="text-align: center;" |$5,000 |
||
| − | | style="text-align: center;" |$30,000 |
+ | | colspan="2" style="text-align: center;" |$30,000 |
| + | |- |
||
| + | | colspan="2" rowspan="4" |Brakes |
||
| + | |Stock Brakes |
||
| + | | style="text-align: center;" |$100 |
||
| + | | colspan="2" style="text-align: center;" |$200 |
||
|- |
|- |
||
| − | |rowspan="3"|Brakes |
||
|Street Brakes |
|Street Brakes |
||
| style="text-align: center;" |$2,000 |
| style="text-align: center;" |$2,000 |
||
| − | | style="text-align: center;" |$4,000 |
+ | | colspan="2" style="text-align: center;" |$4,000 |
|- |
|- |
||
|Sport Brakes |
|Sport Brakes |
||
| style="text-align: center;" |$2,700 |
| style="text-align: center;" |$2,700 |
||
| − | | style="text-align: center;" |$5,400 |
+ | | colspan="2" style="text-align: center;" |$5,400 |
|- |
|- |
||
|Race Brakes |
|Race Brakes |
||
| style="text-align: center;" |$3,500 |
| style="text-align: center;" |$3,500 |
||
| − | | style="text-align: center;" |$7,000 |
+ | | colspan="2" style="text-align: center;" |$7,000 |
|- |
|- |
||
| − | |rowspan="4"|Engine |
+ | | colspan="2" rowspan="4" |Engine |
|EMS Upgrade, Level 1 |
|EMS Upgrade, Level 1 |
||
| style="text-align: center;" |$900 |
| style="text-align: center;" |$900 |
||
| − | | style="text-align: center;" |$1,800 |
+ | | colspan="2" style="text-align: center;" |$1,800 |
|- |
|- |
||
|EMS Upgrade, Level 2 |
|EMS Upgrade, Level 2 |
||
| style="text-align: center;" |$1,250 |
| style="text-align: center;" |$1,250 |
||
| − | | style="text-align: center;" |$2,500 |
+ | | colspan="2" style="text-align: center;" |$2,500 |
|- |
|- |
||
|EMS Upgrade, Level 3 |
|EMS Upgrade, Level 3 |
||
| style="text-align: center;" |$1,800 |
| style="text-align: center;" |$1,800 |
||
| − | | style="text-align: center;" |$3,600 |
+ | | colspan="2" style="text-align: center;" |$3,600 |
|- |
|- |
||
|EMS Upgrade, Level 4 |
|EMS Upgrade, Level 4 |
||
| style="text-align: center;" |$3,350 |
| style="text-align: center;" |$3,350 |
||
| − | | style="text-align: center;" |$6,700 |
+ | | colspan="2" style="text-align: center;" |$6,700 |
| + | |- |
||
| + | | colspan="2" rowspan="2" |[[Car Bomb|Explosives]] |
||
| + | |Ignition Bomb |
||
| + | | style="text-align: center;" |N/A |
||
| + | | colspan="2" style="text-align: center;" |$5,000 |
||
| + | |- |
||
| + | |Remote Bomb |
||
| + | | style="text-align: center;" |N/A |
||
| + | | colspan="2" style="text-align: center;" |$7,500 |
||
| + | |- |
||
| + | | colspan="2" rowspan="2" |Fenders <small><sup>E</sup></small> |
||
| + | |Stock Left Fender |
||
| + | | style="text-align: center;" |$150 |
||
| + | | style="text-align: center;" |$300 |
||
| + | |[[File:Picador-GTAOe-Fenders-StockLeftFender.png|thumb|center|220px]] |
||
| + | |- |
||
| + | |Flat Front Fenders |
||
| + | | style="text-align: center;" |$450 |
||
| + | | style="text-align: center;" |$900 |
||
| + | |[[File:Picador-GTAOe-Fenders-FlatFrontFenders.png|thumb|center|220px]] |
||
| + | |- |
||
| + | | colspan="2" rowspan="3" |Headlight Covers <small><sup>E</sup></small> |
||
| + | |No Headlight Covers |
||
| + | | style="text-align: center;" |$100 |
||
| + | | style="text-align: center;" |$200 |
||
| + | |[[File:Picador-GTAOe-HeadlightCovers-NoHeadlightCovers.png|thumb|center|220px]] |
||
| + | |- |
||
| + | |Red Headlight Covers |
||
| + | | style="text-align: center;" |$375 |
||
| + | | style="text-align: center;" |$750 |
||
| + | |[[File:Picador-GTAOe-HeadlightCovers-RedHeadlightCovers.png|thumb|center|220px]] |
||
| + | |- |
||
| + | |White Headlight Covers |
||
| + | | style="text-align: center;" |$670 |
||
| + | | style="text-align: center;" |$1,340 |
||
| + | |[[File:Picador-GTAOe-HeadlightCovers-WhiteHeadlightCovers.png|thumb|center|220px]] |
||
| + | |- |
||
| + | | colspan="2" rowspan="5" |Hoods <small><sup>E</sup></small> |
||
| + | |Stock Hood |
||
| + | | style="text-align: center;" |$800 |
||
| + | | style="text-align: center;" |$300 |
||
| + | |[[File:Picador-GTAOe-Hoods-StockHood.png|thumb|center|220px]] |
||
| + | |- |
||
| + | |Vent Delete |
||
| + | | style="text-align: center;" |$1,500 |
||
| + | | style="text-align: center;" |$650 |
||
| + | |[[File:Picador-GTAOe-Hoods-VentDelete.png|thumb|center|220px]] |
||
| + | |- |
||
| + | |Rear Vents |
||
| + | | style="text-align: center;" |$2,500 |
||
| + | | style="text-align: center;" |$1,500 |
||
| + | |[[File:Picador-GTAOe-Hoods-RearVents.png|thumb|center|220px]] |
||
| + | |- |
||
| + | |Tuner Hood |
||
| + | | style="text-align: center;" |$4,000 |
||
| + | | style="text-align: center;" |$1,750 |
||
| + | |[[File:Picador-GTAOe-Hoods-TunerHood.png|thumb|center|220px]] |
||
| + | |- |
||
| + | |Race Hood |
||
| + | | style="text-align: center;" |$4,800 |
||
| + | | style="text-align: center;" |$2,000 |
||
| + | |[[File:Picador-GTAOe-Hoods-RaceHood.png|thumb|center|220px]] |
||
| + | |- |
||
| + | | colspan="2" |Horns |
||
| + | |''Main article: [[Los Santos Customs/Horns]]'' |
||
| + | | style="text-align: center;" | - |
||
| + | | colspan="2" style="text-align: center;" | - |
||
| + | |- |
||
| + | | rowspan="3" |Lights |
||
| + | | rowspan="2" |Headlights |
||
| + | |Stock Lights |
||
| + | | style="text-align: center;" |$100 |
||
| + | | colspan="2" style="text-align: center;" |$200 |
||
|- |
|- |
||
| − | | rowspan="2" |Lights |
||
|Xenon Lights |
|Xenon Lights |
||
| style="text-align: center;" |$300 |
| style="text-align: center;" |$300 |
||
| − | | style="text-align: center;" |$3,000 |
+ | | colspan="2" style="text-align: center;" |$3,000 |
|- |
|- |
||
| + | |Neon Kits |
||
| − | |<div class="mw-collapsible mw-collapsed" style="width:100%"> |
||
| + | |''Main article: [[Los Santos Customs/Lights]]'' |
||
| − | <div class="mw-collapsible-content"> |
||
| − | {{Main|Los Santos Customs/Lights}} |
||
| − | </div> |
||
| − | </div> |
||
| − | | style="text-align: center;" | - |
||
| style="text-align: center;" | - |
| style="text-align: center;" | - |
||
| + | | colspan="2" style="text-align: center;" | - |
||
| + | |- |
||
| + | | colspan="2" rowspan="11" |Livery <small><sup>E</sup></small> |
||
| + | |None |
||
| + | | style="text-align: center;" |$350 |
||
| + | | style="text-align: center;" |$11,400 |
||
| + | |[[File:Picador-GTAOe-LiveryFront-None.png|thumb|center|220px|<small>([[:File:Picador-GTAOe-LiveryRear-None.png|Rear quarter view]])</small>]] |
||
| + | |- |
||
| + | |White Stripes |
||
| + | | style="text-align: center;" |$350 |
||
| + | | style="text-align: center;" |$18,240 |
||
| + | |[[File:Picador-GTAOe-LiveryFront-WhiteStripes.png|thumb|center|220px|<small>([[:File:Picador-GTAOe-LiveryRear-WhiteStripes.png|Rear quarter view]])</small>]] |
||
| + | |- |
||
| + | |Red Stripes |
||
| + | | style="text-align: center;" |$350 |
||
| + | | style="text-align: center;" |$19,380 |
||
| + | |[[File:Picador-GTAOe-LiveryFront-RedStripes.png|thumb|center|220px|<small>([[:File:Picador-GTAOe-LiveryRear-RedStripes.png|Rear quarter view]])</small>]] |
||
| + | |- |
||
| + | |[[Bullhead]] Racing |
||
| + | | style="text-align: center;" |$350 |
||
| + | | style="text-align: center;" |$20,520 |
||
| + | |[[File:Picador-GTAOe-LiveryFront-BullheadRacing.png|thumb|center|220px|<small>([[:File:Picador-GTAOe-LiveryRear-BullheadRacing.png|Rear quarter view]])</small>]] |
||
| + | |- |
||
| + | |[[Amigas]] Racing |
||
| + | | style="text-align: center;" |$350 |
||
| + | | style="text-align: center;" |$21,660 |
||
| + | |[[File:Picador-GTAOe-LiveryFront-AmigasRacing.png|thumb|center|220px|<small>([[:File:Picador-GTAOe-LiveryRear-AmigasRacing.png|Rear quarter view]])</small>]] |
||
| + | |- |
||
| + | |Pinstripes |
||
| + | | style="text-align: center;" |$350 |
||
| + | | style="text-align: center;" |$22,800 |
||
| + | |[[File:Picador-GTAOe-LiveryFront-Pinstripes.png|thumb|center|220px|<small>([[:File:Picador-GTAOe-LiveryRear-Pinstripes.png|Rear quarter view]])</small>]] |
||
| + | |- |
||
| + | |Flaming Angel |
||
| + | | style="text-align: center;" |$350 |
||
| + | | style="text-align: center;" |$23,370 |
||
| + | |[[File:Picador-GTAOe-LiveryFront-FlamingAngel.png|thumb|center|220px|<small>([[:File:Picador-GTAOe-LiveryRear-FlamingAngel.png|Rear quarter view]])</small>]] |
||
| + | |- |
||
| + | |Flaming Lowrider |
||
| + | | style="text-align: center;" |$350 |
||
| + | | style="text-align: center;" |$23,939 |
||
| + | |[[File:Picador-GTAOe-LiveryFront-FlamingLowrider.png|thumb|center|220px|<small>([[:File:Picador-GTAOe-LiveryRear-FlamingLowrider.png|Rear quarter view]])</small>]] |
||
| + | |- |
||
| + | |[[Ragga Rum]] |
||
| + | | style="text-align: center;" |$350 |
||
| + | | style="text-align: center;" |$24,510 |
||
| + | |[[File:Picador-GTAOe-LiveryFront-RaggaRum.png|thumb|center|220px|<small>([[:File:Picador-GTAOe-LiveryRear-RaggaRum.png|Rear quarter view]])</small>]] |
||
| + | |- |
||
| + | |Vampire Lowrider |
||
| + | | style="text-align: center;" |$350 |
||
| + | | style="text-align: center;" |$25,080 |
||
| + | |[[File:Picador-GTAOe-LiveryFront-VampireLowrider.png|thumb|center|220px|<small>([[:File:Picador-GTAOe-LiveryRear-VampireLowrider.png|Rear quarter view]])</small>]] |
||
| + | |- |
||
| + | |Floral Lowrider |
||
| + | | style="text-align: center;" |$350 |
||
| + | | style="text-align: center;" |$25,650 |
||
| + | |[[File:Picador-GTAOe-LiveryFront-FloralLowrider.png|thumb|center|220px|<small>([[:File:Picador-GTAOe-LiveryRear-FloralLowrider.png|Rear quarter view]])</small>]] |
||
|- |
|- |
||
| − | |rowspan="2"|Loss/Theft Prevention |
+ | | colspan="2" rowspan="2" |Loss/Theft Prevention |
|Tracker |
|Tracker |
||
| style="text-align: center;" |N/A |
| style="text-align: center;" |N/A |
||
| − | | style="text-align: center;" |$2,000 |
+ | | colspan="2" style="text-align: center;" |$2,000 |
|- |
|- |
||
|Full Coverage |
|Full Coverage |
||
| style="text-align: center;" |N/A |
| style="text-align: center;" |N/A |
||
| − | | style="text-align: center;" |$1,125 |
+ | | colspan="2" style="text-align: center;" |$1,125 |
|- |
|- |
||
| + | | colspan="2" rowspan="5" |Plates |
||
| − | |rowspan="2"|Respray |
||
| + | |Blue on White 1 |
||
| − | |<div class="mw-collapsible mw-collapsed" style="width:100%"> |
||
| + | | style="text-align: center;" |$50 |
||
| − | <div class="mw-collapsible-content"> |
||
| + | | colspan="2" style="text-align: center;" |$200 |
||
| − | {{ResprayColorsExpand}} |
||
| + | |- |
||
| − | </div> |
||
| + | |Blue on White 2 |
||
| − | </div> |
||
| − | | style="text-align: center;" | |
+ | | style="text-align: center;" |$50 |
| + | | colspan="2" style="text-align: center;" |$200 |
||
| + | |- |
||
| + | |Blue on White 3 |
||
| + | | style="text-align: center;" |$50 |
||
| + | | colspan="2" style="text-align: center;" |$200 |
||
| + | |- |
||
| + | |Yellow on Blue |
||
| + | | style="text-align: center;" |$75 |
||
| + | | colspan="2" style="text-align: center;" |$300 |
||
| + | |- |
||
| + | |Yellow on Black |
||
| + | | style="text-align: center;" |$150 |
||
| + | | colspan="2" style="text-align: center;" |$600 |
||
| + | |- |
||
| + | | colspan="2" rowspan="10" |Rear Covers <small><sup>E</sup></small> |
||
| + | |Stock Rear Cover |
||
| + | | style="text-align: center;" |$350 |
||
| + | | style="text-align: center;" |$700 |
||
| + | |[[File:Picador-GTAOe-RearCovers-StockRearCover.png|thumb|center|220px]] |
||
| + | |- |
||
| + | |Flat Bedcover |
||
| + | | style="text-align: center;" |$550 |
||
| + | | style="text-align: center;" |$1,100 |
||
| + | |[[File:Picador-GTAOe-RearCovers-FlatBedcover.png|thumb|center|220px]] |
||
| + | |- |
||
| + | |Vinyl Bedcover |
||
| + | | style="text-align: center;" |$675 |
||
| + | | style="text-align: center;" |$1,350 |
||
| + | |[[File:Picador-GTAOe-RearCovers-VinylBedcover.png|thumb|center|220px]] |
||
| + | |- |
||
| + | |Stripped Vinyl Bedcover |
||
| + | | style="text-align: center;" |$750 |
||
| + | | style="text-align: center;" |$1,500 |
||
| + | |[[File:Picador-GTAOe-RearCovers-StrippedVinylBedcover.png|thumb|center|220px]] |
||
| + | |- |
||
| + | |Outer Cage |
||
| + | | style="text-align: center;" |$1,375 |
||
| + | | style="text-align: center;" |$2,750 |
||
| + | |[[File:Picador-GTAOe-RearCovers-OuterCage.png|thumb|center|220px]] |
||
| + | |- |
||
| + | |Outer Cage Braced |
||
| + | | style="text-align: center;" |$2,300 |
||
| + | | style="text-align: center;" |$3,600 |
||
| + | |[[File:Picador-GTAOe-RearCovers-OuterCageBraced.png|thumb|center|220px]] |
||
| + | |- |
||
| + | |Small Stature Cage |
||
| + | | style="text-align: center;" |$2,450 |
||
| + | | style="text-align: center;" |$4,900 |
||
| + | |[[File:Picador-GTAOe-RearCovers-SmallStatureCage.png|thumb|center|220px]] |
||
| + | |- |
||
| + | |Rally Set up |
||
| + | | style="text-align: center;" |$2,900 |
||
| + | | style="text-align: center;" |$5,800 |
||
| + | |[[File:Picador-GTAOe-RearCovers-RallySetup.png|thumb|center|220px]] |
||
| + | |- |
||
| + | |Heavy Duty Cage |
||
| + | | style="text-align: center;" |$3,500 |
||
| + | | style="text-align: center;" |$7,000 |
||
| + | |[[File:Picador-GTAOe-RearCovers-HeavyDutyCage.png|thumb|center|220px]] |
||
| + | |- |
||
| + | |Full Set Up |
||
| + | | style="text-align: center;" |$4,000 |
||
| + | | style="text-align: center;" |$8,000 |
||
| + | |[[File:Picador-GTAOe-RearCovers-FullSetUp.png|thumb|center|220px]] |
||
| + | |- |
||
| + | | colspan="2" |Respray |
||
| + | |''Main article: [[Los Santos Customs/Respray Colors]]'' |
||
| style="text-align: center;" | - |
| style="text-align: center;" | - |
||
| + | | colspan="2" style="text-align: center;" | - |
||
|- |
|- |
||
| + | | colspan="2" rowspan="4" |Roll Cages <small><sup>E</sup></small> |
||
| − | |Crew Emblem |
||
| + | |No Roll Cage |
||
| − | | style="text-align: center;" |N/A |
||
| − | | style="text-align: center;" |$ |
+ | | style="text-align: center;" |$350 |
| + | | style="text-align: center;" |$700 |
||
| + | |[[File:Picador-GTAOe-RollCages-NoRollCage.png|thumb|center|220px]] |
||
| + | |- |
||
| + | |Half Cage |
||
| + | | style="text-align: center;" |$550 |
||
| + | | style="text-align: center;" |$1,100 |
||
| + | |[[File:Picador-GTAOe-RollCages-HalfCage.png|thumb|center|220px]] |
||
| + | |- |
||
| + | |Full Cage |
||
| + | | style="text-align: center;" |$675 |
||
| + | | style="text-align: center;" |$1,350 |
||
| + | |[[File:Picador-GTAOe-RollCages-FullCage.png|thumb|center|220px]] |
||
| + | |- |
||
| + | |Padded Full Cage |
||
| + | | style="text-align: center;" |$750 |
||
| + | | style="text-align: center;" |$1,500 |
||
| + | |[[File:Picador-GTAOe-RollCages-PaddedFullCage.png|thumb|center|220px]] |
||
| + | |- |
||
| + | | colspan="2" rowspan="4" |Roofs <small><sup>E</sup></small> |
||
| + | |Stock Roof |
||
| + | | style="text-align: center;" |$100 |
||
| + | | style="text-align: center;" |$200 |
||
| + | |[[File:Picador-GTAOe-Roofs-StockRoof.png|thumb|center|220px]] |
||
| + | |- |
||
| + | |Roof Scoop |
||
| + | | style="text-align: center;" |$350 |
||
| + | | style="text-align: center;" |$700 |
||
| + | |[[File:Picador-GTAOe-Roofs-RoofScoop.png|thumb|center|220px]] |
||
| + | |- |
||
| + | |Tuner Roof Scoop |
||
| + | | style="text-align: center;" |$575 |
||
| + | | style="text-align: center;" |$1,150 |
||
| + | |[[File:Picador-GTAOe-Roofs-TunerRoofScoop.png|thumb|center|220px]] |
||
| + | |- |
||
| + | |Race Roof Scoop |
||
| + | | style="text-align: center;" |$800 |
||
| + | | style="text-align: center;" |$1,600 |
||
| + | |[[File:Picador-GTAOe-Roofs-RaceRoofScoop.png|thumb|center|220px]] |
||
|- |
|- |
||
| − | |Sell |
+ | | colspan="2" |Sell |
|Sell Vehicle |
|Sell Vehicle |
||
| style="text-align: center;" |N/A |
| style="text-align: center;" |N/A |
||
| + | | colspan="2" style="text-align: center;" |$900 |
||
| + | |- |
||
| + | | colspan="2" rowspan="2" |Skirts <small><sup>E</sup></small> |
||
| + | |Stock Skirts |
||
| + | | style="text-align: center;" |$1,250 |
||
| + | | style="text-align: center;" |$600 |
||
| + | |[[File:Picador-GTAOe-Skirts-StockSkirts.png|thumb|center|220px]] |
||
| + | |- |
||
| + | |Wing Flames |
||
| + | | style="text-align: center;" |$1,500 |
||
| + | | style="text-align: center;" |$830 |
||
| + | |[[File:Picador-GTAOe-Skirts-WingFlames.png|thumb|center|220px]] |
||
| + | |- |
||
| + | | colspan="2" rowspan="9" |Splitters <small><sup>E</sup></small> |
||
| + | |Stock Splitter |
||
| + | | style="text-align: center;" |$100 |
||
| + | | style="text-align: center;" |$200 |
||
| + | |[[File:Picador-GTAOe-Splitters-StockSplitter.png|thumb|center|220px]] |
||
| + | |- |
||
| + | |Secondary Splitter |
||
| + | | style="text-align: center;" |$375 |
||
| + | | style="text-align: center;" |$750 |
||
| + | |[[File:Picador-GTAOe-Splitters-SecondarySplitter.png|thumb|center|220px]] |
||
| + | |- |
||
| + | |Tuner Splitter |
||
| + | | style="text-align: center;" |$670 |
||
| + | | style="text-align: center;" |$1,340 |
||
| + | |[[File:Picador-GTAOe-Splitters-TunerSplitter.png|thumb|center|220px]] |
||
| + | |- |
||
| + | |Tuner Splitter Alt |
||
| + | | style="text-align: center;" |$825 |
||
| + | | style="text-align: center;" |$1,650 |
||
| + | |[[File:Picador-GTAOe-Splitters-TunerSplitterAlt.png|thumb|center|220px]] |
||
| + | |- |
||
| + | |Street Splitter |
||
| + | | style="text-align: center;" |$1,500 |
||
| + | | style="text-align: center;" |$3,000 |
||
| + | |[[File:Picador-GTAOe-Splitters-StreetSplitter.png|thumb|center|220px]] |
||
| + | |- |
||
| + | |Secondary Race Splitter |
||
| + | | style="text-align: center;" |$1,600 |
||
| + | | style="text-align: center;" |$3,200 |
||
| + | |[[File:Picador-GTAOe-Splitters-SecondaryRaceSplitter.png|thumb|center|220px]] |
||
| + | |- |
||
| + | |Primary Race Splitter |
||
| + | | style="text-align: center;" |$350 |
||
| + | | style="text-align: center;" |$3,650 |
||
| + | |[[File:Picador-GTAOe-Splitters-PrimaryRaceSplitter.png|thumb|center|220px]] |
||
| + | |- |
||
| + | |Secondary Snowplow Splitter |
||
| + | | style="text-align: center;" |$350 |
||
| + | | style="text-align: center;" |$4,100 |
||
| + | |[[File:Picador-GTAOe-Splitters-SecondarySnowplowSplitter.png|thumb|center|220px]] |
||
| + | |- |
||
| + | |Primary Snowplow Splitter |
||
| + | | style="text-align: center;" |$350 |
||
| + | | style="text-align: center;" |$4,550 |
||
| + | |[[File:Picador-GTAOe-Splitters-PrimarySnowplowSplitter.png|thumb|center|220px]] |
||
| + | |- |
||
| + | | colspan="2" rowspan="7" |Spoilers <small><sup>E</sup></small> |
||
| + | |None |
||
| + | | style="text-align: center;" |$3,000 |
||
| + | | style="text-align: center;" |$300 |
||
| + | |[[File:Picador-GTAOe-Spoilers-None.png|thumb|center|220px]] |
||
| + | |- |
||
| + | |Boot Lip Spoiler |
||
| + | | style="text-align: center;" |$3,750 |
||
| + | | style="text-align: center;" |$550 |
||
| + | |[[File:Picador-GTAOe-Spoilers-BootLipSpoiler.png|thumb|center|220px]] |
||
| + | |- |
||
| + | |Medium Boot Lip Spoiler |
||
| + | | style="text-align: center;" |$5,000 |
||
| + | | style="text-align: center;" |$700 |
||
| + | |[[File:Picador-GTAOe-Spoilers-MediumBootLipSpoiler.png|thumb|center|220px]] |
||
| + | |- |
||
| + | |Large Boot Lip Spoiler |
||
| + | | style="text-align: center;" |$6,500 |
||
| + | | style="text-align: center;" |$1,050 |
||
| + | |[[File:Picador-GTAOe-Spoilers-LargeBootLipSpoiler.png|thumb|center|220px]] |
||
| + | |- |
||
| + | |Tuner Wing |
||
| + | | style="text-align: center;" |$7,000 |
||
| + | | style="text-align: center;" |$1,500 |
||
| + | |[[File:Picador-GTAOe-Spoilers-TunerWing.png|thumb|center|220px]] |
||
| + | |- |
||
| + | |Street Wing |
||
| + | | style="text-align: center;" |$8,000 |
||
| + | | style="text-align: center;" |$2,000 |
||
| + | |[[File:Picador-GTAOe-Spoilers-StreetWing.png|thumb|center|220px]] |
||
| + | |- |
||
| + | |Race Wing |
||
| + | | style="text-align: center;" |$8,500 |
||
| + | | style="text-align: center;" |$2,300 |
||
| + | |[[File:Picador-GTAOe-Spoilers-RaceWing.png|thumb|center|220px]] |
||
| + | |- |
||
| + | | colspan="2" rowspan="9" |Sunstrips <small><sup>E</sup></small> |
||
| + | |None |
||
| + | | style="text-align: center;" |$150 |
||
| + | | style="text-align: center;" |$200 |
||
| + | |[[File:Picador-GTAOe-Sunstrips-None.png|thumb|center|220px]] |
||
| + | |- |
||
| + | |Primary Sunstrip |
||
| + | | style="text-align: center;" |$450 |
||
| style="text-align: center;" |$900 |
| style="text-align: center;" |$900 |
||
| + | |[[File:Picador-GTAOe-Sunstrips-PrimarySunstrip.png|thumb|center|220px]] |
||
| + | |- |
||
| + | |Plastic Sunstrip |
||
| + | | style="text-align: center;" |$750 |
||
| + | | style="text-align: center;" |$1,500 |
||
| + | |[[File:Picador-GTAOe-Sunstrips-PlasticSunstrip.png|thumb|center|220px]] |
||
| + | |- |
||
| + | |White [[Fukaru]] Sunstrip |
||
| + | | style="text-align: center;" |$850 |
||
| + | | style="text-align: center;" |$1,650 |
||
| + | |[[File:Picador-GTAOe-Sunstrips-WhiteFukaruSunstrip.png|thumb|center|220px]] |
||
| + | |- |
||
| + | |Black Fukaru Sunstrip |
||
| + | | style="text-align: center;" |$950 |
||
| + | | style="text-align: center;" |$3,000 |
||
| + | |[[File:Picador-GTAOe-Sunstrips-BlackFukaruSunstrip.png|thumb|center|220px]] |
||
| + | |- |
||
| + | |White [[Meinmacht]] Sunstrip |
||
| + | | style="text-align: center;" |$1,000 |
||
| + | | style="text-align: center;" |$3,200 |
||
| + | |[[File:Picador-GTAOe-Sunstrips-WhiteMeinmachtSunstrip.png|thumb|center|220px]] |
||
| + | |- |
||
| + | |Black Meinmacht Sunstrip |
||
| + | | style="text-align: center;" |$1,050 |
||
| + | | style="text-align: center;" |$3,650 |
||
| + | |[[File:Picador-GTAOe-Sunstrips-BlackMeinmachtSunstrip.png|thumb|center|220px]] |
||
| + | |- |
||
| + | |White [[Power Metal|Powermetal]] Sunstrip |
||
| + | | style="text-align: center;" |$1,100 |
||
| + | | style="text-align: center;" |$4,100 |
||
| + | |[[File:Picador-GTAOe-Sunstrips-WhitePowermetalSunstrip.png|thumb|center|220px]] |
||
| + | |- |
||
| + | |Black Powermetal Sunstrip |
||
| + | | style="text-align: center;" |$1,150 |
||
| + | | style="text-align: center;" |$4,550 |
||
| + | |[[File:Picador-GTAOe-Sunstrips-BlackPowermetalSunstrip.png|thumb|center|220px]] |
||
| + | |- |
||
| + | | colspan="2" rowspan="5" |Suspension <small><sup>E</sup></small> |
||
| + | |Stock Suspension |
||
| + | | style="text-align: center;" |$100 |
||
| + | | colspan="2" style="text-align: center;" |$200 |
||
| + | |- |
||
| + | |Lowered Suspension |
||
| + | | style="text-align: center;" |$500 |
||
| + | | colspan="2" style="text-align: center;" |$1,000 |
||
| + | |- |
||
| + | |Street Suspension |
||
| + | | style="text-align: center;" |$1,000 |
||
| + | | colspan="2" style="text-align: center;" |$2,000 |
||
| + | |- |
||
| + | |Sport Suspension |
||
| + | | style="text-align: center;" |$1,700 |
||
| + | | colspan="2" style="text-align: center;" |$3,400 |
||
| + | |- |
||
| + | |Competition Suspension |
||
| + | | style="text-align: center;" |$2,200 |
||
| + | | colspan="2" style="text-align: center;" |$4,400 |
||
| + | |- |
||
| + | | colspan="2" rowspan="4" |Transmission |
||
| + | |Stock Transmission |
||
| + | | style="text-align: center;" |$100 |
||
| + | | colspan="2" style="text-align: center;" |$200 |
||
|- |
|- |
||
| − | |rowspan="3"|Transmission |
||
|Street Transmission |
|Street Transmission |
||
| style="text-align: center;" |$2,950 |
| style="text-align: center;" |$2,950 |
||
| − | | style="text-align: center;" |$5,900 |
+ | | colspan="2" style="text-align: center;" |$5,900 |
|- |
|- |
||
|Sports Transmission |
|Sports Transmission |
||
| style="text-align: center;" |$3,250 |
| style="text-align: center;" |$3,250 |
||
| − | | style="text-align: center;" |$6,500 |
+ | | colspan="2" style="text-align: center;" |$6,500 |
|- |
|- |
||
|Race Transmission |
|Race Transmission |
||
| style="text-align: center;" |$4,000 |
| style="text-align: center;" |$4,000 |
||
| − | | style="text-align: center;" |$8,000 |
+ | | colspan="2" style="text-align: center;" |$8,000 |
| + | |- |
||
| + | | colspan="2" rowspan="2" |Turbo |
||
| + | |None |
||
| + | | style="text-align: center;" |$500 |
||
| + | | colspan="2" style="text-align: center;" |$1,000 |
||
|- |
|- |
||
| − | |Turbo |
||
|Turbo Tuning |
|Turbo Tuning |
||
| style="text-align: center;" |$2,500 |
| style="text-align: center;" |$2,500 |
||
| − | | style="text-align: center;" |$30,000 |
+ | | colspan="2" style="text-align: center;" |$30,000 |
|- |
|- |
||
| − | |Wheels |
+ | | colspan="2" |Wheels |
| + | |''Main article: [[Los Santos Customs/Wheels]]'' |
||
| − | |<div class="mw-collapsible mw-collapsed" style="width:100%"> |
||
| − | <div class="mw-collapsible-content"> |
||
| − | {{WheelsExpand}} |
||
| − | </div> |
||
| − | </div> |
||
| − | | style="text-align: center;" | - |
||
| style="text-align: center;" | - |
| style="text-align: center;" | - |
||
| + | | colspan="2" style="text-align: center;" | - |
||
| + | |- |
||
| + | | colspan="2" rowspan="4" |Windows |
||
| + | |None |
||
| + | | style="text-align: center;" |$100 |
||
| + | | colspan="2" style="text-align: center;" |$500 |
||
|- |
|- |
||
| − | |rowspan="3"|Windows |
||
|Light Smoke |
|Light Smoke |
||
| style="text-align: center;" |$200 |
| style="text-align: center;" |$200 |
||
| − | | style="text-align: center;" |$1,500 |
+ | | colspan="2" style="text-align: center;" |$1,500 |
|- |
|- |
||
|Dark Smoke |
|Dark Smoke |
||
| style="text-align: center;" |$450 |
| style="text-align: center;" |$450 |
||
| − | | style="text-align: center;" |$3,500 |
+ | | colspan="2" style="text-align: center;" |$3,500 |
|- |
|- |
||
|Limo |
|Limo |
||
| style="text-align: center;" |$700 |
| style="text-align: center;" |$700 |
||
| − | | style="text-align: center;" |$5,000 |
+ | | colspan="2" style="text-align: center;" |$5,000 |
|} |
|} |
||
| − | == |
+ | ==Gallery== |
===''Grand Theft Auto: San Andreas''=== |
===''Grand Theft Auto: San Andreas''=== |
||
| − | <gallery position="center"> |
+ | <gallery position="center" spacing="small" widths="270px"> |
| + | Picador-GTASA-planks-front.png|A '''Picador''' carrying planks. <small>([[:File:Picador-GTASA-planks-rear.png|Rear quarter view]])</small> |
||
| − | Picador-GTASA-Sideview.jpg|Side view. |
||
| − | Picador-GTASA-Front&Side.jpg|A '''Picador'''. |
||
</gallery> |
</gallery> |
||
| − | ===''Grand Theft Auto V''=== |
+ | ===''Grand Theft Auto V'' and ''Online''=== |
| − | <gallery position="center"> |
+ | <gallery position="center" spacing="small"> |
Picador-GTAV.png|The '''Picador''' as seen in the ''GTA V'' trailer "Franklin". |
Picador-GTAV.png|The '''Picador''' as seen in the ''GTA V'' trailer "Franklin". |
||
GTA_V_Picador_Rear_Right.png|Rear view of the '''Picador''' as seen in the ''GTA V'' trailer "Franklin". |
GTA_V_Picador_Rear_Right.png|Rear view of the '''Picador''' as seen in the ''GTA V'' trailer "Franklin". |
||
| − | Picador-GTAV-RSC.jpg|The '''Picador''' on |
+ | Picador-GTAV-RSC.jpg|The '''Picador''' on [[Rockstar Games Social Club]]. |
| + | Picador-GTAO-RGSC2.jpg|The '''Picador''' on the updated [[Rockstar Games Social Club]]. |
||
| − | ChevalPicador-Front-GTAV.png|''GTA V''. (<small>[[:Image:ChevalPicador-Rear-GTAV.png|Rear quarter view]]</small>). |
||
| + | Picador-GTAV-RGSC.jpg|The '''Picador''' in the cinematic preview on the ''Grand Theft Auto V'' [[Rockstar Games Social Club]]. |
||
| + | Picador-GTAO-RGSC3.jpg|The '''Picador''' in the cinematic preview on the ''Grand Theft Auto Online'' [[Rockstar Games Social Club]]. |
||
| + | ChevalPicador-Front-GTAV.png|The '''Picador''' in the original version of ''GTA V'' (<small>[[:File:ChevalPicador-Rear-GTAV.png|Rear quarter view]]</small>). |
||
| + | Picador-GTAV-front.png|The '''Picador''' in ''GTA V'', prior to [[GTA Online: The Criminal Enterprises|The Criminal Enterprises]] update; note the lack of visible seams around the doors and hood (<small>[[:File:Picador-GTAV-rear.png|Rear quarter view]]</small>). |
||
| + | Picador-GTAV-SSASA.png|The '''Picador''' on [[Southern San Andreas Super Autos]]. |
||
</gallery> |
</gallery> |
||
==Variants== |
==Variants== |
||
{{Variant |
{{Variant |
||
| − | |float = |
+ | |float = |
|title = Marshall |
|title = Marshall |
||
| − | |games = Grand Theft Auto V |
+ | |games = Grand Theft Auto V & Grand Theft Auto Online |
|article_link = Marshall |
|article_link = Marshall |
||
|front_image = MarshallUK-GTAVPC-Front.png |
|front_image = MarshallUK-GTAVPC-Front.png |
||
|rear_image = MarshallUK-GTAVPC-Rear.png |
|rear_image = MarshallUK-GTAVPC-Rear.png |
||
|caption = The '''Marshall''' in ''[[Grand Theft Auto V]]''. |
|caption = The '''Marshall''' in ''[[Grand Theft Auto V]]''. |
||
| − | |description = In the |
+ | |description = In the [[PlayStation 4]], [[Xbox One]], and [[Personal Computer|PC]] versions of the game, there is a monster truck variant of the Picador named the '''Marshall'''. It is essentially a lifted monster truck with the bodywork of a Picador attached to the chassis, powered by a large V8 engine in a mid configuration, powering all four wheels. |
}} |
}} |
||
| Line 400: | Line 855: | ||
==Notable Owners== |
==Notable Owners== |
||
===''Grand Theft Auto: San Andreas''=== |
===''Grand Theft Auto: San Andreas''=== |
||
| − | *[[Ryder]] owns |
+ | *[[Ryder]] owns an all-brown Picador with a license plate reading "SHERM" and he uses it in some missions. Even after [[Pier 69 (mission)|his death]], the car still spawns regularly. The bed accessories are still the same as a normal one. |
| + | |||
| + | <gallery position="center" spacing="small" widths="270px"> |
||
| + | Catalyst-GTASA-SS54.png|Ryder's Picador, as seen during the mission [[Catalyst]]. |
||
| + | </gallery> |
||
==Locations== |
==Locations== |
||
===''Grand Theft Auto: San Andreas''=== |
===''Grand Theft Auto: San Andreas''=== |
||
| − | * |
+ | *It can be found around [[Los Santos (3D Universe)|Los Santos]], especially in [[Ocean Docks]] and [[Willowfield]], and other southern districts. |
| − | * |
+ | *It is parked at [[Ryder's House|Ryder's house]] in [[Ganton]], Los Santos, always with an all-brown body. |
| + | **However, if one passes the mission [[House Party]] before the mission [[Catalyst]], the Picador may never spawn again at this spot. |
||
| − | *Rarely found in [[San Fierro (3D Universe)|San Fierro]] and [[Las Venturas]]. |
||
| − | * |
+ | *It is rarely found in [[San Fierro (3D Universe)|San Fierro]] and [[Las Venturas (3D Universe)|Las Venturas]]. |
| + | *It is commonly found in [[Red County]], [[Flint County]] and [[Whetstone]]. |
||
===''Grand Theft Auto V''=== |
===''Grand Theft Auto V''=== |
||
*Can be seen driven around [[Strawberry]]. |
*Can be seen driven around [[Strawberry]]. |
||
*Very common around [[Sandy Shores]] and occasionally [[Harmony]]. |
*Very common around [[Sandy Shores]] and occasionally [[Harmony]]. |
||
| + | |||
| − | *Can be bought online from [[Southern San Andreas Super Autos]] for $9,000. |
||
| + | ===''Grand Theft Auto Online''=== |
||
| + | *Available for purchase from [[Southern San Andreas Super Autos]] for $9,000. |
||
| + | **No longer available in the enhanced versions of the game; [[:Category:Vehicles removed for purchase in GTA Online|removed]] from the website as part of the [[GTA Online: San Andreas Mercenaries|San Andreas Mercenaries]] update. |
||
| + | **However, it can still be stolen from the street and kept by adding the Tracker and Full Coverage (Insurance) modifications at [[Los Santos Customs]]. |
||
| + | |||
| + | ==Events== |
||
| + | ===''Grand Theft Auto Online''=== |
||
| + | *Available to test drive and purchase from the [[Premium Deluxe Motorsport]] showroom for $31,800 during [[SM722 Week]]. |
||
| + | |||
| + | ==Radio Stations== |
||
| + | {{Defaultradioheader|name=Picador}} |
||
| + | {{Defaultradio|game=SA|defaultstation=[[Radio Los Santos]]}} |
||
| + | {{Defaultradio|game=VO|defaultgroup=mexican}} |
||
==Trivia== |
==Trivia== |
||
| − | === |
+ | ===General=== |
| + | *The Spanish name {{WP|Picador}} is a horse-mounted member of a bullfighting crew, which confronts the bull with his pike ("pica", hence the name) during the first third of each bull. Additionally, "Picador" in Spanish may also refer to a vehicle or a person that takes part in "picadas" (slang for drag racing commonly used on Latin America). This makes sense, as the Picador is a muscle car. |
||
| − | *The default radio stations for the Picador are: |
||
| − | **'''''GTA San Andreas'':''' [[Radio Los Santos]]. |
||
| − | **'''''GTA V'':''' [[Rebel Radio]] (or [[East Los FM]] in the [[Varrios Los Aztecas (HD Universe)|Aztecas']] variant). |
||
| − | *The Spanish name [[wp:Picador|Picador]] is a horse-mounted member of a bullfighting crew, which confronts the bull with his pike ("pica", hence the name) during the first third of each bull. Additionally, "Picador" in Spanish may also refer to a vehicle or a person that takes part in "picadas" (slang for drag racing commonly used on Latin America). This makes sense, as the Picador is a muscle car. |
||
===''Grand Theft Auto: San Andreas''=== |
===''Grand Theft Auto: San Andreas''=== |
||
*Ryder's Picador has a license plate reading "SHERM", a slang term for a PCP-immersed Marijuana and Tobacco mixture ([[Carl Johnson|CJ]] calls Ryder "sherm-head" throughout the game). |
*Ryder's Picador has a license plate reading "SHERM", a slang term for a PCP-immersed Marijuana and Tobacco mixture ([[Carl Johnson|CJ]] calls Ryder "sherm-head" throughout the game). |
||
| − | **Only the front plate reads "SHERM". The rear plate is a standard randomized plate. |
+ | **Only the front plate reads "SHERM". The rear plate is a standard randomized plate. This was corrected in the ''Definitive Edition''. |
*The Picador took the place of a [[Sadler]] as Ryder's car of choice [[Beta Releases|during development of the game]].<ref name="Beta Sadler">[http://www.gtasanandreas.net/screenshots/gallery.php?image=29 Ryder's Sadler]</ref> |
*The Picador took the place of a [[Sadler]] as Ryder's car of choice [[Beta Releases|during development of the game]].<ref name="Beta Sadler">[http://www.gtasanandreas.net/screenshots/gallery.php?image=29 Ryder's Sadler]</ref> |
||
| − | *It is one of few cars to have the protagonist driving it during missions while the owner is in the passenger seat. Others include [[Sweet Johnson]]'s [[Greenwood]], [[Big Smoke]]'s black [[Perennial]] (though [[Carl Johnson|CJ]] and Smoke are not seen riding it with CJ in the driver's seat near the ending cutscene of [[Big Smoke ( |
+ | *It is one of few cars to have the protagonist driving it during missions while the owner is in the passenger seat. Others include [[Sweet Johnson]]'s [[Greenwood]], [[Big Smoke]]'s black [[Perennial]] (though [[Carl Johnson|CJ]] and Smoke are not seen riding it with CJ in the driver's seat near the ending cutscene of [[Big Smoke (mission)|Big Smoke's introduction mission]]) and [[Glendale]], [[Cesar Vialpando]]'s red [[Savanna]] (only during the mission [[Photo Opportunity]]), [[Phil Cassidy]]'s [[Walton]] and [[Lance Vance]]'s [[Infernus]]. |
| − | *There is a glitch with Ryder's Picador on the mobile version of ''GTA San Andreas''. After completion of the mission [[Robbing Uncle Sam]], Ryder's Picador will stop spawning. To fix this glitch, turn off the game and wait a few hours while outside his house. If successful, the car will always respawn and the player can steal it |
+ | *There is a glitch with Ryder's Picador on the mobile version of ''GTA San Andreas''. After completion of the mission [[Robbing Uncle Sam]], Ryder's Picador will stop spawning. To fix this glitch, turn off the game and wait a few hours while outside his house. If successful, the car will always respawn and the player can steal it at any time. |
| − | ===''Grand Theft Auto V''=== |
+ | ===''Grand Theft Auto V'' and ''Online''=== |
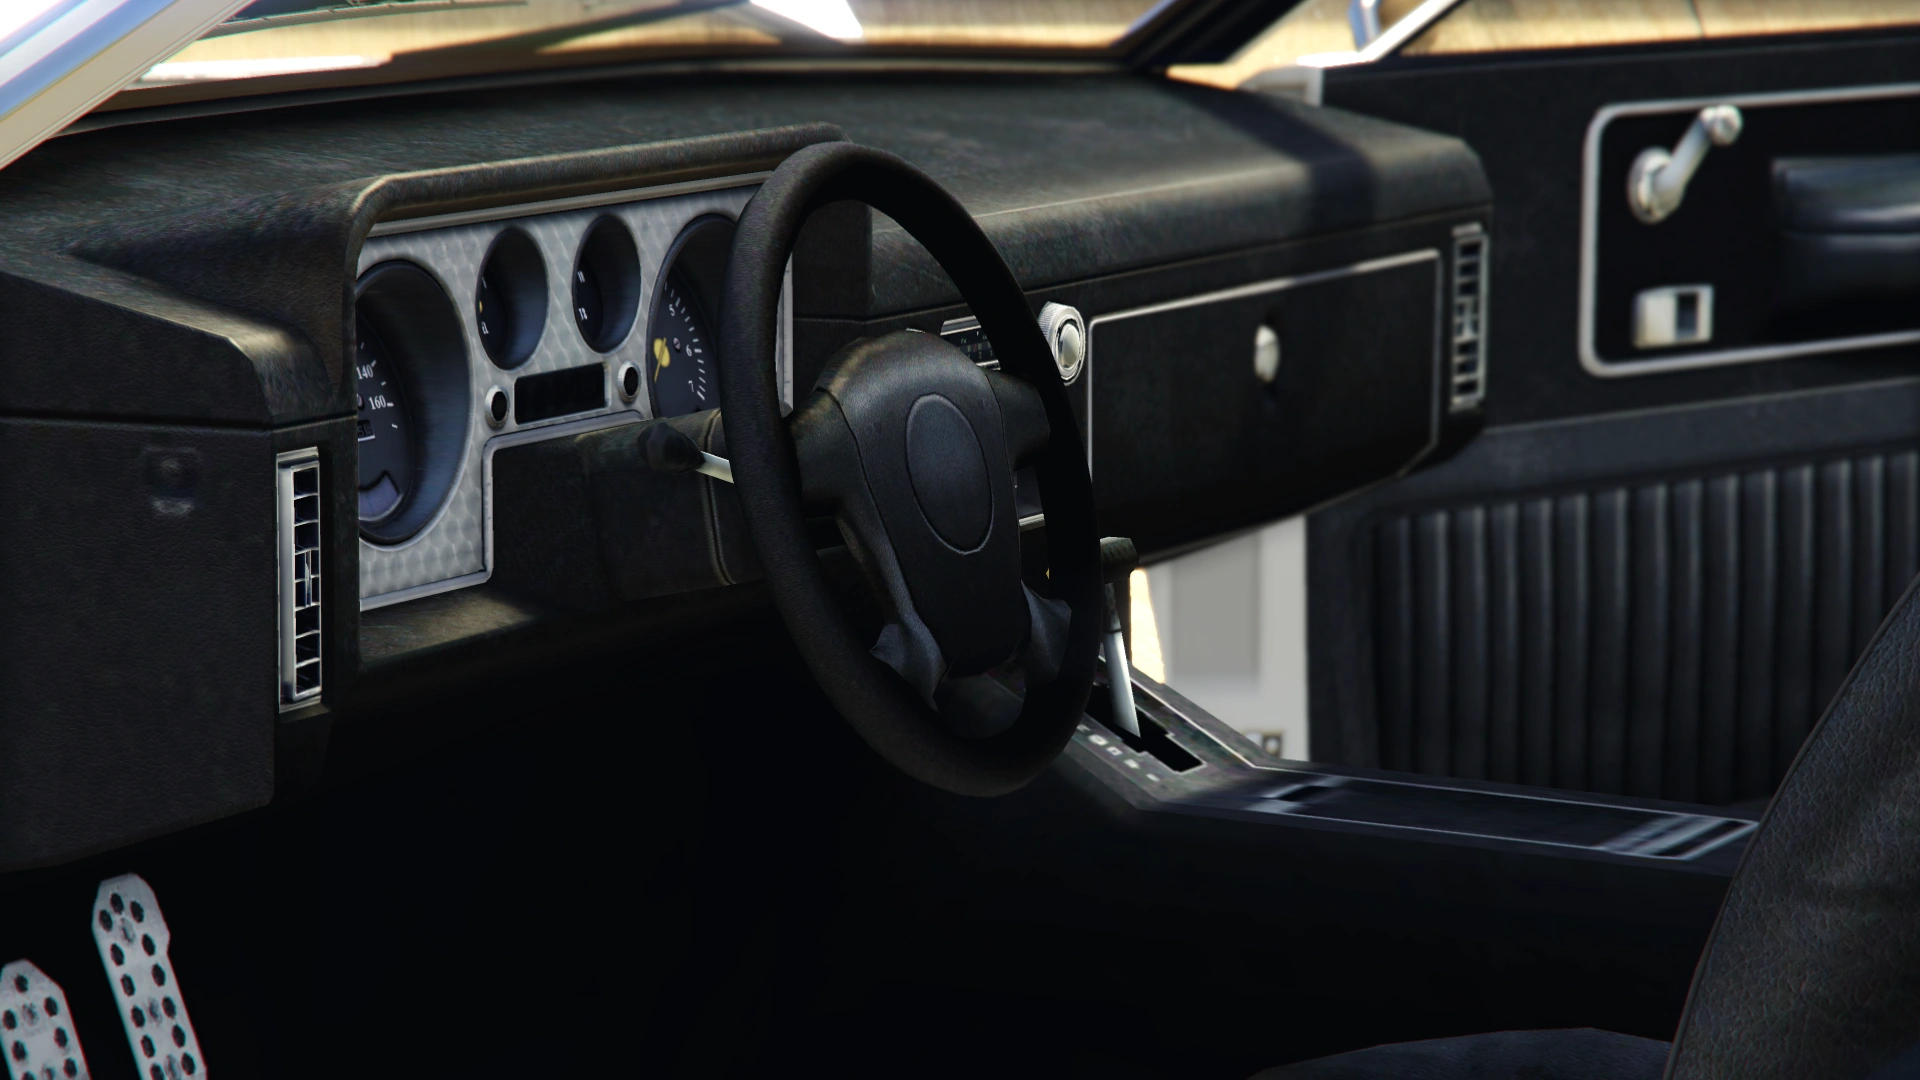
| + | *Strangely, the interior has a [[Vapid]] logo on the floor mat of the Picador. This is most likely due to the reuse of vehicle interiors. |
||
| − | *In ''[[Grand Theft Auto V]]'', the Picador's brake lights are located separately from its taillights, found on the rear bumper. Additionally, it does not feature reverse lights. |
||
| + | |||
| − | *Oddly, when the headlights are turned on, bright light only comes from two of the four headlights. |
||
| + | ==Bugs/Glitches== |
||
| − | *Strangely, the interior has a [[Vapid]] logo on the floor mat of the Picador. This is most likely due to Rockstar's tendency to re-use vehicle interiors. |
||
| + | ===''Grand Theft Auto V'' and ''Online''=== |
||
| + | *Some of the splitter options leave small gaps, as if they do not fit correctly. Additionally, full roll cage options seem to partially clip with the interior textures, which is more evident on the rear portion. |
||
==References== |
==References== |
||
| Line 437: | Line 909: | ||
==See Also== |
==See Also== |
||
| − | *[[Marshall]] - Monster truck variant of the Picador in ''GTA V''. |
+ | *[[Marshall]] - Monster truck variant of the Picador in ''GTA V'' & ''GTA Online''. |
| + | |||
==Navigation== |
==Navigation== |
||
{{Navboxes |
{{Navboxes |
||
| Line 445: | Line 918: | ||
{{gtasa vehicles|state=collapsed}} |
{{gtasa vehicles|state=collapsed}} |
||
{{gtav vehicles|state=collapsed}} |
{{gtav vehicles|state=collapsed}} |
||
| + | {{gtao vehicles|state=collapsed}} |
||
}} |
}} |
||
| − | [[de:Picador (SA)]] |
||
| − | [[es:Picador]] |
||
| − | [[fi:Picador]] |
||
| − | [[pl:Picador]] |
||
| − | [[Category:Vehicles]] |
||
| − | [[Category:Vehicles in GTA San Andreas]] |
||
| − | [[Category:Vehicles in GTA V]] |
||
| − | [[Category:Vehicles manufactured by Cheval]] |
||
[[Category:Vehicles in GTA Online]] |
[[Category:Vehicles in GTA Online]] |
||
| + | [[Category:Vehicles in GTA V]] |
||
| + | [[Category:Vehicles in GTA San Andreas]] |
||
| + | [[Category:Coupe utilities]] |
||
[[Category:Muscle Cars]] |
[[Category:Muscle Cars]] |
||
| − | [[Category: |
+ | [[Category:Muscle class]] |
| − | [[Category:Muscle Vehicle Class]] |
||
[[Category:All wheel drive vehicles]] |
[[Category:All wheel drive vehicles]] |
||
| + | [[Category:Vehicles manufactured by Cheval]] |
||
| + | [[Category:Vehicles manufactured in the 1960s]] |
||
| + | [[Category:Vehicles removed for purchase in GTA Online]] |
||
| + | |||
| + | [[de:Picador]] |
||
| + | [[es:Picador]] |
||
| + | [[fi:Picador]] |
||
| + | [[fr:Picador]] |
||
| + | [[pl:Picador]] |
||
| + | [[pt:Picador]] |
||
| + | [[ru:Picador]] |
||
Latest revision as of 22:15, 16 April 2024
The Picador is a coupé utility featured in Grand Theft Auto: San Andreas, Grand Theft Auto V and Grand Theft Auto Online. It is manufactured by Cheval in the HD Universe.
Design
Grand Theft Auto: San Andreas
The Picador is based on the 1971–1972 Chevrolet El Camino, which happens to share similar design cues with the 1970–1972 Chevrolet Monte Carlo (a car which the Buccaneer shares a likeness to). As a result, the Picador is implied to be a ute variant of the Buccaneer, which shares a similar grille and headlight design.
The Picador may occasionally be depicted with different items on its bed as two separate extras, the first one being two planks and the second one several Sprunk cans. The vehicle is seen in a variety of primary colors on the body, as well as secondary colors on the inner bed walls and wheel wells (though this color cannot be changed through a mod shop).
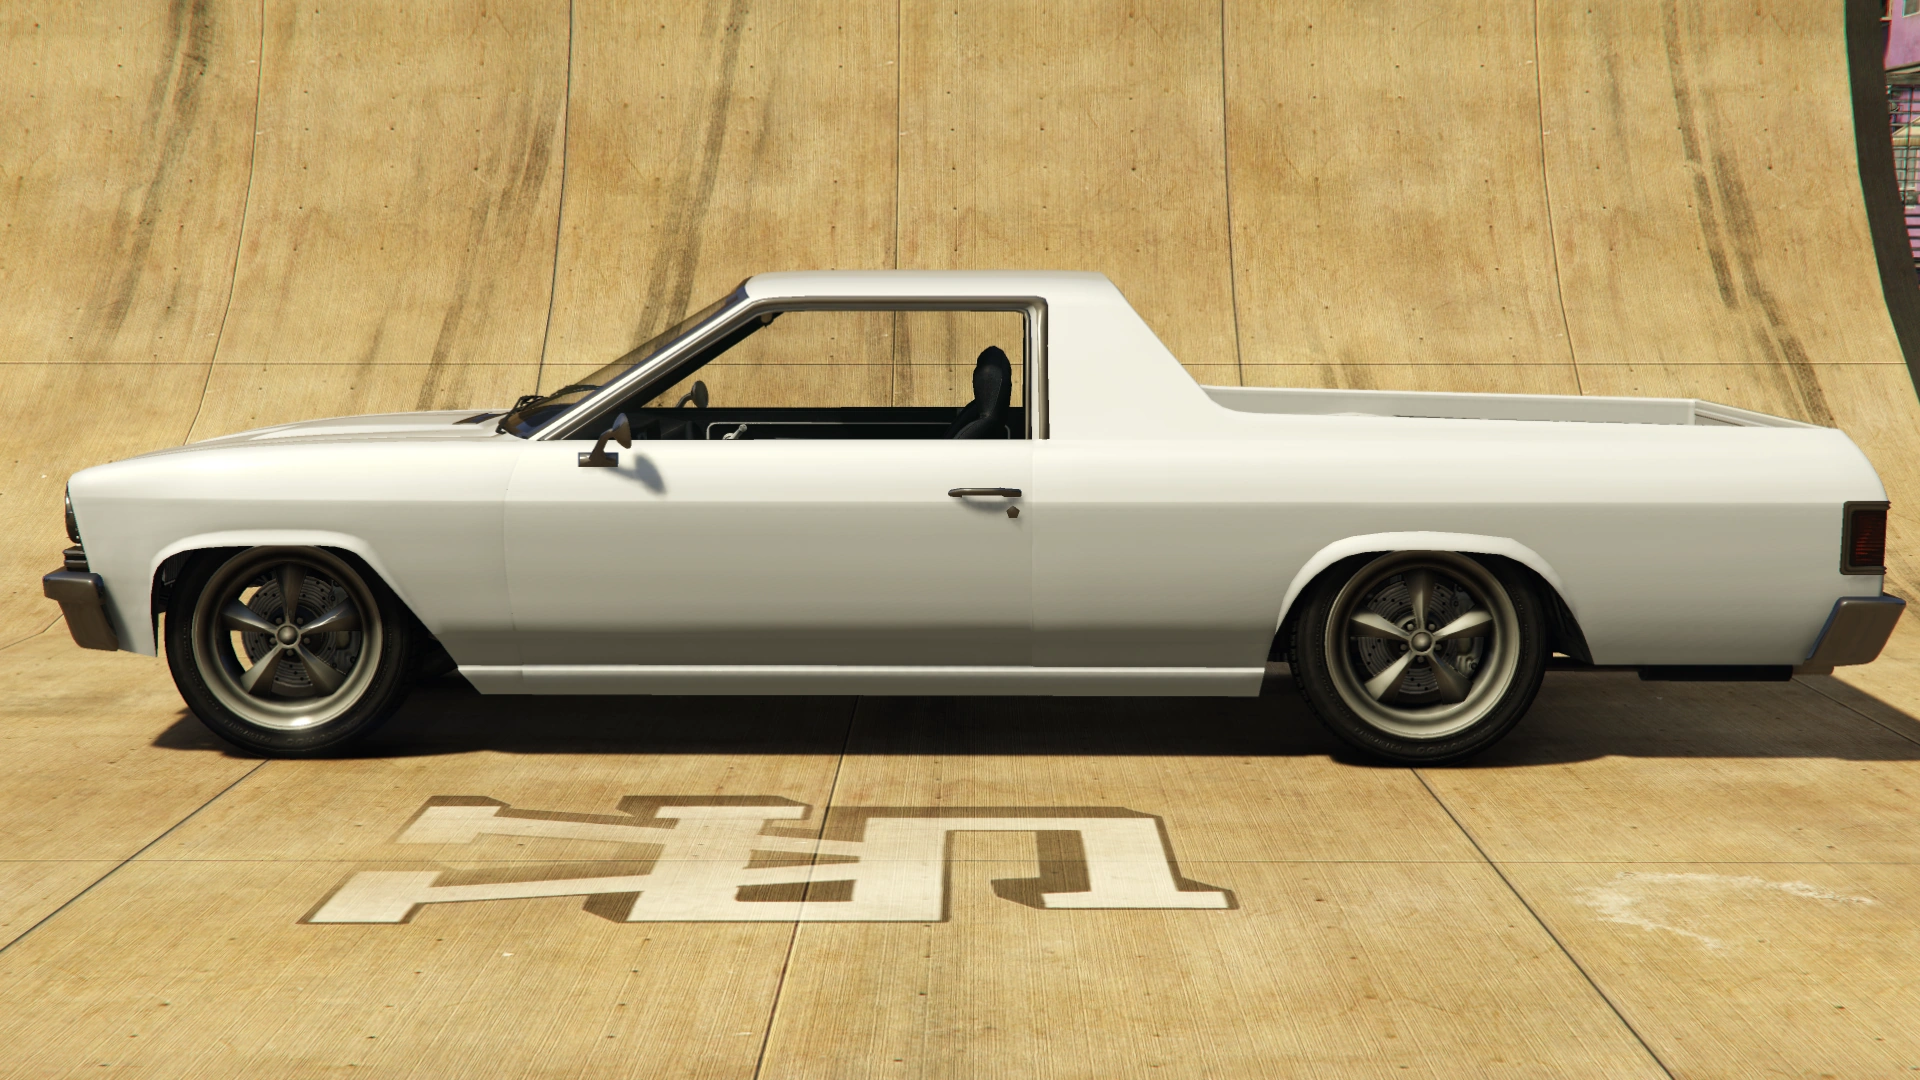
Grand Theft Auto V and Online
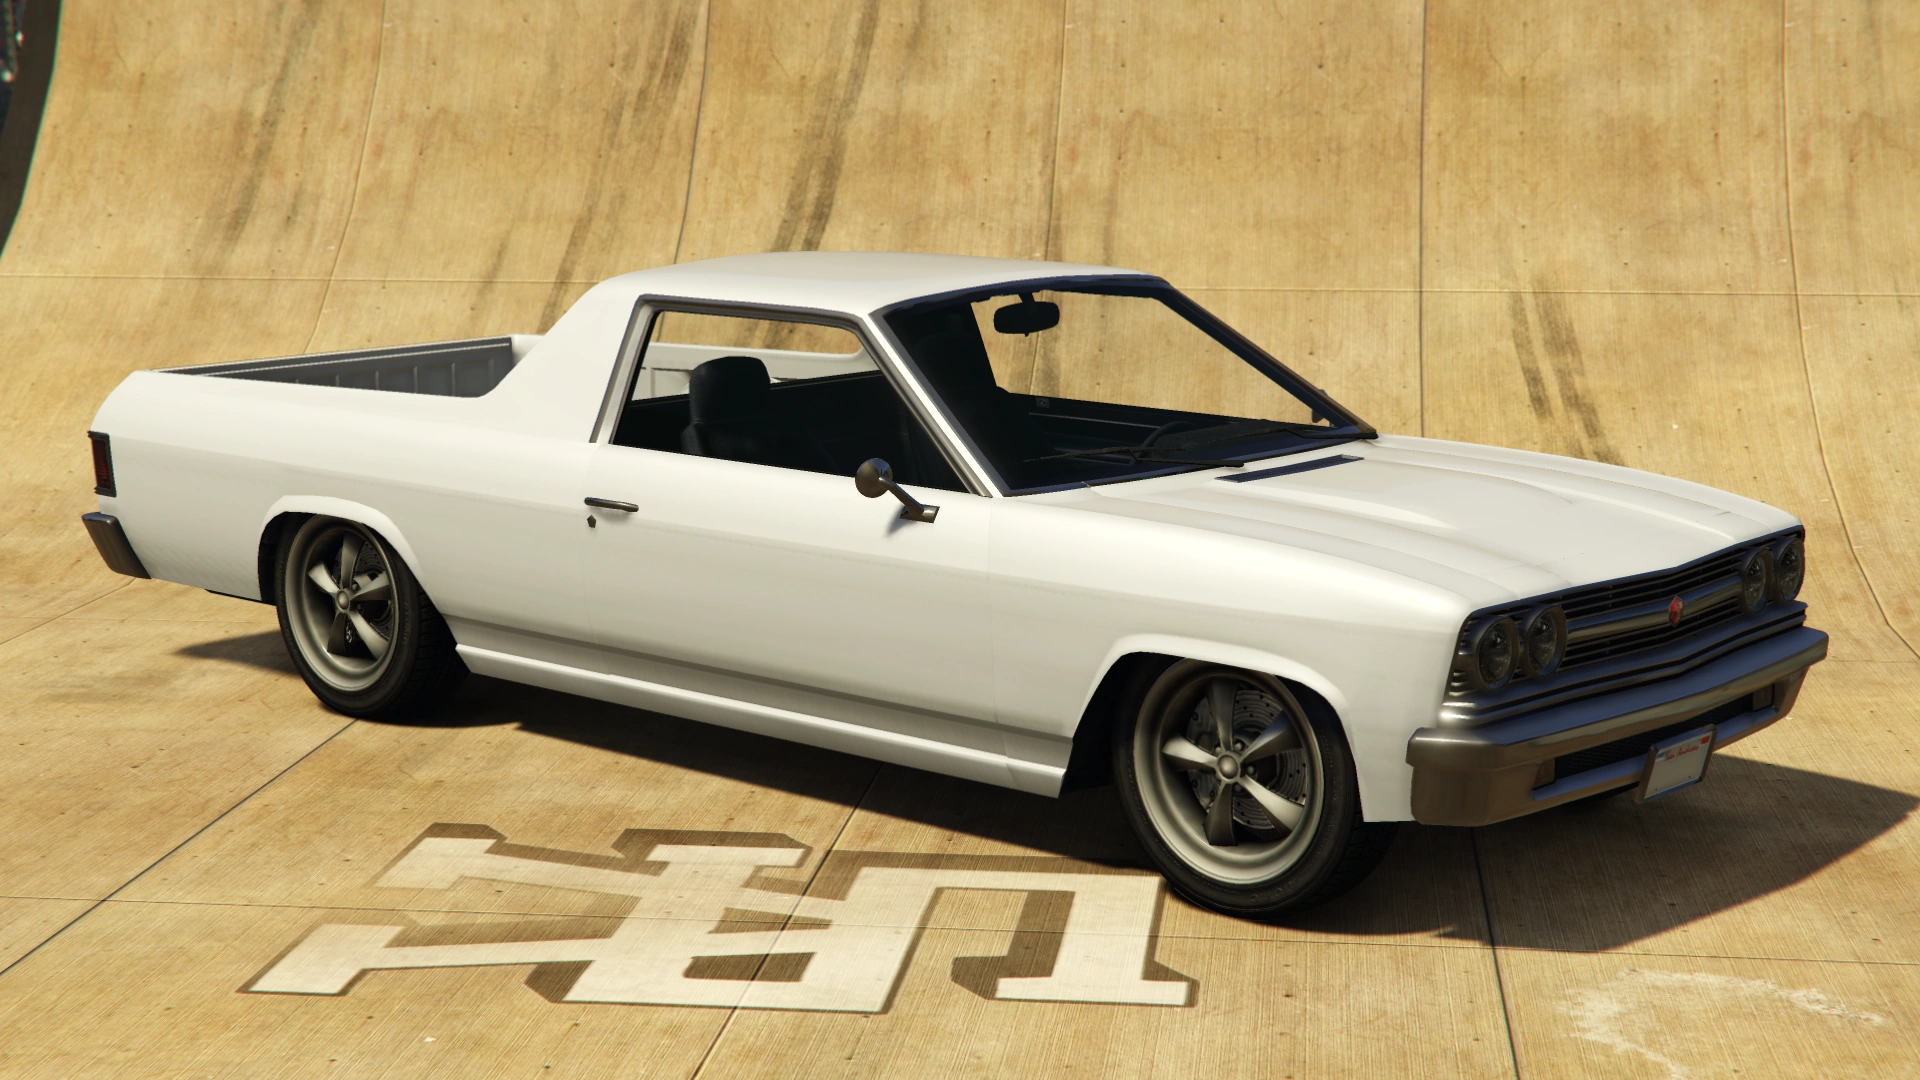
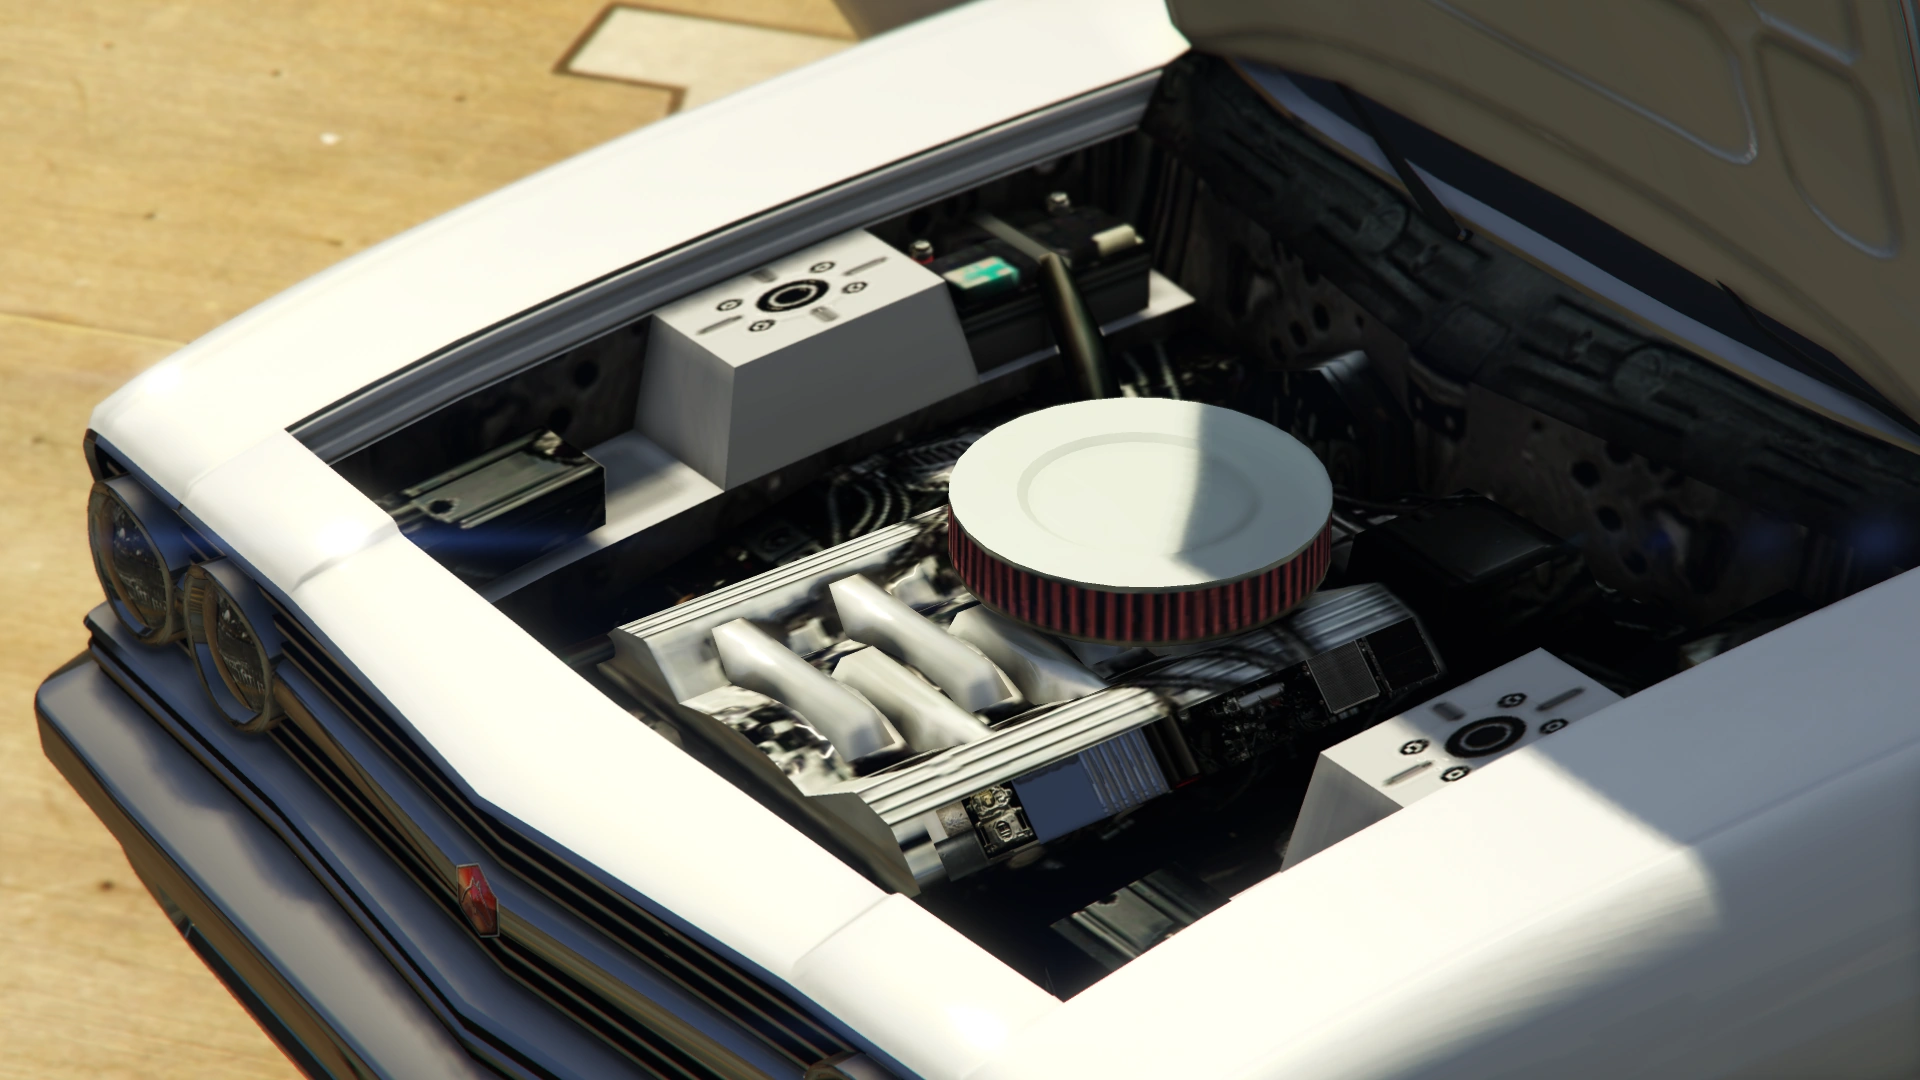
In Grand Theft Auto V and Grand Theft Auto Online, the Picador retains the essential ute design, taking design cues from the Holden HJ[1], Holden HK[2] and Chevrolet El Camino utilities in keeping with Cheval being primarily based on GM-Holden. The rear fascia and tail light design is almost identical to that of the 1969 El Camino[3], while retaining the overall shape and size of the later model Holden. The front end has references to the 1967 El Camino in the headlight and grille assembly[4], with some similarity to the the rarer dual headlight version of the HK Holden[5].
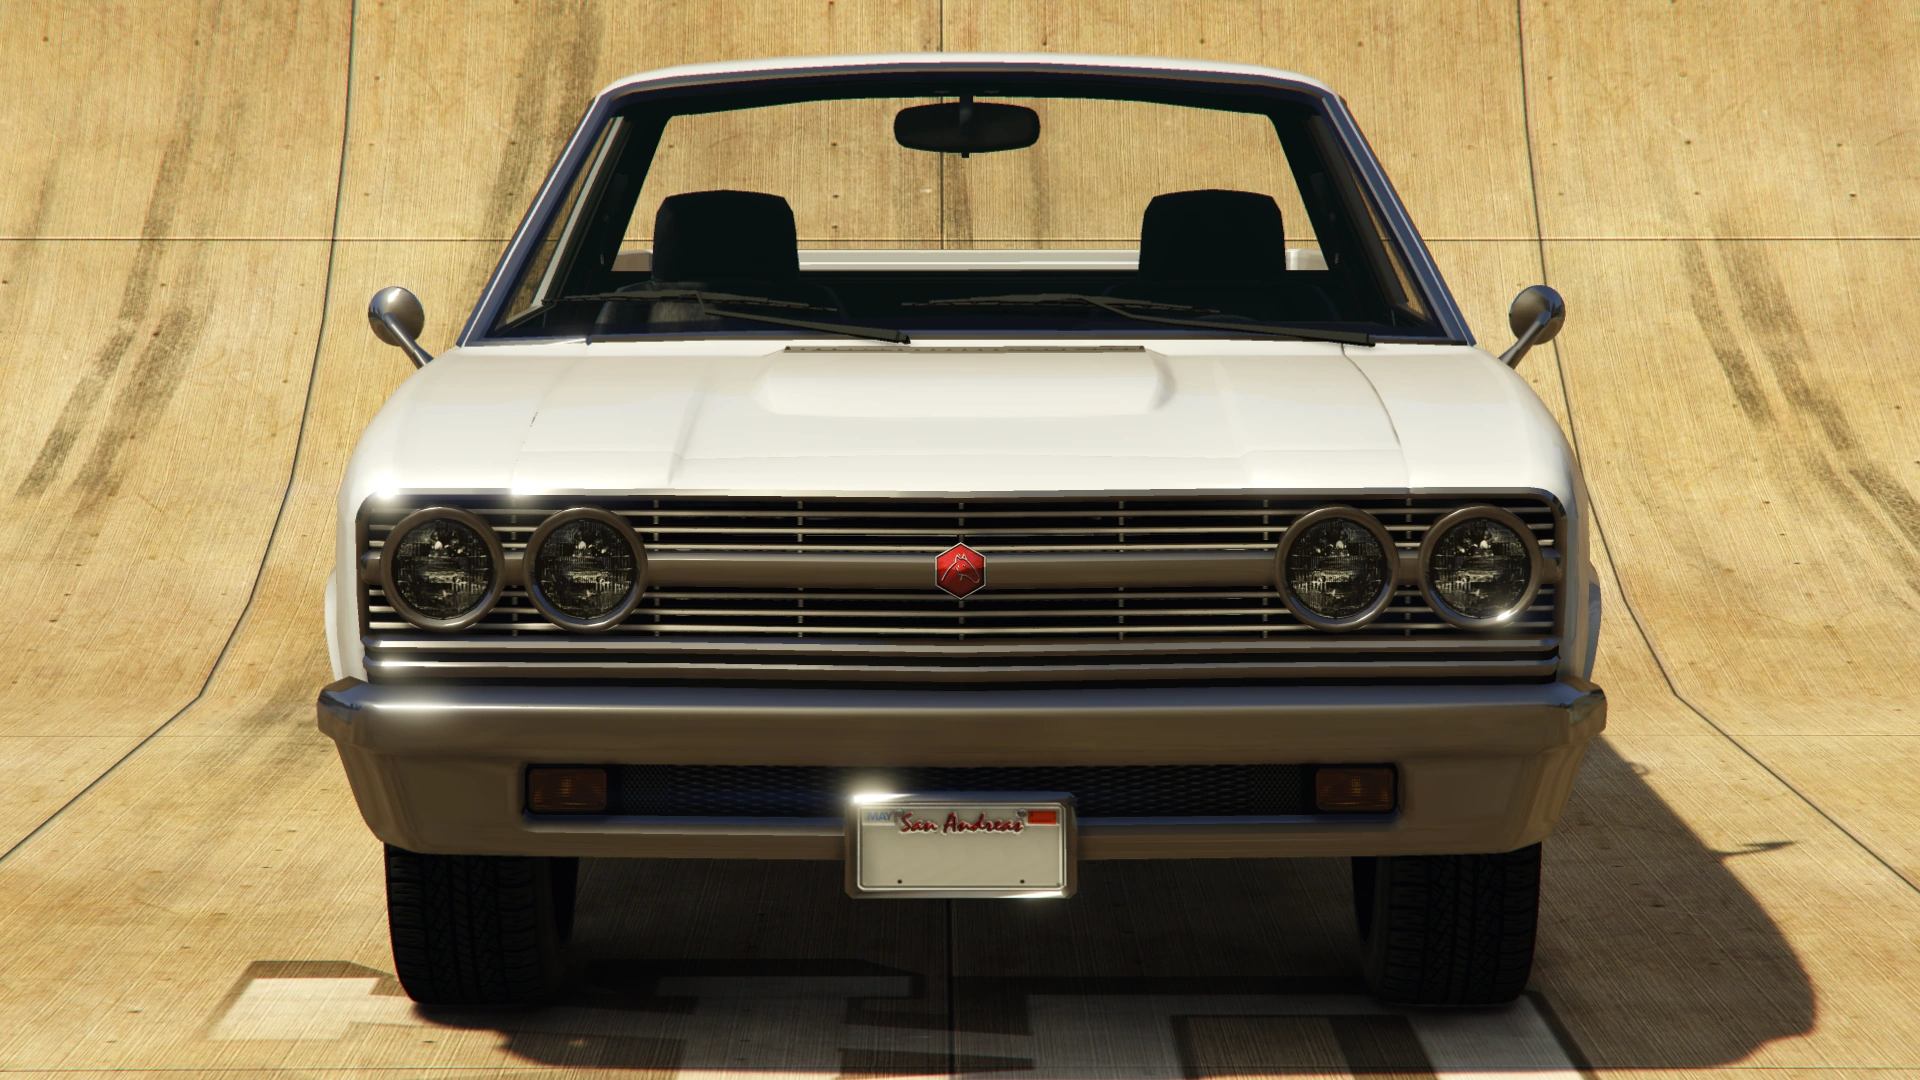
The Picador's design is generally narrower than the GTA San Andreas iteration, featuring a silver front bumper with a wide vented section holding two square amber signals on the edges and a plate holder on the center. The upper area consist of a grilled section with a wide divider on the middle and the Cheval emblem on the center, along with four circular headlamps on the outer edges. The bonnet has a slightly bulged profile and features a vented section near the windshield.
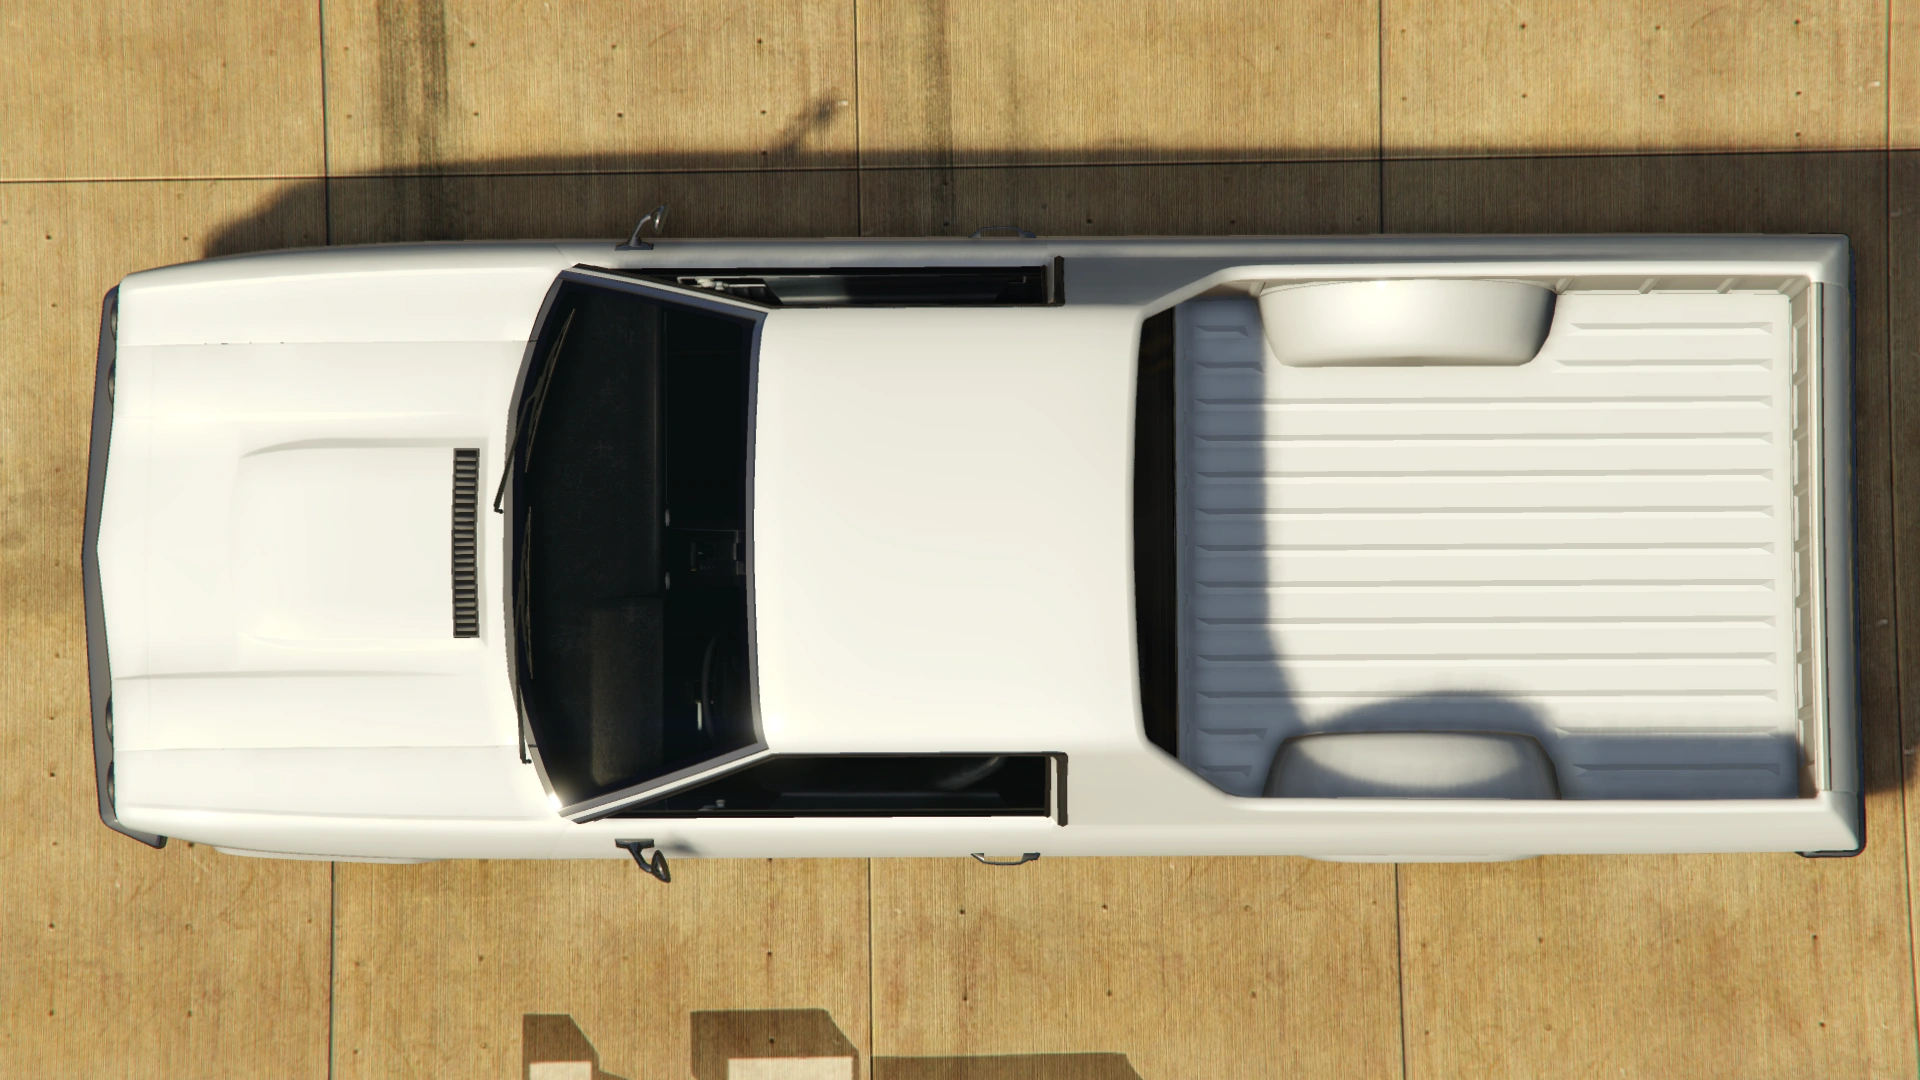
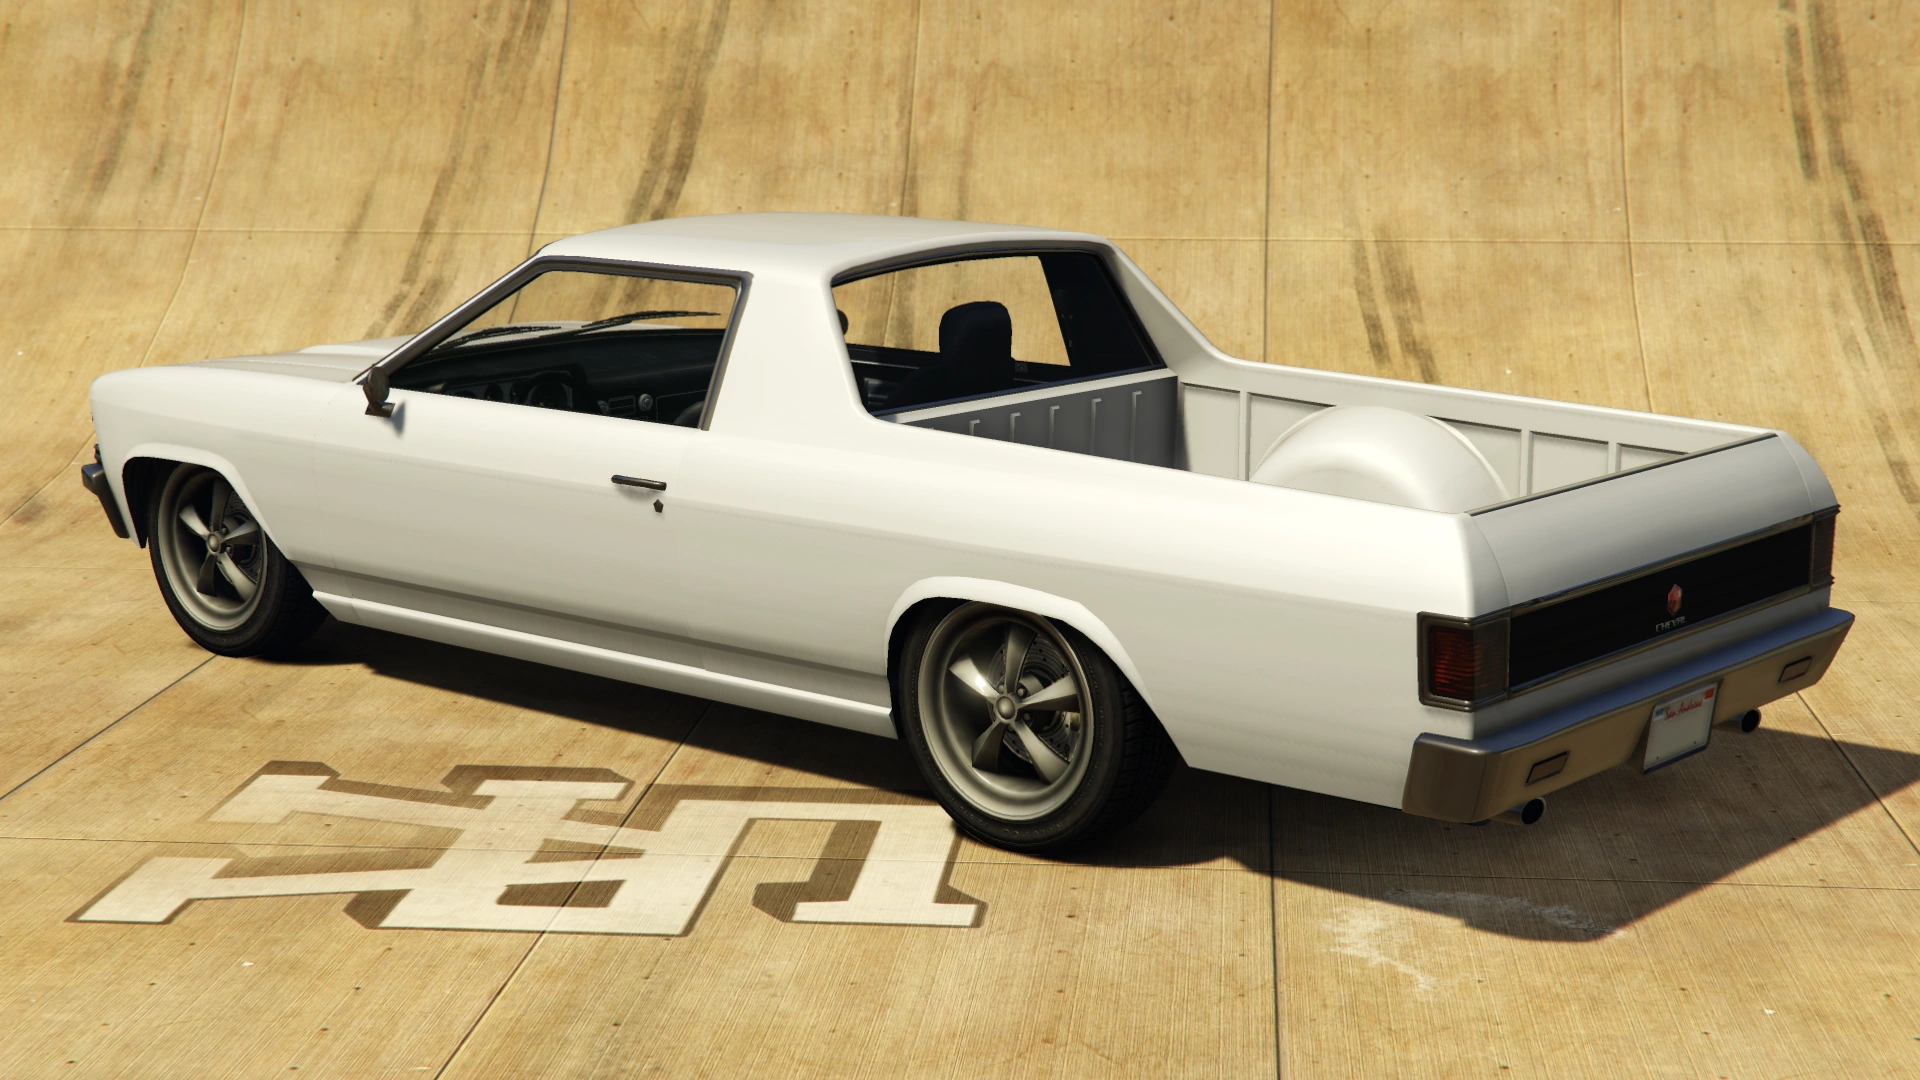
The sides of the vehicle are very simple in design, featuring small flares around the upper sides of the wheel arches and inset/ridged details on the skirting area, as well as horizontal door handles and circular rear-view mirrors near the A-pillars of the cabin. The cabin area is relatively small, featuring silver trimming around the windshield and rear window, while the sides appear to use dual trimming; thinner trim around the window glass and wider around the actual door frame, seen in the small gaps next to the door windows. The area behind the cabin is occupied by a small truck bed with the wheel wells on either side.
The rear end of the car mostly consists of the tailgate, which has a black panel with silver upper and lower borders and a plastic middle strip, as well as the Cheval badges on the center. The rear quarters of the vehicle are occupied by square-shaped red marker lamps, which also have silver trimming around. The rear bumper is finished in silver and houses two rectangular brake lamps near the edges and the license plate on the center, while two exhaust tubes can be seen below. In the enhanced version, the car uses the same interior as the Bobcat XL.
The vehicle only has a primary color, which is applied on the entire bodywork. It also uses a set of five-spoke rims wrapped in low-profile tires, which is unique in design compared to certain muscle rims seen in Los Santos Customs and other mod shops.
As of The Criminal Enterprises update for the enhanced version of Grand Theft Auto Online, the vehicle gains visual modifications and the option to apply a secondary color for applicable modifications and a trim color for the paddings of the "Padded Full Cage" option.
Current Design Gallery


Version History Gallery
")
Performance
Grand Theft Auto: San Andreas
The Picador has the highest top speed and acceleration for any pickup in the game, possibly due to the large V8 diesel engine. However, it is also the lightest and lacks the torque of the stronger trucks; its cornering is also a little unstable, owing to its rear-wheel-drive layout. The Picador can only carry two in the cab.
The vehicle uses a low-revving and noisy engine from cars such as the Romero, the Perennial and the Greenwood.
GTA San Andreas Overview
| Acceleration (0-60 mph in Seconds) |
Top Speed (mph / kmh) |
Gears | Engine | Drivetrain (FWD / RWD / AWD) |
Mass (kg / lbs) |
|---|---|---|---|---|---|
| N/A | 103 / 165 | 5 | Diesel | RWD | 1600 / 3527 |
| N/A | N/A | 5 | FR V8 (In-game model) | RWD | Cannot be observed |
Grand Theft Auto V and Online
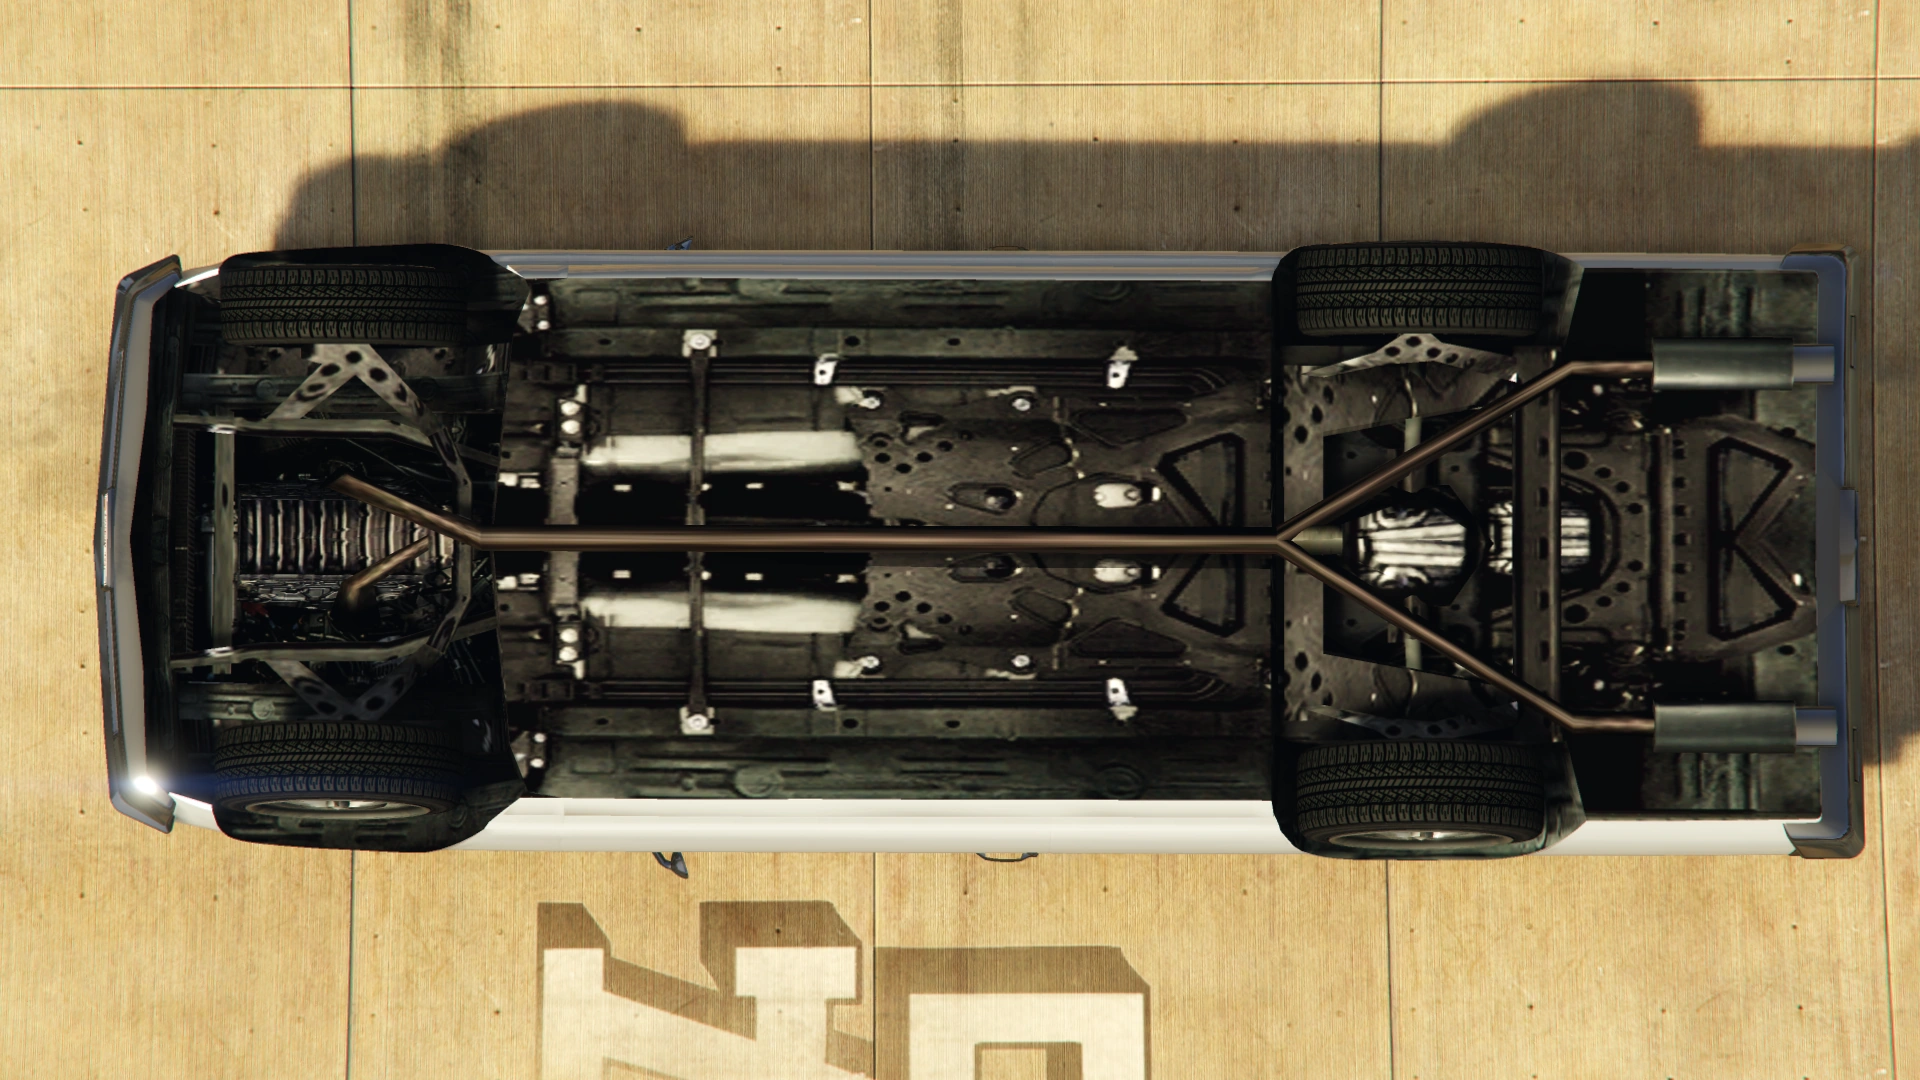
The Picador's speed and acceleration are good in comparison to most street cars, especially when upgraded, but it is heavily outclassed by other muscle cars. Its handling is at odds with more conventional muscle cars, since its four-wheel-drive system gives it excellent traction and launch speed. This, combined with its soft suspension, makes the Picador one of the best muscle cars for offroading, though one must be wary of body roll. Crash deformation is poor and bullet resistance is only average.
The Picador is powered by a large displacement V8 and is mated to a 5-speed gearbox, powering all rear wheels with a torque distribution of 40% to the front wheels and 60% to the rear wheels. It shares its engine sound with the Sabre Turbo, Fugitive and Gauntlet.
GTA V and Online Overview
| Acceleration (0-60 mph in Seconds) |
Top Speed (mph / kmh) |
Gears | Engine | Drivetrain (FWD / RWD / AWD) |
Mass (kg / lbs) |
Fuel Tank Size (litres) |
|---|---|---|---|---|---|---|
| N/A | 84 / 135 | 5 | N/A | AWD 40% FWD 60% RWD |
1600 / 3527 | 65 |
| N/A | N/A | N/A | N/A | N/A | N/A | N/A |
| 7.8 Seconds | 100 / 160 | 5 | F4 SOHC V8 (In-game model) | AWD | Cannot be observed | Cannot be observed |
Modifications
Grand Theft Auto: San Andreas
- The Picador can be modified at TransFender:
| Type | Upgrade | Cost |
|---|---|---|
| Color | Car Color 1 (64 different colors) | $ 150 |
| Hood | Fury Scoop | $ 150 |
| Champ Scoop | $ 100 | |
| Exhausts | Large Exhaust | $ 250 |
| Small Exhaust | $ 150 | |
| Upswept Exhaust | $ 400 | |
| Lights | Round Fog Lamp | $ 100 |
| Nitro | 2x Nitrous | $ 200 |
| 5x Nitrous | $ 500 | |
| 10x Nitrous | $ 1000 | |
| Roof | Roof Scoop | $ 80 |
| Side skirts | Side Skirt | $ 500 |
| Wheels | Import | $ 820 |
| Atomic | $ 770 | |
| Ahab | $ 1000 | |
| Virtual | $ 620 | |
| Access | $ 1140 | |
| Off Road Wheel | $ 1000 | |
| Mega | $ 1030 | |
| Grove | $ 1230 | |
| Twist | $ 1200 | |
| Wires | $ 1560 | |
| Car Stereo | Bass Boost | $ 100 |
| Hydraulics | Hydraulics | $ 1500 |
- The Transfender in Las Venturas charges 20% more for each modification except colours.
Grand Theft Auto V and Online
- Options marked E are exclusive to the enhanced versions of Grand Theft Auto V and Grand Theft Auto Online, and were added as part of The Criminal Enterprises update.
| Category | Modification | Cost (GTA V) | Cost (GTA Online) | Image | |
|---|---|---|---|---|---|
| Armor | No Armor | $100 | $200 | ||
| Armor Upgrade 20% | $500 | $4,500 | |||
| Armor Upgrade 40% | $1,250 | $7,500 | |||
| Armor Upgrade 60% | $2,000 | $12,000 | |||
| Armor Upgrade 80% | $3,500 | $21,000 | |||
| Armor Upgrade 100% | $5,000 | $30,000 | |||
| Brakes | Stock Brakes | $100 | $200 | ||
| Street Brakes | $2,000 | $4,000 | |||
| Sport Brakes | $2,700 | $5,400 | |||
| Race Brakes | $3,500 | $7,000 | |||
| Engine | EMS Upgrade, Level 1 | $900 | $1,800 | ||
| EMS Upgrade, Level 2 | $1,250 | $2,500 | |||
| EMS Upgrade, Level 3 | $1,800 | $3,600 | |||
| EMS Upgrade, Level 4 | $3,350 | $6,700 | |||
| Explosives | Ignition Bomb | N/A | $5,000 | ||
| Remote Bomb | N/A | $7,500 | |||
| Fenders E | Stock Left Fender | $150 | $300 | ||
| Flat Front Fenders | $450 | $900 | |||
| Headlight Covers E | No Headlight Covers | $100 | $200 | ||
| Red Headlight Covers | $375 | $750 | |||
| White Headlight Covers | $670 | $1,340 | |||
| Hoods E | Stock Hood | $800 | $300 | ||
| Vent Delete | $1,500 | $650 | |||
| Rear Vents | $2,500 | $1,500 | |||
| Tuner Hood | $4,000 | $1,750 | |||
| Race Hood | $4,800 | $2,000 | |||
| Horns | Main article: Los Santos Customs/Horns | - | - | ||
| Lights | Headlights | Stock Lights | $100 | $200 | |
| Xenon Lights | $300 | $3,000 | |||
| Neon Kits | Main article: Los Santos Customs/Lights | - | - | ||
| Livery E | None | $350 | $11,400 | ||
| White Stripes | $350 | $18,240 | |||
| Red Stripes | $350 | $19,380 | |||
| Bullhead Racing | $350 | $20,520 | |||
| Amigas Racing | $350 | $21,660 | |||
| Pinstripes | $350 | $22,800 | |||
| Flaming Angel | $350 | $23,370 | |||
| Flaming Lowrider | $350 | $23,939 | |||
| Ragga Rum | $350 | $24,510 | |||
| Vampire Lowrider | $350 | $25,080 | |||
| Floral Lowrider | $350 | $25,650 | |||
| Loss/Theft Prevention | Tracker | N/A | $2,000 | ||
| Full Coverage | N/A | $1,125 | |||
| Plates | Blue on White 1 | $50 | $200 | ||
| Blue on White 2 | $50 | $200 | |||
| Blue on White 3 | $50 | $200 | |||
| Yellow on Blue | $75 | $300 | |||
| Yellow on Black | $150 | $600 | |||
| Rear Covers E | Stock Rear Cover | $350 | $700 | ||
| Flat Bedcover | $550 | $1,100 | |||
| Vinyl Bedcover | $675 | $1,350 | |||
| Stripped Vinyl Bedcover | $750 | $1,500 | |||
| Outer Cage | $1,375 | $2,750 | |||
| Outer Cage Braced | $2,300 | $3,600 | |||
| Small Stature Cage | $2,450 | $4,900 | |||
| Rally Set up | $2,900 | $5,800 | |||
| Heavy Duty Cage | $3,500 | $7,000 | |||
| Full Set Up | $4,000 | $8,000 | |||
| Respray | Main article: Los Santos Customs/Respray Colors | - | - | ||
| Roll Cages E | No Roll Cage | $350 | $700 | ||
| Half Cage | $550 | $1,100 | |||
| Full Cage | $675 | $1,350 | |||
| Padded Full Cage | $750 | $1,500 | |||
| Roofs E | Stock Roof | $100 | $200 | ||
| Roof Scoop | $350 | $700 | |||
| Tuner Roof Scoop | $575 | $1,150 | |||
| Race Roof Scoop | $800 | $1,600 | |||
| Sell | Sell Vehicle | N/A | $900 | ||
| Skirts E | Stock Skirts | $1,250 | $600 | ||
| Wing Flames | $1,500 | $830 | |||
| Splitters E | Stock Splitter | $100 | $200 | ||
| Secondary Splitter | $375 | $750 | |||
| Tuner Splitter | $670 | $1,340 | |||
| Tuner Splitter Alt | $825 | $1,650 | |||
| Street Splitter | $1,500 | $3,000 | |||
| Secondary Race Splitter | $1,600 | $3,200 | |||
| Primary Race Splitter | $350 | $3,650 | |||
| Secondary Snowplow Splitter | $350 | $4,100 | |||
| Primary Snowplow Splitter | $350 | $4,550 | |||
| Spoilers E | None | $3,000 | $300 | ||
| Boot Lip Spoiler | $3,750 | $550 | |||
| Medium Boot Lip Spoiler | $5,000 | $700 | |||
| Large Boot Lip Spoiler | $6,500 | $1,050 | |||
| Tuner Wing | $7,000 | $1,500 | |||
| Street Wing | $8,000 | $2,000 | |||
| Race Wing | $8,500 | $2,300 | |||
| Sunstrips E | None | $150 | $200 | ||
| Primary Sunstrip | $450 | $900 | |||
| Plastic Sunstrip | $750 | $1,500 | |||
| White Fukaru Sunstrip | $850 | $1,650 | |||
| Black Fukaru Sunstrip | $950 | $3,000 | |||
| White Meinmacht Sunstrip | $1,000 | $3,200 | |||
| Black Meinmacht Sunstrip | $1,050 | $3,650 | |||
| White Powermetal Sunstrip | $1,100 | $4,100 | |||
| Black Powermetal Sunstrip | $1,150 | $4,550 | |||
| Suspension E | Stock Suspension | $100 | $200 | ||
| Lowered Suspension | $500 | $1,000 | |||
| Street Suspension | $1,000 | $2,000 | |||
| Sport Suspension | $1,700 | $3,400 | |||
| Competition Suspension | $2,200 | $4,400 | |||
| Transmission | Stock Transmission | $100 | $200 | ||
| Street Transmission | $2,950 | $5,900 | |||
| Sports Transmission | $3,250 | $6,500 | |||
| Race Transmission | $4,000 | $8,000 | |||
| Turbo | None | $500 | $1,000 | ||
| Turbo Tuning | $2,500 | $30,000 | |||
| Wheels | Main article: Los Santos Customs/Wheels | - | - | ||
| Windows | None | $100 | $500 | ||
| Light Smoke | $200 | $1,500 | |||
| Dark Smoke | $450 | $3,500 | |||
| Limo | $700 | $5,000 | |||
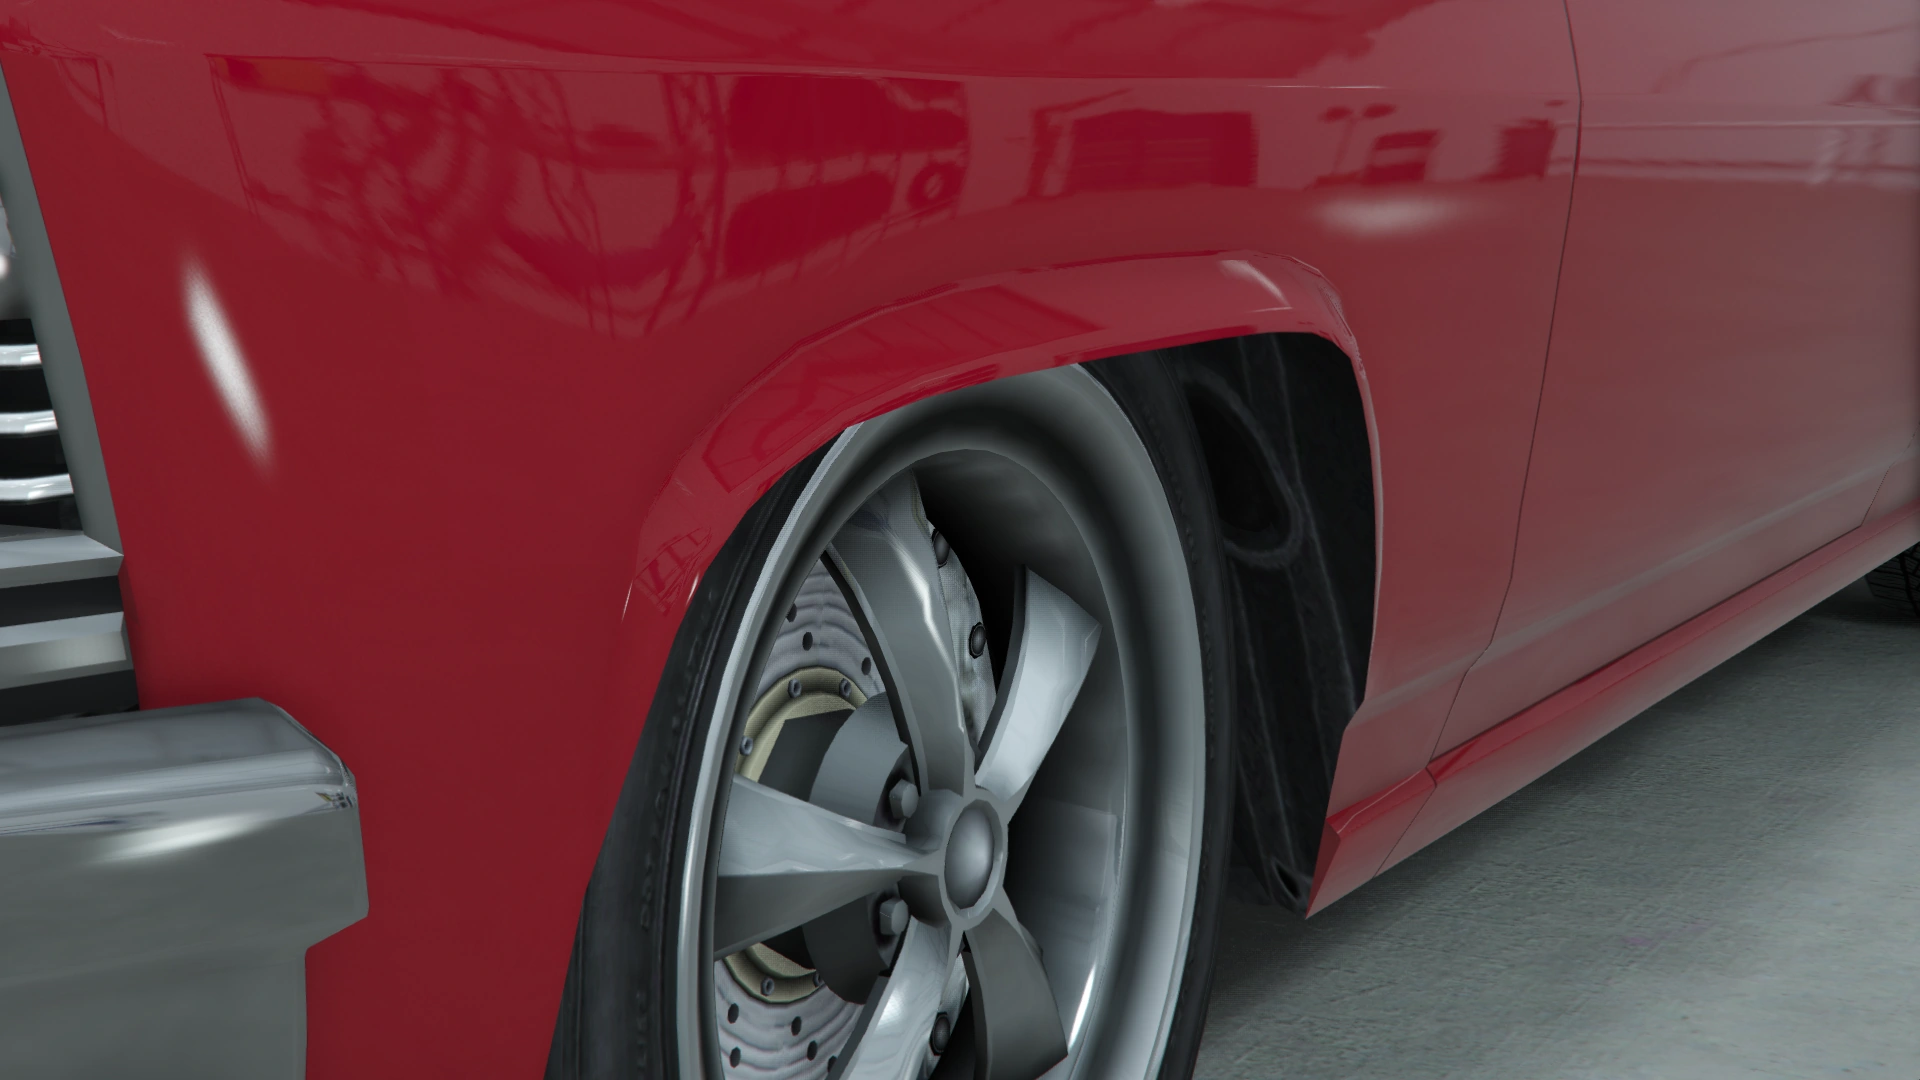
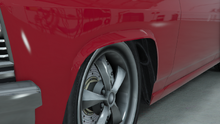


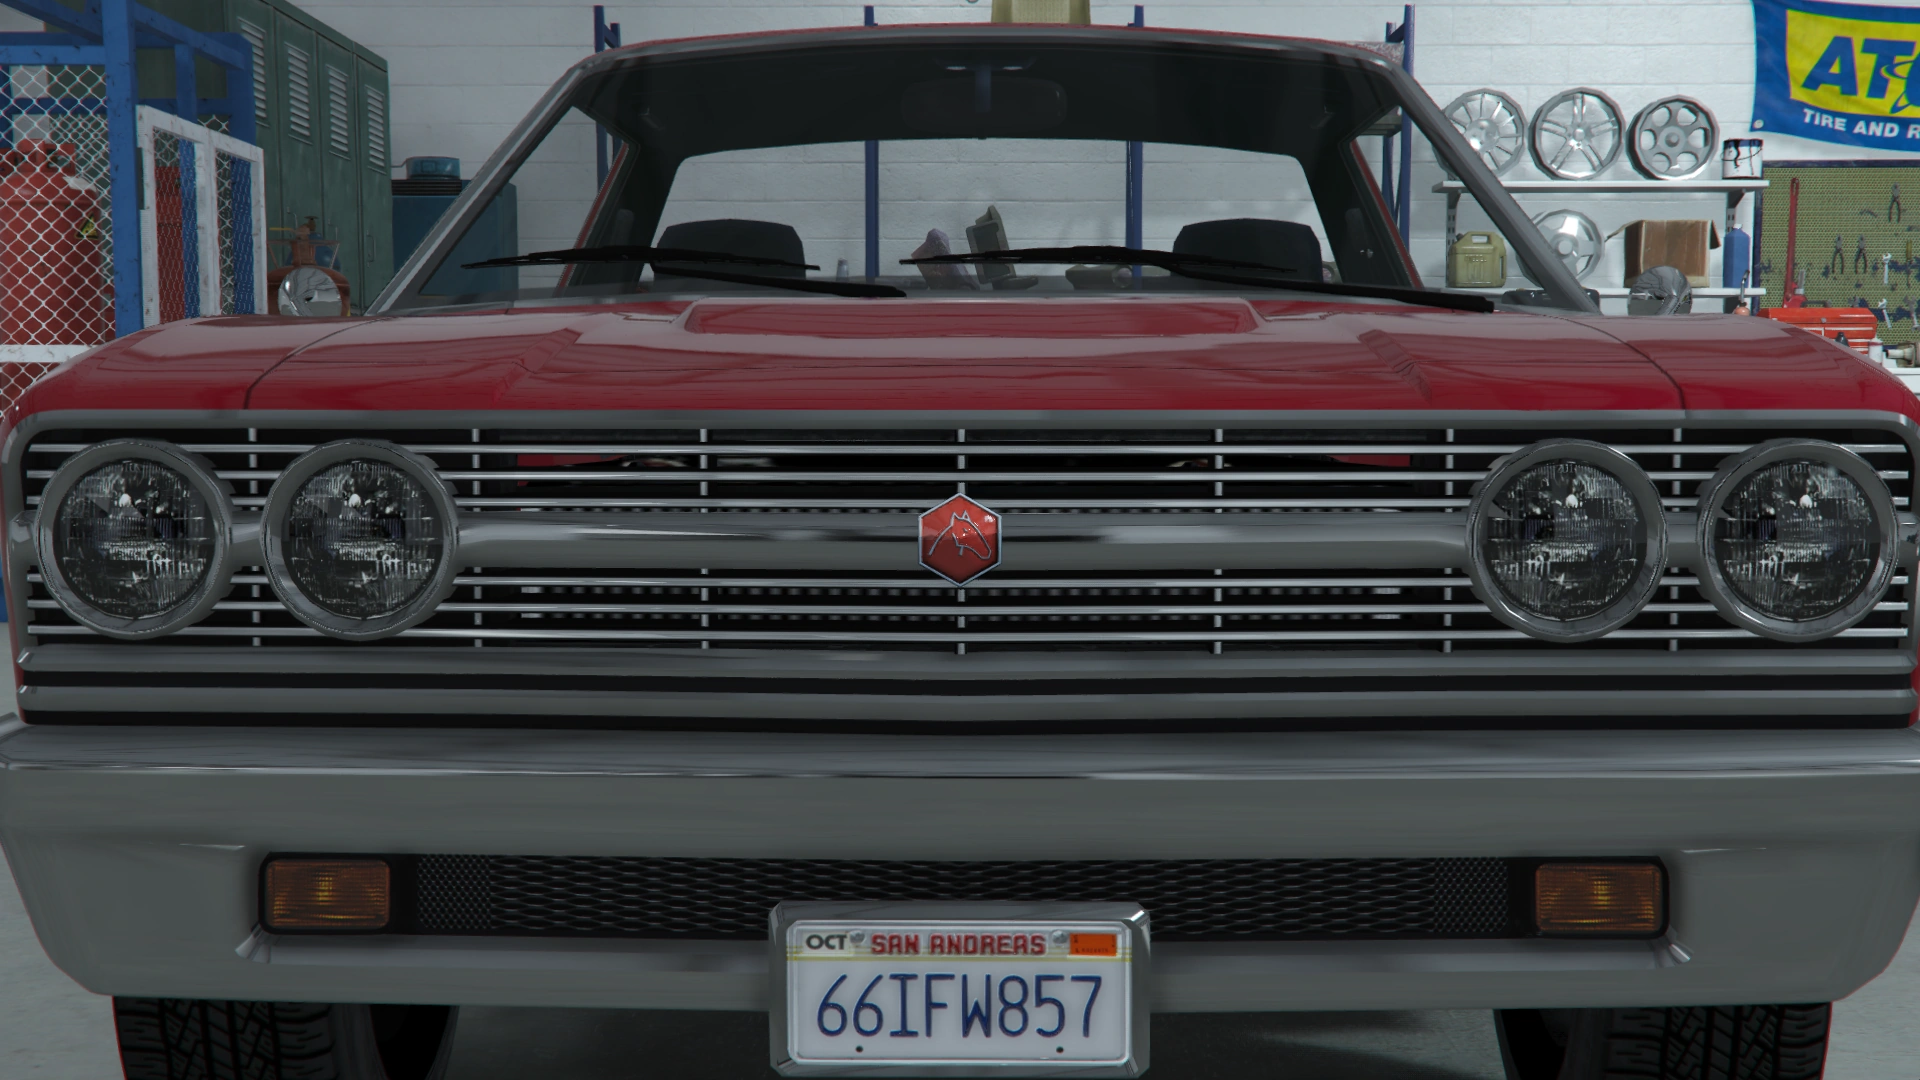


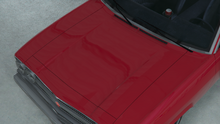

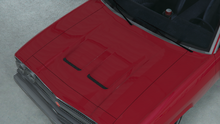

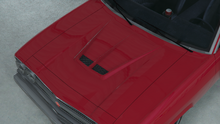
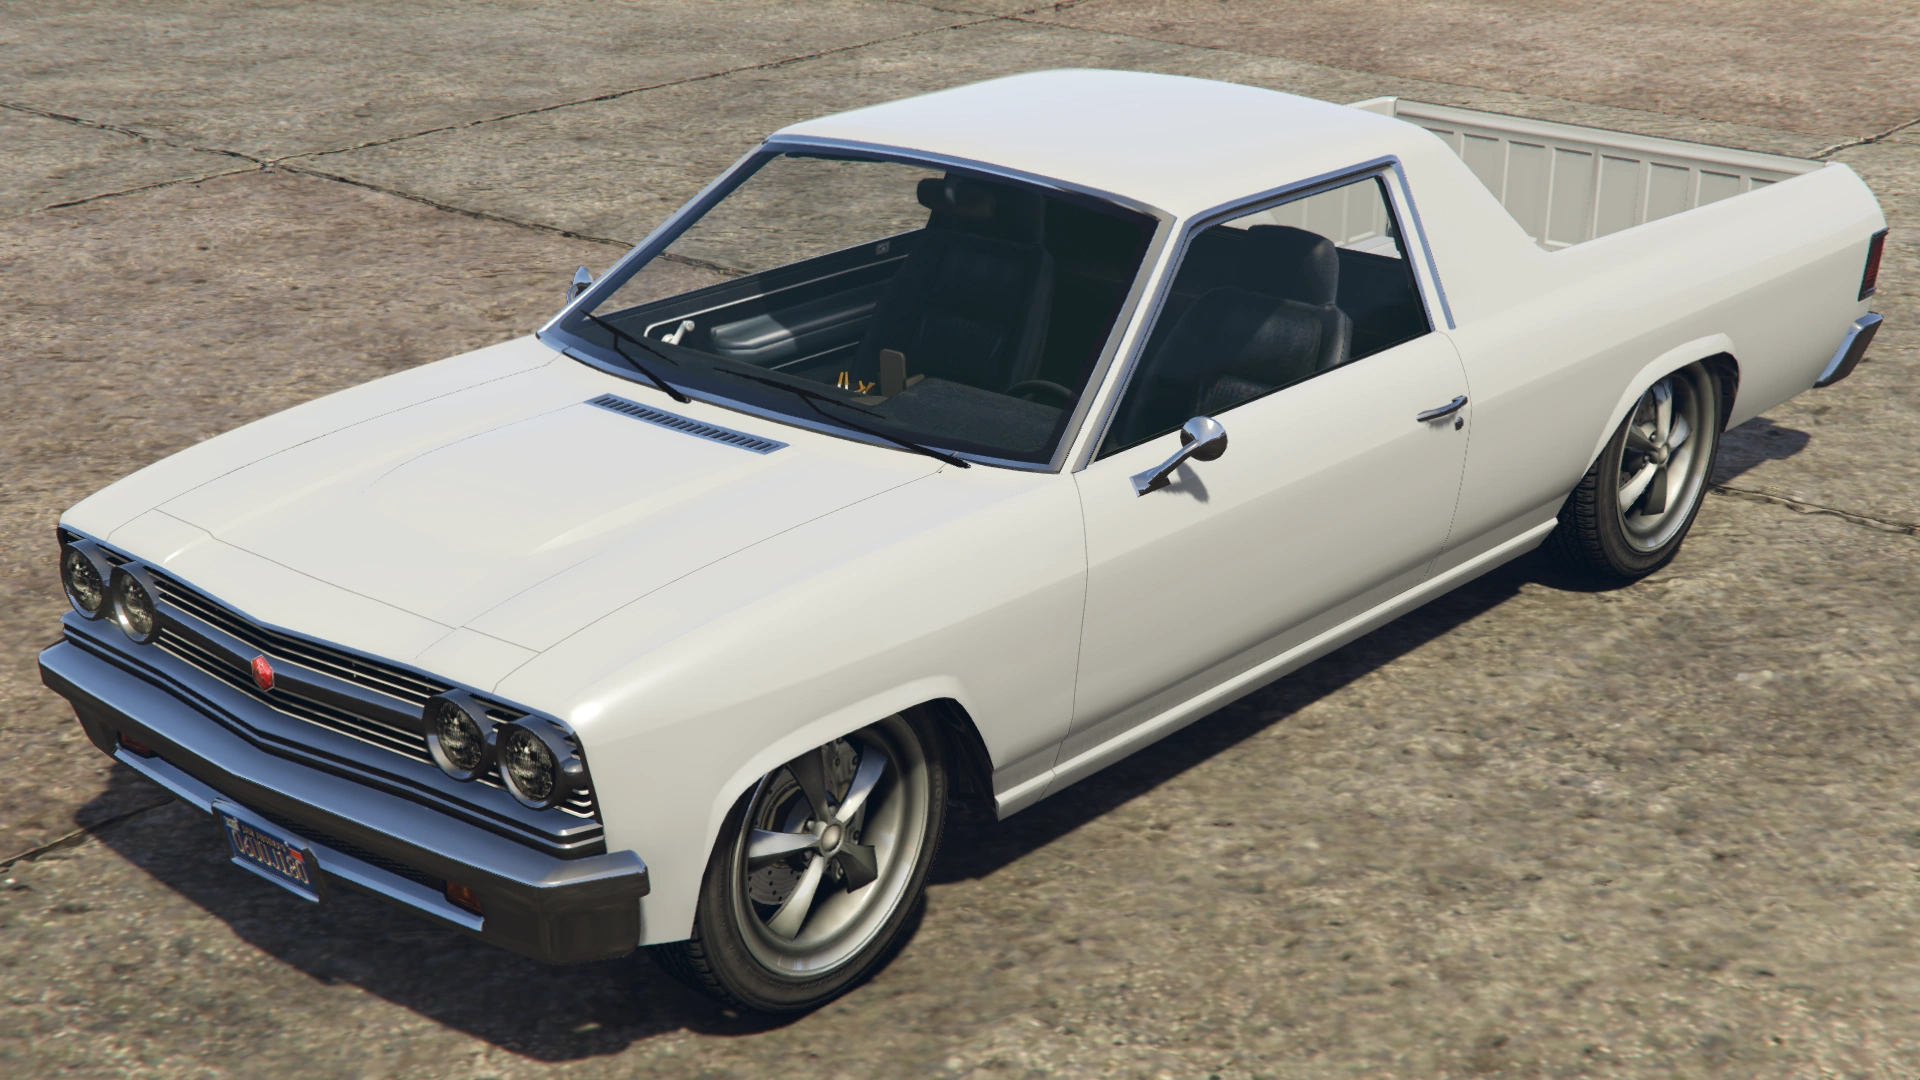


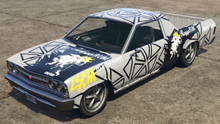

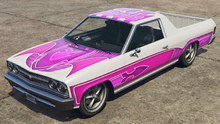
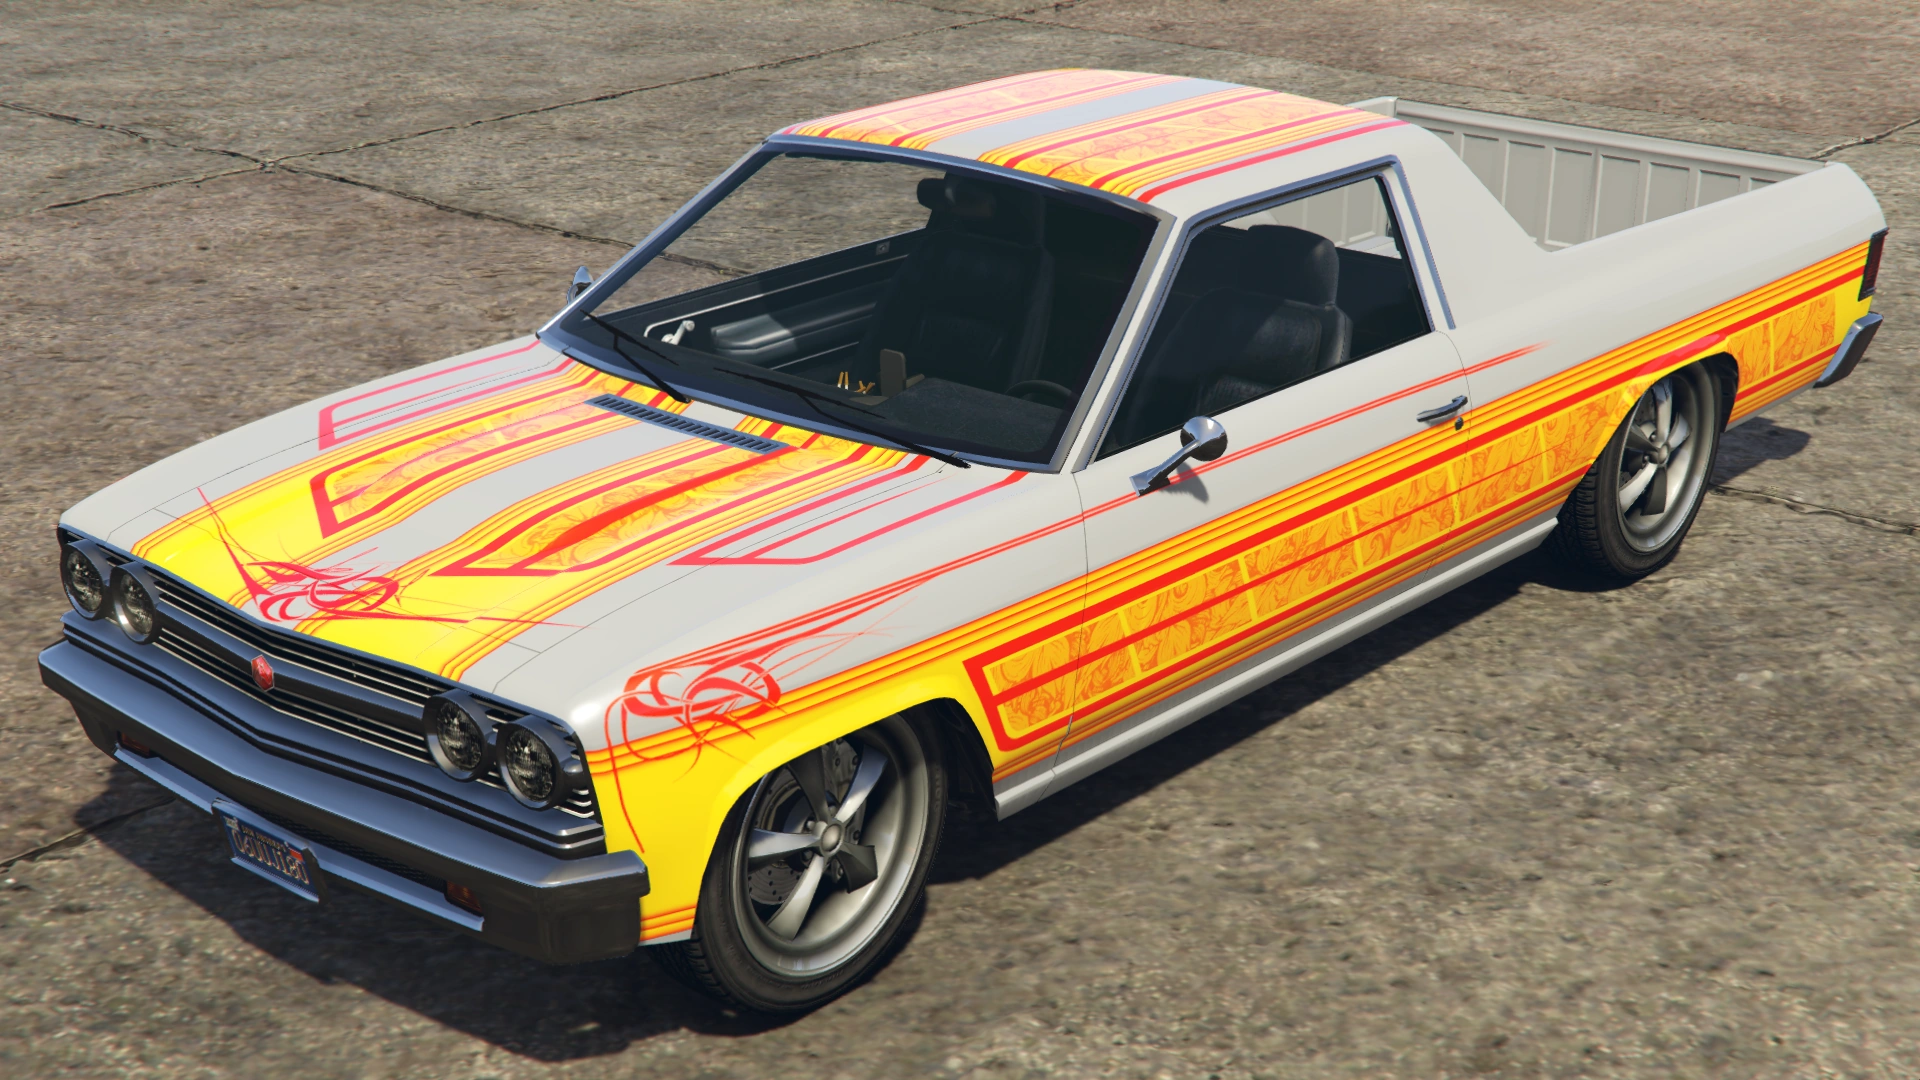
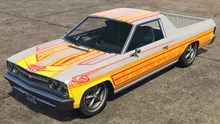


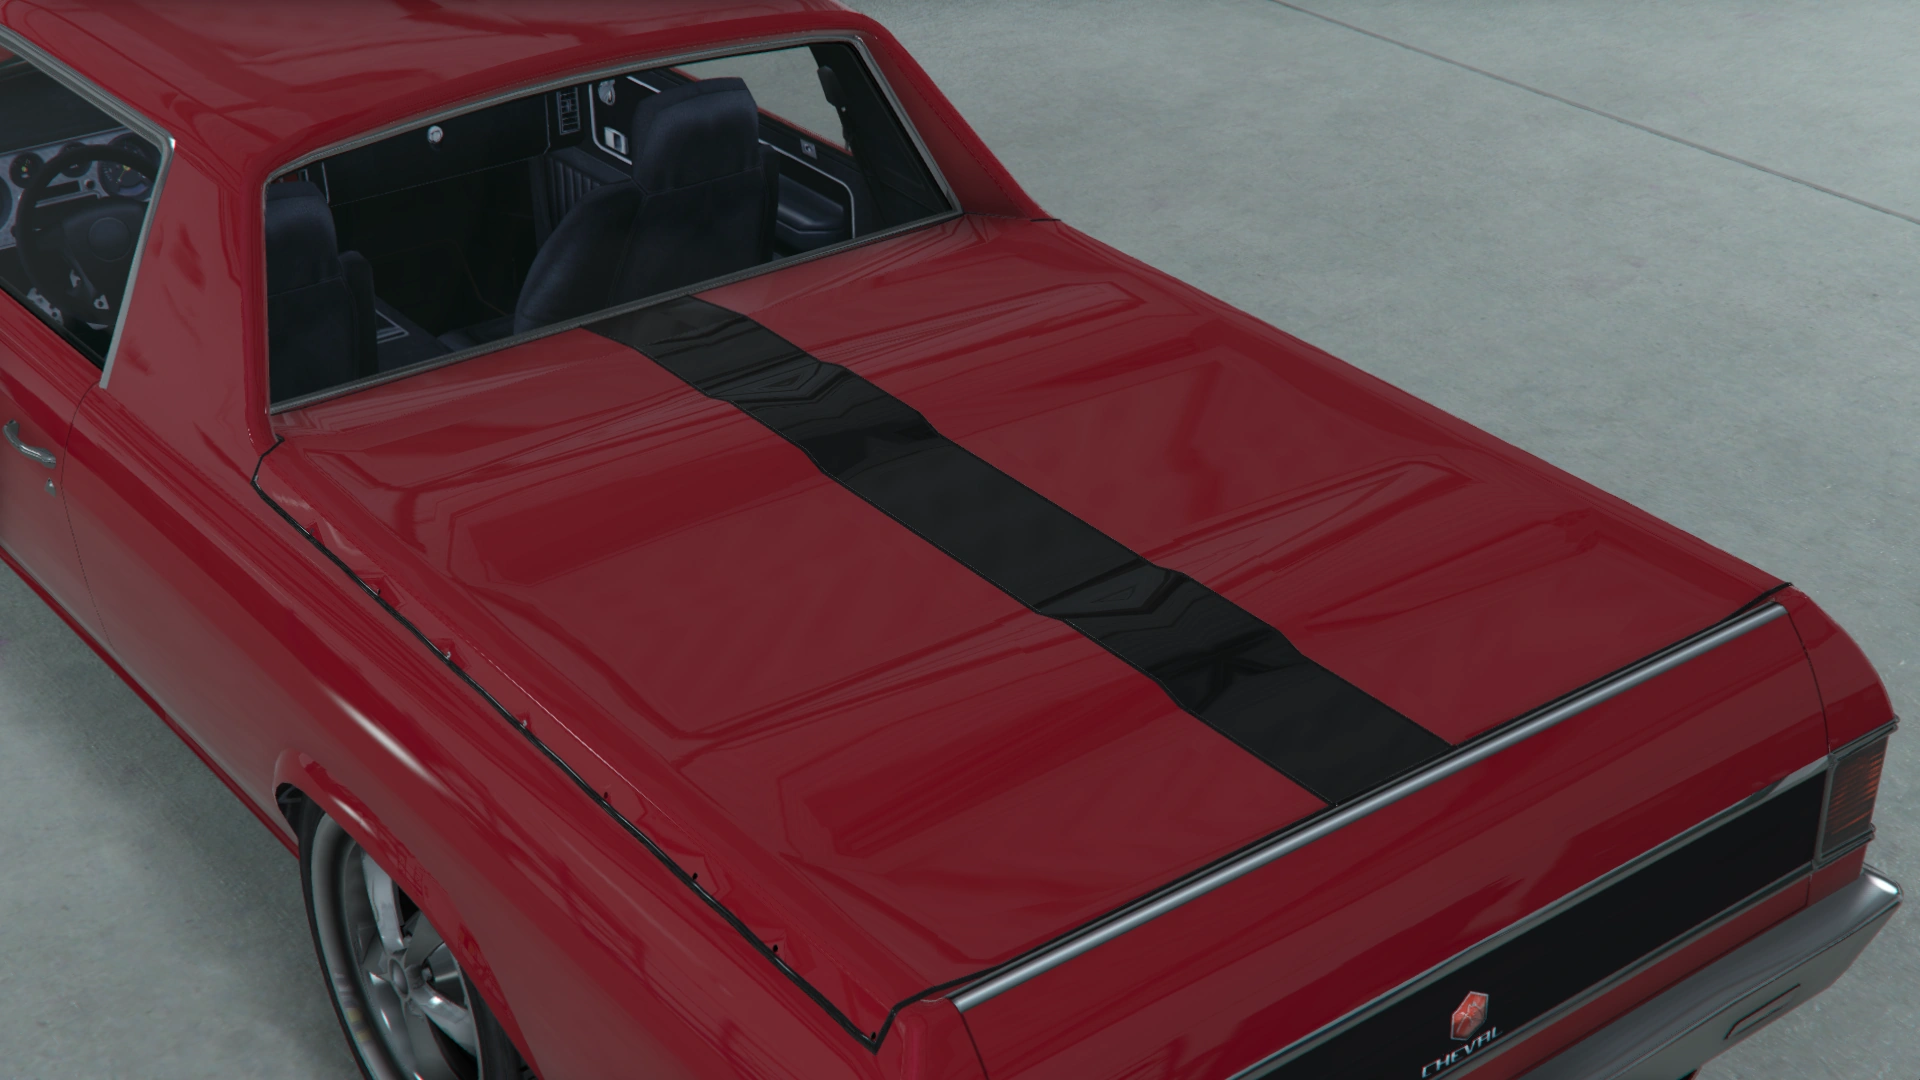
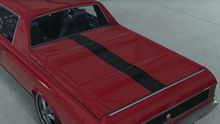
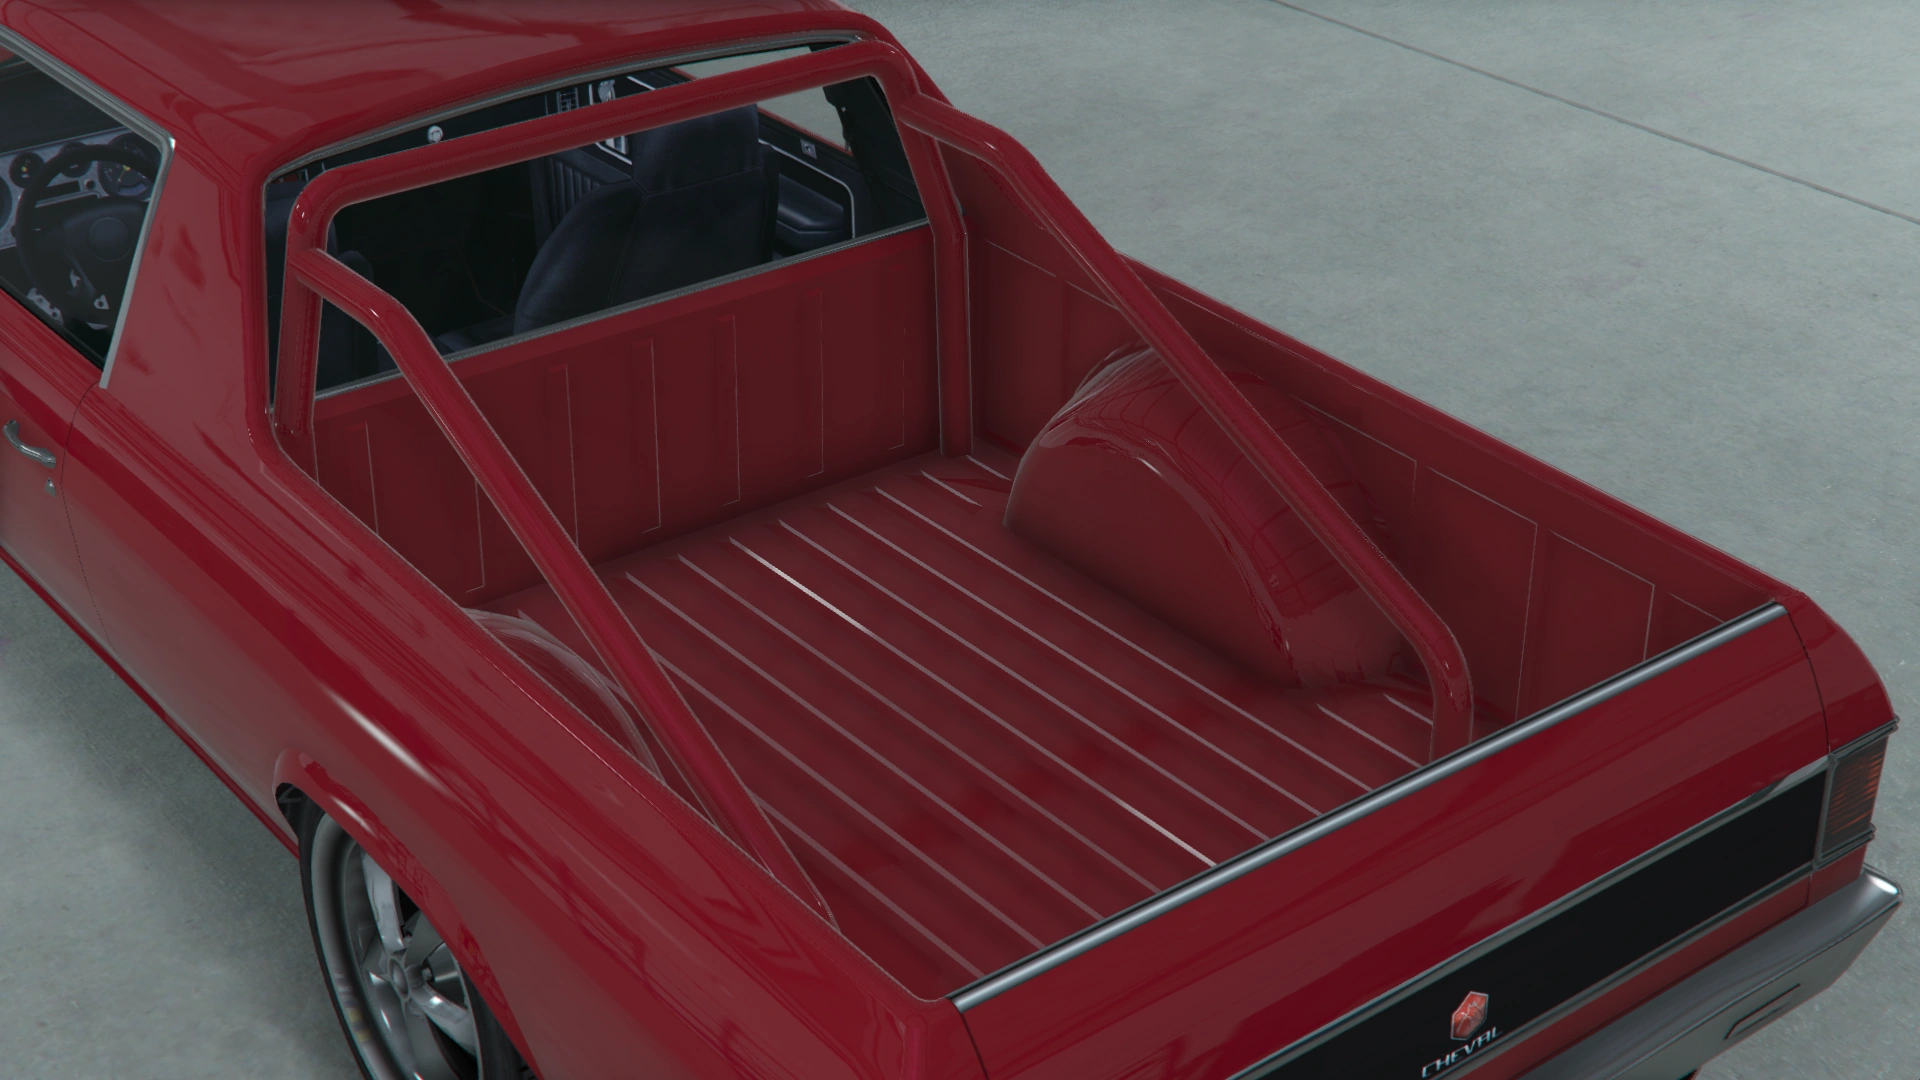

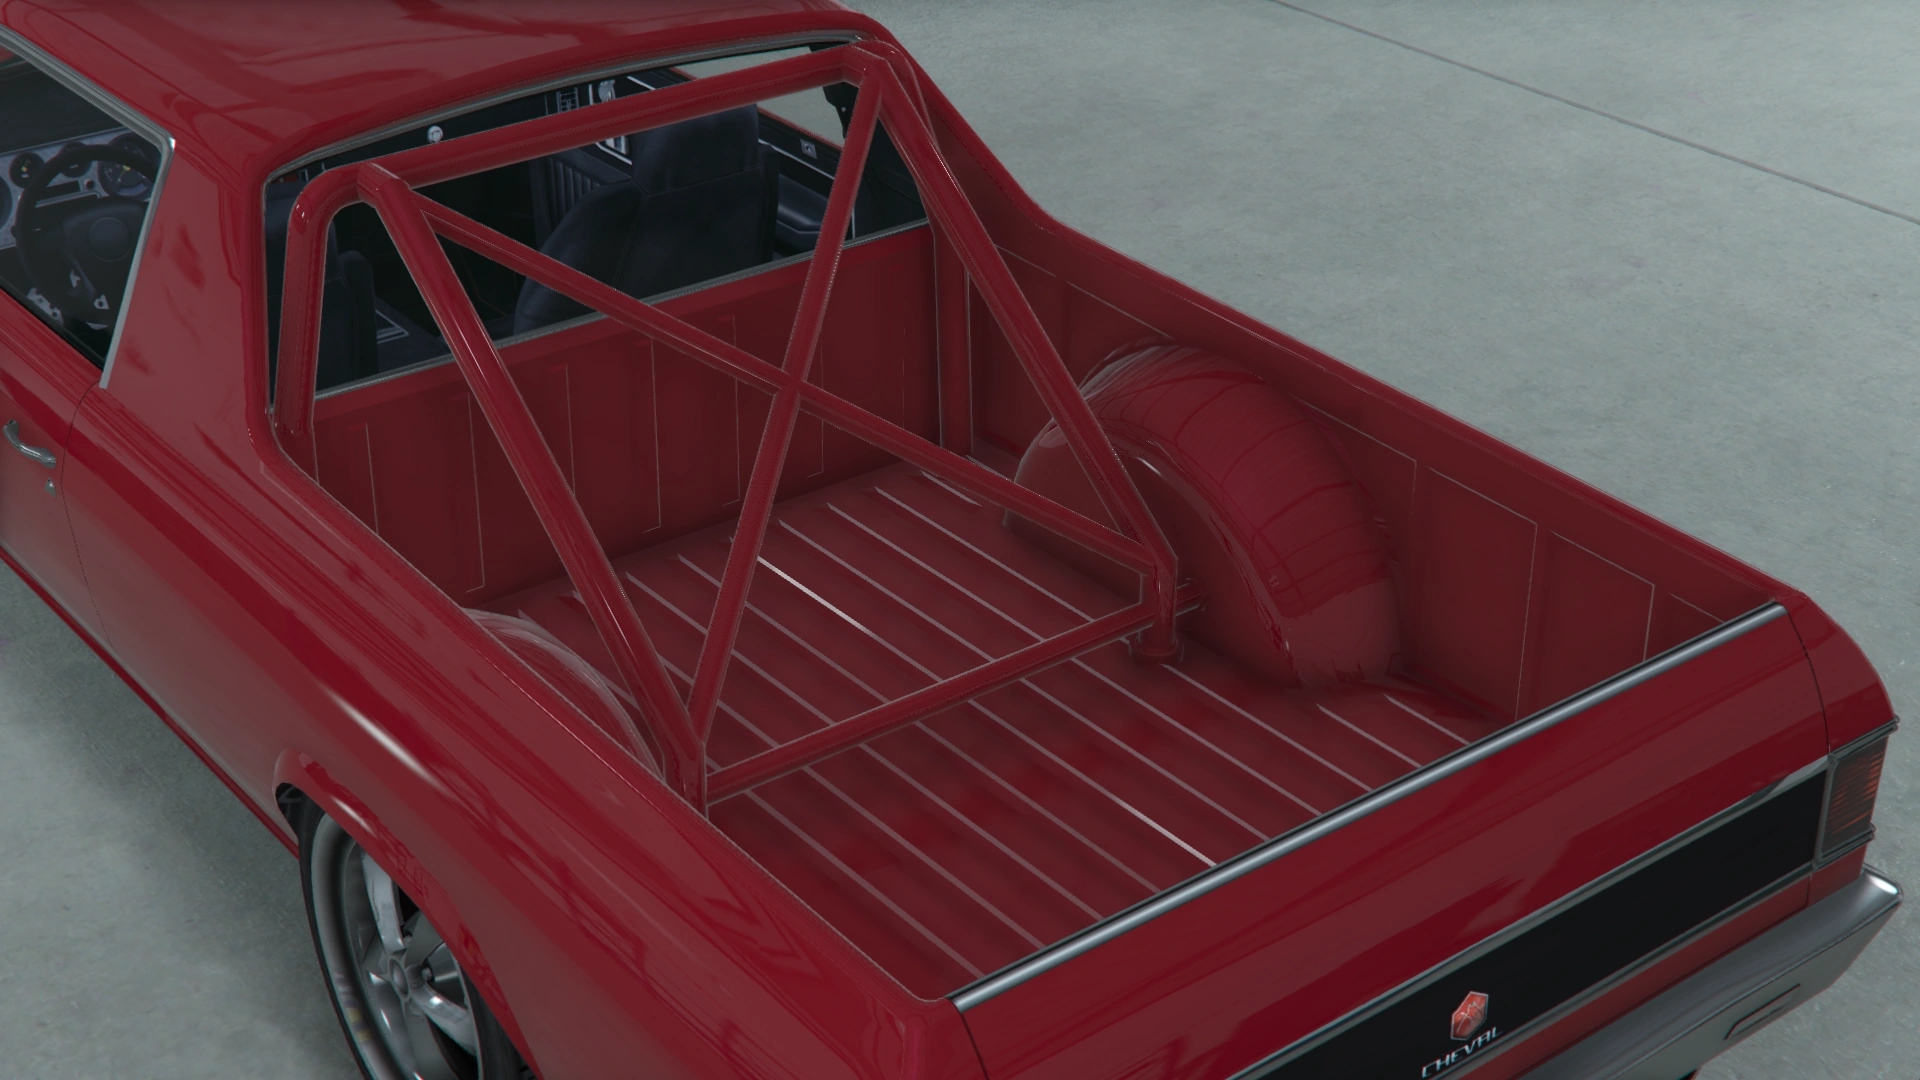


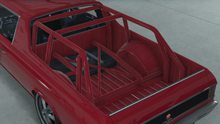

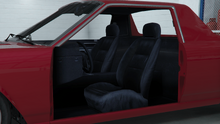


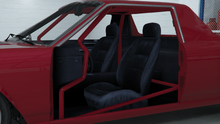
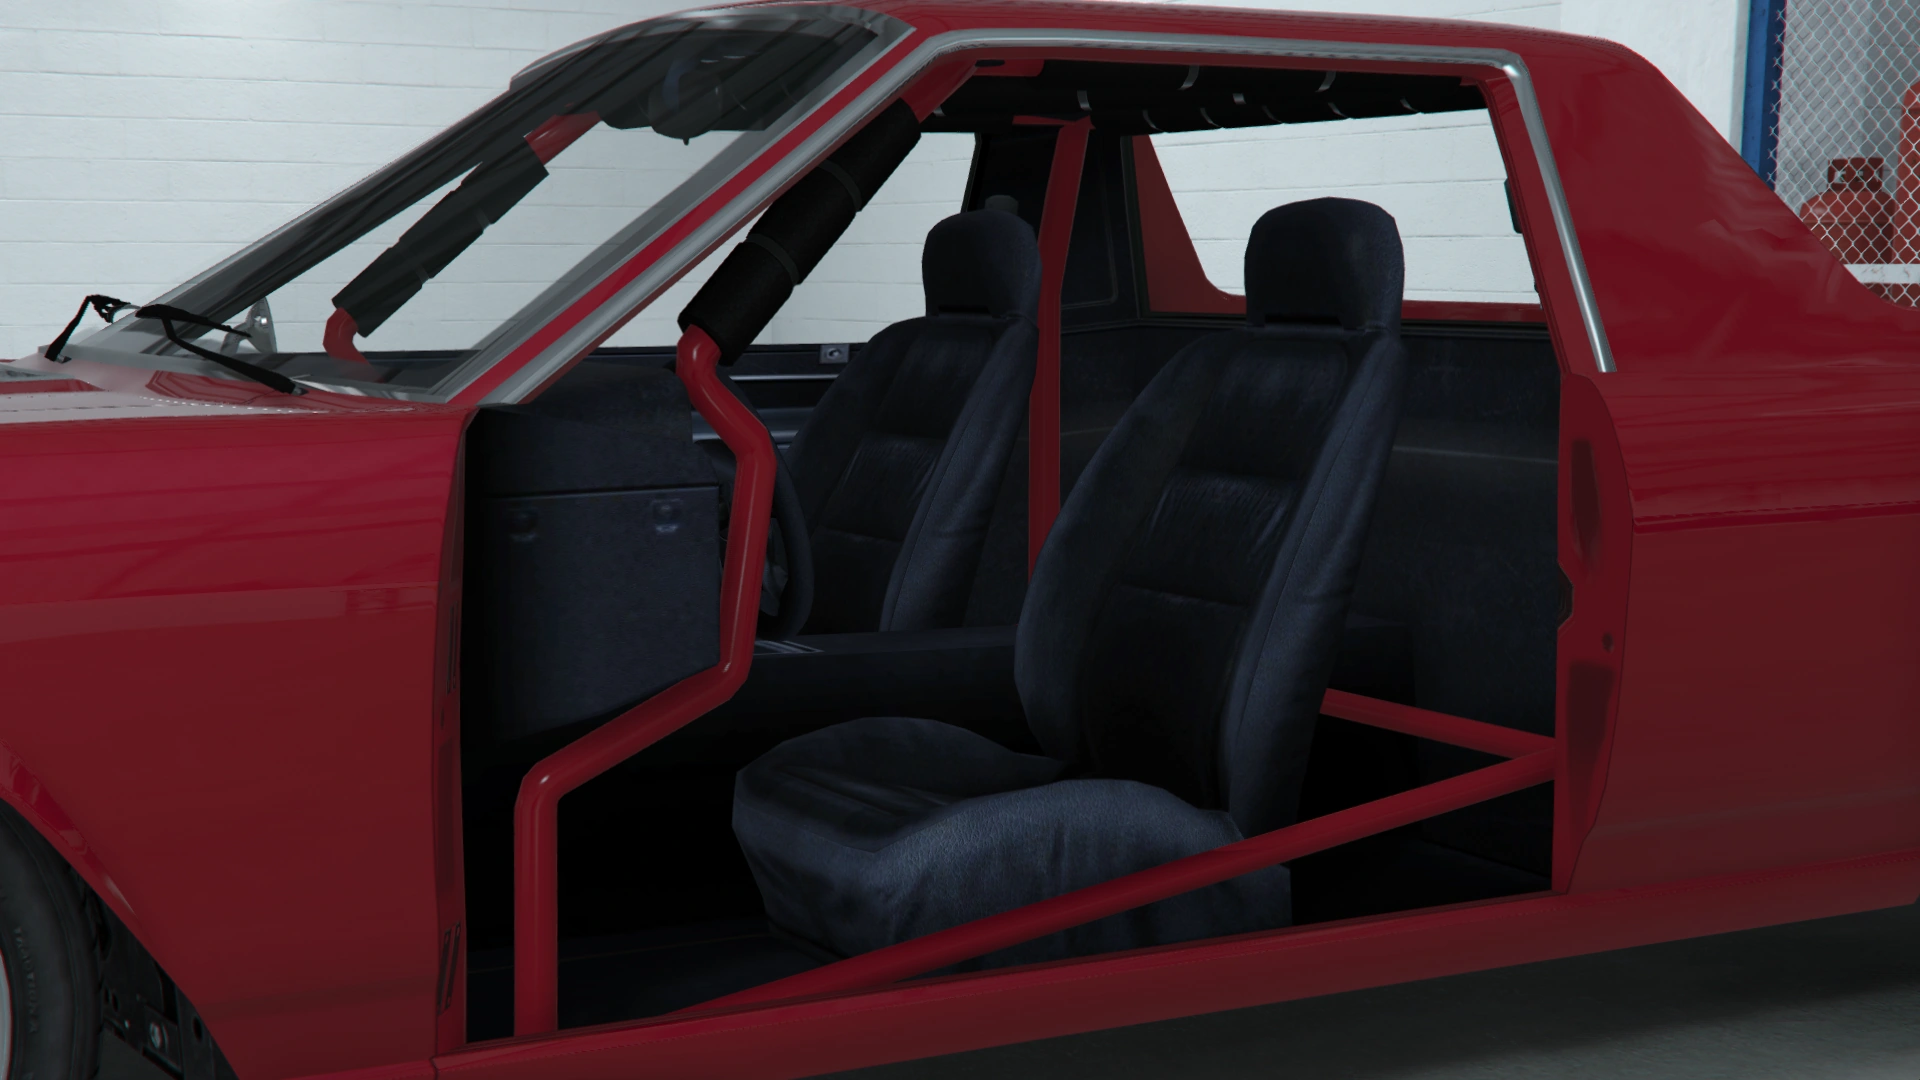
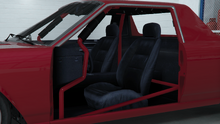

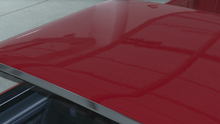


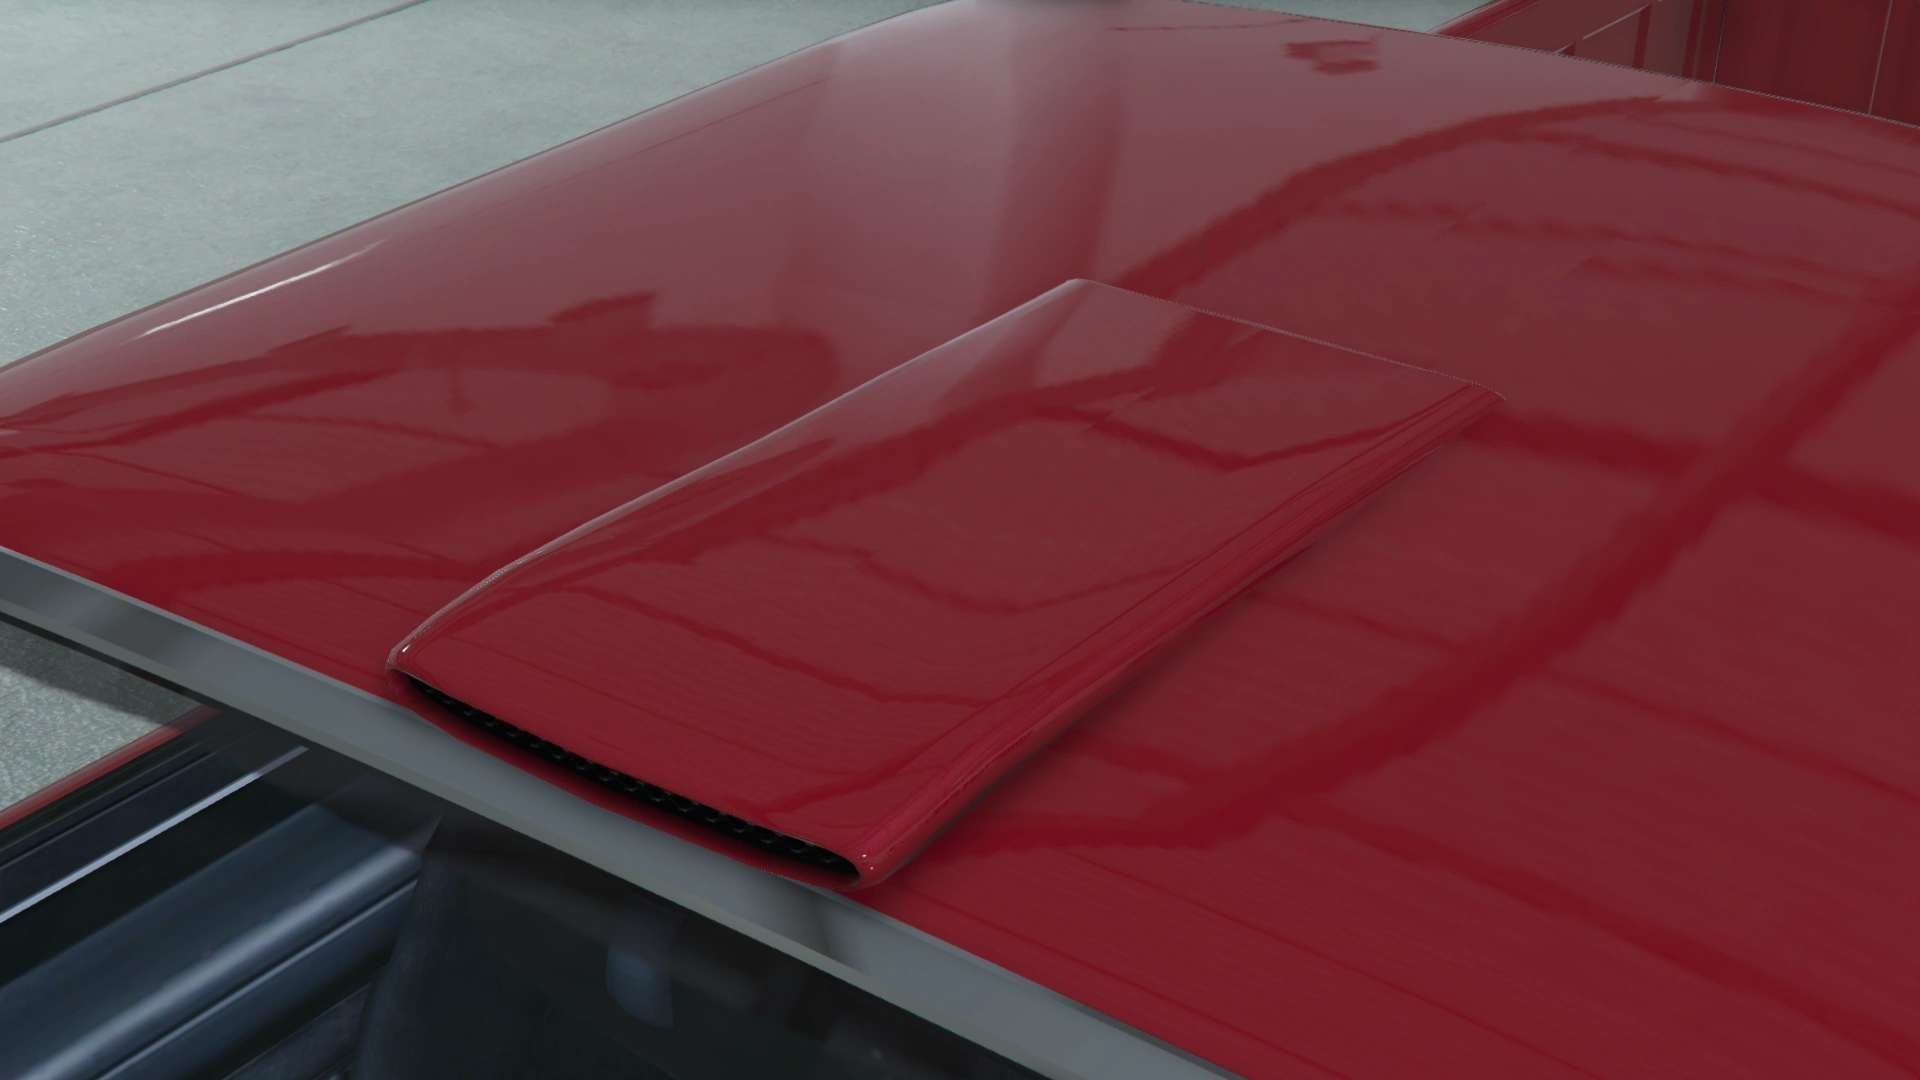

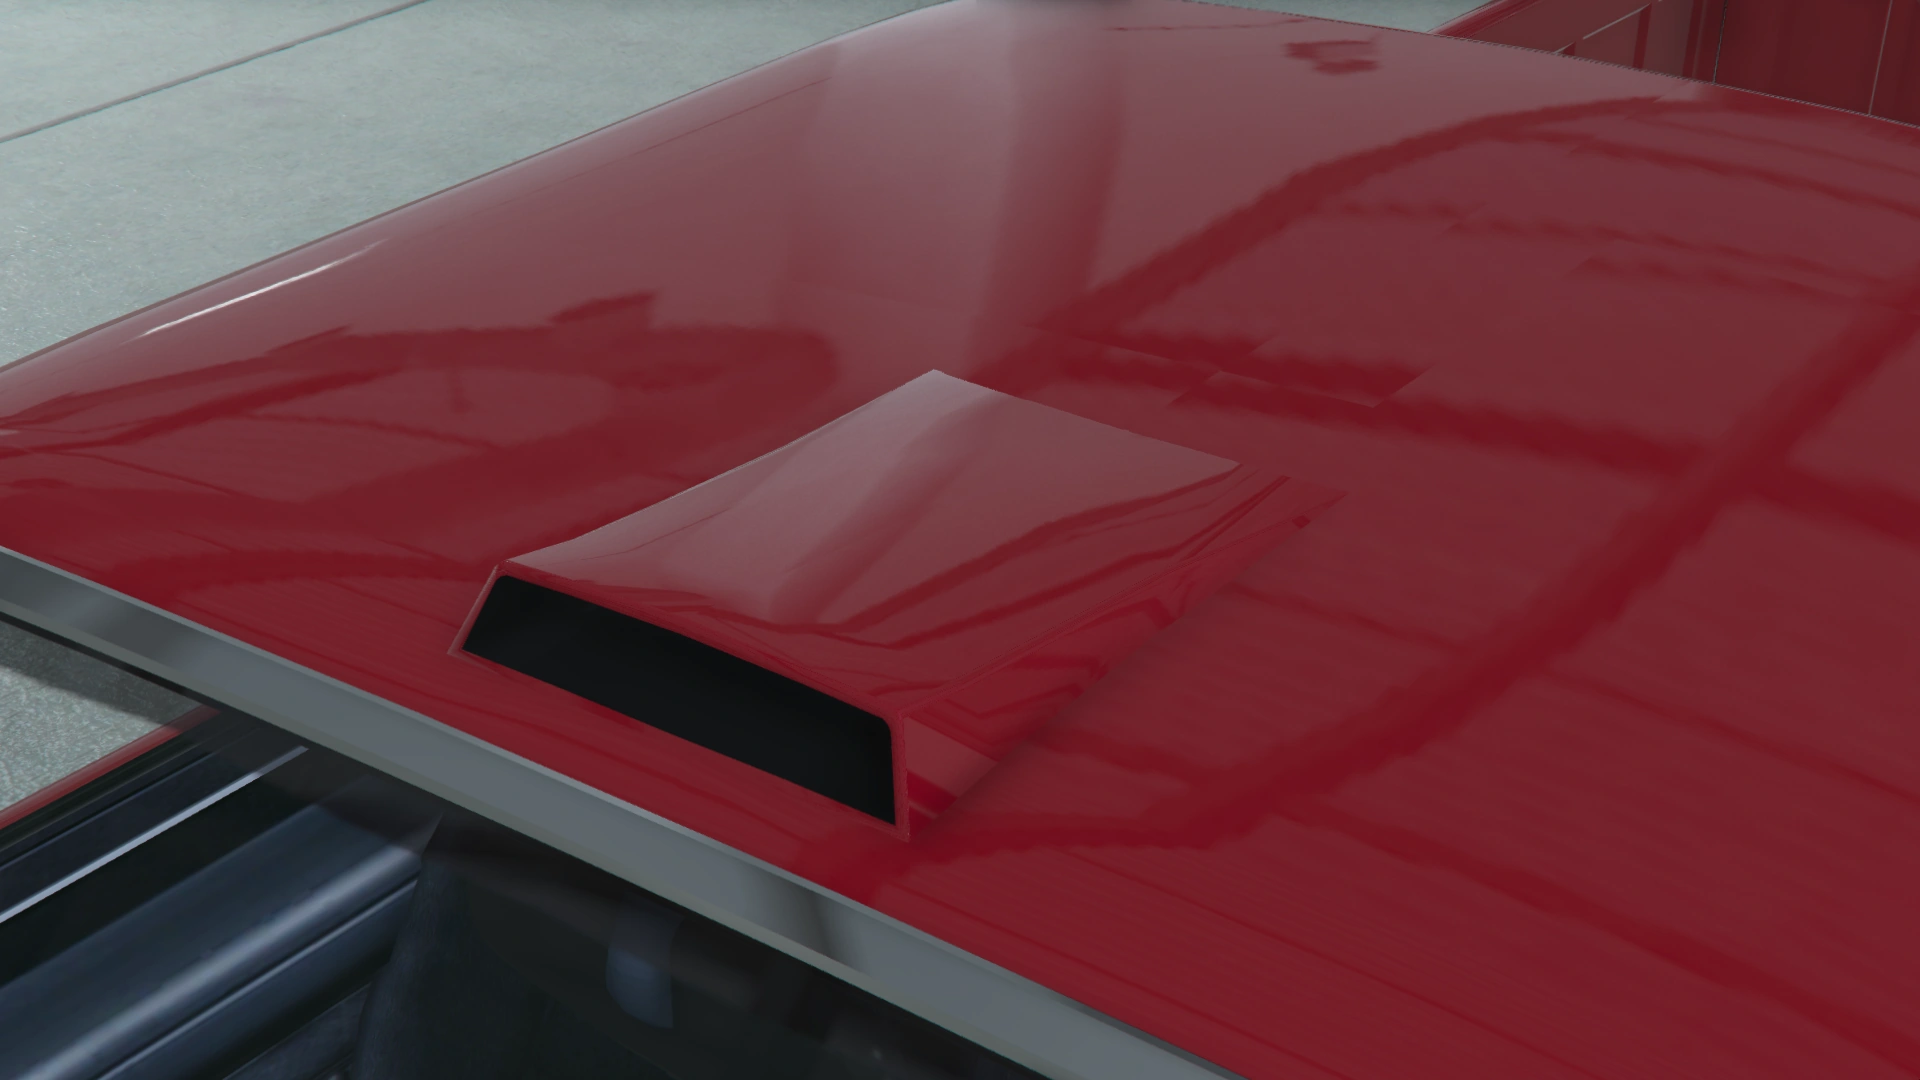

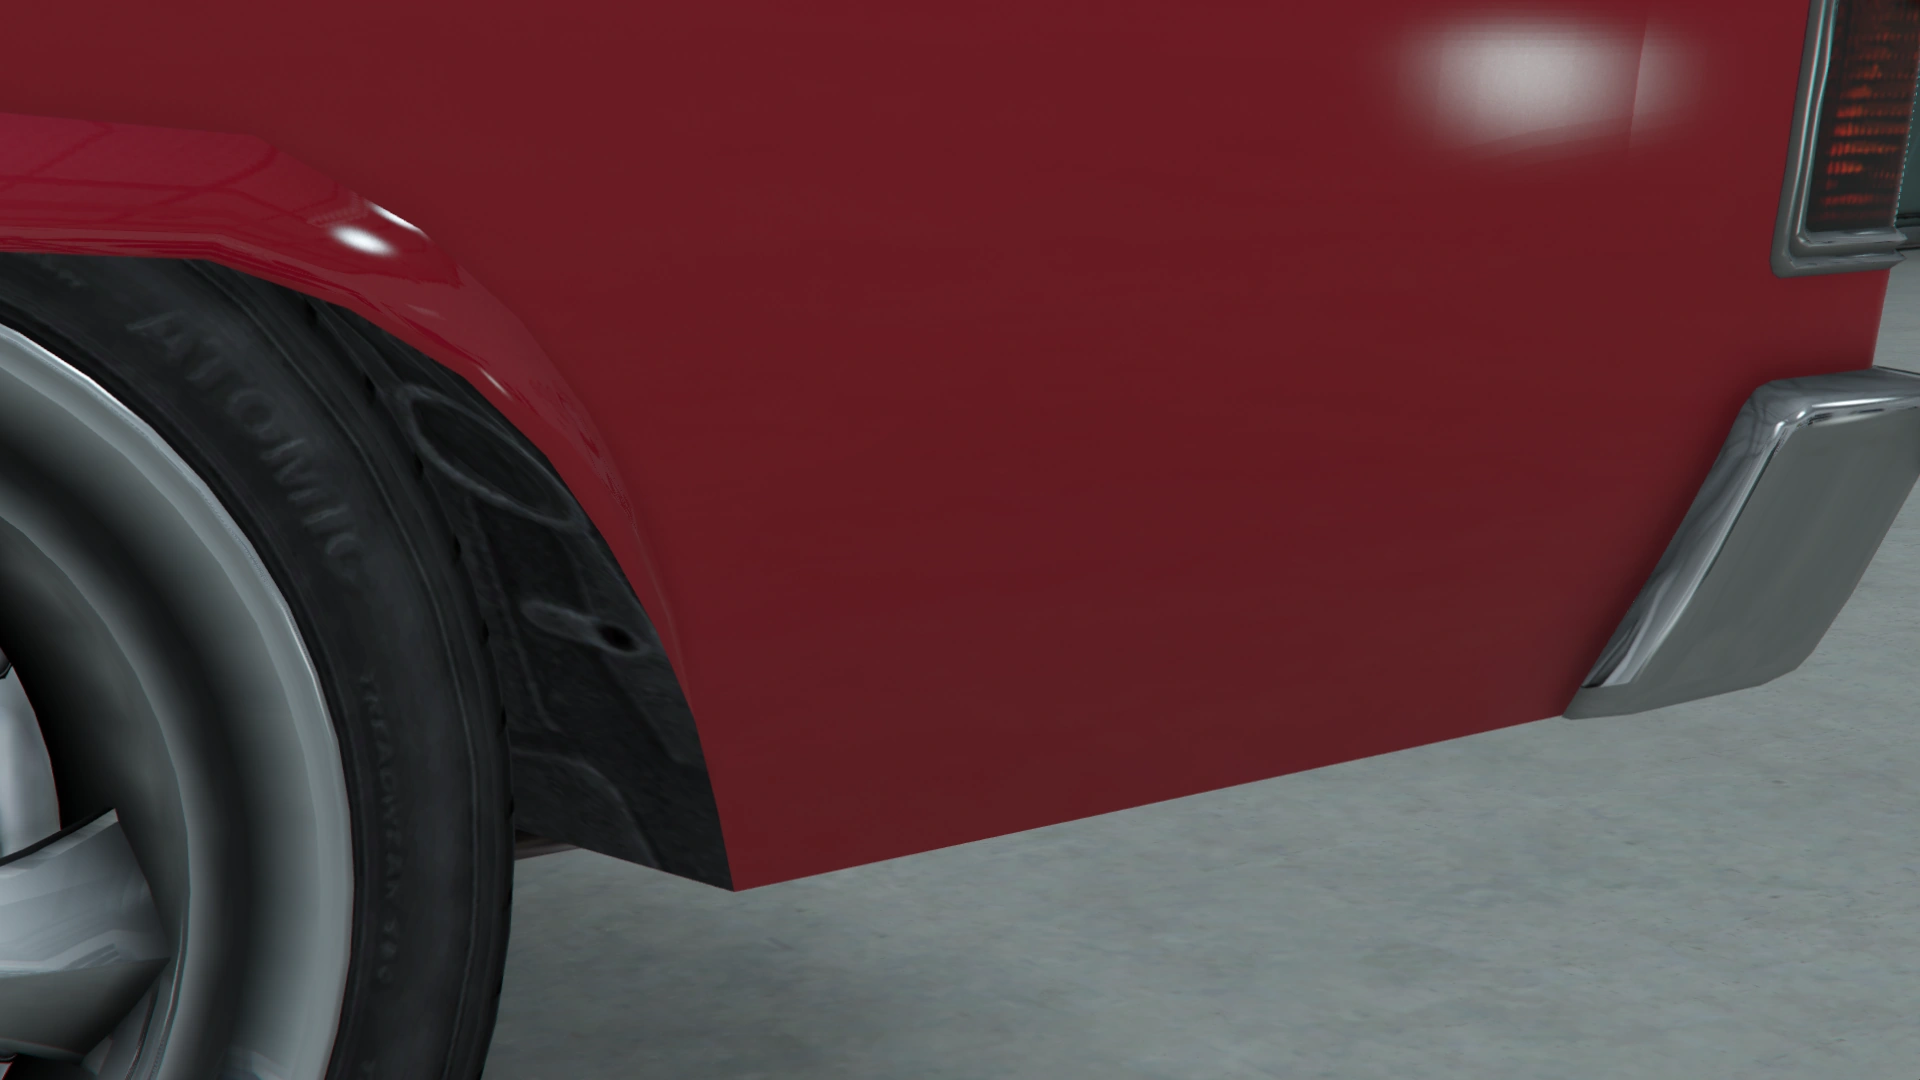


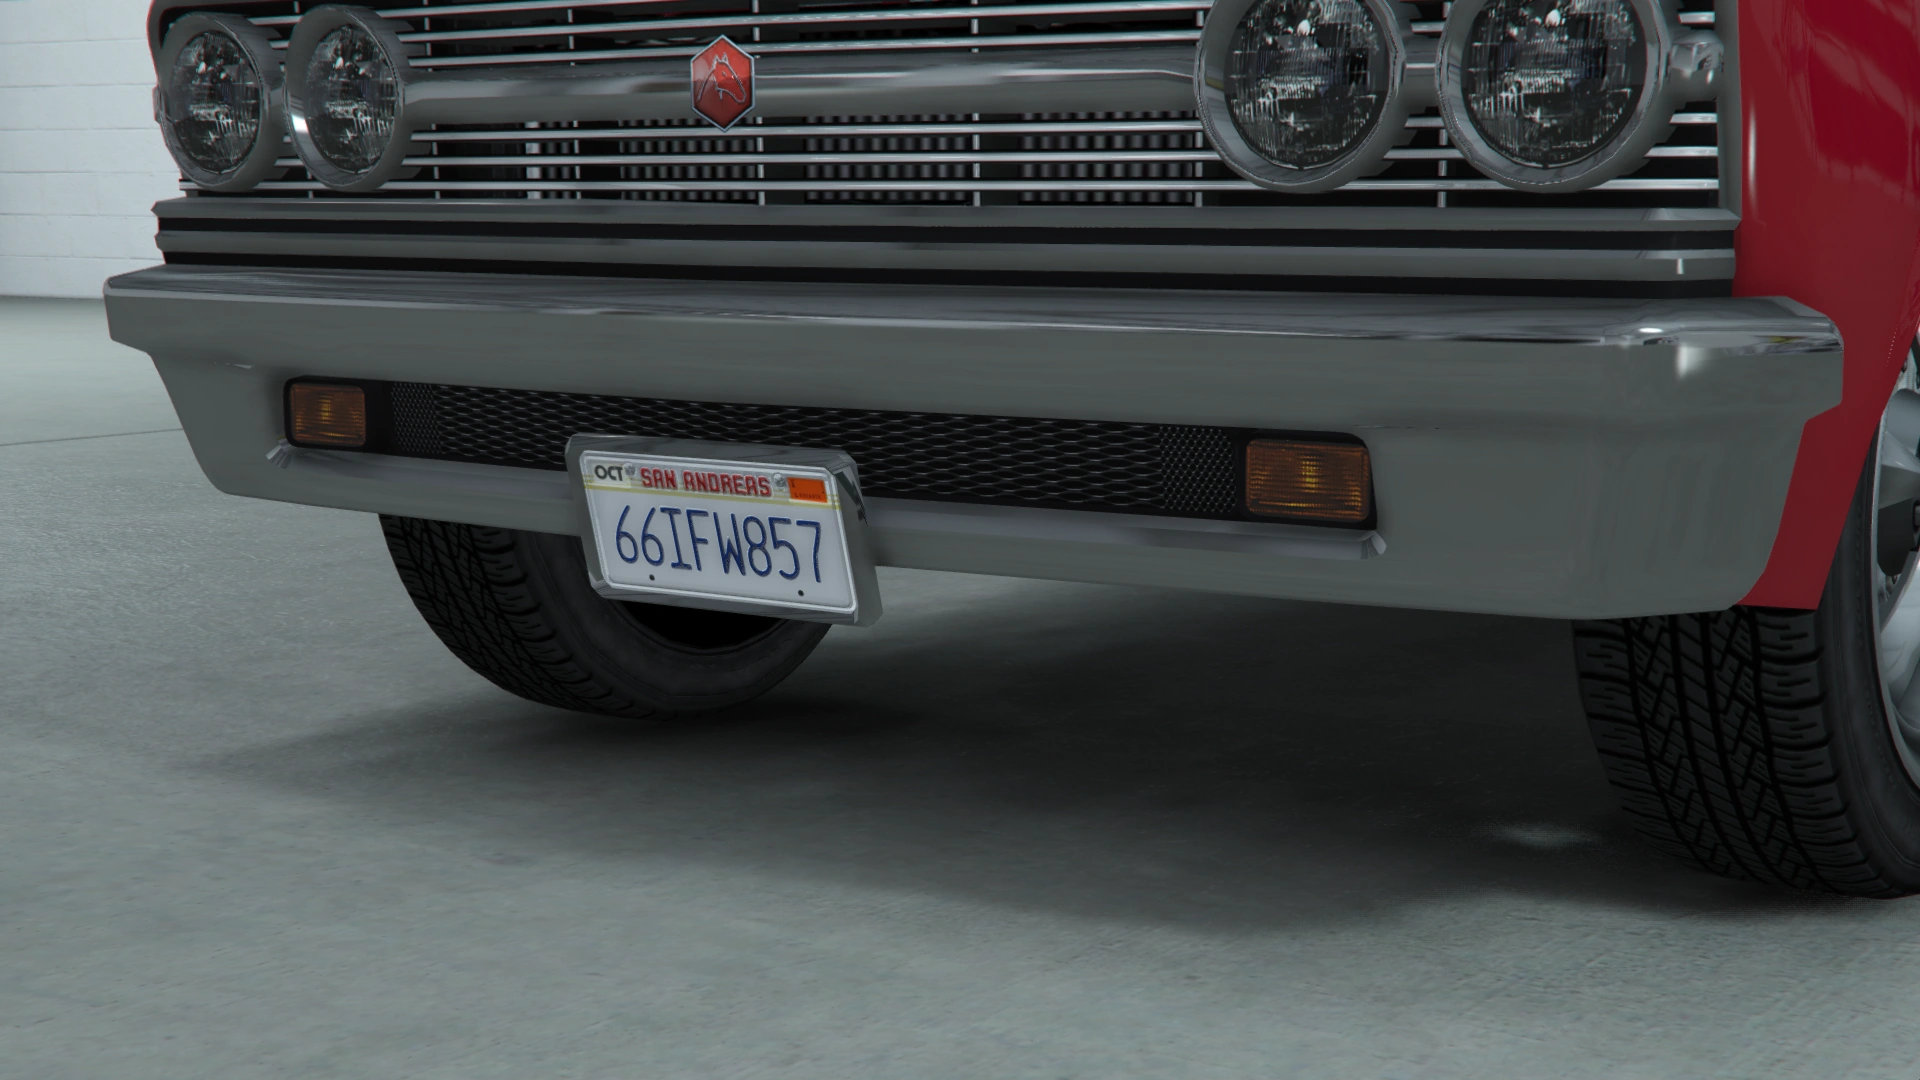
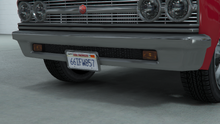
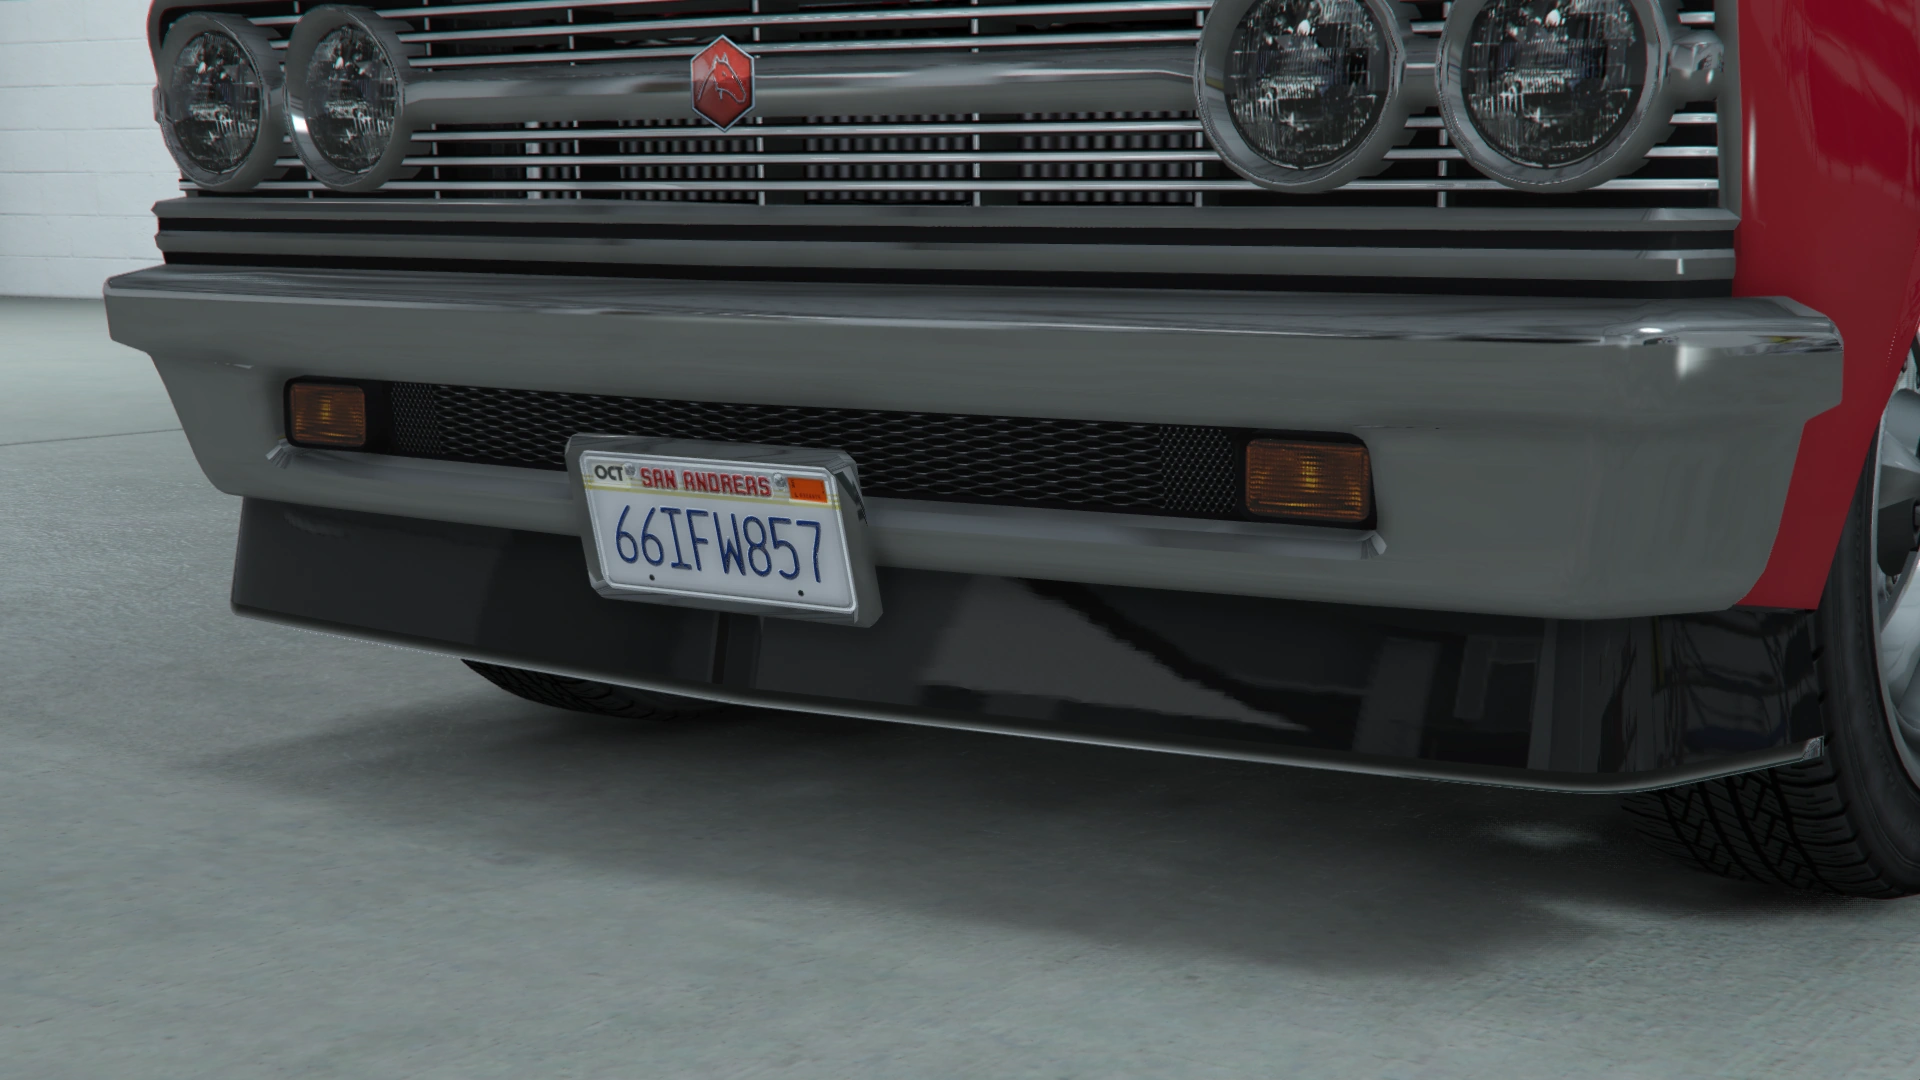


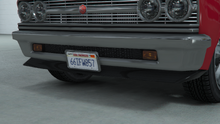
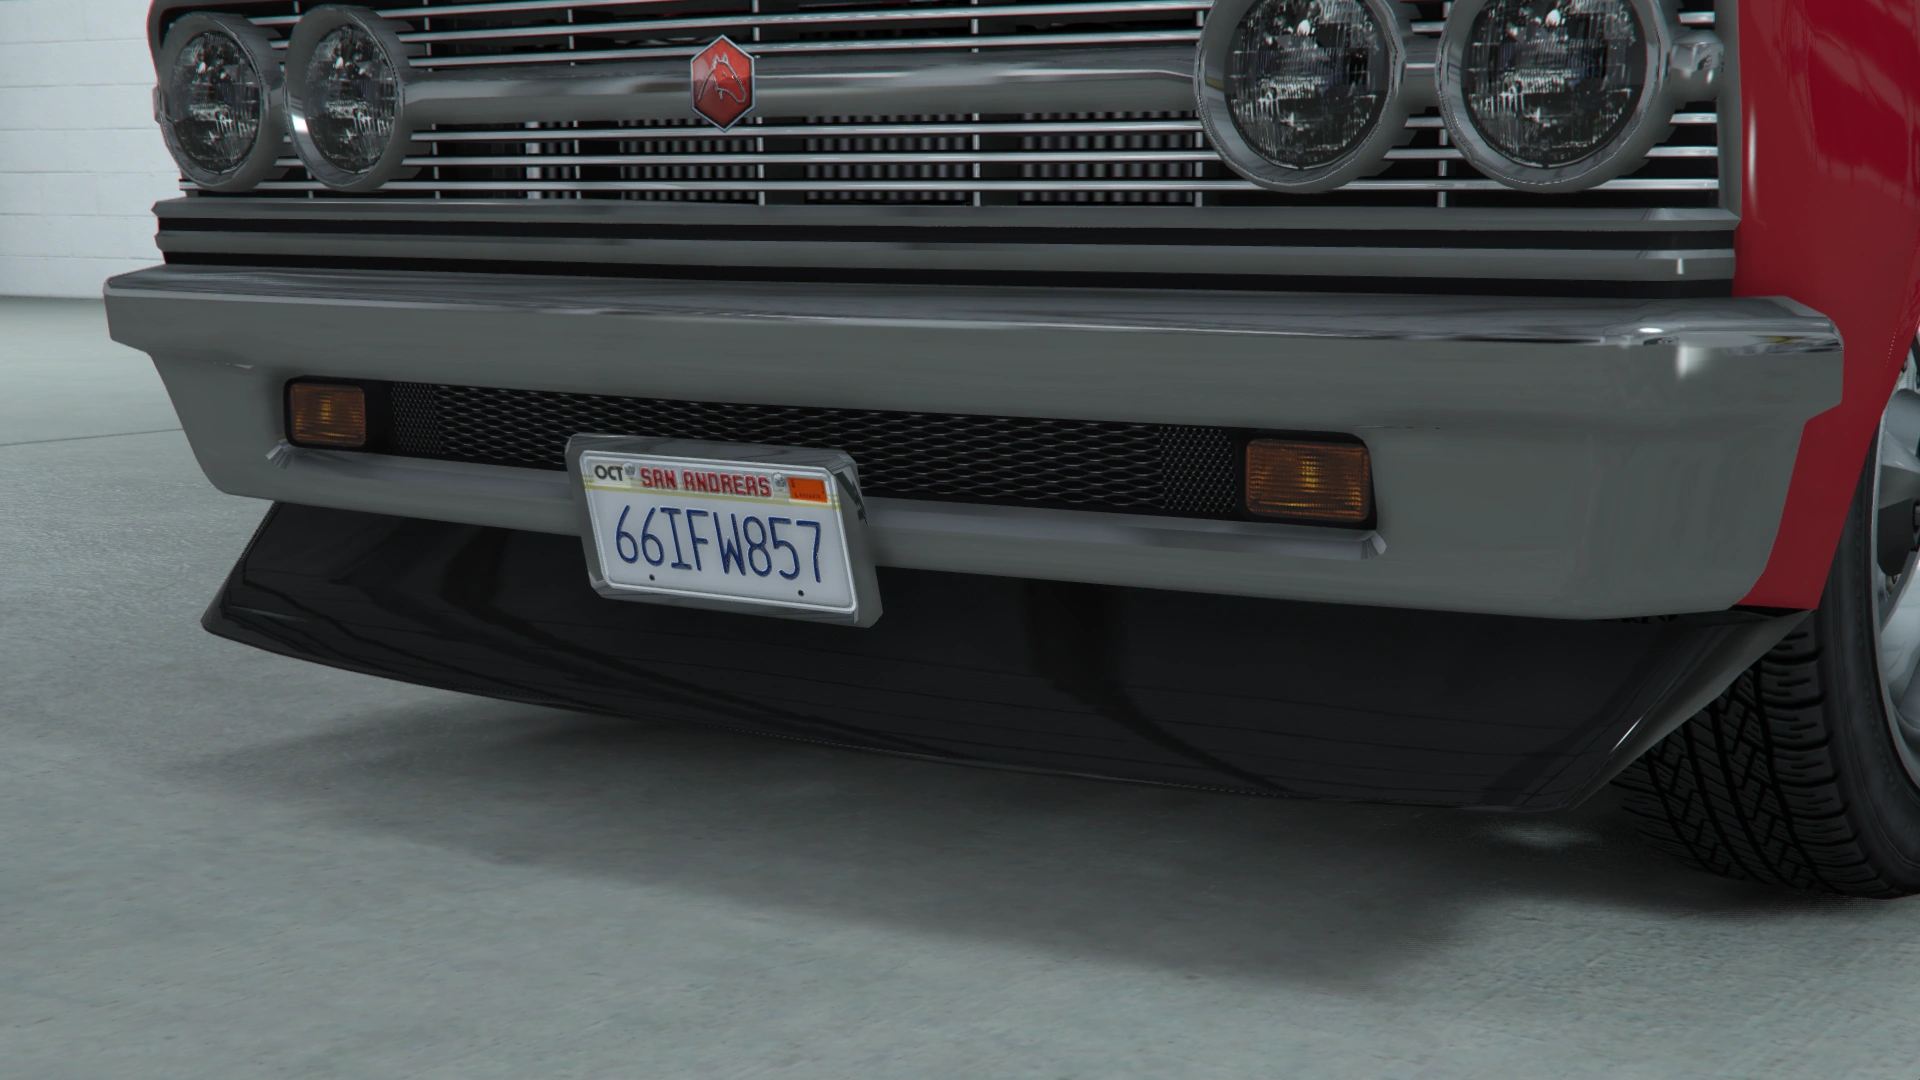
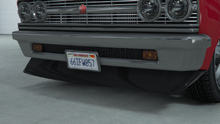
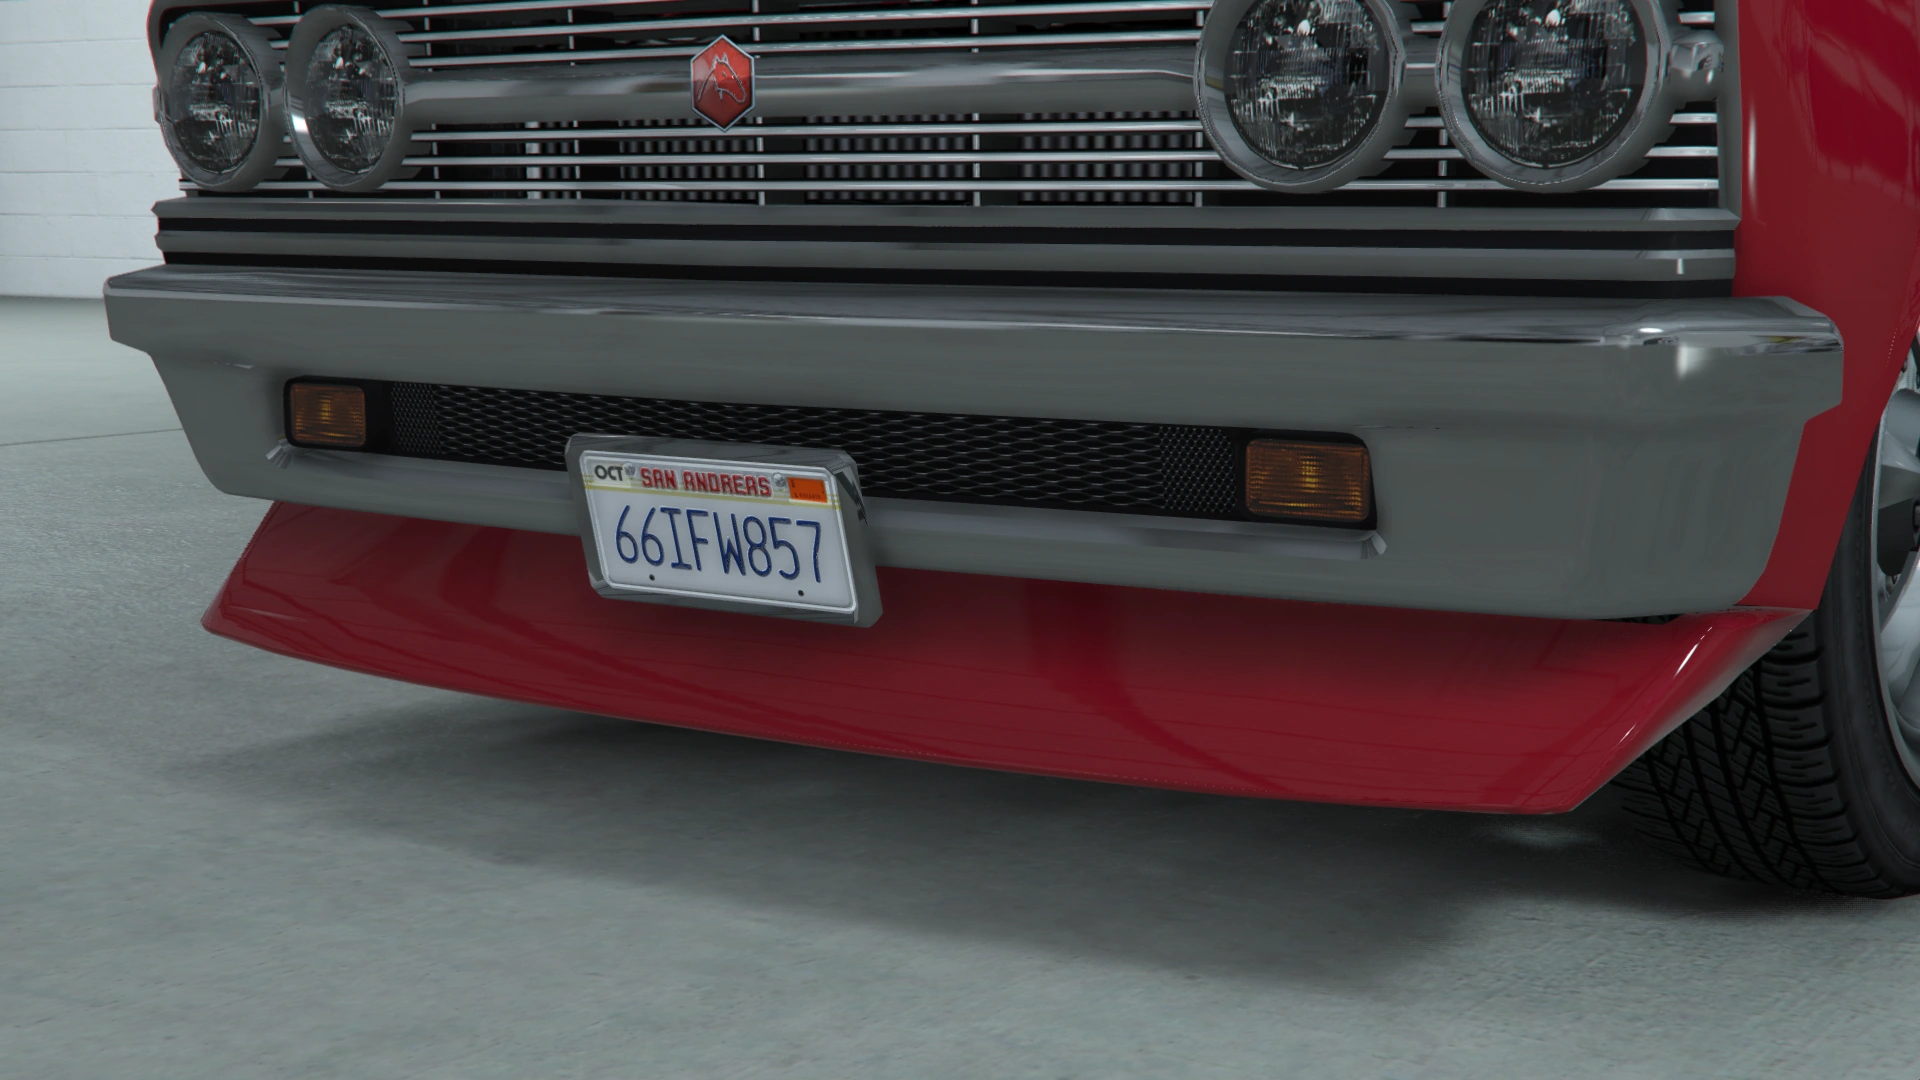
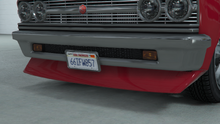
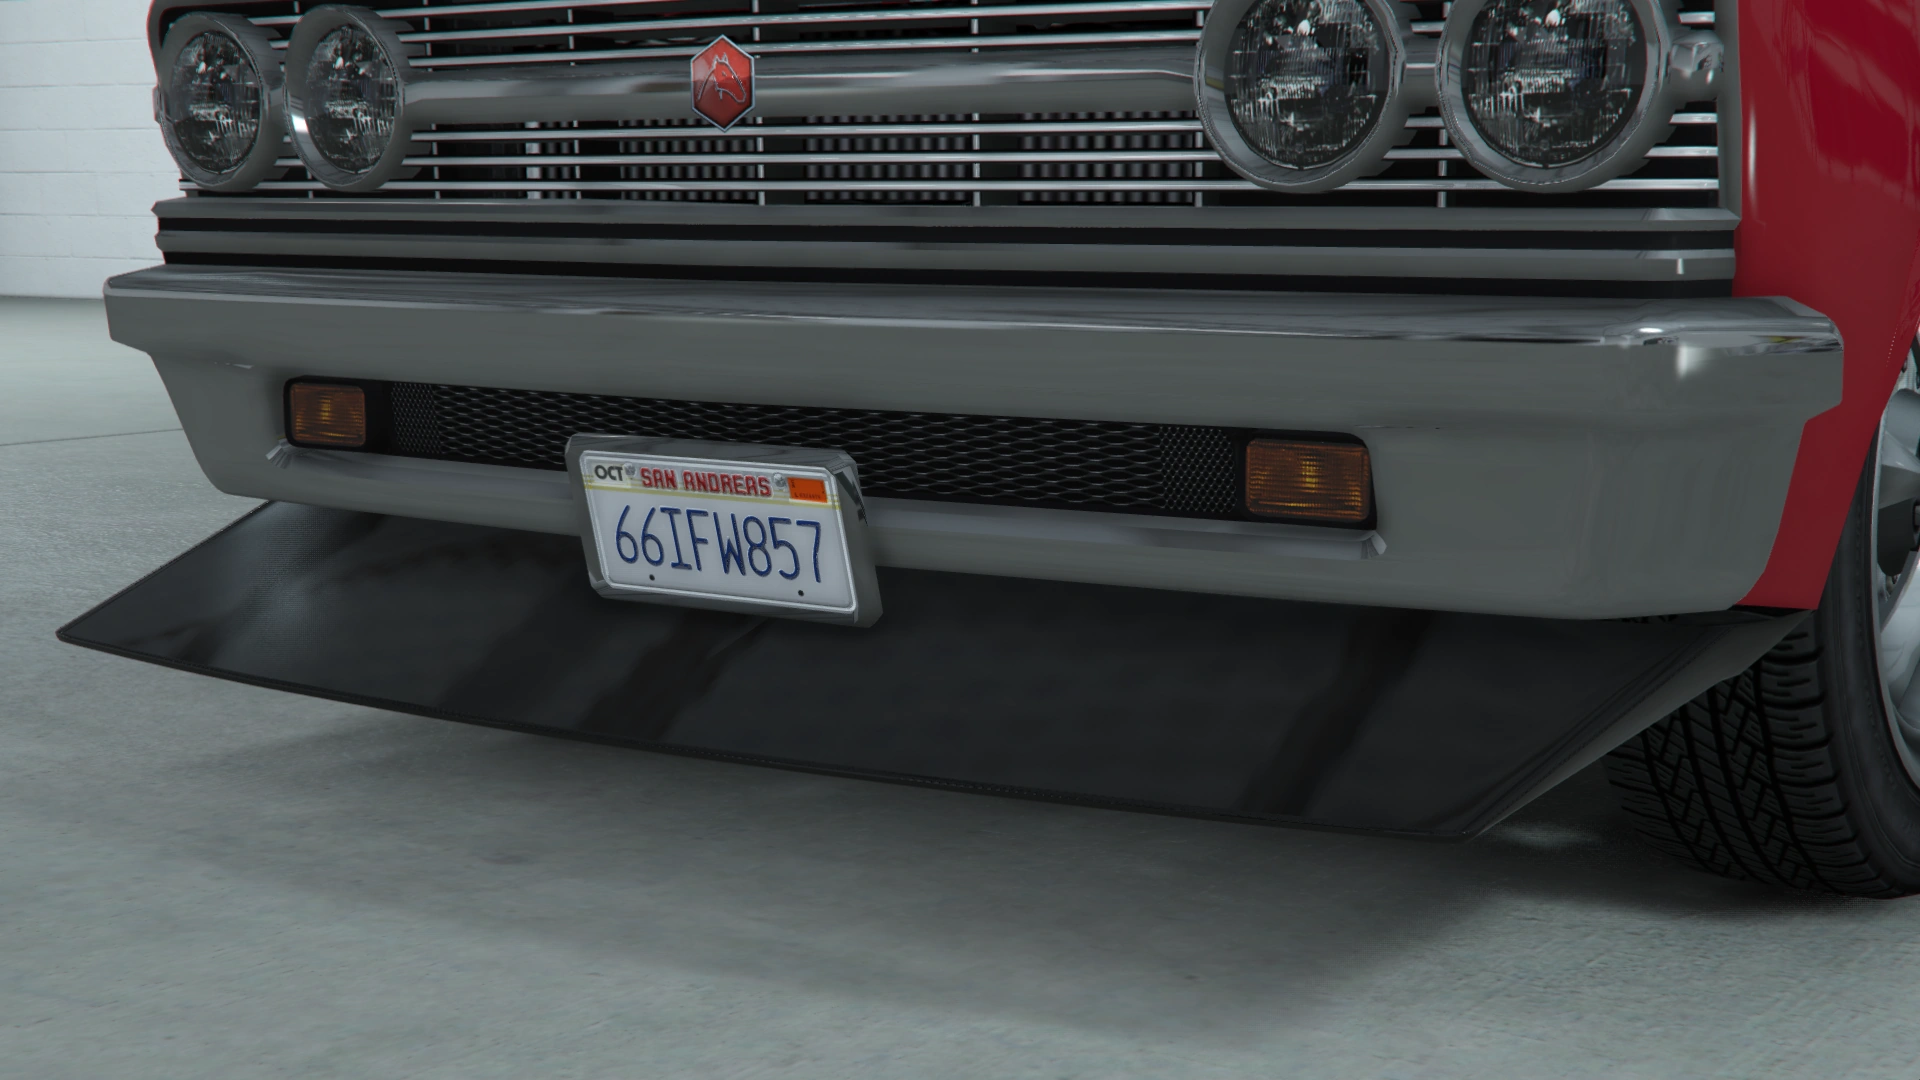

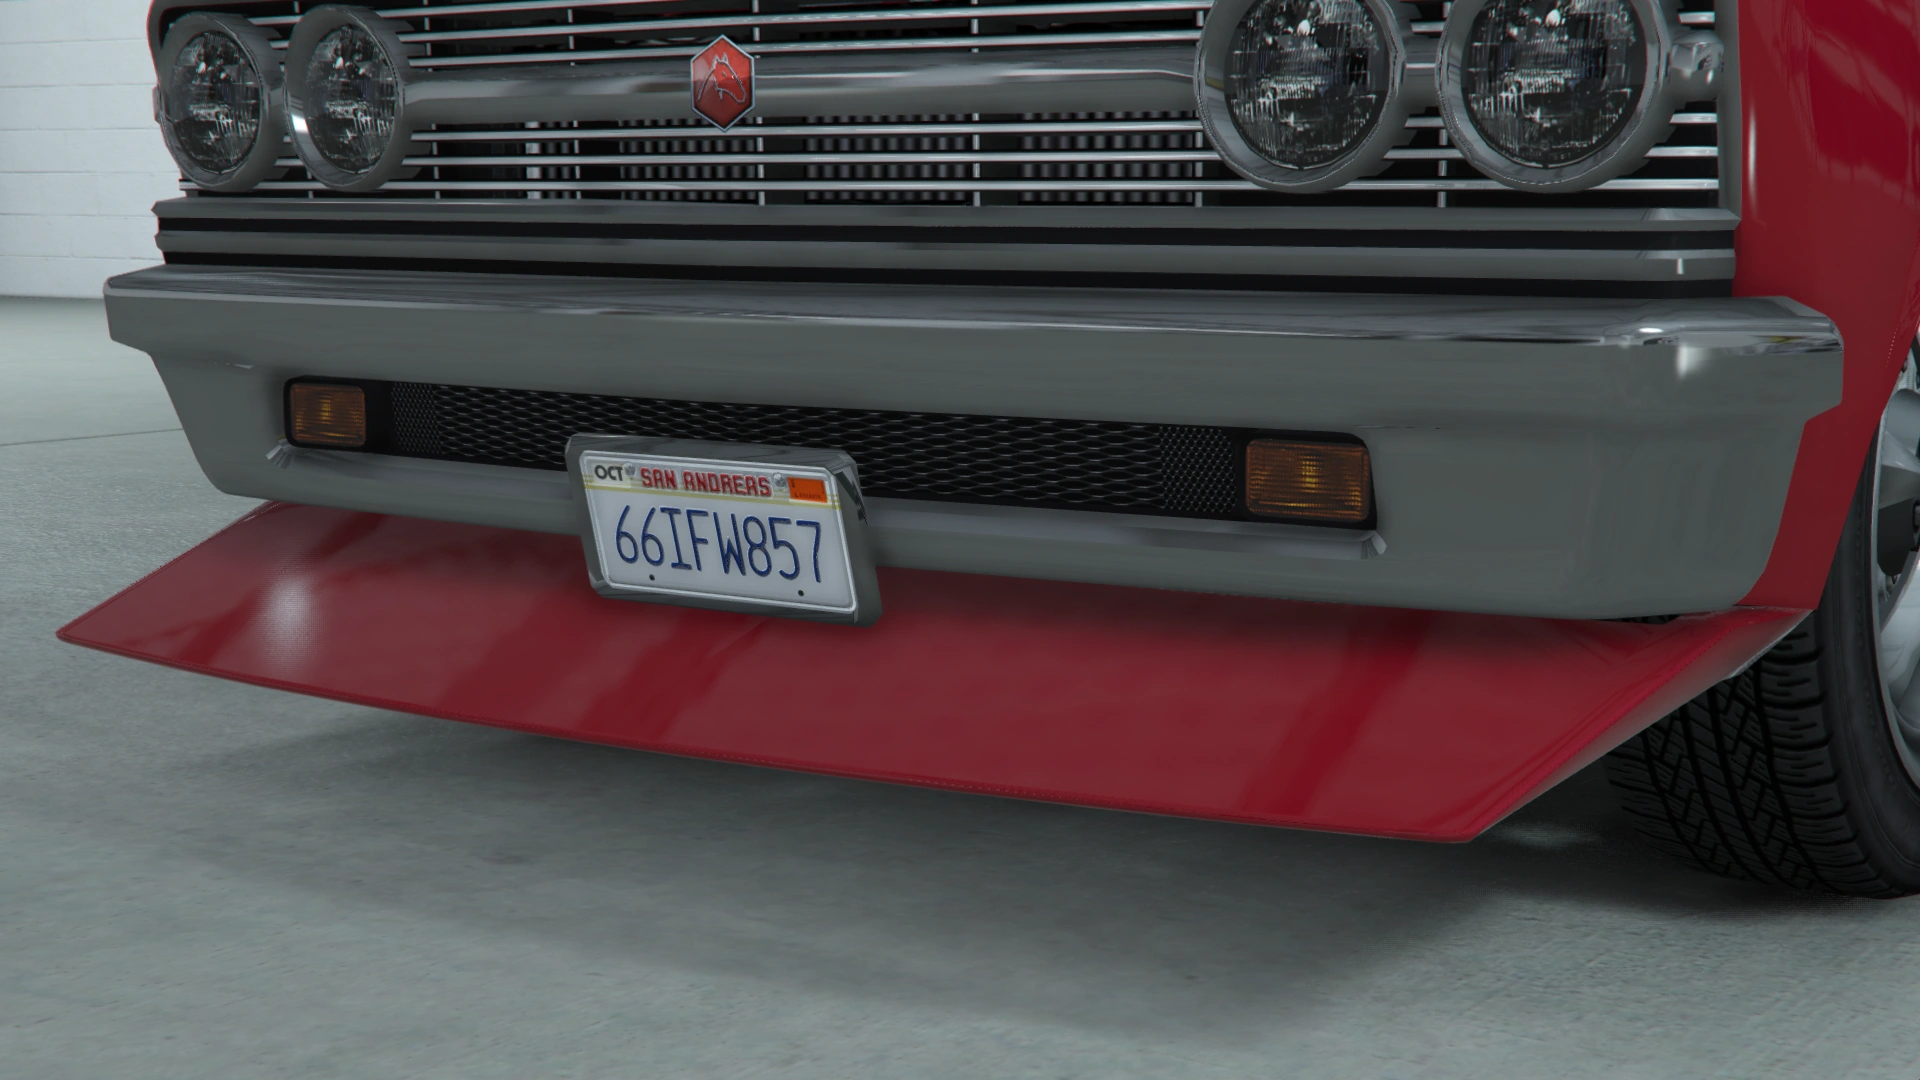


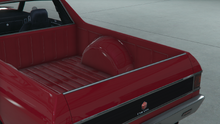
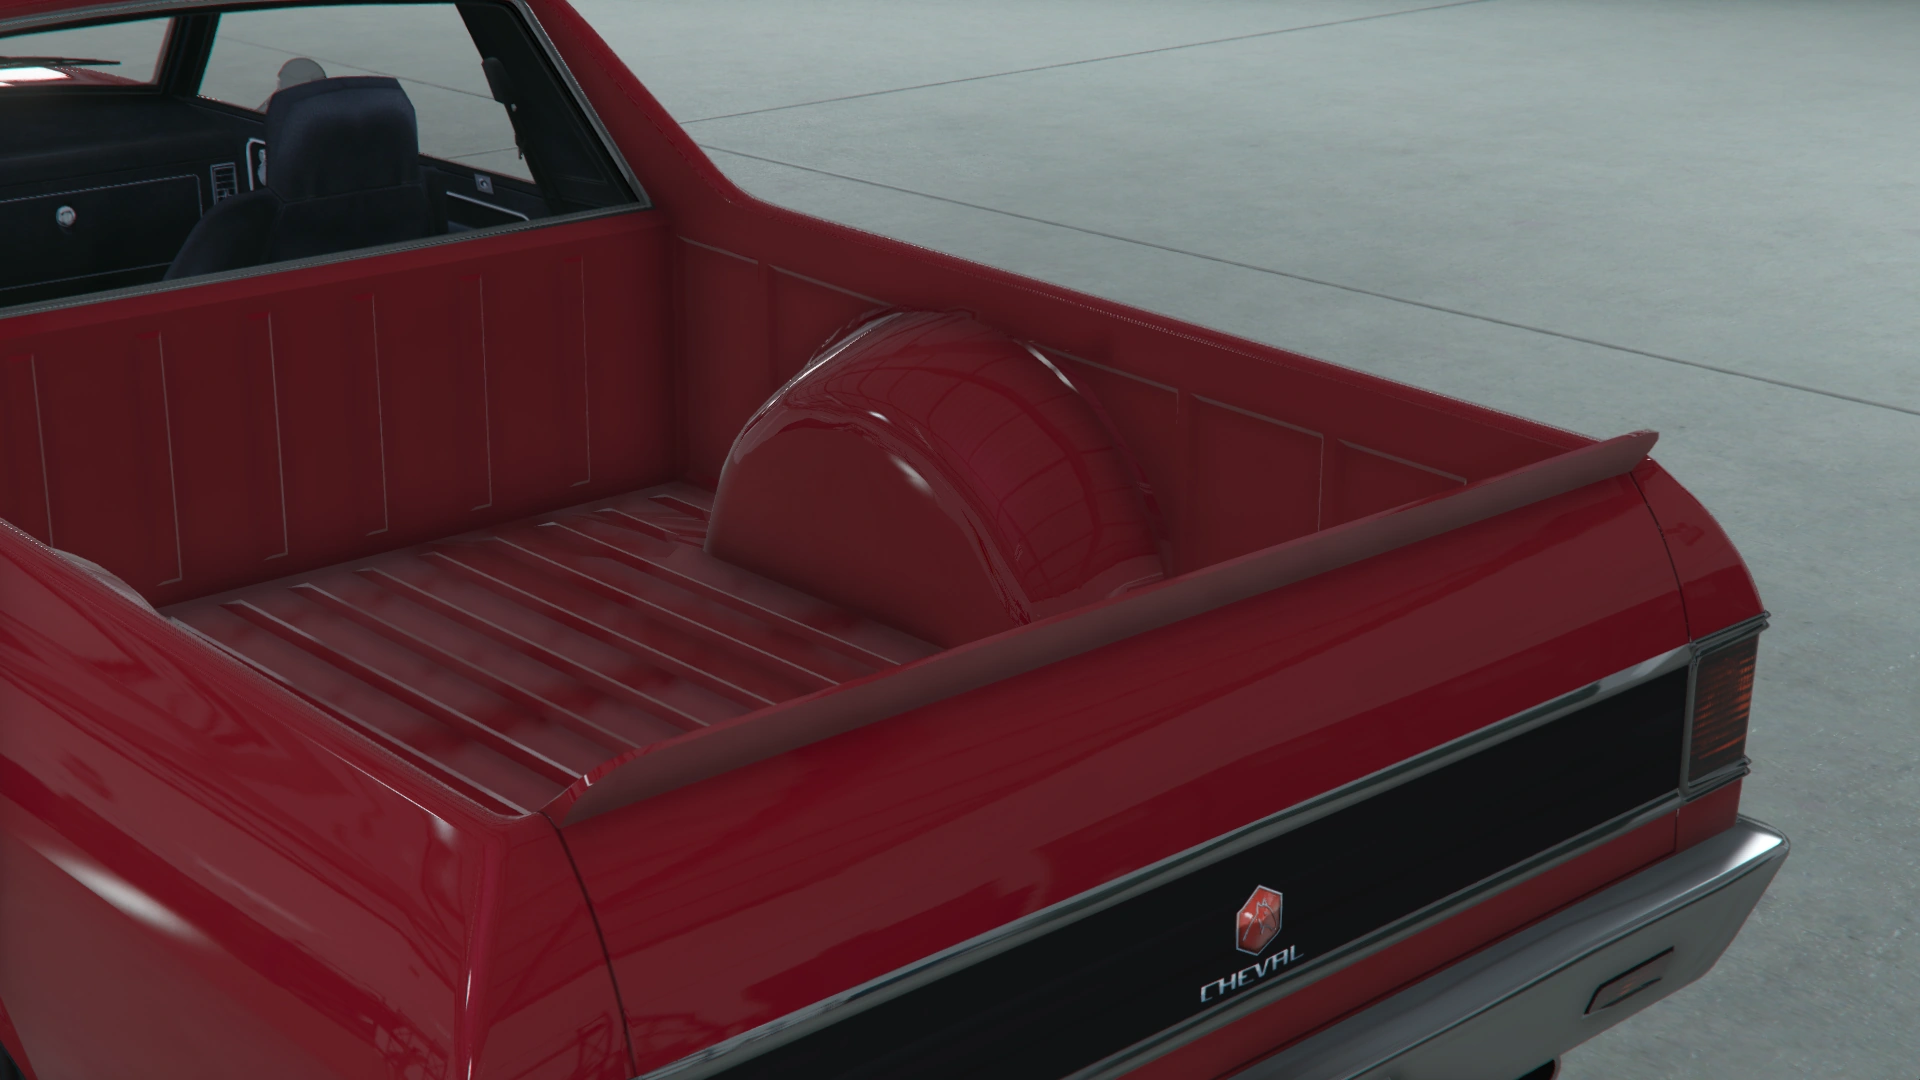


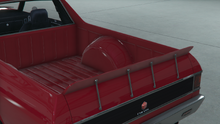

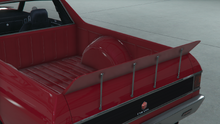
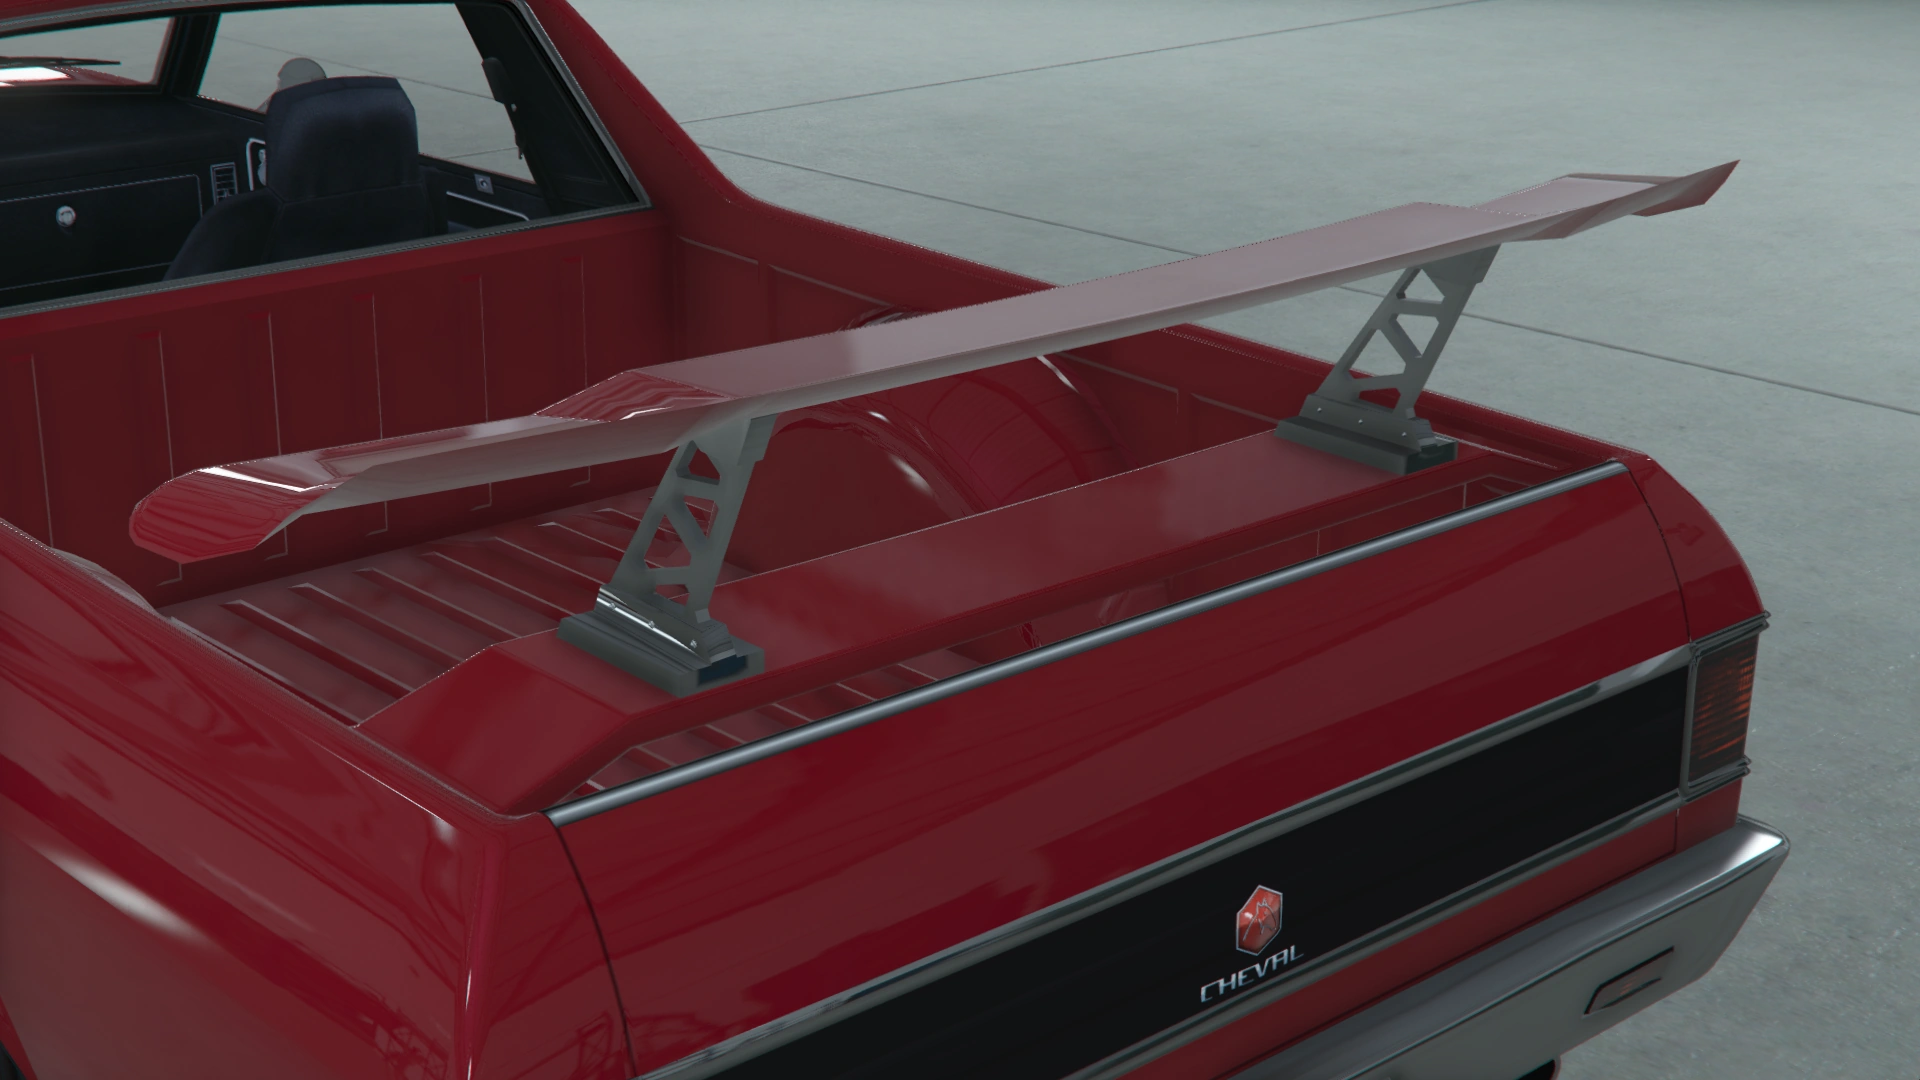
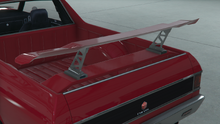
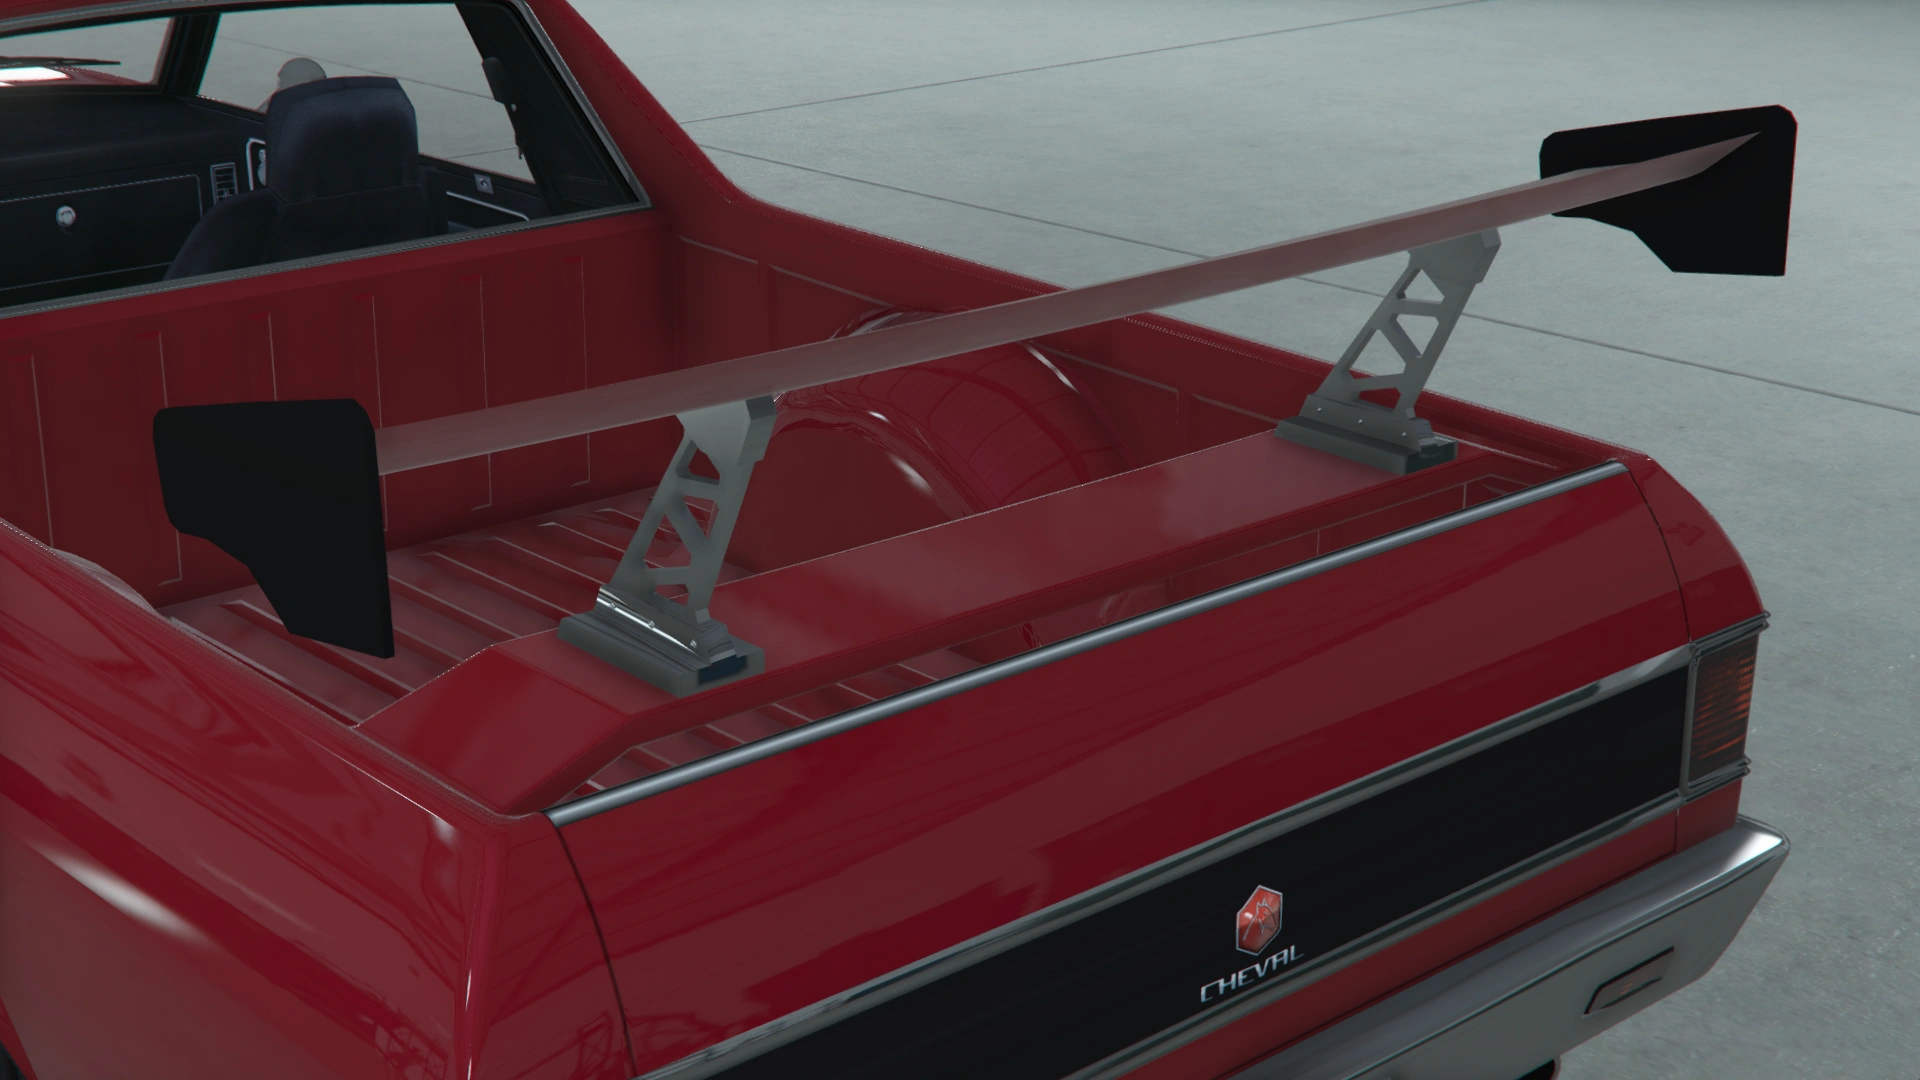

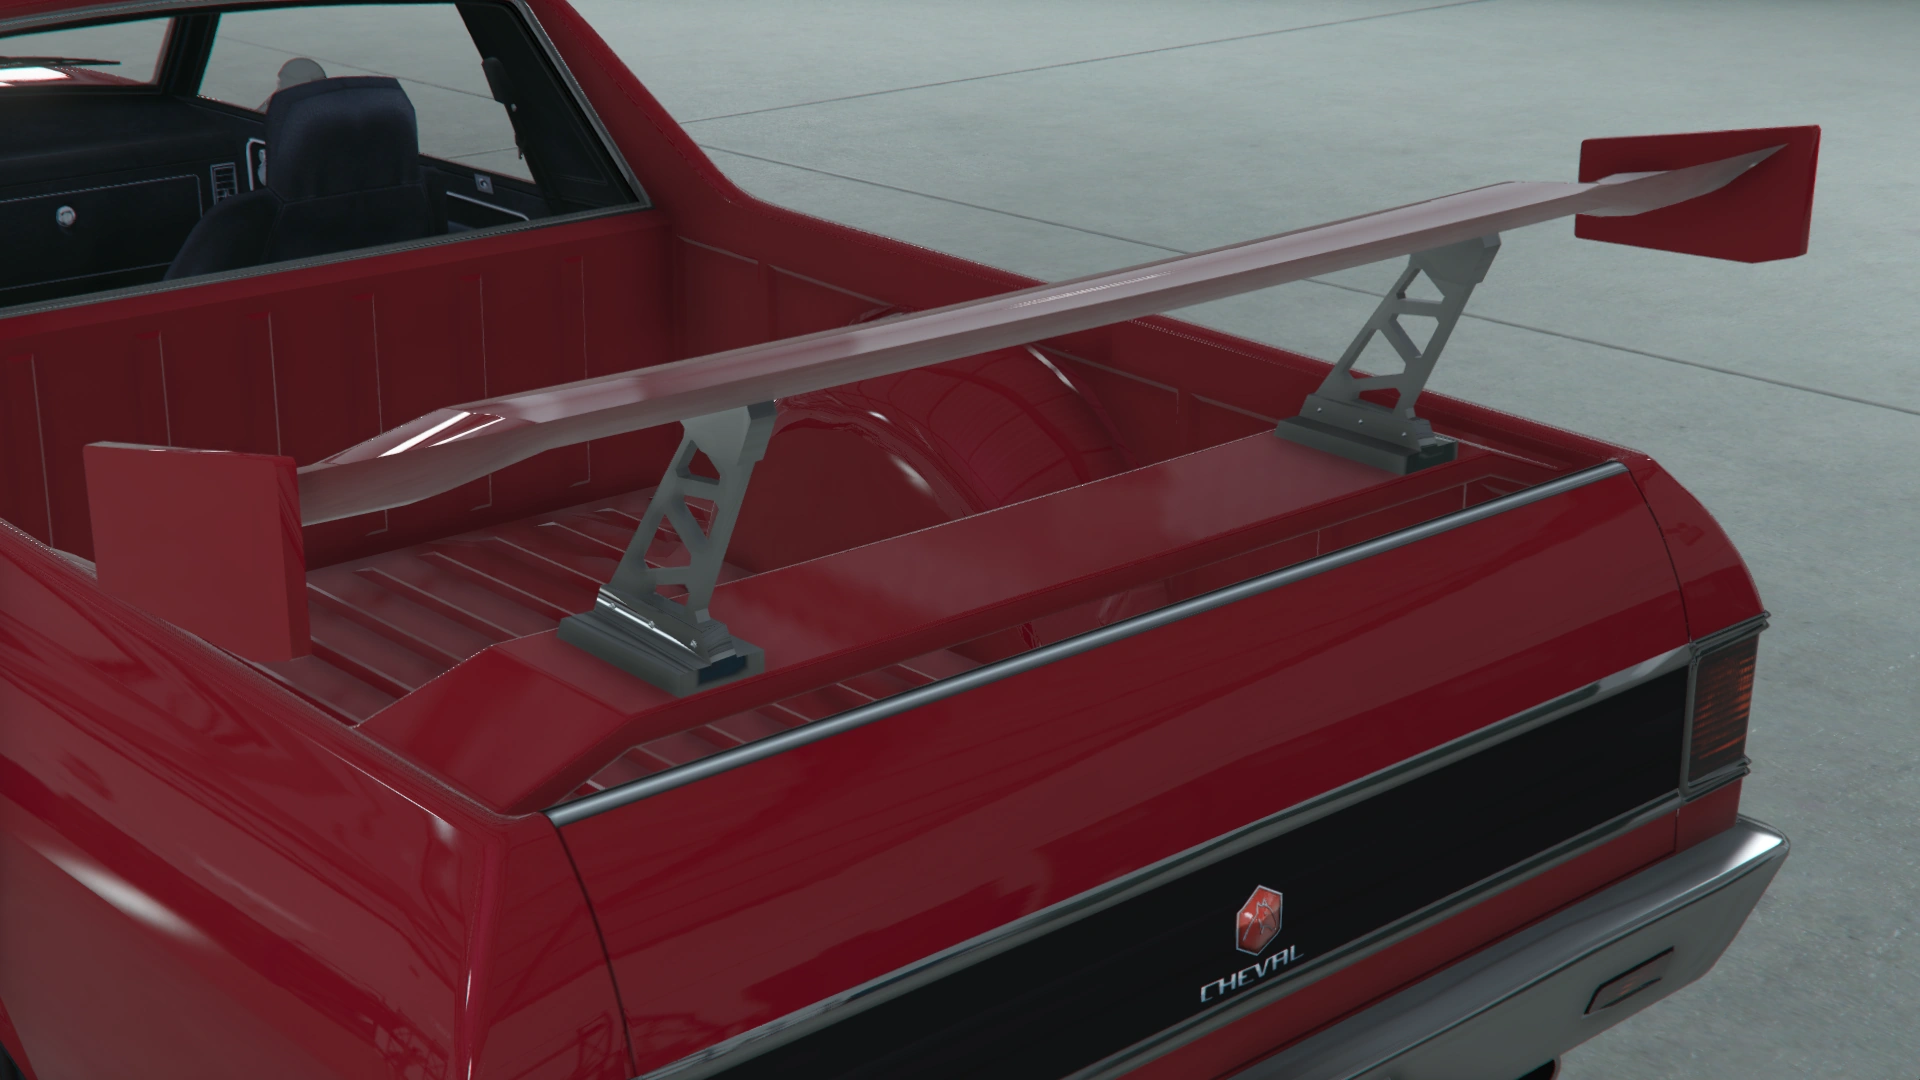

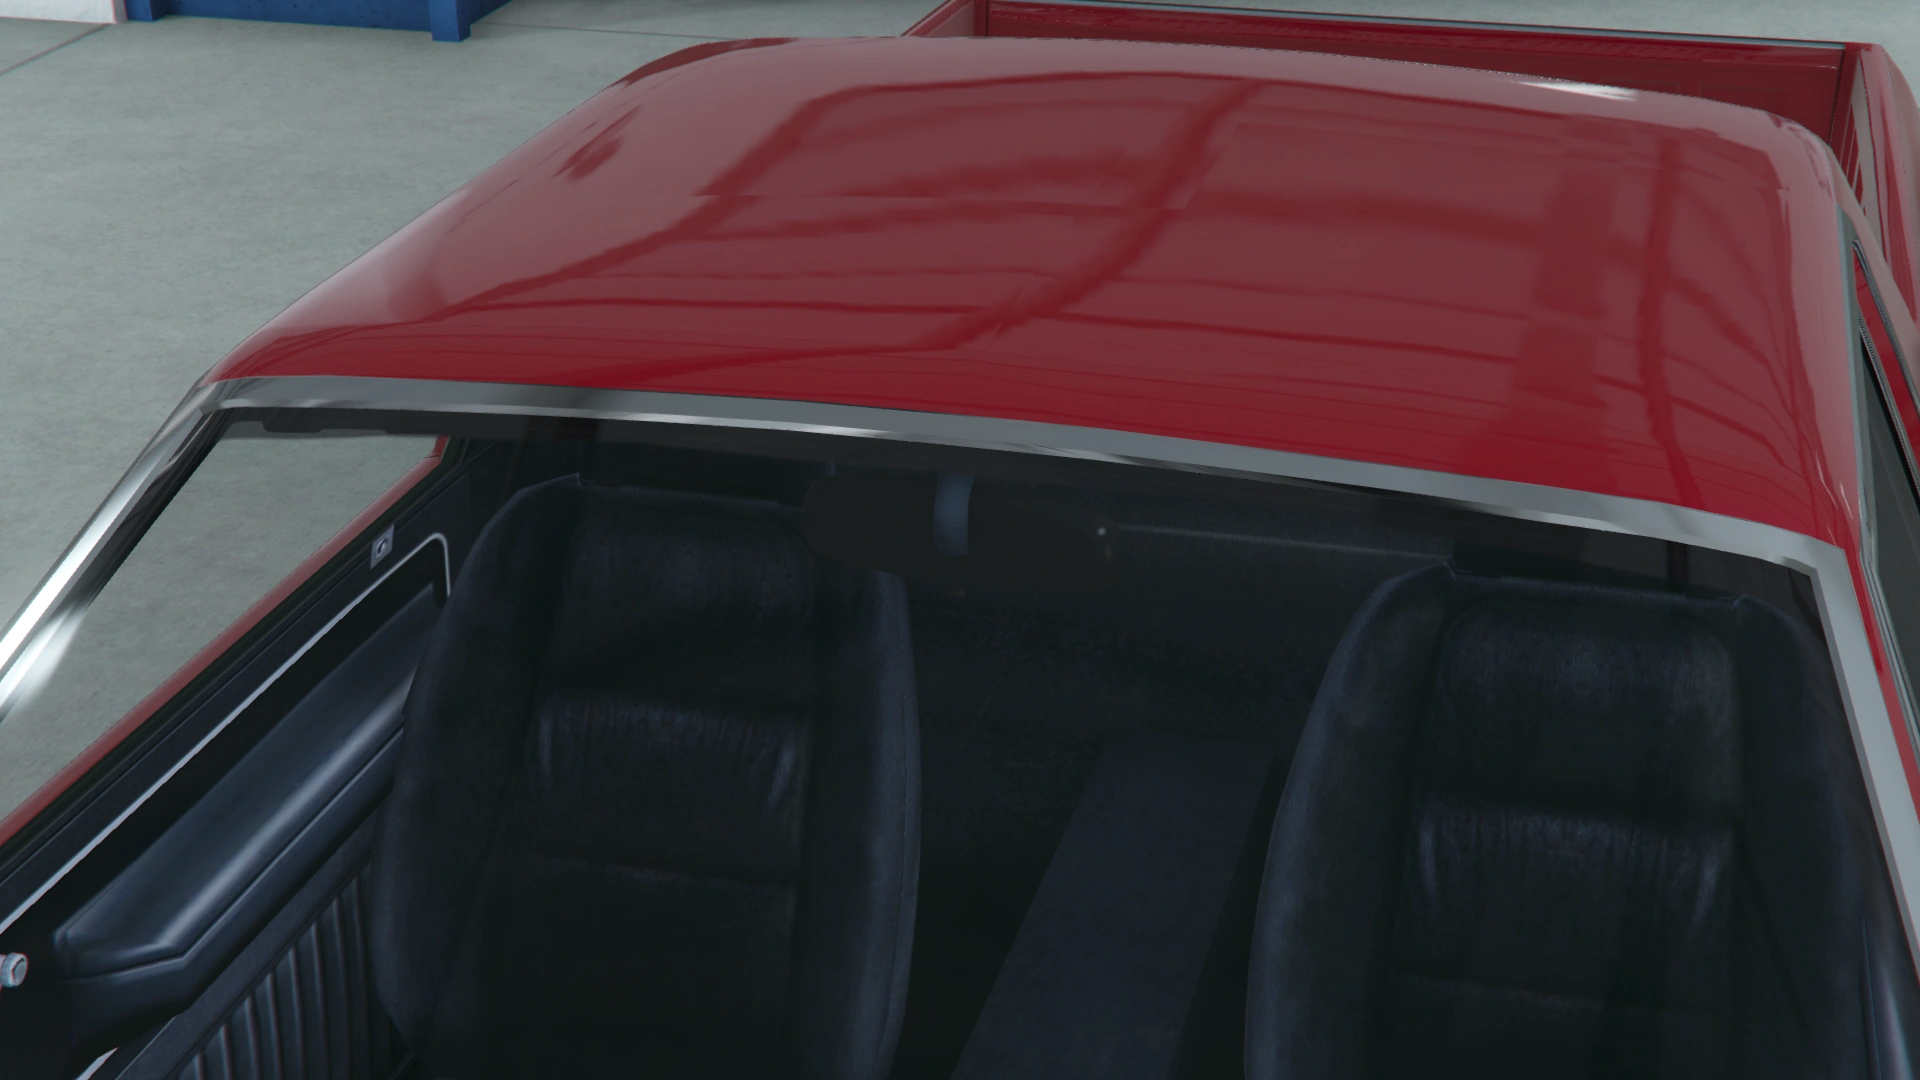
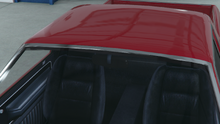

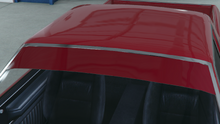
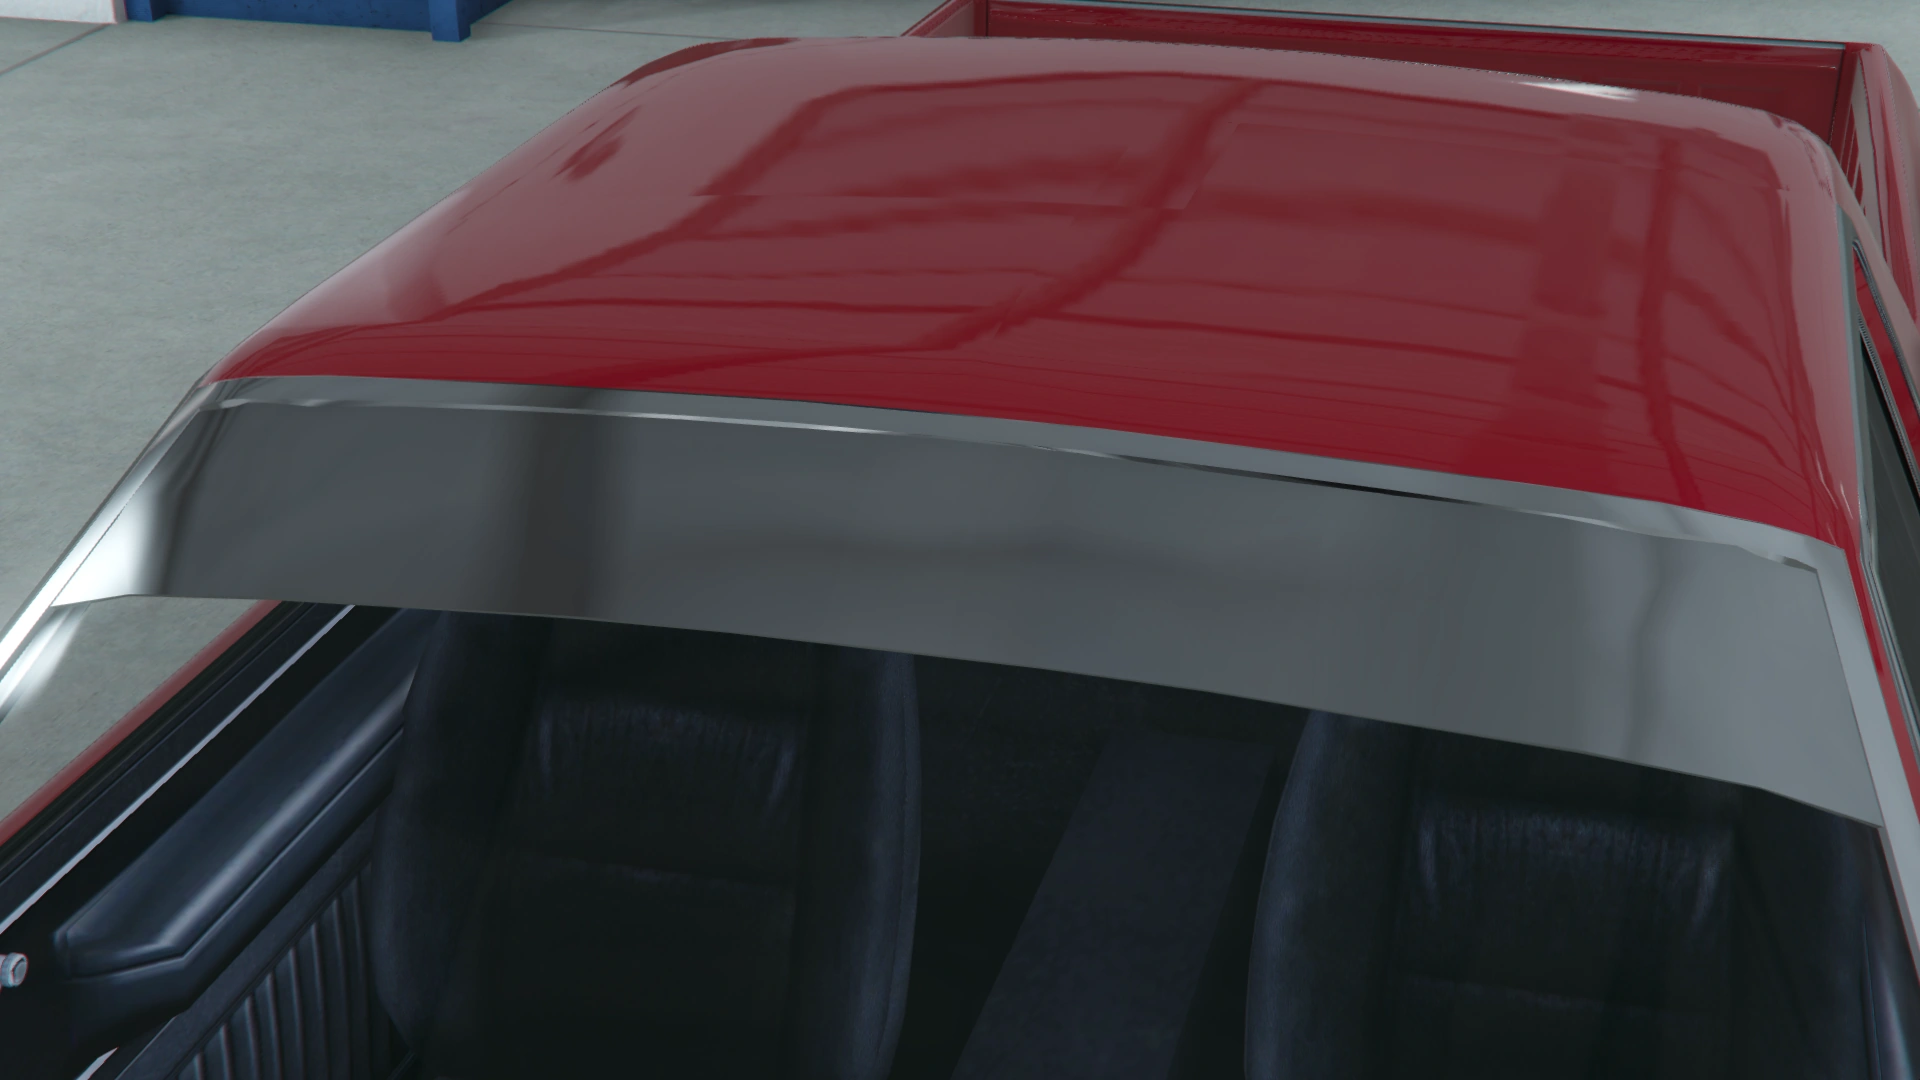
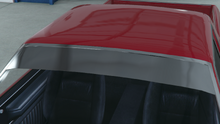
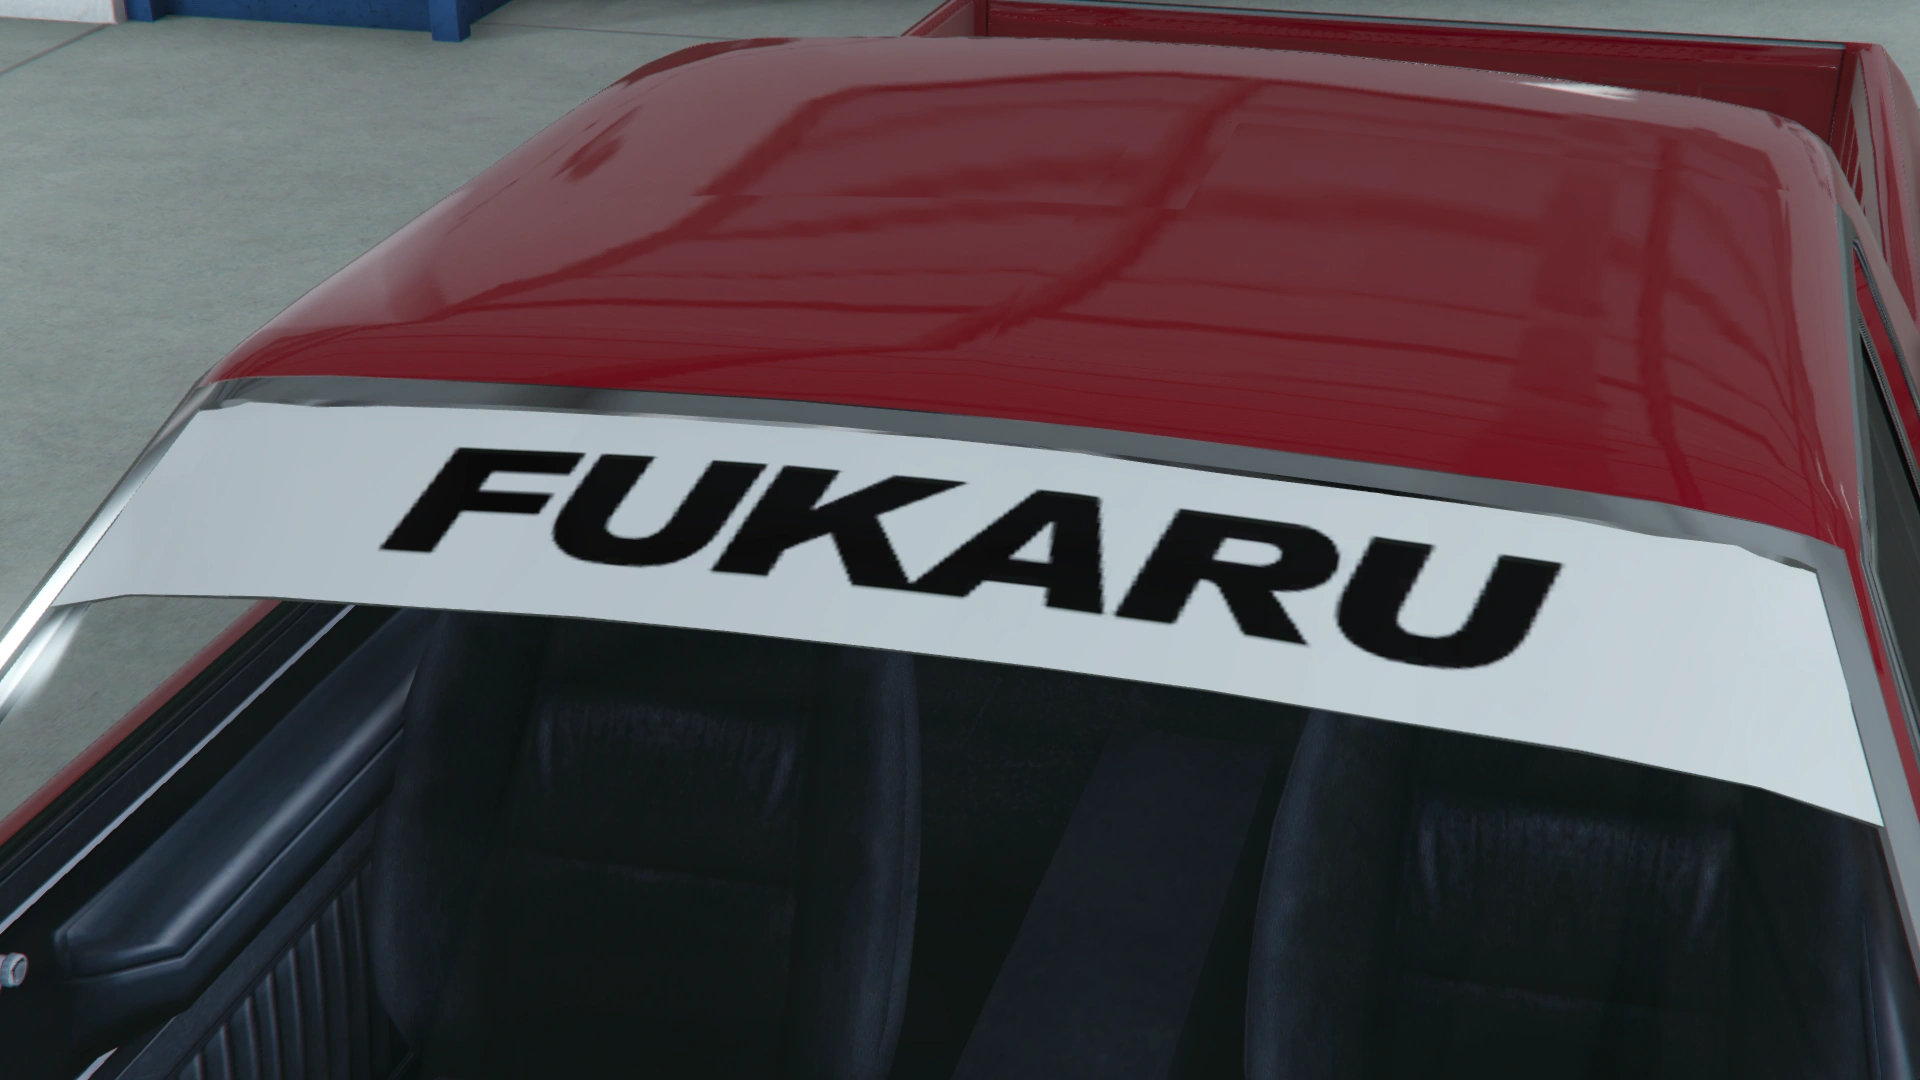

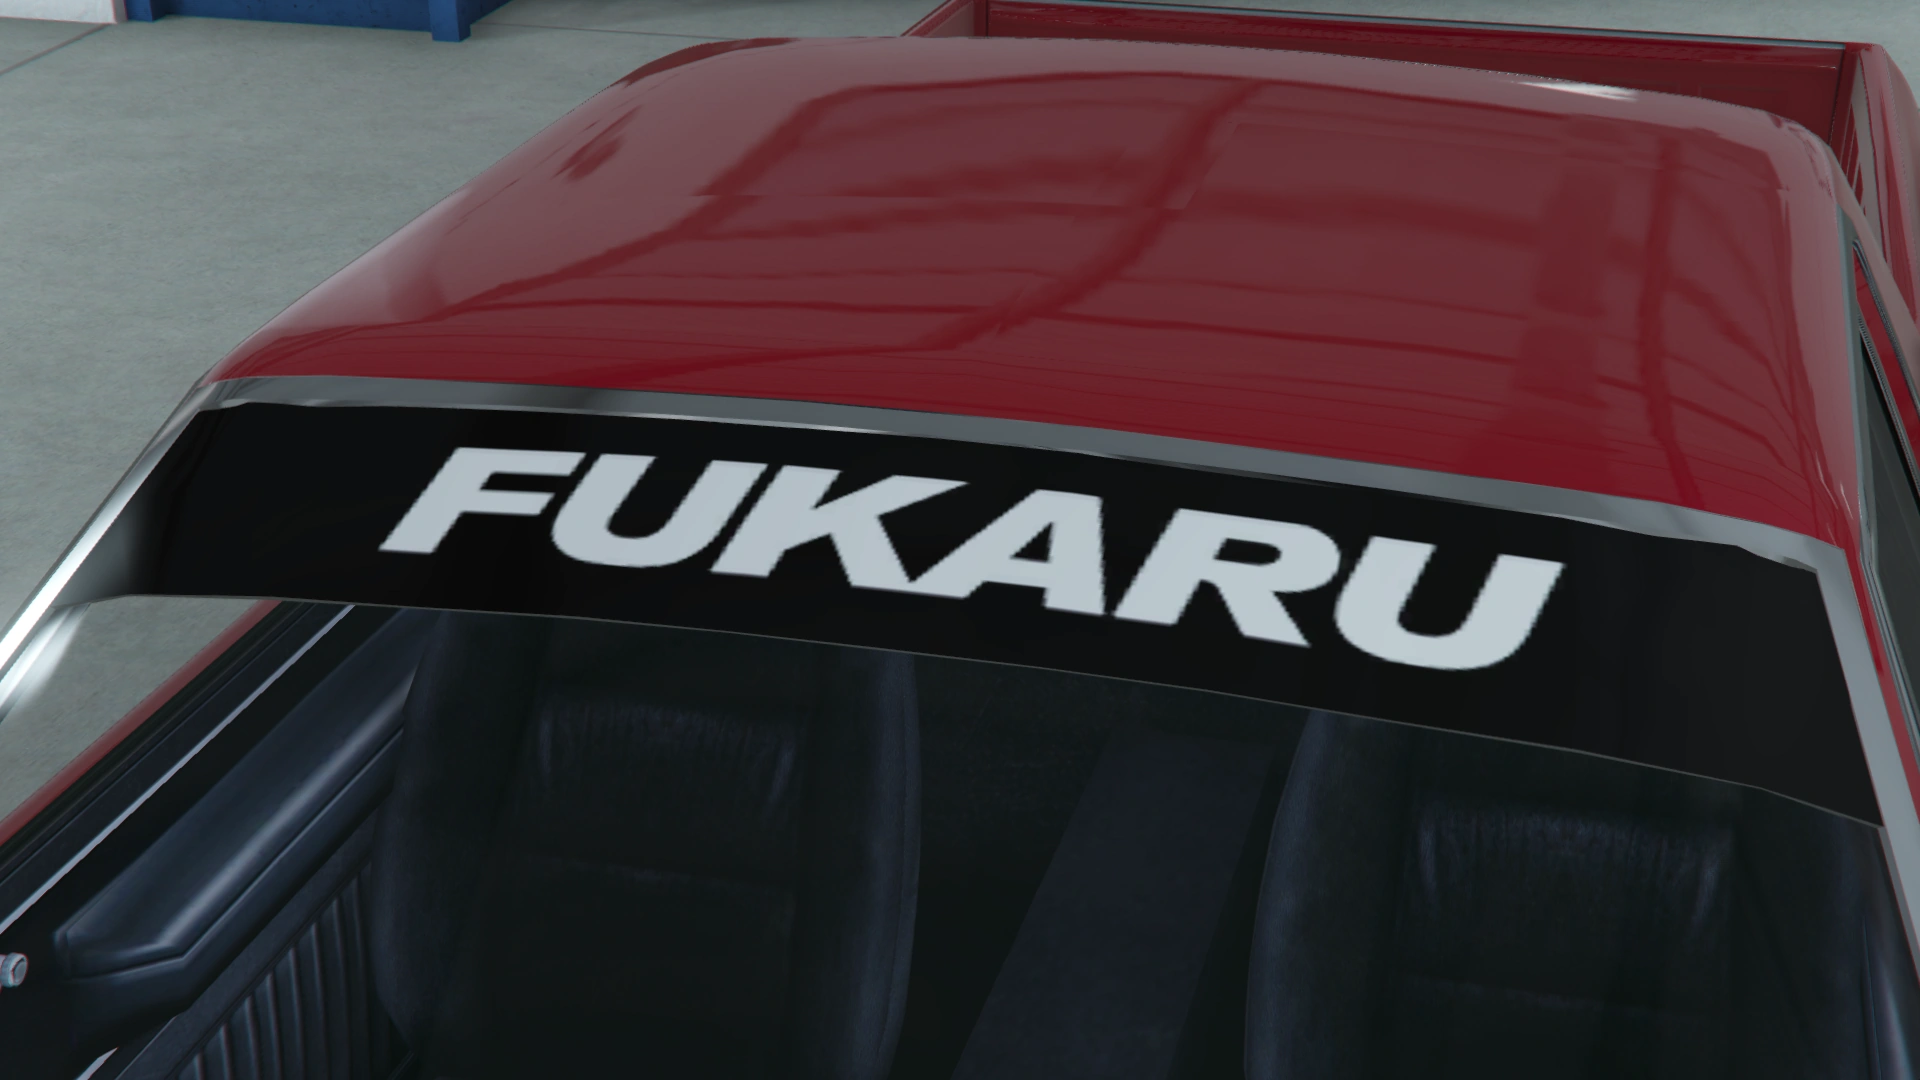
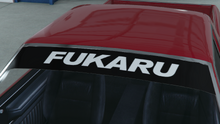

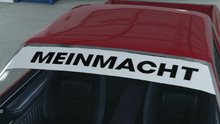
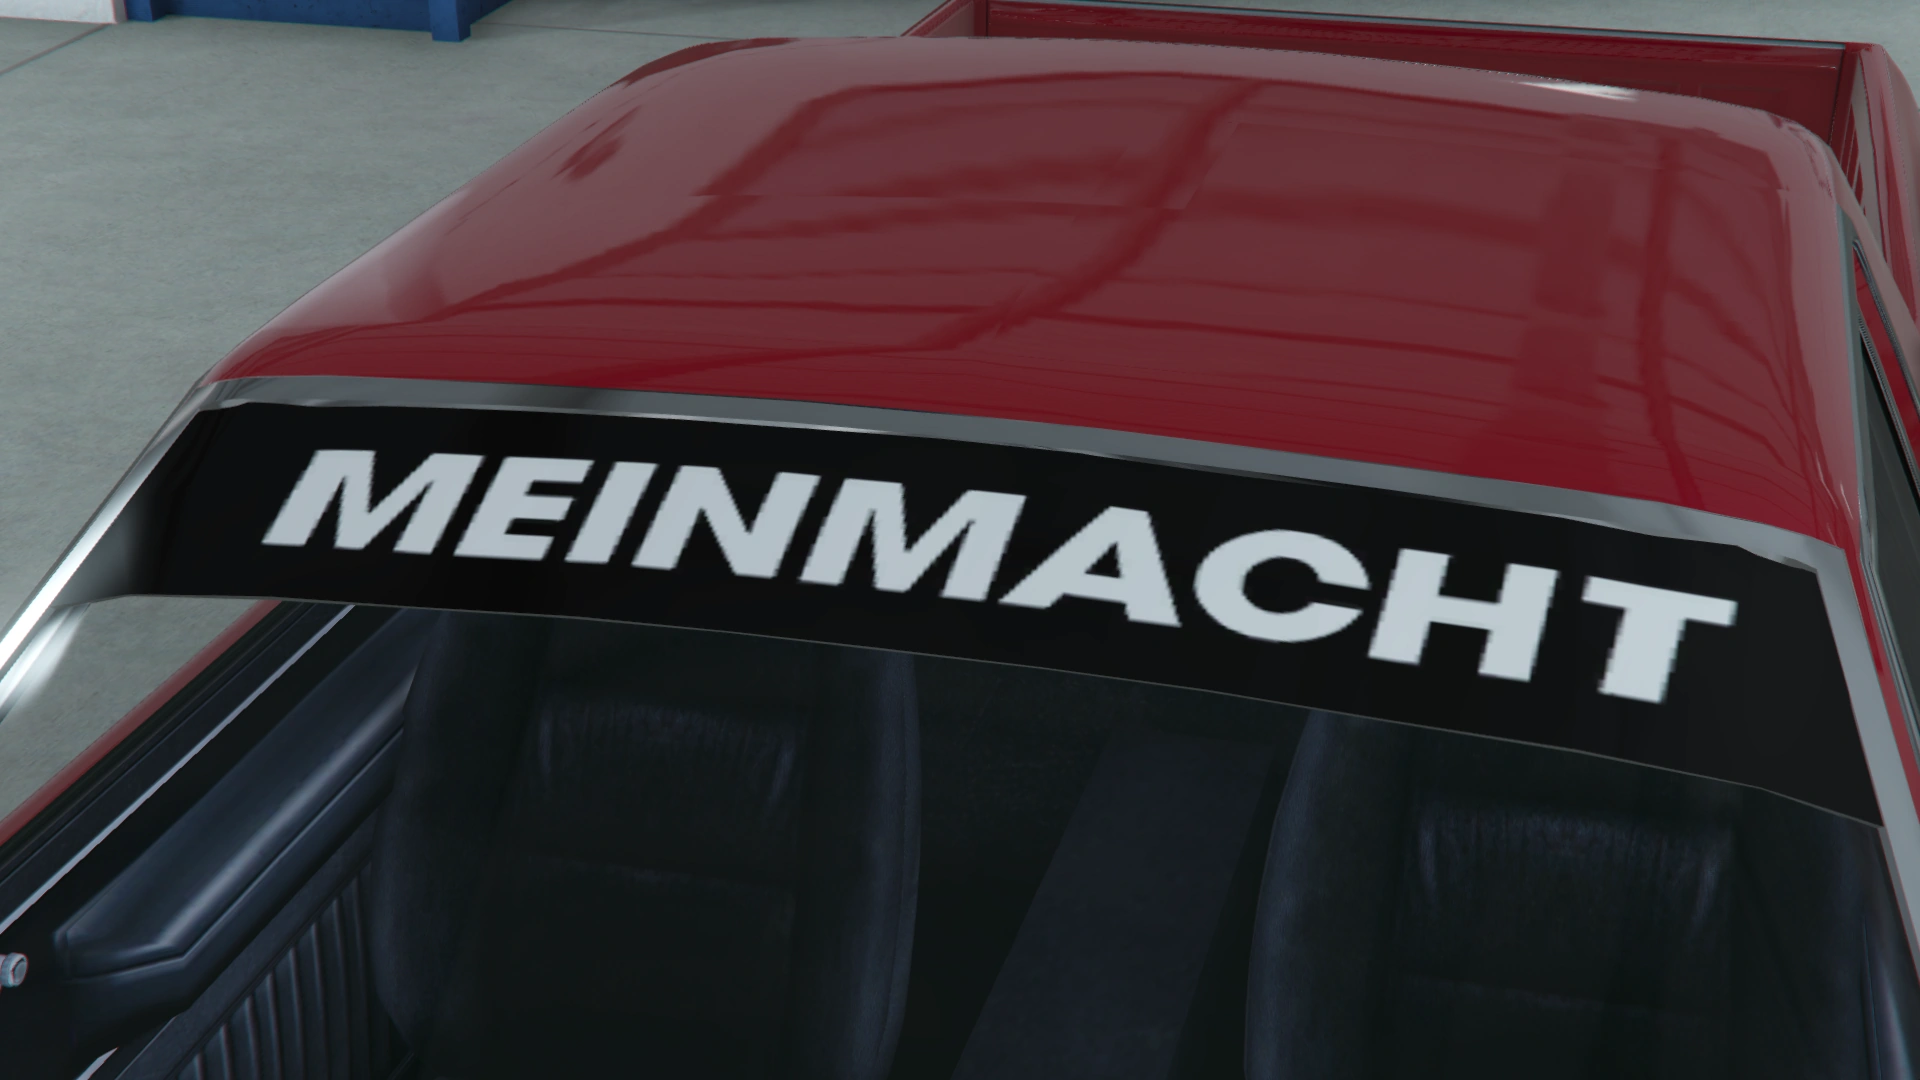
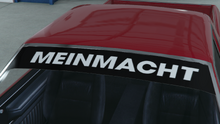
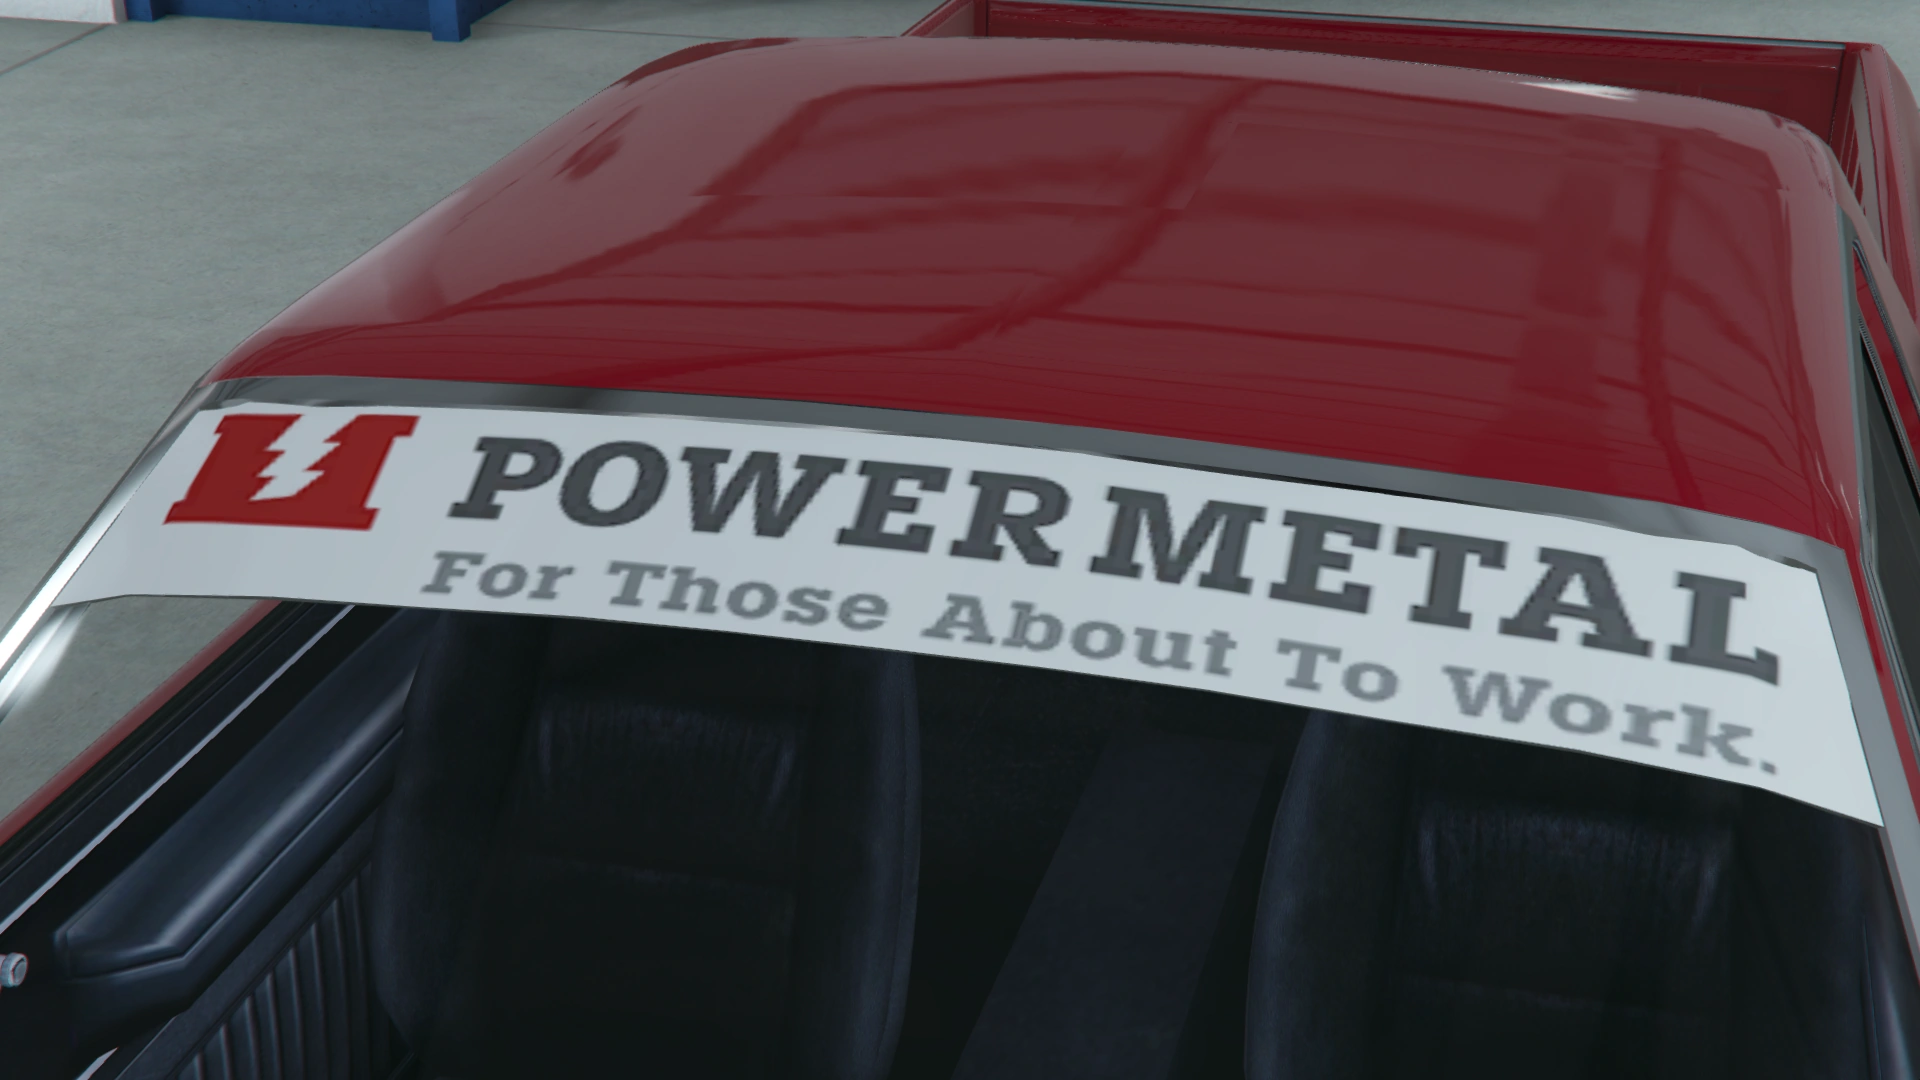

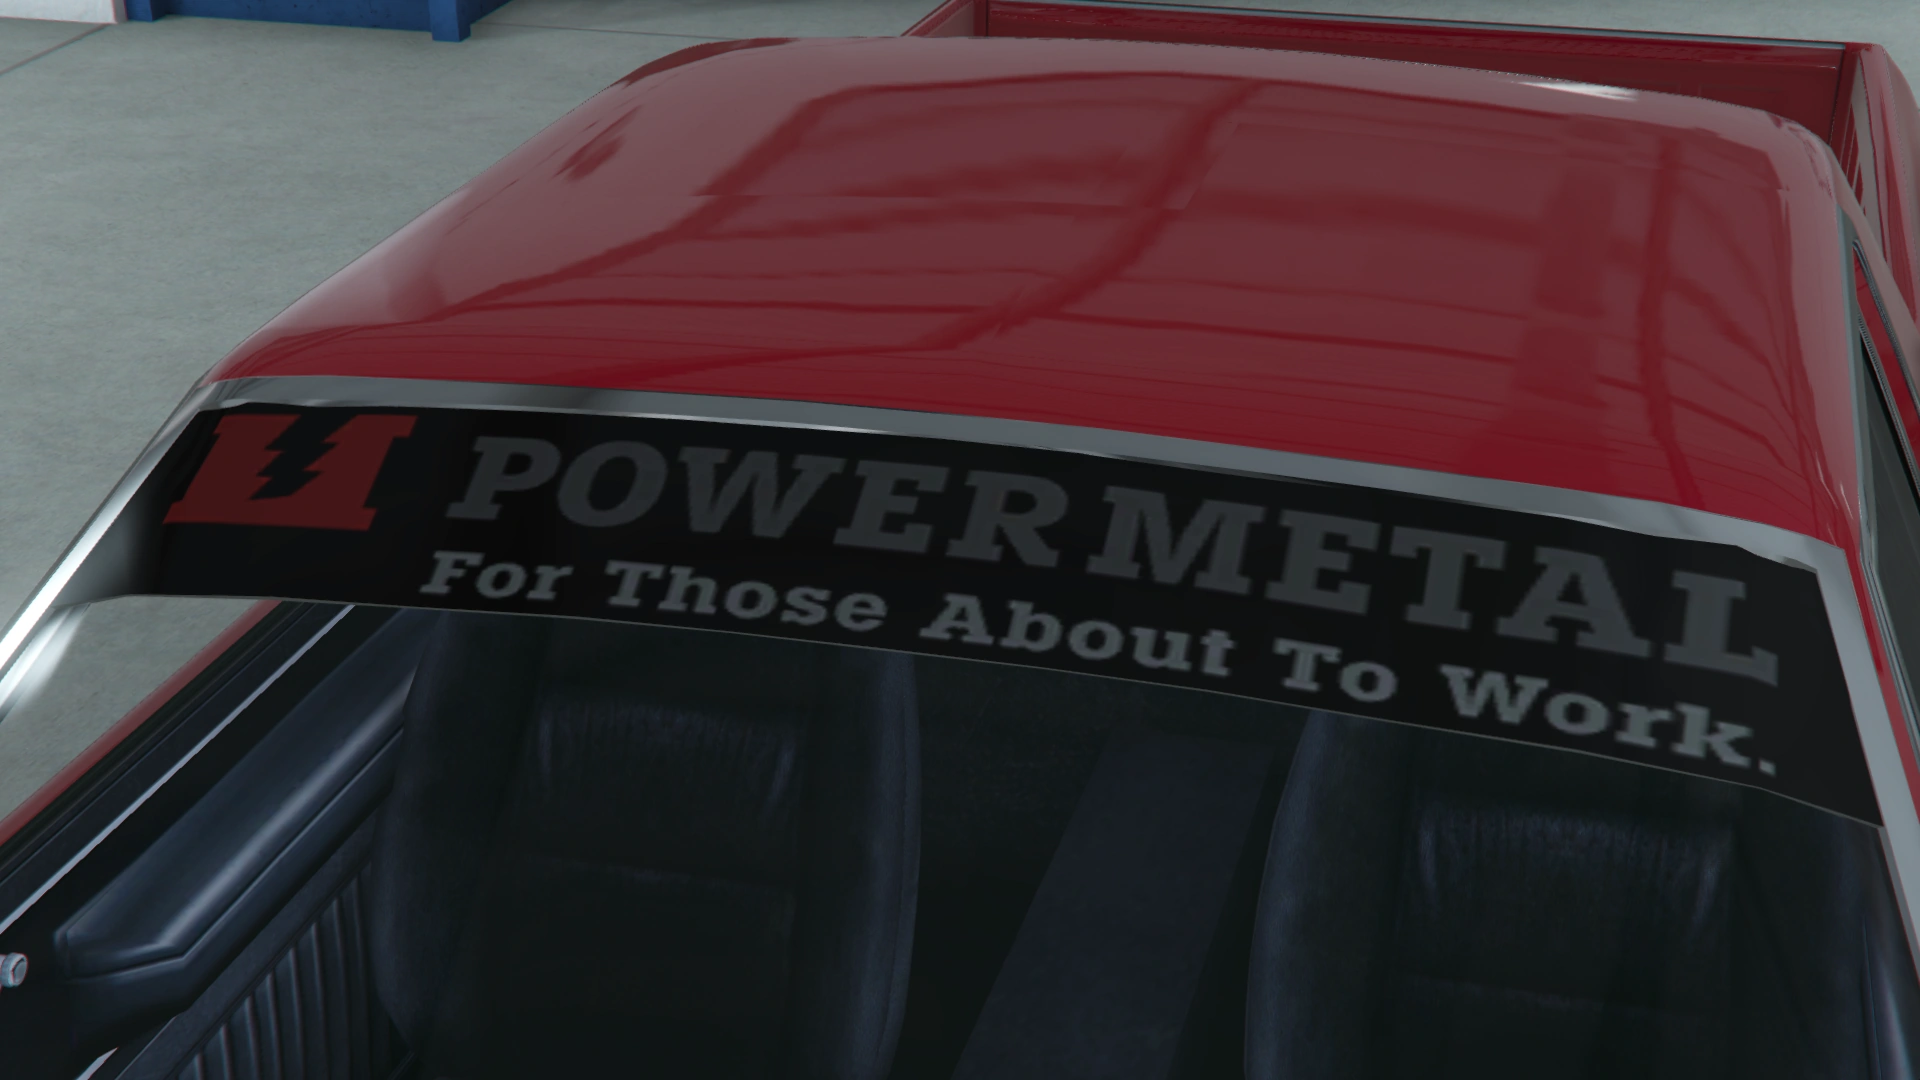

Gallery
Grand Theft Auto: San Andreas
")
Grand Theft Auto V and Online
")
")
")
")
")
")
")
")
")
Variants
MarshallGrand Theft Auto V & Grand Theft Auto Online |
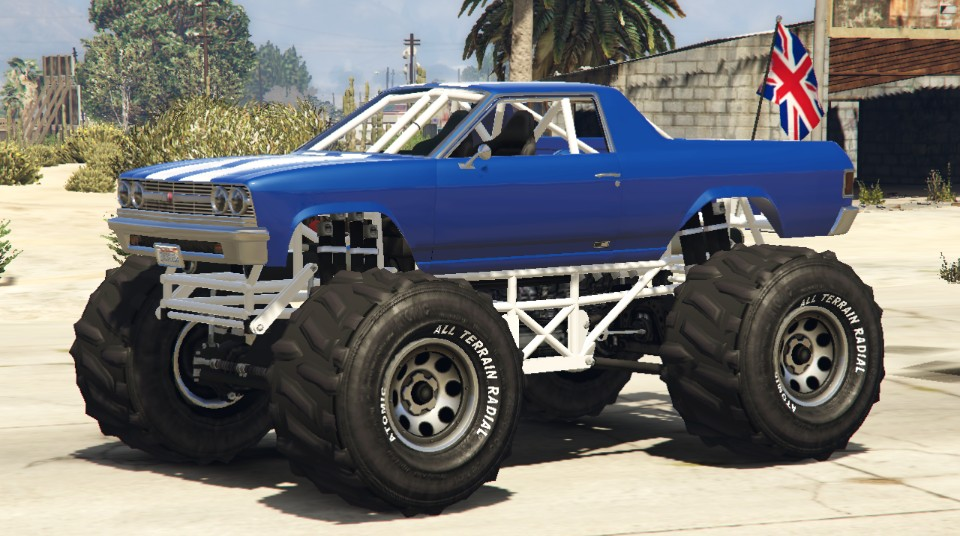 (Rear quarter view) |
In the PlayStation 4, Xbox One, and PC versions of the game, there is a monster truck variant of the Picador named the Marshall. It is essentially a lifted monster truck with the bodywork of a Picador attached to the chassis, powered by a large V8 engine in a mid configuration, powering all four wheels. |
Prominent Appearances in Missions
Grand Theft Auto: San Andreas
- Ryder - CJ and Ryder use the car to go to Well Stacked Pizza and Reece's barbershop, both in Idlewood, LS.
- Catalyst - CJ and Ryder go to the Freight train stopped in Jefferson and kill some Vagos and Ballas. After CJ climbs on the train, he has to throw the crates to Ryder that's standing on his Picador.
- Photo Opportunity - Ryder appears with his Picador in Angel Pine.
- Pier 69 - Ryder arrives at Pier 69 with his car.
Notable Owners
Grand Theft Auto: San Andreas
- Ryder owns an all-brown Picador with a license plate reading "SHERM" and he uses it in some missions. Even after his death, the car still spawns regularly. The bed accessories are still the same as a normal one.
")
Locations
Grand Theft Auto: San Andreas
- It can be found around Los Santos, especially in Ocean Docks and Willowfield, and other southern districts.
- It is parked at Ryder's house in Ganton, Los Santos, always with an all-brown body.
- However, if one passes the mission House Party before the mission Catalyst, the Picador may never spawn again at this spot.
- It is rarely found in San Fierro and Las Venturas.
- It is commonly found in Red County, Flint County and Whetstone.
Grand Theft Auto V
- Can be seen driven around Strawberry.
- Very common around Sandy Shores and occasionally Harmony.
Grand Theft Auto Online
- Available for purchase from Southern San Andreas Super Autos for $9,000.
- No longer available in the enhanced versions of the game; removed from the website as part of the San Andreas Mercenaries update.
- However, it can still be stolen from the street and kept by adding the Tracker and Full Coverage (Insurance) modifications at Los Santos Customs.
Events
Grand Theft Auto Online
- Available to test drive and purchase from the Premium Deluxe Motorsport showroom for $31,800 during SM722 Week.
Radio Stations
- In Grand Theft Auto: San Andreas, the Picador plays Radio Los Santos.
- In Grand Theft Auto V and Grand Theft Auto Online, the default radio stations are grouped by genre. The Picador uses the "Mexican" group which can play East Los FM.
Trivia
General
- The Spanish name Picador is a horse-mounted member of a bullfighting crew, which confronts the bull with his pike ("pica", hence the name) during the first third of each bull. Additionally, "Picador" in Spanish may also refer to a vehicle or a person that takes part in "picadas" (slang for drag racing commonly used on Latin America). This makes sense, as the Picador is a muscle car.
Grand Theft Auto: San Andreas
- Ryder's Picador has a license plate reading "SHERM", a slang term for a PCP-immersed Marijuana and Tobacco mixture (CJ calls Ryder "sherm-head" throughout the game).
- Only the front plate reads "SHERM". The rear plate is a standard randomized plate. This was corrected in the Definitive Edition.
- The Picador took the place of a Sadler as Ryder's car of choice during development of the game.[6]
- It is one of few cars to have the protagonist driving it during missions while the owner is in the passenger seat. Others include Sweet Johnson's Greenwood, Big Smoke's black Perennial (though CJ and Smoke are not seen riding it with CJ in the driver's seat near the ending cutscene of Big Smoke's introduction mission) and Glendale, Cesar Vialpando's red Savanna (only during the mission Photo Opportunity), Phil Cassidy's Walton and Lance Vance's Infernus.
- There is a glitch with Ryder's Picador on the mobile version of GTA San Andreas. After completion of the mission Robbing Uncle Sam, Ryder's Picador will stop spawning. To fix this glitch, turn off the game and wait a few hours while outside his house. If successful, the car will always respawn and the player can steal it at any time.
Grand Theft Auto V and Online
- Strangely, the interior has a Vapid logo on the floor mat of the Picador. This is most likely due to the reuse of vehicle interiors.
Bugs/Glitches
Grand Theft Auto V and Online
- Some of the splitter options leave small gaps, as if they do not fit correctly. Additionally, full roll cage options seem to partially clip with the interior textures, which is more evident on the rear portion.
References
See Also
- Marshall - Monster truck variant of the Picador in GTA V & GTA Online.