No edit summary Tag: rte-source |
m (added the right redirection for waste management) |
||
| (8 intermediate revisions by 7 users not shown) | |||
| Line 1: | Line 1: | ||
| + | |||
[[File:Nuclear_waste_gta.jpg|thumb|Finding Nuclear Waste in GTA V.]] |
[[File:Nuclear_waste_gta.jpg|thumb|Finding Nuclear Waste in GTA V.]] |
||
| − | '''Nuclear Waste''' are [[Collectibles]] found in [[Grand Theft Auto V]]. |
+ | '''Nuclear Waste''' are [[Collectibles|collectibles]] found in [[Grand Theft Auto V]]. |
==Description== |
==Description== |
||
| ⚫ | |||
| ⚫ | |||
| ⚫ | The barrels can be found in various spots in the oceans around [[San Andreas (HD Universe)|San Andreas]]. Each barrel can be collected by the player for $23,000, and after all barrels are collected, the player will gain an extra $250,000. The mission to collect the barrels is unlocked upon purchasing the [[Sonar Collections Dock]] and completing [[The Merryweather Heist]]. Collecting all 30 will award the player the [[Achievements and Trophies (GTA V)|Achievement/Trophy]] [[Waste Management (trophy)|Waste Management]]. Purchasing the dock will also unlock [[Death at Sea]] for [[Abigail Mathers]] available to [[Michael De Santa]] and collecting all [[Submarine Pieces]]. |
||
| ⚫ | There are 30 barrels in total and they can only be found by using the [[Submersible]] that will spawn at the dock (the [[Kraken]] in the |
||
| ⚫ | There are 30 barrels in total and they can only be found by using the [[Submersible]] that will spawn at the dock (the [[Kraken]] in the Enhanced Version of the game can also be used, provided it has been unlocked). The barrels can be picked up in the sub or the player can alternatively get out and swim to them. Collecting all barrels will roughly take up to two hours if done in one sitting, as the Mini Sub is considerably slow and may become difficult to control over time due to frequent crashing, but it is still a very sturdy vehicle. Care must be taken not to dive too deep, otherwise the water pressure will crush the sub (a few of the waste containers are located on the edge of this zone). If this happens, a message on the top left of the screen will say "WARNING! Approaching crush zone!" will appear and the water height meter will turn red. Collecting the barrels will require circumnavigating the entire island (another reason for doing the mission in one sitting rather than having to return to the last barrel location); note that if Michael's or [[Trevor|Trevor's]] exile from [[Los Santos]] to [[Blaine County]] is still in effect, piloting the sub near the city will result in warnings and [[Martin Madrazo|Martin Madrazo's]] [[Madrazo Cartel|gang members]] will swarm on land, but as long as Michael or Trevor don't exit the sub or attempt to land, there is no danger. Similarly, [[shark]]s pose no danger as it is unnecessary to leave the sub to collect the barrels (it ''is'', however, necessary to pick up any other objects spotted, such as [[Weapons in GTA V|Weapons]], [[Body Armor]], and [[Health|Health Kits]].). |
||
| ⚫ | To find the barrels, the [[Trackify]] app is used, though it only tends to show the general direction in which a barrel is located rather than its distance from the sub. When following the signal, the player must be very careful not to ground the sub |
||
| + | |||
| ⚫ | To find the barrels, the [[Trackify]] app is used, though it only tends to show the general direction in which a barrel is located rather than its distance from the sub. When following the signal, the player must be very careful not to ground the sub, collide with underwater cliffs/rocky outcrops, or force it to reach land. |
||
The $250,000 bonus collected after completing this mission covers the cost of purchasing the dock, making the $690,000 earned from picking up the barrels ($23,000 x 30) pure profit. |
The $250,000 bonus collected after completing this mission covers the cost of purchasing the dock, making the $690,000 earned from picking up the barrels ($23,000 x 30) pure profit. |
||
| + | |||
| + | All three protagonists can search for the nuclear waste barrels, though all profits will go to the dock's owner. |
||
==Locations for Nuclear Waste== |
==Locations for Nuclear Waste== |
||
| Line 97: | Line 102: | ||
|- |
|- |
||
|16 |
|16 |
||
| + | |[[File:2015-08-27 00003.jpg|thumb|180x180px]] |
||
| − | | |
||
| + | |[[File:2015-08-27 00001.jpg|thumb|180x180px]] |
||
| − | | |
||
| + | |364ft |
||
| − | | |
||
|- |
|- |
||
|17 |
|17 |
||
| + | |[[File:2015-08-27 00005.jpg|thumb|180x180px]] |
||
| − | | |
||
| + | |[[File:2015-08-27 00004.jpg|thumb|180x180px]] |
||
| − | | |
||
| + | |144ft |
||
| − | | |
||
|- |
|- |
||
|18 |
|18 |
||
| + | |[[File:2015-08-27 00006.jpg|thumb|180x180px]] |
||
| − | | |
||
| + | |[[File:2015-08-27 00007.jpg|thumb|180x180px]] |
||
| − | | |
||
| + | |141ft |
||
| − | | |
||
|- |
|- |
||
|19 |
|19 |
||
| + | |[[File:2015-08-27 00008.jpg|thumb|180x180px]] |
||
| − | | |
||
| + | |[[File:2015-08-27 00009.jpg|thumb|180x180px]] |
||
| − | | |
||
| + | |49ft |
||
| − | | |
||
|- |
|- |
||
|20 |
|20 |
||
| + | |[[File:2015-08-27 00010.jpg|thumb|180x180px]] |
||
| − | | |
||
| + | |[[File:2015-08-27 00011.jpg|thumb|180x180px]] |
||
| − | | |
||
| + | |85ft |
||
| − | | |
||
|- |
|- |
||
|21 |
|21 |
||
| + | |[[File:2015-08-27 00013.jpg|thumb|180x180px]] |
||
| − | | |
||
| + | |[[File:2015-08-27 00014.jpg|thumb|180x180px]] |
||
| − | | |
||
| + | |187ft |
||
| − | | |
||
|- |
|- |
||
|22 |
|22 |
||
| + | |[[File:2015-08-27 00016.jpg|thumb|180x180px]] |
||
| − | | |
||
| + | |[[File:2015-08-27 00017.jpg|thumb|180x180px]] |
||
| − | | |
||
| + | |75ft |
||
| − | | |
||
|- |
|- |
||
|23 |
|23 |
||
| + | |[[File:2015-08-27 00018.jpg|thumb|180x180px]] |
||
| − | | |
||
| + | |[[File:2015-08-27 00019.jpg|thumb|180x180px]] |
||
| − | | |
||
| + | |49ft |
||
| − | | |
||
|- |
|- |
||
|24 |
|24 |
||
| + | |[[File:2015-08-27 00020.jpg|thumb|180x180px]] |
||
| − | | |
||
| + | |[[File:2015-08-27 00021.jpg|thumb|180x180px]] |
||
| − | | |
||
| + | |26ft |
||
| − | | |
||
|- |
|- |
||
|25 |
|25 |
||
| + | |[[File:2015-08-27 00023.jpg|thumb|180x180px]] |
||
| − | | |
||
| + | |[[File:2015-08-27 00024.jpg|thumb|180x180px]] |
||
| − | | |
||
| + | |66ft |
||
| − | | |
||
|- |
|- |
||
|26 |
|26 |
||
| + | |[[File:2015-08-27 00025.jpg|thumb|180x180px]] |
||
| − | | |
||
| + | |[[File:2015-08-27 00026.jpg|thumb|180x180px]] |
||
| − | | |
||
| + | |69ft |
||
| − | | |
||
|- |
|- |
||
|27 |
|27 |
||
| + | |[[File:2015-08-27 00027.jpg|thumb|180x180px]] |
||
| − | | |
||
| + | |[[File:2015-08-27 00028.jpg|thumb|180x180px]] |
||
| − | | |
||
| + | |154ft |
||
| − | | |
||
|- |
|- |
||
|28 |
|28 |
||
| + | |[[File:2015-08-27 00029.jpg|thumb|180x180px]] |
||
| − | | |
||
| + | |[[File:2015-08-27 00030.jpg|thumb|180x180px]] |
||
| − | | |
||
| + | |161ft |
||
| − | | |
||
|- |
|- |
||
|29 |
|29 |
||
| + | |[[File:2015-08-27 00031.jpg|thumb|180x180px]] |
||
| − | | |
||
| + | |[[File:2015-08-27 00032.jpg|thumb|180x180px]] |
||
| − | | |
||
| + | |338ft |
||
| − | | |
||
|- |
|- |
||
|30 |
|30 |
||
| + | |[[File:2015-08-27 00034.jpg|thumb|180x180px]] |
||
| − | | |
||
| + | |[[File:2015-08-27 00035.jpg|thumb|180x180px]] |
||
| − | | |
||
| + | |469ft |
||
| − | | |
||
|} |
|} |
||
| − | == |
+ | ==Glitch== |
| ⚫ | |||
| ⚫ | |||
| − | == |
+ | ==Video== |
| ⚫ | |||
| ⚫ | |||
| − | *If Michael purchases the dock, Trevor or Franklin can still search for waste. The same applies if Franklin or Trevor buys the dock. However, all profits from collecting waste will go to the dock's owner, regardless of which character actually collects the barrels. |
||
| − | *This in an easy way to earn money early on in the game. |
||
| ⚫ | * |
||
==References== |
==References== |
||
Revision as of 19:26, 19 March 2020
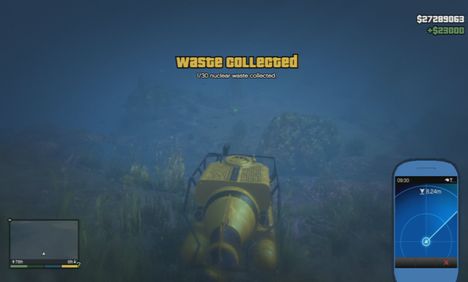
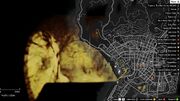
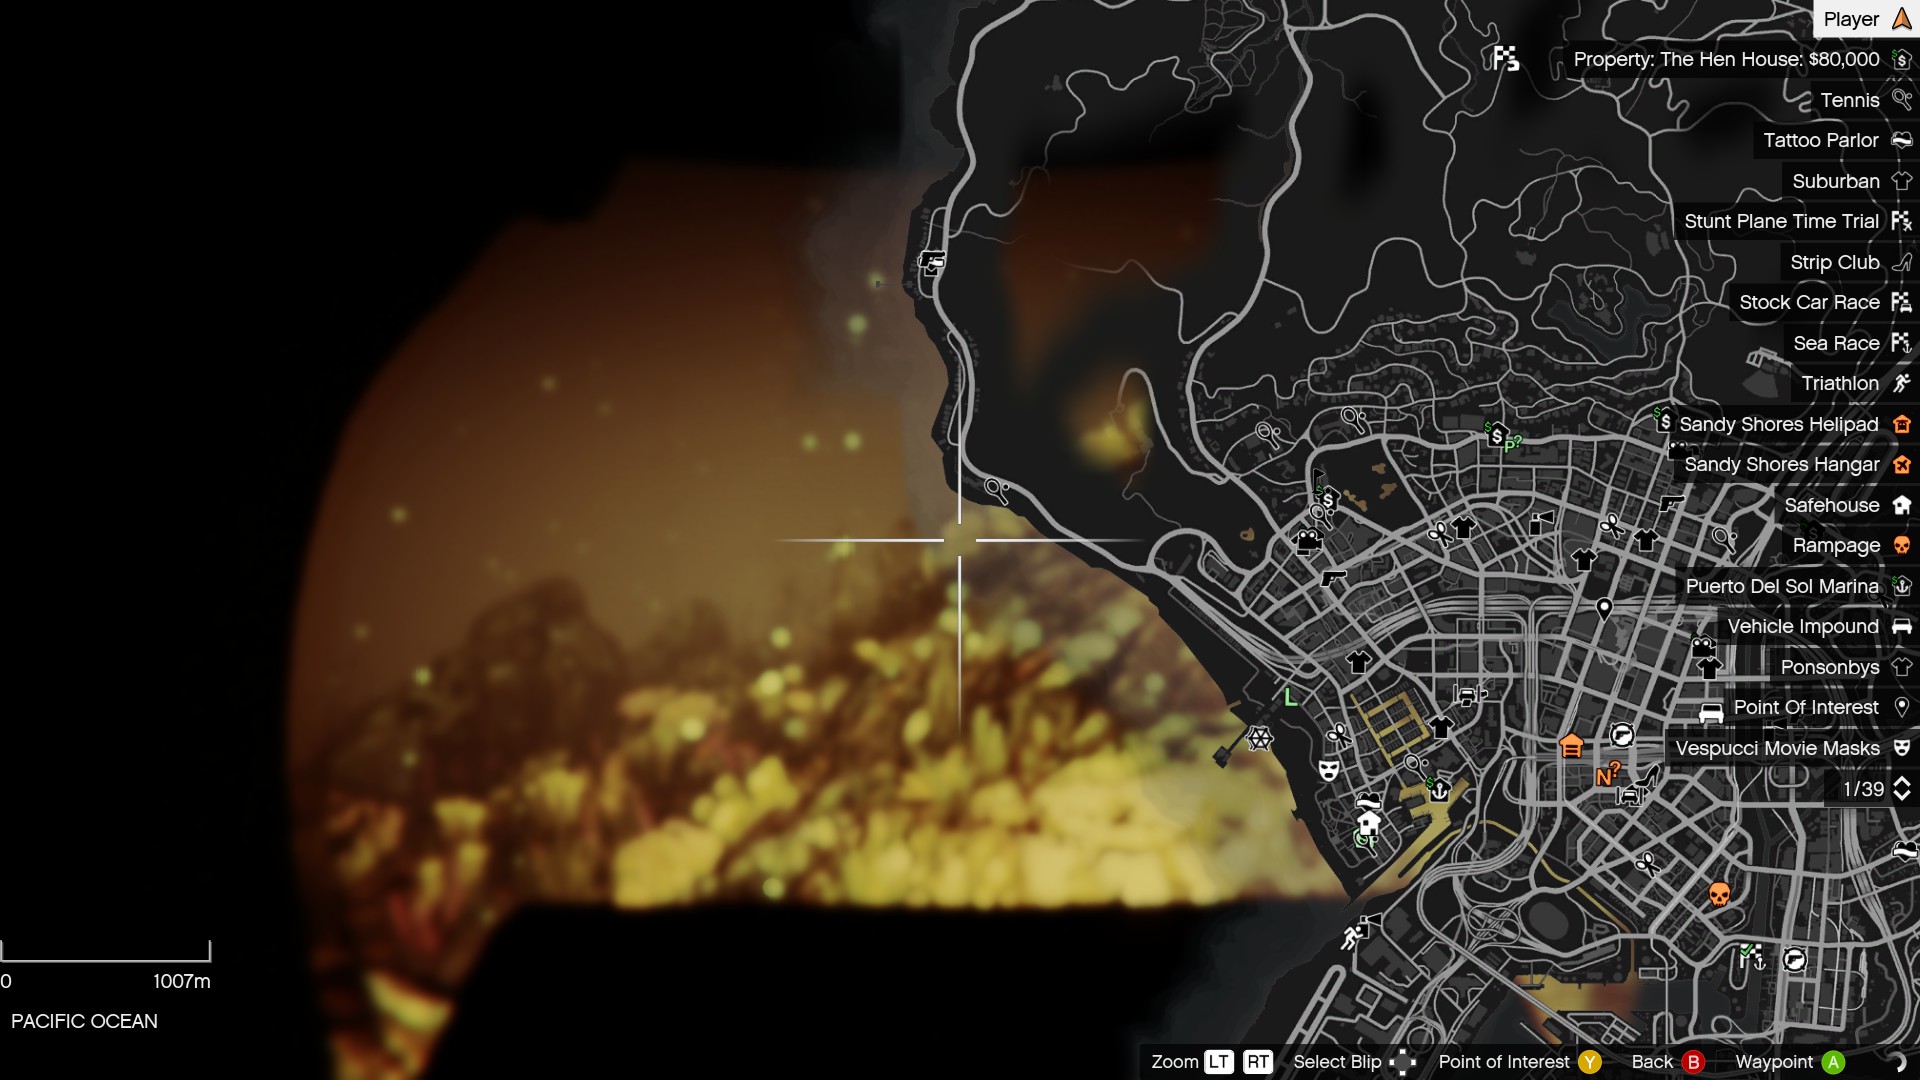
Finding Nuclear Waste in GTA V.
Nuclear Waste are collectibles found in Grand Theft Auto V.
Description
According to an internet news article from Public Liberty Online after the mission Fame or Shame, the nuclear waste tanks were deposited into the ocean following a winter storm.
The barrels can be found in various spots in the oceans around San Andreas. Each barrel can be collected by the player for $23,000, and after all barrels are collected, the player will gain an extra $250,000. The mission to collect the barrels is unlocked upon purchasing the Sonar Collections Dock and completing The Merryweather Heist. Collecting all 30 will award the player the Achievement/Trophy Waste Management. Purchasing the dock will also unlock Death at Sea for Abigail Mathers available to Michael De Santa and collecting all Submarine Pieces.
There are 30 barrels in total and they can only be found by using the Submersible that will spawn at the dock (the Kraken in the Enhanced Version of the game can also be used, provided it has been unlocked). The barrels can be picked up in the sub or the player can alternatively get out and swim to them. Collecting all barrels will roughly take up to two hours if done in one sitting, as the Mini Sub is considerably slow and may become difficult to control over time due to frequent crashing, but it is still a very sturdy vehicle. Care must be taken not to dive too deep, otherwise the water pressure will crush the sub (a few of the waste containers are located on the edge of this zone). If this happens, a message on the top left of the screen will say "WARNING! Approaching crush zone!" will appear and the water height meter will turn red. Collecting the barrels will require circumnavigating the entire island (another reason for doing the mission in one sitting rather than having to return to the last barrel location); note that if Michael's or Trevor's exile from Los Santos to Blaine County is still in effect, piloting the sub near the city will result in warnings and Martin Madrazo's gang members will swarm on land, but as long as Michael or Trevor don't exit the sub or attempt to land, there is no danger. Similarly, sharks pose no danger as it is unnecessary to leave the sub to collect the barrels (it is, however, necessary to pick up any other objects spotted, such as Weapons, Body Armor, and Health Kits.).
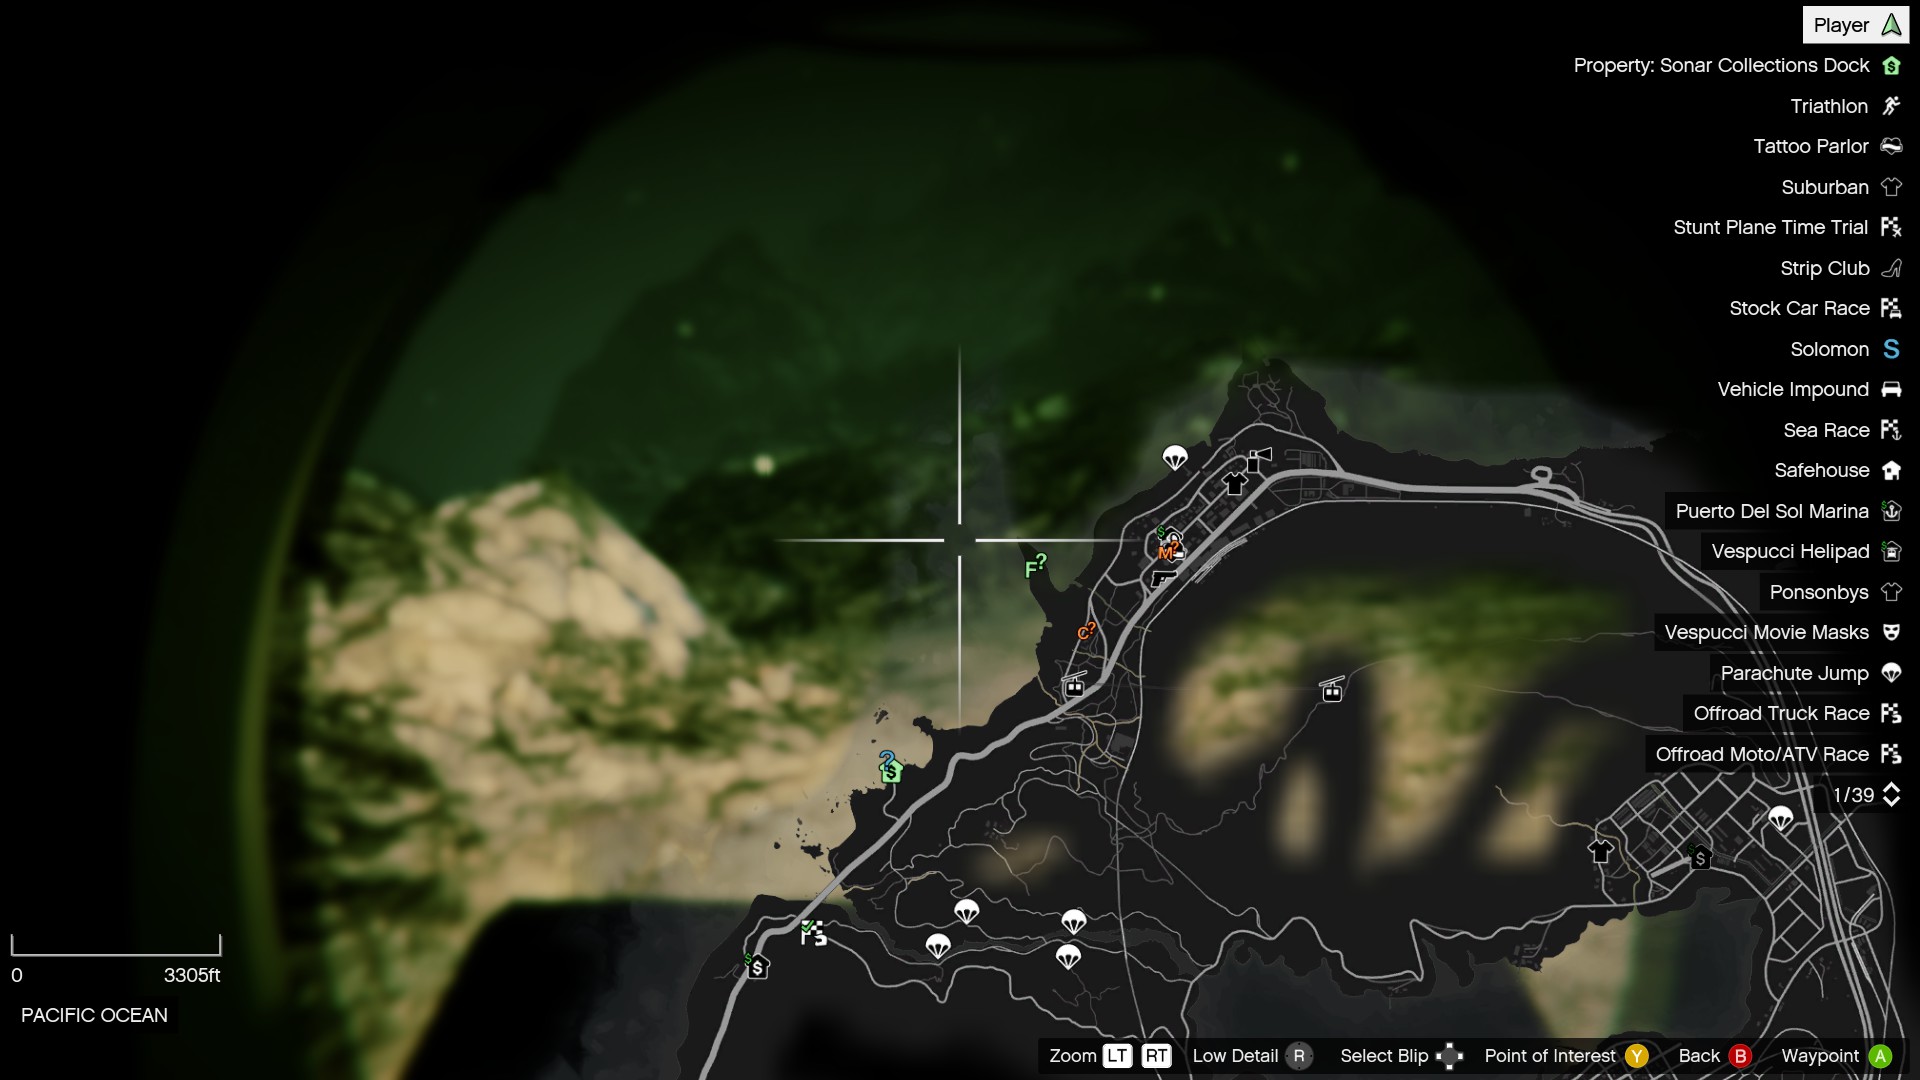
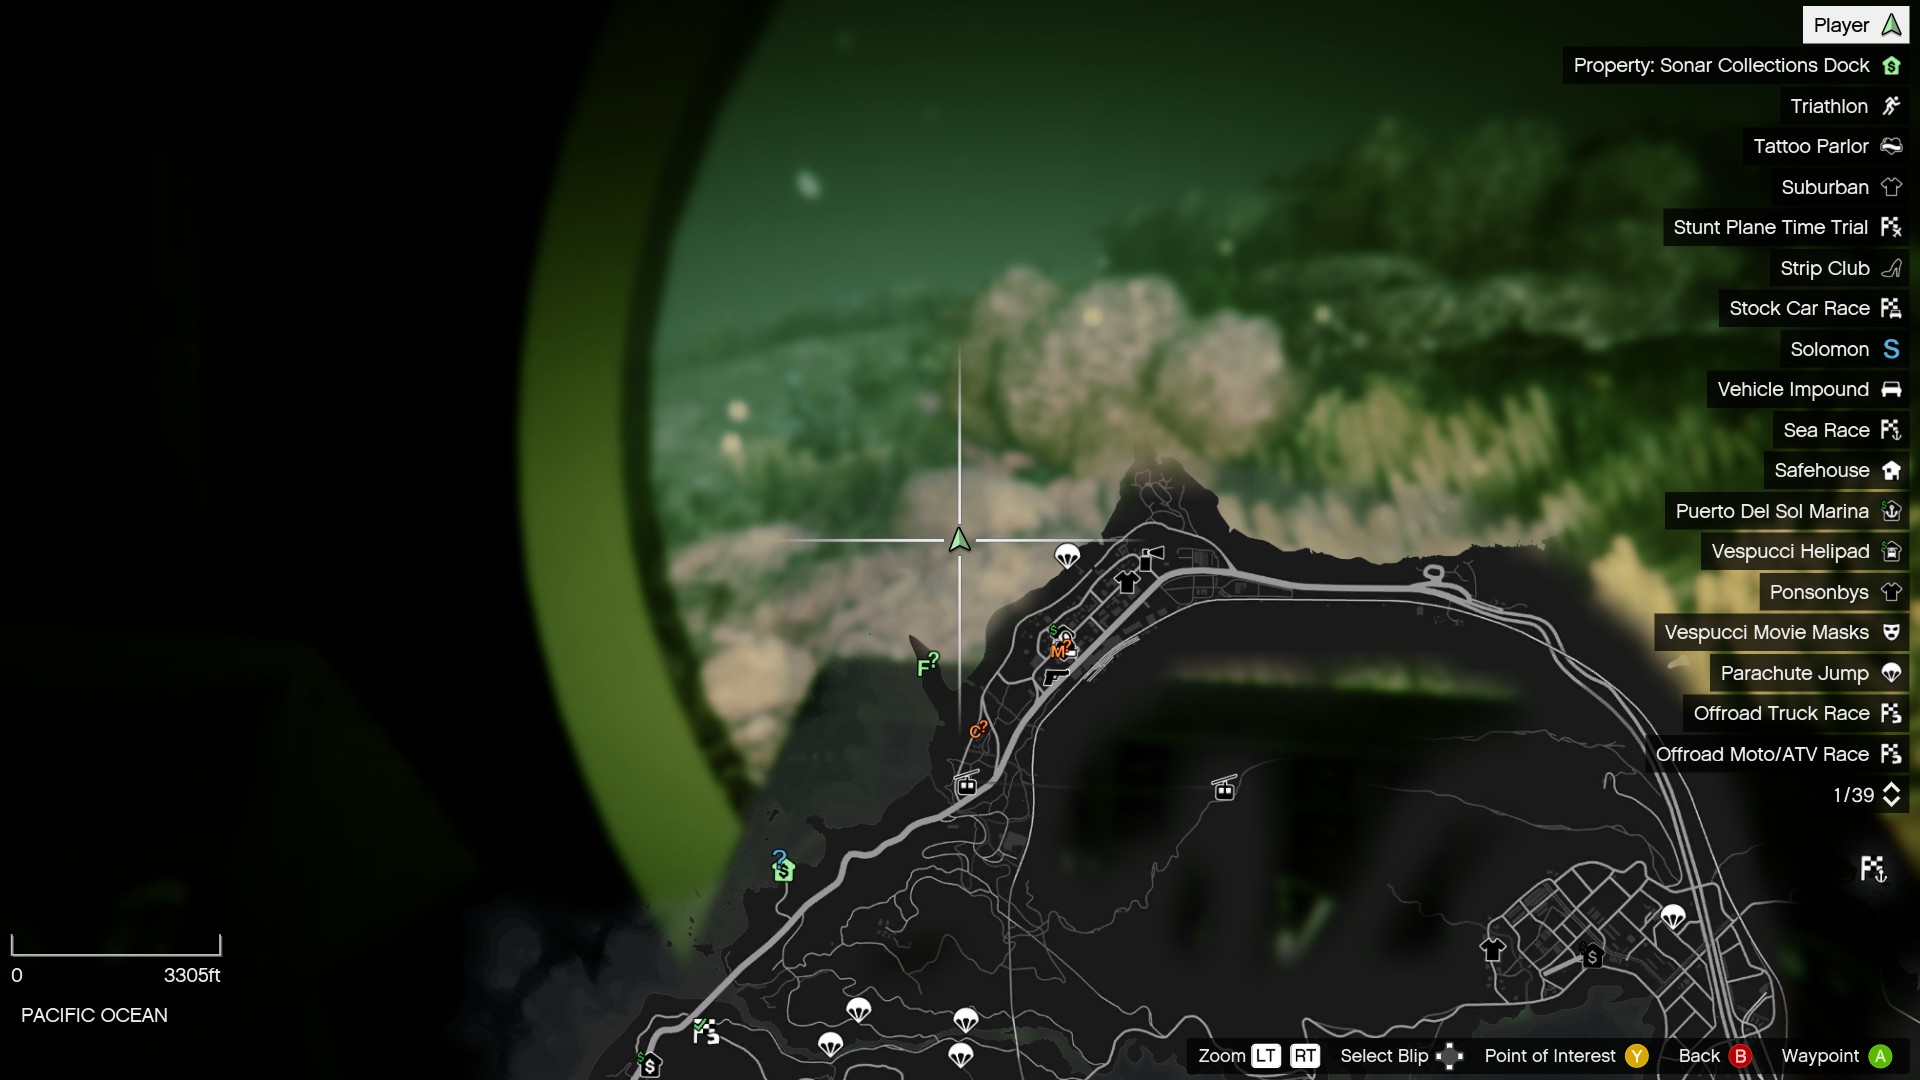
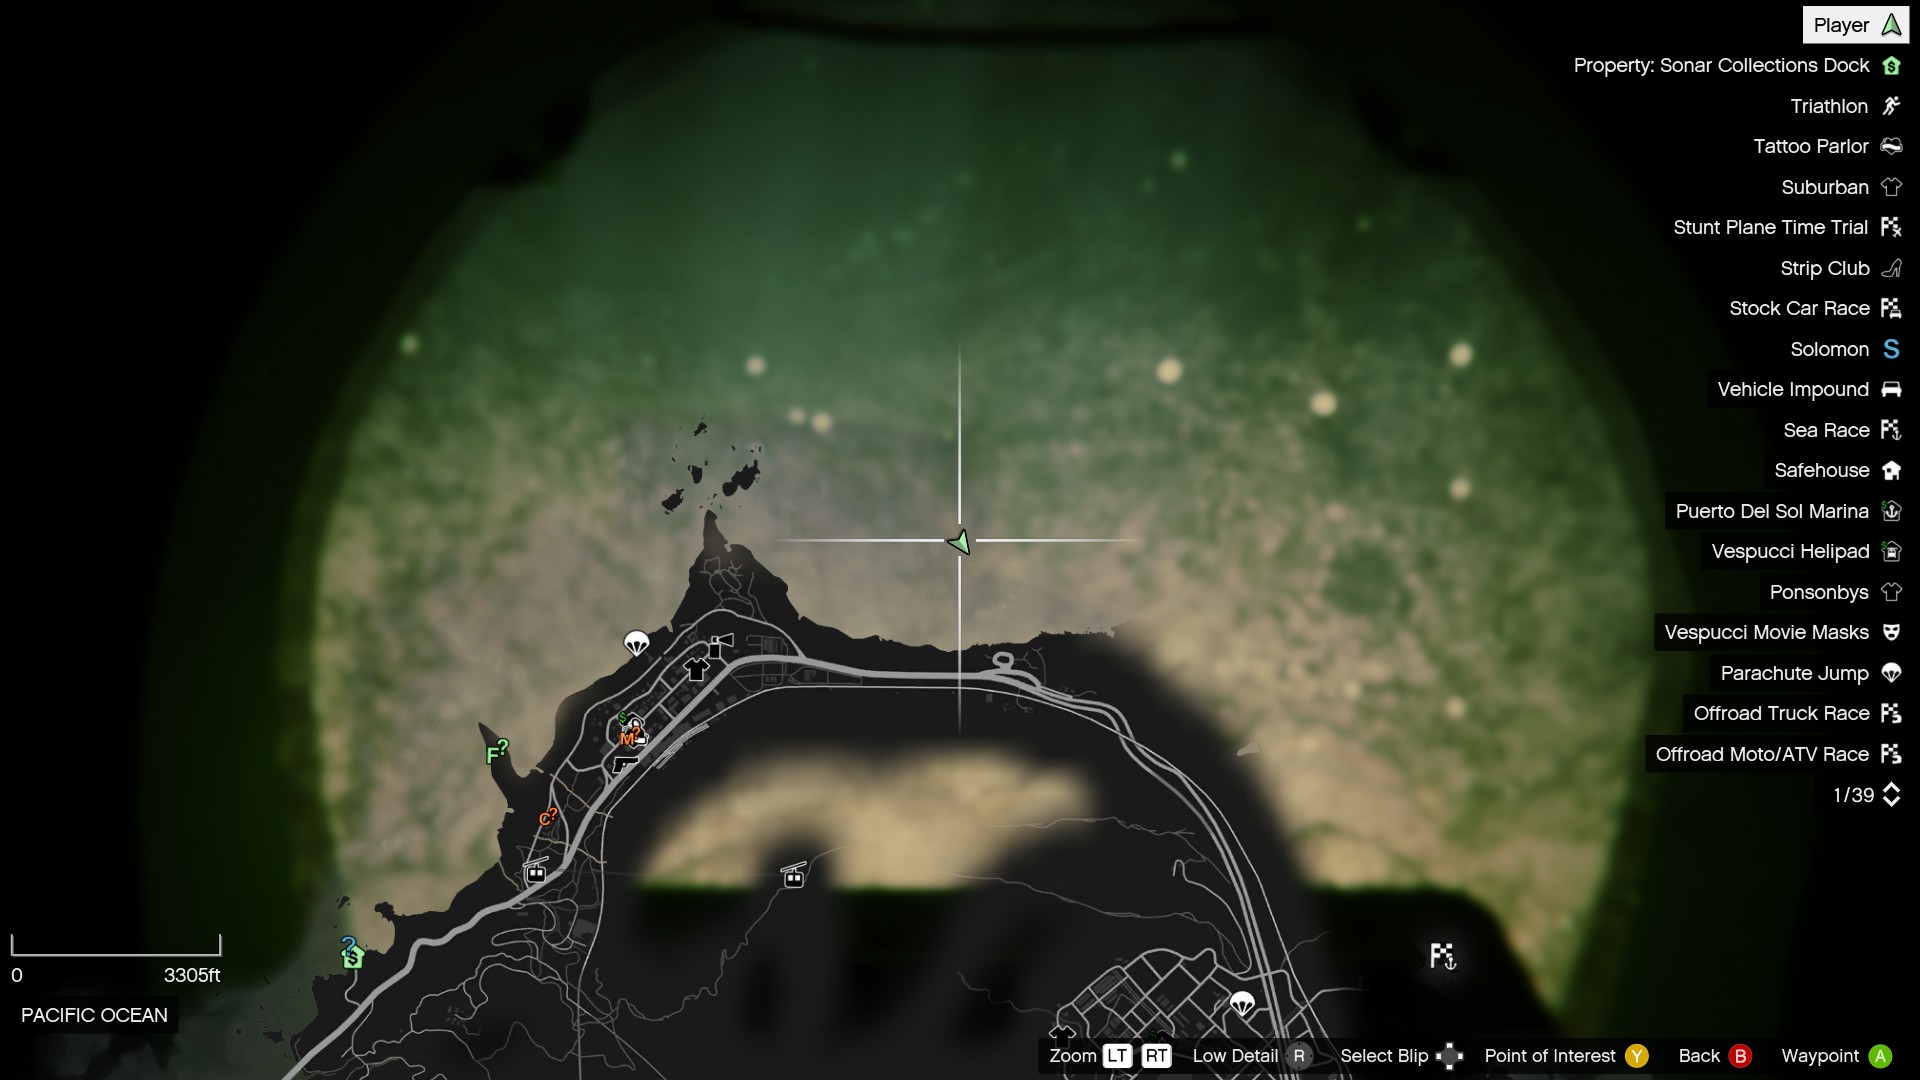
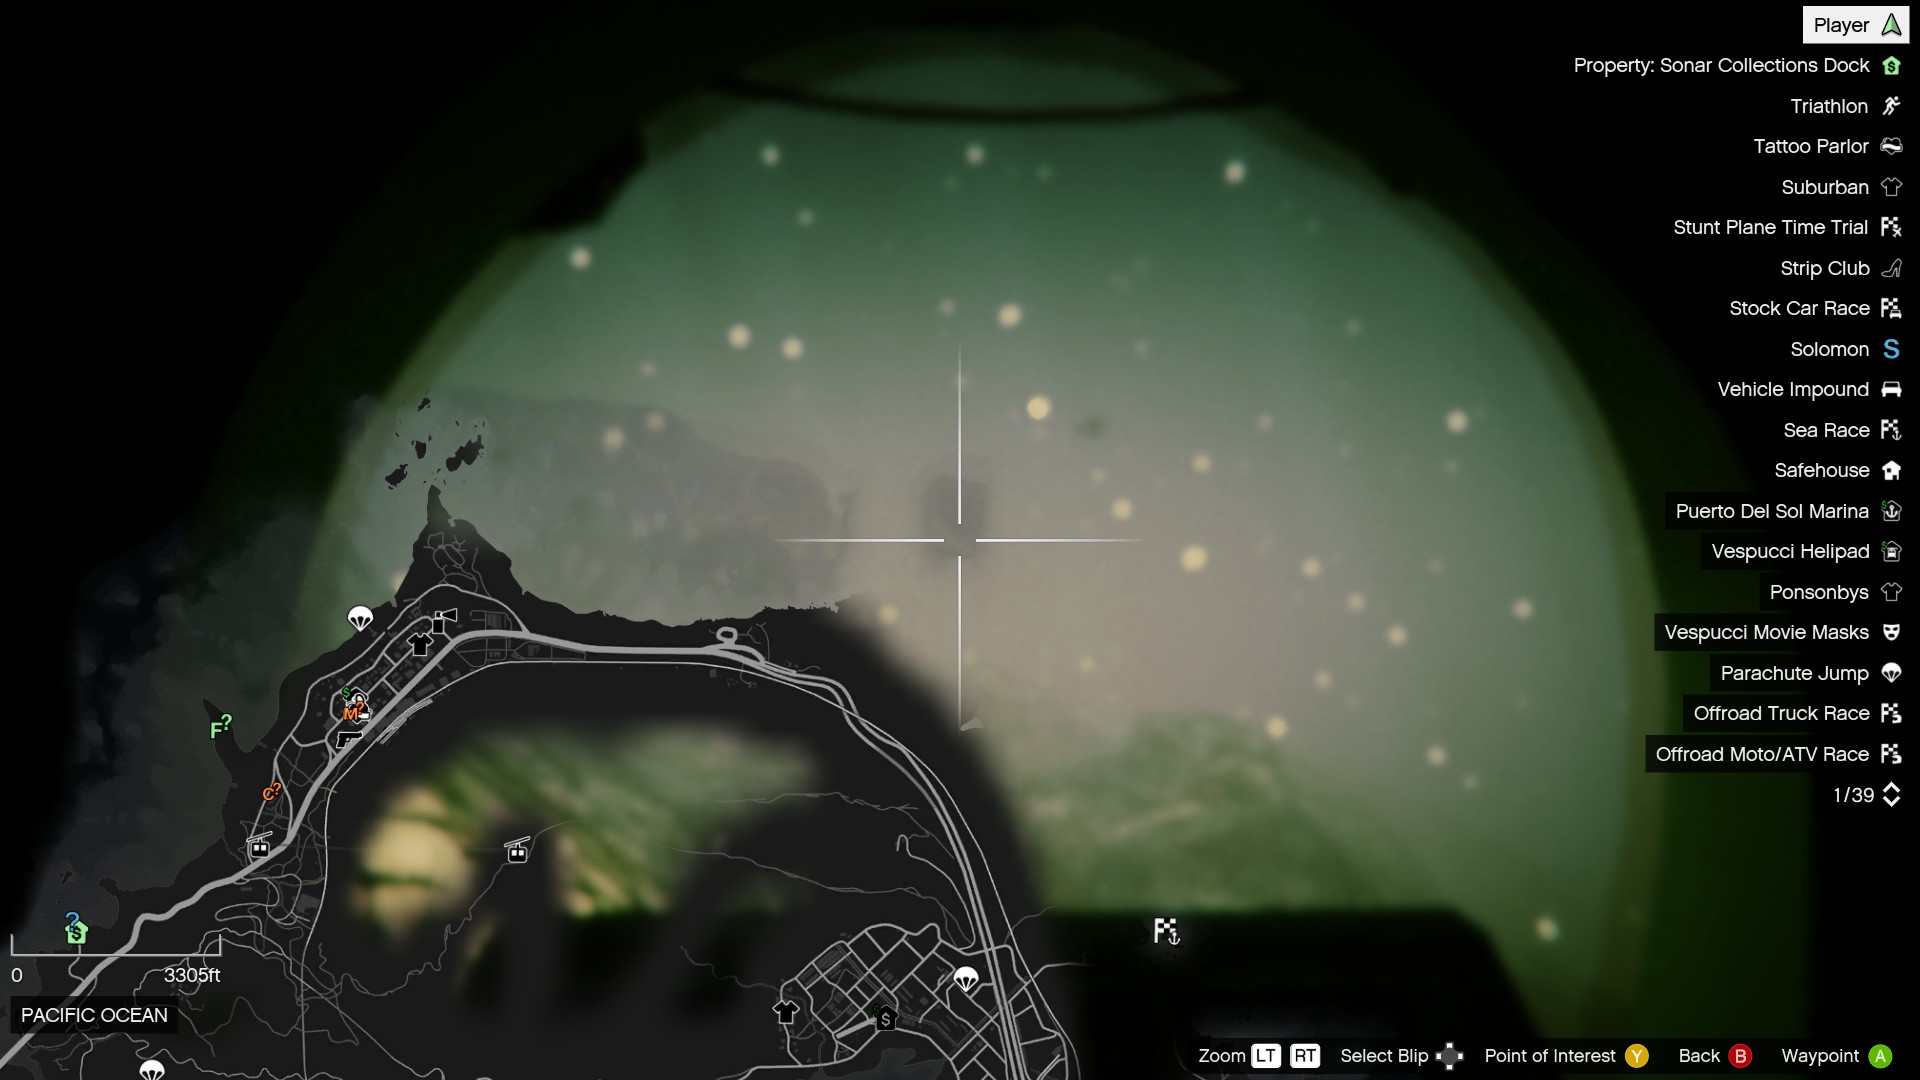
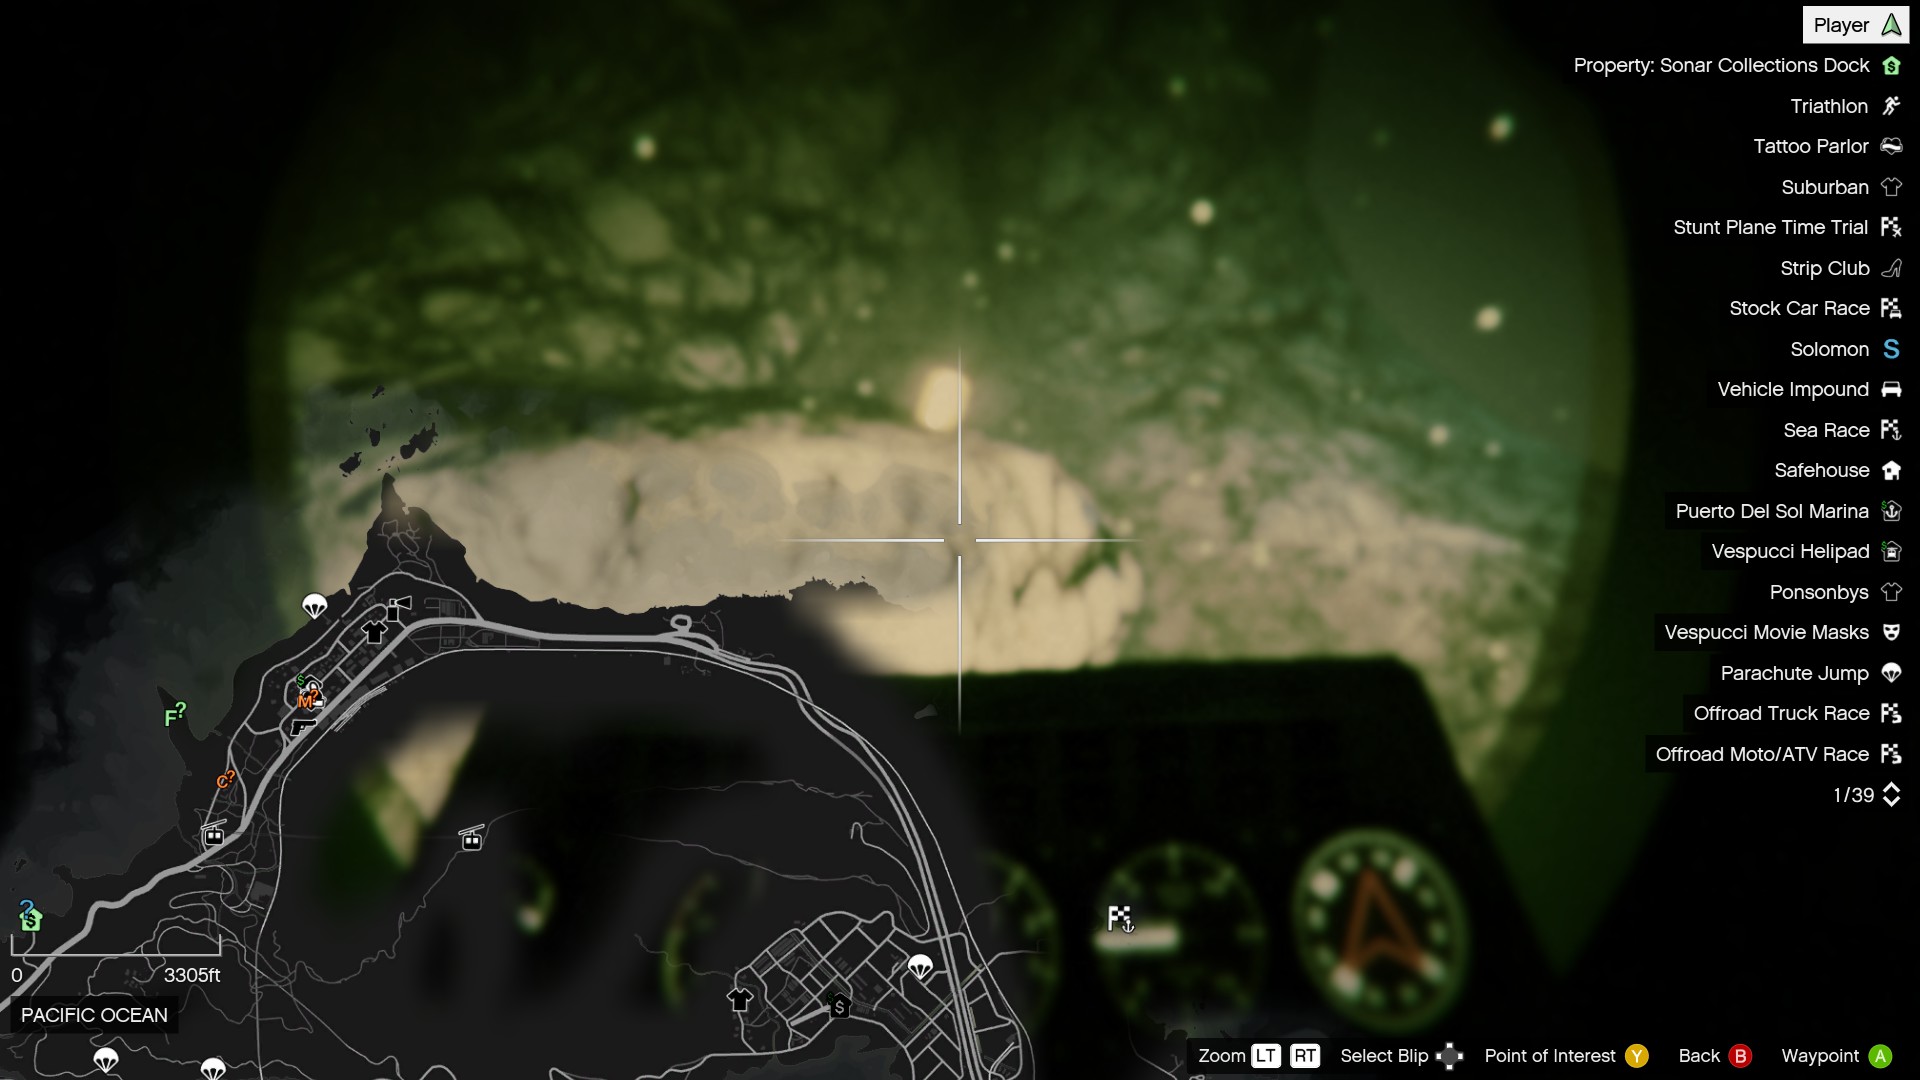
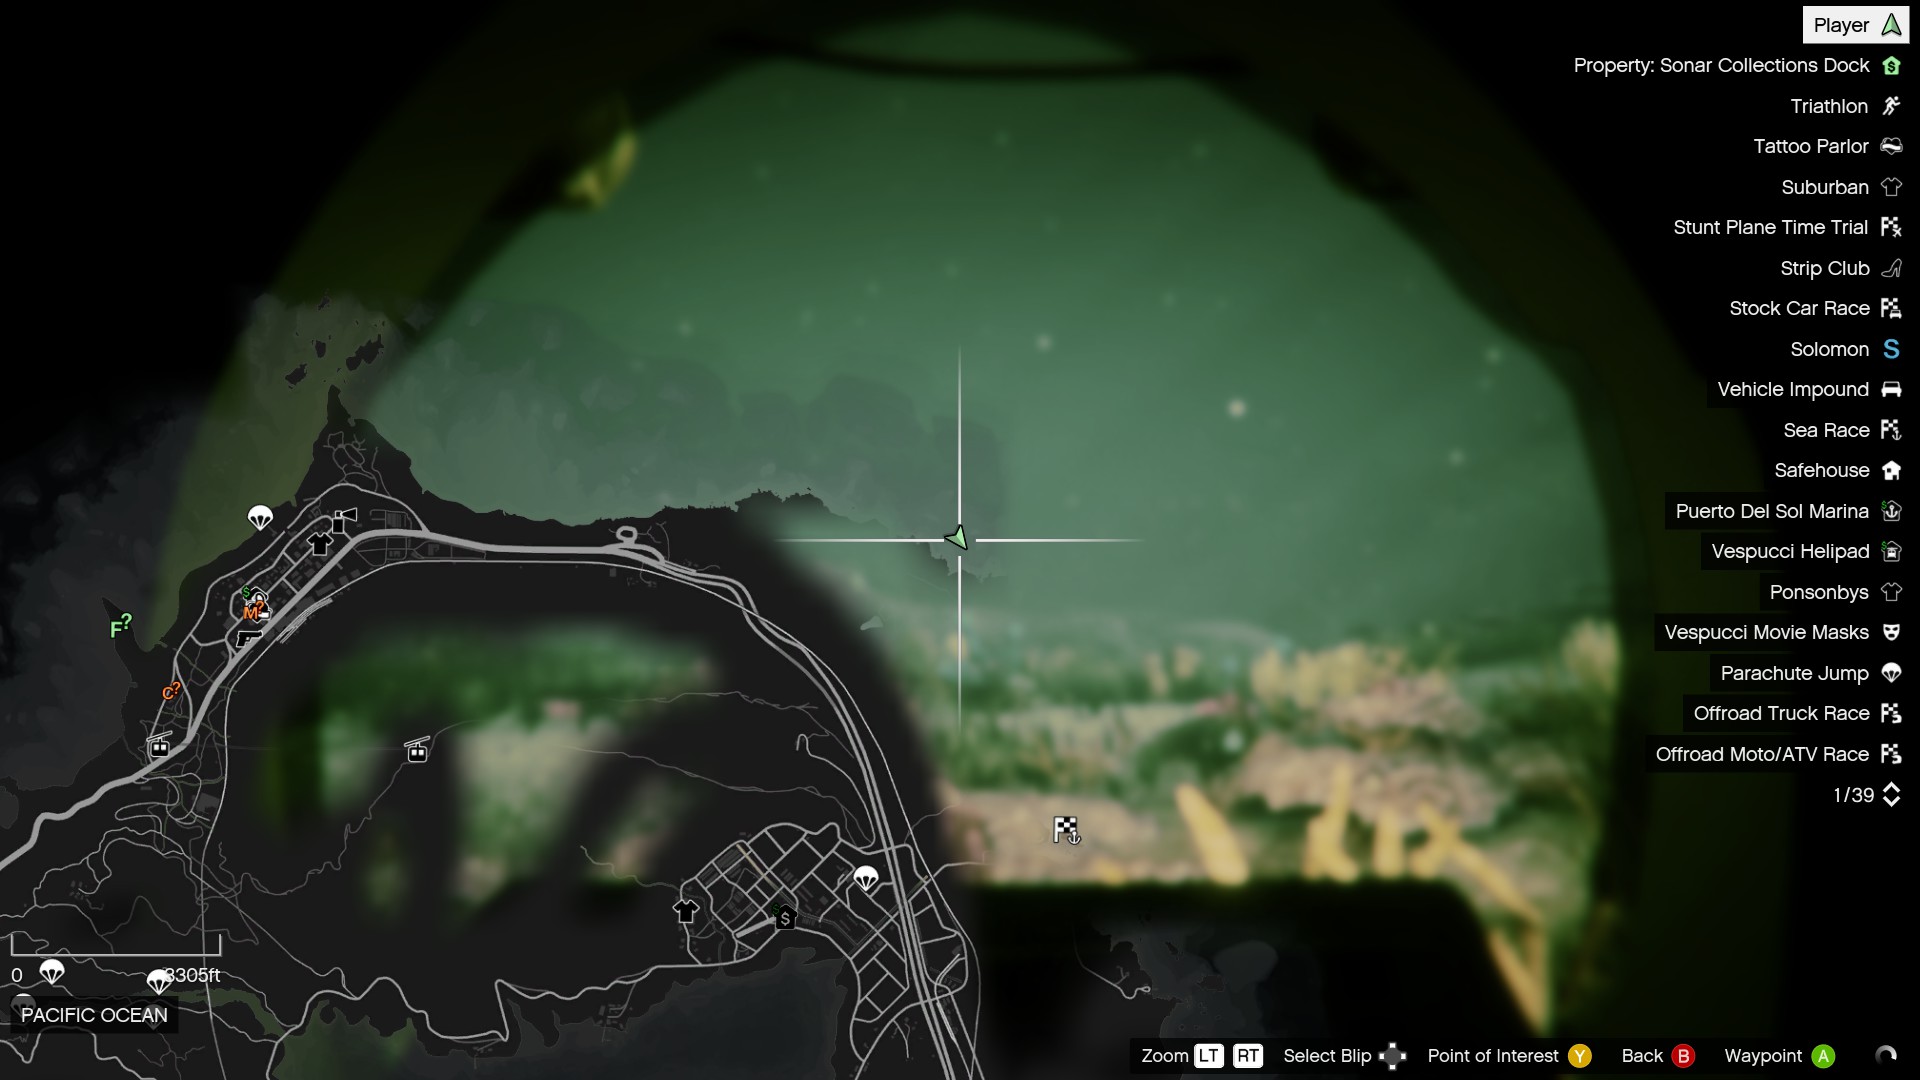
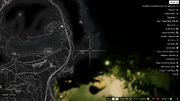
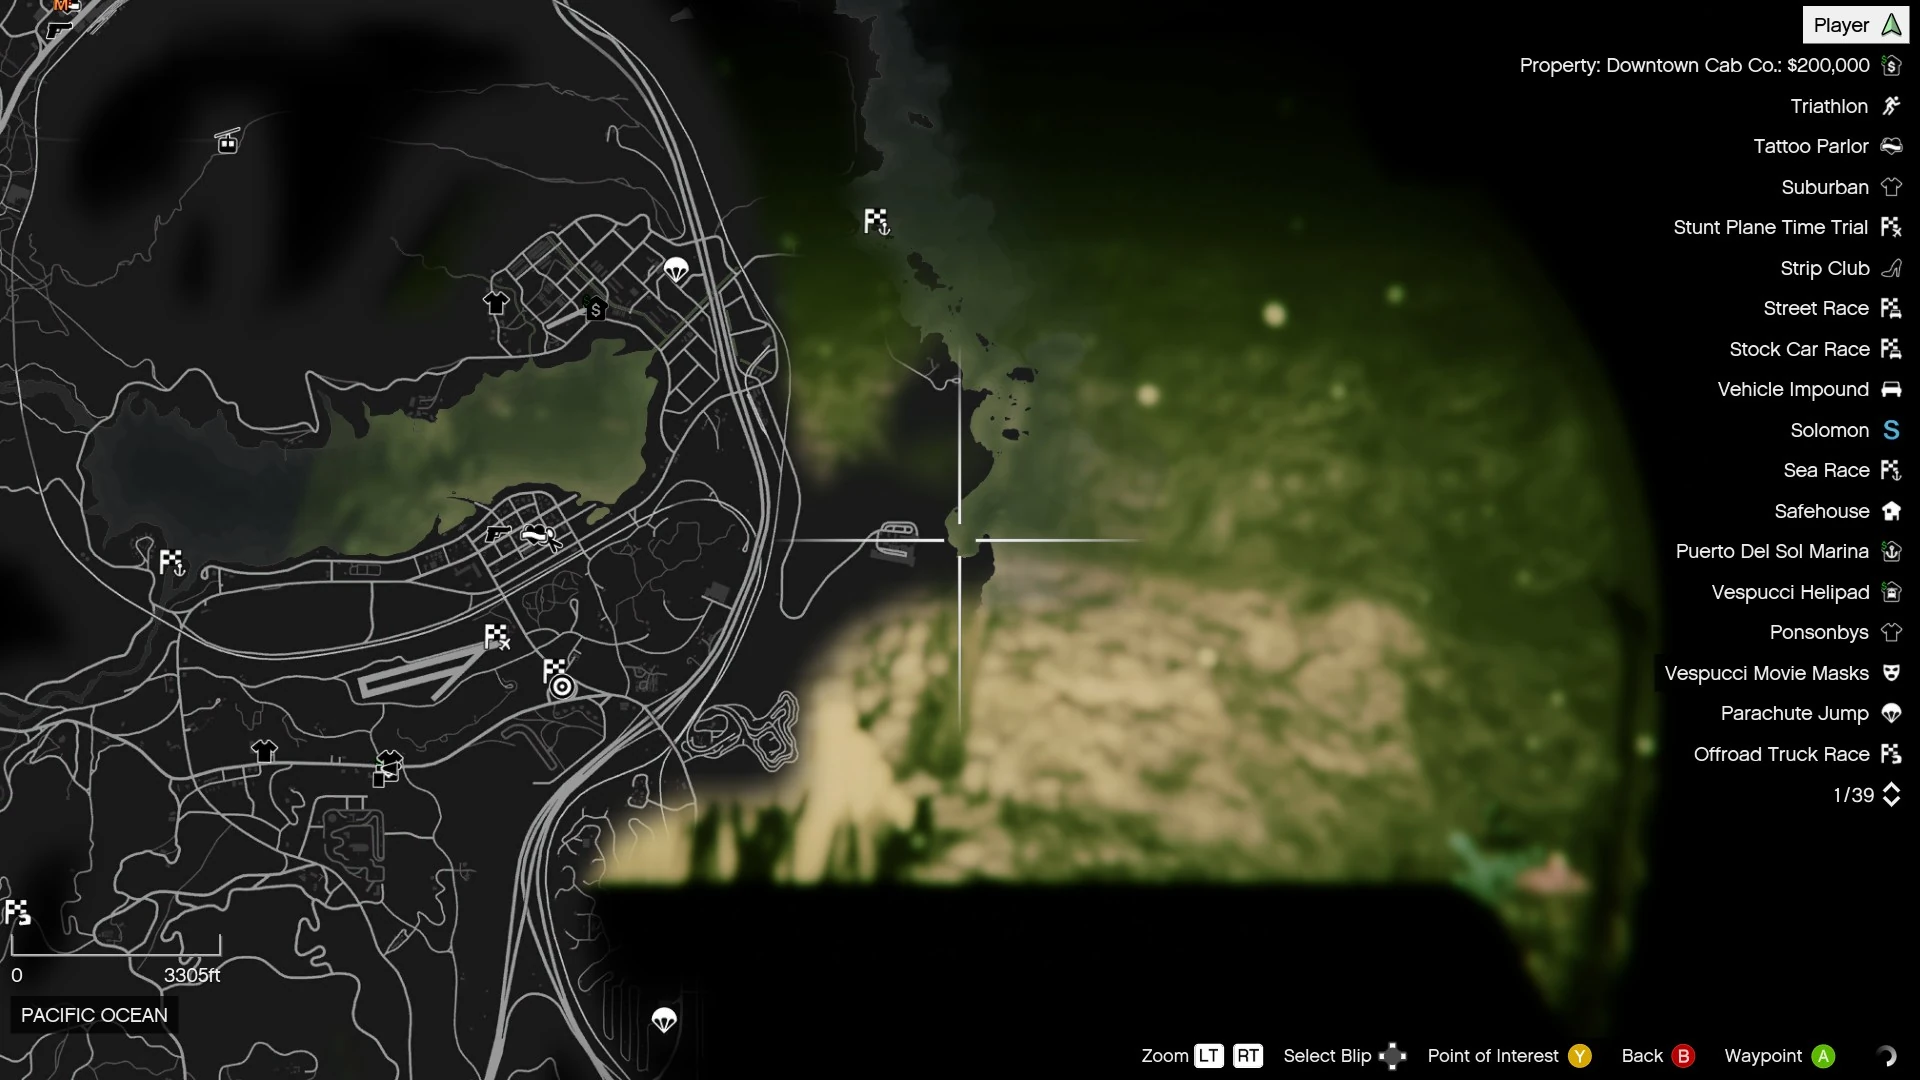
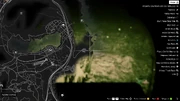
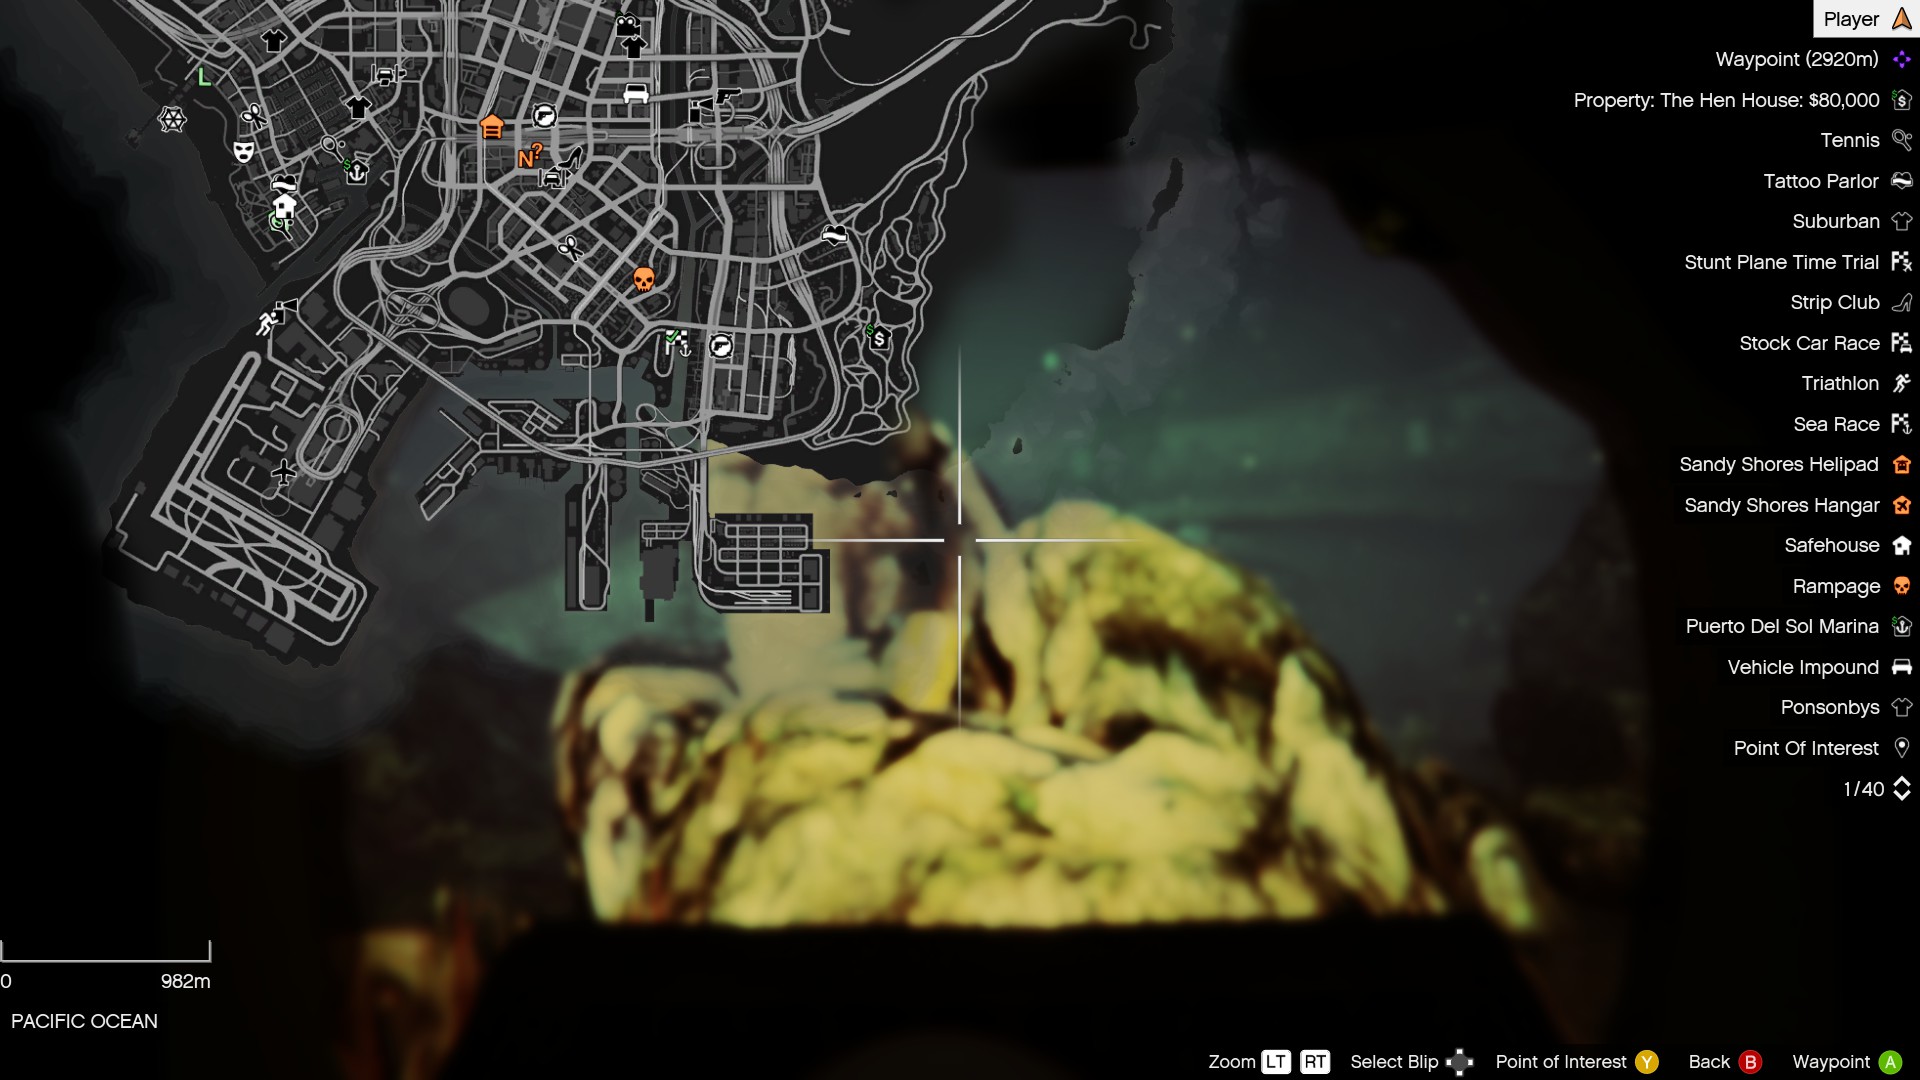
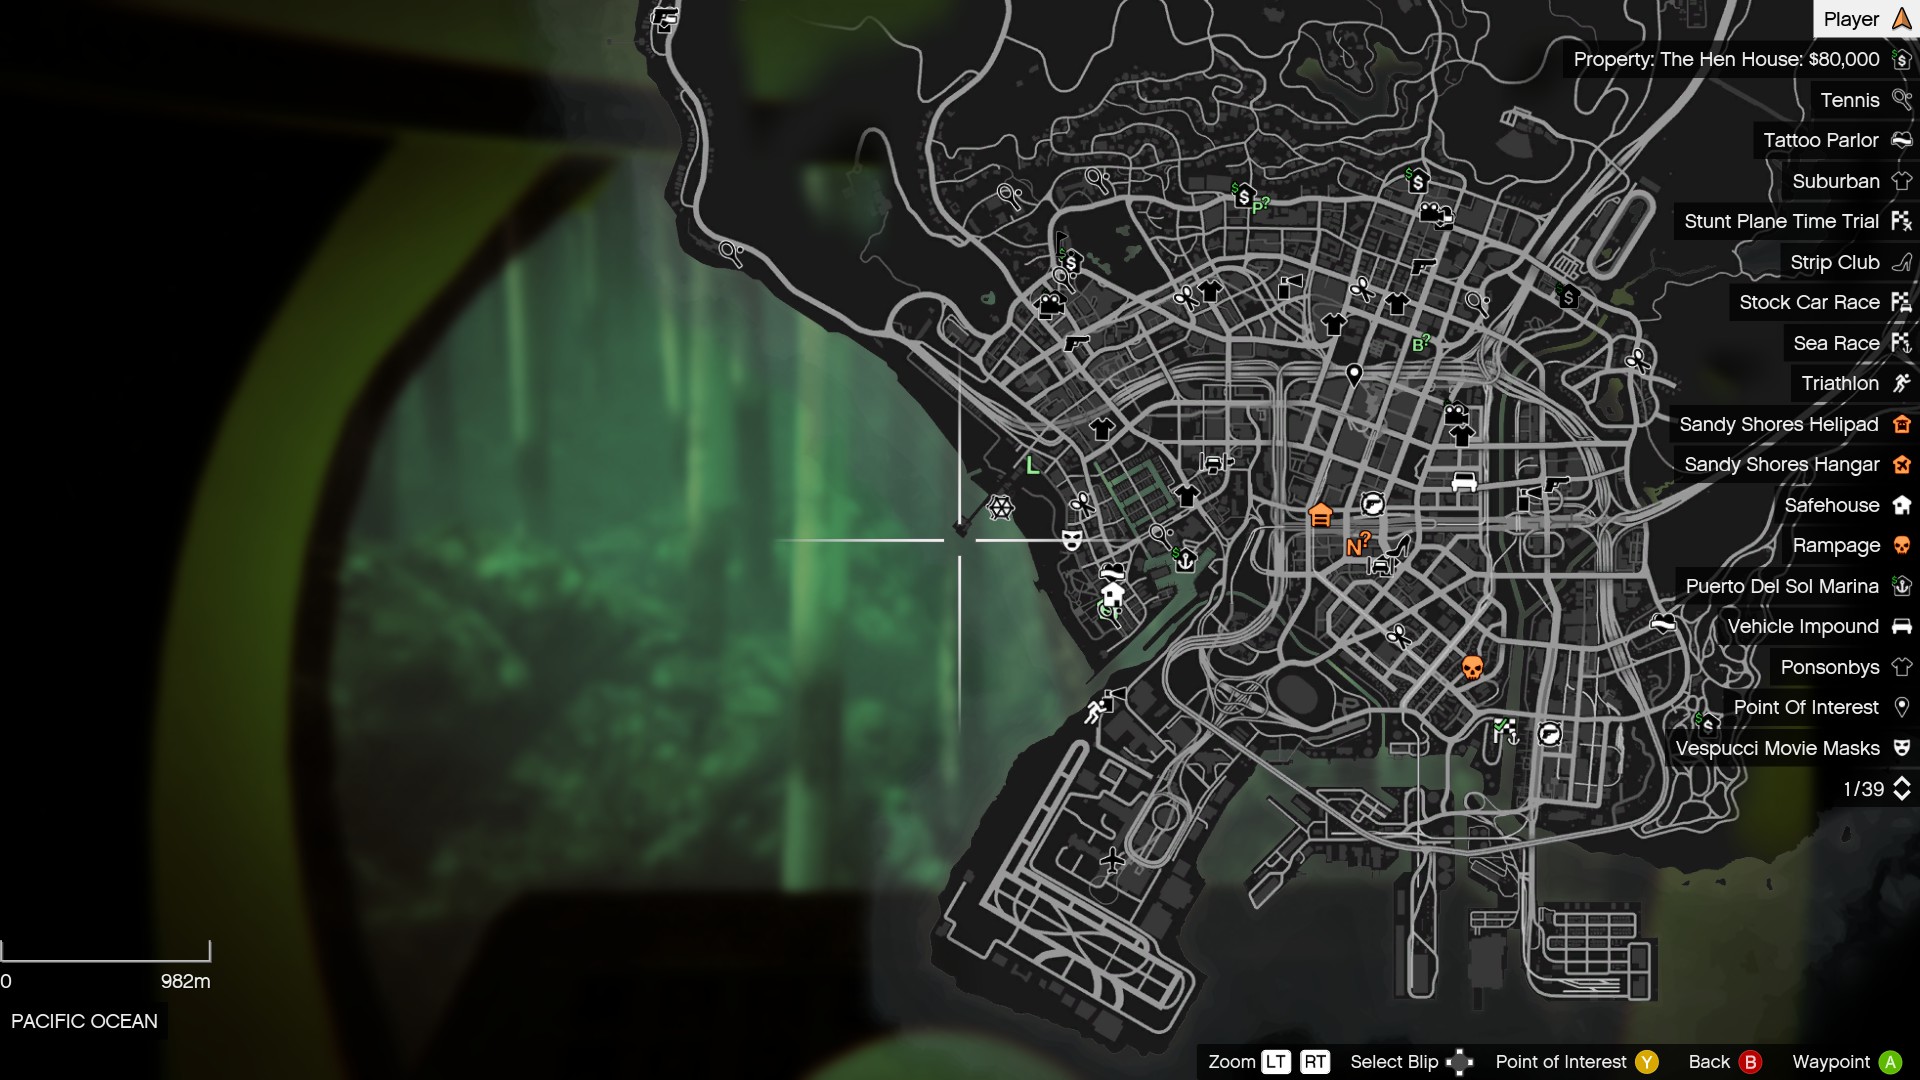
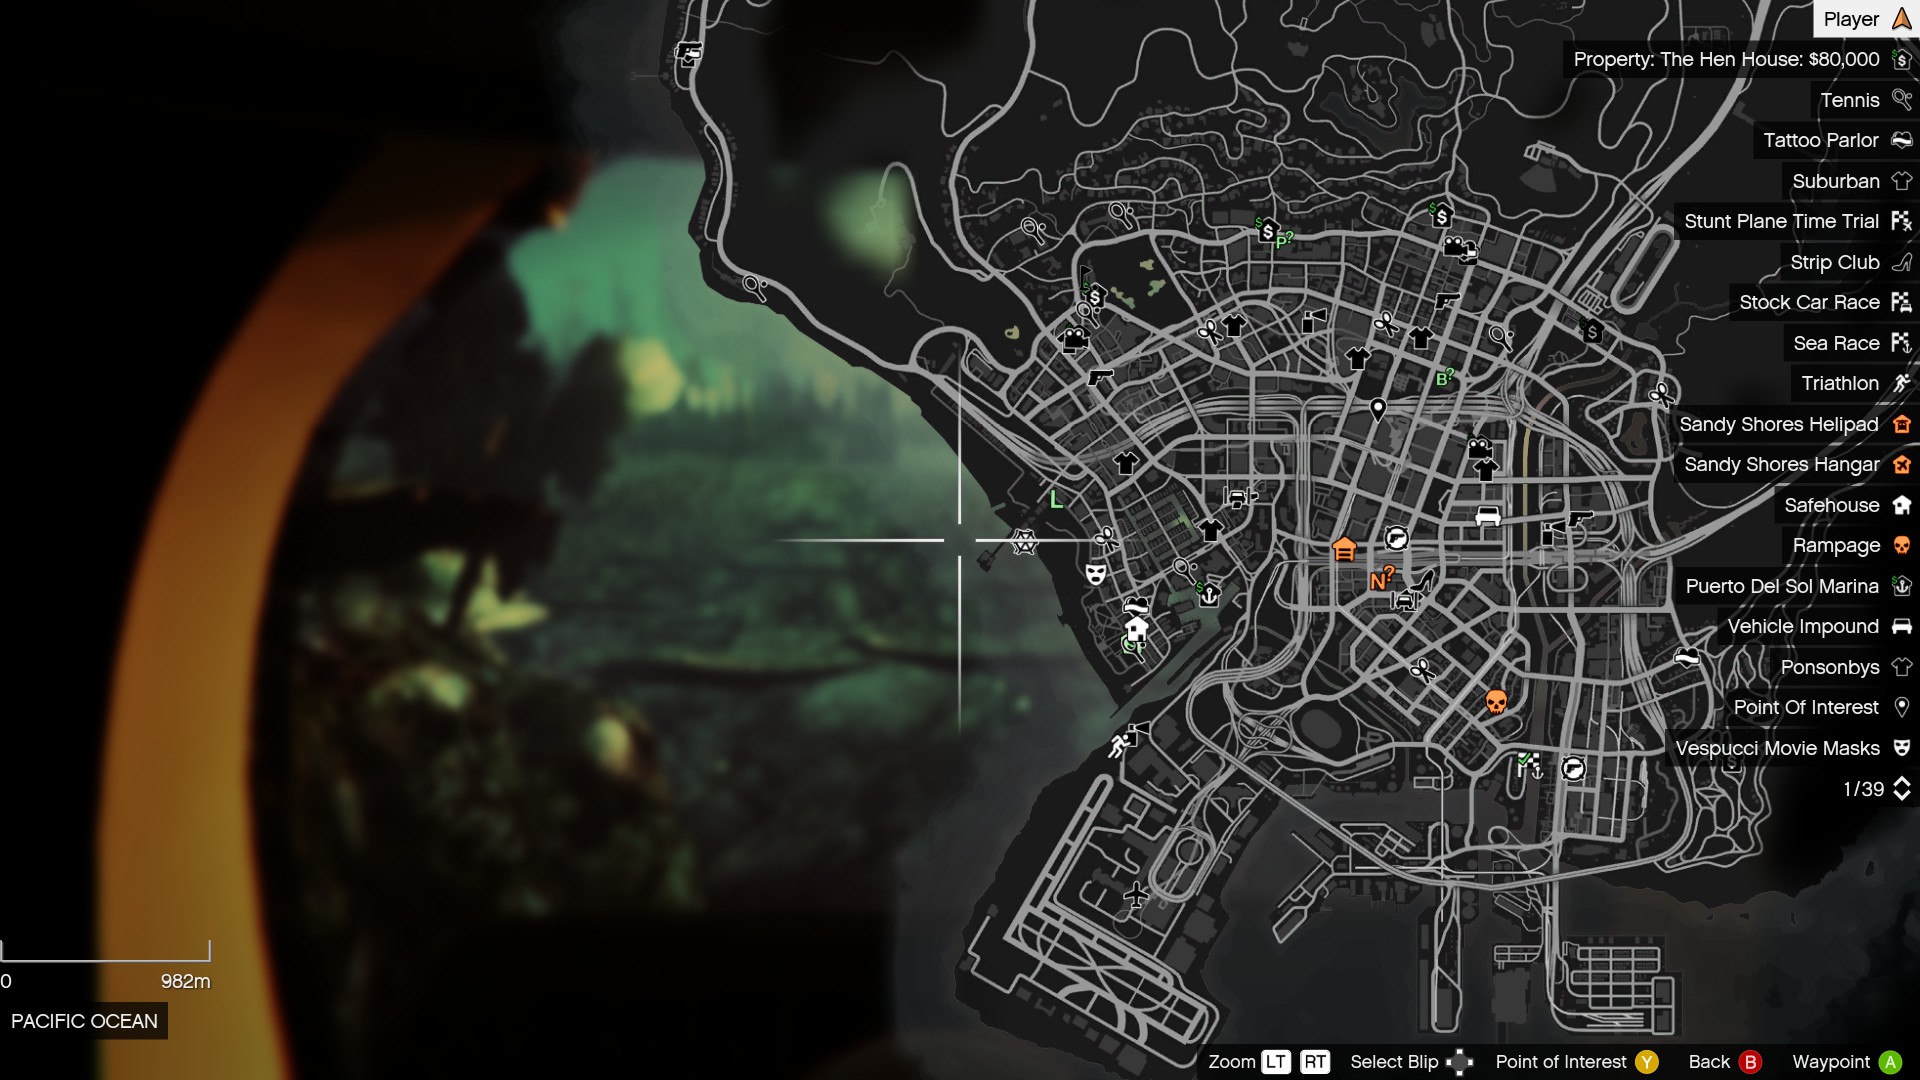
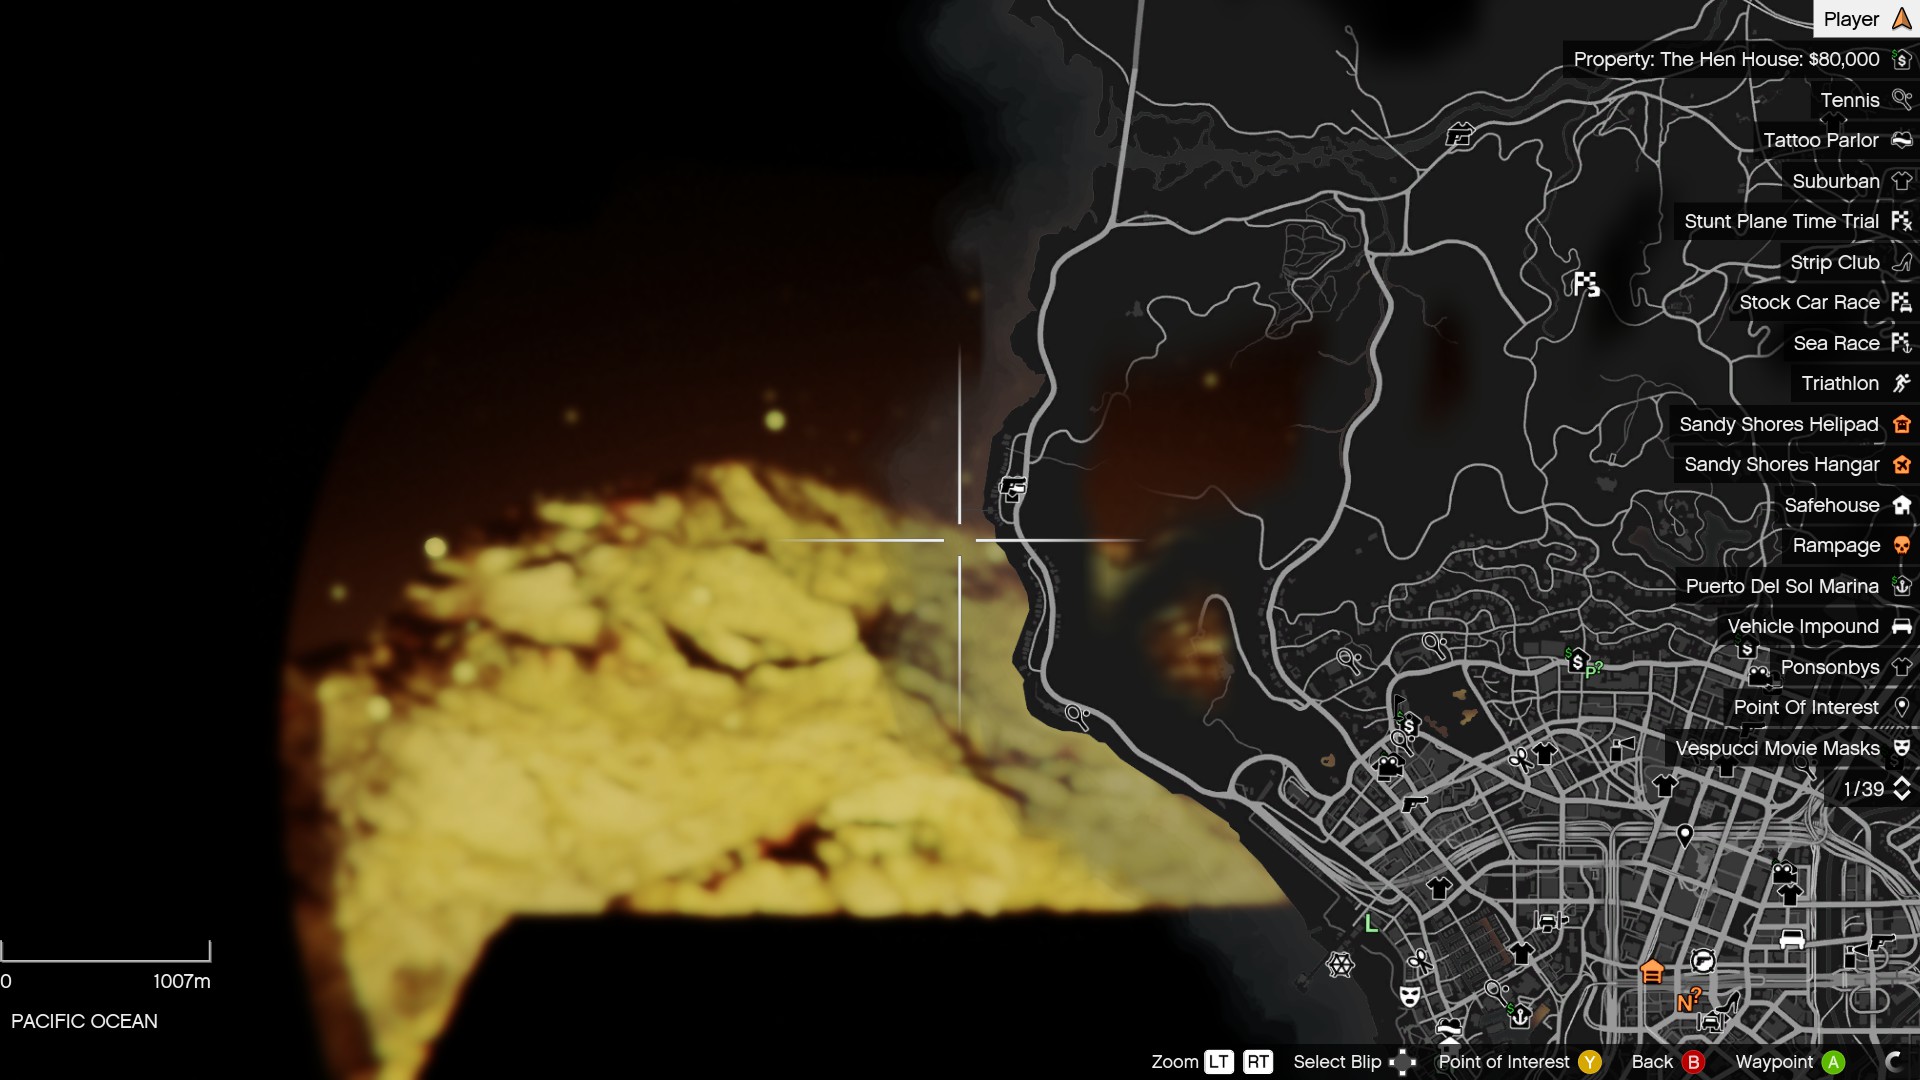
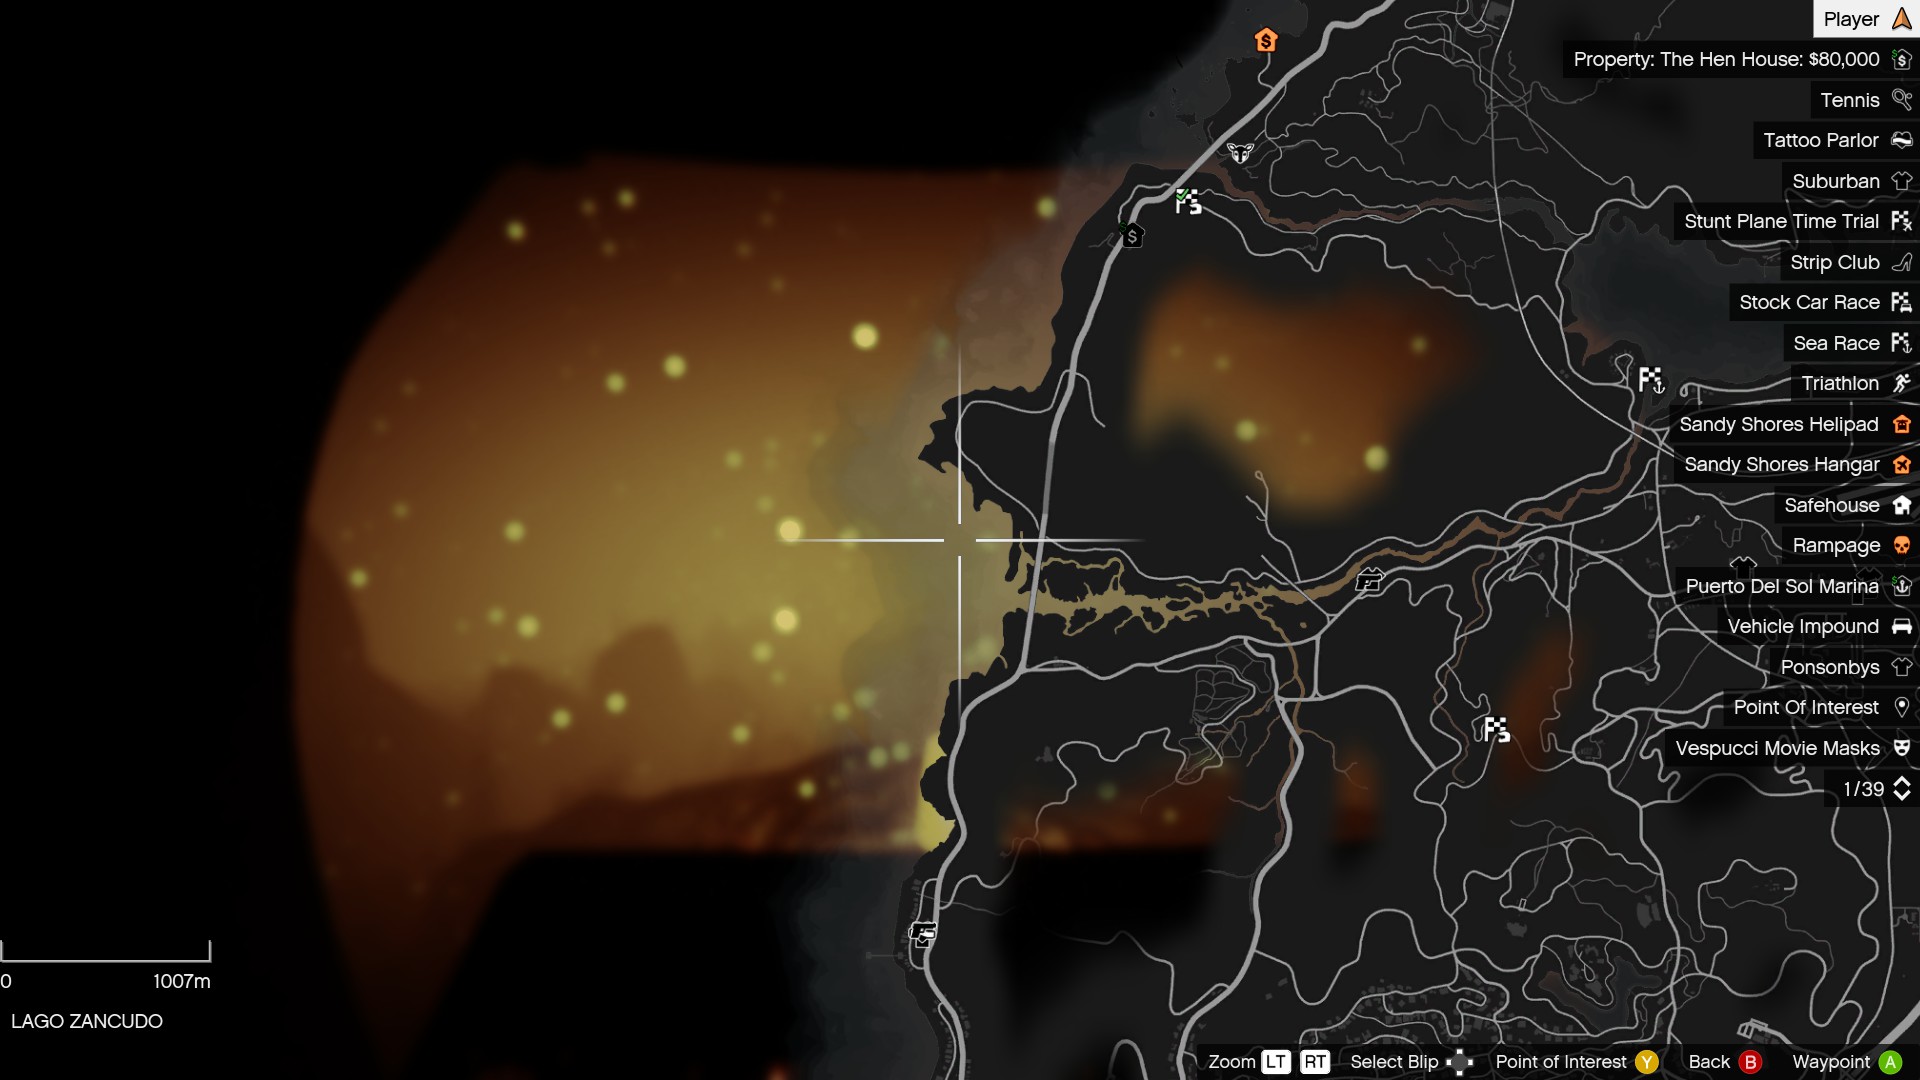
To find the barrels, the Trackify app is used, though it only tends to show the general direction in which a barrel is located rather than its distance from the sub. When following the signal, the player must be very careful not to ground the sub, collide with underwater cliffs/rocky outcrops, or force it to reach land.
The $250,000 bonus collected after completing this mission covers the cost of purchasing the dock, making the $690,000 earned from picking up the barrels ($23,000 x 30) pure profit.
All three protagonists can search for the nuclear waste barrels, though all profits will go to the dock's owner.
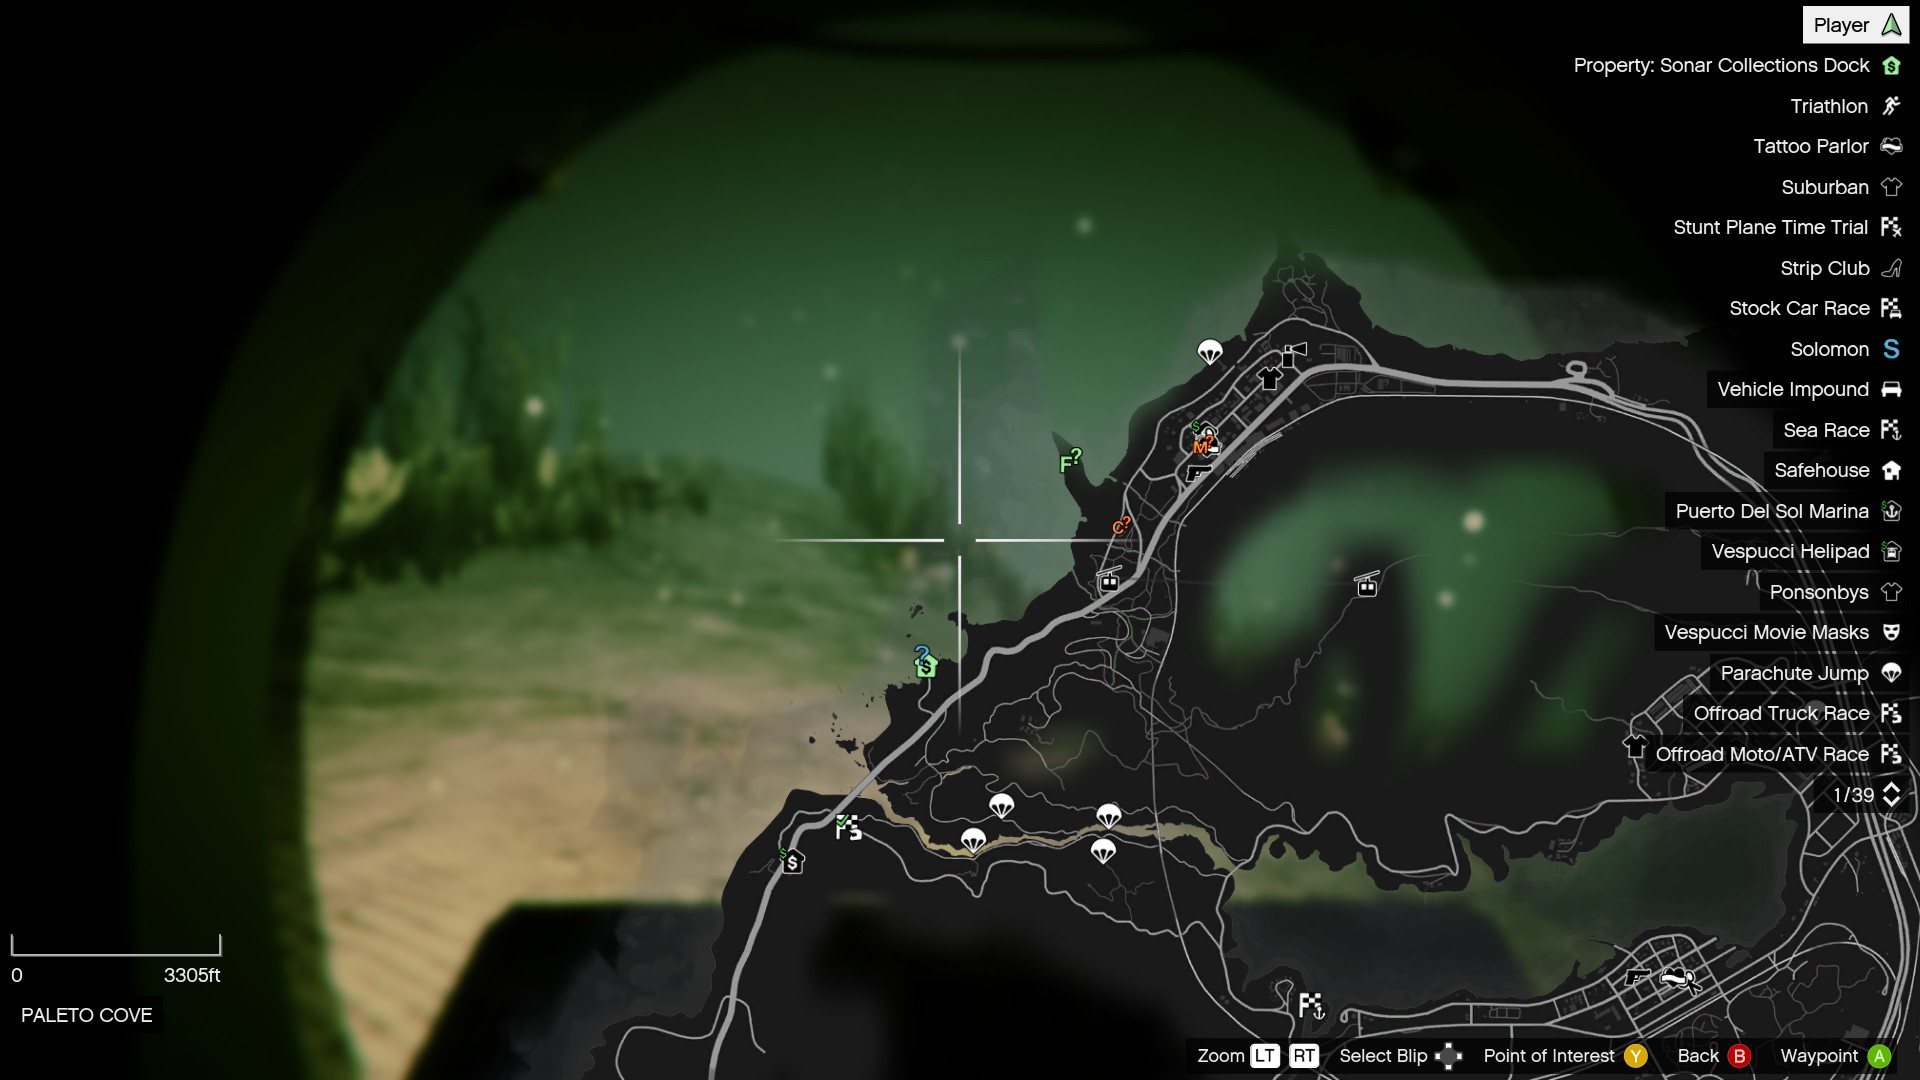
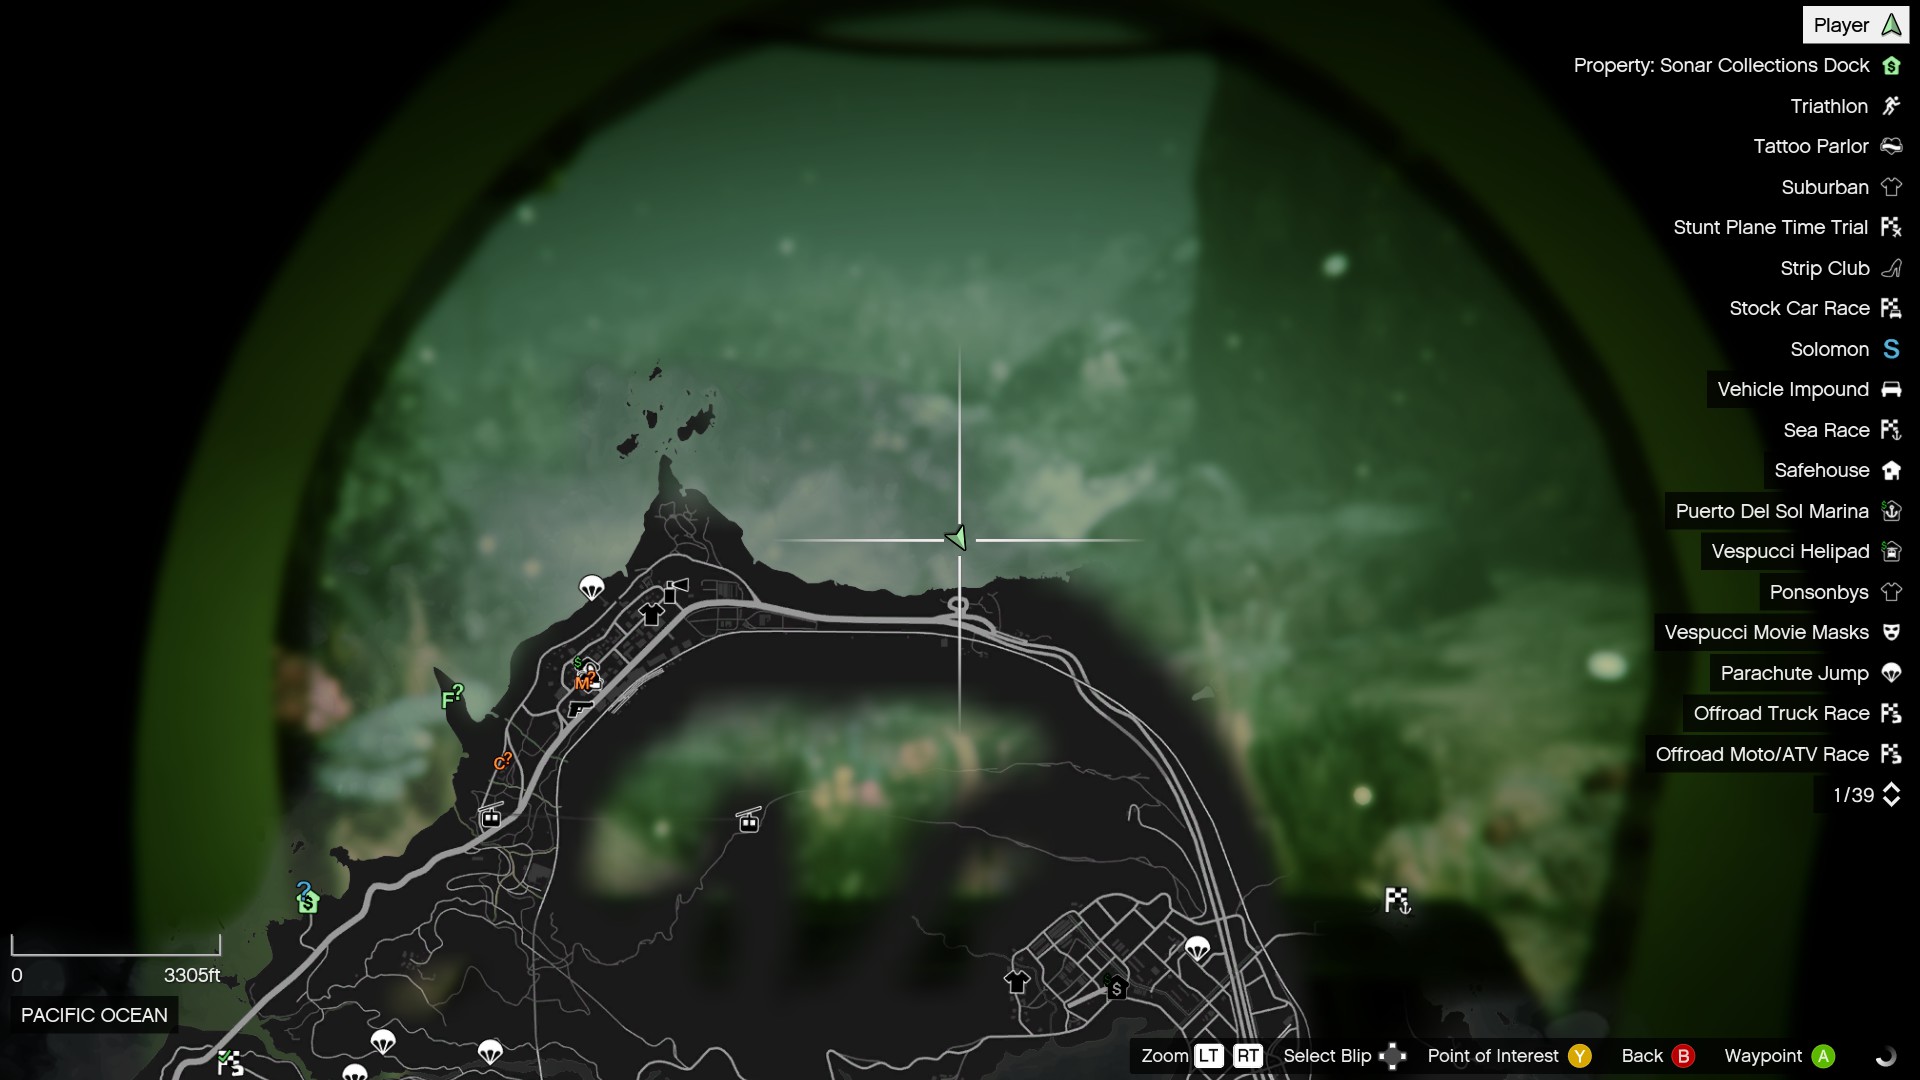
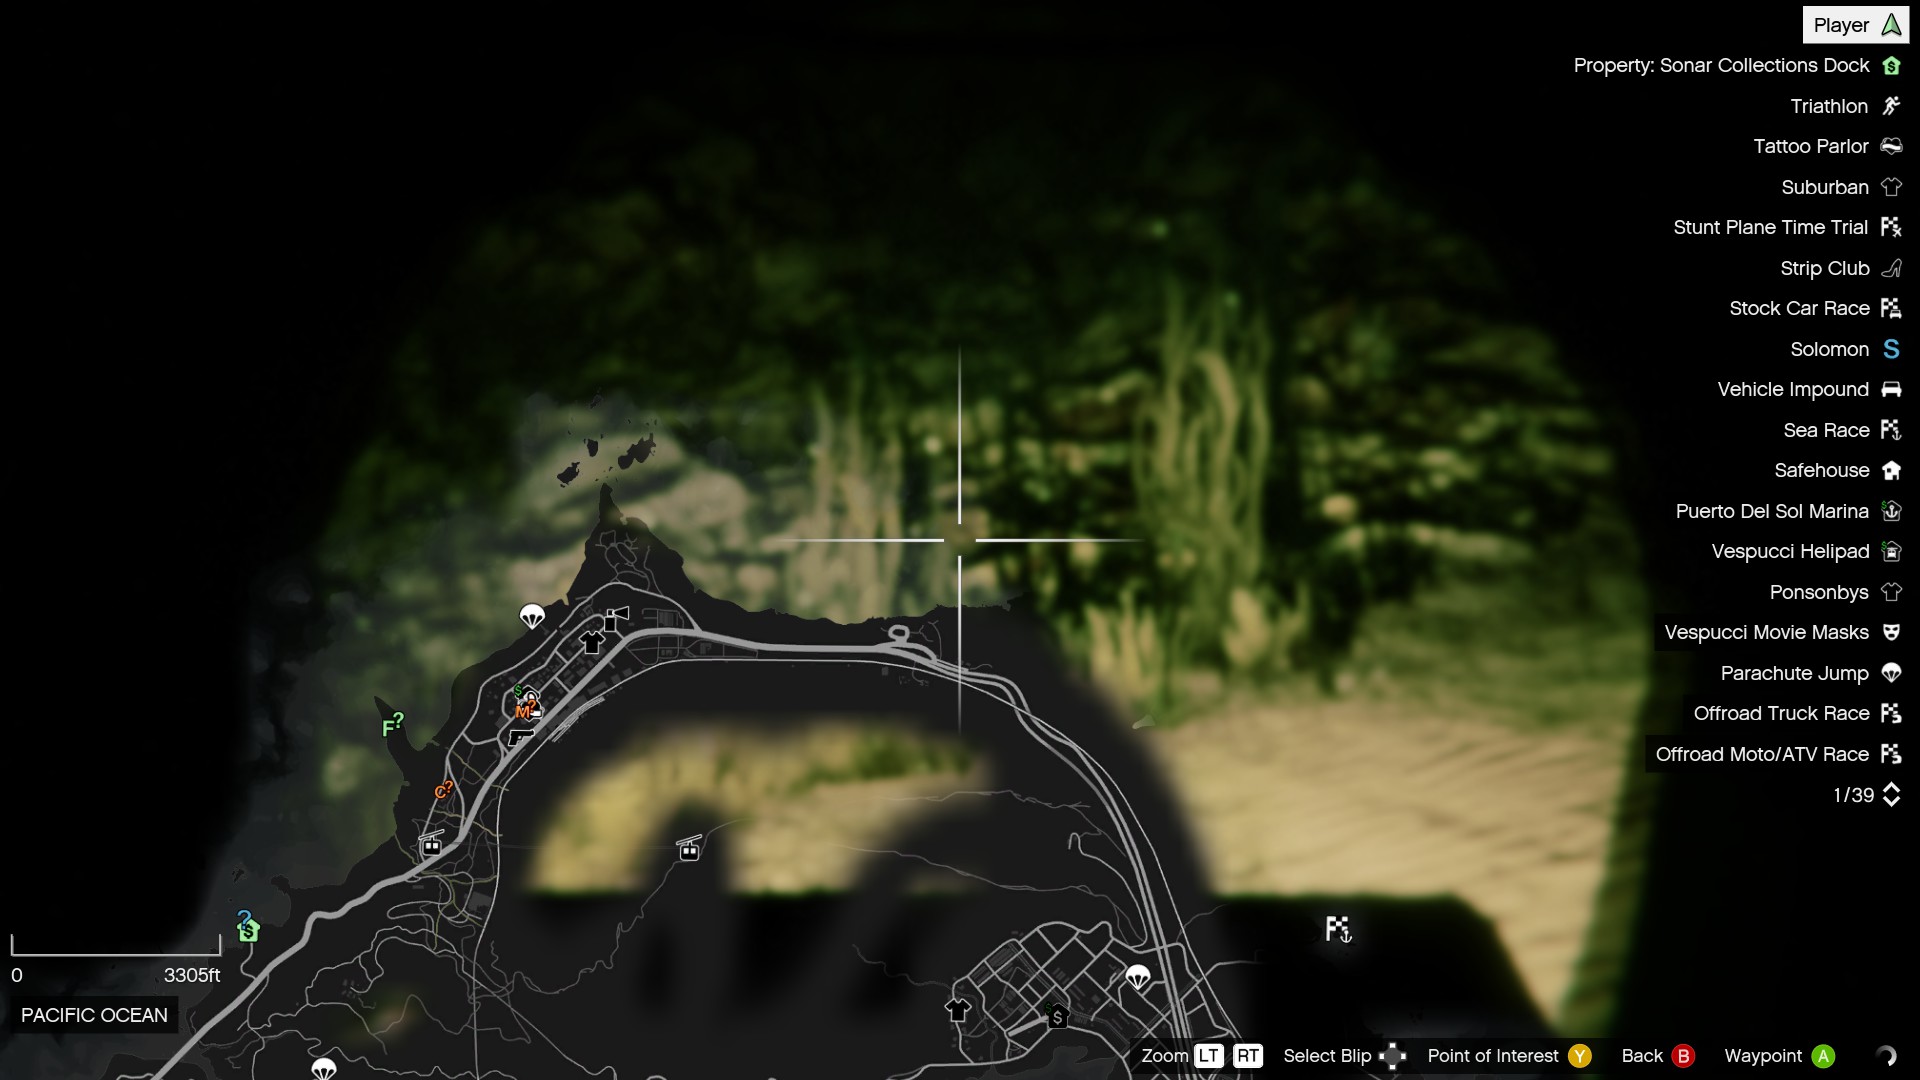
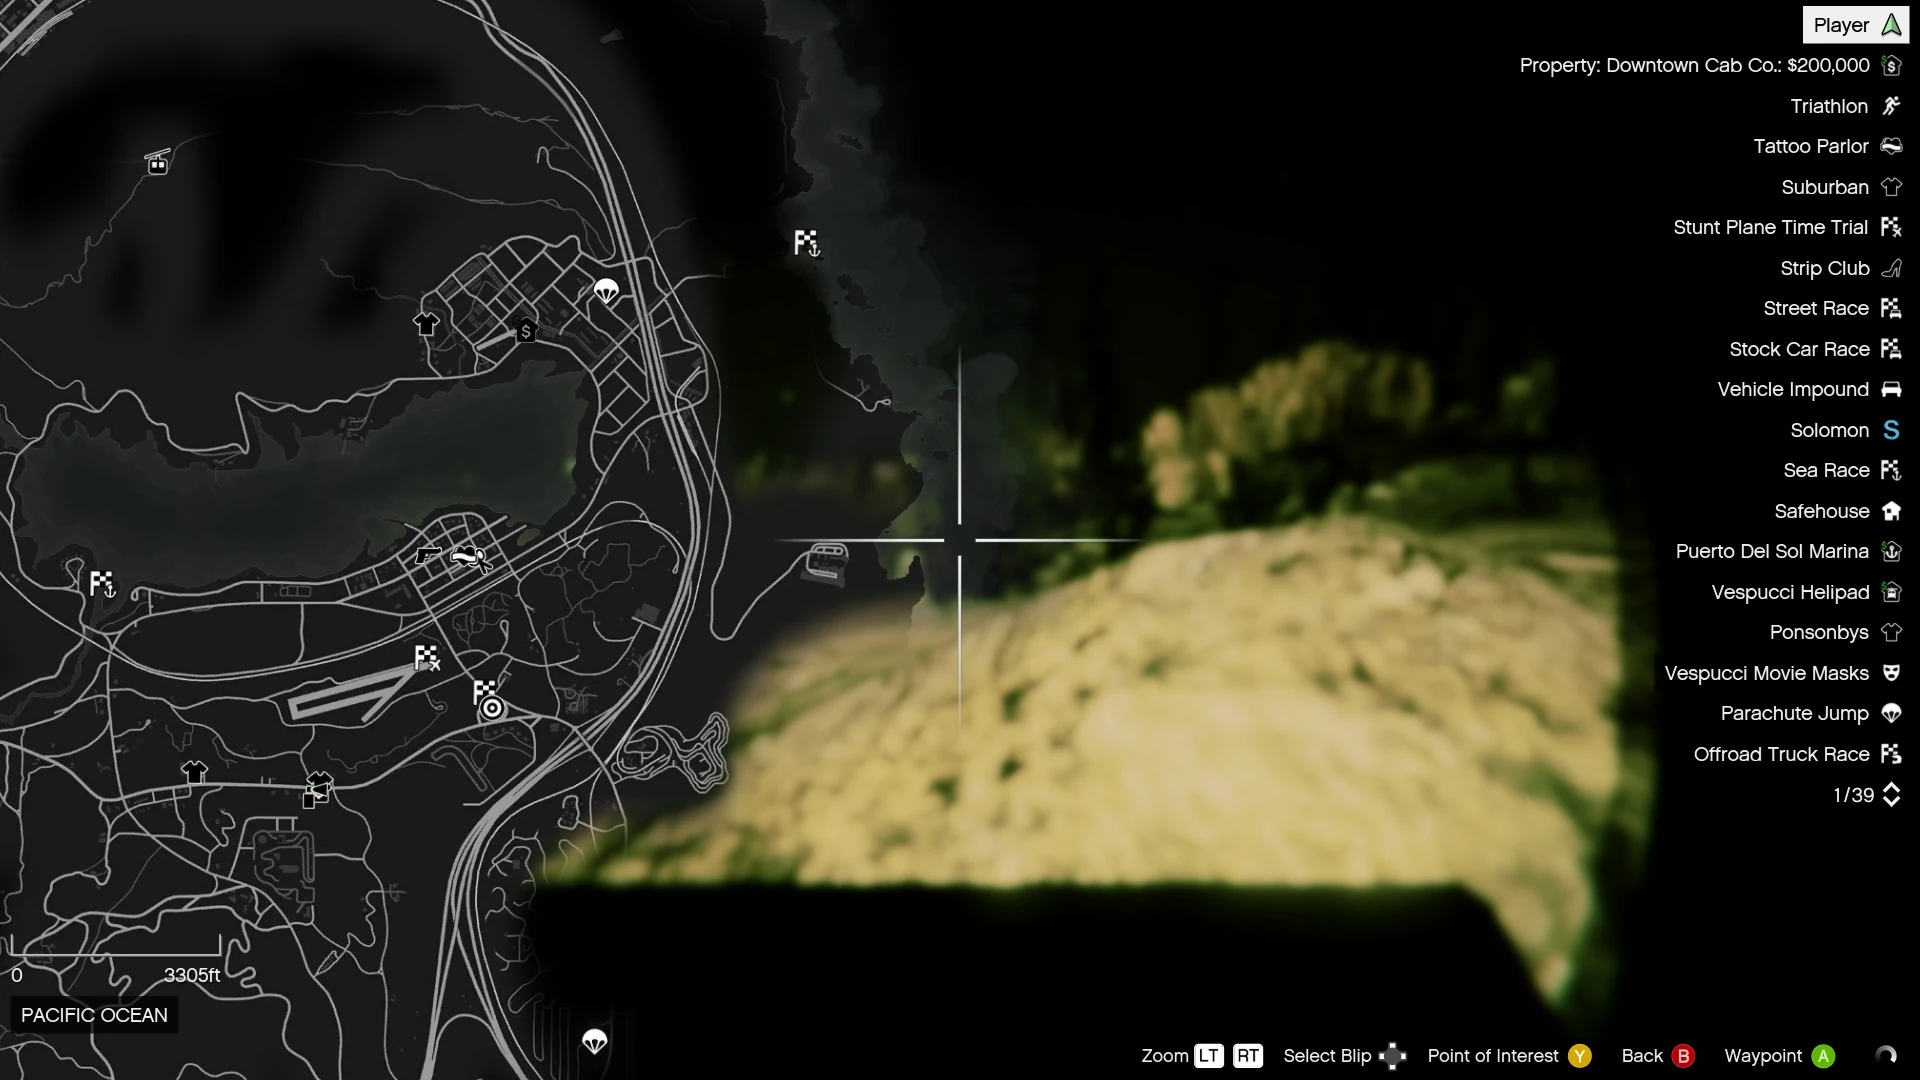
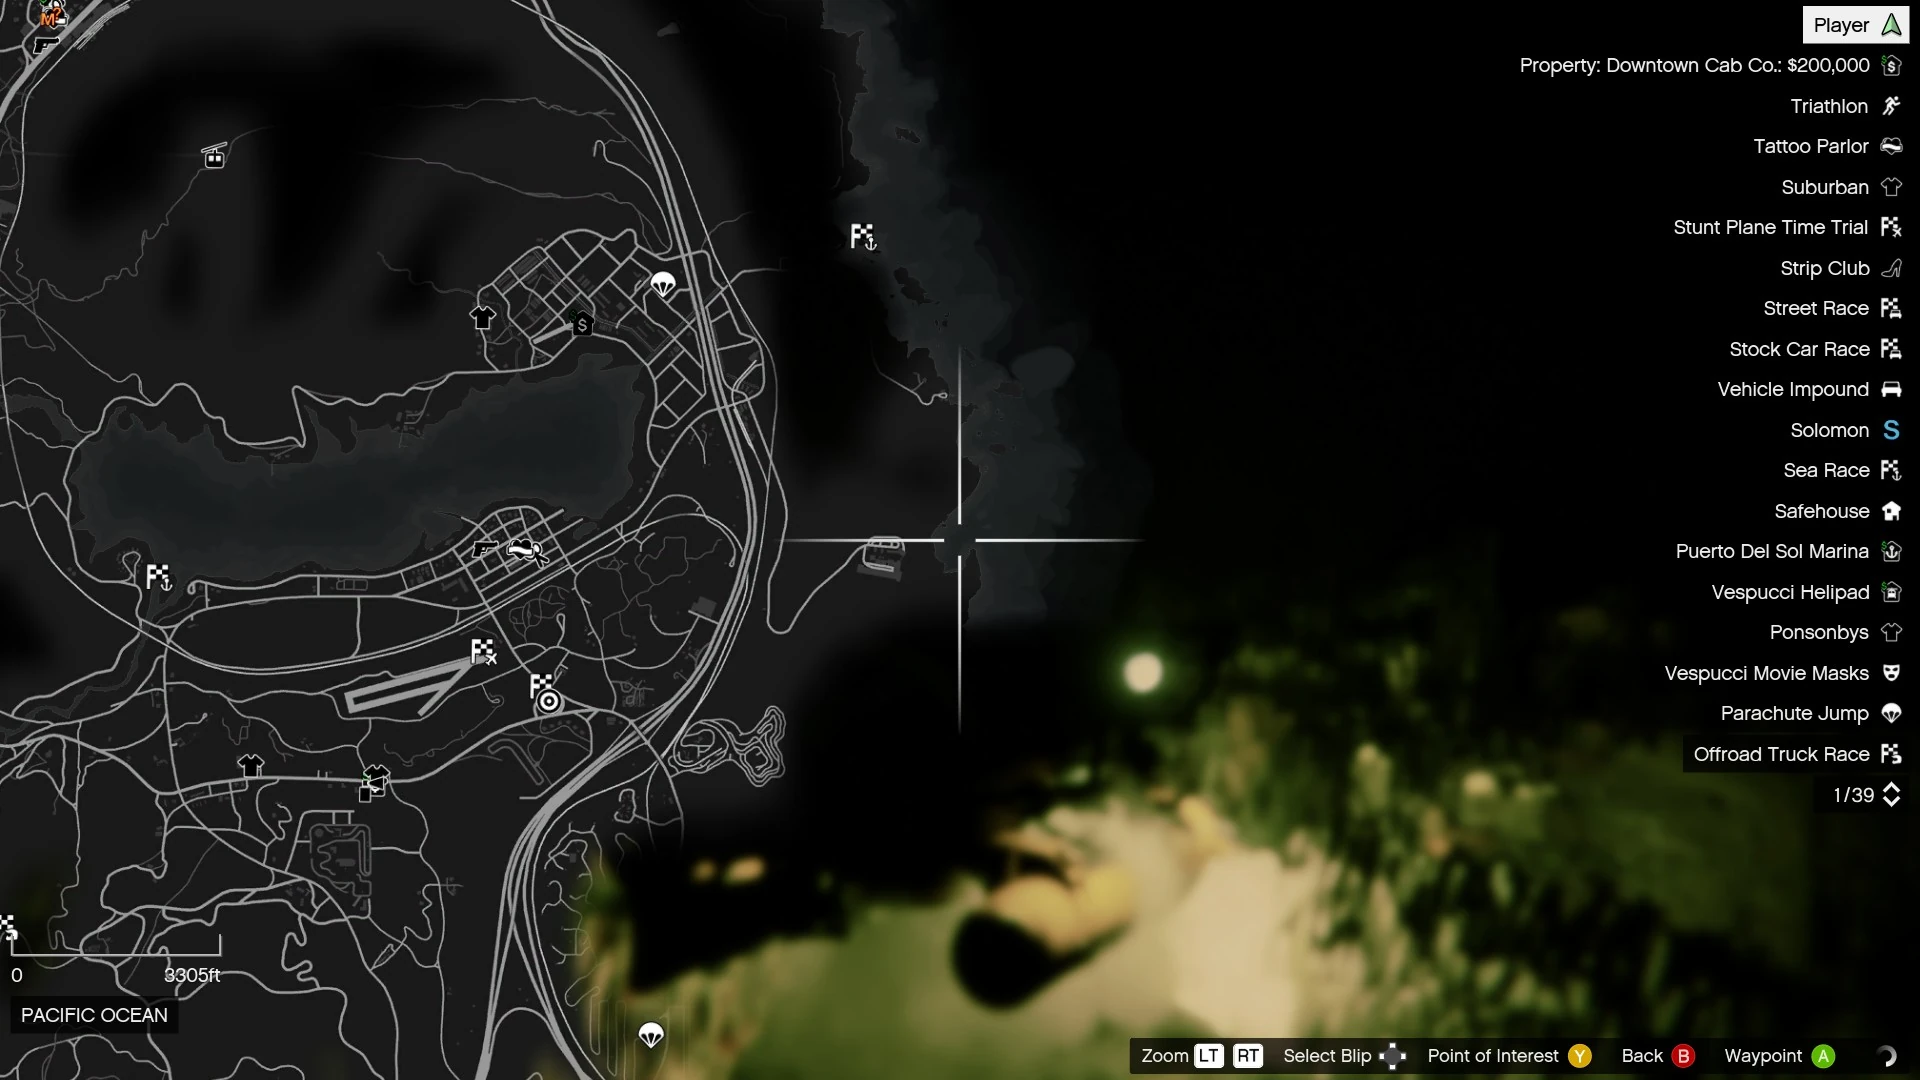
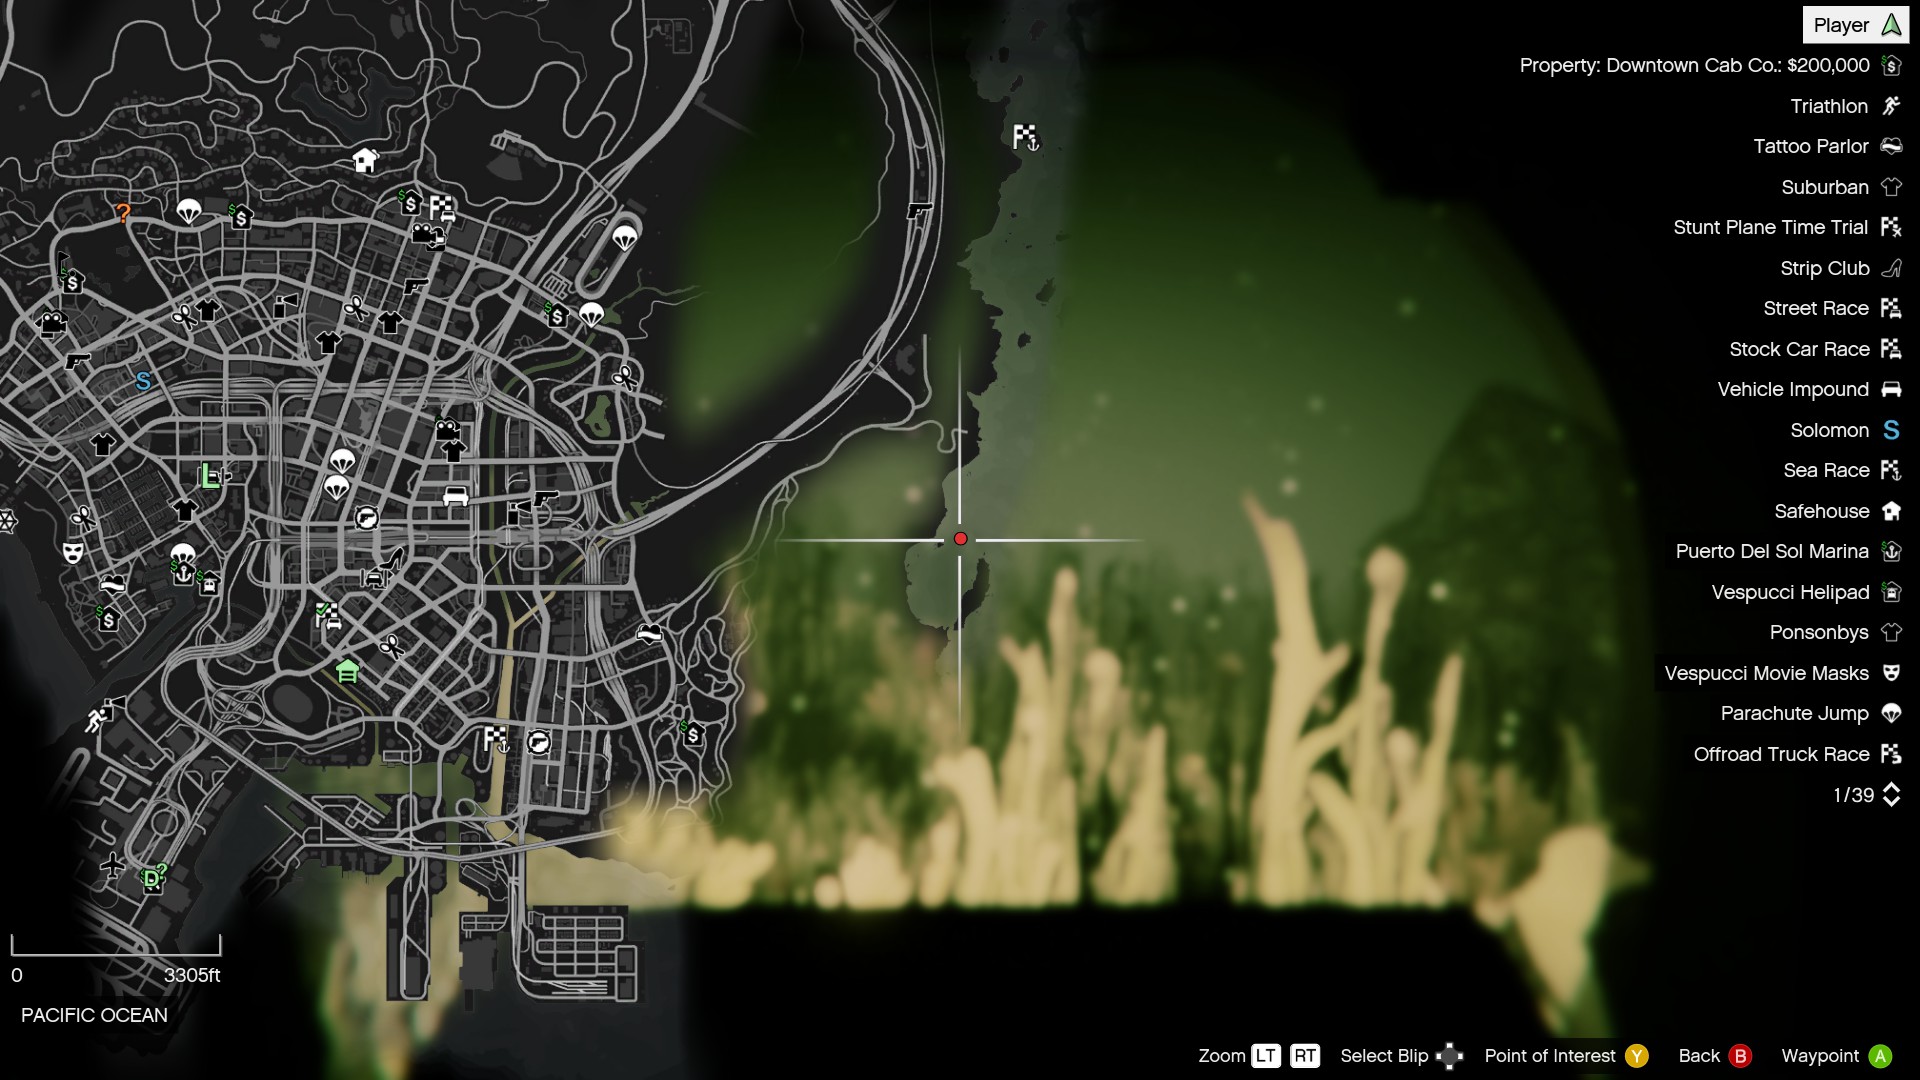
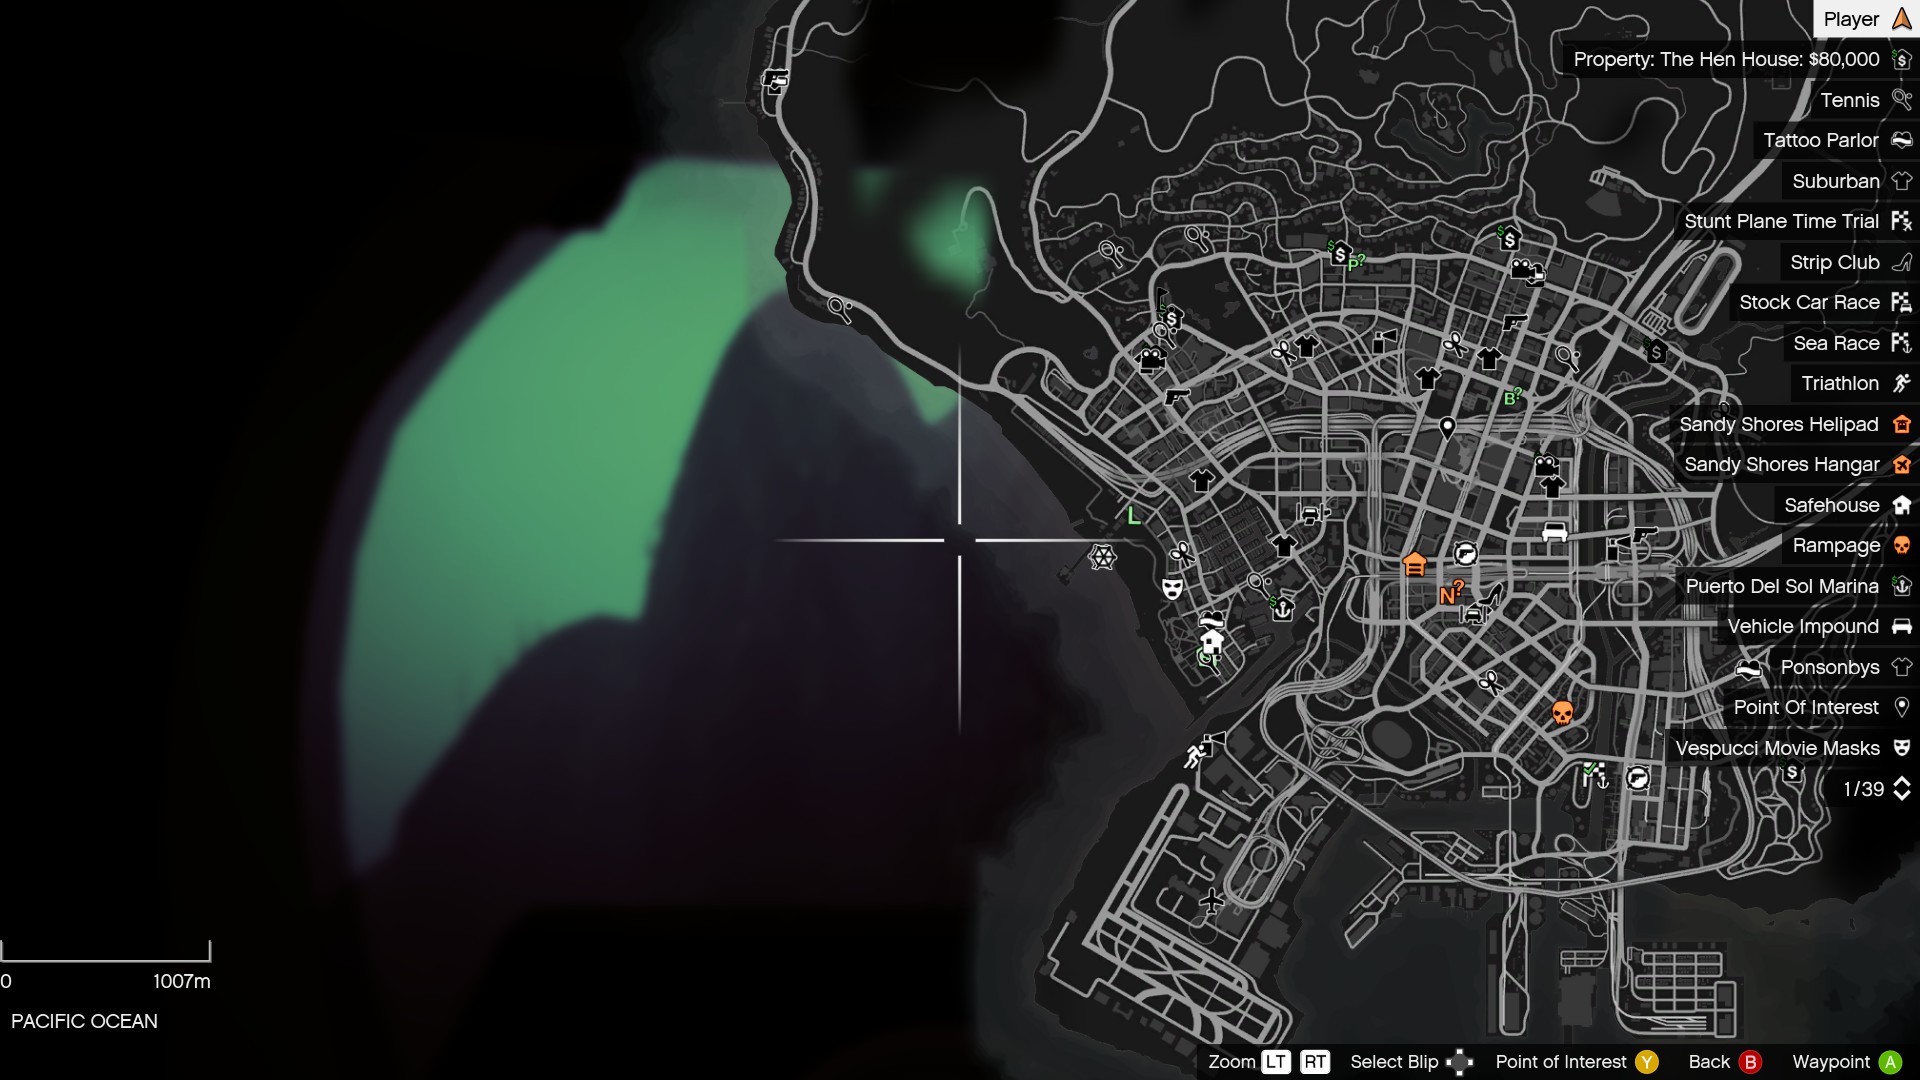
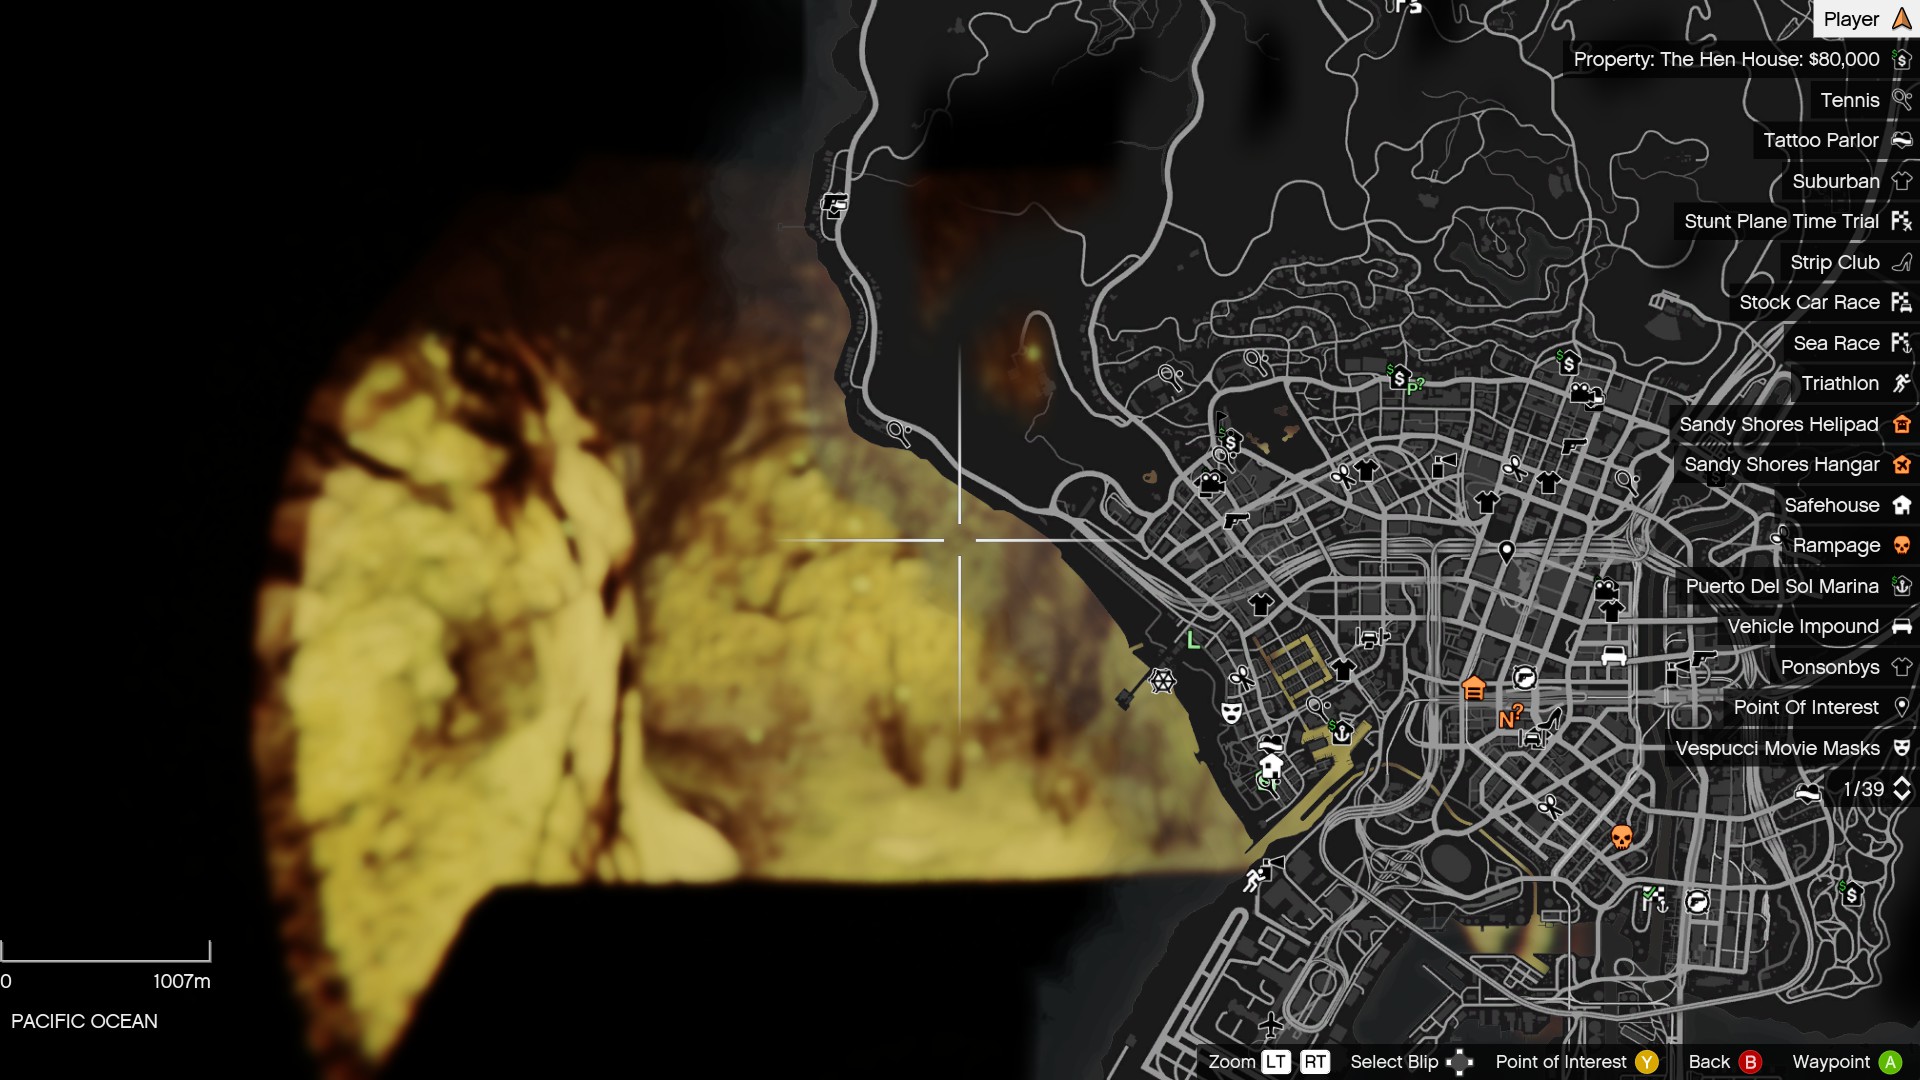
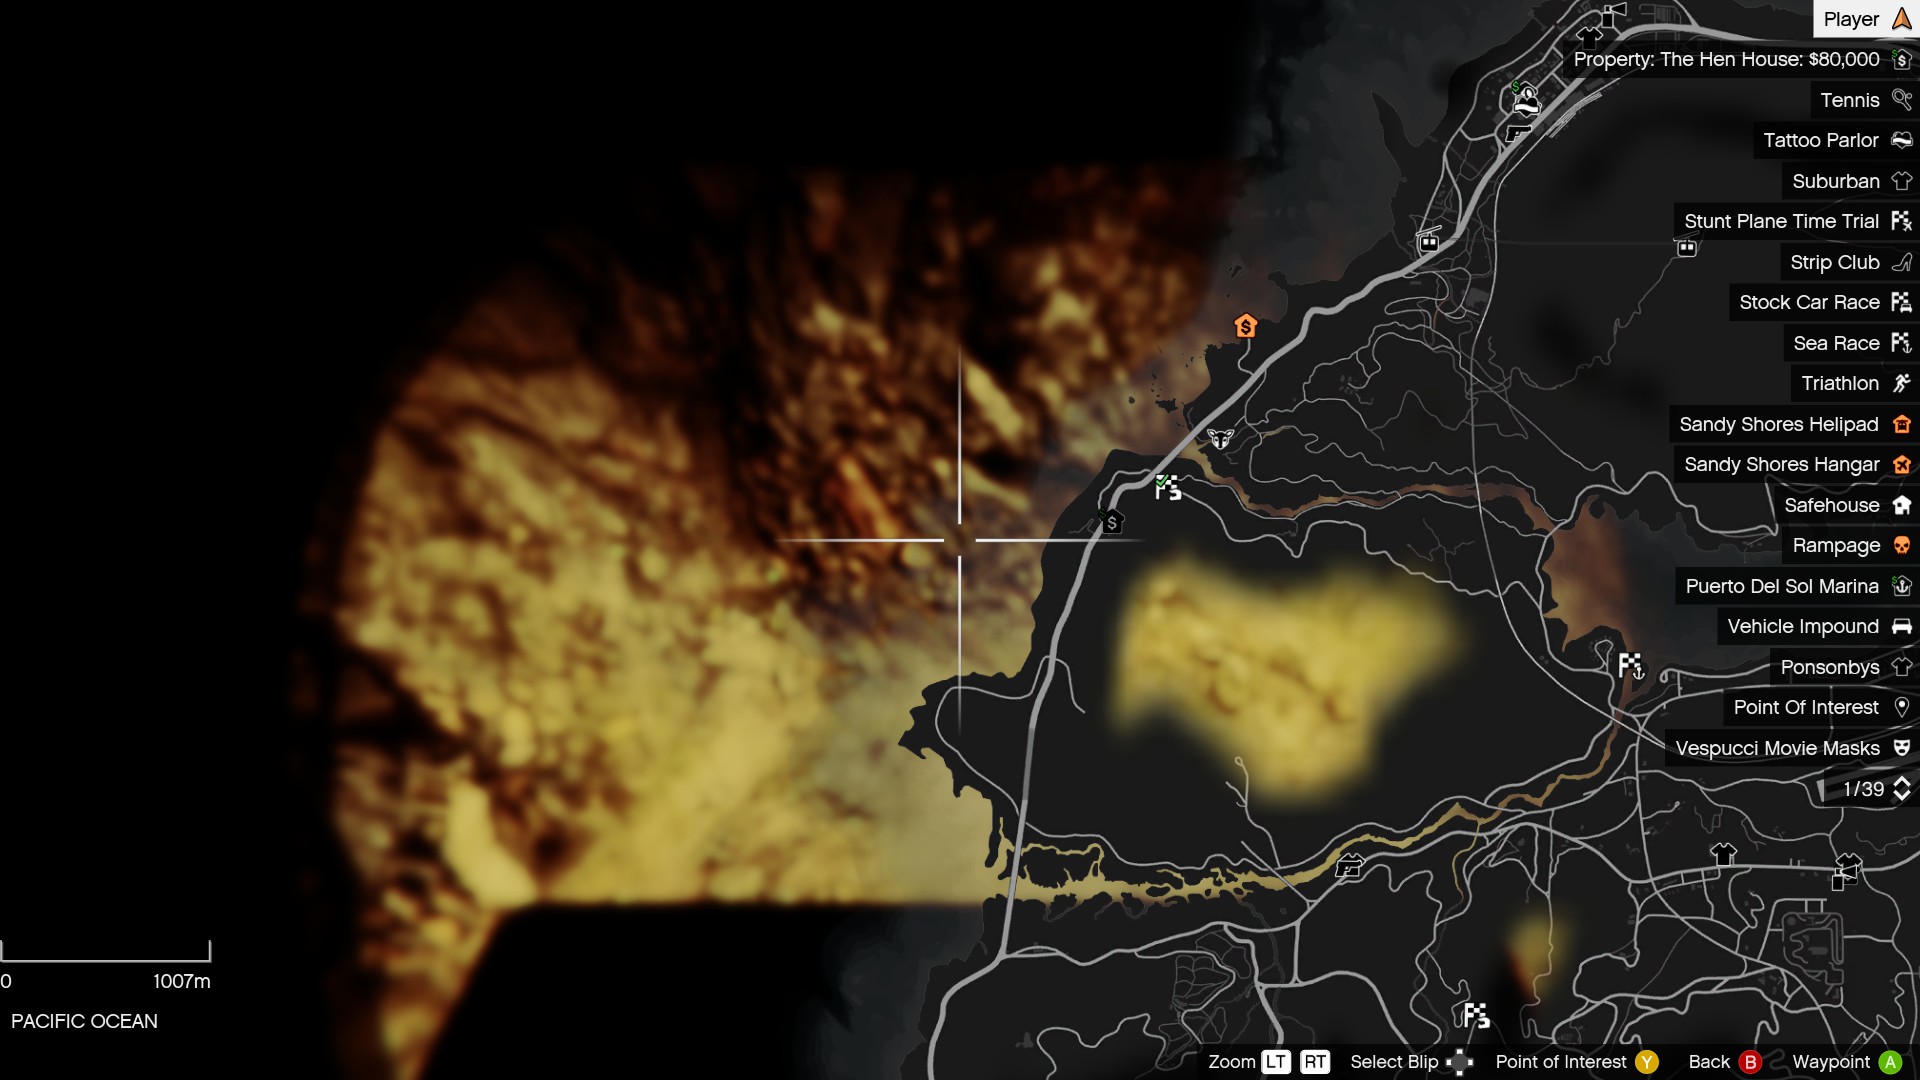
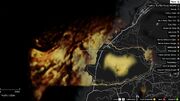
Locations for Nuclear Waste

| Barrel # | Image | Map | Depth |
|---|---|---|---|
| 1 | 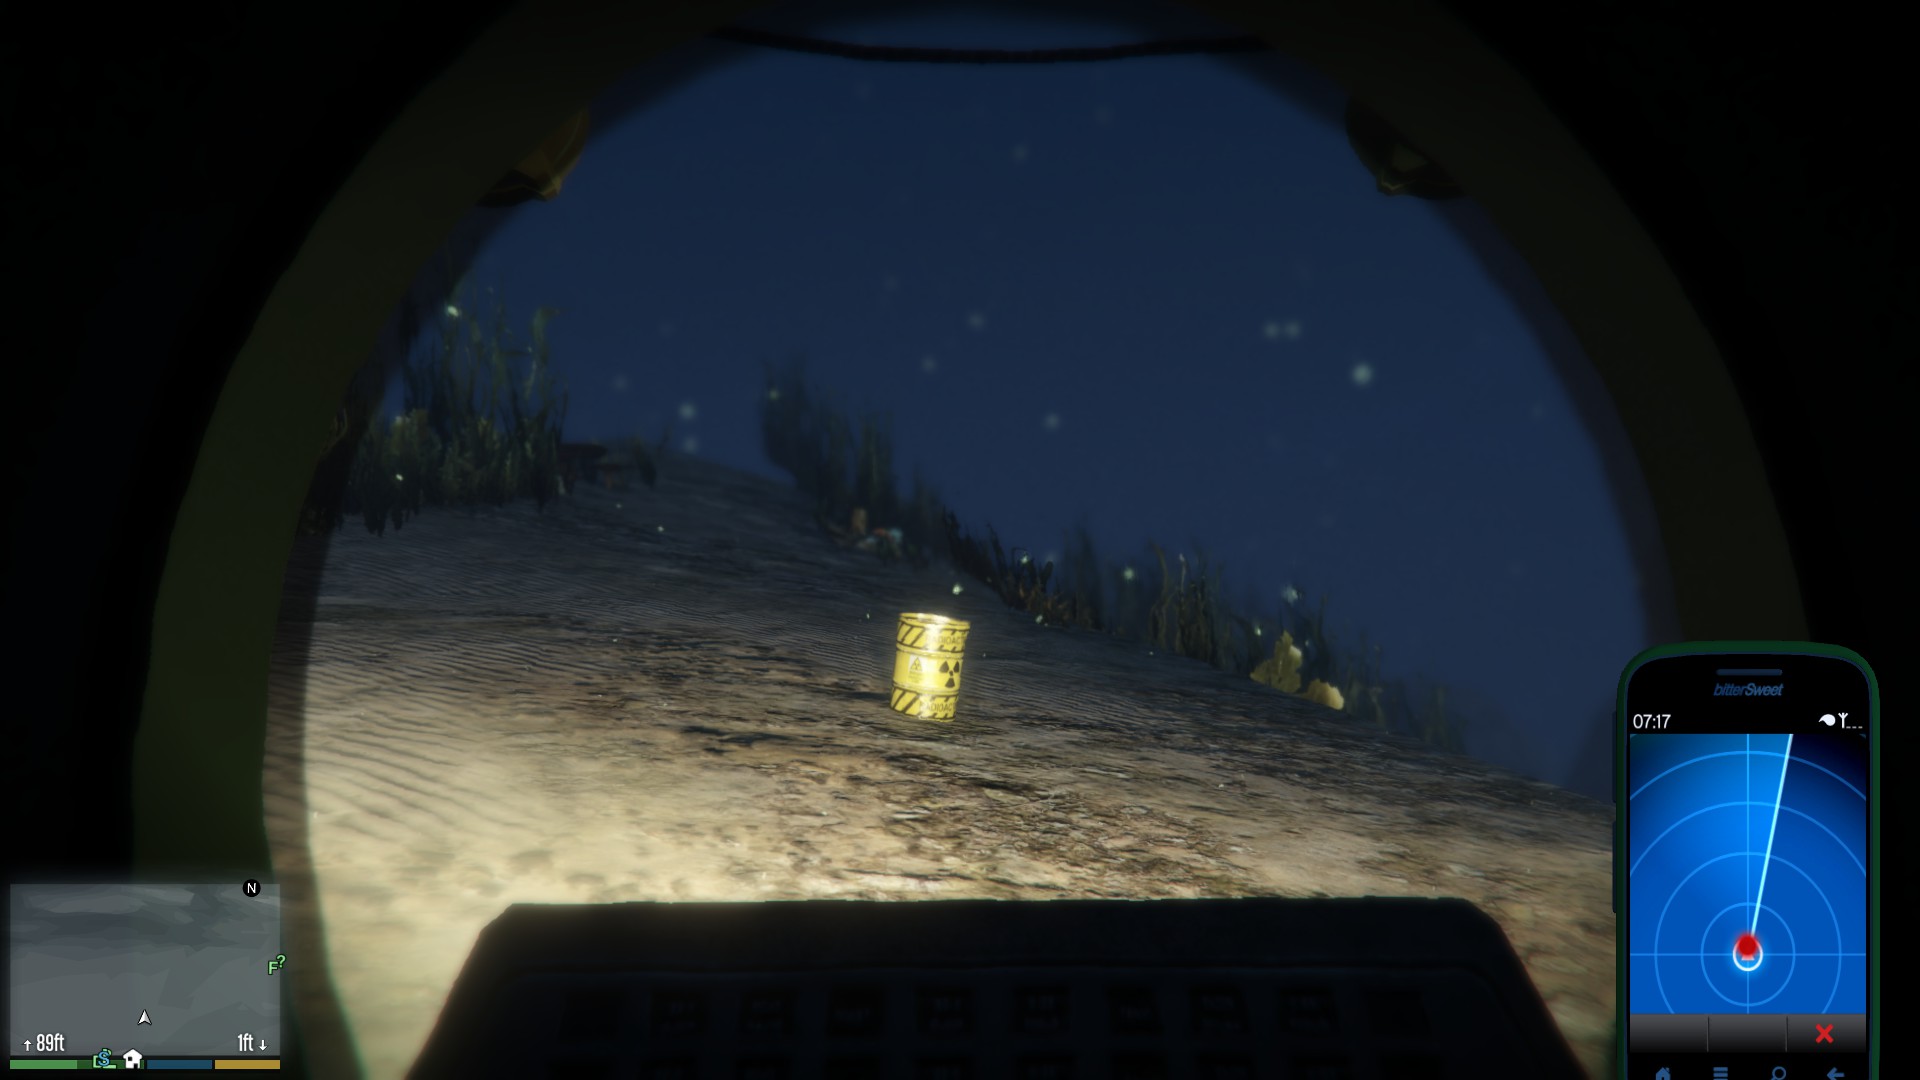  |
  |
90ft |
| 2 | 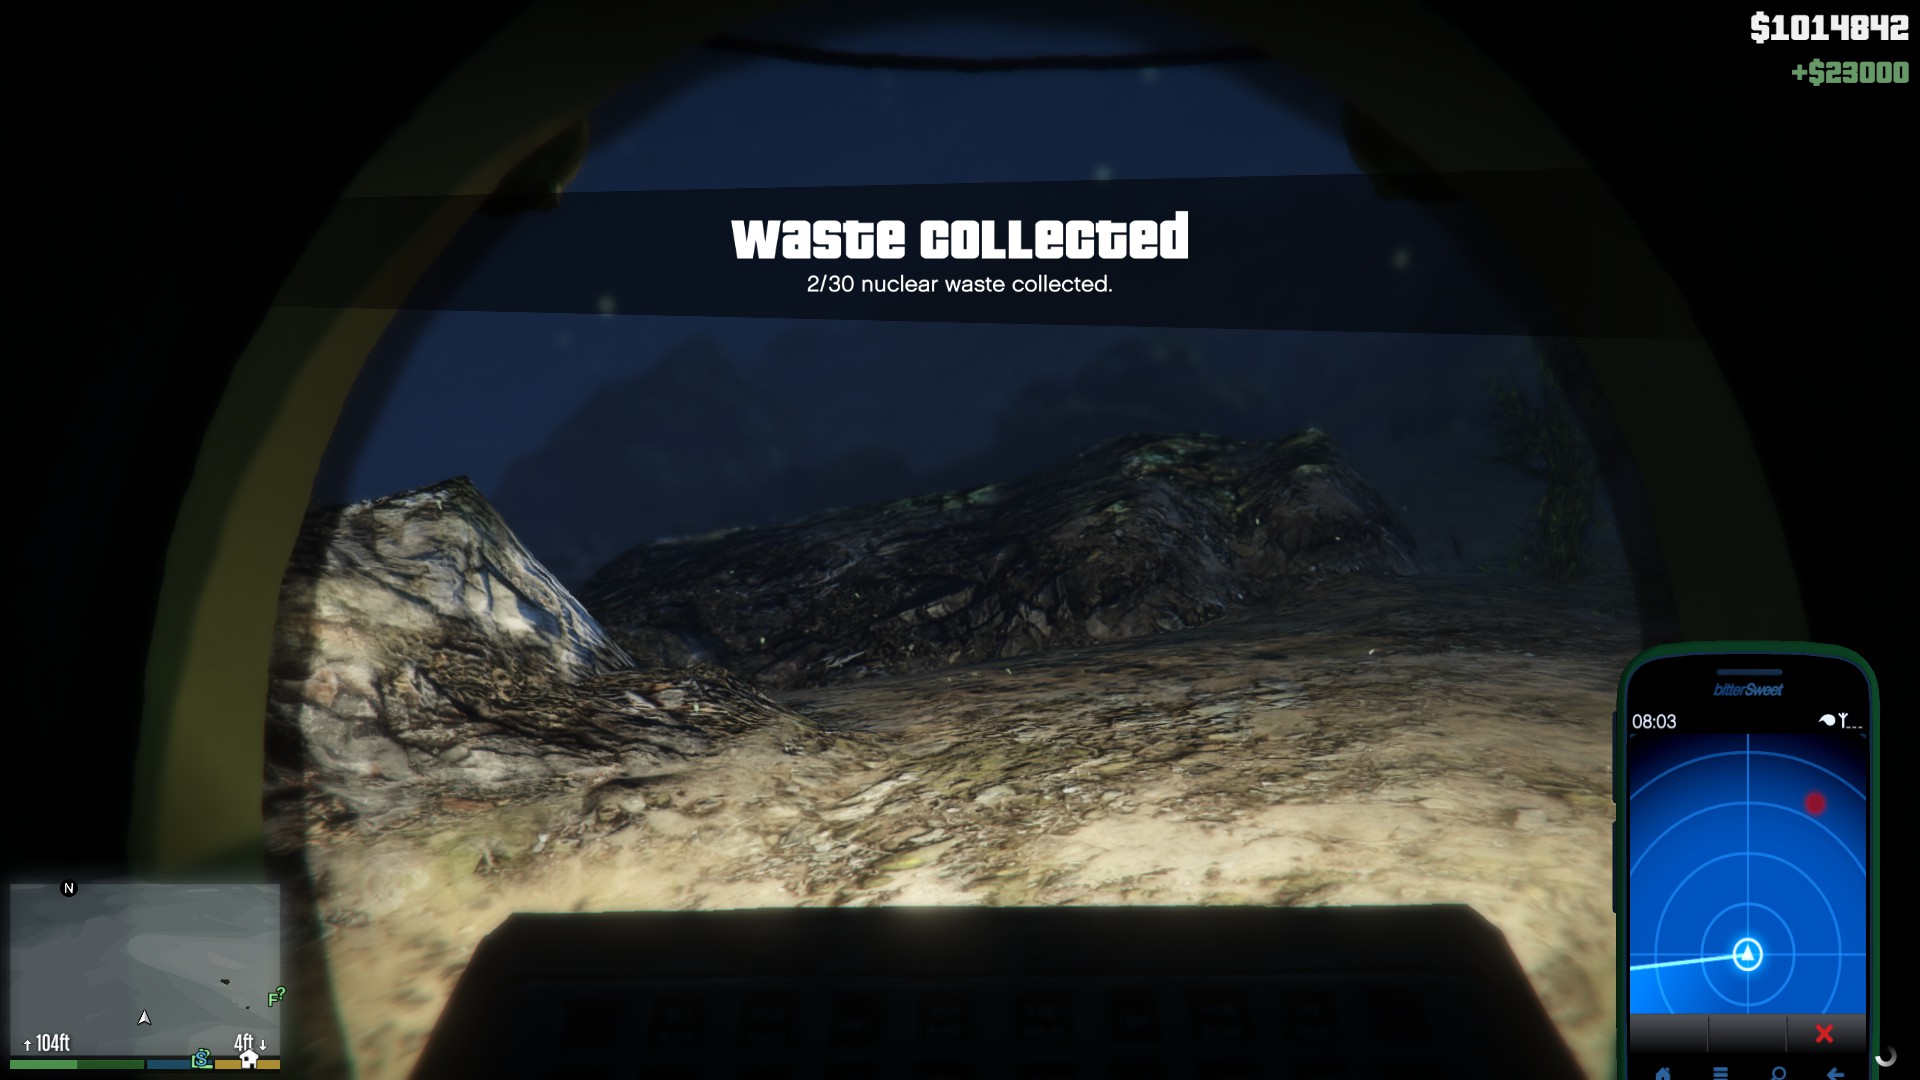  [ accidentally picked it up before photo ] |
  |
105ft |
| 3 |   |
  |
85ft |
| 4 |   |
  |
430ft |
| 5 | 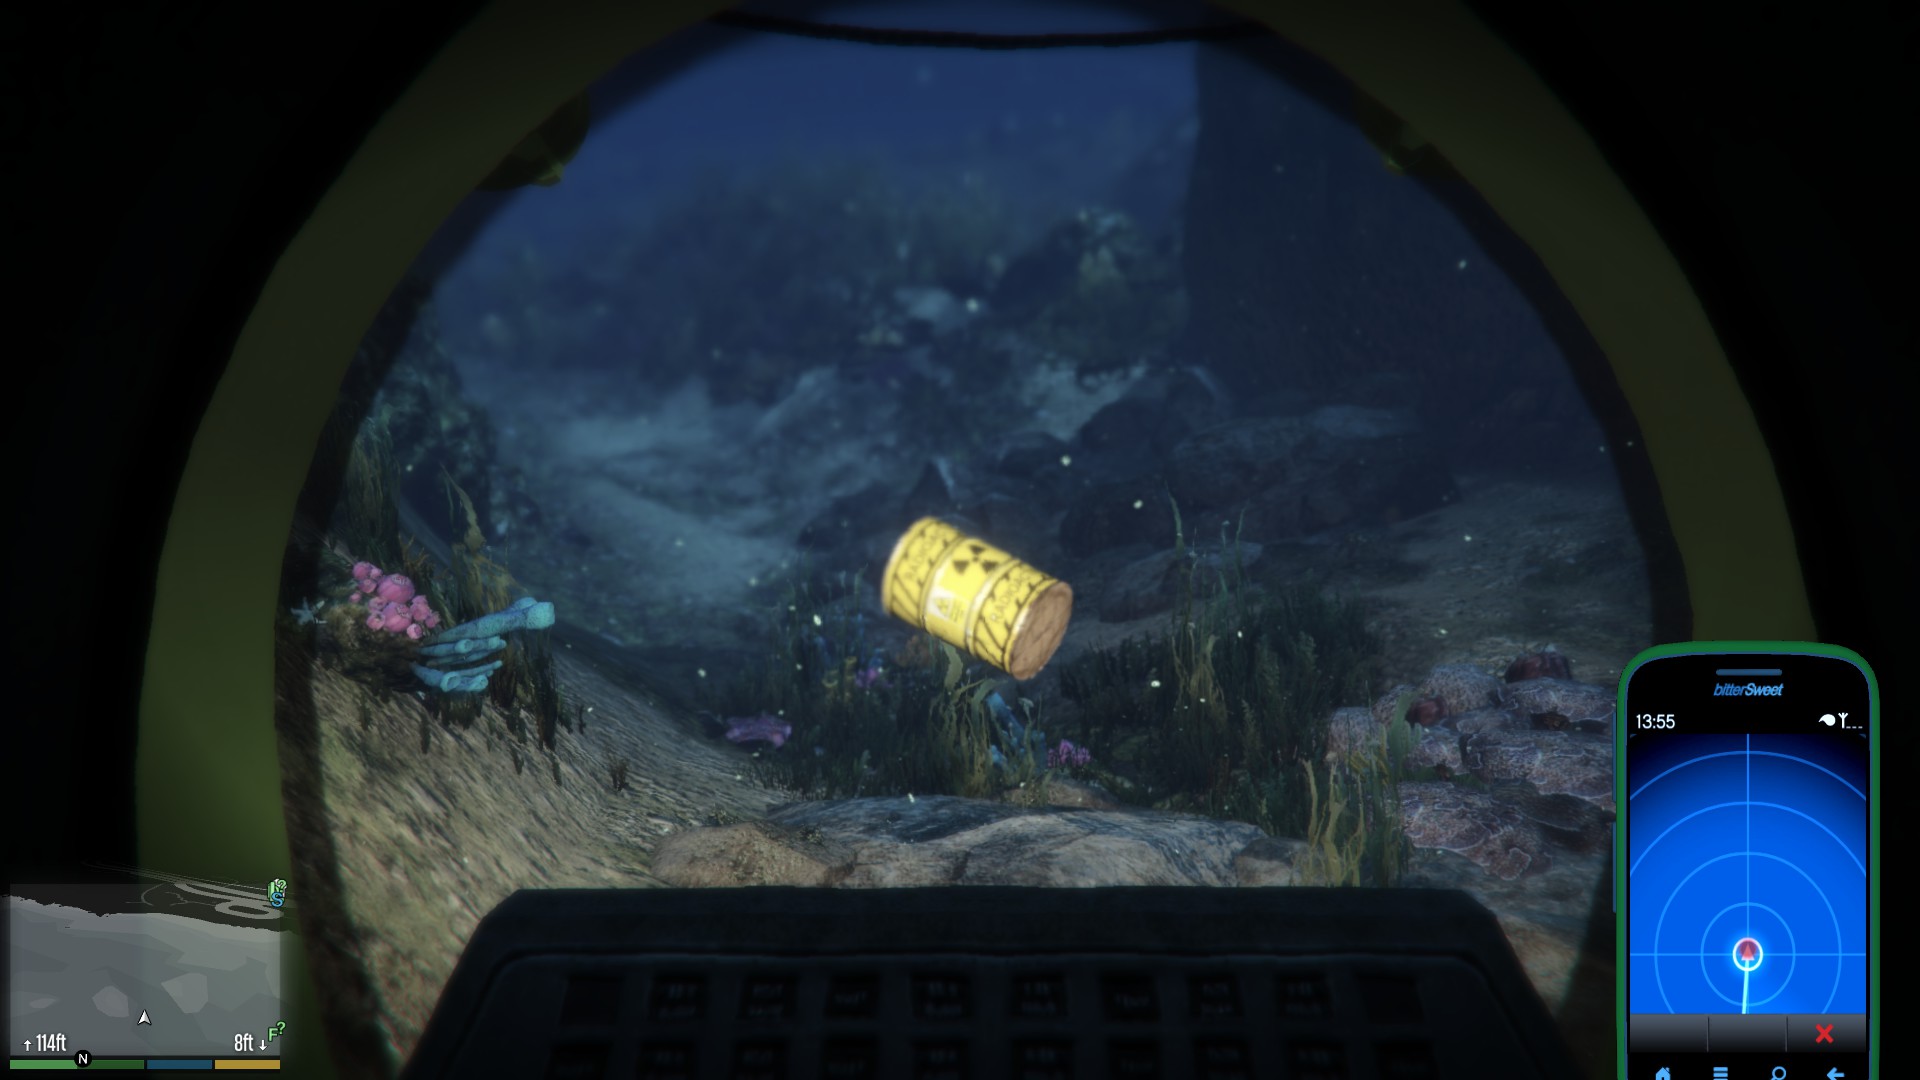  |
  |
115ft |
| 6 | 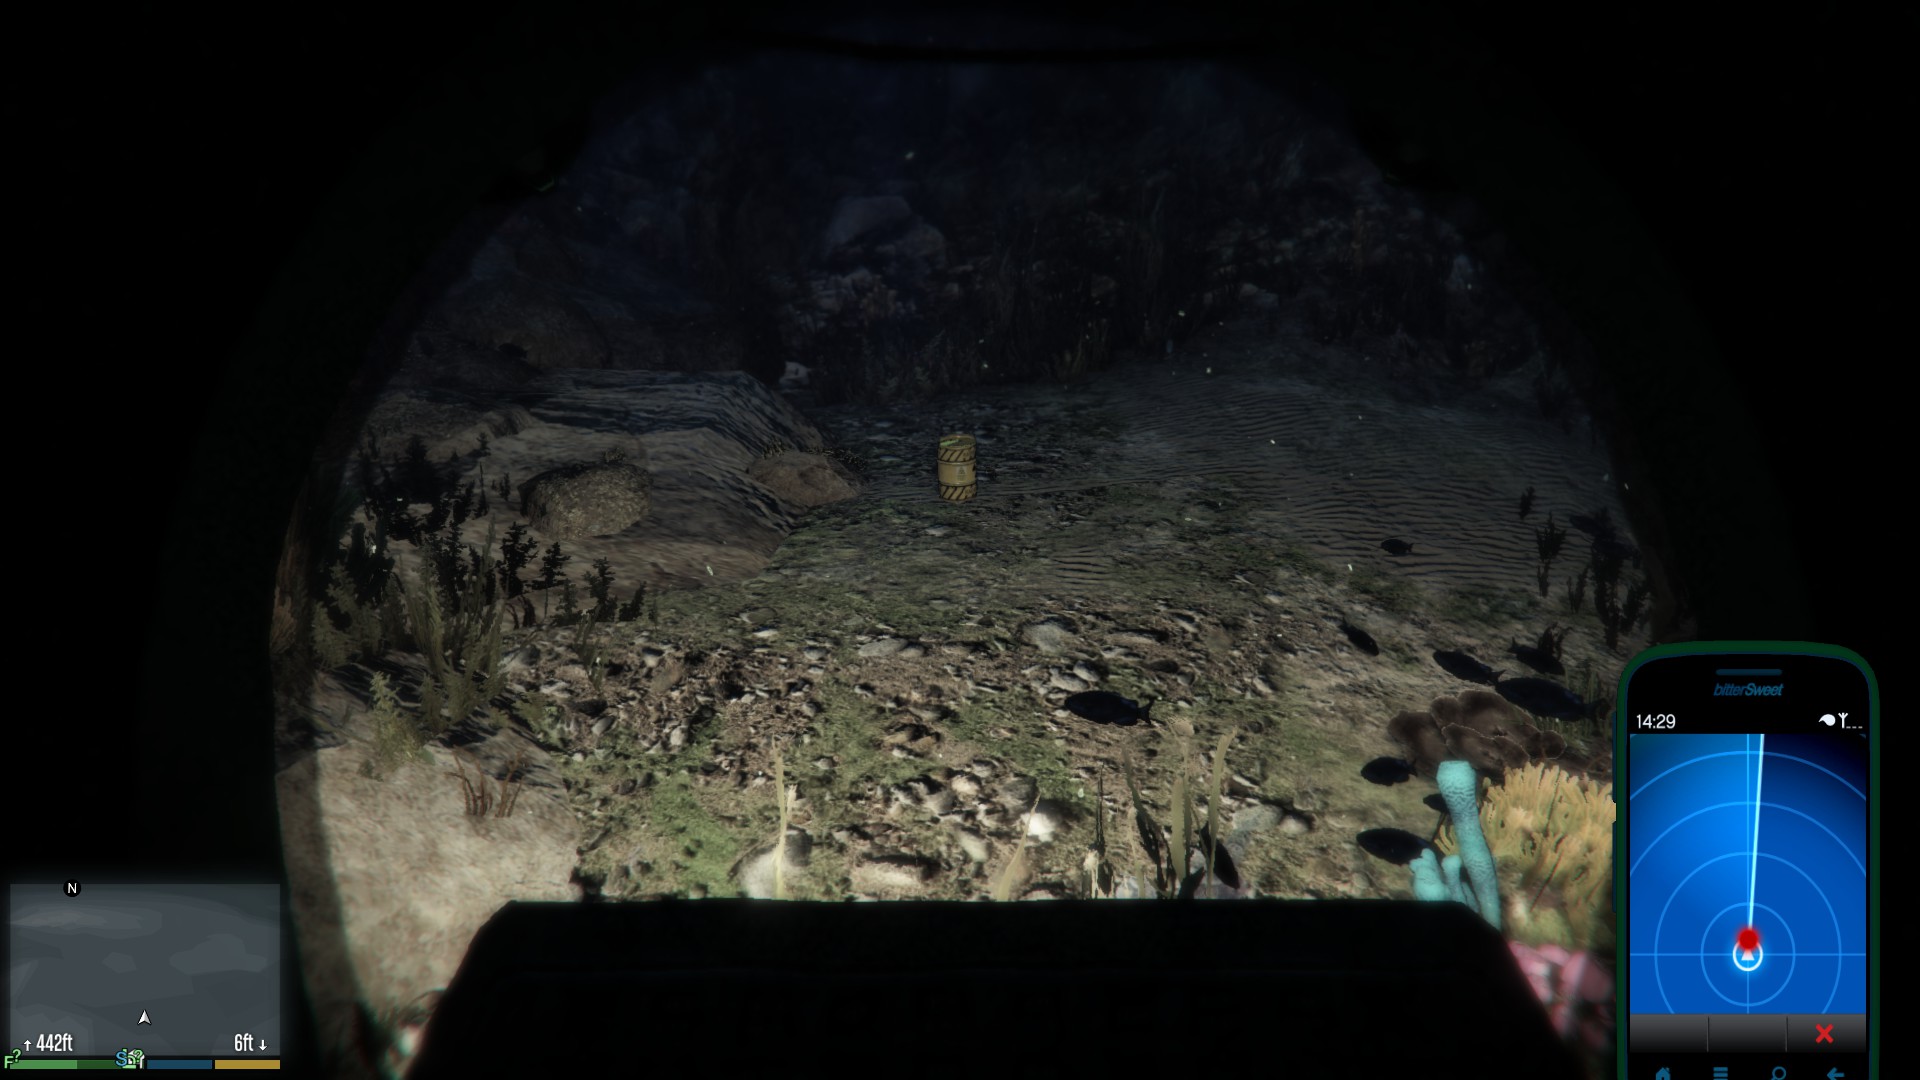  |
  |
445ft |
| 7 | 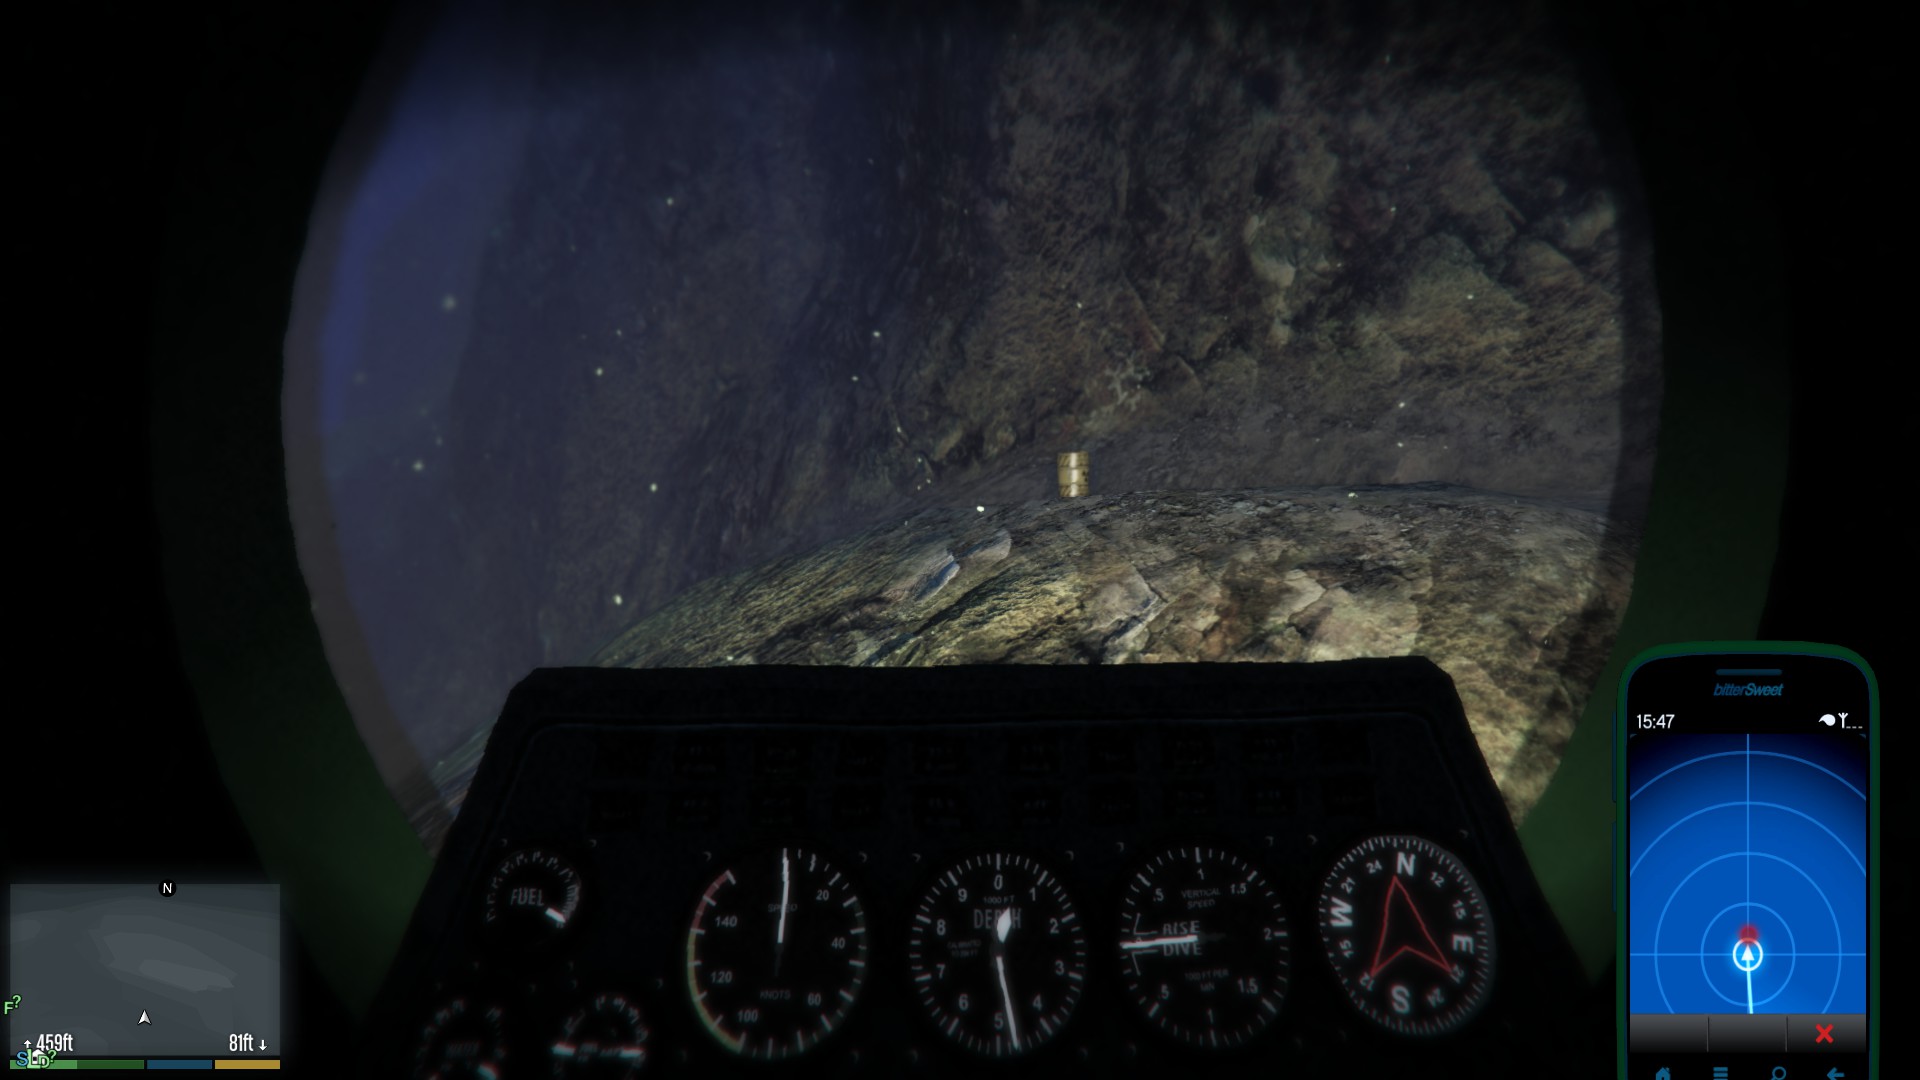  |
  |
460ft |
| 8 | 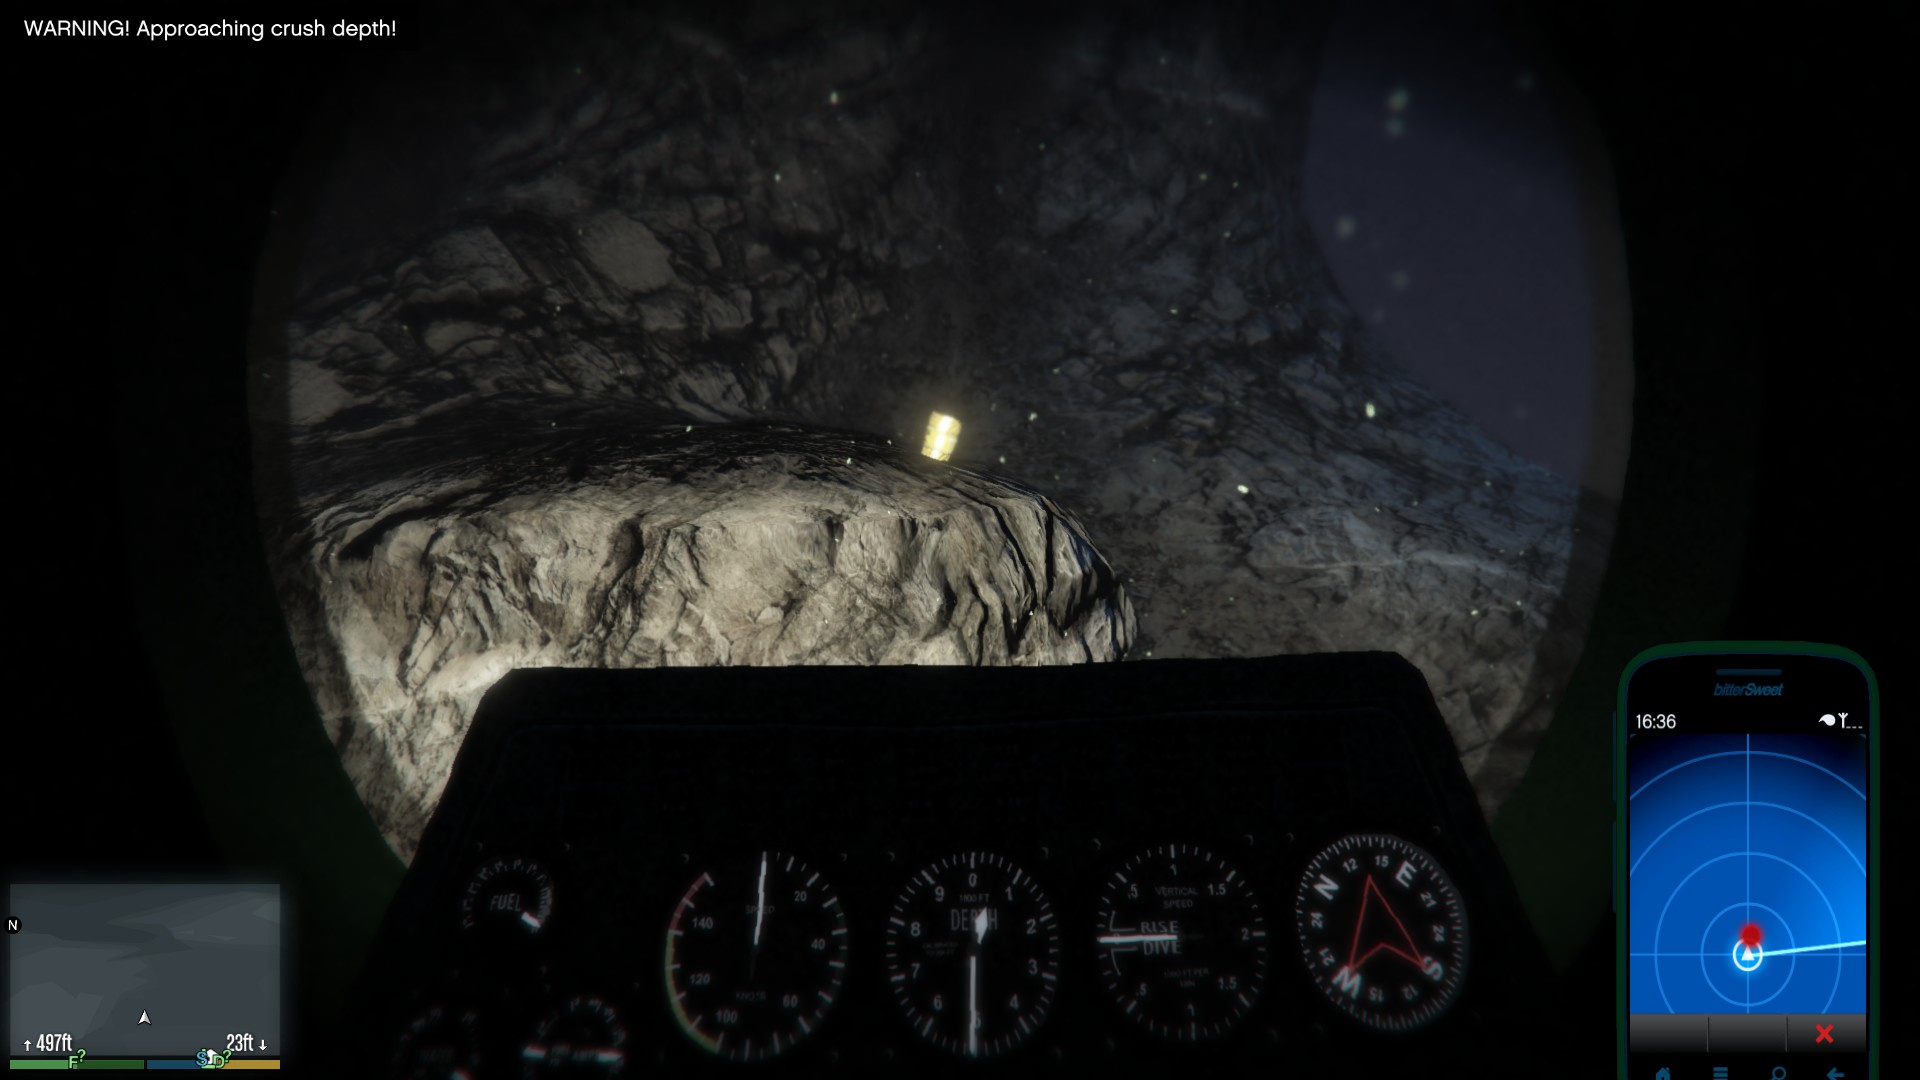  |
  |
500ft |
| 9 | 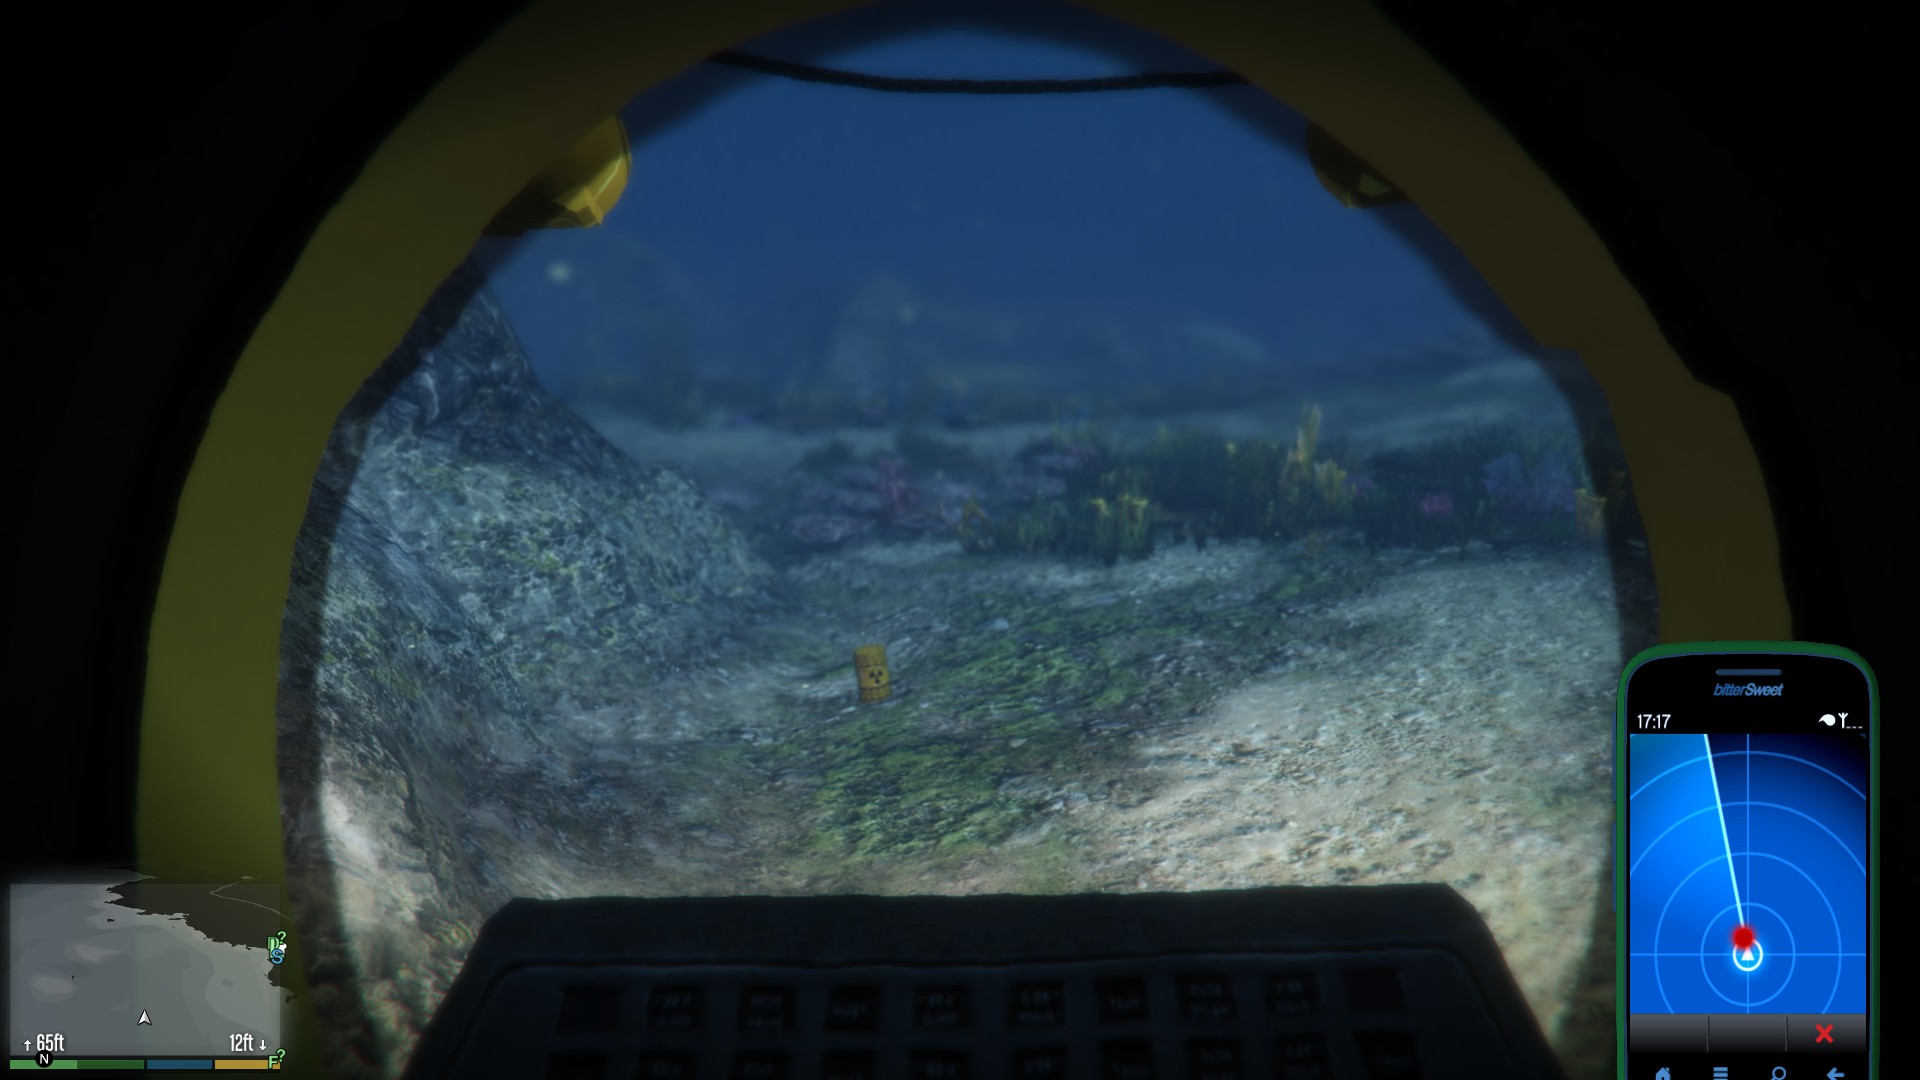  |
  |
65ft |
| 10 | 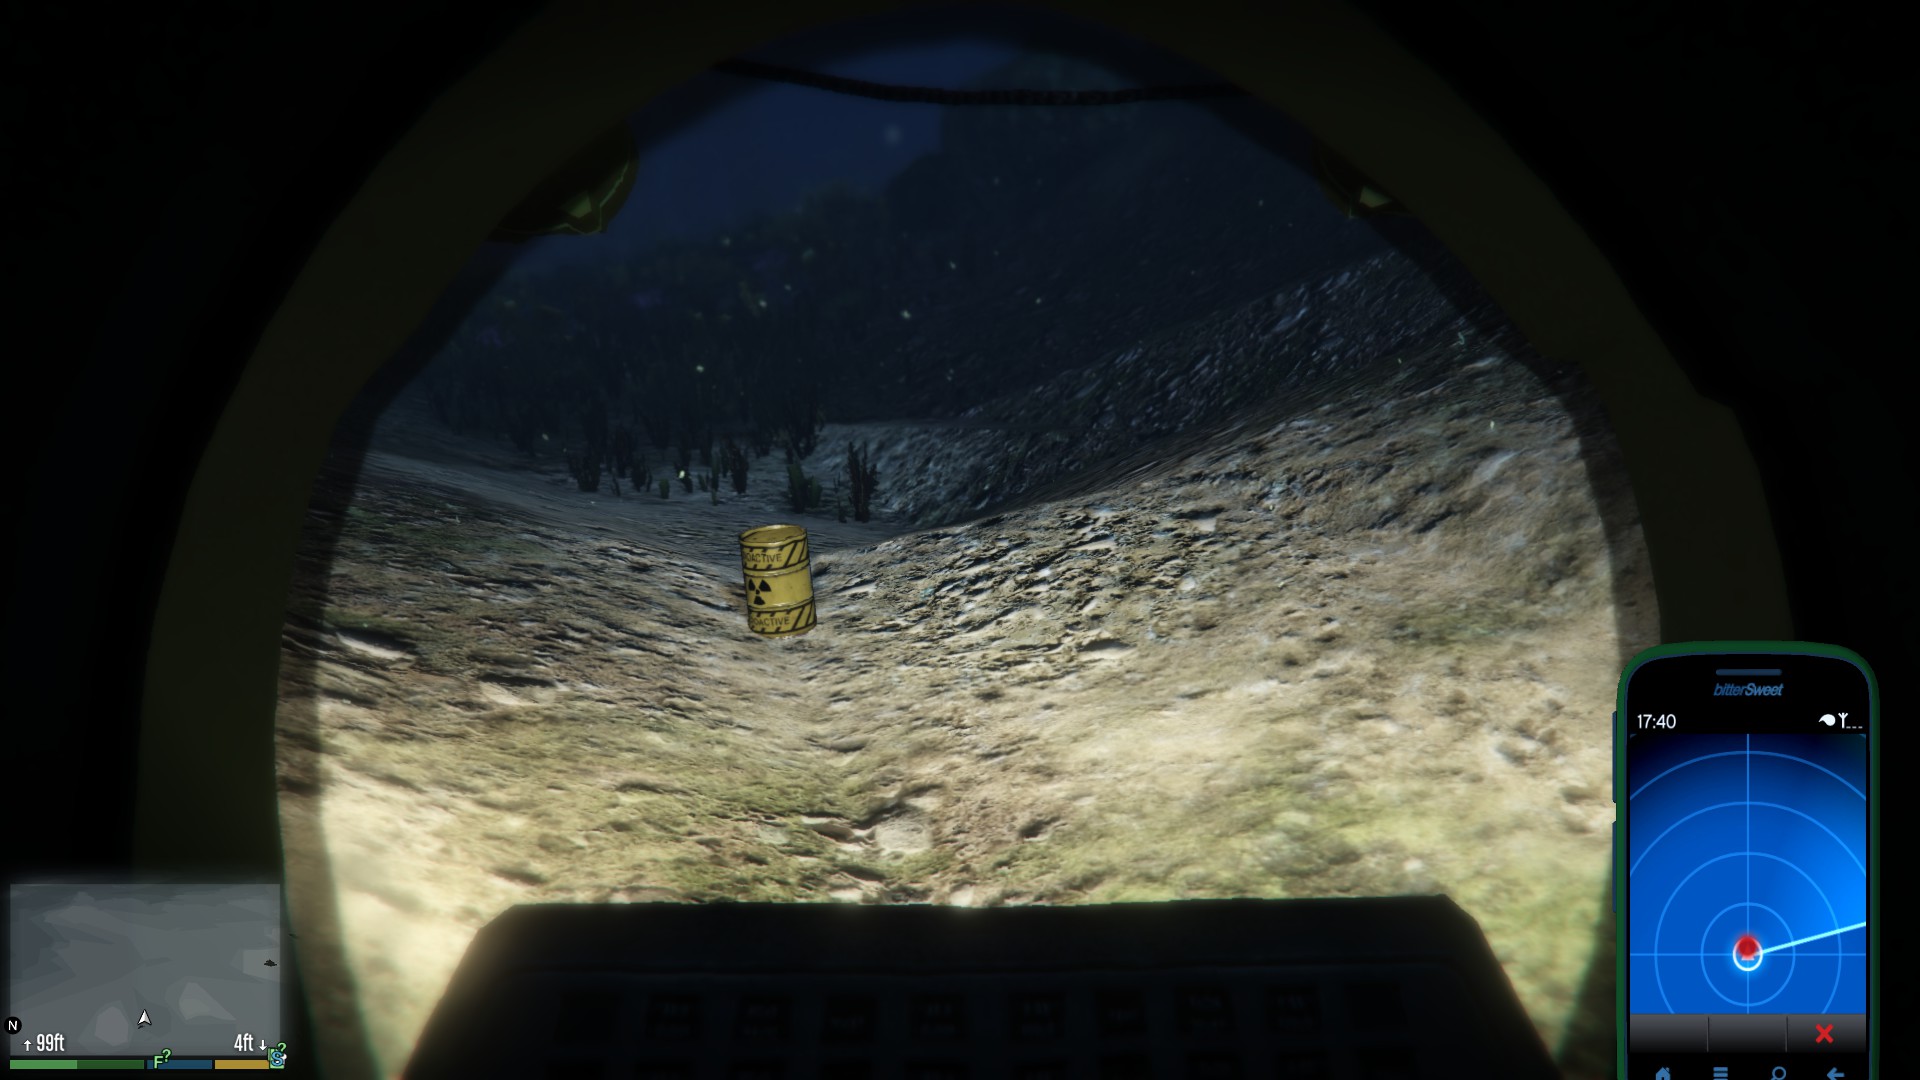  |
  |
100ft |
| 11 | 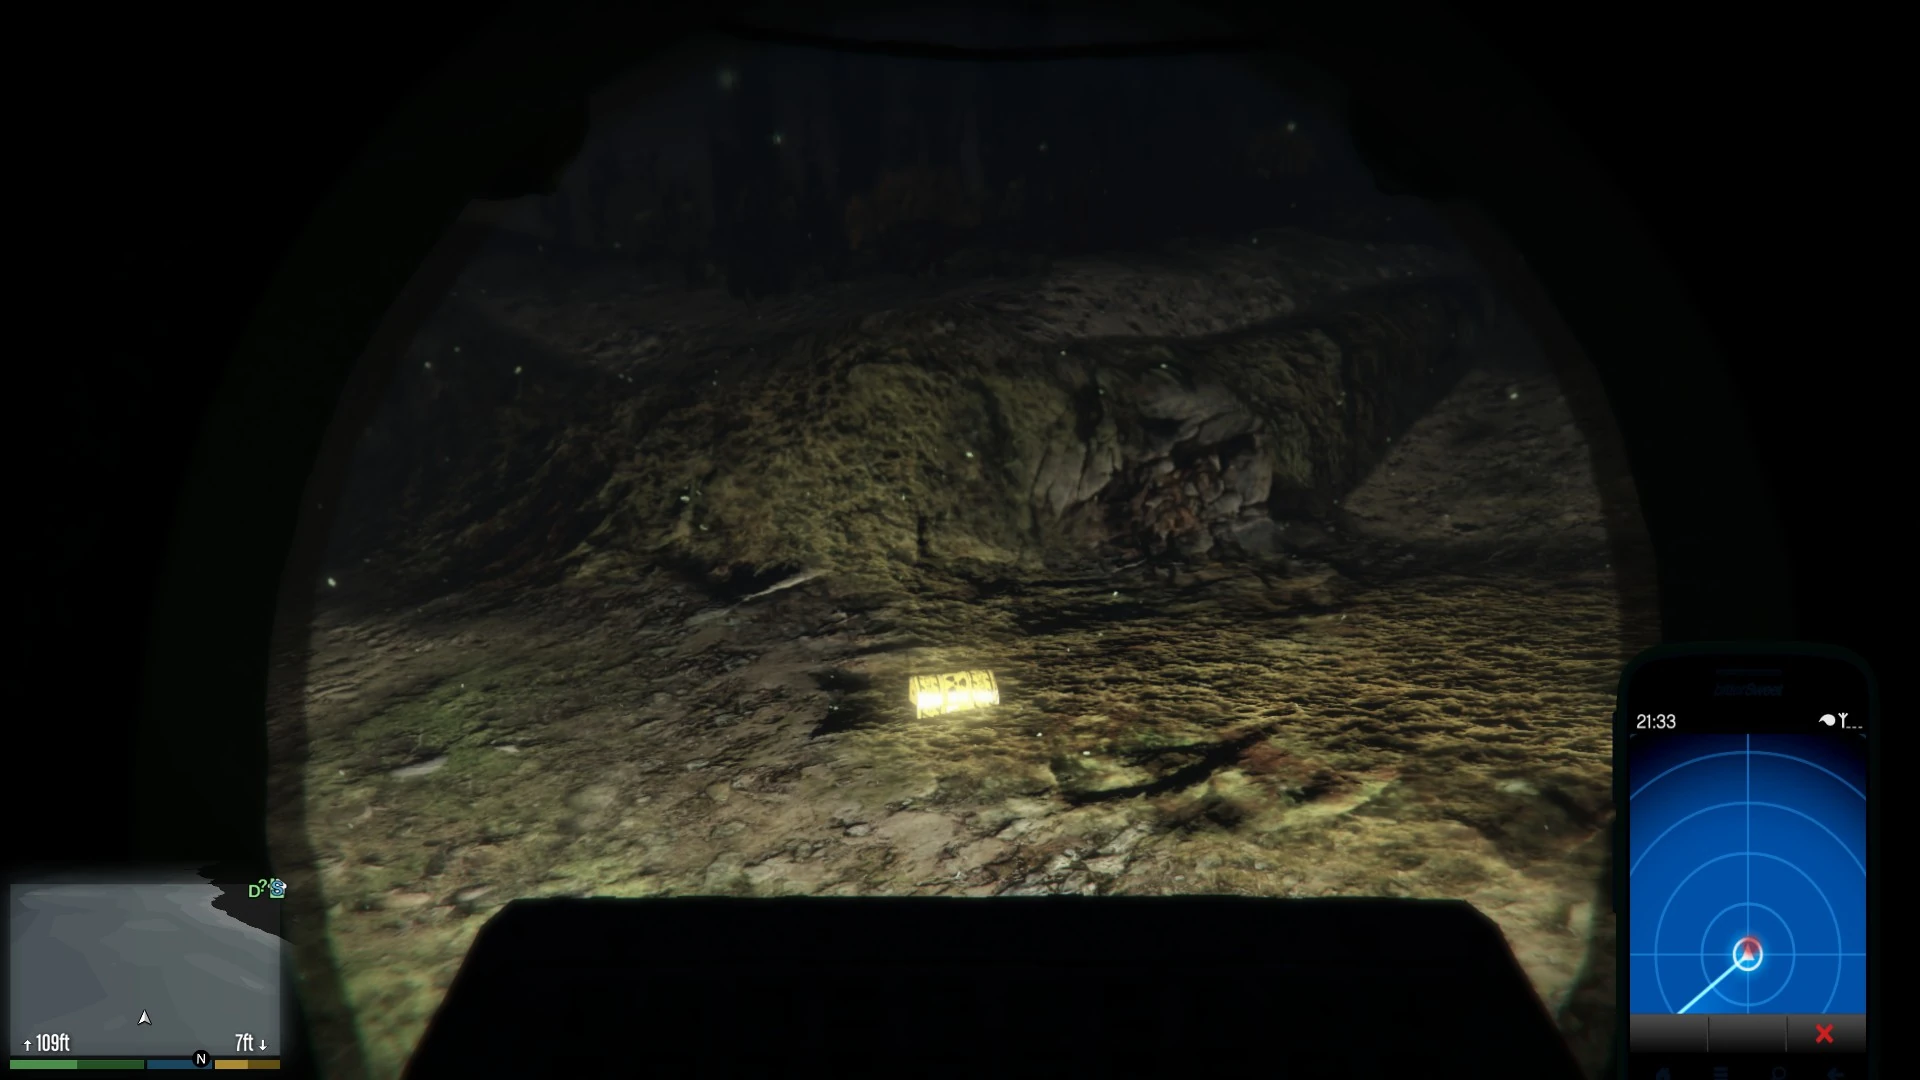 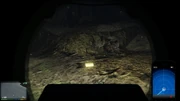 |
  |
110ft |
| 12 | 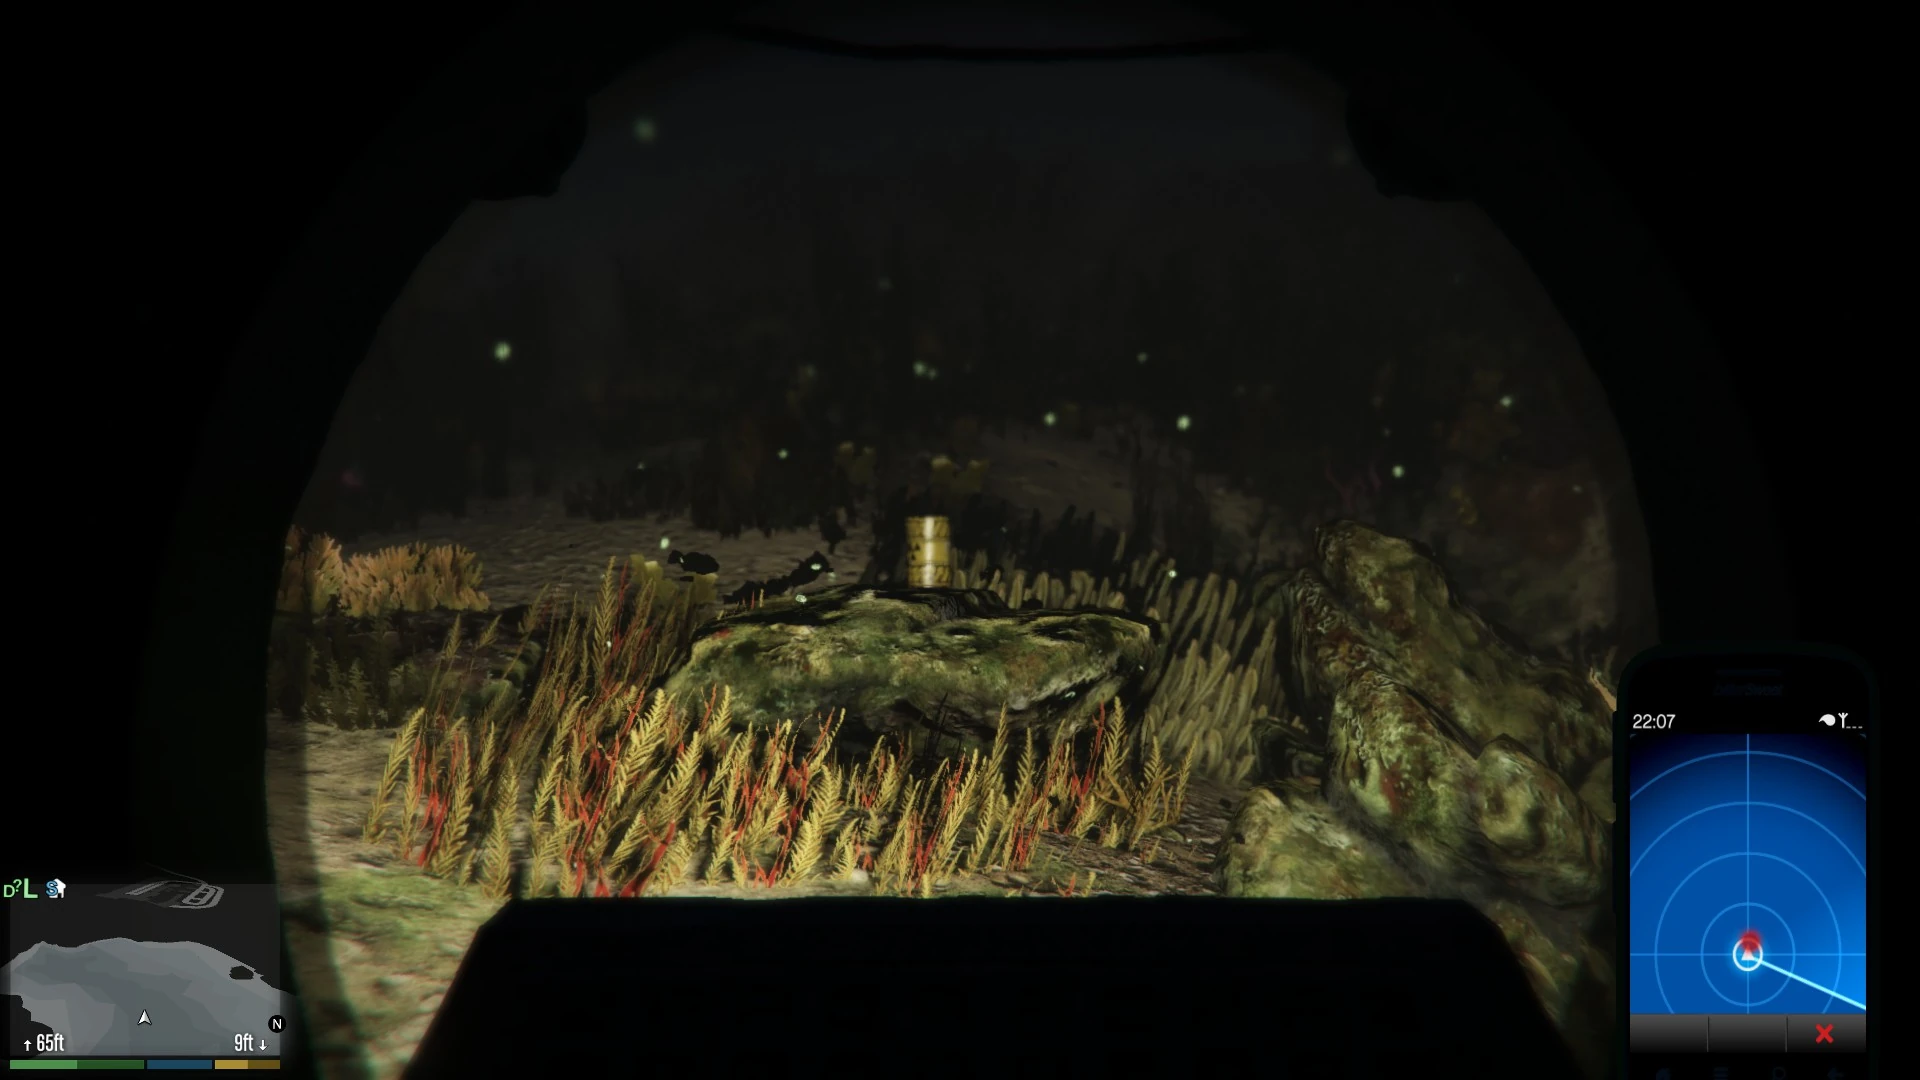  |
  |
65ft |
| 13 |  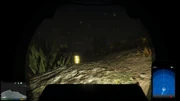 |
  |
42ft |
| 14 | 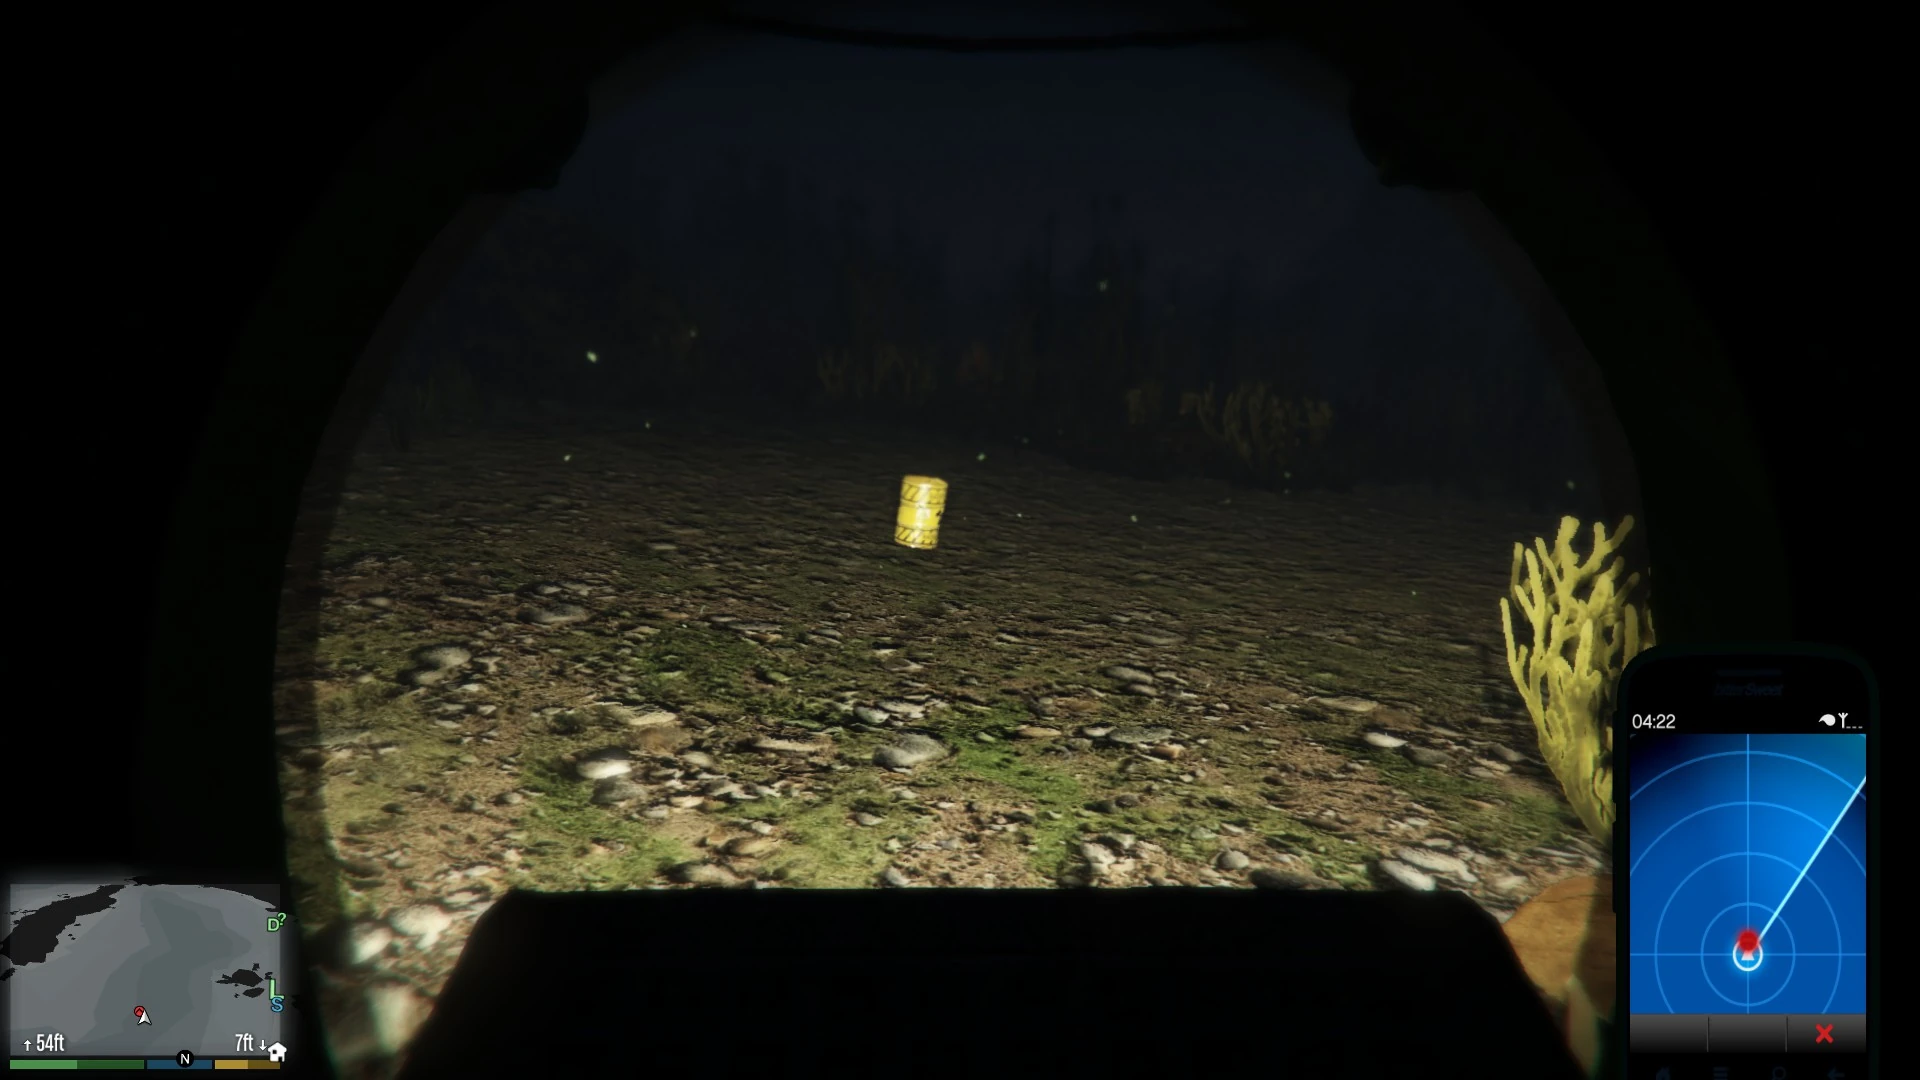  |
  |
55ft |
| 15 |   |
  |
460ft |
| 16 | 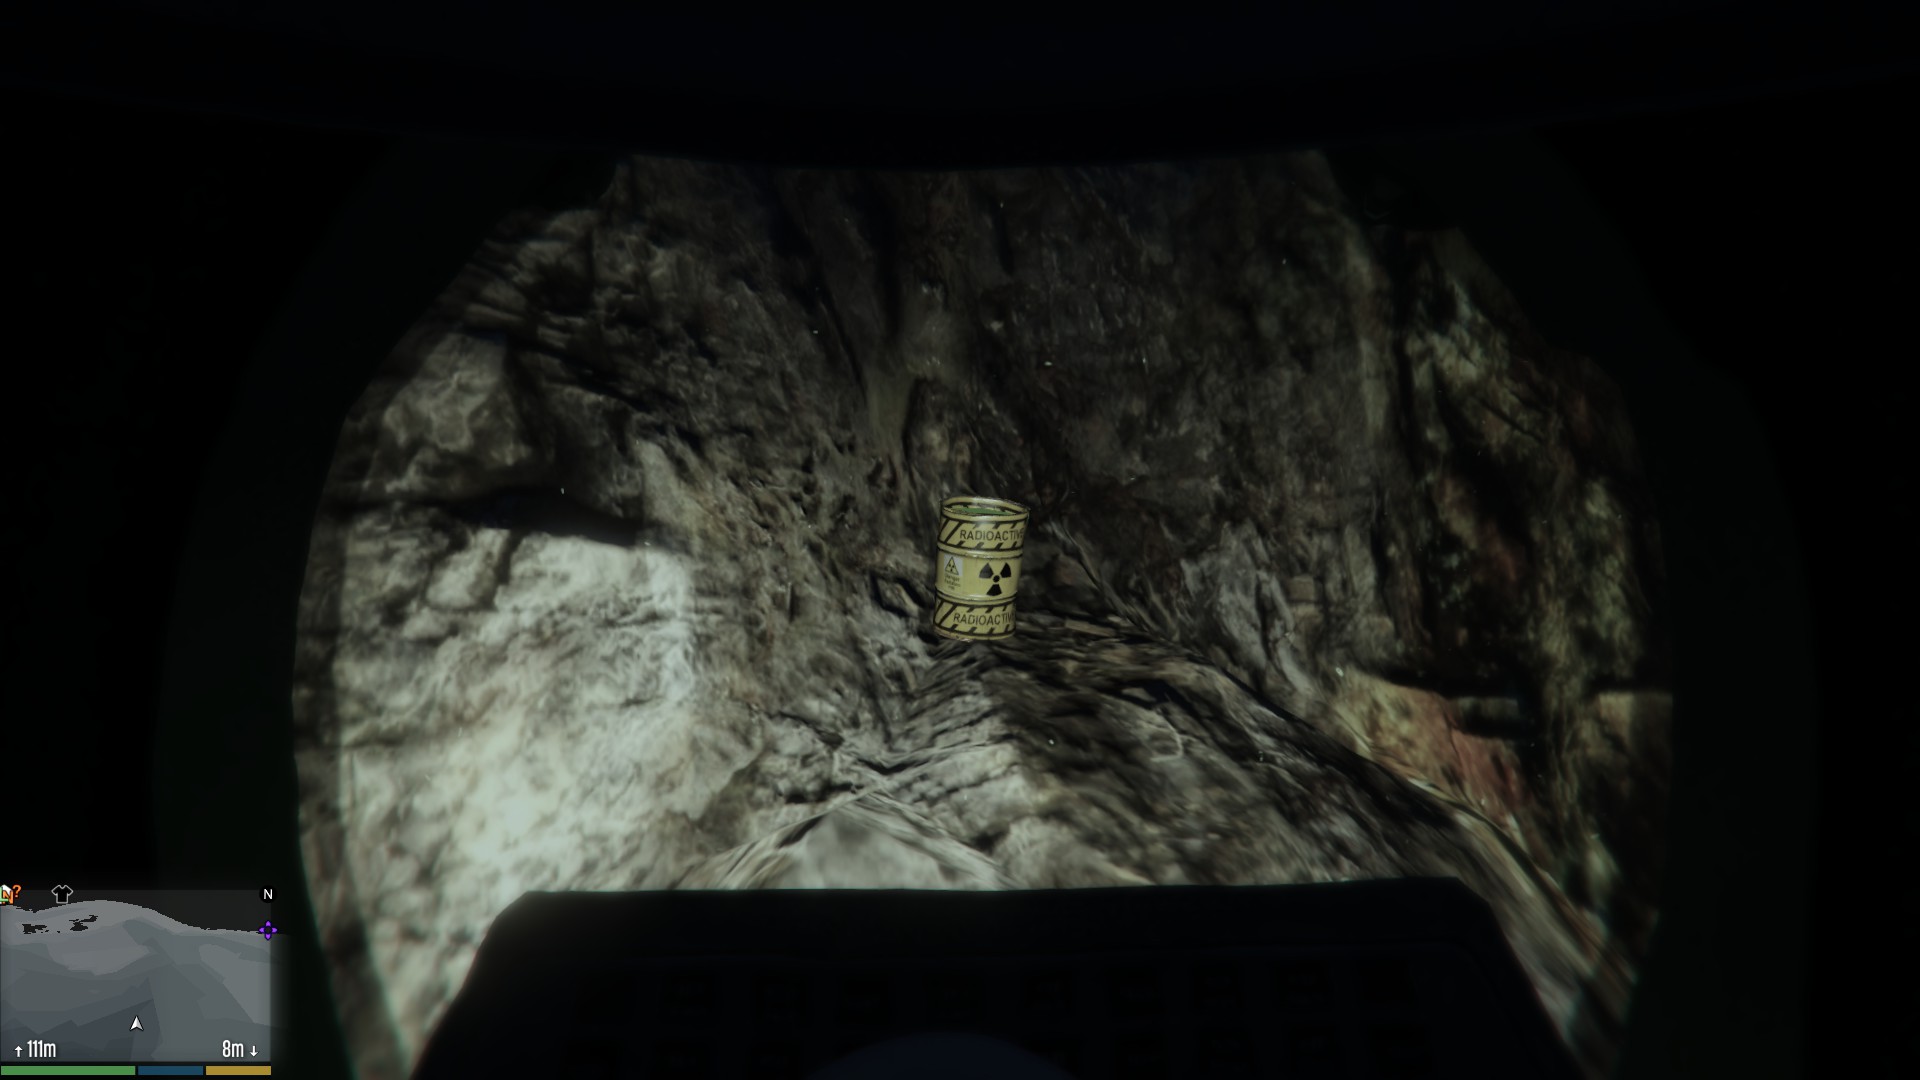  |
  |
364ft |
| 17 | 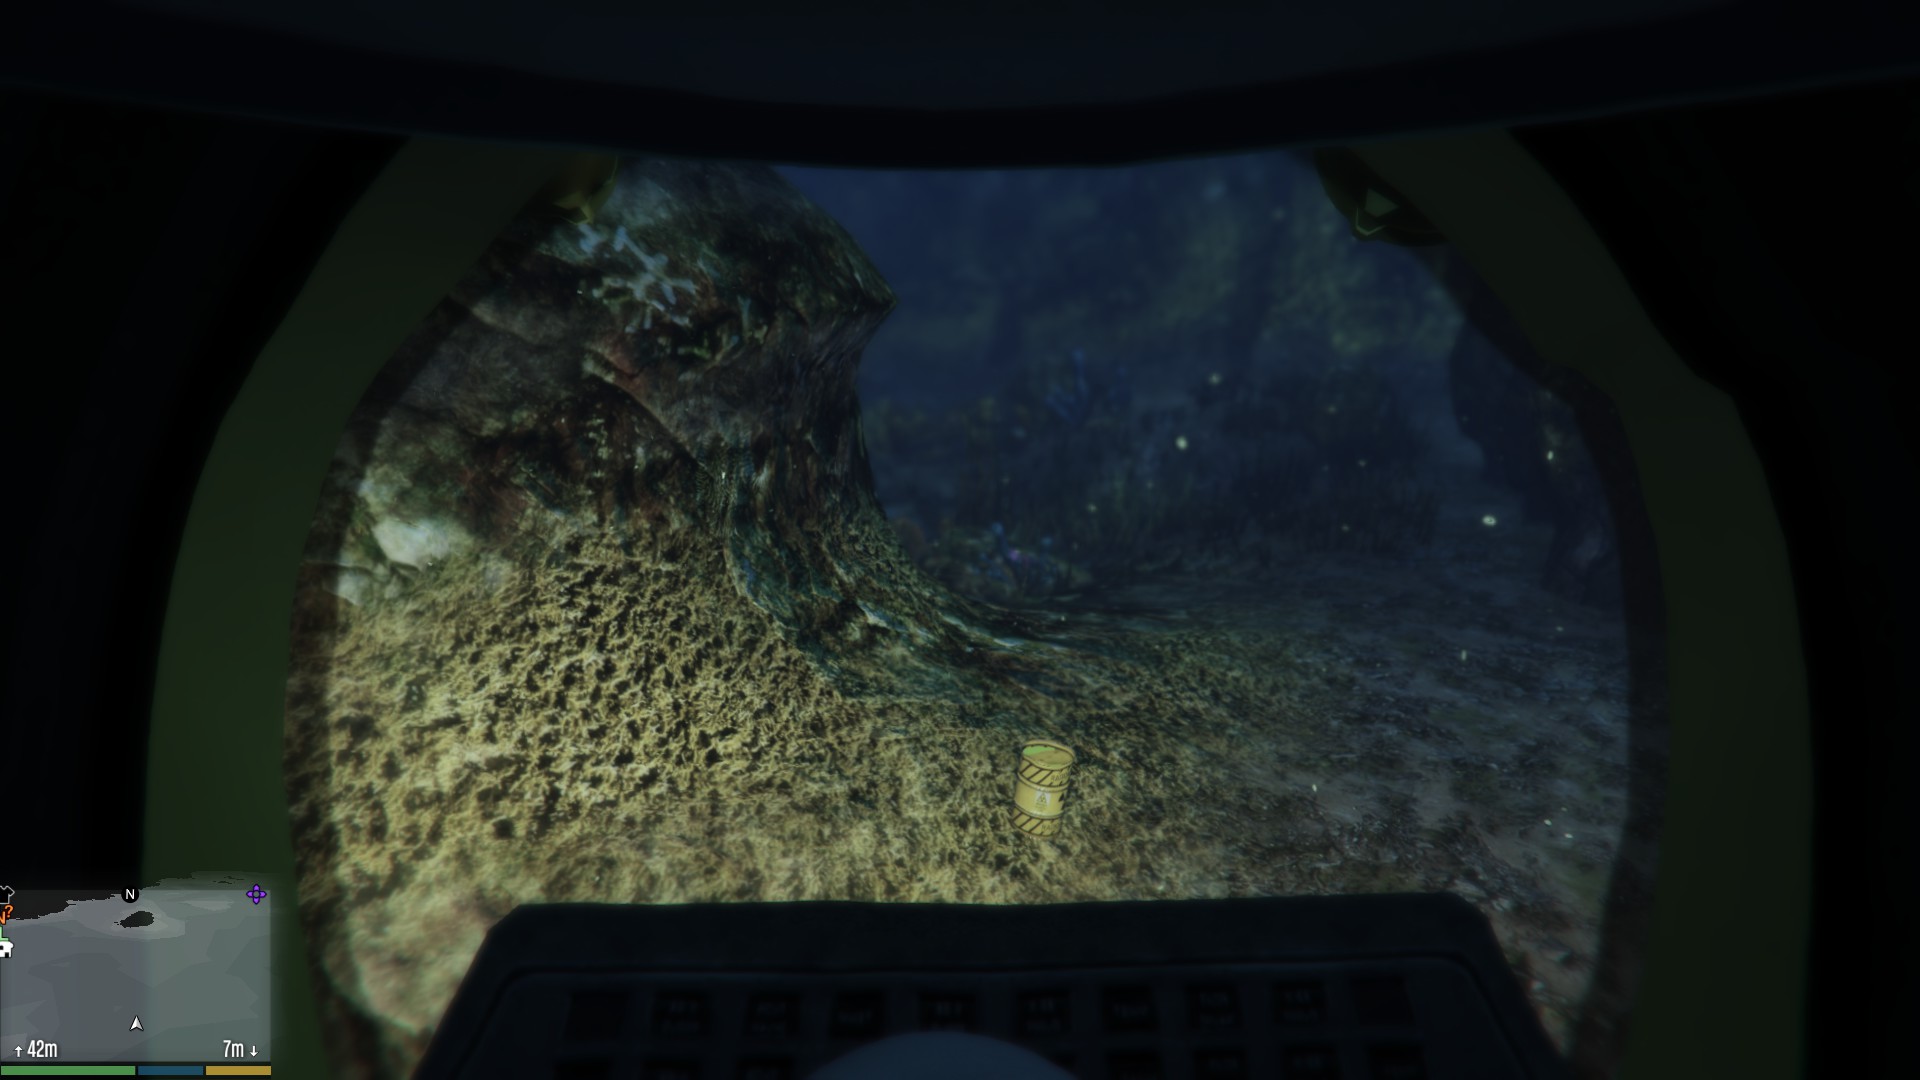  |
  |
144ft |
| 18 | 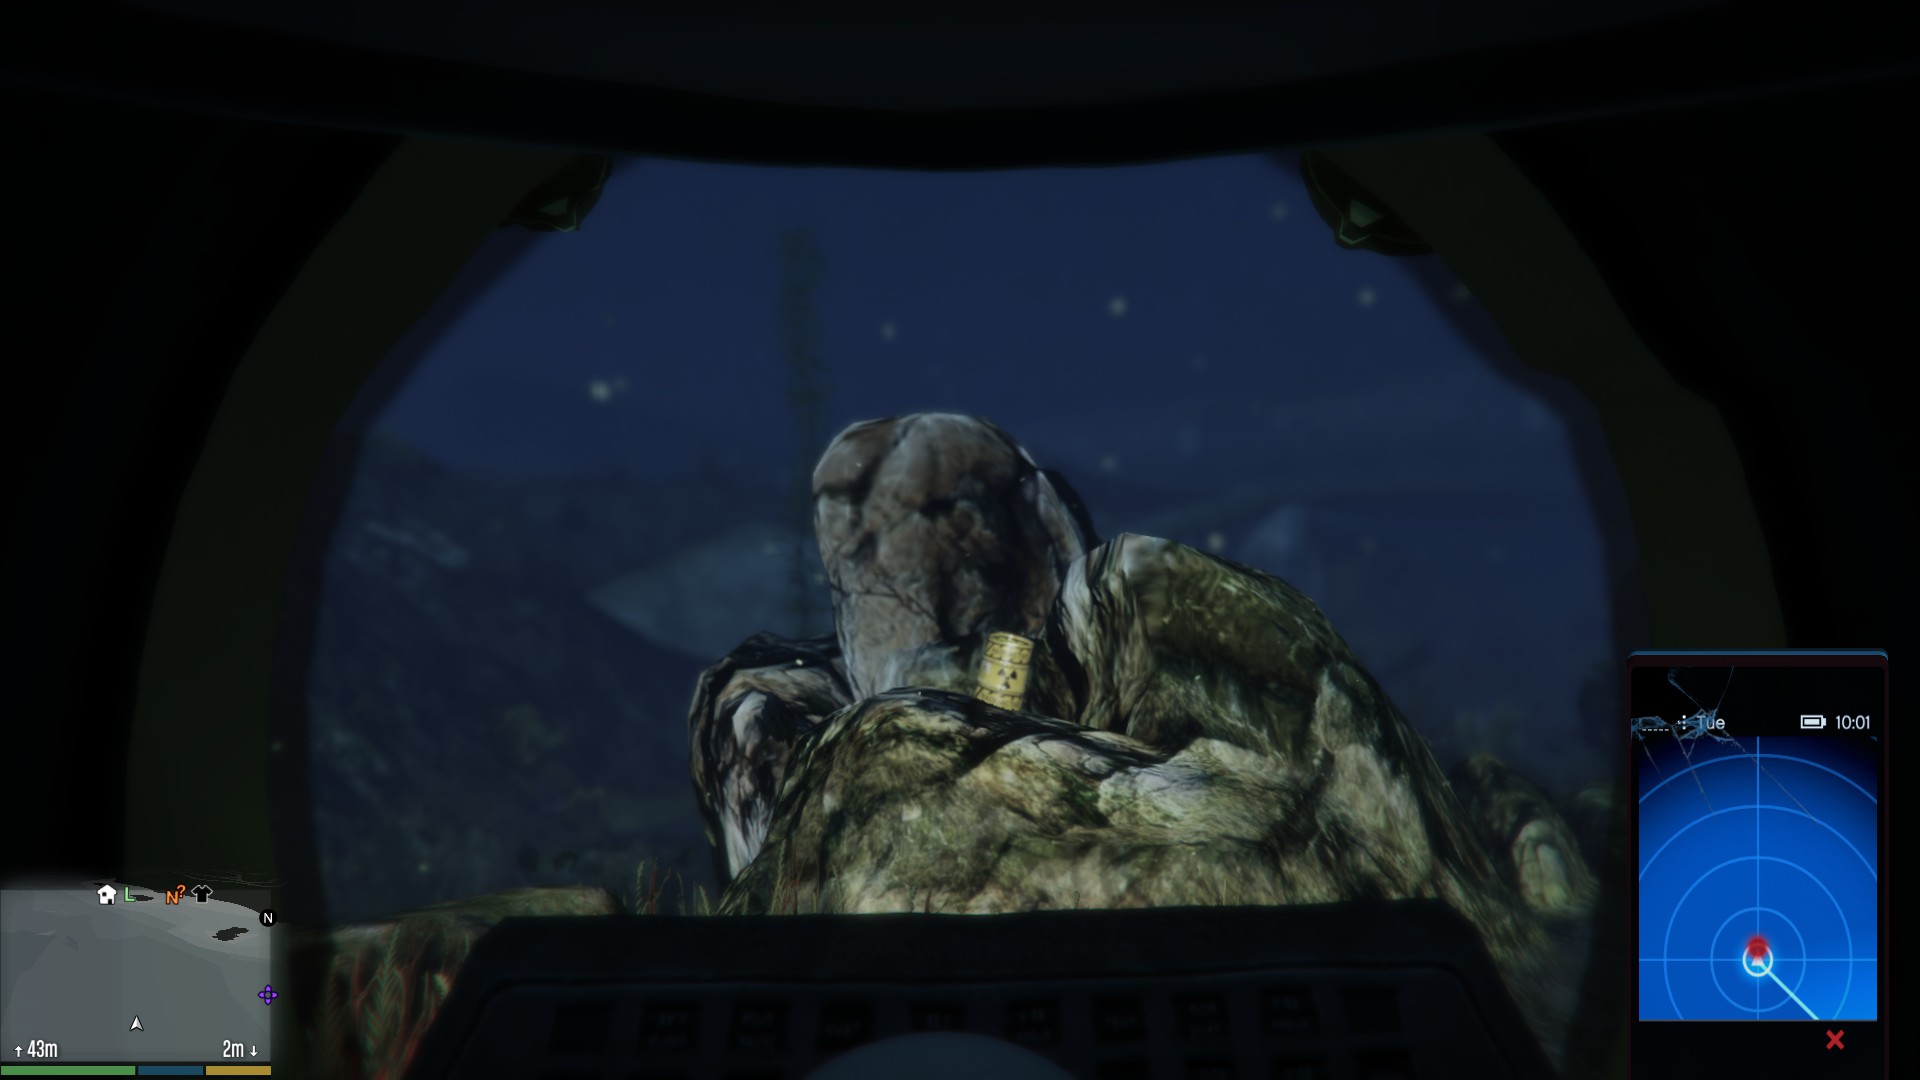 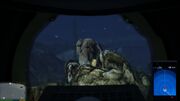 |
  |
141ft |
| 19 | 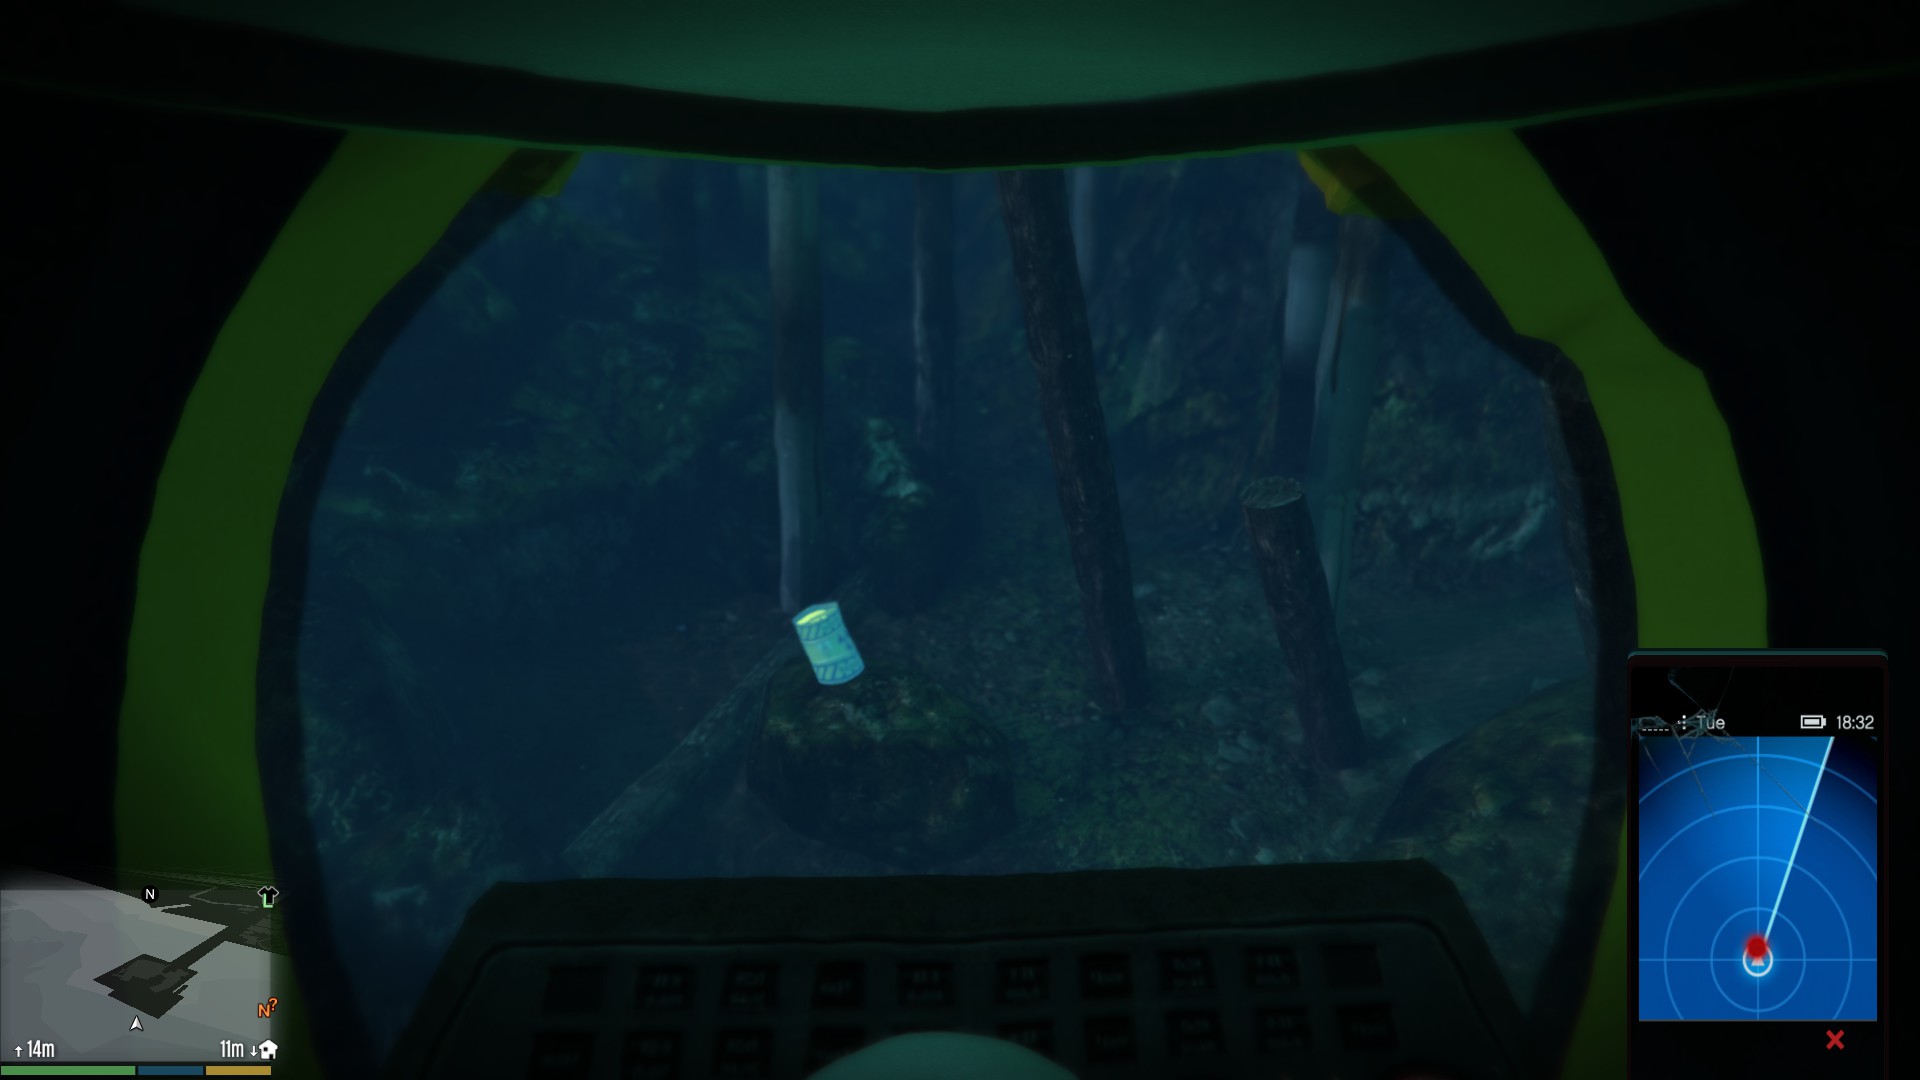  |
  |
49ft |
| 20 |   |
  |
85ft |
| 21 | 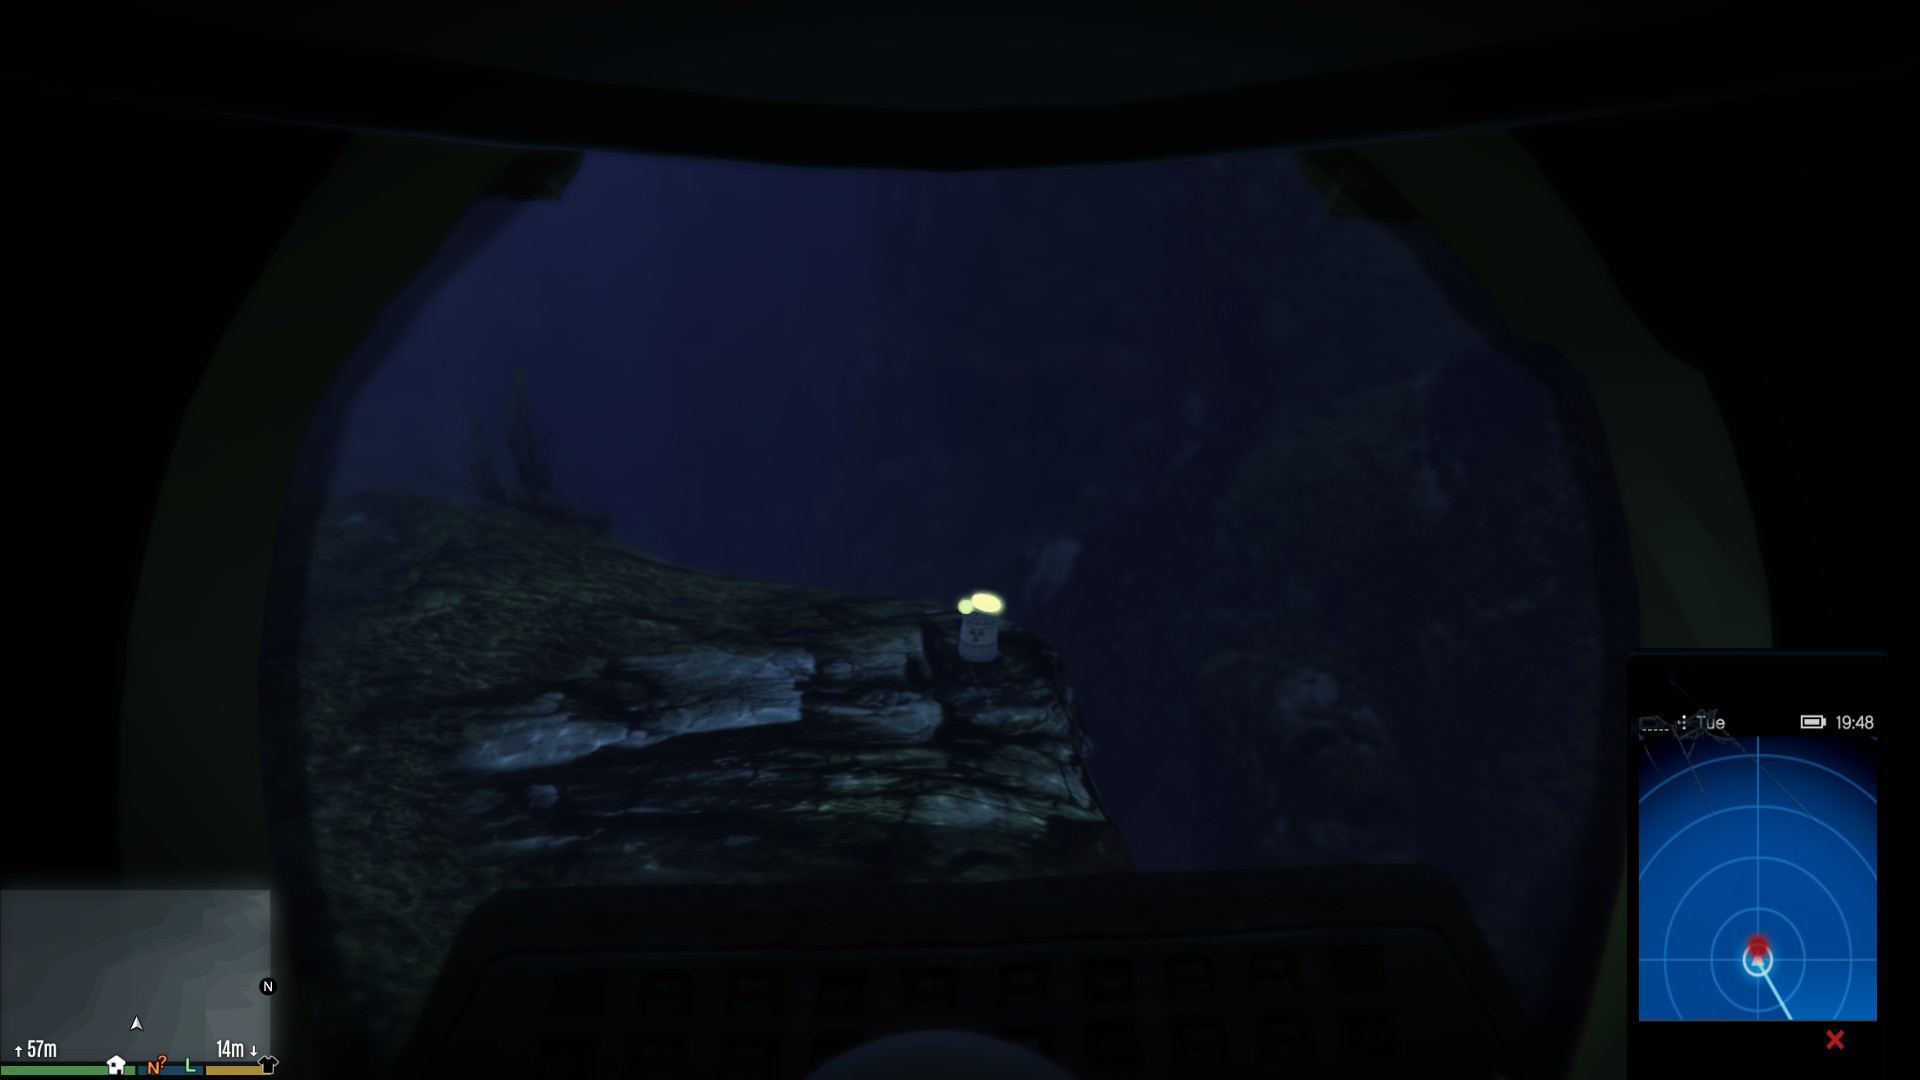  |
  |
187ft |
| 22 | 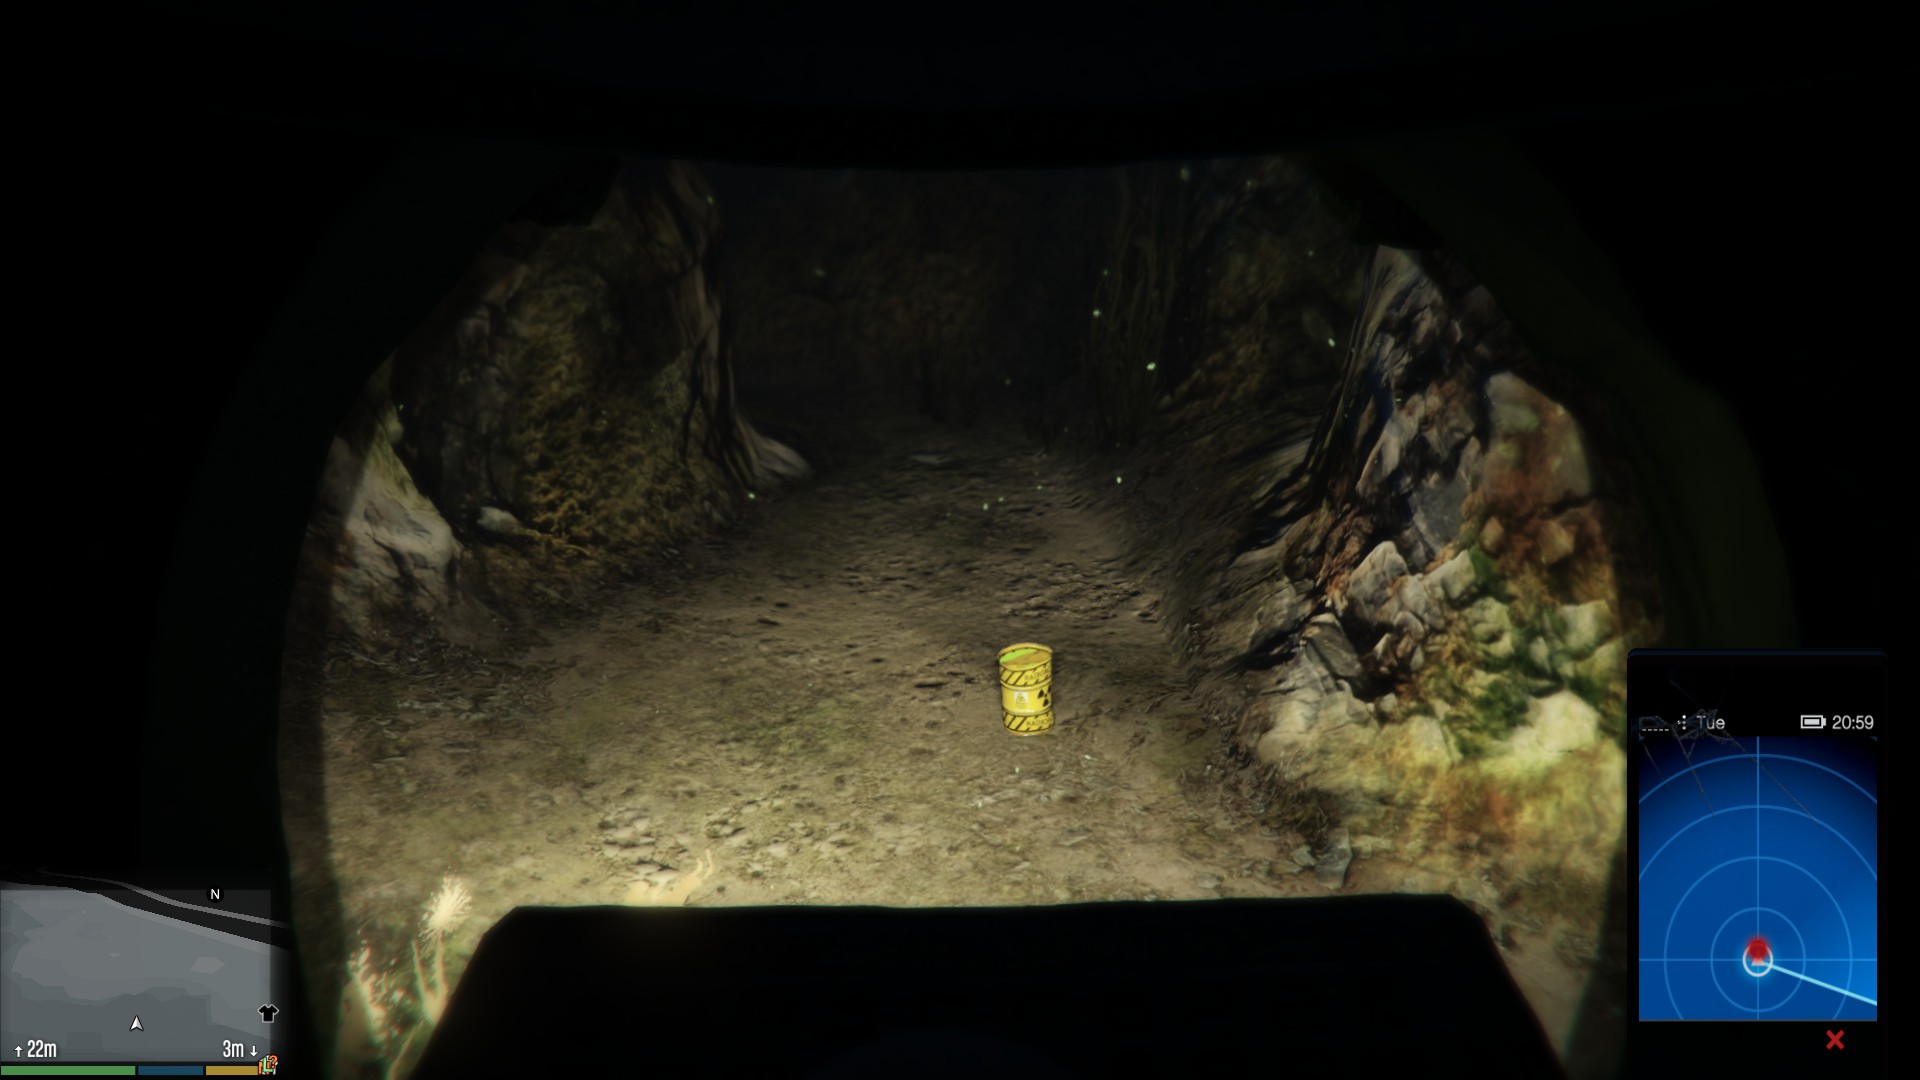  |
  |
75ft |
| 23 | 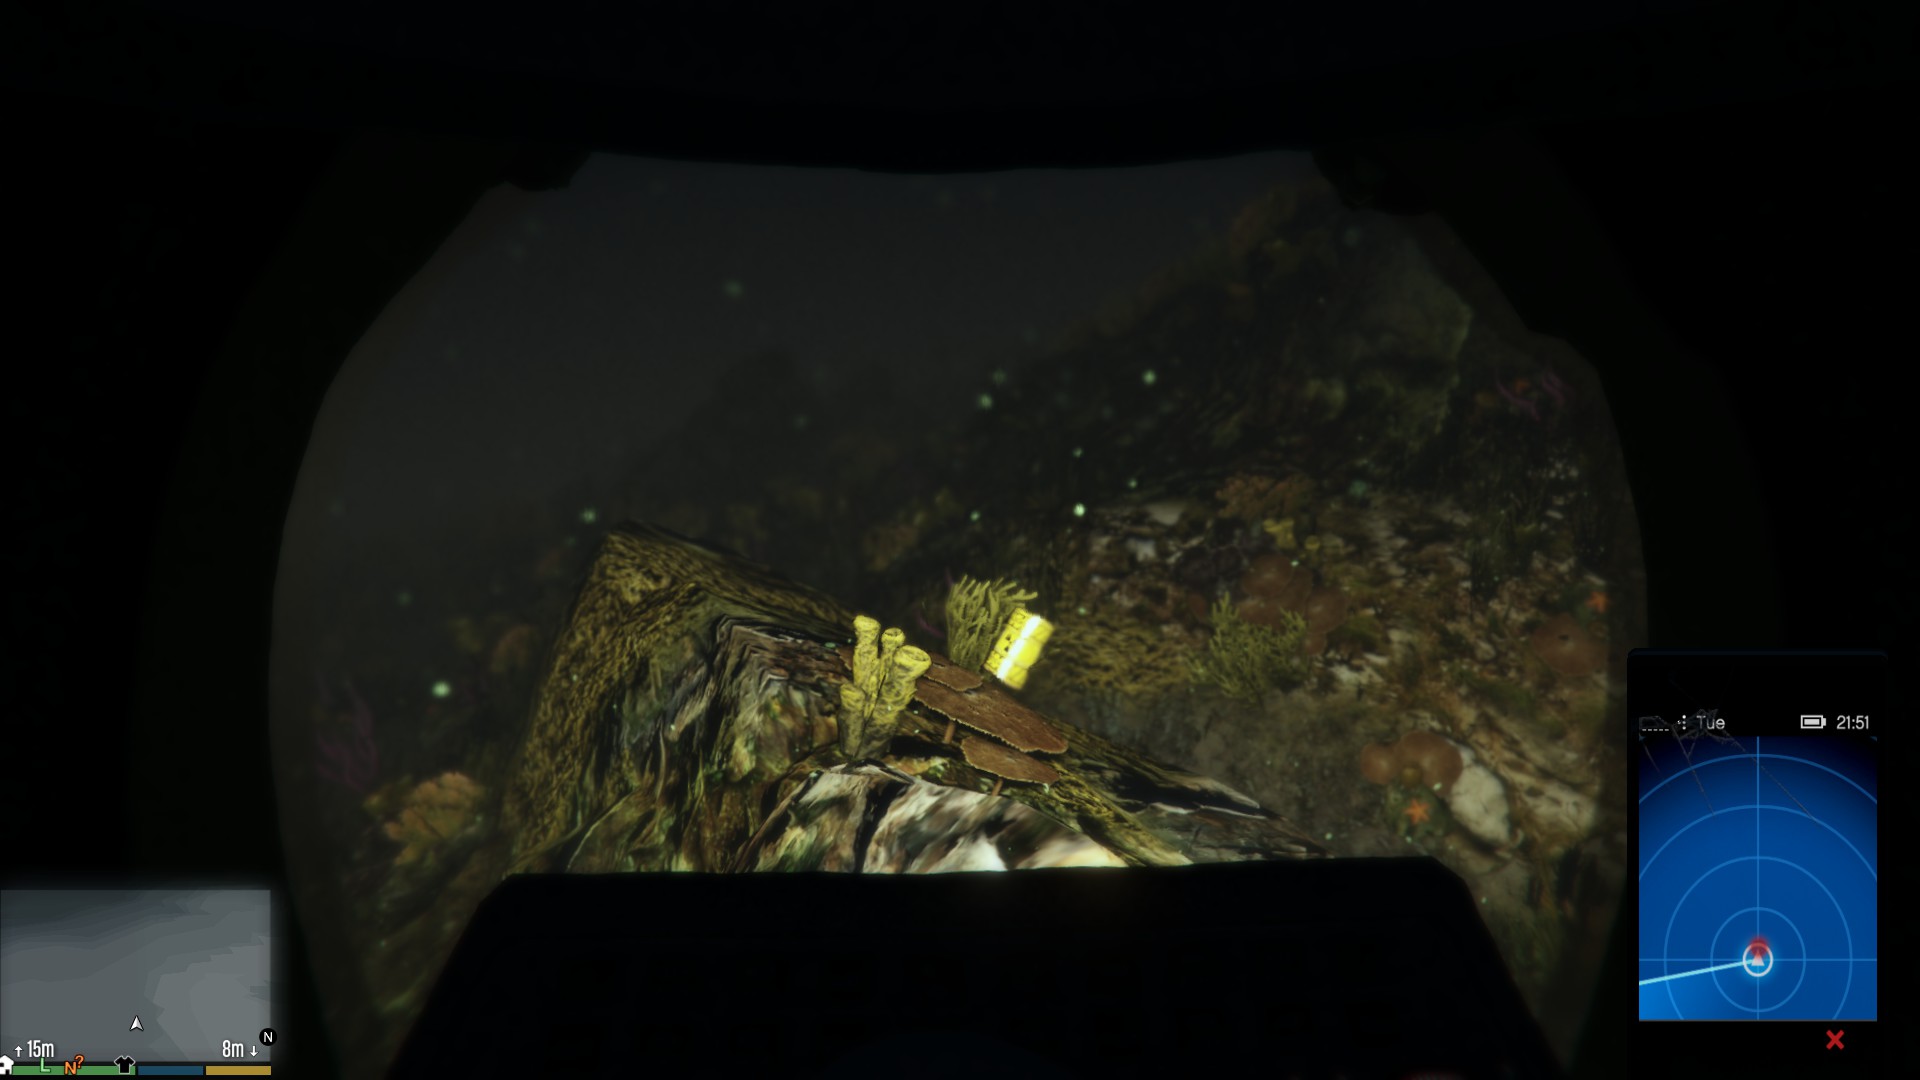  |
  |
49ft |
| 24 |   |
  |
26ft |
| 25 | 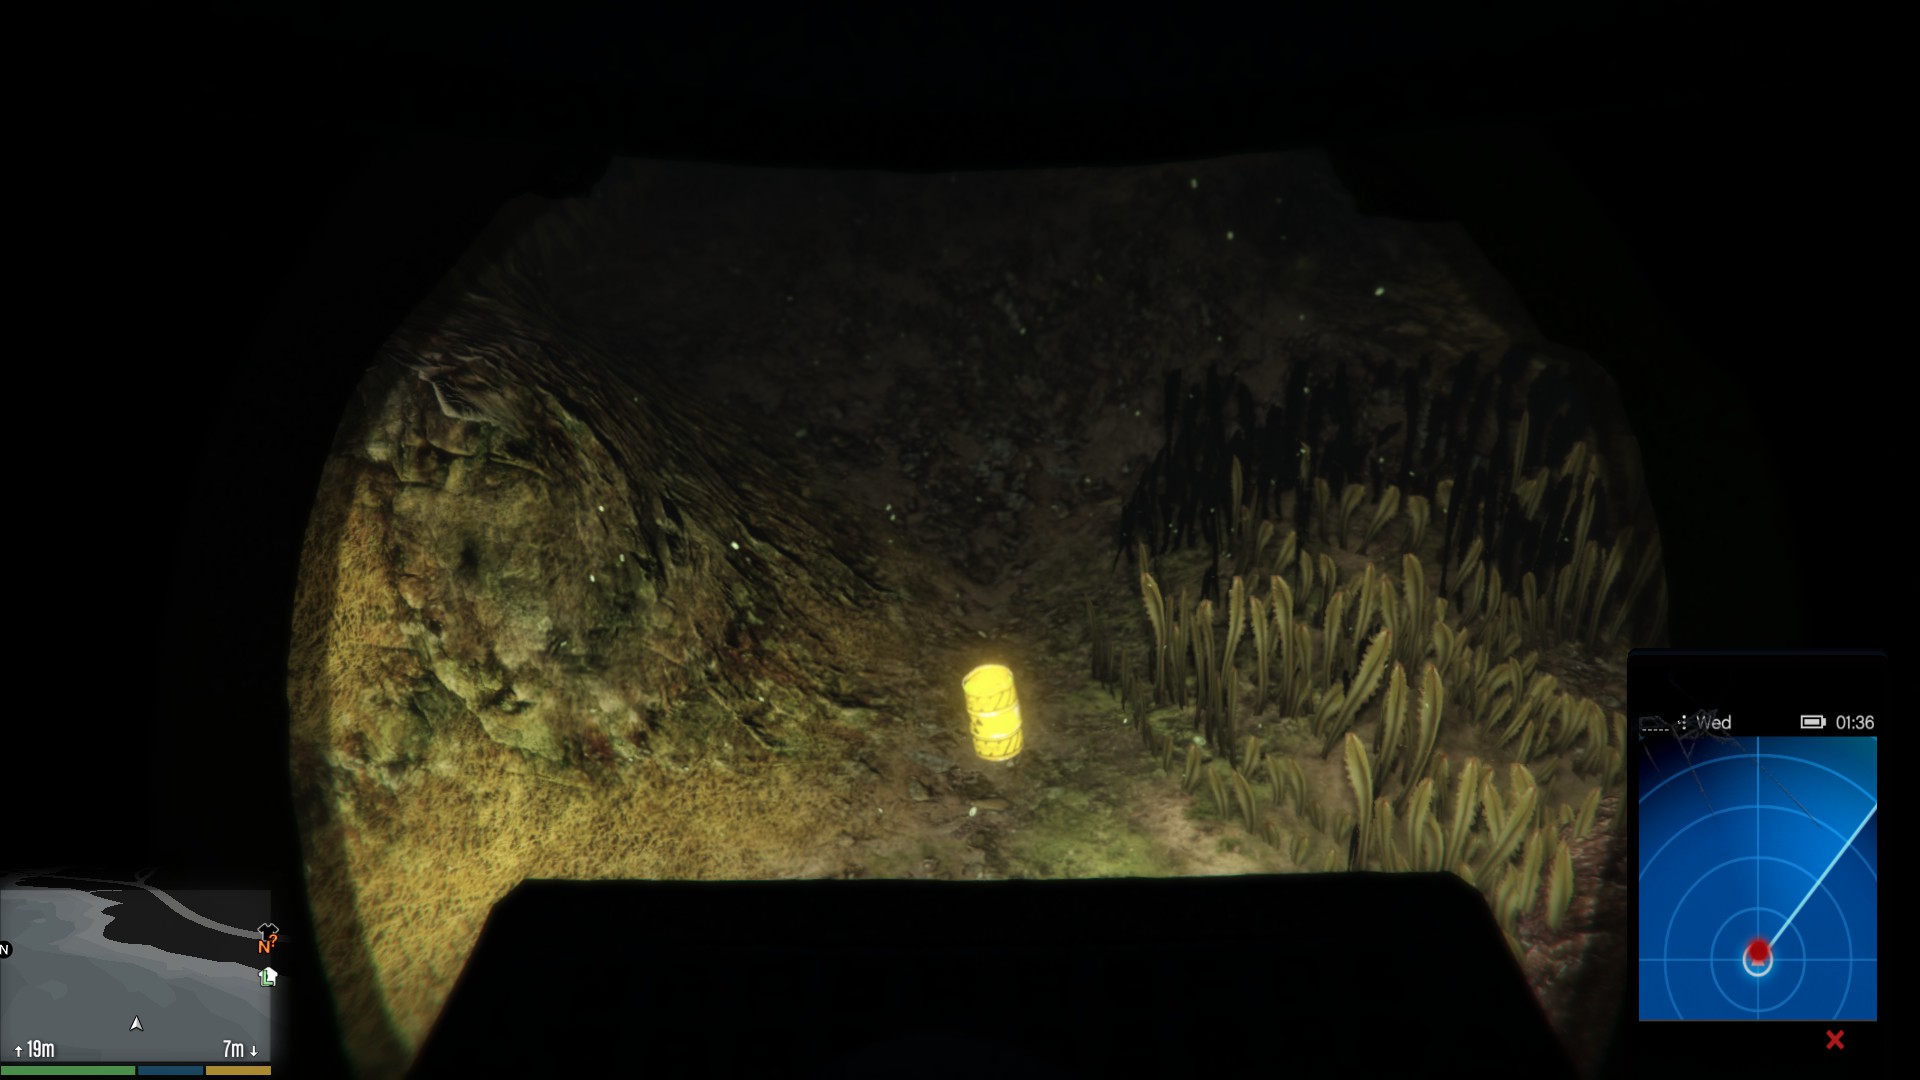  |
  |
66ft |
| 26 | 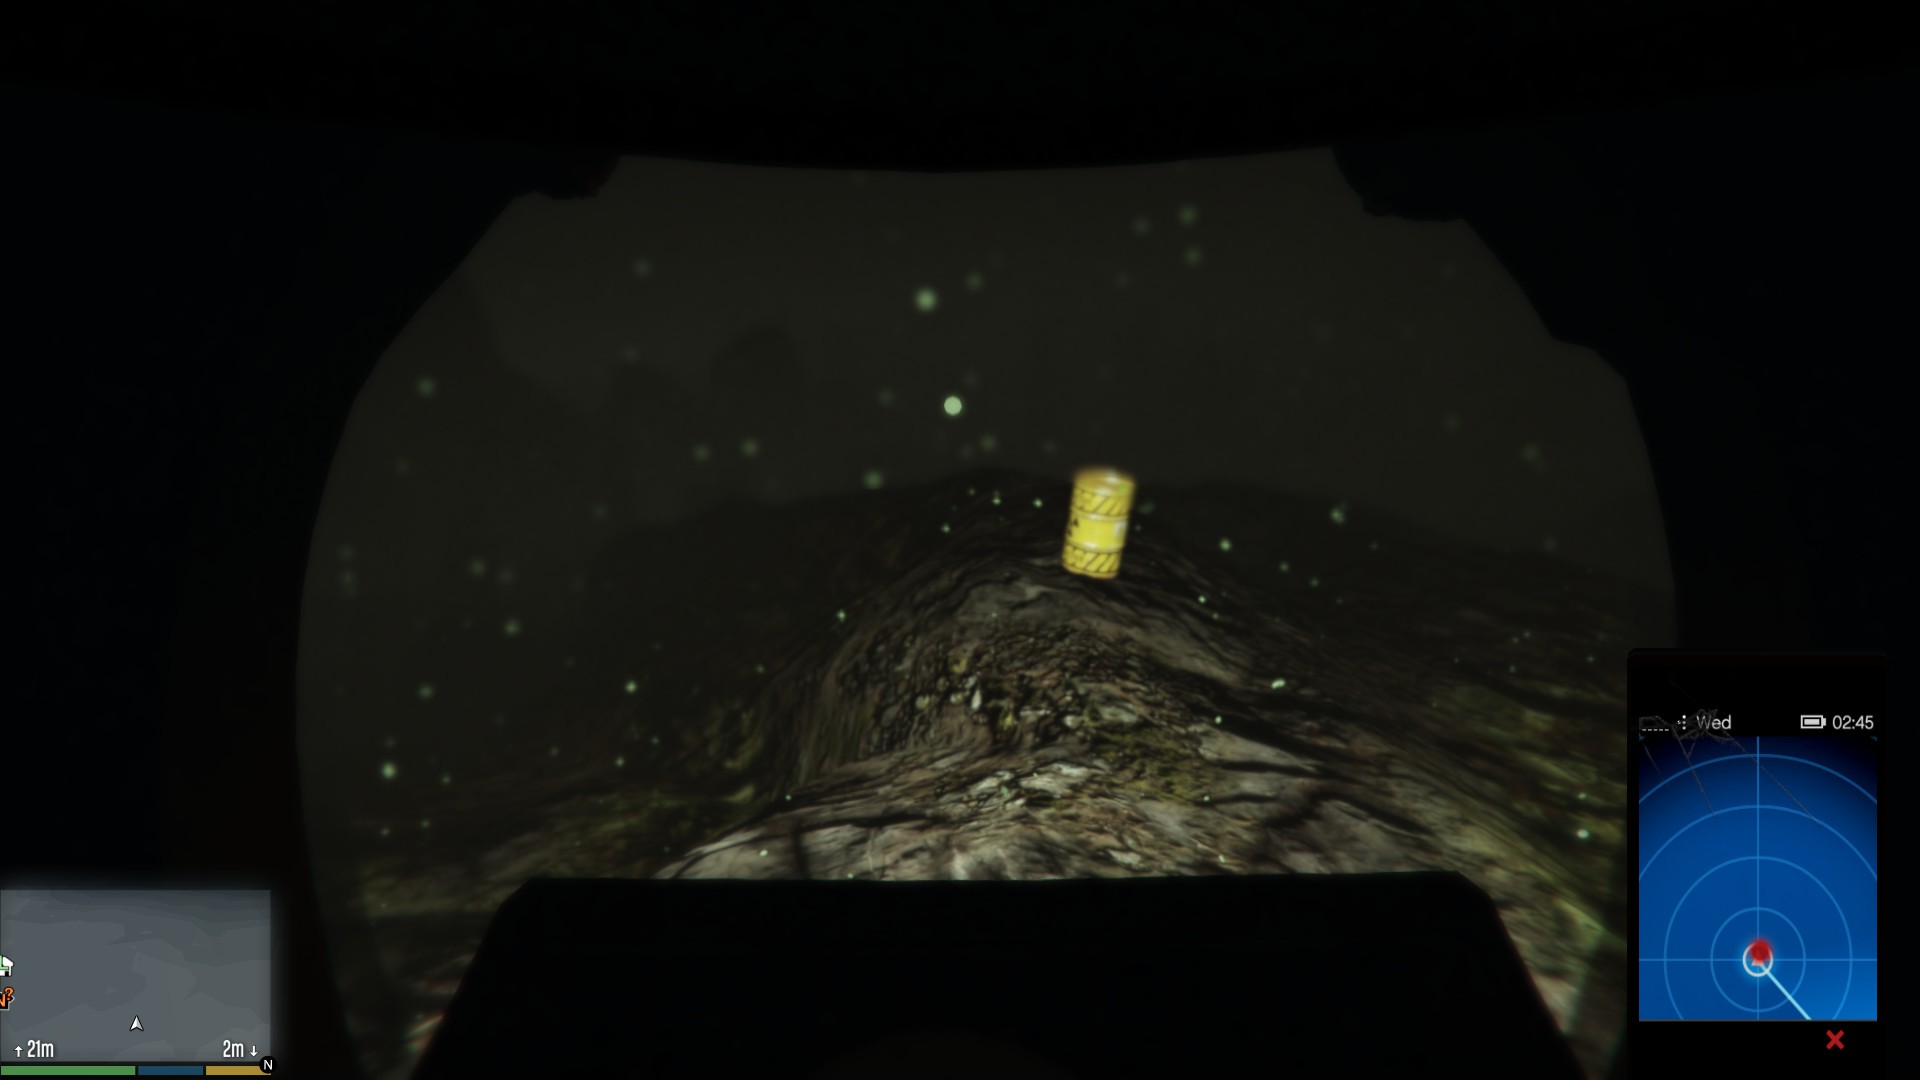  |
  |
69ft |
| 27 |  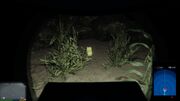 |
  |
154ft |
| 28 |  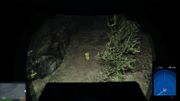 |
161ft | |
| 29 | 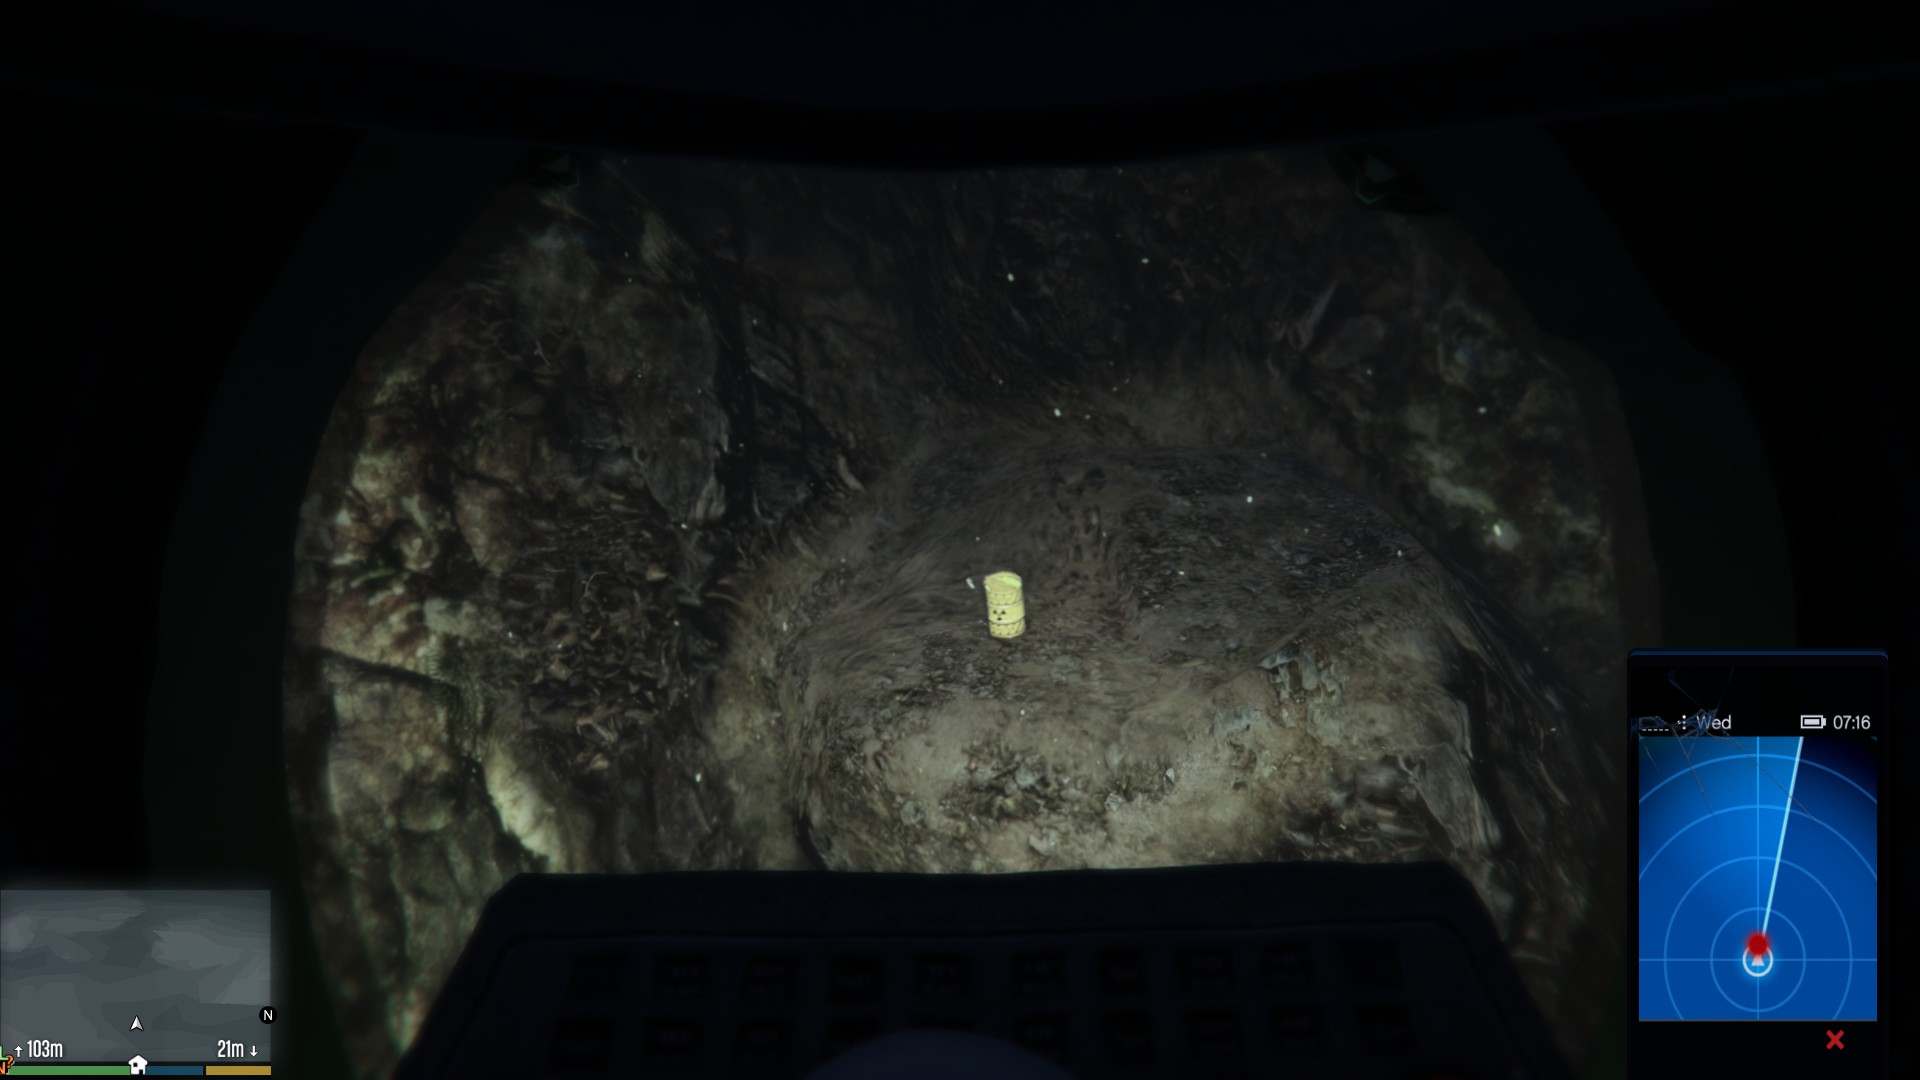  |
  |
338ft |
| 30 | 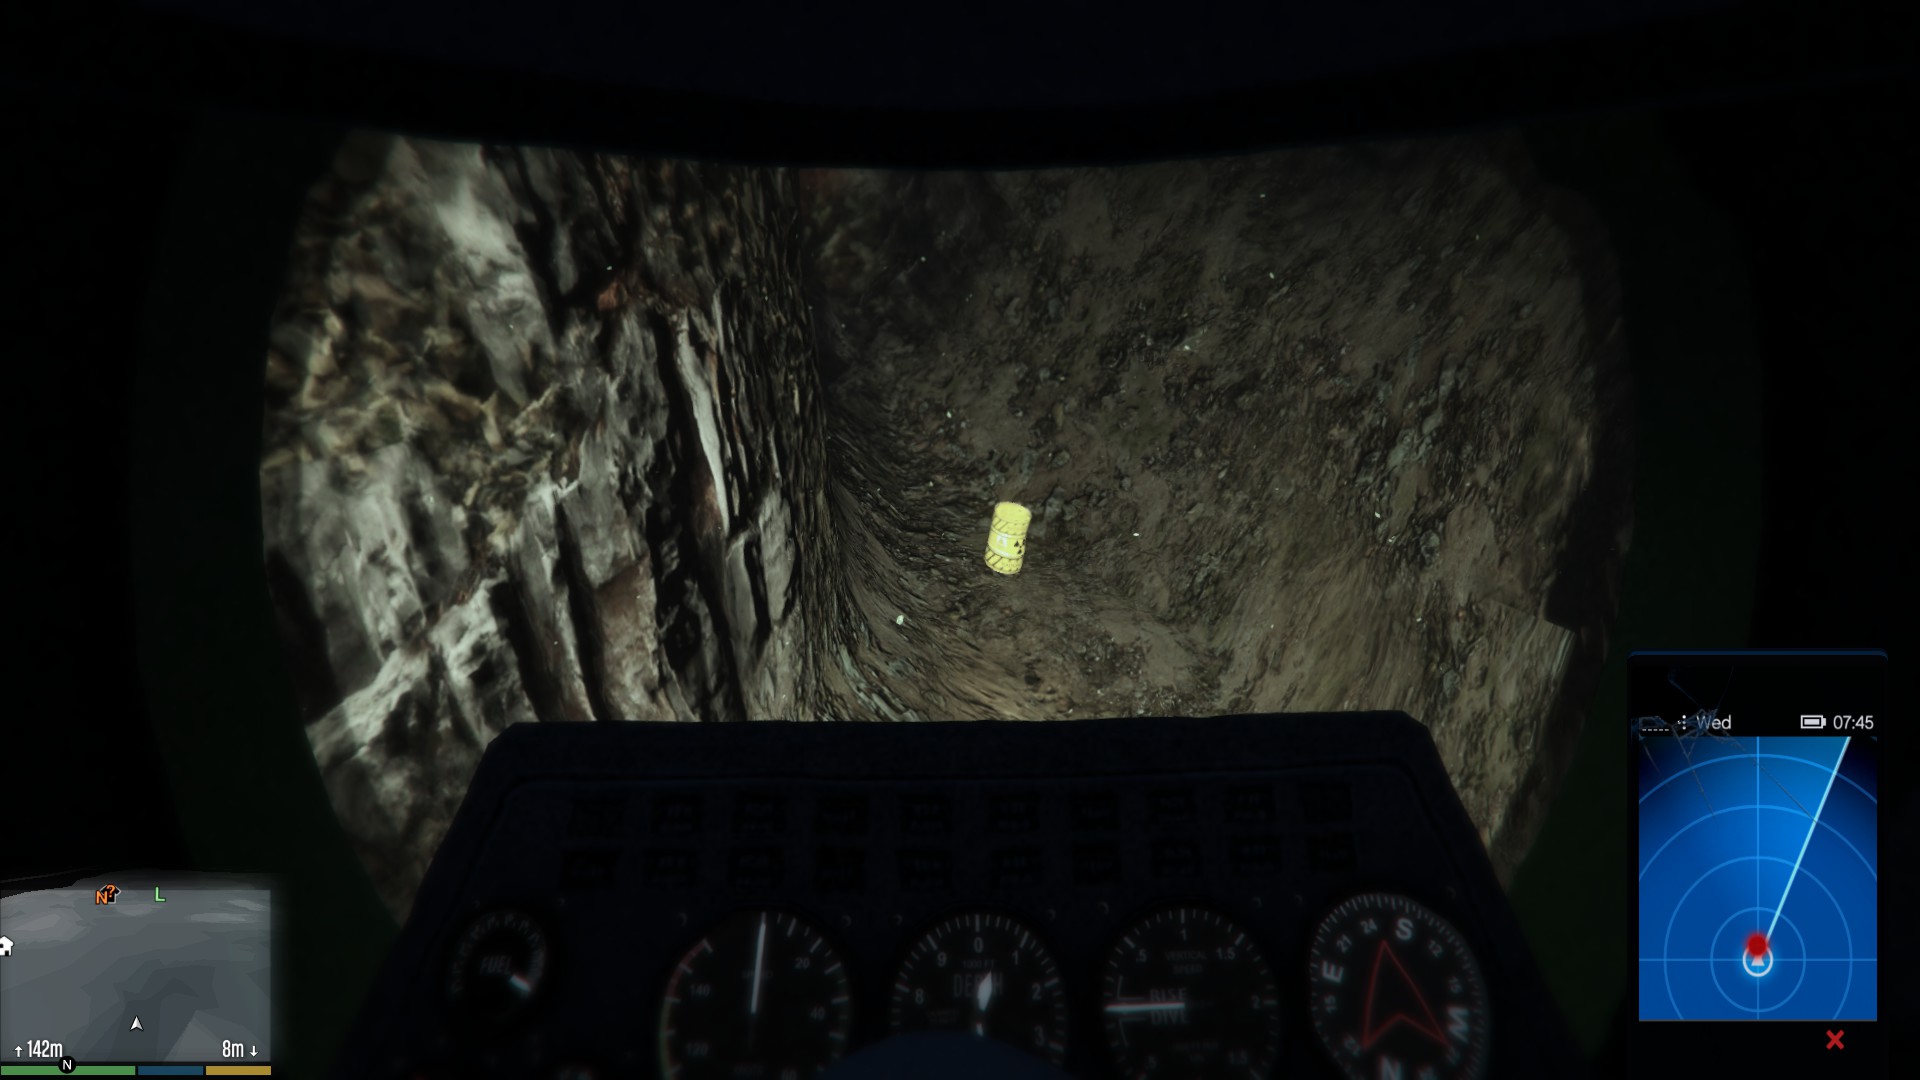 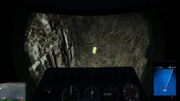 |
  |
469ft |
Glitch
- When entering the sub with the protagonist's phone in landscape mode (for example when reading an email). The Trackify app will load in landscape mode thus making each blip appear to be 90 degrees from where it actually is, and effectively sending the player in circles.
Video

References
1: http://www.ign.com/wikis/gta-5/Nuclear_Waste