No edit summary |
Noirlime4L (talk | contribs) mNo edit summary |
||
| (10 intermediate revisions by 5 users not shown) | |||
| Line 1: | Line 1: | ||
| − | {{Under Construction|new=y|January 12, 2019}} |
||
| − | {{Images}} |
||
{{Next-Gen}} |
{{Next-Gen}} |
||
{{Infobox vehicles |
{{Infobox vehicles |
||
| Line 6: | Line 4: | ||
|front_image = NightmareSlamvan-GTAO-front.png |
|front_image = NightmareSlamvan-GTAO-front.png |
||
|rear_image = NightmareSlamvan-GTAO-rear.png |
|rear_image = NightmareSlamvan-GTAO-rear.png |
||
| − | |caption = |
+ | |caption = A '''Nightmare Slamvan''' in ''[[Grand Theft Auto Online]]''. |
|vehicle_class = Muscle |
|vehicle_class = Muscle |
||
| − | |vehicle_type = Civilian |
+ | |vehicle_type = Civilian vehicle |
|body_style = Custom 2-door pickup truck |
|body_style = Custom 2-door pickup truck |
||
|capacity = 2 <small>(driver and passenger)</small> |
|capacity = 2 <small>(driver and passenger)</small> |
||
| Line 16: | Line 14: | ||
|related = [[Apocalypse Slamvan]]<br>[[Future Shock Slamvan]]<br>[[Slamvan]]<br>[[Slamvan Custom]] |
|related = [[Apocalypse Slamvan]]<br>[[Future Shock Slamvan]]<br>[[Slamvan]]<br>[[Slamvan Custom]] |
||
|variants = |
|variants = |
||
| − | |swankness = |
+ | |swankness = 4 |
| + | |dashtype = Dukes <small>(needle)</small><br>[[File:Dukes-Dials-GTAV.png|thumb|center|170px]]<br>Dominator <small>(dial texture)</small><br>[[File:Dominator-GTAV-DialSet.png|thumb|center|170px]] |
||
| − | |dashtype = |
||
|inttxd = |
|inttxd = |
||
| + | {{BP}}Sasquatch |
||
| + | {{BP}}Dominator |
||
|carcols = |
|carcols = |
||
| + | {{CarColV/Title|extended=y}} |
||
| − | |wheeltype = |
||
| + | {{CarColV|extended=y|no=1|8|135|7|88|2|156}}<br> |
||
| + | |wheeltype = Muscle |
||
|flags = |
|flags = |
||
| + | {{Expand|'''Slamvan6'''| |
||
| − | |modelsets = |
||
| + | {{Flags|FLAG_EXTRAS_STRONG}}<br> |
||
| − | |modelname = |
||
| + | {{Flags|FLAG_AVERAGE_CAR}}<br> |
||
| − | |handlingname = |
||
| + | {{Flags|FLAG_HAS_INTERIOR_EXTRAS}}<br> |
||
| − | |textlabelname = |
||
| + | {{Flags|FLAG_CAN_HAVE_NEONS}}<br> |
||
| − | |roadspawn = |
||
| + | {{Flags|FLAG_USE_AIRCRAFT_STYLE_WEAPON_TARGETING}}<br> |
||
| − | |roadspawnmaxcol = |
||
| + | {{Flags|FLAG_HAS_JUMP_MOD}}<br> |
||
| − | |roadspawnfreq = |
||
| + | {{Flags|FLAG_HAS_SIDE_SHUNT}}<br> |
||
| − | |roadspawntrailer = |
||
| + | {{Flags|FLAG_HAS_WEAPON_BLADE_MODS}}<br> |
||
| − | |roadspawnidendis = |
||
| + | {{Flags|FLAG_HAS_WEAPON_SPIKE_MODS}}<br> |
||
| − | |roadspawndrivers = |
||
| + | {{Flags|FLAG_HAS_RAMMING_SCOOP_MOD}}<br> |
||
| − | |roadspawngroups = |
||
| + | {{Flags|FLAG_HAS_RAMMING_BAR_MOD}}<br> |
||
| − | |roadspawnlicense = |
||
| + | {{Flags|FLAG_HAS_NITROUS_MOD}}<br> |
||
| + | }} |
||
| + | {{Expand|'''.50 Cal'''| |
||
| + | {{Flags|Gun}}<br> |
||
| + | {{Flags|UsableOnFoot}}<br> |
||
| + | {{Flags|Vehicle}}<br> |
||
| + | {{Flags|ForceEjectShellAfterFiring}}<br> |
||
| + | {{Flags|CanBlowUpVehicleAtZeroBodyHealth}}<br> |
||
| + | {{Flags|UseVehicleWeaponBoneForward}}<br> |
||
| + | }} |
||
| + | {{Expand|'''Mines'''| |
||
| + | <center>Ammo</center> |
||
| + | {{Flags|AddSmokeOnExplosion}}<br> |
||
| + | <center>Projectile</center> |
||
| + | {{Flags|Sticky}}<br> |
||
| + | {{Flags|ProcessImpacts}}<br> |
||
| + | {{Flags|NoPullPin}}<br> |
||
| + | {{Flags|CanBeDestroyedByDamage}}<br> |
||
| + | {{Flags|ProximityDetonation}}<br> |
||
| + | <center>Weapon</center> |
||
| + | {{Flags|Silenced}}<br> |
||
| + | {{Flags|SuppressGunshotEvent}}<br> |
||
| + | }} |
||
| + | |modelsets = <!--null--> |
||
| + | |modelname = slamvan6 |
||
| + | |handlingname = SLAMVAN4 |
||
| + | |textlabelname = SLAMVAN6 |
||
| + | |roadspawn = No |
||
| + | |roadspawnmaxcol = 1 |
||
| + | |roadspawnfreq = 30 |
||
| + | |roadspawntrailer = <!--null--> |
||
| + | |roadspawnidendis = 20 |
||
| + | |roadspawndrivers = <!--null--> |
||
| + | |roadspawngroups = <!--null--> |
||
| + | |roadspawnlicense = Standard White - 100% |
||
|engineacceleration = |
|engineacceleration = |
||
|exhaustacceleration = |
|exhaustacceleration = |
||
| Line 41: | Line 78: | ||
|gensucced = |
|gensucced = |
||
}} |
}} |
||
| − | {{ |
+ | {{Quote|Perfectly camouflaged for the landfill at the end of the world.|[[Arenawar|Arena War]] description.}} |
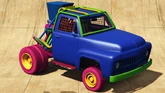
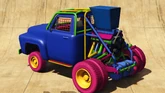
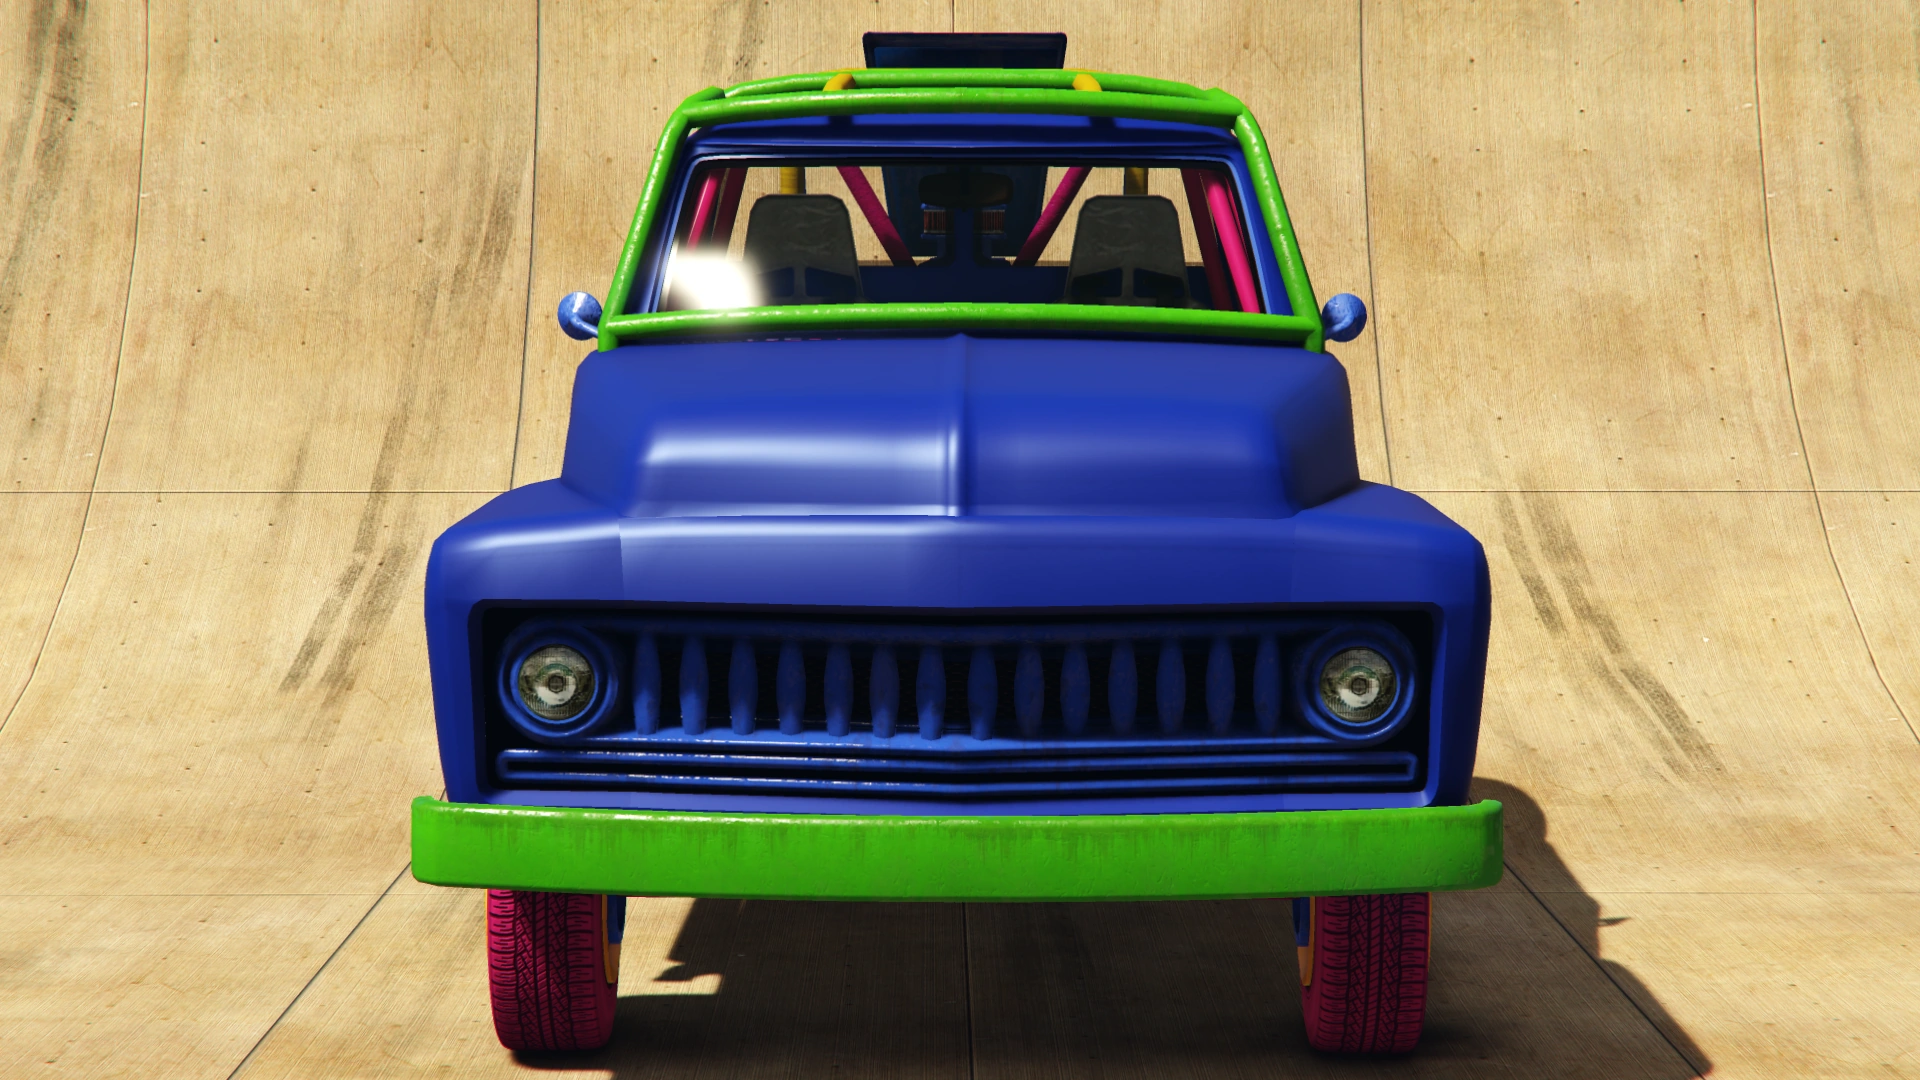
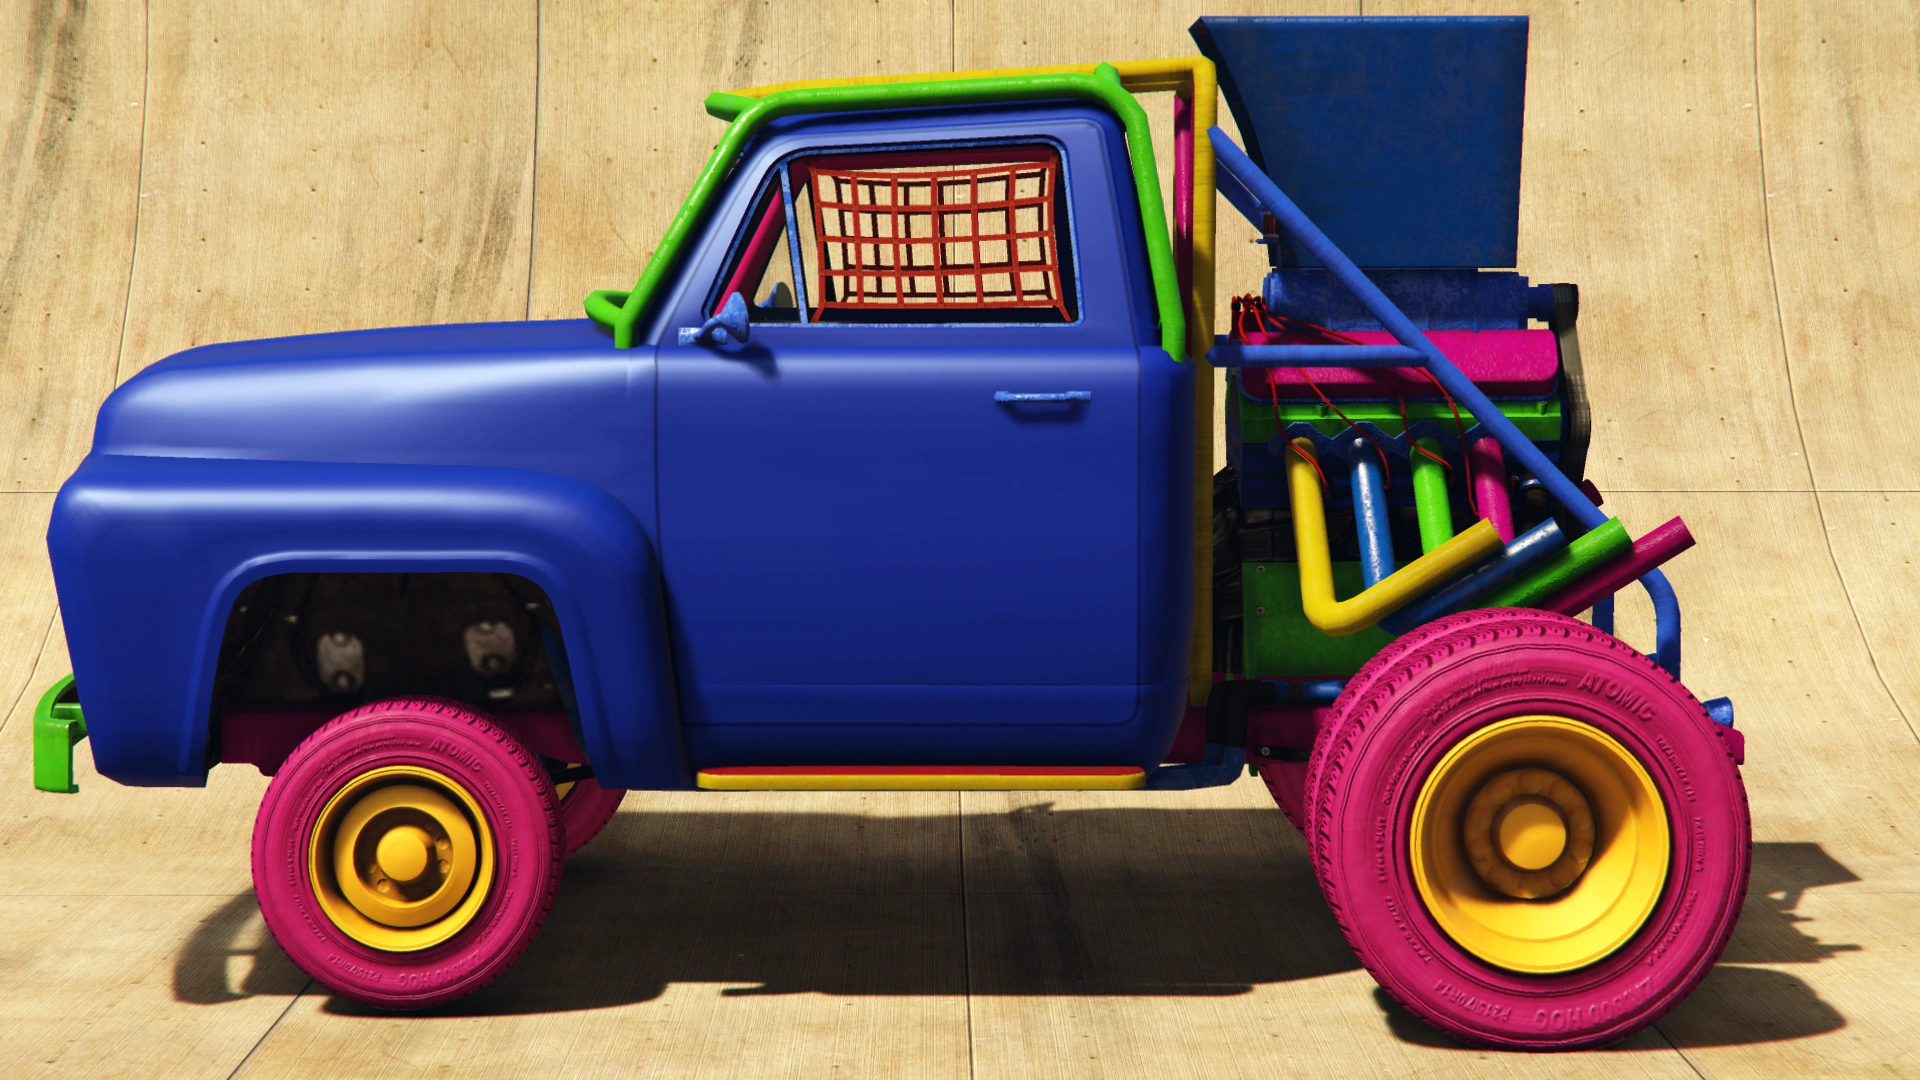
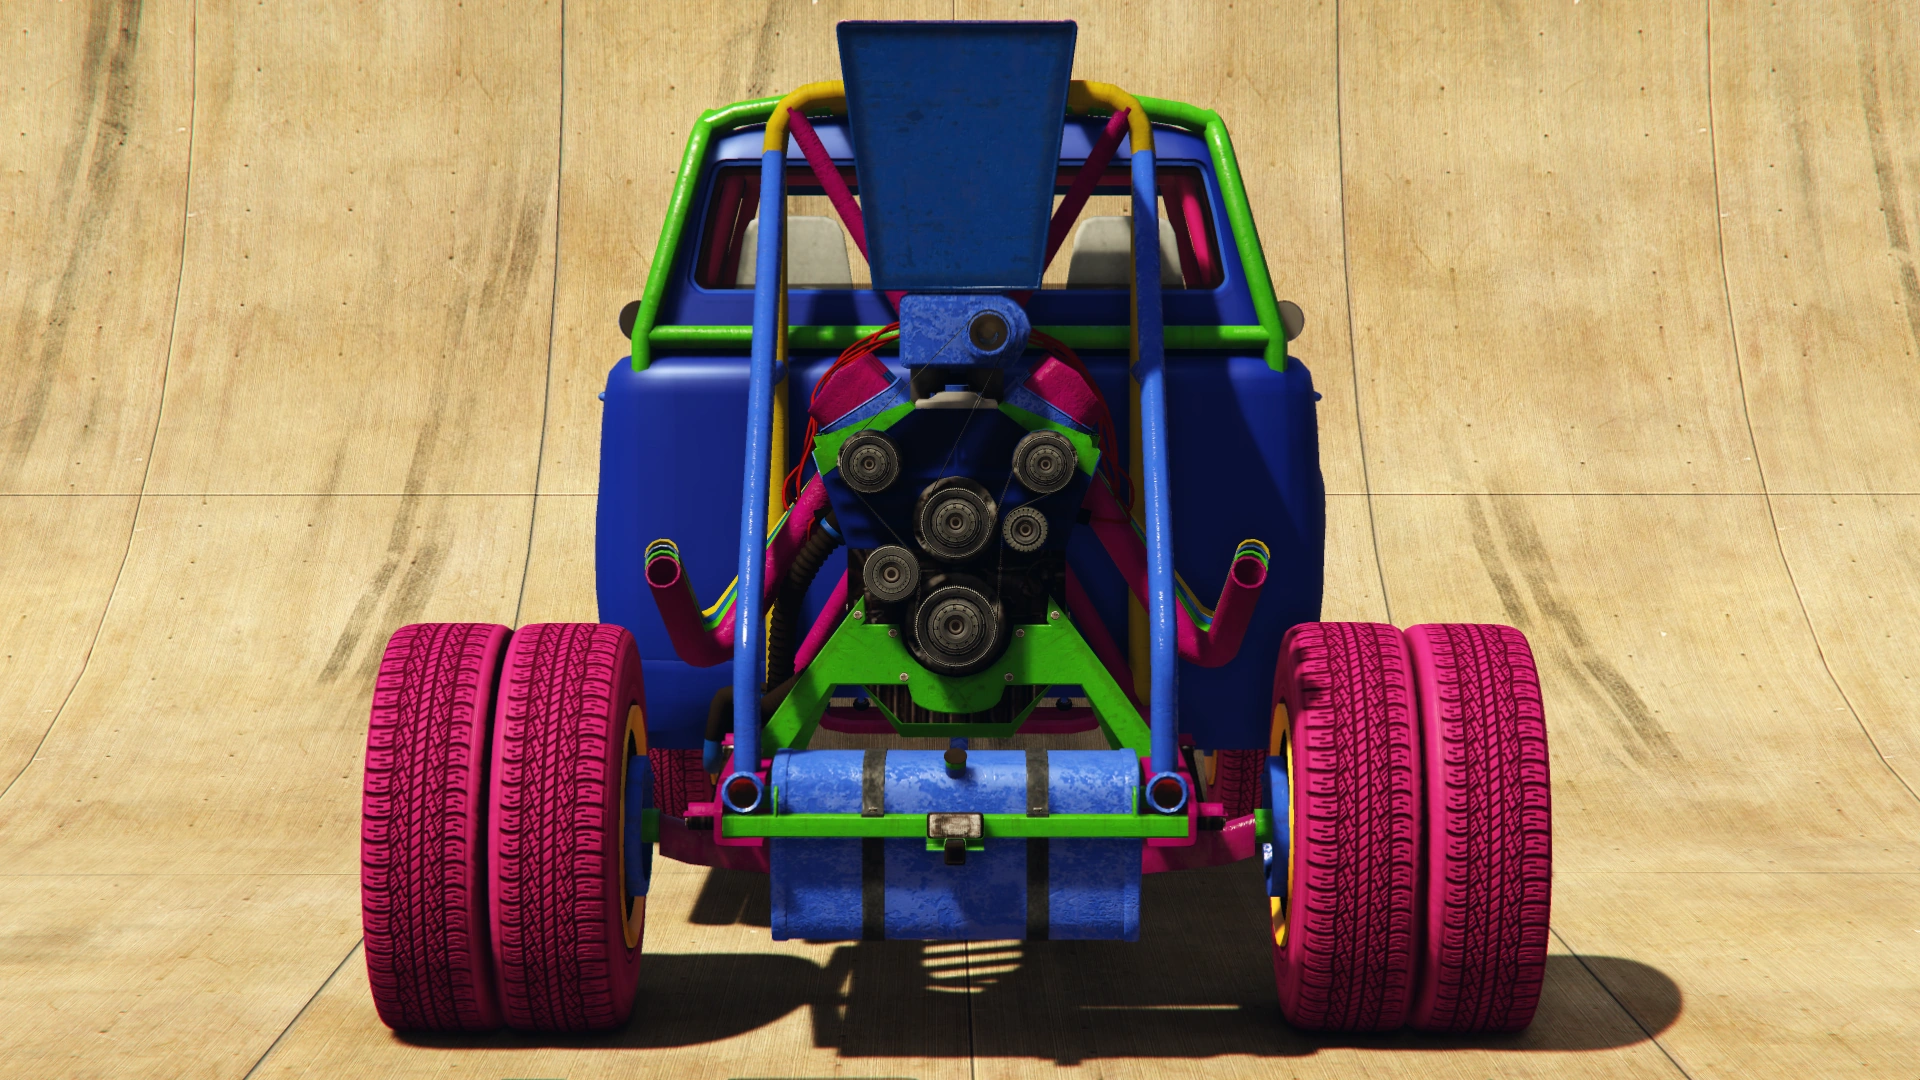
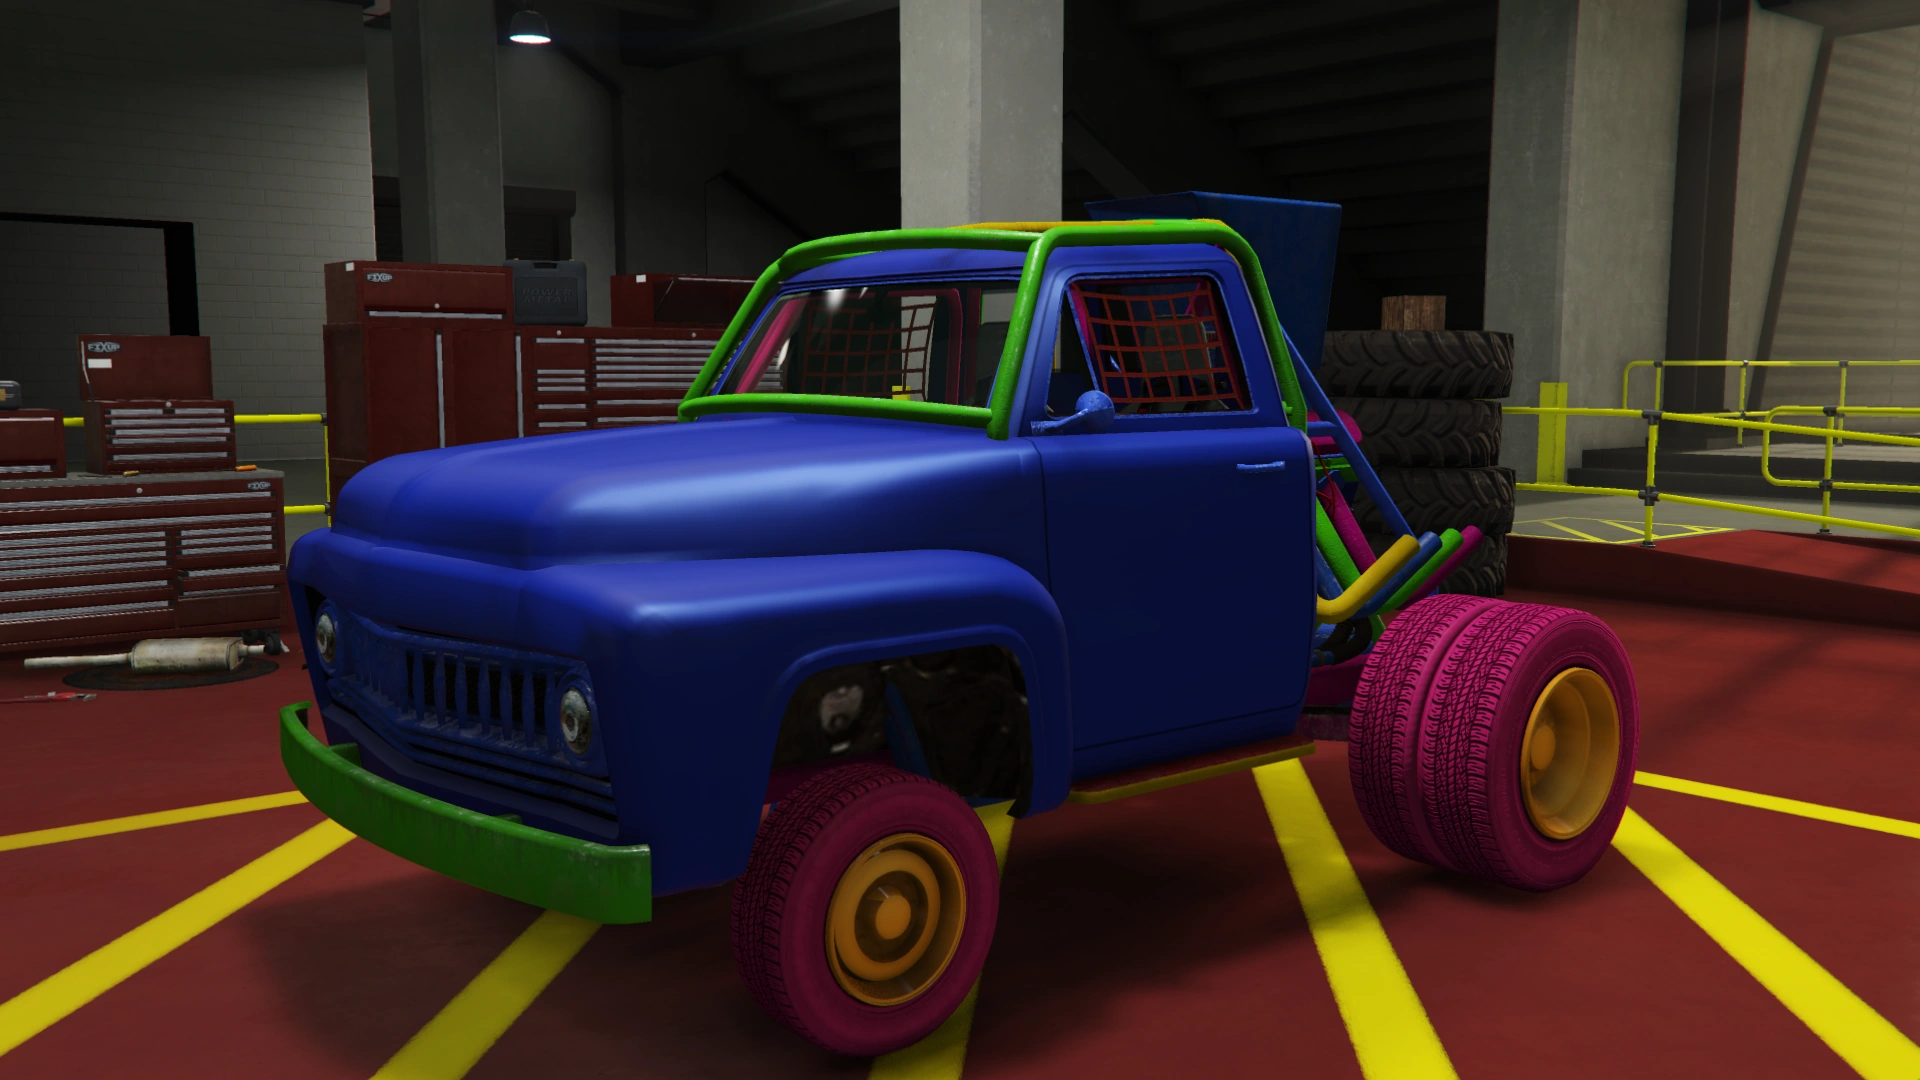
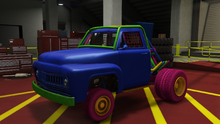
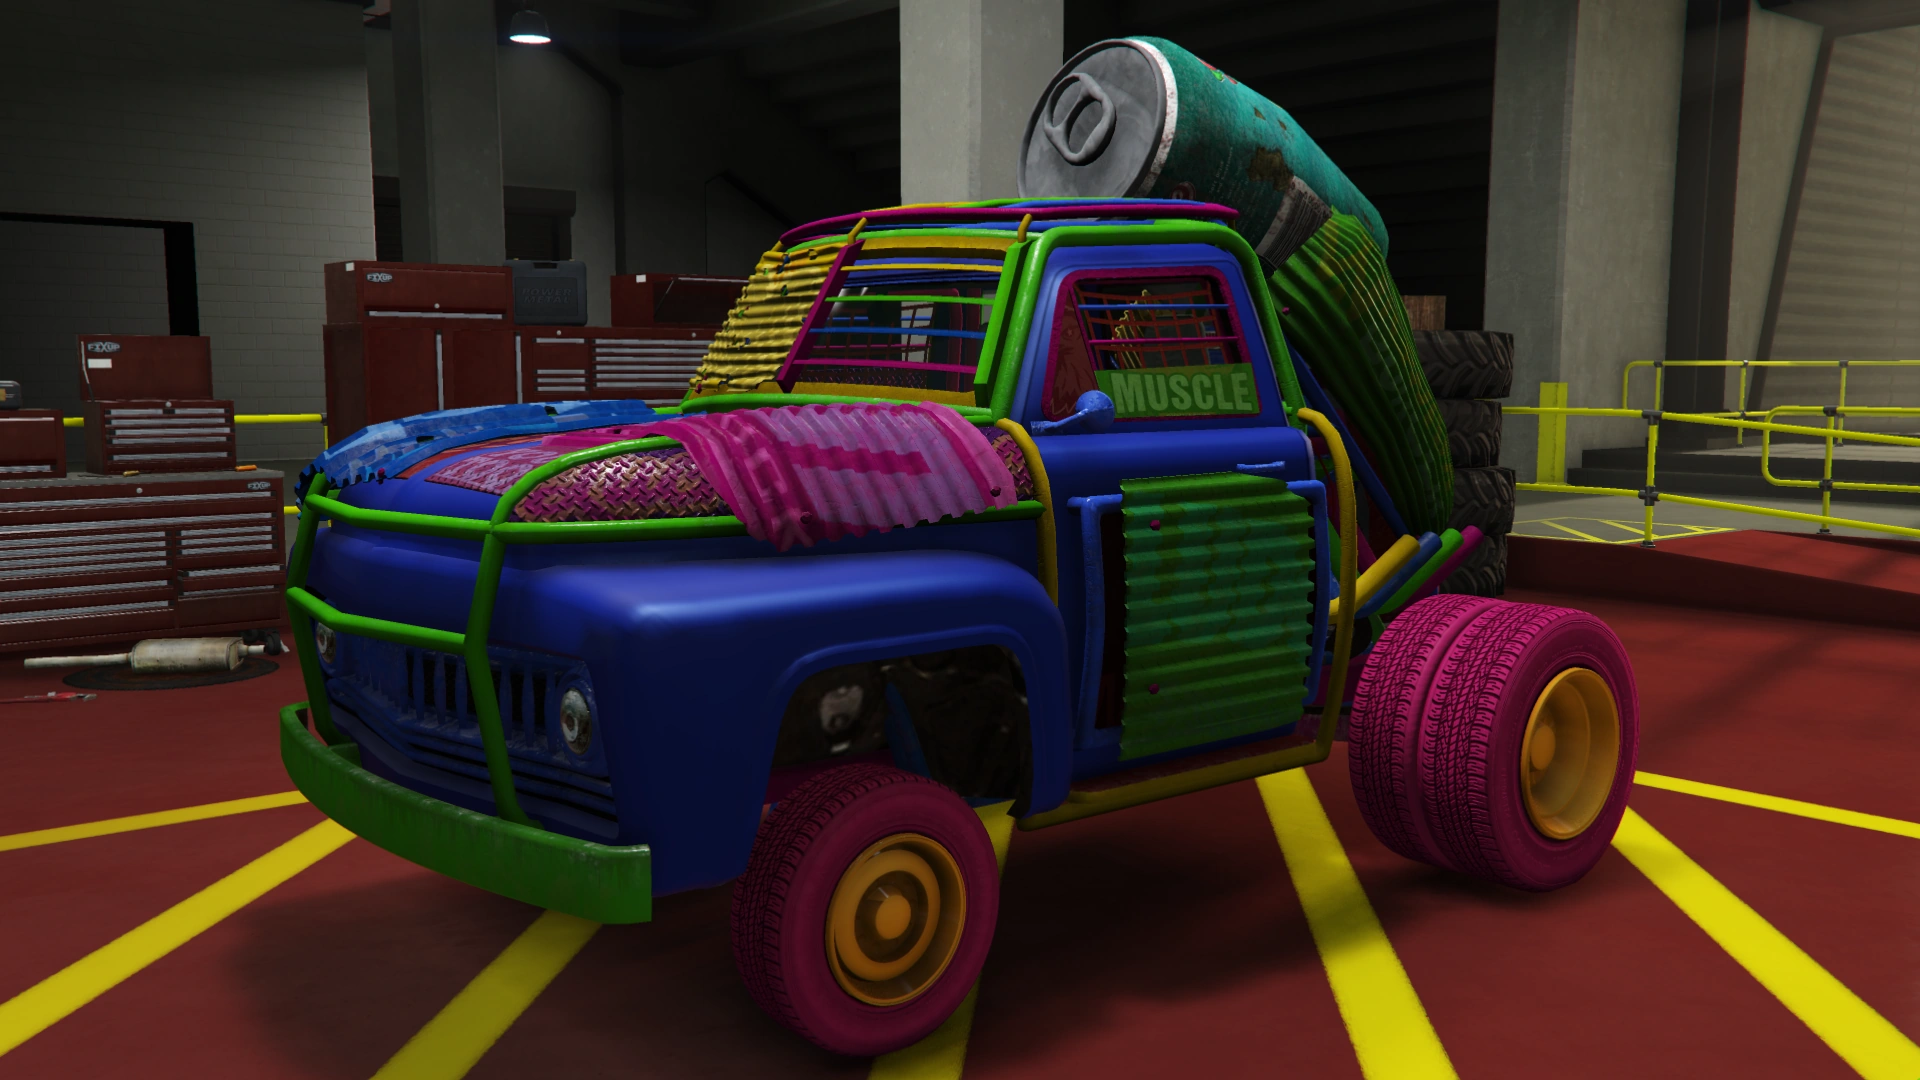
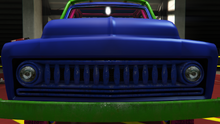
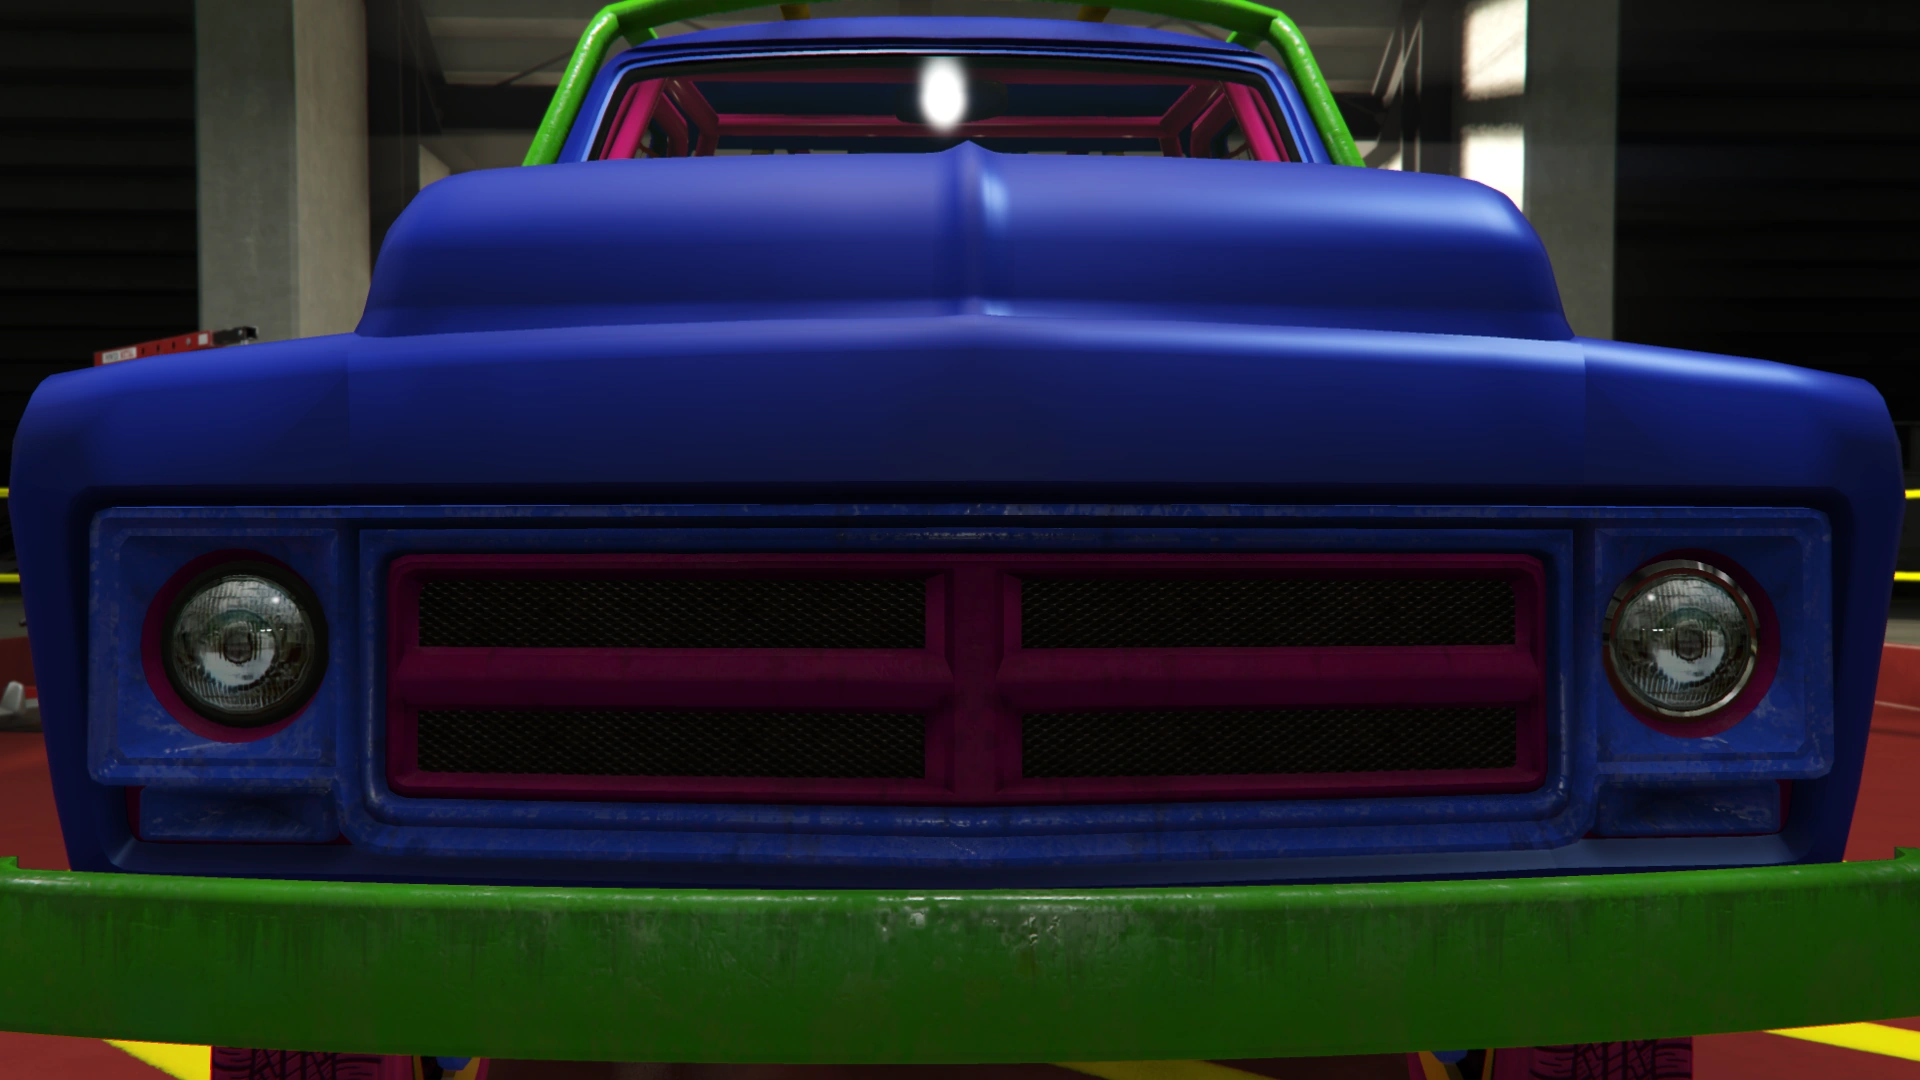
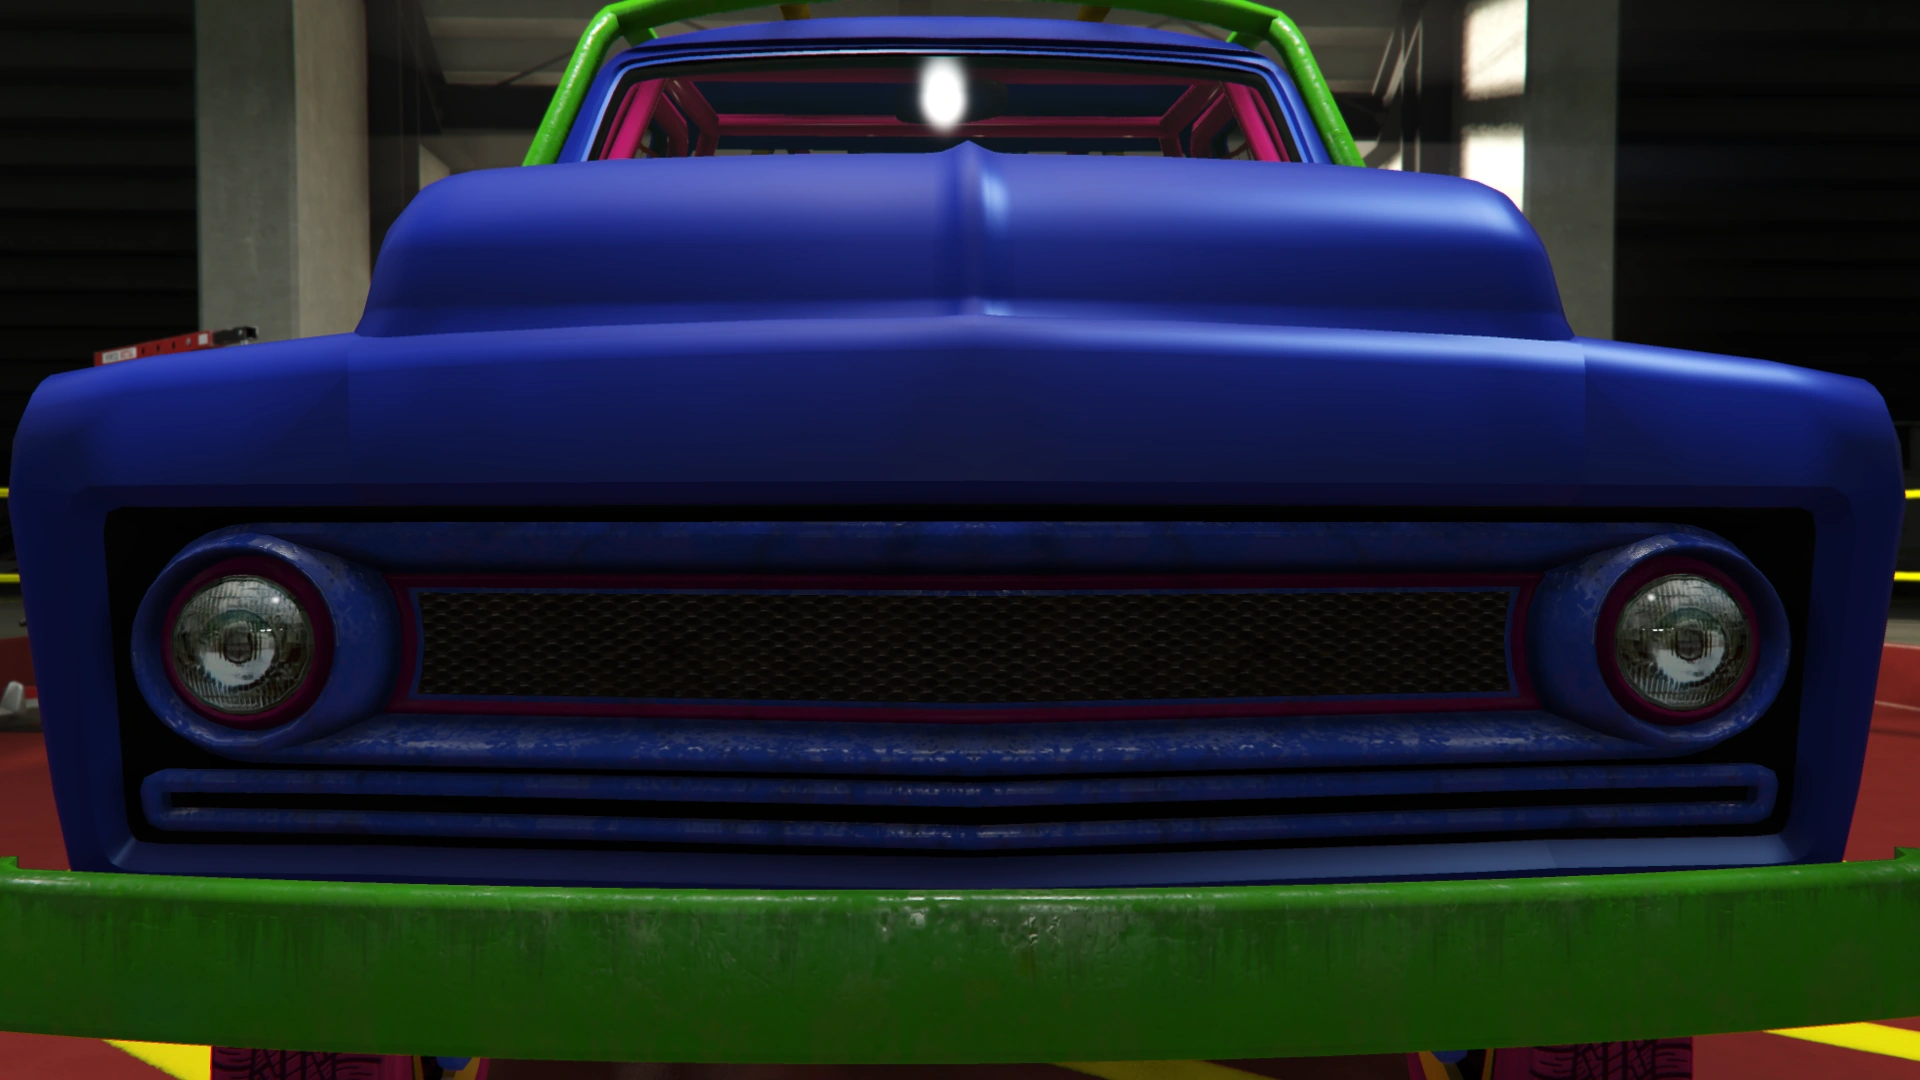
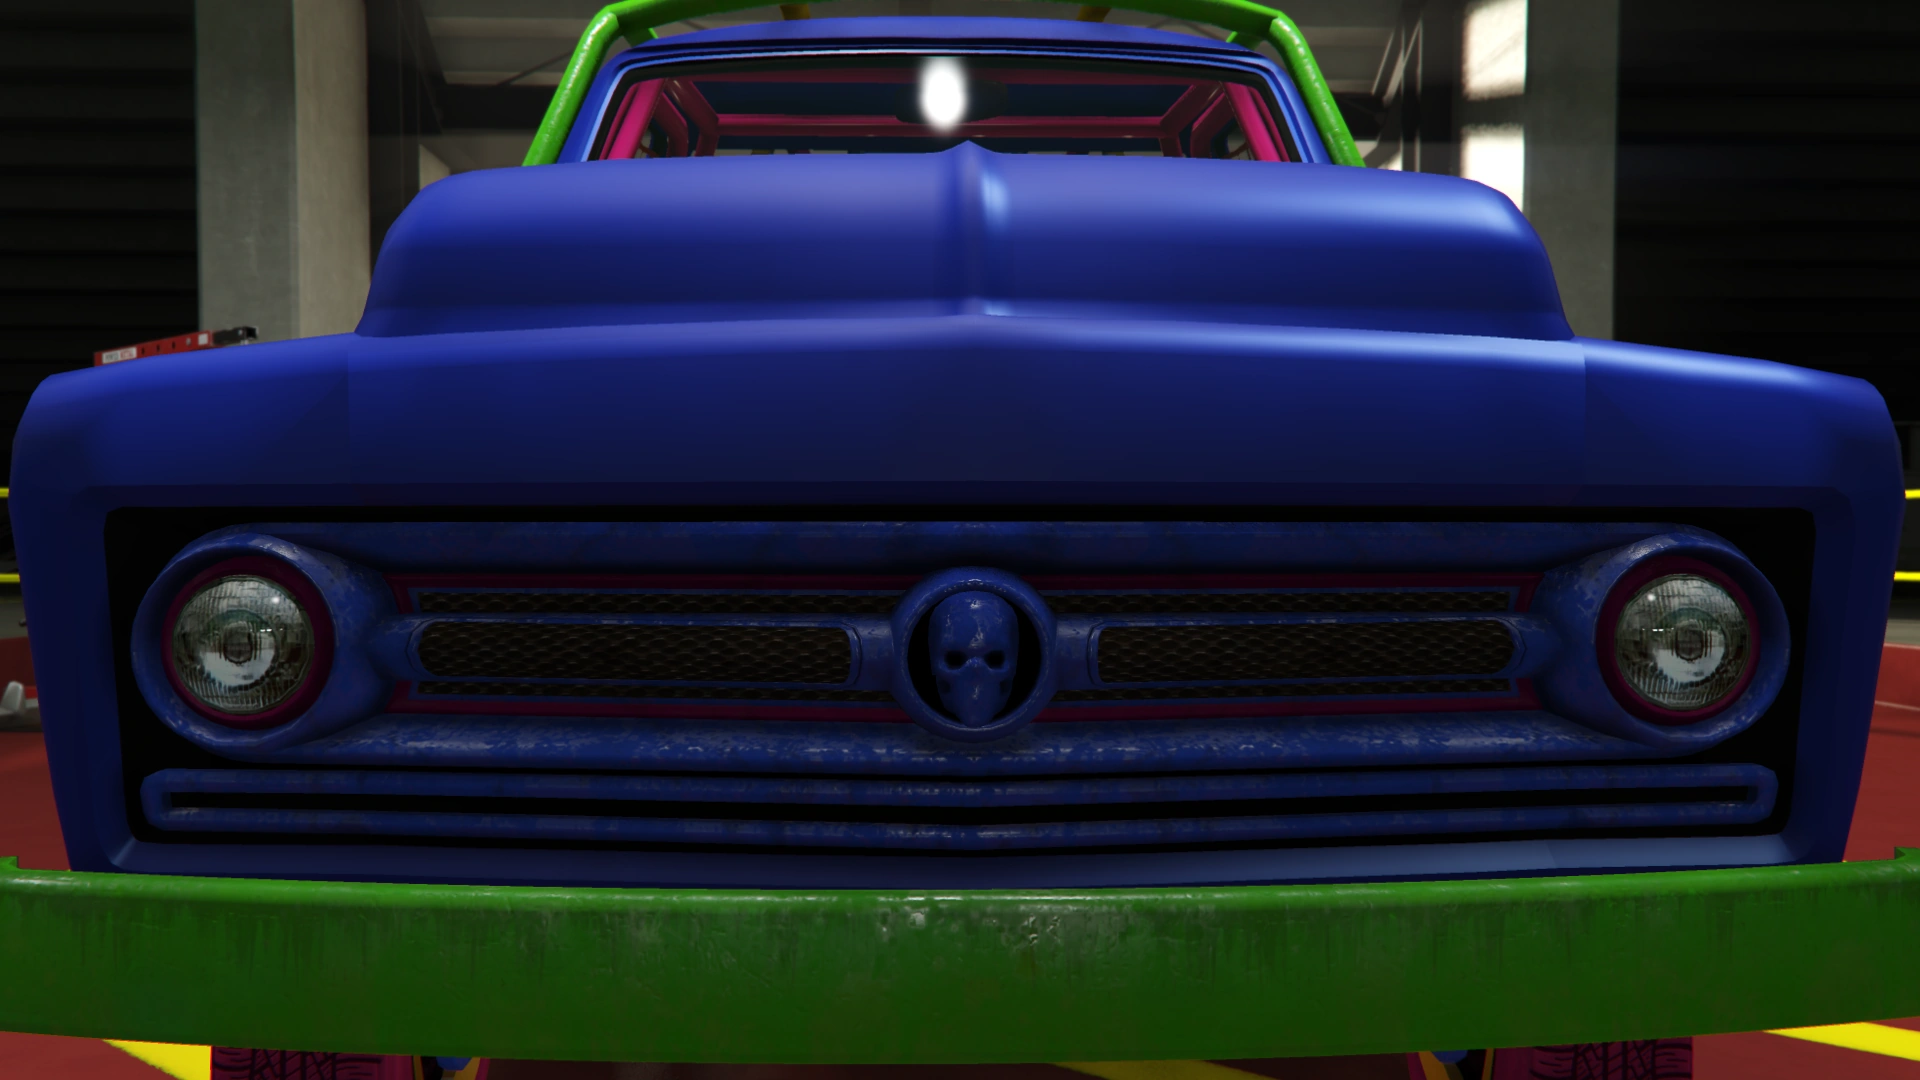
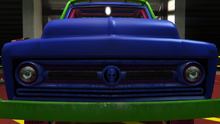
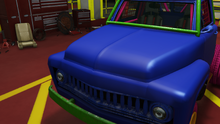
The [[Vapid]] '''Nightmare Slamvan''' is a custom pickup truck featured in ''[[Grand Theft Auto Online]]'' as part of the [[GTA Online: Arena War|Arena War]] update. |
The [[Vapid]] '''Nightmare Slamvan''' is a custom pickup truck featured in ''[[Grand Theft Auto Online]]'' as part of the [[GTA Online: Arena War|Arena War]] update. |
||
| Line 48: | Line 85: | ||
The vehicle is evidently based on the {{URL|https://static.carthrottle.com/workspace/uploads/comments/a7f3d5bec3bd0c9e346998e81da3a66a.jpg|custom 1950 Ford F6, aka "Stubby Bob"}}, appearing in the 44th episode of the TV show {{WP|Roadkill (Internet show)|Roadkill}}. |
The vehicle is evidently based on the {{URL|https://static.carthrottle.com/workspace/uploads/comments/a7f3d5bec3bd0c9e346998e81da3a66a.jpg|custom 1950 Ford F6, aka "Stubby Bob"}}, appearing in the 44th episode of the TV show {{WP|Roadkill (Internet show)|Roadkill}}. |
||
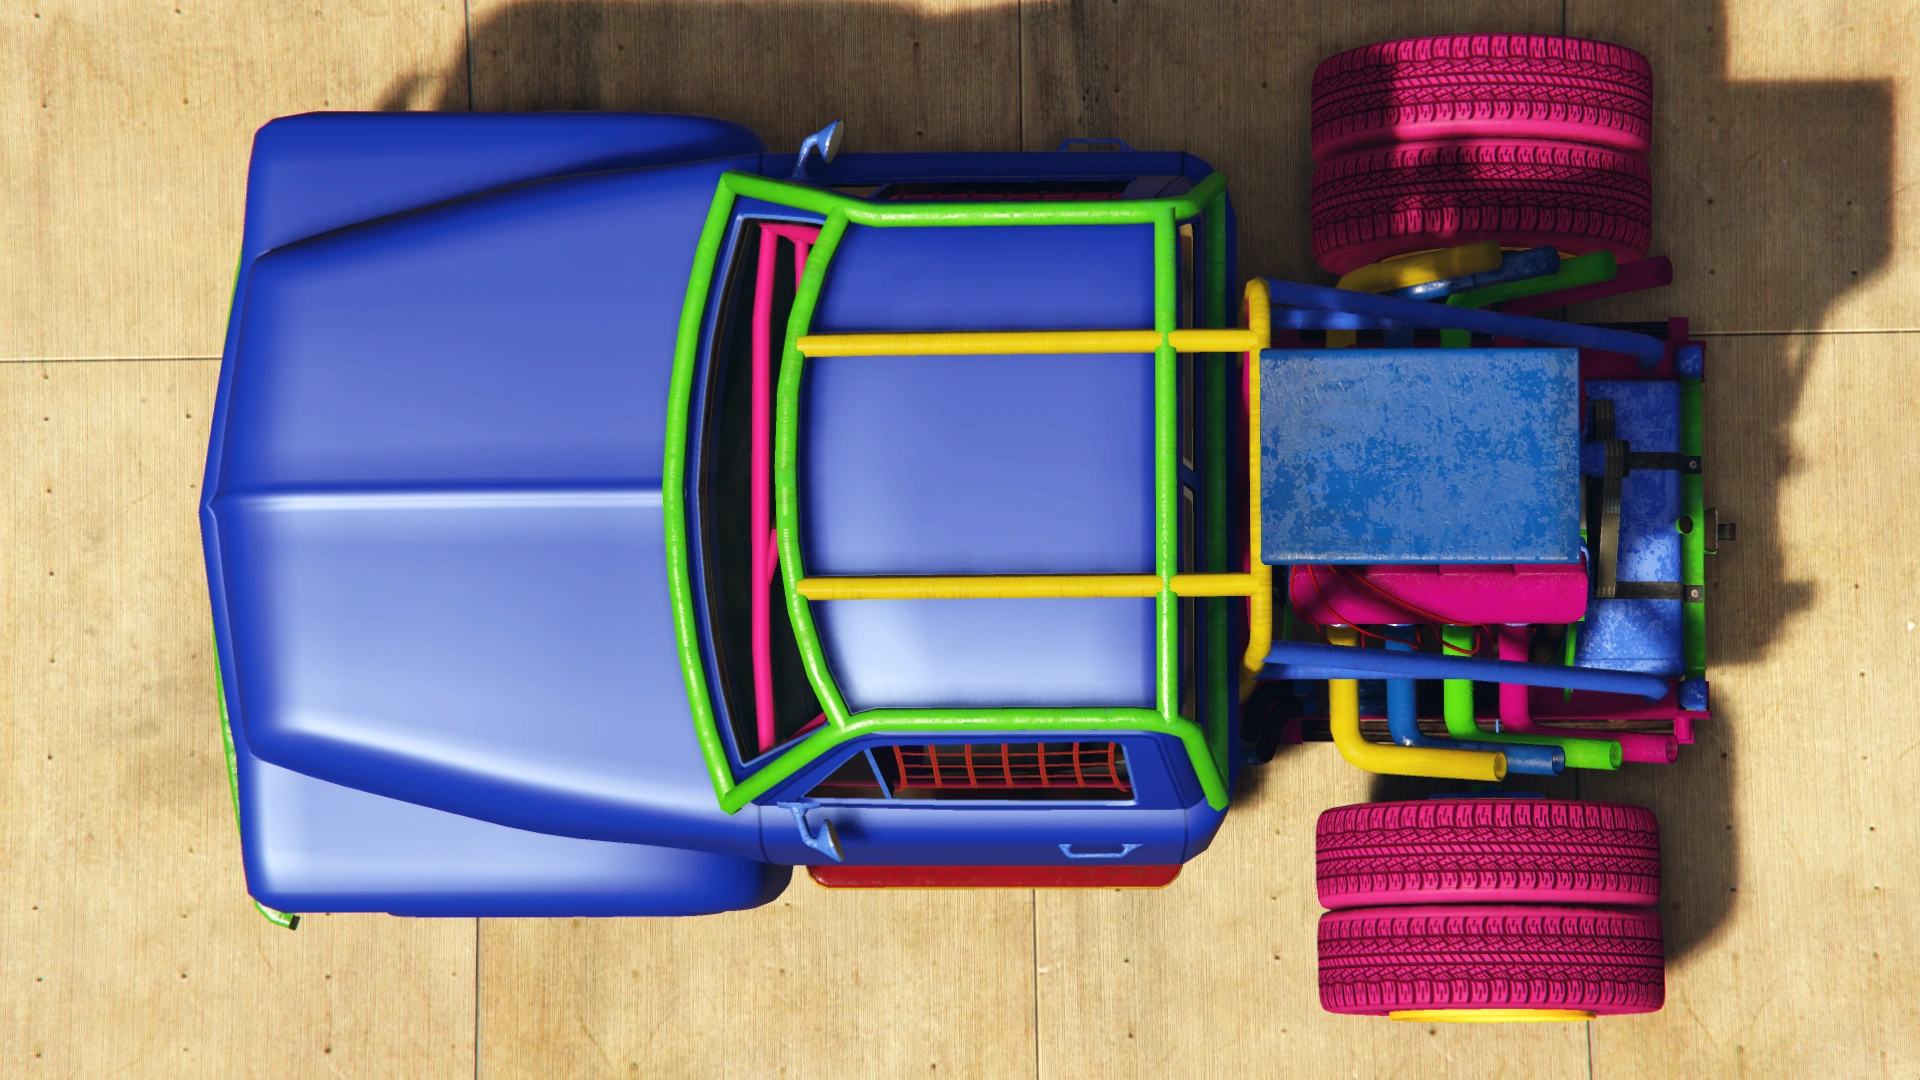
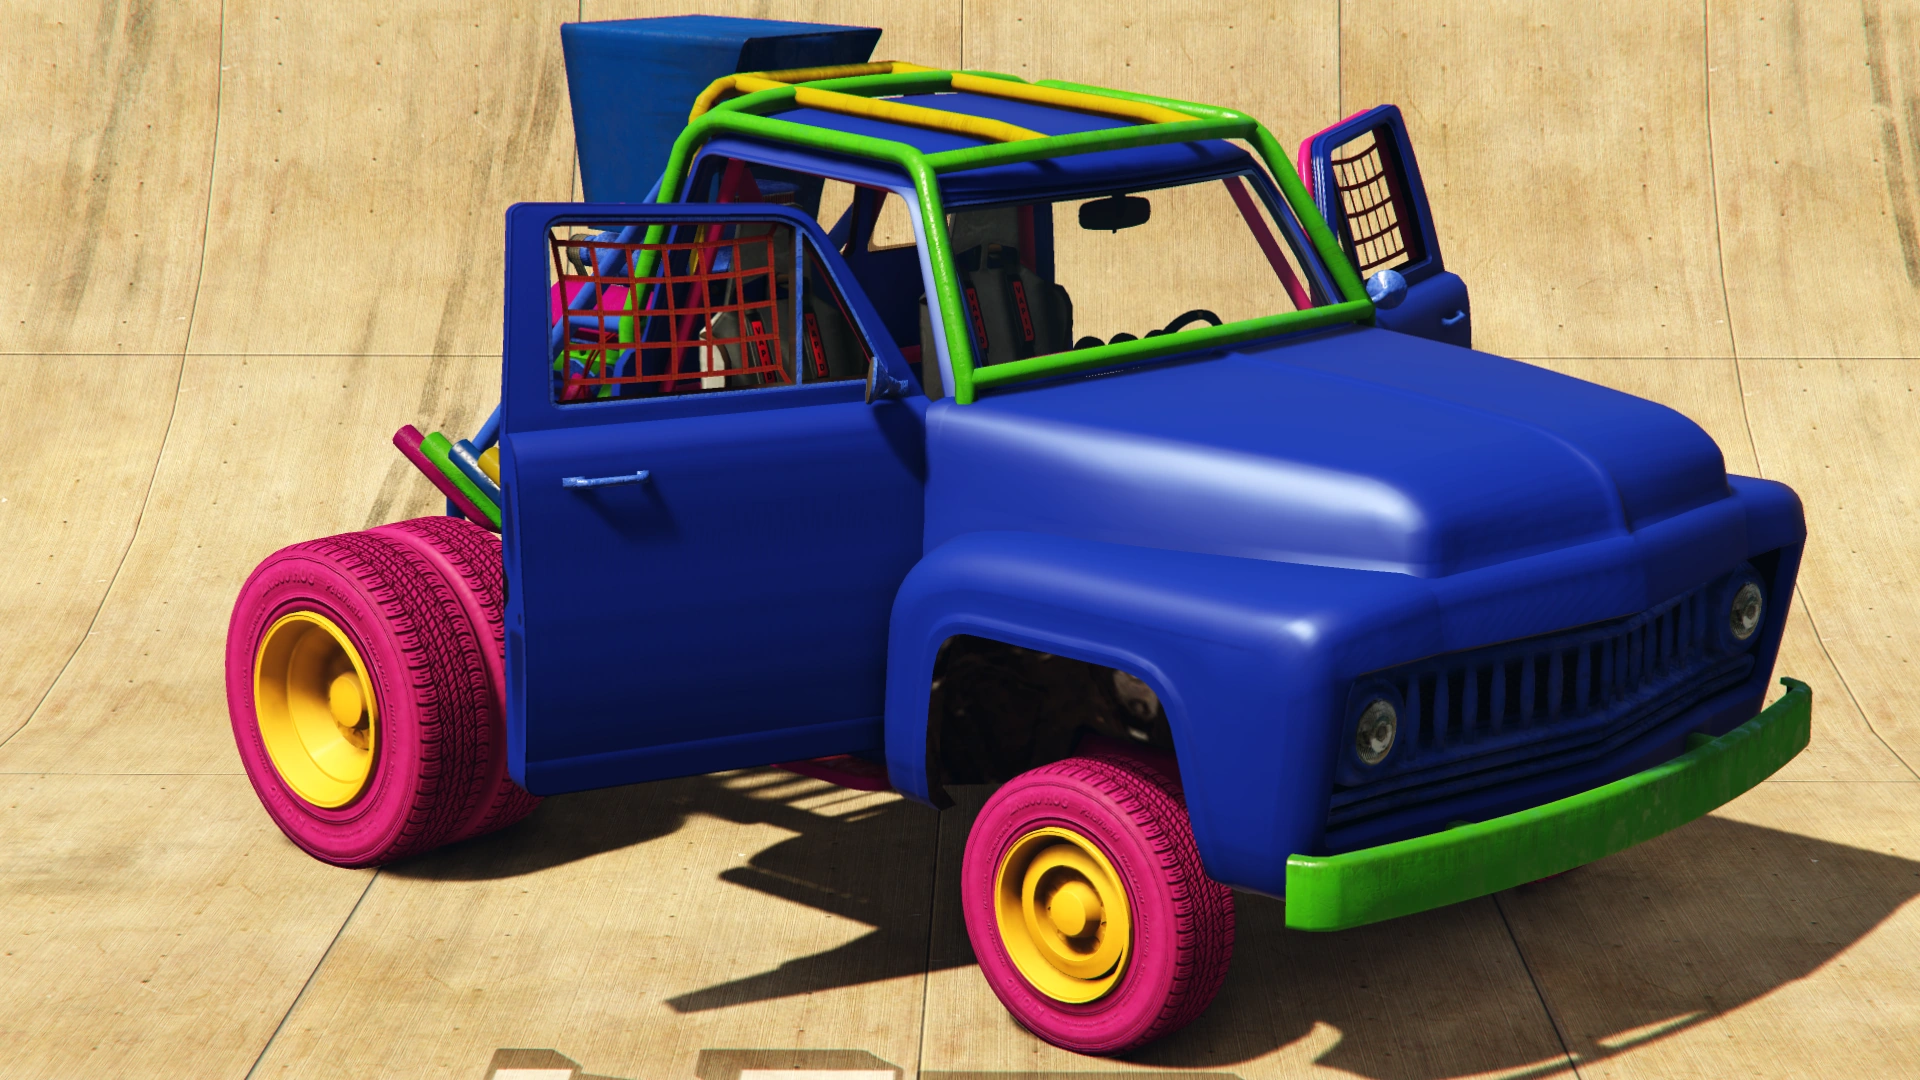
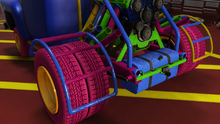
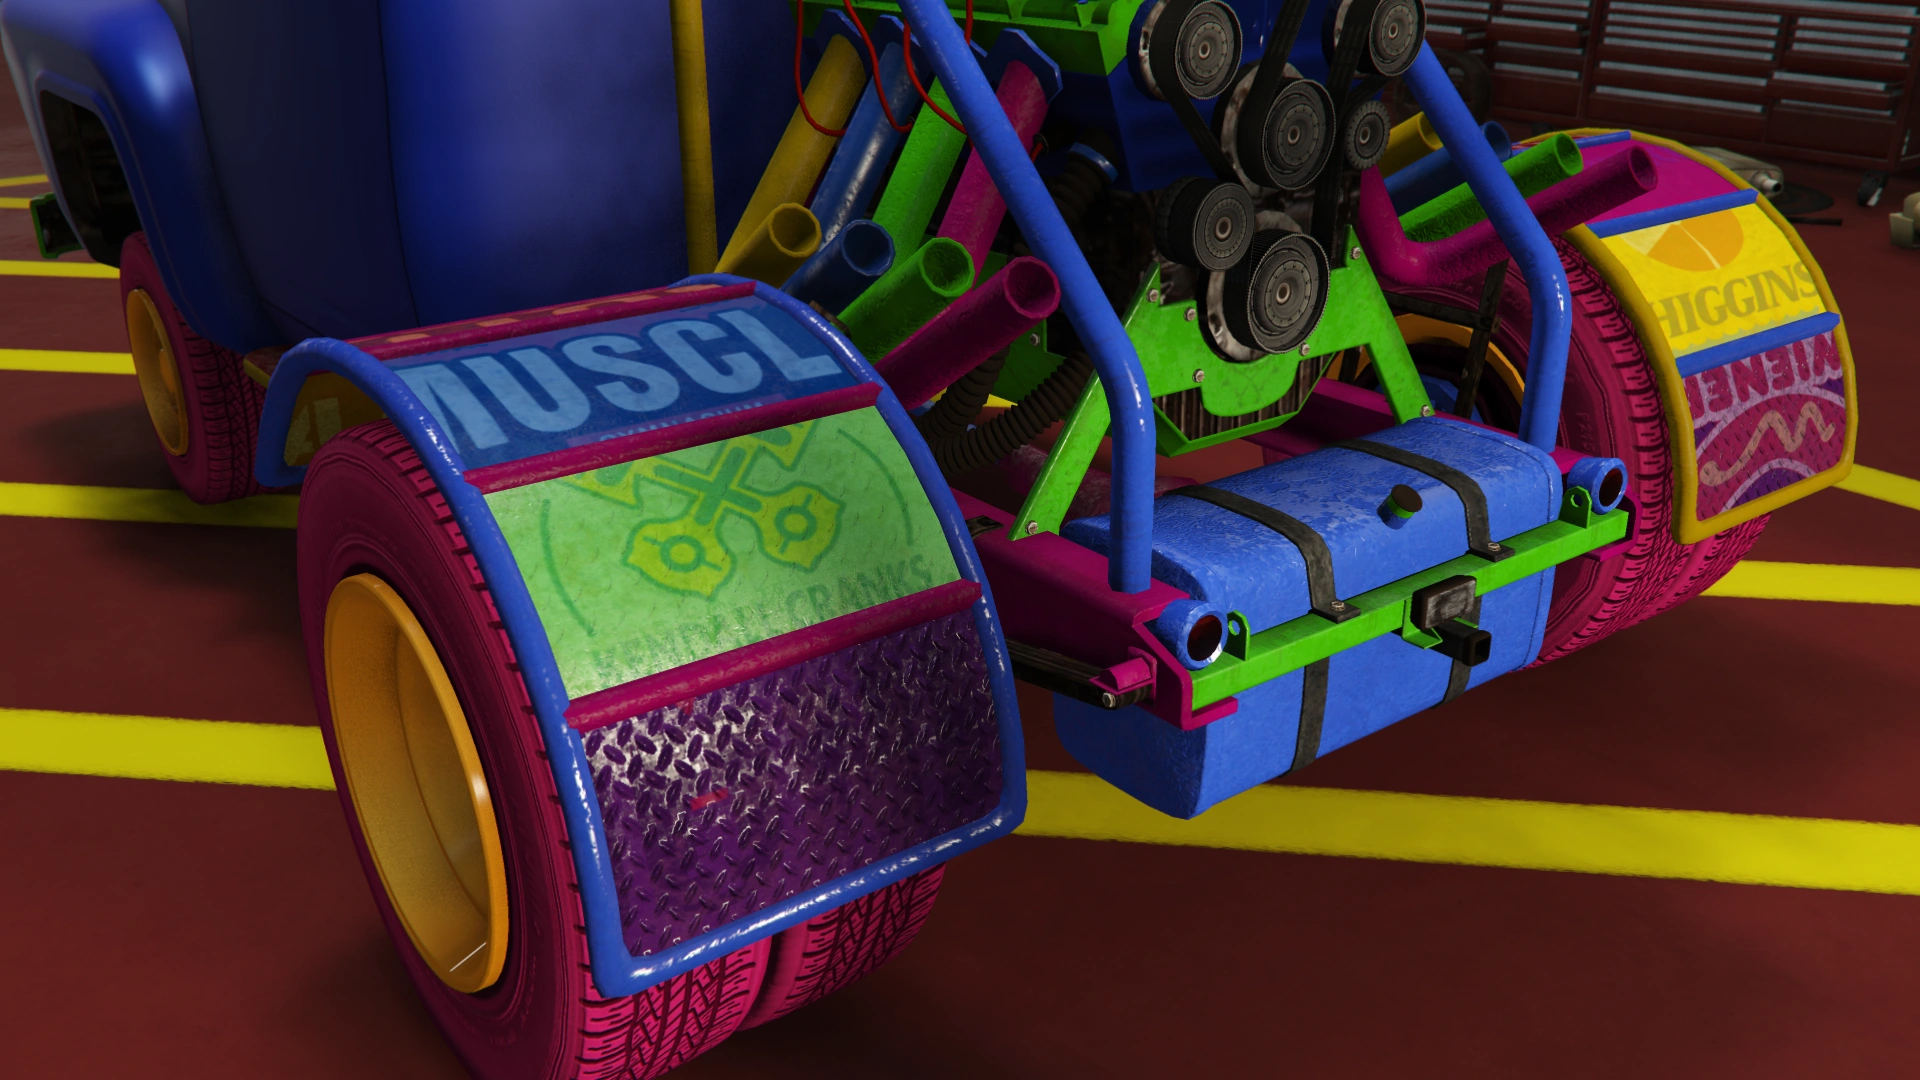
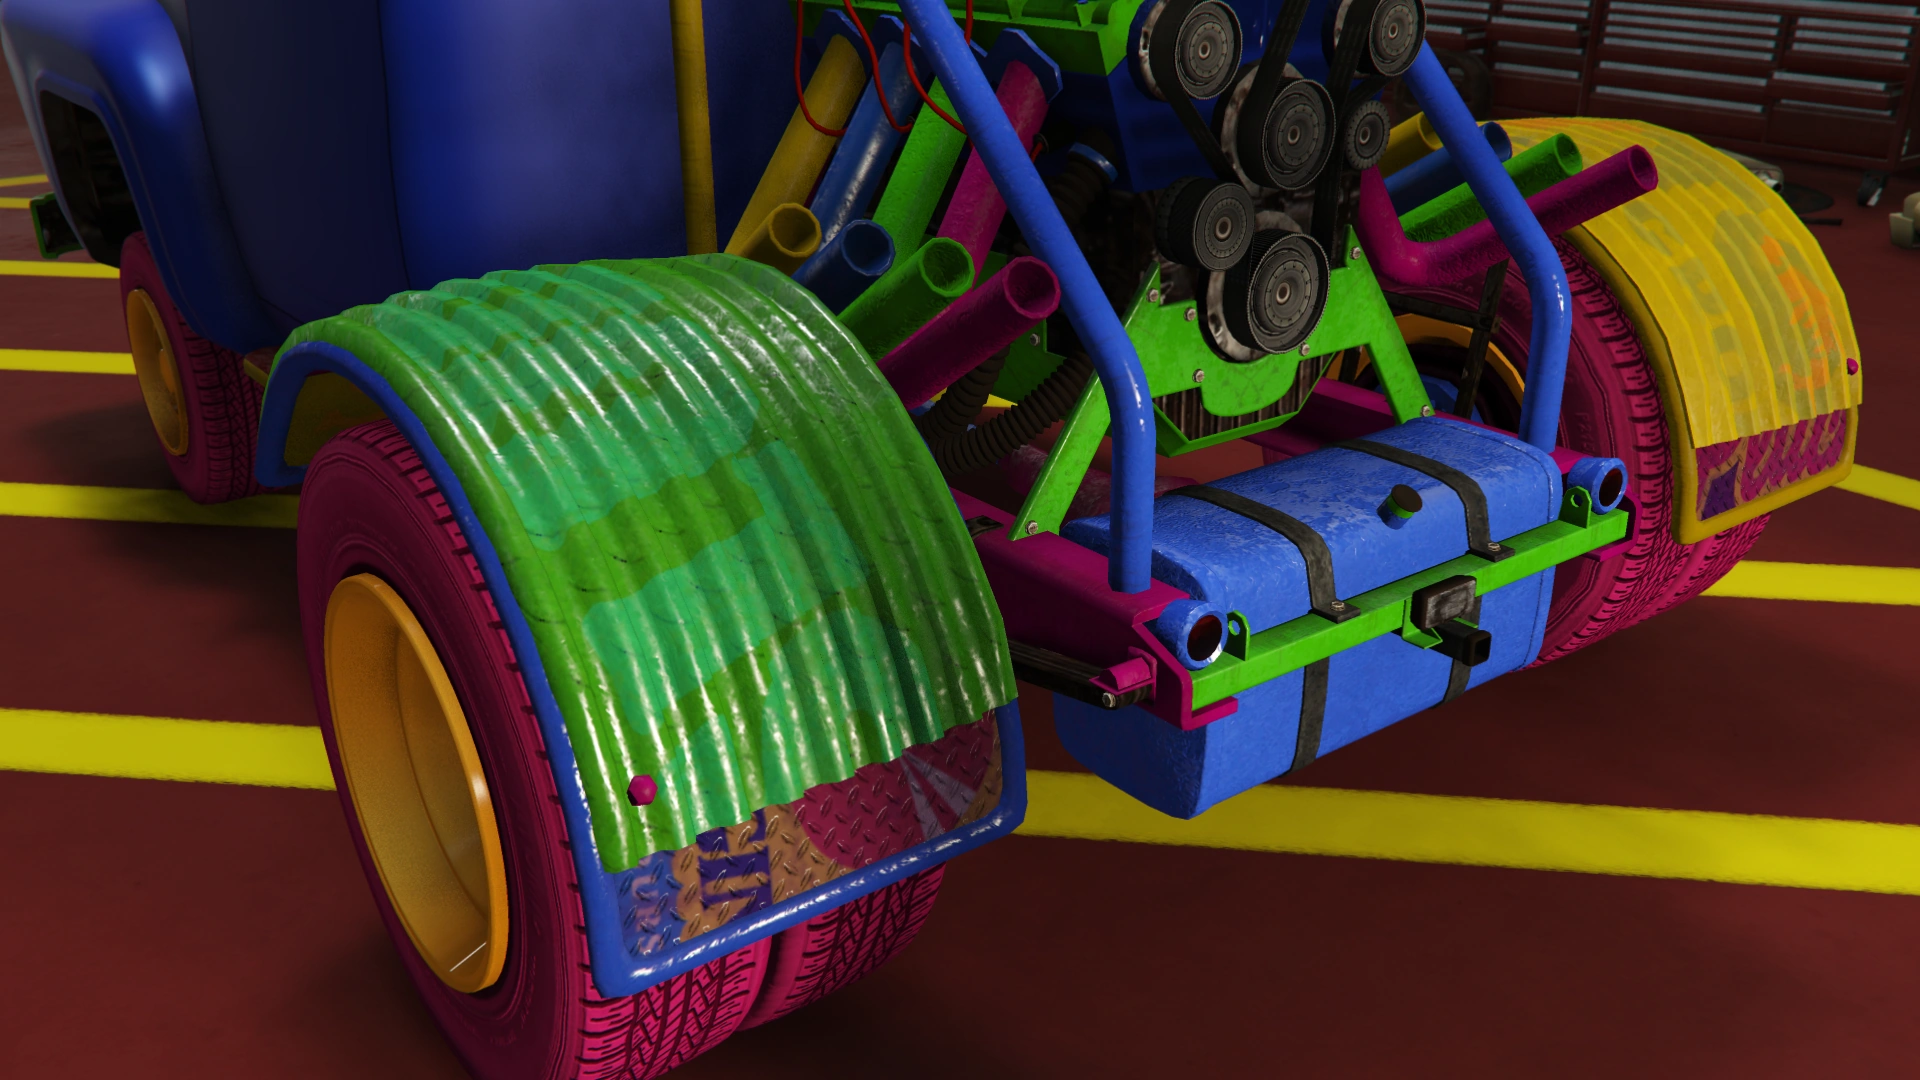
| + | The vehicle is essentially identical to its [[Apocalypse Slamvan|Apocalypse variant]], but sports bright colors for the bodywork. The tires and inner roll cage are colored with the secondary color. |
||
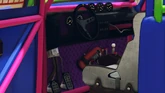
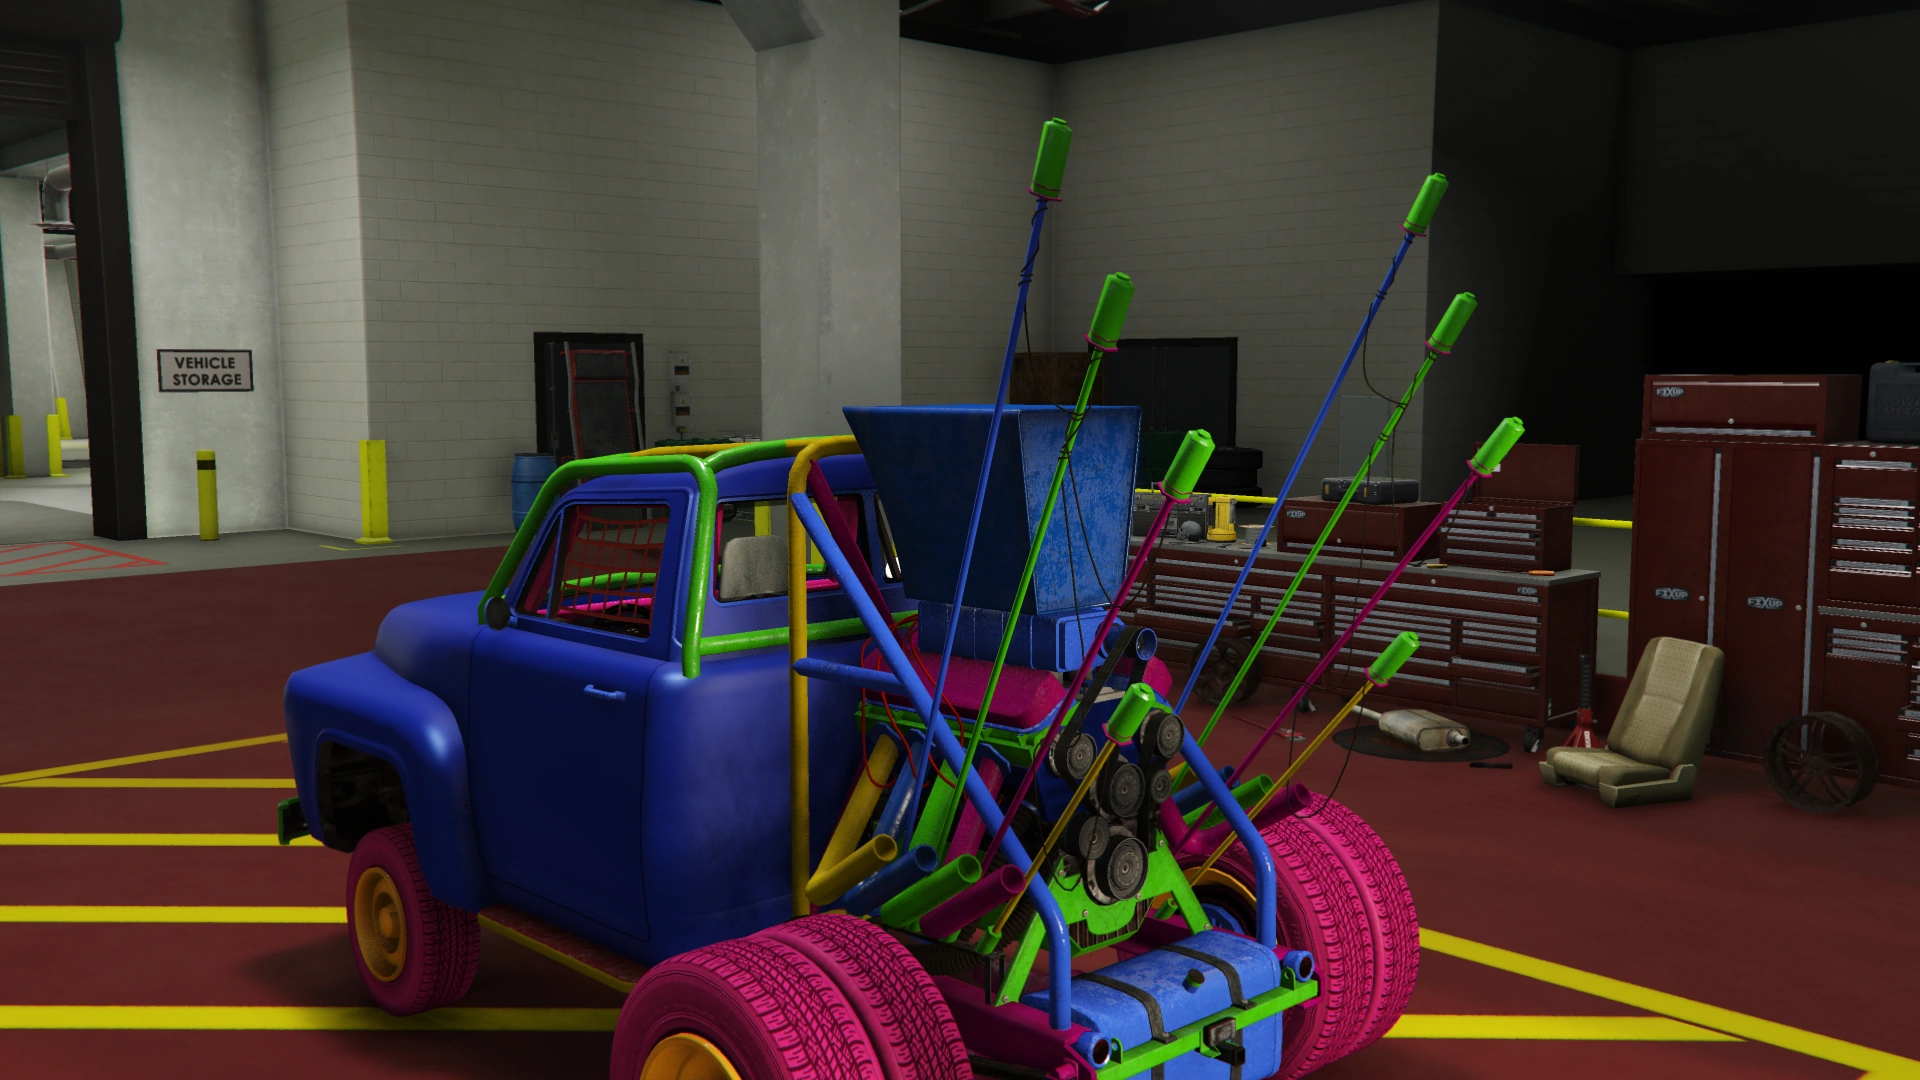
| − | In-game, it is considered a drag-style variant of the [[Slamvan]], which removes the truck bed in order to fit the massive engine with a large intake just behind the cabin. The vehicle sports dual large-profile tires on the rear axle and smaller basic wheels on the front axle. It also features rally nets on its side windows and a roll cage. By default comes with the "Benny's Shop Truck" livery and a Light Scoop. |
||
| + | |||
| + | The vehicle also sports permanent colors applied to random parts, which are the following; |
||
| + | <!--Incomplete. Underside not checked.--> |
||
| + | *Blue: grille, rear-view mirrors, window trims, engine intake, supercharger, cam cover trims, engine block, exhaust outlets, second exhaust pipes, engine protection frames, fuel tank and tail lamp cases. |
||
| + | *Green: front bumper, cabin protection frames, cam cover lower trims, third exhaust pipes, engine crankcase and rear end frame. |
||
| + | *Pink: Cam covers, lower rear frames, inner middle protection frames and fourth exhaust pipes. |
||
| + | *Yellow: stepsides, outer middle protection frames and first exhaust pipes. |
||
| + | *Red: stepside upper and lower surfaces. |
||
| + | |||
| + | {{Clr}} |
||
| + | ===Current Design Gallery=== |
||
| + | <!--Please ensure you have read the Manual of Style [GTA_Wiki:Manual_of_Style/Vehicles/Design_Galleries] before uploading and adding images to the Current Design Gallery. Failure to meet these guidelines will result in the images being removed and deleted, and repeated offences may result in a warning.--> |
||
| + | |||
| + | {{Current Design Gallery |
||
| + | |front_quarter_image = NightmareSlamvan-GTAO-FrontQuarter.png |
||
| + | |top_image = NightmareSlamvan-GTAO-Top.png |
||
| + | |rear_quarter_image = NightmareSlamvan-GTAO-RearQuarter.png |
||
| + | |front_image = NightmareSlamvan-GTAO-Front.png |
||
| + | |side_image = NightmareSlamvan-GTAO-Side.png |
||
| + | |rear_image = NightmareSlamvan-GTAO-Rear.png |
||
| + | |engine_image = NightmareSlamvan-GTAO-Engine.png |
||
| + | |underside_image = NightmareSlamvan-GTAO-Underside.png |
||
| + | |inside_image = NightmareSlamvan-GTAO-Inside.png |
||
| + | |detail_image = ApocalypseSlamvan-GTAO-Detail.png |
||
| + | |open_other_image = NightmareSlamvan-GTAO-Other.png |
||
| + | |dashboard_image = NightmareSlamvan-GTAO-Dashboard.png |
||
| + | }} |
||
==Performance== |
==Performance== |
||
| Line 61: | Line 125: | ||
;Armor |
;Armor |
||
| − | The Slamvan, like other Arena vehicles, can withstand a single explosive without being destroyed, although the large windows leaves the occupants highly vulnerable to gunfire, as well as high chances of receiving damage to its engine. This can be solved with the addition of armor upgrades, partially protecting the cabin with metal bars on the driver side and a plate on the passenger side, while the side windows are partially protected by metal bars. These upgrades also cover the |
+ | The Slamvan, like other Arena vehicles, can withstand a single explosive without being destroyed, although the large windows leaves the occupants highly vulnerable to gunfire, as well as high chances of receiving damage to its engine. This can be solved with the addition of armor upgrades, partially protecting the cabin with metal bars on the driver side and a plate on the passenger side, while the side windows are partially protected by metal bars. These upgrades also cover the engine, with the Heavy Armor upgrade providing full protection. The rear wheels can be also protected with curved plates acting as mudguards, although Bulletproof Tires are still recommended. |
;Weaponry |
;Weaponry |
||
<!--these descriptions are to be made and used as standard for applicable arena cars--> |
<!--these descriptions are to be made and used as standard for applicable arena cars--> |
||
*The vehicle can be fitted with a Ram Weapon. The ram weapon behaves in a similar way to the updated scoops and ramming bars of the [[RCV]] and [[Armored Boxville]], causing a large amount of damage to other vehicles and often sending them flying into mid-air with little to no disadvantage against the vehicle itself, and no damage to the vehicle's engine whatsoever. It should be noted that the effectiveness against other players is significantly reduced compared to its effectiveness against NPCs and their vehicles. |
*The vehicle can be fitted with a Ram Weapon. The ram weapon behaves in a similar way to the updated scoops and ramming bars of the [[RCV]] and [[Armored Boxville]], causing a large amount of damage to other vehicles and often sending them flying into mid-air with little to no disadvantage against the vehicle itself, and no damage to the vehicle's engine whatsoever. It should be noted that the effectiveness against other players is significantly reduced compared to its effectiveness against NPCs and their vehicles. |
||
| − | *The Slamvan can be modified to have two .50 caliber machine guns |
+ | *The Slamvan can be modified to have two {{WP|M1919 Browning machine gun|M1919 Browning}} .50 caliber machine guns. They behave similarly to other front-mounted machine guns from various armed land vehicles, but it is difficult to use and lacks enough firepower to sort out heavily-armored vehicles. |
*The vehicle has the option for installing Proximity Mines. Unlike [[Weaponized Vehicles]] added in the [[Gunrunning]] update, the Bruiser, along with all Arena Cars in the Arena War update, has five different Proximity Mine choices: Kinetic, Spike, EMP, Slick and Sticky; |
*The vehicle has the option for installing Proximity Mines. Unlike [[Weaponized Vehicles]] added in the [[Gunrunning]] update, the Bruiser, along with all Arena Cars in the Arena War update, has five different Proximity Mine choices: Kinetic, Spike, EMP, Slick and Sticky; |
||
**The '''Kinetic''' option (orange flashing light) creates a small impulse spreading several meters around the area, sending players and vehicles into the air. The impulse deals little damage to both players and vehicles. |
**The '''Kinetic''' option (orange flashing light) creates a small impulse spreading several meters around the area, sending players and vehicles into the air. The impulse deals little damage to both players and vehicles. |
||
| Line 77: | Line 141: | ||
====GTA Online Overview==== |
====GTA Online Overview==== |
||
{{Vehiclestats-gtav |
{{Vehiclestats-gtav |
||
| − | |handling_top_speed = |
+ | |handling_top_speed = 84.2 / 135.5 |
| − | |handling_gears = |
+ | |handling_gears = 4 |
| − | |handling_drivetrain = |
+ | |handling_drivetrain = RWD |
| − | |handling_mass = |
+ | |handling_mass = 1245 / 2745 |
| − | |handling_fuel_tank = |
+ | |handling_fuel_tank = 65 |
|website_acceleration = |
|website_acceleration = |
||
|website_top_speed = |
|website_top_speed = |
||
| Line 90: | Line 154: | ||
|observed_acceleration = |
|observed_acceleration = |
||
|observed_top_speed = |
|observed_top_speed = |
||
| − | |observed_gears = |
+ | |observed_gears = 4 |
| + | |observed_engine = {{H:title|Rear mid engine, rear wheel drive|RMR}} {{H:title|Single Overhead Camshaft|SOHC}} Big-Block V8 w/ 8 Velocity Stack Carburetors <small>(In-game model)</small> |
||
| − | |observed_engine = |
||
| − | |observed_drivetrain = |
+ | |observed_drivetrain = RWD |
| − | |rsc_image = |
+ | |rsc_image = ArenaSlamvan-GTAO-RSCStats.png |
| − | |rsc_top_speed = |
+ | |rsc_top_speed = {{PercentBar|72.702705|width=150}} |
| − | |rsc_acceleration = |
+ | |rsc_acceleration = {{PercentBar|67.5|width=150}} |
| − | |rsc_braking = |
+ | |rsc_braking = {{PercentBar|13.333334|width=150}} |
| − | |rsc_traction = |
+ | |rsc_traction = {{PercentBar|56.060608|width=150}} |
}} |
}} |
||
| Line 113: | Line 177: | ||
| colspan="2" rowspan="4" |Brakes |
| colspan="2" rowspan="4" |Brakes |
||
|Stock Brakes |
|Stock Brakes |
||
| − | | colspan="2" style="text-align: center;"|$1,000 |
+ | | colspan="2" style="text-align: center;" |$1,000 |
|- |
|- |
||
|Street Brakes |
|Street Brakes |
||
| − | | colspan="2" style="text-align: center;"|$20,000 |
+ | | colspan="2" style="text-align: center;" |$20,000 |
|- |
|- |
||
|Sport Brakes |
|Sport Brakes |
||
| − | | colspan="2" style="text-align: center;"|$27,000 |
+ | | colspan="2" style="text-align: center;" |$27,000 |
|- |
|- |
||
|Race Brakes |
|Race Brakes |
||
| − | | colspan="2" style="text-align: center;"|$35,000 |
+ | | colspan="2" style="text-align: center;" |$35,000 |
|- |
|- |
||
| colspan="2" rowspan="5" |Boost |
| colspan="2" rowspan="5" |Boost |
||
|None |
|None |
||
| − | | colspan="2" style="text-align: center;"|$20,000 |
+ | | colspan="2" style="text-align: center;" |$20,000 |
|- |
|- |
||
|Boost Upgrade 20% |
|Boost Upgrade 20% |
||
| − | | colspan="2" style="text-align: center;"|$100,000<br />$50,000 (AW) |
+ | | colspan="2" style="text-align: center;" |$100,000<br />$50,000 (AW) |
|- |
|- |
||
|Boost Upgrade 60% |
|Boost Upgrade 60% |
||
| − | | colspan="2" style="text-align: center;"|$230,000<br />$115,000 (AW) |
+ | | colspan="2" style="text-align: center;" |$230,000<br />$115,000 (AW) |
|- |
|- |
||
|Boost Upgrade 100% |
|Boost Upgrade 100% |
||
| − | | colspan="2" style="text-align: center;"|$400,000<br />$200,000 (AW) |
+ | | colspan="2" style="text-align: center;" |$400,000<br />$200,000 (AW) |
|- |
|- |
||
|Shunt Boost |
|Shunt Boost |
||
| − | | colspan="2" style="text-align: center;"|$520,000<br />$260,000 (AW) |
+ | | colspan="2" style="text-align: center;" |$520,000<br />$260,000 (AW) |
|- |
|- |
||
| colspan="2" rowspan="4" |Rear Bumpers |
| colspan="2" rowspan="4" |Rear Bumpers |
||
|Stock Rear Bumper |
|Stock Rear Bumper |
||
| − | | style="text-align: center;"|$2,200 |
+ | | style="text-align: center;" |$2,200 |
| + | |[[File:NightmareSlamvan-GTAO-StockRearBumper.png|thumb|center|220px]] |
||
| − | | |
||
|- |
|- |
||
|Light Armor |
|Light Armor |
||
| − | | style="text-align: center;"|$4,600 |
+ | | style="text-align: center;" |$4,600 |
| + | |[[File:NightmareSlamvan-GTAO-LightBumperArmor.png|thumb|center|220px]] |
||
| − | | |
||
|- |
|- |
||
|Reinforced Armor |
|Reinforced Armor |
||
| + | <br /> |
||
| − | | style="text-align: center;"|$7,400<br />$3,700 (AW) |
||
| + | <br /> |
||
| − | | |
||
| + | <small>''Brands: ???, [[Higgins Helitours]], Kendall Cranks [[Muscle Gymnasium]] and Wiener Club .''</small> |
||
| + | | style="text-align: center;" |$7,400<br />$3,700 (AW) |
||
| + | |[[File:NightmareSlamvan-GTAO-ReinforcedBumperArmor.png|thumb|center|220px]] |
||
|- |
|- |
||
|Heavy Armor |
|Heavy Armor |
||
| + | <br /> |
||
| − | | style="text-align: center;"|$11,700<br />$5,850 (AW) |
||
| + | <br /> |
||
| − | | |
||
| + | <small>''Brands: ???, ???, Higgins Helitours and [[Lucky Plucker]].''</small> |
||
| + | | style="text-align: center;" |$11,700<br />$5,850 (AW) |
||
| + | |[[File:NightmareSlamvan-GTAO-HeavyBumperArmor.png|thumb|center|220px]] |
||
|- |
|- |
||
| rowspan="12" |Bodywork |
| rowspan="12" |Bodywork |
||
| rowspan="4" |Decorations |
| rowspan="4" |Decorations |
||
|None |
|None |
||
| − | | style="text-align: center;"|$4,200 |
+ | | style="text-align: center;" |$4,200 |
| + | |[[File:NightmareSlamvan-GTAO-NoDecoration.png|thumb|center|220px]] |
||
| − | | |
||
|- |
|- |
||
|Basic Spears |
|Basic Spears |
||
| − | | style="text-align: center;"|$6,720<br />$3,360 (AW) |
+ | | style="text-align: center;" |$6,720<br />$3,360 (AW) |
| + | |[[File:NightmareSlamvan-GTAO-BasicSpears.png|thumb|center|220px]] |
||
| − | | |
||
|- |
|- |
||
|Knife Spears |
|Knife Spears |
||
| − | | style="text-align: center;"|$7,140<br />$3,570 (AW) |
+ | | style="text-align: center;" |$7,140<br />$3,570 (AW) |
| + | |[[File:NightmareSlamvan-GTAO-KnifeSpears.png|thumb|center|220px]] |
||
| − | | |
||
|- |
|- |
||
|Fork & knife |
|Fork & knife |
||
| − | | style="text-align: center;"|$7,560<br />$3,780 (AW) |
+ | | style="text-align: center;" |$7,560<br />$3,780 (AW) |
| + | |[[File:NightmareSlamvan-GTAO-Fork&Knife.png|thumb|center|220px]] |
||
| − | | |
||
|- |
|- |
||
| rowspan="2" |Spikes |
| rowspan="2" |Spikes |
||
|None |
|None |
||
| − | | style="text-align: center;"|$5,000 |
+ | | style="text-align: center;" |$5,000 |
| + | |[[File:NightmareSlamvan-GTAO-NoSpikes.png|thumb|center|220px]] |
||
| − | | |
||
|- |
|- |
||
|Body Spikes |
|Body Spikes |
||
| − | | style="text-align: center;"|$55,000<br />$27,500 (AW) |
+ | | style="text-align: center;" |$55,000<br />$27,500 (AW) |
| + | |[[File:NightmareSlamvan-GTAO-BodySpikes.png|thumb|center|220px]] |
||
| − | | |
||
|- |
|- |
||
| rowspan="2" |Blades |
| rowspan="2" |Blades |
||
|None |
|None |
||
| − | | style="text-align: center;"|$50,000 |
+ | | style="text-align: center;" |$50,000 |
| + | |[[File:NightmareSlamvan-GTAO-NoBlades.png|thumb|center|220px]] |
||
| − | | |
||
|- |
|- |
||
|Spinning Blades |
|Spinning Blades |
||
| − | | style="text-align: center;"|$145,000 |
+ | | style="text-align: center;" |$145,000 |
| + | |[[File:NightmareSlamvan-GTAO-SpinningBlades.png|thumb|center|220px]] |
||
| − | | |
||
|- |
|- |
||
| rowspan="4" |Armor Plating |
| rowspan="4" |Armor Plating |
||
|No Armor Plating |
|No Armor Plating |
||
| − | | style="text-align: center;"|$20,000 |
+ | | style="text-align: center;" |$20,000 |
| + | |[[File:NightmareSlamvan-GTAO-NoArmorPlating.png|thumb|center|220px]] |
||
| − | | |
||
|- |
|- |
||
|Light Armor |
|Light Armor |
||
| + | <br /> |
||
| − | | style="text-align: center;"|$110,000<br />$55,000 (AW) |
||
| + | <br /> |
||
| − | | |
||
| + | <small>''Brands: Butter Streaks and [[Sneaky Footwear]].''</small> |
||
| + | | style="text-align: center;" |$110,000<br />$55,000 (AW) |
||
| + | |[[File:NightmareSlamvan-GTAO-LightArmor.png|thumb|center|220px]] |
||
|- |
|- |
||
|Reinforced Armor |
|Reinforced Armor |
||
| + | <br /> |
||
| − | | style="text-align: center;"|$175,000<br />$87,500 (AW) |
||
| + | <br /> |
||
| − | | |
||
| + | <small>''Brands: ???, ???, ???, [[Fleeca]], [[Junk Energy Drink]], Lucky Plucker and [[Stank]].''</small> |
||
| + | | style="text-align: center;" |$175,000<br />$87,500 (AW) |
||
| + | |[[File:NightmareSlamvan-GTAO-ReinforcedArmor.png|thumb|center|220px]] |
||
|- |
|- |
||
|Heavy Armor |
|Heavy Armor |
||
| + | <br /> |
||
| − | | style="text-align: center;"|$300,000<br />$150,000 (AW) |
||
| + | <br /> |
||
| − | | |
||
| + | <small>''Brands: ???, ???, ???, ???, Junk, Muscle Gymnasium and [[You Tool]].''</small> |
||
| + | | style="text-align: center;" |$300,000<br />$150,000 (AW) |
||
| + | |[[File:NightmareSlamvan-GTAO-HeavyArmor.png|thumb|center|220px]] |
||
|- |
|- |
||
| colspan="2" rowspan="4" |Engine |
| colspan="2" rowspan="4" |Engine |
||
|EMS Upgrade, Level 1 |
|EMS Upgrade, Level 1 |
||
| − | | colspan="2" style="text-align: center;"|$9,000 |
+ | | colspan="2" style="text-align: center;" |$9,000 |
|- |
|- |
||
|EMS Upgrade, Level 2 |
|EMS Upgrade, Level 2 |
||
| − | | colspan="2" style="text-align: center;"|$12,500 |
+ | | colspan="2" style="text-align: center;" |$12,500 |
|- |
|- |
||
|EMS Upgrade, Level 3 |
|EMS Upgrade, Level 3 |
||
| − | | colspan="2" style="text-align: center;"|$18,000 |
+ | | colspan="2" style="text-align: center;" |$18,000 |
|- |
|- |
||
|EMS Upgrade, Level 4 |
|EMS Upgrade, Level 4 |
||
| − | | colspan="2" style="text-align: center;"|$33,500 |
+ | | colspan="2" style="text-align: center;" |$33,500 |
|- |
|- |
||
| − | | colspan="2" rowspan="5" | |
+ | | colspan="2" rowspan="5" |Grilles |
|Stock Grille |
|Stock Grille |
||
| − | | style="text-align: center;"|$200 |
+ | | style="text-align: center;" |$200 |
| + | |[[File:NightmareSlamvan-GTAO-StockGrille.png|thumb|center|220px]] |
||
| − | | |
||
|- |
|- |
||
|70s Hybrid Grille |
|70s Hybrid Grille |
||
| − | | style="text-align: center;"|$750 |
+ | | style="text-align: center;" |$750 |
| + | |[[File:NightmareSlamvan-GTAO-70sHybridGrille.png|thumb|center|220px]] |
||
| − | | |
||
|- |
|- |
||
|Restomod Grille |
|Restomod Grille |
||
| − | | style="text-align: center;"|$1,340 |
+ | | style="text-align: center;" |$1,340 |
| + | |[[File:NightmareSlamvan-GTAO-RestomodGrille.png|thumb|center|220px]] |
||
| − | | |
||
|- |
|- |
||
|Speedway Grille |
|Speedway Grille |
||
| − | | style="text-align: center;"|$1,650 |
+ | | style="text-align: center;" |$1,650 |
| + | |[[File:NightmareSlamvan-GTAO-SpeedwayGrille.png|thumb|center|220px]] |
||
| − | | |
||
|- |
|- |
||
|Custom Grille |
|Custom Grille |
||
| − | | style="text-align: center;"|$3,000 |
+ | | style="text-align: center;" |$3,000 |
| + | |[[File:NightmareSlamvan-GTAO-CustomGrille.png|thumb|center|220px]] |
||
| − | | |
||
|- |
|- |
||
| colspan="2" rowspan="6" |Hoods |
| colspan="2" rowspan="6" |Hoods |
||
|Stock Hood |
|Stock Hood |
||
| − | | style="text-align: center;"|$1,600 |
+ | | style="text-align: center;" |$1,600 |
| + | |[[File:NightmareSlamvan-GTAO-StockHood.png|thumb|center|220px]] |
||
| − | | |
||
|- |
|- |
||
|Rusty Metal Bull Horn |
|Rusty Metal Bull Horn |
||
| − | | style="text-align: center;"|$3,000 |
+ | | style="text-align: center;" |$3,000 |
| + | |[[File:NightmareSlamvan-GTAO-RustyMetalBullHorn.png|thumb|center|220px]] |
||
| − | | |
||
|- |
|- |
||
|Rusty Chrome Bull Horn |
|Rusty Chrome Bull Horn |
||
| − | | style="text-align: center;"|$5,000 |
+ | | style="text-align: center;" |$5,000 |
| + | |[[File:NightmareSlamvan-GTAO-RustyChromeBullHorn.png|thumb|center|220px]] |
||
| − | | |
||
|- |
|- |
||
|Real Bull Horn |
|Real Bull Horn |
||
| − | | style="text-align: center;"|$8,000 |
+ | | style="text-align: center;" |$8,000 |
| + | |[[File:NightmareSlamvan-GTAO-RealBullHorn.png|thumb|center|220px]] |
||
| − | | |
||
|- |
|- |
||
|Battle Cross |
|Battle Cross |
||
| − | | style="text-align: center;"|$19,200<br />$9,600 (AW) |
+ | | style="text-align: center;" |$19,200<br />$9,600 (AW) |
| + | |[[File:NightmareSlamvan-GTAO-BattleCross.png|thumb|center|220px]] |
||
| − | | |
||
|- |
|- |
||
|War Cross |
|War Cross |
||
| − | | style="text-align: center;"|$22,000<br />$11,000 (AW) |
+ | | style="text-align: center;" |$22,000<br />$11,000 (AW) |
| + | |[[File:NightmareSlamvan-GTAO-WarCross.png|thumb|center|220px]] |
||
| − | | |
||
| + | |- |
||
| + | | colspan="2" |Horns |
||
| + | |''Main article: [[Los Santos Customs/Horns]]'' |
||
| + | | colspan="2" style="text-align: center;" | - |
||
|- |
|- |
||
| rowspan="16" |Lights |
| rowspan="16" |Lights |
||
| rowspan="15" |Headlights |
| rowspan="15" |Headlights |
||
|Stock Lights |
|Stock Lights |
||
| − | | style="text-align: center;" |$600 |
+ | | colspan="2" style="text-align: center;" |$600 |
| − | | |
||
|- |
|- |
||
|Xenon Lights |
|Xenon Lights |
||
| − | | style="text-align: center;" |$7,500 |
+ | | colspan="2" style="text-align: center;" |$7,500 |
| − | | |
||
|- |
|- |
||
|White Lights |
|White Lights |
||
| − | | style="text-align: center;"|$20,000 |
+ | | colspan="2" style="text-align: center;" |$20,000 |
| − | | |
||
|- |
|- |
||
|Blue Lights |
|Blue Lights |
||
| − | | style="text-align: center;"|$49,200<br />$24,600 (AW) |
+ | | colspan="2" style="text-align: center;" |$49,200<br />$24,600 (AW) |
| − | | |
||
|- |
|- |
||
|Electric Blue Lights |
|Electric Blue Lights |
||
| − | | style="text-align: center;"|$49,800<br />$24,900 (AW) |
+ | | colspan="2" style="text-align: center;" |$49,800<br />$24,900 (AW) |
| − | | |
||
|- |
|- |
||
|Mint Green Lights |
|Mint Green Lights |
||
| − | | style="text-align: center;"|$50,400<br />$25,200 (AW) |
+ | | colspan="2" style="text-align: center;" |$50,400<br />$25,200 (AW) |
| − | | |
||
|- |
|- |
||
|Lime Green Lights |
|Lime Green Lights |
||
| − | | style="text-align: center;"|$51,000<br />$25,500 (AW) |
+ | | colspan="2" style="text-align: center;" |$51,000<br />$25,500 (AW) |
| − | | |
||
|- |
|- |
||
|Yellow Lights |
|Yellow Lights |
||
| − | | style="text-align: center;"|$51,600<br />$25,800 (AW) |
+ | | colspan="2" style="text-align: center;" |$51,600<br />$25,800 (AW) |
| − | | |
||
|- |
|- |
||
|Golden Shower Lights |
|Golden Shower Lights |
||
| − | | style="text-align: center;"|$52,200<br />$26,100 (AW) |
+ | | colspan="2" style="text-align: center;" |$52,200<br />$26,100 (AW) |
| − | | |
||
|- |
|- |
||
|Orange Lights |
|Orange Lights |
||
| − | | style="text-align: center;"|$52,800<br />$26,400 (AW) |
+ | | colspan="2" style="text-align: center;" |$52,800<br />$26,400 (AW) |
| − | | |
||
|- |
|- |
||
|Red Lights |
|Red Lights |
||
| − | | style="text-align: center;"|$53,400<br />$26,700 (AW) |
+ | | colspan="2" style="text-align: center;" |$53,400<br />$26,700 (AW) |
| − | | |
||
|- |
|- |
||
|Pony Pink Lights |
|Pony Pink Lights |
||
| − | | style="text-align: center;"|$54,000<br />$27,000 (AW) |
+ | | colspan="2" style="text-align: center;" |$54,000<br />$27,000 (AW) |
| − | | |
||
|- |
|- |
||
|Hot Pink Lights |
|Hot Pink Lights |
||
| − | | style="text-align: center;"|$54,600<br />$27,300 (AW) |
+ | | colspan="2" style="text-align: center;" |$54,600<br />$27,300 (AW) |
| − | | |
||
|- |
|- |
||
|Purple Lights |
|Purple Lights |
||
| − | | style="text-align: center;"|$55,200<br />$27,600 (AW) |
+ | | colspan="2" style="text-align: center;" |$55,200<br />$27,600 (AW) |
| − | | |
||
|- |
|- |
||
|Blacklight Lights |
|Blacklight Lights |
||
| − | | style="text-align: center;"|$80,000<br />$40,000 (AW) |
+ | | colspan="2" style="text-align: center;" |$80,000<br />$40,000 (AW) |
| − | | |
||
|- |
|- |
||
|Neon Kits |
|Neon Kits |
||
| + | |''Main article: [[Los Santos Customs/Lights]]'' |
||
| − | |<div class="mw-collapsible mw-collapsed" style="width:100%"> |
||
| − | <div class="mw-collapsible-content">{{Main|Los Santos Customs/Lights}}</div></div> |
||
| colspan="2" style="text-align: center;" | - |
| colspan="2" style="text-align: center;" | - |
||
| − | |||
|- |
|- |
||
| colspan="2" rowspan="5" |Livery |
| colspan="2" rowspan="5" |Livery |
||
|None |
|None |
||
| − | | style="text-align: center;"|$11,400 |
+ | | style="text-align: center;" |$11,400 |
| + | |[[File:NightmareSlamvan-GTAO-front.png|thumb|center|220px|<small>([[:File:NightmareSlamvan-GTAO-rear.png|Rear quarter view]])</small>]] |
||
| − | | |
||
|- |
|- |
||
| − | |[[ |
+ | |[[Ping!]] |
| + | <br /> |
||
| − | | style="text-align: center;"|$18,240 |
||
| + | <br /> |
||
| − | | |
||
| + | <small>''Brands: ???, ???, [[Coolhand Lube]], Junk, [[Princess Robot Bubblegum]].''</small> |
||
| + | | style="text-align: center;" |$18,240 |
||
| + | |[[File:NightmareSlamvan-GTAO-front-Ping!Livery.png|thumb|center|220px|<small>([[:File:NightmareSlamvan-GTAO-rear-Ping!Livery.png|Rear quarter view]])</small>]] |
||
|- |
|- |
||
| − | |Bshot |
+ | |[[Burger Shot|Bshot]] |
| + | <br /> |
||
| − | | style="text-align: center;"|$38,760<br />$19,380 (AW) |
||
| + | <br /> |
||
| − | | |
||
| + | <small>''Brands: ???, ???, [[Arrow Gasoline]], [[Cluckin' Bell]] and Lil Rotters.''</small> |
||
| + | | style="text-align: center;" |$38,760<br />$19,380 (AW) |
||
| + | |[[File:NightmareSlamvan-GTAO-front-BshotLivery.png|thumb|center|220px|<small>([[:File:NightmareSlamvan-GTAO-rear-BshotLivery.png|Rear quarter view]])</small>]] |
||
|- |
|- |
||
|X&O |
|X&O |
||
| + | <br /> |
||
| − | | style="text-align: center;"|$41,040<br />$20,520 (AW) |
||
| + | <br /> |
||
| − | | |
||
| + | <small>''Brands: [[Atomic]], [[Chepalle]], Cluckin' Bell and [[Xero]].''</small> |
||
| + | | style="text-align: center;" |$41,040<br />$20,520 (AW) |
||
| + | |[[File:NightmareSlamvan-GTAO-front-X&OLivery.png|thumb|center|220px|<small>([[:File:NightmareSlamvan-GTAO-rear-X&OLivery.png|Rear quarter view]])</small>]] |
||
|- |
|- |
||
|Rage |
|Rage |
||
| + | <br /> |
||
| − | | style="text-align: center;"|$43,320<br />$21,660 (AW) |
||
| + | <br /> |
||
| − | | |
||
| + | <small>''Brands: Higgins Helitours, [[Kabel]], [[Kung Fu Rainbow Lazerforce]] and [[Impotent Rage]].''</small> |
||
| + | | style="text-align: center;" |$43,320<br />$21,660 (AW) |
||
| + | |[[File:NightmareSlamvan-GTAO-front-RageLivery.png|thumb|center|220px|<small>([[:File:NightmareSlamvan-GTAO-rear-RageLivery.png|Rear quarter view]])</small>]] |
||
|- |
|- |
||
| colspan="2" rowspan="2" |Loss/Theft Prevention |
| colspan="2" rowspan="2" |Loss/Theft Prevention |
||
| Line 398: | Line 476: | ||
| colspan="2" rowspan="4" |Vertical Jump |
| colspan="2" rowspan="4" |Vertical Jump |
||
|None |
|None |
||
| − | | colspan="2" style="text-align: center;"|$20,000 |
+ | | colspan="2" style="text-align: center;" |$20,000 |
|- |
|- |
||
|Jump Upgrade 20% |
|Jump Upgrade 20% |
||
| − | | colspan="2" style="text-align: center;"|$130,000<br />$65,000 (AW) |
+ | | colspan="2" style="text-align: center;" |$130,000<br />$65,000 (AW) |
|- |
|- |
||
|Jump Upgrade 60% |
|Jump Upgrade 60% |
||
| − | | colspan="2" style="text-align: center;"|$224,000<br />$112,000 (AW) |
+ | | colspan="2" style="text-align: center;" |$224,000<br />$112,000 (AW) |
|- |
|- |
||
|Jump Upgrade 100% |
|Jump Upgrade 100% |
||
| − | | colspan="2" style="text-align: center;"|$420,000<br />$ |
+ | | colspan="2" style="text-align: center;" |$420,000<br />$210,000 (AW) |
|- |
|- |
||
| colspan="2" |Wheels |
| colspan="2" |Wheels |
||
| + | |''Main article: [[Los Santos Customs/Wheels]]'' |
||
| − | |<div class="mw-collapsible mw-collapsed" style="width:100%"> |
||
| + | | colspan="2" style="text-align: center;" | - |
||
| − | <div class="mw-collapsible-content">{{WheelsExpand}}</div></div> |
||
| − | | colspan="2" style="text-align: center;" | |
||
| − | |||
|- |
|- |
||
| colspan="2" rowspan="2" |Wheelie Bars |
| colspan="2" rowspan="2" |Wheelie Bars |
||
|No Wheelie Bar |
|No Wheelie Bar |
||
| style="text-align: center;" |$21,000 |
| style="text-align: center;" |$21,000 |
||
| + | |[[File:NightmareSlamvan-GTAO-NoWheelieBar.png|thumb|center|220px]] |
||
| − | | |
||
|- |
|- |
||
|Wheelie Bar |
|Wheelie Bar |
||
| style="text-align: center;" |$33,600 |
| style="text-align: center;" |$33,600 |
||
| + | |[[File:NightmareSlamvan-GTAO-WheelieBar.png|thumb|center|220px]] |
||
| − | | |
||
|- |
|- |
||
| colspan="2" rowspan="4" |Windows |
| colspan="2" rowspan="4" |Windows |
||
|None |
|None |
||
| − | | colspan="2" style="text-align: center;"|$500 |
+ | | colspan="2" style="text-align: center;" |$500 |
|- |
|- |
||
|Light Smoke |
|Light Smoke |
||
| − | | colspan="2" style="text-align: center;"|$1,500 |
+ | | colspan="2" style="text-align: center;" |$1,500 |
|- |
|- |
||
|Dark Smoke |
|Dark Smoke |
||
| − | | colspan="2" style="text-align: center;"|$3,500 |
+ | | colspan="2" style="text-align: center;" |$3,500 |
|- |
|- |
||
|Limo |
|Limo |
||
| − | | colspan="2" style="text-align: center;"|$5,000 |
+ | | colspan="2" style="text-align: center;" |$5,000 |
|- |
|- |
||
| rowspan="16" |Weapons |
| rowspan="16" |Weapons |
||
| rowspan="7" |Ram Weapons |
| rowspan="7" |Ram Weapons |
||
|None |
|None |
||
| − | | style="text-align: center;"|$20,000 |
+ | | style="text-align: center;" |$20,000 |
| + | |[[File:NightmareSlamvan-GTAO-NoRamWeapon.png|thumb|center|220px]] |
||
| − | | |
||
|- |
|- |
||
|Light Ram |
|Light Ram |
||
| − | | style="text-align: center;"|$195,000 |
+ | | style="text-align: center;" |$195,000 |
| + | |[[File:NightmareSlamvan-GTAO-LightRam.png|thumb|center|220px]] |
||
| − | | |
||
|- |
|- |
||
|Reinforced Ram |
|Reinforced Ram |
||
| + | <br /> |
||
| − | | style="text-align: center;"|$225,000 |
||
| + | <br /> |
||
| − | | |
||
| + | <small>''Brands: Screw Faces and [[Cash Cards|Shark Cards]].''</small> |
||
| + | | style="text-align: center;" |$225,000 |
||
| + | |[[File:NightmareSlamvan-GTAO-ReinforcedRam.png|thumb|center|220px]] |
||
|- |
|- |
||
|Heavy Ram |
|Heavy Ram |
||
| − | | style="text-align: center;"|$255,000 |
+ | | style="text-align: center;" |$255,000 |
| + | |[[File:NightmareSlamvan-GTAO-HeavyRam.png|thumb|center|220px]] |
||
| − | | |
||
|- |
|- |
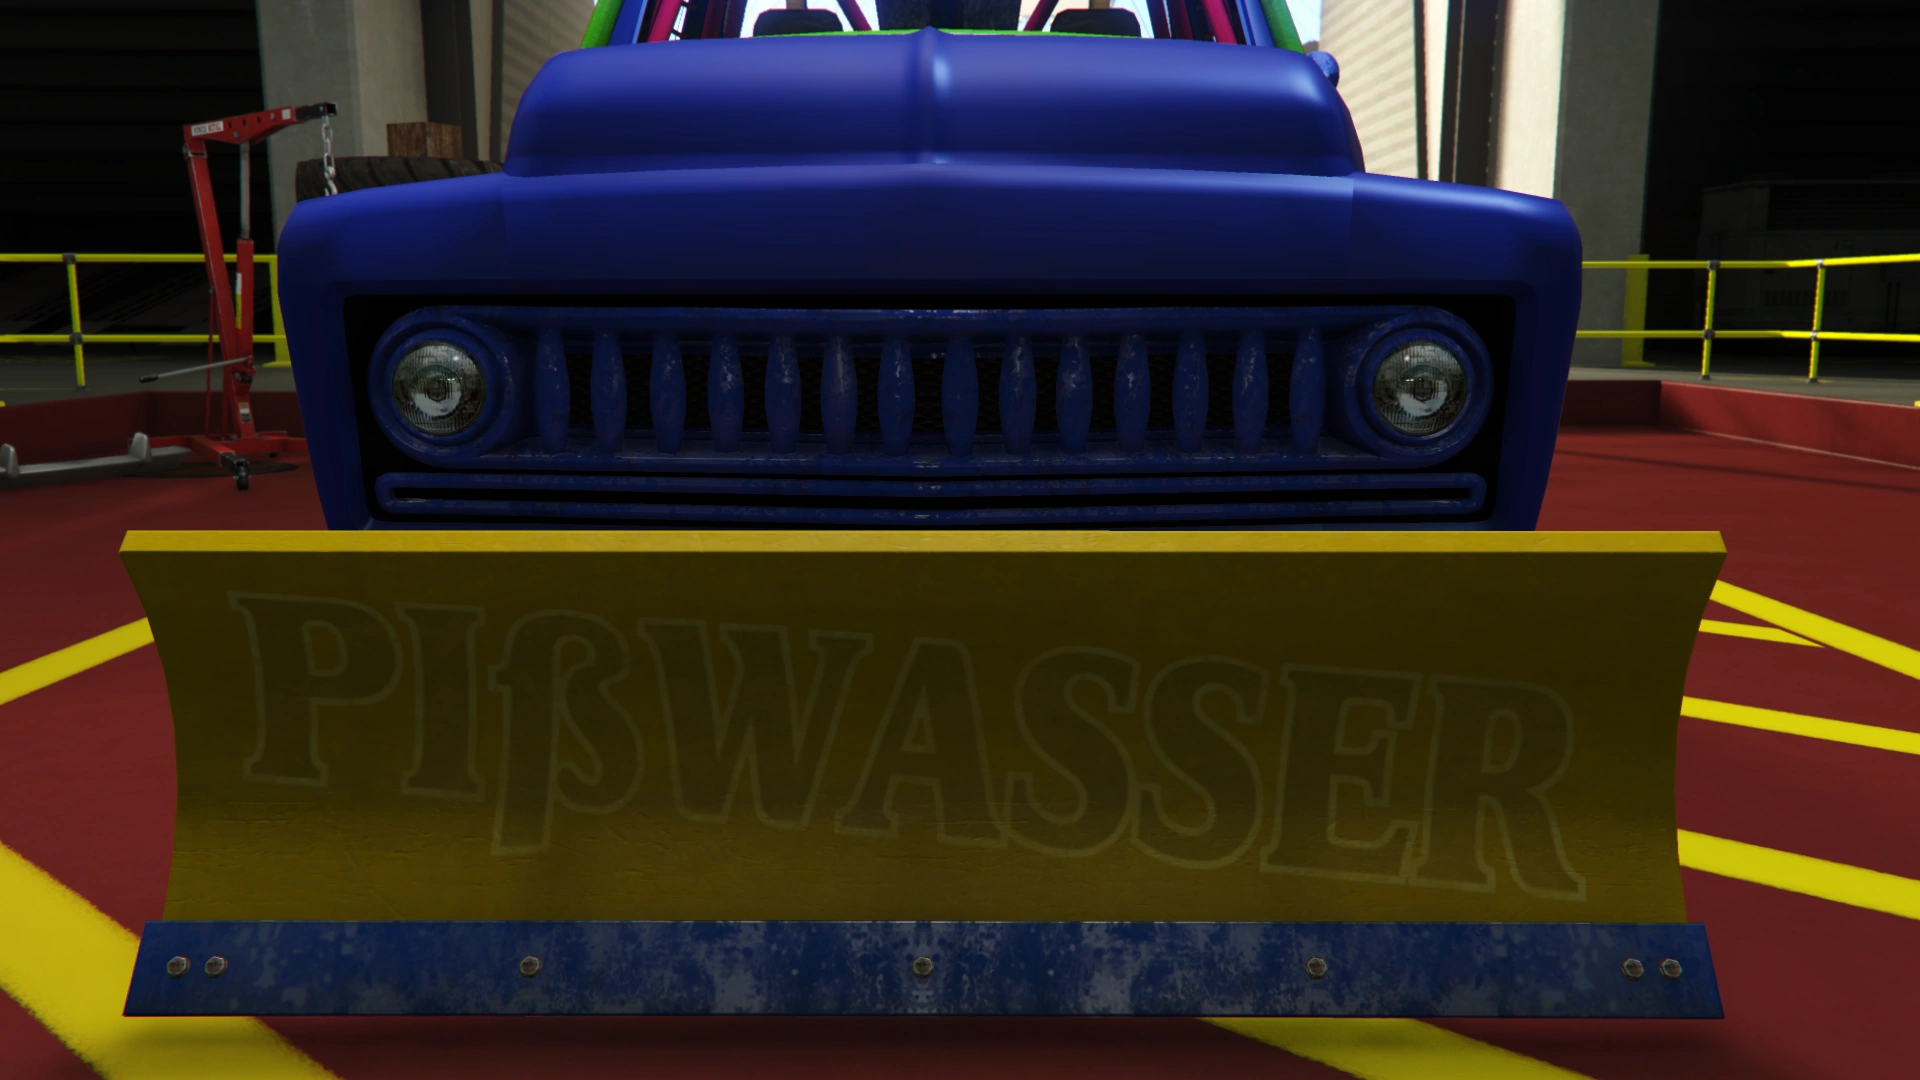
||
|Light Scoop |
|Light Scoop |
||
| + | <br /> |
||
| − | | style="text-align: center;"|$295,000 |
||
| + | <br /> |
||
| − | | |
||
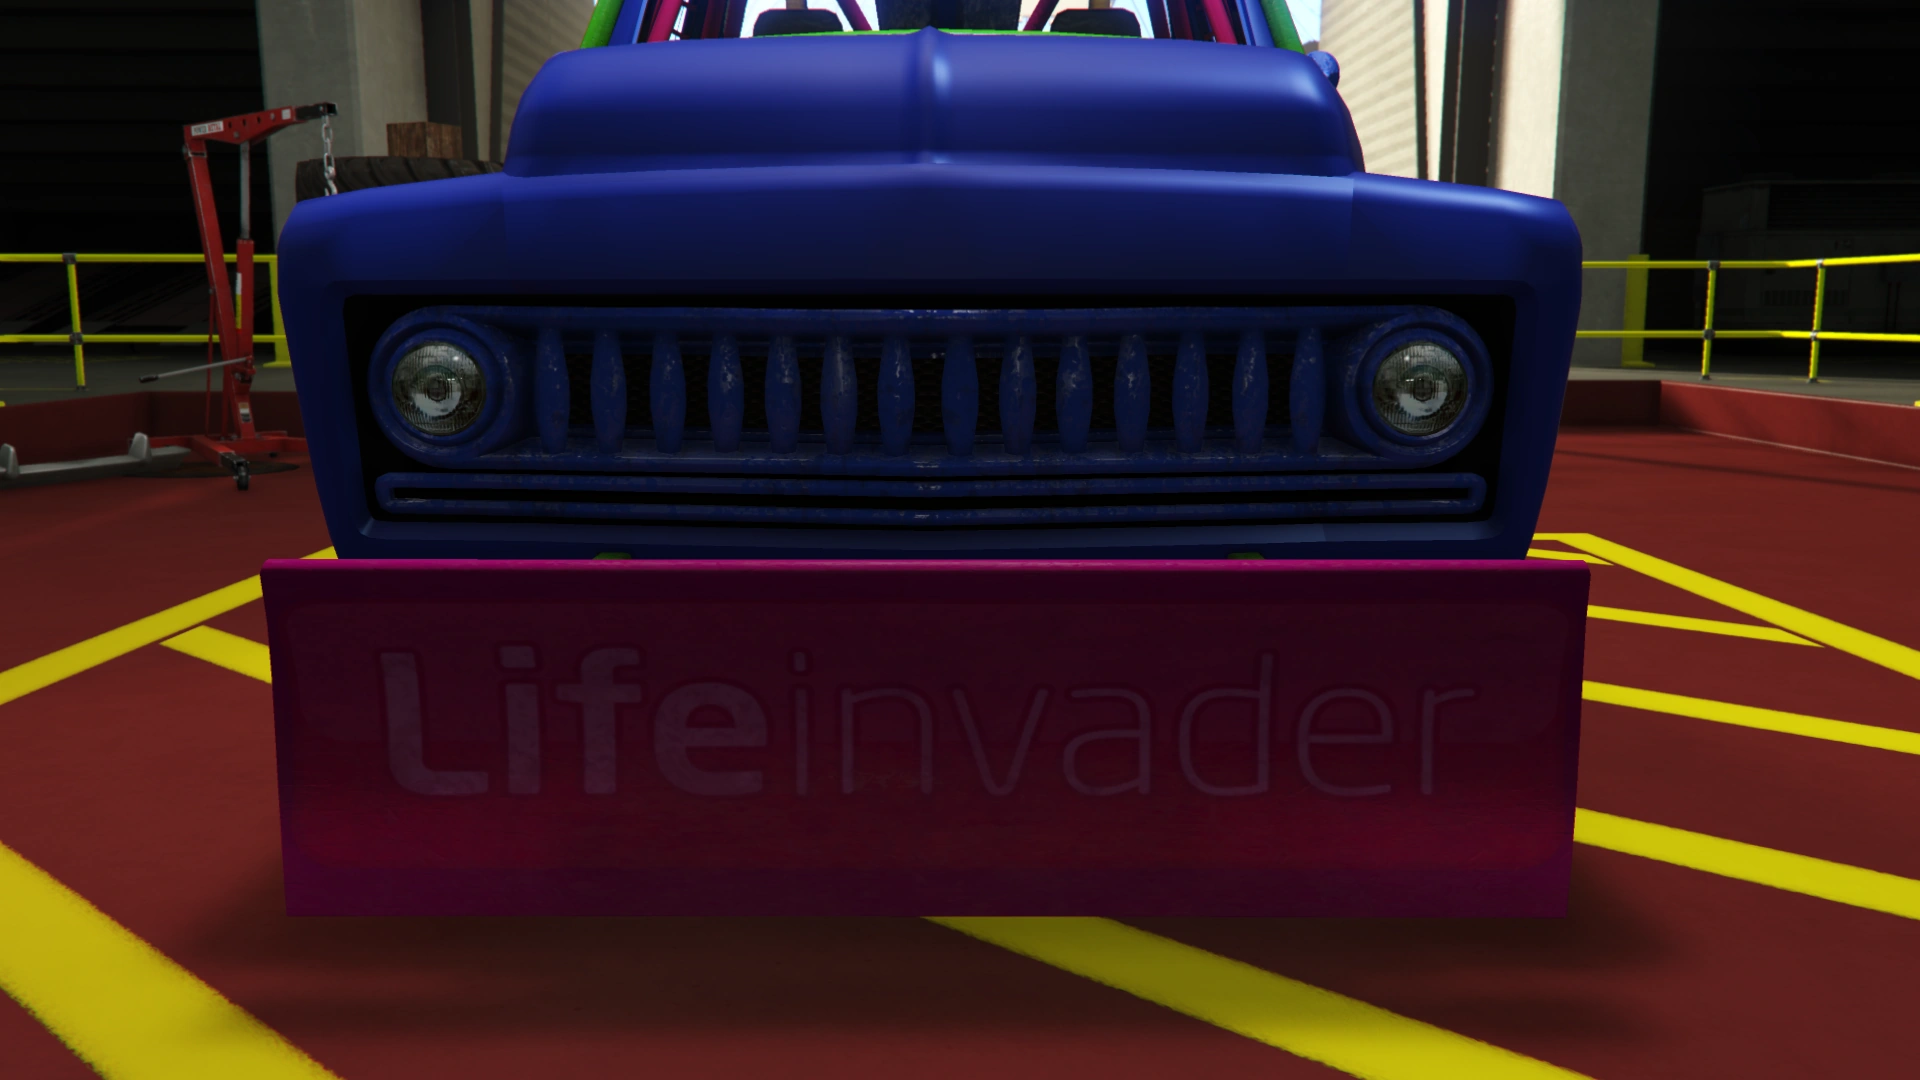
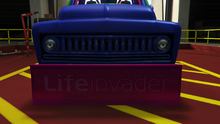
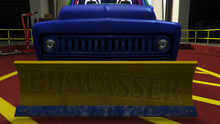
| + | <small>''Brands: [[Lifeinvader]].''</small> |
||
| + | | style="text-align: center;" |$295,000 |
||
| + | |[[File:NightmareSlamvan-GTAO-LightScoop.png|thumb|center|220px]] |
||
|- |
|- |
||
|Reinforced Scoop |
|Reinforced Scoop |
||
| + | <br /> |
||
| − | | style="text-align: center;"|$337,500 |
||
| + | <br /> |
||
| − | | |
||
| + | <small>''Brands: [[Pißwasser]].''</small> |
||
| + | | style="text-align: center;" |$337,500 |
||
| + | |[[File:NightmareSlamvan-GTAO-ReinforcedScoop.png|thumb|center|220px]] |
||
|- |
|- |
||
|Large Scoop |
|Large Scoop |
||
| + | <br /> |
||
| − | | style="text-align: center;"|$389,500 |
||
| + | <br /> |
||
| − | | |
||
| + | <small>''Brands: Princess Robot Bubblegum.''</small> |
||
| + | | style="text-align: center;" |$389,500 |
||
| + | |[[File:NightmareSlamvan-GTAO-LargeScoop.png|thumb|center|220px]] |
||
|- |
|- |
||
| rowspan="3" |Primary Weapons |
| rowspan="3" |Primary Weapons |
||
|None |
|None |
||
| − | | style="text-align: center;"|$50,000 |
+ | | style="text-align: center;" |$50,000 |
| + | |[[File:NightmareSlamvan-GTAO-NoPrimaryWeapon.png|thumb|center|220px]] |
||
| − | | |
||
|- |
|- |
||
|Mounted .50 Cal (Clean) |
|Mounted .50 Cal (Clean) |
||
| − | | style="text-align: center;"|$297,000 |
+ | | style="text-align: center;" |$297,000 |
| + | |[[File:NightmareSlamvan-GTAO-Mounted.50Cal(Clean).png|thumb|center|220px]] |
||
| − | | |
||
|- |
|- |
||
|Mounted .50 Cal (Painted) |
|Mounted .50 Cal (Painted) |
||
| − | | style="text-align: center;"|$325,000 |
+ | | style="text-align: center;" |$325,000 |
| + | |[[File:NightmareSlamvan-GTAO-Mounted.50Cal(Painted).png|thumb|center|220px]] |
||
| − | | |
||
|- |
|- |
||
| rowspan="6" |[[Vehicle Mines|Proximity Mine]] |
| rowspan="6" |[[Vehicle Mines|Proximity Mine]] |
||
|No Proximity Mine |
|No Proximity Mine |
||
| − | | colspan="2" style="text-align: center;"|$50,000 |
+ | | colspan="2" style="text-align: center;" |$50,000 |
|- |
|- |
||
|Kinetic |
|Kinetic |
||
| − | | colspan="2" style="text-align: center;"|$270,000<br />$135,000 (AW) |
+ | | colspan="2" style="text-align: center;" |$270,000<br />$135,000 (AW) |
|- |
|- |
||
|Spike |
|Spike |
||
| − | | colspan="2" style="text-align: center;"|$158,000<br />$79,000 (AW) |
+ | | colspan="2" style="text-align: center;" |$158,000<br />$79,000 (AW) |
|- |
|- |
||
|EMP |
|EMP |
||
| − | | colspan="2" style="text-align: center;"|$300,000<br />$150,000 (AW) |
+ | | colspan="2" style="text-align: center;" |$300,000<br />$150,000 (AW) |
|- |
|- |
||
|Slick |
|Slick |
||
| − | | colspan="2" style="text-align: center;"|$198,000<br />$99,000 (AW) |
+ | | colspan="2" style="text-align: center;" |$198,000<br />$99,000 (AW) |
|- |
|- |
||
|Sticky |
|Sticky |
||
| − | | colspan="2" style="text-align: center;"|$250,000<br />$125,000 (AW) |
+ | | colspan="2" style="text-align: center;" |$250,000<br />$125,000 (AW) |
|} |
|} |
||
:''(AW)'' Unlock this item for purchase via the Arena War Career. |
:''(AW)'' Unlock this item for purchase via the Arena War Career. |
||
| + | |||
| + | ==Image Gallery== |
||
| + | ===''Grand Theft Auto Online''=== |
||
| + | <gallery position="center" spacing="small" hideaddbutton="true"> |
||
| + | ArenaWar-GTAO-NightmareSlamvan.png|Modified example of the '''Nightmare Slamvan''' on the [[Arenawar|Arena War]] website. |
||
| + | ArenaSlamvan-GTAO-RGSC.jpg|The '''Arena Slamvan''' on [[Rockstar Games Social Club]]. |
||
| + | ArenaSlamvan-GTAO-RGSC2.jpg|The '''Arena Slamvan''' on the updated [[Rockstar Games Social Club]]. |
||
| + | ArenaSlamvan-GTAO-RGSC3.jpg|The '''Arena Slamvan''' in the cinematic preview on [[Rockstar Games Social Club]]. |
||
| + | </gallery> |
||
| + | |||
| + | ===Video=== |
||
| + | [[File:GTA Online Arena War - Vapid Slamvan (Apocalypse, Future Shock & Nightmare)|center|350px]] |
||
==Locations== |
==Locations== |
||
===''Grand Theft Auto Online''=== |
===''Grand Theft Auto Online''=== |
||
*Can be converted from a [[Slamvan]] at an [[Arena Workshop]], for [[Money|$]]1,321,875. |
*Can be converted from a [[Slamvan]] at an [[Arena Workshop]], for [[Money|$]]1,321,875. |
||
| + | **The vehicle comes with the "Ping!" Livery and a Light Scoop Ram Weapon as standard upon conversion. |
||
==See Also== |
==See Also== |
||
Revision as of 16:04, 6 June 2020
Template:Next-Gen Template:Infobox vehicles
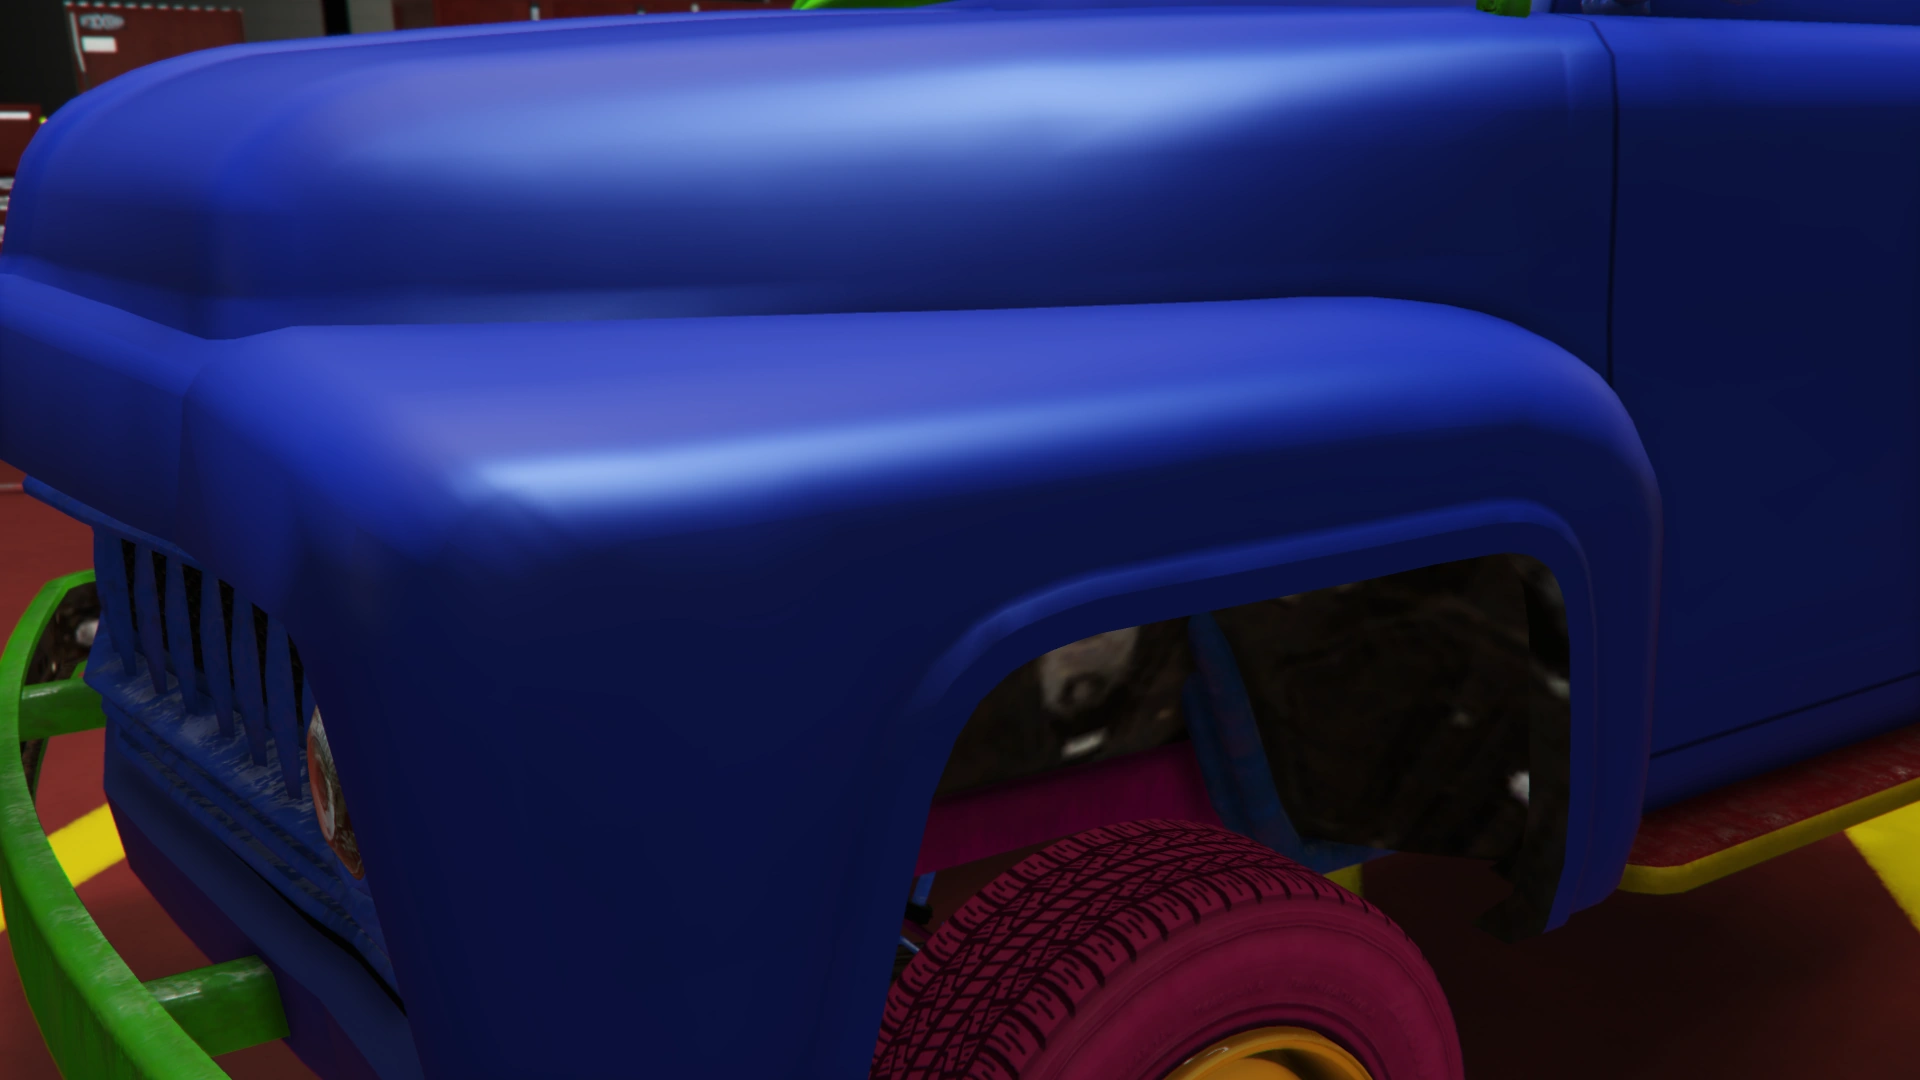
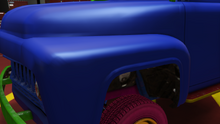
The Vapid Nightmare Slamvan is a custom pickup truck featured in Grand Theft Auto Online as part of the Arena War update.
Design
Grand Theft Auto Online
The vehicle is evidently based on the custom 1950 Ford F6, aka "Stubby Bob", appearing in the 44th episode of the TV show Roadkill.
The vehicle is essentially identical to its Apocalypse variant, but sports bright colors for the bodywork. The tires and inner roll cage are colored with the secondary color.
The vehicle also sports permanent colors applied to random parts, which are the following;
- Blue: grille, rear-view mirrors, window trims, engine intake, supercharger, cam cover trims, engine block, exhaust outlets, second exhaust pipes, engine protection frames, fuel tank and tail lamp cases.
- Green: front bumper, cabin protection frames, cam cover lower trims, third exhaust pipes, engine crankcase and rear end frame.
- Pink: Cam covers, lower rear frames, inner middle protection frames and fourth exhaust pipes.
- Yellow: stepsides, outer middle protection frames and first exhaust pipes.
- Red: stepside upper and lower surfaces.
Current Design Gallery


Performance
Grand Theft Auto Online
- Vehicle
The vehicle performs similarly to its base model, having average acceleration and top speed. Because of the drag-style modifications, the vehicle may experience some degree of understeer. The unequal weight distribution and the slightly wider rear axle leads to fishtailing when the rear wheels hit an obstacle or when performing sharp turns at high speeds.
- Abilities
- The vehicle can be installed with both "Jump" mods and "Shunt" mods. The Jump modifications come in three levels of effectiveness and can be activated using the horn button. When activated, the vehicle will be launched into the air, in a similar way to the Ruiner 2000 and Scramjet. The Shunt modifications allow the vehicle to shunt to the side.
- The vehicle can be installed with Boost upgrades. This can be used to significantly speed up the vehicle. It can be used repeatedly while driving the vehicle, but it is better to let it fully recharge for maximum efficiency.
- Armor
The Slamvan, like other Arena vehicles, can withstand a single explosive without being destroyed, although the large windows leaves the occupants highly vulnerable to gunfire, as well as high chances of receiving damage to its engine. This can be solved with the addition of armor upgrades, partially protecting the cabin with metal bars on the driver side and a plate on the passenger side, while the side windows are partially protected by metal bars. These upgrades also cover the engine, with the Heavy Armor upgrade providing full protection. The rear wheels can be also protected with curved plates acting as mudguards, although Bulletproof Tires are still recommended.
- Weaponry
- The vehicle can be fitted with a Ram Weapon. The ram weapon behaves in a similar way to the updated scoops and ramming bars of the RCV and Armored Boxville, causing a large amount of damage to other vehicles and often sending them flying into mid-air with little to no disadvantage against the vehicle itself, and no damage to the vehicle's engine whatsoever. It should be noted that the effectiveness against other players is significantly reduced compared to its effectiveness against NPCs and their vehicles.
- The Slamvan can be modified to have two M1919 Browning .50 caliber machine guns. They behave similarly to other front-mounted machine guns from various armed land vehicles, but it is difficult to use and lacks enough firepower to sort out heavily-armored vehicles.
- The vehicle has the option for installing Proximity Mines. Unlike Weaponized Vehicles added in the Gunrunning update, the Bruiser, along with all Arena Cars in the Arena War update, has five different Proximity Mine choices: Kinetic, Spike, EMP, Slick and Sticky;
- The Kinetic option (orange flashing light) creates a small impulse spreading several meters around the area, sending players and vehicles into the air. The impulse deals little damage to both players and vehicles.
- The Spike option (dark blue flashing light) bursts the tires of vehicles passing over or near it, as well as dealing a small amount of damage to the vehicle, mainly effecting the vehicle's windows, but otherwise dealing no damage or force. The mine does not burst vehicles with Bulletproof Tires installed.
- The EMP option (light blue flashing light) disables the vehicle's electronics when passing over it. The accelerator, brakes and steering, as well as the radio and other features are disabled for around 5 seconds before reactivating. It also deals a small amount of damage to players. The player will be notified by whom their vehicle was disabled by in a small notification above the radar.
- The Slick option (green flashing light) bursts a large amount of oil on the surface, causing vehicles passing over it to lose control. This deals no damage to both vehicles or players.
- The Sticky option (purple flashing light) bursts a large amount of sticky substance on the surface, causing vehicles passing over it to slow down. This deals no damage to both vehicles or players.
- The truck can also be installed with both bodywork Spikes and Saw Blades. The spikes deal damage to NPCs and players, contact with the spikes can instantly kill them, while the saw blades can pop vehicle tires and damage NPCs as well.
GTA Online Overview
| Acceleration (0-60 mph in Seconds) |
Top Speed (mph / kmh) |
Gears | Engine | Drivetrain (FWD / RWD / AWD) |
Mass (kg / lbs) |
Fuel Tank Size (litres) |
|---|---|---|---|---|---|---|
| N/A | 84.2 / 135.5 | 4 | N/A | RWD | 1245 / 2745 | 65 |
| N/A | N/A | N/A | N/A | N/A | N/A | N/A |
| N/A | N/A | 4 | RMR SOHC Big-Block V8 w/ 8 Velocity Stack Carburetors (In-game model) | RWD | Cannot be observed | Cannot be observed |
Modifications
Grand Theft Auto Online
The Nightmare Slamvan can only be modified at an Arena Workshop.
| Category | Modification | Cost | Image | |
|---|---|---|---|---|
| Brakes | Stock Brakes | $1,000 | ||
| Street Brakes | $20,000 | |||
| Sport Brakes | $27,000 | |||
| Race Brakes | $35,000 | |||
| Boost | None | $20,000 | ||
| Boost Upgrade 20% | $100,000 $50,000 (AW) | |||
| Boost Upgrade 60% | $230,000 $115,000 (AW) | |||
| Boost Upgrade 100% | $400,000 $200,000 (AW) | |||
| Shunt Boost | $520,000 $260,000 (AW) | |||
| Rear Bumpers | Stock Rear Bumper | $2,200 | ||
| Light Armor | $4,600 | |||
| Reinforced Armor
|
$7,400 $3,700 (AW) |
|||
| Heavy Armor
|
$11,700 $5,850 (AW) |
|||
| Bodywork | Decorations | None | $4,200 | |
| Basic Spears | $6,720 $3,360 (AW) |
|||
| Knife Spears | $7,140 $3,570 (AW) |
|||
| Fork & knife | $7,560 $3,780 (AW) |
|||
| Spikes | None | $5,000 | ||
| Body Spikes | $55,000 $27,500 (AW) |
|||
| Blades | None | $50,000 | ||
| Spinning Blades | $145,000 | |||
| Armor Plating | No Armor Plating | $20,000 | ||
| Light Armor
|
$110,000 $55,000 (AW) |
|||
| Reinforced Armor
|
$175,000 $87,500 (AW) |
|||
| Heavy Armor
|
$300,000 $150,000 (AW) |
|||
| Engine | EMS Upgrade, Level 1 | $9,000 | ||
| EMS Upgrade, Level 2 | $12,500 | |||
| EMS Upgrade, Level 3 | $18,000 | |||
| EMS Upgrade, Level 4 | $33,500 | |||
| Grilles | Stock Grille | $200 | ||
| 70s Hybrid Grille | $750 | |||
| Restomod Grille | $1,340 | |||
| Speedway Grille | $1,650 | |||
| Custom Grille | $3,000 | |||
| Hoods | Stock Hood | $1,600 | ||
| Rusty Metal Bull Horn | $3,000 | |||
| Rusty Chrome Bull Horn | $5,000 | |||
| Real Bull Horn | $8,000 | |||
| Battle Cross | $19,200 $9,600 (AW) |
|||
| War Cross | $22,000 $11,000 (AW) |
|||
| Horns | Main article: Los Santos Customs/Horns | - | ||
| Lights | Headlights | Stock Lights | $600 | |
| Xenon Lights | $7,500 | |||
| White Lights | $20,000 | |||
| Blue Lights | $49,200 $24,600 (AW) | |||
| Electric Blue Lights | $49,800 $24,900 (AW) | |||
| Mint Green Lights | $50,400 $25,200 (AW) | |||
| Lime Green Lights | $51,000 $25,500 (AW) | |||
| Yellow Lights | $51,600 $25,800 (AW) | |||
| Golden Shower Lights | $52,200 $26,100 (AW) | |||
| Orange Lights | $52,800 $26,400 (AW) | |||
| Red Lights | $53,400 $26,700 (AW) | |||
| Pony Pink Lights | $54,000 $27,000 (AW) | |||
| Hot Pink Lights | $54,600 $27,300 (AW) | |||
| Purple Lights | $55,200 $27,600 (AW) | |||
| Blacklight Lights | $80,000 $40,000 (AW) | |||
| Neon Kits | Main article: Los Santos Customs/Lights | - | ||
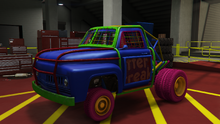
| Livery | None | $11,400 | ||
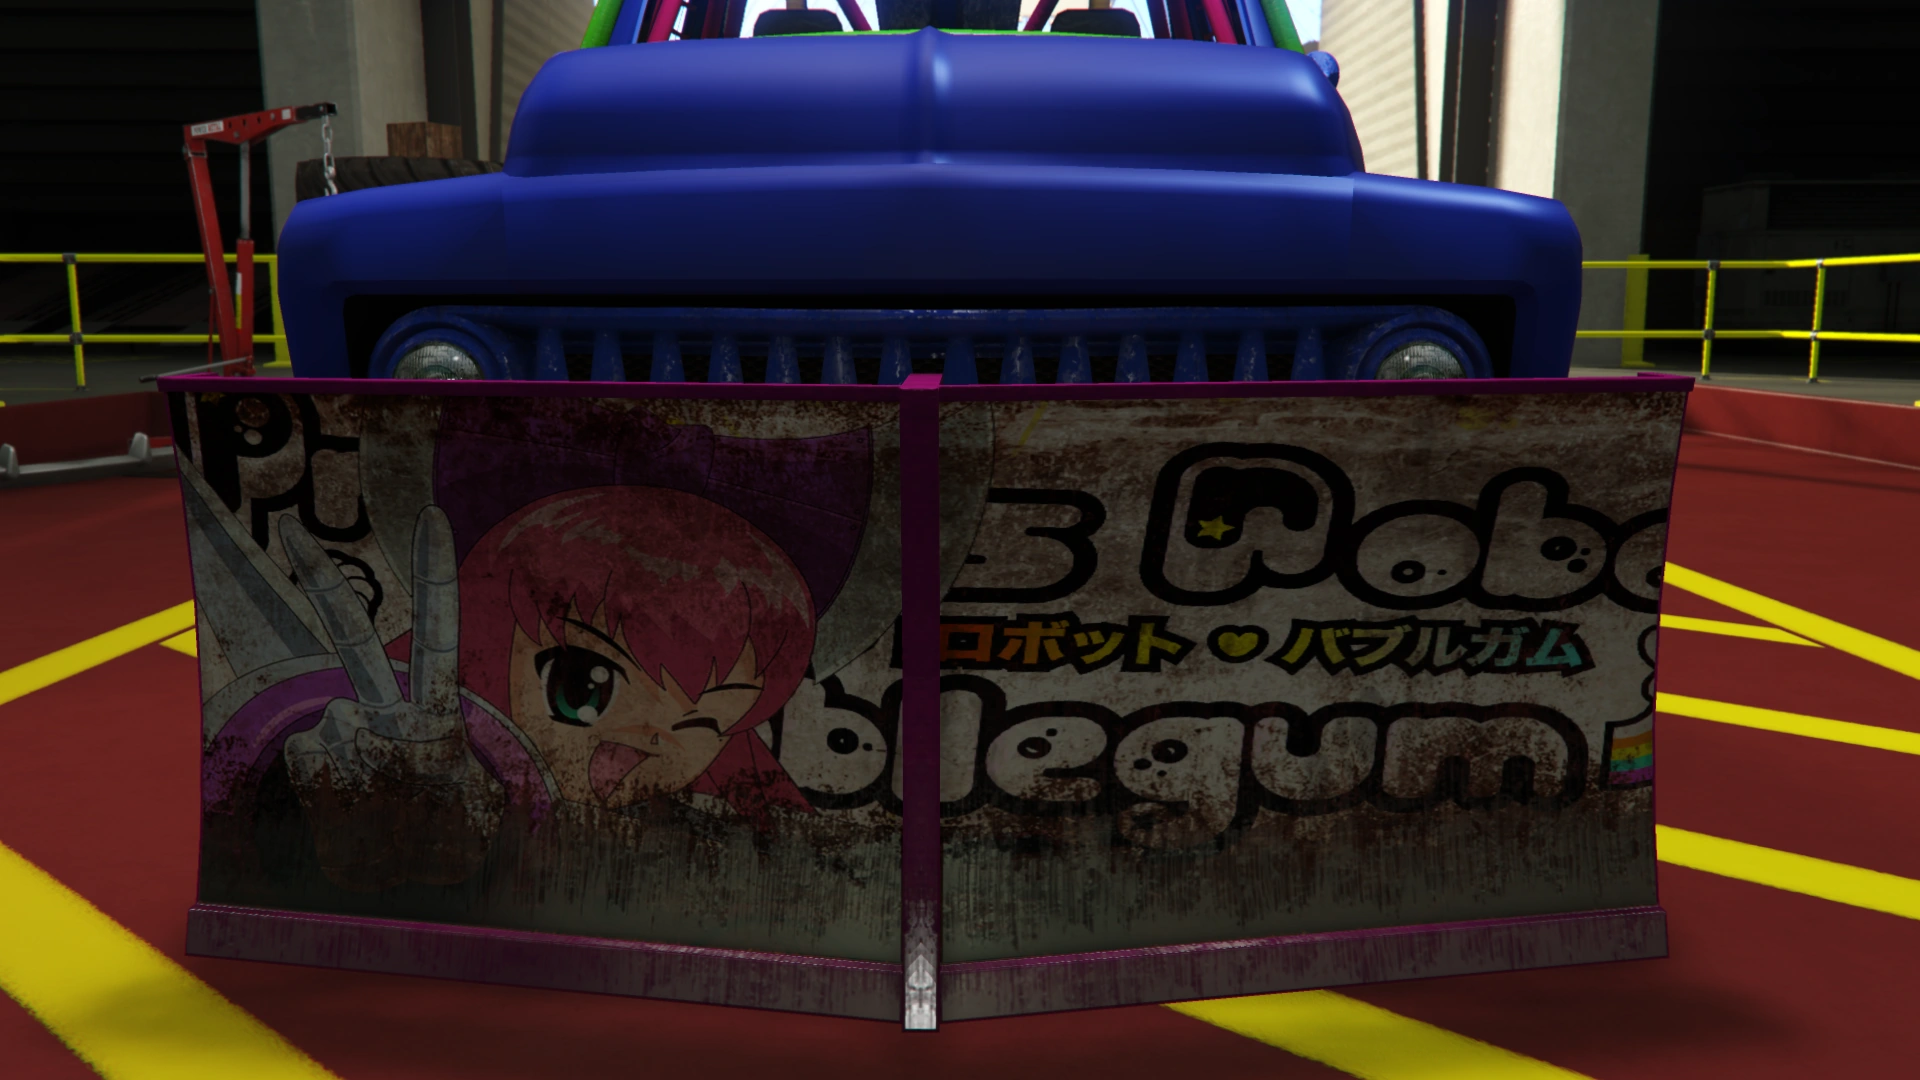
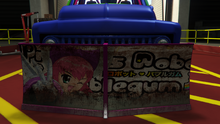
| Ping!
|
$18,240 | |||
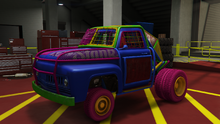
| Bshot
|
$38,760 $19,380 (AW) |
|||
| X&O | $41,040 $20,520 (AW) |
|||
| Rage
|
$43,320 $21,660 (AW) |
|||
| Loss/Theft Prevention | Tracker | |||
| Full Coverage | ||||
| Name | - | |||
| Respray | Main article: Los Santos Customs/Respray Colors | - | ||
| Sell | Sell Vehicle | |||
| Transmission | Stock Transmission | $1,000 | ||
| Street Transmission | $29,500 | |||
| Sports Transmission | $32,500 | |||
| Race Transmission | $40,000 | |||
| Turbo | None | $5,000 | ||
| Turbo Tuning | $50,000 | |||
| Vertical Jump | None | $20,000 | ||
| Jump Upgrade 20% | $130,000 $65,000 (AW) | |||
| Jump Upgrade 60% | $224,000 $112,000 (AW) | |||
| Jump Upgrade 100% | $420,000 $210,000 (AW) | |||
| Wheels | Main article: Los Santos Customs/Wheels | - | ||
| Wheelie Bars | No Wheelie Bar | $21,000 | ||
| Wheelie Bar | $33,600 | |||
| Windows | None | $500 | ||
| Light Smoke | $1,500 | |||
| Dark Smoke | $3,500 | |||
| Limo | $5,000 | |||
| Weapons | Ram Weapons | None | $20,000 | |
| Light Ram | $195,000 | |||
| Reinforced Ram
|
$225,000 | |||
| Heavy Ram | $255,000 | |||
| Light Scoop
|
$295,000 | |||
| Reinforced Scoop
|
$337,500 | |||
| Large Scoop
|
$389,500 | |||
| Primary Weapons | None | $50,000 | ||
| Mounted .50 Cal (Clean) | $297,000 | |||
| Mounted .50 Cal (Painted) | $325,000 | |||
| Proximity Mine | No Proximity Mine | $50,000 | ||
| Kinetic | $270,000 $135,000 (AW) | |||
| Spike | $158,000 $79,000 (AW) | |||
| EMP | $300,000 $150,000 (AW) | |||
| Slick | $198,000 $99,000 (AW) | |||
| Sticky | $250,000 $125,000 (AW) | |||


.png)
.png)
- (AW) Unlock this item for purchase via the Arena War Career.
Image Gallery
Grand Theft Auto Online
")
Video

Locations
Grand Theft Auto Online
- Can be converted from a Slamvan at an Arena Workshop, for $1,321,875.
- The vehicle comes with the "Ping!" Livery and a Light Scoop Ram Weapon as standard upon conversion.
See Also
- Apocalypse Slamvan
- Future Shock Slamvan
- Slamvan - Base model.