Tag: Visual edit |
Tag: Visual edit |
||
| (37 intermediate revisions by 13 users not shown) | |||
| Line 15: | Line 15: | ||
|appearances = ''[[Grand Theft Auto: San Andreas]]<br>[[Grand Theft Auto: Liberty City Stories]]'' {{UN|cutcontent=1}}<br>''[[Grand Theft Auto V]]'' {{DLC|Business Update (original version)}}<br>''[[Grand Theft Auto Online]]'' {{DLC|Business Update (original version)}} |
|appearances = ''[[Grand Theft Auto: San Andreas]]<br>[[Grand Theft Auto: Liberty City Stories]]'' {{UN|cutcontent=1}}<br>''[[Grand Theft Auto V]]'' {{DLC|Business Update (original version)}}<br>''[[Grand Theft Auto Online]]'' {{DLC|Business Update (original version)}} |
||
|manufacturer = [[Dinka]] <small>([[HD Universe]])</small> |
|manufacturer = [[Dinka]] <small>([[HD Universe]])</small> |
||
| − | |variants = [[Jester (Racecar) |
+ | |variants = [[Jester (Racecar)]] |
| + | |related = [[SC1]] |
||
| + | |makeyear = |
||
| + | |swankness = |
||
|dashtype = Banshee |
|dashtype = Banshee |
||
| − | |related =[[SC1]] |
||
|inttxd = Vacca |
|inttxd = Vacca |
||
| − | |roadspawn = |
||
| − | {{BP}}Yes <small>(GTA SA and GTA V; Enhanced version)</small> |
||
| − | {{BP}}No <small>(GTA V; Original version)</small><br> |
||
|carcols = |
|carcols = |
||
{{Expand|'''GTA San Andreas'''| |
{{Expand|'''GTA San Andreas'''| |
||
| + | {{CarColSA/Title}} |
||
| − | <center>COLOR SET 1</center> |
||
| − | {{CarColSA|51|1}} |
+ | {{CarColSA|no=1|51|1}} |
| + | {{CarColSA|no=2|58|8}} |
||
| − | <center>COLOR SET 2</center> |
||
| − | {{CarColSA| |
+ | {{CarColSA|no=3|60|1}} |
| + | {{CarColSA|no=4|68|8}} |
||
| − | <center>COLOR SET 3</center> |
||
| − | {{CarColSA| |
+ | {{CarColSA|no=5|2|1}} |
| + | {{CarColSA|no=6|13|8}} |
||
| − | <center>COLOR SET 4</center> |
||
| − | {{CarColSA| |
+ | {{CarColSA|no=7|22|1}} |
| + | {{CarColSA|no=8|36|8}}<br> |
||
| − | <center>COLOR SET 5</center> |
||
| − | {{CarColSA|2|1}}<br> |
||
| − | <center>COLOR SET 6</center> |
||
| − | {{CarColSA|13|8}}<br> |
||
| − | <center>COLOR SET 7</center> |
||
| − | {{CarColSA|22|1}}<br> |
||
| − | <center>COLOR SET 8</center> |
||
| − | {{CarColSA|36|8}}<br> |
||
}} |
}} |
||
---- |
---- |
||
{{Expand|'''GTA V'''| |
{{Expand|'''GTA V'''| |
||
| + | {{CarColV/Title}} |
||
| − | <center>COLOR SET 1</center> |
||
| − | {{CarColV|0|0|0|156}} |
+ | {{CarColV|no=1|0|0|0|156}} |
| + | {{CarColV|no=2|1|0|4|156}} |
||
| − | <center>COLOR SET 2</center> |
||
| − | {{CarColV| |
+ | {{CarColV|no=3|6|0|111|156}} |
| + | {{CarColV|no=4|3|3|5|156}} |
||
| − | <center>COLOR SET 3</center> |
||
| − | {{CarColV| |
+ | {{CarColV|no=5|5|5|111|156}} |
| + | {{CarColV|no=6|111|111|111|156}} |
||
| − | <center>COLOR SET 4</center> |
||
| − | {{CarColV| |
+ | {{CarColV|no=7|7|7|5|156}} |
| + | {{CarColV|no=8|0|13|93|156}} |
||
| − | <center>COLOR SET 5</center> |
||
| − | {{CarColV| |
+ | {{CarColV|no=9|34|34|36|156}} |
| + | {{CarColV|no=10|31|0|41|156}} |
||
| − | <center>COLOR SET 6</center> |
||
| − | {{CarColV| |
+ | {{CarColV|no=11|130|12|130|156}} |
| + | {{CarColV|no=12|72|72|73|156}} |
||
| − | <center>COLOR SET 7</center> |
||
| − | {{CarColV| |
+ | {{CarColV|no=13|88|2|89|156}} |
| + | {{CarColV|no=14|28|12|36|156}} |
||
| − | <center>COLOR SET 8</center> |
||
| − | {{CarColV| |
+ | {{CarColV|no=15|12|12|0|156}} |
| + | {{CarColV|no=16|39|0|0|156}} |
||
| − | <center>COLOR SET 9</center> |
||
| − | {{CarColV|34|34|36|156}} |
||
| − | <center>COLOR SET 10</center> |
||
| − | {{CarColV|31|0|41|156}} |
||
| − | <center>COLOR SET 11</center> |
||
| − | {{CarColV|130|12|130|156}} |
||
| − | <center>COLOR SET 12</center> |
||
| − | {{CarColV|72|72|73|156}} |
||
| − | <center>COLOR SET 13</center> |
||
| − | {{CarColV|88|2|89|156}} |
||
| − | <center>COLOR SET 14</center> |
||
| − | {{CarColV|28|12|36|156}} |
||
| − | <center>COLOR SET 15</center> |
||
| − | {{CarColV|12|12|0|156}} |
||
| − | <center>COLOR SET 16</center> |
||
| − | {{CarColV|39|0|0|156}} |
||
}} |
}} |
||
|wheeltype = High End |
|wheeltype = High End |
||
| Line 91: | Line 68: | ||
|handlingname = JESTER |
|handlingname = JESTER |
||
|textlabelname = JESTER |
|textlabelname = JESTER |
||
| + | |roadspawn = |
||
| + | {{BP}}Yes <small>(GTA SA and GTA V; Enhanced version)</small> |
||
| + | {{BP}}No <small>(GTA V; Original version)</small> |
||
| + | |roadspawnmaxcol = |
||
| + | |roadspawnfreq = |
||
| + | |roadspawntrailer = <!--null--> |
||
| + | |roadspawnidendis = |
||
| + | |roadspawndrivers = |
||
| + | |roadspawngroups = |
||
| + | |roadspawnlicense = |
||
|engineacceleration = |
|engineacceleration = |
||
|exhaustacceleration = |
|exhaustacceleration = |
||
|idle = |
|idle = |
||
|deceleration = |
|deceleration = |
||
| − | |genpreced =[[Jester Classic]] |
+ | |genpreced = [[Jester Classic]] |
|gensucced = |
|gensucced = |
||
}} |
}} |
||
{{Quote|A Japanese hybrid-electric sportscar with a front-end designed to look like an angry grin might be too whimsical for some, but with a 4-liter V6 engine, 420 hp and a top speed of 180mph, the Dinka Jester still packs a serious punchline.|[[Legendary Motorsport]] description.}} |
{{Quote|A Japanese hybrid-electric sportscar with a front-end designed to look like an angry grin might be too whimsical for some, but with a 4-liter V6 engine, 420 hp and a top speed of 180mph, the Dinka Jester still packs a serious punchline.|[[Legendary Motorsport]] description.}} |
||
| − | The '''Jester''' is a two-door |
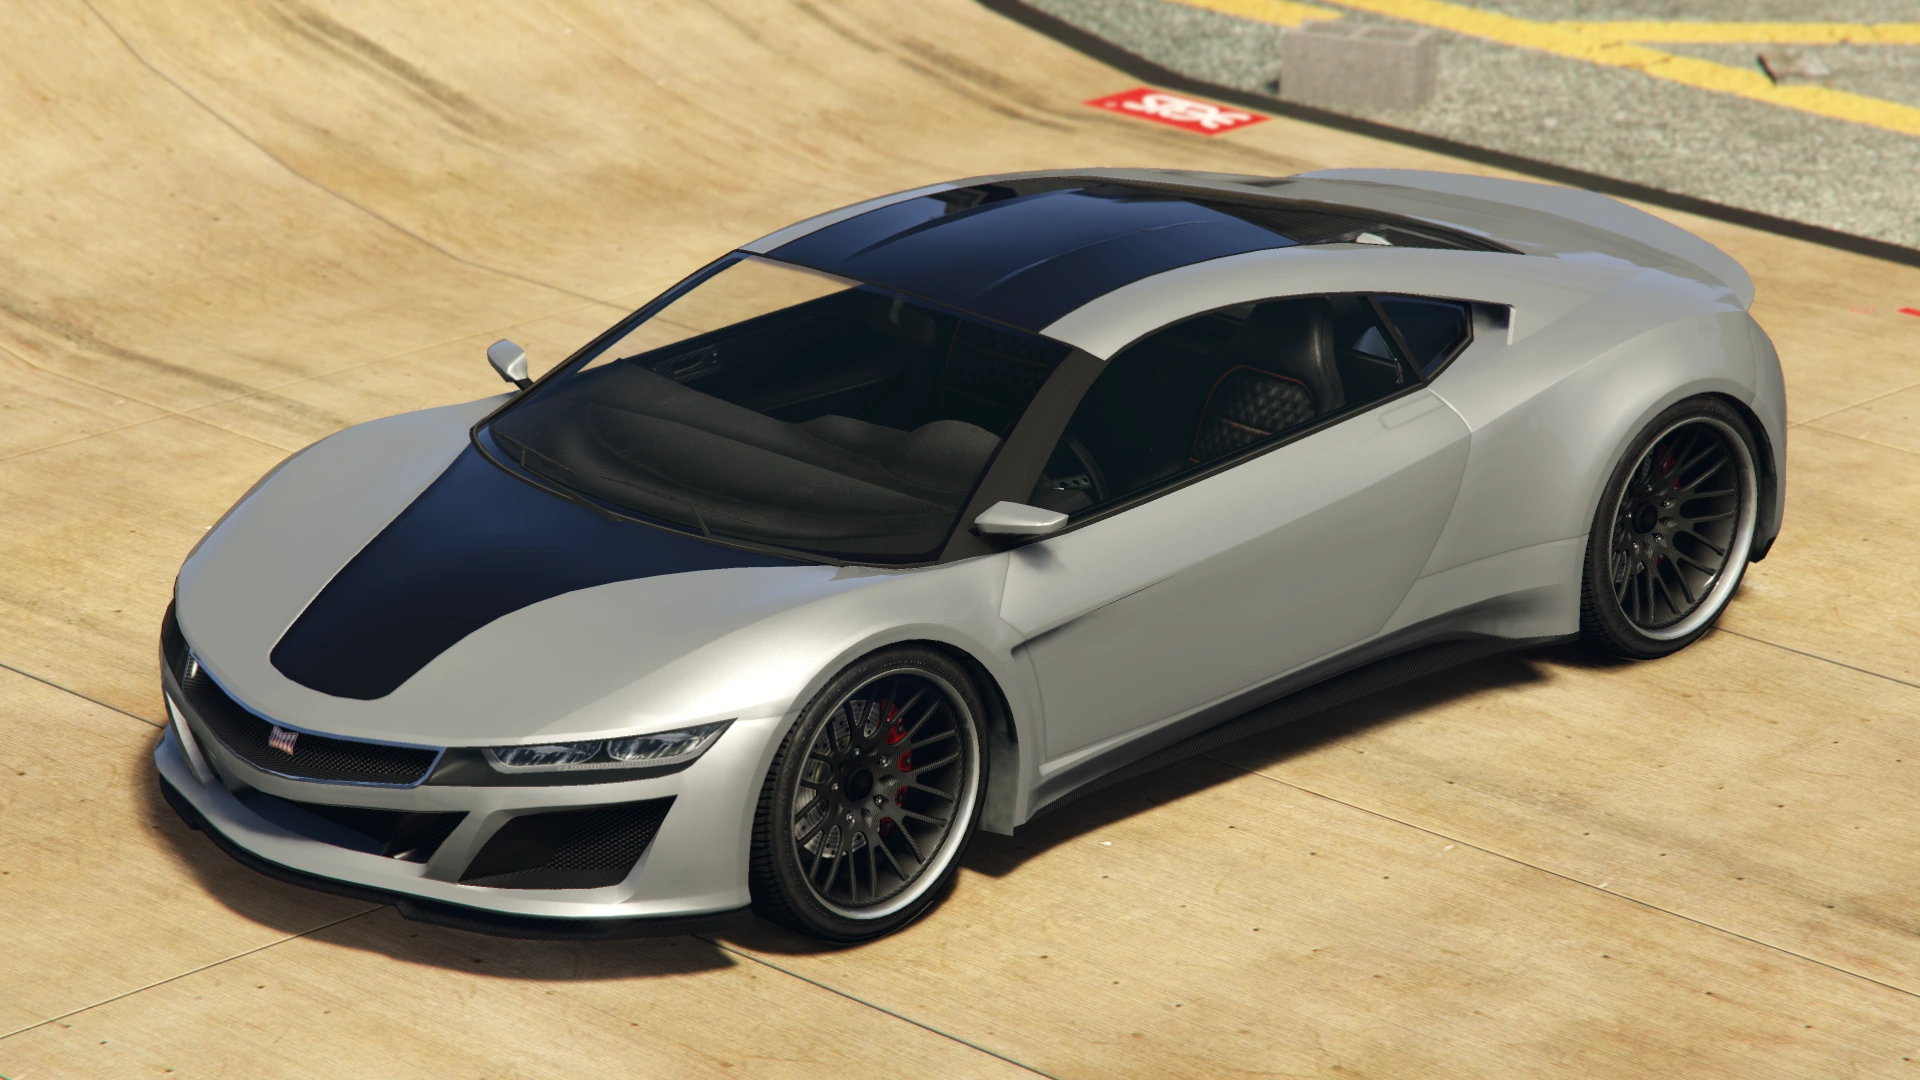
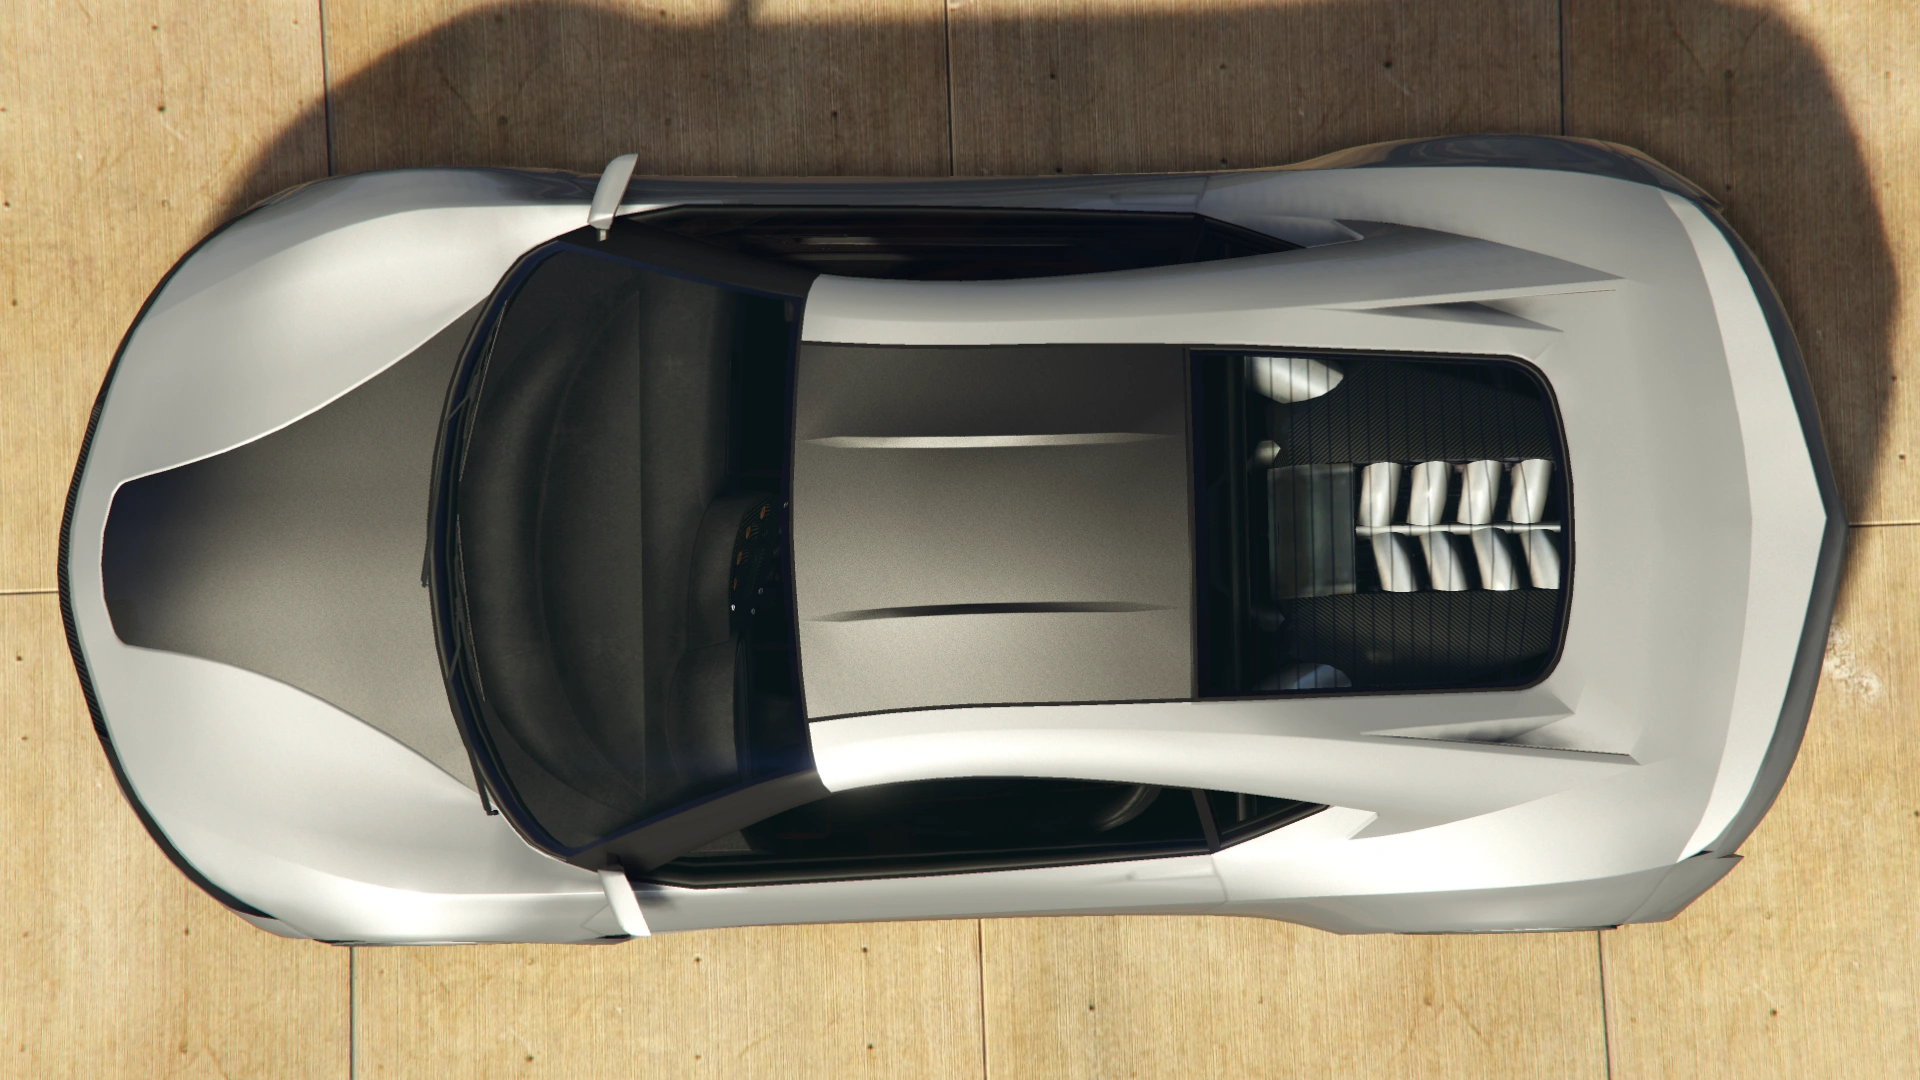
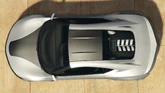
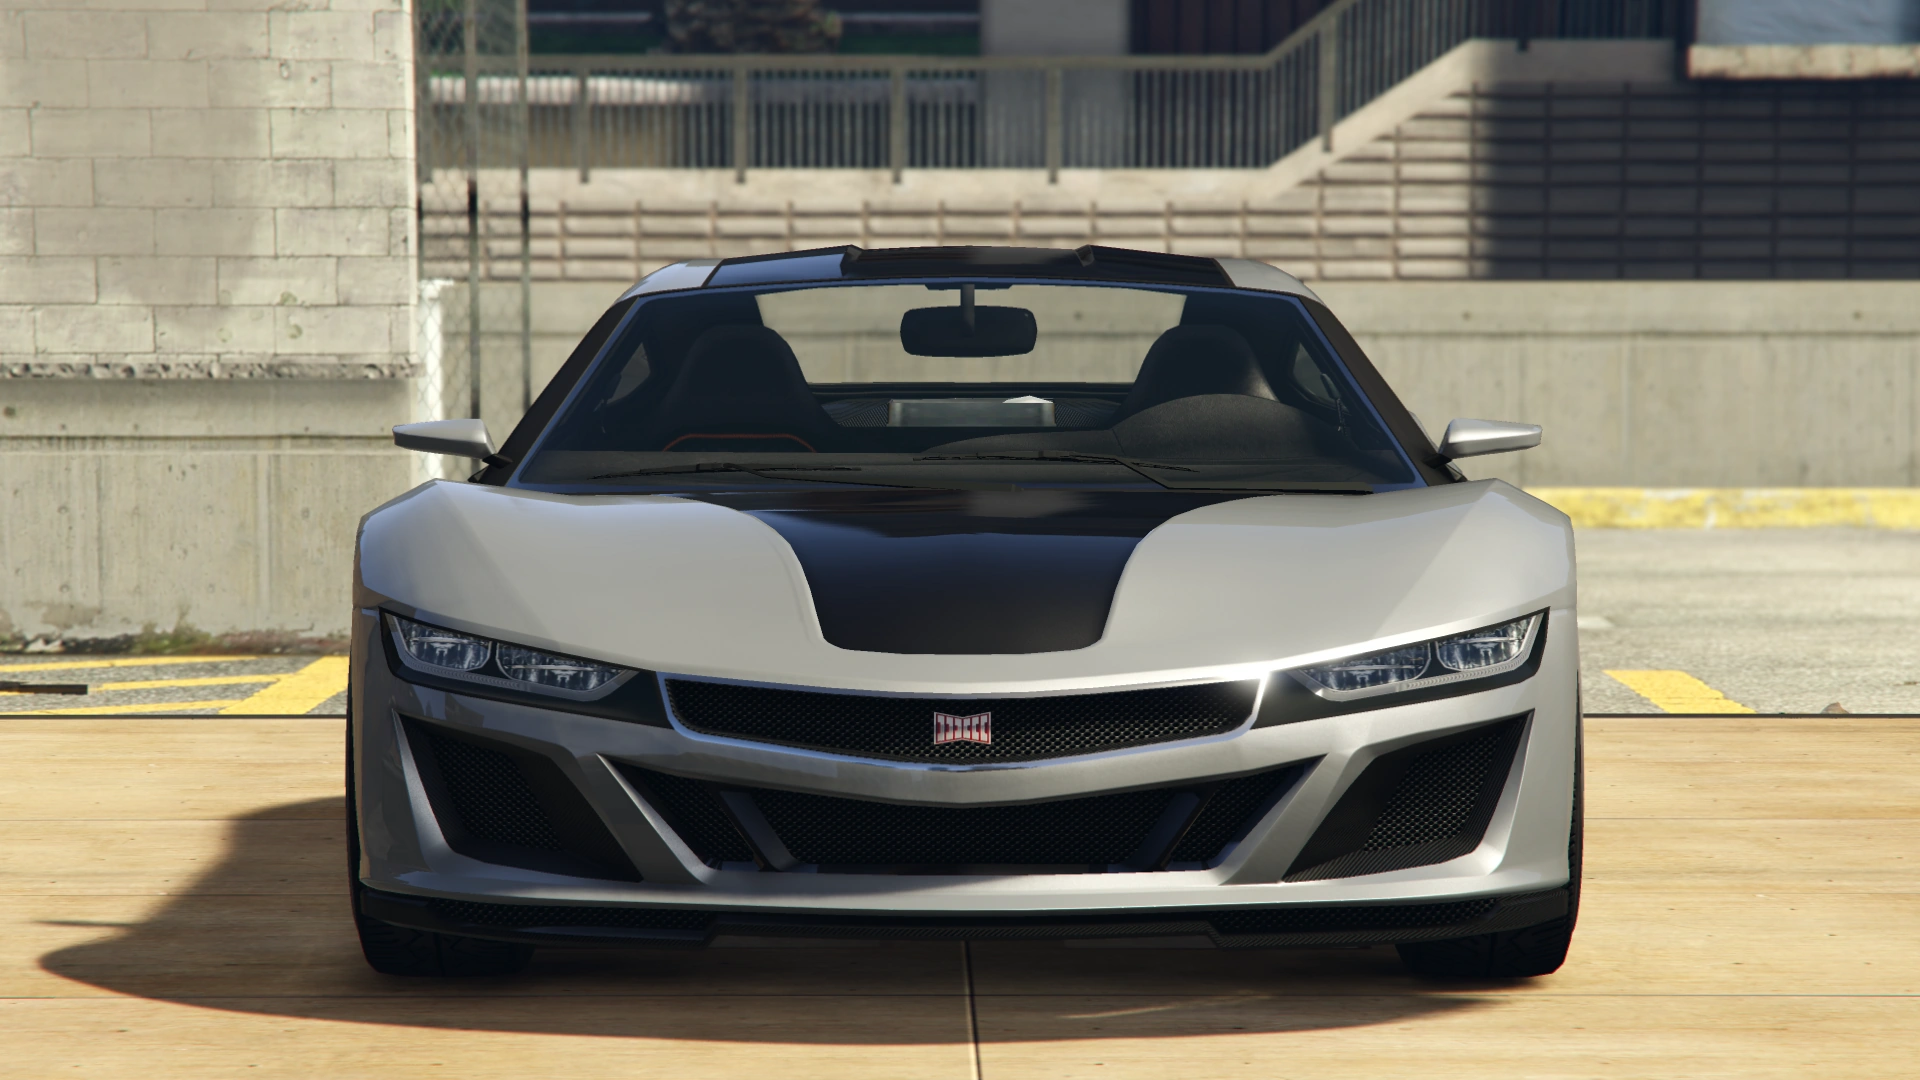
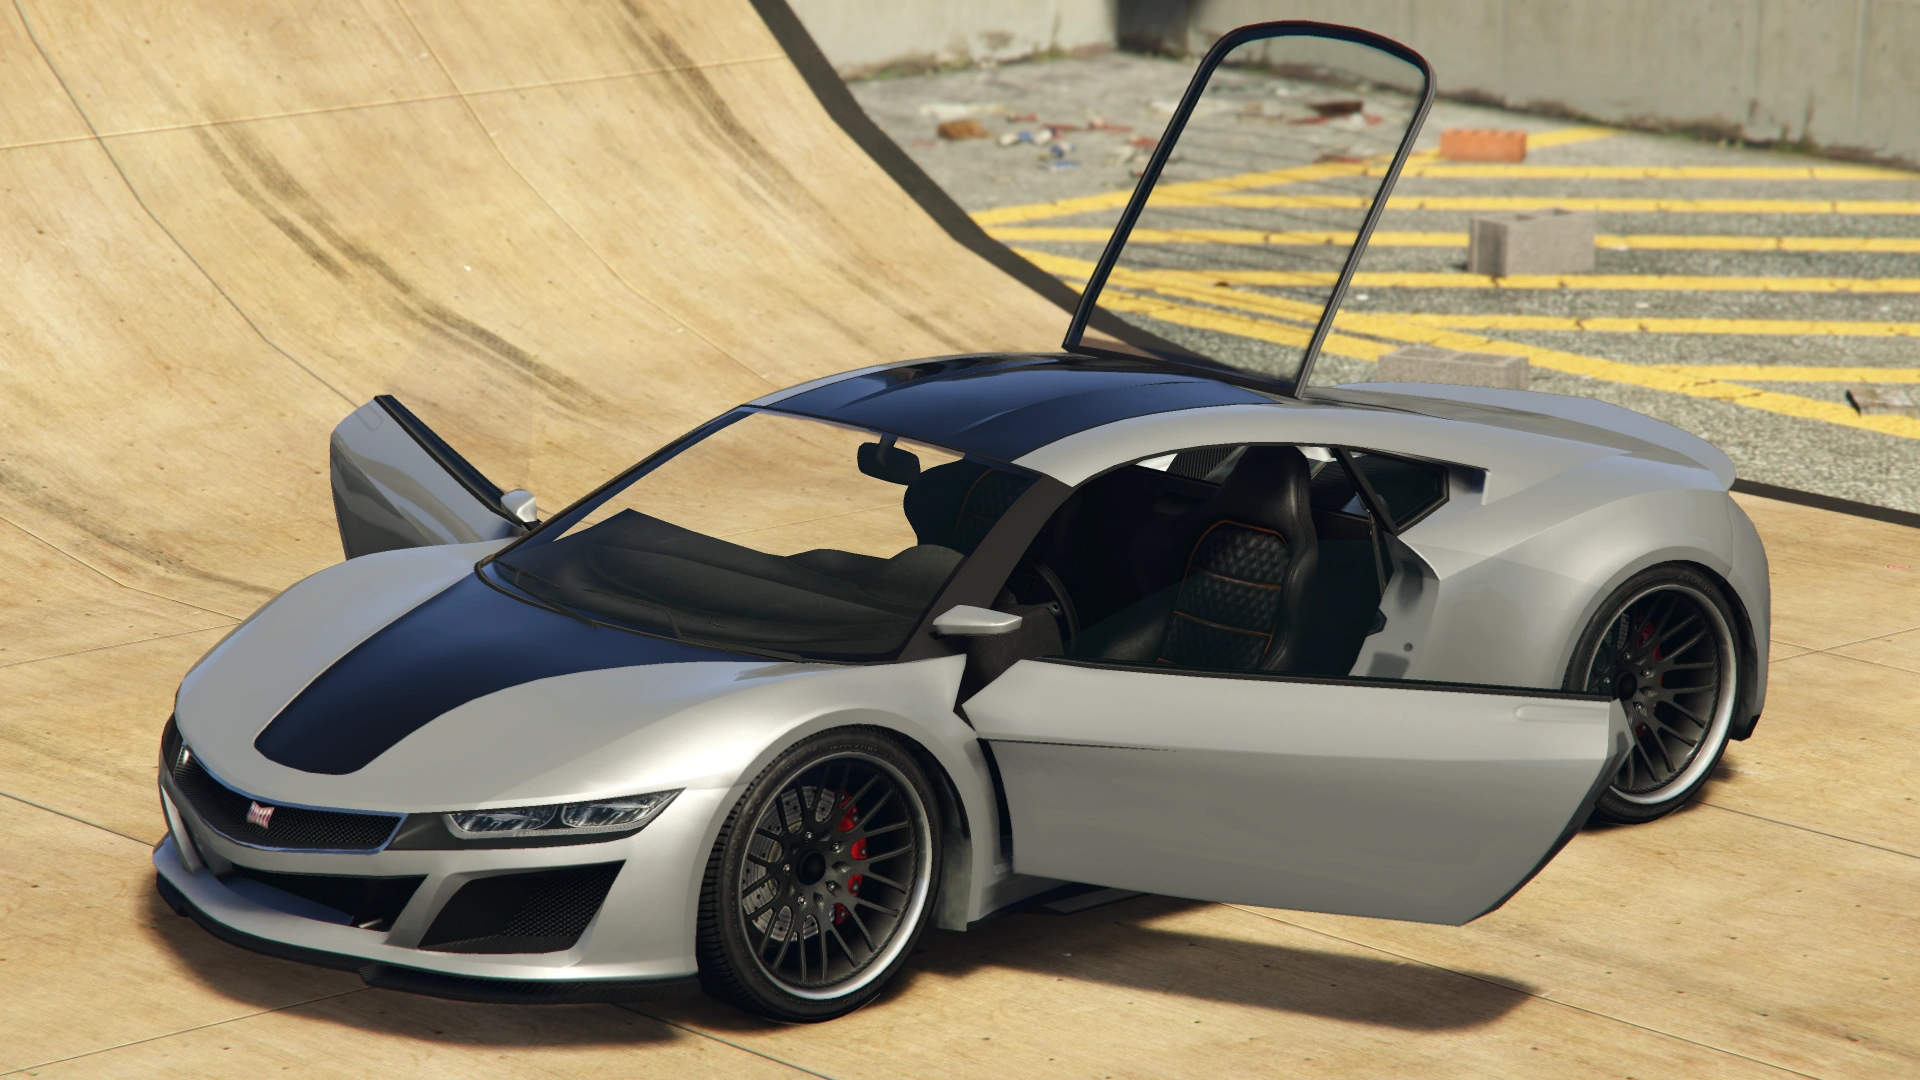
+ | The '''Jester''' is a two-door sports car in ''[[Grand Theft Auto: San Andreas]]'', ''[[Grand Theft Auto V]]'' and ''[[Grand Theft Auto Online]]''. It was also supposed to appear in ''[[Grand Theft Auto: Liberty City Stories]]'', but was [[Beta Releases in GTA Liberty City Stories|removed]] before the game's release. It is manufactured by [[Dinka]] in the [[HD Universe]]. |
==Design== |
==Design== |
||
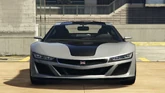
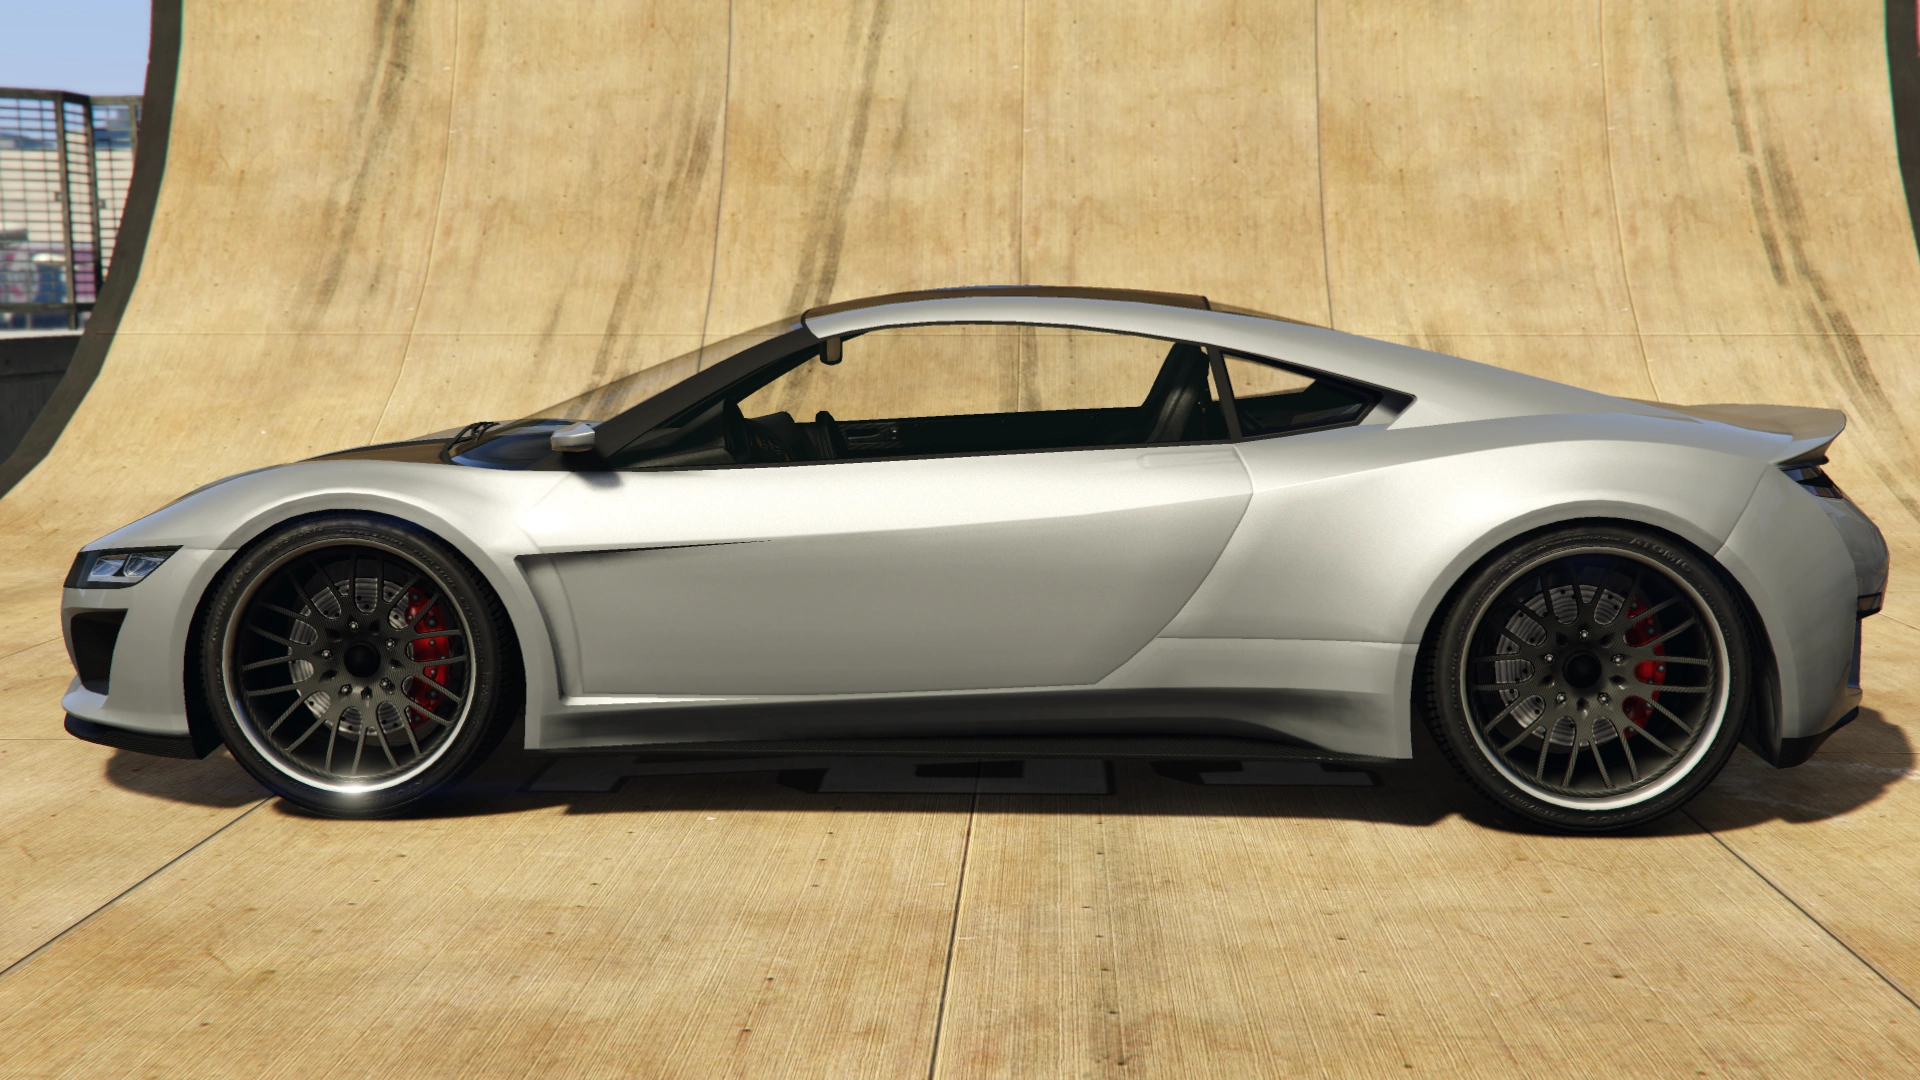
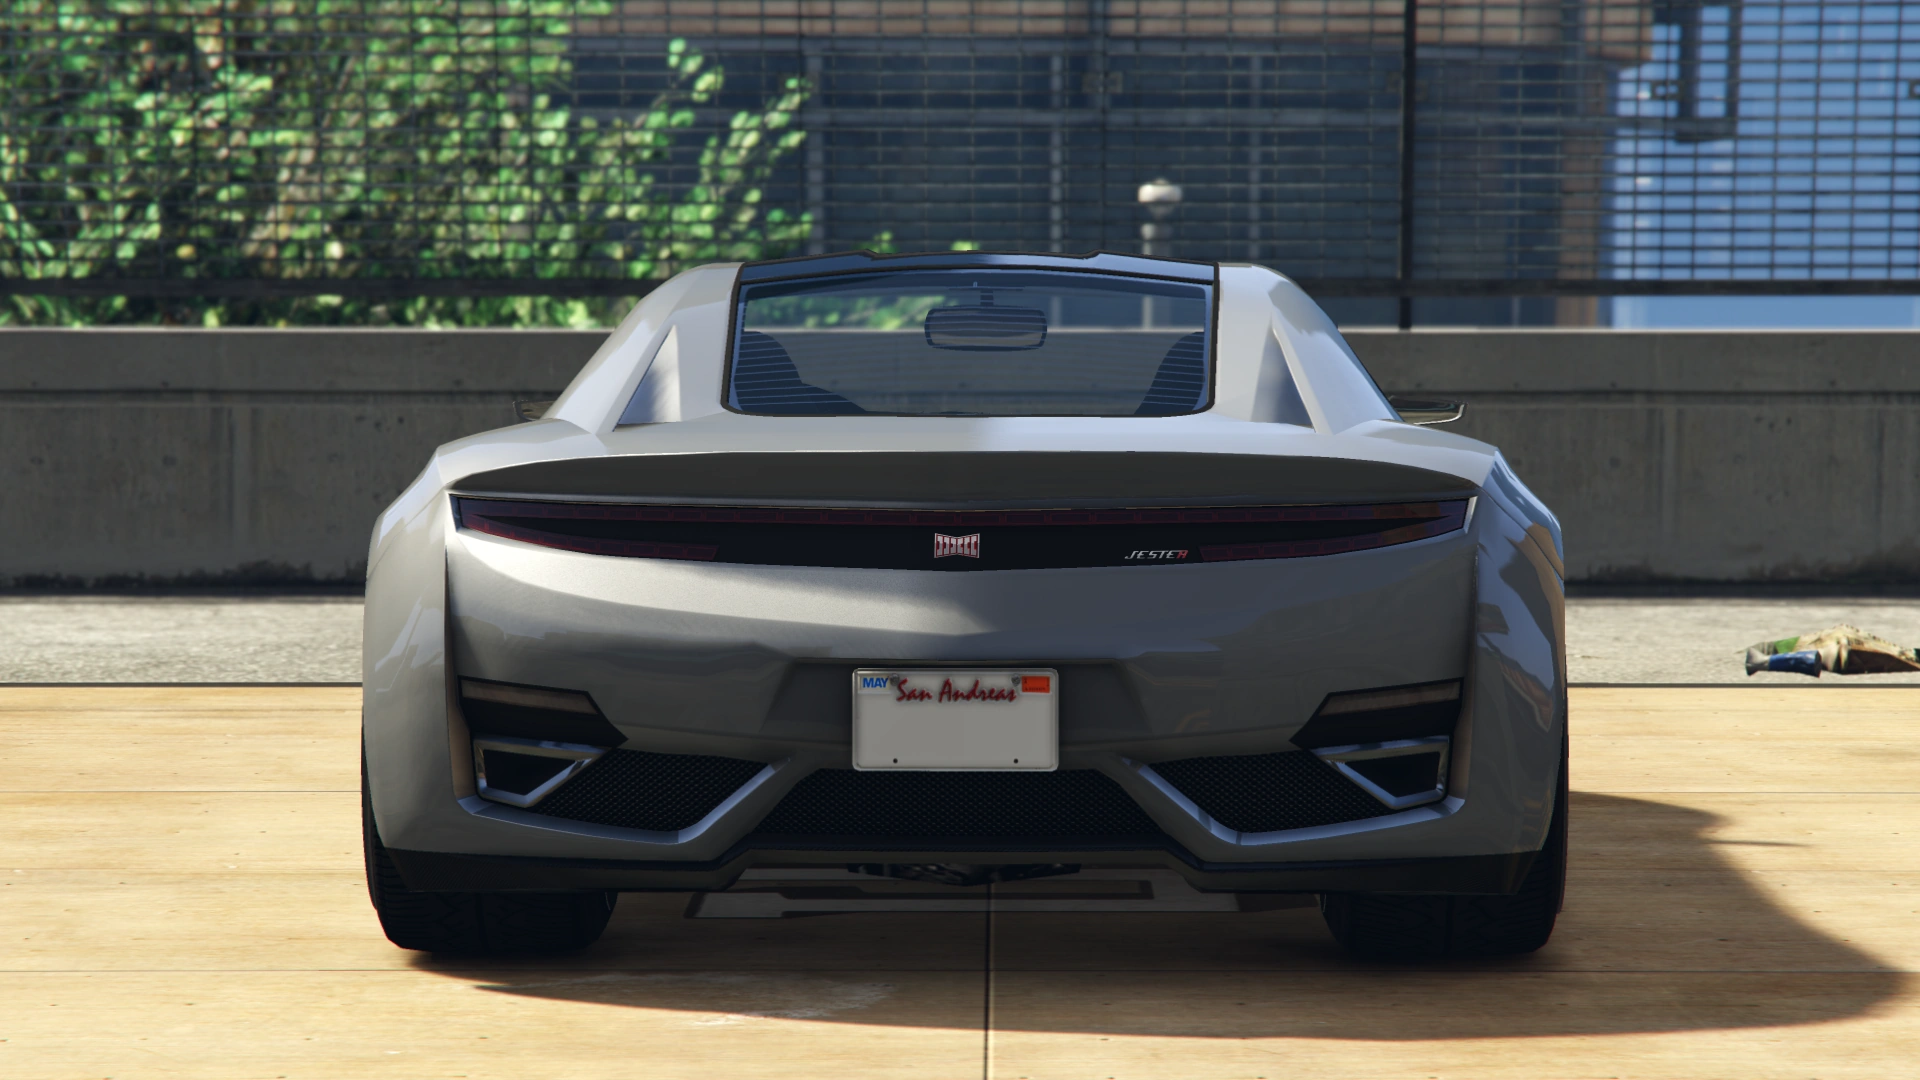
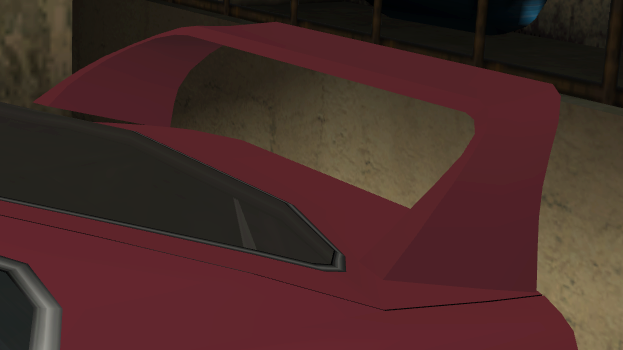
The car appears as a two-door coupé in ''GTA San Andreas'', and a two-door mid-engine sports car in ''GTA V''. |
The car appears as a two-door coupé in ''GTA San Andreas'', and a two-door mid-engine sports car in ''GTA V''. |
||
| + | |||
| − | |||
===''Grand Theft Auto: San Andreas''=== |
===''Grand Theft Auto: San Andreas''=== |
||
| − | Designed as a two-door sports coupe, the Jester bears resemblance to several real life cars, such as the |
+ | Designed as a two-door sports coupe, the Jester bears resemblance to several real life cars, such as the {{WP|Toyota Supra#A80 (1993–2002)|Toyota Supra Mark IV (A80)}}, the {{WP|Nissan 300ZX#Z31|Nissan 300ZX Z31}}, and a hint of {{WP|Fiat Barchetta}}. However, the design has a strong resemblance to the Toyota Supra RZ. |
===''Grand Theft Auto V''=== |
===''Grand Theft Auto V''=== |
||
| − | The Jester now mostly resembles the |
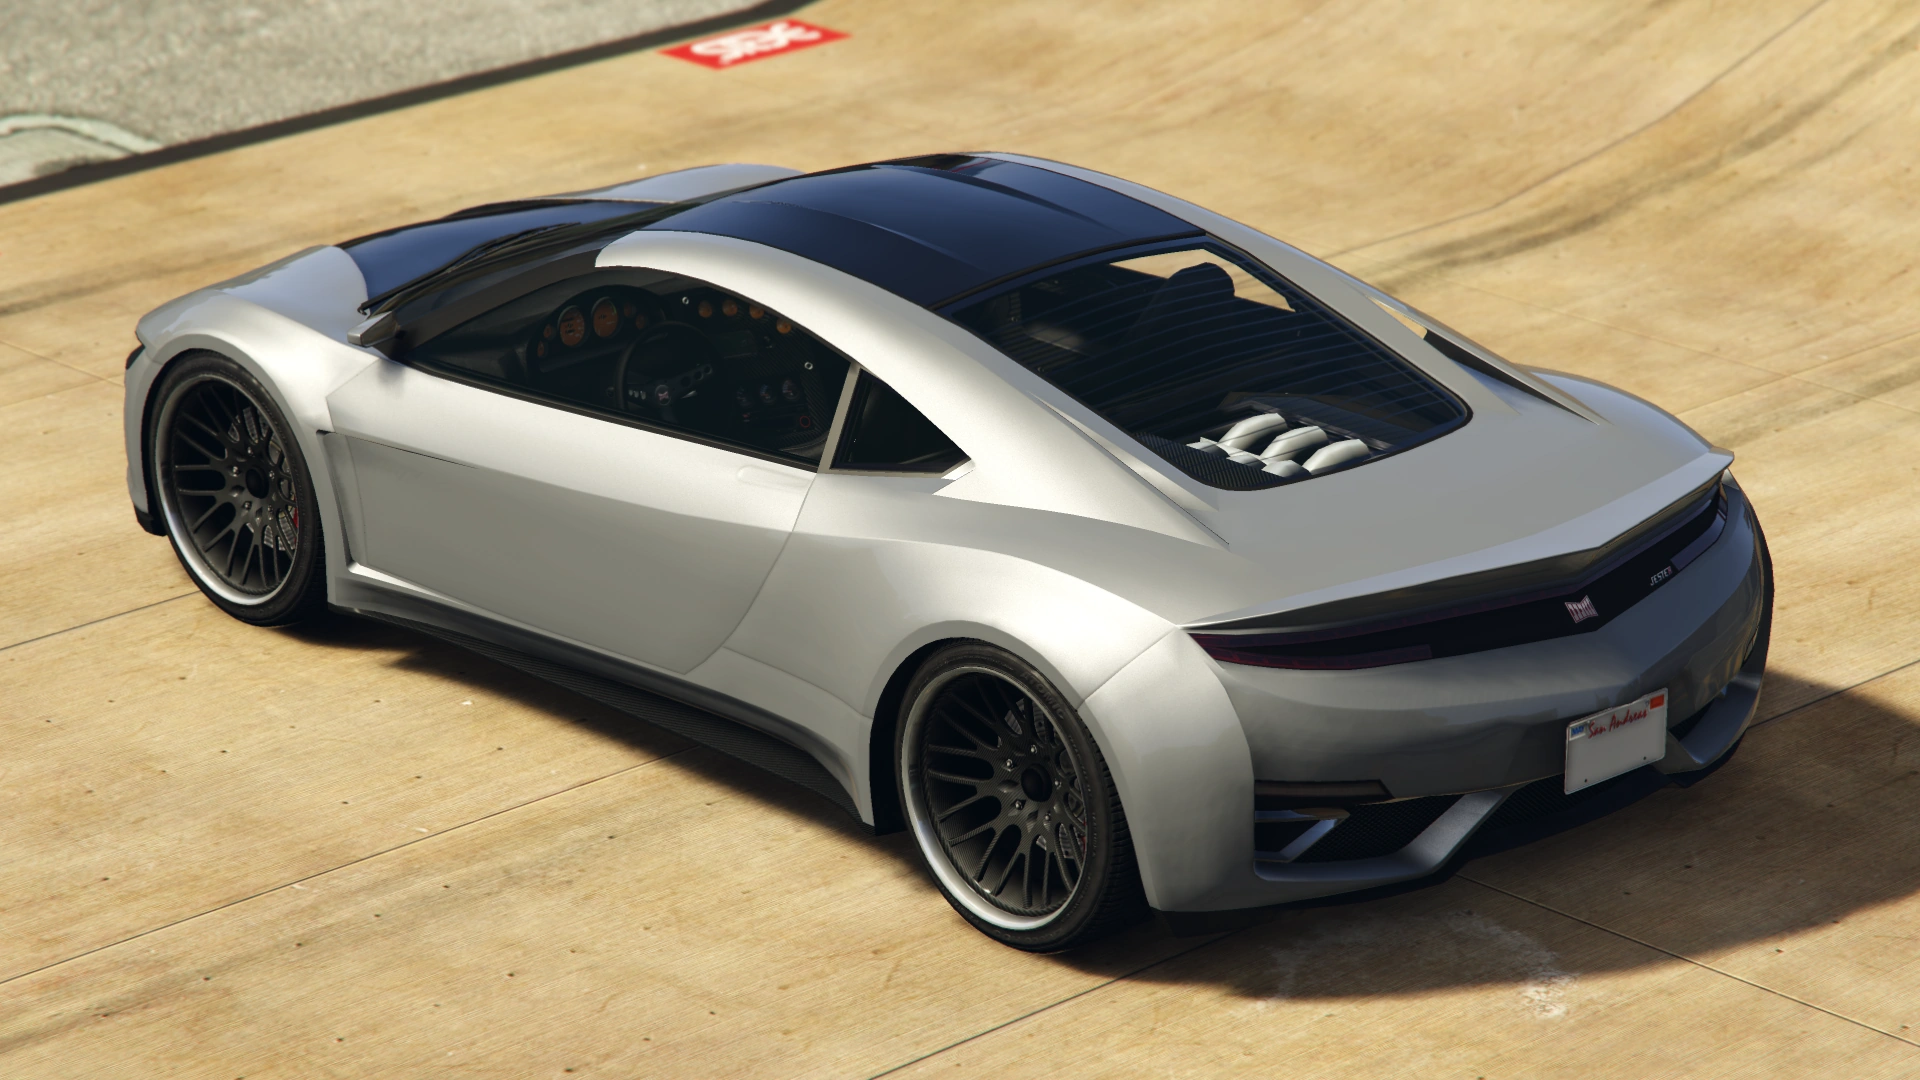
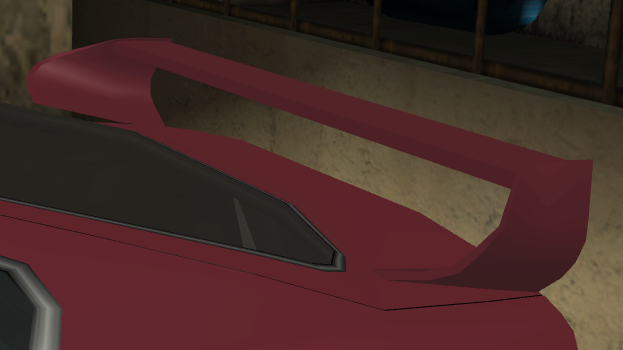
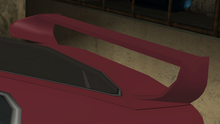
+ | The Jester now mostly resembles the {{WP|Acura NSX|2015 Honda/Acura NSX}}, with curvy features and distinct Japanese styling in both the bodywork and front and rear fascia. The headlights and the hood are derived from the {{WP|BMW i8}}. |
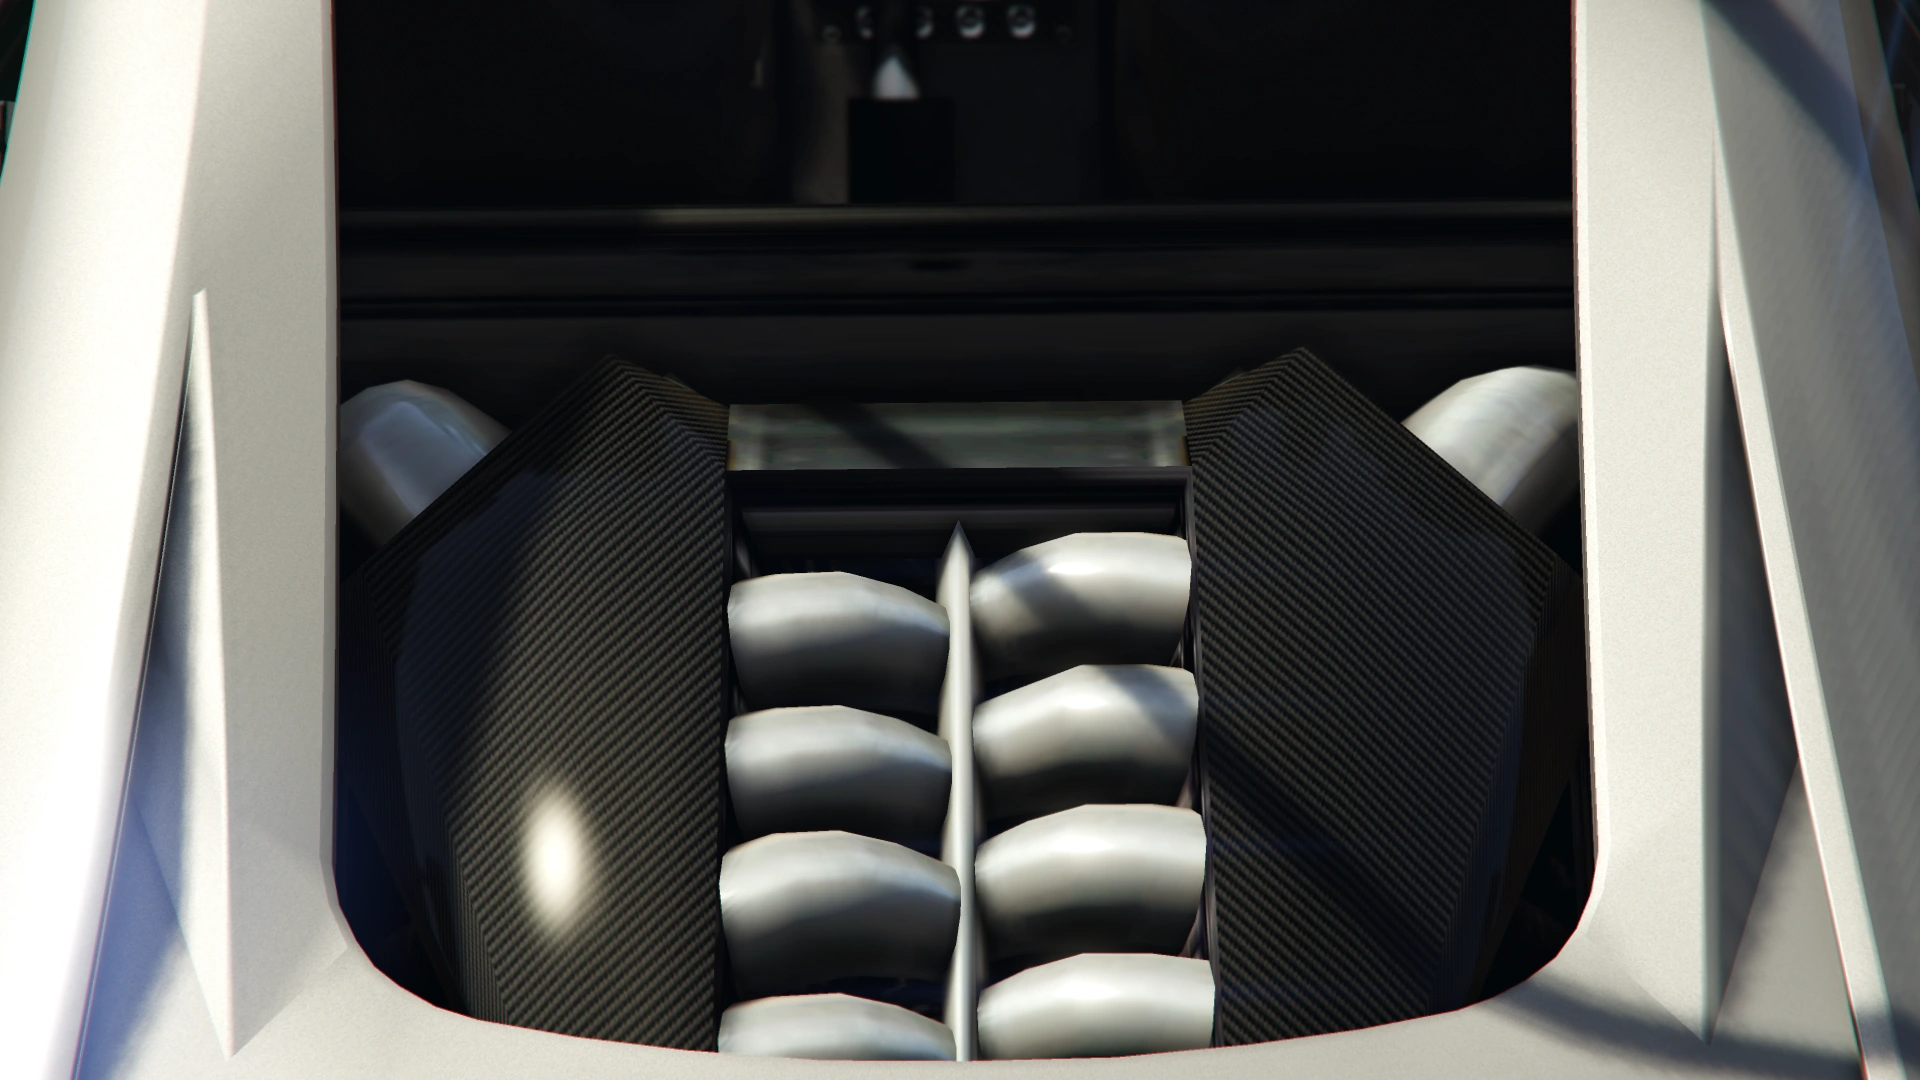
| − | The Jester is made up of an aggressive front face made by the irregular shape of the headlights, causing it to resemble an angry grin. There is a noticeable [[Japan |
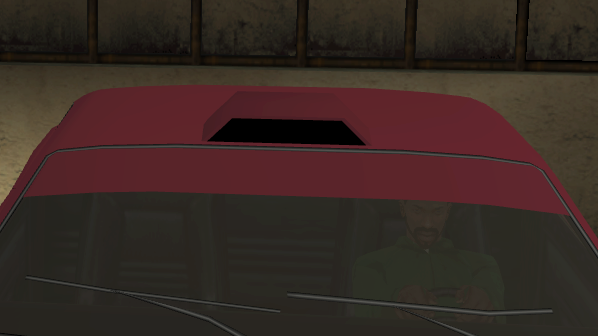
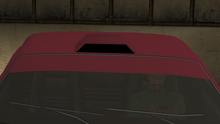
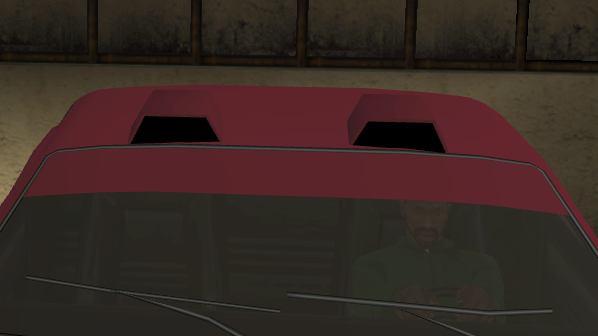
+ | The Jester is made up of an aggressive front face made by the irregular shape of the headlights, causing it to resemble an angry grin. There is a noticeable [[Japan]]ese style on the Jester, which included many sharp curves throughout the car, specifically the front and sides. The rear is more sloped and rounded, giving it a stark contrast between the front. The Jester also features two fuel tank caps, one on either side. |
{{Clr}} |
{{Clr}} |
||
===Current Design Gallery=== |
===Current Design Gallery=== |
||
| − | <!--Please ensure you have read the Manual of Style [GTA_Wiki:Manual_of_Style/Vehicles/Design_Galleries] before uploading and adding images to the Current Design Gallery. Failure to meet these guidelines will result in the images being removed and deleted, and repeated offences may result in a warning.--> |
+ | <!--Please ensure you have read the Manual of Style [GTA_Wiki:Manual_of_Style/Vehicles/Design_Galleries] before uploading and adding images to the Current Design Gallery. Failure to meet these guidelines will result in the images being removed and deleted, and repeated offences may result in a warning.--> |
| + | |||
| − | | front_quarter_image = DinkaJester-GTAV-Frontquarter.png |
||
| + | {{Current Design Gallery |
||
| − | | top_image = DinkaJester-GTAV-Top.png |
||
| − | | |
+ | |front_quarter_image = Jester-GTAV-FrontQuarter.png |
| − | | |
+ | |top_image = Jester-GTAV-Top.png |
| − | | |
+ | |rear_quarter_image = Jester-GTAV-RearQuarter.png |
| − | | |
+ | |front_image = Jester-GTAV-Front.png |
| − | | |
+ | |side_image = Jester-GTAV-Side.png |
| − | | |
+ | |rear_image = Jester-GTAV-Rear.png |
| − | | |
+ | |engine_image = Jester-GTAV-Engine.png |
| − | | |
+ | |underside_image = Jester-GTAV-Underside.png |
| − | | |
+ | |inside_image = Jester-GTAV-Inside.png |
| − | | |
+ | |detail_image = Jester-GTAV-Badges.png |
| + | |open_other_image = Jester-GTAV-Other.png |
||
| + | |dashboard_image = Jester-GTAV-Dashboard.png |
||
}} |
}} |
||
===Version History Gallery=== |
===Version History Gallery=== |
||
{{Vehicle Design History Gallery |
{{Vehicle Design History Gallery |
||
| − | | |
+ | |GTASA_Front_imagename = Jester-GTASA-front.jpg |
| − | | |
+ | |GTASA_Rear_imagename = Jester-GTASA-rear.jpg |
}} |
}} |
||
| Line 169: | Line 158: | ||
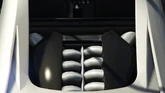
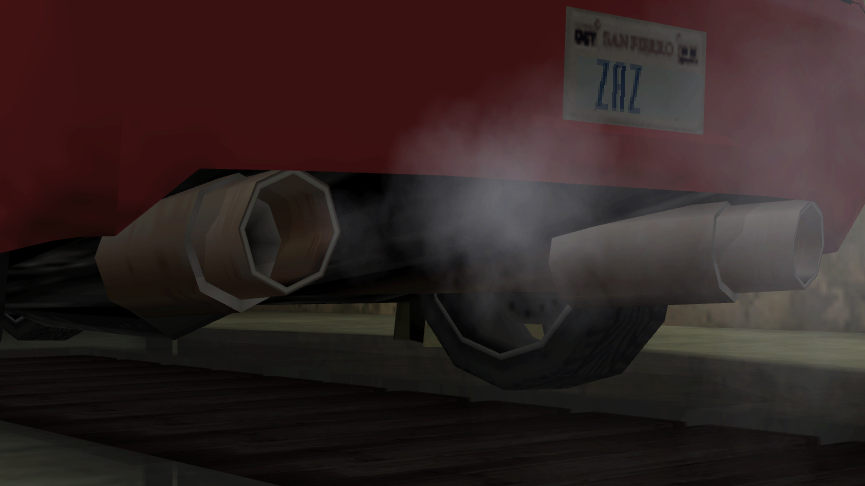
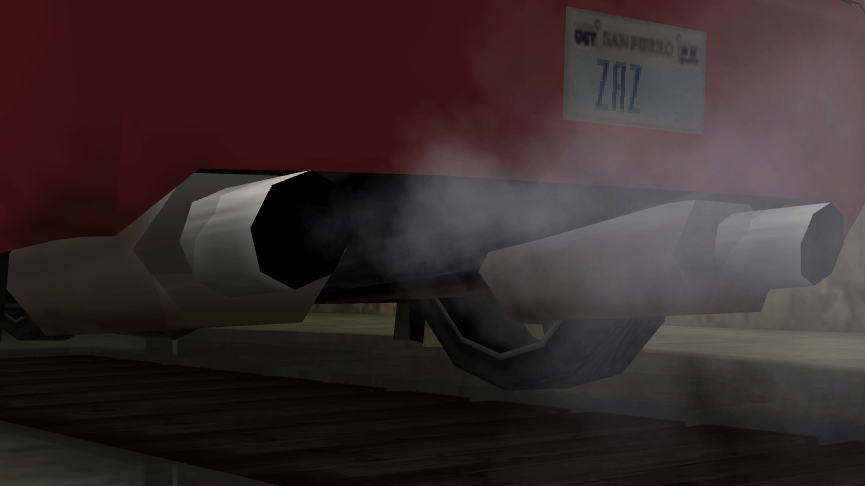
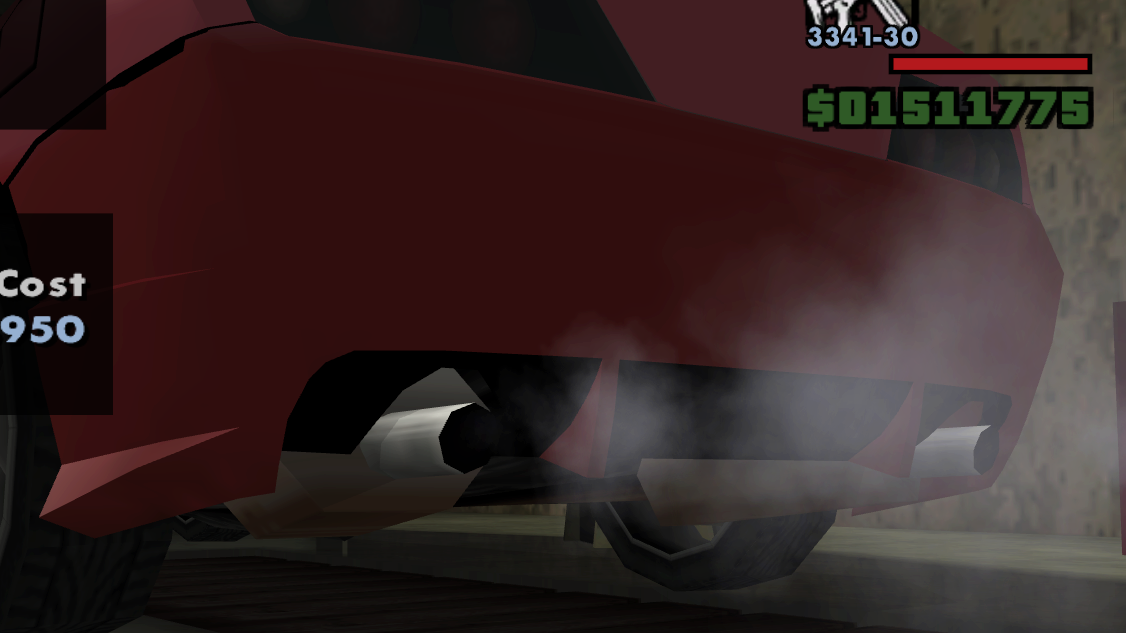
Despite claiming to have a V6 engine, it actually has a V8 engine, which can be seen through the rear window. The Jester shares the same engine sound as the [[Coquette]]. |
Despite claiming to have a V6 engine, it actually has a V8 engine, which can be seen through the rear window. The Jester shares the same engine sound as the [[Coquette]]. |
||
| − | ==== |
+ | ====GTA V Overview==== |
{{Vehiclestats-gtav |
{{Vehiclestats-gtav |
||
|handling_top_speed = 98 / 158 |
|handling_top_speed = 98 / 158 |
||
| Line 196: | Line 185: | ||
==Modifications== |
==Modifications== |
||
===''Grand Theft Auto: San Andreas''=== |
===''Grand Theft Auto: San Andreas''=== |
||
| − | [[File:Jester-GTASA-modified-front.jpg|300px|thumb|Possible combinations of modifications that can be given to Jesters at [[Wheel Arch Angels]] in ''GTA San Andreas''.]] |
||
The Jester can only be modified at [[Wheel Arch Angels]] in [[Ocean Flats]], [[San Fierro (3D Universe)|San Fierro]]. |
The Jester can only be modified at [[Wheel Arch Angels]] in [[Ocean Flats]], [[San Fierro (3D Universe)|San Fierro]]. |
||
| − | |||
{| class="wikitable" |
{| class="wikitable" |
||
!Type |
!Type |
||
!Upgrade |
!Upgrade |
||
!Cost |
!Cost |
||
| + | !Image |
||
|- |
|- |
||
| rowspan="3" |Paint Jobs |
| rowspan="3" |Paint Jobs |
||
|Paintjob 1 |
|Paintjob 1 |
||
|$ 500 |
|$ 500 |
||
| + | |[[File:Jester-GTSA-Paintjob1.png|thumb|220x220px]] |
||
|- |
|- |
||
|Paintjob 2 |
|Paintjob 2 |
||
|$ 500 |
|$ 500 |
||
| + | |[[File:Jester-GTSA-Paintjob2.png|thumb|220x220px]] |
||
|- |
|- |
||
|Paintjob 3 |
|Paintjob 3 |
||
|$ 500 |
|$ 500 |
||
| + | |[[File:Jester-GTSA-Paintjob3.png|thumb|220x220px]] |
||
|- |
|- |
||
|Colors |
|Colors |
||
|Car Color 1 (64 different colors) |
|Car Color 1 (64 different colors) |
||
|$ 150 |
|$ 150 |
||
| + | |[[File:Jester-GTSA-Colors.png|thumb|220x220px]] |
||
|- |
|- |
||
| rowspan="2" |Exhausts |
| rowspan="2" |Exhausts |
||
|Alien Exhaust |
|Alien Exhaust |
||
|$ 850 |
|$ 850 |
||
| + | |[[File:Jester-GTSA-AlienExhaust.png|thumb|220x220px]] |
||
|- |
|- |
||
|X-Flow Exhaust |
|X-Flow Exhaust |
||
|$ 750 |
|$ 750 |
||
| + | |[[File:Jester-GTSA-XflowExhaust.png|thumb|220x220px]] |
||
|- |
|- |
||
| rowspan="2" |Front Bumper |
| rowspan="2" |Front Bumper |
||
|Alien Front Bumper |
|Alien Front Bumper |
||
|$ 1050 |
|$ 1050 |
||
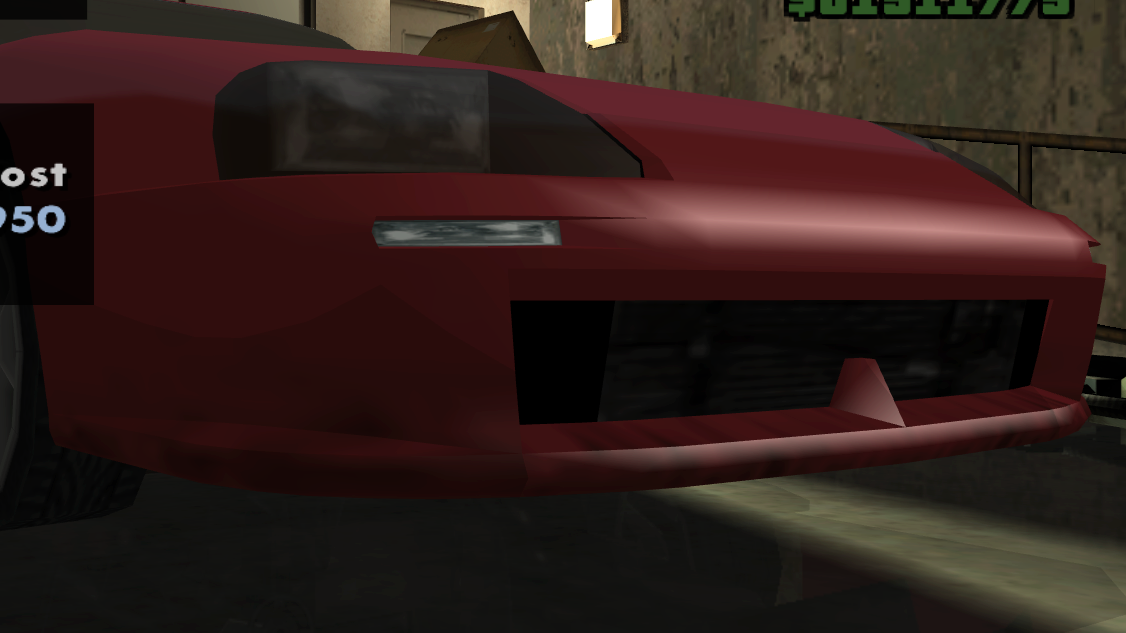
| + | |[[File:AlienFrontBumper-0.png|thumb|220x220px]] |
||
|- |
|- |
||
|X-Flow Front Bumper |
|X-Flow Front Bumper |
||
|$ 950 |
|$ 950 |
||
| + | |[[File:XflowFrontBumper-0.png|thumb|220x220px]] |
||
|- |
|- |
||
| rowspan="2" |Rear Bumper |
| rowspan="2" |Rear Bumper |
||
|Alien Rear Bumper |
|Alien Rear Bumper |
||
|$ 1050 |
|$ 1050 |
||
| + | |[[File:AlienRearBumper-0.png|thumb|220x220px]] |
||
|- |
|- |
||
|X-Flow Rear Bumper |
|X-Flow Rear Bumper |
||
|$ 950 |
|$ 950 |
||
| + | |[[File:XflowRearBumper-0.png|thumb|220x220px]] |
||
|- |
|- |
||
| rowspan="2" |Roof |
| rowspan="2" |Roof |
||
|Alien Roof Vent |
|Alien Roof Vent |
||
|$ 250 |
|$ 250 |
||
| + | |[[File:AlienRoofVents-0.png|thumb|220x220px]] |
||
|- |
|- |
||
|X-Flow Roof Vent |
|X-Flow Roof Vent |
||
|$ 200 |
|$ 200 |
||
| + | |[[File:XflowRoofVents-0.png|thumb|220x220px]] |
||
|- |
|- |
||
| rowspan="2" |Spoilers |
| rowspan="2" |Spoilers |
||
|Alien Spoiler |
|Alien Spoiler |
||
|$ 650 |
|$ 650 |
||
| + | |[[File:AlienSpoiler-0.png|thumb|220x220px]] |
||
|- |
|- |
||
|X-Flow Spoiler |
|X-Flow Spoiler |
||
|$ 550 |
|$ 550 |
||
| + | |[[File:XflowSpoiler-0.png|thumb|220x220px]] |
||
|- |
|- |
||
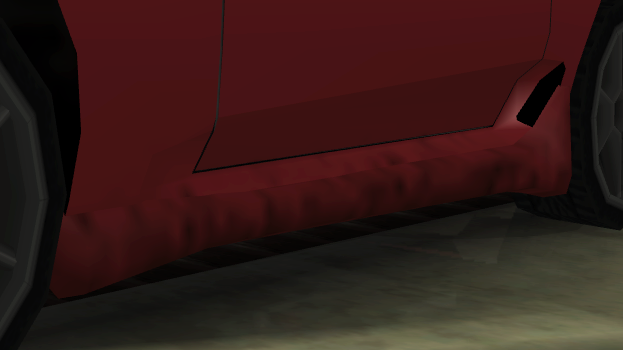
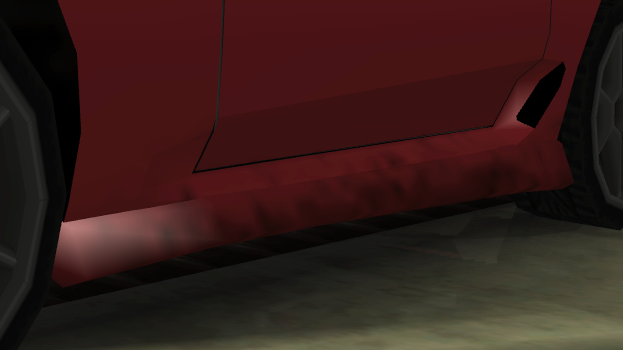
| rowspan="2" |Side Skirts |
| rowspan="2" |Side Skirts |
||
|Alien Side Skirts |
|Alien Side Skirts |
||
|$ 550 |
|$ 550 |
||
| + | |[[File:AlienSideSkirts-0.png|thumb|220x220px]] |
||
|- |
|- |
||
|X-Flow Side Skirts |
|X-Flow Side Skirts |
||
|$ 450 |
|$ 450 |
||
| + | |[[File:XflowSideSkirts-0.png|thumb|220x220px]] |
||
|- |
|- |
||
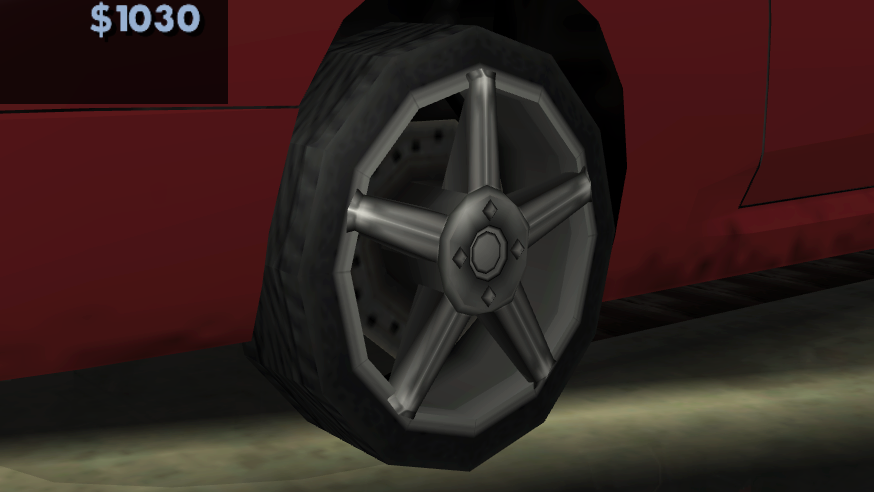
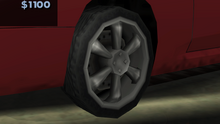
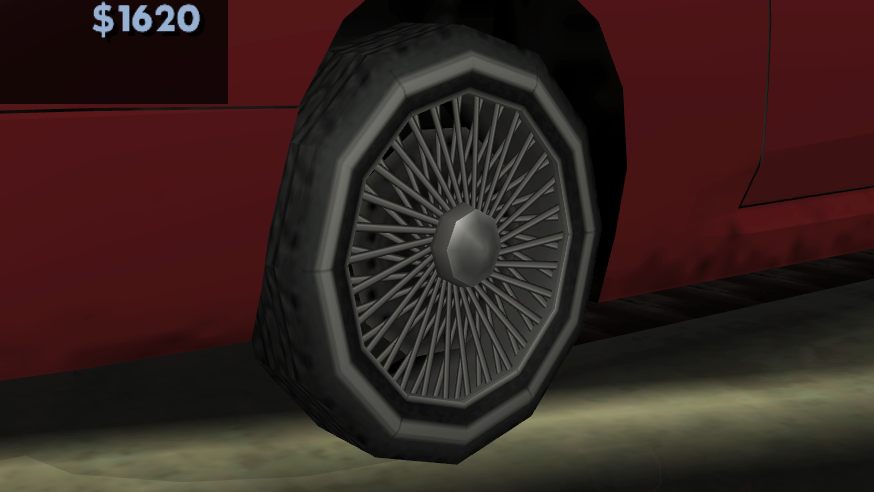
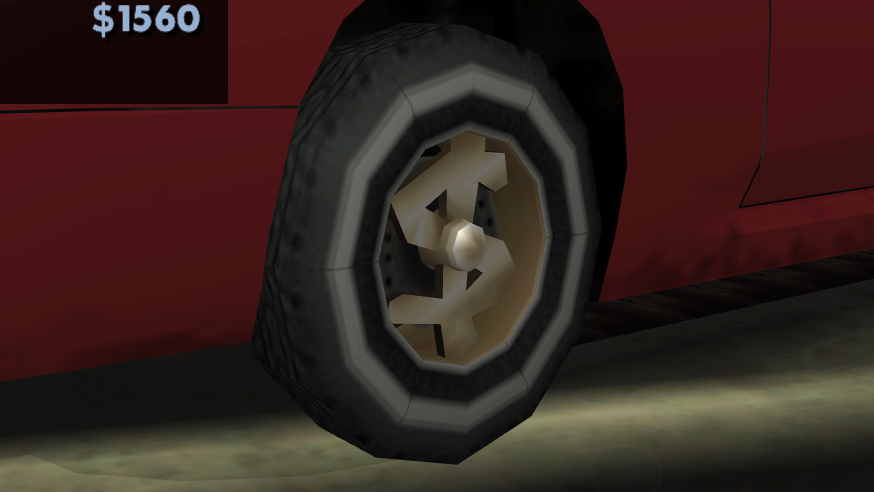
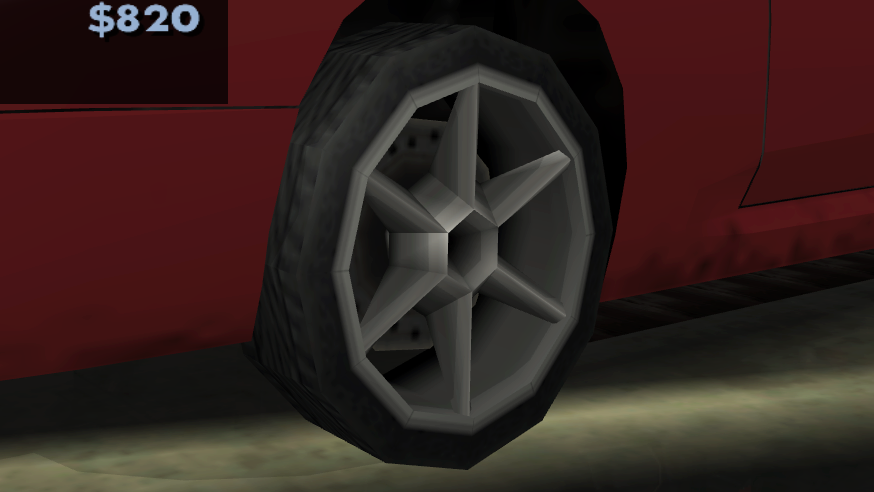
| rowspan="10" |Wheels |
| rowspan="10" |Wheels |
||
|Cutter |
|Cutter |
||
|$ 1030 |
|$ 1030 |
||
| + | |[[File:Cutter-0.png|thumb|220x220px]] |
||
|- |
|- |
||
|Rimshine |
|Rimshine |
||
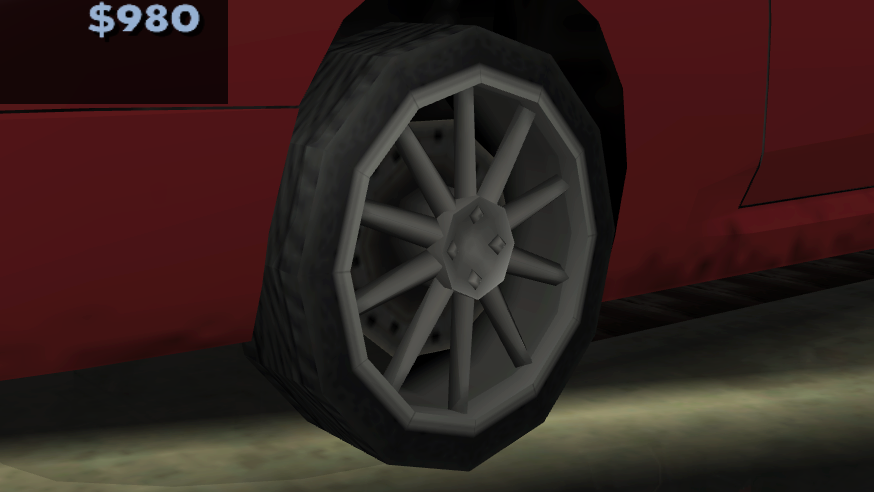
|$ 980 |
|$ 980 |
||
| + | |[[File:Rimshine-0.png|thumb|220x220px]] |
||
|- |
|- |
||
|Mega |
|Mega |
||
|$ 1030 |
|$ 1030 |
||
| + | |[[File:Mega-0.png|thumb|220x220px]] |
||
|- |
|- |
||
|Grove |
|Grove |
||
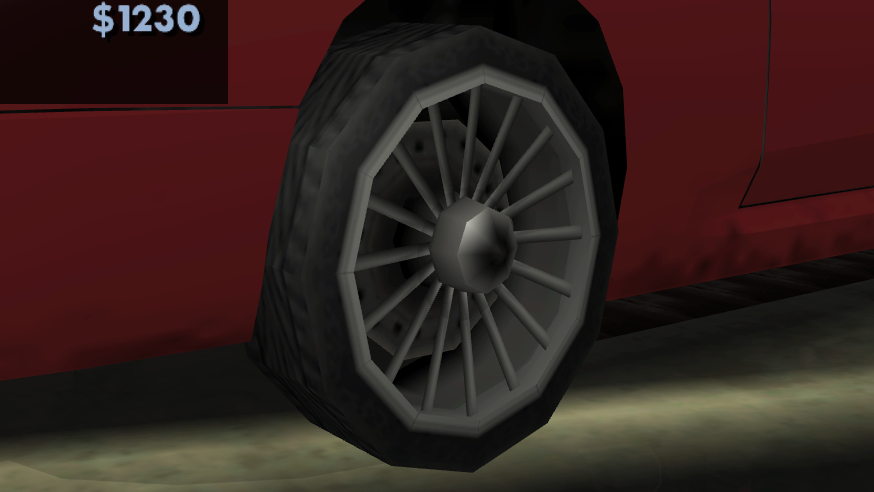
|$ 1230 |
|$ 1230 |
||
| + | |[[File:Grove.png|thumb|220x220px]] |
||
|- |
|- |
||
|Switch |
|Switch |
||
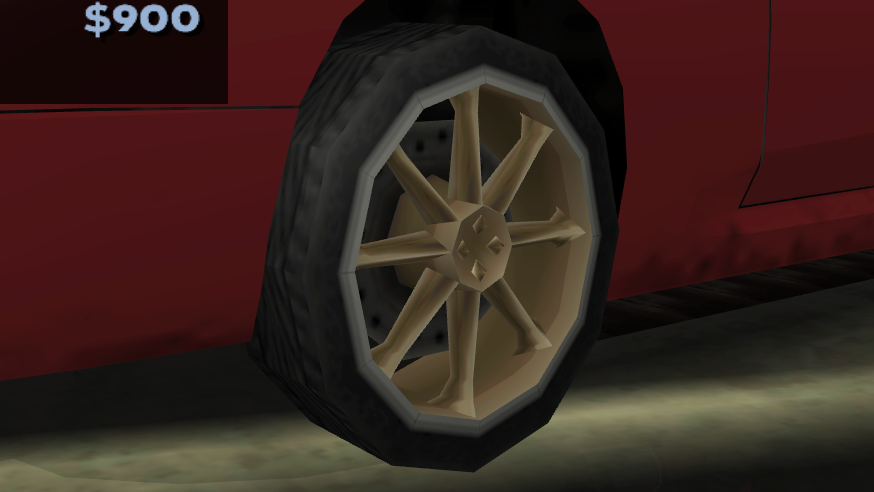
|$ 900 |
|$ 900 |
||
| + | |[[File:Switch-0.png|thumb|220x220px]] |
||
|- |
|- |
||
|Shadow |
|Shadow |
||
|$ 1100 |
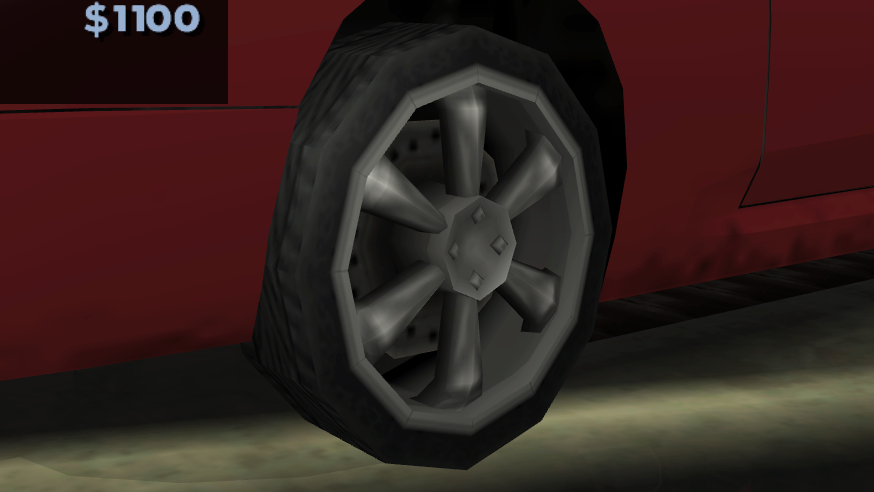
|$ 1100 |
||
| + | |[[File:Shadow-0.png|thumb|220x220px]] |
||
|- |
|- |
||
|Classic |
|Classic |
||
|$ 1620 |
|$ 1620 |
||
| + | |[[File:Classic-0.png|thumb|220x220px]] |
||
|- |
|- |
||
|Dollar |
|Dollar |
||
|$ 1560 |
|$ 1560 |
||
| + | |[[File:Dollar-0.png|thumb|220x220px]] |
||
|- |
|- |
||
|Import |
|Import |
||
|$ 820 |
|$ 820 |
||
| + | |[[File:Import-0.png|thumb|220x220px]] |
||
|- |
|- |
||
|Atomic |
|Atomic |
||
|$ 770 |
|$ 770 |
||
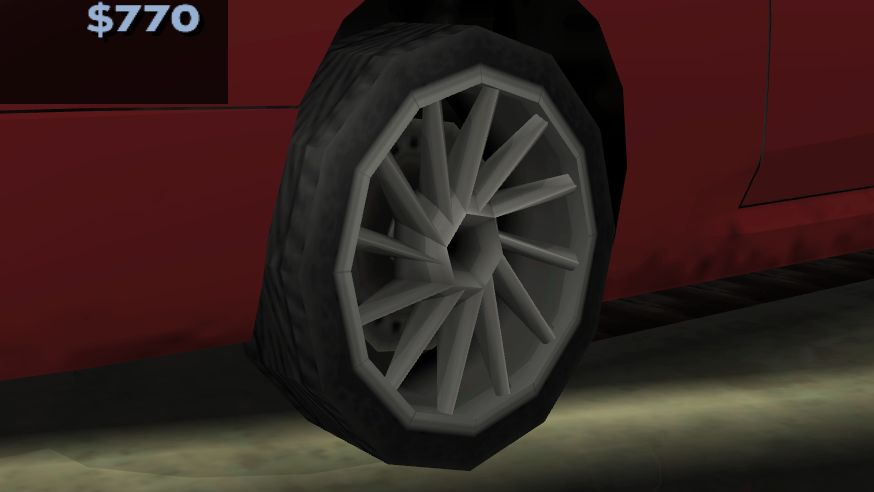
| + | |[[File:Atomic-1.png|thumb|220x220px]] |
||
|- |
|- |
||
|Car Stereo |
|Car Stereo |
||
|Bass Boost |
|Bass Boost |
||
|$ 100 |
|$ 100 |
||
| + | | |
||
|- |
|- |
||
|Hydraulics |
|Hydraulics |
||
|Hydraulics |
|Hydraulics |
||
|$ 1500 |
|$ 1500 |
||
| + | |[[File:Hydraulics.png|thumb|220x220px]] |
||
|- |
|- |
||
| rowspan="3" |Nitro |
| rowspan="3" |Nitro |
||
|2x Nitrous |
|2x Nitrous |
||
|$ 200 |
|$ 200 |
||
| + | |[[File:NitroX2-0.png|thumb|220x220px]] |
||
|- |
|- |
||
|5x Nitrous |
|5x Nitrous |
||
|$ 500 |
|$ 500 |
||
| + | |[[File:NitroX5-0.png|thumb|220x220px]] |
||
|- |
|- |
||
|10x Nitrous |
|10x Nitrous |
||
|$ 1000 |
|$ 1000 |
||
| + | |[[File:NitroX10-0.png|thumb|220x220px]] |
||
|} |
|} |
||
===''Grand Theft Auto V''=== |
===''Grand Theft Auto V''=== |
||
{| class="wikitable" |
{| class="wikitable" |
||
| + | ! colspan="2" scope="col" |Category |
||
| − | !Type |
||
| + | ! scope="col" |Modification |
||
| − | !Upgrade |
||
| − | !Cost ( |
+ | ! scope="col" |Cost (''GTA V'') |
| − | !Cost ([[Grand Theft Auto Online|Online]]) |
+ | ! scope="col" |Cost ([[Grand Theft Auto Online|''GTA Online'']]) |
| + | ! scope="col" |Image |
||
| + | |- |
||
| + | | colspan="2" rowspan="6" |Armor |
||
| + | |No Armor |
||
| + | | style="text-align: center;" |$500 |
||
| + | | colspan="2" style="text-align: center;" |$1,000 |
||
|- |
|- |
||
| − | | rowspan="5" |Armor |
||
|Armor Upgrade 20% |
|Armor Upgrade 20% |
||
| style="text-align: center;" |$2,500 |
| style="text-align: center;" |$2,500 |
||
| − | | style="text-align: center;" |$7,500 |
+ | | colspan="2" style="text-align: center;" |$7,500 |
|- |
|- |
||
|Armor Upgrade 40% |
|Armor Upgrade 40% |
||
| style="text-align: center;" |$6,250 |
| style="text-align: center;" |$6,250 |
||
| − | | style="text-align: center;" |$12,000 |
+ | | colspan="2" style="text-align: center;" |$12,000 |
|- |
|- |
||
|Armor Upgrade 60% |
|Armor Upgrade 60% |
||
| style="text-align: center;" |$10,000 |
| style="text-align: center;" |$10,000 |
||
| − | | style="text-align: center;" |$20,000 |
+ | | colspan="2" style="text-align: center;" |$20,000 |
|- |
|- |
||
|Armor Upgrade 80% |
|Armor Upgrade 80% |
||
| style="text-align: center;" |$17,500 |
| style="text-align: center;" |$17,500 |
||
| − | | style="text-align: center;" |$35,000 |
+ | | colspan="2" style="text-align: center;" |$35,000 |
|- |
|- |
||
|Armor Upgrade 100% |
|Armor Upgrade 100% |
||
| style="text-align: center;" |$25,000 |
| style="text-align: center;" |$25,000 |
||
| − | | style="text-align: center;" |$50,000 |
+ | | colspan="2" style="text-align: center;" |$50,000 |
| + | |- |
||
| + | | colspan="2" rowspan="4" |Brakes |
||
| + | |Stock Brakes |
||
| + | | style="text-align: center;" |$500 |
||
| + | | colspan="2" style="text-align: center;" |$1,000 |
||
|- |
|- |
||
| − | | rowspan="3" |Brakes |
||
|Street Brakes |
|Street Brakes |
||
| style="text-align: center;" |$10,000 |
| style="text-align: center;" |$10,000 |
||
| − | | style="text-align: center;" |$20,000 |
+ | | colspan="2" style="text-align: center;" |$20,000 |
|- |
|- |
||
|Sport Brakes |
|Sport Brakes |
||
| style="text-align: center;" |$13,500 |
| style="text-align: center;" |$13,500 |
||
| − | | style="text-align: center;" |$27,000 |
+ | | colspan="2" style="text-align: center;" |$27,000 |
|- |
|- |
||
|Race Brakes |
|Race Brakes |
||
| style="text-align: center;" |$17,500 |
| style="text-align: center;" |$17,500 |
||
| − | | style="text-align: center;" |$35,000 |
+ | | colspan="2" style="text-align: center;" |$35,000 |
| + | |- |
||
| + | | colspan="2" rowspan="7" |Bumpers |
||
| + | |Stock Front Bumper |
||
| + | | style="text-align: center;" |$1,100 |
||
| + | | style="text-align: center;" |$2,200 |
||
| + | | |
||
|- |
|- |
||
| − | | rowspan="5" |Bumpers |
||
|Custom Front Splitter |
|Custom Front Splitter |
||
| − | | style="text-align: center;" |$ |
+ | | style="text-align: center;" |$2,300 |
| style="text-align: center;" |$4,600 |
| style="text-align: center;" |$4,600 |
||
| + | | |
||
|- |
|- |
||
|Splitter With Canards |
|Splitter With Canards |
||
| − | | style="text-align: center;" |$ |
+ | | style="text-align: center;" |$3,700 |
| style="text-align: center;" |$7,400 |
| style="text-align: center;" |$7,400 |
||
| + | | |
||
|- |
|- |
||
|Carbon Splitter & Canards |
|Carbon Splitter & Canards |
||
| − | | style="text-align: center;" |$ |
+ | | style="text-align: center;" |$5,850 |
| style="text-align: center;" |$11,700 |
| style="text-align: center;" |$11,700 |
||
| + | | |
||
| + | |- |
||
| + | |Stock Rear Bumper |
||
| + | | style="text-align: center;" |$1,100 |
||
| + | | style="text-align: center;" |$2,200 |
||
| + | | |
||
|- |
|- |
||
|Painted Rear Diffuser |
|Painted Rear Diffuser |
||
| − | | style="text-align: center;" |$ |
+ | | style="text-align: center;" |$2,300 |
| style="text-align: center;" |$4,600 |
| style="text-align: center;" |$4,600 |
||
| + | | |
||
|- |
|- |
||
|Carbon Rear Diffuser |
|Carbon Rear Diffuser |
||
| − | | style="text-align: center;" |$ |
+ | | style="text-align: center;" |$3,700 |
| style="text-align: center;" |$7,500 |
| style="text-align: center;" |$7,500 |
||
| + | | |
||
|- |
|- |
||
| − | | rowspan="4" |Engine |
+ | | colspan="2" rowspan="4" |Engine |
|EMS Upgrade, Level 1 |
|EMS Upgrade, Level 1 |
||
| style="text-align: center;" |$4,500 |
| style="text-align: center;" |$4,500 |
||
| − | | style="text-align: center;" |$9,000 |
+ | | colspan="2" style="text-align: center;" |$9,000 |
|- |
|- |
||
|EMS Upgrade, Level 2 |
|EMS Upgrade, Level 2 |
||
| style="text-align: center;" |$6,250 |
| style="text-align: center;" |$6,250 |
||
| − | | style="text-align: center;" |$12,500 |
+ | | colspan="2" style="text-align: center;" |$12,500 |
|- |
|- |
||
|EMS Upgrade, Level 3 |
|EMS Upgrade, Level 3 |
||
| style="text-align: center;" |$9,000 |
| style="text-align: center;" |$9,000 |
||
| − | | style="text-align: center;" |$18,000 |
+ | | colspan="2" style="text-align: center;" |$18,000 |
|- |
|- |
||
|EMS Upgrade, Level 4 |
|EMS Upgrade, Level 4 |
||
| style="text-align: center;" |$16,750 |
| style="text-align: center;" |$16,750 |
||
| − | | style="text-align: center;" |$33,500 |
+ | | colspan="2" style="text-align: center;" |$33,500 |
| + | |- |
||
| + | | colspan="2" rowspan="4" |Exhausts |
||
| + | |Stock Exhaust |
||
| + | | style="text-align: center;" |$130 |
||
| + | | style="text-align: center;" |$260 |
||
| + | | |
||
|- |
|- |
||
| − | | rowspan="3" |Exhaust |
||
|Oval Exhaust |
|Oval Exhaust |
||
| style="text-align: center;" |$375 |
| style="text-align: center;" |$375 |
||
| style="text-align: center;" |$750 |
| style="text-align: center;" |$750 |
||
| + | | |
||
|- |
|- |
||
|Chrome Tip Exhaust |
|Chrome Tip Exhaust |
||
| style="text-align: center;" |$899 |
| style="text-align: center;" |$899 |
||
| style="text-align: center;" |$1,800 |
| style="text-align: center;" |$1,800 |
||
| + | | |
||
|- |
|- |
||
|Race Exhaust |
|Race Exhaust |
||
| style="text-align: center;" |$1,499 |
| style="text-align: center;" |$1,499 |
||
| style="text-align: center;" |$3,000 |
| style="text-align: center;" |$3,000 |
||
| + | | |
||
|- |
|- |
||
| − | | rowspan="2" | |
+ | | colspan="2" rowspan="2" |[[Car Bomb|Explosives]] |
| + | |Ignition Bomb |
||
| − | |Xenon Lights |
||
| − | | style="text-align: center;" | |
+ | | style="text-align: center;" |N/A |
| − | | style="text-align: center;" |$ |
+ | | colspan="2" style="text-align: center;" |$5,000 |
|- |
|- |
||
| + | |Remote Bomb |
||
| − | |<div class="mw-collapsible mw-collapsed" style="width:100%"> |
||
| + | | style="text-align: center;" |N/A |
||
| − | <div class="mw-collapsible-content"> |
||
| + | | colspan="2" style="text-align: center;" |$7,500 |
||
| − | {{Main|Los Santos Customs/Lights}} |
||
| + | |- |
||
| − | </div> |
||
| + | | colspan="2" |Horns |
||
| − | </div> |
||
| + | |''Main article: [[Los Santos Customs/Horns]]'' |
||
| style="text-align: center;" | - |
| style="text-align: center;" | - |
||
| + | | colspan="2" style="text-align: center;" | - |
||
| + | |- |
||
| + | | rowspan="3" |Lights |
||
| + | | rowspan="2" |Headlights |
||
| + | |Stock Lights |
||
| + | | style="text-align: center;" |$300 |
||
| + | | colspan="2" style="text-align: center;" |$600 |
||
| + | |- |
||
| + | |Xenon Lights |
||
| + | | style="text-align: center;" |$1,450 |
||
| + | | colspan="2" style="text-align: center;" |$7,500 |
||
| + | |- |
||
| + | |Neon Kits |
||
| + | |''Main article: [[Los Santos Customs/Lights]]'' |
||
| style="text-align: center;" | - |
| style="text-align: center;" | - |
||
| + | | colspan="2" style="text-align: center;" | - |
||
|- |
|- |
||
| − | | rowspan="2" |Loss/Theft Prevention |
+ | | colspan="2" rowspan="2" |Loss/Theft Prevention |
|Tracker |
|Tracker |
||
| style="text-align: center;" |N/A |
| style="text-align: center;" |N/A |
||
| − | | style="text-align: center;" | |
+ | | colspan="2" style="background-color:black;text-align: center;" |Too Hot |
|- |
|- |
||
|Full Coverage |
|Full Coverage |
||
| style="text-align: center;" |N/A |
| style="text-align: center;" |N/A |
||
| − | | style="text-align: center;" | |
+ | | colspan="2" style="background-color:black;text-align: center;" |Too Hot |
|- |
|- |
||
| + | | colspan="2" rowspan="5" |Plates |
||
| − | |Respray |
||
| + | |Blue on White 1 |
||
| − | |<div class="mw-collapsible mw-collapsed" style="width:100%"> |
||
| + | | style="text-align: center;" |$50 |
||
| − | <div class="mw-collapsible-content"> |
||
| + | | colspan="2" style="text-align: center;" |$200 |
||
| − | {{ResprayColorsExpand}} |
||
| + | |- |
||
| − | </div> |
||
| + | |Blue on White 2 |
||
| − | </div> |
||
| − | | style="text-align: center;" | |
+ | | style="text-align: center;" |$50 |
| + | | colspan="2" style="text-align: center;" |$200 |
||
| + | |- |
||
| + | |Blue on White 3 |
||
| + | | style="text-align: center;" |$50 |
||
| + | | colspan="2" style="text-align: center;" |$200 |
||
| + | |- |
||
| + | |Yellow on Blue |
||
| + | | style="text-align: center;" |$75 |
||
| + | | colspan="2" style="text-align: center;" |$300 |
||
| + | |- |
||
| + | |Yellow on Black |
||
| + | | style="text-align: center;" |$150 |
||
| + | | colspan="2" style="text-align: center;" |$600 |
||
| + | |- |
||
| + | | colspan="2" |Respray |
||
| + | |''Main article: [[Los Santos Customs/Respray Colors]]'' |
||
| style="text-align: center;" | - |
| style="text-align: center;" | - |
||
| + | | colspan="2" style="text-align: center;" | - |
||
| + | |- |
||
| + | | colspan="2" rowspan="3" |Roll Cages |
||
| + | |No Roll Cage |
||
| + | | style="text-align: center;" |$350 |
||
| + | | style="text-align: center;" |$700 |
||
| + | | |
||
|- |
|- |
||
| − | | rowspan="2" |Roll Cage |
||
|Roll Cage and Chassis Upgrade |
|Roll Cage and Chassis Upgrade |
||
| style="text-align: center;" |$550 |
| style="text-align: center;" |$550 |
||
| style="text-align: center;" |$1,100 |
| style="text-align: center;" |$1,100 |
||
| + | | |
||
|- |
|- |
||
|Roll Cage & Race Modifications |
|Roll Cage & Race Modifications |
||
| style="text-align: center;" |$675 |
| style="text-align: center;" |$675 |
||
| style="text-align: center;" |$1,350 |
| style="text-align: center;" |$1,350 |
||
| + | | |
||
| + | |- |
||
| + | | colspan="2" rowspan="2" |Roofs |
||
| + | |Stock Roof |
||
| + | | style="text-align: center;" |$100 |
||
| + | | style="text-align: center;" |$200 |
||
| + | | |
||
|- |
|- |
||
| − | | rowspan="1" |Roof |
||
|Rear Louvers |
|Rear Louvers |
||
| style="text-align: center;" |$350 |
| style="text-align: center;" |$350 |
||
| style="text-align: center;" |$700 |
| style="text-align: center;" |$700 |
||
| + | | |
||
|- |
|- |
||
| − | |Sell |
+ | | colspan="2" |Sell |
|Sell Vehicle |
|Sell Vehicle |
||
| style="text-align: center;" |N/A |
| style="text-align: center;" |N/A |
||
| − | | style="text-align: center;" | |
+ | | colspan="2" style="background-color:black;text-align: center;" |Too Hot |
| + | |- |
||
| + | | colspan="2" rowspan="4" |Skirts |
||
| + | |Stock Skirts |
||
| + | | style="text-align: center;" |$1,250 |
||
| + | | style="text-align: center;" |$2,500 |
||
| + | | |
||
|- |
|- |
||
| − | | rowspan="3" |Skirts |
||
|Custom Skirts |
|Custom Skirts |
||
| − | | style="text-align: center;" |$ |
+ | | style="text-align: center;" |$2,750 |
| style="text-align: center;" |$5,500 |
| style="text-align: center;" |$5,500 |
||
| + | | |
||
|- |
|- |
||
|Sport Skirts |
|Sport Skirts |
||
| − | | style="text-align: center;" |$ |
+ | | style="text-align: center;" |$4,000 |
| style="text-align: center;" |$8,000 |
| style="text-align: center;" |$8,000 |
||
| + | | |
||
|- |
|- |
||
|Carbon Skirts |
|Carbon Skirts |
||
| − | | style="text-align: center;" |$ |
+ | | style="text-align: center;" |$5,250 |
| style="text-align: center;" |$10,600 |
| style="text-align: center;" |$10,600 |
||
| + | | |
||
| + | |- |
||
| + | | colspan="2" rowspan="5" |Spoilers |
||
| + | |None |
||
| + | | style="text-align: center;" |$3,000 |
||
| + | | style="text-align: center;" |$6,000 |
||
| + | | |
||
|- |
|- |
||
| − | | rowspan="4" |Spoiler |
||
|Carbon Wing |
|Carbon Wing |
||
| − | | style="text-align: center;" |$ |
+ | | style="text-align: center;" |$3,750 |
| style="text-align: center;" |$7,050 |
| style="text-align: center;" |$7,050 |
||
| + | | |
||
|- |
|- |
||
|Color Coded Wing |
|Color Coded Wing |
||
| − | | style="text-align: center;" |$ |
+ | | style="text-align: center;" |$5,000 |
| style="text-align: center;" |$10,000 |
| style="text-align: center;" |$10,000 |
||
| + | | |
||
|- |
|- |
||
|Carbon Wing Type II |
|Carbon Wing Type II |
||
| − | | style="text-align: center;" |$ |
+ | | style="text-align: center;" |$6,500 |
| style="text-align: center;" |$13,000 |
| style="text-align: center;" |$13,000 |
||
| + | | |
||
|- |
|- |
||
|GT Wing |
|GT Wing |
||
| − | | style="text-align: center;" |$ |
+ | | style="text-align: center;" |$7,000 |
| style="text-align: center;" |$14,000 |
| style="text-align: center;" |$14,000 |
||
| + | | |
||
| + | |- |
||
| + | | colspan="2" rowspan="5" |Suspension |
||
| + | |Stock Suspension |
||
| + | | style="text-align: center;" |$100 |
||
| + | | colspan="2" style="text-align: center;" |$200 |
||
|- |
|- |
||
| − | | rowspan="4" |Suspension |
||
|Lowered Suspension |
|Lowered Suspension |
||
| style="text-align: center;" |$500 |
| style="text-align: center;" |$500 |
||
| − | | style="text-align: center;" |$ |
+ | | colspan="2" style="text-align: center;" |$1,000 |
|- |
|- |
||
|Street Suspension |
|Street Suspension |
||
| style="text-align: center;" |$1,000 |
| style="text-align: center;" |$1,000 |
||
| − | | style="text-align: center;" |$ |
+ | | colspan="2" style="text-align: center;" |$2,000 |
|- |
|- |
||
|Sport Suspension |
|Sport Suspension |
||
| style="text-align: center;" |$1,700 |
| style="text-align: center;" |$1,700 |
||
| − | | style="text-align: center;" |$ |
+ | | colspan="2" style="text-align: center;" |$3,400 |
|- |
|- |
||
|Competition Suspension |
|Competition Suspension |
||
| style="text-align: center;" |$2,200 |
| style="text-align: center;" |$2,200 |
||
| − | | style="text-align: center;" |$ |
+ | | colspan="2" style="text-align: center;" |$4,400 |
| + | |- |
||
| + | | colspan="2" rowspan="4" |Transmission |
||
| + | |Stock Transmission |
||
| + | | style="text-align: center;" |$500 |
||
| + | | colspan="2" style="text-align: center;" |$1,000 |
||
|- |
|- |
||
| − | | rowspan="3" |Transmission |
||
|Street Transmission |
|Street Transmission |
||
| style="text-align: center;" |$14,750 |
| style="text-align: center;" |$14,750 |
||
| − | | style="text-align: center;" |$ |
+ | | colspan="2" style="text-align: center;" |$29,500 |
|- |
|- |
||
|Sports Transmission |
|Sports Transmission |
||
| style="text-align: center;" |$16,250 |
| style="text-align: center;" |$16,250 |
||
| − | | style="text-align: center;" |$ |
+ | | colspan="2" style="text-align: center;" |$32,500 |
|- |
|- |
||
|Race Transmission |
|Race Transmission |
||
| style="text-align: center;" |$20,000 |
| style="text-align: center;" |$20,000 |
||
| − | | style="text-align: center;" |$ |
+ | | colspan="2" style="text-align: center;" |$40,000 |
| + | |- |
||
| + | | colspan="2" rowspan="2" |Turbo |
||
| + | |None |
||
| + | | style="text-align: center;" |$2,500 |
||
| + | | colspan="2" style="text-align: center;" |$5,000 |
||
|- |
|- |
||
| − | |Turbo |
||
|Turbo Tuning |
|Turbo Tuning |
||
| style="text-align: center;" |$12,500 |
| style="text-align: center;" |$12,500 |
||
| − | | style="text-align: center;" |$ |
+ | | colspan="2" style="text-align: center;" |$50,000 |
|- |
|- |
||
| − | |Wheels |
+ | | colspan="2" |Wheels |
| + | |''Main article: [[Los Santos Customs/Wheels]]'' |
||
| − | |<div class="mw-collapsible mw-collapsed" style="width:100%"> |
||
| − | <div class="mw-collapsible-content"> |
||
| − | {{WheelsExpand}} |
||
| − | </div> |
||
| − | </div> |
||
| − | | style="text-align: center;" | - |
||
| style="text-align: center;" | - |
| style="text-align: center;" | - |
||
| + | | colspan="2" style="text-align: center;" | - |
||
| + | |- |
||
| + | | colspan="2" rowspan="4" |Windows |
||
| + | |None |
||
| + | | style="text-align: center;" |$100 |
||
| + | | colspan="2" style="text-align: center;" |$500 |
||
|- |
|- |
||
| − | | rowspan="3" |Windows |
||
|Light Smoke |
|Light Smoke |
||
| style="text-align: center;" |$200 |
| style="text-align: center;" |$200 |
||
| − | | style="text-align: center;" |$ |
+ | | colspan="2" style="text-align: center;" |$1,500 |
|- |
|- |
||
|Dark Smoke |
|Dark Smoke |
||
| style="text-align: center;" |$450 |
| style="text-align: center;" |$450 |
||
| − | | style="text-align: center;" |$ |
+ | | colspan="2" style="text-align: center;" |$3,500 |
|- |
|- |
||
|Limo |
|Limo |
||
| style="text-align: center;" |$700 |
| style="text-align: center;" |$700 |
||
| − | | style="text-align: center;" |$ |
+ | | colspan="2" style="text-align: center;" |$5,000 |
|} |
|} |
||
==Image Gallery== |
==Image Gallery== |
||
| + | <gallery position="center" spacing="small" hideaddbutton="true"> |
||
| − | ===''Grand Theft Auto V''=== |
||
| + | Jester-GTASA-modified-front.jpg|Possible combinations of modifications that can be given to the '''Jester''' at [[Wheel Arch Angels]] in ''GTA San Andreas''. |
||
| − | <gallery position="center"> |
||
| − | Jester-GTAV-RSC.jpg|The '''Jester''' on the [[Rockstar Games Social Club]]. |
||
Jester-GTAV-LegendaryMS.png|The '''Jester''' on [[Legendary Motorsport]] in the enhanced version of ''GTA V''. |
Jester-GTAV-LegendaryMS.png|The '''Jester''' on [[Legendary Motorsport]] in the enhanced version of ''GTA V''. |
||
| + | Jester-GTAV-RSC.jpg|The '''Jester''' on [[Rockstar Games Social Club]]. |
||
| − | </gallery> |
||
| + | Jester-GTAV-RGSC.jpg|The '''Jester''' on the updated Rockstar Games Social Club. |
||
| − | |||
| + | Jester-GTAV-RGSC2.jpg|The '''Jester''' in the cinematic preview on ''GTA V'' Rockstar Games Social Club. |
||
| − | ===''Grand Theft Auto Online''=== |
||
| + | Jester-GTAO-RGSC.jpg|The '''Jester''' in the cinematic preview on ''GTA Online'' Rockstar Games Social Club. |
||
| − | <gallery position="center"> |
||
| − | Jester-GTAO-ImportExport1.png|H0TP1NK '''Jester''' seen in [[Vehicle Cargo]] missions. |
||
| − | Jester-GTAO-ImportExport2.png|T0PCL0WN '''Jester''' seen in Vehicle Cargo missions. |
||
| − | Jester-GTAO-ImportExport3.png|N0F00L '''Jester''' seen in Vehicle Cargo missions. |
||
</gallery> |
</gallery> |
||
==Variants== |
==Variants== |
||
{{Variant |
{{Variant |
||
| − | |float = |
+ | |float = center |
|title = Jester (Racecar) |
|title = Jester (Racecar) |
||
|games = Grand Theft Auto V |
|games = Grand Theft Auto V |
||
| Line 565: | Line 687: | ||
|description = The [[Festive Surprise]] update includes a new Jester with a racing livery from [[Dinka]], named '''Jester (Racecar)'''. It is one of the two "Racecars" added in the update. |
|description = The [[Festive Surprise]] update includes a new Jester with a racing livery from [[Dinka]], named '''Jester (Racecar)'''. It is one of the two "Racecars" added in the update. |
||
}} |
}} |
||
| + | |||
| − | {{Variant |
||
| + | ==Special Variants== |
||
| − | |float = |
||
| + | ===GTA Online: Import/Export=== |
||
| − | |title = Jester Classic |
||
| + | {{Next-Gen}}3 heavily modified variants of the Jester may appear in [[Vehicle Cargo]] source missions. Each variant has a unique license plate number, colour combination and different set of bodywork modifications. |
||
| − | |games = Grand Theft Auto Online |
||
| + | |||
| − | |article_link = Jester Classic |
||
| + | {{ModelSet |
||
| − | |front_image = SSA-GTAO-Thumbnail-JesterClassic.png |
||
| + | |modelset_name = Import/Export 1 |
||
| − | |rear_image = SSA-GTAO-JesterClassic.png |
||
| + | |modelset_file = |
||
| − | |caption = The '''Jester Classic''' in ''[[Grand Theft Auto Online]]''. |
||
| + | |modelset_colorset = |
||
| − | |description = The '''Jester Classic''' is a sports tuning car based on the {{WP|Toyota Supra|fourth generation Toyota Supra (A80)}}. |
||
| + | {{CarColV/Title}} |
||
| + | {{CarColV|135|54|67|140}} |
||
| + | |modelset_window = |
||
| + | |modelset_livery = {{No}} |
||
| + | |modelset_modkit = |
||
| + | {{Modkit |
||
| + | |fbumper = Splitter With Canards |
||
| + | |rbumper = Painted Rear Diffuser |
||
| + | |spoiler = Color Coded Wing |
||
| + | |skirts = Custom Skirts |
||
| + | |exhaust = Race Exhaust |
||
| + | |rollcage = Roll Cage and Chassis Upgrade |
||
| + | |roof = Rear Louvers |
||
| + | |horn = Musical Horn 3 |
||
| + | |wheels = High End - Hypher |
||
| + | |plate = H0TP1NK - Yellow on Blue |
||
| + | |tires = Blue Tire Smoke |
||
| + | |lights = Xenon Lights |
||
| + | |neons = Front, Back and Sides - Mint Green |
||
| + | }} |
||
| + | }} |
||
| + | {{ModelSet |
||
| + | |modelset_name = Import/Export 2 |
||
| + | |modelset_file = |
||
| + | |modelset_colorset = |
||
| + | {{CarColV/Title}} |
||
| + | {{CarColV|52|0|5|151}} |
||
| + | |modelset_window = |
||
| + | |modelset_livery = {{No}} |
||
| + | |modelset_modkit = |
||
| + | {{Modkit |
||
| + | |fbumper = Carbon Splitter & Canards |
||
| + | |rbumper = Carbon Rear Diffuser |
||
| + | |spoiler = Carbon Wing |
||
| + | |skirts = Carbon Skirts |
||
| + | |rollcage = Roll Cage and Chassis Upgrade |
||
| + | |exhaust = Oval Exhaust |
||
| + | |wheels = Sports - Ferocci RR |
||
| + | |plate = T0PCL0WN - Yellow on Black |
||
| + | }} |
||
| + | }} |
||
| + | {{ModelSet |
||
| + | |modelset_name = Import/Export 3 |
||
| + | |modelset_file = |
||
| + | |modelset_colorset = |
||
| + | {{CarColV/Title}} |
||
| + | {{CarColV|131|42|0|88}} |
||
| + | |modelset_window = |
||
| + | |modelset_livery = {{No}} |
||
| + | |modelset_modkit = |
||
| + | {{Modkit |
||
| + | |fbumper = Splitter With Canards |
||
| + | |rbumper = Painted Rear Diffuser |
||
| + | |skirts = Sport Skirts |
||
| + | |exhaust = Oval Exhaust |
||
| + | |rollcage = Roll Cage and Chassis Upgrade |
||
| + | |spoiler = GT Wing |
||
| + | |suspension = Competition Suspension |
||
| + | |wheels = Tuner - Super Mesh |
||
| + | |tires = Custom Tires |
||
| + | |plate = NOF00L - Blue on White 2 |
||
| + | }} |
||
}} |
}} |
||
| + | |||
| + | <gallery position="center" spacing="small" hideaddbutton="true"> |
||
| + | Jester-GTAO-front-H0TP1NK.png|The H0TP1NK '''Jester''' seen in [[Vehicle Cargo]] missions, ''[[GTA Online]]''. (<small>[[:File:Jester-GTAO-rear-H0TP1NK.png|Rear quarter view]]</small>) |
||
| + | Jester-GTAO-front-T0PCL0WN.png|The T0PCL0WN '''Jester''' seen in Vehicle Cargo missions, ''GTA Online''. (<small>[[:File:Jester-GTAO-rear-T0PCL0WN.png|Rear quarter view]]</small>) |
||
| + | Jester-GTAO-front-NOF00L.png|The NOF00L '''Jester''' seen in Vehicle Cargo missions, ''GTA Online''. (<small>[[:File:Jester-GTAO-rear-NOF00L.png|Rear quarter view]]</small>) |
||
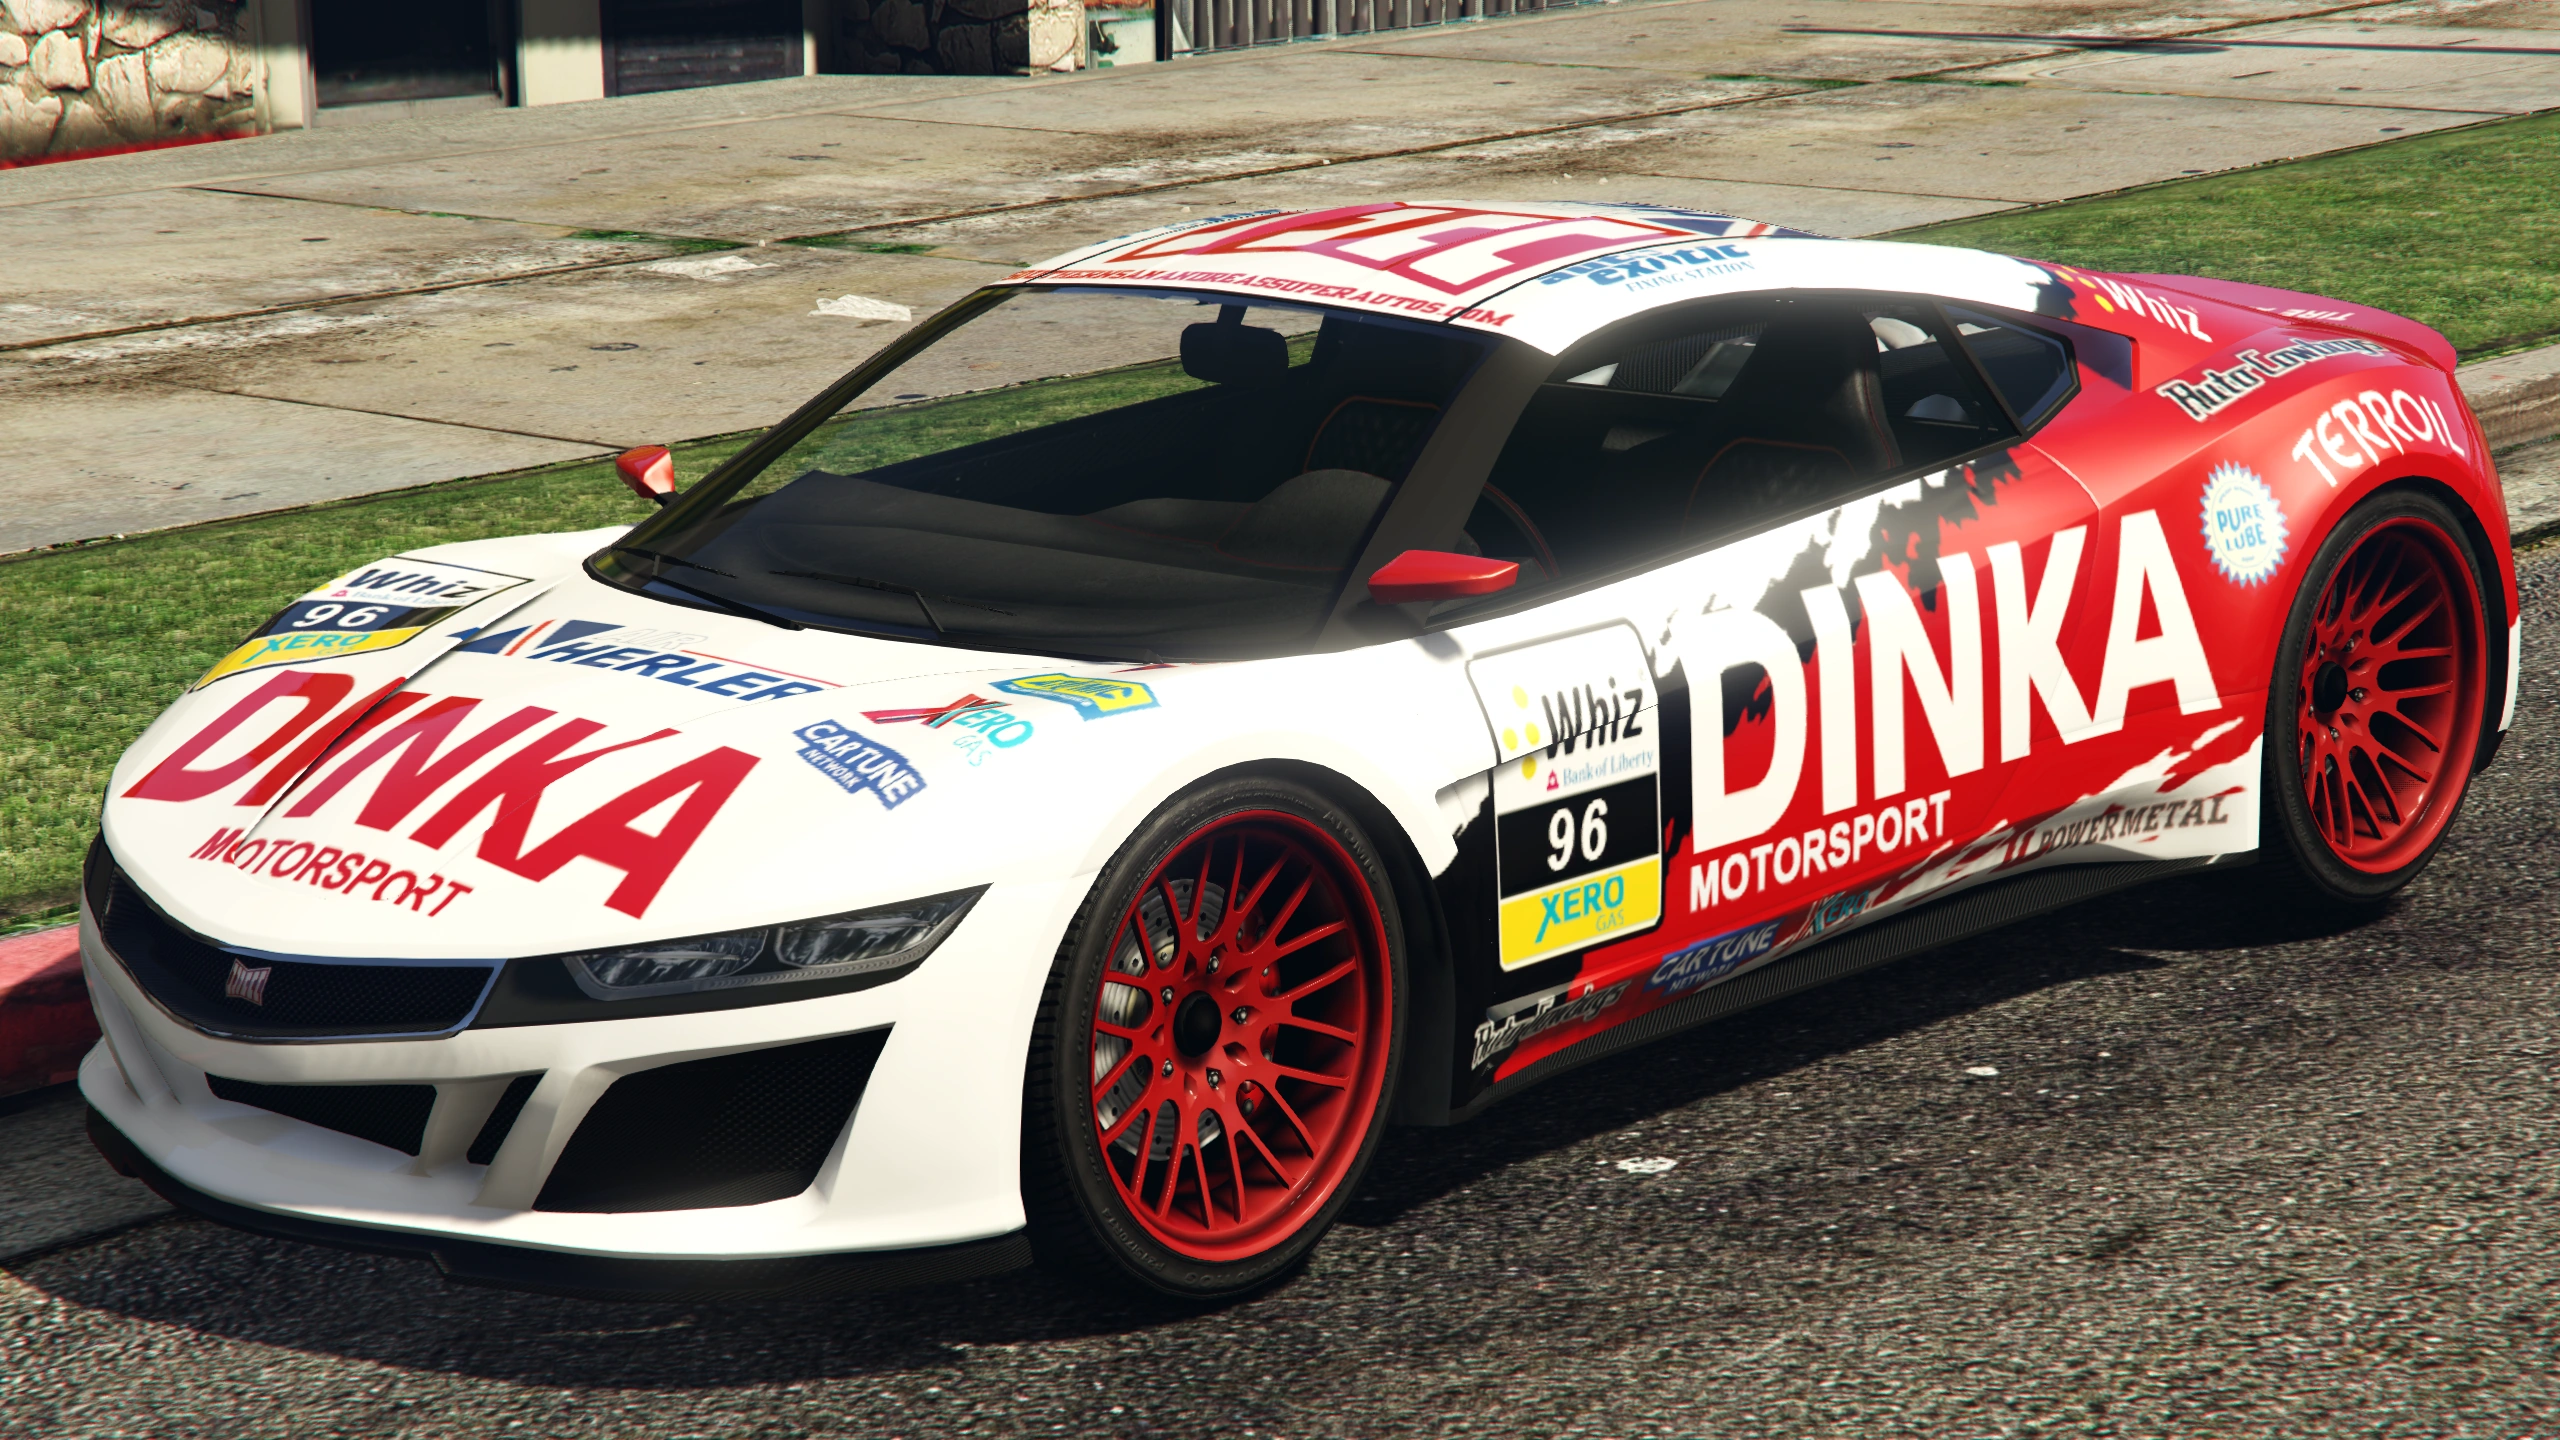
| + | Jester-GTAO-ImportExport1.png|H0TP1NK '''Jester''' thumbnail on [[Ad-Hawk Autos]]. |
||
| + | Jester-GTAO-ImportExport2.png|T0PCL0WN '''Jester''' thumbnail on [[Ad-Hawk Autos]]. |
||
| + | Jester-GTAO-ImportExport3.png|NOF00L '''Jester''' thumbnail on [[Ad-Hawk Autos]]. |
||
| + | </gallery> |
||
==NPC-Modified Variants== |
==NPC-Modified Variants== |
||
| Line 580: | Line 773: | ||
{{Clr}} |
{{Clr}} |
||
===Business DLC Sports Modded=== |
===Business DLC Sports Modded=== |
||
| − | Pre-modified variants of the Jester can be seen driving around [[Los Santos]] randomly. |
+ | Pre-modified variants of the Jester can be seen driving around [[Los Santos]] randomly. |
| + | |||
{{ModelSet |
{{ModelSet |
||
| − | |modelset_name = |
+ | |modelset_name = Business DLC Sports Modded 1 |
| + | |modelset_file = BUSINESS_DLC_<br>SPORTS_MODDED_1 |
||
| − | |modelset_colorset = {{CarColV|54|89|0|89}} |
||
| + | |modelset_colorset = |
||
| + | {{CarColV/Title}} |
||
| + | {{CarColV|54|89|0|89}} |
||
|modelset_window = {{No}} |
|modelset_window = {{No}} |
||
|modelset_livery = {{No}} |
|modelset_livery = {{No}} |
||
|modelset_modkit = |
|modelset_modkit = |
||
| + | {{Modkit |
||
| − | {{BP}}Front Bumper: Carbon Splitter & Canards |
||
| − | + | |fbumper = Carbon Splitter & Canards |
|
| + | |rbumper = Carbon Rear Diffuser |
||
| − | {{BP}}Chassis: Roll Cage & Race Modifications |
||
| + | |chassis = Roll Cage & Race Modifications |
||
| − | {{BP}}Exhaust: Race Exhaust |
||
| + | |exhaust = Race Exhaust |
||
| − | {{BP}}Roof: Rear Louvers |
||
| + | |roof = Rear Louvers |
||
| − | {{BP}}Spoiler: GT Wing |
||
| + | |spoiler = GT Wing |
||
| − | {{BP}}Skirts: Carbon Skirts |
||
| + | |skirts = Carbon Skirts |
||
| − | {{BP}}Suspension: Lowered Suspension |
||
| + | |suspension = Lowered Suspension |
||
| − | {{BP}}Wheels: Carbon Shadow |
||
| + | |wheels = Carbon Shadow |
||
| + | }} |
||
}} |
}} |
||
{{ModelSet |
{{ModelSet |
||
| − | |modelset_name = |
+ | |modelset_name = Business DLC Sports Modded 2 |
| + | |modelset_file = BUSINESS_DLC_<br>SPORTS_MODDED_2 |
||
| − | |modelset_colorset = {{CarColV|120|0|120|120}} |
||
| + | |modelset_colorset = |
||
| + | {{CarColV/Title}} |
||
| + | {{CarColV|120|0|120|120}} |
||
|modelset_window = {{No}} |
|modelset_window = {{No}} |
||
|modelset_livery = {{No}} |
|modelset_livery = {{No}} |
||
|modelset_modkit = |
|modelset_modkit = |
||
| + | {{Modkit |
||
| − | {{BP}}Front Bumper: Carbon Splitter & Canards |
||
| − | + | |fbumper = Carbon Splitter & Canards |
|
| + | |rbumper = Carbon Rear Diffuser |
||
| − | {{BP}}Chassis: Roll Cage & Race Modifications |
||
| + | |chassis = Roll Cage & Race Modifications |
||
| − | {{BP}}Exhaust: Race Exhaust |
||
| + | |exhaust = Race Exhaust |
||
| − | {{BP}}Roof: Rear Louvers |
||
| + | |roof = Rear Louvers |
||
| − | {{BP}}Spoiler: GT Wing |
||
| + | |spoiler = GT Wing |
||
| − | {{BP}}Skirts: Carbon Skirts |
||
| + | |skirts = Carbon Skirts |
||
| − | {{BP}}Suspension: Lowered Suspension |
||
| + | |suspension = Lowered Suspension |
||
| − | {{BP}}Wheels: Carbon Shadow |
||
| + | |wheels = Carbon Shadow |
||
| + | }} |
||
}} |
}} |
||
| − | <gallery position="center" widths="270px"> |
+ | <gallery position="center" spacing="small" widths="270px" hideaddbutton="true"> |
Jester-GTAV-front-BusinessDLCSportsModded2.png|The Business DLC Sports Modded 2 '''Jester''' in ''[[Grand Theft Auto V]]''. (<small>[[:File:Jester-GTAV-rear-BusinessDLCSportsModded2.png|Rear quarter view]]</small>) |
Jester-GTAV-front-BusinessDLCSportsModded2.png|The Business DLC Sports Modded 2 '''Jester''' in ''[[Grand Theft Auto V]]''. (<small>[[:File:Jester-GTAV-rear-BusinessDLCSportsModded2.png|Rear quarter view]]</small>) |
||
</gallery> |
</gallery> |
||
| Line 620: | Line 824: | ||
===Los Santos Customs Modded Single Player=== |
===Los Santos Customs Modded Single Player=== |
||
Like the randomly spawning modified Jesters, two sets of Jesters may spawn outside Los Santos Customs, pre-modified. These again only spawn in single player. The vehicles appear in set color sets with the same modifications. They will not spawn with any of the default extra components. These variants are named "LS_CUSTOMS_MODDED_SP" and use the exact same modifications and colors as the Business DLC Sports Modded sets. |
Like the randomly spawning modified Jesters, two sets of Jesters may spawn outside Los Santos Customs, pre-modified. These again only spawn in single player. The vehicles appear in set color sets with the same modifications. They will not spawn with any of the default extra components. These variants are named "LS_CUSTOMS_MODDED_SP" and use the exact same modifications and colors as the Business DLC Sports Modded sets. |
||
| + | |||
| − | <gallery position="center" widths="270px"> |
||
| + | <gallery position="center" spacing="small" widths="270px" hideaddbutton="true"> |
||
NPC-Modified Jester-GTAV-Front Quarter.jpg|An NPC-modified Jester outside Los Santos Customs (<small>[[:File:NPC-Modified Jester-GTAV-Rear Quarter.jpg|Rear quarter view]]</small>) |
NPC-Modified Jester-GTAV-Front Quarter.jpg|An NPC-modified Jester outside Los Santos Customs (<small>[[:File:NPC-Modified Jester-GTAV-Rear Quarter.jpg|Rear quarter view]]</small>) |
||
</gallery> |
</gallery> |
||
| Line 626: | Line 831: | ||
==Prominent Appearances in Missions== |
==Prominent Appearances in Missions== |
||
===''Grand Theft Auto: San Andreas''=== |
===''Grand Theft Auto: San Andreas''=== |
||
| − | * |
+ | *[[Customs Fast Track]] - Carl and [[Cesar]] bring a Jester from the containers at the docks to the [[Doherty Garage|Garage]], as it's one of the wish list's car. |
| − | * |
+ | *[[Race Tournaments in GTA San Andreas|Race Tournaments]] - The player has to race against this car in [[San Fierro Fastlane]]. |
| + | |||
| + | ===''Grand Theft Auto Online''=== |
||
*This vehicle may be selected randomly as a standard-class target source vehicle from [[SecuroServ]] during [[Vehicle Cargo]] missions with one of three variations: H0TP1NK, T0PCL0WN and N0F00L. |
*This vehicle may be selected randomly as a standard-class target source vehicle from [[SecuroServ]] during [[Vehicle Cargo]] missions with one of three variations: H0TP1NK, T0PCL0WN and N0F00L. |
||
**This vehicle is classed as a Standard-Range vehicle. |
**This vehicle is classed as a Standard-Range vehicle. |
||
**Jester "N0F00L" is part of the 4-vehicle "Hip To Be Square" [[Vehicle Cargo|Vehicle Cargo Collection]]. |
**Jester "N0F00L" is part of the 4-vehicle "Hip To Be Square" [[Vehicle Cargo|Vehicle Cargo Collection]]. |
||
| − | == |
+ | ==Locations== |
===''Grand Theft Auto: San Andreas''=== |
===''Grand Theft Auto: San Andreas''=== |
||
*Importable at [[Easter Basin]], [[San Fierro (3D Universe)|San Fierro]] after completing [[Customs Fast Track]]. Import cost: [[Money|$]]28,000 (Tuesdays and Fridays only). |
*Importable at [[Easter Basin]], [[San Fierro (3D Universe)|San Fierro]] after completing [[Customs Fast Track]]. Import cost: [[Money|$]]28,000 (Tuesdays and Fridays only). |
||
| Line 643: | Line 850: | ||
;Enhanced version |
;Enhanced version |
||
*Can spawn in traffic. |
*Can spawn in traffic. |
||
| + | |||
| − | *As already noted, pre-modified variants can spawn in numerous locations: |
||
| + | ;[[Vehicles in GTA V/Scenarios|Scenarios]] (enhanced version) |
||
| − | **Seen driving beside the off-ramp next to the [[Arcadius Business Center]], heading west. |
||
| + | The Jester is part of two <code>vehiclemodelsets</code>, "<code>LS_CUSTOMS_MODDED_SP</code>" and "<code>BUSINESS_DLC_SPORTS_MODDED</code>". The first allows the Jester, among other cars, to spawn outside [[Los Santos Customs]] heavily modified, and in other places around the city, the second allows the Jester and [[Massacro]] to spawn heavily modified in specific locations. They only spawn in ''GTA V''. |
||
| − | **Pulling out of the Arcadius Business Center underground parking lot west entrance. |
||
| + | |||
| − | **Pulling out of the [[Mission Row Police Station]] police parking lot. |
||
| + | {{Scenarios|ls_customs_modded_sp}} |
||
| − | **Pulling out of the [[Pillbox Hill Garage]] parking area. |
||
| + | {{Scenarios|business_dlc_sports_modded}} |
||
| − | **Parked inside the parking lot between [[Vespucci Boulevard]] and [[San Andreas Avenue]], facing towards the passing [[La Puerta Freeway]]. |
||
| − | **Parked inside the [[La Mesa Police Station]] public parking lot. |
||
| − | **Parked inside the parking garage under [[The Gentry Manor Hotel]] in [[West Vinewood]]. |
||
| − | **Parked outside [[Los Santos Customs]] in [[Burton]]. |
||
===''Grand Theft Auto Online''=== |
===''Grand Theft Auto Online''=== |
||
| − | * |
+ | *Available for purchase from [[Legendary Motorsport]] for [[Money|$]]240,000. |
==Trivia== |
==Trivia== |
||
| Line 663: | Line 867: | ||
===''Grand Theft Auto: San Andreas''=== |
===''Grand Theft Auto: San Andreas''=== |
||
| − | * |
+ | *A model car called "Jester Crossflow" and looking like a tuned Jester can be found in the [[Zero RC]] shop in [[San Fierro (3D Universe)|San Fierro]]. |
| − | * |
+ | *In [[Customs Fast Track]], [[Carl Johnson|CJ]] and [[Cesar Vialpando]] steal a red Jester from a container ship in [[Easter Basin]], delivering the car to [[Doherty Garage]]. While the previous stolen vehicles spawn in the [[Wang Cars]] showroom after mission completion, the Jester is replaced by a [[Savanna]]. |
| − | * |
+ | *In the [[Beta Releases|beta version]] of the game, the Jester had Ferrari-styled rims.<ref>[http://www.gtasanandreas.net/screenshots/gallery.php?image=43 Beta Jester]</ref> |
| − | * |
+ | *The X Flow rear spoiler reassembles the rear spoiler which was a factory option on Toyota Supras. |
| − | * |
+ | *Sometimes, when the player buys the Jester in the [[Exports and Imports|Exports/Imports]] ship, it will come with a [[Custom Vehicle License Plates|unique license plate]] reading "X2 GAV". |
| + | *The A80 Supra wasn't in production until 1993, making the car slightly anachronistic to the game's setting. |
||
| − | === |
+ | ===''Grand Theft Auto V''=== |
| − | *The "R" in Jester is colored red, mimicking the Type-R badge famous among Honda cars, for example the [[wp:Honda NSX|First Generation Honda NSX]]. |
+ | *The "R" in the Jester's badge is colored red, mimicking the Type-R badge famous among Honda cars, for example the [[wp:Honda NSX|First Generation Honda NSX]]. |
*When heavily damaged, smoke will come out of the front end, as if its engine was at the front, despite being just in front of the rear axle (rear-mid). This is likely a developer oversight. |
*When heavily damaged, smoke will come out of the front end, as if its engine was at the front, despite being just in front of the rear axle (rear-mid). This is likely a developer oversight. |
||
| + | **This has since been fixed in enhanced version of the game, and will now emit smoke from the rear. |
||
==See Also== |
==See Also== |
||
| − | *[[Jester (Racecar)]] - Racing variant. |
+ | *[[Jester (Racecar)]] - Racing variant. |
| + | *[[Jester Classic]] - Predecessor. |
||
| + | *[[SC1]] - A vehicle in ''GTA Online'' with very similar design cues. |
||
==References== |
==References== |
||
| + | {{Scrollbox| |
||
{{Reflist}} |
{{Reflist}} |
||
| + | }} |
||
==Navigation== |
==Navigation== |
||
| Line 686: | Line 896: | ||
{{gtasa vehicles|state=collapsed}} |
{{gtasa vehicles|state=collapsed}} |
||
{{Gtav vehicles|state=collapsed}} |
{{Gtav vehicles|state=collapsed}} |
||
| + | }}[[de:Jester]] |
||
| − | }} |
||
| − | |||
| − | [[de:Jester]] |
||
[[es:Jester]] |
[[es:Jester]] |
||
[[nl:Jester]] |
[[nl:Jester]] |
||
| Line 699: | Line 907: | ||
[[Category:Vehicles in GTA V]] |
[[Category:Vehicles in GTA V]] |
||
[[Category:Vehicles in GTA Online]] |
[[Category:Vehicles in GTA Online]] |
||
| − | [[Category: |
+ | [[Category:Vehicles in Business Update]] |
| + | [[Category:Vehicles manufactured by Dinka]] |
||
| + | [[Category:DLC Vehicles]] |
||
[[Category:DLC Vehicles in GTA V]] |
[[Category:DLC Vehicles in GTA V]] |
||
| + | [[Category:DLC Vehicles in GTA Online]] |
||
[[Category:Front wheel drive vehicles]] |
[[Category:Front wheel drive vehicles]] |
||
| − | [[Category: |
+ | [[Category:Hybrid Vehicles]] |
[[Category:Rear-Engine Vehicles]] |
[[Category:Rear-Engine Vehicles]] |
||
| − | [[Category: |
+ | [[Category:Sports Cars]] |
| − | [[Category: |
+ | [[Category:Sports Vehicle Class]] |
[[Category:Tuners]] |
[[Category:Tuners]] |
||
| − | [[Category:Hybrid Vehicles]] |
||
| − | [[Category:DLC Vehicles in GTA Online]] |
||
| − | [[Category:Vehicles in Business Update]] |
||
| − | [[Category:DLC Vehicles]] |
||
Revision as of 13:13, 25 June 2020
Template:Infobox vehicles
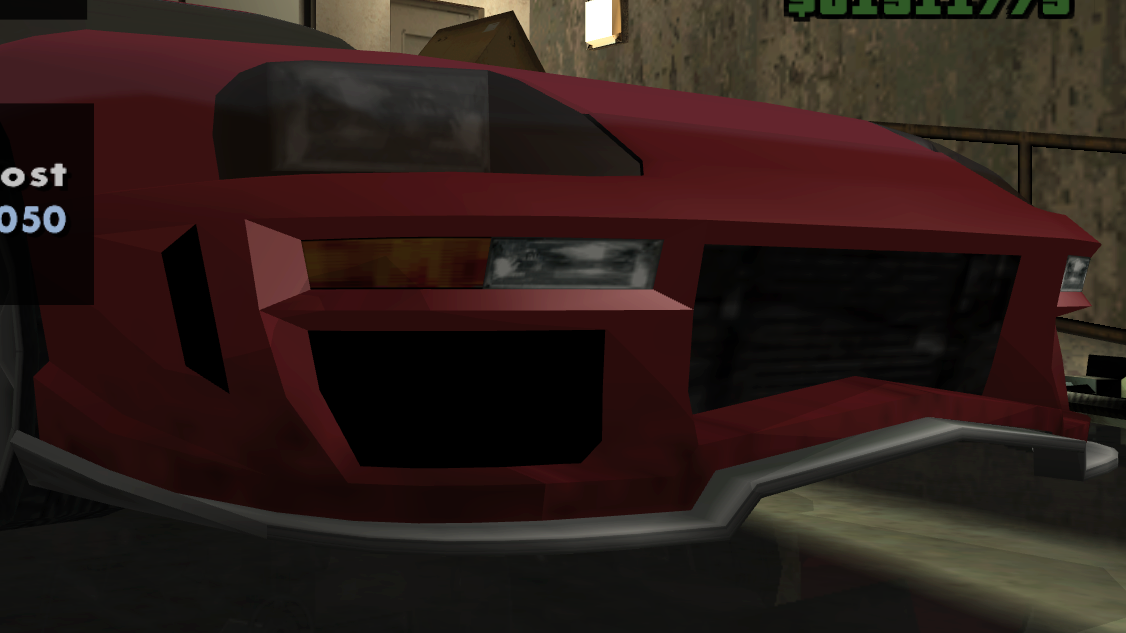
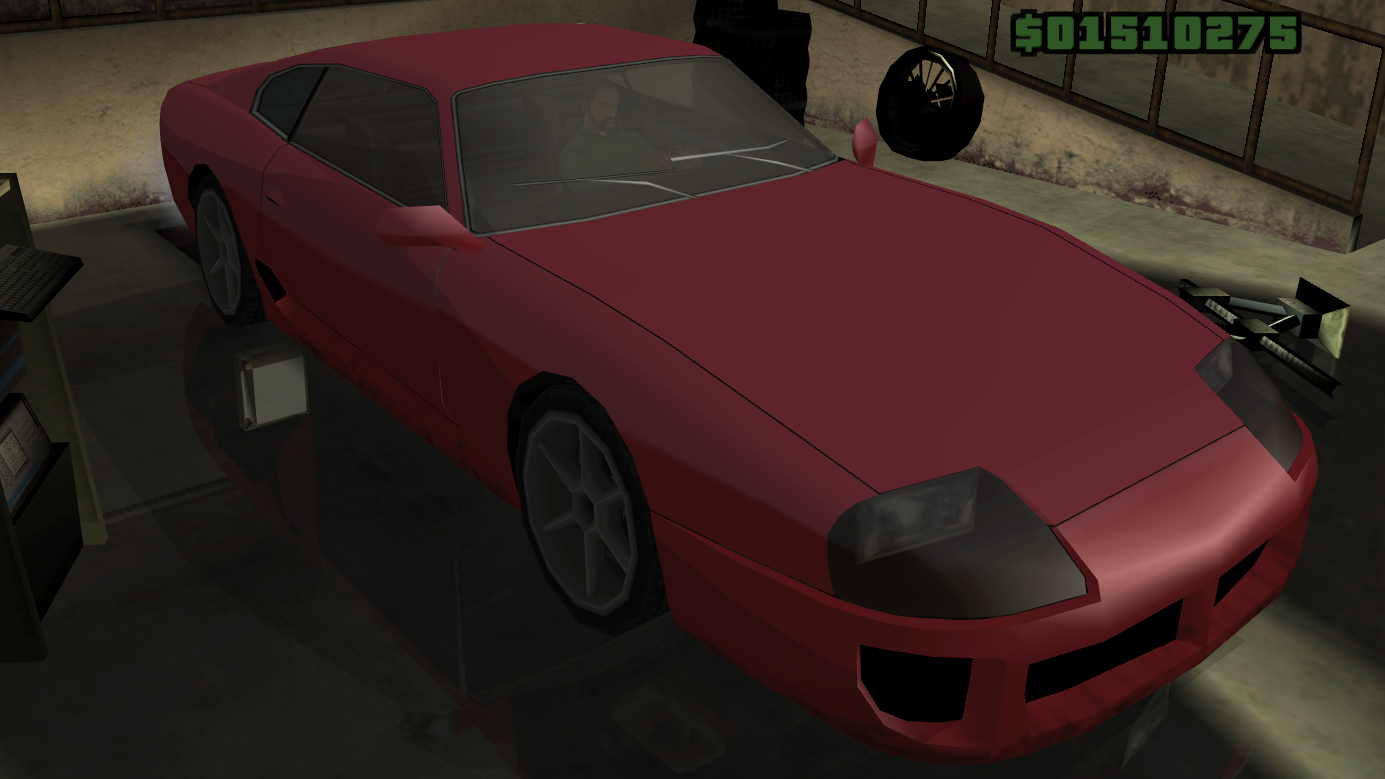
The Jester is a two-door sports car in Grand Theft Auto: San Andreas, Grand Theft Auto V and Grand Theft Auto Online. It was also supposed to appear in Grand Theft Auto: Liberty City Stories, but was removed before the game's release. It is manufactured by Dinka in the HD Universe.
Design
The car appears as a two-door coupé in GTA San Andreas, and a two-door mid-engine sports car in GTA V.
Grand Theft Auto: San Andreas
Designed as a two-door sports coupe, the Jester bears resemblance to several real life cars, such as the Toyota Supra Mark IV (A80), the Nissan 300ZX Z31, and a hint of Fiat Barchetta. However, the design has a strong resemblance to the Toyota Supra RZ.
Grand Theft Auto V
The Jester now mostly resembles the 2015 Honda/Acura NSX, with curvy features and distinct Japanese styling in both the bodywork and front and rear fascia. The headlights and the hood are derived from the BMW i8.
The Jester is made up of an aggressive front face made by the irregular shape of the headlights, causing it to resemble an angry grin. There is a noticeable Japanese style on the Jester, which included many sharp curves throughout the car, specifically the front and sides. The rear is more sloped and rounded, giving it a stark contrast between the front. The Jester also features two fuel tank caps, one on either side.
Current Design Gallery


Version History Gallery
")
Performance
Grand Theft Auto: San Andreas
The car is equipped with an inline engine sporting a performance intake manifold. Unlike the Supra, the Jester is front-wheel-drive, yet retains its sporty qualities. In acceleration, speed, handling, and braking, the Jester is inferior to most other sports cars and tuners in the game, superior only to the Euros. However, the vehicle still possesses good grip and braking, ideal for sharp cornering using the brake or handbrake. Like most tuners in the game, the body construction is poor, making the car susceptible to intense damage from high-speed impacts and heavy gunfire.
GTA San Andreas Overview
| Acceleration (0-60 mph in Seconds) |
Top Speed (mph / kmh) |
Gears | Engine | Drivetrain (FWD / RWD / AWD) |
Mass (kg / lbs) |
|---|---|---|---|---|---|
| N/A | 124 / 200 | 5 | Petrol | FWD | 1500 / 3307 |
| N/A | N/A | N/A | N/A | FWD | Cannot be observed |
Grand Theft Auto: Liberty City Stories
Based on what the files suggest,[1] the car performed similarly to how it did in San Andreas. However, this time it had a RWD configuration. Because the car never made it into the final game, it's unknown if it remained exactly the same as in its predecessor.
Grand Theft Auto V
The Jester has good top speed and acceleration, making it comparable to other sports cars in its class. The acceleration is average, however the handling makes up for this. Based on a Japanese sports car, the steering and agility of the vehicle are extremely sensitive and responsive, due to the fact that the Jester is all-wheel drive (20% - 80%, front to rear torque distribution). This also allows the car to have exceptional handling even over slippery or wet surfaces, making it a useful getaway vehicle even in poor conditions.
The agility of many Japanese sports cars contributes to extremely skillful and quick moves if used right, but at low speeds could cause a crash with excessive traction, acceleration, and small turning radius, likely due to the all-wheel drive nature of the car.
Due to the fact that there is an electric motor, there is no loss of power during gear shifts; this is very useful when racing and simply wanting a smooth ride. But the Jester tends to start drifting when driven on dirt roads, most likely due to its large power output. Crash deformation is excellent, and it can take multiple front end collisions without deforming the front wheels.
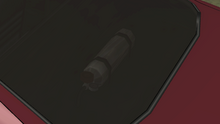
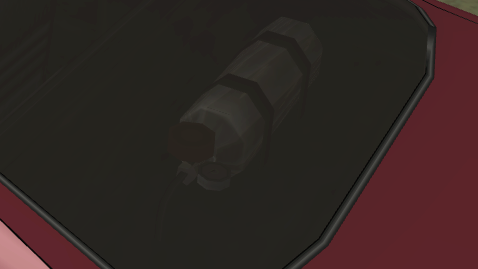
Despite claiming to have a V6 engine, it actually has a V8 engine, which can be seen through the rear window. The Jester shares the same engine sound as the Coquette.
GTA V Overview
| Acceleration (0-60 mph in Seconds) |
Top Speed (mph / kmh) |
Gears | Engine | Drivetrain (FWD / RWD / AWD) |
Mass (kg / lbs) |
Fuel Tank Size (litres) |
|---|---|---|---|---|---|---|
| N/A | 98 / 158 | 6 | N/A | AWD 20% FWD 80% RWD |
1300 / 2866 | 65 |
| 4.5 Seconds | 180 / 290 | N/A | 4.0L V6 420hp (Website) | N/A | N/A | N/A |
| 5.4 Seconds | 120 / 193 | 6 | M4 V8 (In-game model) | AWD | Cannot be observed | Cannot be observed |
Modifications
Grand Theft Auto: San Andreas
The Jester can only be modified at Wheel Arch Angels in Ocean Flats, San Fierro.


Grand Theft Auto V
| Category | Modification | Cost (GTA V) | Cost (GTA Online) | Image | |
|---|---|---|---|---|---|
| Armor | No Armor | $500 | $1,000 | ||
| Armor Upgrade 20% | $2,500 | $7,500 | |||
| Armor Upgrade 40% | $6,250 | $12,000 | |||
| Armor Upgrade 60% | $10,000 | $20,000 | |||
| Armor Upgrade 80% | $17,500 | $35,000 | |||
| Armor Upgrade 100% | $25,000 | $50,000 | |||
| Brakes | Stock Brakes | $500 | $1,000 | ||
| Street Brakes | $10,000 | $20,000 | |||
| Sport Brakes | $13,500 | $27,000 | |||
| Race Brakes | $17,500 | $35,000 | |||
| Bumpers | Stock Front Bumper | $1,100 | $2,200 | ||
| Custom Front Splitter | $2,300 | $4,600 | |||
| Splitter With Canards | $3,700 | $7,400 | |||
| Carbon Splitter & Canards | $5,850 | $11,700 | |||
| Stock Rear Bumper | $1,100 | $2,200 | |||
| Painted Rear Diffuser | $2,300 | $4,600 | |||
| Carbon Rear Diffuser | $3,700 | $7,500 | |||
| Engine | EMS Upgrade, Level 1 | $4,500 | $9,000 | ||
| EMS Upgrade, Level 2 | $6,250 | $12,500 | |||
| EMS Upgrade, Level 3 | $9,000 | $18,000 | |||
| EMS Upgrade, Level 4 | $16,750 | $33,500 | |||
| Exhausts | Stock Exhaust | $130 | $260 | ||
| Oval Exhaust | $375 | $750 | |||
| Chrome Tip Exhaust | $899 | $1,800 | |||
| Race Exhaust | $1,499 | $3,000 | |||
| Explosives | Ignition Bomb | N/A | $5,000 | ||
| Remote Bomb | N/A | $7,500 | |||
| Horns | Main article: Los Santos Customs/Horns | - | - | ||
| Lights | Headlights | Stock Lights | $300 | $600 | |
| Xenon Lights | $1,450 | $7,500 | |||
| Neon Kits | Main article: Los Santos Customs/Lights | - | - | ||
| Loss/Theft Prevention | Tracker | N/A | Too Hot | ||
| Full Coverage | N/A | Too Hot | |||
| Plates | Blue on White 1 | $50 | $200 | ||
| Blue on White 2 | $50 | $200 | |||
| Blue on White 3 | $50 | $200 | |||
| Yellow on Blue | $75 | $300 | |||
| Yellow on Black | $150 | $600 | |||
| Respray | Main article: Los Santos Customs/Respray Colors | - | - | ||
| Roll Cages | No Roll Cage | $350 | $700 | ||
| Roll Cage and Chassis Upgrade | $550 | $1,100 | |||
| Roll Cage & Race Modifications | $675 | $1,350 | |||
| Roofs | Stock Roof | $100 | $200 | ||
| Rear Louvers | $350 | $700 | |||
| Sell | Sell Vehicle | N/A | Too Hot | ||
| Skirts | Stock Skirts | $1,250 | $2,500 | ||
| Custom Skirts | $2,750 | $5,500 | |||
| Sport Skirts | $4,000 | $8,000 | |||
| Carbon Skirts | $5,250 | $10,600 | |||
| Spoilers | None | $3,000 | $6,000 | ||
| Carbon Wing | $3,750 | $7,050 | |||
| Color Coded Wing | $5,000 | $10,000 | |||
| Carbon Wing Type II | $6,500 | $13,000 | |||
| GT Wing | $7,000 | $14,000 | |||
| Suspension | Stock Suspension | $100 | $200 | ||
| Lowered Suspension | $500 | $1,000 | |||
| Street Suspension | $1,000 | $2,000 | |||
| Sport Suspension | $1,700 | $3,400 | |||
| Competition Suspension | $2,200 | $4,400 | |||
| Transmission | Stock Transmission | $500 | $1,000 | ||
| Street Transmission | $14,750 | $29,500 | |||
| Sports Transmission | $16,250 | $32,500 | |||
| Race Transmission | $20,000 | $40,000 | |||
| Turbo | None | $2,500 | $5,000 | ||
| Turbo Tuning | $12,500 | $50,000 | |||
| Wheels | Main article: Los Santos Customs/Wheels | - | - | ||
| Windows | None | $100 | $500 | ||
| Light Smoke | $200 | $1,500 | |||
| Dark Smoke | $450 | $3,500 | |||
| Limo | $700 | $5,000 | |||
Image Gallery
")
")
Variants
Jester (Racecar)Grand Theft Auto V |
 (Rear quarter view) |
The Festive Surprise update includes a new Jester with a racing livery from Dinka, named Jester (Racecar). It is one of the two "Racecars" added in the update. |
-GTAV-rear.png)
Special Variants
GTA Online: Import/Export
Template:Next-Gen3 heavily modified variants of the Jester may appear in Vehicle Cargo source missions. Each variant has a unique license plate number, colour combination and different set of bodywork modifications.
| File | Color Set | Window Tint? | Livery? | Mod Kit | |||||||||||||||||||||||||||||||||||||||||||||||||||||||||||||||||||
|---|---|---|---|---|---|---|---|---|---|---|---|---|---|---|---|---|---|---|---|---|---|---|---|---|---|---|---|---|---|---|---|---|---|---|---|---|---|---|---|---|---|---|---|---|---|---|---|---|---|---|---|---|---|---|---|---|---|---|---|---|---|---|---|---|---|---|---|---|---|---|---|
|
N/A | No |
| ||||||||||||||||||||||||||||||||||||||||||||||||||||||||||||||||||||
| File | Color Set | Window Tint? | Livery? | Mod Kit | ||||||||||||||||||||||||||||||||||||||||||||||||||||||||
|---|---|---|---|---|---|---|---|---|---|---|---|---|---|---|---|---|---|---|---|---|---|---|---|---|---|---|---|---|---|---|---|---|---|---|---|---|---|---|---|---|---|---|---|---|---|---|---|---|---|---|---|---|---|---|---|---|---|---|---|---|
|
N/A | No |
| |||||||||||||||||||||||||||||||||||||||||||||||||||||||||
| File | Color Set | Window Tint? | Livery? | Mod Kit | |||||||||||||||||||||||||||||||||||||||||||||||||||||||||||
|---|---|---|---|---|---|---|---|---|---|---|---|---|---|---|---|---|---|---|---|---|---|---|---|---|---|---|---|---|---|---|---|---|---|---|---|---|---|---|---|---|---|---|---|---|---|---|---|---|---|---|---|---|---|---|---|---|---|---|---|---|---|---|---|
|
N/A | No |
| ||||||||||||||||||||||||||||||||||||||||||||||||||||||||||||
")
")
")
")
")
")
NPC-Modified Variants
Template:Next-Gen
Business DLC Sports Modded
Pre-modified variants of the Jester can be seen driving around Los Santos randomly.
| File | Color Set | Window Tint? | Livery? | Mod Kit | |||||||||||||||||||||||||||||||||||||||||||||||||||||||
|---|---|---|---|---|---|---|---|---|---|---|---|---|---|---|---|---|---|---|---|---|---|---|---|---|---|---|---|---|---|---|---|---|---|---|---|---|---|---|---|---|---|---|---|---|---|---|---|---|---|---|---|---|---|---|---|---|---|---|---|
| BUSINESS_DLC_ SPORTS_MODDED_1 |
|
No | No |
| |||||||||||||||||||||||||||||||||||||||||||||||||||||||
| File | Color Set | Window Tint? | Livery? | Mod Kit | |||||||||||||||||||||||||||||||||||||||||||||||||||||||
|---|---|---|---|---|---|---|---|---|---|---|---|---|---|---|---|---|---|---|---|---|---|---|---|---|---|---|---|---|---|---|---|---|---|---|---|---|---|---|---|---|---|---|---|---|---|---|---|---|---|---|---|---|---|---|---|---|---|---|---|
| BUSINESS_DLC_ SPORTS_MODDED_2 |
|
No | No |
| |||||||||||||||||||||||||||||||||||||||||||||||||||||||
")
Los Santos Customs Modded Single Player
Like the randomly spawning modified Jesters, two sets of Jesters may spawn outside Los Santos Customs, pre-modified. These again only spawn in single player. The vehicles appear in set color sets with the same modifications. They will not spawn with any of the default extra components. These variants are named "LS_CUSTOMS_MODDED_SP" and use the exact same modifications and colors as the Business DLC Sports Modded sets.
")
Prominent Appearances in Missions
Grand Theft Auto: San Andreas
- Customs Fast Track - Carl and Cesar bring a Jester from the containers at the docks to the Garage, as it's one of the wish list's car.
- Race Tournaments - The player has to race against this car in San Fierro Fastlane.
Grand Theft Auto Online
- This vehicle may be selected randomly as a standard-class target source vehicle from SecuroServ during Vehicle Cargo missions with one of three variations: H0TP1NK, T0PCL0WN and N0F00L.
- This vehicle is classed as a Standard-Range vehicle.
- Jester "N0F00L" is part of the 4-vehicle "Hip To Be Square" Vehicle Cargo Collection.
Locations
Grand Theft Auto: San Andreas
- Importable at Easter Basin, San Fierro after completing Customs Fast Track. Import cost: $28,000 (Tuesdays and Fridays only).
- Behind the Wheel Arch Angels garage in Ocean Flats, San Fierro (Sometimes locked or equipped with an alarm).
- Very common around The Strip, Las Venturas and the richest areas of Los Santos and San Fierro, like Richman and Paradiso, respectively.
Grand Theft Auto V
- Original version
- Available in every garage for all the protagonists in single player, after installing The Business Update DLC.
- Enhanced version
- Can spawn in traffic.
- Scenarios (enhanced version)
The Jester is part of two vehiclemodelsets, "LS_CUSTOMS_MODDED_SP" and "BUSINESS_DLC_SPORTS_MODDED". The first allows the Jester, among other cars, to spawn outside Los Santos Customs heavily modified, and in other places around the city, the second allows the Jester and Massacro to spawn heavily modified in specific locations. They only spawn in GTA V.
Coquette Classic | Feltzer | Dubsta2 | Infernus | Dominator | Ruiner | Sabre Turbo | Gauntlet | Sentinel | Rapid GT | Voltic | Comet | Surano | Thrust | Alpha | Huntley S | Jester | Massacro | Turismo R | Zentorno | Blade | Glendale | Panto | Pigalle | Rhapsody | Warrener
- May be seen parked outside Los Santos Customs in Burton, at any time of day. (marker)[2].
- May be seen parked outside Los Santos Customs near the Los Santos International Airport, at any time of day. (marker)[3].
- May be seen driving out of Los Santos Customs in La Mesa onto Popular Street heading south, at any time of day (marker)[4].
- May be seen driving north along Playa Vista shortly after the Bay City Avenue intersection, between 06:00 am and 18:00 pm (marker)[5].
- May be seen driving away from the Union Depository , opposite the Maze Bank Tower, west towards Little Seoul, between 06:00 am and 20:00 pm (marker)[6].
- May be seen driving out of the Mission Row Police Station impound garage north onto Sinner Street between 10:00 am and 16:00 pm (marker)[7].
- Up to two may be seen driving east along Eclipse Boulevard towards Vinewood Boulevard between 12:00 pm and 12:00 am (marker)[8].
- May be seen driving out of Up-n-Atom Burger on Vinewood Boulevard, turning west onto Vinewood Boulevard between 06:00 am and 18:00 pm (marker)[9].
- May be seen driving west along Boulevard Del Perro past the Rockford Hills Sign between 10:00 am and 18:00 pm (marker)[10].
- May be found parked outside the main entrance of Banner Hotel & Spa on Boulevard Del Perro in Del Perro between 07:00 am and 15:00 pm (marker)[11].
- May be found driving south across the Cassidy Creek Bridge at any time of day (marker)[12].
- May be seen driving out of the Arcadius Business Center underground parking lot south onto Las Lagunas Boulevard between 18:00 pm and 04:00 am (marker)[13].
- May be found parked inside the first level of the red San Andreas Parking Counsel parking lot in Pillbox Hill at any time of day (marker)[14].
- May be seen turning off Swiss Street onto Elgin Avenue just north of the IAA Headquarters between 09:00 am and 05:00 am (marker)[15].
Grand Theft Auto Online
- Available for purchase from Legendary Motorsport for $240,000.
Trivia
General
- The default radio stations for the Jester are:
- GTA San Andreas: CSR 103.9.
- GTA V: The Lowdown 91.1 or Space 103.2.
Grand Theft Auto: San Andreas
- A model car called "Jester Crossflow" and looking like a tuned Jester can be found in the Zero RC shop in San Fierro.
- In Customs Fast Track, CJ and Cesar Vialpando steal a red Jester from a container ship in Easter Basin, delivering the car to Doherty Garage. While the previous stolen vehicles spawn in the Wang Cars showroom after mission completion, the Jester is replaced by a Savanna.
- In the beta version of the game, the Jester had Ferrari-styled rims.[16]
- The X Flow rear spoiler reassembles the rear spoiler which was a factory option on Toyota Supras.
- Sometimes, when the player buys the Jester in the Exports/Imports ship, it will come with a unique license plate reading "X2 GAV".
- The A80 Supra wasn't in production until 1993, making the car slightly anachronistic to the game's setting.
Grand Theft Auto V
- The "R" in the Jester's badge is colored red, mimicking the Type-R badge famous among Honda cars, for example the First Generation Honda NSX.
- When heavily damaged, smoke will come out of the front end, as if its engine was at the front, despite being just in front of the rear axle (rear-mid). This is likely a developer oversight.
- This has since been fixed in enhanced version of the game, and will now emit smoke from the rear.
See Also
- Jester (Racecar) - Racing variant.
- Jester Classic - Predecessor.
- SC1 - A vehicle in GTA Online with very similar design cues.
References
|