This page is about characters who can be recruited for Heists. To see when to select them and when they are used see; Heists and Heist Setups.


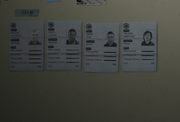
Heist Crew Members are minor characters in Grand Theft Auto V who can be hired by the protagonists to assist in Heist missions.
Description
In setups, the player can select crew members when Michael selects personnel. He can choose from gunmen, hackers and drivers, needed to complete the job alongside Michael, Franklin, and Trevor (excluding The Merryweather Heist and Blitz Play). Better crew members can do the job well, but ask for a higher cut (except for Taliana Martinez). Cheap hirelings will get better with each successful heist they take part in, assuming they survive, but their base performance level can result in catastrophe, or at least a more challenging mission for the protagonists.
Two potential crew members need random events completed before they can be recruited. Patrick McReary from Grand Theft Auto IV can be hired, but first a player-character must help him get away from a robbery at the drug store near Franklin's original safe-house, a random encounter available after the mission Pulling Favors has been completed. Taliana Martinez can also be hired after helping her receive medical attention following a car crash in the median of the freeway east of Paleto Bay, a random event available after the mission Mr. Philips.
Two more potential crew members will call a protagonist and offer their services; Rickie Lukens, a potential hacker, will call Michael after the mission Friend Request, and again after The Paleto Score or The Bureau Raid if he has not been hired by then. Chef will contact Trevor after Blitz Play and offer his services as a gunman.
Crew members
The following is a table of all the available characters for the various heists in-game that require additional crew members; The Jewel Store Job, The Paleto Score, The Bureau Raid and The Big Score. This includes their required payment (percentage cut of the take), their starting experience (performance quality), and the earliest heist in which they may be utilized:
| Class | Name | Cut | Quality | Earliest Heist Available |
|---|---|---|---|---|
| Driver | Eddie Toh | 14% | Good | The Jewel Store Job |
| Driver | Karim Denz | 8% | Poor | The Jewel Store Job |
| Driver | Taliana Martinez† | 5% | Good | The Bureau Raid |
| Gunman | Gustavo Mota | 14% | Good | The Jewel Store Job |
| Gunman | Norm Richards | 7% | Poor | The Jewel Store Job |
| Gunman | Patrick McReary† | 12% | Good | The Jewel Store Job |
| Gunman | Daryl Johns | 6% | Poor | The Paleto Score |
| Gunman | Chef* | 12% | Good | The Paleto Score |
| Gunman | Hugh Welsh | 7% | Poor | The Bureau Raid |
| Gunman | Karl Abolaji | 8% | Poor | The Big Score |
| Hacker | Paige Harris | 15% | Good | The Jewel Store Job |
| Hacker | Christian Feltz | 10% | Mediocre | The Jewel Store Job |
| Hacker | Rickie Lukens* | 4% | Poor | The Jewel Store Job |
| † These crew members require the completion of a certain random event. | ||||
| * These crew members require a timely phone call with their related protagonist. | ||||
Upgrading crew skills
Each time a crew member participates in a successful heist and survives, their skill ratings are increased by approximately 25% without increasing his or her pay rate. However, each of these skills, represented by the bars on the character's résumé sheet, are relatively unimportant, a few gunmen being the notable exception. What is more important is how the game classifies each crew member based on their experience for various scripted events during each heist; this can be categorized within this article as Good or Poor, and/or Mediocre for hackers specifically. Each heist should upgrade a chosen crew member by one category. For example, if Rickie Lukens, originally a 'Poor' hacker, is used in the Jewel Store Job, then he will be a 'Mediocre' hacker for the Bureau Raid, and if utilized during that heist as well, he will become 'Good' during the Big Score.
A gunman's skill does have an effect outside of scripted events, as their max health, accuracy, shoot rate, and weapon choice are all very relevant to each gunman's overall usefulness in a fire fight. However, it's important to note that a Poor gunman can't be improved more than once - by participating in the Bureau Raid, the second-to-last heist - as they won't survive through earlier heists. Furthermore, while experience from the Bureau Raid will increase the gunman's skill, it will not increase their classification during future scripted events.
Mission effects of crew skills
Drivers
Good: Eddie and Taliana*, or Karim with one heist. Poor: Karim w/o experience.
The Jewel Store Job
Smart
- Good: Will select Sanchezes for the escape (which handle well in all terrains), and will radio helpful directions to Franklin. *Taliana's random event will be unavailable until after this heist, making Eddie the only good driver.
- Poor: Will select Bati 801RRs for the escape (which handle poorly in mud), and will not be helpful in navigating. If the gunman crashes, the driver will stop briefly in the tunnels to calm down.
Loud
- Good: Will empty the display cases without dropping any jewelry. Will select Sanchezes for the escape (which handle well in all terrains), and will radio helpful directions to Franklin. *Taliana's random event will be unavailable until after this heist, making Eddie the only good driver.
- Poor: Will drop roughly 10% of the jewelry. Will select Bati 801RRs for the escape (which handle poorly in mud), and will not be helpful in navigating. If the gunman crashes, the driver will stop briefly in the tunnels to calm down.
The Bureau Raid
Note: The covert approach does not utilize a driver.
Roof
- Good: Will arrive on time driving an Ambulance, allowing for an easy and stealthy getaway, provided the player doesn't draw any attention to themselves.
- Poor: Will arrive late driving a Burrito, leading to a police chase after the protagonists and gunmen are forced to hold off cops.
The Big Score
Obvious
- Good: As Driver 1, will successfully pilot the helicopter through the wind farm and deliver the gold, provided Trevor and Lester destroy the pursuing Merryweather choppers. As Driver 2, will drive the train successfully.
- Poor: As Driver 1, will crash the helicopter in the wind farm, losing half of the overall take and causing a heist casualty. As Driver 2, will drive the train successfully.
Subtle
- Good: As Driver 1, will successfully evade police in the Gauntlet. As Driver 2, will keep the truck steady for Franklin to board.
- Poor: As Driver 1, will be arrested at a road block, losing a quarter of the overall take and causing a heist casualty. As Driver 2, will weave the truck from side to side, making Franklin's boarding slightly more difficult.
Gunmen
Good: Gus, Packie, and Chef. Poor: Karl, Norm, Daryl, and Hugh (with or w/o experience).
The Jewel Store Job
Smart
- Good: Will empty the display cases without dropping any jewelry, and will escape through the sewers with the driver and Franklin.
- Poor: Will drop roughly 10% of the jewelry, and will crash his bike during the escape, causing a heist casualty and dropping a third of the jewelry - recoverable by Franklin.
Loud
- Good: Will handle crowd control without incident, and will escape through the sewers with the driver and Franklin.
- Poor: Will fail to control the store manager, forcing Michael to subdue her, and will crash his bike during the escape, causing a heist casualty while dropping a third of the jewelry - recoverable by Franklin.
The Paleto Score
- Good: Will effectively help fend off law enforcement, before creating a diversion to take some of the heat off the protagonists, escaping on his own.
- Poor: Will be pinned to a wall by a police car and left behind, causing a heist casualty and dropping his third of the money - recoverable by Michael or Trevor. Michael, Trevor, and Franklin will also have to face more law enforcement while making their escape.
The Bureau Raid
Roof
- Good: Will select a black parachute and an exceptional weapon, effectively helping to fend off law enforcement.
- Poor: Will select a rainbow parachute and an impoverished weapon, being of little assistance and requiring more help from the protagonists.
Covert
- Good: Will not die during the escape, requiring two Good gunmen to avoid a casualty.
- Poor: Will only survive if chosen as Gunman 1 alongside another Poor gunman. Otherwise, if chosen with a Good gunman, or chosen as Gunman 2 alongside another Poor gunman, he will die in an explosion during the escape. In either event, the crew will experience a heist casualty.
The Big Score
Obvious
- Good: As Gunman 1, will successfully move the gold from the vault. As Gunman 2, will effectively help fight through the police and NOOSE to the getaway car.
- Poor: As Gunman 1, will successfully move the gold from the vault. As Gunman 2, will be of little assistance in the shootout, requiring more help from Michael.
Subtle
- Good: As Gunman 1, will load all the gold into the Gauntlets and will effectively fend off attacking enemies. As Gunman 2, will successfully change the Securicar tires and guard the hostages.
- Poor: As Gunman 1, will drop roughly 9% of the gold and will be weak at fending off attacking enemies. As Gunman 2, will successfully change the Securicar tires and guard the hostages.
Hackers
Good: Paige, or Christian with one heist, or Rickie with two heists. Mediocre: Christian, or Rickie with one heist. Poor: Rickie w/o experience.
The Jewel Store Job
Note: Either approach will be identical for the hacker.
- Good: Will hold off the alarm for 90 seconds
- Mediocre: Will hold off the alarm for 60 seconds
- Poor: Will hold off the alarm for 50 seconds (30 seconds in the original console release)
The Bureau Raid
Note: The covert approach does not utilize a hacker.
Roof
- Good: Will do a good job helping Michael hack the system, and turn off the sprinklers.
- Mediocre: Will do a mediocre job helping Michael hack the system, and might turn off the sprinklers.
- Poor: Will neither help hack the system nor turn off the sprinklers.
The Big Score
Note: The obvious approach does not utilize a hacker.
Subtle
- Good: Will control the traffic lights with no delay while effectively sourcing the Gauntlets needed for the escape.
- Mediocre: Will have a 1-2 second delay in controlling the traffic lights while adequately sourcing the Gauntlets needed for the escape.
- Poor: Will have a 2-4 second delay in controlling the traffic lights while poorly sourcing the Gauntlets needed for the escape.
Crew choices for maximum net revenue
The player only gets one shot at making money from each heist, thus it's important to go over all the variables and generally make the most profitable choices to the benefit of each protagonist. One can always replay the mission after-the-fact to test alternate methods or attain higher achievement medals.
If the player simply plays it safe and always hires the best - and most expensive - contract criminals, one can easily find themselves giving a majority of the take to the chosen employees. Alternatively, going with the cheapest help can cost the player far more than they were attempting to save. So, knowing when a low-cost crew member can do the job perfectly well, or a high-cost crew member is required, can make all the difference in attaining maximum profit.
The Jewel Store Job
Smart
- Driver: Karim Denz (8%)
- Gunman: Packie McReary† (12%)
- Hacker: Rickie Lukens* (4%)
Crew cut: 24% (preferred)
Loud
- Driver: Eddie Toh (14%)
- Gunman: Packie McReary† (12%)
- Hacker: Rickie Lukens* (4%)
Crew cut: 30%
Summary
During this first heist, it's essential to choose a good crew member to help Michael clean out the display cases, which unfortunately is never mentioned during the recruitment period. This task falls to the gunman in the Smart approach and the driver in the Loud approach; a poor crewman in this role will drop roughly 10% of the jewelry, or ~$500,000 worth.
In the Loud approach, not only will a poor driver (Karim) drop loot, but a poor gunman (Norm) also fails at crowd control, costing Michael some time and making a clean sweep all the more difficult. Alternatively, during the Smart approach, using the cheaper gunman Norm will result in dropped jewelry, but choosing Karim over the pricier Eddie as the driver will have no adverse consequences, save the minor challenge of driving a Bati 801RR through the sewers, rather than the preferred Sanchez. In either approach, Norm will crash his bike, becoming a casualty and raising his cost to 10.5%, while also forcing Franklin to attempt recovery of his dropped bag, or else lose a third of the take. As the hacker, Rickie can only hold the alarm for 50 seconds, making a clean sweep more difficult but still possible. Moreover, it's important for Rickie to start gaining experience for later heists.
For these reasons, the Smart approach is preferred, as it only requires an expensive gunman. The Loud approach essentially requires both an expensive gunman and an expensive driver; while it is possible to go with a cheap gunman, sacrificing Norm to reduce the relative crew cut by 1.5%, this makes the mission more difficult, it prevents Norm from being utilized during later heists, and in the end it can't compete with the best Smart approach - even without unlocking Packie beforehand.
The Paleto Score
- Gunman: Norm Richards (7%)
Casualty expense: 10.5%
Summary
Either of the cheap gunmen will die here, but even with the 1.5x casualty penalty and assuming the player picks up the dropped bag, Norm ends up costing the least. Chef and Packie will survive and decrease the overall difficulty of the heist, but cost 1.5% more and their earned experience is largely inconsequential. Meanwhile, Daryl technically costs the least at 9% casualty expense, but he's particularly valuable during later heists. In the end, with only a $10k difference in reward for each protagonist between the three ideal gunmen, the only bad choices are the pragmatic Daryl and the expensive Gustavo.
The Bureau Raid
Roof Entry
- Driver: Taliana Martinez† (5%)
- Gunman: Daryl Johns (6%)
- Hacker: Rickie Lukens* (4%)
Crew cut: 15% (preferred)
Covert
- Gunmen: Daryl Johns (6%) and Hugh Welsh (7%)
Crew cut/casualty expense: 16.5%
Summary
At first glance, the Covert approach would seem less expensive with one less crew member, but this is balanced by ensuring a gunman casualty, unless the two most expensive gunmen are chosen, making the crew cut 26%. However, a new gunman being made available (Hugh) can serve as a worthy sacrifice if one is set on this approach, as long as an appropriate Gunman 1 is chosen. Alternatively, nobody will die in the Rooftop approach, even with the cheapest crew members, despite increasing the difficulty. Among the drivers, Taliana is just as effective as Eddie and is the least expensive, though requires the completion of a random event beforehand. Rickie can be tolerable, especially with experience gained from the Vangelico stickup which makes him just as effective as Christian, at less than half the cost, and can still benefit from the experience earned towards a future heist.
Again, similar to the Paleto Score, there's only a ~$5k optimum difference in reward for Franklin between the two approaches, making multiple options equally viable. The only bad choices include practically any expensive crew member, or the Covert approach wherein Daryl dies.
The Big Score
Obvious
- Driver 1 (helicopter): Taliana Martinez† (5%)
- Driver 2 (train): Karim Denz (8%)
- Gunman 1 (with Franklin): Hugh Welsh (7%)
- Gunman 2 (with Michael): Daryl Johns (6%)
Crew cut: 26% (preferred)
Subtle
- Driver 1 (Bravado): Taliana Martinez† (5%)
- Driver 2 (truck): Karim Denz (8%)
- Gunman 1 (gold transfer): Packie McReary† or Chef (12%)
- Gunman 2 (hostages): Daryl Johns (6%)
- Hacker: Rickie Lukens* (4%)
Crew cut: 35%
Summary
In the Obvious approach, the helicopter pilot needs to be good, as the chopper will otherwise crash and lose half the take, while anyone can drive the train. If Karim does not have experience from a previous heist, then he needs to drive the train, though if he does have previous experience, all the drivers are essentially interchangeable. The first gunman merely serves as muscle, helping Franklin move the gold out of the vault, and thus can be anyone. The second gunman has to shoot his way through local law enforcement with Michael to the getaway car, and should be the cheapest with the best stats - preferably whoever was used during the Bureau Raid. The only complication that might arise is too many gunmen casualties during previous heists; if two have died, the player will be forced to utilize Karl with his 8% cut, and if three have died, the player will need to utilize both Karl and one of the good gunmen, potentially increasing the gunman's crew cuts by a total of 7%, making the Subtle approach a viable alternative.
In the Subtle approach, the Bravado driver needs to be good, as they will otherwise wreck and get arrested, losing a quarter of the take, while the driver of the truck is a far less risky position, potentially weaving from side to side if driven by a poor driver. Assuming Karim has previous experience from at least one heist, he'll be good enough for either position. This approach does require a good Gunman 1, as a cheap one regardless of experience will drop ~9% of the gold while transferring it into the Bravados, or roughly 18 million dollars. Gunman 2, similar to Gunman 1 in the Obvious approach, serves as muscle and just helps change the tires of the Securicar and looks after the hostages. Rickie can be a challenge to use without any experience, though given the wide margin in crew cut, is generally still preferred - with the experience of two previous heists, he'll be just as effective as Paige, at less than a third of the cost. Note that this approach will also cost the player a $300,000 bribe, along with the expense of upgrading the Bravados, assuming Franklin hasn't purchased the auto shop available to him.
This final heist can make a huge difference regarding the player's end-game fiscal capabilities, with each single percentage of crew cut potentially costing the protagonists two million dollars, or ~$650k each. With this amount of money at stake, it almost requires the exclusion of all expensive crew members for max revenue, making the Subtle approach ill-advised as it requires an additional crew member, and a more experienced crew overall. This heist also benefits the most from unlocked crew members - particularly Taliana, as the player will otherwise be forced to incorporate Eddie, and the driver's crew cuts for either approach increase by a total of 9%.
Potential crew member casualties
Depending on your heist specialists' experience, they can sometimes end up dying or arrested, in which case their death or legal expenses will be 1.5x their original cut; e.g. losing a crew member with a cut of 7% will increase his cost to 10.5%.
Drivers
Eddie Toh
- The Big Score (Obvious) If Trevor doesn't keep the helicopter steady so Lester can destroy the Merryweather helicopters he'll be shot down.
Karim Denz
- The Big Score
- (Subtle) If his driving experience is low and if he is chosen to drive the fourth Gauntlet, he crashes his car, gets pulled out and arrested by the police.
- (Obvious) If his driving experience is low and he is chosen to pilot the helicopter carrying the gold, he crashes it into a windmill and it explodes, killing him. Or if he has experience, if Trevor doesn't keep his own helicopter steady so Lester can destroy the Merryweather helicopters he'll be shot down.
Taliana Martinez
- The Big Score (Obvious) If Trevor doesn't keep his own helicopter steady so Lester can destroy the Merryweather helicopters she'll be shot down.
Gunmen
Packie McCreary, Gustavo Mota, Chef
- Will not die in scripted events. Cannot be killed in shootouts, either, because if that happens the mission auto-fails and restarts from a checkpoint.
Daryl Johns
- The Paleto Score Gets hit by a police car and pinned to a wall, forcing the group to leave him behind and possibly get arrested by the police.
- The Bureau Raid (Covert) Gets caught in the backdraft when the locked door opens and dies.*
- The Bureau Raid (Roof) May be killed in the shootout with law enforcement.
- The Big Score (Obvious) If chosen to accompany Michael, may be killed in the shootout with law enforcement.
Hugh Welsh
- The Bureau Raid (Covert) Gets caught in the backdraft when the locked door opens and dies.*
- The Bureau Raid (Roof) May be killed in the shootout with law enforcement.
- The Big Score (Obvious) If chosen to accompany Michael, may be killed in the shootout with law enforcement.
Norm Richards
- The Jewel Store Job (either approach) Crashes his bike during the escape; he either dies or gets arrested.
- The Paleto Score Gets hit by a police car and pinned to a wall, forcing the group to leave him behind and possibly get arrested by the police.
- The Bureau Raid (Covert) Gets caught in the backdraft when the locked door opens and dies.*
- The Bureau Raid (Roof) May be killed in the shootout with law enforcement.
- The Big Score (Obvious) If chosen to accompany Michael, may be killed in the shootout with law enforcement.
Karl Abolaji
- The Big Score (Obvious) If chosen to accompany Michael, may be killed in the shootout with law enforcement.
*If the other gunman is good, or if chosen as Gunman 2 alongside another poor gunman. Will survive as Gunman 1 alongside another poor gunman.
Video

Trivia
- Daryl Johns, Hugh Welsh and Karl Abolaji can't be recruited if the player replays a heist, for unknown reasons.
- Karl Abolaji is the only low-skilled gunman who cannot die without failing the mission, since he can only be selected in The Big Score, and in that heist, the gunmen always survive no matter what happens. In other heists, the mission will not fail if a low-skilled gunman dies. Therefore he is only low-skilled gunman who canonically survives.
- None of the hackers can die in any heist.
- All drivers are determinant characters.