(Editing a gallery) |
|||
| Line 132: | Line 132: | ||
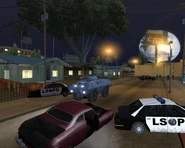
EndoftheLine-GTASA5.jpg|[[Frank Tenpenny]] shortly before his death on [[Grove Street (3D Universe)|Grove Street]] |
EndoftheLine-GTASA5.jpg|[[Frank Tenpenny]] shortly before his death on [[Grove Street (3D Universe)|Grove Street]] |
||
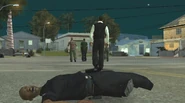
Death.jpg|Frank Tenpenny after his death on Grove Street. |
Death.jpg|Frank Tenpenny after his death on Grove Street. |
||
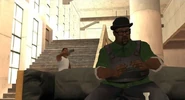
| + | 57C618F0-CB66-40DF-820C-2746637D09D2.png|Big Smoke before Death |
||
</gallery> |
</gallery> |
||
Revision as of 01:33, 23 December 2018

- Carl: "Hey, Sweet!"
- Sweet: "Wassup?"
- Carl: "It's time for Smoke."
- Sweet: "Alright let's roll."
- Carl: "Johnson brothers fittin' to take that fat fool down!"
- —Carl Johnson and Sean Johnson, before setting off to where Big Smoke is hiding.
End of the Line is the final storyline mission in Grand Theft Auto: San Andreas given to protagonist Carl Johnson by his brother and leader of the Grove Street Families, Sean from his home in Grove Street, Ganton, Los Santos.
Overview
Carl and Sweet have managed to find out where their former friend, Big Smoke, is hiding. They drive over to Smoke's hideout in East Los Santos while avoiding rioters. Upon arriving, they see that Smoke's crack palace has heavy security and there's no way to enter the place except for breaking through the wall. Carl convinces Sweet to allow him to go by himself, saying that Smoke and Tenpenny played him, and also wanted to atone for letting their brother, Brian, die five years prior. Carl finds a SWAT Tank nearby and steals it while being attacked by SWAT officers and Ballas gang members. He successfully smashes the wall and enters the crack palace.
Upon entering, Carl makes his way through three floors while killing Ballas, Vagos, San Fierro Rifa, and Russian Mafia gang members as well as workers, whom all carry M4s, AK-47s, Combat Shotguns and MP5s amongst other strong weapons. Carl manages to find Big Smoke, who claims that he doesn't feel any regrets over betraying the Grove Street Families and takes out a gun ready to battle Carl. During a shootout, Carl manages to kill Smoke and after a brief conversation questioning Smoke's decision, he says he had no choice and saw the opportunity for power and money before dying. With his dying breath, Smoke claims that "everyone will remember his name", ensuring his legacy. As soon as he dies, Carl sadly laments Smoke's end, muttering "Damn, man. What a waste..."
Frank Tenpenny, who had been watching the whole thing, arrives and asks Carl to put all of Smoke's money in his bag. Tenpenny threatens Carl with a Combat Shotgun, and sarcastically congratulates Carl on killing both Eddie Pulaski and Big Smoke. Tenpenny then states his next move, boarding a plane to flee from Los Santos to avoid the rioters. As Tenpenny prepares to kill Carl, Carl manages to trick Tenpenny into believing Sweet had just arrived, and as Tenpenny quickly turns around, Carl manages to dive out of the way as Tenpenny quickly brings his attention back to Carl and shoots at him, albeit missing, and flees from the room. After that, Tenpenny runs to the second floor and sets the whole building on fire by shooting a generator and causing it to explode. Carl leaves the Crack Palace the same way he came in, killing anyone in his way.
After successfully escaping, Tenpenny attempts to drive away in his Fire Truck but Sweet jumps on his Greenwood and then leaps at the ladder on the back of the truck, and hangs on from the ladder. Carl enters a parked Feltzer and starts to chase Tenpenny. During a long chase throughout Los Santos with Vagos and Ballas on the road throwing molotovs and police chasing the trio, a police officer in the truck gets out and starts stomping on Sweet's fingers. Carl gets the Feltzer under the ladder and Sweet drops onto the hood and then climbs over into the passenger seat.
On Carl's order, Sweet then takes control of the car with Carl acting as the shooter with his Micro SMG. The chase continues throughout the city with Carl destroying Police Cars as well as Vagos's rioters chasing them in Tornados and on bikes. The chase comes to an end on the bridge going above Ganton where Tenpenny crashes his truck through a breakable part of the bridge. Tenpenny climbs out of the fire truck and deliriously shouts about how he had kept the neighborhood clean with his deeds and would "do it all again" before dying in the middle of Grove Street, where the story began and now where it ends.
During this, Carl, Cesar, Sweet and Kendl confront Tenpenny, and Carl prepares to kill Tenpenny with a Desert Eagle. Sweet lowers Carl's gun however, instead deciding that Tenpenny "killed himself in a traffic accident, no one to blame", possibly so that nobody can link any of them or Grove Street Families to Tenpenny's demise. The Truth then appears, congratulating Carl for "beating the system", a feat which Truth claims would take ages for himself to achieve. Carl informs the others about Big Smoke's death, with Kendl remarking about how Smoke was only out for himself, a statement that Truth agrees with, referring to it as the surest path to Hell ("That or forty pounds of mescaline"). As Truth, Sweet, Cesar and Kendl walk away, Carl checks Tenpenny's corpse, before swiftly kicking him aside and mocking by mimicking Tenpenny's usual greetings towards him with: "See you around... Officer".
With that, the group reconvene inside the Johnson House to talk about their future, with Kendl dicussing their ventures in San Fierro and Las Venturas, remarking on how "shit never ends". Ken Rosenberg, Madd Dogg, Kent Paul and Maccer enter the house, causing the rather paranoid group to ready their guns, then lower them upon seeing who it is. Madd Dogg announces his first gold record and they all celebrate their success and Maccer gleefully announces that he will be getting breast implants before Carl heads out of the house "fittin' to hit the block, see what's happening". Following the ending credits, Catalina calls for the last time and is heard having sex with her boyfriend Claude, in a failed attempt to make Carl jealous, as Carl expresses his annoyment and disgust at Catalina, telling her to get help.
Tips
- Before starting the mission, head over to Mike Toreno's Ranch and grab a minigun. In addition to making clearing each floor easier, it will make the fight with Big Smoke easier, allowing for a rather short gun fight, as the minigun will deplete Big Smoke's health tremendously.
- Completing the Vigilante, Paramedic and Firefighter side-missions will make completing this mission easier, as Carl will have more armor and health during shootouts, and being fireproof makes the fire extinguisher redundant in this mission, which makes the escape easier.
Mission Objectives
In order to complete the mission the player must:
- Drive to Big Smoke's Crack Fortress.
- Go get the SWAT Tank.
- Use the SWAT Tank to ram right through the entrance of Big Smoke's Crack Fortress.
- Smoke is on the Fourth floor in his Penthouse Suite. You will have to work your way through three floors to get there.
- Make your way to Floors 3 and 4.
- Go get Big Smoke.
- Smoke has switched the lights off. Go get the thermal goggles by the lower window.
- Use the night vision goggles you have just picked up from Big Smoke to help you see in the dark and escape the building as quick as possible.
- The floor is on fire use a fire extinguisher to help you get out.
- Follow Tenpenny and make sure Sweet is safe, stay close to the fire truck and do not lose Tenpenny.
- The cop is stomping on Sweet's fingers get your car close to him in case he loses his grip.
- Protect the car from the police, Vagos and Ballas.
Deaths
- Frank Tenpenny - Died after succumbing to fatal wounds caused by his fire engine losing control and running off the overpass into Grove Street.
- Big Smoke - Killed by Carl Johnson for betraying the Grove Street Families, defecting to the Ballas, and usurping control of the Families for money and power.
- Numerous members of the Ballas, Vagos, San Fierro Rifa, Russian Mafia, and Crack Palace workers - Killed by Carl Johnson for getting in his way of killing Big Smoke.
- Numerous LSPD police officers - Killed by Carl Johnson for getting in his way of chasing after Frank Tenpenny alongside his brother, Sweet Johnson.
- Various Ballas and Vagos protestors - Killed by Carl Johnson for attempting to kill him and getting in his way of chasing after Frank Tenpenny alongside Sweet Johnson.
Rewards
Post-mission phone call script
Carl Johnson: Eh, whassup?
Catalina: (Heavy breathing)
Carl Johnson: Hello?
Catalina: Yes, Claude, faster, harder, DEEPER! Oh, yes, yes, YES!
Carl Johnson: Catalina! You sick! Get help!
Catalina: And you, Carl, you are jealous!
After the mission
Although this is the final mission of the game, the game itself does not end upon its conclusion. Following the closing cutscene and closing credits, Carl is back on Grove Street. A last phone call from Catalina is received, after which Carl is free to roam about San Andreas as the game enters pure sandbox mode. Any leftover non-storyline missions such as the Zero, Wang Cars, and Casino strands can still be played out, as can street races, etc. The riots subside, and a final WCTR news report is broadcast detailing the aftermath of the riots. If 100% Completion has been attained, the various rewards will become available after the closing credits.
In sandbox mode, certain aspects of the San Andreas universe continue to play out. Progress with the various girlfriends will still go up and down depending on whether Carl continues to date them or not; Carl's physical condition will still change depending on actions like working out and eating; enemy gang members may still randomly shoot at Carl when he passes.
Also, Gang Warfare conditions still apply, meaning Carl will still need to defend territory in Los Santos should any neighboring enemy gang areas remain.
Trivia
- Carl is free from police attention during the mission (aside from the scripted police sequences).
- Sweet's Greenwood is locked once Carl and Sweet arrive at Big Smoke's Crack Palace, and the player cannot enter it again during the mission. Sweet remains inside until he jumps onto the ladder of the fire truck. Also, the Greenwood is indestructible and can't be moved without a minigun or sawn-off shotgun when the mission fails (similar to Tagging Up Turf).
- It is possible to shoot out the tires of Tenpenny's firetruck during the chase sequence with Sweet. However, this won't affect it much and it will continue driving along its path as normal.
- CJ smashing the S.W.A.T. vehicle through the front door of the crack palace is a reference to former LAPD police chief Daryl Gates, authorizing the LAPD's S.W.A.T. to use the Cadillac Gage V-100 Commando, an amphibious armored vehicle they referred to as the "battering ram" (which the in-game S.W.A.T. vehicle is based on) to execute search warrants by raiding and smashing into suspected crack dens in South Central Los Angeles during the late-1980s.
- In the cutscene when Carl confronts Big Smoke, Smoke pulls a Combat Shotgun. However, when the gunfight begins, he uses an AK-47, possibly for balancing reasons. His AK-47 has reduced overall performance.
- Similarly, in the cutscene when Tenpenny appears, he pulls out a Combat Shotgun, but later uses a Pump Shotgun to shoot a generator.
- Another strange thing with Big Smoke is after the cutscene where Tenpenny leaves the drug lab, is that Smoke's head is under the couch, regardless of where the player killed him. He also has an AK-47 which he dropped and body armor.
- In the cutscene when Tenpenny asks Carl to give the suitcase full of money over to him, the suitcase passes through Big Smoke's CJD 500.
- No matter what pistol the player has in their inventory, Carl will always have a Desert Eagle when he confronts Smoke, and after he's killed Smoke. This will also be the default weapon Carl pulls out regardless of what weapon the player has selected before the cutscene begins.
- Similarly, regardless of what weapon Carl has in his submachine gun slot, following the completion of this mission, Carl will always have a Micro SMG with 70 rounds of ammunition.
- The Feltzer in this mission is bulletproof/fireproof/explosionproof/damageproof, and can be obtained by ditching it. The license plate reads "IMY AK", which cannot be saved at a garage. Same plate can be found on BF-400 in Just Business and Cheetah if the player buys it at the Easter Basin Docks.
- The two SWAT tanks seen in this mission are the only two in the entire game. The one used to smash the wall can be stored in a garage, however, it will disappear after the mission unless the player fails the mission beforehand.
- The time in this mission is prewritten. Regardless of what time the player begins the mission, the mission will start at 21:30 outside Sweet's house, so the confrontation between Carl and Smoke would be during the night. Although, after Tenpenny blows up the generators and CJ is left alone in the room with Smoke's body, the time is 00:00. Since the player has seven minutes (seven GTA hours) to escape from the lab, when Carl leaves the lab it should be early in the morning. However, when the pursuit of Tenpenny begins, the time is 17:00. Tenpenny's death is around 23:00 and the mission is finally passed at 1:00.
- At one point, a SWAT Tank breaks in through the wall from a back alleyway, allowing S.W.A.T. to enter the building. However, there is no back alleyway on the building's exterior, and there is no hole anywhere where the tank could have burst in through. The tank comes from the Hidden Interiors Universe, as one can tell by re-entering the building after completing the mission, going upstairs to the hole and looking around the exterior.
- When Carl is standing over Tenpenny's corpse, he sarcastically says "See you around...officer!". This is a reference to what Tenpenny says ("See you around like a donut, Carl!") when he shoves Carl out of the police car during the first mission and when he says "Hey Carl, see you around" during the opening of Running Dog.
- After Tenpenny dies, the gang heads in the direction of Sweet's house but end up in the Johnson house. Also, The Truth is seen with the gang but is not seen inside the Johnson house.
- The GTA Vice City Stories mission Jive Drive and the GTA V mission Father/Son bear similarities to the second and first parts of the third act.
- In GTA V and the first part, the protagonists Carl Johnson, Michael De Santa and Franklin Clinton use a car (Feltzer and Sentinel) to chase after a truck while Sweet and Jimmy are dangling from the ladder of Tenpenny's firetruck and the side of Michael De Santa's towed boat respectively, and both CJ and Michael must catch Sweet and Jimmy in their cars.
- In GTA VCS and the second part, both CJ and Vic must shoot the enemies pursuing them while Sweet and Lance drive the car that they are using (Feltzer and Stinger).
- This is the last mission where the player must shoot from a car as a passenger.
- A statue of Big Smoke's beta appearance can be seen inside the Crack Palace during the mission.
- Only in this mission can the player see prostitutes in the 3rd floor of the crack palace. They can be killed by Carl, although this doesn't affect the mission nor the game.
- If CJ shoots at the officer on the back of the fire truck during the chase, he will not fall off the truck and hit the ground. Instead, he will dangle from the fire truck's ladder by his feet.
- Another officer will come out of the firetruck and attempt to shoot at the player. However, if you kill this one, his body will fall to the ground. It is interesting to note that at the cutscene where Tenpenny escapes in the firetruck, he is the one driving it. But the officer mentioned above climbs from the door on the left, the same door that Tenpenny entered through. It is unknown if this was just an oversight on the developer's part.
- If one was to explore the cutscene after the gun-fight with Big Smoke, the player could see that Tenpenny is fully animated and is observing CJ's and Big Smoke's coversation off-camera.
- The VC Edition's gold music award is shown differently. In GTA Vice City, there's a black circle in the middle, the side rings are yellow, and the outter part after the side rings is red, while Madd Dagg's award is slightly changed in this mission, in the release, it shows the middle as blue, and outter as black for some reason.
[1]more
Gallery
Video Walkthroughs
See Also
References
| Missions in Grand Theft Auto: San Andreas | |||||||||||||
|---|---|---|---|---|---|---|---|---|---|---|---|---|---|
| Introduction | The Introduction | In the Beginning | Big Smoke | Sweet & Kendl | ||||||||||||
| Lance Wilson (Ryder) |
|
||||||||||||
| Sean Johnson (Sweet) |
|
||||||||||||
| Melvin Harris (Big Smoke) | OG Loc | Running Dog | Wrong Side of the Tracks | Just Business | ||||||||||||
| Cesar Vialpando |
|
||||||||||||
| Jeffrey Cross (OG Loc) | Life's a Beach | Madd Dogg's Rhymes | Management Issues | House Party | ||||||||||||
| C.R.A.S.H. |
|
||||||||||||
| Catalina | First Date | First Base | Gone Courting | Made in Heaven
|
||||||||||||
| The Truth |
|
||||||||||||
| Carl Johnson |
|
||||||||||||
| Zero | Air Raid | Supply Lines... | New Model Army | ||||||||||||
| Jizzy B. |
|
||||||||||||
| Wu Zi Mu |
|
||||||||||||
| Mike Toreno |
|
||||||||||||
| Triads |
|
||||||||||||
| Mafia |
|
||||||||||||
| Madd Dogg |
|
||||||||||||
| Side Missions | Paramedic | Firefighter | Vigilante | Taxi Driver | Brown Thunder | Pimping | Freight Train Challenge | Burglar | BMX Challenge | The Chiliad Challenge | NRG-500 Challenge | 8-Track | Kickstart | Blood Bowl | Dirt Track | Shooting Range | Roboi's Food Mart Courier Mission | Hippy Shopper Courier Missions | Burger Shot Courier Missions | Trucking | Valet | Quarry | Exports and Imports
|
||||||||||||
| Missions in GTA San Andreas (Category) | Missions | Beta Missions | Side Missions (Category) * denotes the final story mission. | |||||||||||||


