(→Trivia) |
JonTheVGNerd (talk | contribs) (→Trivia) |
||
| (37 intermediate revisions by 25 users not shown) | |||
| Line 1: | Line 1: | ||
| + | {{spoiler}} |
||
{{infobox mission |
{{infobox mission |
||
|name = Death Row |
|name = Death Row |
||
| − | |image = DeathRow-GTAVC. |
+ | |image = DeathRow-GTAVC-Intro.png |
|size = 300px |
|size = 300px |
||
| + | |caption = |
||
| − | |caption = [[Tommy Vercetti]] killing one of [[Ricardo Diaz|Ricardo Diaz']] [[Diaz' Gang|men]] in his attempt to rescue [[Lance Vance]] |
||
|game = VC |
|game = VC |
||
| − | |for = [[Kent Paul]] |
+ | |for = [[File:Radar-KentIcon-GTAVC.png|24px|link=Kent Paul]] [[Kent Paul]] |
| − | |location = [[Malibu Club]], [[Vice Point]] |
+ | |location = [[Malibu Club]], [[Vice Point]], [[Vice City Beach]] |
|target = Saving [[Lance Vance]] |
|target = Saving [[Lance Vance]] |
||
|fail = [[Wasted]]<br>[[Busted]]<br>[[Lance Vance|Lance]] dies |
|fail = [[Wasted]]<br>[[Busted]]<br>[[Lance Vance|Lance]] dies |
||
|reward = None |
|reward = None |
||
| − | |unlocks = [[All Hands On Deck]]<br>[[Rub Out]] |
+ | |unlocks = [[All Hands On Deck!]]<br>[[Rub Out]] |
|unlockedby = [[Supply & Demand]]<br>[[Sir, Yes Sir!]] |
|unlockedby = [[Supply & Demand]]<br>[[Sir, Yes Sir!]] |
||
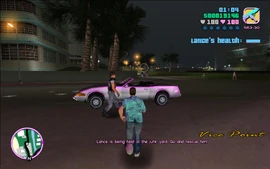
| + | |todo = {{BP}}<font color=#ff99cc>Lance is being held at the junk yard. Go and rescue him!</font><br> |
||
| + | {{BP}}<font color=#ff99cc>Diaz's guys are after you! Get Lance to the hospital.</font><br> |
||
}} |
}} |
||
| − | |||
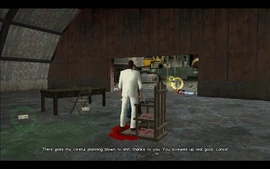
{{quote|There goes my careful planning blown to shit, thanks to you! You screwed up real good, Lance!|[[Tommy Vercetti]]}} |
{{quote|There goes my careful planning blown to shit, thanks to you! You screwed up real good, Lance!|[[Tommy Vercetti]]}} |
||
| − | '''Death Row''' is the only mission in [[Grand Theft Auto: Vice City]] given to protagonist [[Tommy Vercetti]] by Malibu Club member [[Kent Paul]]. |
+ | '''Death Row''' is the only mission in ''[[Grand Theft Auto: Vice City]]'' given to protagonist [[Tommy Vercetti]] by Malibu Club member [[Kent Paul]]. |
| − | == |
+ | ==Description== |
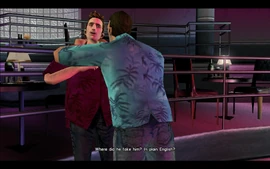
| + | Tommy arrives at the Malibu Club and Kent Paul approaches him. Paul informs Tommy that [[Lance Vance]] tried to attack [[Ricardo Diaz]] but failed, and Diaz's men are now holding him hostage at the Junkyard. Tommy leaves the club and drives across town to the junkyard where he finds it heavily guarded by Diaz's goons. |
||
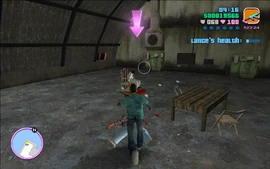
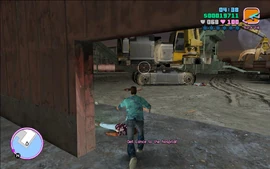
| + | Tommy fights his way to a storage hangar at the rear of the junkyard where he finds a heavily injured, but still lingering, Lance. Tommy berates Lance for his actions as it has "blown all [his] careful planning to shit", but Lance reveals he was attempting to get revenge for Diaz ordering his [[Victor Vance|brother]]'s [[In the Beginning|death]]. Tommy decides they must now kill Diaz before he has a chance to kill them, and agrees to drive Lance to the hospital. |
||
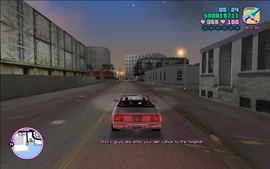
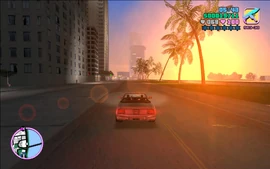
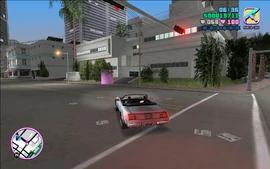
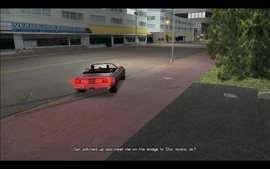
| + | Tommy then escapes with Lance. When the duo leave the junkyard they are chased by more of Diaz's men. Tommy manages to evade them and takes Lance to the [[Schuman Health Care Center]] [[Downtown Vice City|Downtown]]. Tommy tells Lance to meet him by the bridge to [[Starfish Island]] once he has recovered. |
||
| − | |||
| − | ===Brief=== |
||
| − | After a phone from Kent Paul, Tommy heads to the [[Malibu Club]] and finds out from Paul that Lance Vance unsuccessfully tried to kill [[Ricardo Diaz]] and Diaz has captured him. Now Diaz's people are torturing Lance in the Junkyard. After hearing this Tommy quickly heads to junkyard to rescue Lance before he dies. |
||
| − | |||
| − | ===The Mission=== |
||
| − | This is perhaps one of the most difficult missions in the whole game. Pick up some [[Body Armor]] and heavy weapons before accepting the mission. Time is of the essence here, so you will need a fast vehicle or a helicopter. One method for speed through traffic without delay or damage to your vehicle would be to use a [[FBI Washington]] or [[VCPD Cheetah]] with its sirens on. The sirens would make it easy to clear roadways while speeding to Lance's location. |
||
| − | |||
| − | Head to the junkyard and you'll face a barricade at the gate. If your car catches fire on the stretch of road leading up to the junkyard, it's a good idea to bail out of it as it hits the barricade, causing mass destruction and saving yourself. This is quite difficult to engineer, however. A more surefire method is to pull in at the left side of the road just before the barricade and snipe their cars until they explode and take out the guards around them. |
||
| − | |||
| − | One recommendation is to go through the back of the junkyard, and get on top of the trash pile, as this gives you an excellent vantage point to fire down on Diaz's gang. Make sure you're ready for battling them, as they will engage you with Rugers and Uzis in the gunfight. While the gang members drop lots of money, don't go out of your way to pick up the cash, and remember that Lance's health is dropping steadily. Run towards the yellow marker to find [[Lance Vance|Lance]] and trigger a cutscene. Afterward, stay in front of Lance to shield him from any remaining goons, as he can only take a couple of bullets before dying. |
||
| − | |||
| − | As you exit the junkyard, Diaz's men in four Comets will come after you as you try to deliver Lance to the [[Schuman Health Care Center]]. If you took the [[Sentinel]], it is recommended that you back into the junkyard to trap a couple Comets there, then accelerate forward as they try to get back their bearings, since the Sentinel won't be able to outrun the agile and fast Comets in a straight chase. Alternatively, if you take the [[Trashmaster]], it can withstand lots of punishment. |
||
| − | |||
| − | There are other variations in completing this mission. A motorcycle (preferably a Freeway for the ruggedness and speed) is effective at quickly getting to Lance's shed (once you've eliminated the barricade, ignore the others in the junkyard) and it is fast enough to outrun the Comets; however if a tire gets punctured or if the motorcycle gets knocked down, you'll have to restart the mission. Landing a helicopter by Lance's shed also enables you to avoid most of the junkyard thugs. After the conclusion of this mission, Tommy cuts his ties with Diaz. |
||
| − | |||
| − | You may also use the bulletproof Admiral (from [[Guardian Angels]]) or a [[tank]] (from [[Sir, Yes Sir!]] if you drove it into Hyman Condos instead of the lockup) to beat the mission. |
||
==Mission objectives== |
==Mission objectives== |
||
In order to complete the mission the player must: |
In order to complete the mission the player must: |
||
| + | *<font color="#ff99cc">Lance is being held at the junk yard. Go and rescue him!</font> |
||
| − | *Get to the junkyard and kill Diaz's goons |
||
| + | *<font color="#ff99cc">Diaz's guys are after you! Get Lance to the hospital.</font> |
||
| − | *Rescue Lance |
||
| + | |||
| − | *Drive Lance to the hospital in Downtown after getting rid of the pursuers |
||
| + | ==Transcript== |
||
| + | {{/Transcript}} |
||
==Post mission phone call== |
==Post mission phone call== |
||
'''Colonel Juan Cortez''': Tommy, Thomas it's Cortez. Look, the French are giving me all kinds of trouble, amigo. Damn hyprocrites. They spend a hundred years stealing from poor countries and they call me a thief! I am going to need your help as soon as possible, amigo. So please hurry, Tommy, I need you, all right? I hate the damn French. |
'''Colonel Juan Cortez''': Tommy, Thomas it's Cortez. Look, the French are giving me all kinds of trouble, amigo. Damn hyprocrites. They spend a hundred years stealing from poor countries and they call me a thief! I am going to need your help as soon as possible, amigo. So please hurry, Tommy, I need you, all right? I hate the damn French. |
||
| − | |||
| ⚫ | |||
| ⚫ | |||
| − | *After Lance is dropped off at the hospital, he wields a [[Micro-SMG|Micro SMG]] while walking in. |
||
| − | *Every part of this mission is very difficult. The first part, if you don't have a good weapon or aim badly, you can lose a lot of ammo, health or armor. The second part is again hard, as the [[Comet]]s are very fast and if you don't get the [[Trashmaster]], but instead the [[Sentinel]], you are likely to fail the mission as they ram you, your car explodes and [[Lance]] is likely to be run over or caught in the explosion. |
||
| − | **If the player elect not to use the helicopter or the Rhino (Jacked in a six star wanted frenzy or from Baxter AFB), then the easiest way to complete this mission and make it much easier is a couple of things: 1. Get the rocket launcher and the PSG-1 or the sniper rifle. 2. Do not take the sentinel out of the junkyard, or at least, not very far. 3. memorize the quickest way to the junk yard. The 3rd part is the most important. Use either a helicopter or a fast bike, such as the [[PCJ-600]]. Open the map and figure out the quickest way there. Once there, on the street leading to the junkyard, abandon the car or bike and let it slide forward towards the entrance, take out the rocket launcher and aim for the abandoned vehicle. The explosion should take out multiple guards. Then use the sniper to quickly kill the remaining guards. Once Lance is free, kill the remaining few, if there still any left. Now take the Sentinel and just go out the Junk Yard. Once the game prompts the player that more Diaz men in the four Comets have arrived, turn 180 and head back into the Junkyard. Off to the player's right and near the entrance is a raised light blue platform. Stop there and get on. If any of the Diaz men make it through, they will have an impossible time reaching the player since they never abandon their vehicles and the Comet can not get up the Platform. Destroy their vehicles at your leisure. Most likely, they will be stuck at the entrance sides, if this happens, take out the rocket launcher and blow them all up in one go. This will usually garner 2 wanted stars but will make the "runaway" a cinch compared to other wise. |
||
| − | *You can also use the small red bridge to escape with Lance to the hospital. When you get out from junkyard in a Sentinel or any fast car, simply turn right between two buildings, then across the bridge. After that you can return to the street, drive through the [[Print Works]] building and then to the hospital in Downtown by a 2-lane road. There is no other peds and cars appeared in the city during escape, and you can get lost from Diaz guys for a while, so it makes the escape part of this mission much easier. |
||
| − | * This is a similar mission to [[Hostile Negotiation]] in [[Grand Theft Auto IV|GTA IV]] and [[Lamar Down]] in [[Grand Theft Auto V|GTA V]]. |
||
| − | * In the IOS version, the line "I hate the damn French" was censored. |
||
==Gallery== |
==Gallery== |
||
| + | <gallery position="center"> |
||
| − | |||
| ⚫ | |||
DeathRow-GTAVC2.jpg|[[Tommy Vercetti]] and [[Lance Vance]], shortly after Vercetti rescued Vance |
DeathRow-GTAVC2.jpg|[[Tommy Vercetti]] and [[Lance Vance]], shortly after Vercetti rescued Vance |
||
| ⚫ | |||
| + | |||
| + | ===Walkthrough=== |
||
| + | <gallery position="center" hideaddbutton="true" spacing="small" widths="270px" bordersize="small"> |
||
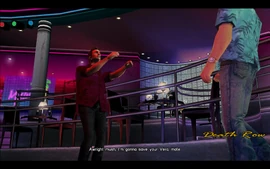
| + | DeathRow-GTAVC-SS1.jpg|[[Tommy Vercetti|Tommy]] arrives at the [[Malibu Club]] in [[Vice Point]] and is immediately met by [[Kent Paul]]. Kent tells Tommy that he is going to save him. |
||
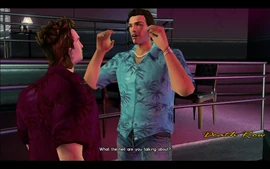
| + | DeathRow-GTAVC-SS2.jpg|Tommy is confused by Kent and asks what he means by that. |
||
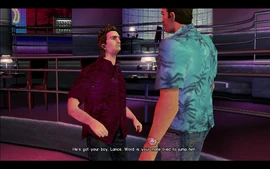
| + | DeathRow-GTAVC-SS3.jpg|Kent reveals that the word around town is that [[Lance Vance|Lance]] tried to kill [[Ricardo Diaz|Diaz]], but Diaz survived the assassination attempt and now holds Lance hostage. |
||
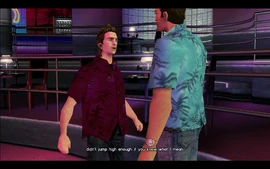
| + | DeathRow-GTAVC-SS4.jpg|Kent jokes about Lance, saying that he tried to jump up, but didn't jump high enough. |
||
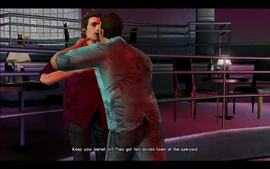
| + | DeathRow-GTAVC-SS5.jpg|Tommy is not amused by Kent's jokes and presses him against a railing and asks him to stop joking around and tell him where Lance is being held. |
||
| + | DeathRow-GTAVC-SS6.jpg|Kent tells Tommy that Lance is apparently being held at the junkyard in [[Little Haiti]]. |
||
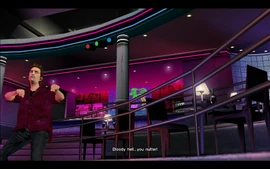
| + | DeathRow-GTAVC-SS7.jpg|Tommy lets Kent go and storms off, while Kent calls Tommy insane. |
||
| + | DeathRow-GTAVC-SS8.jpg|Tommy going back to his vehicle. |
||
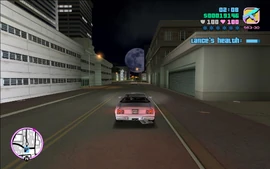
| + | DeathRow-GTAVC-SS9.jpg|Tommy speeding to the junkyard in Little Haiti. |
||
| + | DeathRow-GTAVC-SS10.jpg|Tommy arriving at the junkyard. |
||
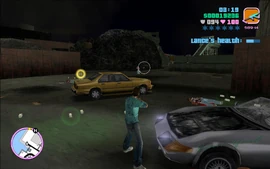
| + | DeathRow-GTAVC-SS11.jpg|Tommy taking out Diaz's [[Diaz' Gang|goons]]. |
||
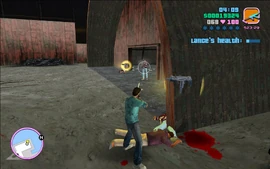
| + | DeathRow-GTAVC-SS12.jpg|Tommy taking out the gangsters guarding Lance. |
||
| + | DeathRow-GTAVC-SS13.jpg|Tommy running to get Lance. |
||
| + | DeathRow-GTAVC-SS14.jpg|Tommy is angry at Lance for ruining his careful planning to get rid of Diaz. |
||
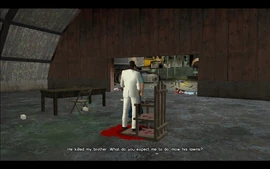
| + | DeathRow-GTAVC-SS15.jpg|Lance tells Tommy to calm down. Diaz killed Lance's brother and Lance was not going to do any more dirty work for Diaz. |
||
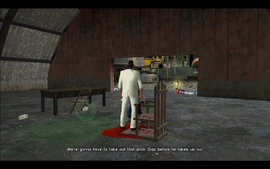
| + | DeathRow-GTAVC-SS16.jpg|Tommy says that since they're now in hot water with Diaz, they're going to have to take him out and asks if Lance is okay to use a gun if needed. |
||
| + | DeathRow-GTAVC-SS17.jpg|After a small chat with Lance, Tommy finally decides to get out of the junkyard. |
||
| + | DeathRow-GTAVC-SS18.jpg|Tommy going back to his vehicle. |
||
| + | DeathRow-GTAVC-SS19.jpg|Shortly after getting out of the junkyard, Tommy realises that Diaz's men are after him and Lance. |
||
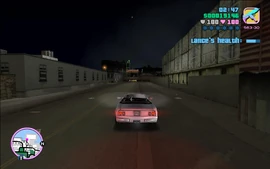
| + | DeathRow-GTAVC-SS20.jpg|Tommy speeding down to the [[Schuman Health Care Center|hospital]] in [[Downtown Vice City|Downtown]]. |
||
| + | DeathRow-GTAVC-SS21.jpg|Tommy and Lance arrive at the hospital. |
||
| + | DeathRow-GTAVC-SS22.jpg|Before letting Lance go, Tommy tells him to meet him near Diaz's [[Vercetti Estate|mansion]] in [[Starfish Island]]. |
||
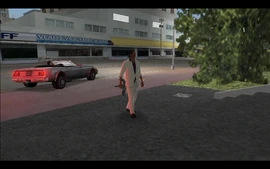
| + | DeathRow-GTAVC-SS23.jpg|Lance walking into the hospital. |
||
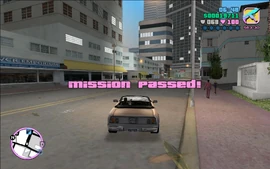
| + | DeathRow-GTAVC-SS24.jpg|Mission passed. |
||
</gallery> |
</gallery> |
||
==Video Walkthroughs== |
==Video Walkthroughs== |
||
| + | <gallery hideaddbutton="true"> |
||
| ⚫ | |||
| ⚫ | |||
| + | </gallery> |
||
| + | |||
| ⚫ | |||
| ⚫ | |||
| + | *During this mission, Tommy refers to Starfish Island as "Star Island", which is the only time in the game that Starfish Island is referred to by this name. Originally, in the [[Beta Releases in GTA Vice City|beta version of GTA Vice City]], Starfish Island was called "Star Island". |
||
| + | *If there are still goons in sight when the duo arrived at the hospital, they will drive away after completion. |
||
| + | *There is no monetary rewards in this mission. However, Ricardo's goons surrounding the junk yard drop large amounts of cash when killed. This can be collected if the player has enough time and can be considered as a reward for this mission. |
||
| + | ==Navigation== |
||
| − | {| class="wikitable" |
||
| + | {{Navboxes |
||
| − | |- |
||
| + | |title= Navigation |
||
| − | !PC Version |
||
| + | |list1= |
||
| − | |- |
||
| + | {{GTA|state=collapsed}} |
||
| − | | |
||
| + | {{Gtavc missions|state=collapsed}} |
||
| ⚫ | |||
| + | }}[[pl:Czekając na śmierć]] |
||
| − | |} |
||
| + | [[zh:Death Row]] |
||
| − | {| class="wikitable" |
||
| − | |- |
||
| − | !iPad 2 Version |
||
| − | |- |
||
| − | | |
||
| ⚫ | |||
| − | |} |
||
[[Category:Missions]] |
[[Category:Missions]] |
||
[[Category:Missions in GTA Vice City]] |
[[Category:Missions in GTA Vice City]] |
||
Revision as of 21:56, 4 February 2020

Death Row is the only mission in Grand Theft Auto: Vice City given to protagonist Tommy Vercetti by Malibu Club member Kent Paul.
Description
Tommy arrives at the Malibu Club and Kent Paul approaches him. Paul informs Tommy that Lance Vance tried to attack Ricardo Diaz but failed, and Diaz's men are now holding him hostage at the Junkyard. Tommy leaves the club and drives across town to the junkyard where he finds it heavily guarded by Diaz's goons.
Tommy fights his way to a storage hangar at the rear of the junkyard where he finds a heavily injured, but still lingering, Lance. Tommy berates Lance for his actions as it has "blown all [his] careful planning to shit", but Lance reveals he was attempting to get revenge for Diaz ordering his brother's death. Tommy decides they must now kill Diaz before he has a chance to kill them, and agrees to drive Lance to the hospital.
Tommy then escapes with Lance. When the duo leave the junkyard they are chased by more of Diaz's men. Tommy manages to evade them and takes Lance to the Schuman Health Care Center Downtown. Tommy tells Lance to meet him by the bridge to Starfish Island once he has recovered.
Mission objectives
In order to complete the mission the player must:
- Lance is being held at the junk yard. Go and rescue him!
- Diaz's guys are after you! Get Lance to the hospital.
Transcript
| Transcript | ||||||||||||||||||||||||||||||||
|---|---|---|---|---|---|---|---|---|---|---|---|---|---|---|---|---|---|---|---|---|---|---|---|---|---|---|---|---|---|---|---|---|
|
Post mission phone call
Colonel Juan Cortez: Tommy, Thomas it's Cortez. Look, the French are giving me all kinds of trouble, amigo. Damn hyprocrites. They spend a hundred years stealing from poor countries and they call me a thief! I am going to need your help as soon as possible, amigo. So please hurry, Tommy, I need you, all right? I hate the damn French.
Gallery
Walkthrough
Video Walkthroughs
Trivia
- The song that can be heard playing in the background during the opening cutscene is "All Night Long" by The Mary Jane Girls. The song is also featured on the in-game radio station Fever 105. The song isn't played inside the Malibu Club during normal gameplay, however.
- During this mission, Tommy refers to Starfish Island as "Star Island", which is the only time in the game that Starfish Island is referred to by this name. Originally, in the beta version of GTA Vice City, Starfish Island was called "Star Island".
- If there are still goons in sight when the duo arrived at the hospital, they will drive away after completion.
- There is no monetary rewards in this mission. However, Ricardo's goons surrounding the junk yard drop large amounts of cash when killed. This can be collected if the player has enough time and can be considered as a reward for this mission.

