No edit summary |
mNo edit summary |
||
| (17 intermediate revisions by 7 users not shown) | |||
| Line 1: | Line 1: | ||
{{Next-Gen}} |
{{Next-Gen}} |
||
{{Infobox vehicles |
{{Infobox vehicles |
||
| − | |name = Barrage |
+ | |name = Barrage |
| − | |front_image = Barrage-GTAO-front.png |
+ | |front_image = Barrage-GTAO-front.png |
| + | |rear_image = Barrage-GTAO-rear.png |
||
| − | |vehicle_class = Military |
||
| + | |caption = A '''Barrage''' in ''[[Grand Theft Auto Online]]''. |
||
| − | |vehicle_type = Military vehicle |
||
| + | |vehicle_class = Military |
||
| − | |body_style = Off-road buggy |
||
| + | |vehicle_type = Military vehicle |
||
| − | |capacity = 4 <small>(driver, passenger, front and rear gunners)</small> |
||
| + | |body_style = Off-road buggy |
||
| − | |appearances = ''[[Grand Theft Auto Online]]'' {{DLC|GTA Online: The Doomsday Heist update}} {{NG}} |
||
| + | |capacity = 4 <small>(driver, passenger, front and rear gunners)</small> |
||
| − | |manufacturer = [[HVY]]<ref>Listed when stored in a garage.<!--Any image for that?--></ref> |
||
| + | |appearances = ''[[Grand Theft Auto Online]]'' {{DLC|GTA Online: The Doomsday Heist update}} {{NG}} |
||
| − | |price = [[Money|$]]2,121,350<br>$1,595,000 <small>(Trade price)</small><br><small>([[Warstock Cache & Carry]])</small> |
||
| + | |manufacturer = [[HVY]]<ref>Listed when stored in a garage.</ref> |
||
| − | |related = [[Insurgent Pick-Up]] ([[Insurgent Pick-Up Custom|Custom]])<br>[[Menacer]]<br>[[Dune FAV]] |
||
| + | |price = [[Money|$]]2,121,350<br>$1,595,000 <small>(Trade price)</small><br><small>([[Warstock Cache & Carry]])</small> |
||
| − | |swankness = 5/5 |
||
| + | |related = [[Menacer]]<br>[[Dune FAV]] |
||
| − | |dashtype = Race <small>(needles)</small> [[File:Race-Dials-GTAV.png|thumb|center|170px]]<br>Race Generic <small>(dial texture)</small>[[File:GenRaceDigital-GTAV-DialSet.png|thumb|center|170px]] |
||
| + | |variants = |
||
| − | |inttxd = {{BP}}Race Generic |
||
| + | |makeyear = |
||
| + | |swankness = 5/5 |
||
| + | |dashtype = Race <small>(needles)</small> [[File:Race-Dials-GTAV.png|thumb|center|170px]]<br>Race Generic <small>(dial texture)</small>[[File:GenRaceDigital-GTAV-DialSet.png|thumb|center|170px]] |
||
| + | |inttxd = |
||
| + | {{BP}}Race Generic |
||
{{BP}}Barrage |
{{BP}}Barrage |
||
| − | |carcols = |
+ | |carcols = |
| + | {{Expand|| |
||
| − | {{CarColV/Title}} |
||
| − | {{CarColV| |
+ | {{CarColV/Title|extended=y}} |
| − | {{CarColV|no= |
+ | {{CarColV|extended=y|no=1|155|3|5|111|155}} |
| − | {{CarColV|no= |
+ | {{CarColV|extended=y|no=2|154|8|18|111|155}} |
| − | {{CarColV|no= |
+ | {{CarColV|extended=y|no=3|153|11|6|111|155}} |
| − | {{CarColV|no= |
+ | {{CarColV|extended=y|no=4|151|100|8|111|155}} |
| + | {{CarColV|extended=y|no=5|152|100|8|111|155}}<br> |
||
}} |
}} |
||
| − | |wheeltype = Sports |
+ | |wheeltype = Sports |
| − | |flags = |
+ | |flags = |
| + | {{Expand|| |
||
{{Flags|FLAG_AVERAGE_CAR}}<br> |
{{Flags|FLAG_AVERAGE_CAR}}<br> |
||
{{Flags|FLAG_POOR_CAR}}<br> |
{{Flags|FLAG_POOR_CAR}}<br> |
||
| Line 38: | Line 45: | ||
{{Flags|FLAG_RESET_TURRET_SEAT_HEADING}}<br> |
{{Flags|FLAG_RESET_TURRET_SEAT_HEADING}}<br> |
||
}} |
}} |
||
| − | |modelname = barrage |
+ | |modelname = barrage |
| − | |handlingname = BARRAGE |
+ | |handlingname = BARRAGE |
| − | |textlabelname = BARRAGE |
+ | |textlabelname = BARRAGE |
| − | |roadspawn = No |
+ | |roadspawn = No |
| − | |roadspawnmaxcol = 1 |
+ | |roadspawnmaxcol = 1 |
| − | |roadspawnfreq = 30 |
+ | |roadspawnfreq = 30 |
| − | |roadspawntrailer = <!--null--> |
+ | |roadspawntrailer = <!--null--> |
| − | |roadspawnidendis = 20 |
+ | |roadspawnidendis = 20 |
| − | |roadspawndrivers = <!--null--> |
+ | |roadspawndrivers = <!--null--> |
| − | |roadspawngroups = <!--null--> |
+ | |roadspawngroups = <!--null--> |
| − | |roadspawnlicense = Standard White - 100% |
+ | |roadspawnlicense = Standard White - 100% |
| + | |engineacceleration = |
||
| − | |rear_image = Barrage-GTAO-rear.png |
||
| + | |exhaustacceleration = |
||
| − | |caption = The '''Barrage''' in ''[[Grand Theft Auto Online]]''. |
||
| + | |idle = |
||
| + | |gensucced = |
||
| + | |deceleration = |
||
| + | |genpreced = |
||
}} |
}} |
||
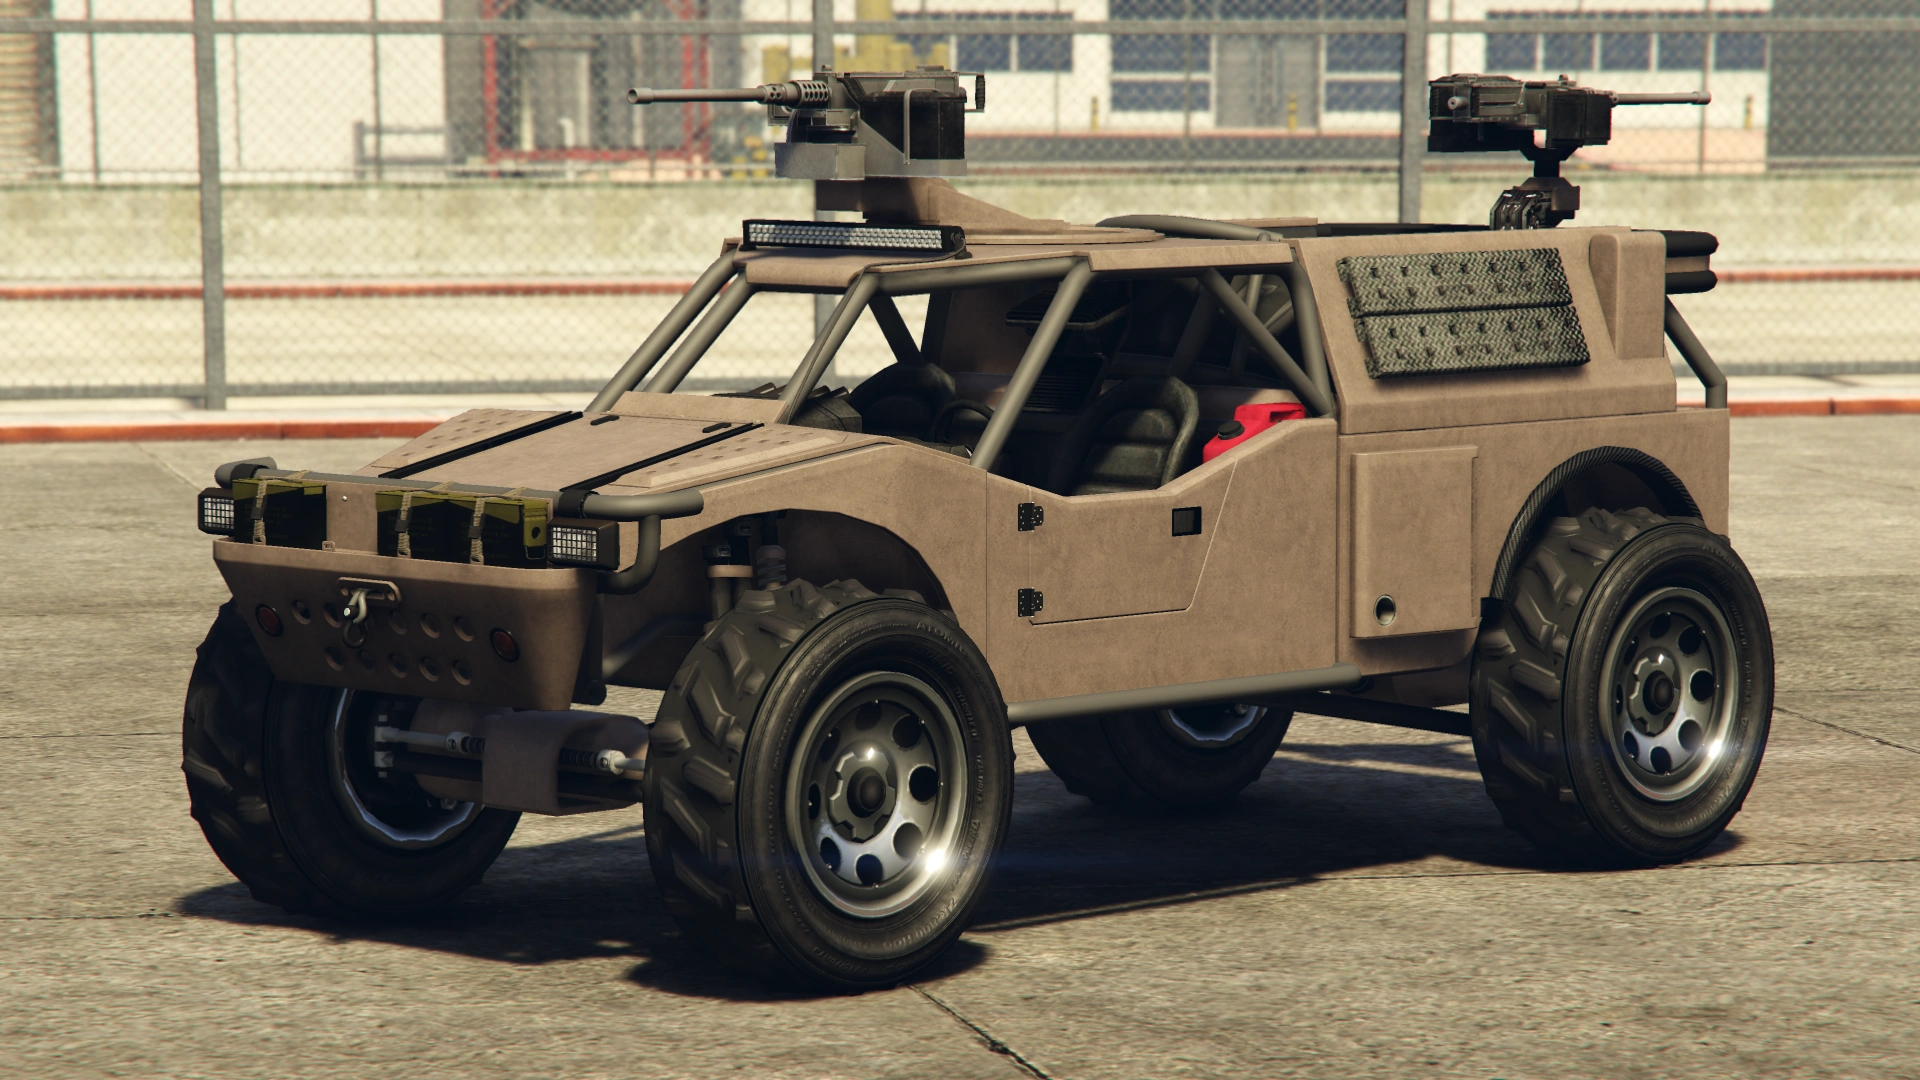
{{Quote|Everyone knows that when your enemies are fleeing in hysterical terror they will run and hide in the most hard-to-reach places. And what's the use of your trusty 50cal turret if there are nooks, crannies and boltholes you can't poke it into? Enter the Barrage: one of the most versatile and resilient off-roaders on the planet equipped with upgradeable front and rear-facing turrets. Running and hiding just got a whole lot harder.<br>Please note: This vehicle can be modified at a Vehicle Workshop inside an Avenger or Mobile Operations Center.|[[Warstock Cache & Carry]] description.}} |
{{Quote|Everyone knows that when your enemies are fleeing in hysterical terror they will run and hide in the most hard-to-reach places. And what's the use of your trusty 50cal turret if there are nooks, crannies and boltholes you can't poke it into? Enter the Barrage: one of the most versatile and resilient off-roaders on the planet equipped with upgradeable front and rear-facing turrets. Running and hiding just got a whole lot harder.<br>Please note: This vehicle can be modified at a Vehicle Workshop inside an Avenger or Mobile Operations Center.|[[Warstock Cache & Carry]] description.}} |
||
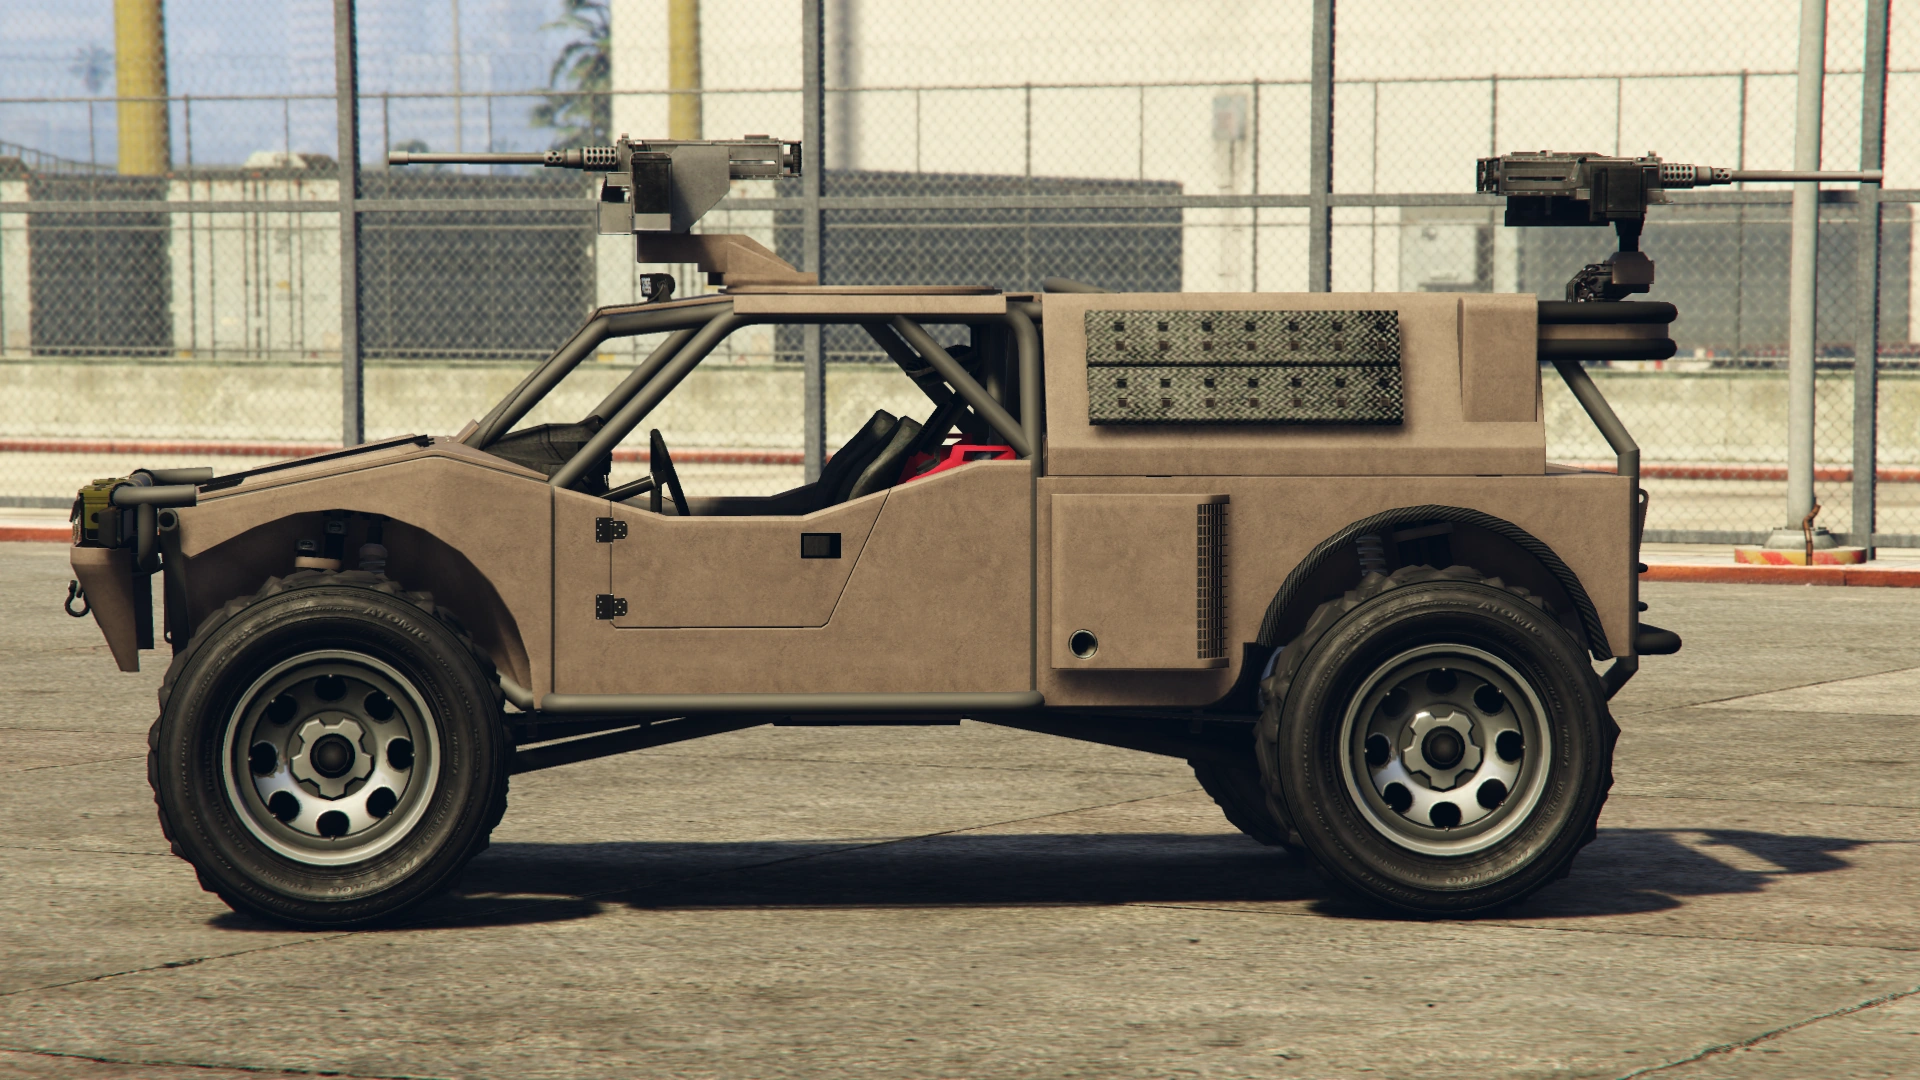
The [[HVY]] '''Barrage''' is a weaponized ATV featured in ''[[Grand Theft Auto Online]]'' as part of the [[GTA Online: The Doomsday Heist|Doomsday Heist]] update. |
The [[HVY]] '''Barrage''' is a weaponized ATV featured in ''[[Grand Theft Auto Online]]'' as part of the [[GTA Online: The Doomsday Heist|Doomsday Heist]] update. |
||
| − | == |
+ | ==Design== |
| − | === |
+ | ===''Grand Theft Auto Online''=== |
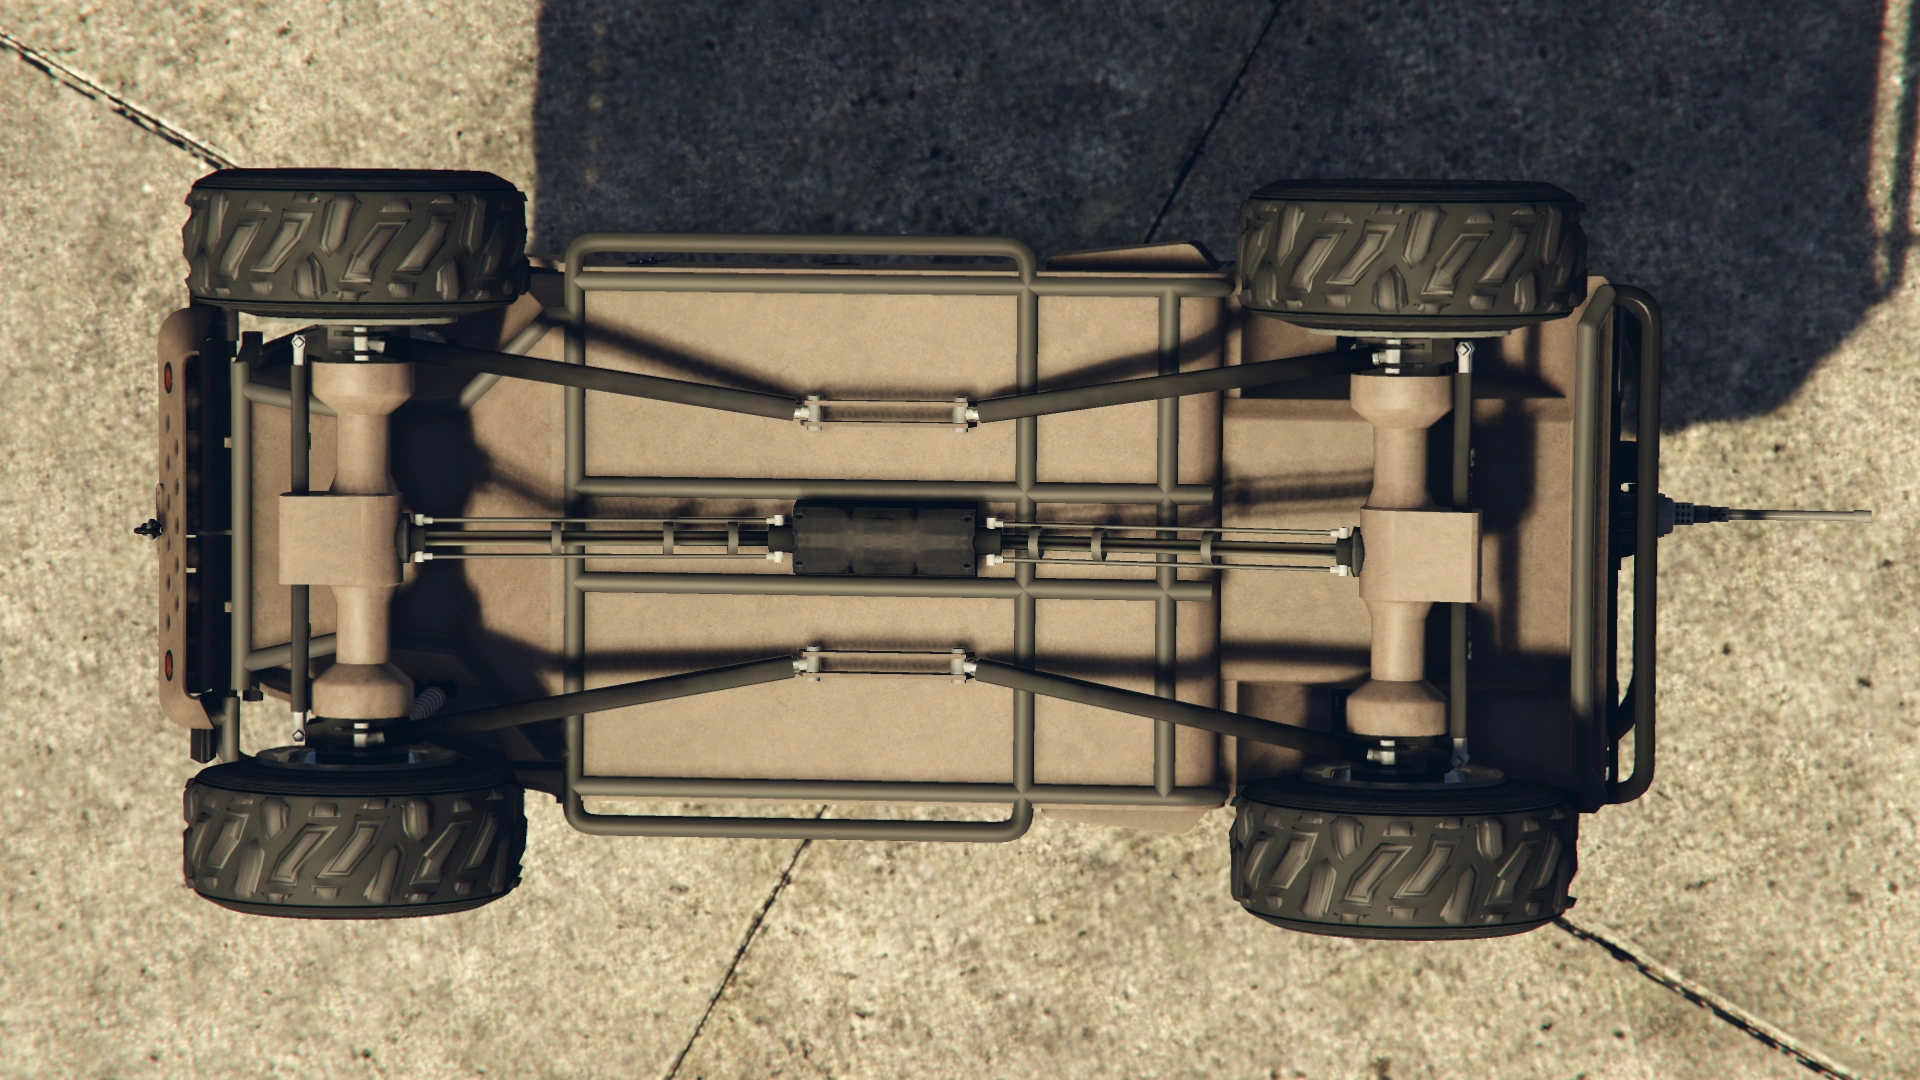
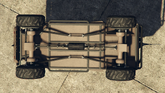
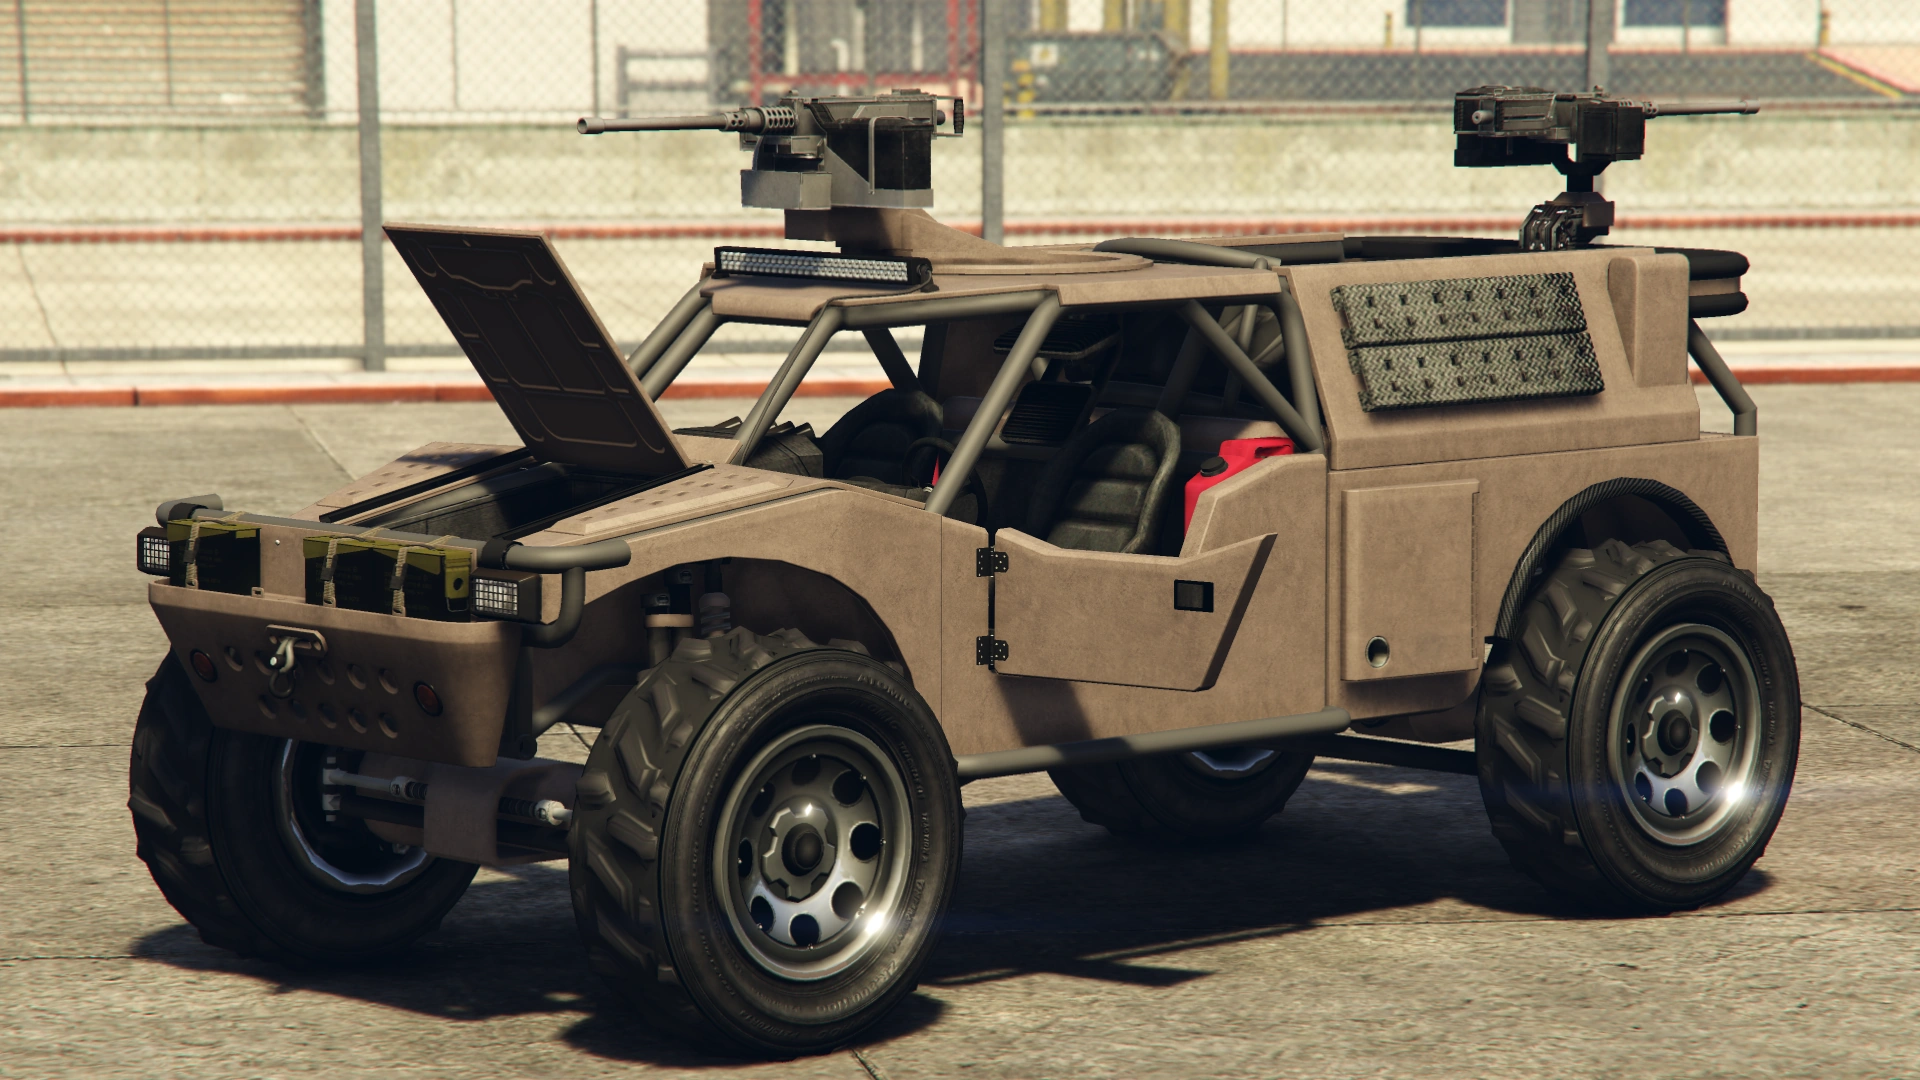
The Barrage is an off-road buggy seemingly based on the {{URL|http://www.hdtglobal.com/product/hdt-storm-srtv/|HDT Storm SRTV (Search & Rescue Tactical Vehicle)}}, having a similar front end, cabin framing and several objects typical of a military buggy. The size and the functionality, however, may suggest it is based on the {{URL|http://www.hdtglobal.com/product/hdt-sword-vehicle/|HDT Sword ITV (Internally Transportable Vehicle)}}, as it can be transported internally by a {{WP|Bell Boeing V-22 Osprey|V-22 Osprey}} (whose GTA equivalent is the [[Avenger (plane)|Avenger]]). |
The Barrage is an off-road buggy seemingly based on the {{URL|http://www.hdtglobal.com/product/hdt-storm-srtv/|HDT Storm SRTV (Search & Rescue Tactical Vehicle)}}, having a similar front end, cabin framing and several objects typical of a military buggy. The size and the functionality, however, may suggest it is based on the {{URL|http://www.hdtglobal.com/product/hdt-sword-vehicle/|HDT Sword ITV (Internally Transportable Vehicle)}}, as it can be transported internally by a {{WP|Bell Boeing V-22 Osprey|V-22 Osprey}} (whose GTA equivalent is the [[Avenger (plane)|Avenger]]). |
||
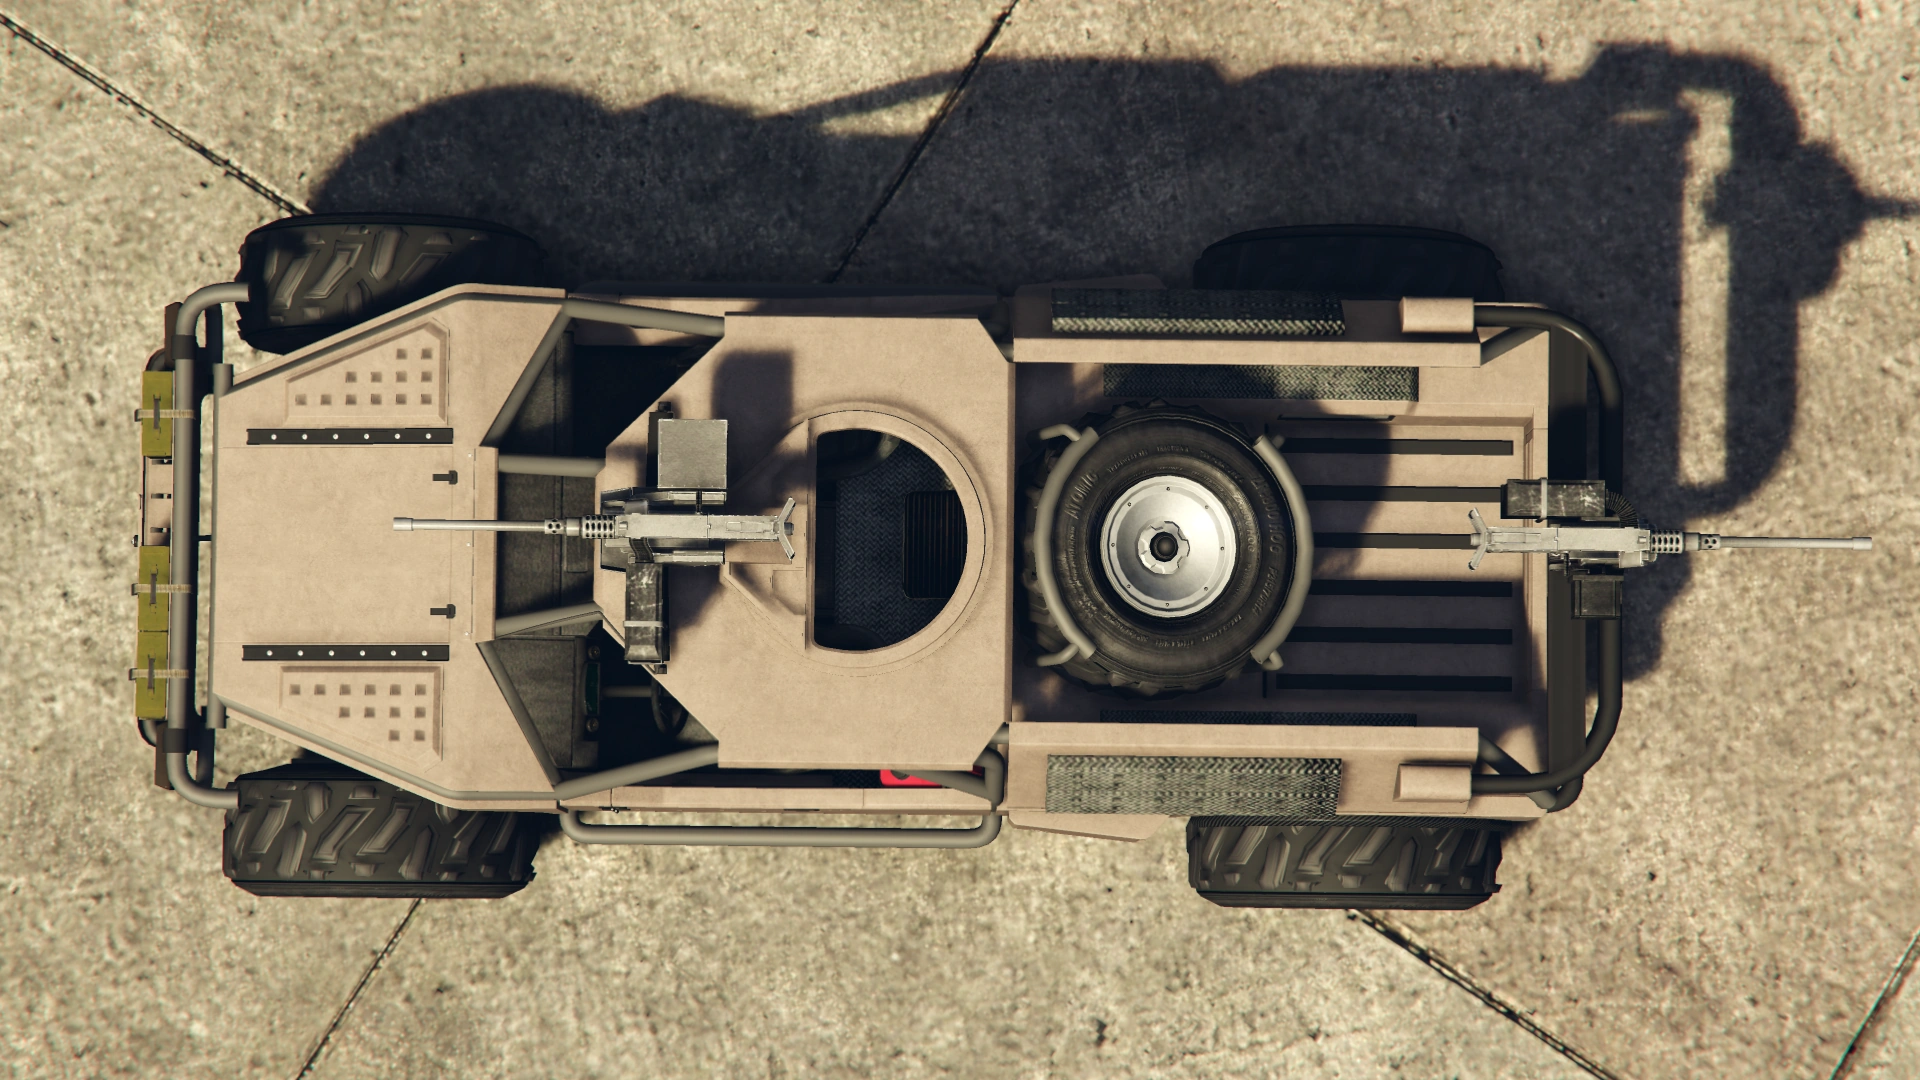
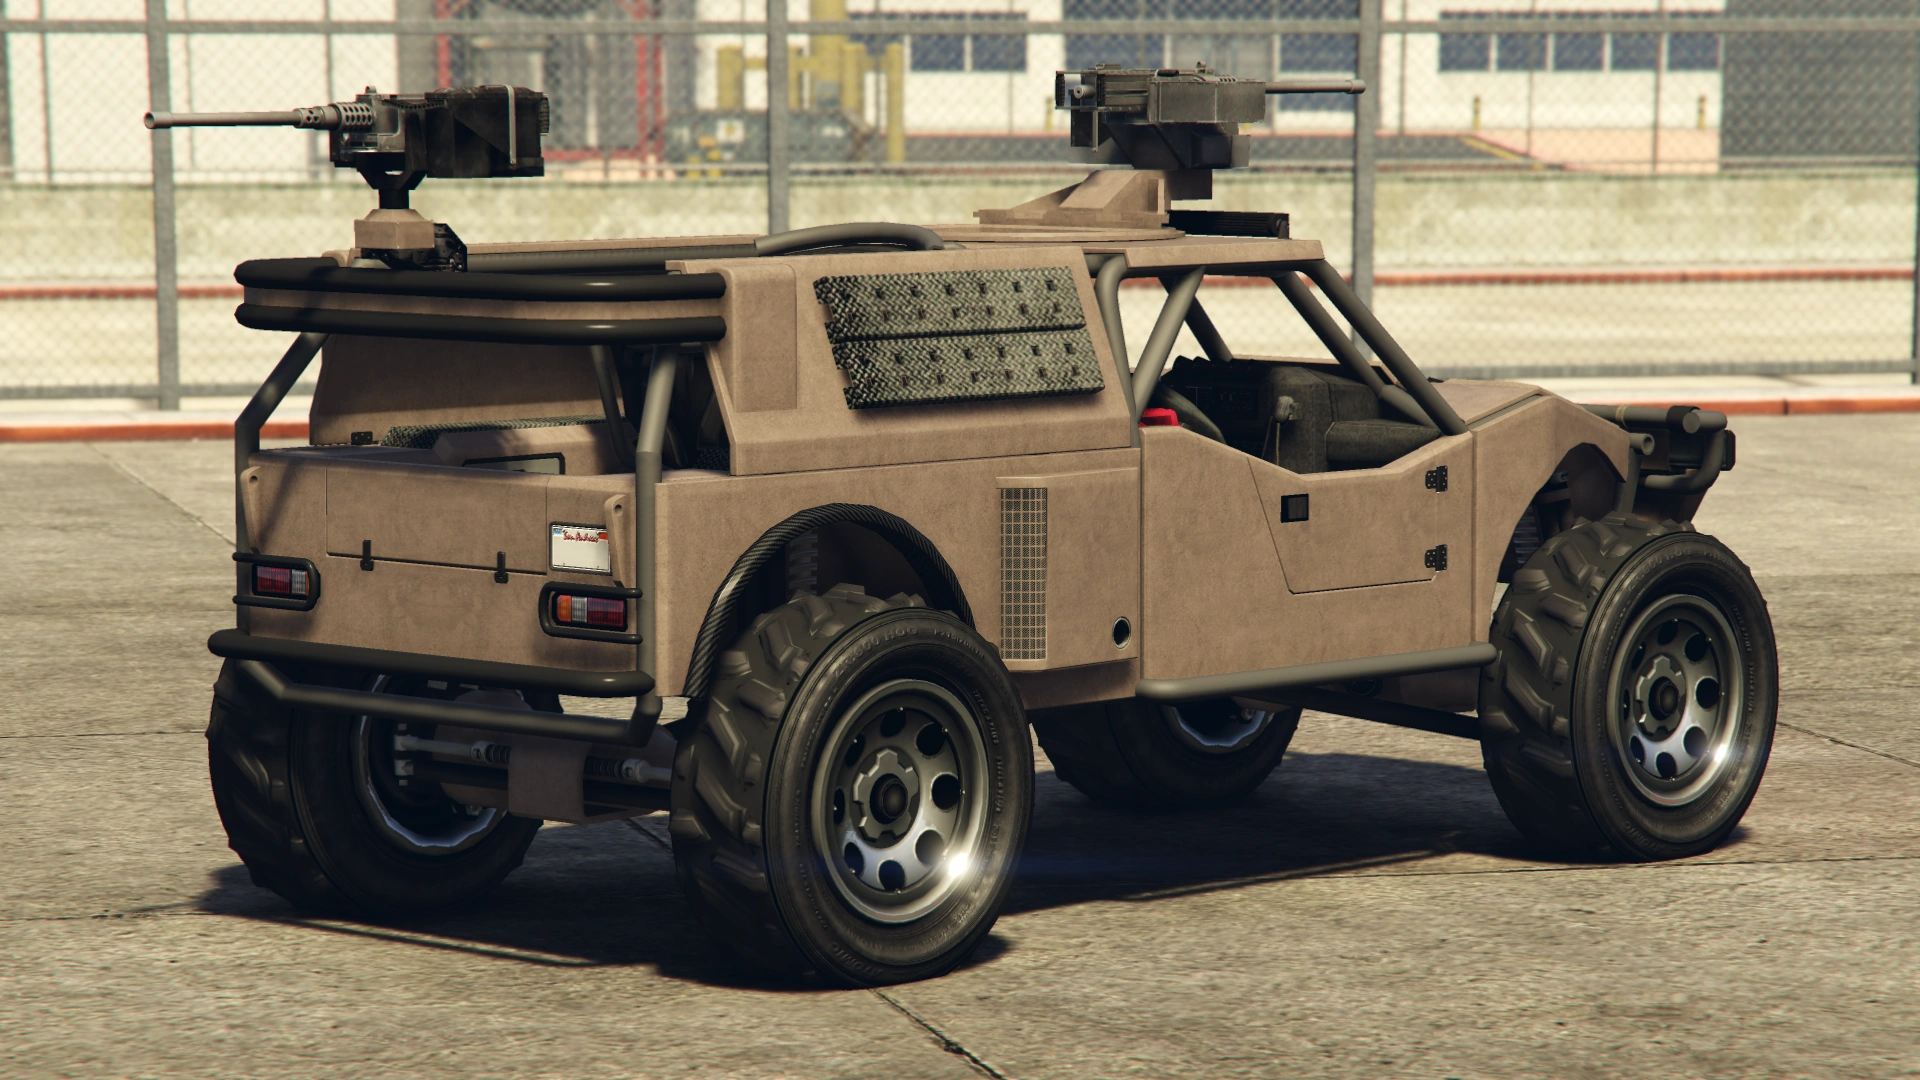
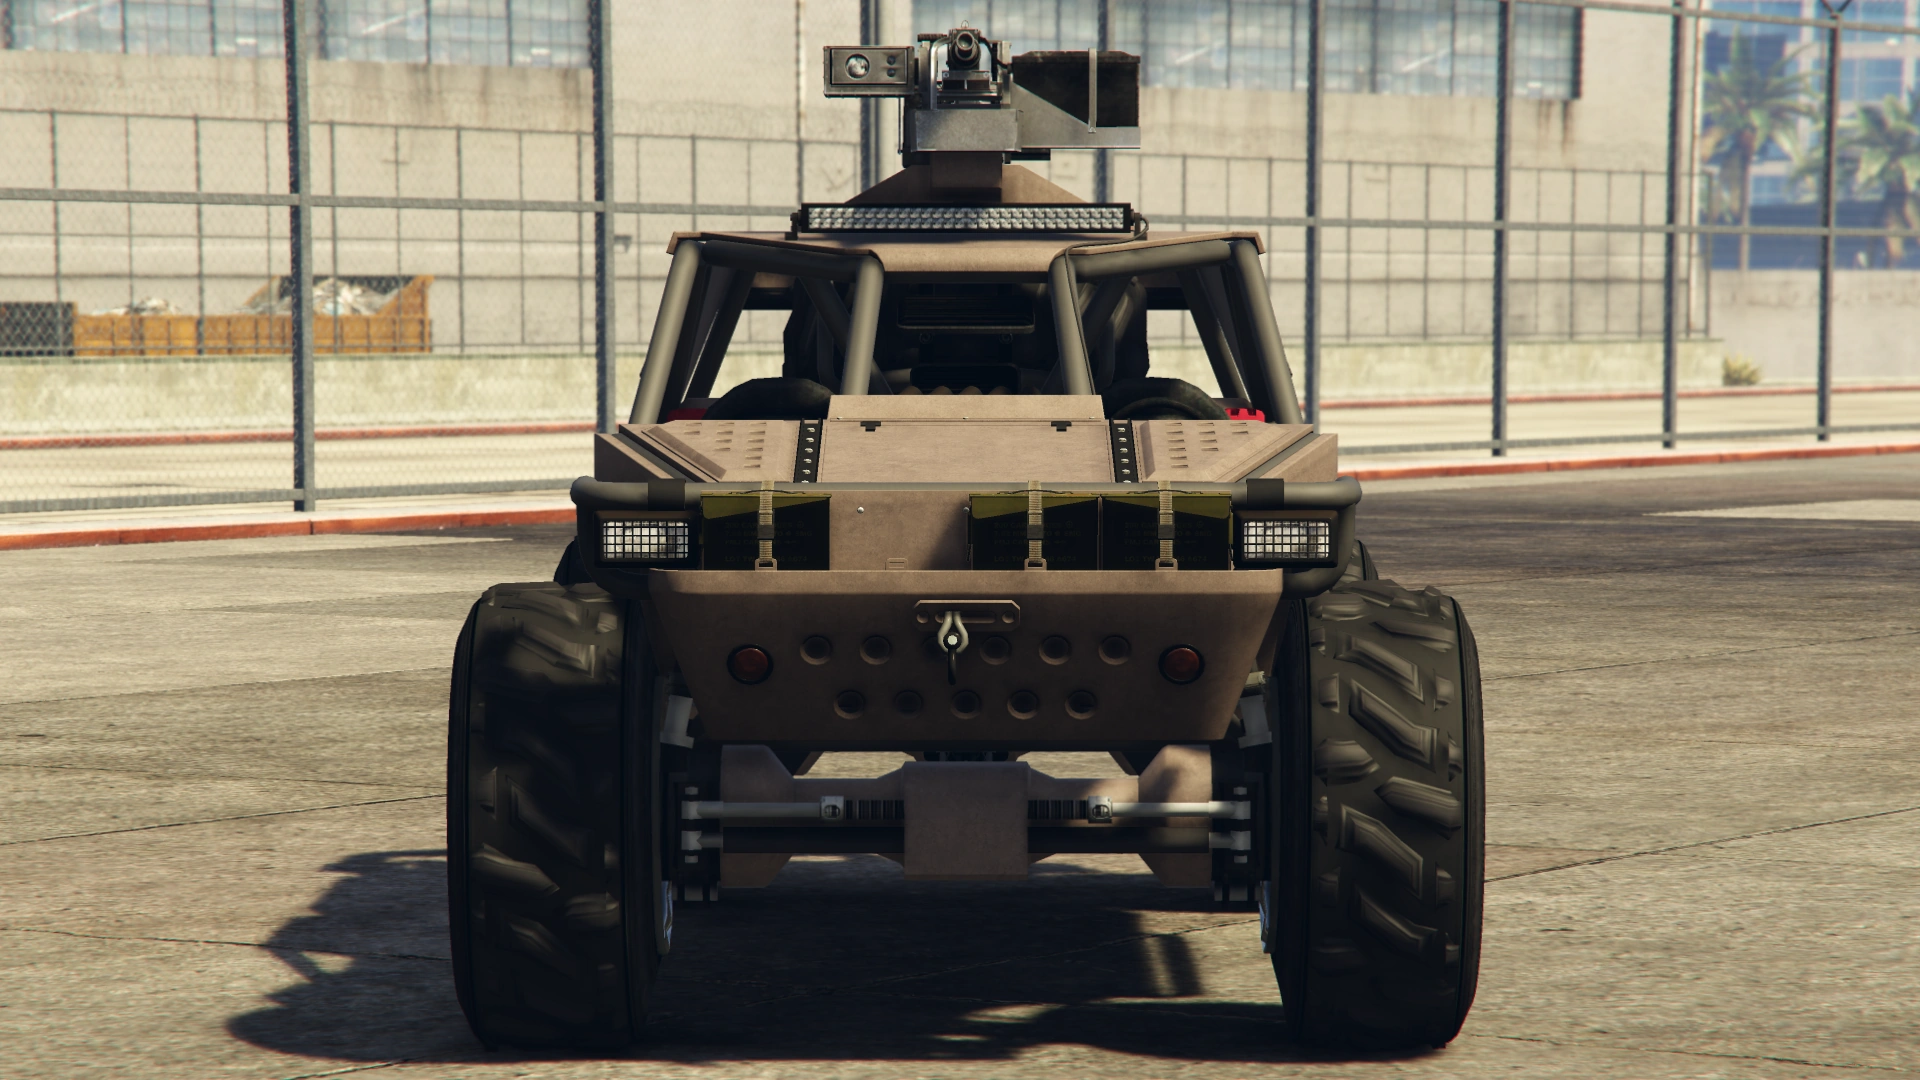
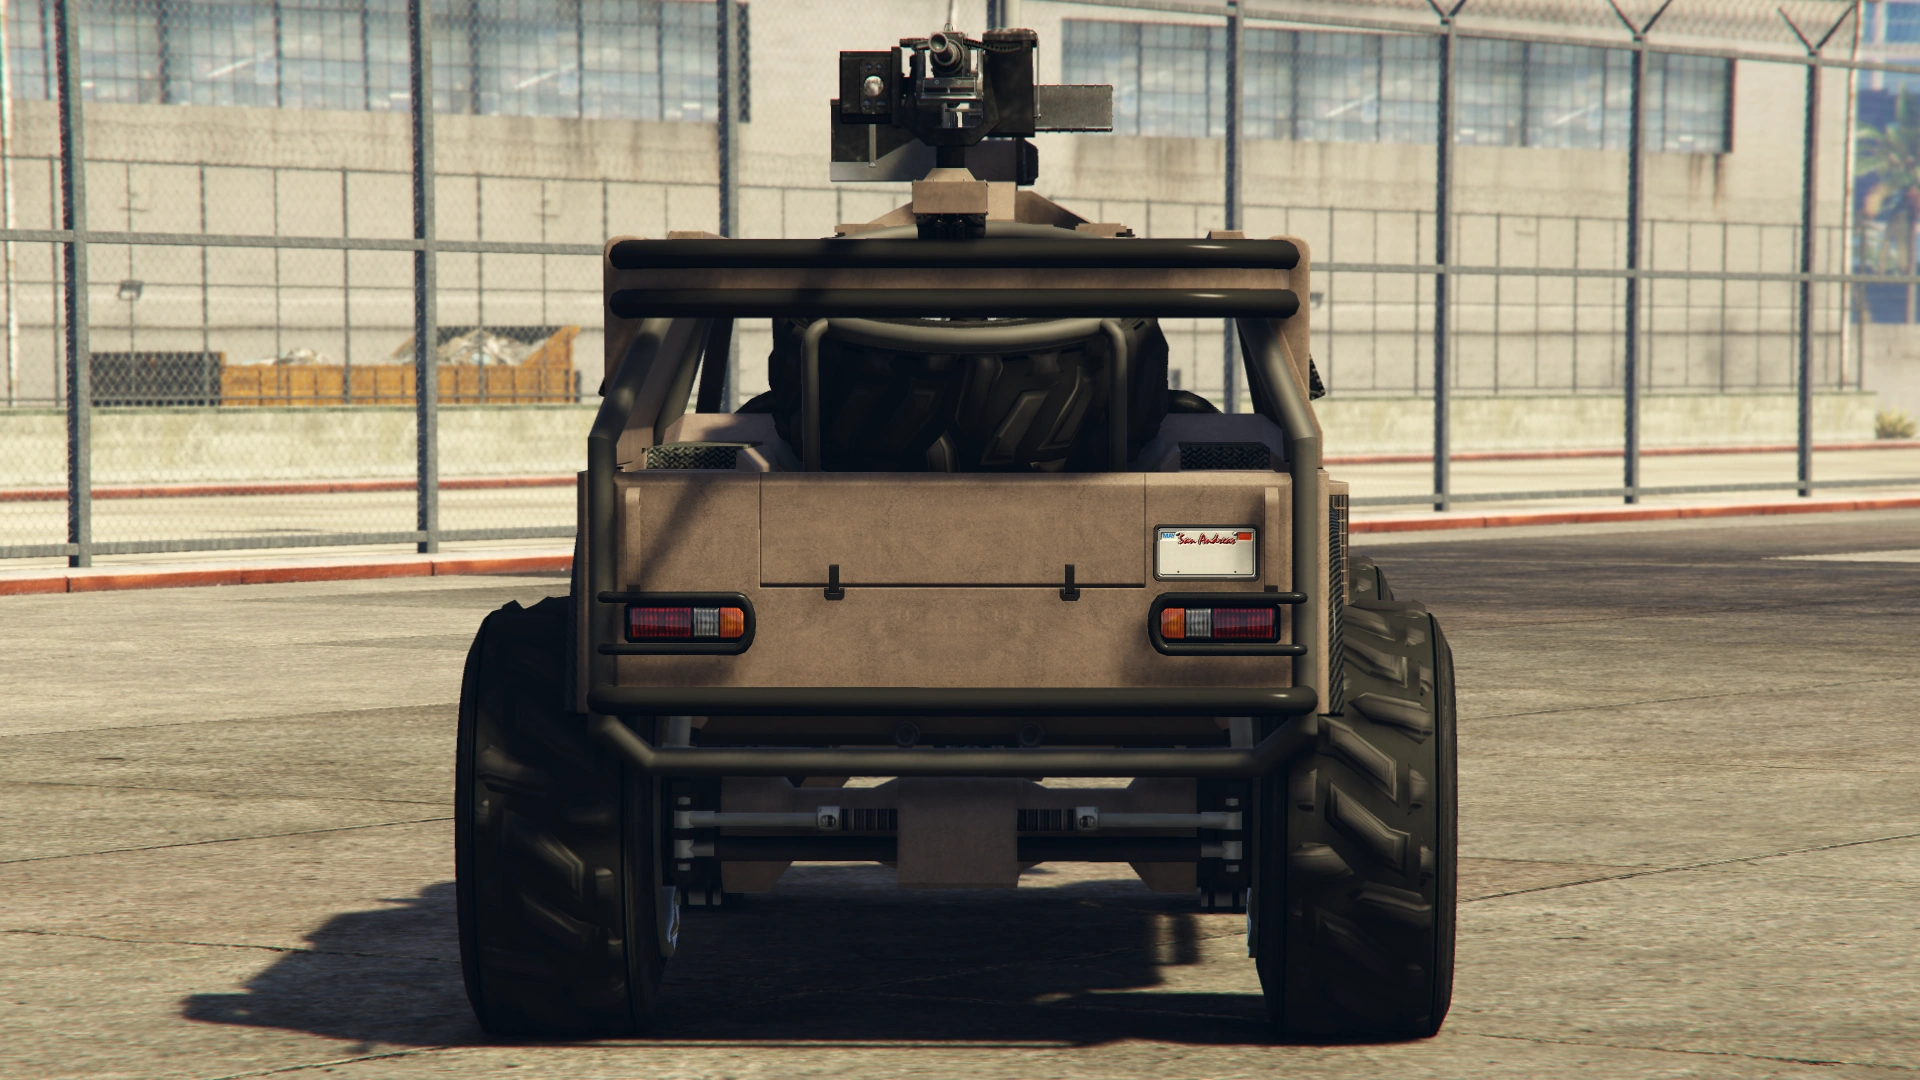
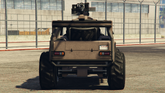
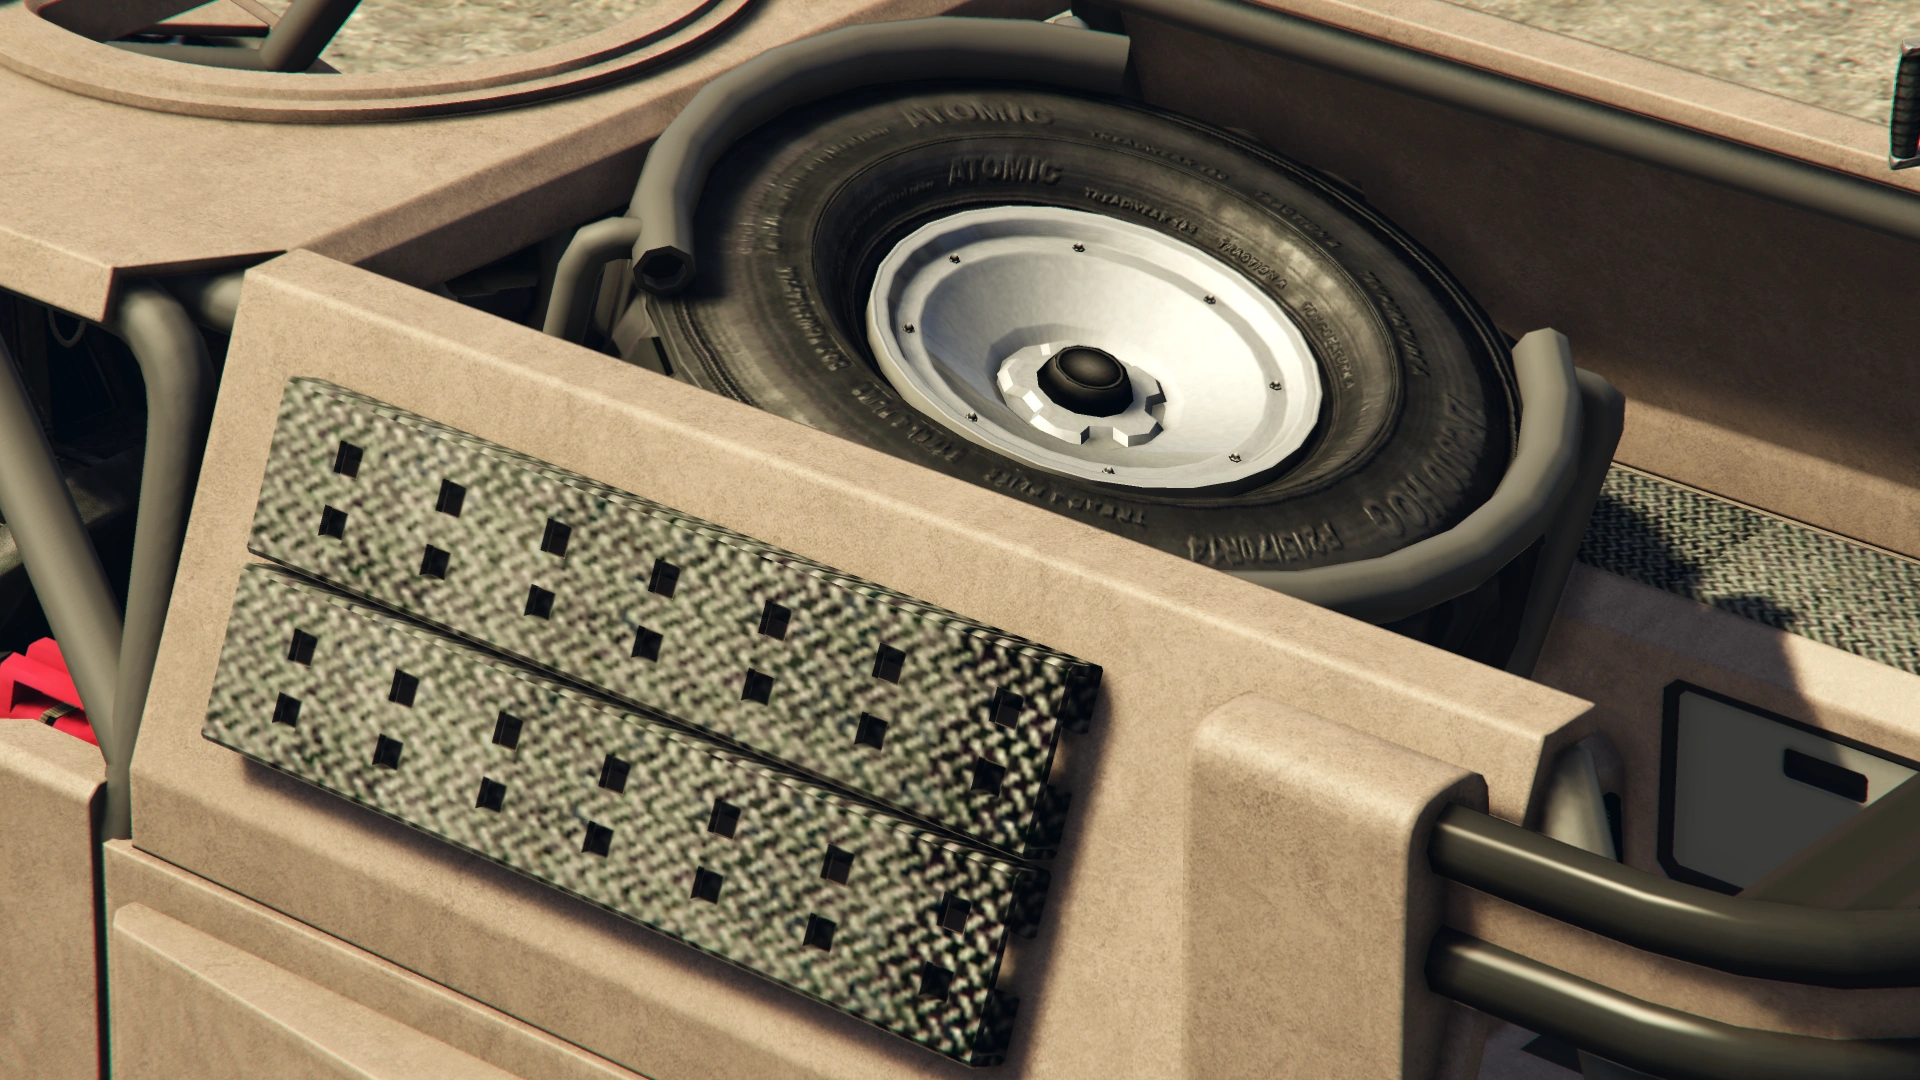
| − | The Barrage features a small bumper with ammo boxes on the front, with the corresponding headlights on either side. A large LED floodlight bar is seen on the roof and a spare tire on the rear bed. Numerous tubular frames protects the frontal area of the vehicle, starting from the cabin, passing on the sides of the hood and ends in another frame protecting the small front end, above the headlights, as well as stepsides and the spare wheel frames of the truck bed. |
+ | The Barrage features a small bumper with ammo boxes on the front, with the corresponding headlights on either side. A large LED floodlight bar is seen on the roof and a spare tire on the rear bed. Numerous tubular frames protects the frontal area of the vehicle, starting from the cabin, passing on the sides of the hood and ends in another frame protecting the small front end, above the headlights, as well as stepsides and the spare wheel frames of the truck bed. Two weapons can be found mounted on the front turret ring and on the rear end frame. |
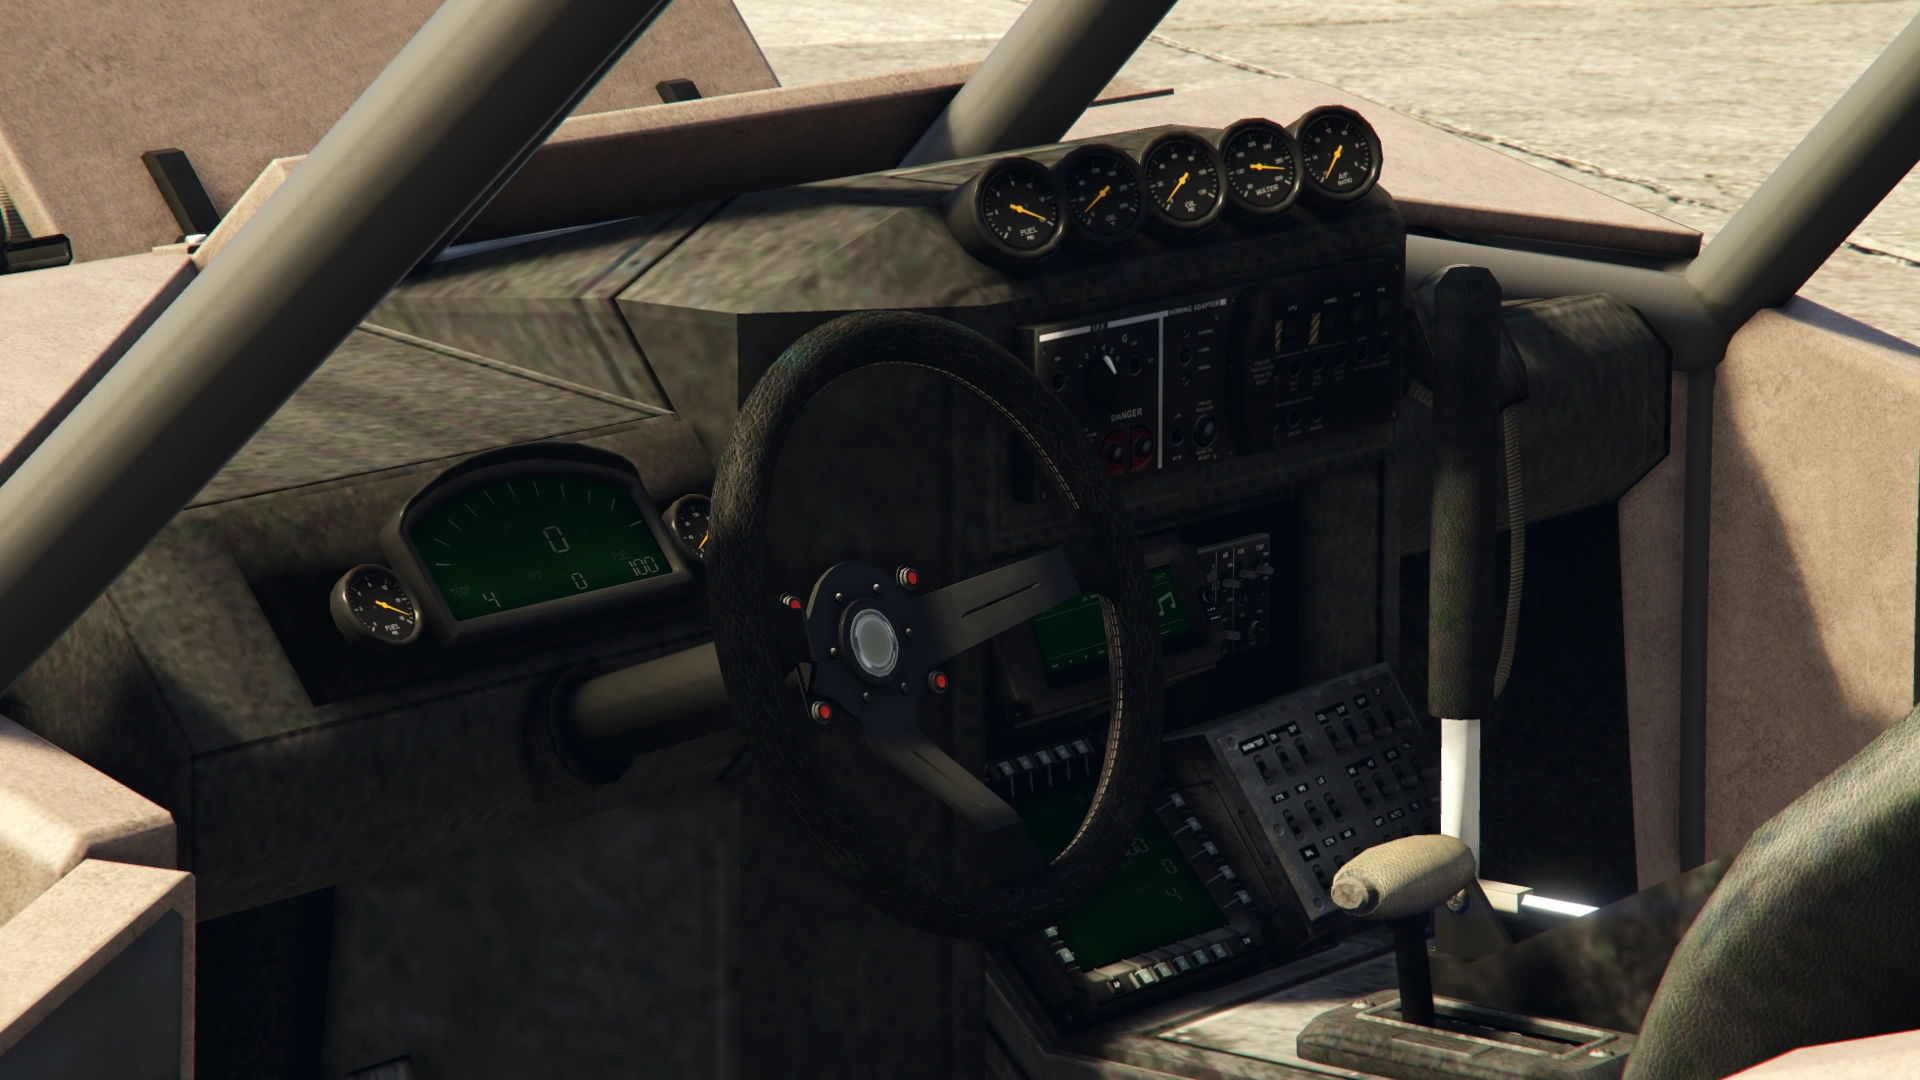
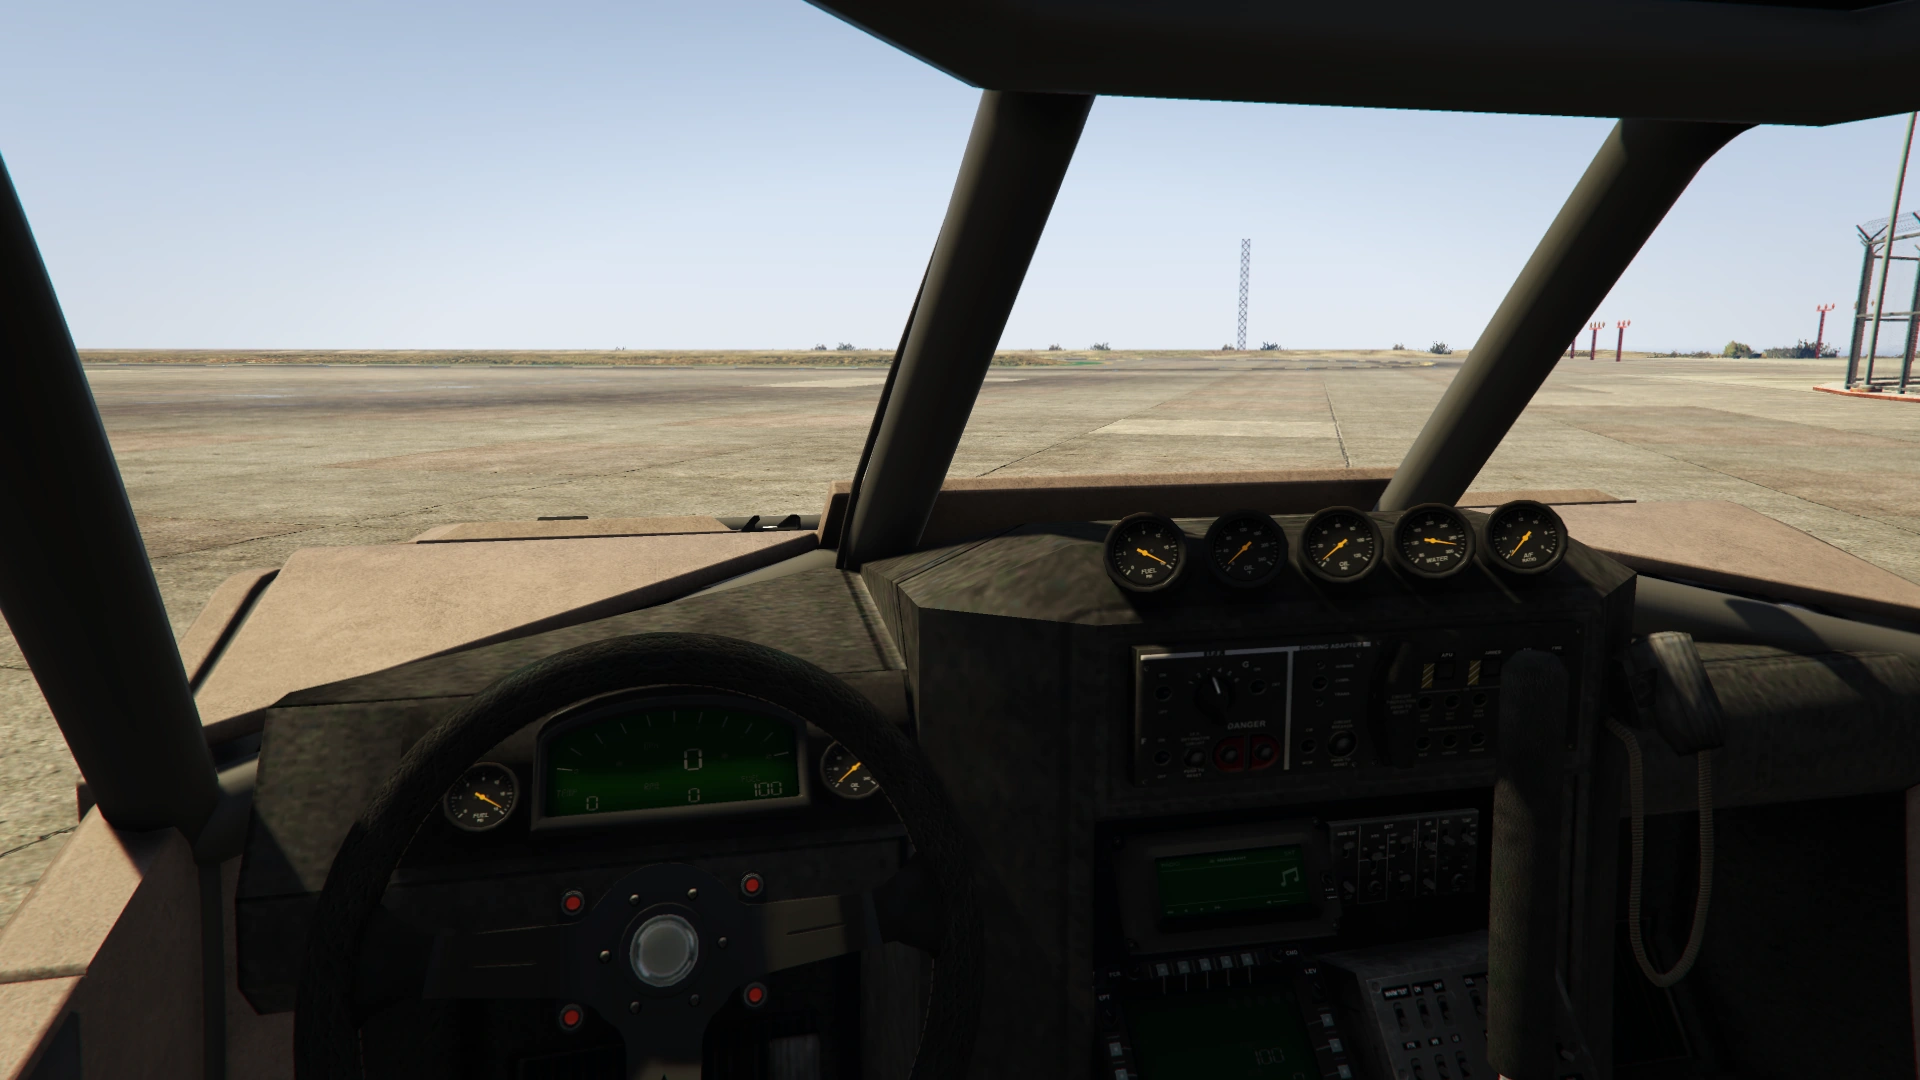
| + | The interior uses basic components and dial sets from race-generic style vehicles, the latter in a layout that is unique to this vehicle, with the digital speedometer centered to the driver's seat and five analog dials centralized on the car's dashboard and facing to the driver side. |
||
| − | Two weapons can be found mounted on the front turret ring and on the rear end frame. |
||
| + | |||
| + | The car is prominently painted in a primary color for the bodywork, while the frames and springs are painted in a secondary color. |
||
{{Clr}} |
{{Clr}} |
||
===Current Design Gallery=== |
===Current Design Gallery=== |
||
<!--Please ensure you have read the Manual of Style [GTA_Wiki:Manual_of_Style/Vehicles/Design_Galleries] before uploading and adding images to the Current Design Gallery. Failure to meet these guidelines will result in the images being removed and deleted, and repeated offences may result in a warning.--> |
<!--Please ensure you have read the Manual of Style [GTA_Wiki:Manual_of_Style/Vehicles/Design_Galleries] before uploading and adding images to the Current Design Gallery. Failure to meet these guidelines will result in the images being removed and deleted, and repeated offences may result in a warning.--> |
||
| − | |||
{{Current Design Gallery |
{{Current Design Gallery |
||
|front_quarter_image = Barrage-GTAO-FrontQuarter.png |
|front_quarter_image = Barrage-GTAO-FrontQuarter.png |
||
| Line 82: | Line 94: | ||
}} |
}} |
||
| − | == |
+ | ==Performance== |
| − | === |
+ | ===''Grand Theft Auto Online''=== |
;Vehicle |
;Vehicle |
||
The Barrage has great top speed and acceleration thanks to its lightweight design and the all-wheel drivetrain. The off-road wheels and the high suspension allows it to cross terrain and small obstacles with no trouble. Even with no engine upgrades, the Barrage performs excepcionally well, but tends to bottom out when landing the vehicle after a jump, so caution should be taken. |
The Barrage has great top speed and acceleration thanks to its lightweight design and the all-wheel drivetrain. The off-road wheels and the high suspension allows it to cross terrain and small obstacles with no trouble. Even with no engine upgrades, the Barrage performs excepcionally well, but tends to bottom out when landing the vehicle after a jump, so caution should be taken. |
||
| − | The vehicle's engine |
+ | The vehicle's engine appears to be located on the middle of the vehicle, as the exhaust tips are located directly behind the cabin area. Said engine is coupled to a 5-speed gearbox in a mid-engine, all wheel drive (50% front, 50% rear) layout. Its engine sound appears to be a slightly louder variation of the one used in most SUVs and off-road vehicles, such as the [[Bodhi]] and the [[Granger]]. |
;Armor |
;Armor |
||
| Line 93: | Line 105: | ||
;Weaponry |
;Weaponry |
||
| + | The Barrage is fitted with two turrets: |
||
| − | *The front turret has a 360 degree coverage and can be easily accessed by one of the front occupants, serving as the primary/offensive option. By default comes with a {{WP|M2 Browning|Browning M2HB .50 caliber machine gun}}, but can be replaced with a {{WP|GAU-19}} three-barreled .50 caliber [[Minigun]]. |
||
| + | *The front one has a rotation angle of 360 degrees and an elevation range of -20 and 30 degrees (similar to the [[Insurgent Pick-Up]]), serving as the primary/offensive option. The gunner must enter it directly, as there is no option to switch places from the front seats. |
||
| − | *The rear turret, on the other part, offers a ~110 degree coverage, being intended for rear defense. By default comes with a Browning M2HB .50 caliber machine gun, but can be replaced with either a GAU-19 three-barreled .50 caliber Minigun or a {{WP|Mk 19 grenade launcher|Mark 19 40mm grenade launcher}}. |
||
| + | *The rear one, on the other hand, offers a limited rotation angle of 112.5 degrees and a slightly smaller elevation range of between -15 and 25 degrees, being intended for rear defense. |
||
| + | |||
| + | Both turrets can be equipped with the following weapons: |
||
| + | *'''Machine Gun''': by default, both turrets come with a {{WP|M2 Browning|Browning M2HB .50 caliber machine gun}}, sharing the same properties as most machine gun turrets, dealing good damage against targets on foot and unarmored vehicles. |
||
| − | Note that every weapon have the same performance as with their respective equivalents found on other vehicles. Additionally, the Grenade Launcher has a limited capacity of 20 grenades. |
||
| + | *'''Minigun''': Both turrets can be upgraded with a {{WP|GAU-19}} three-barreled .50 caliber [[Minigun]], having the same moderate damage and high fire rate as most minigun turrets. |
||
| + | *'''Grenade Launcher''': The rear turret can be upgraded with a {{WP|Mk 19 grenade launcher|Mark 19 40mm grenade launcher}}, being similar to mounted grenade launchers found on the [[Dune FAV]] or [[TM-02 Khanjali]], with a low fire rate and a limited capacity of 20 grenades, but dealing great damage to vehicles and its rounds explode half a second after hitting the ground. |
||
====GTA Online Overview==== |
====GTA Online Overview==== |
||
| Line 197: | Line 214: | ||
== Modifications == |
== Modifications == |
||
=== ''Grand Theft Auto Online'' === |
=== ''Grand Theft Auto Online'' === |
||
| − | The Barrage |
+ | The Barrage can only be modified at a [[Weaponized Vehicle Workshop|vehicle workshop]] inside a [[Mobile Operations Center]] or an [[Avenger (plane)|Avenger]]. |
{| class="wikitable" style="vertical-align:top;" valign="top" |
{| class="wikitable" style="vertical-align:top;" valign="top" |
||
| Line 204: | Line 221: | ||
! scope="col" |Modification |
! scope="col" |Modification |
||
! scope="col" |Cost |
! scope="col" |Cost |
||
| + | ! scope="col" |Image |
||
|- |
|- |
||
| colspan="2" rowspan="6" |Armor |
| colspan="2" rowspan="6" |Armor |
||
|No Armor |
|No Armor |
||
| − | | style="text-align: center;" |$1,000 |
+ | | colspan="2" style="text-align: center;" |$1,000 |
|- |
|- |
||
|Armor Upgrade 20% |
|Armor Upgrade 20% |
||
| − | | style="text-align: center;" |$7,500 |
+ | | colspan="2" style="text-align: center;" |$7,500 |
|- |
|- |
||
|Armor Upgrade 40% |
|Armor Upgrade 40% |
||
| − | | style="text-align: center;" |$12,000 |
+ | | colspan="2" style="text-align: center;" |$12,000 |
|- |
|- |
||
|Armor Upgrade 60% |
|Armor Upgrade 60% |
||
| − | | style="text-align: center;" |$20,000 |
+ | | colspan="2" style="text-align: center;" |$20,000 |
|- |
|- |
||
|Armor Upgrade 80% |
|Armor Upgrade 80% |
||
| − | | style="text-align: center;" |$35,000 |
+ | | colspan="2" style="text-align: center;" |$35,000 |
|- |
|- |
||
|Armor Upgrade 100% |
|Armor Upgrade 100% |
||
| − | | style="text-align: center;" |$50,000 |
+ | | colspan="2" style="text-align: center;" |$50,000 |
|- |
|- |
||
| colspan="2" rowspan="4" |Brakes |
| colspan="2" rowspan="4" |Brakes |
||
|Stock Brakes |
|Stock Brakes |
||
| − | | style="text-align: center;" |$1,000 |
+ | | colspan="2" style="text-align: center;" |$1,000 |
|- |
|- |
||
|Street Brakes |
|Street Brakes |
||
| − | | style="text-align: center;" |$20,000 |
+ | | colspan="2" style="text-align: center;" |$20,000 |
|- |
|- |
||
|Sport Brakes |
|Sport Brakes |
||
| − | | style="text-align: center;" |$27,000 |
+ | | colspan="2" style="text-align: center;" |$27,000 |
|- |
|- |
||
|Race Brakes |
|Race Brakes |
||
| − | | style="text-align: center;" |$35,000 |
+ | | colspan="2" style="text-align: center;" |$35,000 |
|- |
|- |
||
| − | | |
+ | | rowspan="90" |Bodywork |
| − | | |
+ | | rowspan="13" |Doors |
|Stock Door |
|Stock Door |
||
| style="text-align: center;" |$300 |
| style="text-align: center;" |$300 |
||
| + | |[[File:Barrage-GTAO-StockDoor.png|thumb|center|220px]] |
||
|- |
|- |
||
|Primary Custom Frame |
|Primary Custom Frame |
||
| style="text-align: center;" |$900 |
| style="text-align: center;" |$900 |
||
| + | |[[File:Barrage-GTAO-PrimaryCustomFrame.png|thumb|center|220px]] |
||
|- |
|- |
||
|Secondary Custom Frame |
|Secondary Custom Frame |
||
| style="text-align: center;" |$1,500 |
| style="text-align: center;" |$1,500 |
||
| + | |[[File:Barrage-GTAO-SecondaryCustomFrame.png|thumb|center|220px]] |
||
|- |
|- |
||
|Carbon Custom Frame |
|Carbon Custom Frame |
||
| style="text-align: center;" |$1,700 |
| style="text-align: center;" |$1,700 |
||
| + | |[[File:Barrage-GTAO-CarbonCustomFrame.png|thumb|center|220px]] |
||
|- |
|- |
||
|Primary Mesh Frame |
|Primary Mesh Frame |
||
| style="text-align: center;" |$2,000 |
| style="text-align: center;" |$2,000 |
||
| + | |[[File:Barrage-GTAO-PrimaryMeshFrame.png|thumb|center|220px]] |
||
|- |
|- |
||
|Secondary Mesh Frame |
|Secondary Mesh Frame |
||
| style="text-align: center;" |$2,750 |
| style="text-align: center;" |$2,750 |
||
| + | |[[File:Barrage-GTAO-SecondaryMeshFrame.png|thumb|center|220px]] |
||
|- |
|- |
||
|Carbon Mesh Frame |
|Carbon Mesh Frame |
||
| style="text-align: center;" |$3,300 |
| style="text-align: center;" |$3,300 |
||
| + | |[[File:Barrage-GTAO-CarbonMeshFrame.png|thumb|center|220px]] |
||
|- |
|- |
||
|Primary Camouflage Net |
|Primary Camouflage Net |
||
| style="text-align: center;" |$3,900 |
| style="text-align: center;" |$3,900 |
||
| + | |[[File:Barrage-GTAO-PrimaryCamouflageNet.png|thumb|center|220px]] |
||
|- |
|- |
||
|Secondary Camouflage Net |
|Secondary Camouflage Net |
||
| style="text-align: center;" |$4,350 |
| style="text-align: center;" |$4,350 |
||
| + | |[[File:Barrage-GTAO-SecondaryCamouflageNet.png|thumb|center|220px]] |
||
|- |
|- |
||
|Carbon Camouflage Net |
|Carbon Camouflage Net |
||
| style="text-align: center;" |$5,000 |
| style="text-align: center;" |$5,000 |
||
| + | |[[File:Barrage-GTAO-CarbonCamouflageNet.png|thumb|center|220px]] |
||
|- |
|- |
||
|Primary Reinforced Frame |
|Primary Reinforced Frame |
||
| style="text-align: center;" |$5,150 |
| style="text-align: center;" |$5,150 |
||
| + | |[[File:Barrage-GTAO-PrimaryReinforcedFrame.png|thumb|center|220px]] |
||
|- |
|- |
||
|Secondary Reinforced Frame |
|Secondary Reinforced Frame |
||
| style="text-align: center;" |$5,300 |
| style="text-align: center;" |$5,300 |
||
| + | |[[File:Barrage-GTAO-SecondaryReinforcedFrame.png|thumb|center|220px]] |
||
|- |
|- |
||
|Carbon Reinforced Frame |
|Carbon Reinforced Frame |
||
| style="text-align: center;" |$5,450 |
| style="text-align: center;" |$5,450 |
||
| + | |[[File:Barrage-GTAO-CarbonReinforcedFrame.png|thumb|center|220px]] |
||
|- |
|- |
||
| − | | |
+ | | rowspan="11" |Bumper Panel |
|Stock Bumper Panel |
|Stock Bumper Panel |
||
| style="text-align: center;" |$2,200 |
| style="text-align: center;" |$2,200 |
||
| + | |[[File:Barrage-GTAO-StockBumperPanel.png|thumb|center|220px]] |
||
|- |
|- |
||
|Custom Bumper |
|Custom Bumper |
||
| style="text-align: center;" |$4,600 |
| style="text-align: center;" |$4,600 |
||
| + | |[[File:Barrage-GTAO-CustomBumper.png|thumb|center|220px]] |
||
|- |
|- |
||
|Carbon Custom Bumper |
|Carbon Custom Bumper |
||
| style="text-align: center;" |$7,400 |
| style="text-align: center;" |$7,400 |
||
| + | |[[File:Barrage-GTAO-CarbonCustomBumper.png|thumb|center|220px]] |
||
|- |
|- |
||
|Durbar Construct |
|Durbar Construct |
||
| style="text-align: center;" |$11,700 |
| style="text-align: center;" |$11,700 |
||
| + | |[[File:Barrage-GTAO-DurbarConstruct.png|thumb|center|220px]] |
||
|- |
|- |
||
|Carbon Durbar Construct |
|Carbon Durbar Construct |
||
| style="text-align: center;" |$14,500 |
| style="text-align: center;" |$14,500 |
||
| + | |[[File:Barrage-GTAO-CarbonDurbarConstruct.png|thumb|center|220px]] |
||
|- |
|- |
||
|Mk1 Battering Guard |
|Mk1 Battering Guard |
||
| style="text-align: center;" |$14,700 |
| style="text-align: center;" |$14,700 |
||
| + | |[[File:Barrage-GTAO-Mk1BatteringGuard.png|thumb|center|220px]] |
||
|- |
|- |
||
|Mk1 Carbon Battering Guard |
|Mk1 Carbon Battering Guard |
||
| style="text-align: center;" |$14,900 |
| style="text-align: center;" |$14,900 |
||
| + | |[[File:Barrage-GTAO-Mk1CarbonBatteringGuard.png|thumb|center|220px]] |
||
|- |
|- |
||
|Mk2 Battering Guard |
|Mk2 Battering Guard |
||
| style="text-align: center;" |$15,100 |
| style="text-align: center;" |$15,100 |
||
| + | |[[File:Barrage-GTAO-Mk2BatteringGuard.png|thumb|center|220px]] |
||
|- |
|- |
||
|Mk2 Carbon Battering Guard |
|Mk2 Carbon Battering Guard |
||
| style="text-align: center;" |$15,300 |
| style="text-align: center;" |$15,300 |
||
| + | |[[File:Barrage-GTAO-Mk2CarbonBatteringGuard.png|thumb|center|220px]] |
||
|- |
|- |
||
|Mk3 Battering Guard |
|Mk3 Battering Guard |
||
| style="text-align: center;" |$15,500 |
| style="text-align: center;" |$15,500 |
||
| + | |[[File:Barrage-GTAO-Mk3BatteringGuard.png|thumb|center|220px]] |
||
|- |
|- |
||
|Mk3 Carbon Battering Guard |
|Mk3 Carbon Battering Guard |
||
| style="text-align: center;" |$15,700 |
| style="text-align: center;" |$15,700 |
||
| + | |[[File:Barrage-GTAO-Mk3CarbonBatteringGuard.png|thumb|center|220px]] |
||
|- |
|- |
||
| − | | |
+ | | rowspan="9" |Racks |
|Stock Rack |
|Stock Rack |
||
| style="text-align: center;" |$200 |
| style="text-align: center;" |$200 |
||
| + | |[[File:Barrage-GTAO-StockRack.png|thumb|center|220px]] |
||
|- |
|- |
||
|Removed Cartridges |
|Removed Cartridges |
||
| style="text-align: center;" |$750 |
| style="text-align: center;" |$750 |
||
| + | |[[File:Barrage-GTAO-RemovedCartridges.png|thumb|center|220px]] |
||
|- |
|- |
||
|Twin Cartridge Cases |
|Twin Cartridge Cases |
||
| style="text-align: center;" |$1,340 |
| style="text-align: center;" |$1,340 |
||
| + | |[[File:Barrage-GTAO-TwinCartridgeCases.png|thumb|center|220px]] |
||
|- |
|- |
||
|Full Cartridge Cases |
|Full Cartridge Cases |
||
| style="text-align: center;" |$1,550 |
| style="text-align: center;" |$1,550 |
||
| + | |[[File:Barrage-GTAO-FullCartridgeCases.png|thumb|center|220px]] |
||
|- |
|- |
||
|Black Grille Cage |
|Black Grille Cage |
||
| style="text-align: center;" |$3,000 |
| style="text-align: center;" |$3,000 |
||
| + | |[[File:Barrage-GTAO-BlackGrilleCage.png|thumb|center|220px]] |
||
|- |
|- |
||
|Primary Grille Cage |
|Primary Grille Cage |
||
| style="text-align: center;" |$3,200 |
| style="text-align: center;" |$3,200 |
||
| + | |[[File:Barrage-GTAO-PrimrayGrilleCage.png|thumb|center|220px]] |
||
|- |
|- |
||
|Secondary Grille Cage |
|Secondary Grille Cage |
||
| style="text-align: center;" |$3,650 |
| style="text-align: center;" |$3,650 |
||
| + | |[[File:Barrage-GTAO-SecondaryGrilleCage.png|thumb|center|220px]] |
||
|- |
|- |
||
|Carbon Grille Cage |
|Carbon Grille Cage |
||
| style="text-align: center;" |$4,100 |
| style="text-align: center;" |$4,100 |
||
| + | |[[File:Barrage-GTAO-CarbonGrilleCage.png|thumb|center|220px]] |
||
|- |
|- |
||
|Camouflage Net |
|Camouflage Net |
||
| style="text-align: center;" |$4,550 |
| style="text-align: center;" |$4,550 |
||
| + | |[[File:Barrage-GTAO-CamouflageNet.png|thumb|center|220px]] |
||
|- |
|- |
||
| − | | |
+ | | rowspan="11" |Side Panel |
|Stock Side Panel |
|Stock Side Panel |
||
| style="text-align: center;" |$2,200 |
| style="text-align: center;" |$2,200 |
||
| + | |[[File:Barrage-GTAO-StockSidePanel.png|thumb|center|220px]] |
||
|- |
|- |
||
|Basic Panel |
|Basic Panel |
||
| style="text-align: center;" |$4,600 |
| style="text-align: center;" |$4,600 |
||
| + | |[[File:Barrage-GTAO-BasicPanel.png|thumb|center|220px]] |
||
|- |
|- |
||
|Carbon Basic Panel |
|Carbon Basic Panel |
||
| style="text-align: center;" |$7,400 |
| style="text-align: center;" |$7,400 |
||
| + | |[[File:Barrage-GTAO-CarbonBasicPanel.png|thumb|center|220px]] |
||
|- |
|- |
||
|Durbar Panel |
|Durbar Panel |
||
| style="text-align: center;" |$11,700 |
| style="text-align: center;" |$11,700 |
||
| + | |[[File:Barrage-GTAO-DurbarPanel.png|thumb|center|220px]] |
||
|- |
|- |
||
|Carbon Durbar Panel |
|Carbon Durbar Panel |
||
| style="text-align: center;" |$14,500 |
| style="text-align: center;" |$14,500 |
||
| + | |[[File:Barrage-GTAO-CarbonDurbarPanel.png|thumb|center|220px]] |
||
|- |
|- |
||
|Window Panel |
|Window Panel |
||
| style="text-align: center;" |$14,700 |
| style="text-align: center;" |$14,700 |
||
| + | |[[File:Barrage-GTAO-WindowPanel.png|thumb|center|220px]] |
||
|- |
|- |
||
|Carbon Window Panel |
|Carbon Window Panel |
||
| style="text-align: center;" |$14,900 |
| style="text-align: center;" |$14,900 |
||
| + | |[[File:Barrage-GTAO-CarbonWindowPanel.png|thumb|center|220px]] |
||
|- |
|- |
||
|Mesh Grate Panel |
|Mesh Grate Panel |
||
| style="text-align: center;" |$15,100 |
| style="text-align: center;" |$15,100 |
||
| + | |[[File:Barrage-GTAO-MeshGratePanel.png|thumb|center|220px]] |
||
|- |
|- |
||
|Carbon Mesh Grate Panel |
|Carbon Mesh Grate Panel |
||
| style="text-align: center;" |$15,300 |
| style="text-align: center;" |$15,300 |
||
| + | |[[File:Barrage-GTAO-CarbonMeshGratePanel.png|thumb|center|220px]] |
||
|- |
|- |
||
|Reinforced Panel |
|Reinforced Panel |
||
| style="text-align: center;" |$15,500 |
| style="text-align: center;" |$15,500 |
||
| + | |[[File:Barrage-GTAO-ReinforcedPanel.png|thumb|center|220px]] |
||
|- |
|- |
||
|Carbon Reinforced Panel |
|Carbon Reinforced Panel |
||
| style="text-align: center;" |$15,700 |
| style="text-align: center;" |$15,700 |
||
| + | |[[File:Barrage-GTAO-CarbonReinforcedPanel.png|thumb|center|220px]] |
||
|- |
|- |
||
| − | | |
+ | | rowspan="31" |Roll Cage |
|No Roll Cage |
|No Roll Cage |
||
| style="text-align: center;" |$700 |
| style="text-align: center;" |$700 |
||
| + | |[[File:Barrage-GTAO-NoRollCage.png|thumb|center|220px]] |
||
|- |
|- |
||
|Primary Custom Half-Cage |
|Primary Custom Half-Cage |
||
| style="text-align: center;" |$1,100 |
| style="text-align: center;" |$1,100 |
||
| + | |[[File:Barrage-GTAO-PrimaryCustomHalfCage.png|thumb|center|220px]] |
||
|- |
|- |
||
|Secondary Custom Half-Cage |
|Secondary Custom Half-Cage |
||
| style="text-align: center;" |$1,350 |
| style="text-align: center;" |$1,350 |
||
| + | |[[File:Barrage-GTAO-SecondaryCustomHalfCage.png|thumb|center|220px]] |
||
|- |
|- |
||
|Carbon Custom Half-Cage |
|Carbon Custom Half-Cage |
||
| style="text-align: center;" |$1,500 |
| style="text-align: center;" |$1,500 |
||
| + | |[[File:Barrage-GTAO-CarbonCustomHalfCage.png|thumb|center|220px]] |
||
|- |
|- |
||
|Primary Mesh Half-Cage |
|Primary Mesh Half-Cage |
||
| style="text-align: center;" |$2,750 |
| style="text-align: center;" |$2,750 |
||
| + | |[[File:Barrage-GTAO-PrimaryMeshHalfCage.png|thumb|center|220px]] |
||
|- |
|- |
||
|Secondary Mesh Half-Cage |
|Secondary Mesh Half-Cage |
||
| style="text-align: center;" |$3,600 |
| style="text-align: center;" |$3,600 |
||
| + | |[[File:Barrage-GTAO-SecondaryMeshHalfCage.png|thumb|center|220px]] |
||
|- |
|- |
||
|Carbon Mesh Half-Cage |
|Carbon Mesh Half-Cage |
||
| style="text-align: center;" |$4,900 |
| style="text-align: center;" |$4,900 |
||
| + | |[[File:Barrage-GTAO-CarbonMeshHalfCage.png|thumb|center|220px]] |
||
|- |
|- |
||
|Primary Camo Net Half-Cage |
|Primary Camo Net Half-Cage |
||
| style="text-align: center;" |$5,800 |
| style="text-align: center;" |$5,800 |
||
| + | |[[File:Barrage-GTAO-PrimaryCamoNetHalfCage.png|thumb|center|220px]] |
||
|- |
|- |
||
|Secondary Camo Net Half-Cage |
|Secondary Camo Net Half-Cage |
||
| style="text-align: center;" |$7,000 |
| style="text-align: center;" |$7,000 |
||
| + | |[[File:Barrage-GTAO-SecondaryCamoNetHalfCage.png|thumb|center|220px]] |
||
|- |
|- |
||
|Carbon Camo Net Half-Cage |
|Carbon Camo Net Half-Cage |
||
| style="text-align: center;" |$8,000 |
| style="text-align: center;" |$8,000 |
||
| + | |[[File:Barrage-GTAO-CarbonCamoNetHalfCage.png|thumb|center|220px]] |
||
|- |
|- |
||
|Primary Reinforced Half-Cage |
|Primary Reinforced Half-Cage |
||
| style="text-align: center;" |$9,150 |
| style="text-align: center;" |$9,150 |
||
| + | |[[File:Barrage-GTAO-PrimaryReinforcedHalfCage.png|thumb|center|220px]] |
||
|- |
|- |
||
|Secondary Reinforced Half-Cage |
|Secondary Reinforced Half-Cage |
||
| style="text-align: center;" |$10,100 |
| style="text-align: center;" |$10,100 |
||
| + | |[[File:Barrage-GTAO-SecondaryReinforcedHalfCage.png|thumb|center|220px]] |
||
|- |
|- |
||
|Carbon Reinforced Half-Cage |
|Carbon Reinforced Half-Cage |
||
| style="text-align: center;" |$11,500 |
| style="text-align: center;" |$11,500 |
||
| + | |[[File:Barrage-GTAO-CarbonReinforcedHalfCage.png|thumb|center|220px]] |
||
|- |
|- |
||
|Primary Durbar Half-Cage |
|Primary Durbar Half-Cage |
||
| style="text-align: center;" |$11,950 |
| style="text-align: center;" |$11,950 |
||
| + | |[[File:Barrage-GTAO-PrimaryDurbarHalfCage.png|thumb|center|220px]] |
||
|- |
|- |
||
|Secondary Durbar Half-Cage |
|Secondary Durbar Half-Cage |
||
| style="text-align: center;" |$12,900 |
| style="text-align: center;" |$12,900 |
||
| + | |[[File:Barrage-GTAO-SecondaryDurbarHalfCage.png|thumb|center|220px]] |
||
|- |
|- |
||
|Carbon Half Durbar Cage |
|Carbon Half Durbar Cage |
||
| style="text-align: center;" |$13,750 |
| style="text-align: center;" |$13,750 |
||
| + | |[[File:Barrage-GTAO-CarbonDurbarHalfCage.png|thumb|center|220px]] |
||
|- |
|- |
||
|Primary Custom Cage |
|Primary Custom Cage |
||
| style="text-align: center;" |$14,600 |
| style="text-align: center;" |$14,600 |
||
| + | |[[File:Barrage-GTAO-PrimaryCustomCage.png|thumb|center|220px]] |
||
|- |
|- |
||
|Secondary Custom Cage |
|Secondary Custom Cage |
||
| style="text-align: center;" |$15,450 |
| style="text-align: center;" |$15,450 |
||
| + | |[[File:Barrage-GTAO-SecondaryCustomCage.png|thumb|center|220px]] |
||
|- |
|- |
||
|Carbon Custom Cage |
|Carbon Custom Cage |
||
| style="text-align: center;" |$16,250 |
| style="text-align: center;" |$16,250 |
||
| + | |[[File:Barrage-GTAO-CarbonCustomCage.png|thumb|center|220px]] |
||
|- |
|- |
||
|Primary Mesh Cage |
|Primary Mesh Cage |
||
| style="text-align: center;" |$17,050 |
| style="text-align: center;" |$17,050 |
||
| + | |[[File:Barrage-GTAO-PrimaryMeshCage.png|thumb|center|220px]] |
||
|- |
|- |
||
|Secondary Mesh Cage |
|Secondary Mesh Cage |
||
| style="text-align: center;" |$17,800 |
| style="text-align: center;" |$17,800 |
||
| + | |[[File:Barrage-GTAO-SecondaryMeshCage.png|thumb|center|220px]] |
||
|- |
|- |
||
|Carbon Mesh Cage |
|Carbon Mesh Cage |
||
| style="text-align: center;" |$18,550 |
| style="text-align: center;" |$18,550 |
||
| + | |[[File:Barrage-GTAO-CarbonMeshCage.png|thumb|center|220px]] |
||
|- |
|- |
||
|Primary Camo Net Cage |
|Primary Camo Net Cage |
||
| style="text-align: center;" |$19,250 |
| style="text-align: center;" |$19,250 |
||
| + | |[[File:Barrage-GTAO-PrimaryCamoNetCage.png|thumb|center|220px]] |
||
|- |
|- |
||
|Secondary Camo Net Cage |
|Secondary Camo Net Cage |
||
| style="text-align: center;" |$19,950 |
| style="text-align: center;" |$19,950 |
||
| + | |[[File:Barrage-GTAO-SecondaryCamoNetCage.png|thumb|center|220px]] |
||
|- |
|- |
||
|Carbon Camo Net Cage |
|Carbon Camo Net Cage |
||
| style="text-align: center;" |$20,600 |
| style="text-align: center;" |$20,600 |
||
| + | |[[File:Barrage-GTAO-CarbonCamoNetCage.png|thumb|center|220px]] |
||
|- |
|- |
||
|Primary Reinforced Cage |
|Primary Reinforced Cage |
||
| style="text-align: center;" |$21,250 |
| style="text-align: center;" |$21,250 |
||
| + | |[[File:Barrage-GTAO-PrimaryReinforcedCage.png|thumb|center|220px]] |
||
|- |
|- |
||
|Secondary Reinforced Cage |
|Secondary Reinforced Cage |
||
| style="text-align: center;" |$21,850 |
| style="text-align: center;" |$21,850 |
||
| + | |[[File:Barrage-GTAO-SecondaryReinforcedCage.png|thumb|center|220px]] |
||
|- |
|- |
||
|Carbon Reinforced Cage |
|Carbon Reinforced Cage |
||
| style="text-align: center;" |$22,450 |
| style="text-align: center;" |$22,450 |
||
| + | |[[File:Barrage-GTAO-CarbonReinforcedCage.png|thumb|center|220px]] |
||
|- |
|- |
||
|Primary Durbar Cage |
|Primary Durbar Cage |
||
| style="text-align: center;" |$23,000 |
| style="text-align: center;" |$23,000 |
||
| + | |[[File:Barrage-GTAO-PrimaryDurbarCage.png|thumb|center|220px]] |
||
|- |
|- |
||
|Secondary Durbar Cage |
|Secondary Durbar Cage |
||
| style="text-align: center;" |$23,500 |
| style="text-align: center;" |$23,500 |
||
| + | |[[File:Barrage-GTAO-SecondaryDurbarCage.png|thumb|center|220px]] |
||
|- |
|- |
||
|Carbon Durbar Cage |
|Carbon Durbar Cage |
||
| style="text-align: center;" |$24,050 |
| style="text-align: center;" |$24,050 |
||
| + | |[[File:Barrage-GTAO-CarbonDurbarCage.png|thumb|center|220px]] |
||
|- |
|- |
||
| − | | |
+ | | rowspan="5" |Turret Bracket |
|Stock Turret Bracket |
|Stock Turret Bracket |
||
| style="text-align: center;" |$2,500 |
| style="text-align: center;" |$2,500 |
||
| + | |[[File:Barrage-GTAO-StockTurretRacket.png|thumb|center|220px]] |
||
|- |
|- |
||
|Carbon Detail |
|Carbon Detail |
||
| style="text-align: center;" |$5,500 |
| style="text-align: center;" |$5,500 |
||
| + | |[[File:Barrage-GTAO-CarbonDetail.png|thumb|center|220px]] |
||
|- |
|- |
||
|Riot Frame |
|Riot Frame |
||
| style="text-align: center;" |$8,000 |
| style="text-align: center;" |$8,000 |
||
| + | |[[File:Barrage-GTAO-RiotFrame.png|thumb|center|220px]] |
||
|- |
|- |
||
|Reinforced Frame |
|Reinforced Frame |
||
| style="text-align: center;" |$10,500 |
| style="text-align: center;" |$10,500 |
||
| + | |[[File:Barrage-GTAO-ReinforcedFrame.png|thumb|center|220px]] |
||
|- |
|- |
||
|Carbon Reinforced Frame |
|Carbon Reinforced Frame |
||
| style="text-align: center;" |$14,000 |
| style="text-align: center;" |$14,000 |
||
| + | |[[File:Barrage-GTAO-CarbonReinforcedFrameBracket.png|thumb|center|220px]] |
||
|- |
|- |
||
| − | | |
+ | | rowspan="10" |Bedliners |
|Stock Truck Bed |
|Stock Truck Bed |
||
| style="text-align: center;" |$300 |
| style="text-align: center;" |$300 |
||
| + | |[[File:Barrage-GTAO-StockTruckBed.png|thumb|center|220px]] |
||
|- |
|- |
||
|Empty Tyre Rack |
|Empty Tyre Rack |
||
| style="text-align: center;" |$900 |
| style="text-align: center;" |$900 |
||
| + | |[[File:Barrage-GTAO-EmptyTyreRack.png|thumb|center|220px]] |
||
|- |
|- |
||
|None |
|None |
||
| style="text-align: center;" |$1,500 |
| style="text-align: center;" |$1,500 |
||
| + | |[[File:Barrage-GTAO-None.png|thumb|center|220px]] |
||
|- |
|- |
||
|Bed Rack |
|Bed Rack |
||
| style="text-align: center;" |$1,700 |
| style="text-align: center;" |$1,700 |
||
| + | |[[File:Barrage-GTAO-BedRack.png|thumb|center|220px]] |
||
|- |
|- |
||
|Durbar Rack |
|Durbar Rack |
||
| style="text-align: center;" |$2,000 |
| style="text-align: center;" |$2,000 |
||
| + | |[[File:Barrage-GTAO-DurbarRack.png|thumb|center|220px]] |
||
|- |
|- |
||
|Bed Rack w/ Duffle Bags |
|Bed Rack w/ Duffle Bags |
||
| style="text-align: center;" |$2,750 |
| style="text-align: center;" |$2,750 |
||
| + | |[[File:Barrage-GTAO-BedRackwithDuffleBags.png|thumb|center|220px]] |
||
|- |
|- |
||
|Durbar Rack w/ Weapons Crate |
|Durbar Rack w/ Weapons Crate |
||
| style="text-align: center;" |$3,300 |
| style="text-align: center;" |$3,300 |
||
| + | |[[File:Barrage-GTAO-DurbarRackwithWeaponsCrate.png|thumb|center|220px]] |
||
|- |
|- |
||
|Durbar Rack w/ Ammo Box |
|Durbar Rack w/ Ammo Box |
||
| style="text-align: center;" |$3,900 |
| style="text-align: center;" |$3,900 |
||
| + | |[[File:Barrage-GTAO-DurbarRackwithAmmoBox.png|thumb|center|220px]] |
||
|- |
|- |
||
|Utility Upgrade |
|Utility Upgrade |
||
| style="text-align: center;" |$4,350 |
| style="text-align: center;" |$4,350 |
||
| + | |[[File:Barrage-GTAO-UtilityUpgrade.png|thumb|center|220px]] |
||
|- |
|- |
||
|Utility Upgrade 2 |
|Utility Upgrade 2 |
||
| style="text-align: center;" |$5,000 |
| style="text-align: center;" |$5,000 |
||
| + | |[[File:Barrage-GTAO-UtilityUpgrade2.png|thumb|center|220px]] |
||
|- |
|- |
||
| colspan="2" rowspan="4" |Engine |
| colspan="2" rowspan="4" |Engine |
||
|EMS Upgrade, Level 1 |
|EMS Upgrade, Level 1 |
||
| − | | style="text-align: center;" |$9,000 |
+ | | colspan="2" style="text-align: center;" |$9,000 |
|- |
|- |
||
|EMS Upgrade, Level 2 |
|EMS Upgrade, Level 2 |
||
| − | | style="text-align: center;" |$12,500 |
+ | | colspan="2" style="text-align: center;" |$12,500 |
|- |
|- |
||
|EMS Upgrade, Level 3 |
|EMS Upgrade, Level 3 |
||
| − | | style="text-align: center;" |$18,000 |
+ | | colspan="2" style="text-align: center;" |$18,000 |
|- |
|- |
||
|EMS Upgrade, Level 4 |
|EMS Upgrade, Level 4 |
||
| − | | style="text-align: center;" |$33,500 |
+ | | colspan="2" style="text-align: center;" |$33,500 |
|- |
|- |
||
| colspan="2" rowspan="21" |Exhausts |
| colspan="2" rowspan="21" |Exhausts |
||
|Stock Exhaust |
|Stock Exhaust |
||
| style="text-align: center;" |$260 |
| style="text-align: center;" |$260 |
||
| + | | |
||
|- |
|- |
||
|Left Pointed Tip Exhaust |
|Left Pointed Tip Exhaust |
||
| style="text-align: center;" |$750 |
| style="text-align: center;" |$750 |
||
| + | | |
||
|- |
|- |
||
|Right Pointed Tip Exhaust |
|Right Pointed Tip Exhaust |
||
| style="text-align: center;" |$1,800 |
| style="text-align: center;" |$1,800 |
||
| + | | |
||
|- |
|- |
||
|Twin Pointed Tip Exhaust |
|Twin Pointed Tip Exhaust |
||
| style="text-align: center;" |$3,000 |
| style="text-align: center;" |$3,000 |
||
| + | | |
||
|- |
|- |
||
|Left Crosshatch Exhaust |
|Left Crosshatch Exhaust |
||
| style="text-align: center;" |$9,550 |
| style="text-align: center;" |$9,550 |
||
| + | | |
||
|- |
|- |
||
|Right Crosshatch Exhaust |
|Right Crosshatch Exhaust |
||
| style="text-align: center;" |$9,750 |
| style="text-align: center;" |$9,750 |
||
| + | | |
||
|- |
|- |
||
|Twin Crosshatch Exhaust |
|Twin Crosshatch Exhaust |
||
| style="text-align: center;" |$10,500 |
| style="text-align: center;" |$10,500 |
||
| + | | |
||
|- |
|- |
||
|Left Dual Inset Exhaust |
|Left Dual Inset Exhaust |
||
| style="text-align: center;" |$12,000 |
| style="text-align: center;" |$12,000 |
||
| + | | |
||
|- |
|- |
||
|Right Dual Inset Exhaust |
|Right Dual Inset Exhaust |
||
| style="text-align: center;" |$13,750 |
| style="text-align: center;" |$13,750 |
||
| + | | |
||
|- |
|- |
||
|Twin Dual Inset Exhaust |
|Twin Dual Inset Exhaust |
||
| style="text-align: center;" |$14,625 |
| style="text-align: center;" |$14,625 |
||
| + | | |
||
|- |
|- |
||
|Left Performance Exhaust |
|Left Performance Exhaust |
||
| style="text-align: center;" |$15,500 |
| style="text-align: center;" |$15,500 |
||
| + | | |
||
|- |
|- |
||
|Right Performance Exhaust |
|Right Performance Exhaust |
||
| style="text-align: center;" |$16,475 |
| style="text-align: center;" |$16,475 |
||
| + | | |
||
|- |
|- |
||
|Twin Performance Exhaust |
|Twin Performance Exhaust |
||
| style="text-align: center;" |$17,250 |
| style="text-align: center;" |$17,250 |
||
| + | | |
||
|- |
|- |
||
|Left Competition Exhaust |
|Left Competition Exhaust |
||
| style="text-align: center;" |$18,125 |
| style="text-align: center;" |$18,125 |
||
| + | | |
||
|- |
|- |
||
|Right Competition Exhaust |
|Right Competition Exhaust |
||
| style="text-align: center;" |$19,100 |
| style="text-align: center;" |$19,100 |
||
| + | | |
||
|- |
|- |
||
|Twin Competition Exhaust |
|Twin Competition Exhaust |
||
| style="text-align: center;" |$19,975 |
| style="text-align: center;" |$19,975 |
||
| + | | |
||
|- |
|- |
||
|Twin Racing Exhaust |
|Twin Racing Exhaust |
||
| style="text-align: center;" |$20,900 |
| style="text-align: center;" |$20,900 |
||
| + | | |
||
|- |
|- |
||
|Twin Chrome Star Exhaust |
|Twin Chrome Star Exhaust |
||
| style="text-align: center;" |$21,675 |
| style="text-align: center;" |$21,675 |
||
| + | | |
||
|- |
|- |
||
|Twin Stealth Exhaust |
|Twin Stealth Exhaust |
||
| style="text-align: center;" |$22,550 |
| style="text-align: center;" |$22,550 |
||
| + | | |
||
|- |
|- |
||
|Twin Mitered Exhaust |
|Twin Mitered Exhaust |
||
| style="text-align: center;" |$23,350 |
| style="text-align: center;" |$23,350 |
||
| + | | |
||
|- |
|- |
||
|Twin Tech Nine Exhaust |
|Twin Tech Nine Exhaust |
||
| style="text-align: center;" |$24,175 |
| style="text-align: center;" |$24,175 |
||
| + | | |
||
|- |
|- |
||
| − | | colspan="2" rowspan=" |
+ | | colspan="2" rowspan="23" |Hoods |
|Stock Hood |
|Stock Hood |
||
| − | | style="text-align: center;" |$ |
+ | | style="text-align: center;" |$1,600 |
| + | |[[File:Barrage-GTAO-StockHood.png|thumb|center|220px]] |
||
|- |
|- |
||
|Durbar Plate |
|Durbar Plate |
||
| style="text-align: center;" |$3,000 |
| style="text-align: center;" |$3,000 |
||
| + | |[[File:Barrage-GTAO-DurbarPlate.png|thumb|center|220px]] |
||
|- |
|- |
||
|Carbon Durbar Plate |
|Carbon Durbar Plate |
||
| style="text-align: center;" |$5,000 |
| style="text-align: center;" |$5,000 |
||
| + | |[[File:Barrage-GTAO-CarbonDurbarPlate.png|thumb|center|220px]] |
||
|- |
|- |
||
|Durbar Bulkhead |
|Durbar Bulkhead |
||
| style="text-align: center;" |$8,000 |
| style="text-align: center;" |$8,000 |
||
| + | |[[File:Barrage-GTAO-DurbarBulkhead.png|thumb|center|220px]] |
||
|- |
|- |
||
|Carbon Durbar Bulkhead |
|Carbon Durbar Bulkhead |
||
| style="text-align: center;" |$9,600 |
| style="text-align: center;" |$9,600 |
||
| + | |[[File:Barrage-GTAO-CarbonDurbarBulkhead.png|thumb|center|220px]] |
||
|- |
|- |
||
|Twin Vented Hood |
|Twin Vented Hood |
||
| style="text-align: center;" |$11,000 |
| style="text-align: center;" |$11,000 |
||
| + | |[[File:Barrage-GTAO-TwinVentedHood.png|thumb|center|220px]] |
||
|- |
|- |
||
|Carbon Twin Vented Hood |
|Carbon Twin Vented Hood |
||
| style="text-align: center;" |$11,600 |
| style="text-align: center;" |$11,600 |
||
| + | |[[File:Barrage-GTAO-CarbonTwinVentedHood.png|thumb|center|220px]] |
||
|- |
|- |
||
|Large Vent Hood |
|Large Vent Hood |
||
| style="text-align: center;" |$12,000 |
| style="text-align: center;" |$12,000 |
||
| + | |[[File:Barrage-GTAO-LargeVentHood.png|thumb|center|220px]] |
||
|- |
|- |
||
|Carbon Large Vent Hood |
|Carbon Large Vent Hood |
||
| style="text-align: center;" |$12,400 |
| style="text-align: center;" |$12,400 |
||
| + | |[[File:Barrage-GTAO-CarbonLargeVentHood.png|thumb|center|220px]] |
||
|- |
|- |
||
|Hood Rack |
|Hood Rack |
||
| style="text-align: center;" |$12,400 |
| style="text-align: center;" |$12,400 |
||
| + | |[[File:Barrage-GTAO-HoodRack.png|thumb|center|220px]] |
||
|- |
|- |
||
|Carbon Hood Rack |
|Carbon Hood Rack |
||
| style="text-align: center;" |$12,500 |
| style="text-align: center;" |$12,500 |
||
| + | |[[File:Barrage-GTAO-CarbonHoodRack.png|thumb|center|220px]] |
||
|- |
|- |
||
|Camouflage Net |
|Camouflage Net |
||
| style="text-align: center;" |$12,900 |
| style="text-align: center;" |$12,900 |
||
| + | |[[File:Barrage-GTAO-CamouflageNetHood.png|thumb|center|220px]] |
||
|- |
|- |
||
|Carbon Camouflage Net |
|Carbon Camouflage Net |
||
| style="text-align: center;" |$13,250 |
| style="text-align: center;" |$13,250 |
||
| + | |[[File:Barrage-GTAO-CarbonCamouflageNetHood.png|thumb|center|220px]] |
||
|- |
|- |
||
|Closed Shutter Hood |
|Closed Shutter Hood |
||
| style="text-align: center;" |$13,600 |
| style="text-align: center;" |$13,600 |
||
| + | |[[File:Barrage-GTAO-ClosedShutterHood.png|thumb|center|220px]] |
||
|- |
|- |
||
|Carbon Closed Shutter Hood |
|Carbon Closed Shutter Hood |
||
| style="text-align: center;" |$13,900 |
| style="text-align: center;" |$13,900 |
||
| + | |[[File:Barrage-GTAO-CarbonClosedShutterHood.png|thumb|center|220px]] |
||
|- |
|- |
||
|Peeked Shutter Hood |
|Peeked Shutter Hood |
||
| style="text-align: center;" |$14,150 |
| style="text-align: center;" |$14,150 |
||
| + | |[[File:Barrage-GTAO-PeekedShutterHood.png|thumb|center|220px]] |
||
|- |
|- |
||
|Carbon Peeked Shutter Hood |
|Carbon Peeked Shutter Hood |
||
| style="text-align: center;" |$14,400 |
| style="text-align: center;" |$14,400 |
||
| + | |[[File:Barrage-GTAO-CarbonPeekedShutterHood.png|thumb|center|220px]] |
||
|- |
|- |
||
|Utility Hood |
|Utility Hood |
||
| style="text-align: center;" |$14,650 |
| style="text-align: center;" |$14,650 |
||
| + | |[[File:Barrage-GTAO-UtilityHood.png|thumb|center|220px]] |
||
|- |
|- |
||
|Carbon Utility Hood |
|Carbon Utility Hood |
||
| style="text-align: center;" |$14,850 |
| style="text-align: center;" |$14,850 |
||
| + | |[[File:Barrage-GTAO-CarbonUtilityHood.png|thumb|center|220px]] |
||
|- |
|- |
||
|Combination Vents |
|Combination Vents |
||
| style="text-align: center;" |$15,050 |
| style="text-align: center;" |$15,050 |
||
| + | |[[File:Barrage-GTAO-CombinationVents.png|thumb|center|220px]] |
||
|- |
|- |
||
|Carbon Combination Vents |
|Carbon Combination Vents |
||
| style="text-align: center;" |$15,250 |
| style="text-align: center;" |$15,250 |
||
| + | |[[File:Barrage-GTAO-CarbonCombinationVents.png|thumb|center|220px]] |
||
|- |
|- |
||
|Rack w/ Duffle Bags |
|Rack w/ Duffle Bags |
||
| style="text-align: center;" |$15,450 |
| style="text-align: center;" |$15,450 |
||
| + | |[[File:Barrage-GTAO-RackwithDuffleBags.png|thumb|center|220px]] |
||
|- |
|- |
||
| + | |Carbon Hood Rack w/ Duffle Bags |
||
| − | | colspan="1" rowspan="3" |Lights |
||
| + | | style="text-align: center;" |$15,650 |
||
| − | | colspan="1" rowspan="2" |Headlights |
||
| + | |[[File:Barrage-GTAO-CarbonHoodRackwithDuffleBags.png|thumb|center|220px]] |
||
| + | |- |
||
| + | | colspan="2" |Horns |
||
| + | |''Main article: [[Los Santos Customs/Horns]]'' |
||
| + | | colspan="2" style="text-align: center;" | - |
||
| + | |- |
||
| + | | rowspan="3" |Lights |
||
| + | | rowspan="2" |Headlights |
||
|Stock Lights |
|Stock Lights |
||
| − | | style="text-align: center;" |$ |
+ | | colspan="2" style="text-align: center;" |$600 |
|- |
|- |
||
|Xenon Lights |
|Xenon Lights |
||
| − | | style="text-align: center;" |$7,500 |
+ | | colspan="2" style="text-align: center;" |$7,500 |
|- |
|- |
||
| − | + | |Neon Kits |
|
| + | |''Main article: [[Los Santos Customs/Lights]]'' |
||
| − | |<div class="mw-collapsible mw-collapsed" style="width:100%"> |
||
| + | | colspan="2" style="text-align: center;" | - |
||
| − | <div class="mw-collapsible-content">{{Main|Los Santos Customs/Lights}}</div></div> |
||
| − | | style="text-align: center;" | - |
||
| − | |||
|- |
|- |
||
| − | | colspan="2" rowspan=" |
+ | | colspan="2" rowspan="27" |Livery |
|None |
|None |
||
| style="text-align: center;" |$11,400 |
| style="text-align: center;" |$11,400 |
||
| + | | |
||
|- |
|- |
||
|Basic Camo |
|Basic Camo |
||
| style="text-align: center;" |$18,240 |
| style="text-align: center;" |$18,240 |
||
| + | | |
||
|- |
|- |
||
|Zancudo Camo |
|Zancudo Camo |
||
| style="text-align: center;" |$19,380 |
| style="text-align: center;" |$19,380 |
||
| + | | |
||
|- |
|- |
||
|Sprayed Camo |
|Sprayed Camo |
||
| style="text-align: center;" |$20,520 |
| style="text-align: center;" |$20,520 |
||
| + | | |
||
|- |
|- |
||
|3 Color Outline |
|3 Color Outline |
||
| style="text-align: center;" |$21,660 |
| style="text-align: center;" |$21,660 |
||
| + | | |
||
|- |
|- |
||
|90s Sandbox |
|90s Sandbox |
||
| style="text-align: center;" |$22,800 |
| style="text-align: center;" |$22,800 |
||
| + | | |
||
|- |
|- |
||
|Modern 5 Color |
|Modern 5 Color |
||
| style="text-align: center;" |$23,370 |
| style="text-align: center;" |$23,370 |
||
| + | | |
||
|- |
|- |
||
|Arid Theater |
|Arid Theater |
||
| style="text-align: center;" |$23,939 |
| style="text-align: center;" |$23,939 |
||
| + | | |
||
|- |
|- |
||
|Winter Camo |
|Winter Camo |
||
| style="text-align: center;" |$24,510 |
| style="text-align: center;" |$24,510 |
||
| + | | |
||
|- |
|- |
||
|Urban Warrior |
|Urban Warrior |
||
| style="text-align: center;" |$25,080 |
| style="text-align: center;" |$25,080 |
||
| + | | |
||
|- |
|- |
||
|Nature Reserve* |
|Nature Reserve* |
||
| style="text-align: center;" |$25,650 |
| style="text-align: center;" |$25,650 |
||
| + | | |
||
|- |
|- |
||
|Naval Battle* |
|Naval Battle* |
||
| style="text-align: center;" |$26,220 |
| style="text-align: center;" |$26,220 |
||
| + | | |
||
|- |
|- |
||
|Urban Geometric* |
|Urban Geometric* |
||
| style="text-align: center;" |$26,789 |
| style="text-align: center;" |$26,789 |
||
| + | | |
||
|- |
|- |
||
|Coyote Geometric* |
|Coyote Geometric* |
||
| style="text-align: center;" |$27,360 |
| style="text-align: center;" |$27,360 |
||
| + | | |
||
|- |
|- |
||
|Large Geometric* |
|Large Geometric* |
||
| style="text-align: center;" |$27,930 |
| style="text-align: center;" |$27,930 |
||
| + | | |
||
|- |
|- |
||
|Naval Geometric* |
|Naval Geometric* |
||
| style="text-align: center;" |$28,500 |
| style="text-align: center;" |$28,500 |
||
| + | | |
||
|- |
|- |
||
|Desert Fractal* |
|Desert Fractal* |
||
| style="text-align: center;" |$29,070 |
| style="text-align: center;" |$29,070 |
||
| + | | |
||
|- |
|- |
||
|Urban Fractal* |
|Urban Fractal* |
||
| style="text-align: center;" |$29,639 |
| style="text-align: center;" |$29,639 |
||
| + | | |
||
|- |
|- |
||
|Large Digital* |
|Large Digital* |
||
| style="text-align: center;" |$30,210 |
| style="text-align: center;" |$30,210 |
||
| + | | |
||
|- |
|- |
||
|Medium Digital* |
|Medium Digital* |
||
| style="text-align: center;" |$30,780 |
| style="text-align: center;" |$30,780 |
||
| + | | |
||
|- |
|- |
||
|Small Digital* |
|Small Digital* |
||
| style="text-align: center;" |$31,350 |
| style="text-align: center;" |$31,350 |
||
| + | | |
||
| + | |- |
||
| + | | colspan="3" style="text-align: center;" |Released as part of the [[Festive Surprise 2018]] event.<sup>E</sup> |
||
| + | |- |
||
| + | |Galaxy |
||
| + | | style="text-align: center;" |FREE |
||
| + | | |
||
| + | |- |
||
| + | |Trees Camo |
||
| + | | style="text-align: center;" |FREE |
||
| + | | |
||
| + | |- |
||
| + | |Candy Cane |
||
| + | | style="text-align: center;" |FREE |
||
| + | | |
||
| + | |- |
||
| + | |It's a Wrap |
||
| + | | style="text-align: center;" |FREE |
||
| + | | |
||
| + | |- |
||
| + | |Deck the Halls |
||
| + | | style="text-align: center;" |FREE |
||
| + | | |
||
|- |
|- |
||
| colspan="2" rowspan="2" |Loss/Theft Prevention |
| colspan="2" rowspan="2" |Loss/Theft Prevention |
||
|Tracker |
|Tracker |
||
| − | | style="text-align: center;" | |
+ | | colspan="2" style="text-align: center;" | |
|- |
|- |
||
|Full Coverage |
|Full Coverage |
||
| − | | style="text-align: center;" | |
+ | | colspan="2" style="text-align: center;" | |
| + | |- |
||
| + | | colspan="2" rowspan="5" |Plates |
||
| + | |Blue on White 1 |
||
| + | | colspan="2" style="text-align: center;" |$200 |
||
| + | |- |
||
| + | |Blue on White 2 |
||
| + | | colspan="2" style="text-align: center;" |$200 |
||
| + | |- |
||
| + | |Blue on White 3 |
||
| + | | colspan="2" style="text-align: center;" |$200 |
||
| + | |- |
||
| + | |Yellow on Blue |
||
| + | | colspan="2" style="text-align: center;" |$300 |
||
| + | |- |
||
| + | |Yellow on Black |
||
| + | | colspan="2" style="text-align: center;" |$600 |
||
|- |
|- |
||
| colspan="2" |Respray |
| colspan="2" |Respray |
||
| + | |''Main article: [[Los Santos Customs/Respray Colors]]'' |
||
| − | |<div class="mw-collapsible mw-collapsed" style="width:100%"> |
||
| + | | colspan="2" style="text-align: center;" | - |
||
| − | <div class="mw-collapsible-content">{{ResprayColorsExpand}}</div></div> |
||
| − | | style="text-align: center;" | - |
||
| − | |||
|- |
|- |
||
| colspan="2" |Sell |
| colspan="2" |Sell |
||
|Sell Vehicle |
|Sell Vehicle |
||
| − | | style="text-align: center;" | |
+ | | colspan="2" style="text-align: center;" | |
|- |
|- |
||
| colspan="2" rowspan="4" |Transmission |
| colspan="2" rowspan="4" |Transmission |
||
|Stock Transmission |
|Stock Transmission |
||
| − | | style="text-align: center;" |$1,000 |
+ | | colspan="2" style="text-align: center;" |$1,000 |
|- |
|- |
||
|Street Transmission |
|Street Transmission |
||
| − | | style="text-align: center;" |$29,500 |
+ | | colspan="2" style="text-align: center;" |$29,500 |
|- |
|- |
||
|Sports Transmission |
|Sports Transmission |
||
| − | | style="text-align: center;" |$32,500 |
+ | | colspan="2" style="text-align: center;" |$32,500 |
|- |
|- |
||
|Race Transmission |
|Race Transmission |
||
| − | | style="text-align: center;" |$40,000 |
+ | | colspan="2" style="text-align: center;" |$40,000 |
|- |
|- |
||
| colspan="2" rowspan="2" |Turbo |
| colspan="2" rowspan="2" |Turbo |
||
|None |
|None |
||
| − | | style="text-align: center;" |$5,000 |
+ | | colspan="2" style="text-align: center;" |$5,000 |
|- |
|- |
||
|Turbo Tuning |
|Turbo Tuning |
||
| − | | style="text-align: center;" |$50,000 |
+ | | colspan="2" style="text-align: center;" |$50,000 |
|- |
|- |
||
| − | | |
+ | | rowspan="5" |Weapons |
| − | | |
+ | | rowspan="2" |Top Turrets |
|Top .50 Cal Machine Gun |
|Top .50 Cal Machine Gun |
||
| style="text-align: center;" |$700 |
| style="text-align: center;" |$700 |
||
| + | |[[File:Barrage-GTAO-FrontQuarter.png|thumb|center|220px]] |
||
|- |
|- |
||
|Top .50 Cal Minigun |
|Top .50 Cal Minigun |
||
| style="text-align: center;" |$225,000 |
| style="text-align: center;" |$225,000 |
||
| + | |[[File:Barrage-GTAO-front-Top.50CalMinigun.png|thumb|center|220px]] |
||
|- |
|- |
||
| − | | |
+ | | rowspan="3" |Rear Turrets |
|Rear .50 Cal Machine Gun |
|Rear .50 Cal Machine Gun |
||
| style="text-align: center;" |$700 |
| style="text-align: center;" |$700 |
||
| + | |[[File:Barrage-GTAO-FrontQuarter.png|thumb|center|220px]] |
||
|- |
|- |
||
|Rear .50 Cal Minigun |
|Rear .50 Cal Minigun |
||
| style="text-align: center;" |$225,000 |
| style="text-align: center;" |$225,000 |
||
| + | |[[File:Barrage-GTAO-front-Rear.50CalMinigun.png|thumb|center|220px]] |
||
|- |
|- |
||
|Rear 40mm Grenade Launcher |
|Rear 40mm Grenade Launcher |
||
| style="text-align: center;" |$100,000 |
| style="text-align: center;" |$100,000 |
||
| + | |[[File:Barrage-GTAO-front-Rear40mmGrenadeLauncher.png|thumb|center|220px]] |
||
|- |
|- |
||
| colspan="2" |Wheels |
| colspan="2" |Wheels |
||
| + | |''Main article: [[Los Santos Customs/Wheels]]'' |
||
| − | |<div class="mw-collapsible mw-collapsed" style="width:100%"> |
||
| + | | colspan="2" style="text-align: center;" | - |
||
| − | <div class="mw-collapsible-content">{{WheelsExpand}}</div></div> |
||
| − | | style="text-align: center;" | |
||
|} |
|} |
||
| + | *''*'' Denotes items that can only be unlocked for purchase via [[Research]] in the [[Bunkers|Bunker]] property. |
||
| + | *''<sup>E</sup>'' Awarded to players who logged on December 27, during the [[Festive Surprise 2018]] event. |
||
| + | When purchased, the Barrage comes painted in the following colors by default: |
||
| − | *''*'' Denotes items that can only be unlocked for purchase via [[research]] in the [[Bunkers|Bunker]] property. |
||
| + | |||
| + | {| class="wikitable" |
||
| + | !colspan="6"|Applied Colors |
||
| + | |- |
||
| + | !Primary Color |
||
| + | !Secondary Color |
||
| + | !Pearlescent |
||
| + | !Wheel Color |
||
| + | !Trim Color |
||
| + | !Dial Color |
||
| + | |- |
||
| + | |style="text-align: center; background:#243022; color:#000"|'''Matte Green'''<!--128--> |
||
| + | | |
||
| + | | |
||
| + | |style="text-align: center; background-color: #414347; color: #FFFFFF;"|'''Alloy'''<!--156--> |
||
| + | |style="text-align: center; background-color: #080808; color: #FFFFFF;"|'''Metallic Black'''<!--0--> |
||
| + | |style="text-align: center; background:#f0f0f0; color:#000"|'''Worn White'''<!--132--> |
||
| + | |} |
||
==Image Gallery== |
==Image Gallery== |
||
===''Grand Theft Auto Online''=== |
===''Grand Theft Auto Online''=== |
||
| − | <gallery position="center"> |
+ | <gallery position="center" hideaddbutton="true" widths="270px" spacing="small"> |
Barrage-GTAO-Warstock.png|The '''Barrage''' on [[Warstock Cache & Carry]]. |
Barrage-GTAO-Warstock.png|The '''Barrage''' on [[Warstock Cache & Carry]]. |
||
Barrage-GTAO-RGSC.jpg|The '''Barrage''' on [[Rockstar Games Social Club]]. |
Barrage-GTAO-RGSC.jpg|The '''Barrage''' on [[Rockstar Games Social Club]]. |
||
</gallery> |
</gallery> |
||
| − | <gallery position="center" |
+ | <gallery position="center" hideaddbutton="true" spacing="small"> |
| − | Barrage-GTAO |
+ | Barrage-GTAO-Top.50CalMinigun-CloseUp.png|Close-up on the '''Top .50 Cal Minigun'''. |
| − | Barrage-GTAO |
+ | Barrage-GTAO-Rear.50CalMinigun-CloseUp.png|Close-up on the '''Rear .50 Cal Minigun'''. |
| − | Barrage-GTAO |
+ | Barrage-GTAO-Rear40mmGrenadeLauncher-CloseUp.png|Close-up on the '''Rear 40mm Grenade Launcher'''. |
| − | Barrage-GTAO-Top.50CalMinigun-CloseUp.png|Close-up on the Top .50 Cal Minigun. |
||
| − | Barrage-GTAO-Rear.50CalMinigun-CloseUp.png|Close-up on the Rear .50 Cal Minigun. |
||
| − | Barrage-GTAO-Rear40mmGrenadeLauncher-CloseUp.png|Close-up on the Rear 40mm Grenade Launcher. |
||
</gallery> |
</gallery> |
||
| Line 819: | Line 1,054: | ||
[[File:GTA Online - Barrage -The Doomsday Heist-|center|350x350px]] |
[[File:GTA Online - Barrage -The Doomsday Heist-|center|350x350px]] |
||
| − | == |
+ | ==Prominent Appearances in Missions== |
| − | === |
+ | ===''Grand Theft Auto Online''=== |
*It is first seen in the setup mission "[[Setup: Barrage]]", where the crew have to retrieve it from an air convoy. Being intended for [[Avon Hertz|Avon]] and [[Cliffford Mercenaries|his army]], it bears the faction's insignia and colors. |
*It is first seen in the setup mission "[[Setup: Barrage]]", where the crew have to retrieve it from an air convoy. Being intended for [[Avon Hertz|Avon]] and [[Cliffford Mercenaries|his army]], it bears the faction's insignia and colors. |
||
*It can be optionally used by the crew in the heist finale "[[The Doomsday Scenario]]", along with the [[TM-02 Khanjali]]. |
*It can be optionally used by the crew in the heist finale "[[The Doomsday Scenario]]", along with the [[TM-02 Khanjali]]. |
||
| − | *The Barrage is available to use as a personal vehicle in [[Heists]] and other missions. |
||
| − | == |
+ | ==Locations== |
| − | === |
+ | ===''Grand Theft Auto Online''=== |
| − | *Can be purchased on [[Warstock Cache & Carry]] |
+ | *Can be purchased on [[Warstock Cache & Carry]] for [[Money|$]]2,121,350 or for $1,595,000 after completing [[Setup: Barrage]] as the heist leader. |
==Events== |
==Events== |
||
| − | === |
+ | ===''Grand Theft Auto Online''=== |
*Price reduced to $1,378,878 or $1,036,750 (after [[Setup: Barrage]]) (35% off) during [[Valentine's Day 2018]] (13 February - 19 February 2018).<ref>https://www.rockstargames.com/newswire/article/60349/Valentine-s-Week-in-GTA-Online-The-New-Vapid-Hustler-Double-GTA-RP-Mod</ref> |
*Price reduced to $1,378,878 or $1,036,750 (after [[Setup: Barrage]]) (35% off) during [[Valentine's Day 2018]] (13 February - 19 February 2018).<ref>https://www.rockstargames.com/newswire/article/60349/Valentine-s-Week-in-GTA-Online-The-New-Vapid-Hustler-Double-GTA-RP-Mod</ref> |
||
| Line 847: | Line 1,081: | ||
===General=== |
===General=== |
||
*The default radio stations of the Barrage are [[Radio Los Santos]], [[West Coast Classics]], and [[The Lab]]. |
*The default radio stations of the Barrage are [[Radio Los Santos]], [[West Coast Classics]], and [[The Lab]]. |
||
| + | *While the car has "Mudslinger" off-road wheels by default, its spare wheel is of an entirely unique design. |
||
| + | *When modified at an [[Arena Workshop]], the player has the option to equip a mod that adds the Cliffford icons that were previously exclusive to the Doomsday Heist. It is unknown whether or not this was intentional. |
||
| + | **This option is found in the "Vanity Plates" group and named "Custom Mod 1". It costs $11,040. |
||
==Bugs/Glitches== |
==Bugs/Glitches== |
||
| − | *When opening the hood of the vehicle through the |
+ | *When opening the hood of the vehicle through the [[Interaction Menu]], it will not close back manually. |
==See Also== |
==See Also== |
||
| Line 870: | Line 1,107: | ||
[[Category:Vehicles in GTA Online]] |
[[Category:Vehicles in GTA Online]] |
||
[[Category:Exclusive Enhanced Version Content in GTA V]] |
[[Category:Exclusive Enhanced Version Content in GTA V]] |
||
| − | [[Category:Exclusive Enhanced Version Vehicles in GTA V]] |
||
[[Category:Military]] |
[[Category:Military]] |
||
[[Category:Military Vehicles]] |
[[Category:Military Vehicles]] |
||
| Line 881: | Line 1,117: | ||
[[Category:DLC Vehicles]] |
[[Category:DLC Vehicles]] |
||
[[Category:Vehicles in GTA Online: The Doomsday Heist]] |
[[Category:Vehicles in GTA Online: The Doomsday Heist]] |
||
| + | [[Category:Exclusive Enhanced Version Vehicles in GTA Online]] |
||
Revision as of 19:29, 27 October 2019
Template:Next-Gen Template:Infobox vehicles
Please note: This vehicle can be modified at a Vehicle Workshop inside an Avenger or Mobile Operations Center.
The HVY Barrage is a weaponized ATV featured in Grand Theft Auto Online as part of the Doomsday Heist update.
Design
Grand Theft Auto Online
The Barrage is an off-road buggy seemingly based on the HDT Storm SRTV (Search & Rescue Tactical Vehicle), having a similar front end, cabin framing and several objects typical of a military buggy. The size and the functionality, however, may suggest it is based on the HDT Sword ITV (Internally Transportable Vehicle), as it can be transported internally by a V-22 Osprey (whose GTA equivalent is the Avenger).
The Barrage features a small bumper with ammo boxes on the front, with the corresponding headlights on either side. A large LED floodlight bar is seen on the roof and a spare tire on the rear bed. Numerous tubular frames protects the frontal area of the vehicle, starting from the cabin, passing on the sides of the hood and ends in another frame protecting the small front end, above the headlights, as well as stepsides and the spare wheel frames of the truck bed. Two weapons can be found mounted on the front turret ring and on the rear end frame.
The interior uses basic components and dial sets from race-generic style vehicles, the latter in a layout that is unique to this vehicle, with the digital speedometer centered to the driver's seat and five analog dials centralized on the car's dashboard and facing to the driver side.
The car is prominently painted in a primary color for the bodywork, while the frames and springs are painted in a secondary color.
Current Design Gallery


Performance
Grand Theft Auto Online
- Vehicle
The Barrage has great top speed and acceleration thanks to its lightweight design and the all-wheel drivetrain. The off-road wheels and the high suspension allows it to cross terrain and small obstacles with no trouble. Even with no engine upgrades, the Barrage performs excepcionally well, but tends to bottom out when landing the vehicle after a jump, so caution should be taken.
The vehicle's engine appears to be located on the middle of the vehicle, as the exhaust tips are located directly behind the cabin area. Said engine is coupled to a 5-speed gearbox in a mid-engine, all wheel drive (50% front, 50% rear) layout. Its engine sound appears to be a slightly louder variation of the one used in most SUVs and off-road vehicles, such as the Bodhi and the Granger.
- Armor
The car offers limited protection against gunfire due to the open cabin, leaving the occupants highly vulnerable. Surprisingly for a lightweight, all-terrain vehicle, the Barrage can take up to five rockets before exploding, making it an ideal choice when encountering and evading enemies and vehicles with explosive weaponry or homing rockets.
- Weaponry
The Barrage is fitted with two turrets:
- The front one has a rotation angle of 360 degrees and an elevation range of -20 and 30 degrees (similar to the Insurgent Pick-Up), serving as the primary/offensive option. The gunner must enter it directly, as there is no option to switch places from the front seats.
- The rear one, on the other hand, offers a limited rotation angle of 112.5 degrees and a slightly smaller elevation range of between -15 and 25 degrees, being intended for rear defense.
Both turrets can be equipped with the following weapons:
- Machine Gun: by default, both turrets come with a Browning M2HB .50 caliber machine gun, sharing the same properties as most machine gun turrets, dealing good damage against targets on foot and unarmored vehicles.
- Minigun: Both turrets can be upgraded with a GAU-19 three-barreled .50 caliber Minigun, having the same moderate damage and high fire rate as most minigun turrets.
- Grenade Launcher: The rear turret can be upgraded with a Mark 19 40mm grenade launcher, being similar to mounted grenade launchers found on the Dune FAV or TM-02 Khanjali, with a low fire rate and a limited capacity of 20 grenades, but dealing great damage to vehicles and its rounds explode half a second after hitting the ground.
GTA Online Overview
| Acceleration (0-60 mph in Seconds) |
Top Speed (mph / kmh) |
Gears | Engine | Drivetrain (FWD / RWD / AWD) |
Mass (kg / lbs) |
Fuel Tank Size (litres) |
|---|---|---|---|---|---|---|
| N/A | 84 / 135 | 5 | N/A | AWD 50% FWD 50% RWD |
2500 / 5512 | 60 |
| N/A | N/A | N/A | N/A | N/A | N/A | N/A |
| N/A | N/A | 5 | M4 | AWD | Cannot be observed | Cannot be observed |
| Damage (per shot) [?] |
Fire Rate [?] | Range (m / ft) [?] |
Ammo Specifications/ Capacity |
Reload Mechanism | Reload Speed [?] |
|---|---|---|---|---|---|
| N/A | N/A | N/A | N/A | N/A | N/A |
| N/A | N/A | N/A | N/A | N/A | N/A |
| N/A | N/A | N/A | N/A | N/A | N/A |
 |
Damage | ||||
| Fire Rate/Speed | |||||
| Accuracy | |||||
| Range | |||||
| Clip Size | |||||
| Damage (per shot) [?] |
Fire Rate [?] | Range (m / ft) [?] |
Ammo Specifications/ Capacity |
Reload Mechanism | Reload Speed [?] |
|---|---|---|---|---|---|
| N/A | N/A | N/A | N/A | N/A | N/A |
| N/A | N/A | N/A | N/A | N/A | N/A |
| N/A | N/A | N/A | N/A | N/A | N/A |
|
Damage | ||||
| Fire Rate/Speed | |||||
| Accuracy | |||||
| Range | |||||
| Clip Size | |||||
Modifications
Grand Theft Auto Online
The Barrage can only be modified at a vehicle workshop inside a Mobile Operations Center or an Avenger.
| Category | Modification | Cost | Image | |
|---|---|---|---|---|
| Armor | No Armor | $1,000 | ||
| Armor Upgrade 20% | $7,500 | |||
| Armor Upgrade 40% | $12,000 | |||
| Armor Upgrade 60% | $20,000 | |||
| Armor Upgrade 80% | $35,000 | |||
| Armor Upgrade 100% | $50,000 | |||
| Brakes | Stock Brakes | $1,000 | ||
| Street Brakes | $20,000 | |||
| Sport Brakes | $27,000 | |||
| Race Brakes | $35,000 | |||
| Bodywork | Doors | Stock Door | $300 | |
| Primary Custom Frame | $900 | |||
| Secondary Custom Frame | $1,500 | |||
| Carbon Custom Frame | $1,700 | |||
| Primary Mesh Frame | $2,000 | |||
| Secondary Mesh Frame | $2,750 | |||
| Carbon Mesh Frame | $3,300 | |||
| Primary Camouflage Net | $3,900 | |||
| Secondary Camouflage Net | $4,350 | |||
| Carbon Camouflage Net | $5,000 | |||
| Primary Reinforced Frame | $5,150 | |||
| Secondary Reinforced Frame | $5,300 | |||
| Carbon Reinforced Frame | $5,450 | |||
| Bumper Panel | Stock Bumper Panel | $2,200 | ||
| Custom Bumper | $4,600 | |||
| Carbon Custom Bumper | $7,400 | |||
| Durbar Construct | $11,700 | |||
| Carbon Durbar Construct | $14,500 | |||
| Mk1 Battering Guard | $14,700 | |||
| Mk1 Carbon Battering Guard | $14,900 | |||
| Mk2 Battering Guard | $15,100 | |||
| Mk2 Carbon Battering Guard | $15,300 | |||
| Mk3 Battering Guard | $15,500 | |||
| Mk3 Carbon Battering Guard | $15,700 | |||
| Racks | Stock Rack | $200 | ||
| Removed Cartridges | $750 | |||
| Twin Cartridge Cases | $1,340 | |||
| Full Cartridge Cases | $1,550 | |||
| Black Grille Cage | $3,000 | |||
| Primary Grille Cage | $3,200 | |||
| Secondary Grille Cage | $3,650 | |||
| Carbon Grille Cage | $4,100 | |||
| Camouflage Net | $4,550 | |||
| Side Panel | Stock Side Panel | $2,200 | ||
| Basic Panel | $4,600 | |||
| Carbon Basic Panel | $7,400 | |||
| Durbar Panel | $11,700 | |||
| Carbon Durbar Panel | $14,500 | |||
| Window Panel | $14,700 | |||
| Carbon Window Panel | $14,900 | |||
| Mesh Grate Panel | $15,100 | |||
| Carbon Mesh Grate Panel | $15,300 | |||
| Reinforced Panel | $15,500 | |||
| Carbon Reinforced Panel | $15,700 | |||
| Roll Cage | No Roll Cage | $700 | ||
| Primary Custom Half-Cage | $1,100 | |||
| Secondary Custom Half-Cage | $1,350 | |||
| Carbon Custom Half-Cage | $1,500 | |||
| Primary Mesh Half-Cage | $2,750 | |||
| Secondary Mesh Half-Cage | $3,600 | |||
| Carbon Mesh Half-Cage | $4,900 | |||
| Primary Camo Net Half-Cage | $5,800 | |||
| Secondary Camo Net Half-Cage | $7,000 | |||
| Carbon Camo Net Half-Cage | $8,000 | |||
| Primary Reinforced Half-Cage | $9,150 | |||
| Secondary Reinforced Half-Cage | $10,100 | |||
| Carbon Reinforced Half-Cage | $11,500 | |||
| Primary Durbar Half-Cage | $11,950 | |||
| Secondary Durbar Half-Cage | $12,900 | |||
| Carbon Half Durbar Cage | $13,750 | |||
| Primary Custom Cage | $14,600 | |||
| Secondary Custom Cage | $15,450 | |||
| Carbon Custom Cage | $16,250 | |||
| Primary Mesh Cage | $17,050 | |||
| Secondary Mesh Cage | $17,800 | |||
| Carbon Mesh Cage | $18,550 | |||
| Primary Camo Net Cage | $19,250 | |||
| Secondary Camo Net Cage | $19,950 | |||
| Carbon Camo Net Cage | $20,600 | |||
| Primary Reinforced Cage | $21,250 | |||
| Secondary Reinforced Cage | $21,850 | |||
| Carbon Reinforced Cage | $22,450 | |||
| Primary Durbar Cage | $23,000 | |||
| Secondary Durbar Cage | $23,500 | |||
| Carbon Durbar Cage | $24,050 | |||
| Turret Bracket | Stock Turret Bracket | $2,500 | ||
| Carbon Detail | $5,500 | |||
| Riot Frame | $8,000 | |||
| Reinforced Frame | $10,500 | |||
| Carbon Reinforced Frame | $14,000 | |||
| Bedliners | Stock Truck Bed | $300 | ||
| Empty Tyre Rack | $900 | |||
| None | $1,500 | |||
| Bed Rack | $1,700 | |||
| Durbar Rack | $2,000 | |||
| Bed Rack w/ Duffle Bags | $2,750 | |||
| Durbar Rack w/ Weapons Crate | $3,300 | |||
| Durbar Rack w/ Ammo Box | $3,900 | |||
| Utility Upgrade | $4,350 | |||
| Utility Upgrade 2 | $5,000 | |||
| Engine | EMS Upgrade, Level 1 | $9,000 | ||
| EMS Upgrade, Level 2 | $12,500 | |||
| EMS Upgrade, Level 3 | $18,000 | |||
| EMS Upgrade, Level 4 | $33,500 | |||
| Exhausts | Stock Exhaust | $260 | ||
| Left Pointed Tip Exhaust | $750 | |||
| Right Pointed Tip Exhaust | $1,800 | |||
| Twin Pointed Tip Exhaust | $3,000 | |||
| Left Crosshatch Exhaust | $9,550 | |||
| Right Crosshatch Exhaust | $9,750 | |||
| Twin Crosshatch Exhaust | $10,500 | |||
| Left Dual Inset Exhaust | $12,000 | |||
| Right Dual Inset Exhaust | $13,750 | |||
| Twin Dual Inset Exhaust | $14,625 | |||
| Left Performance Exhaust | $15,500 | |||
| Right Performance Exhaust | $16,475 | |||
| Twin Performance Exhaust | $17,250 | |||
| Left Competition Exhaust | $18,125 | |||
| Right Competition Exhaust | $19,100 | |||
| Twin Competition Exhaust | $19,975 | |||
| Twin Racing Exhaust | $20,900 | |||
| Twin Chrome Star Exhaust | $21,675 | |||
| Twin Stealth Exhaust | $22,550 | |||
| Twin Mitered Exhaust | $23,350 | |||
| Twin Tech Nine Exhaust | $24,175 | |||
| Hoods | Stock Hood | $1,600 | ||
| Durbar Plate | $3,000 | |||
| Carbon Durbar Plate | $5,000 | |||
| Durbar Bulkhead | $8,000 | |||
| Carbon Durbar Bulkhead | $9,600 | |||
| Twin Vented Hood | $11,000 | |||
| Carbon Twin Vented Hood | $11,600 | |||
| Large Vent Hood | $12,000 | |||
| Carbon Large Vent Hood | $12,400 | |||
| Hood Rack | $12,400 | |||
| Carbon Hood Rack | $12,500 | |||
| Camouflage Net | $12,900 | |||
| Carbon Camouflage Net | $13,250 | |||
| Closed Shutter Hood | $13,600 | |||
| Carbon Closed Shutter Hood | $13,900 | |||
| Peeked Shutter Hood | $14,150 | |||
| Carbon Peeked Shutter Hood | $14,400 | |||
| Utility Hood | $14,650 | |||
| Carbon Utility Hood | $14,850 | |||
| Combination Vents | $15,050 | |||
| Carbon Combination Vents | $15,250 | |||
| Rack w/ Duffle Bags | $15,450 | |||
| Carbon Hood Rack w/ Duffle Bags | $15,650 | |||
| Horns | Main article: Los Santos Customs/Horns | - | ||
| Lights | Headlights | Stock Lights | $600 | |
| Xenon Lights | $7,500 | |||
| Neon Kits | Main article: Los Santos Customs/Lights | - | ||
| Livery | None | $11,400 | ||
| Basic Camo | $18,240 | |||
| Zancudo Camo | $19,380 | |||
| Sprayed Camo | $20,520 | |||
| 3 Color Outline | $21,660 | |||
| 90s Sandbox | $22,800 | |||
| Modern 5 Color | $23,370 | |||
| Arid Theater | $23,939 | |||
| Winter Camo | $24,510 | |||
| Urban Warrior | $25,080 | |||
| Nature Reserve* | $25,650 | |||
| Naval Battle* | $26,220 | |||
| Urban Geometric* | $26,789 | |||
| Coyote Geometric* | $27,360 | |||
| Large Geometric* | $27,930 | |||
| Naval Geometric* | $28,500 | |||
| Desert Fractal* | $29,070 | |||
| Urban Fractal* | $29,639 | |||
| Large Digital* | $30,210 | |||
| Medium Digital* | $30,780 | |||
| Small Digital* | $31,350 | |||
| Released as part of the Festive Surprise 2018 event.E | ||||
| Galaxy | FREE | |||
| Trees Camo | FREE | |||
| Candy Cane | FREE | |||
| It's a Wrap | FREE | |||
| Deck the Halls | FREE | |||
| Loss/Theft Prevention | Tracker | |||
| Full Coverage | ||||
| Plates | Blue on White 1 | $200 | ||
| Blue on White 2 | $200 | |||
| Blue on White 3 | $200 | |||
| Yellow on Blue | $300 | |||
| Yellow on Black | $600 | |||
| Respray | Main article: Los Santos Customs/Respray Colors | - | ||
| Sell | Sell Vehicle | |||
| Transmission | Stock Transmission | $1,000 | ||
| Street Transmission | $29,500 | |||
| Sports Transmission | $32,500 | |||
| Race Transmission | $40,000 | |||
| Turbo | None | $5,000 | ||
| Turbo Tuning | $50,000 | |||
| Weapons | Top Turrets | Top .50 Cal Machine Gun | $700 | |
| Top .50 Cal Minigun | $225,000 | |||
| Rear Turrets | Rear .50 Cal Machine Gun | $700 | ||
| Rear .50 Cal Minigun | $225,000 | |||
| Rear 40mm Grenade Launcher | $100,000 | |||
| Wheels | Main article: Los Santos Customs/Wheels | - | ||

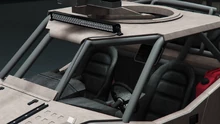

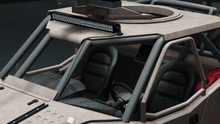
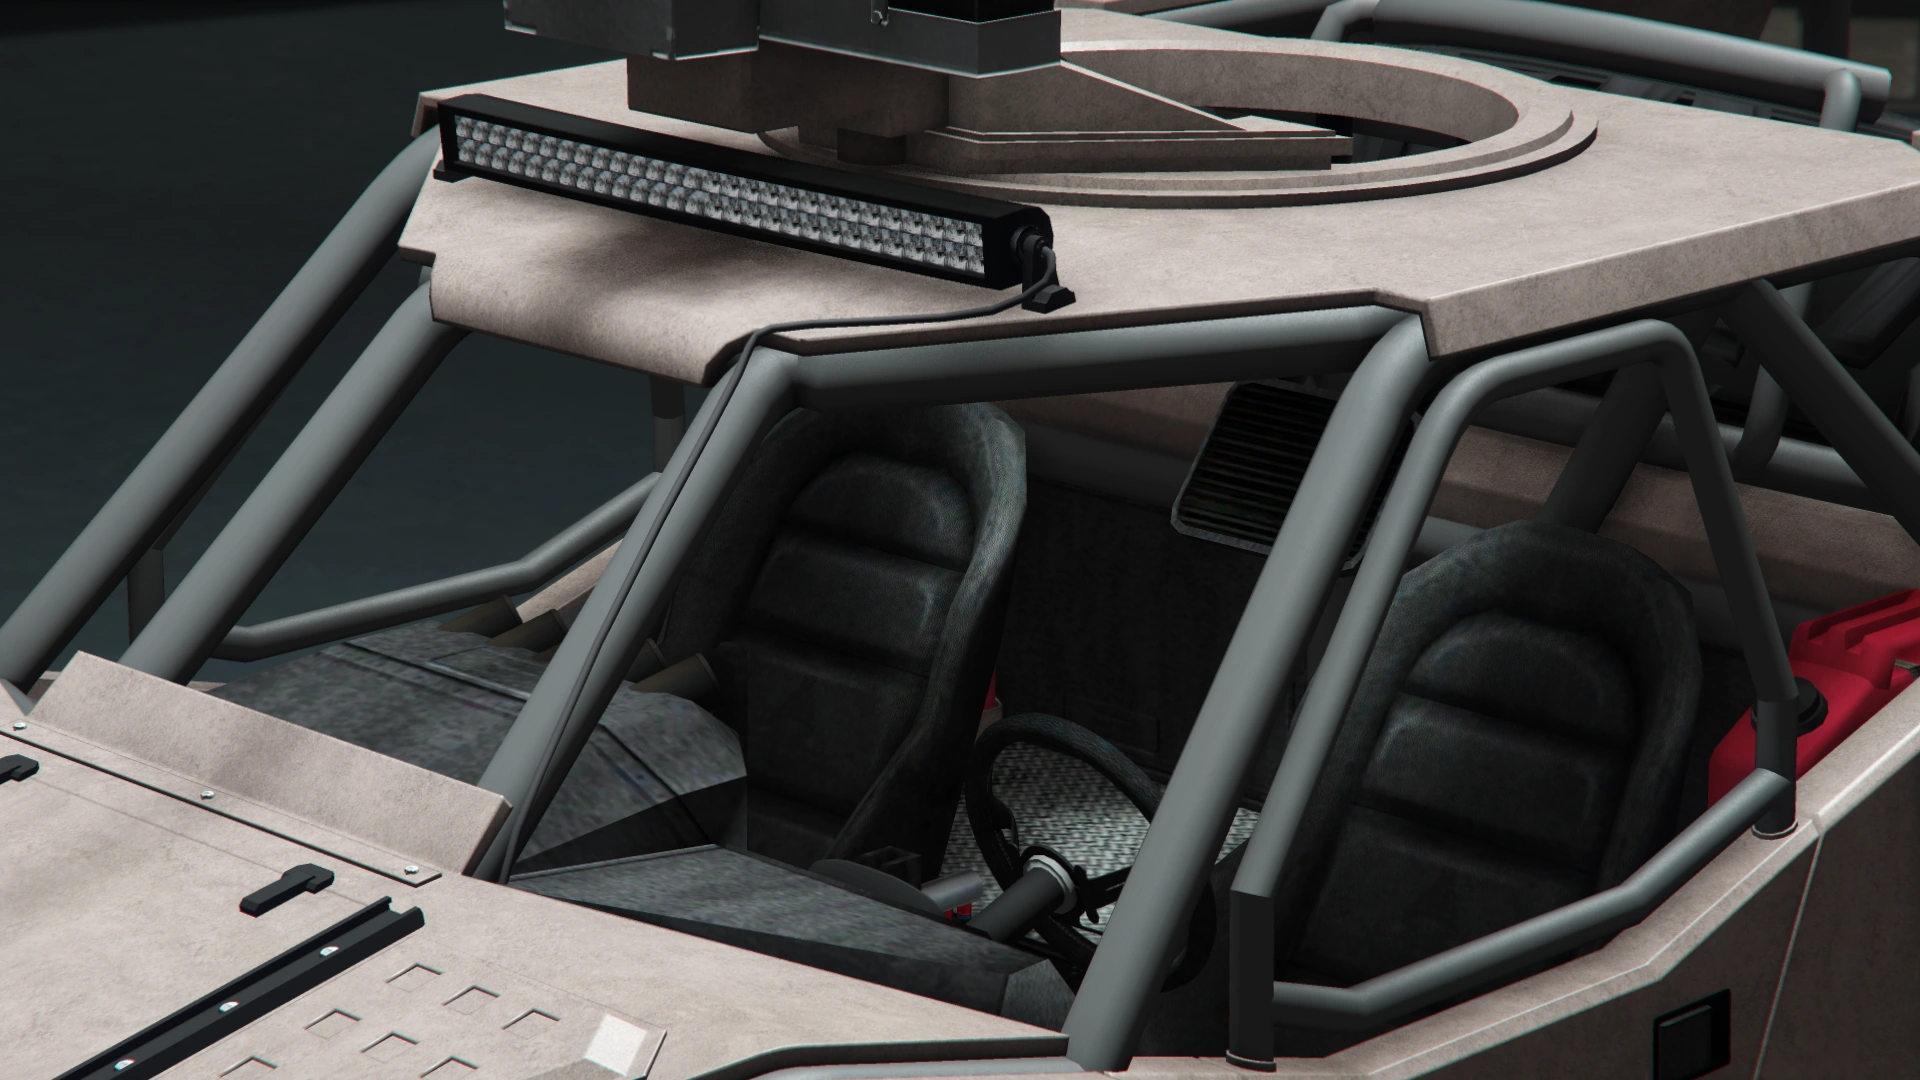
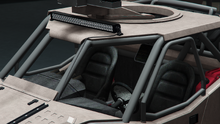


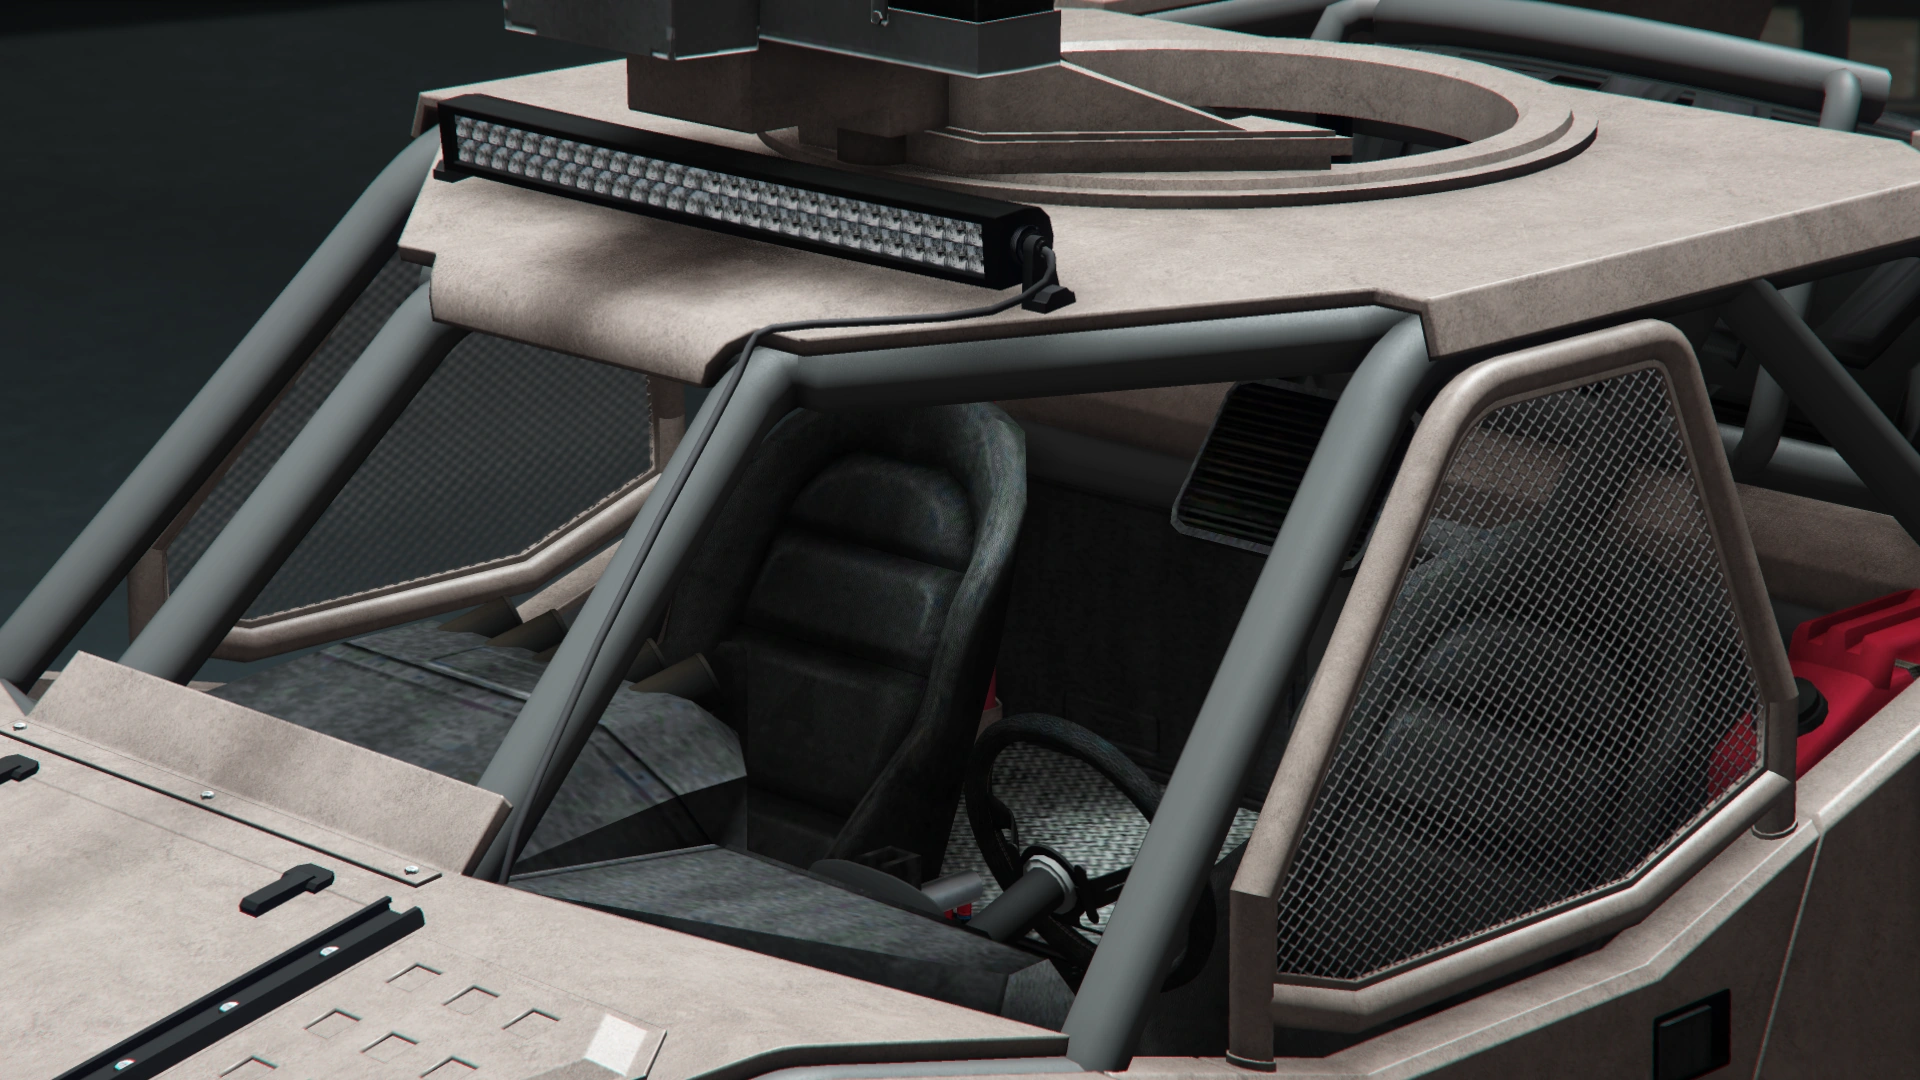

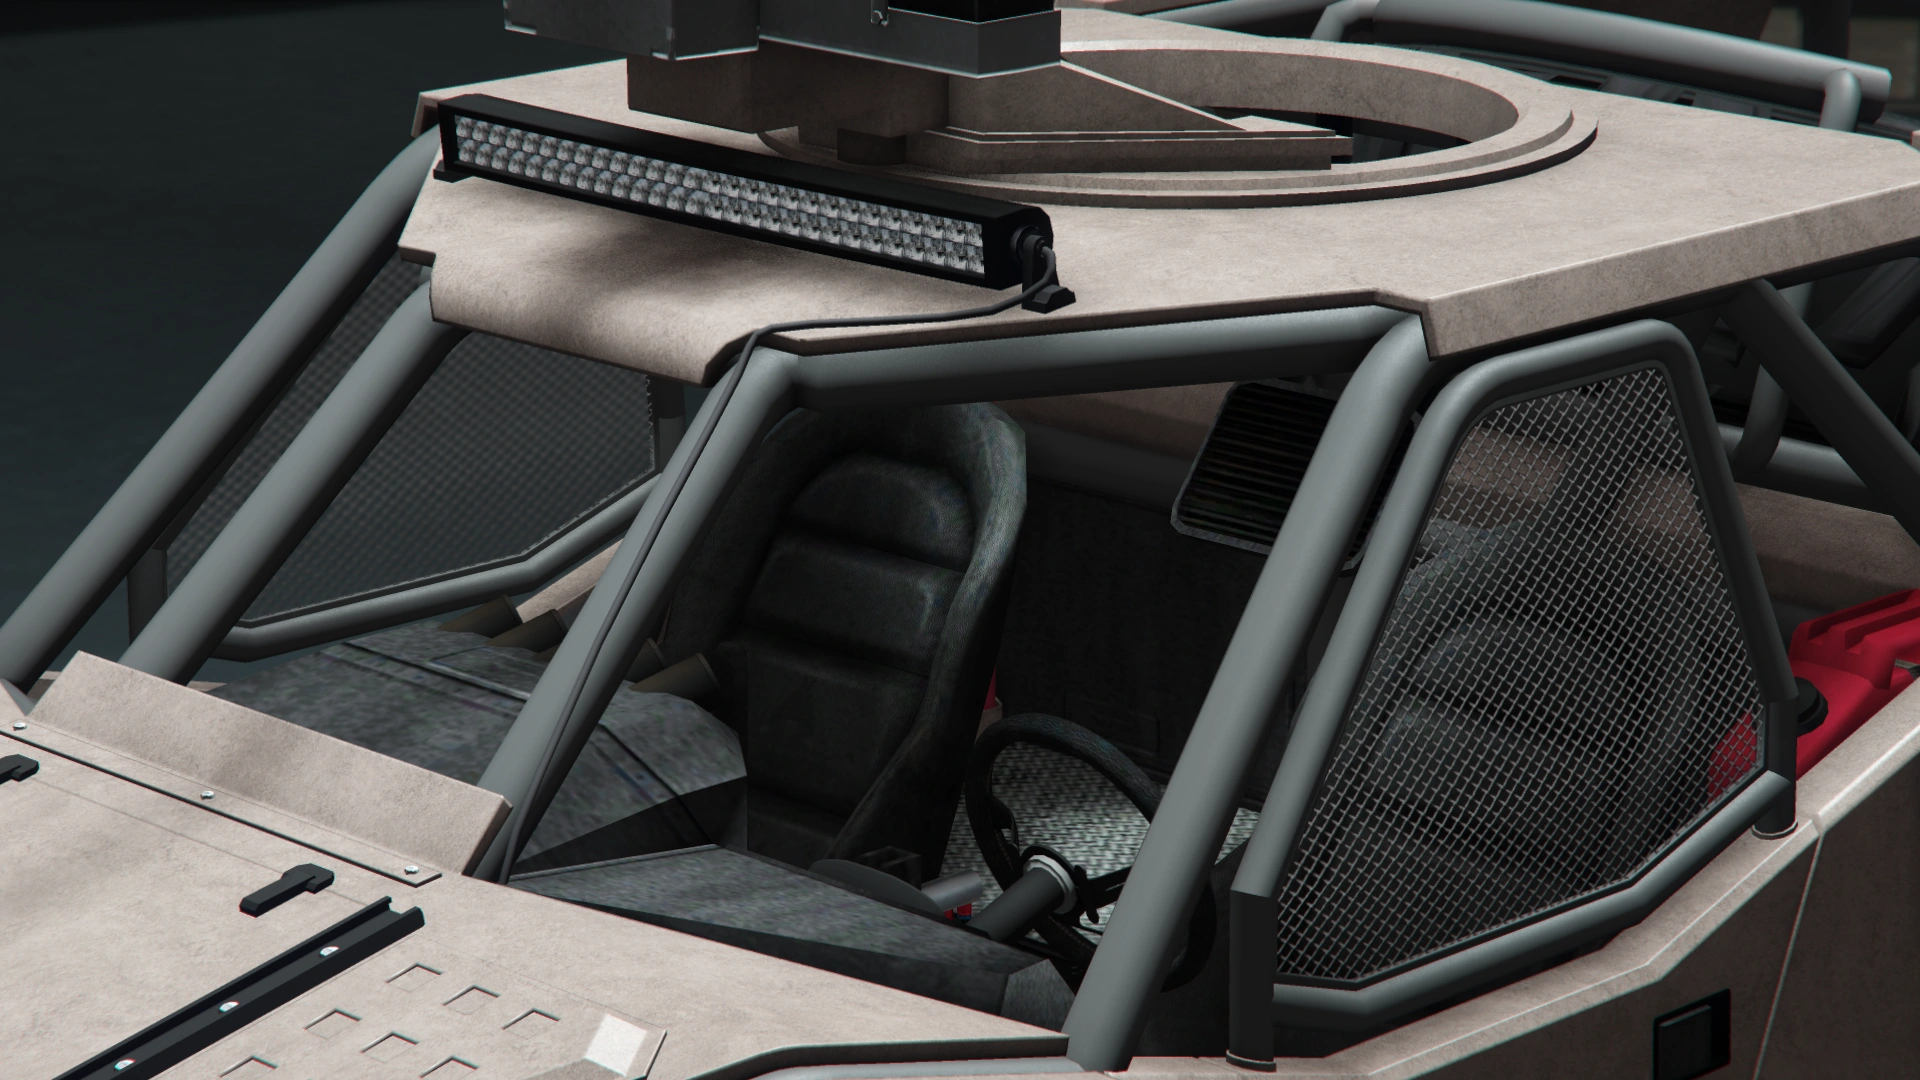
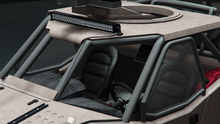
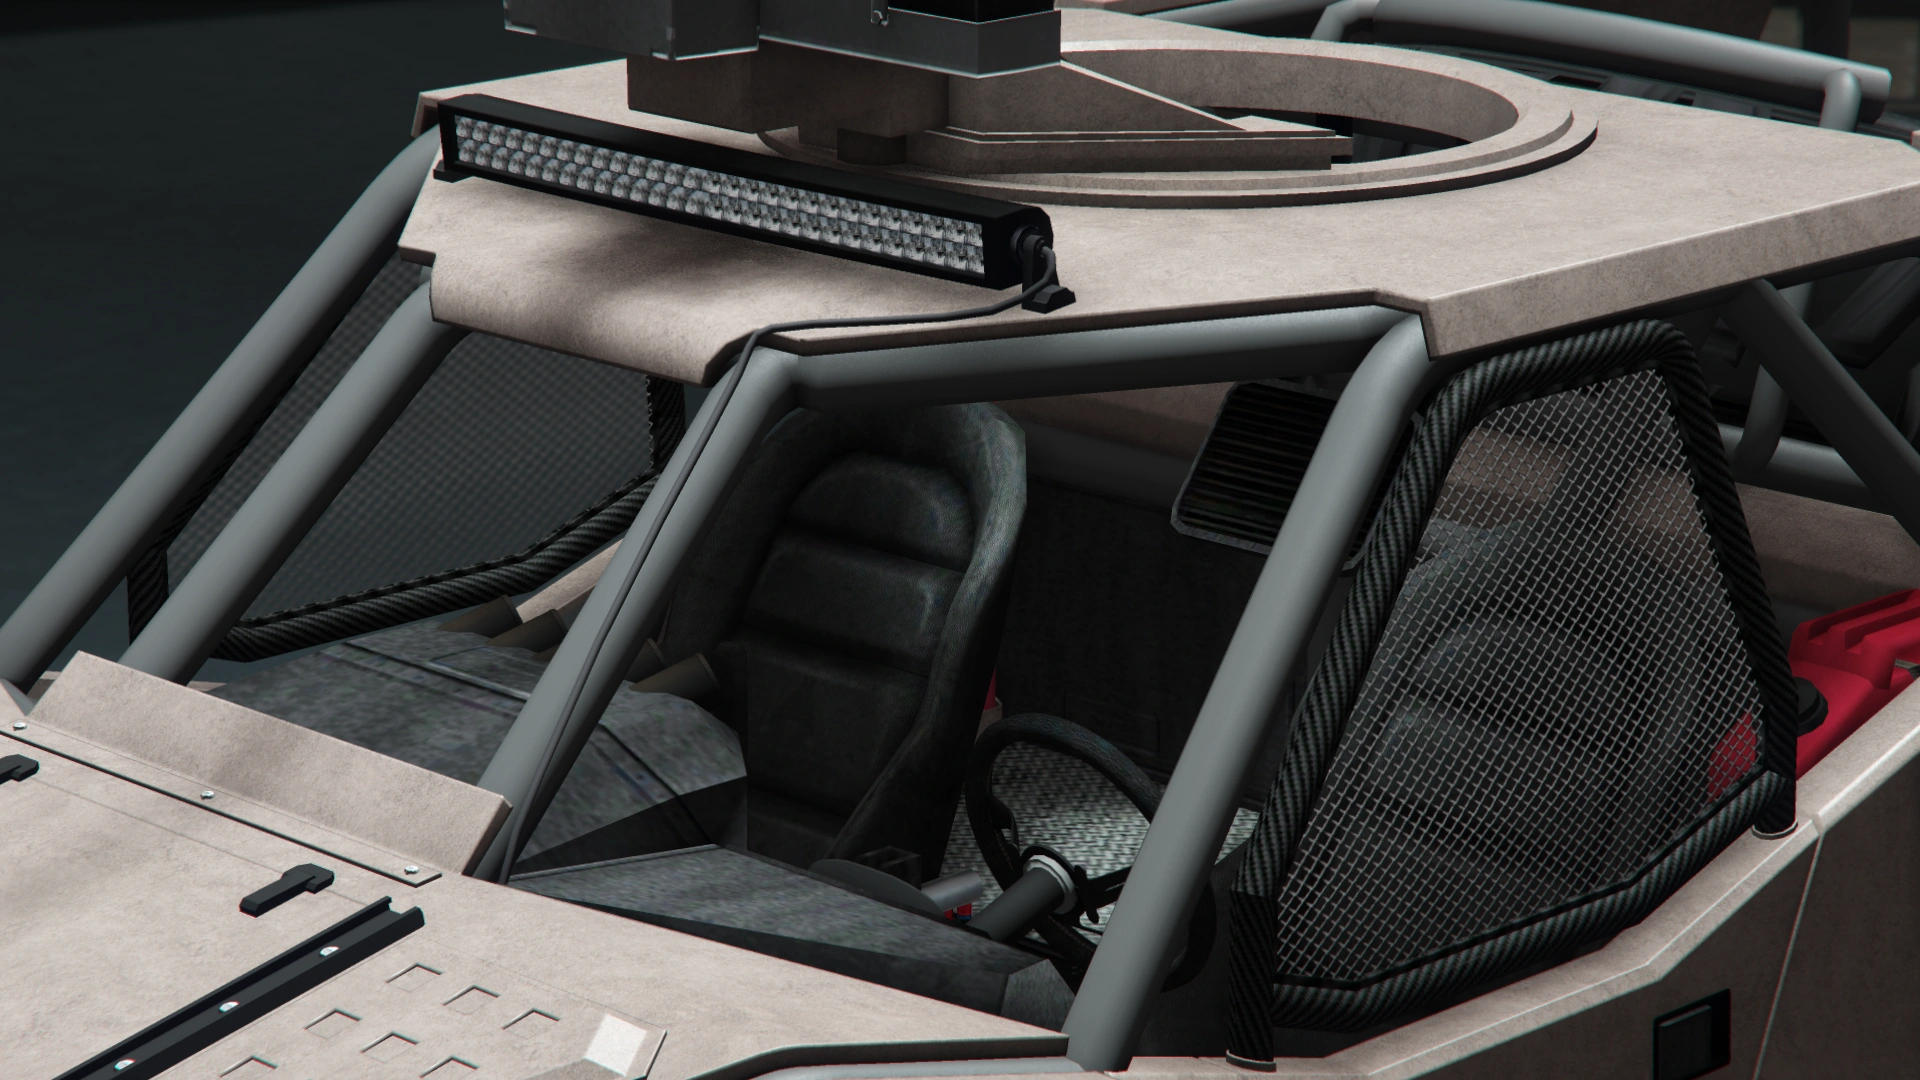


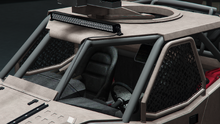
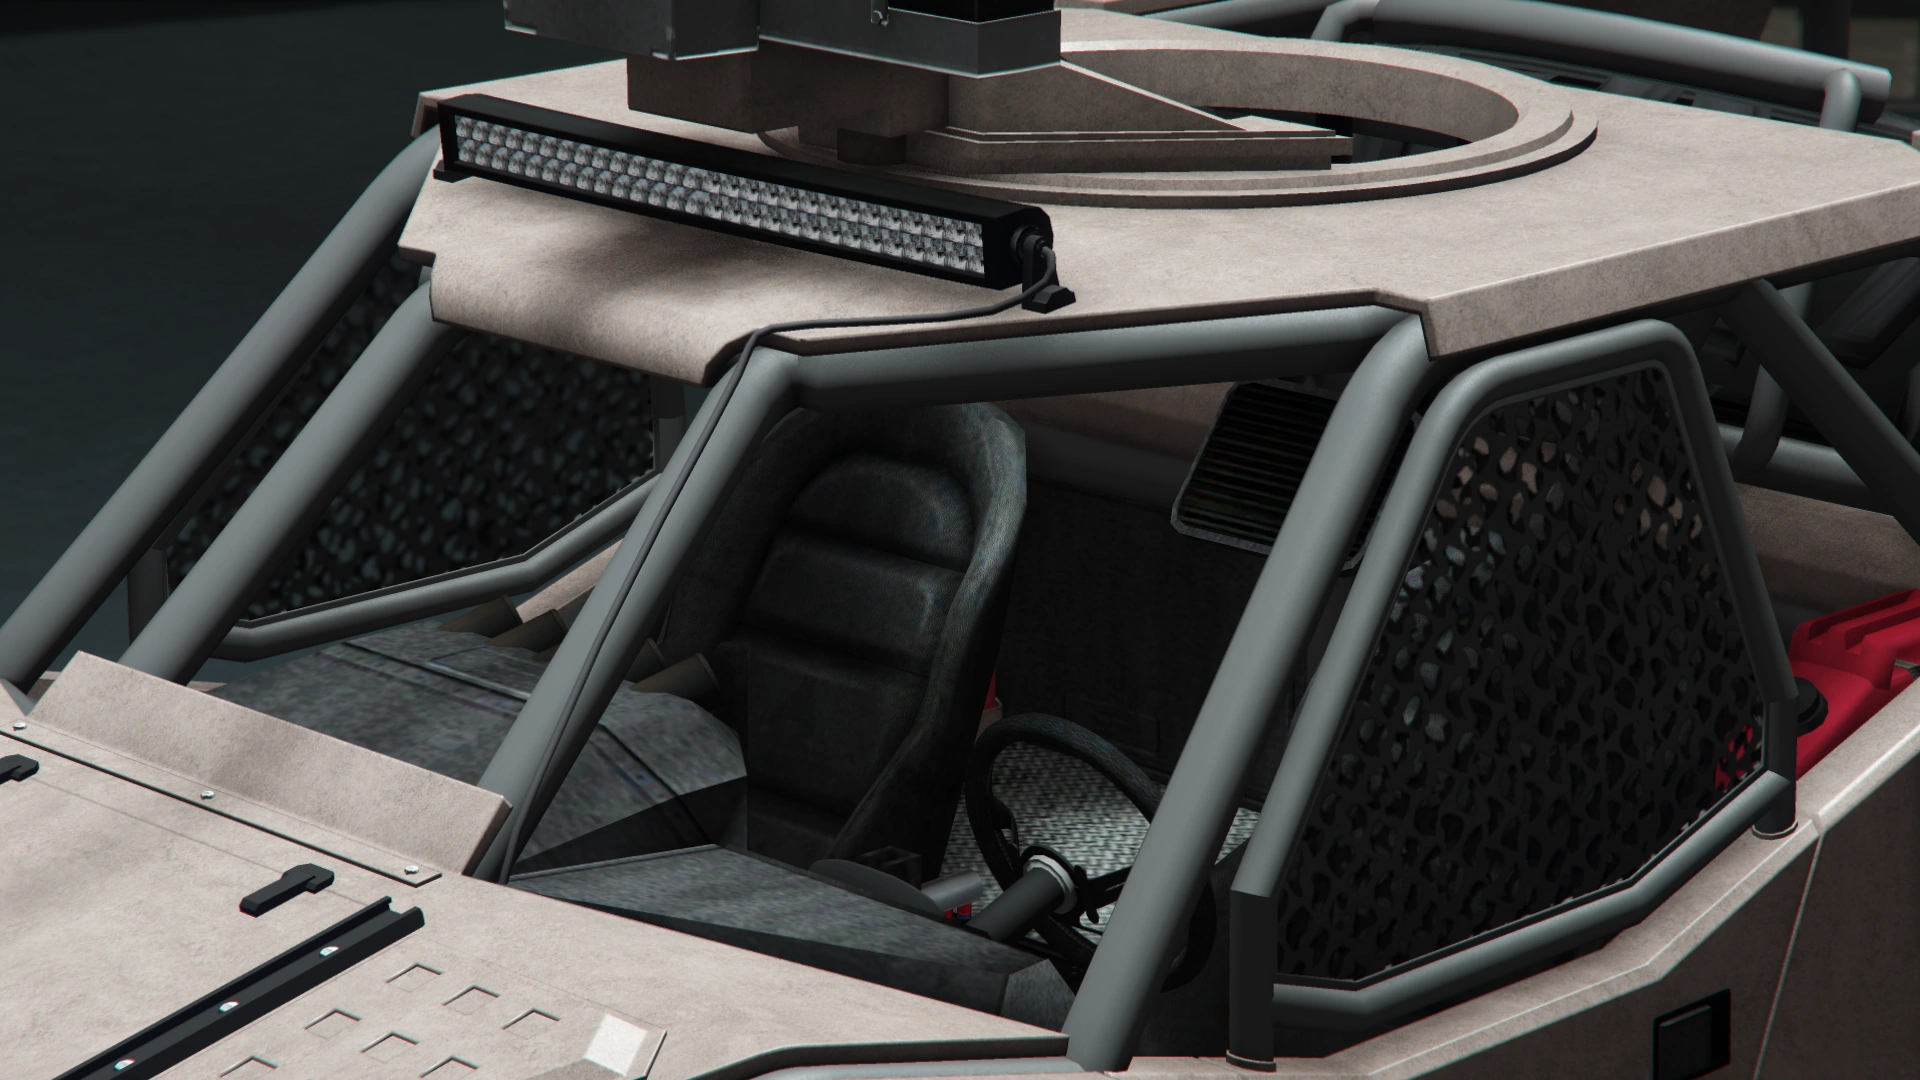

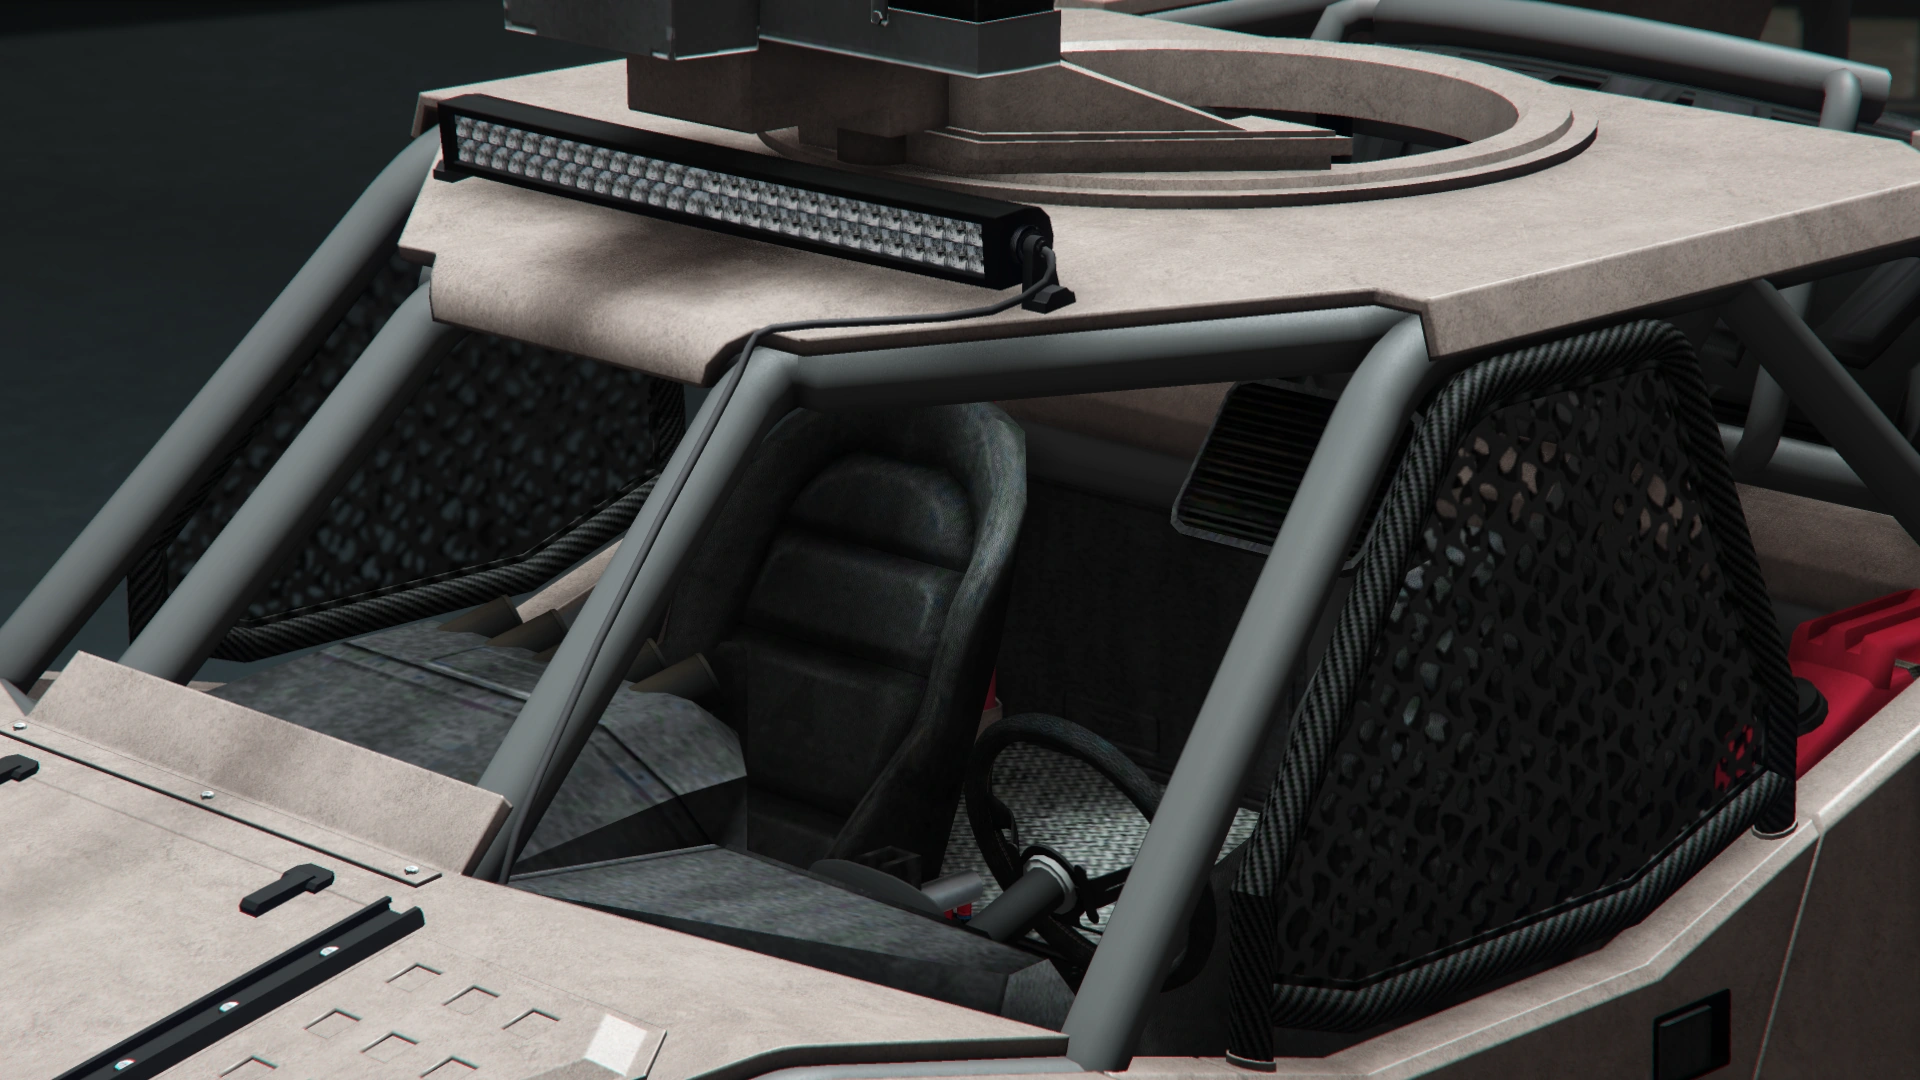

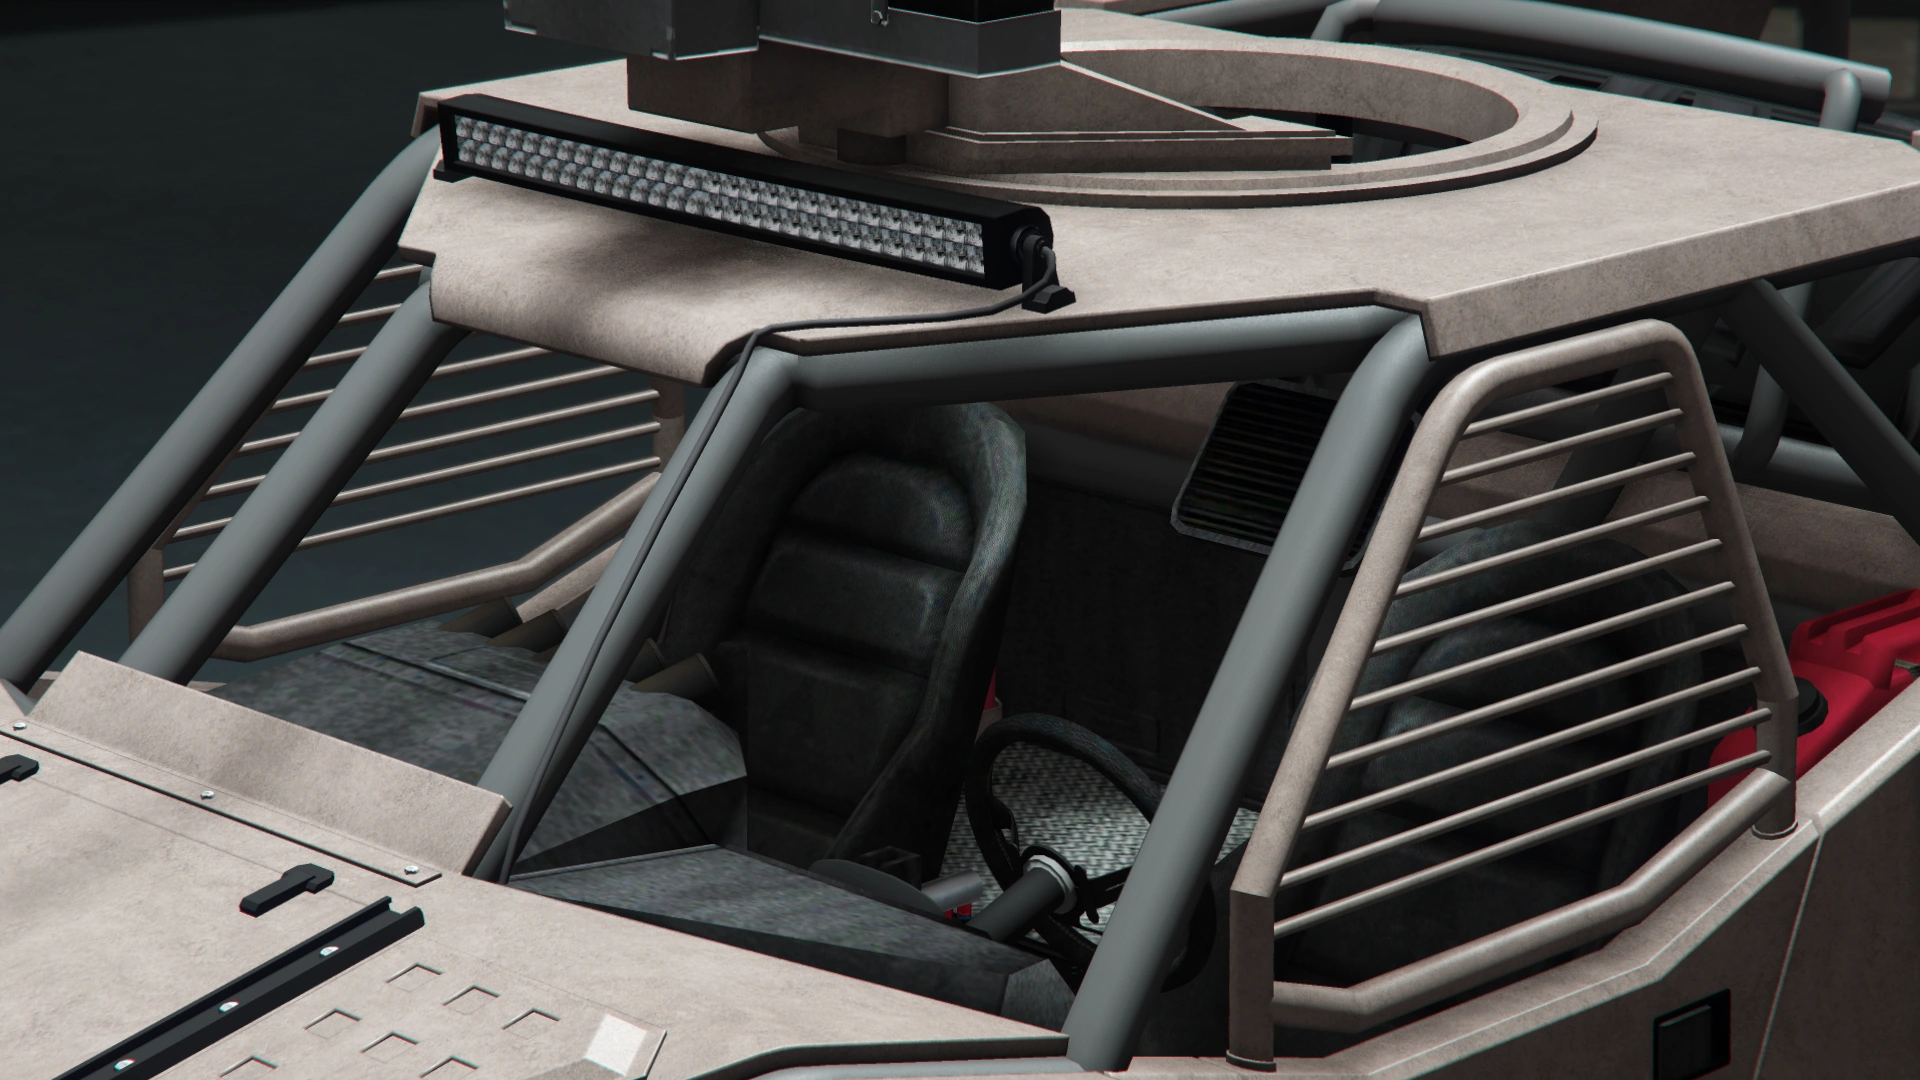
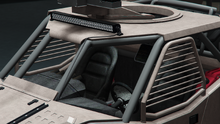
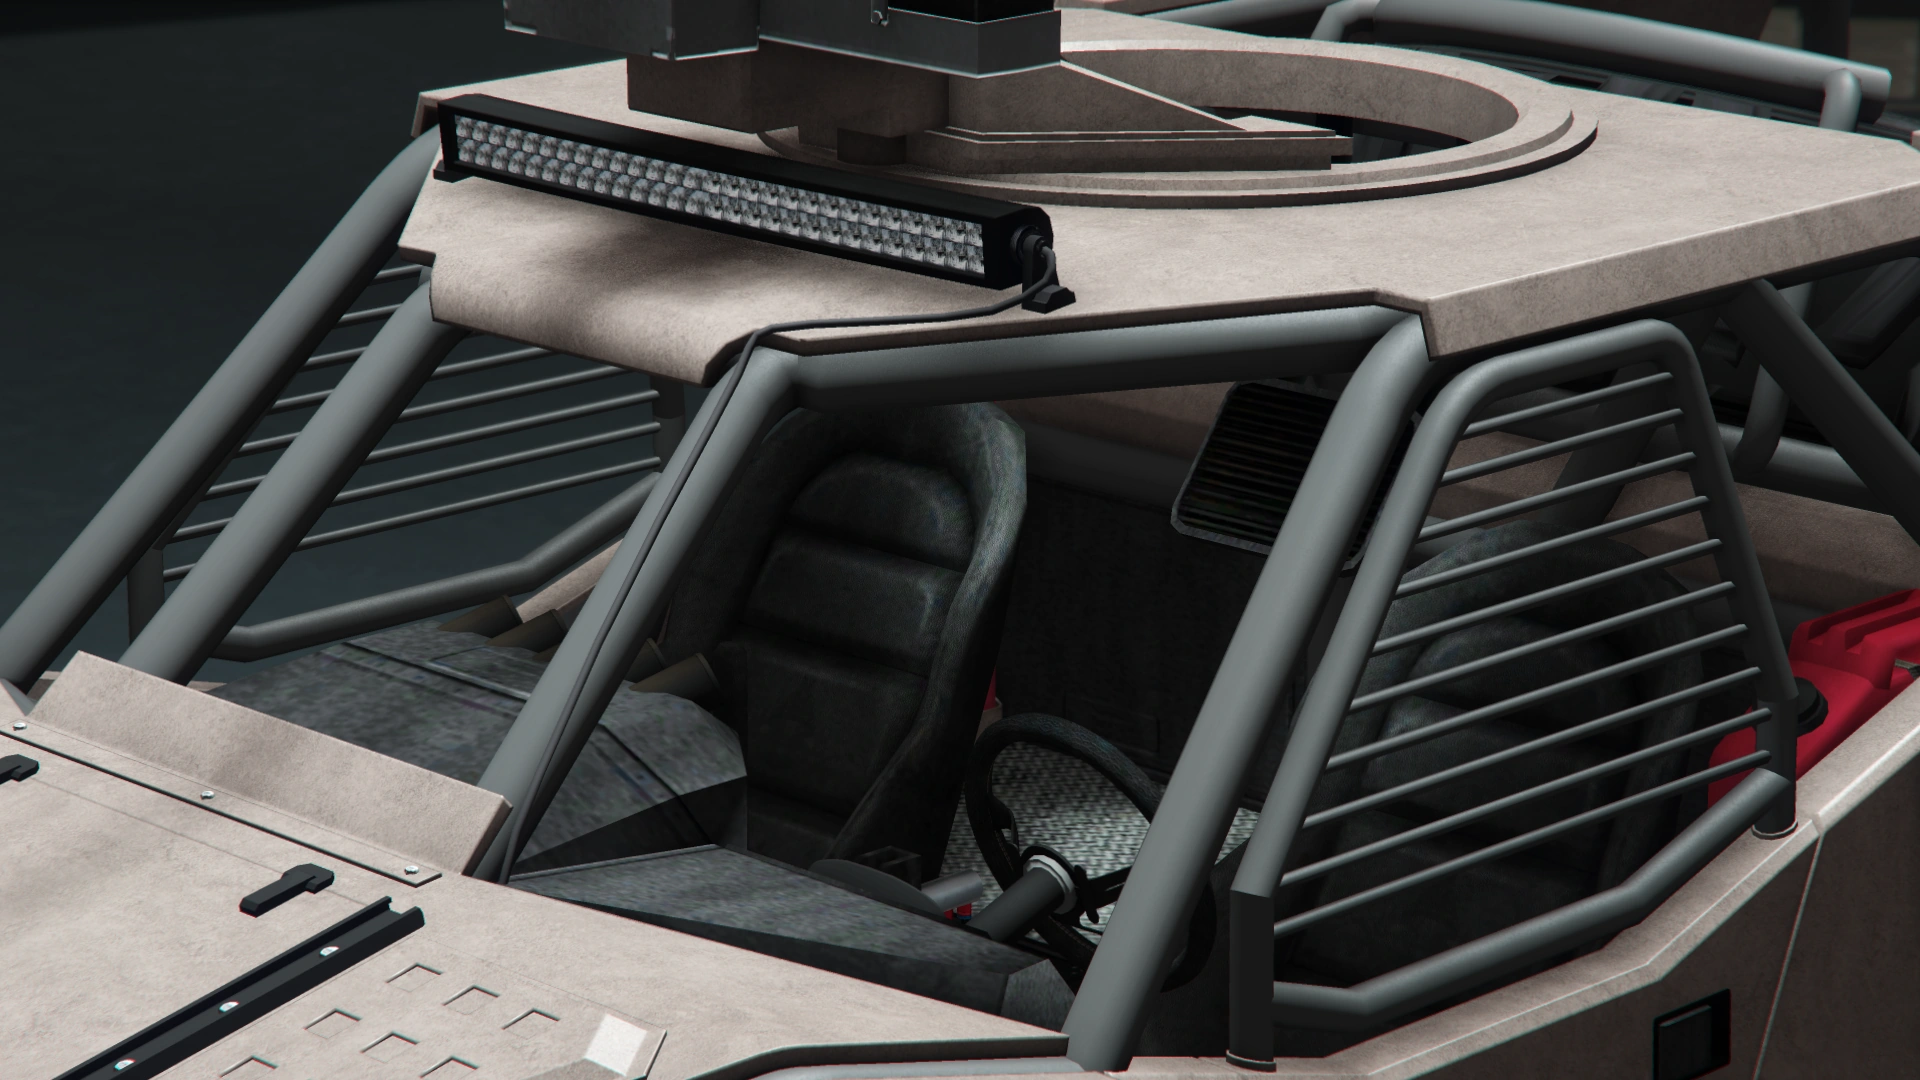

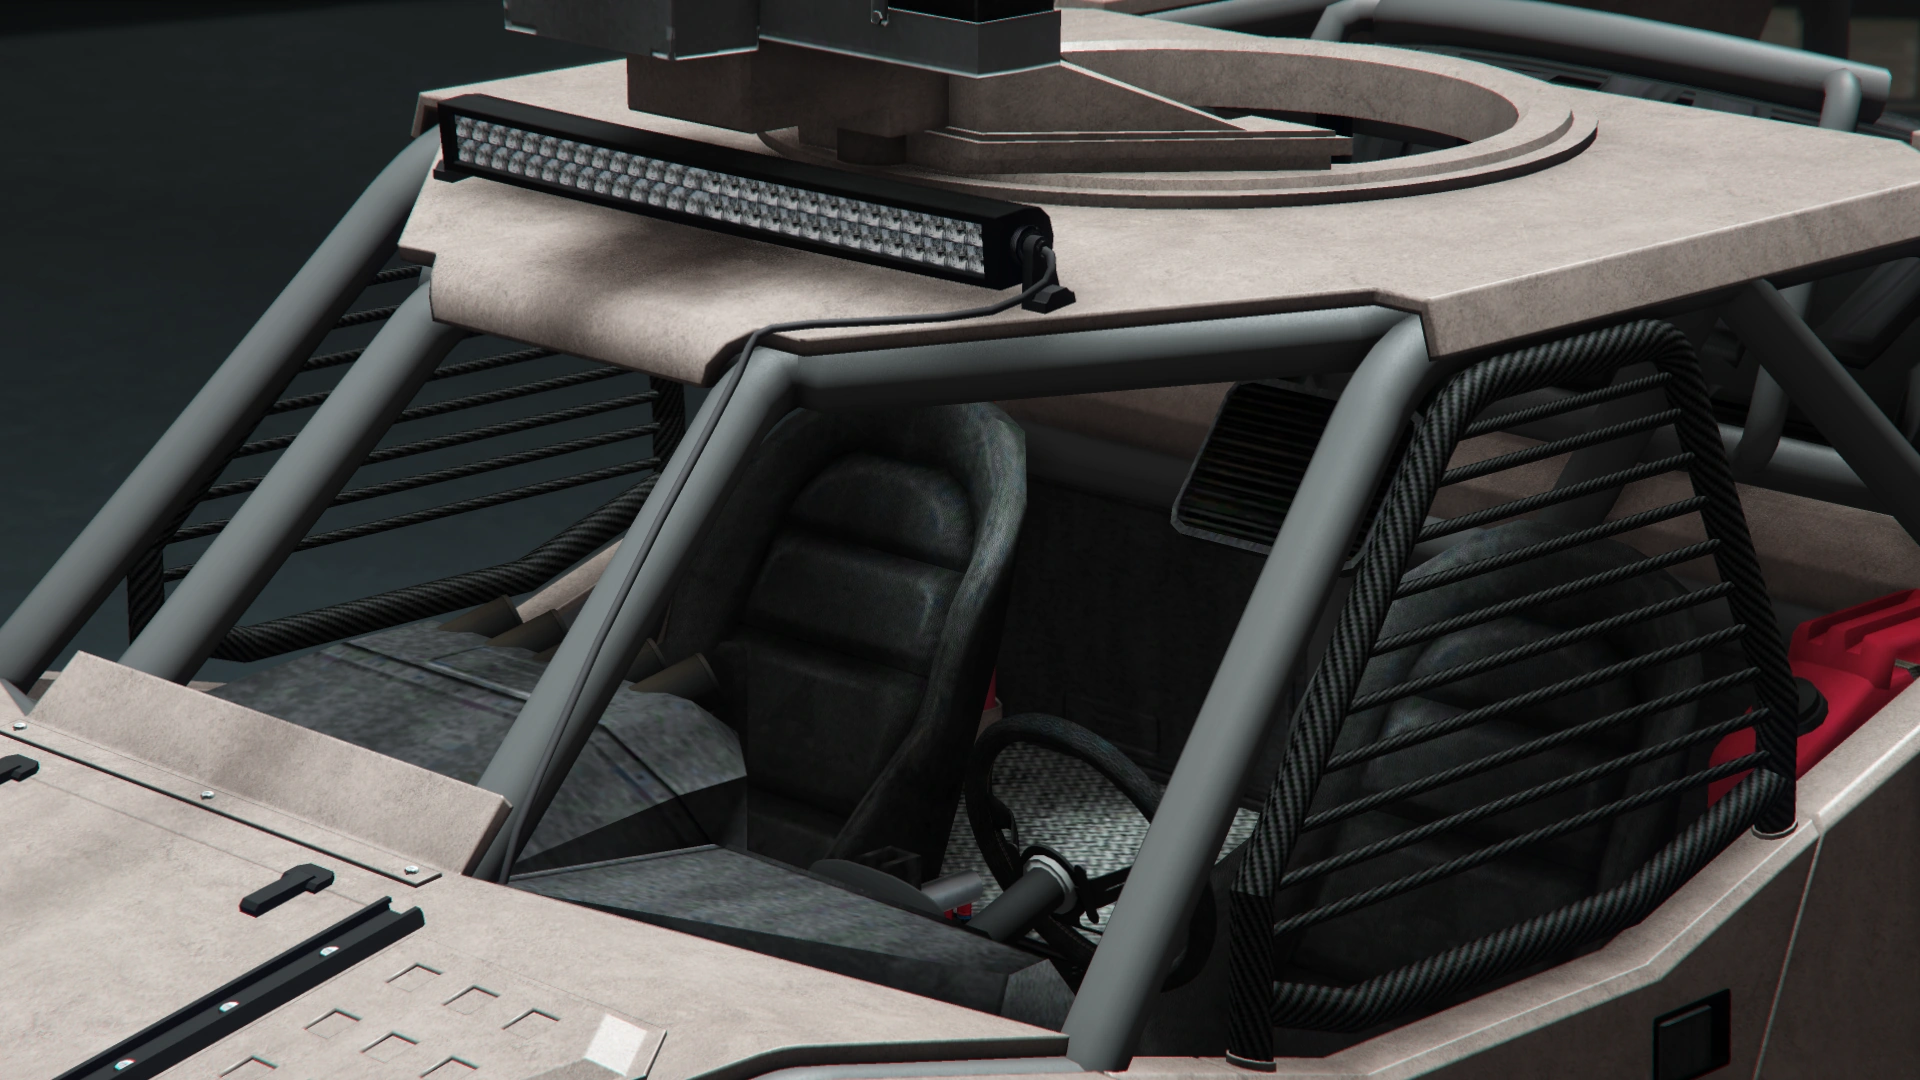
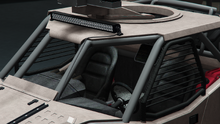
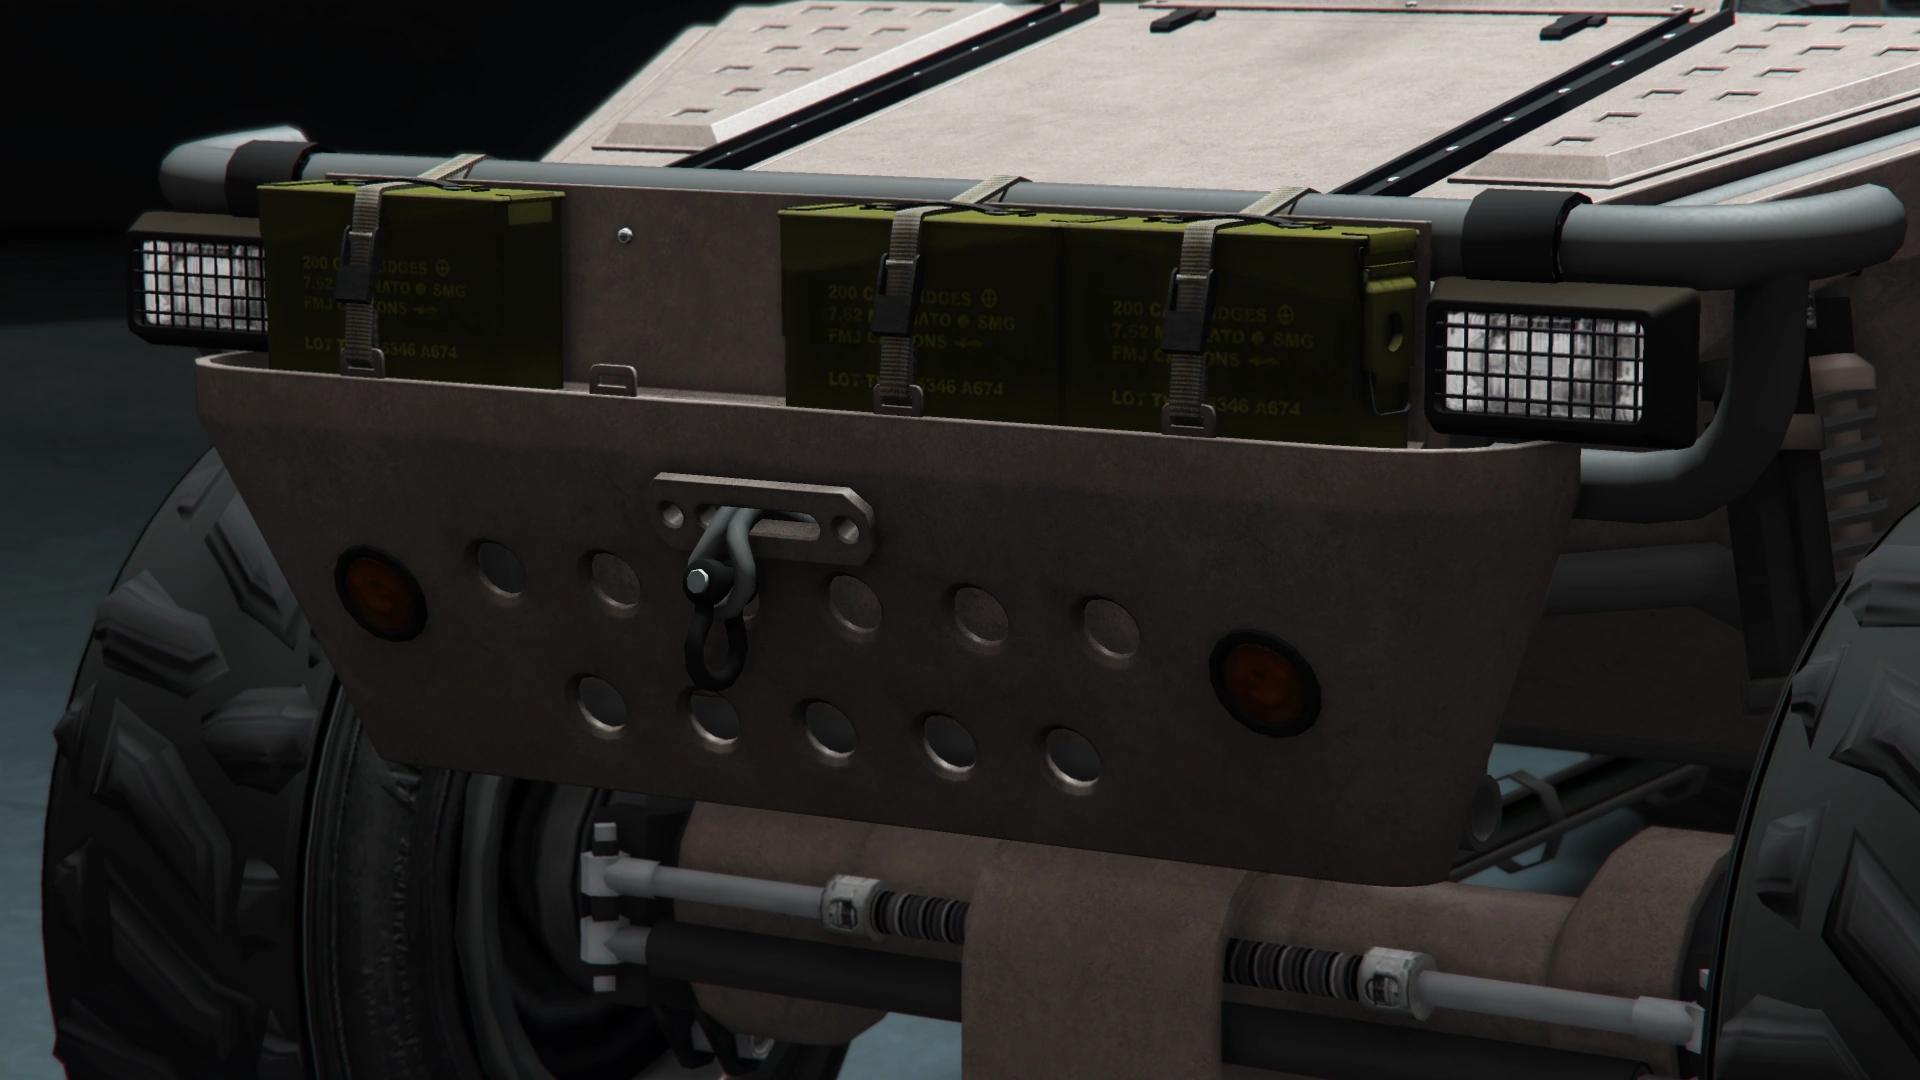


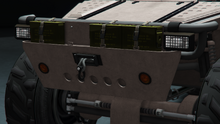
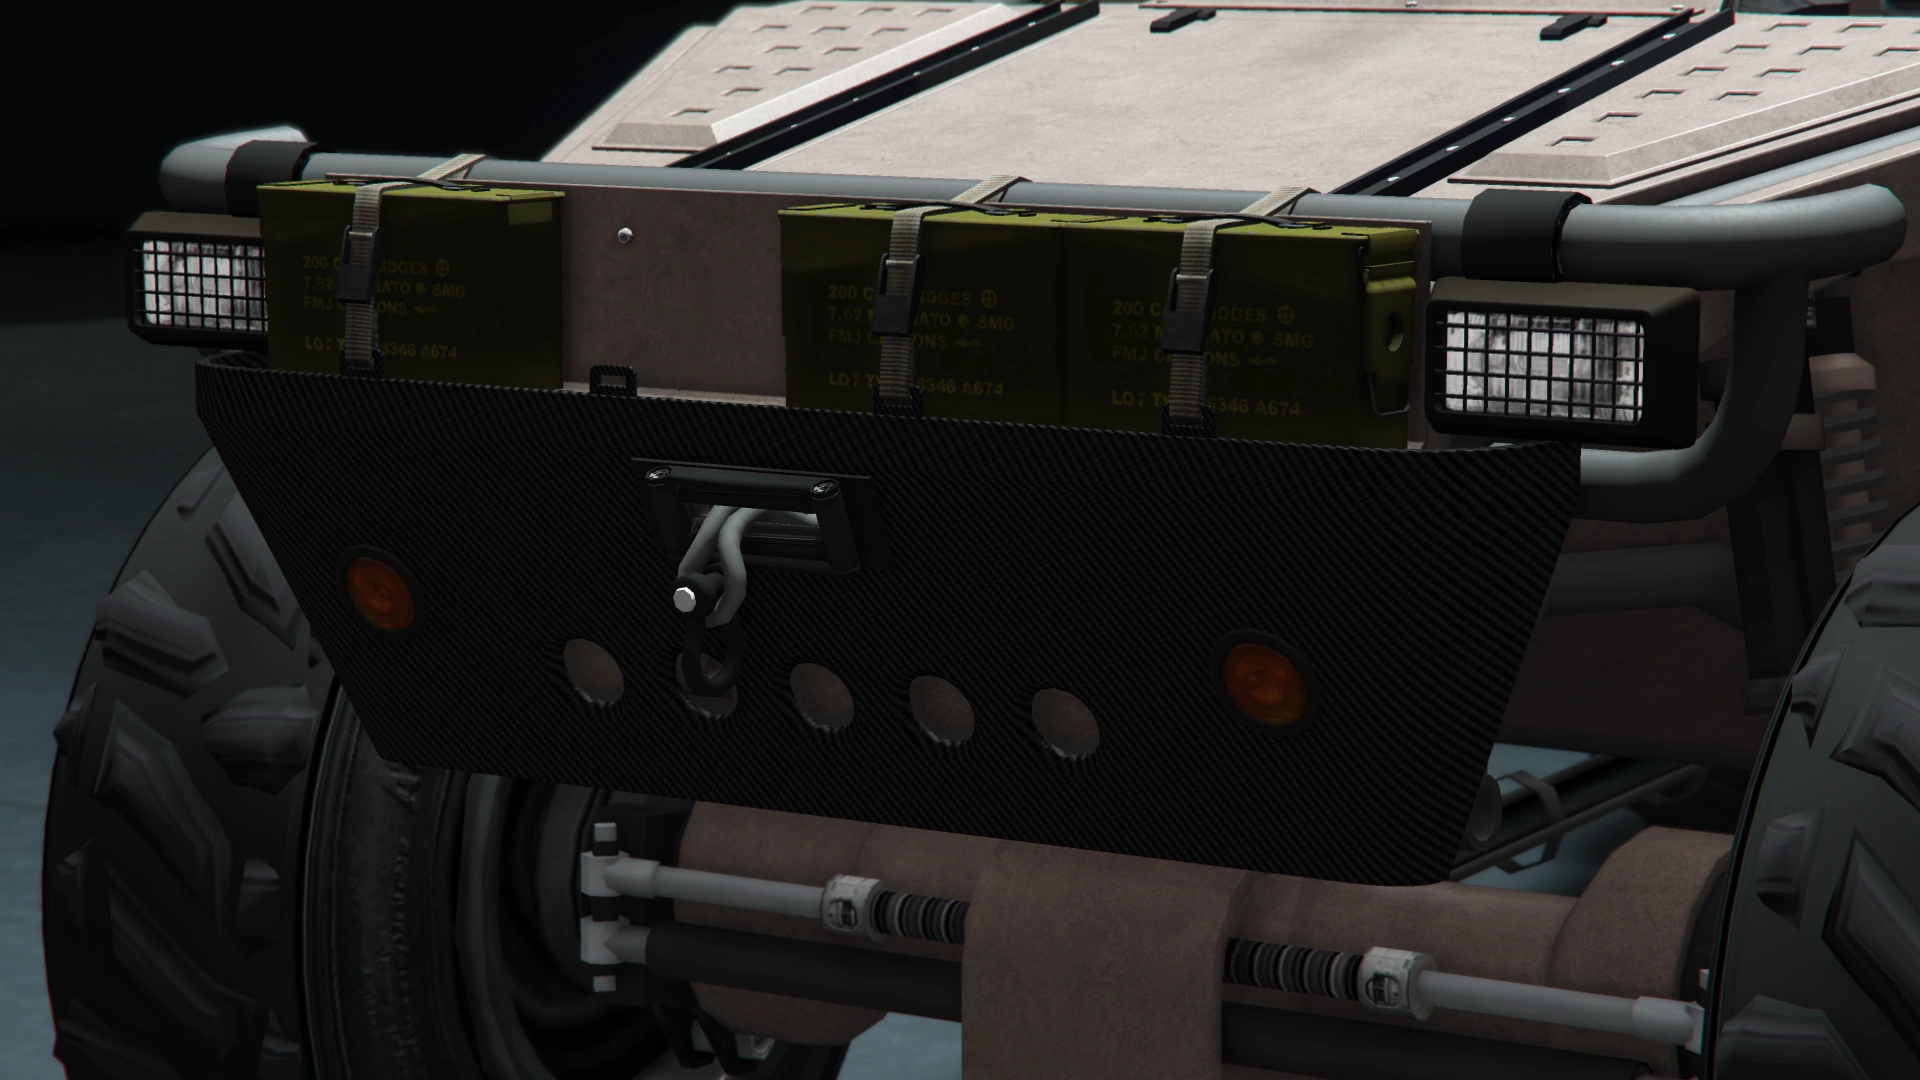

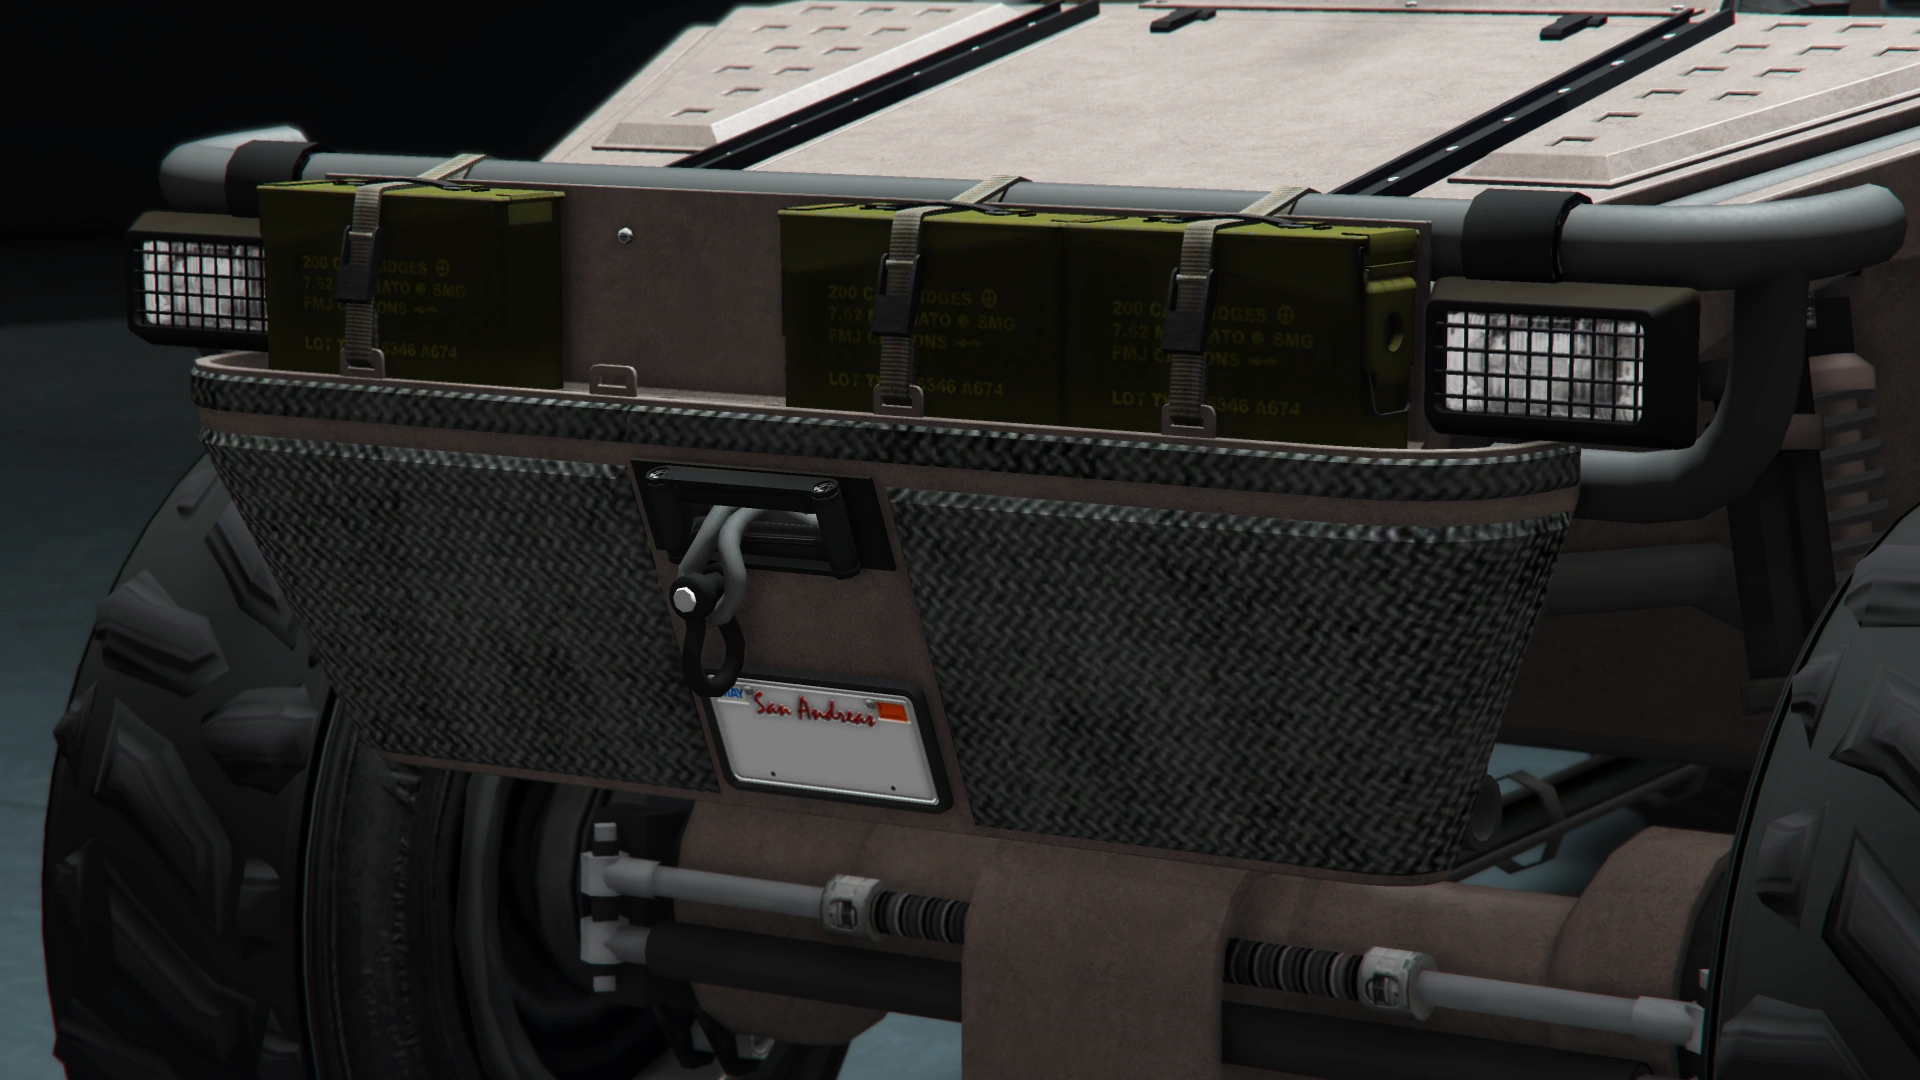
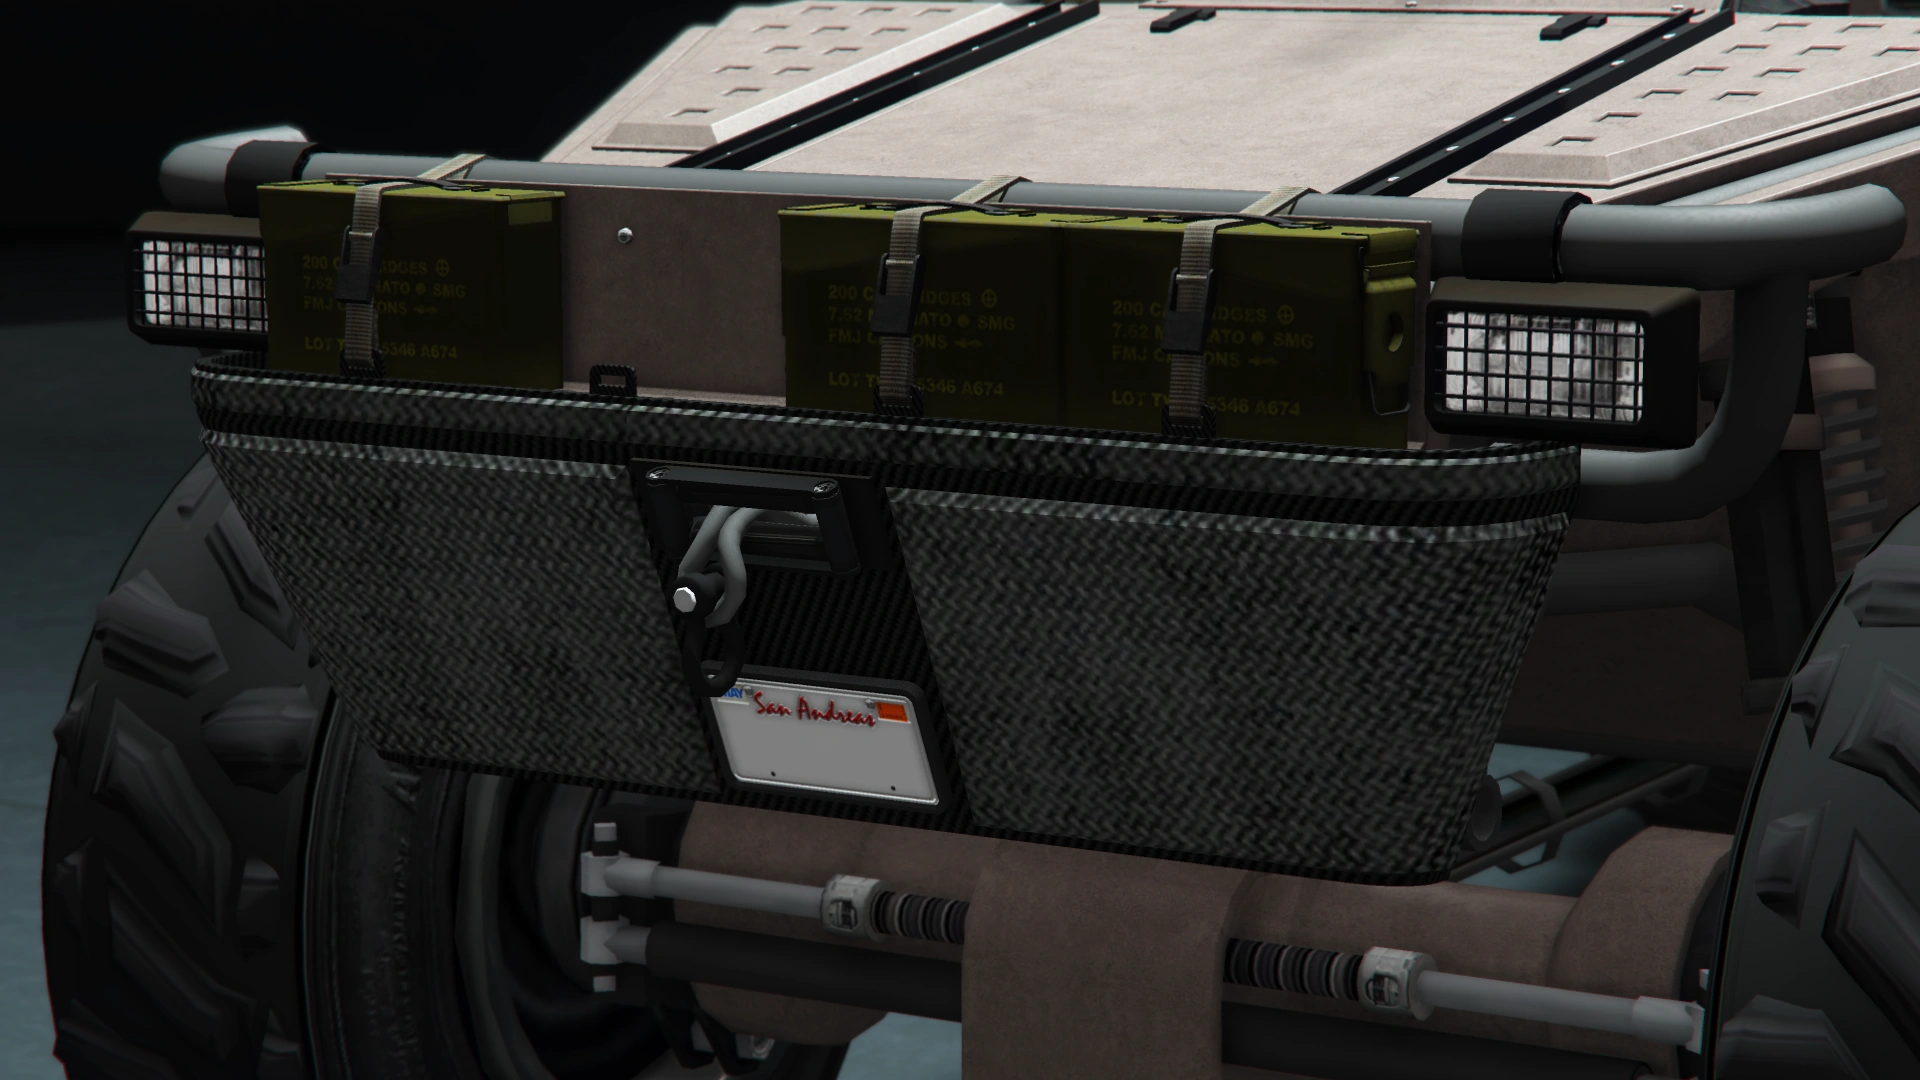

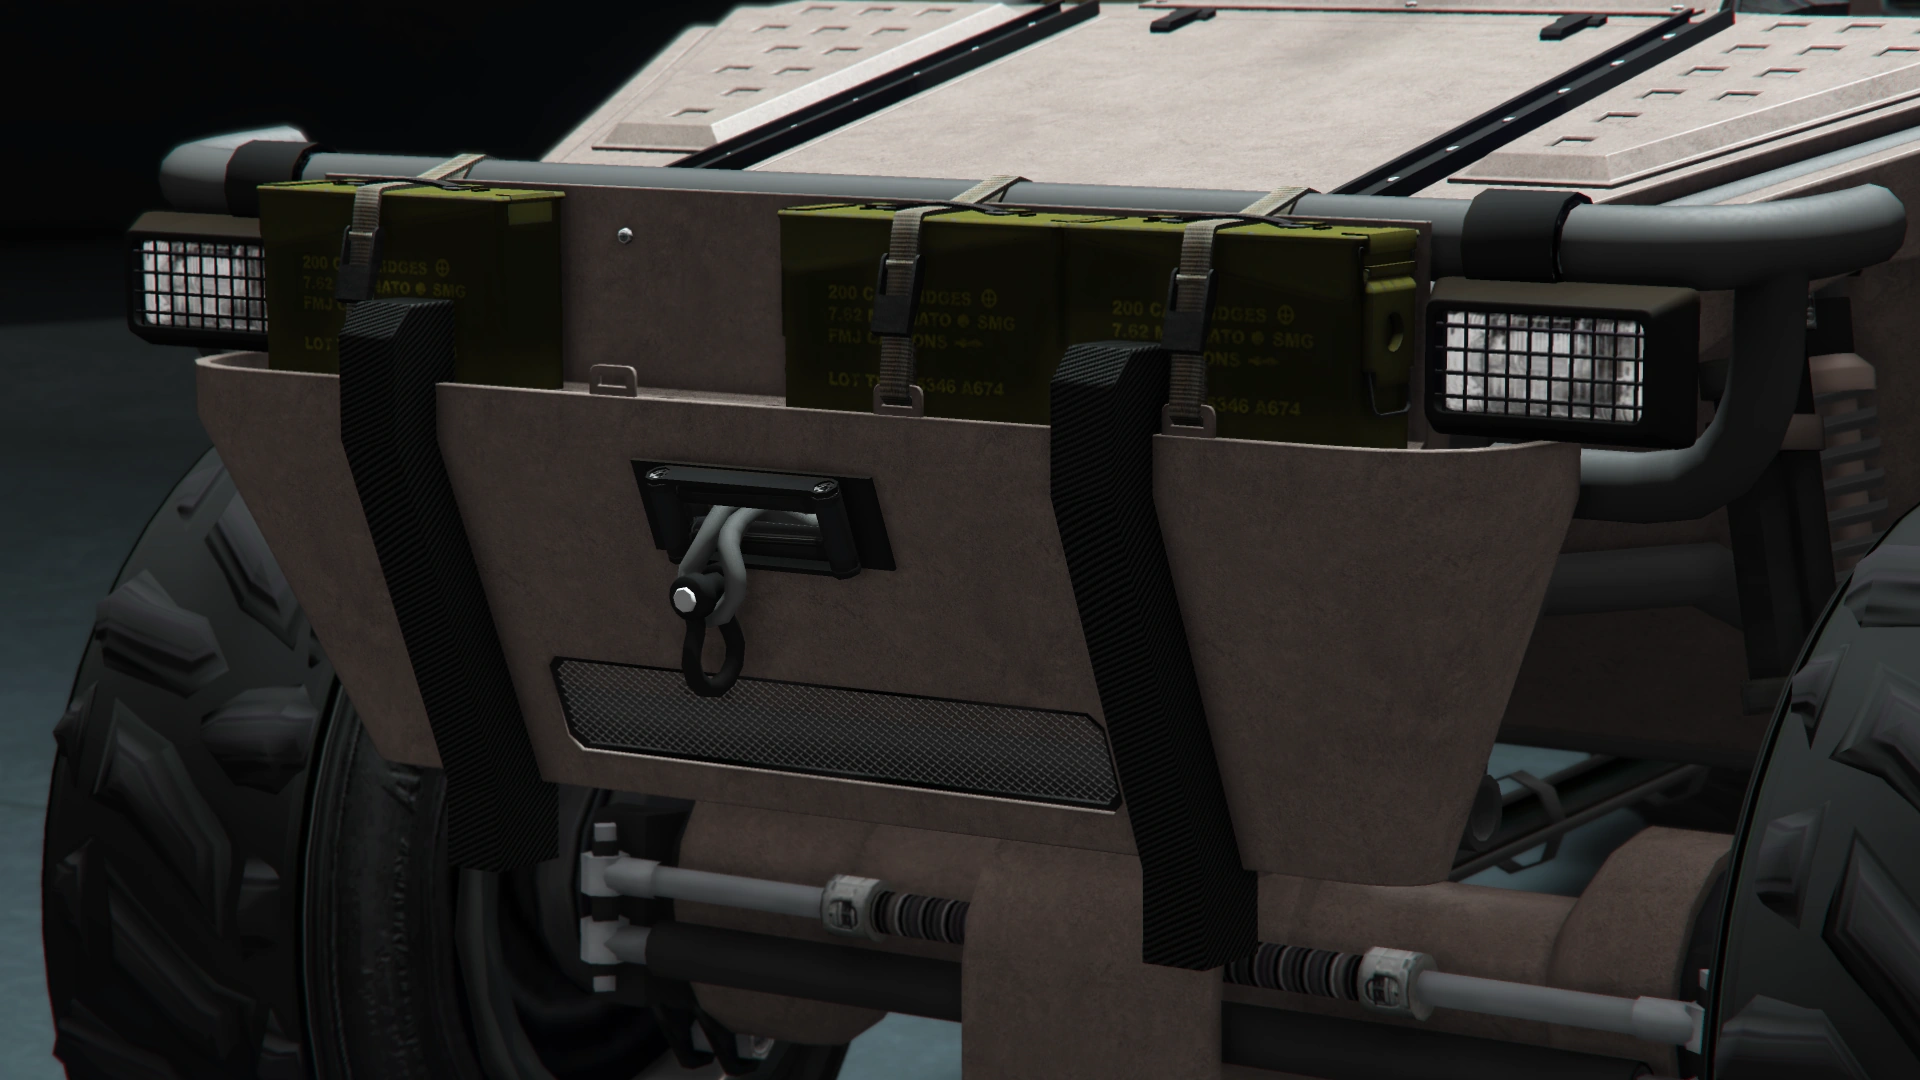
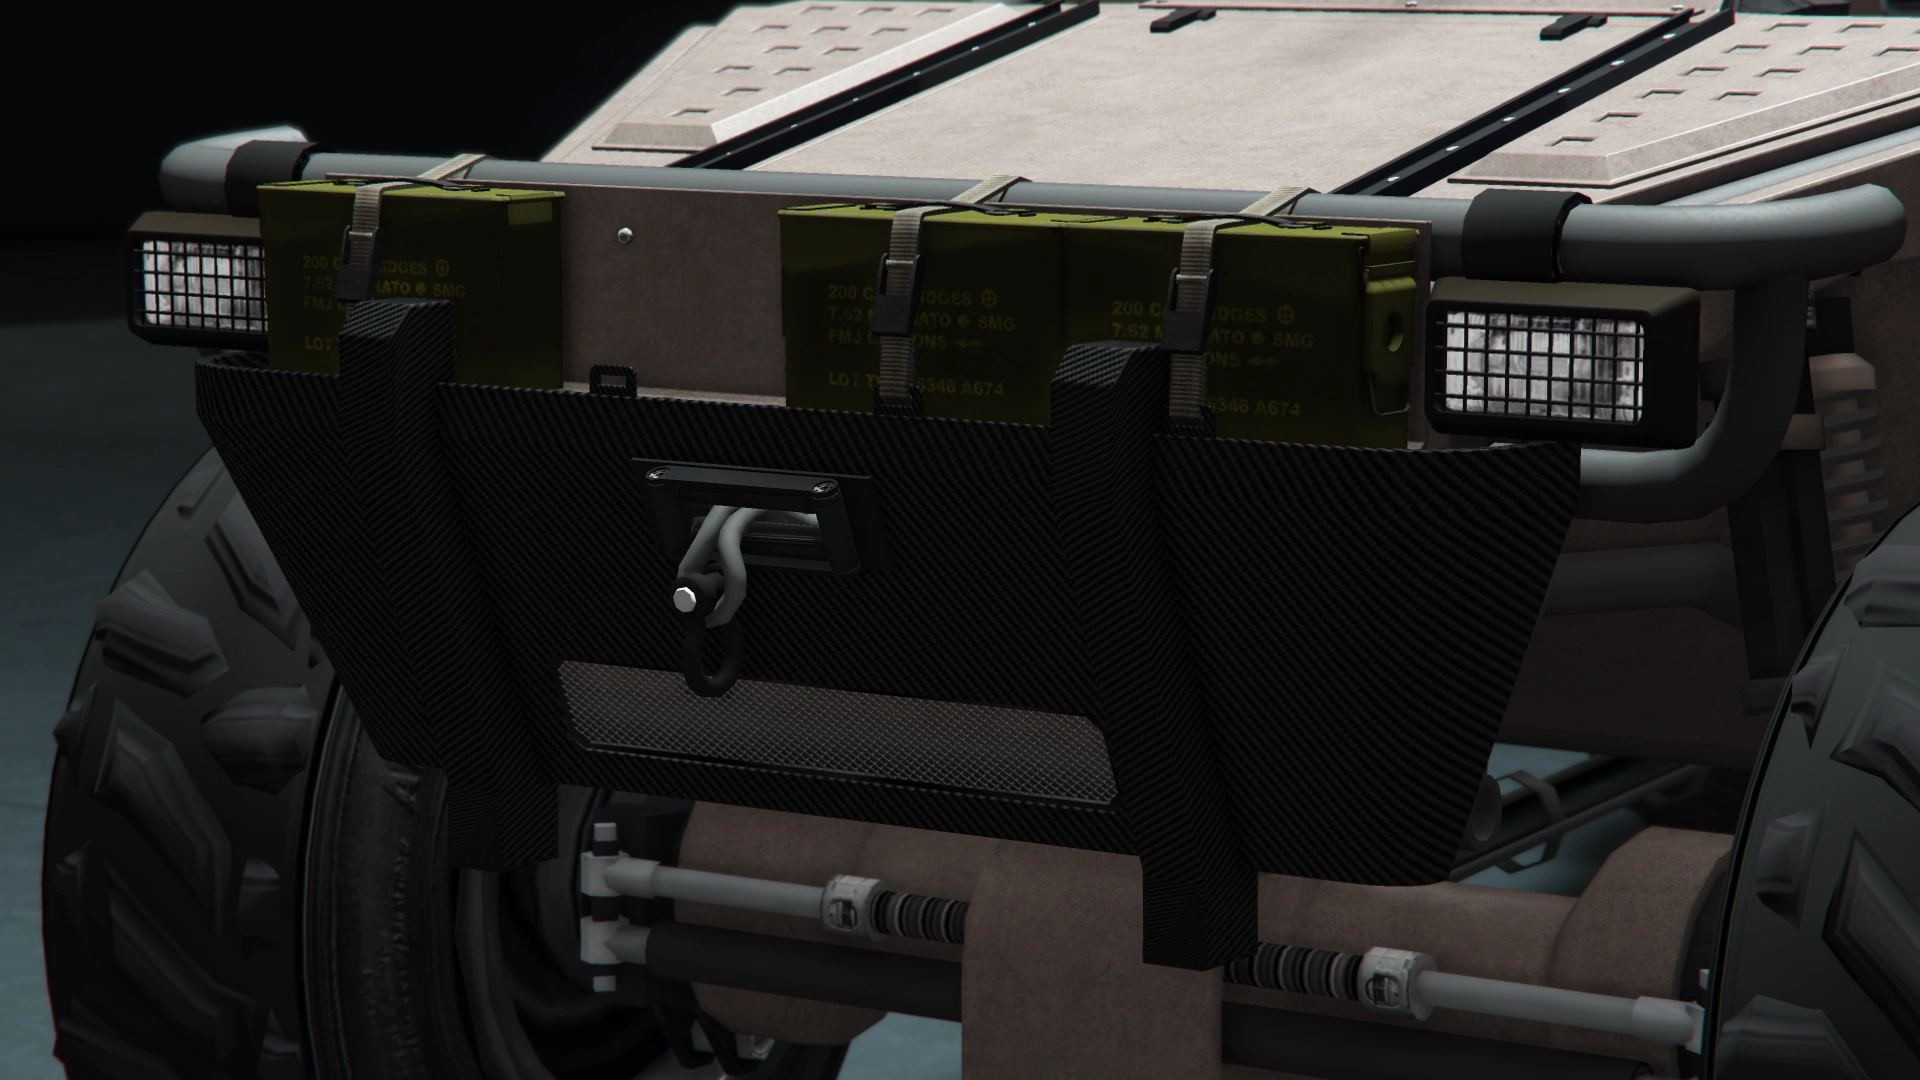

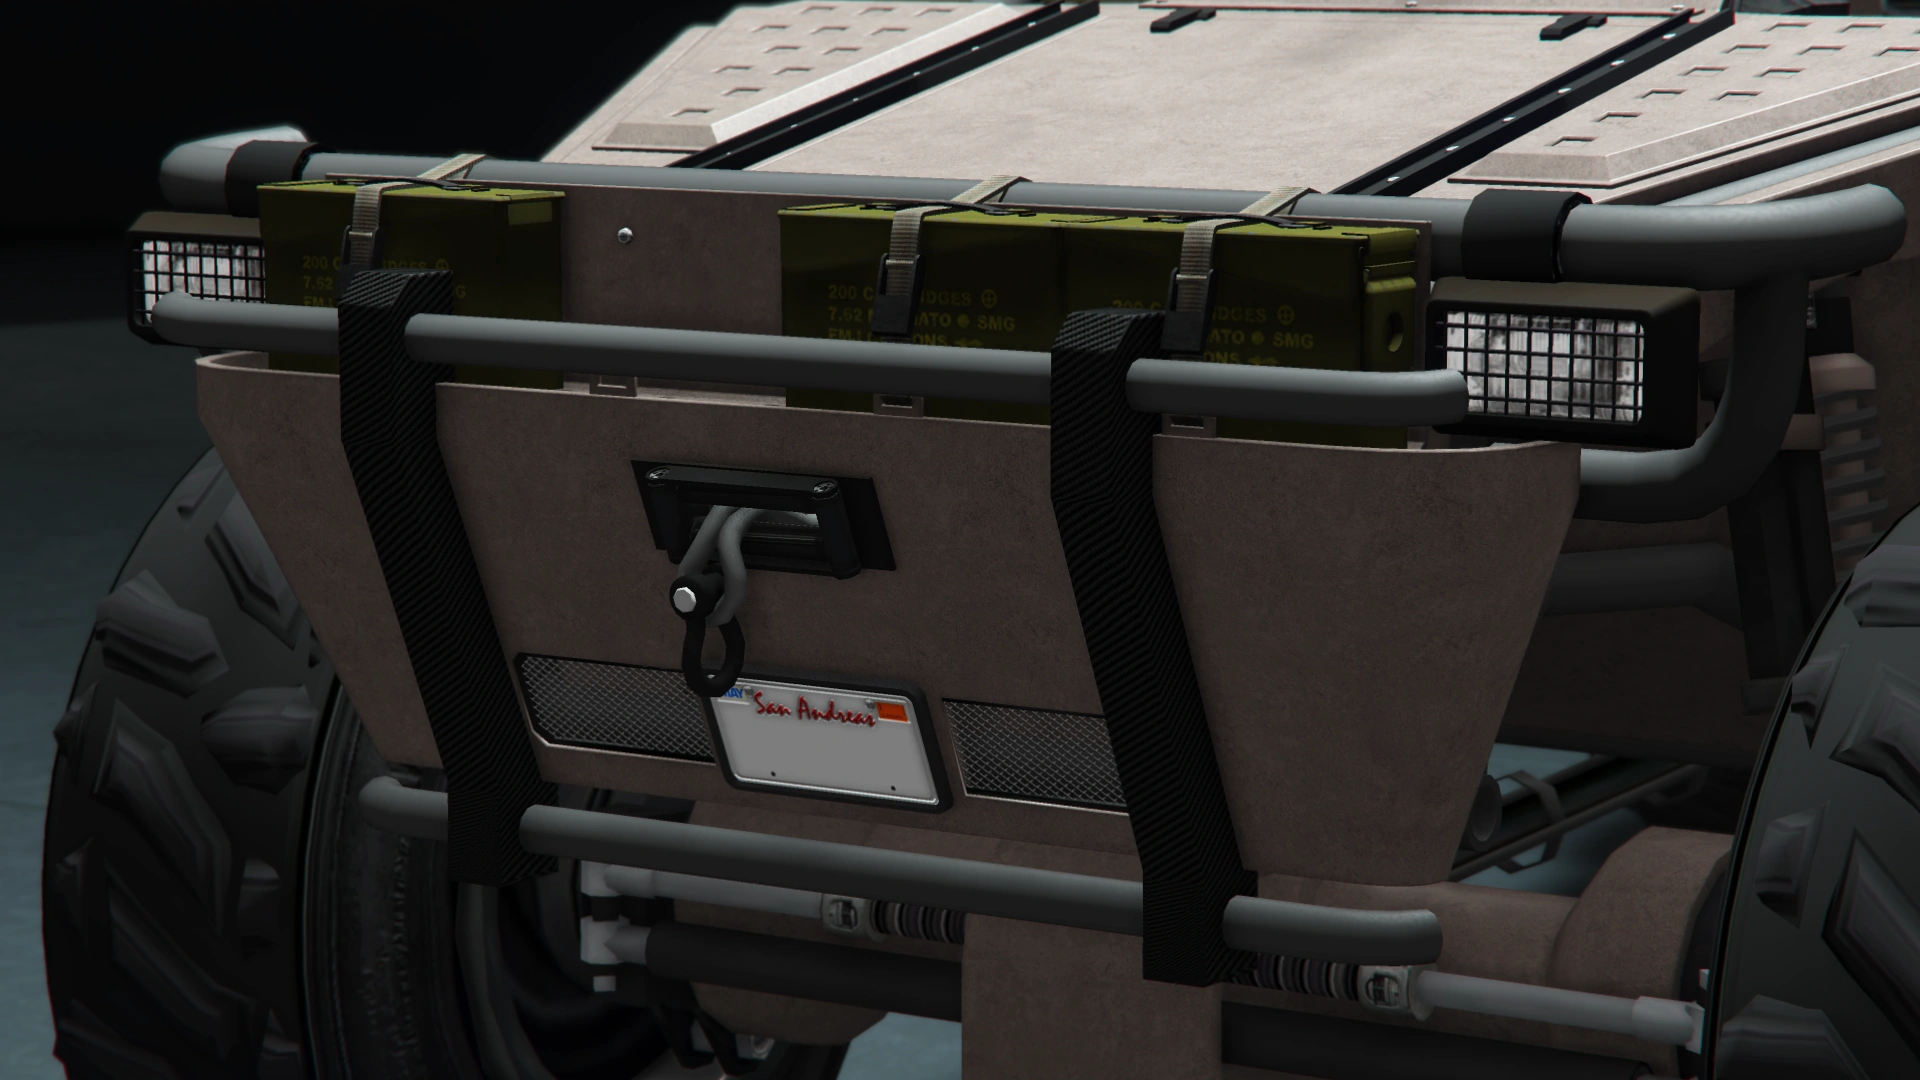
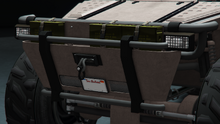
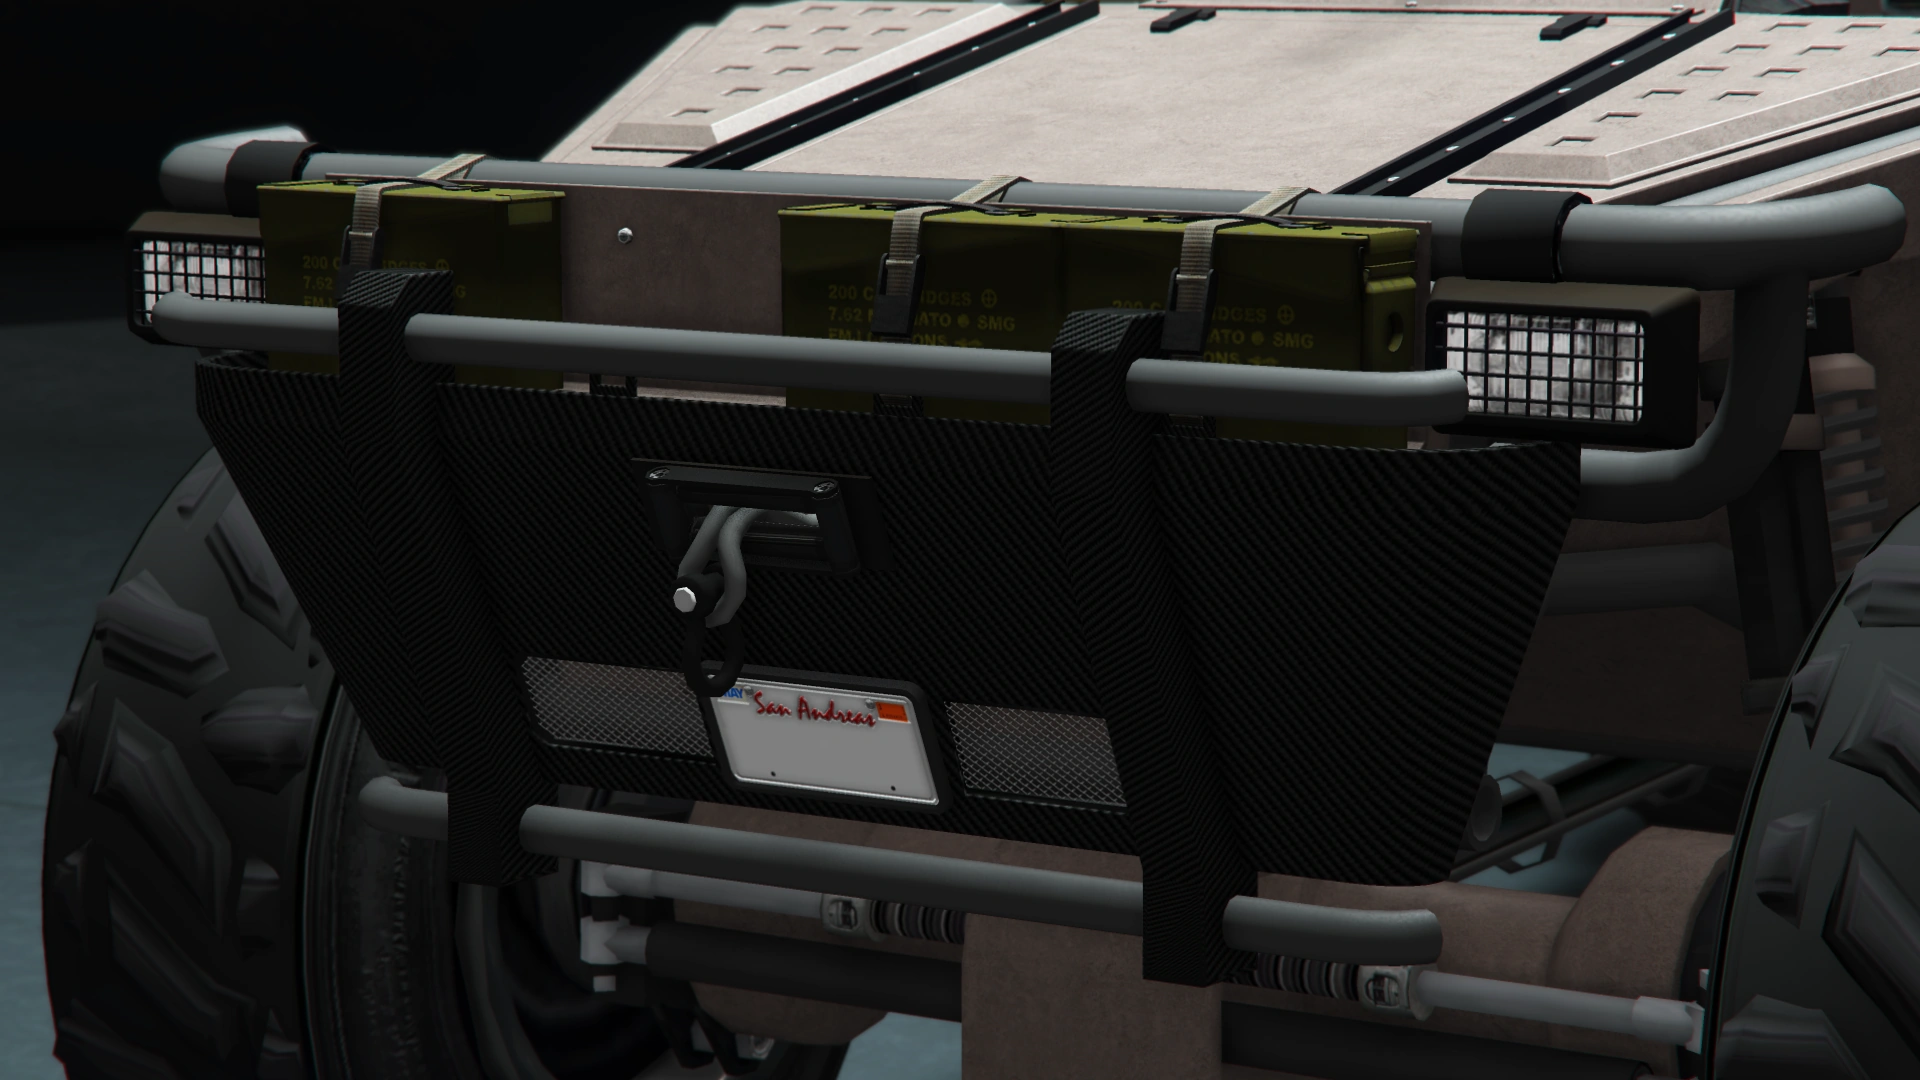

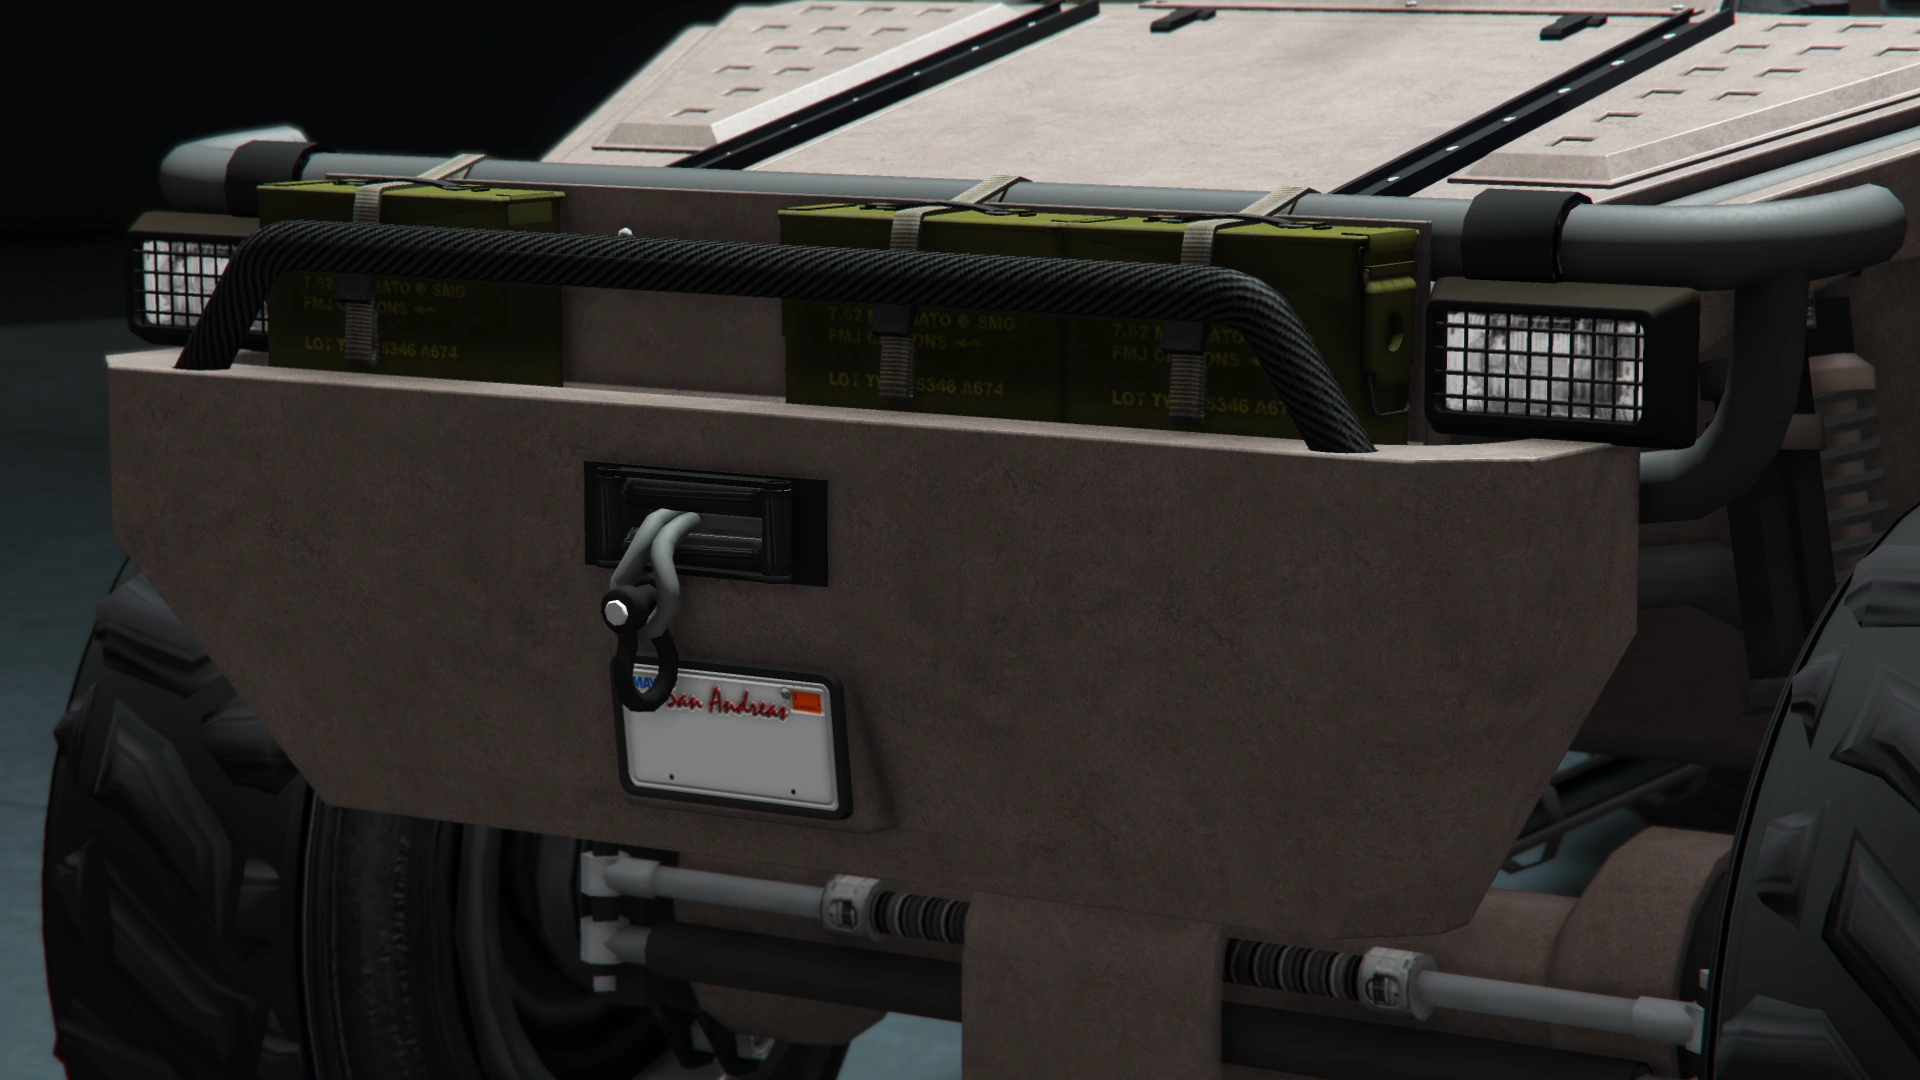
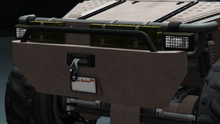
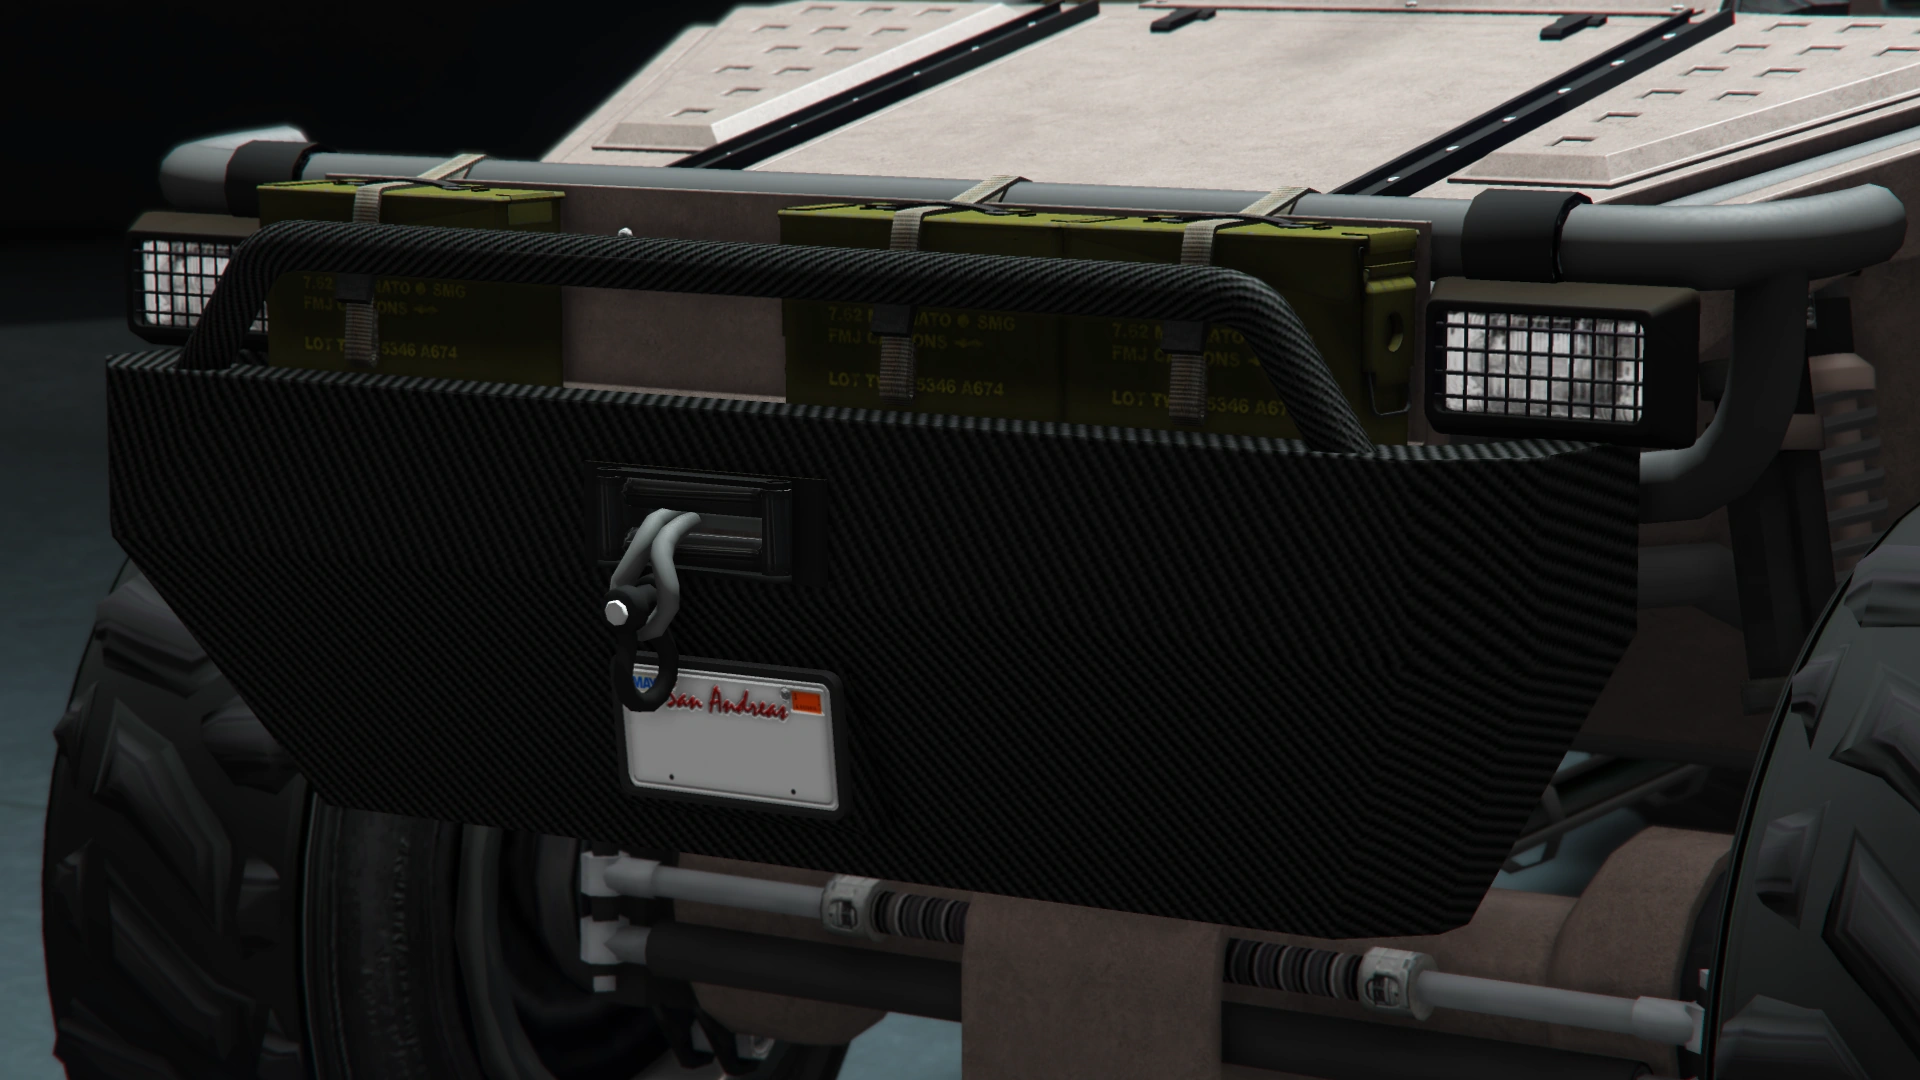


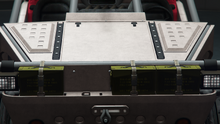
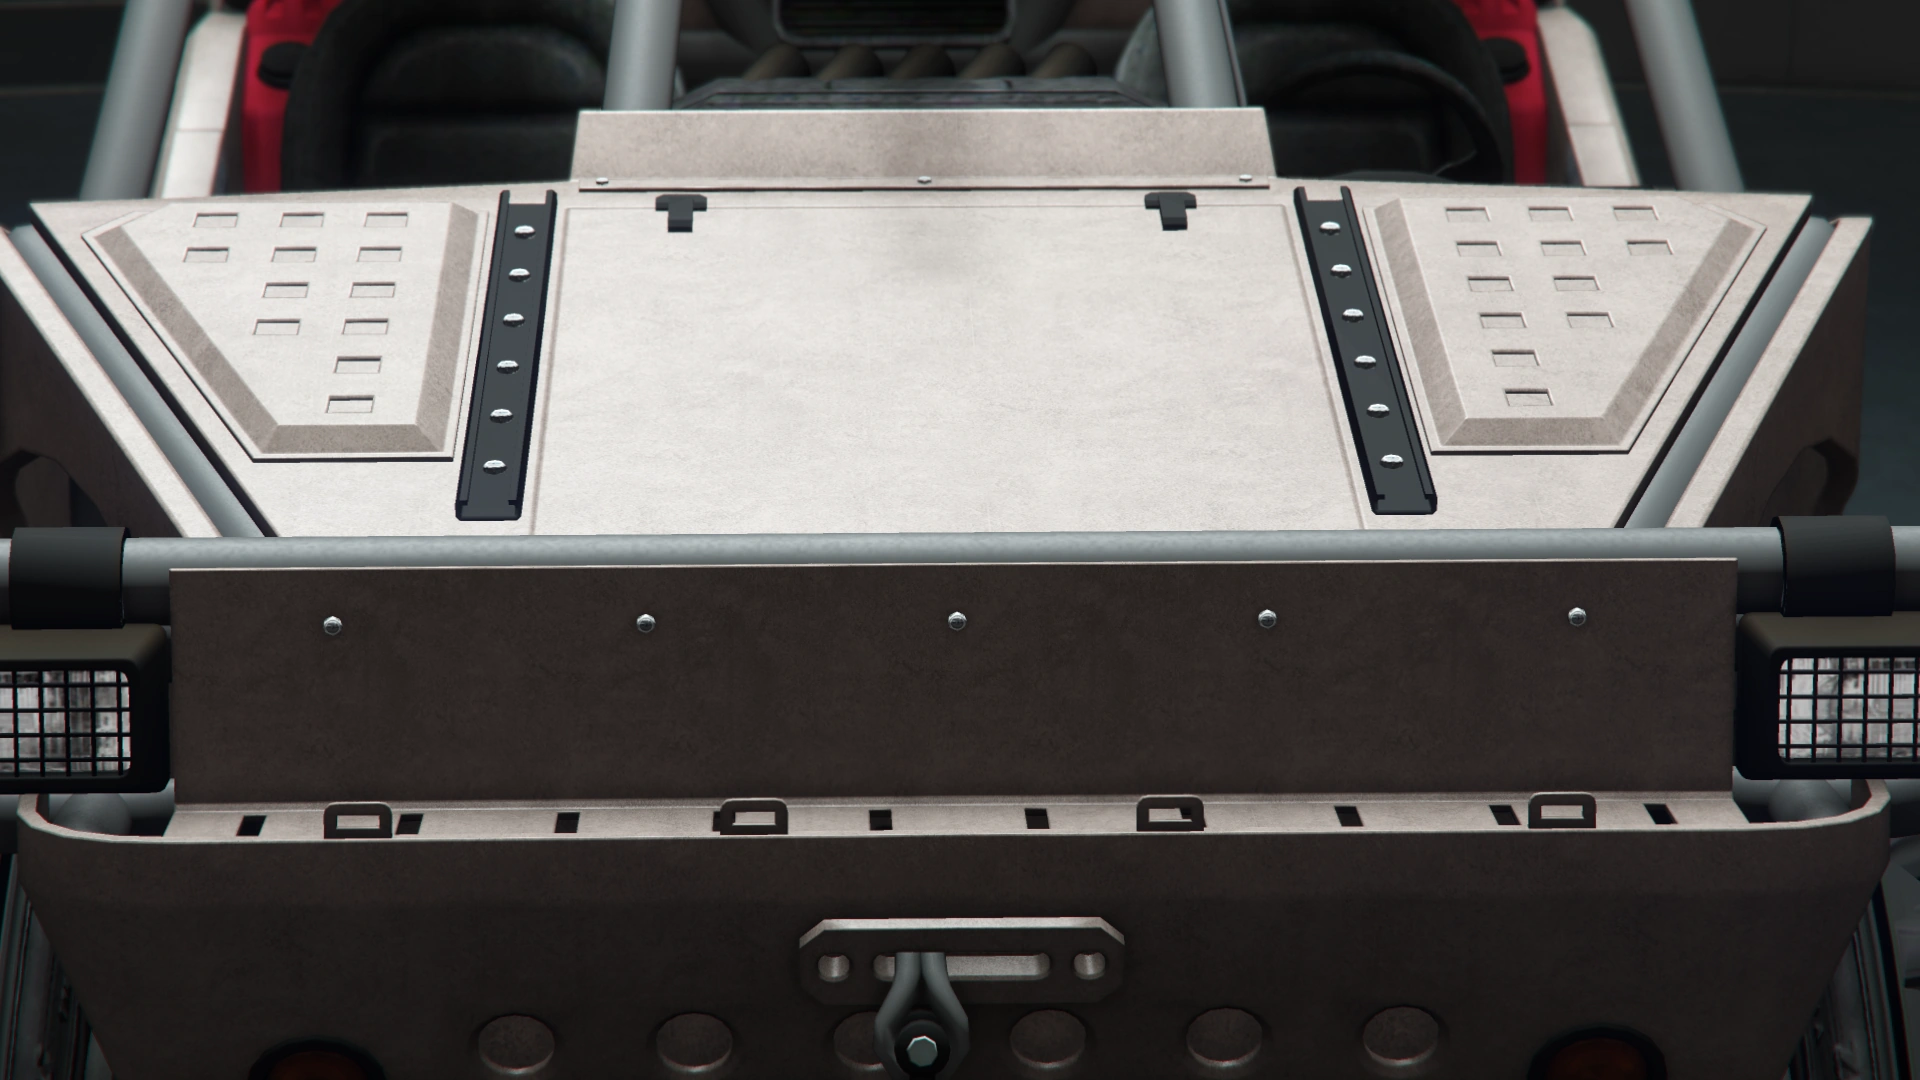


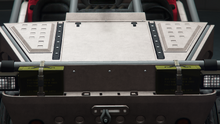
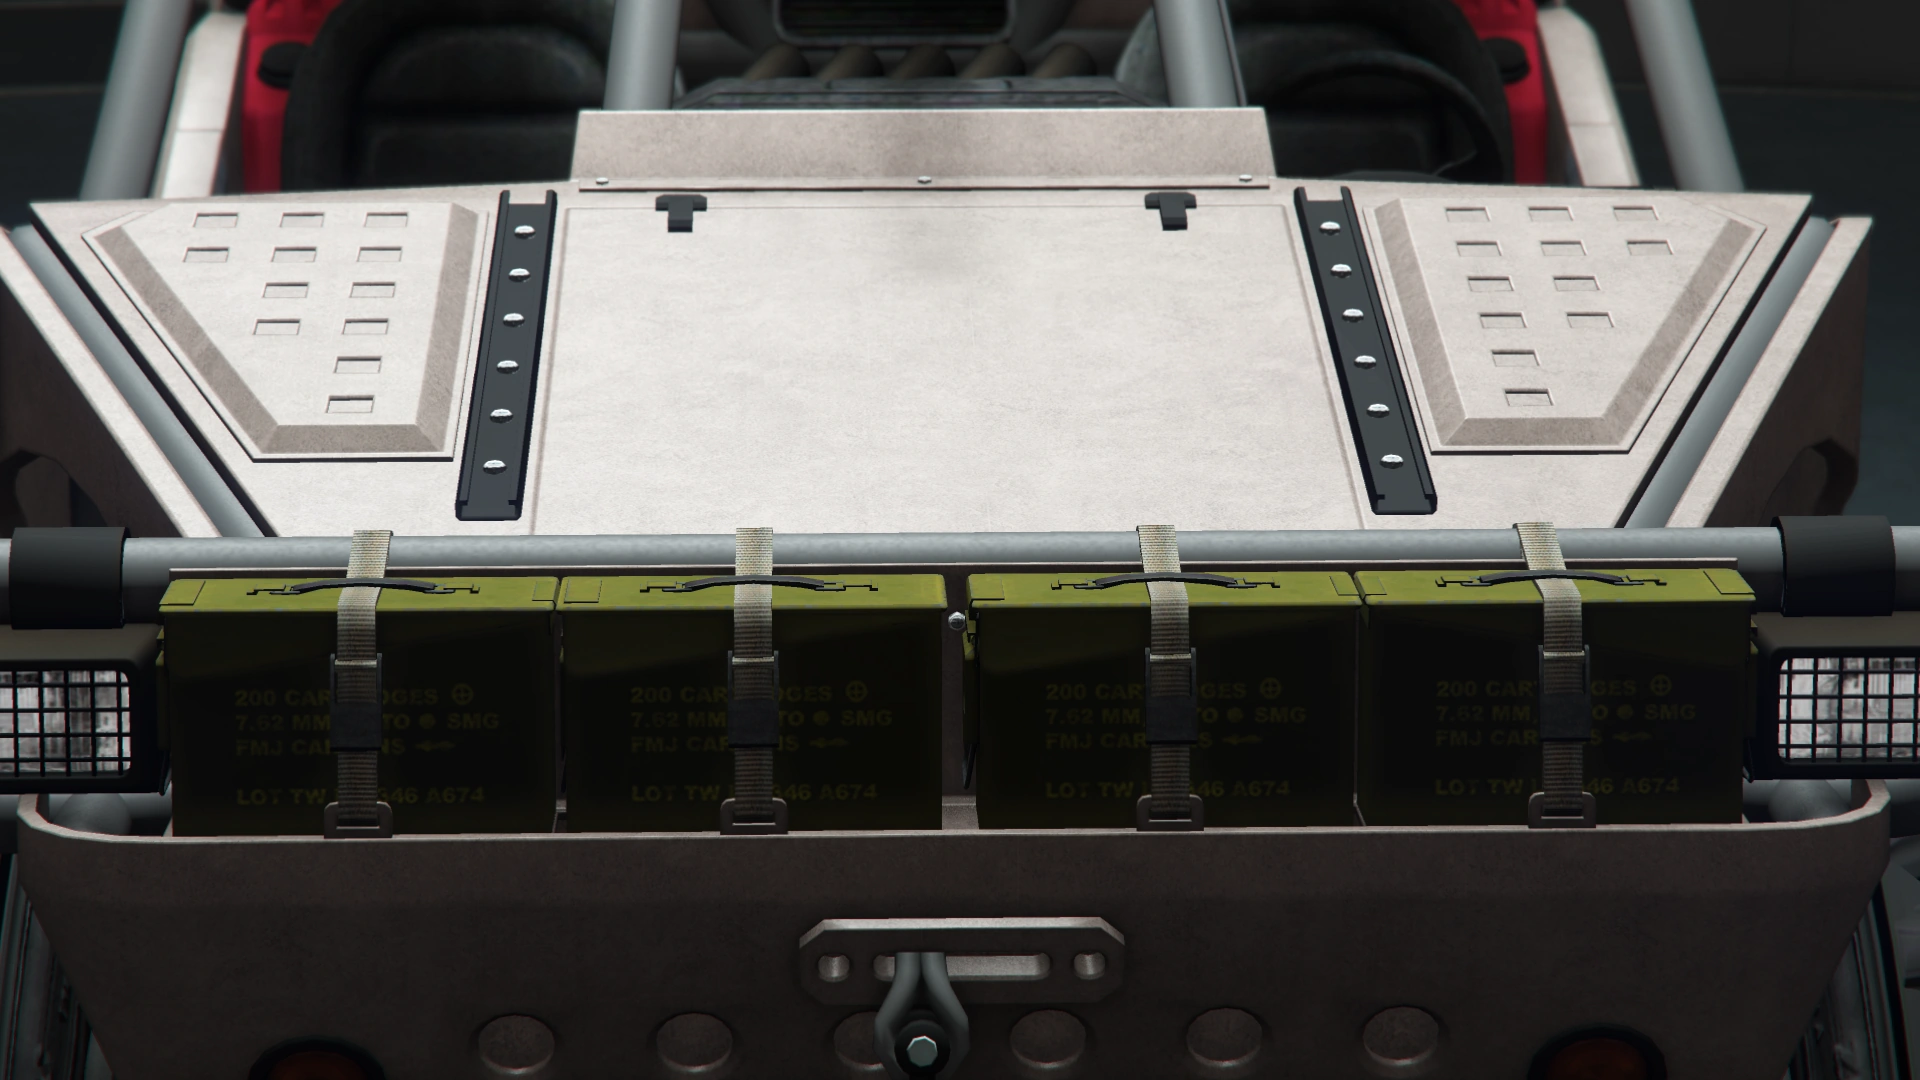
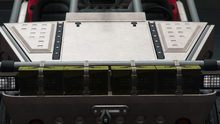
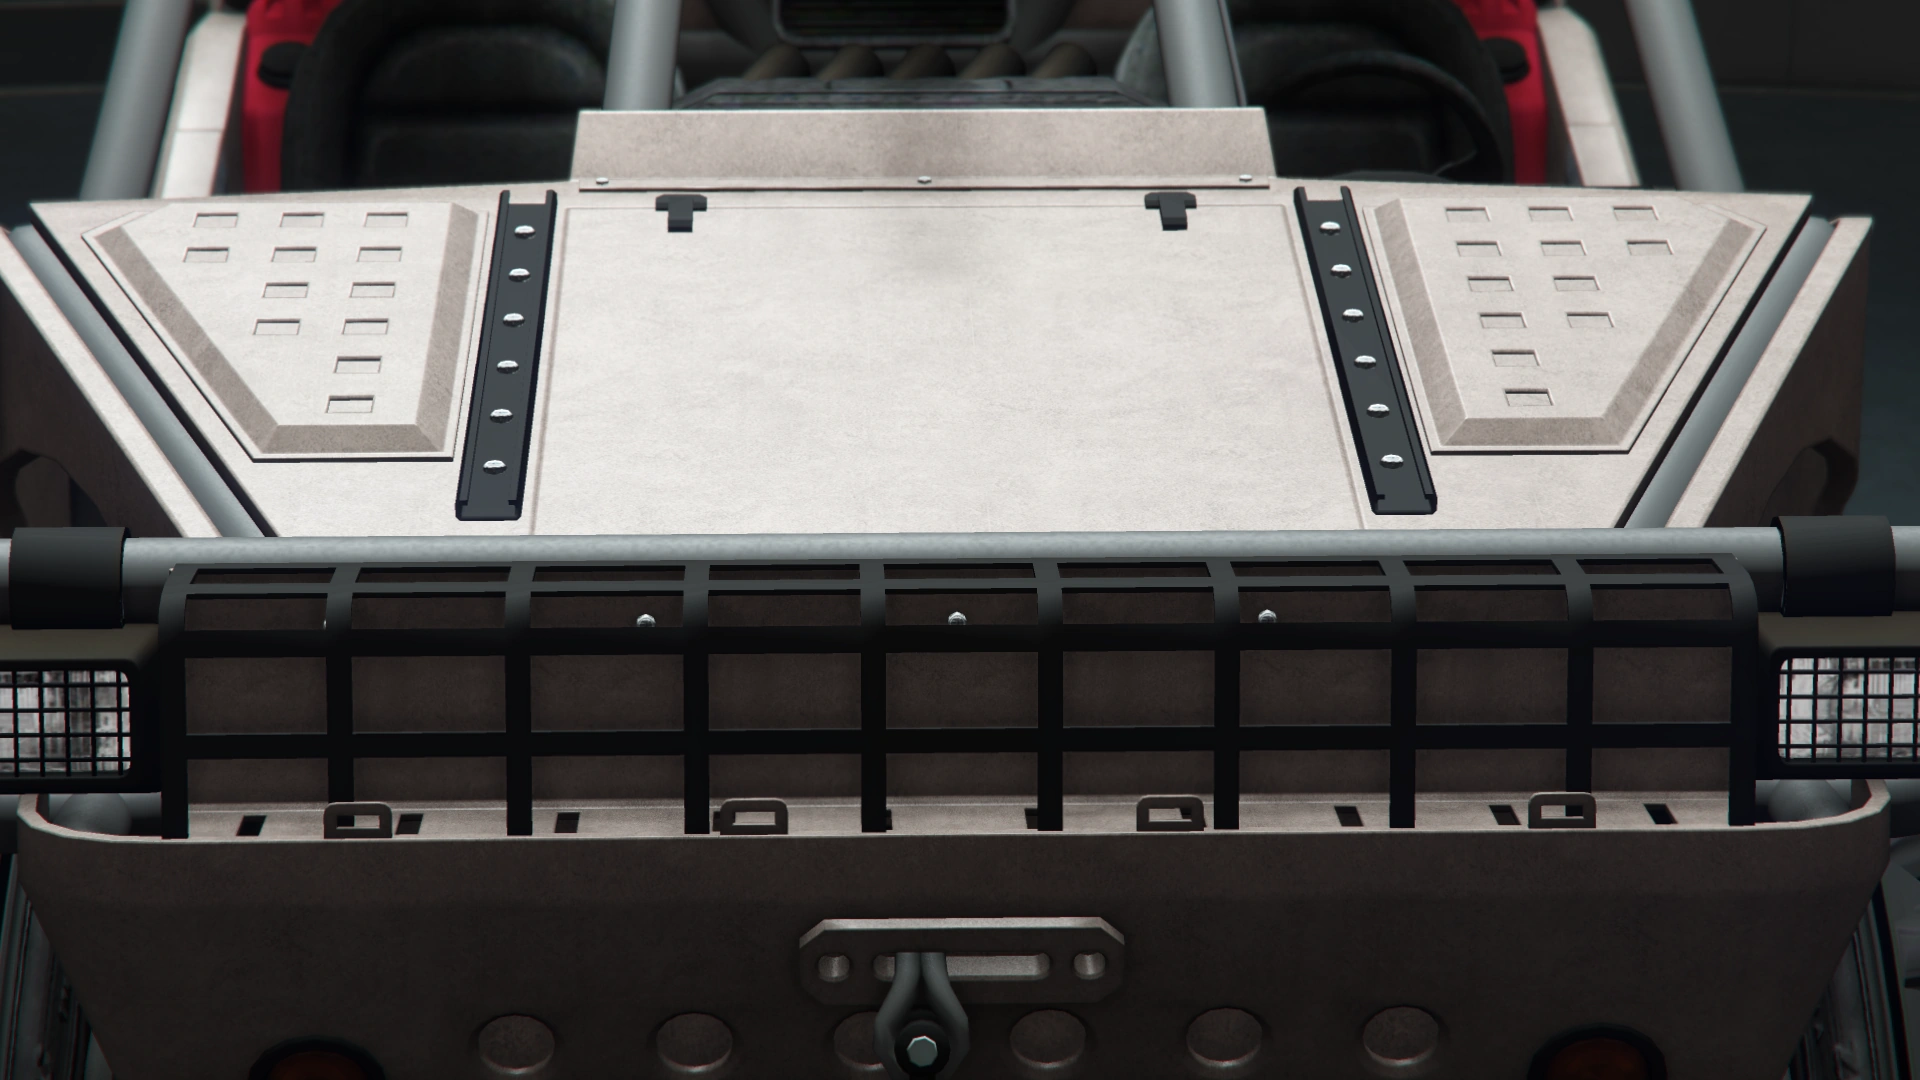


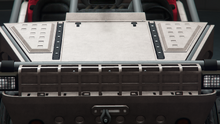
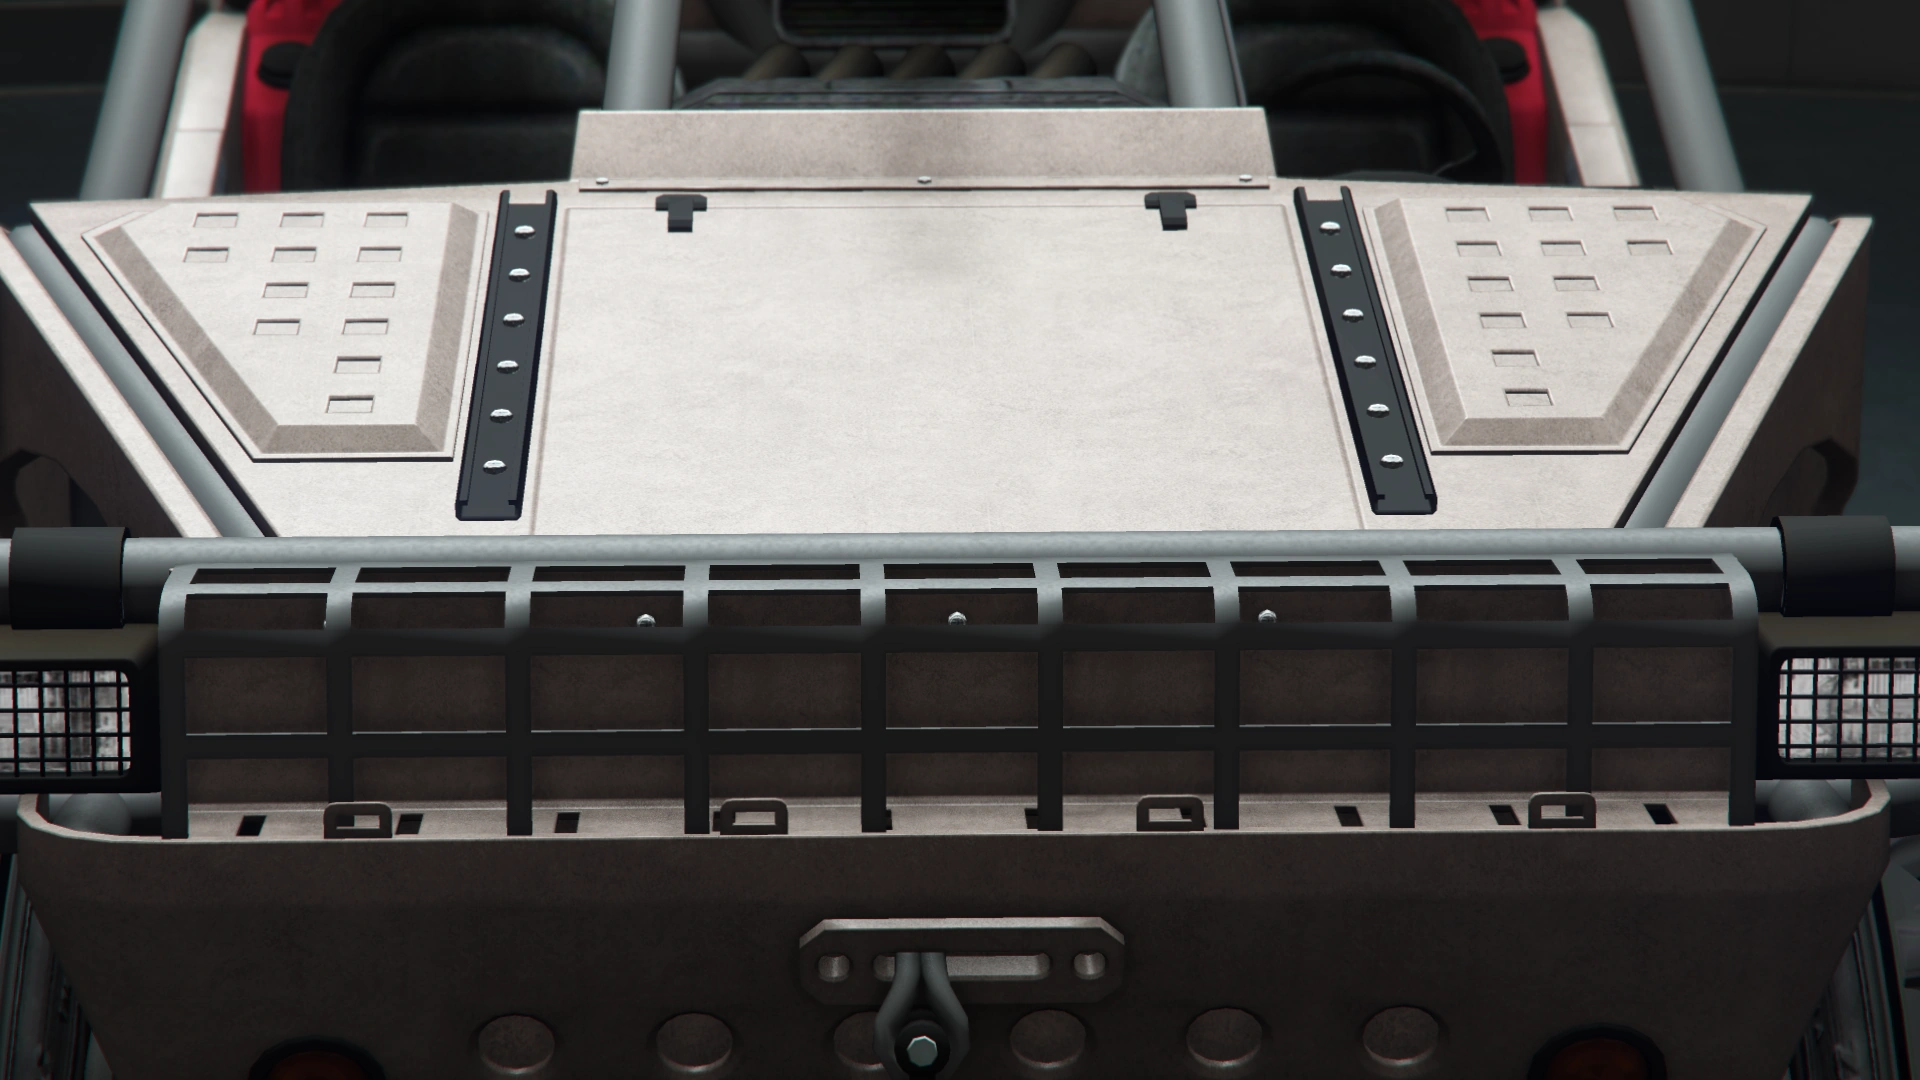

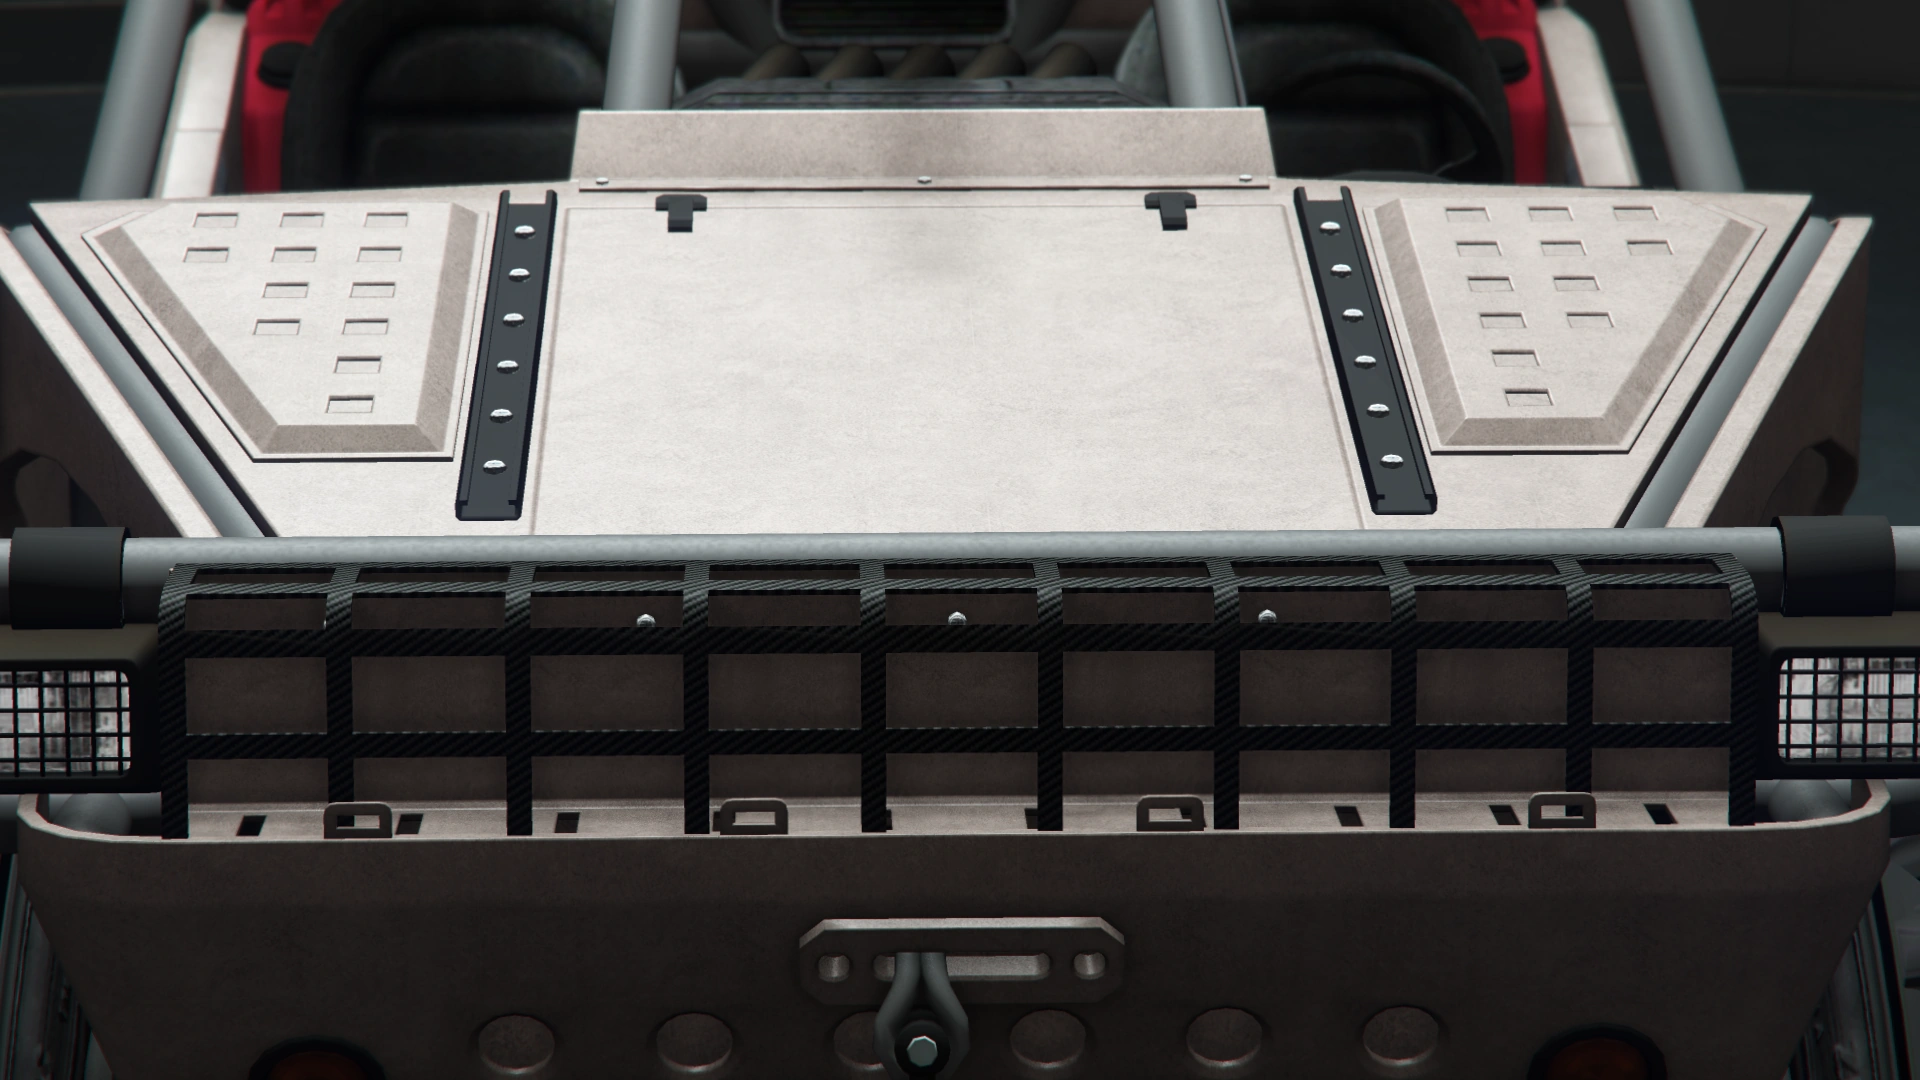
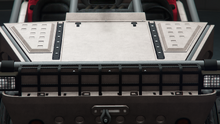
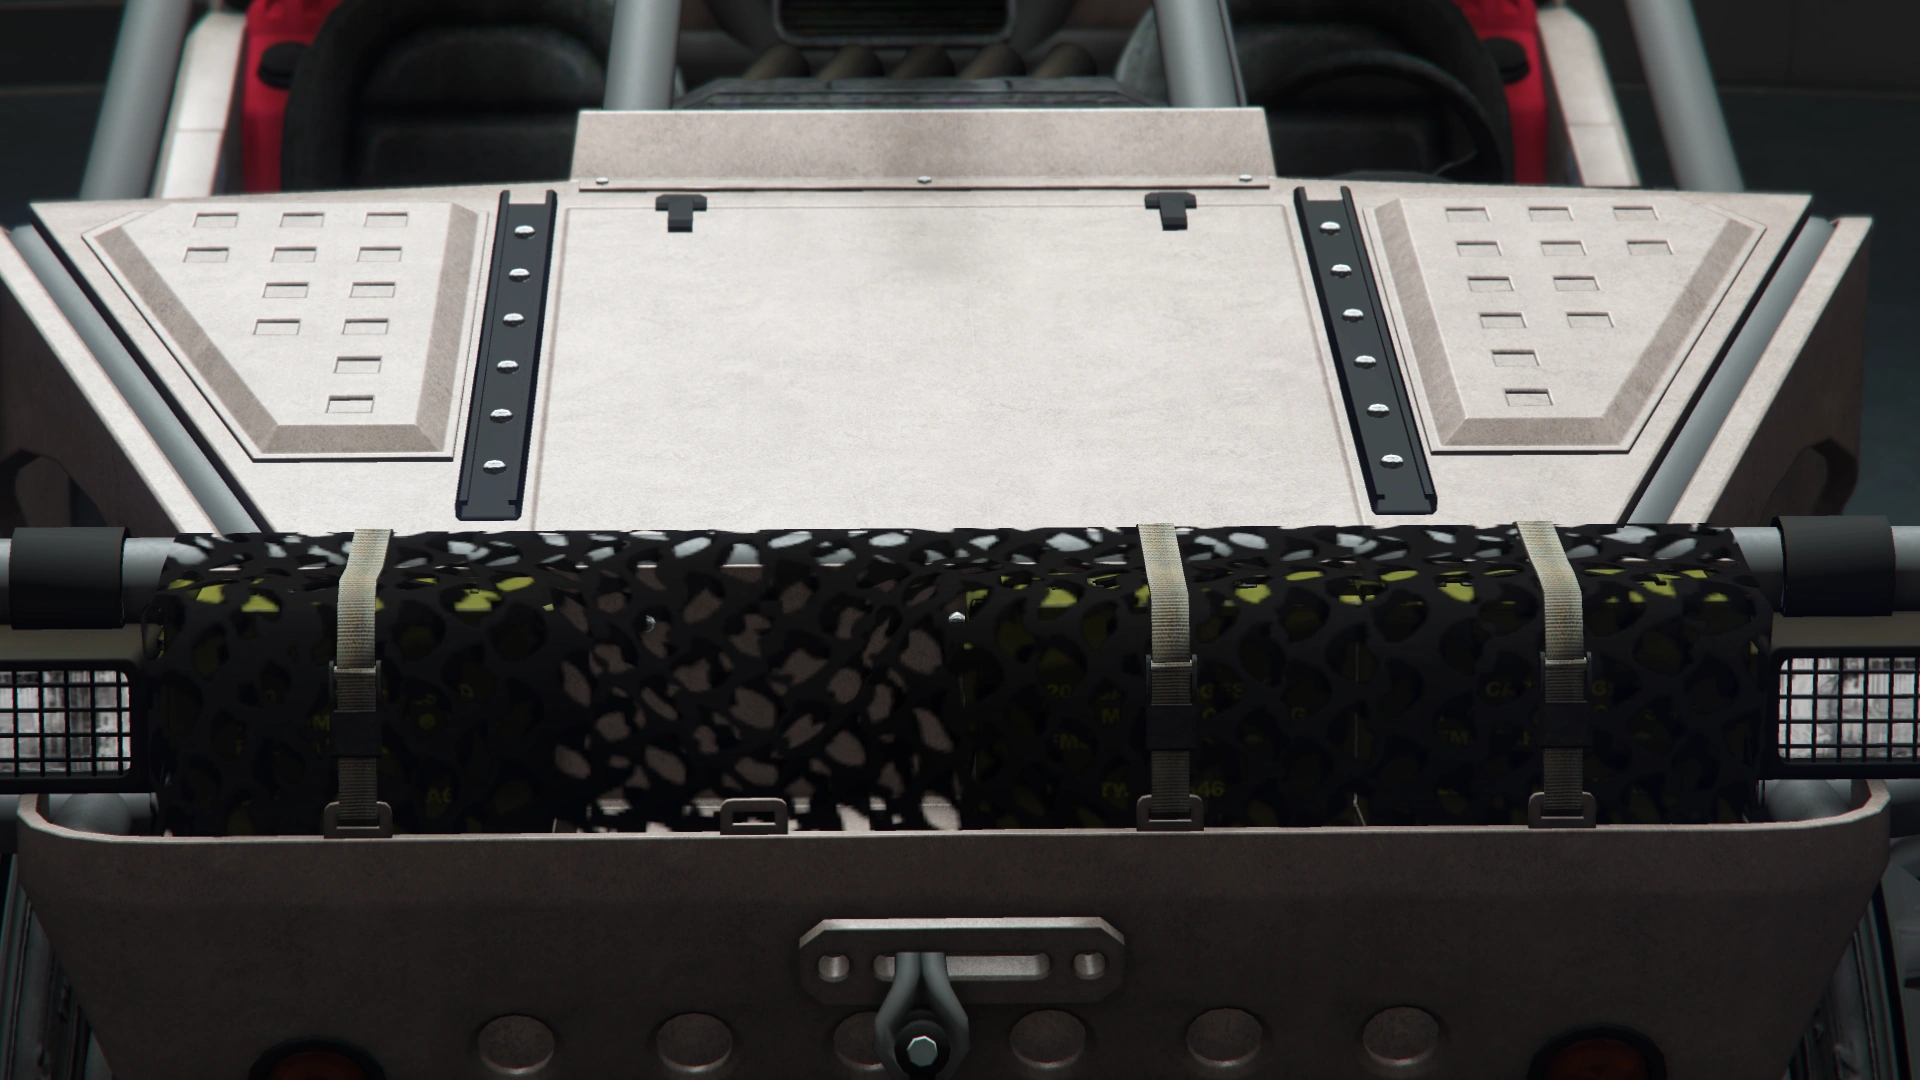
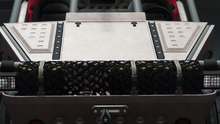
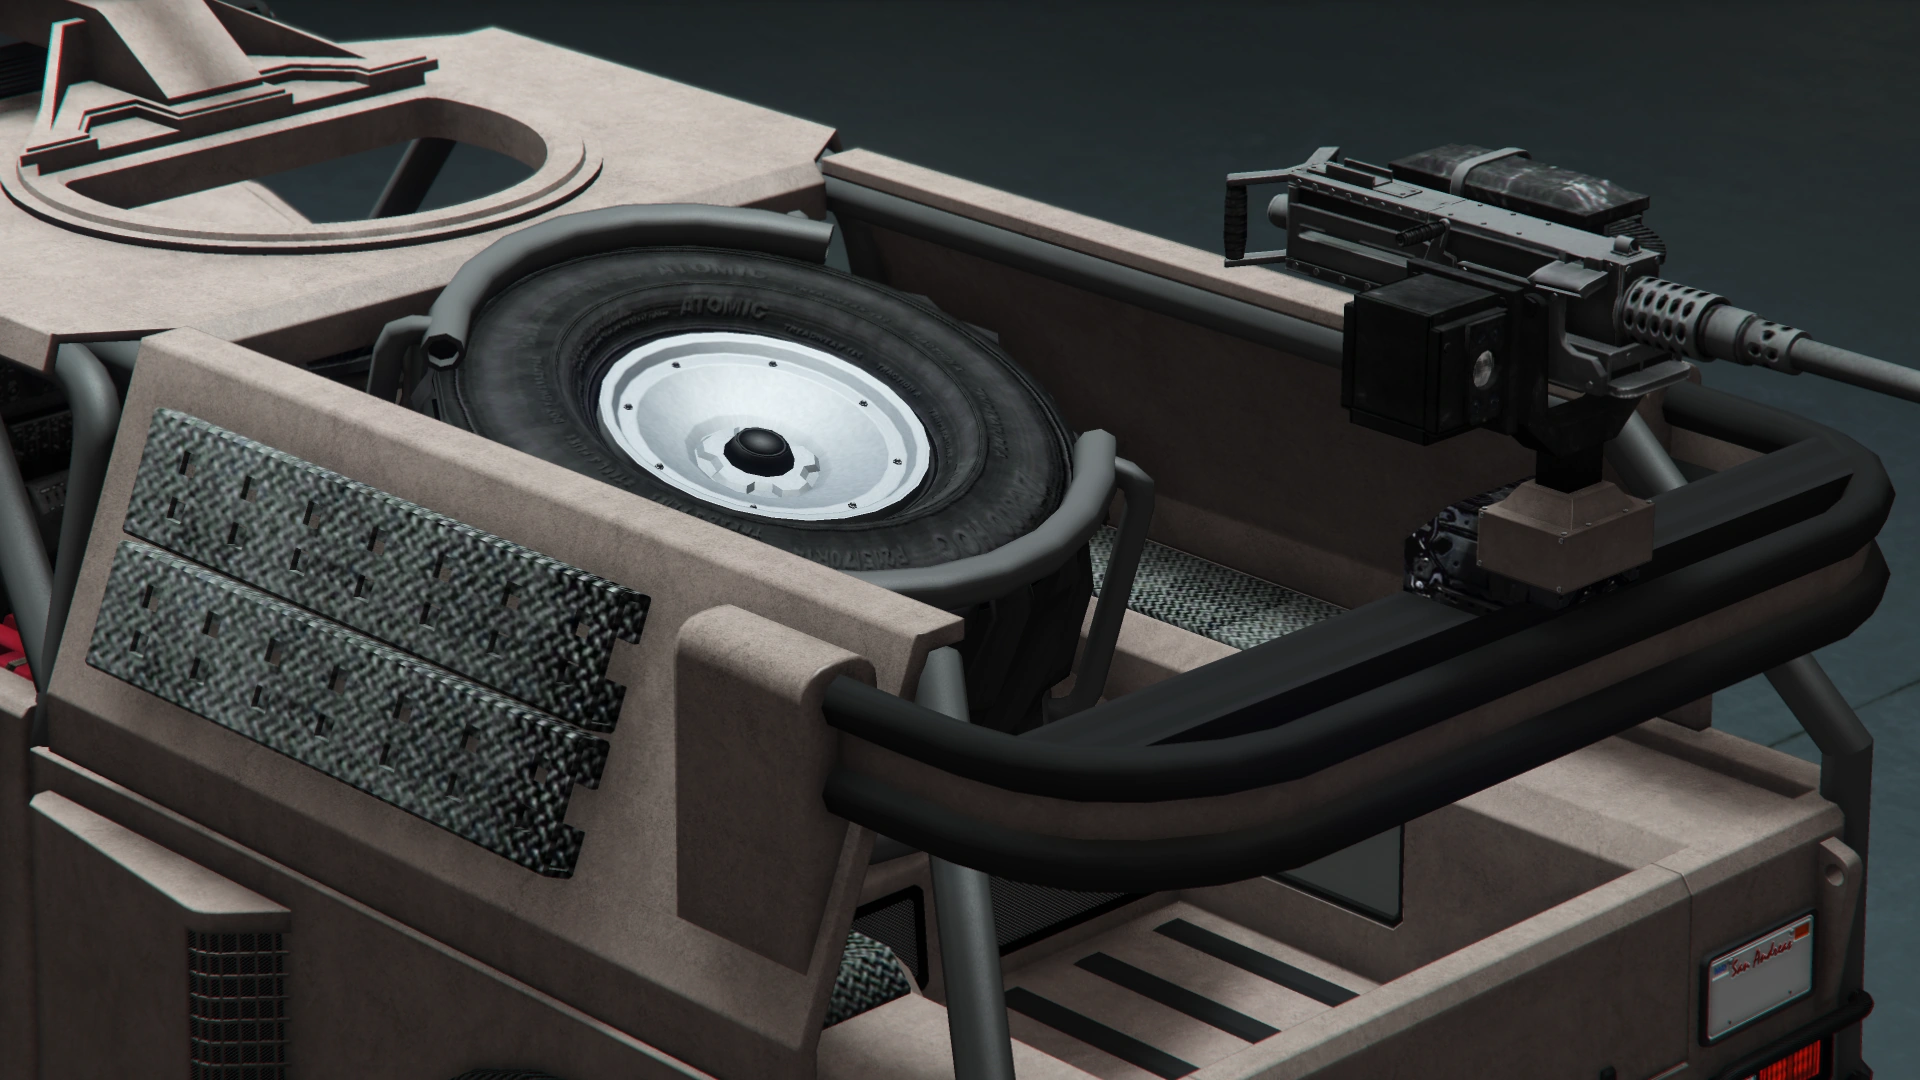
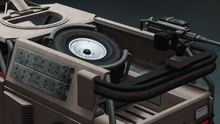
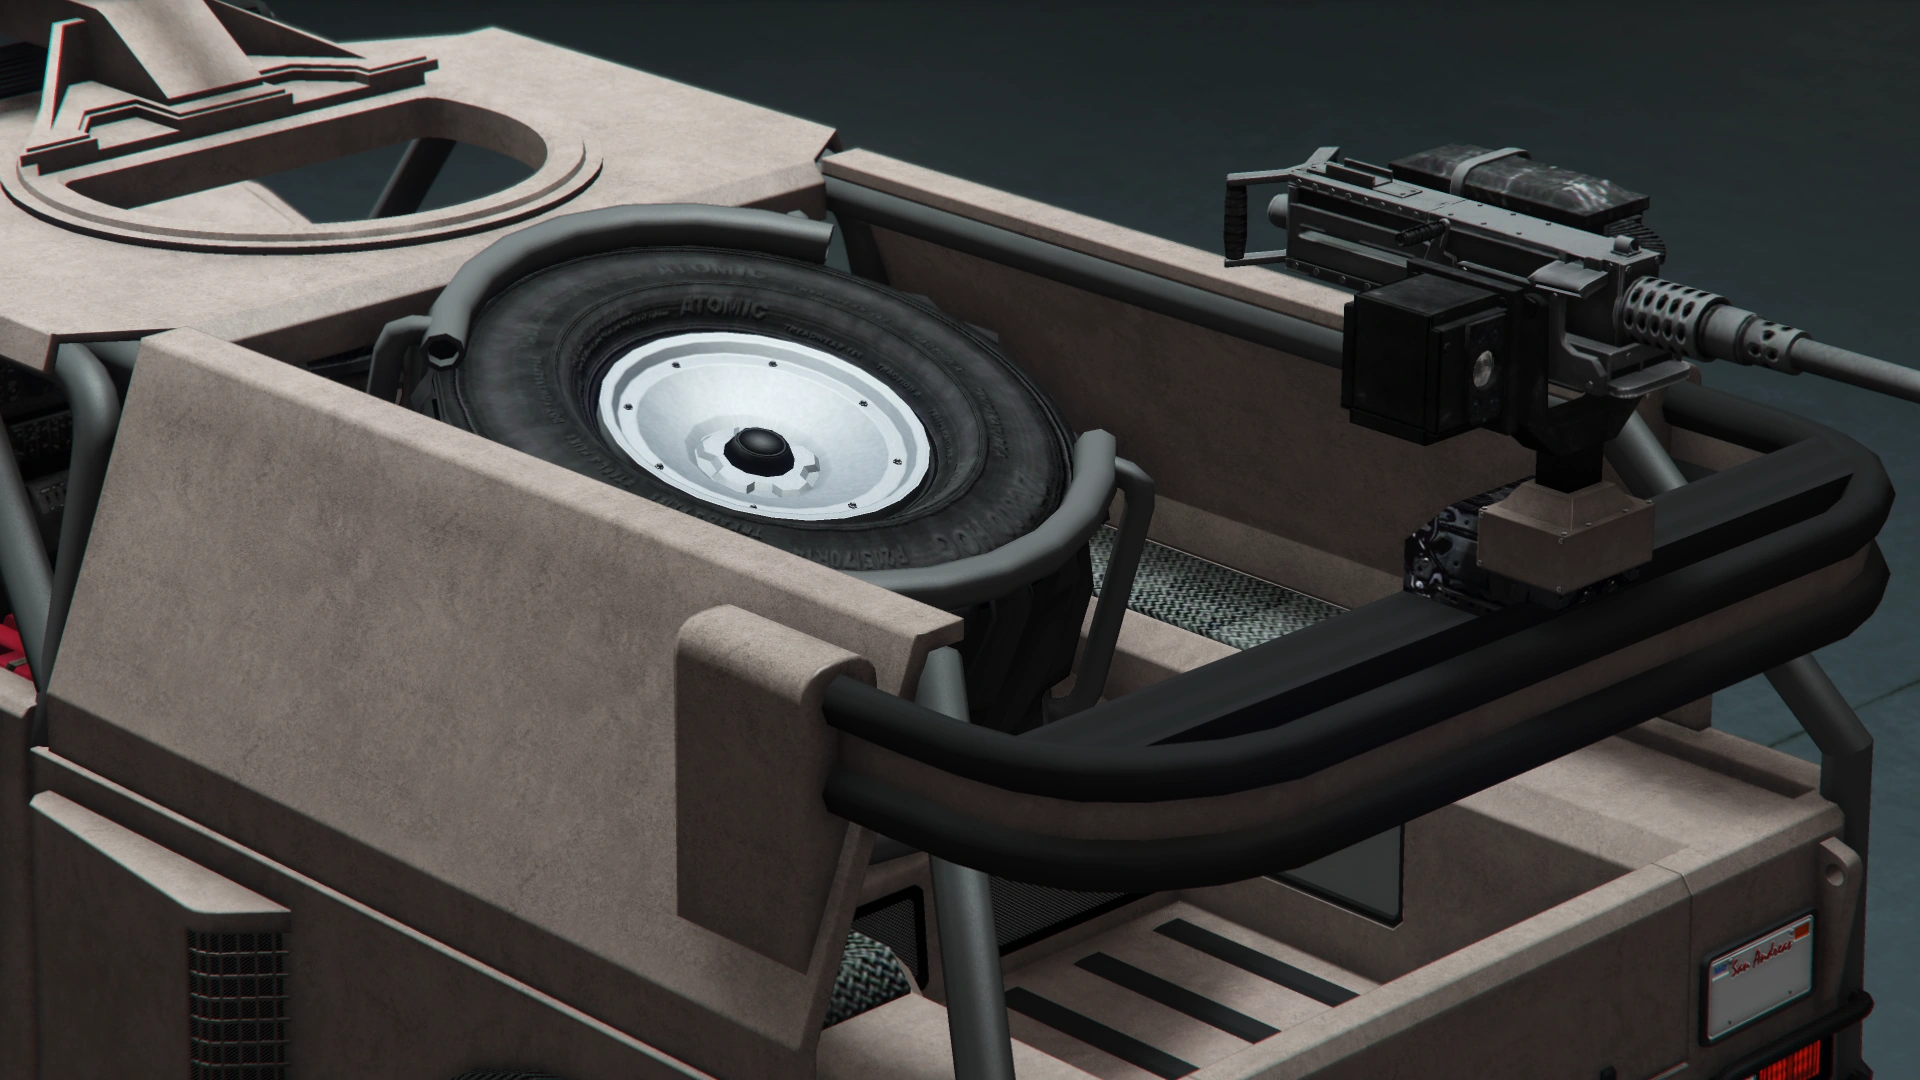


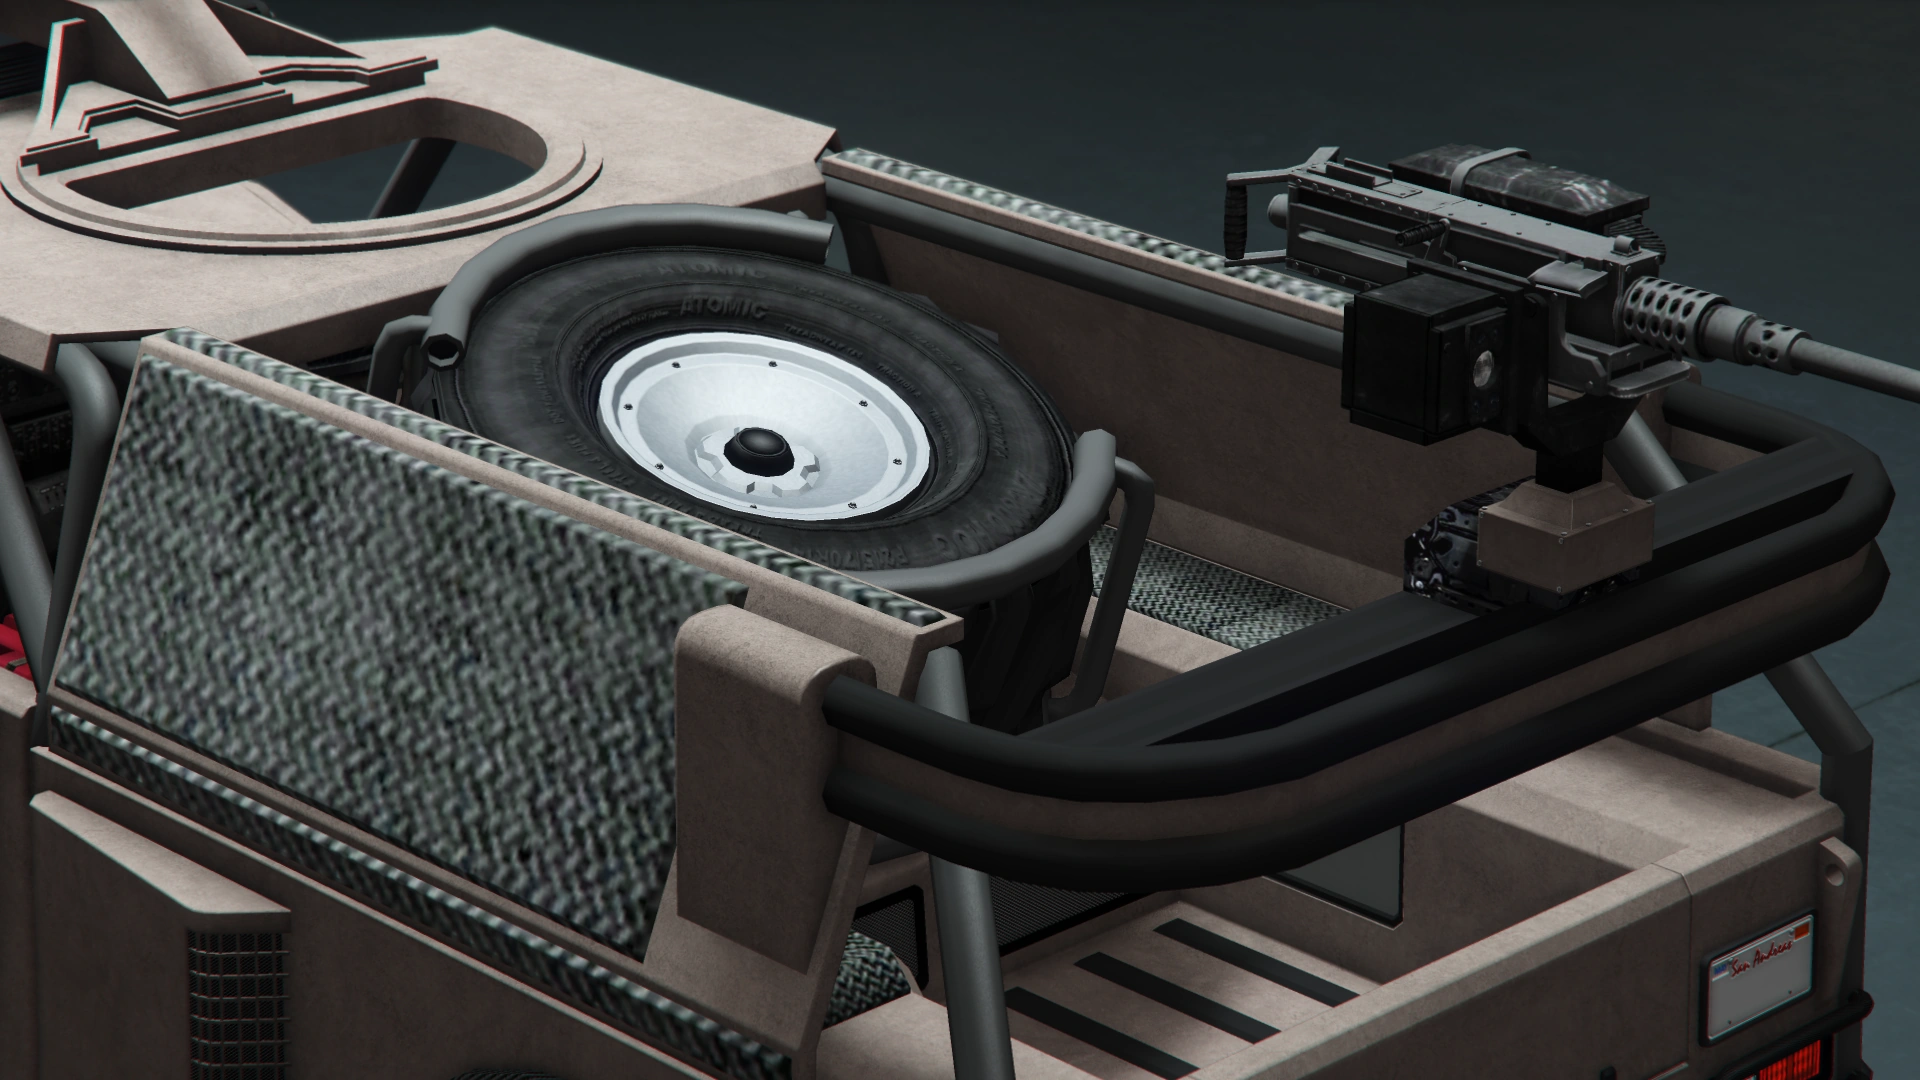
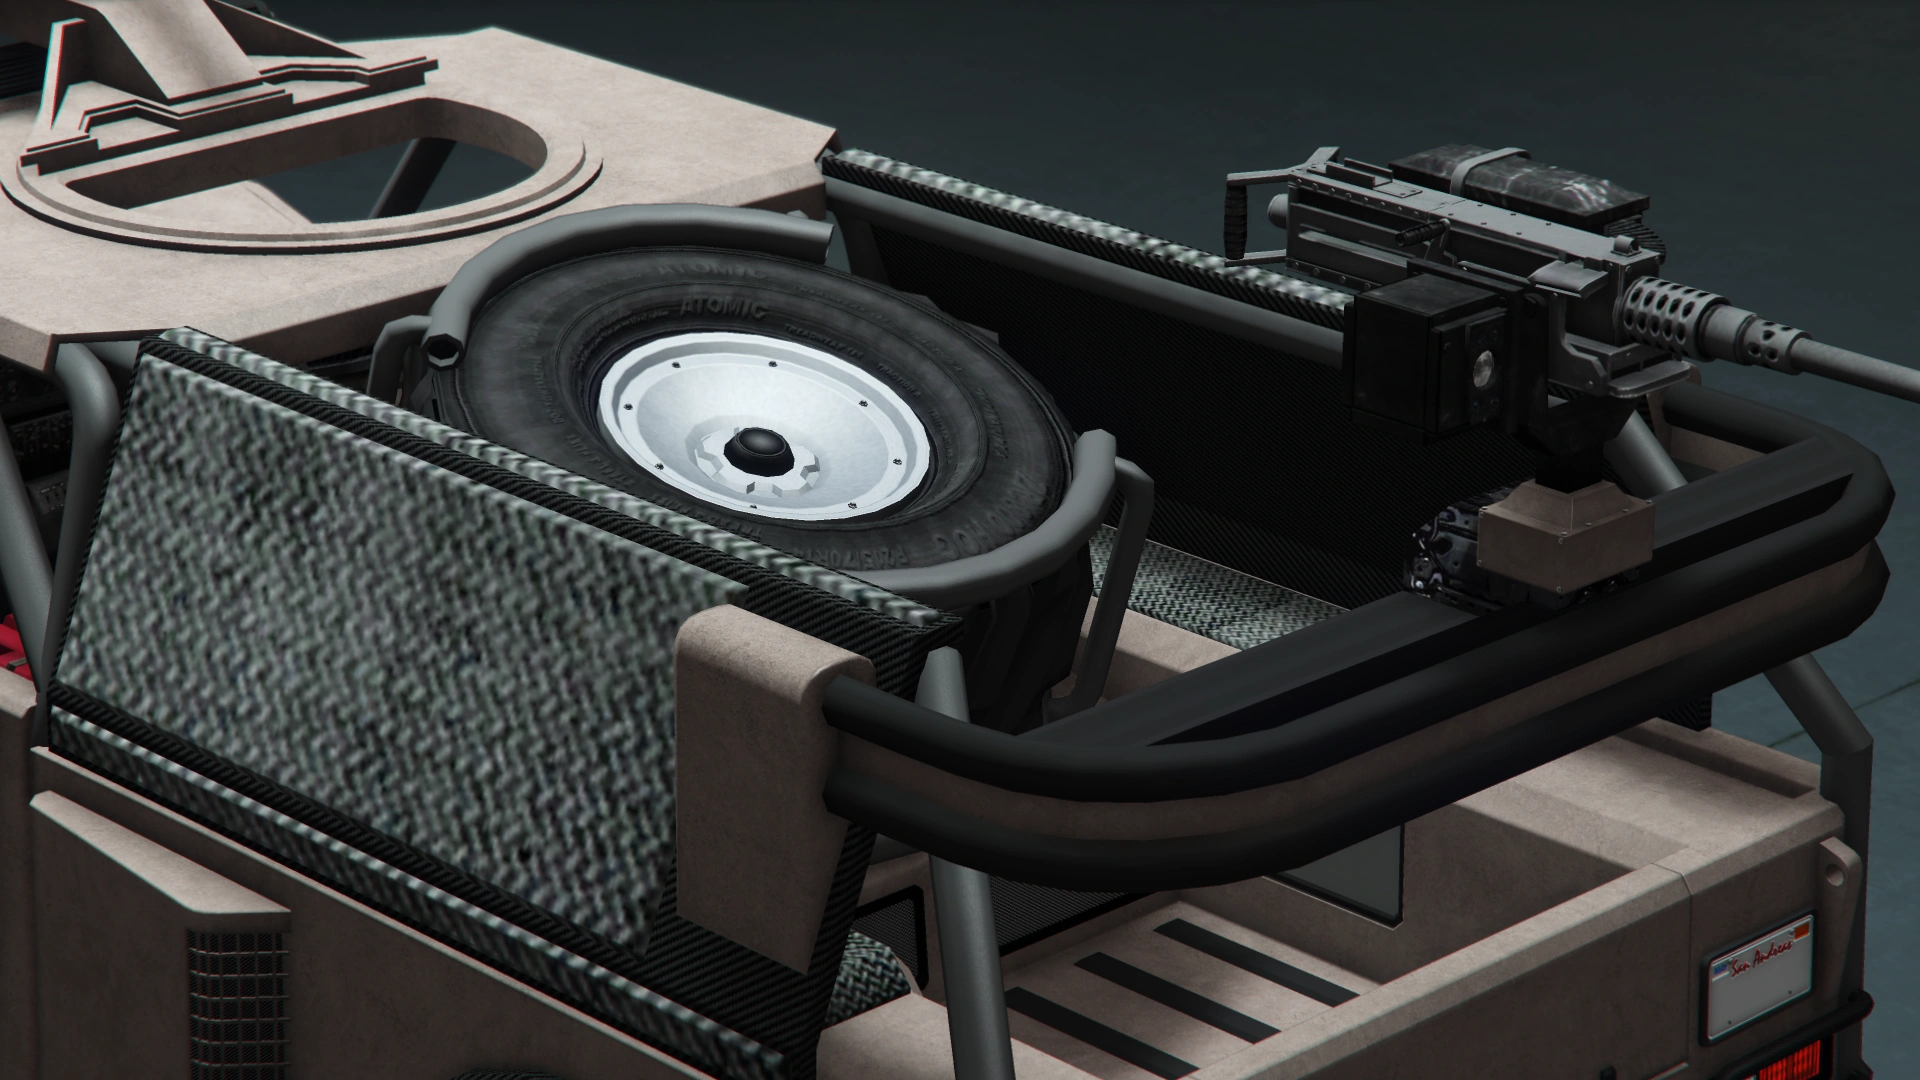

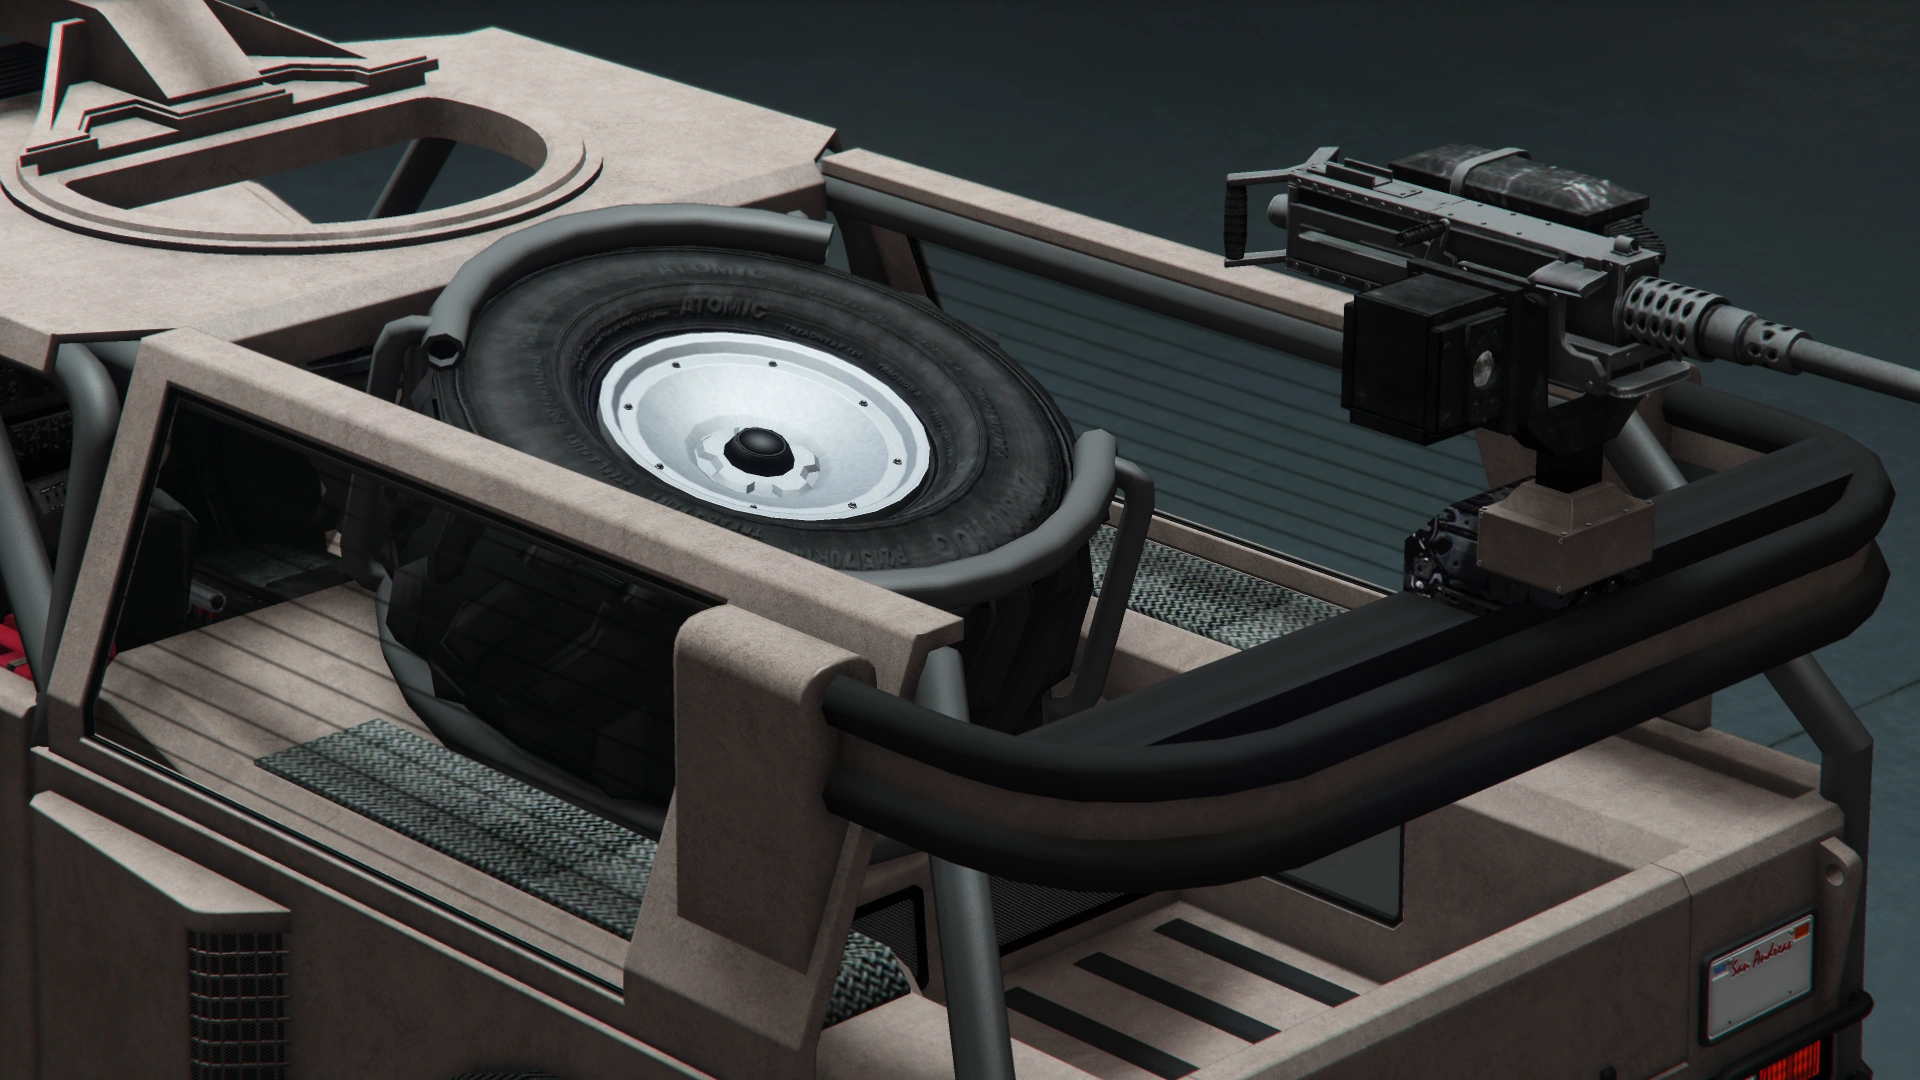
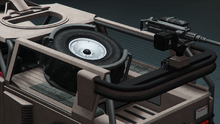
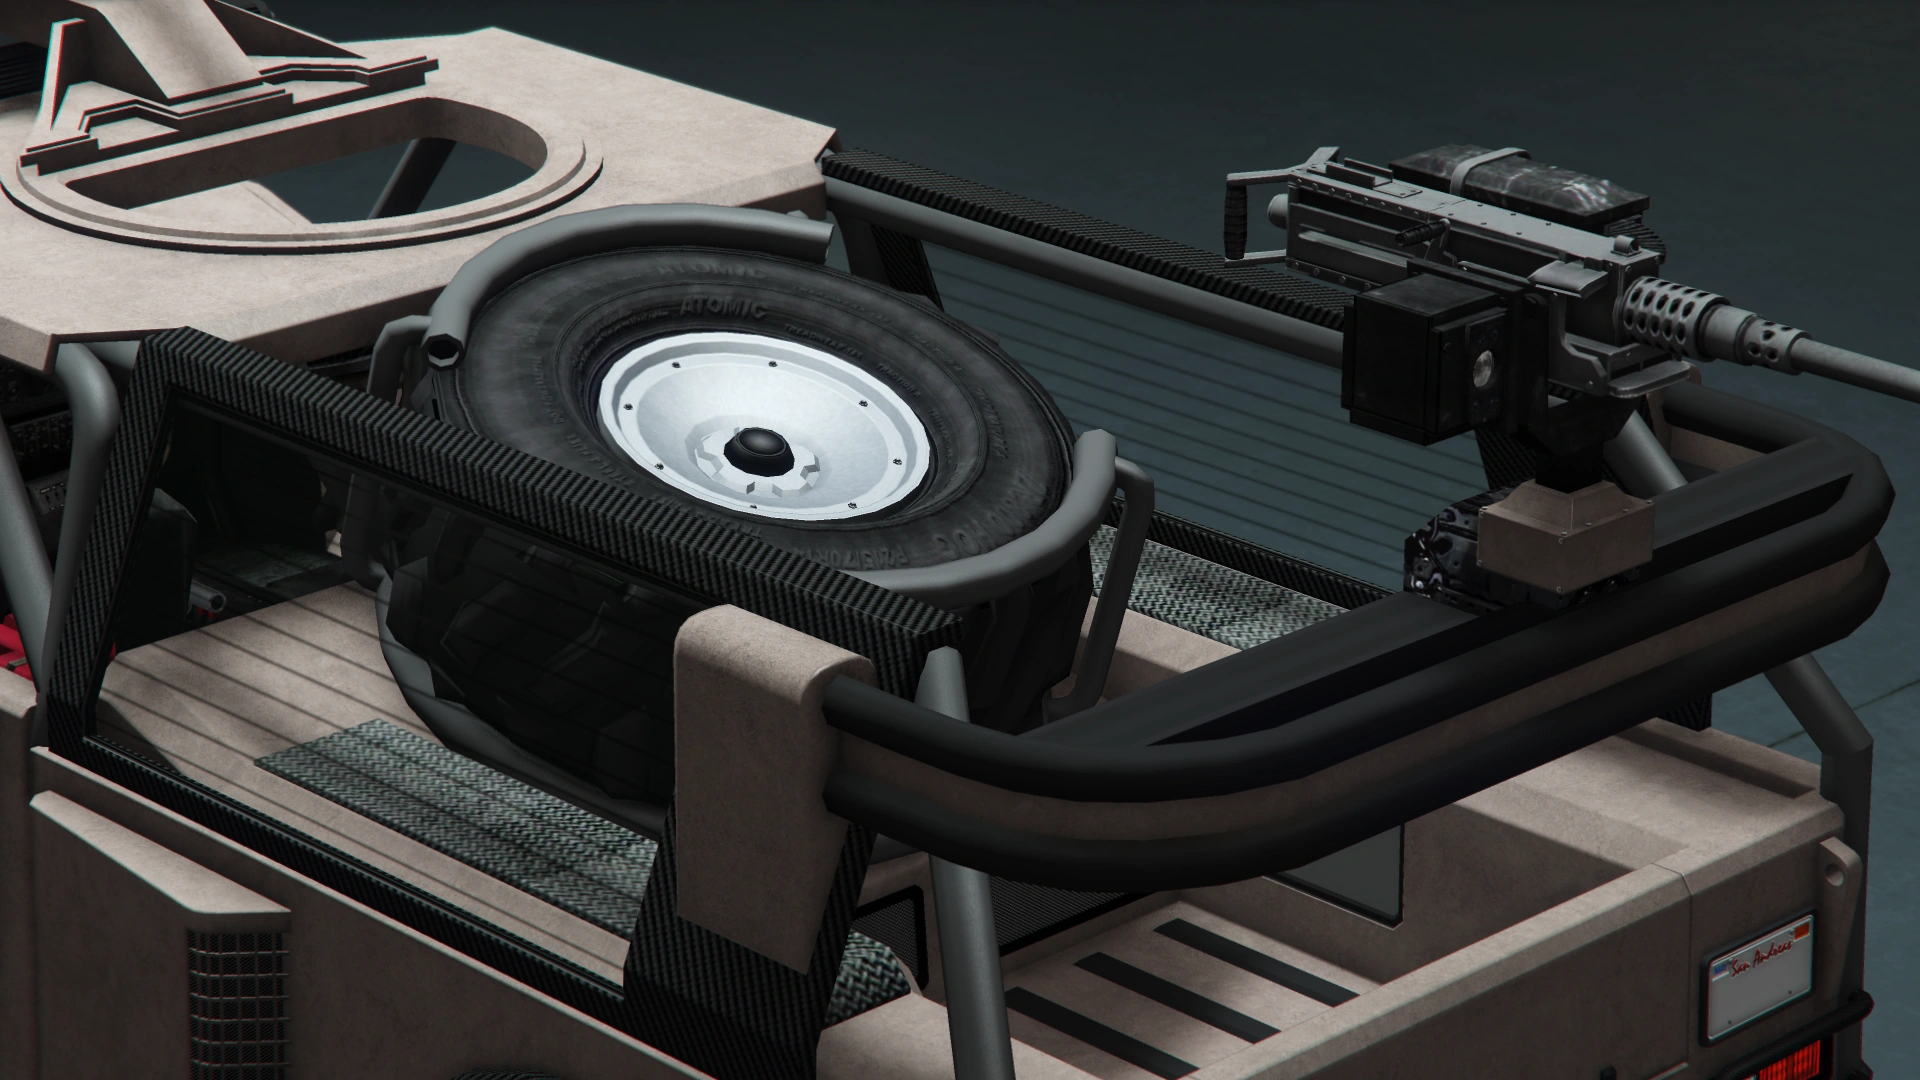
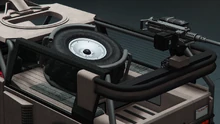
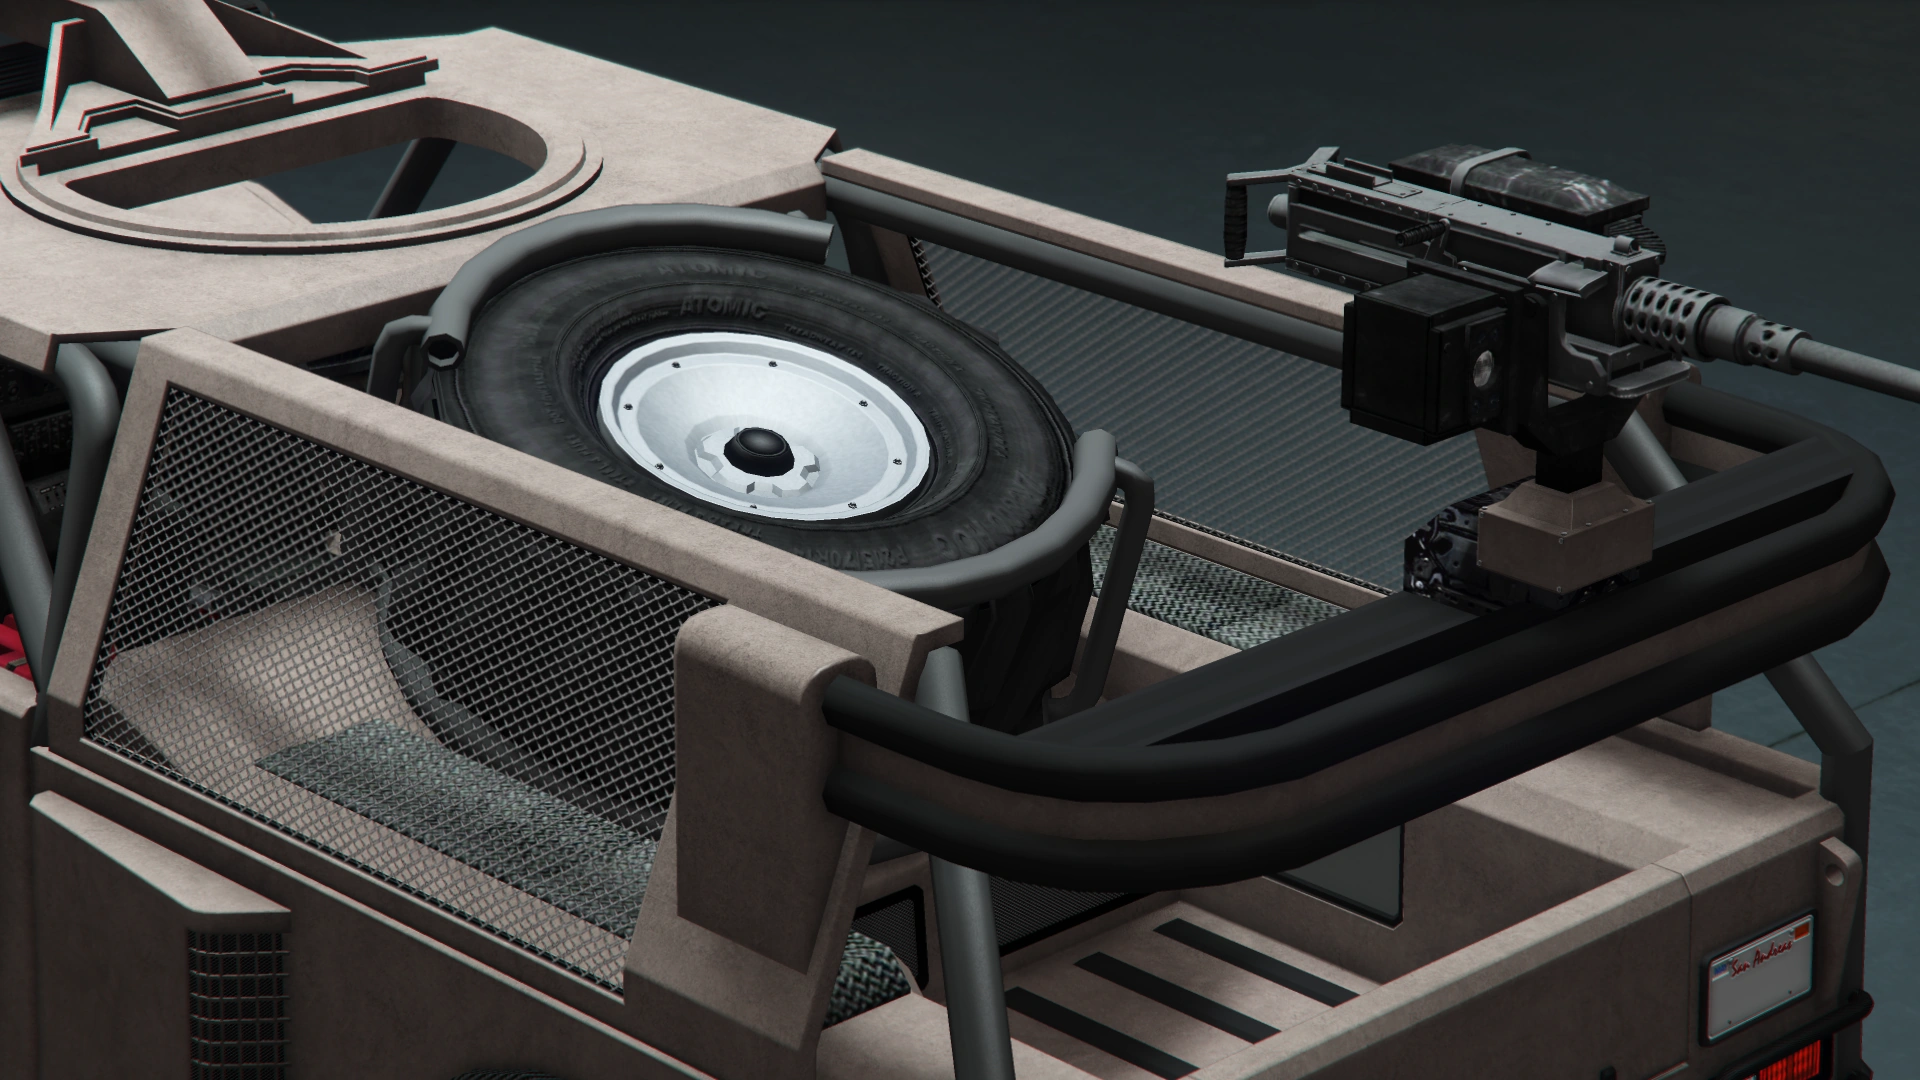

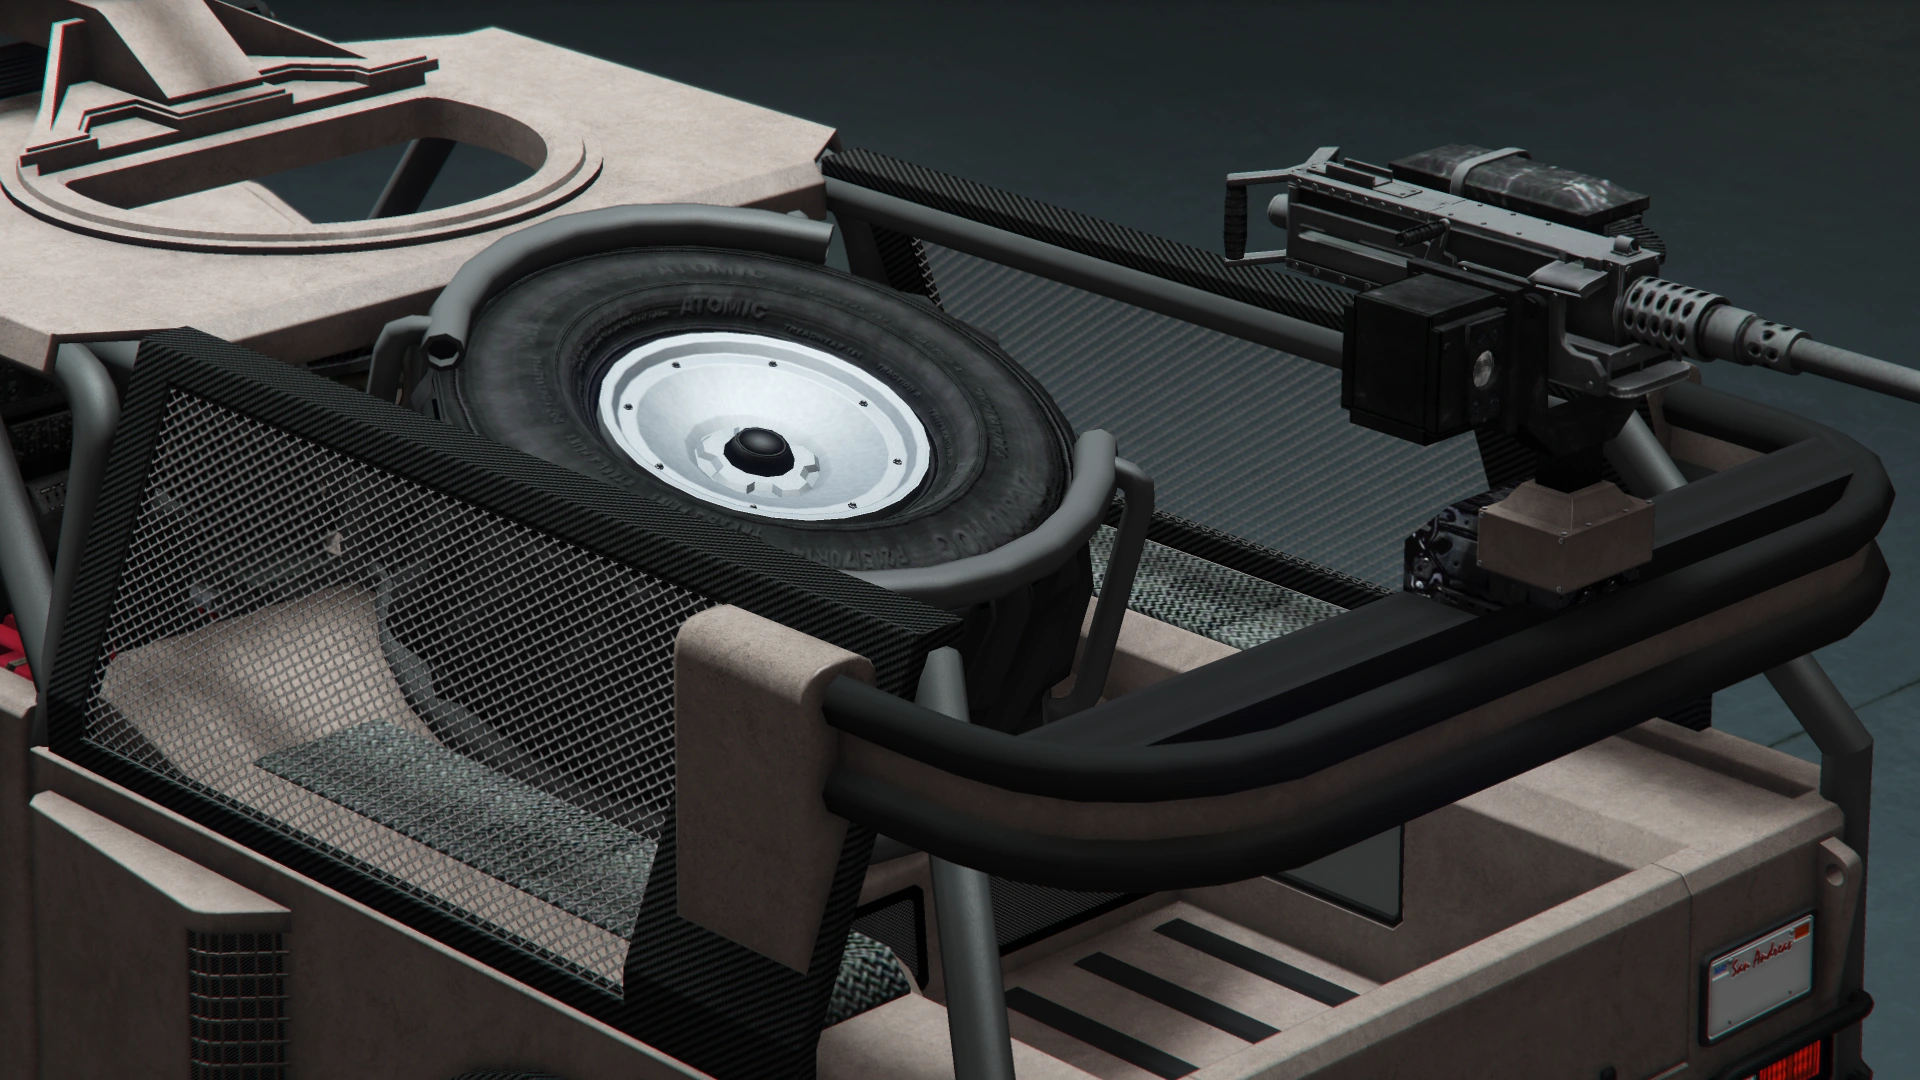

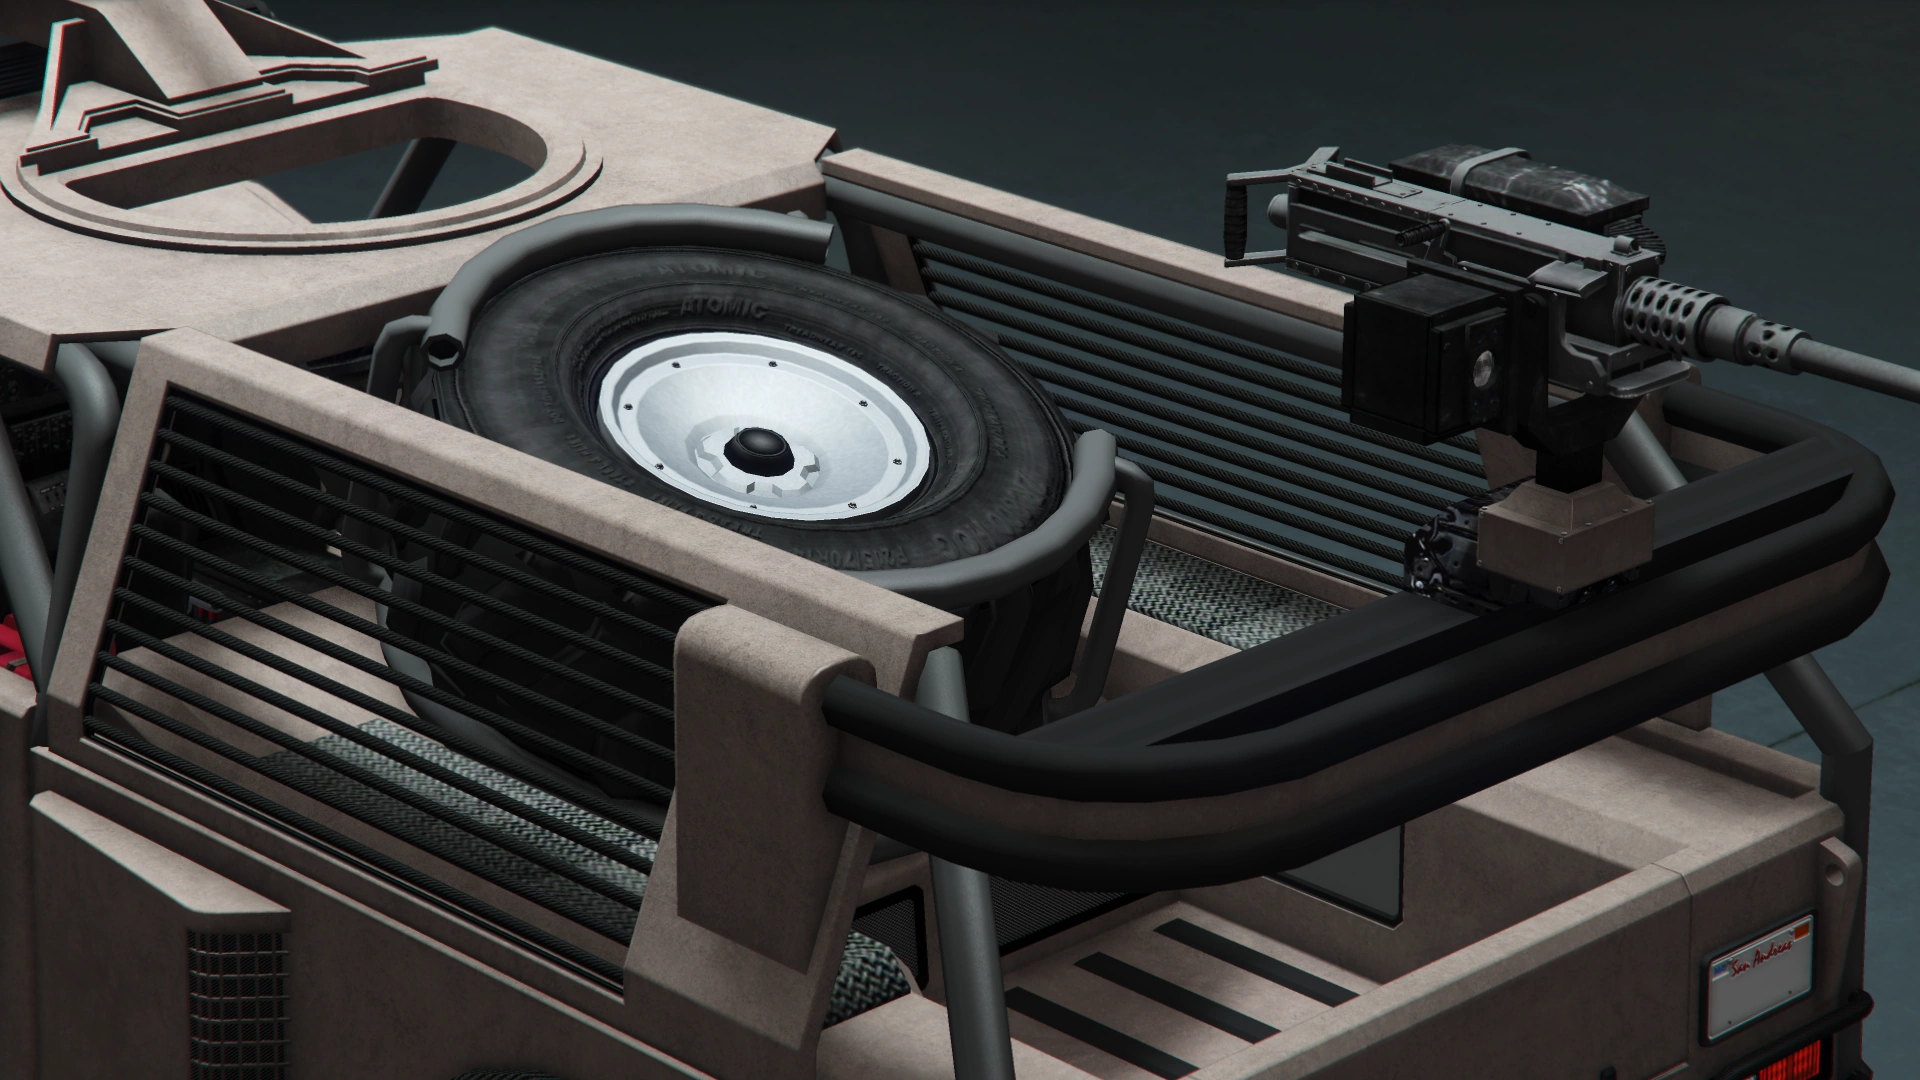
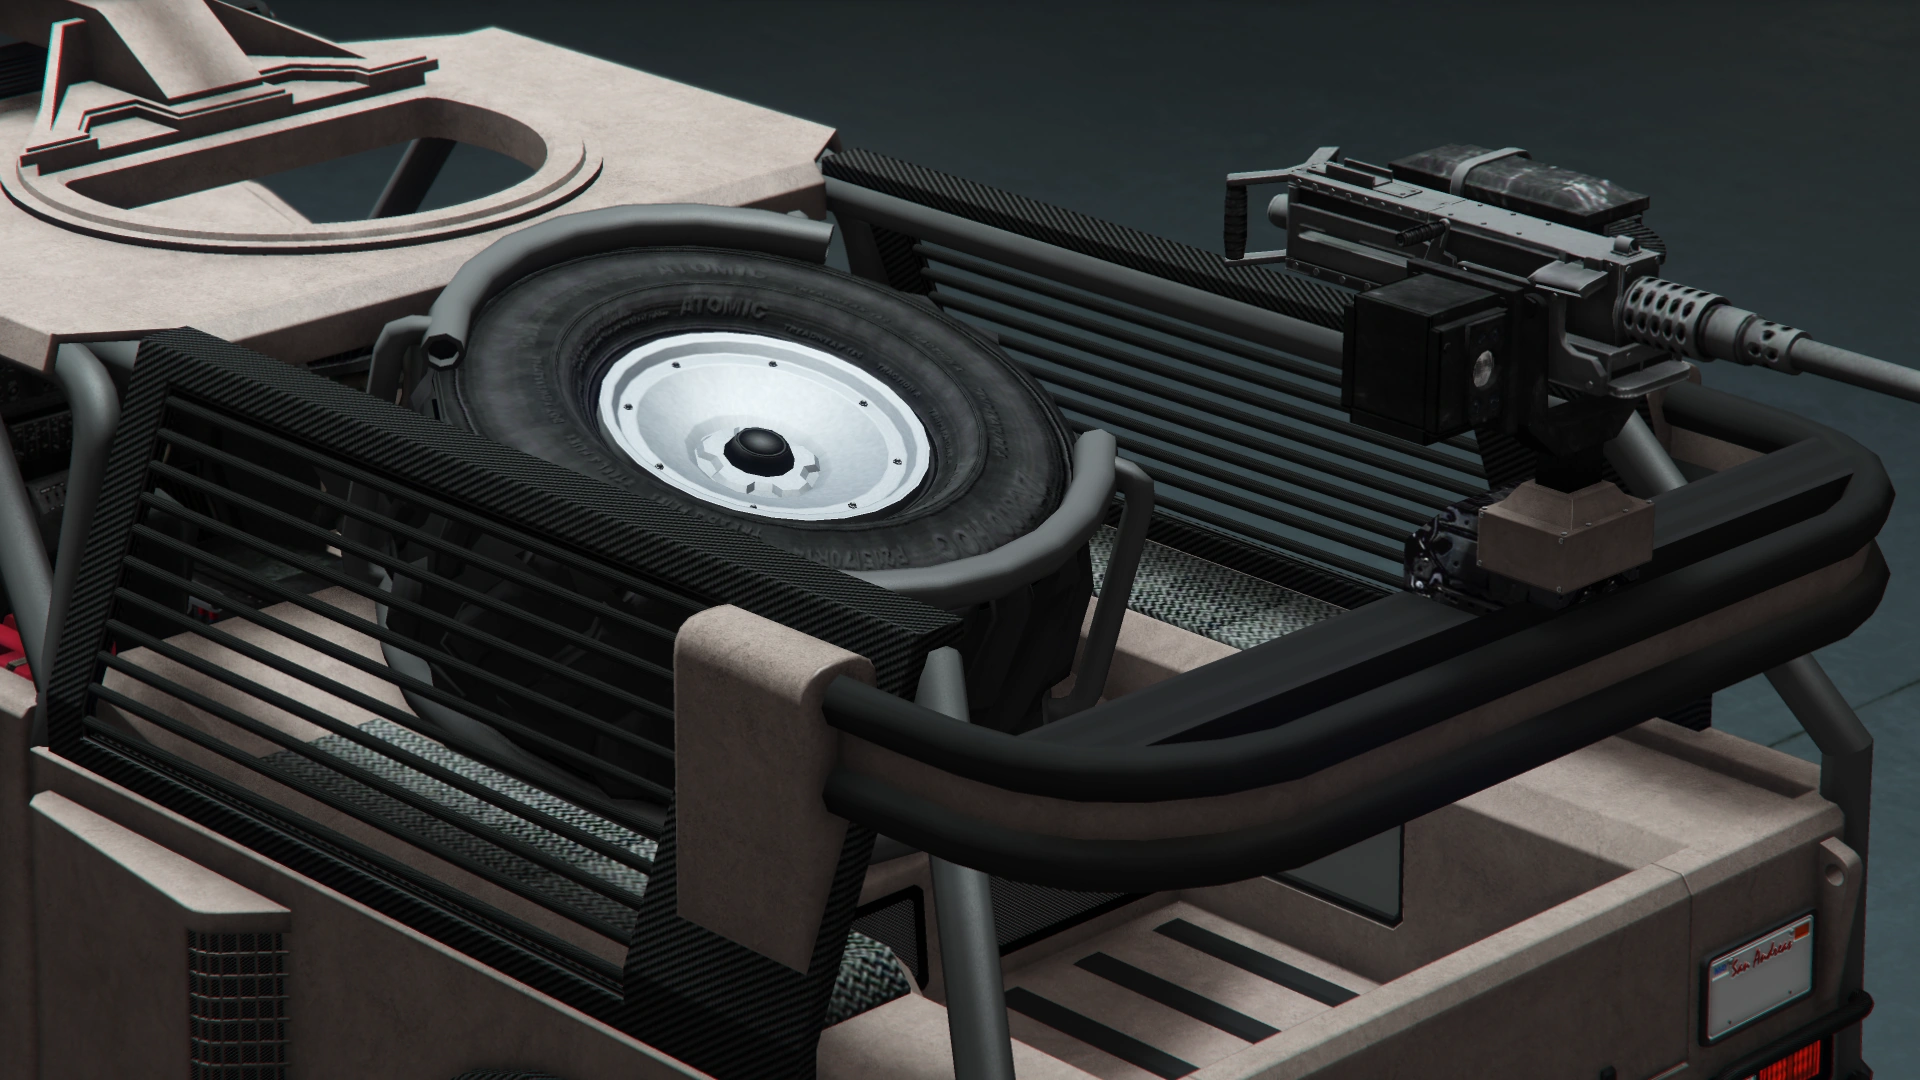
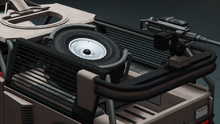
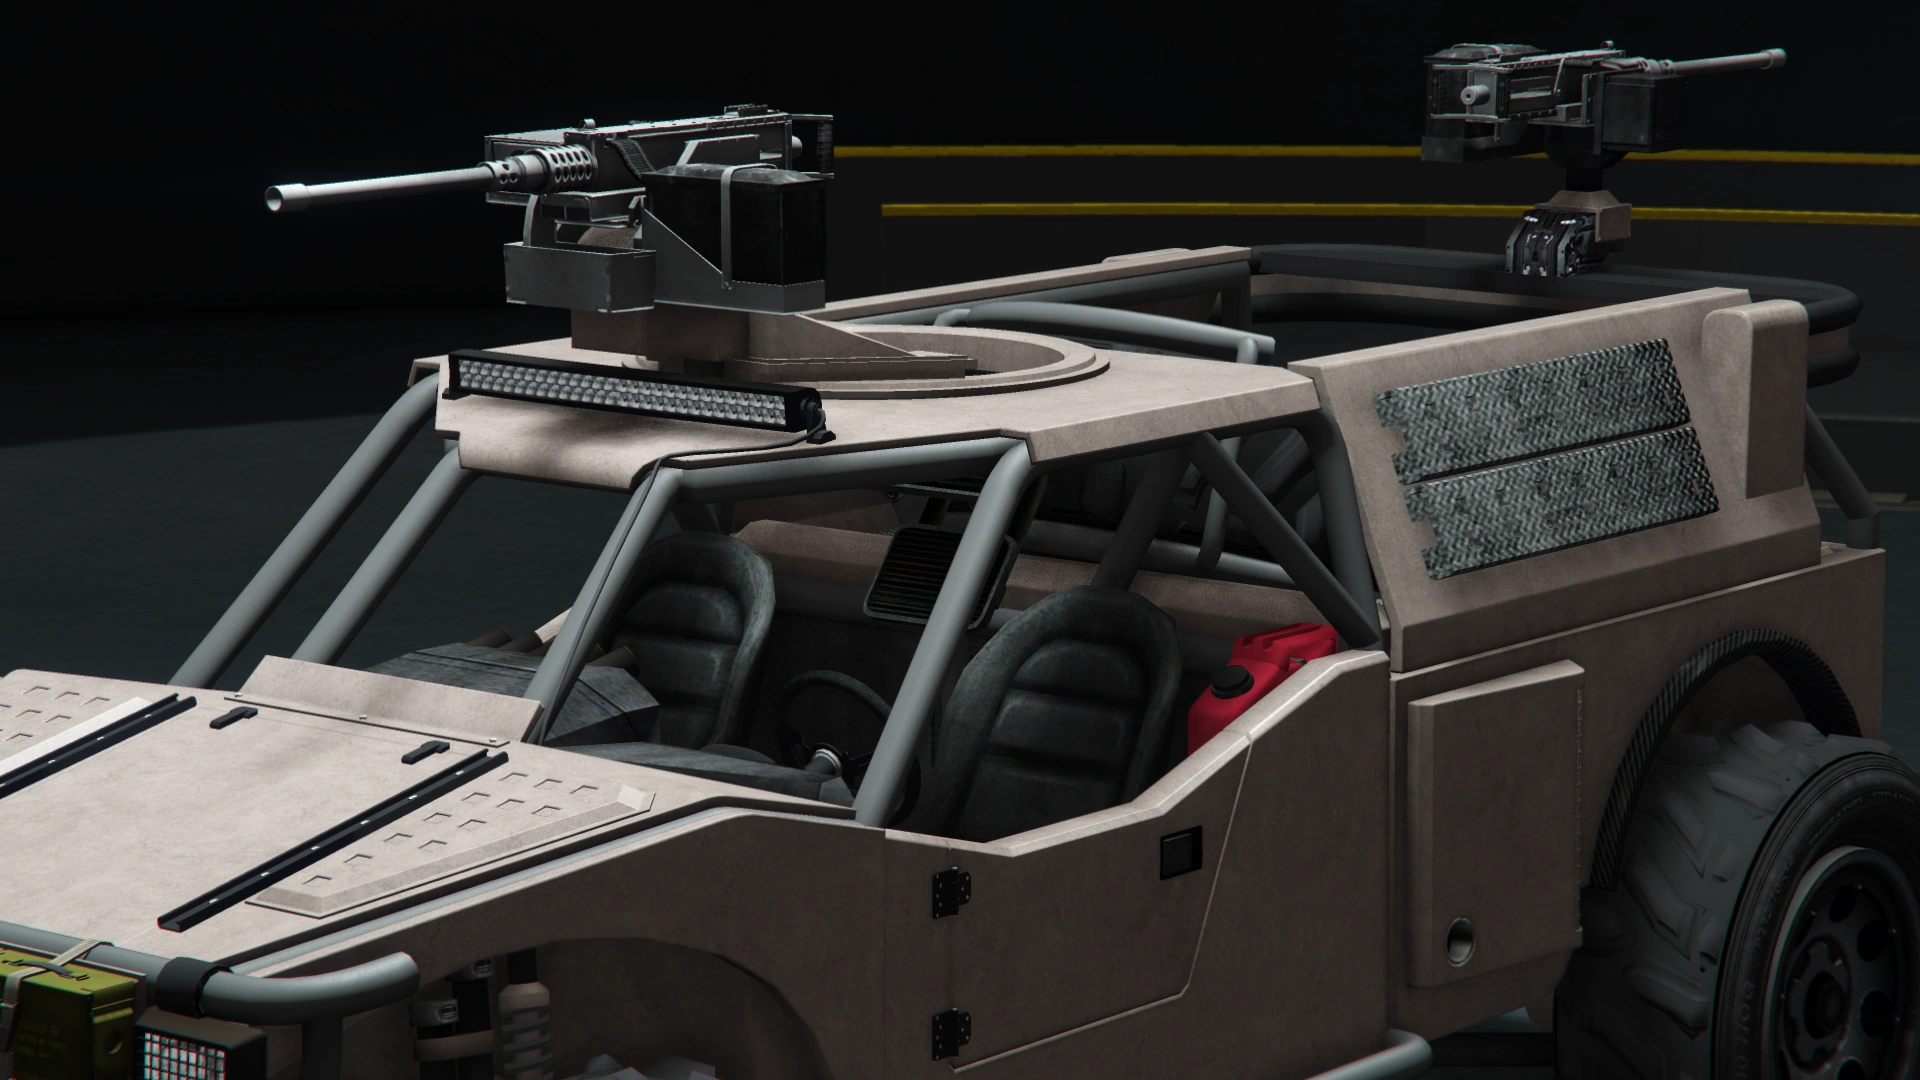
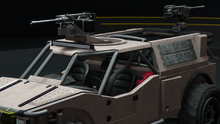
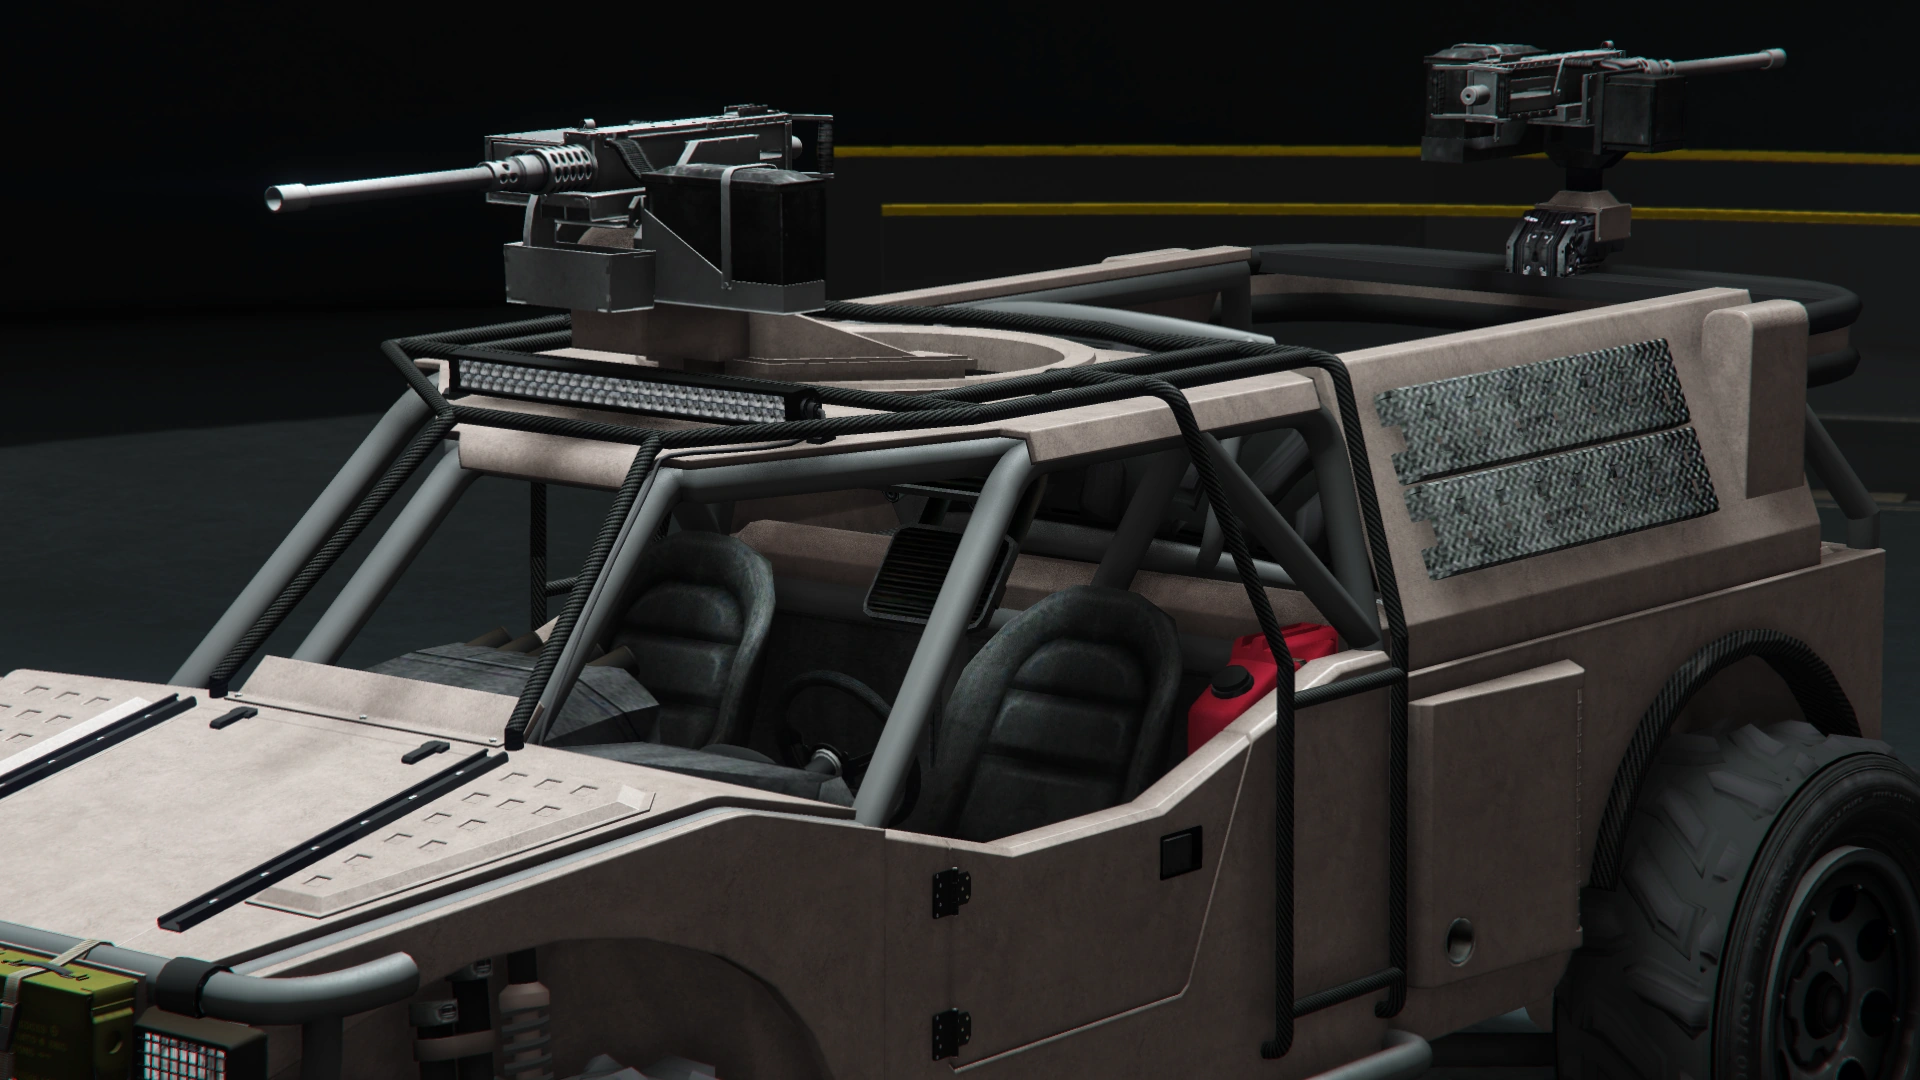
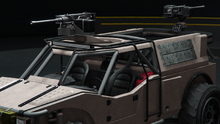
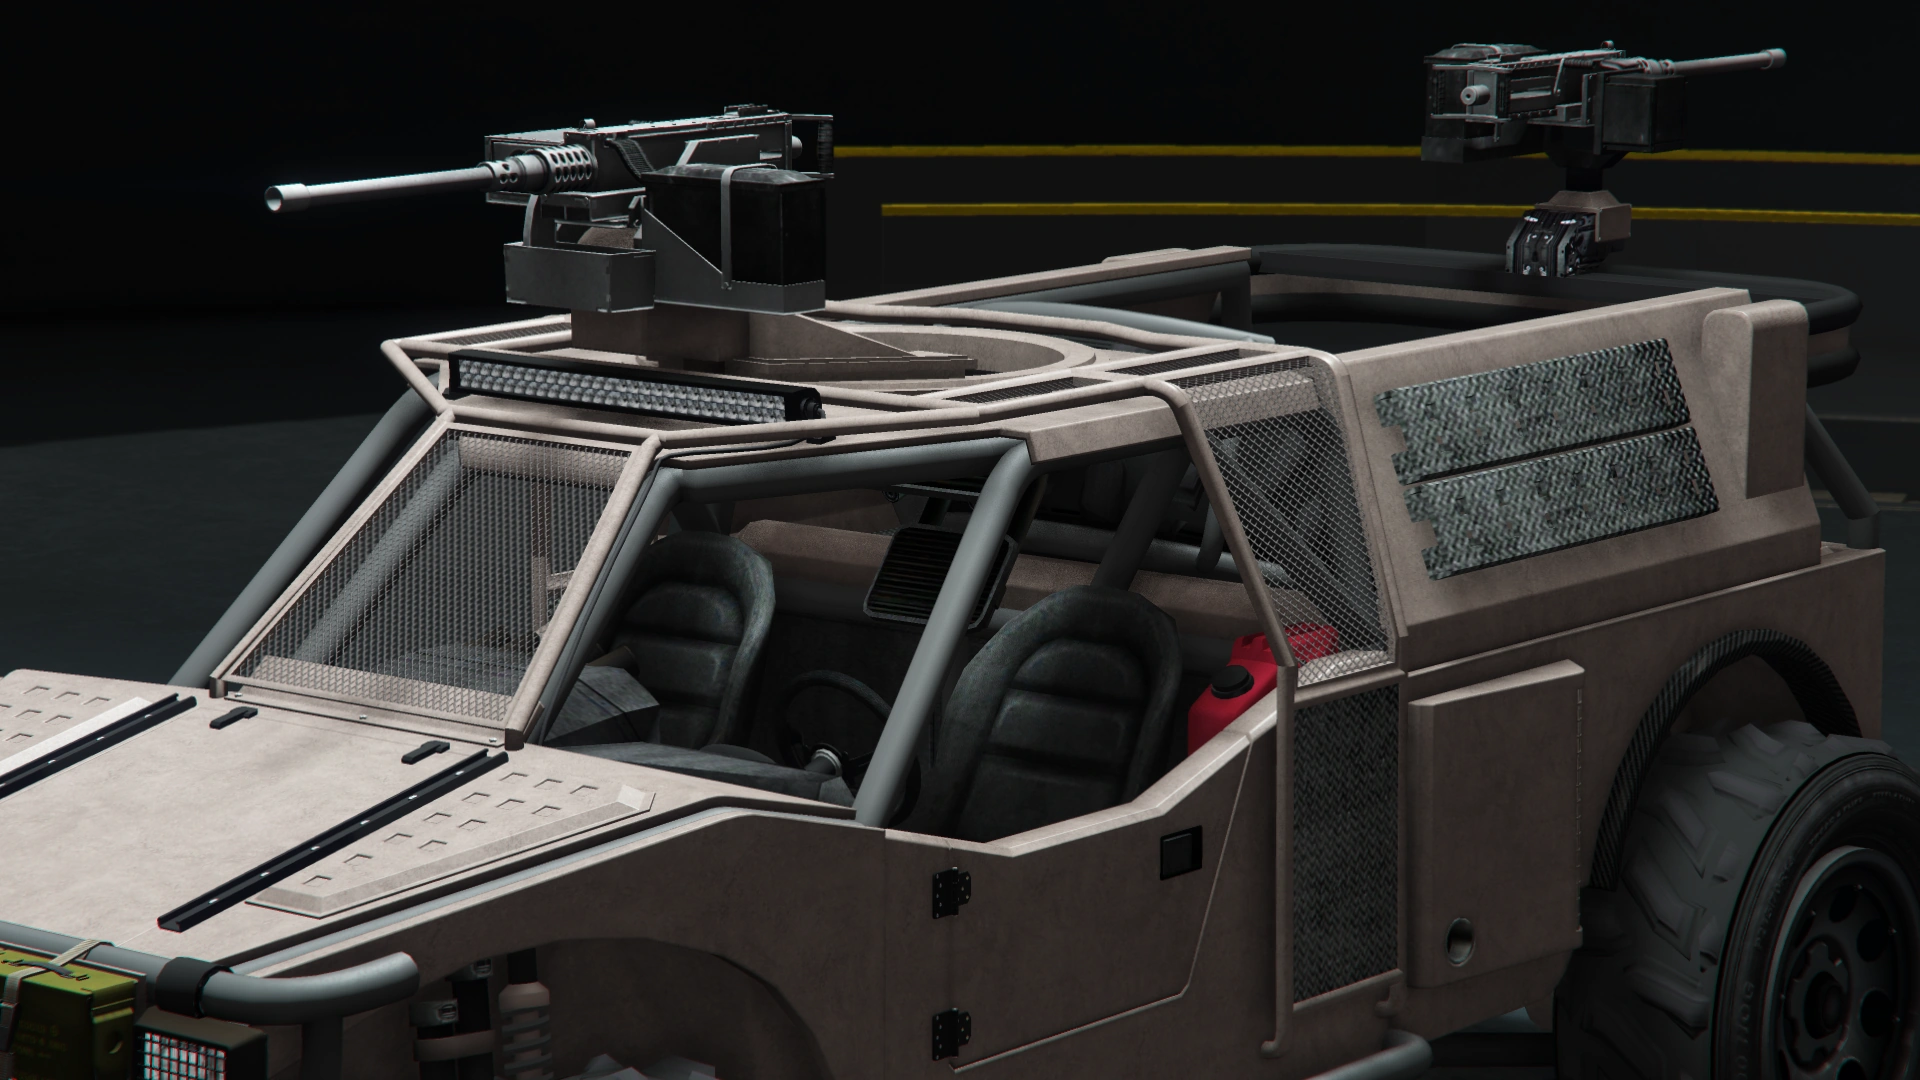
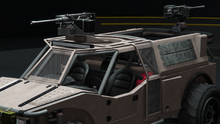
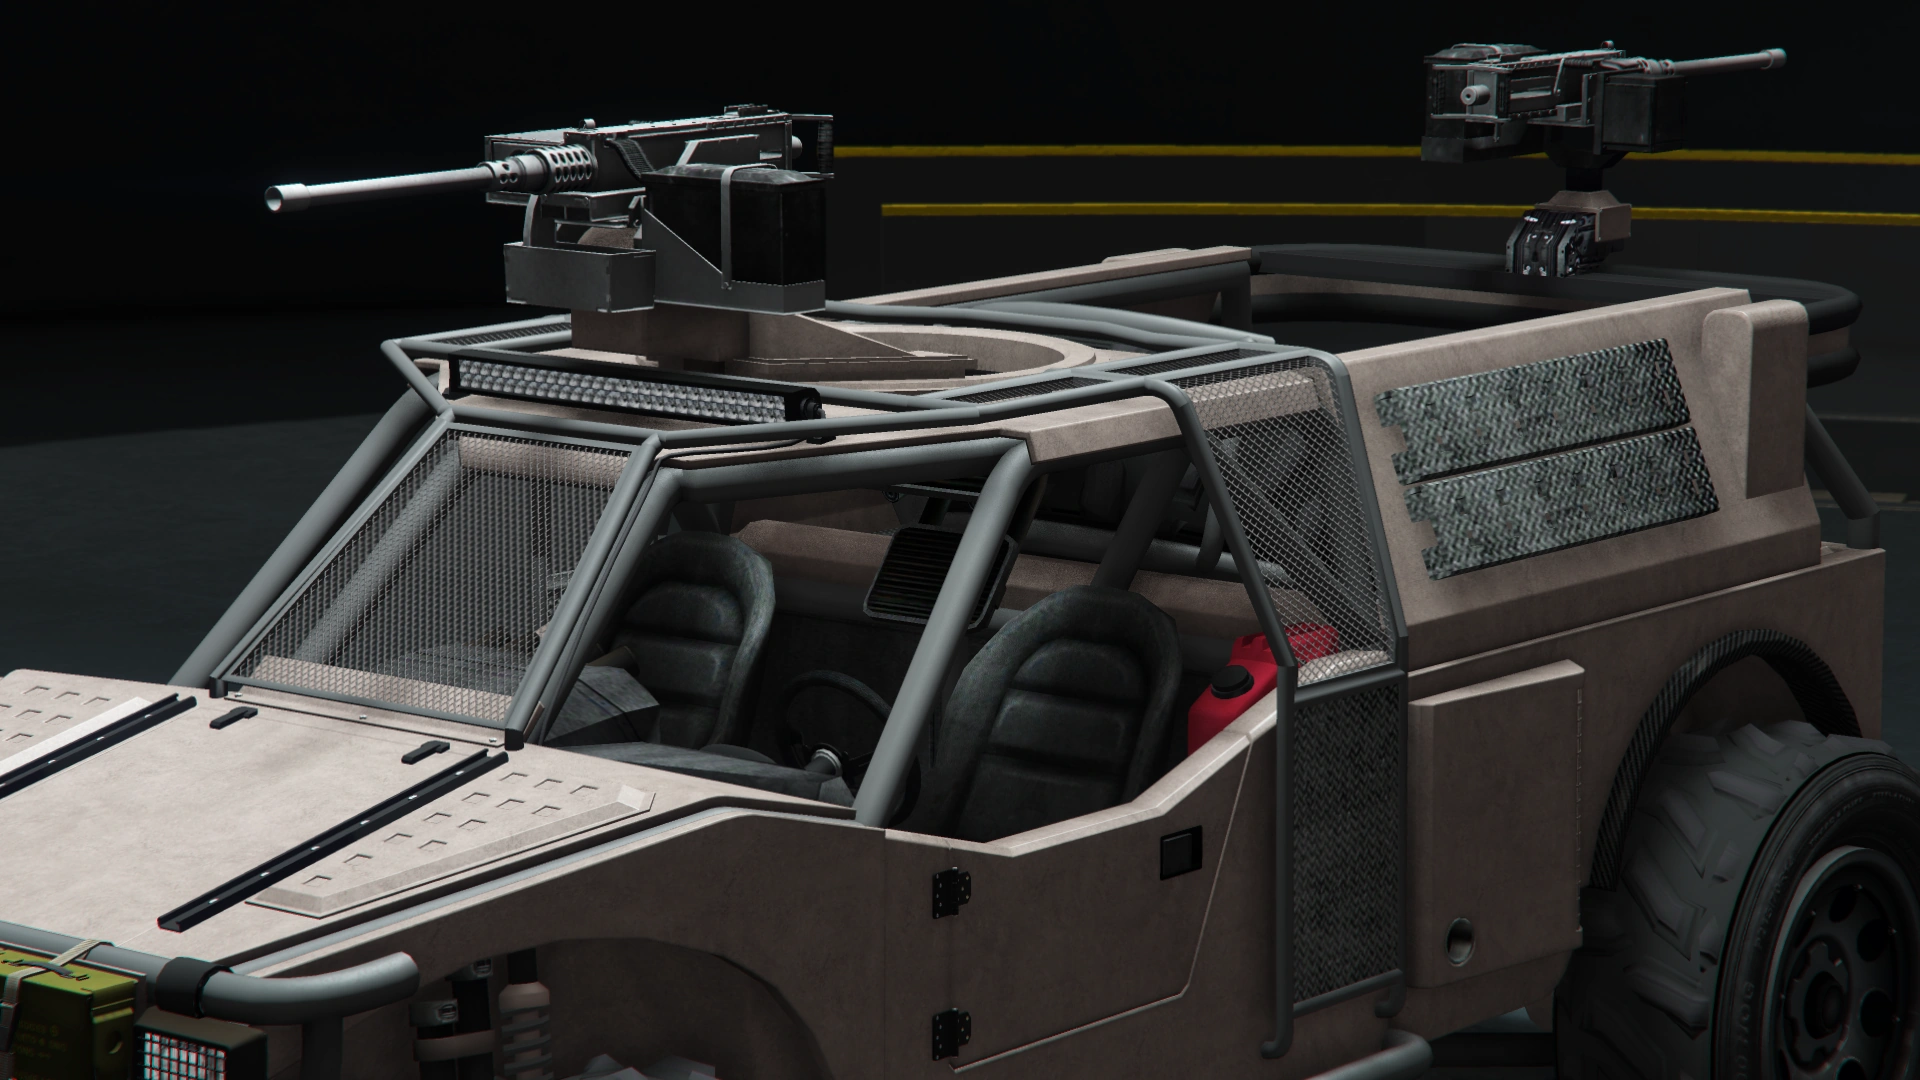
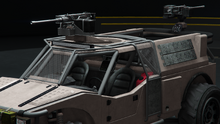
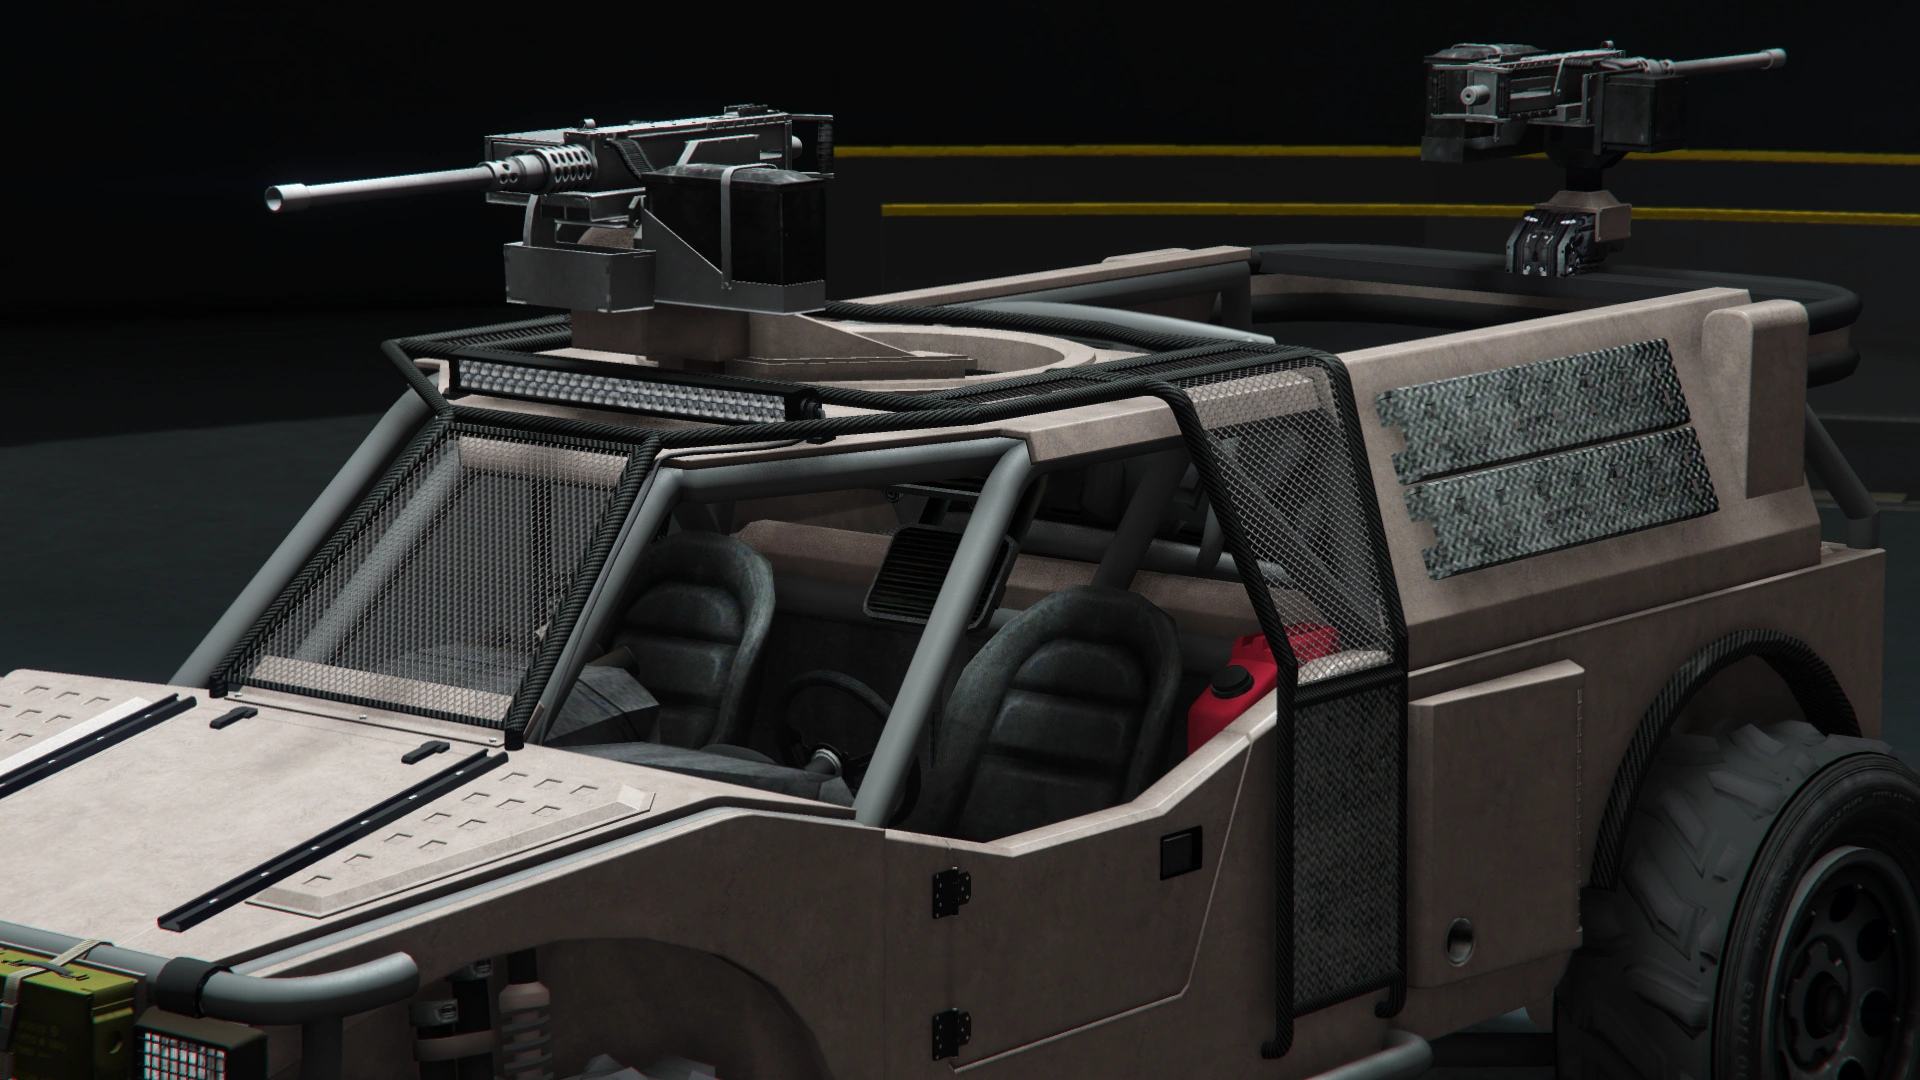
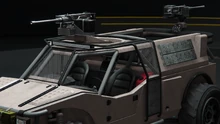
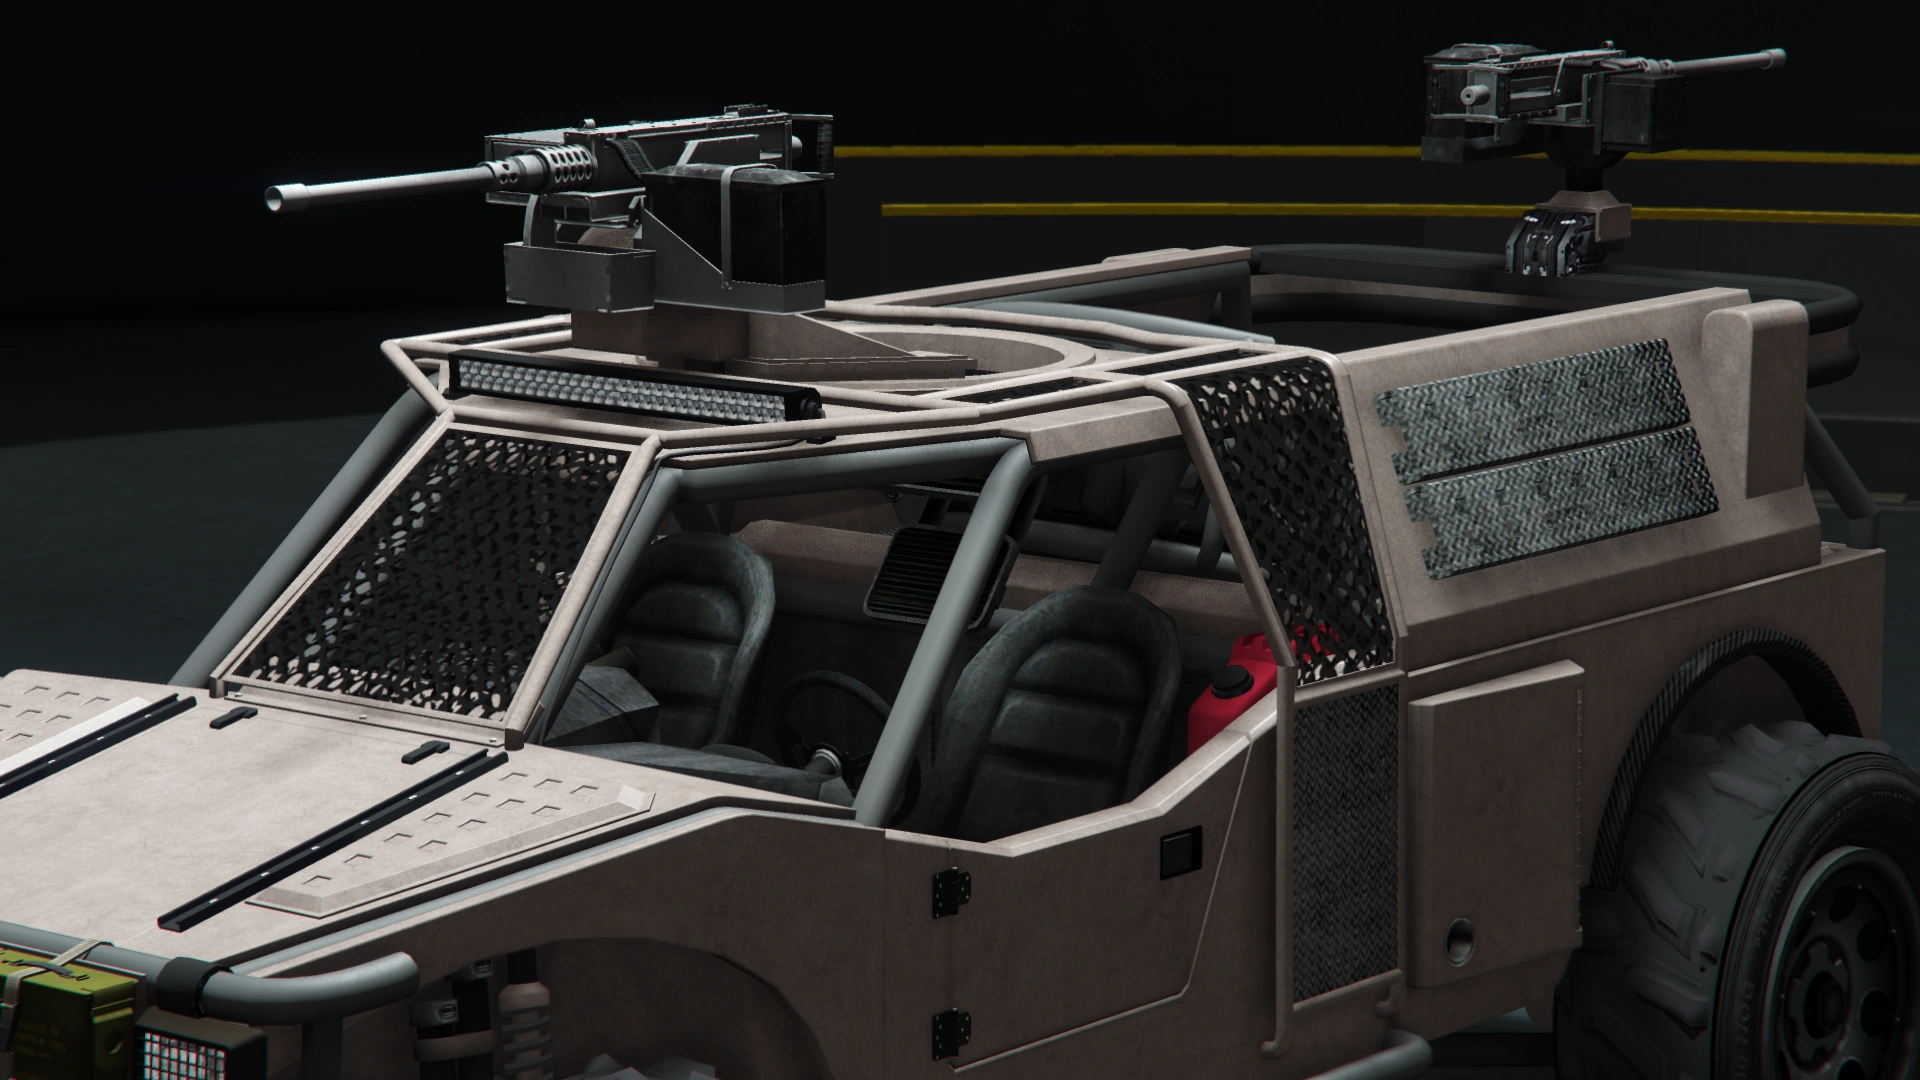
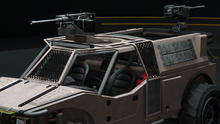
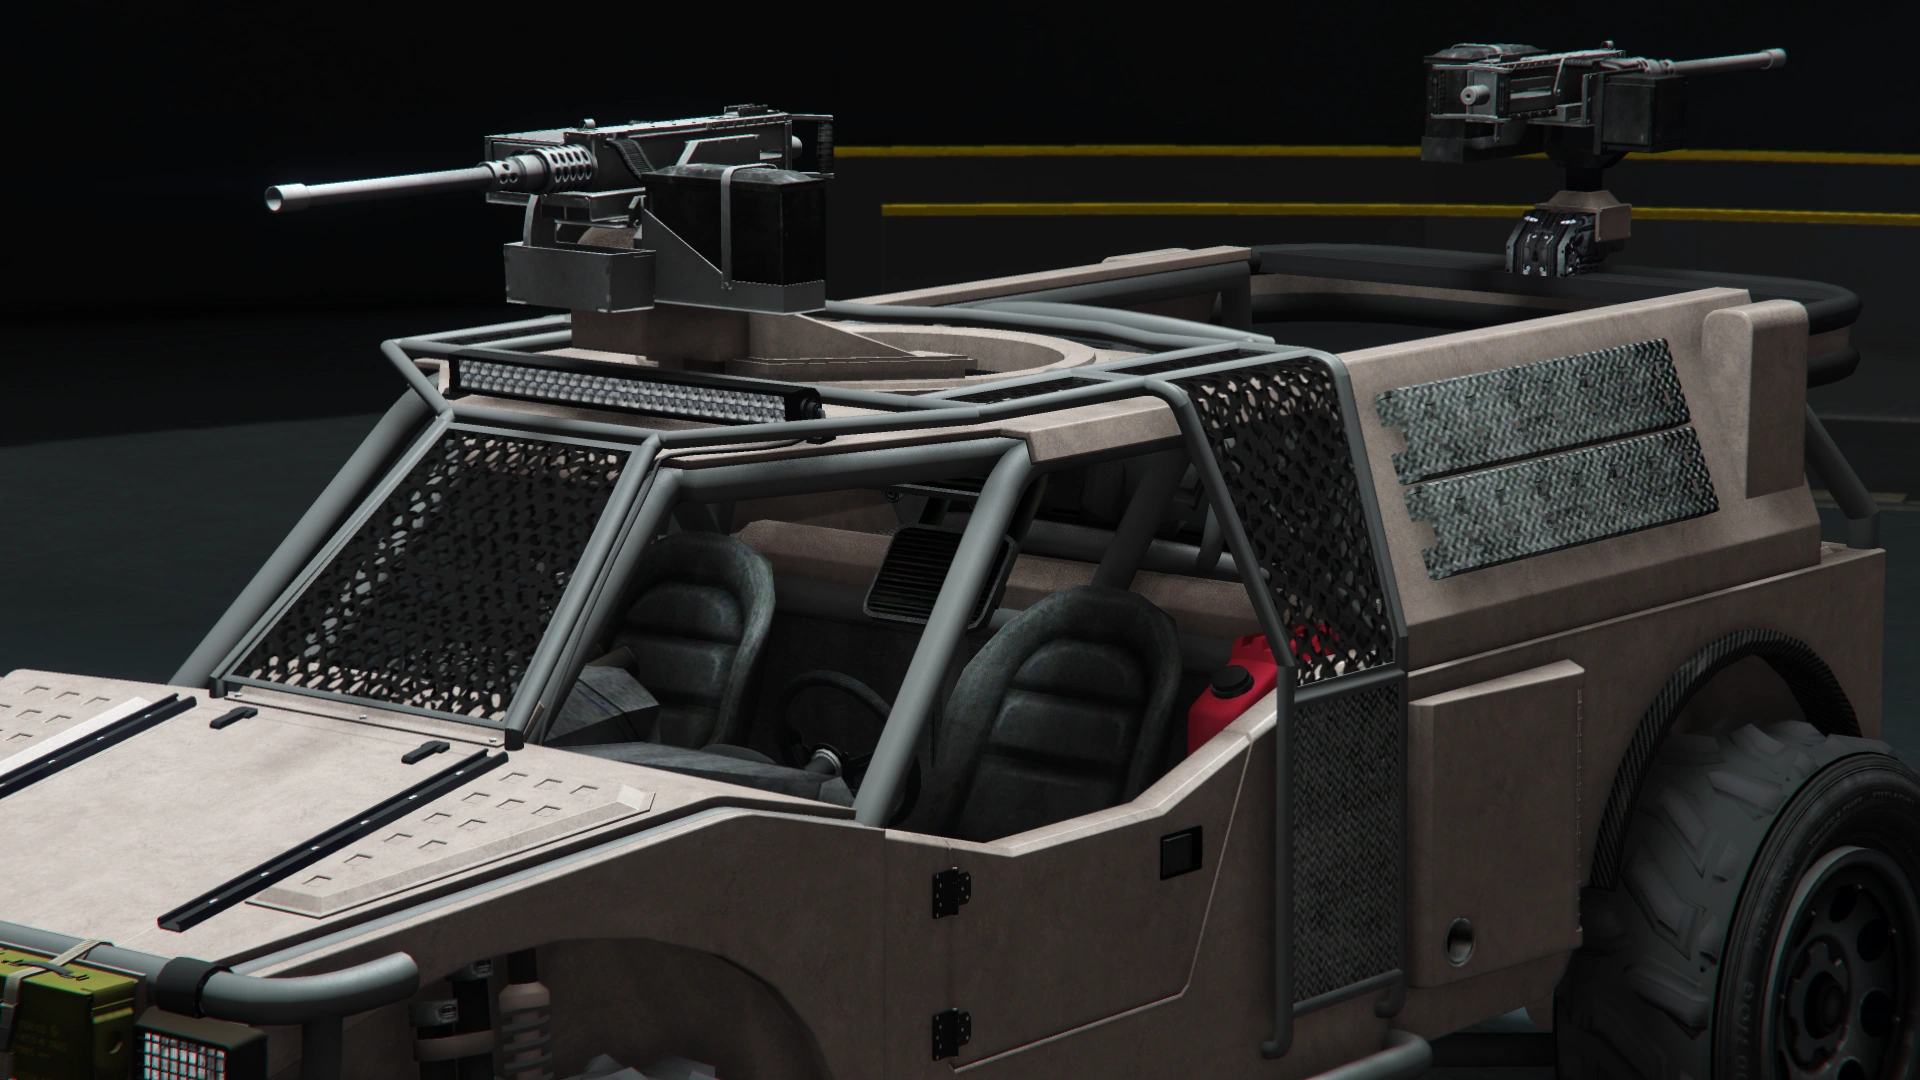
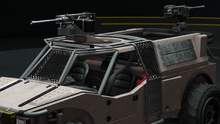
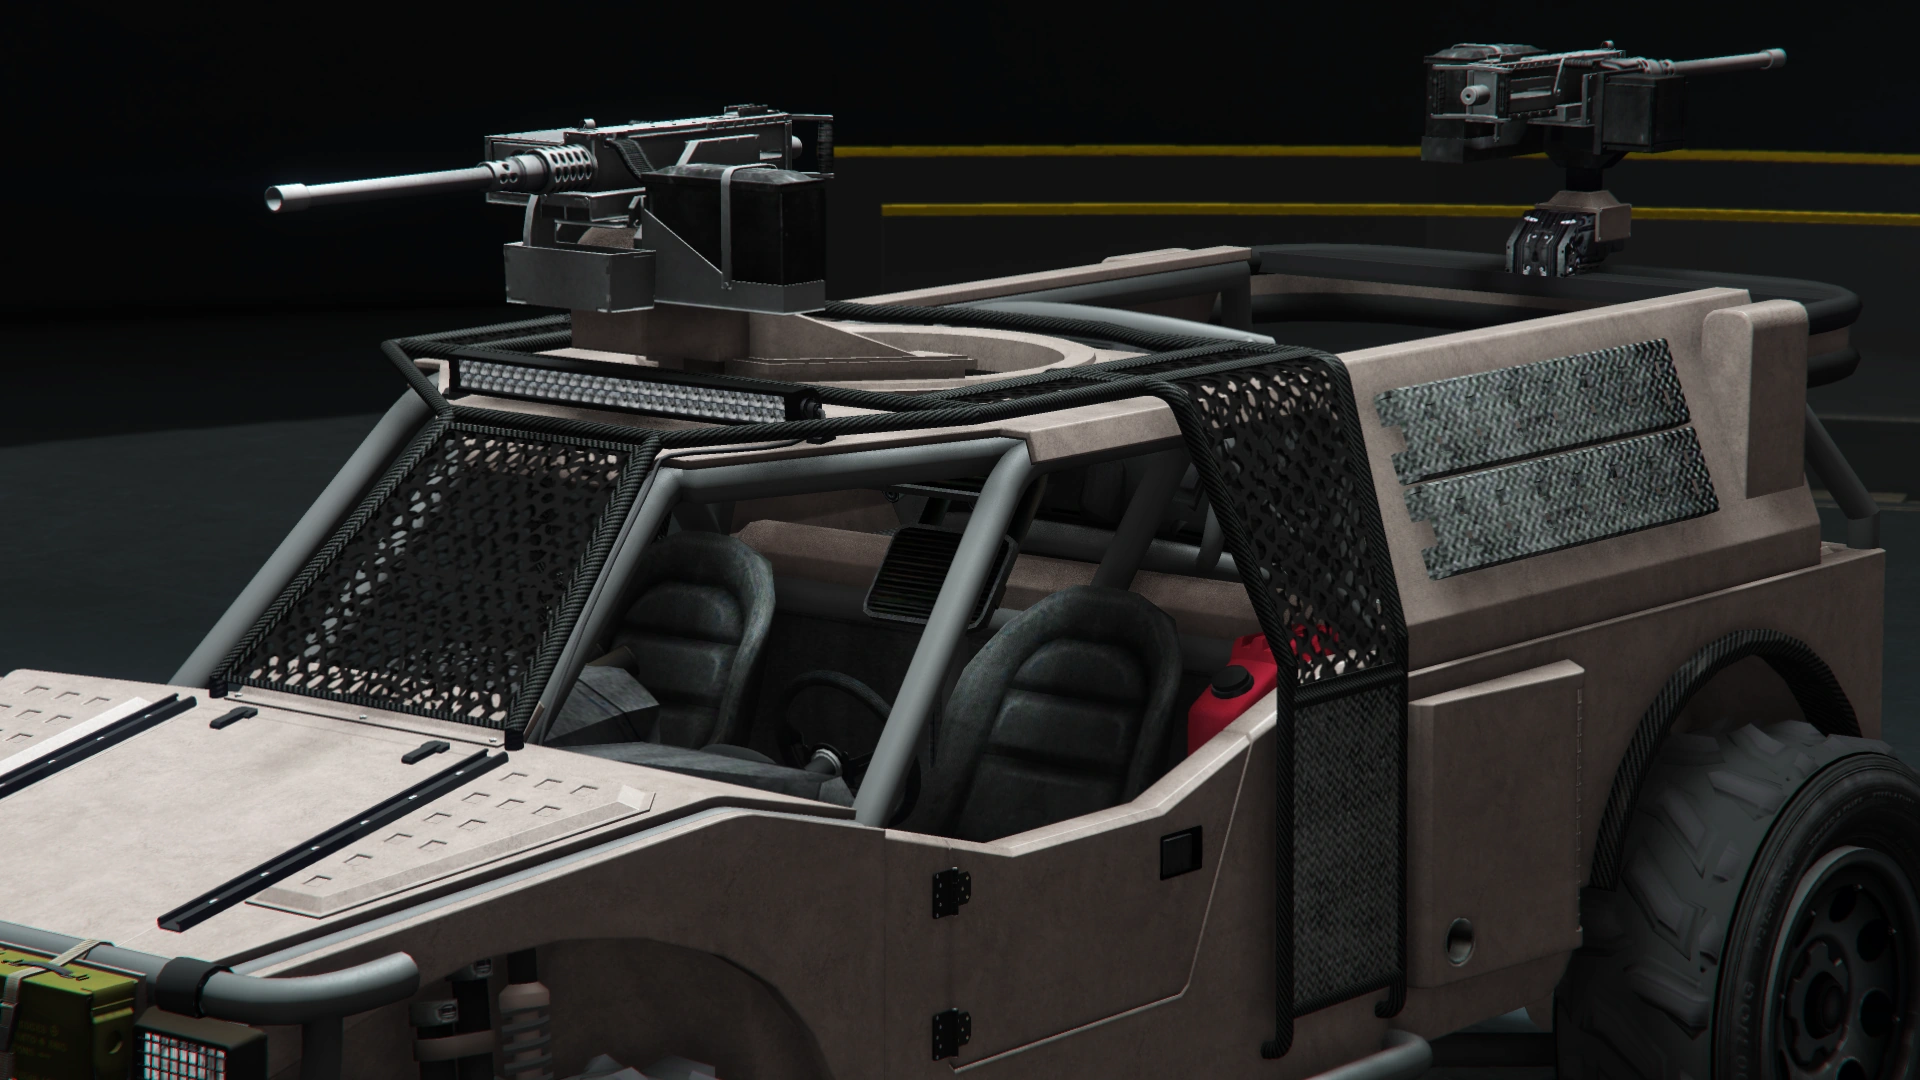
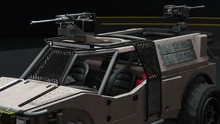
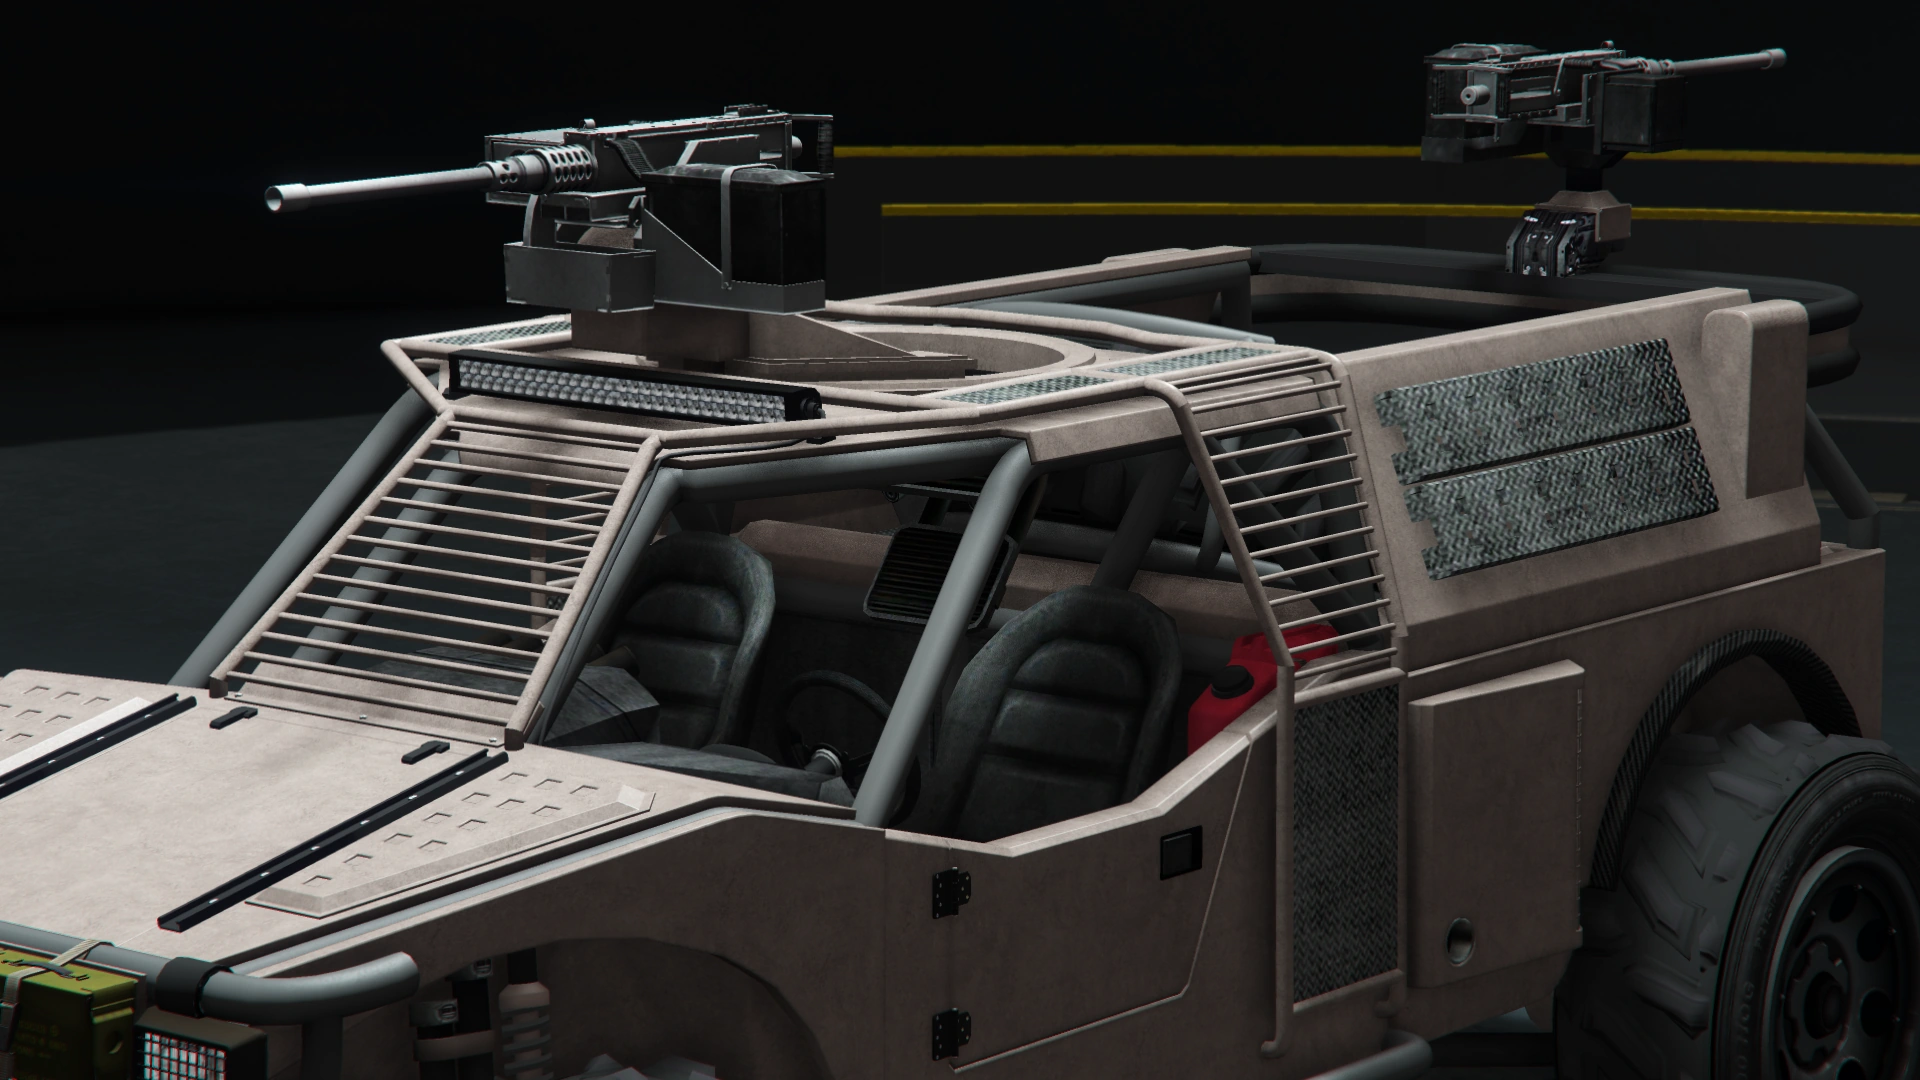

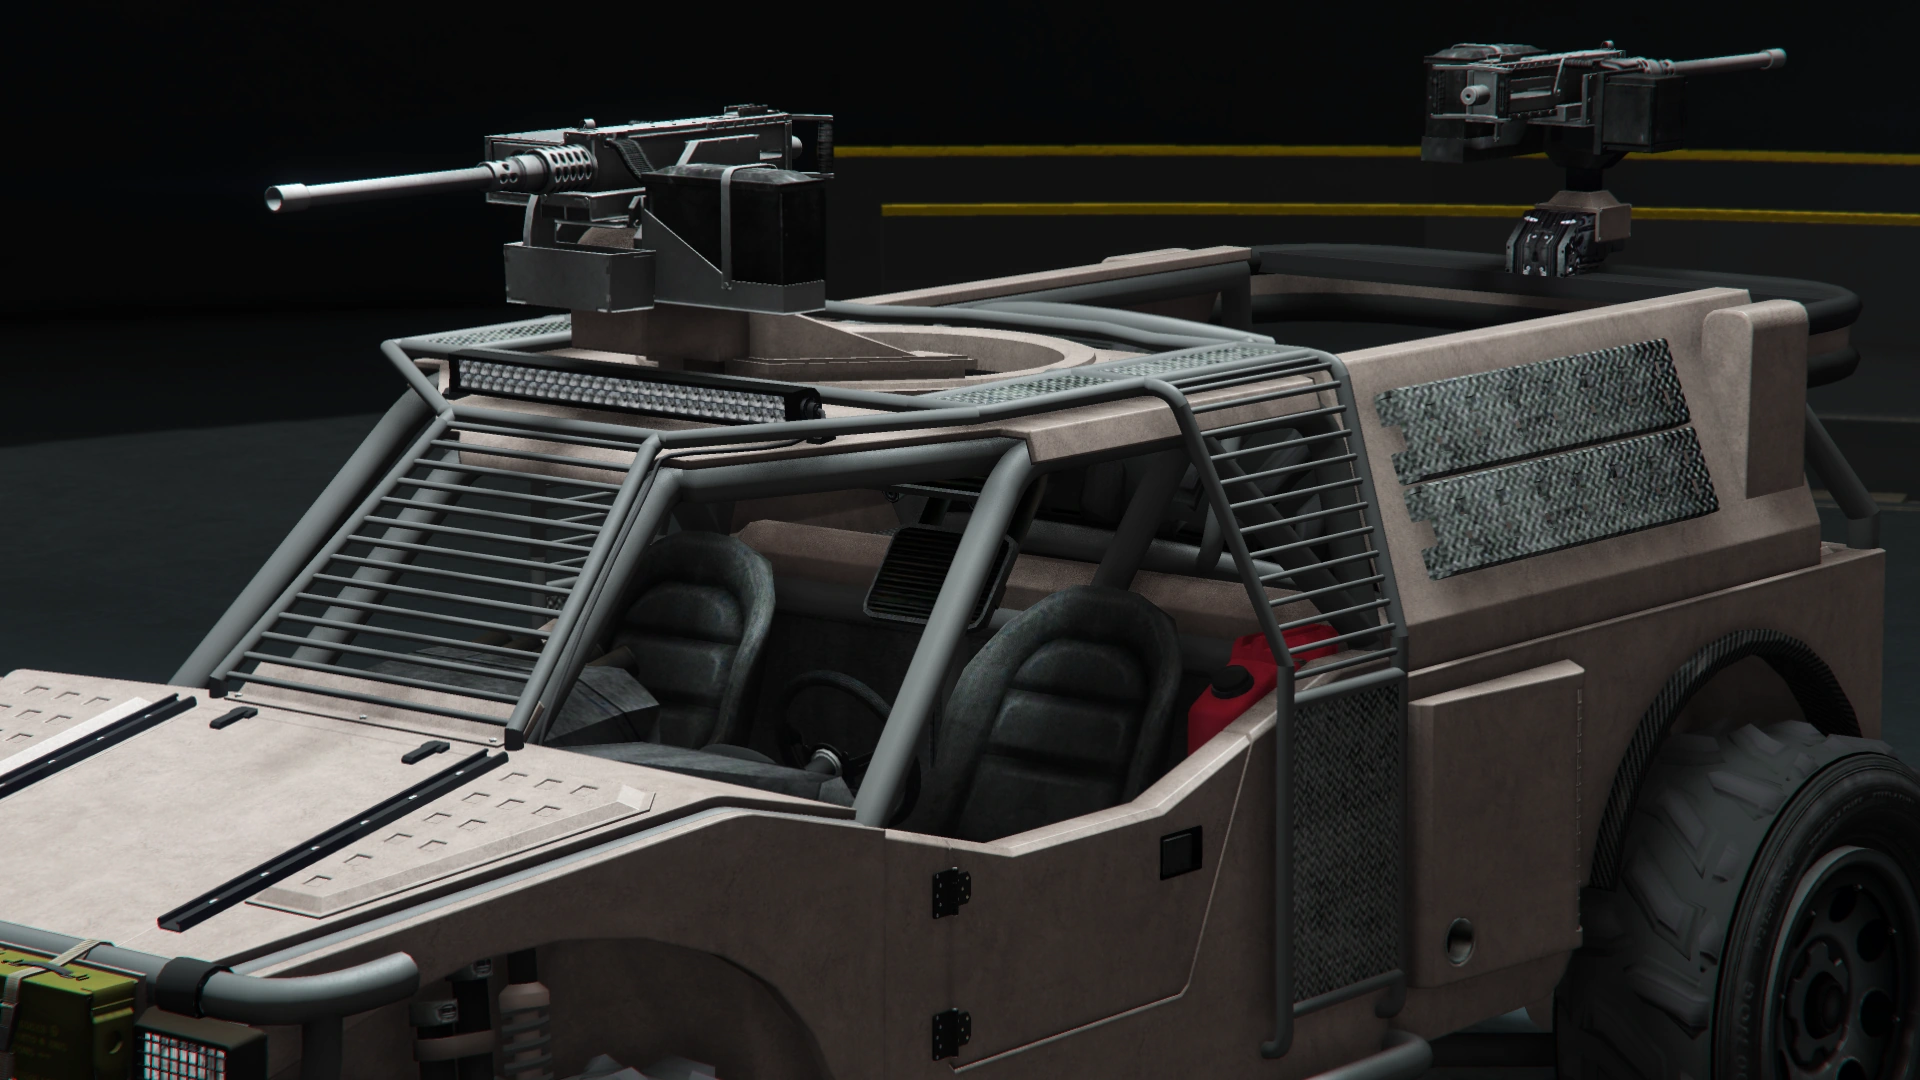
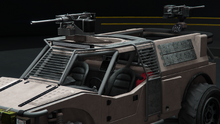
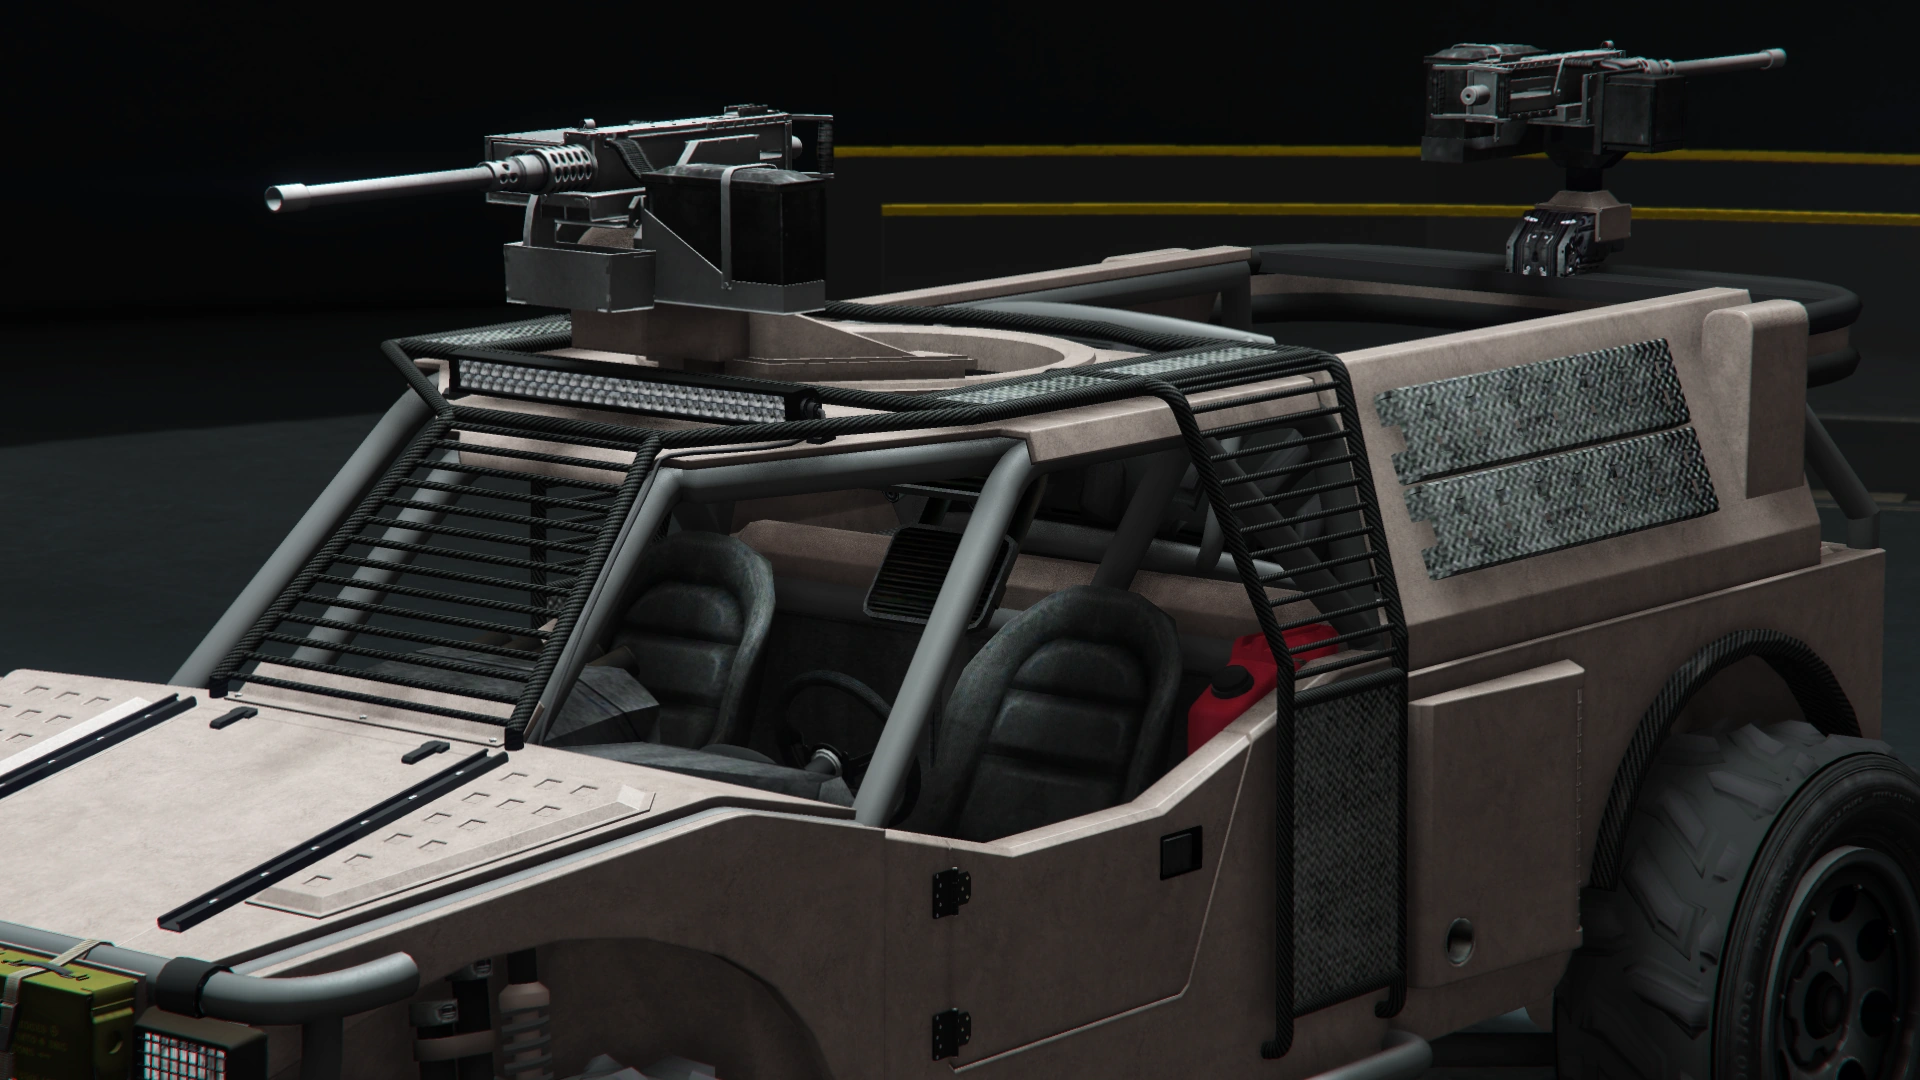
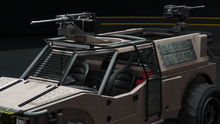
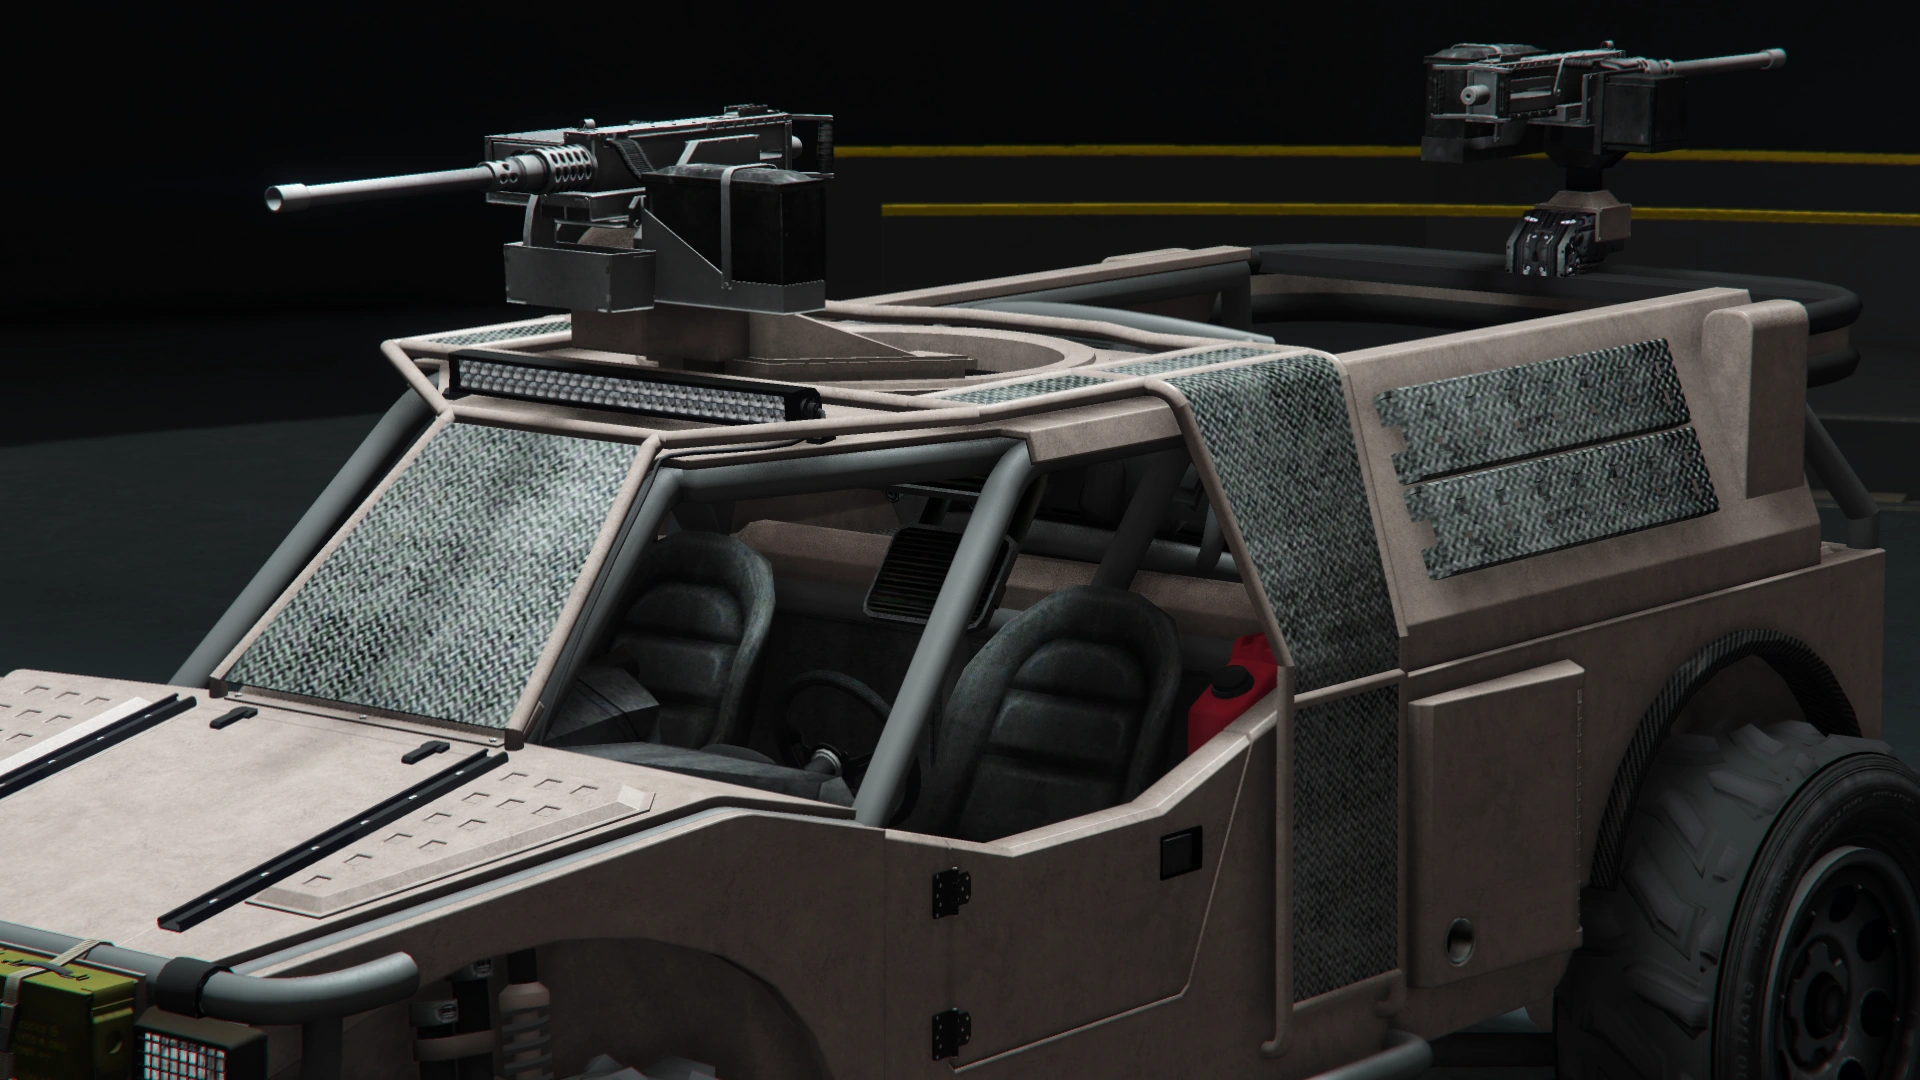

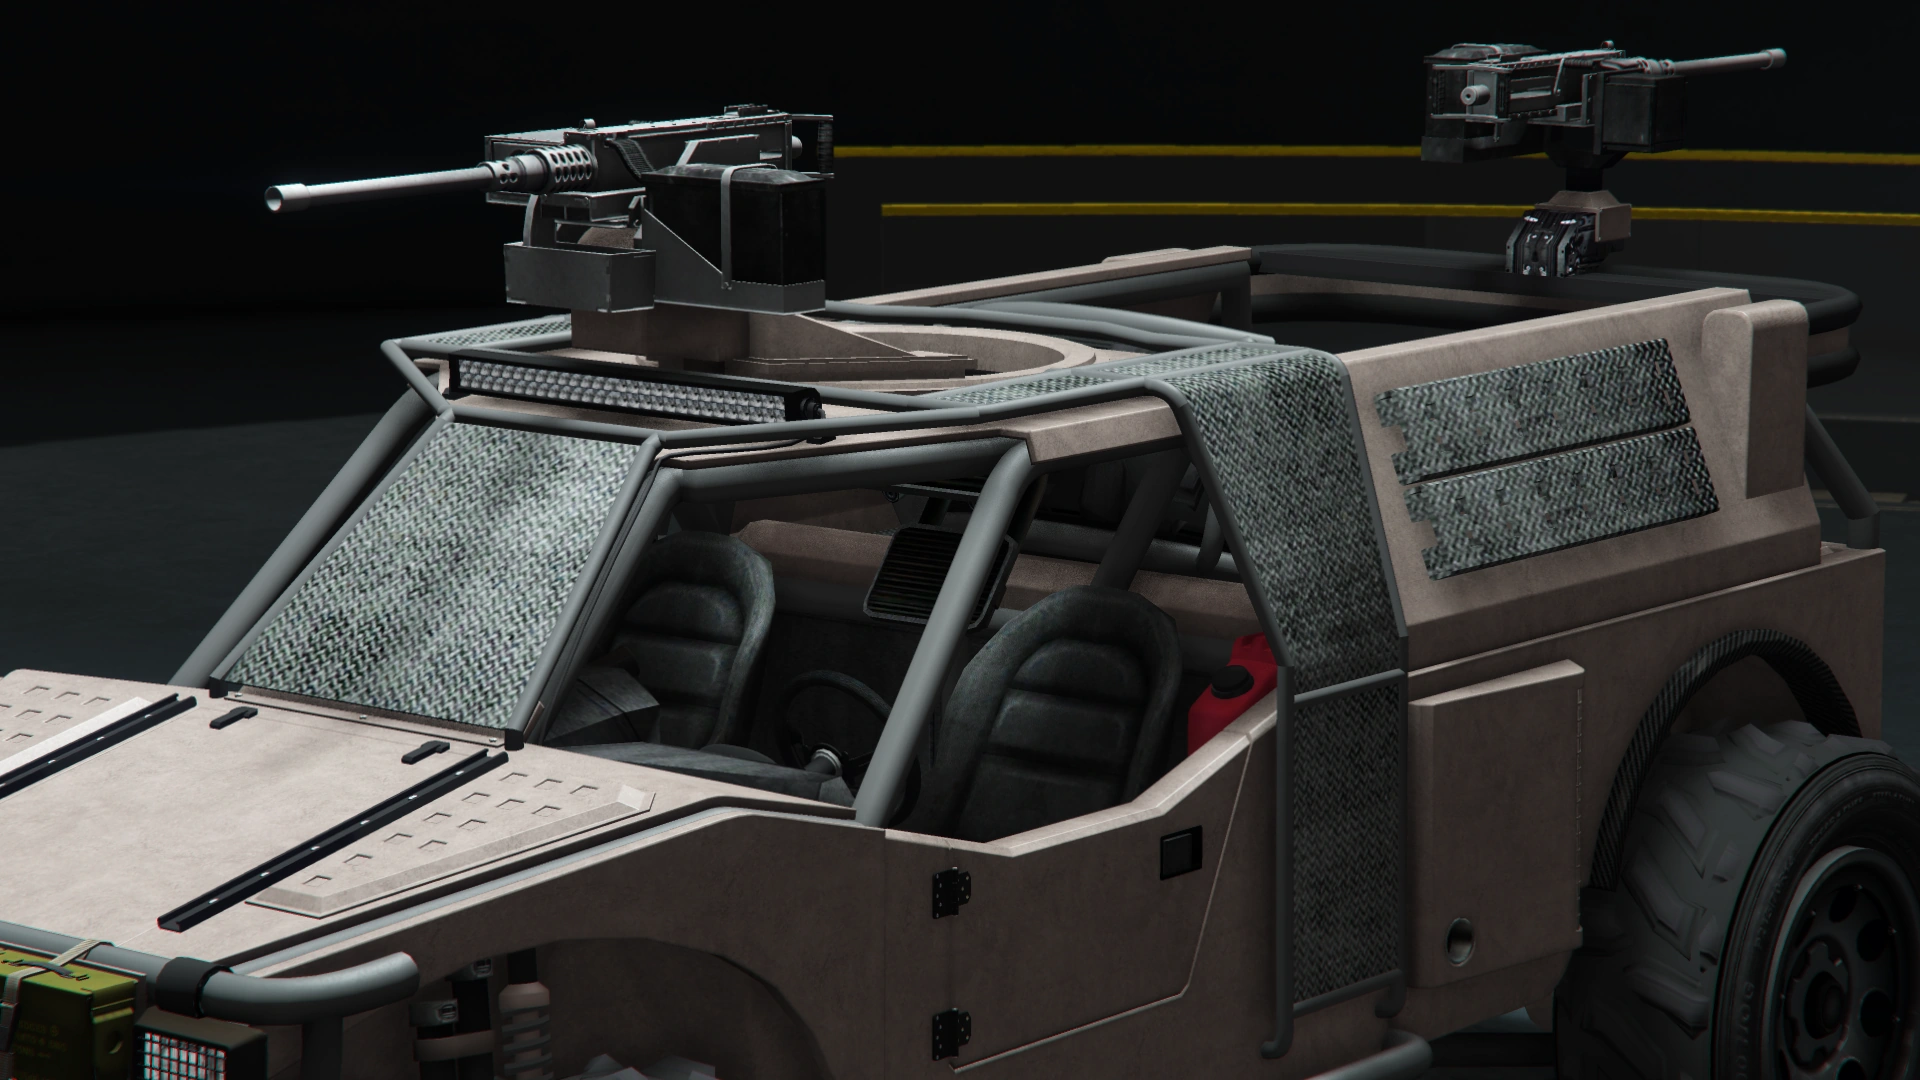
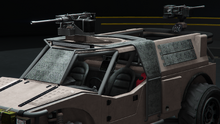

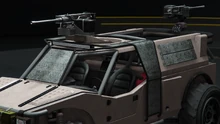

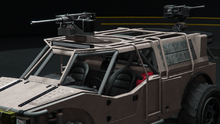
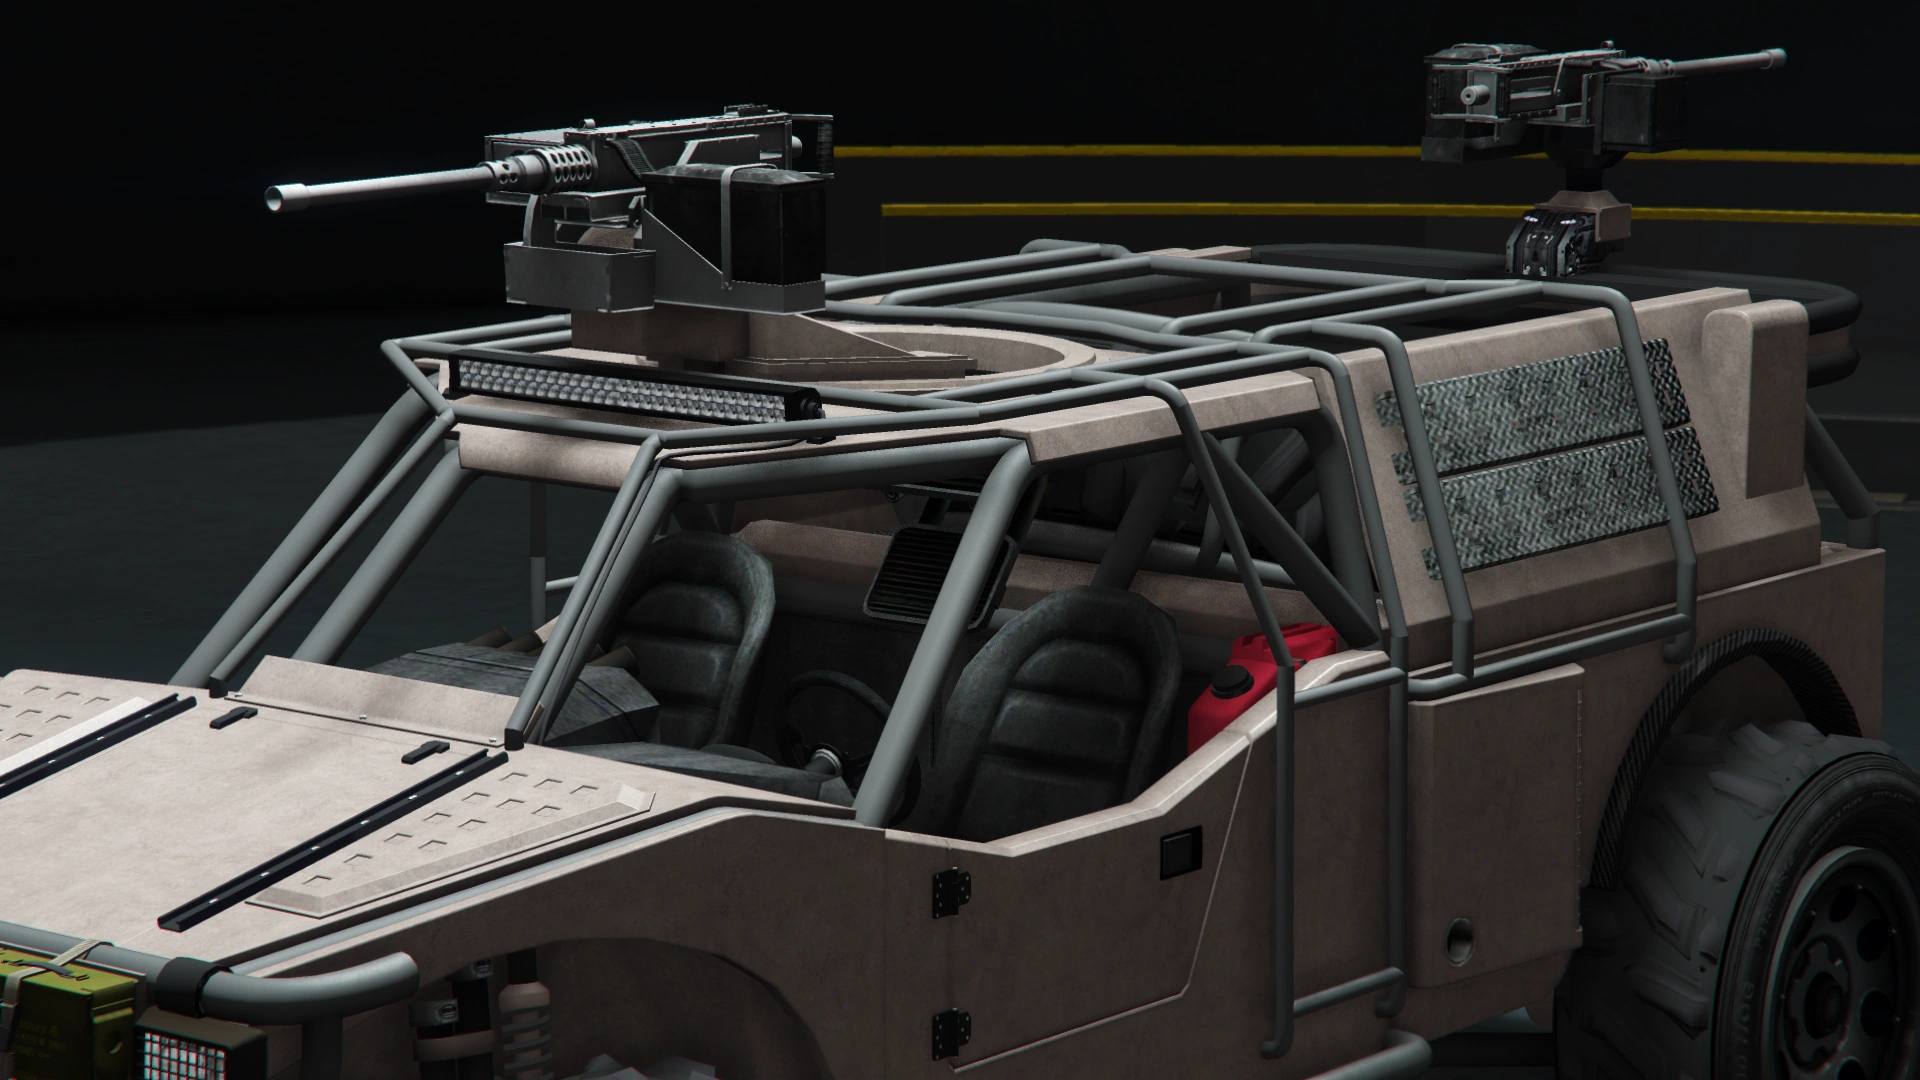
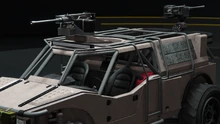
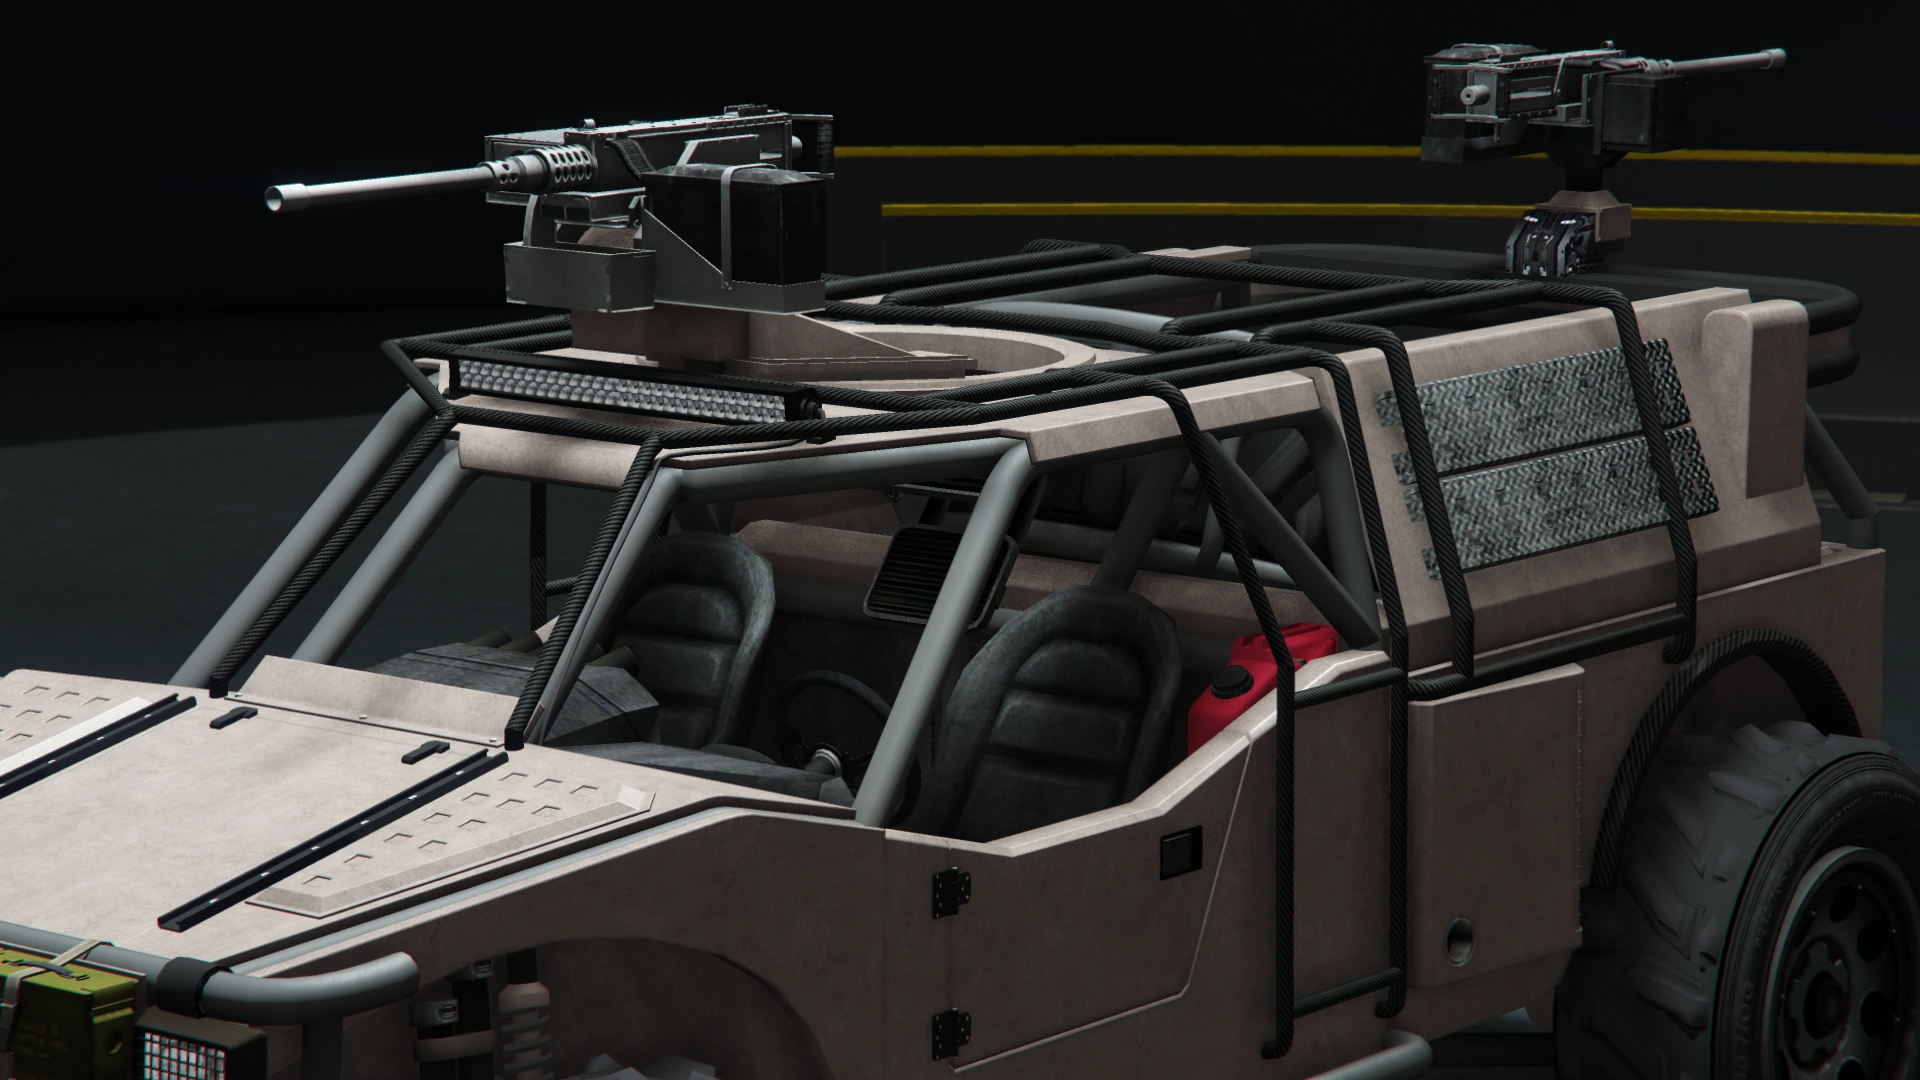
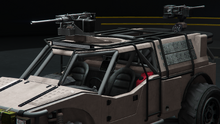

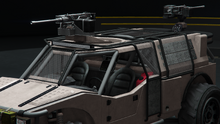

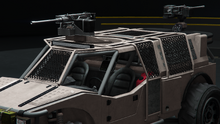
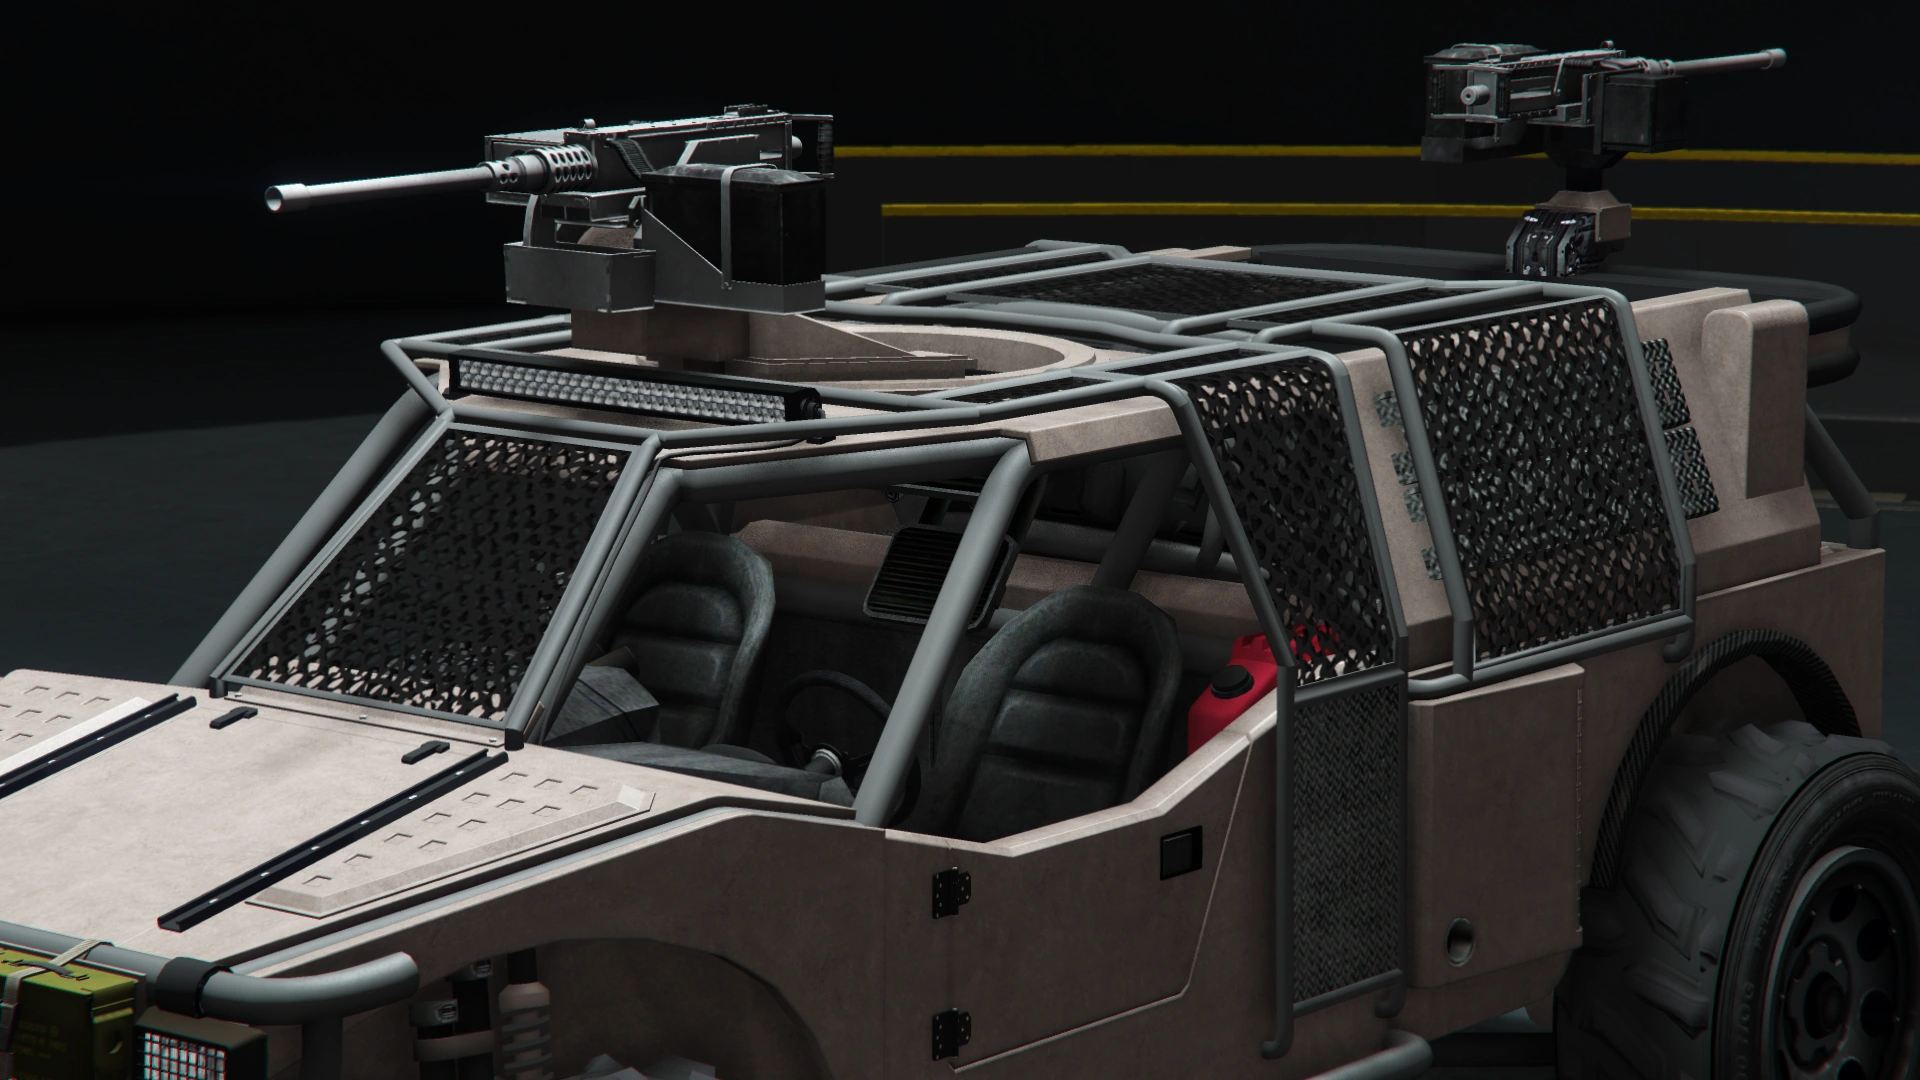
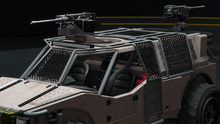
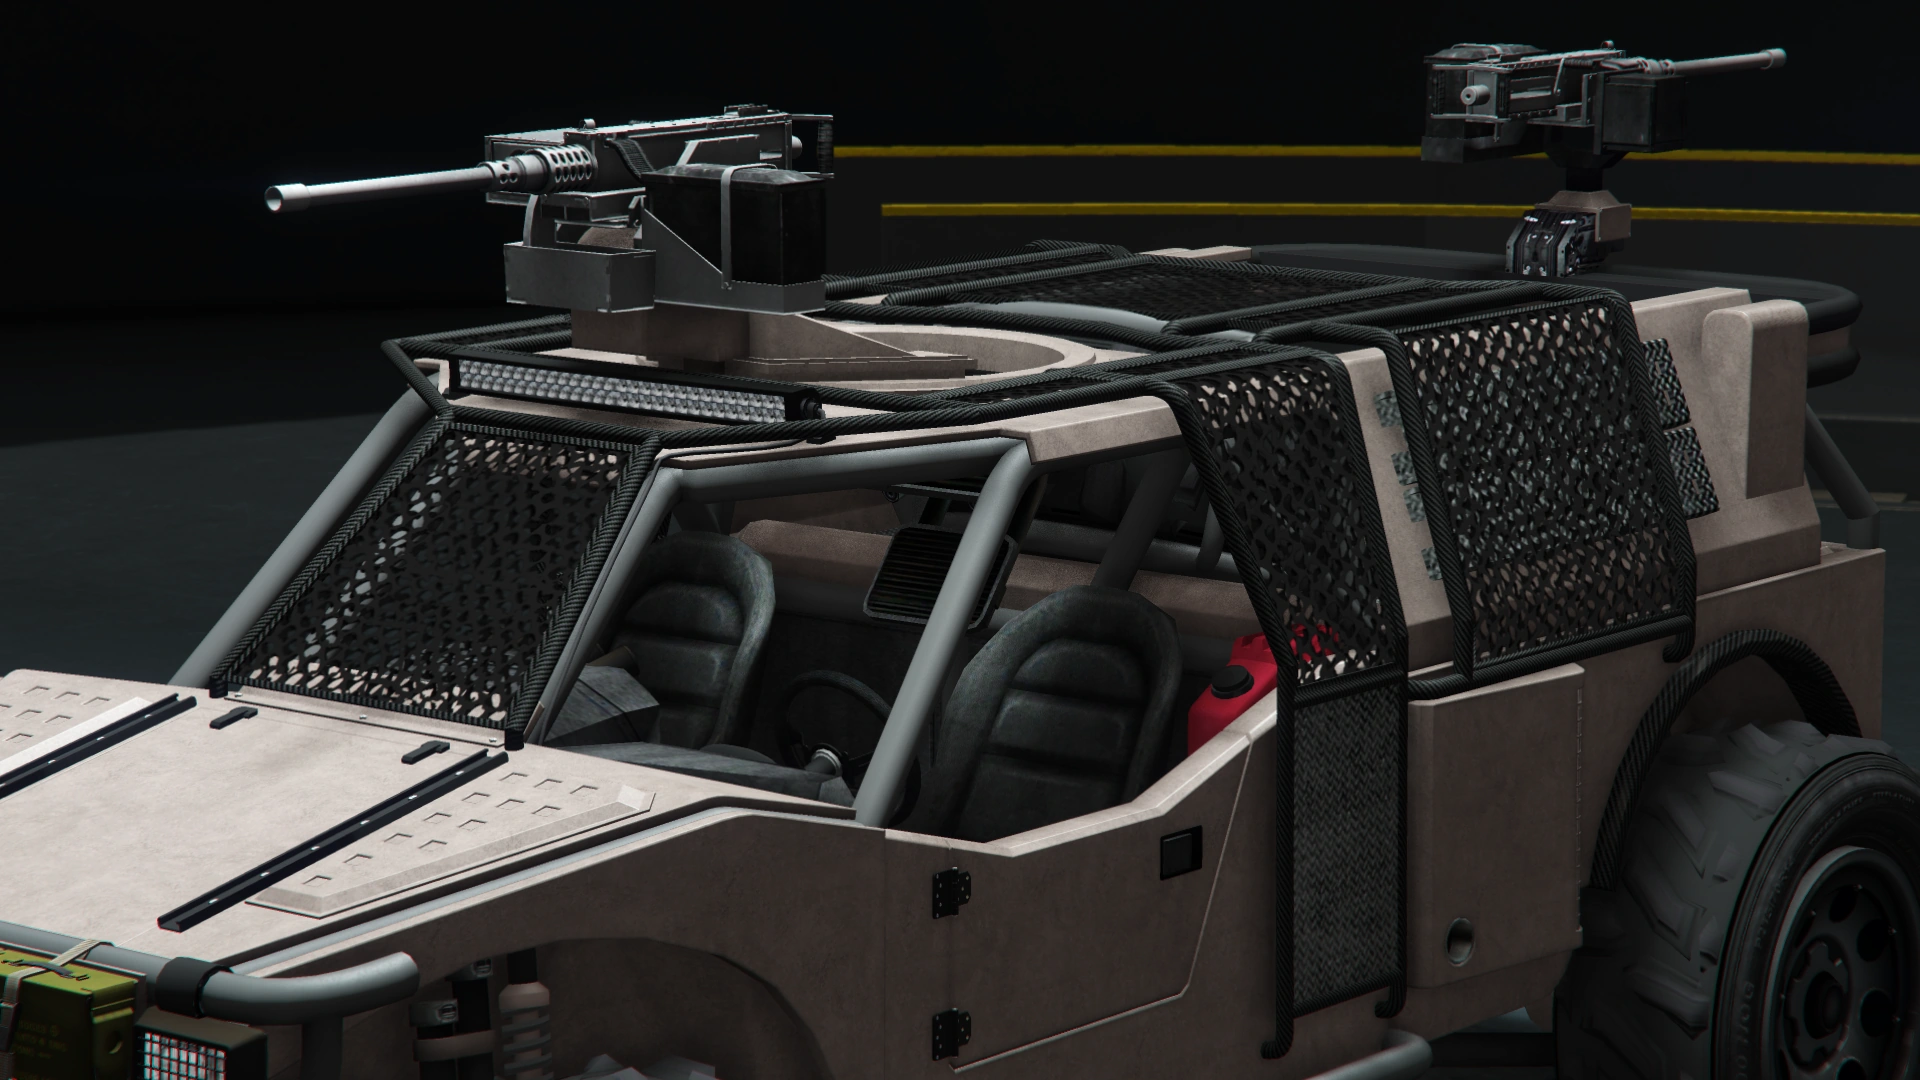

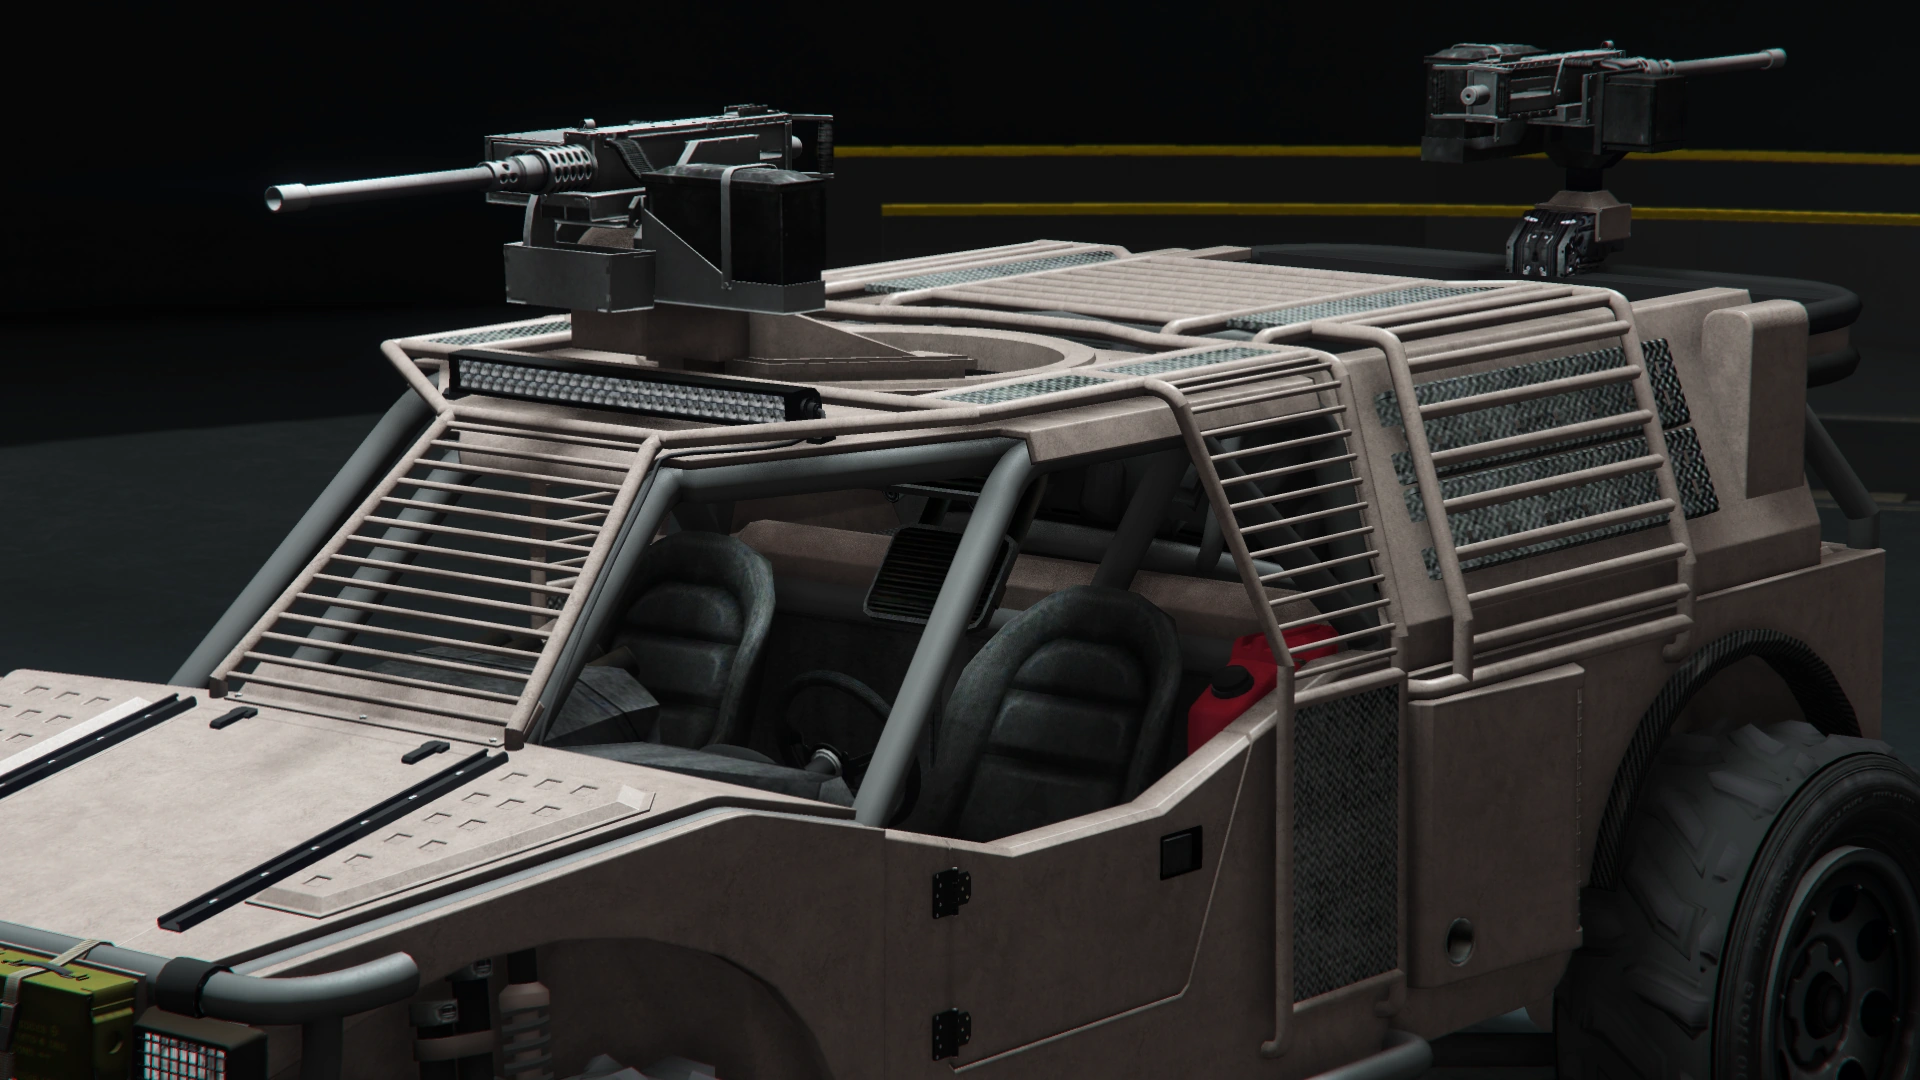
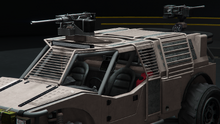
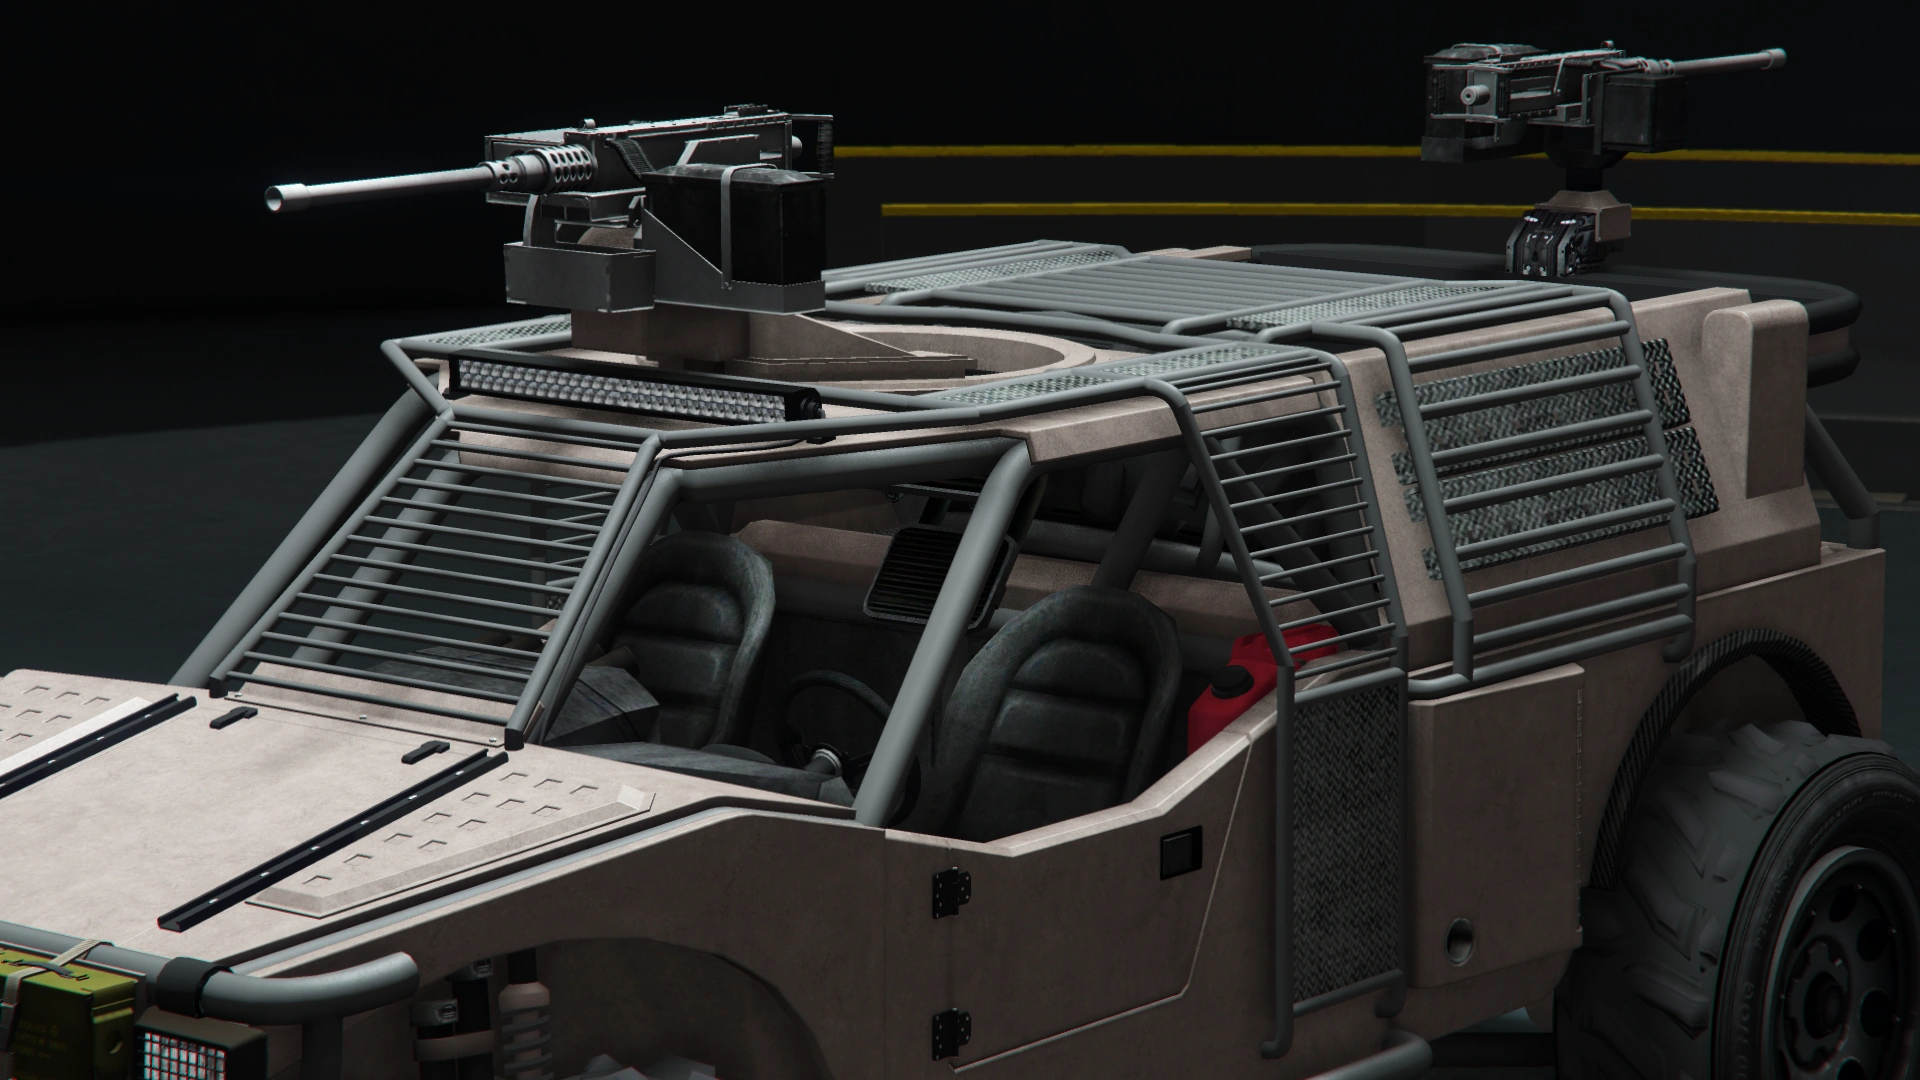
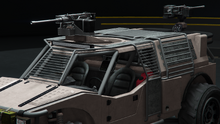
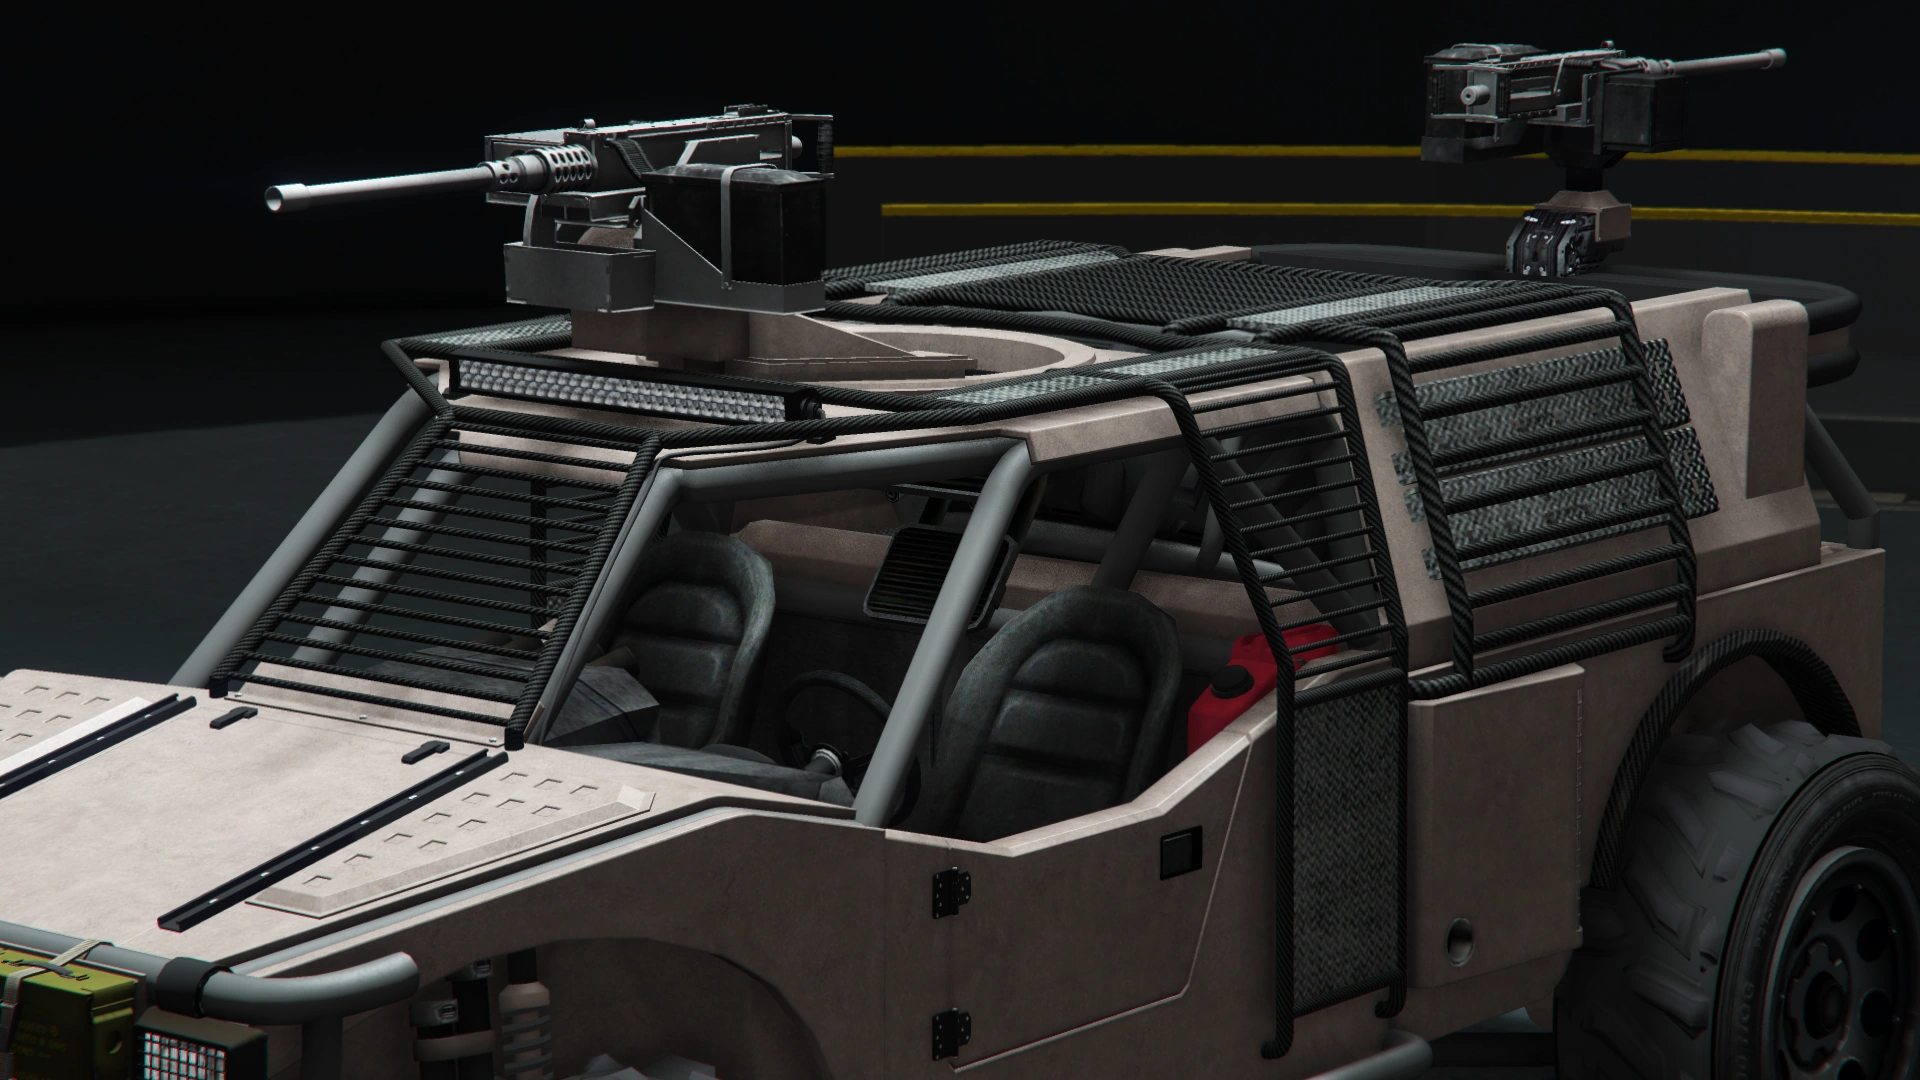

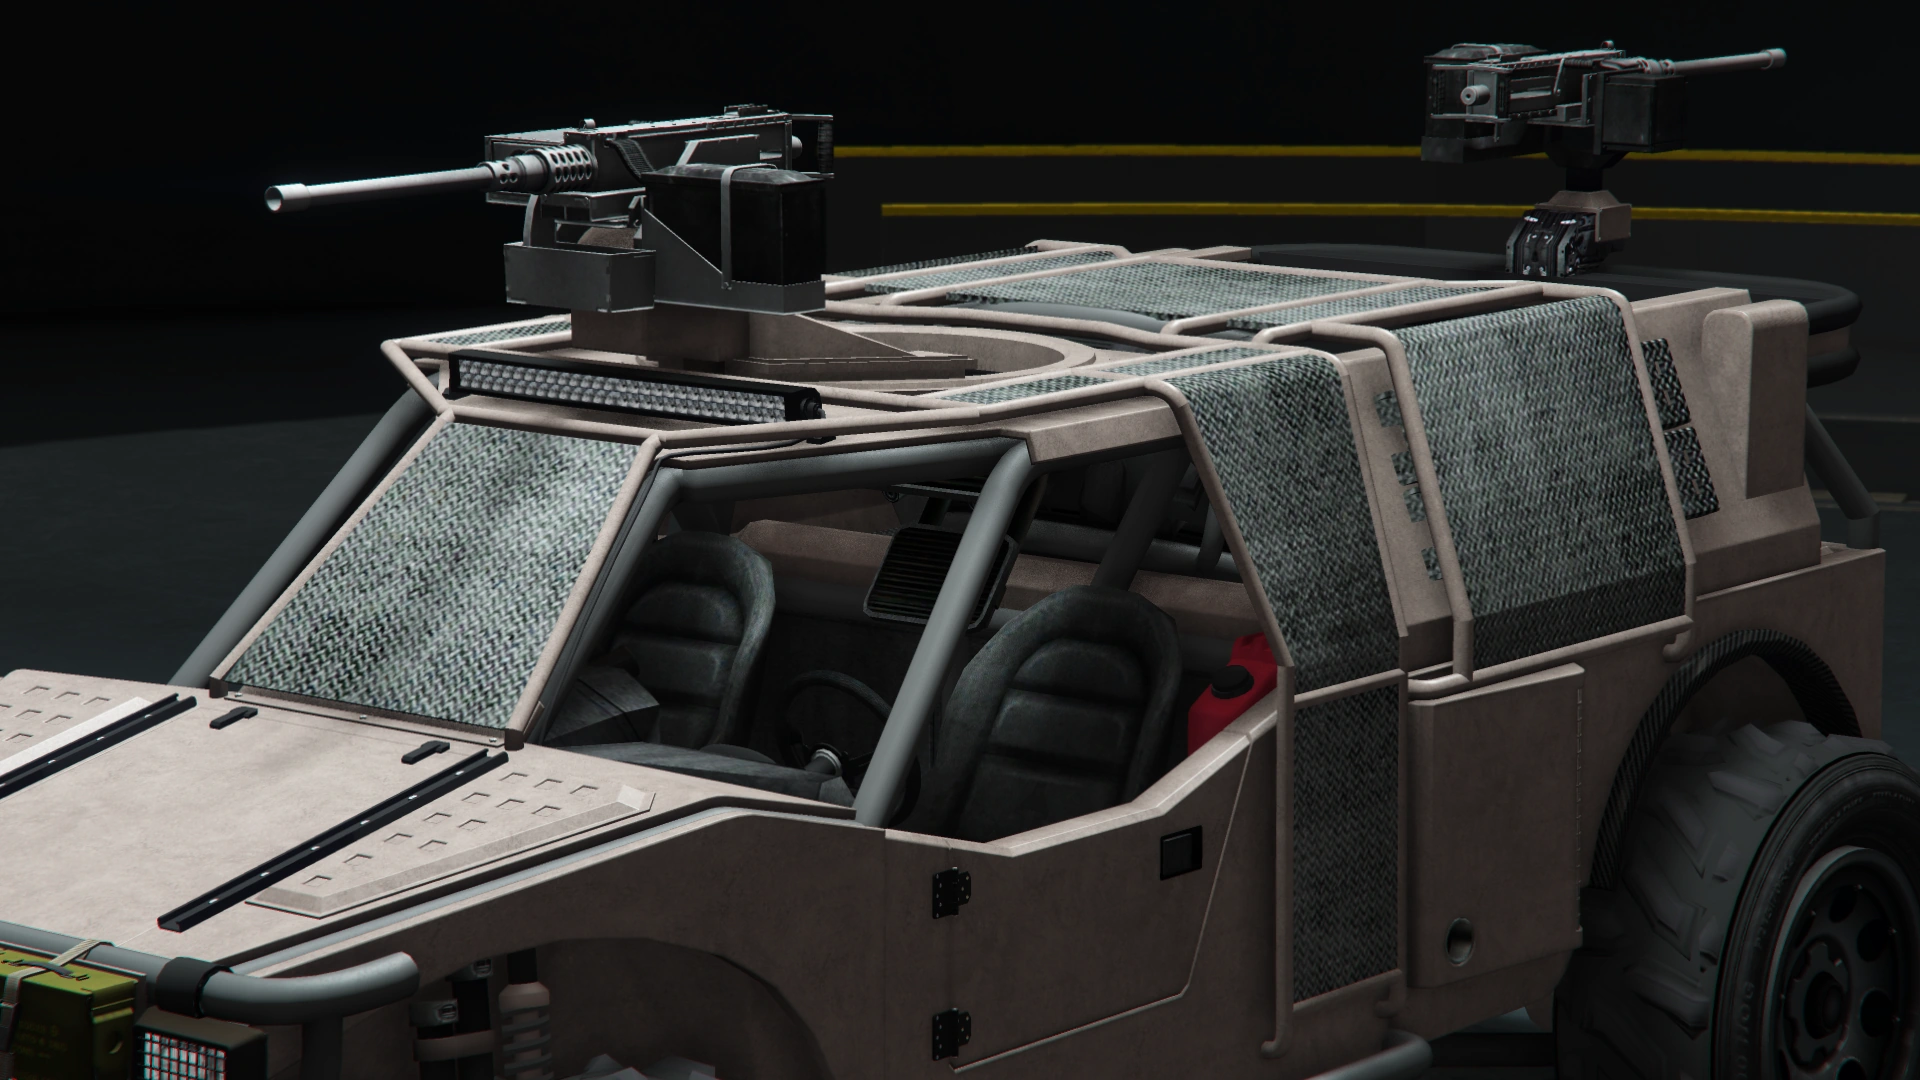

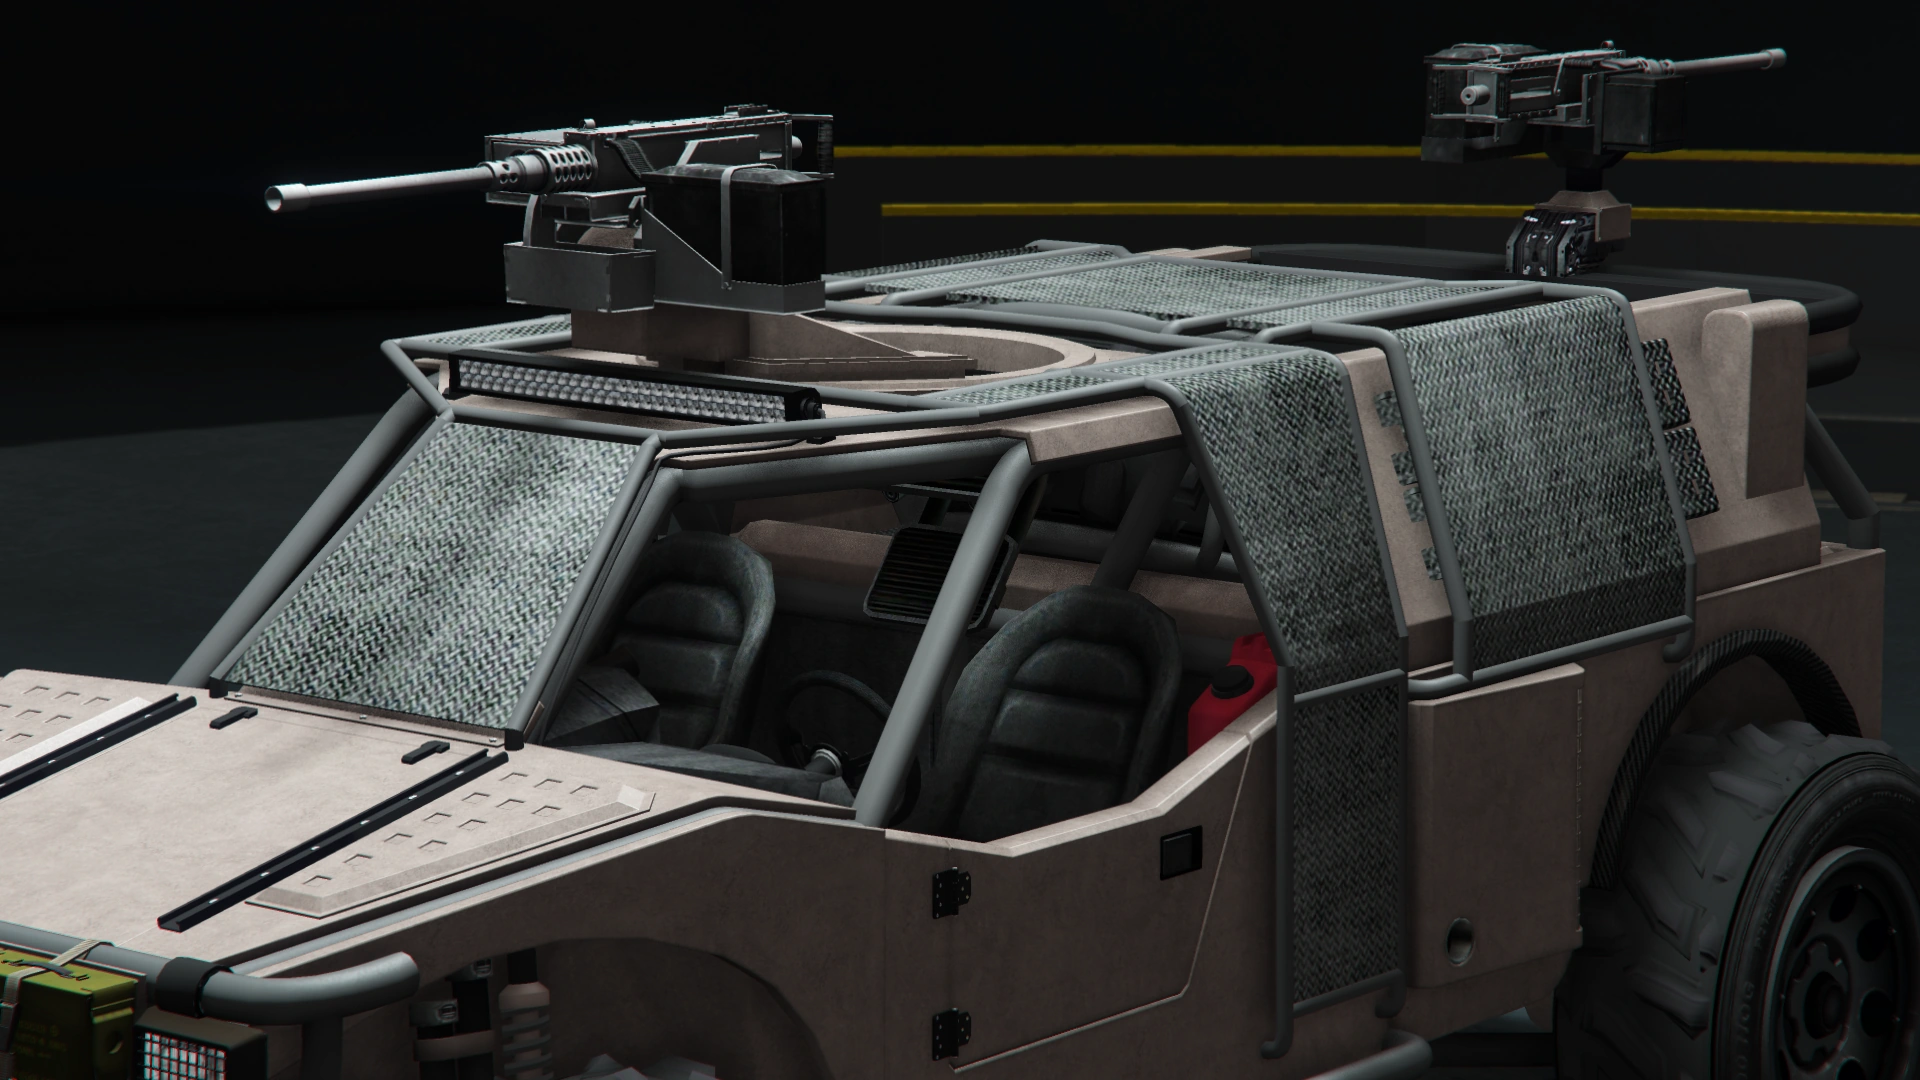


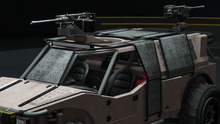


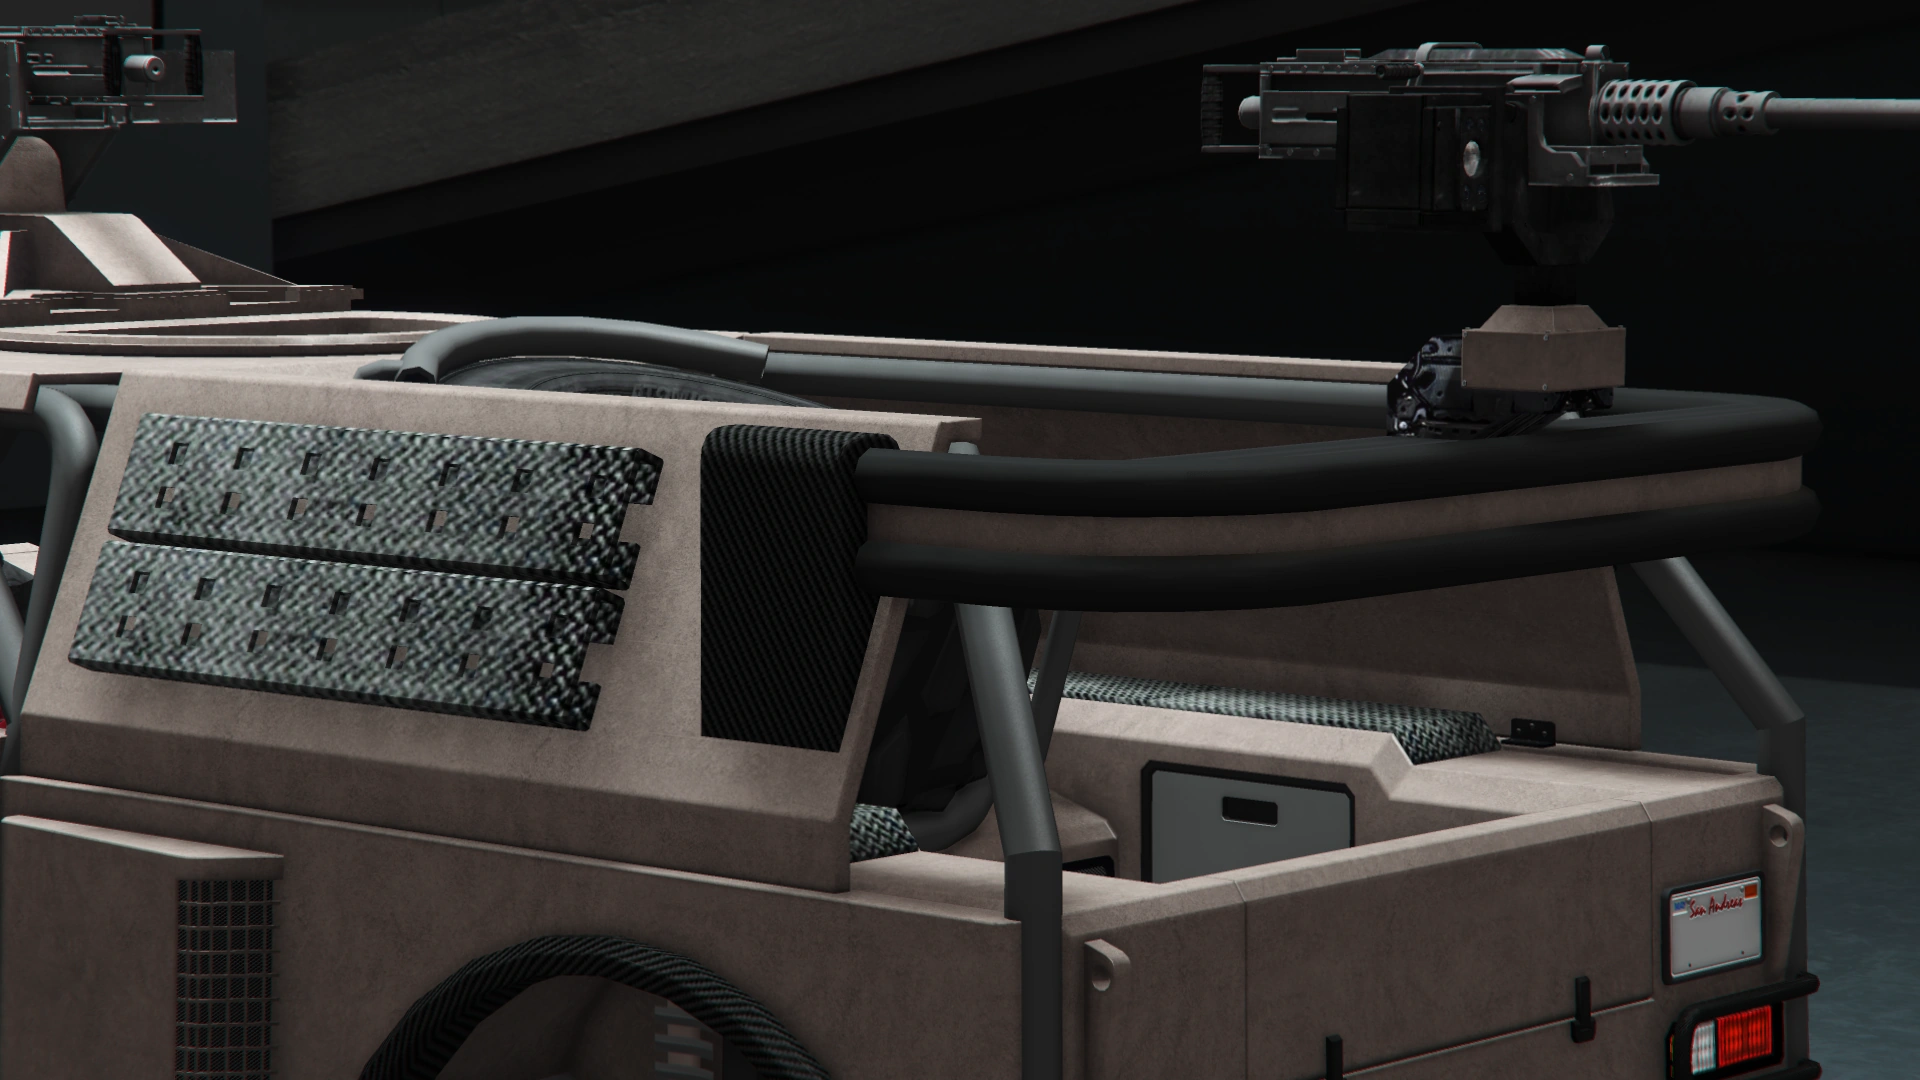

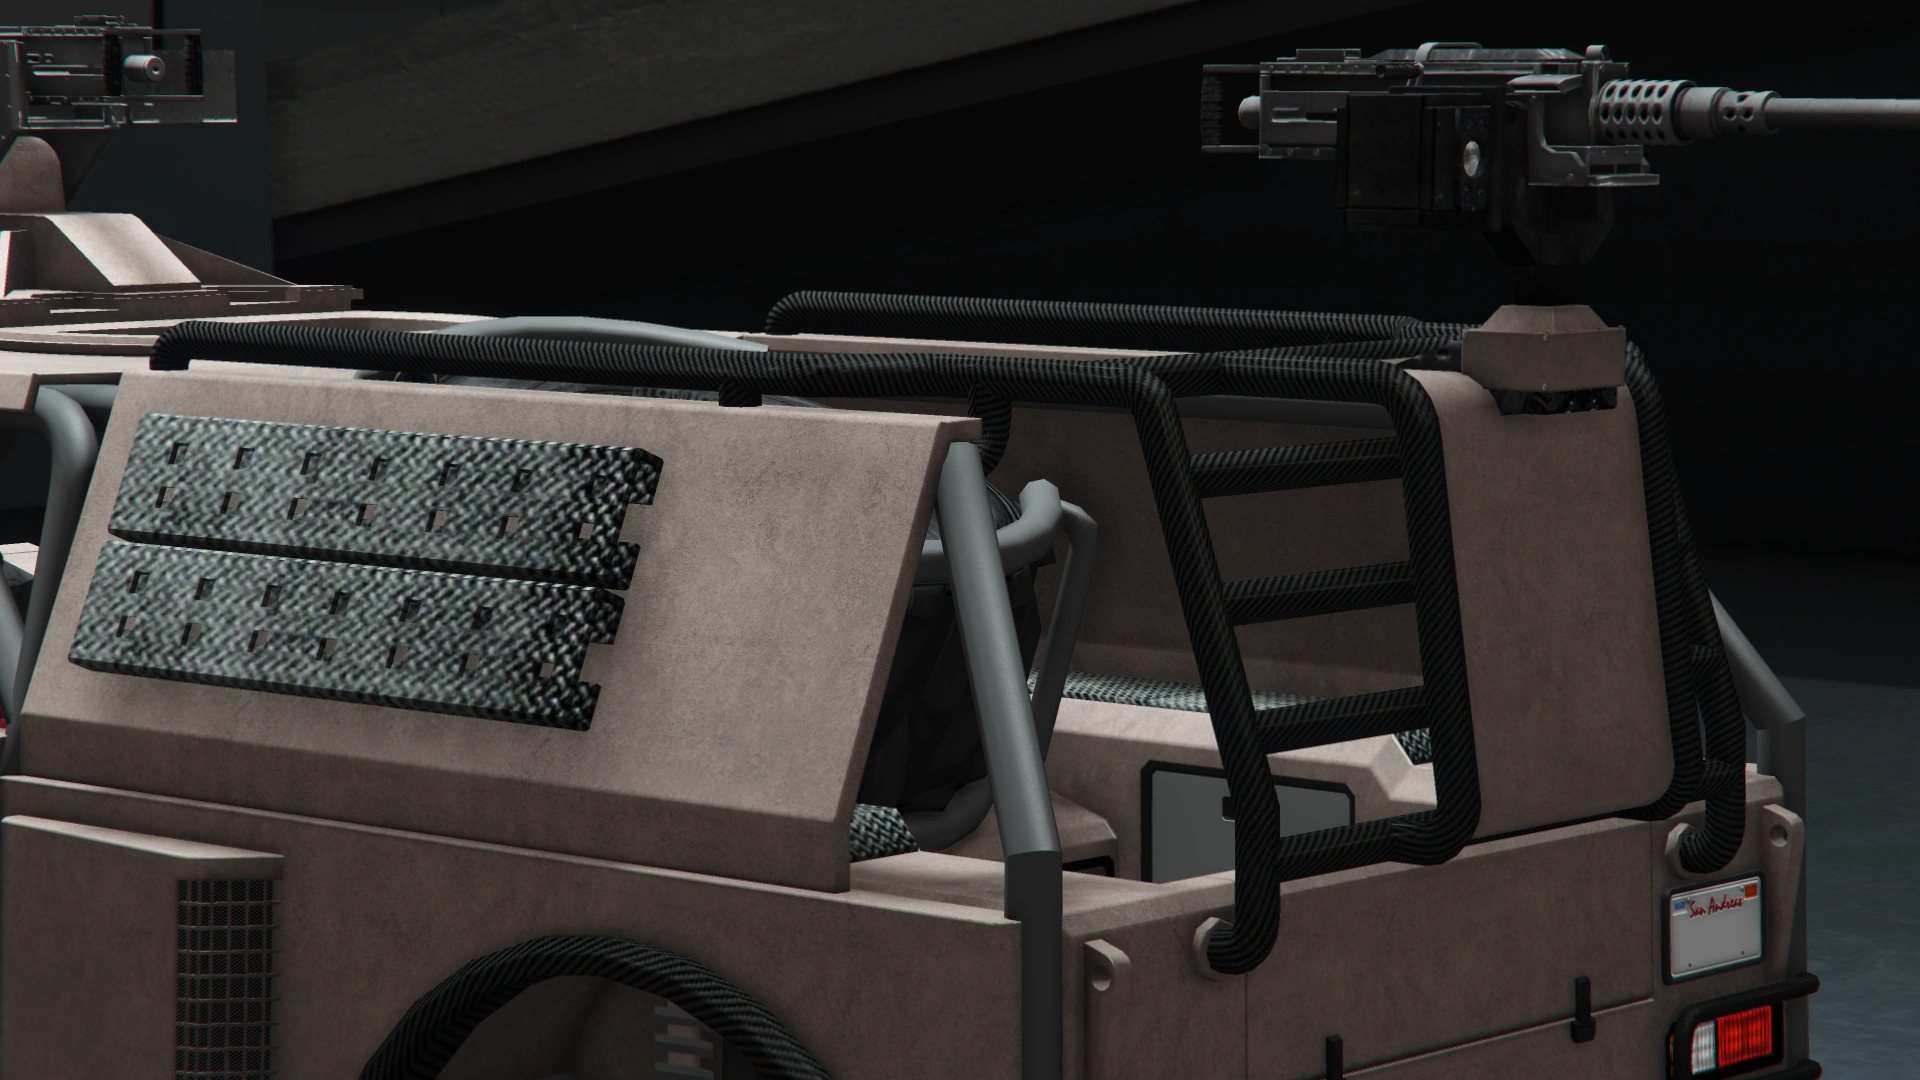

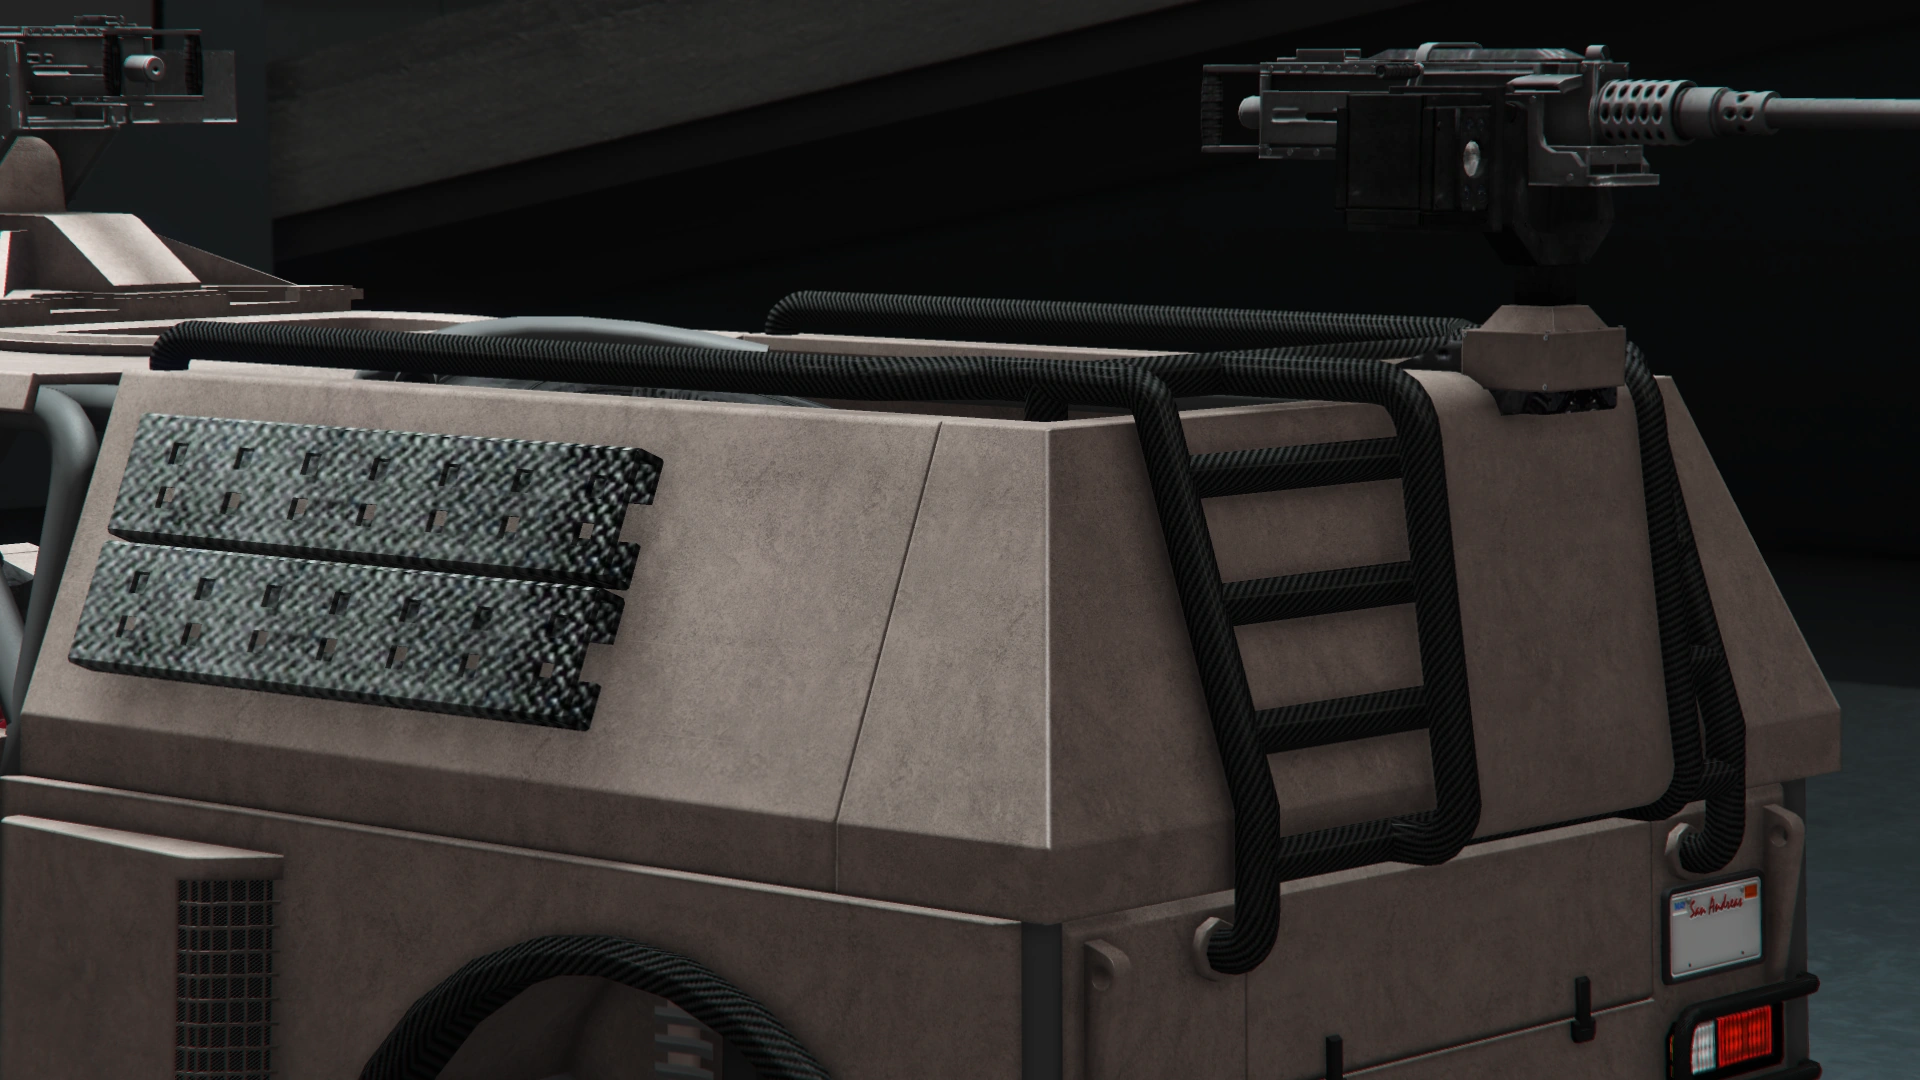

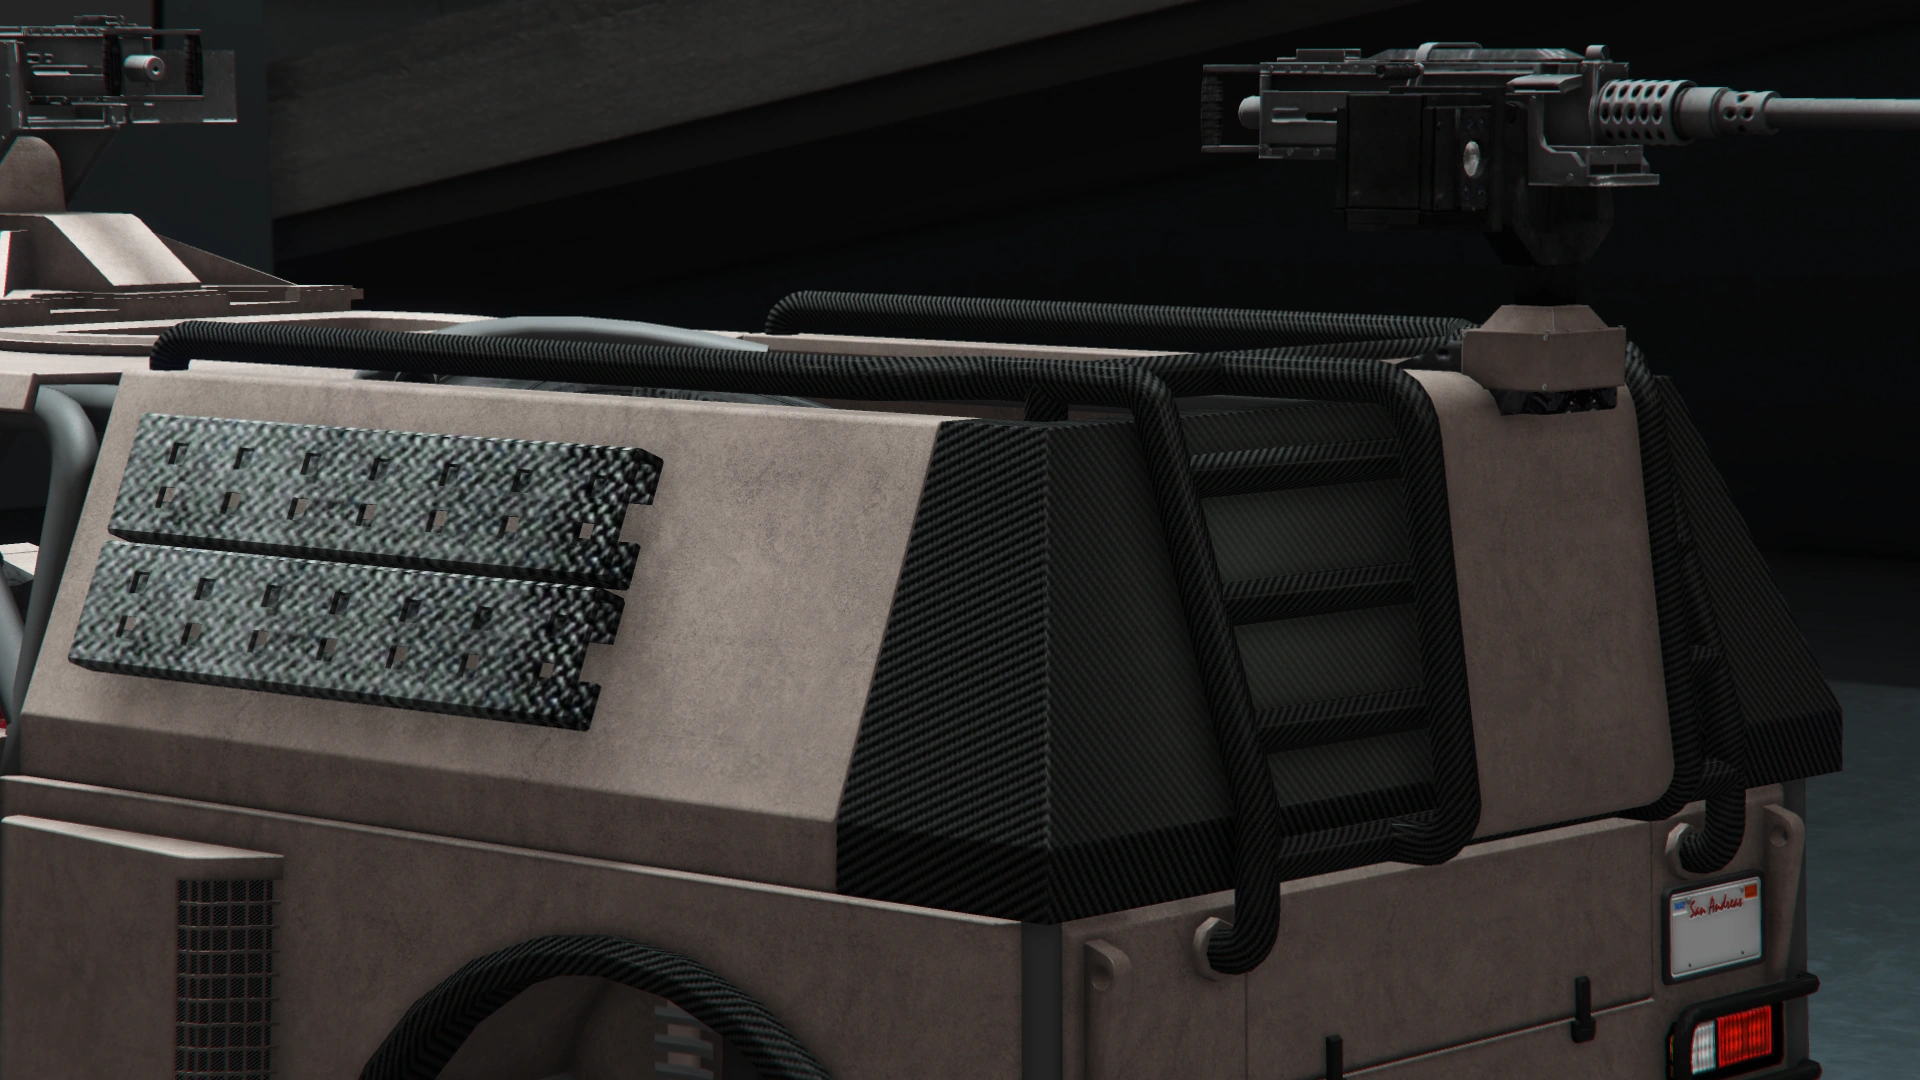
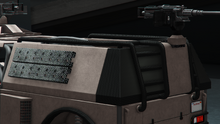


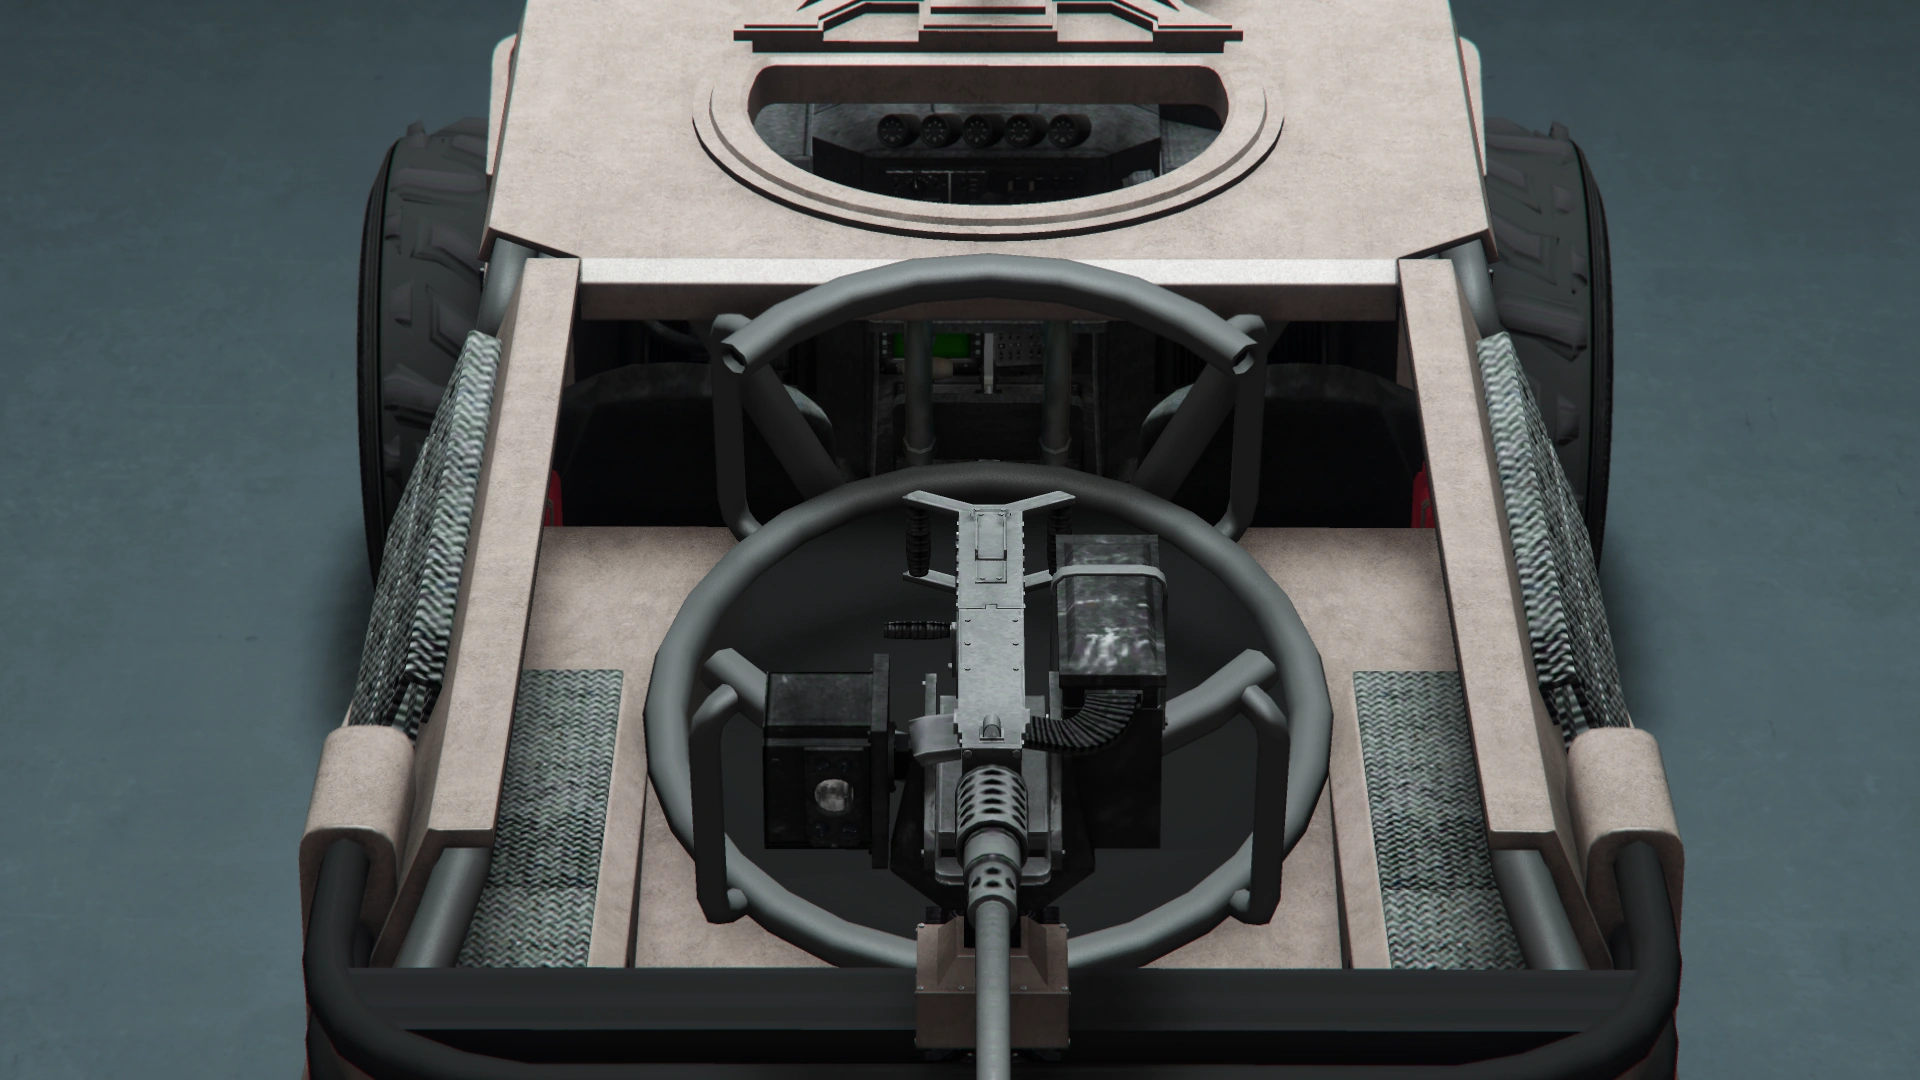
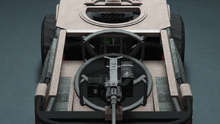
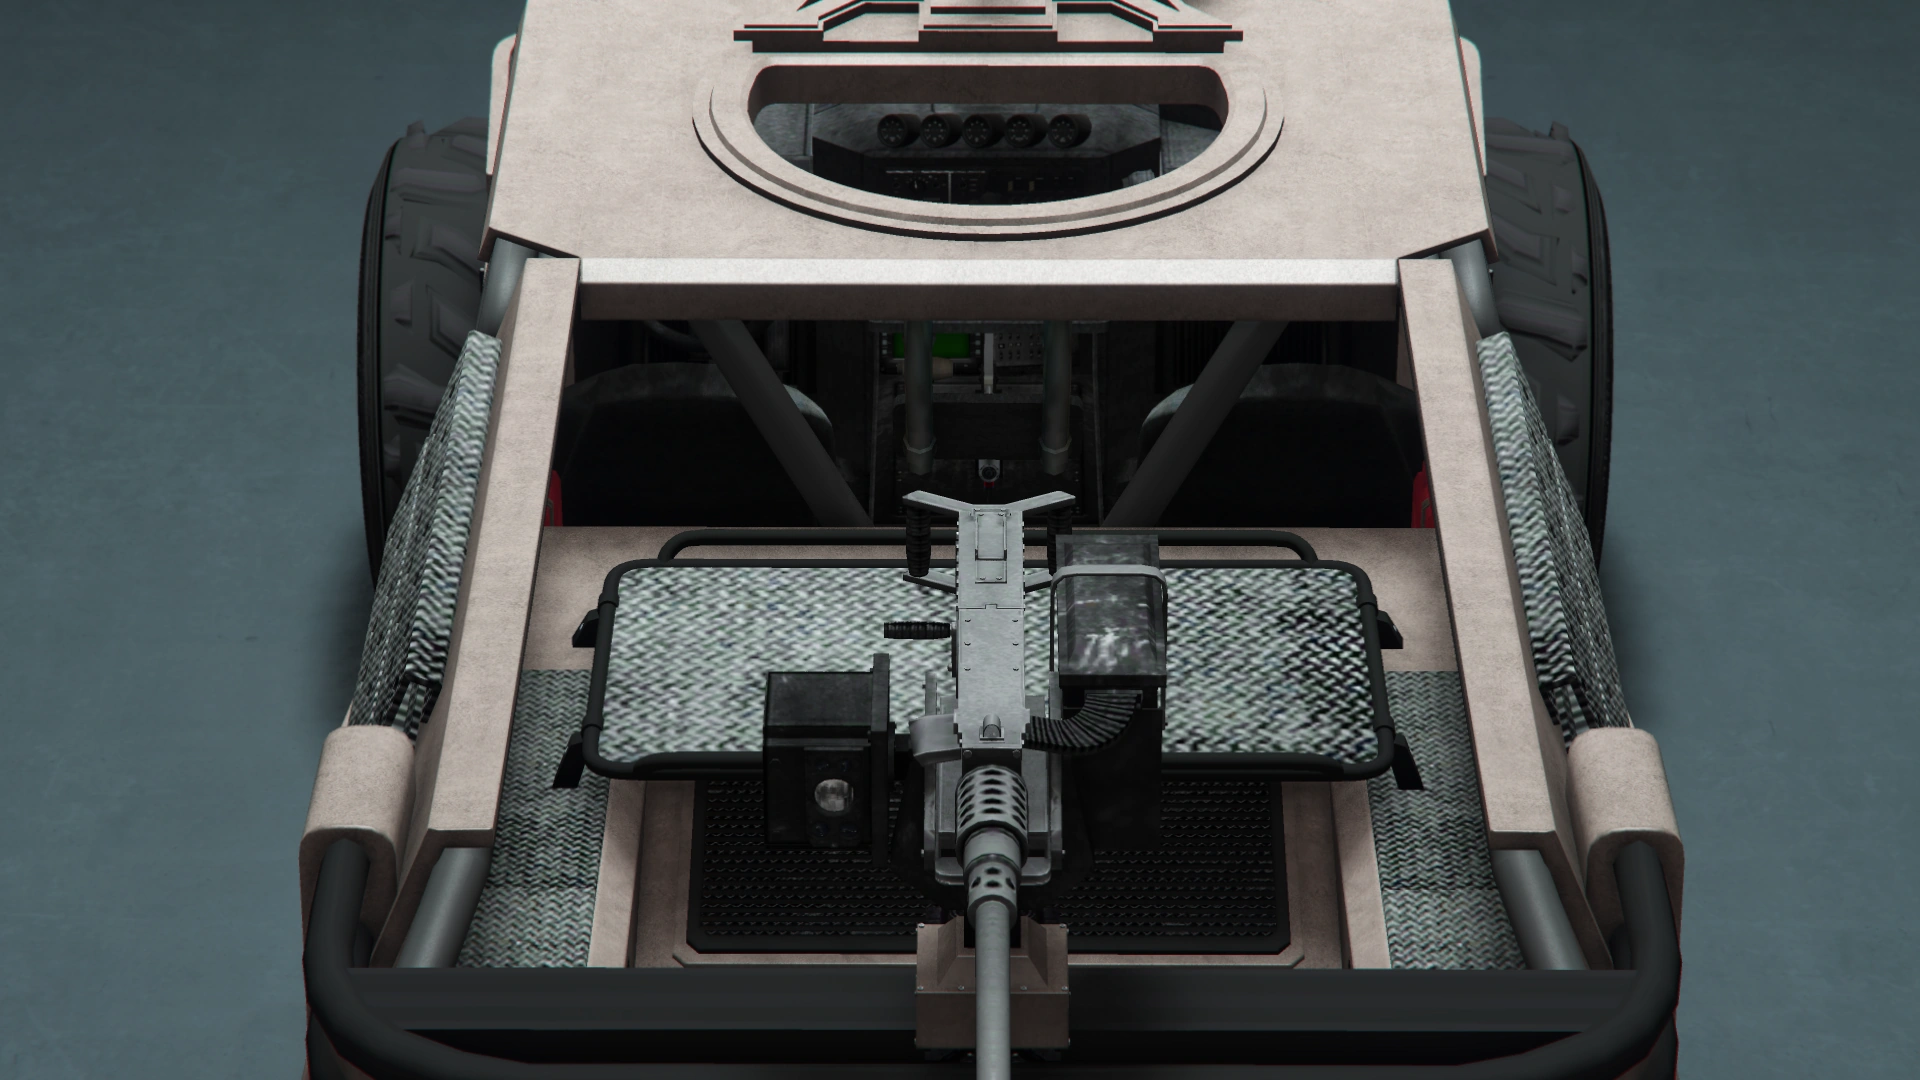

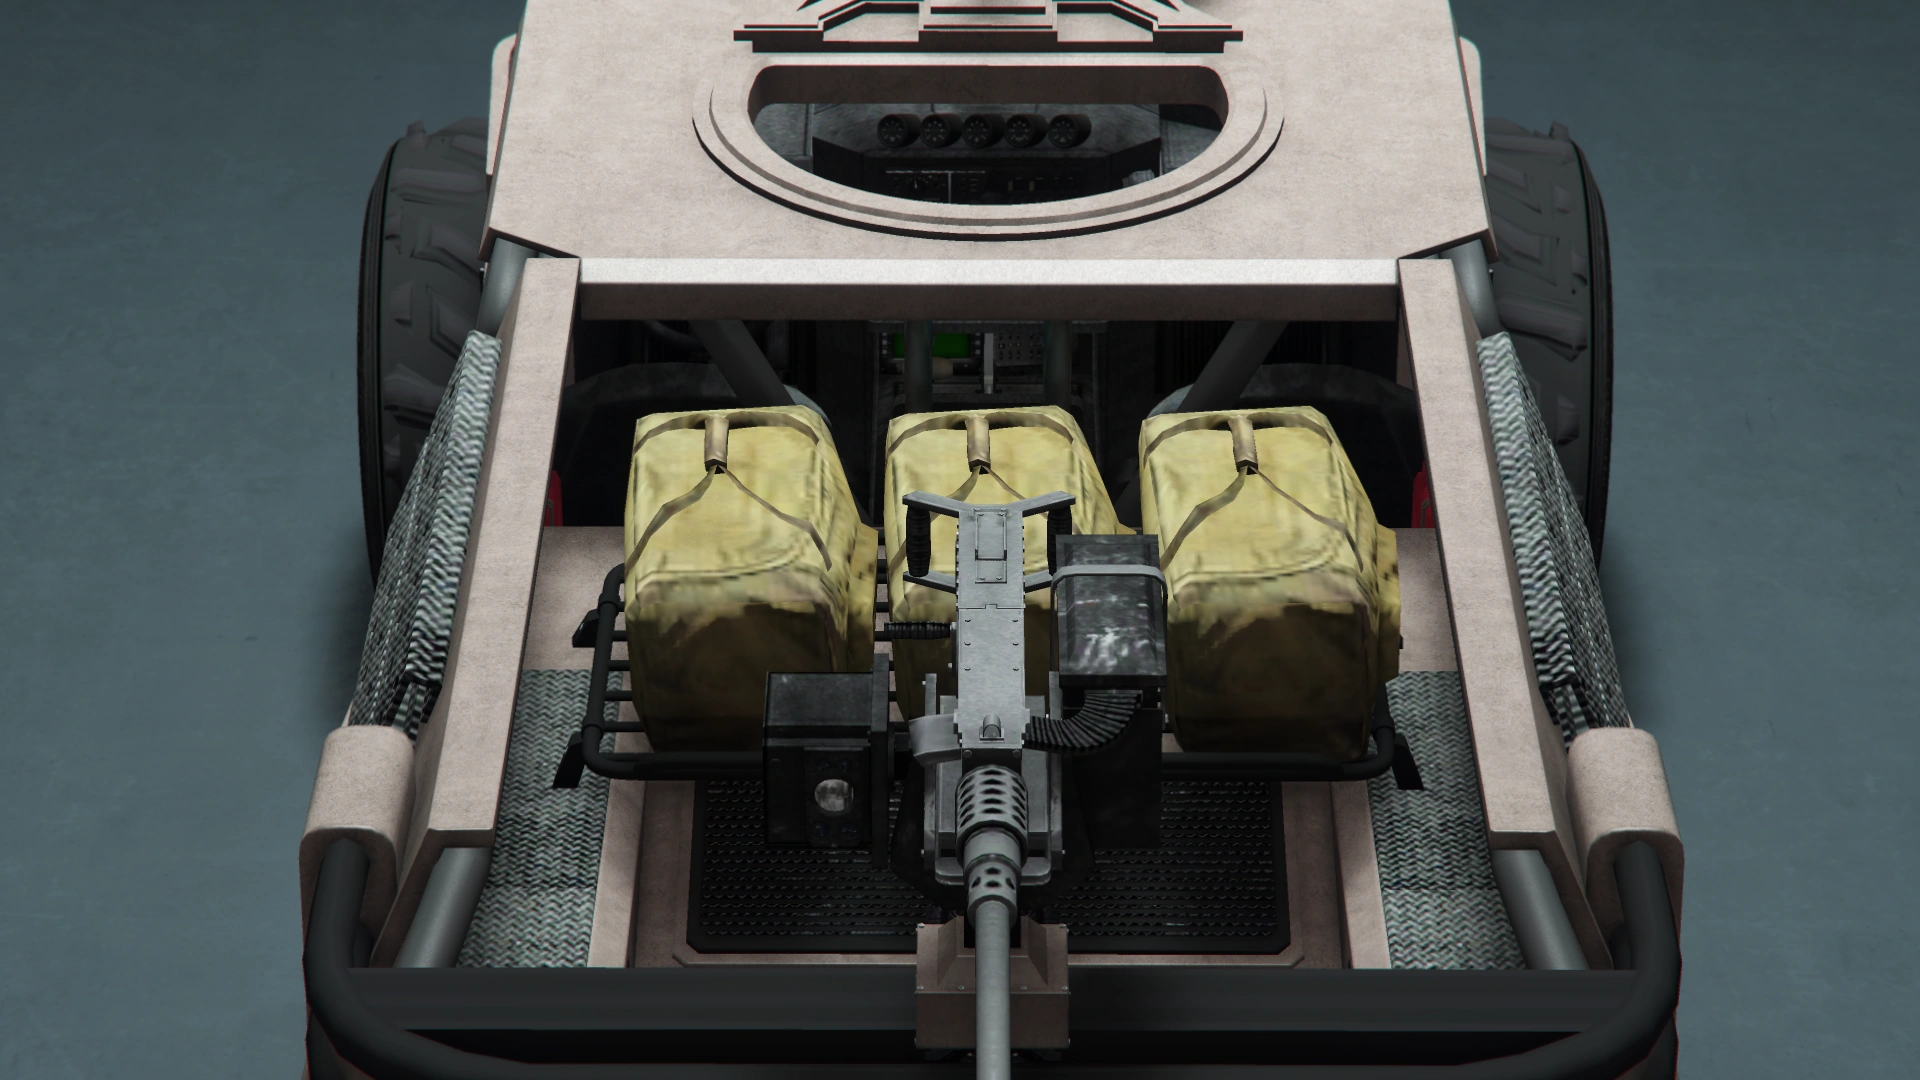

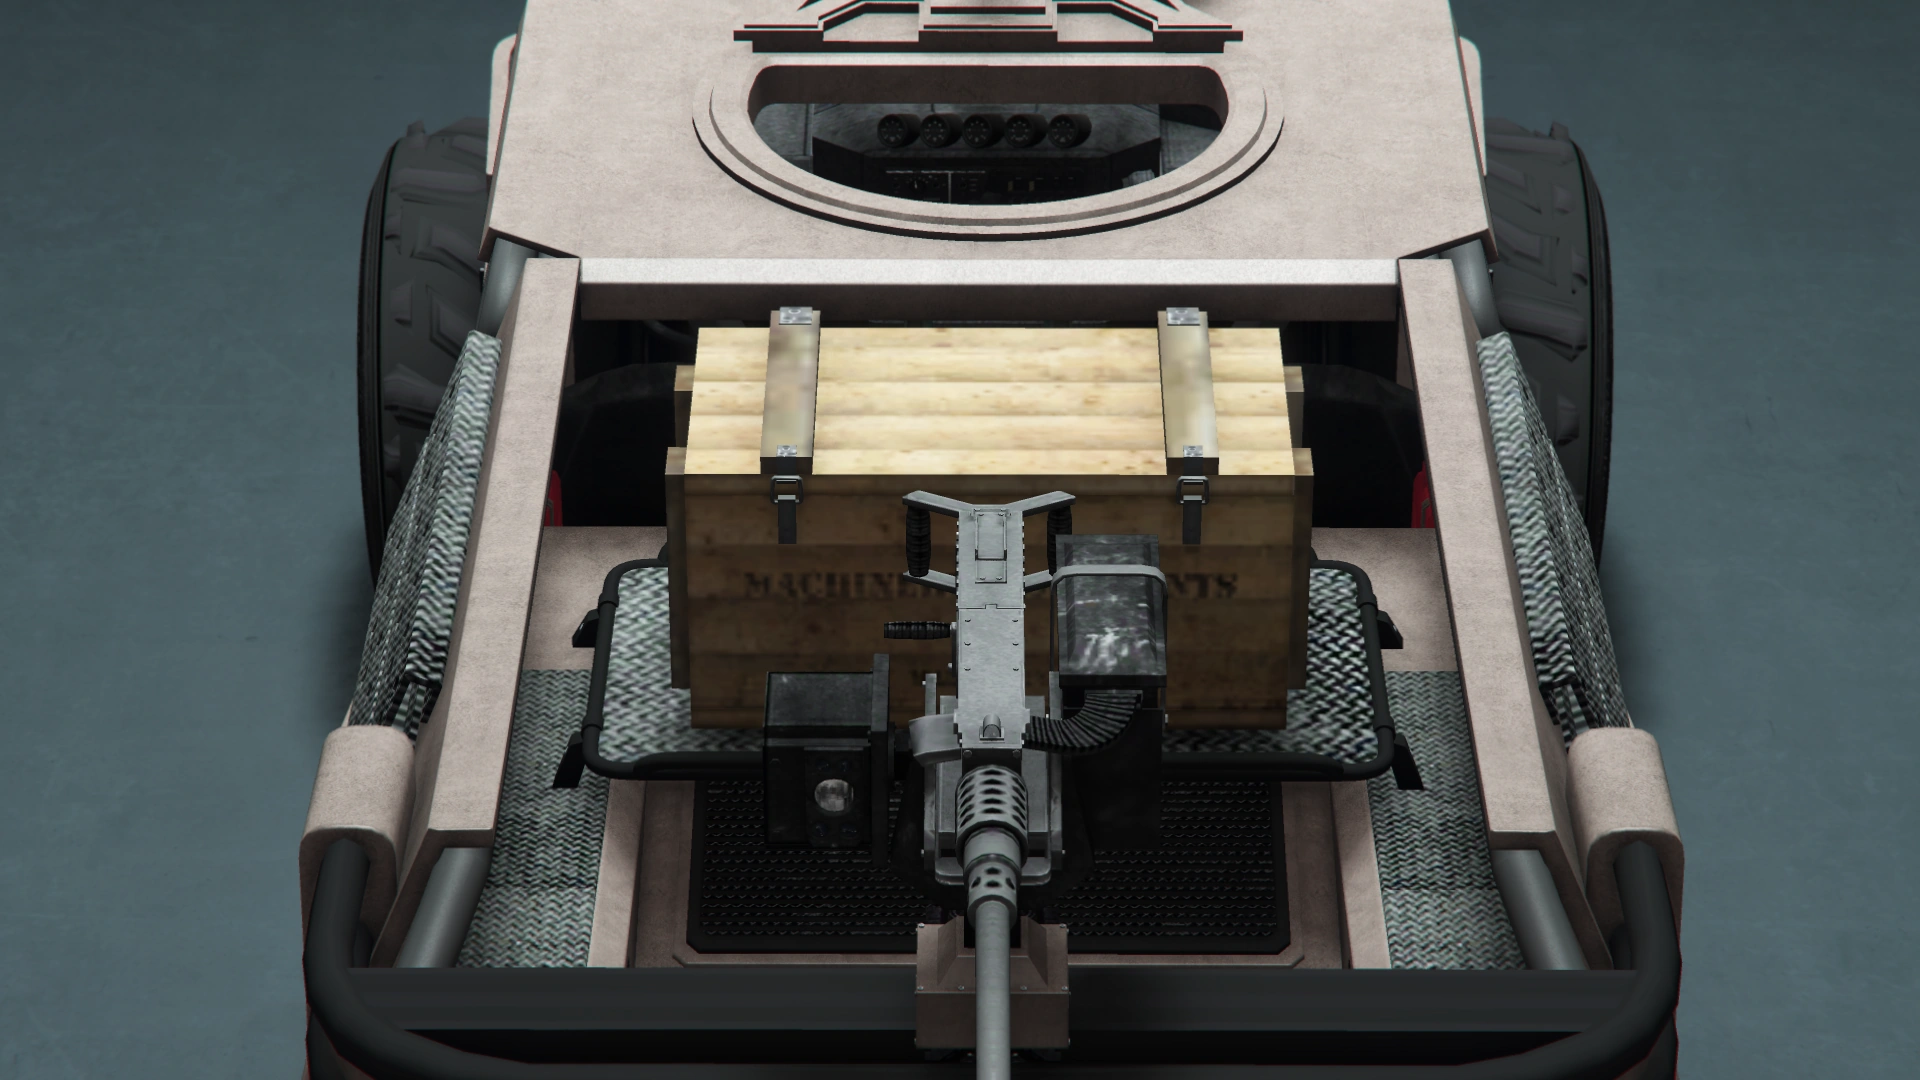
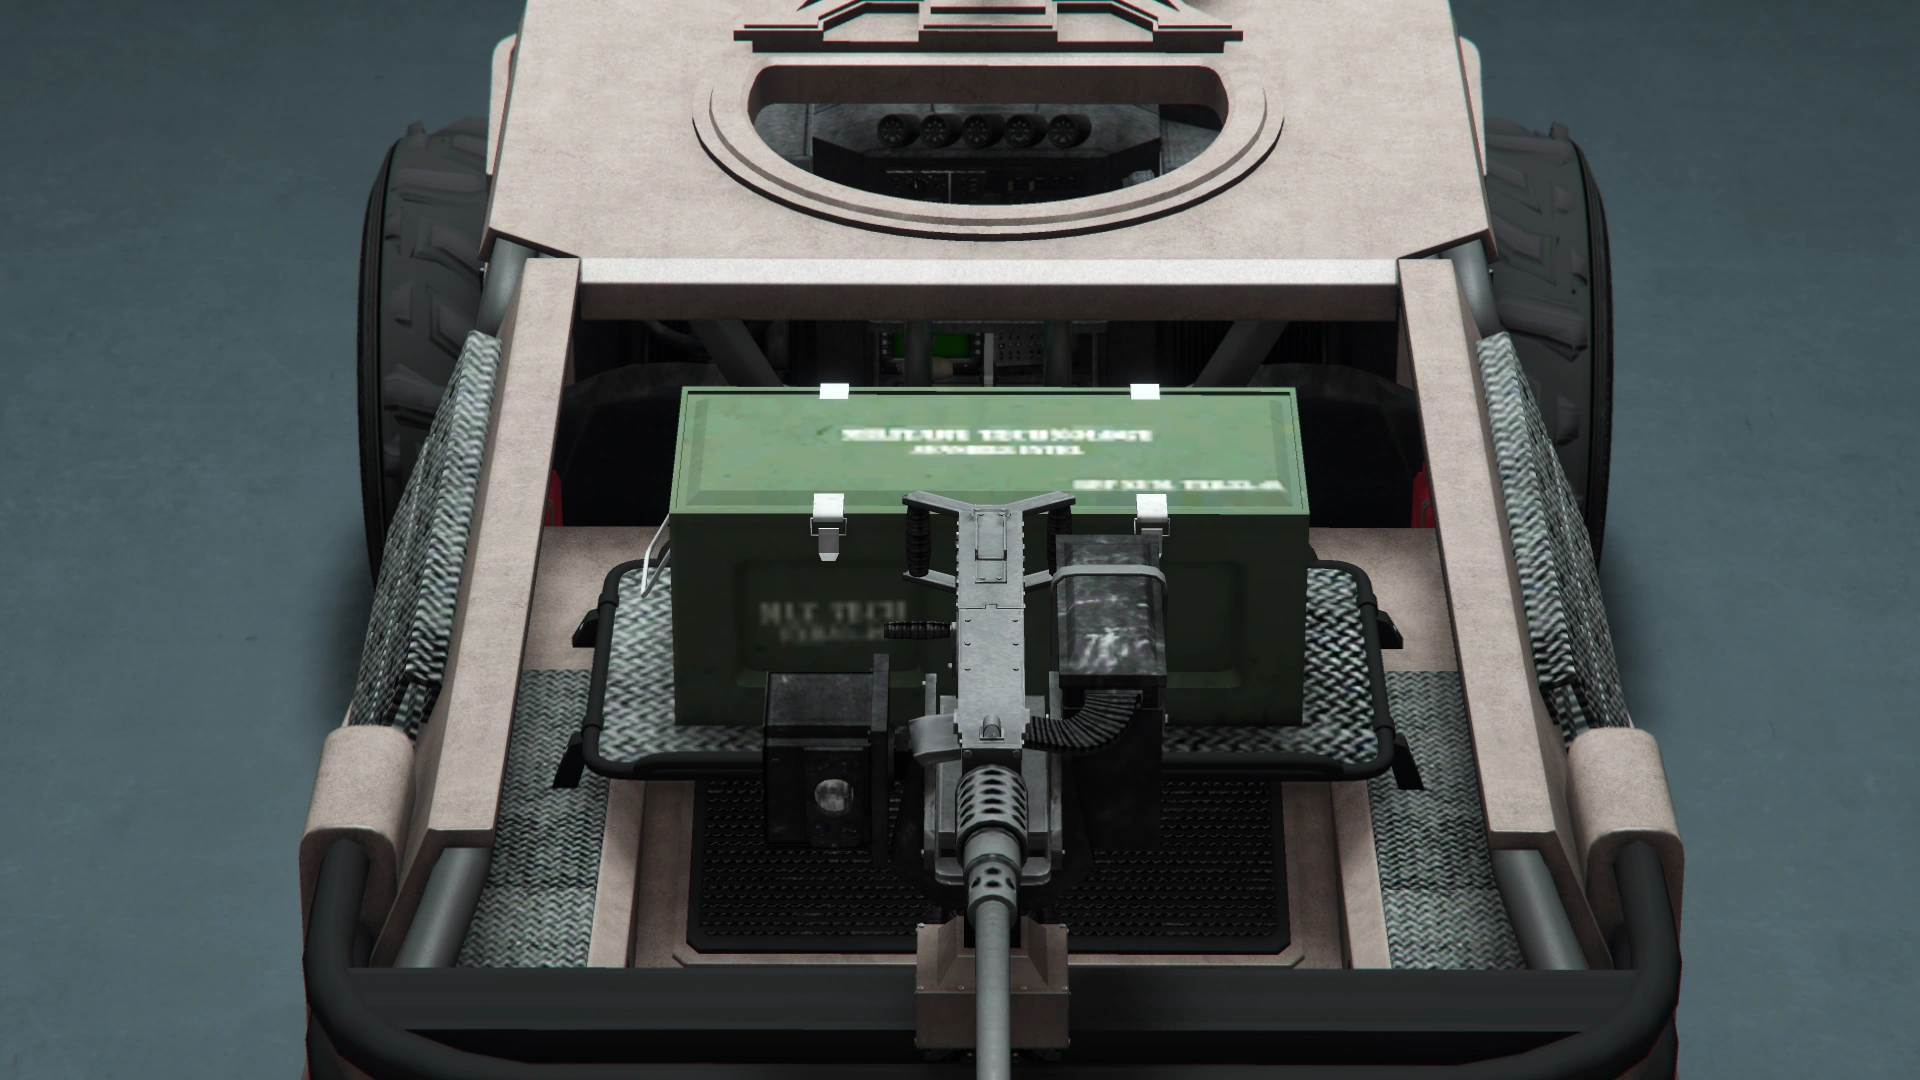
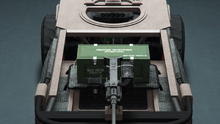
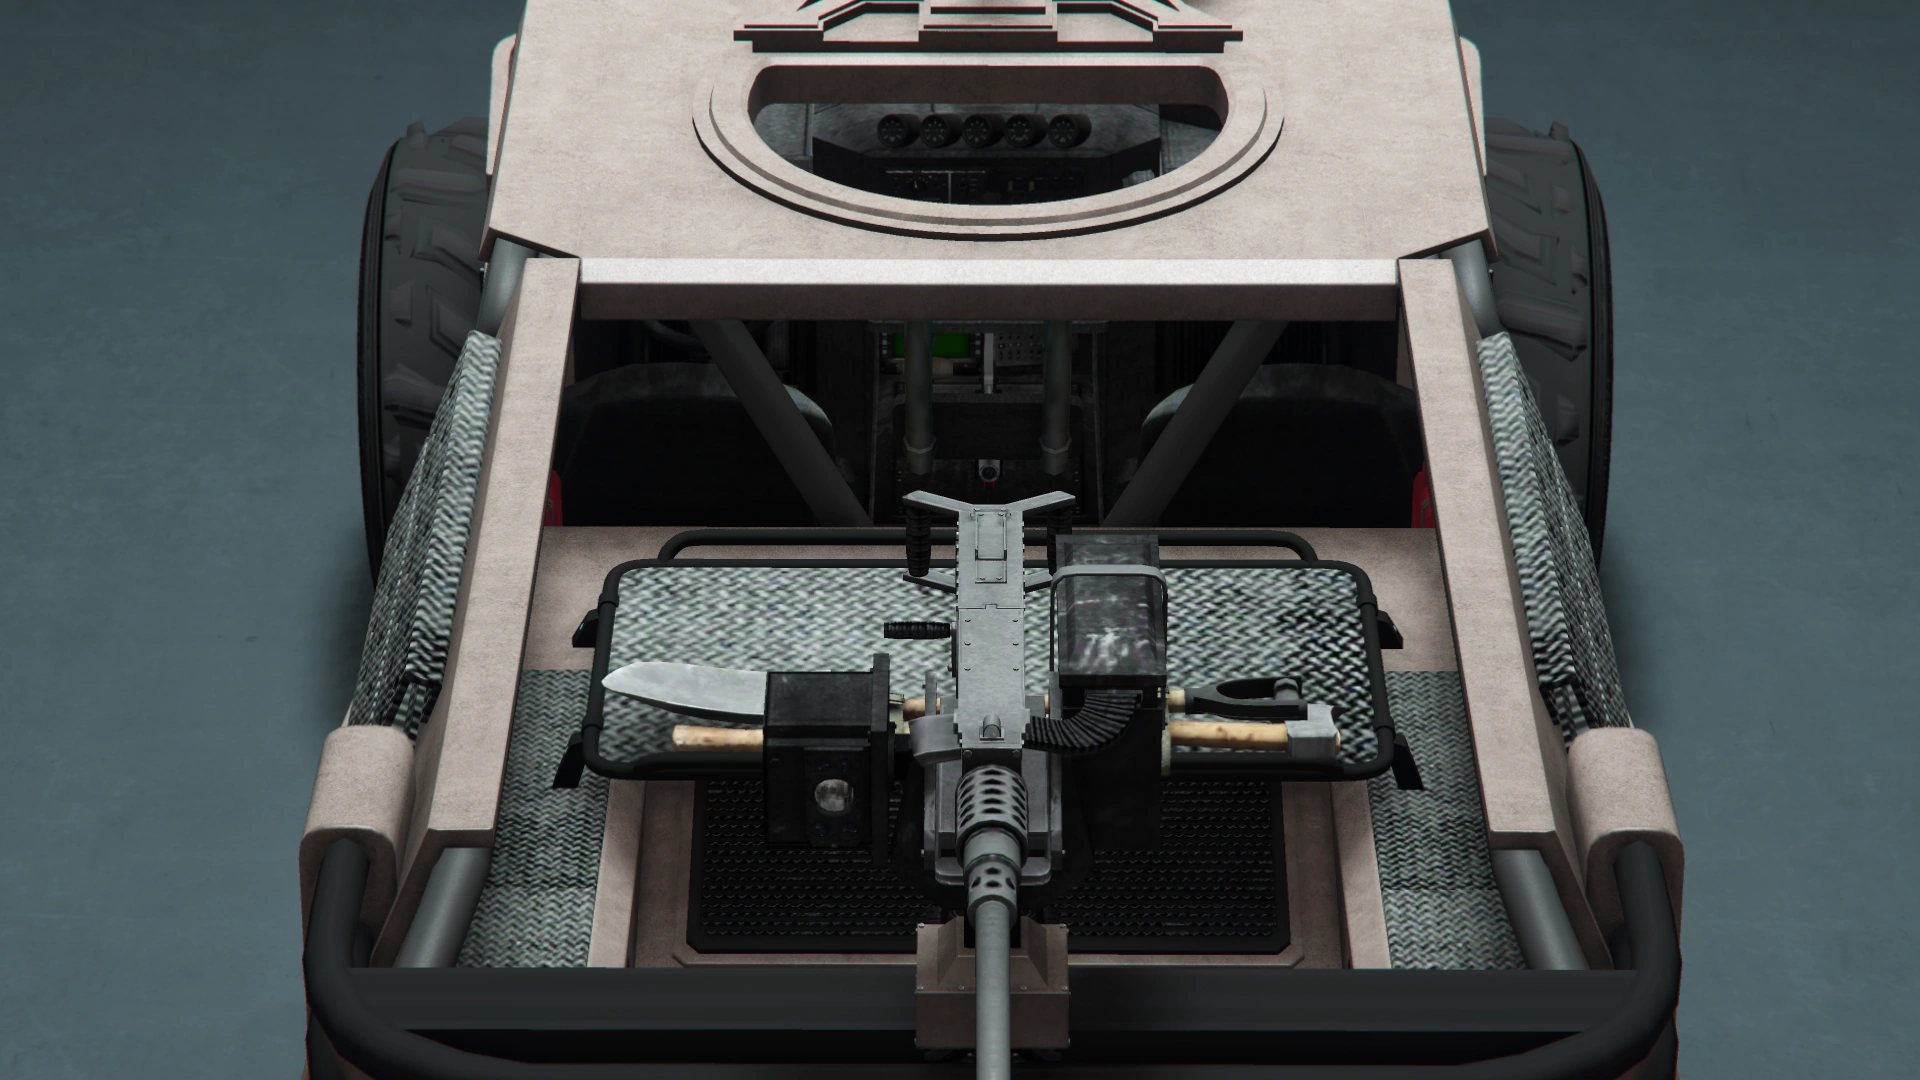
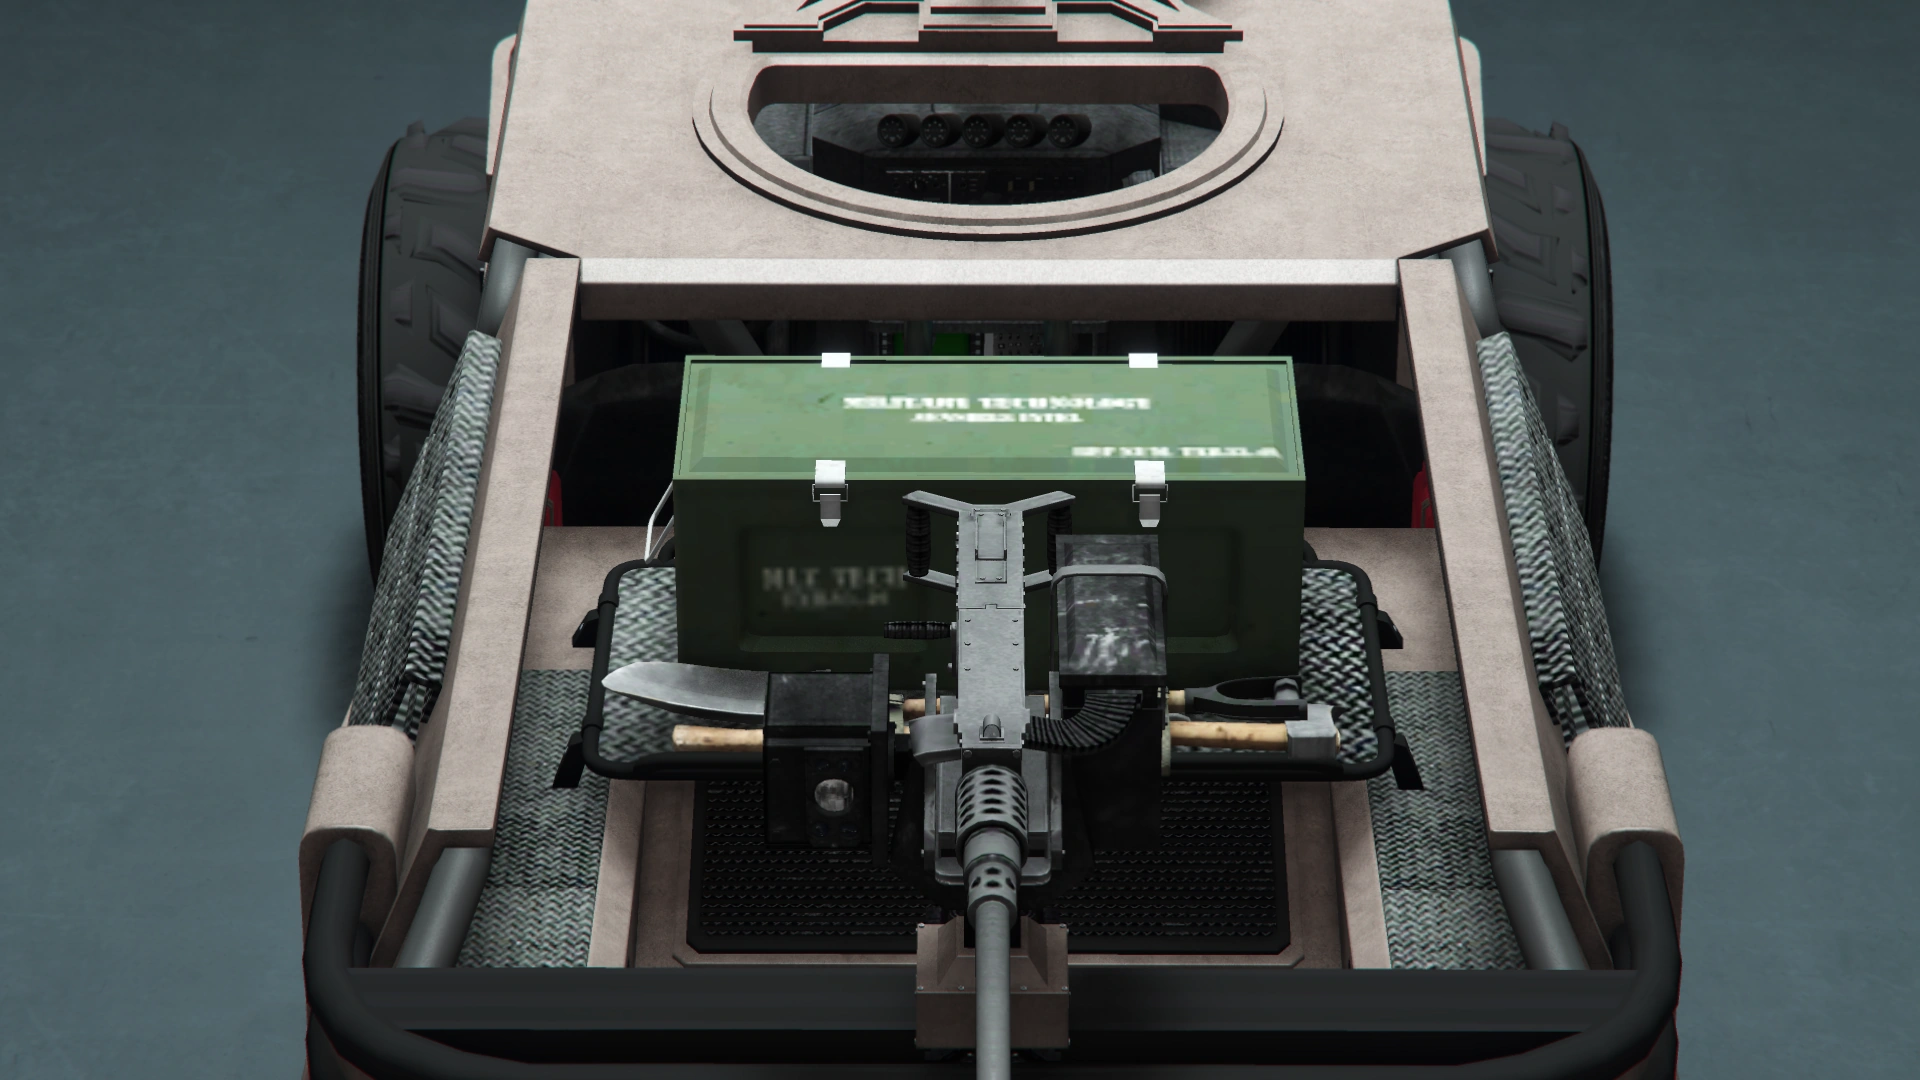

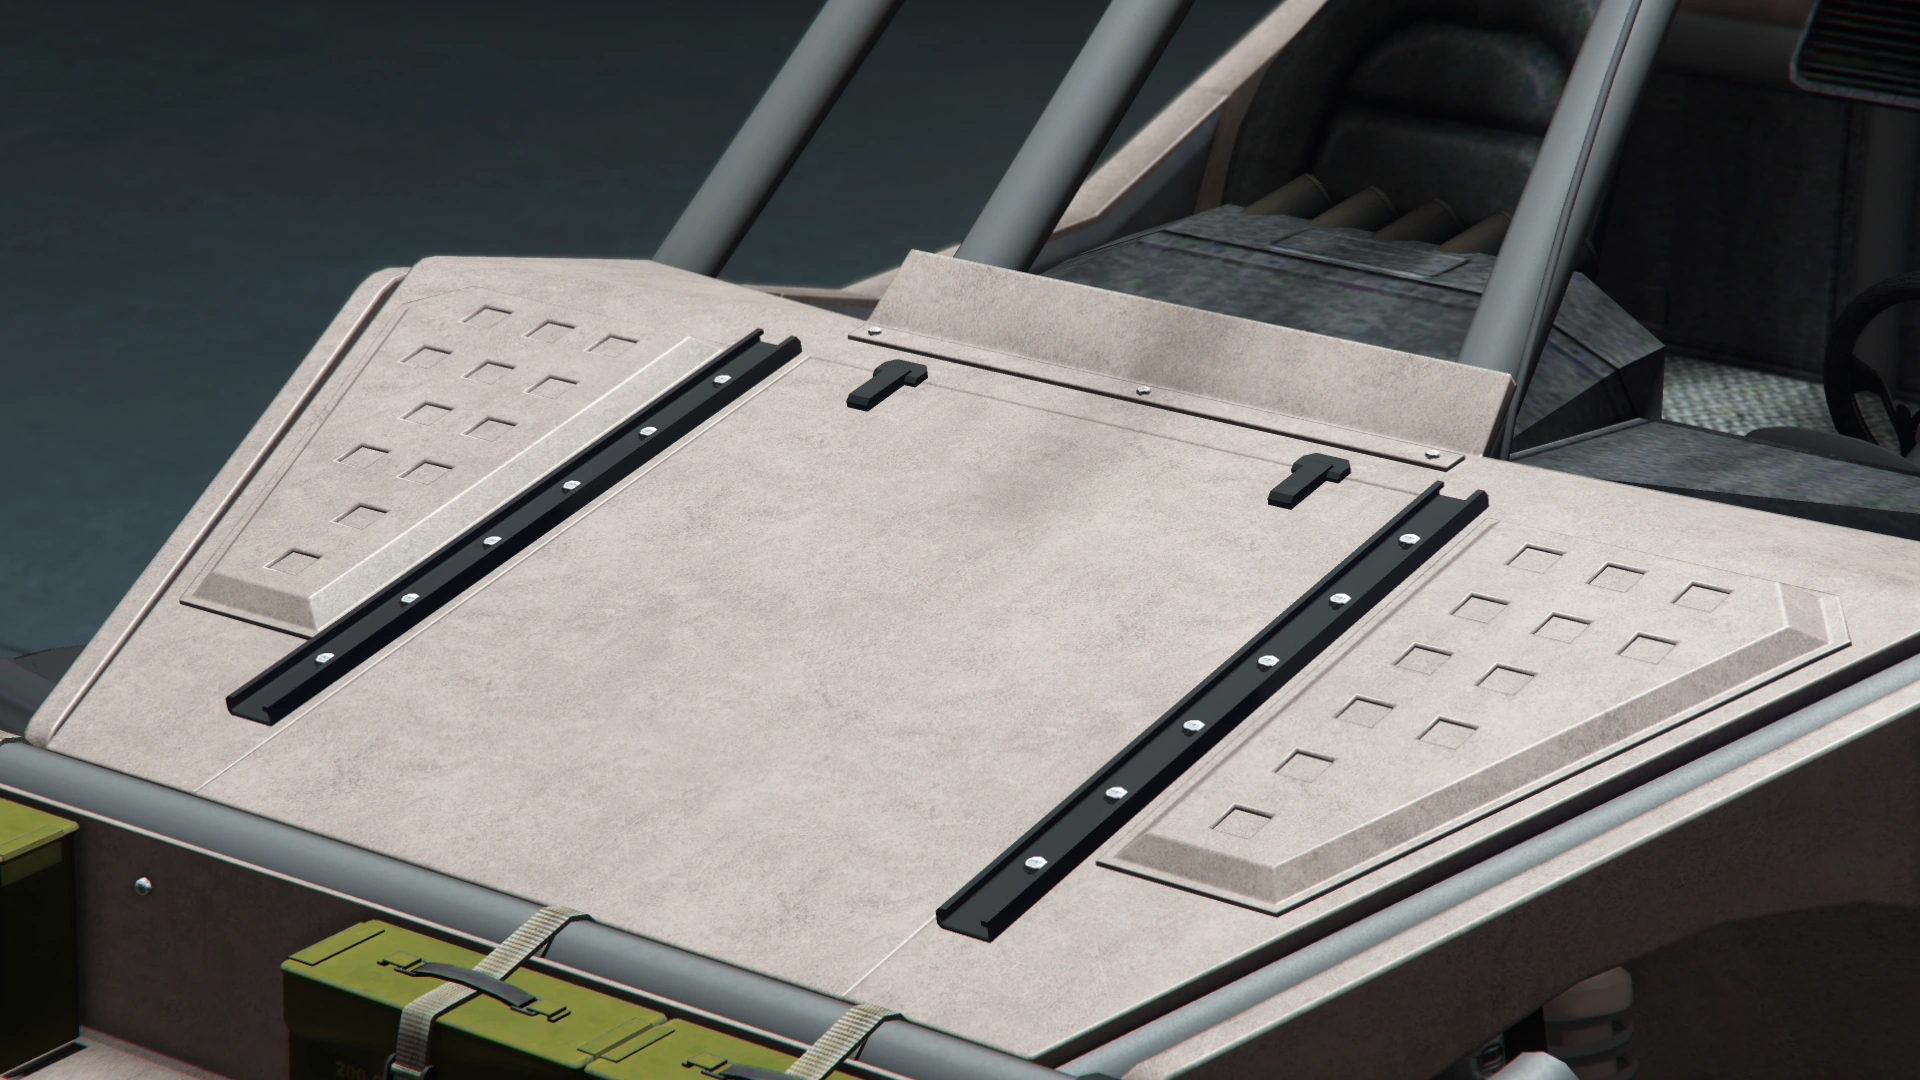
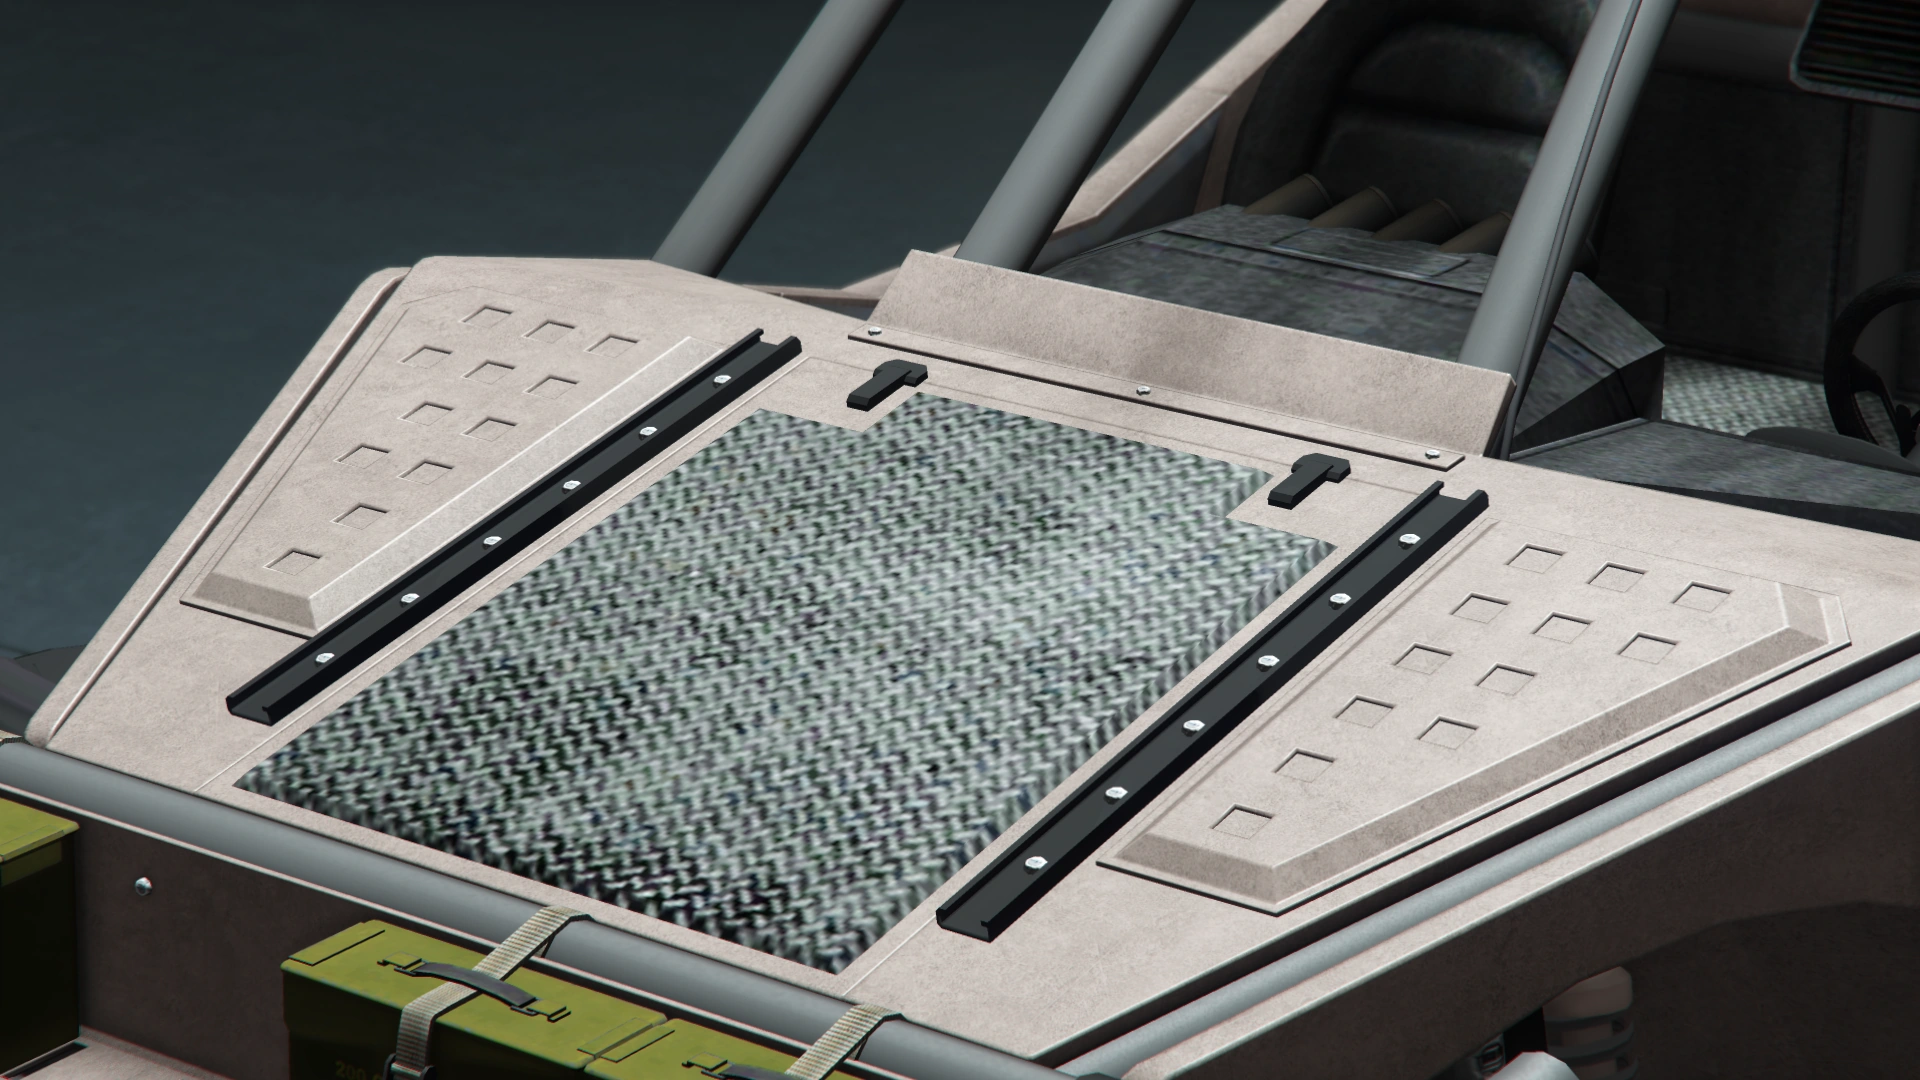

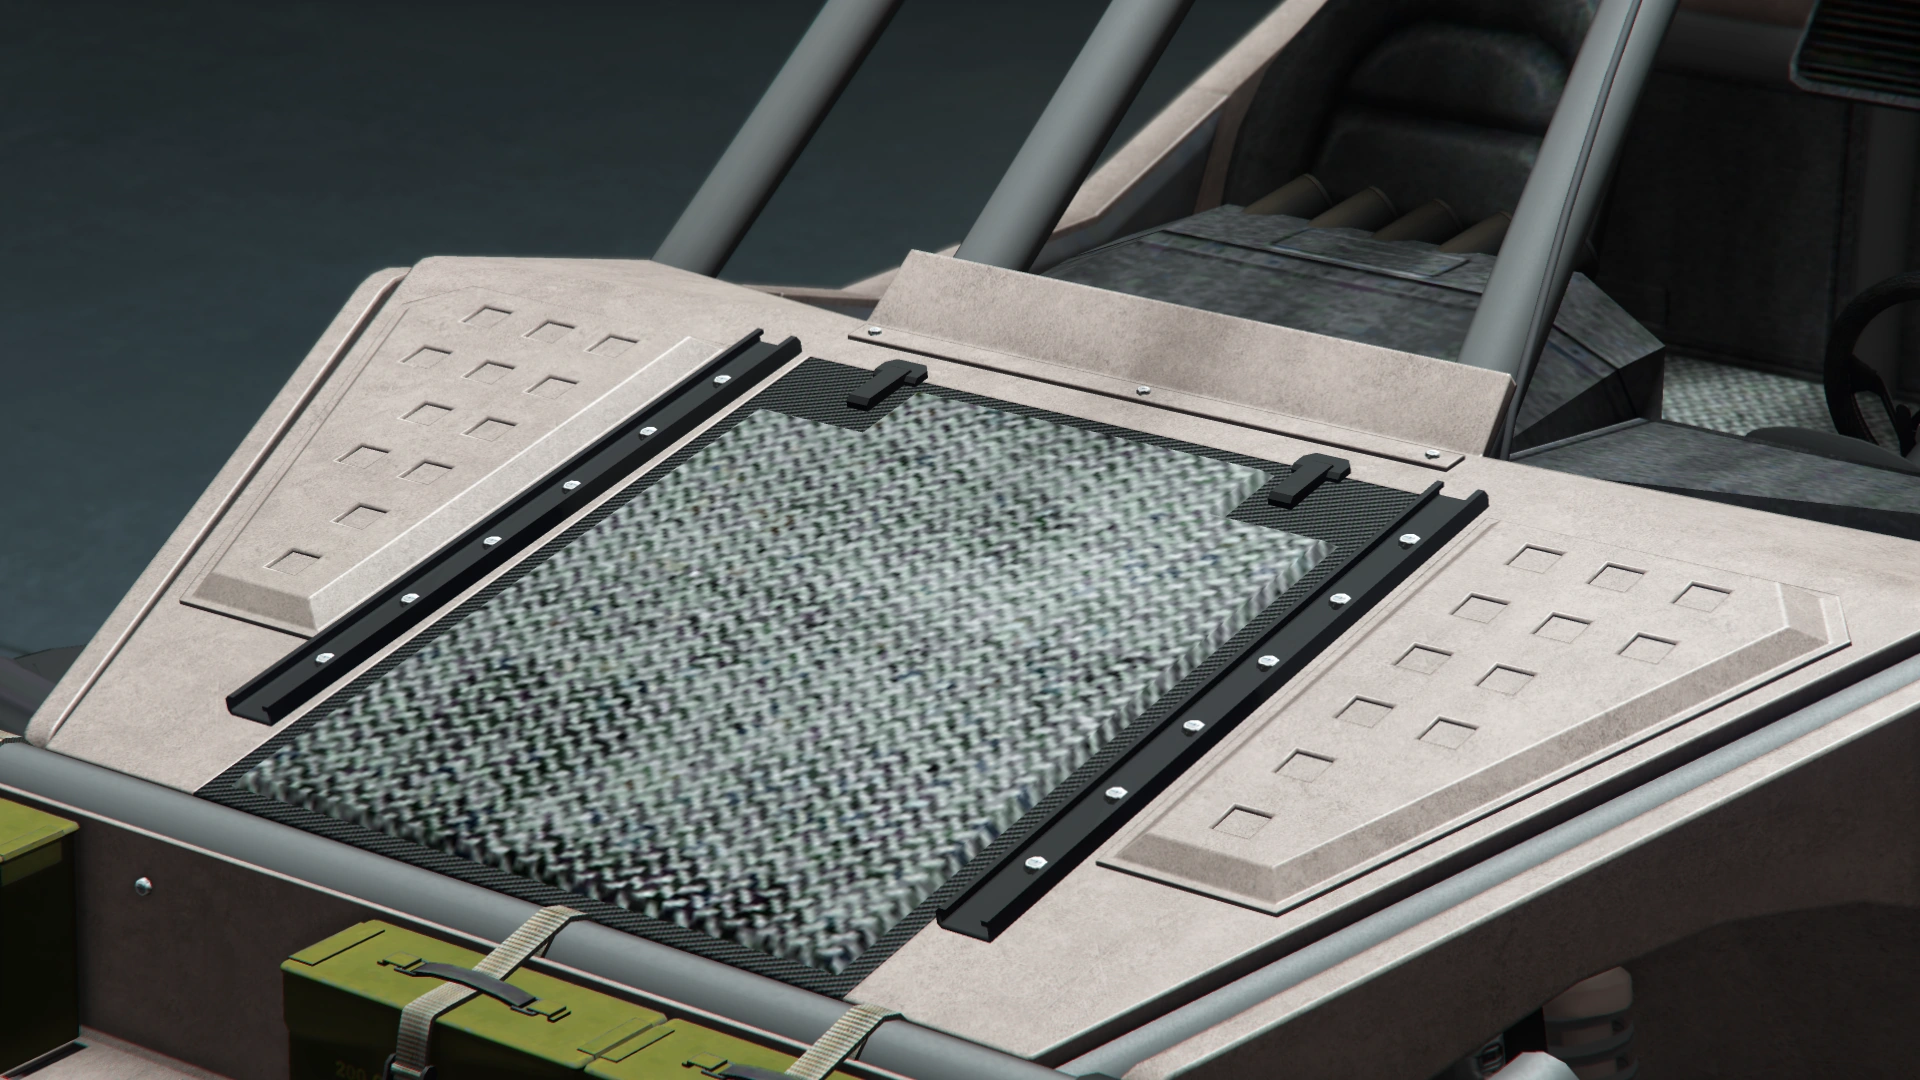
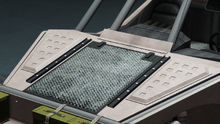
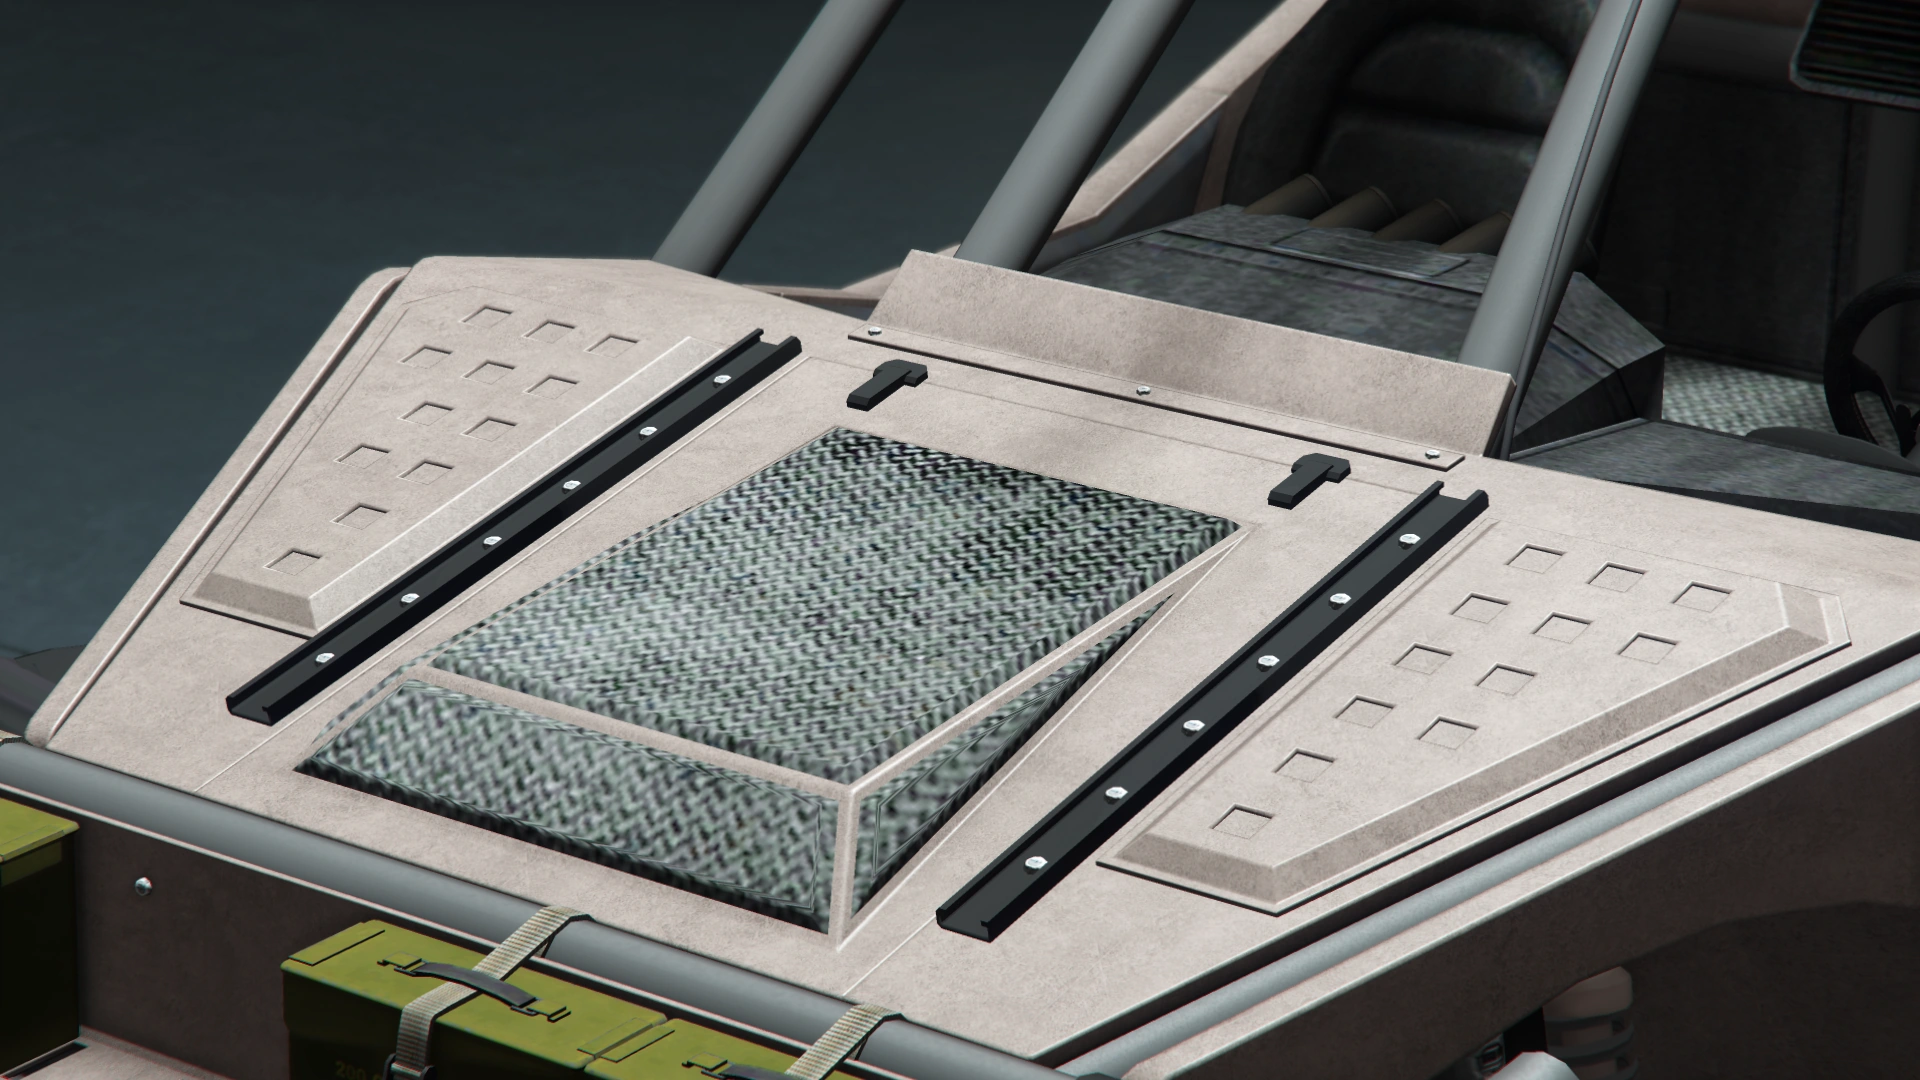


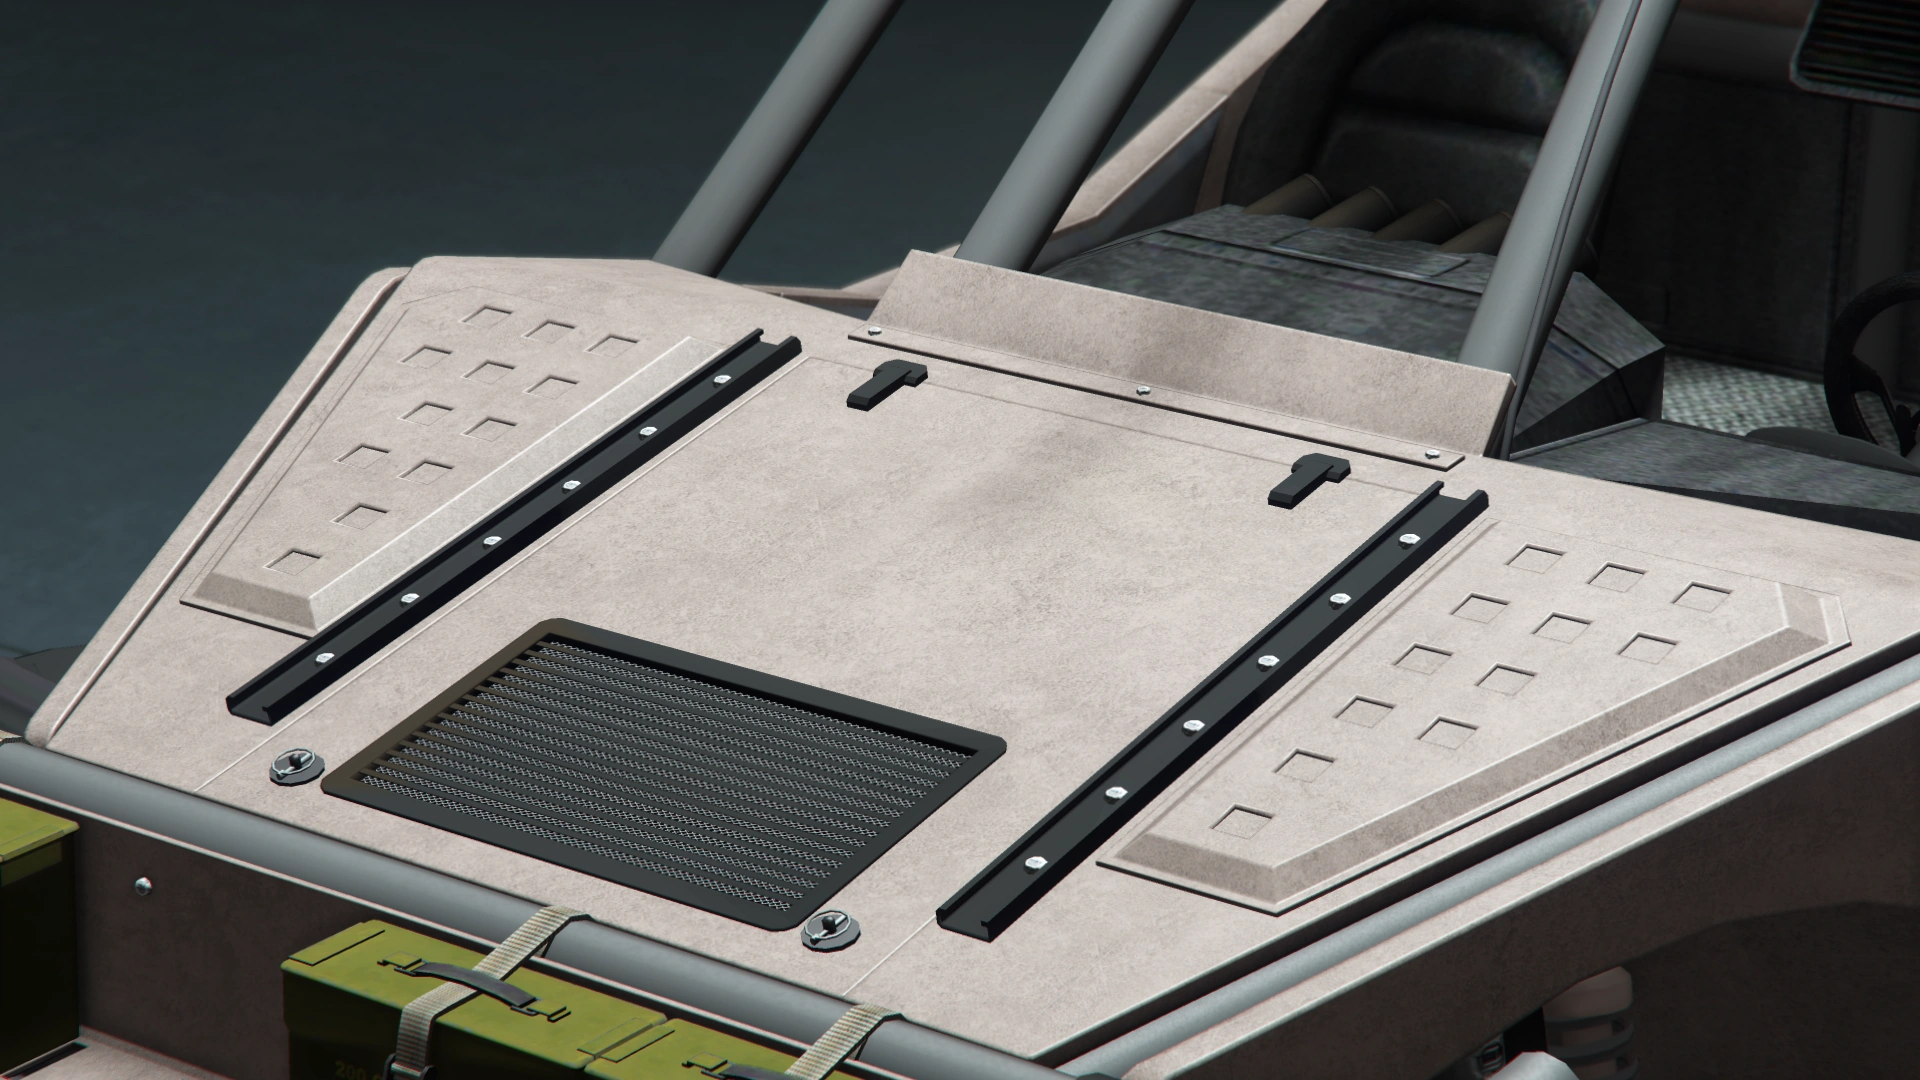
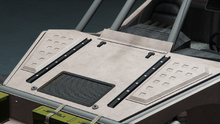


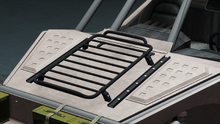
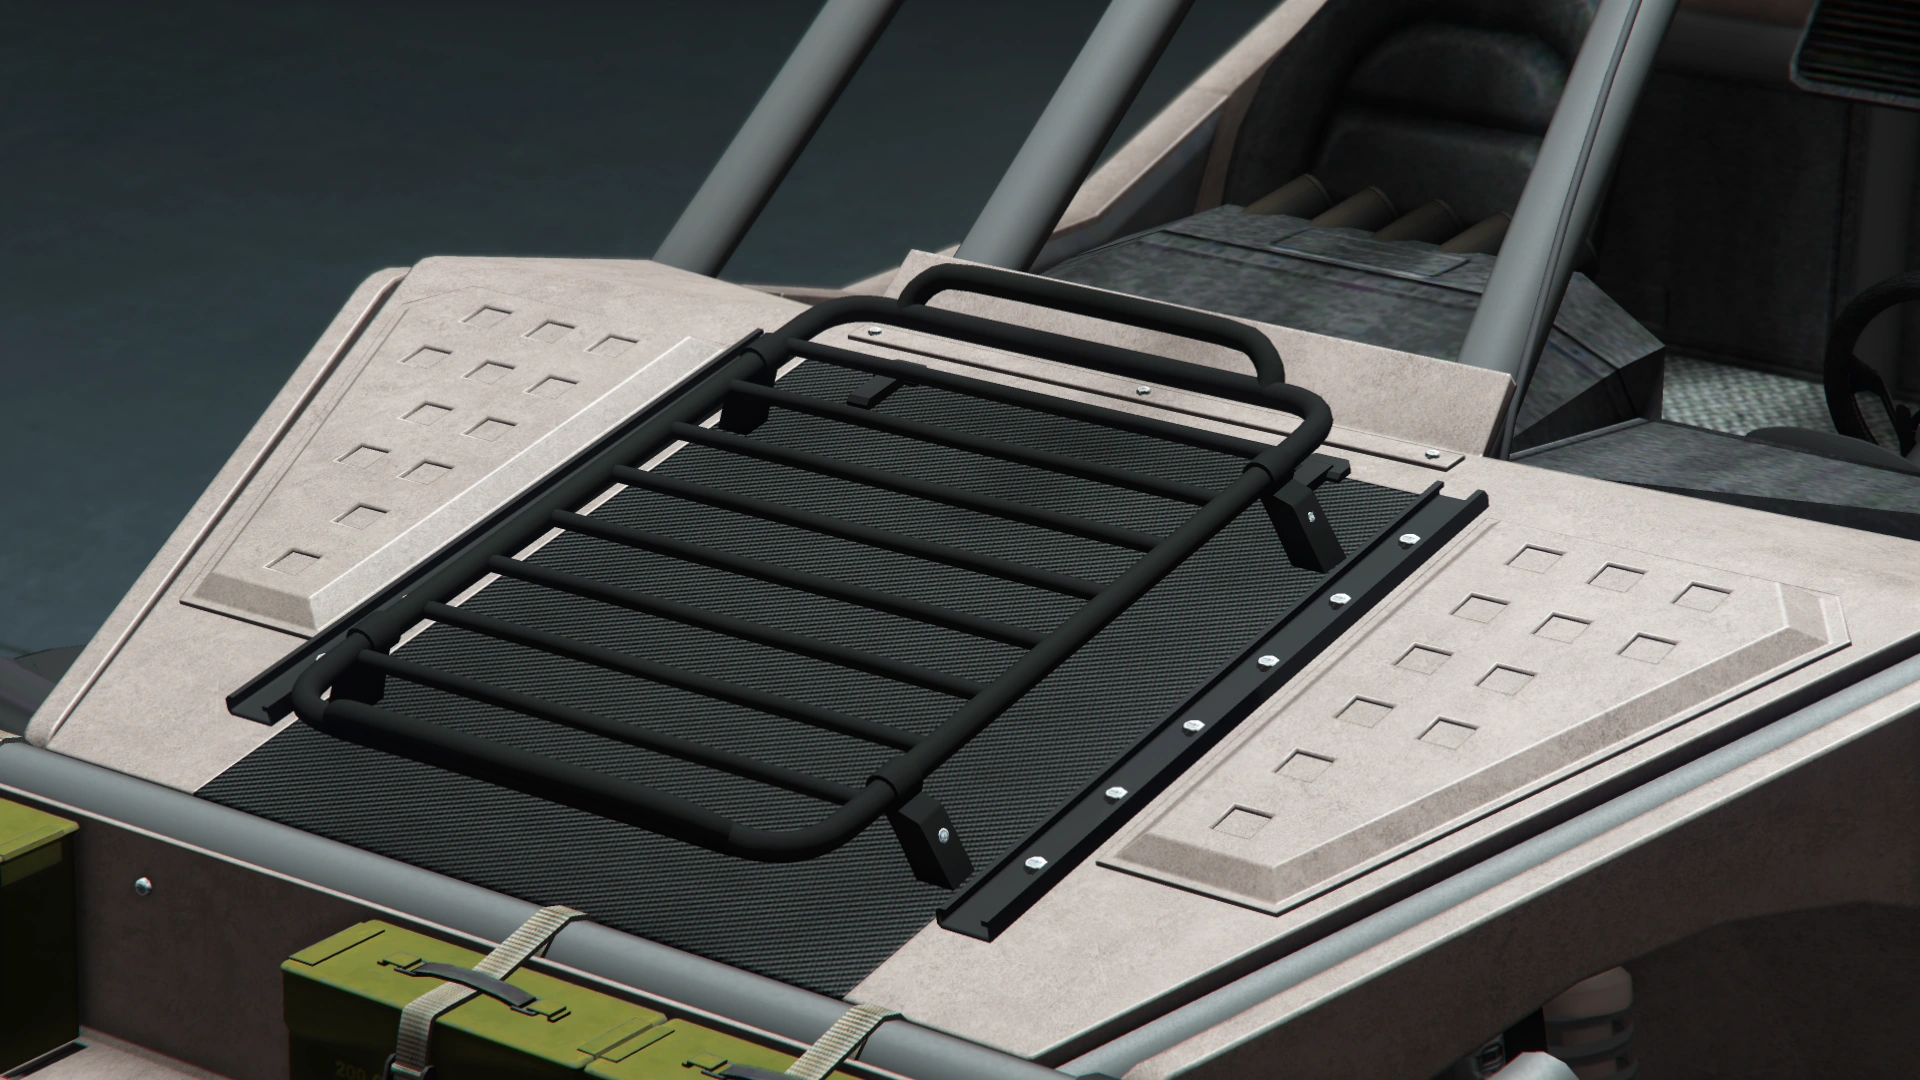

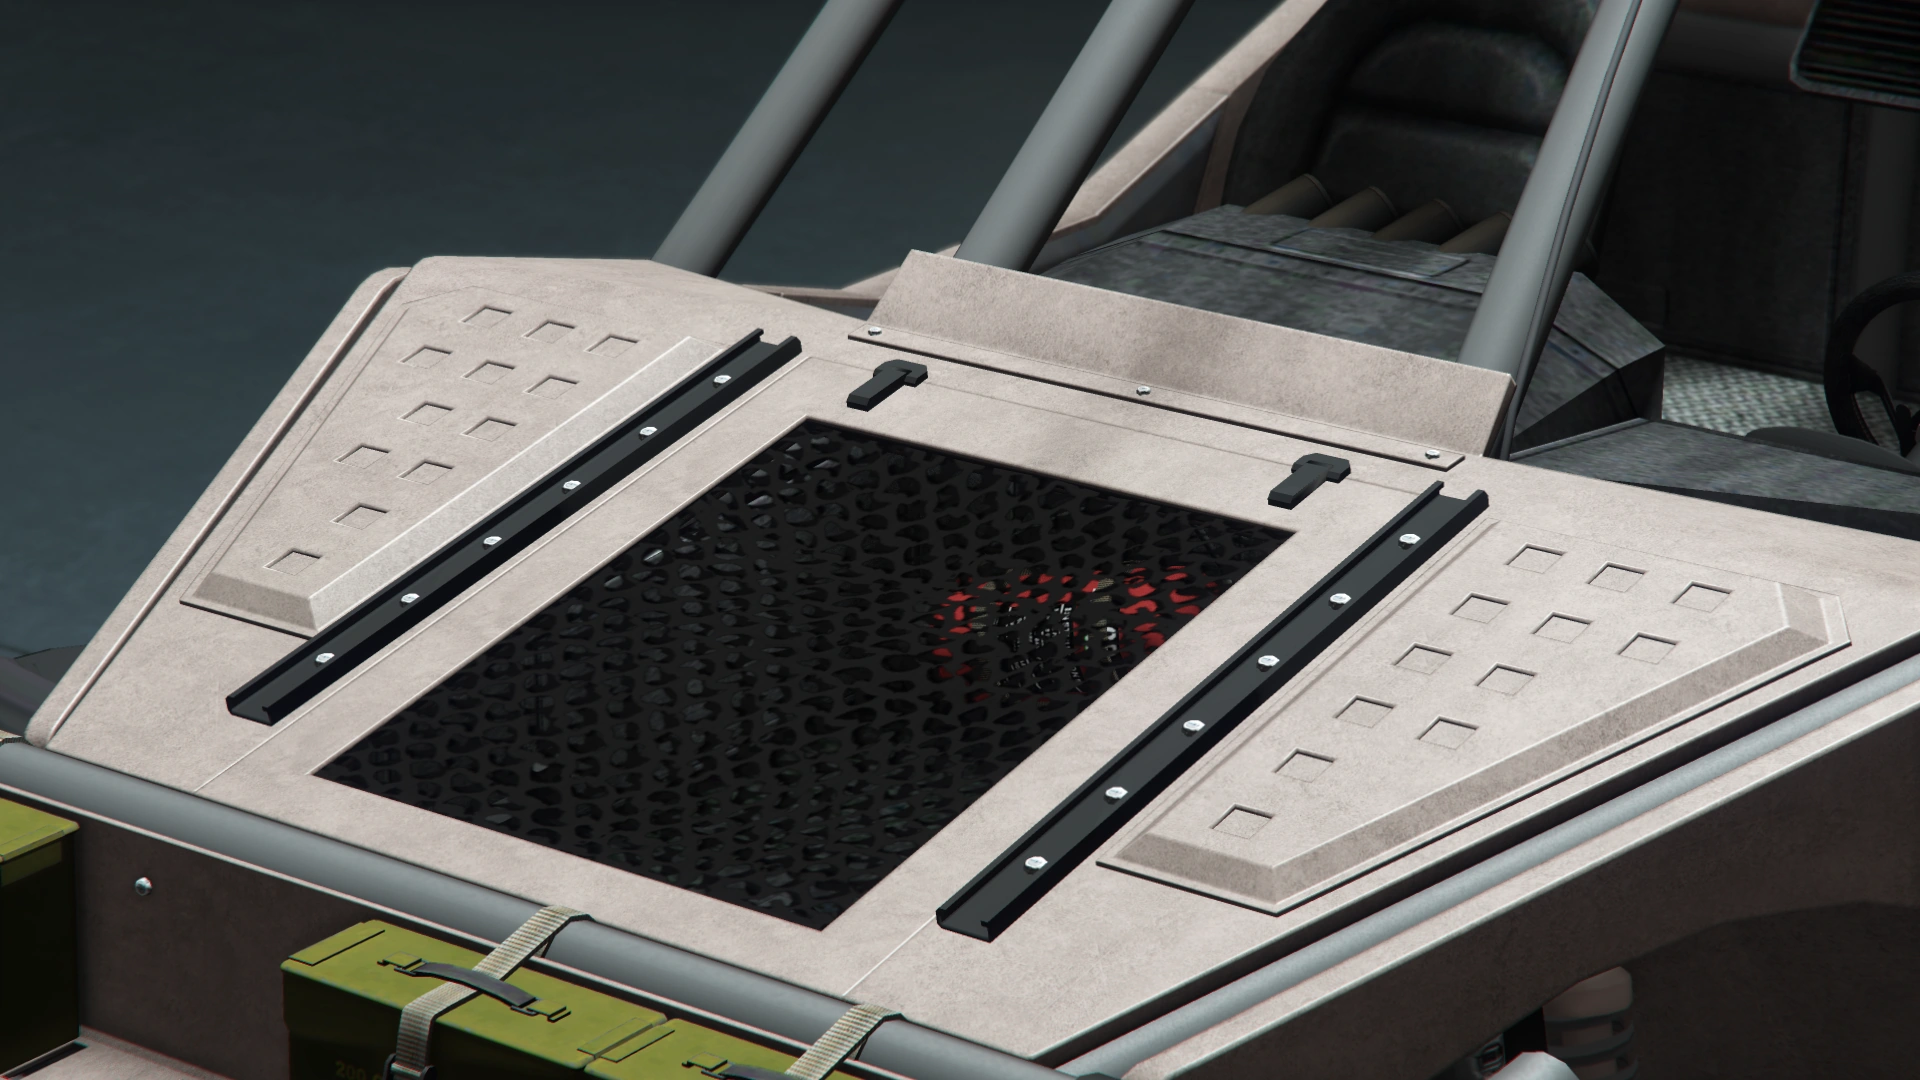

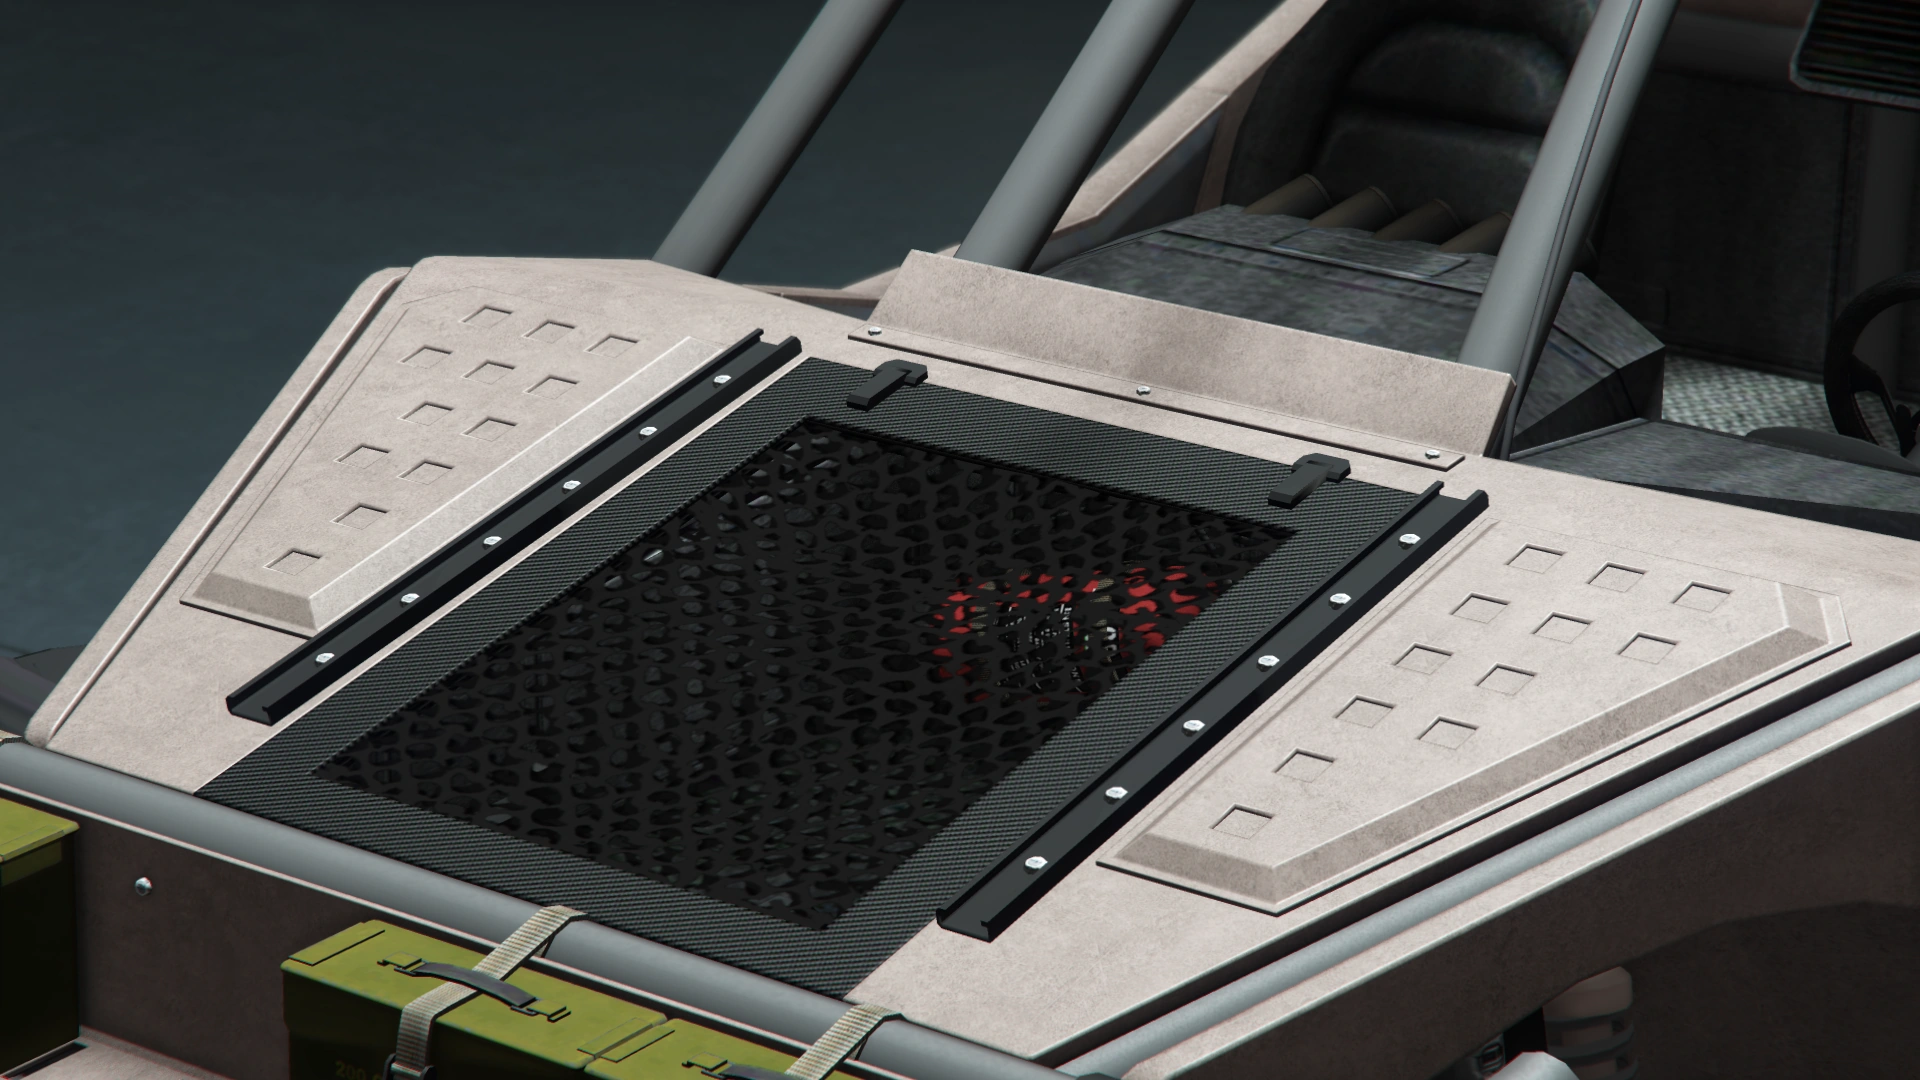
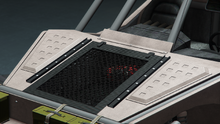


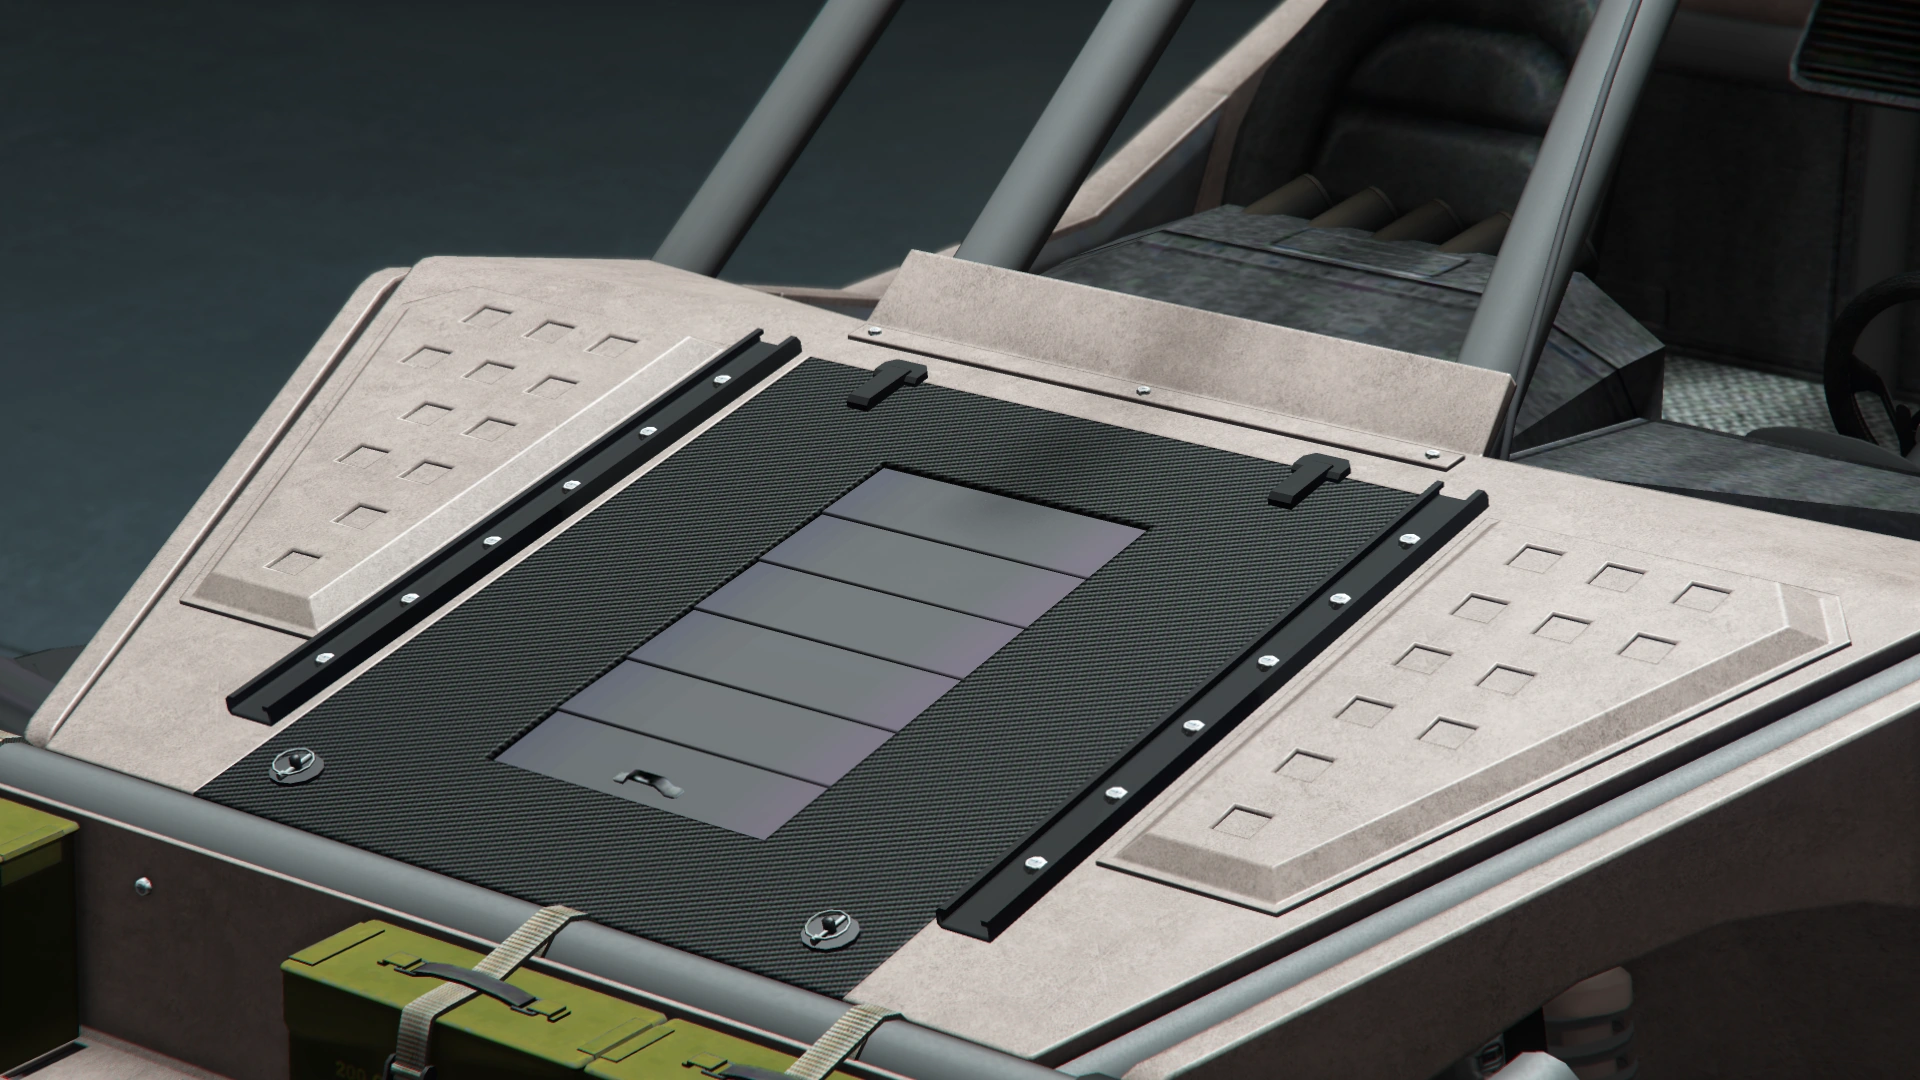
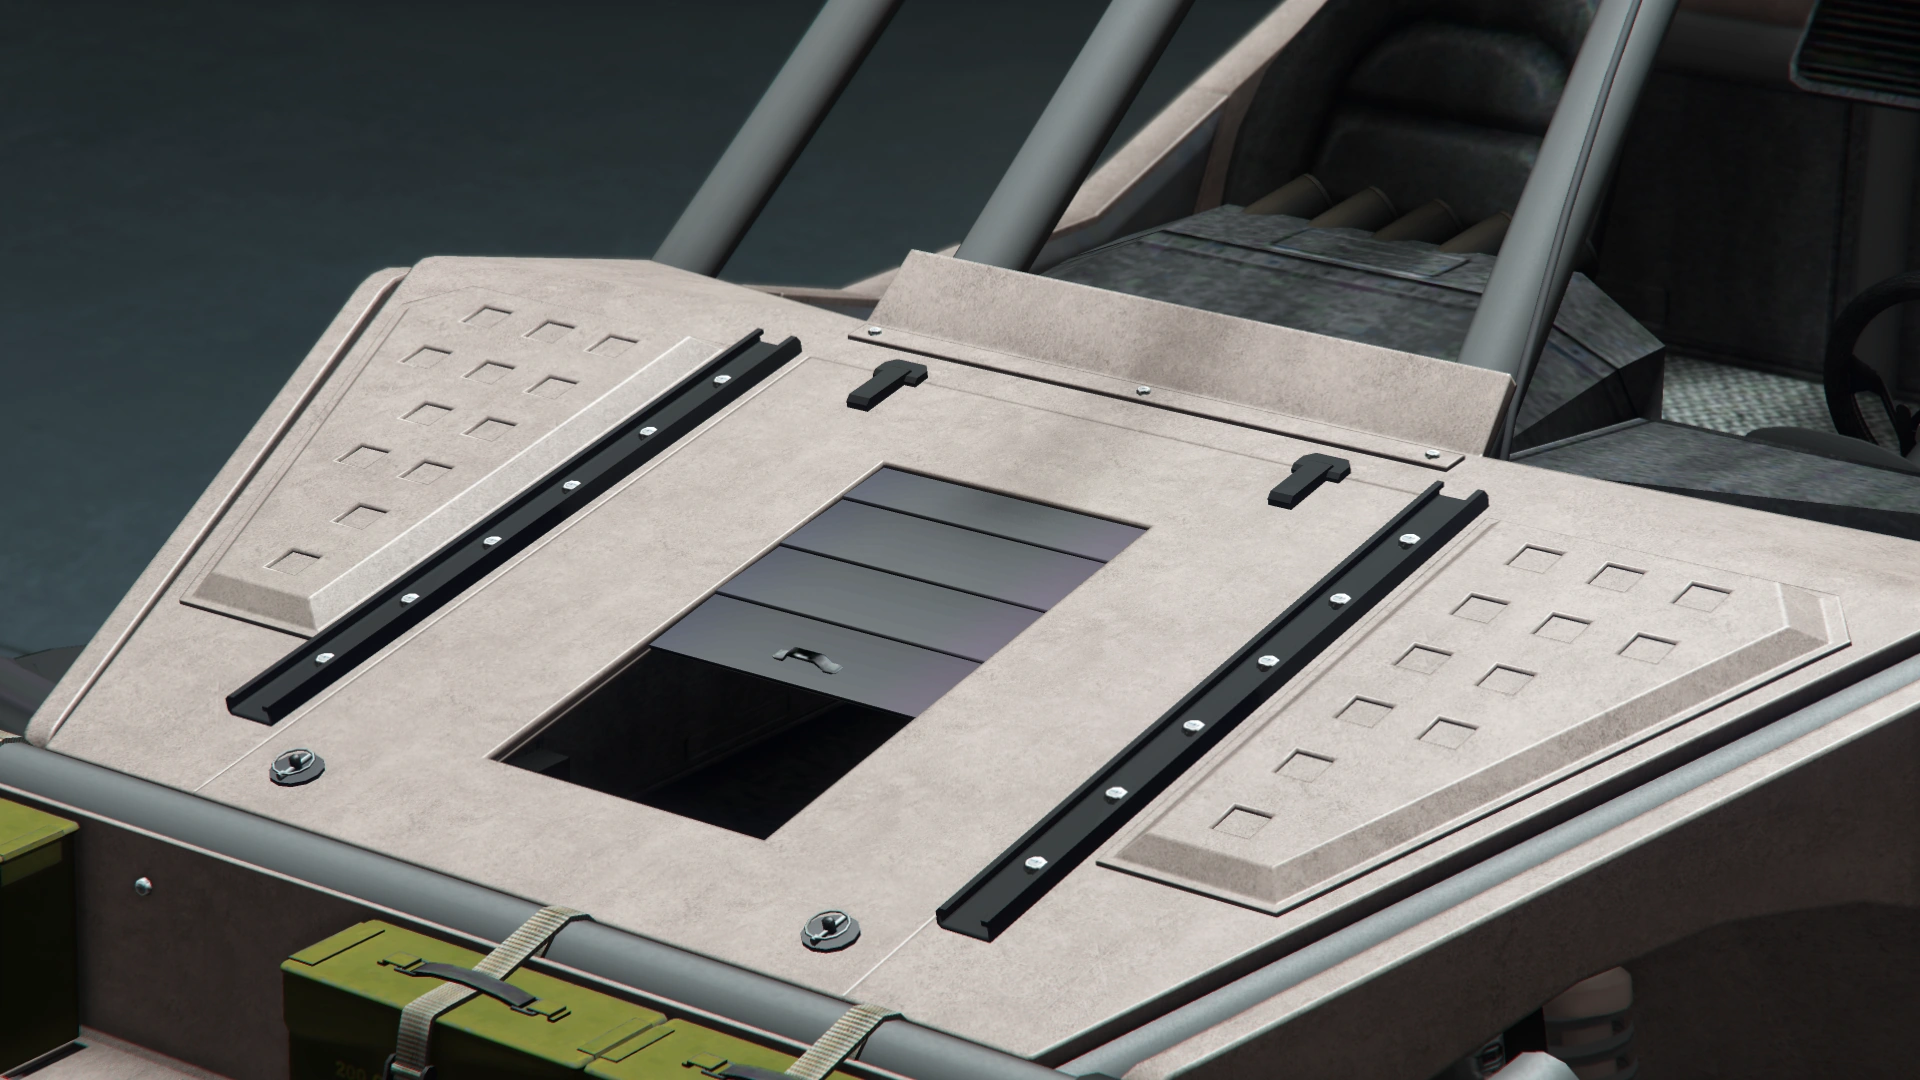
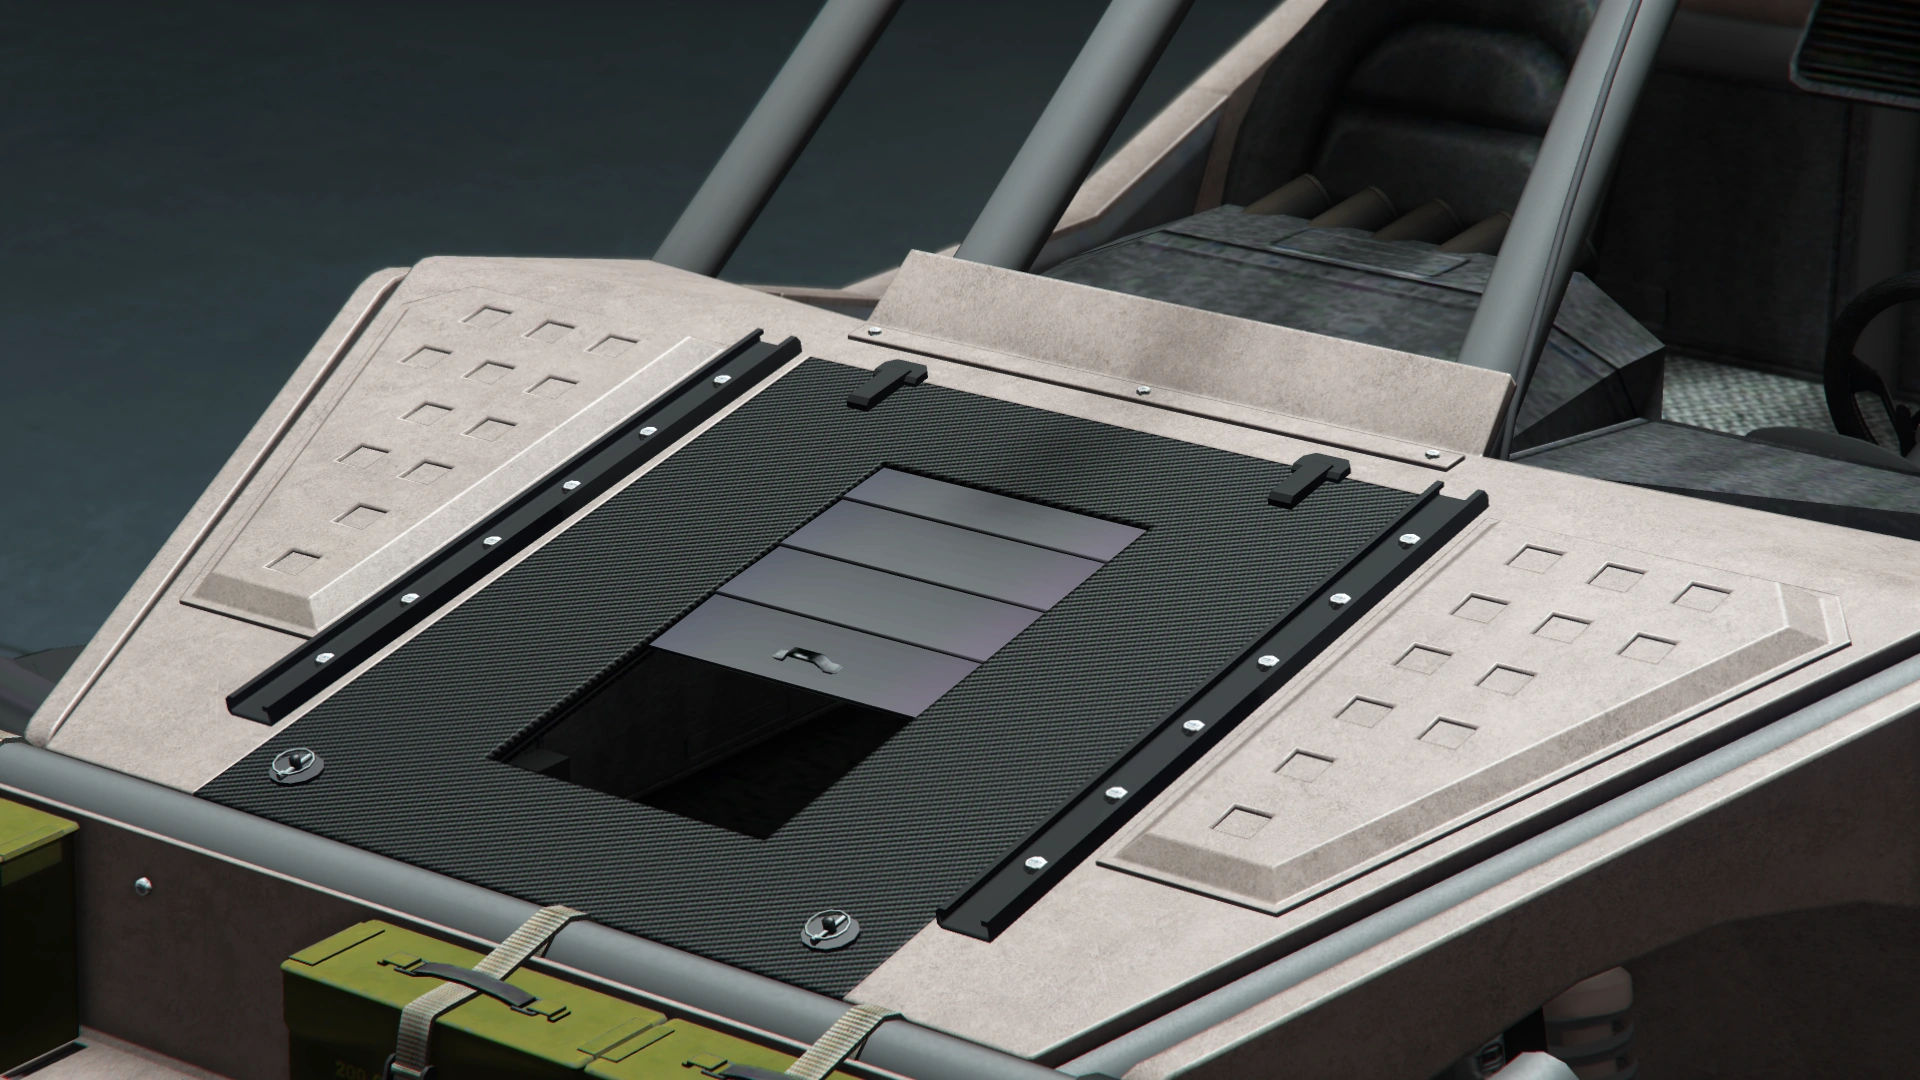
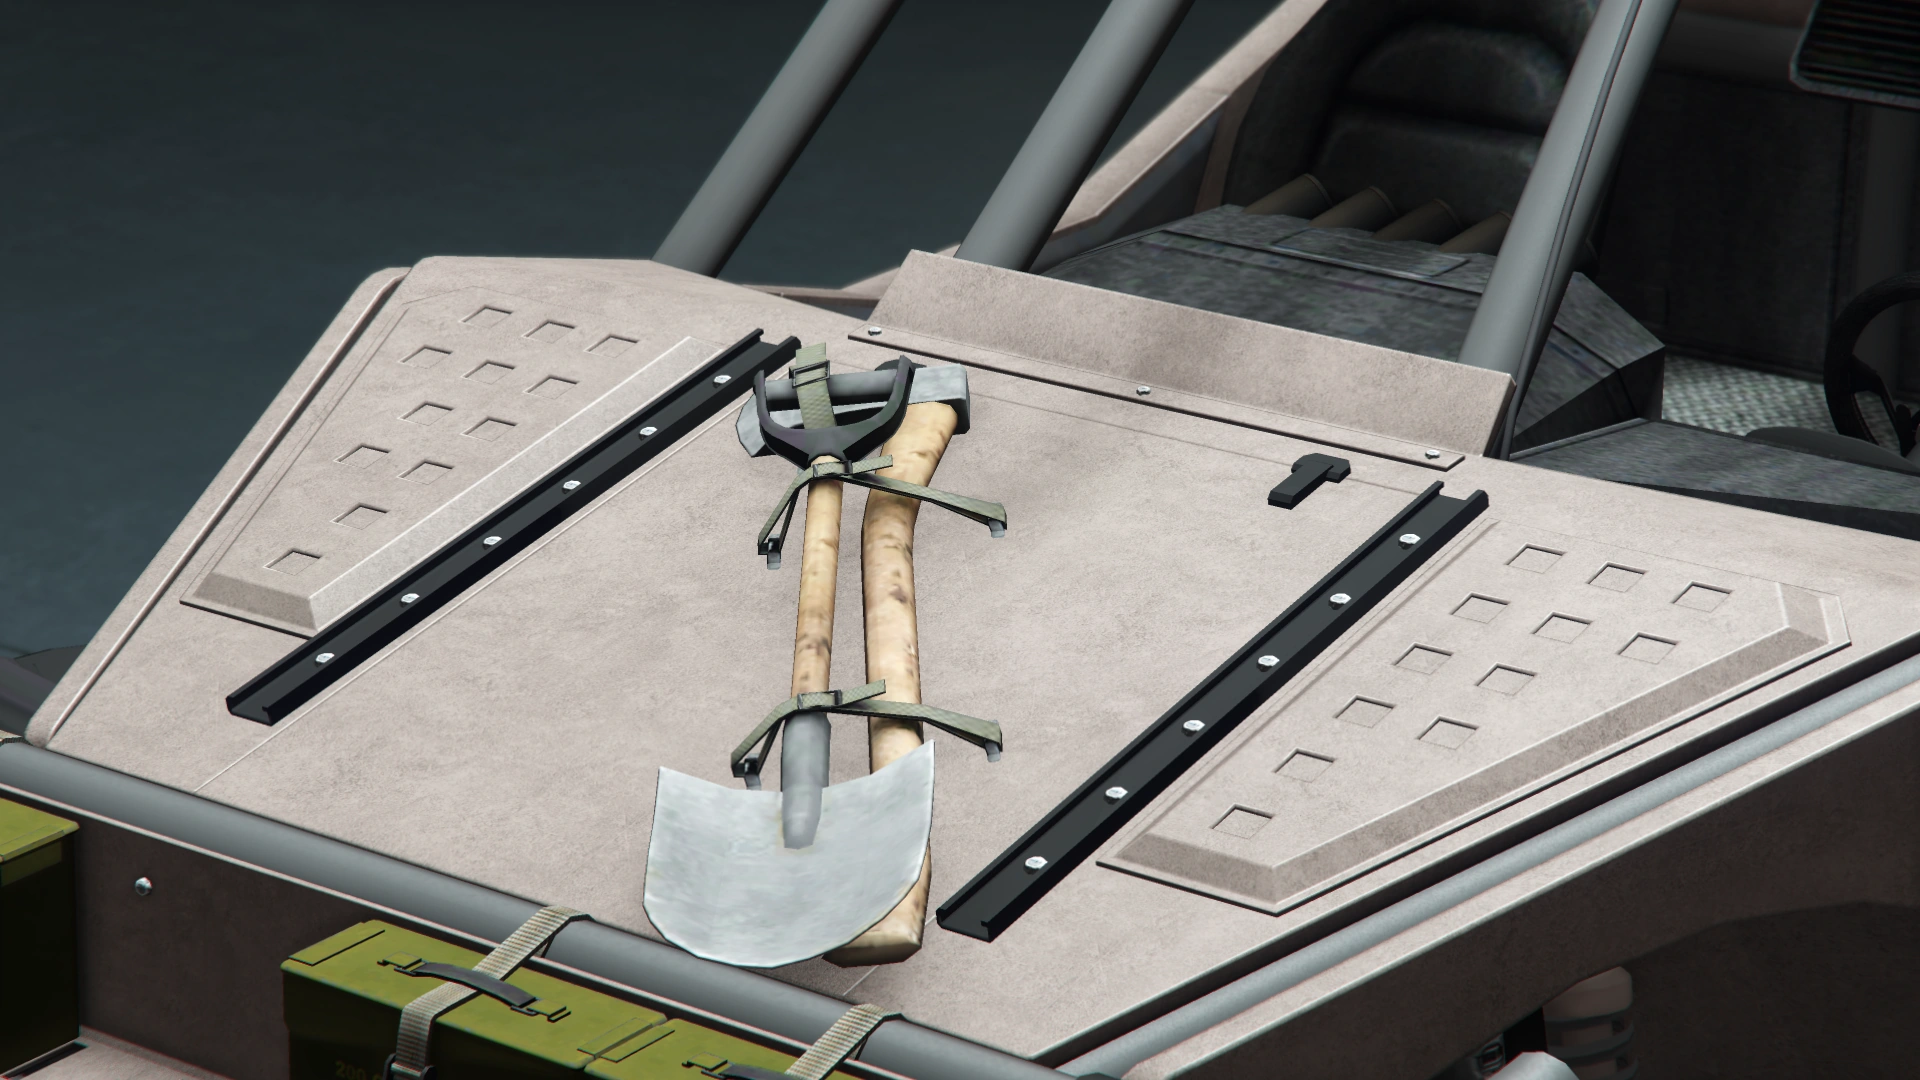

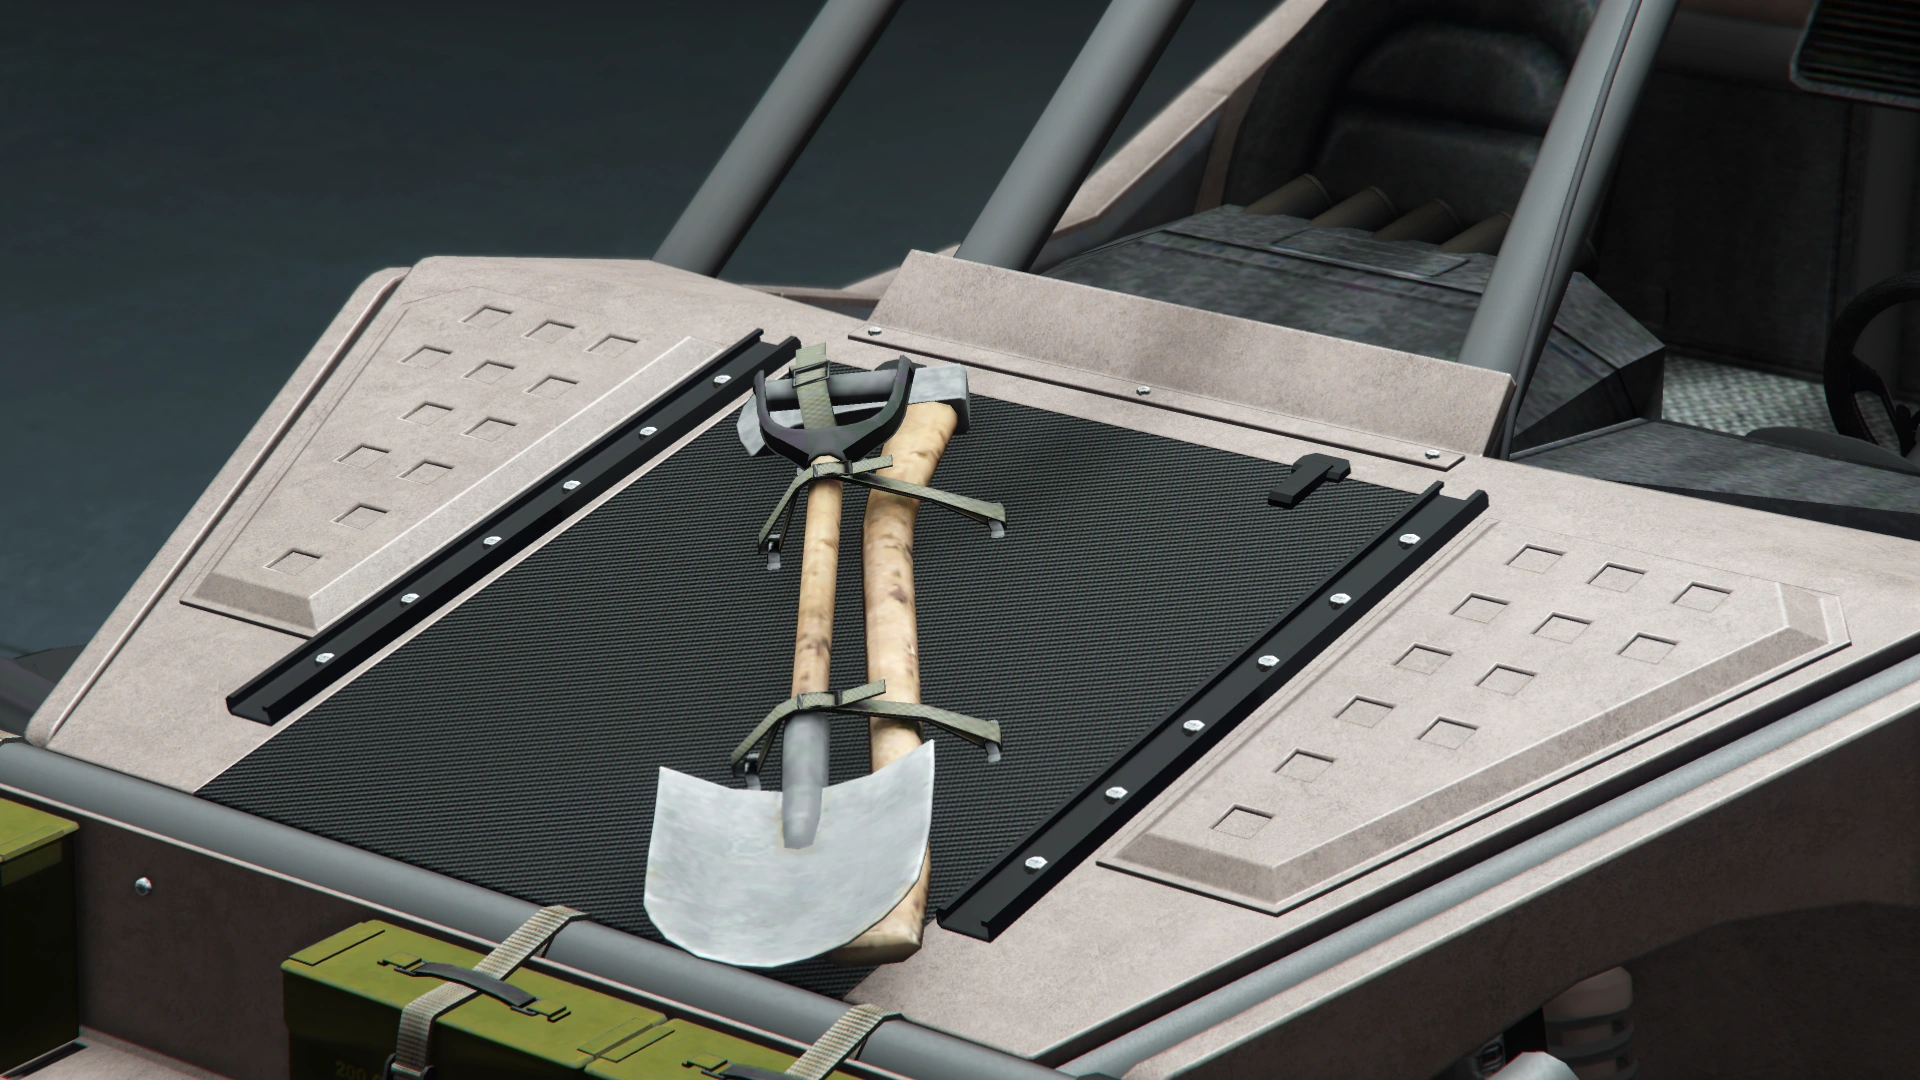

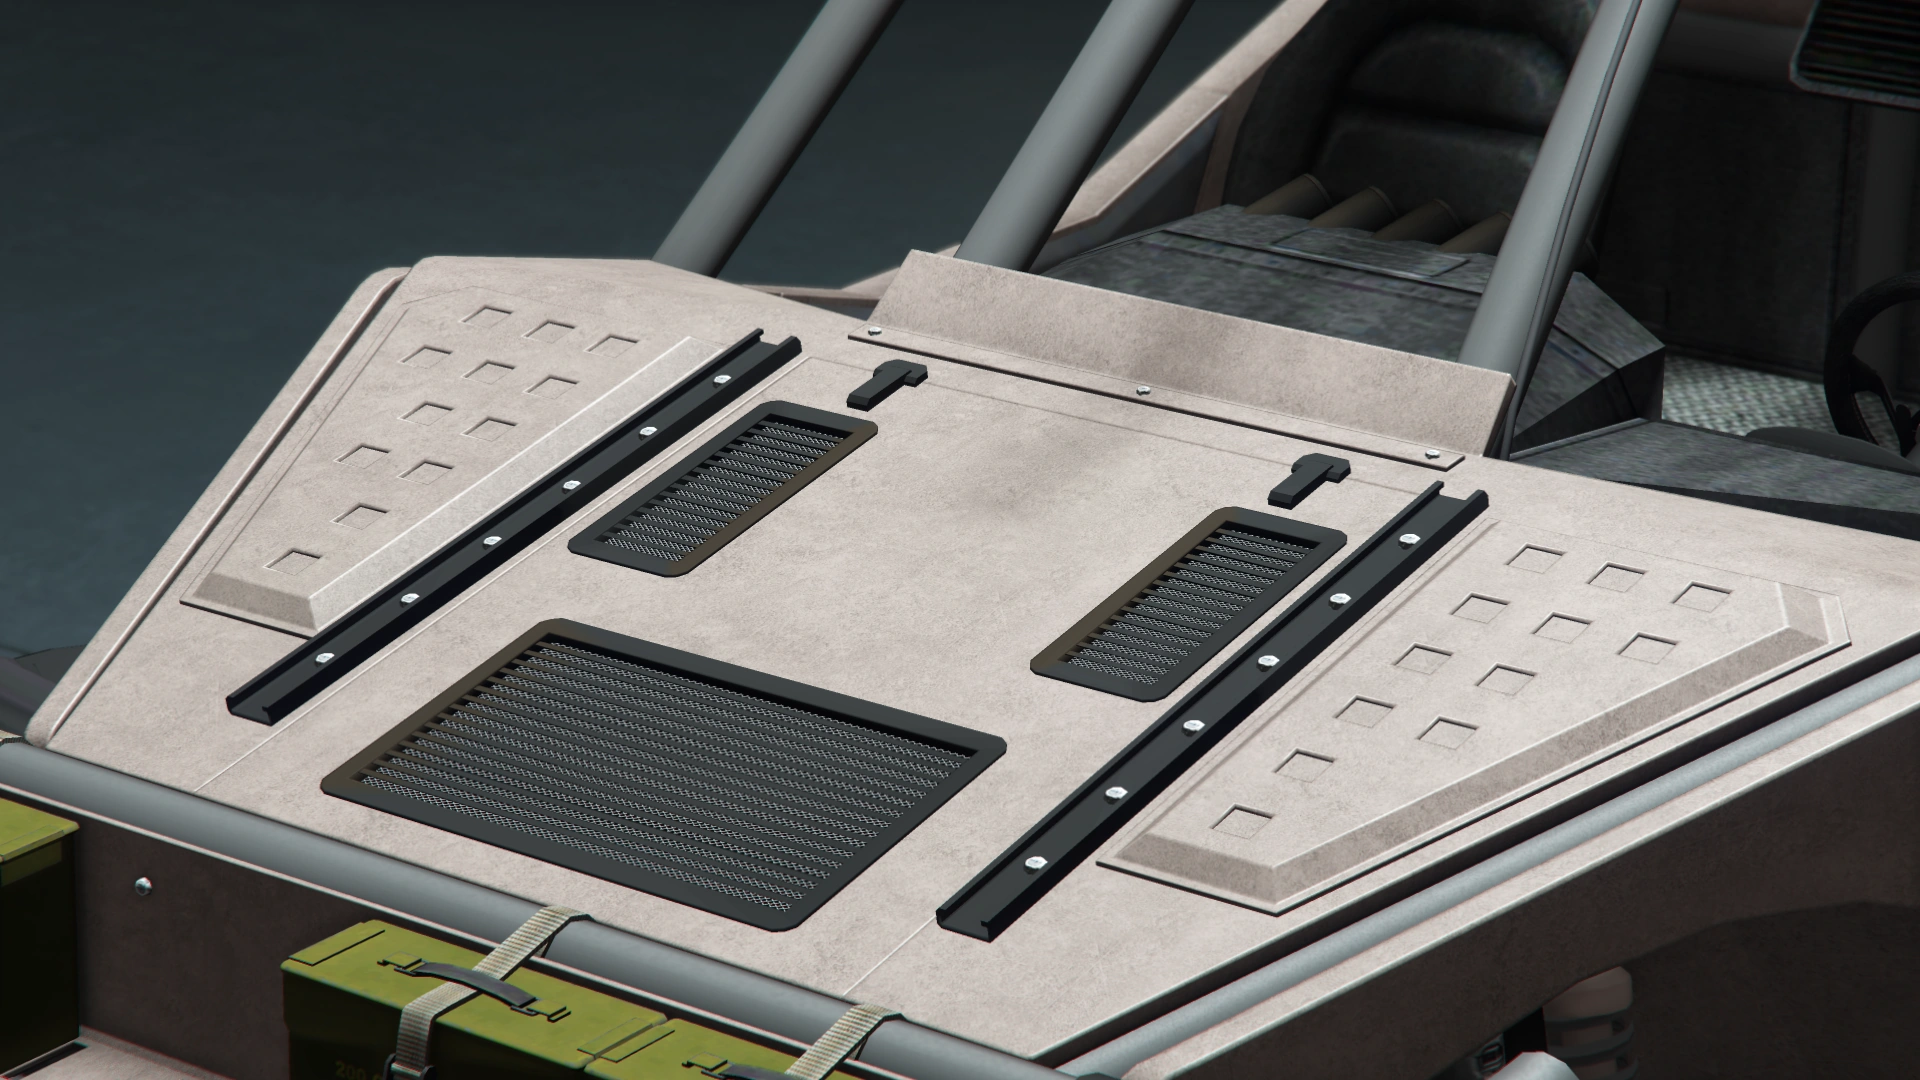
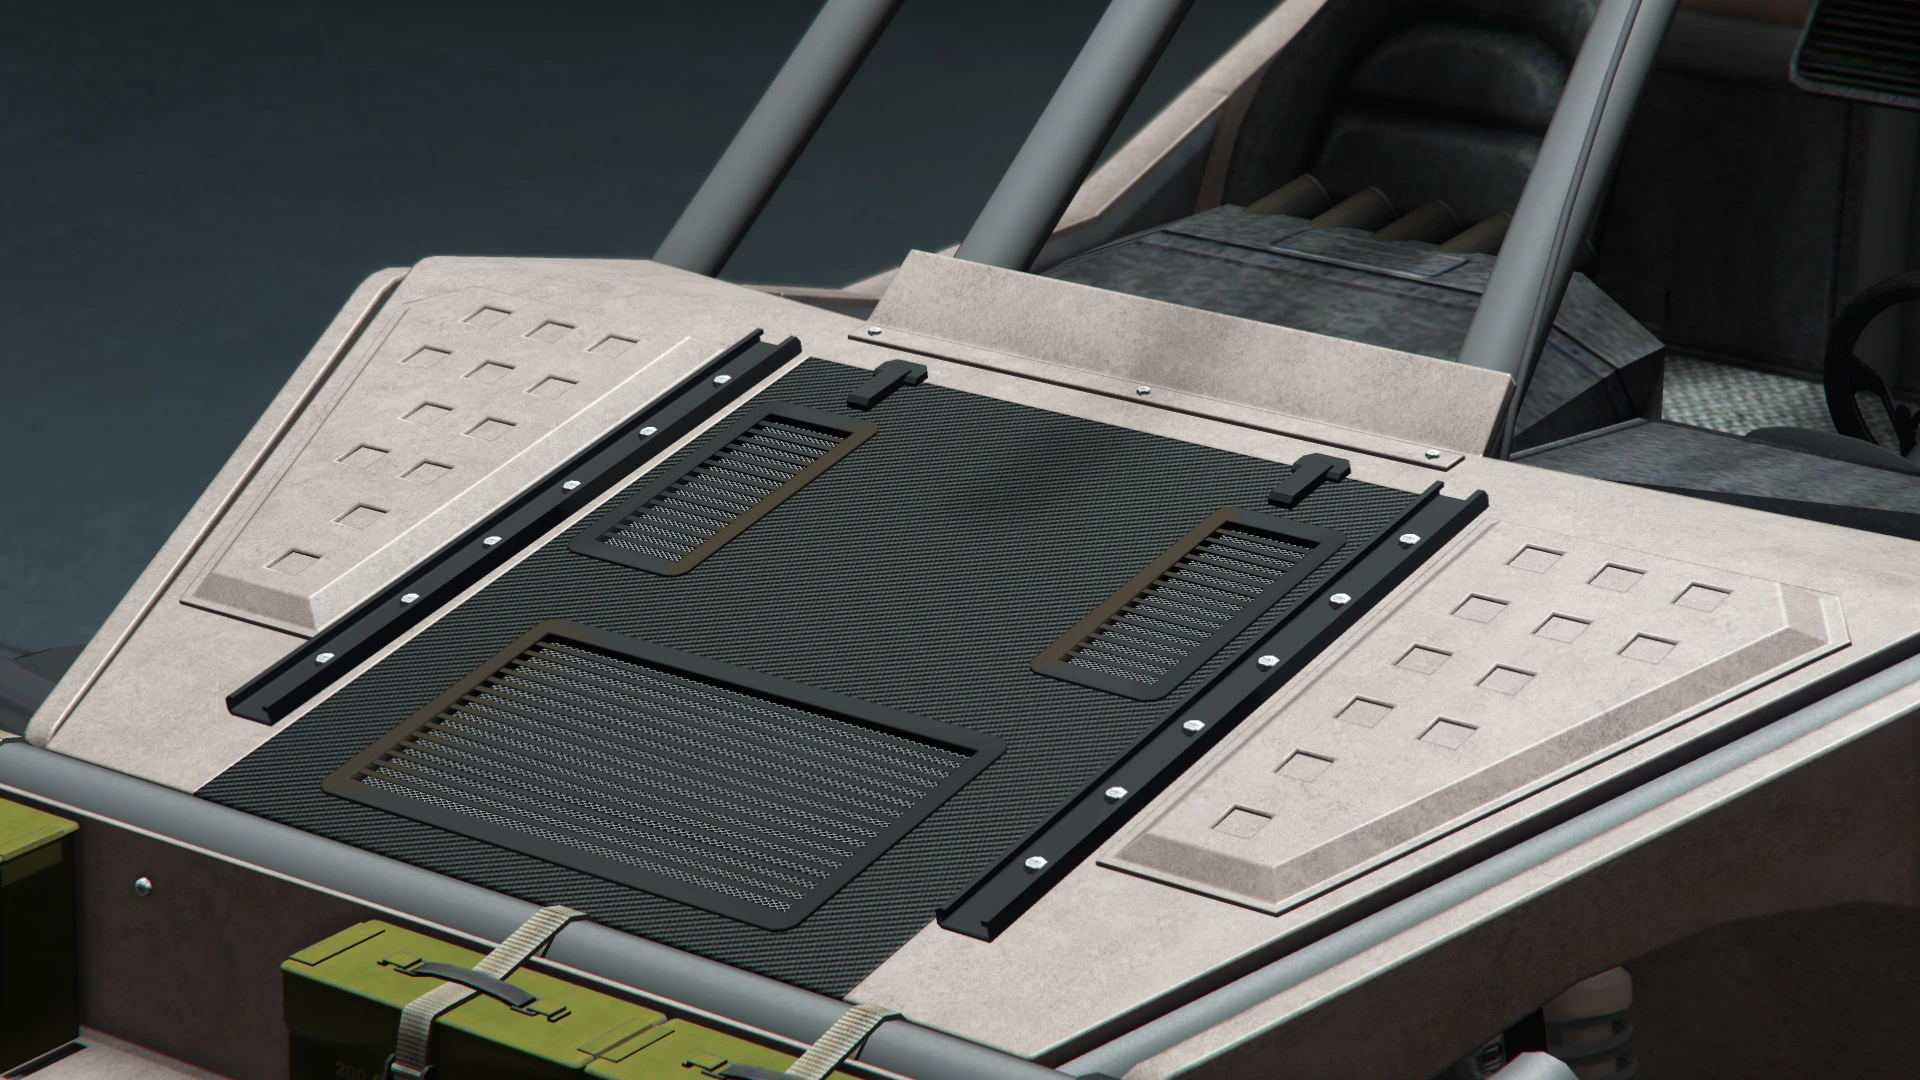

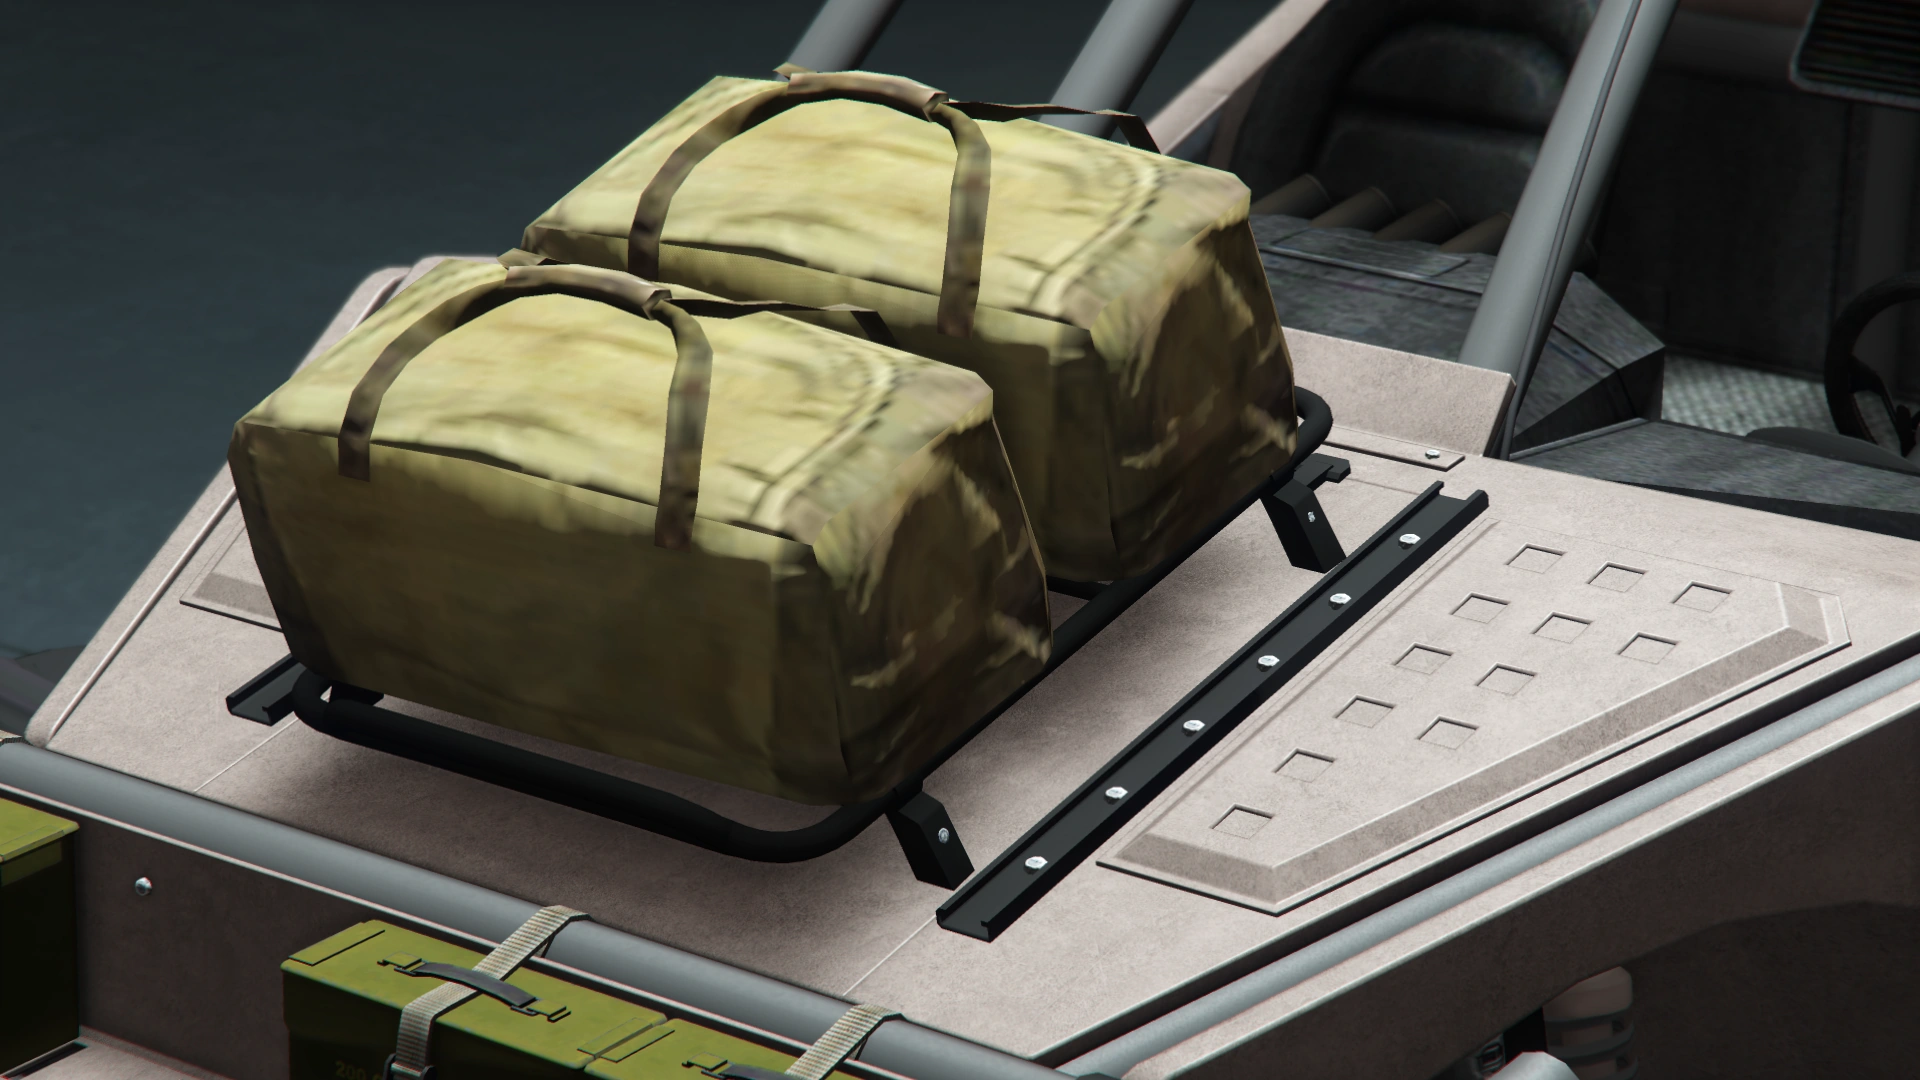


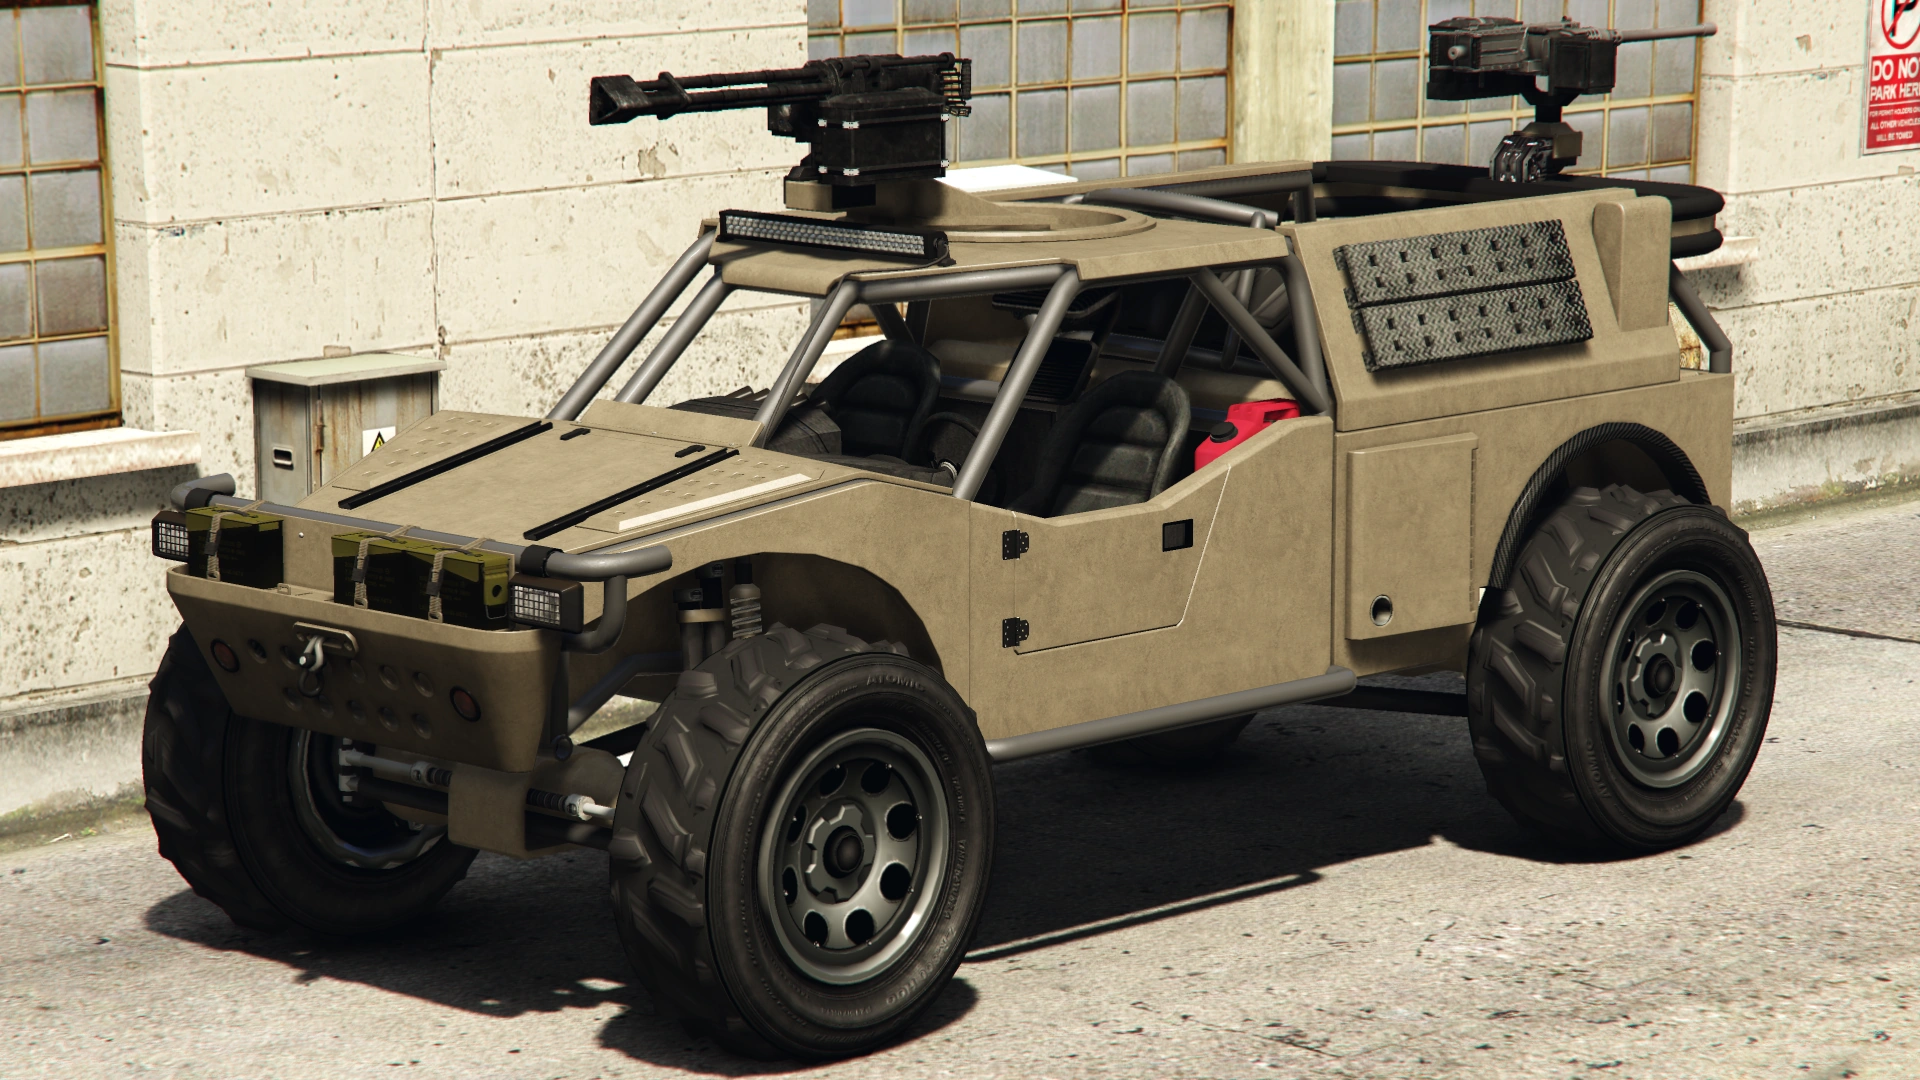


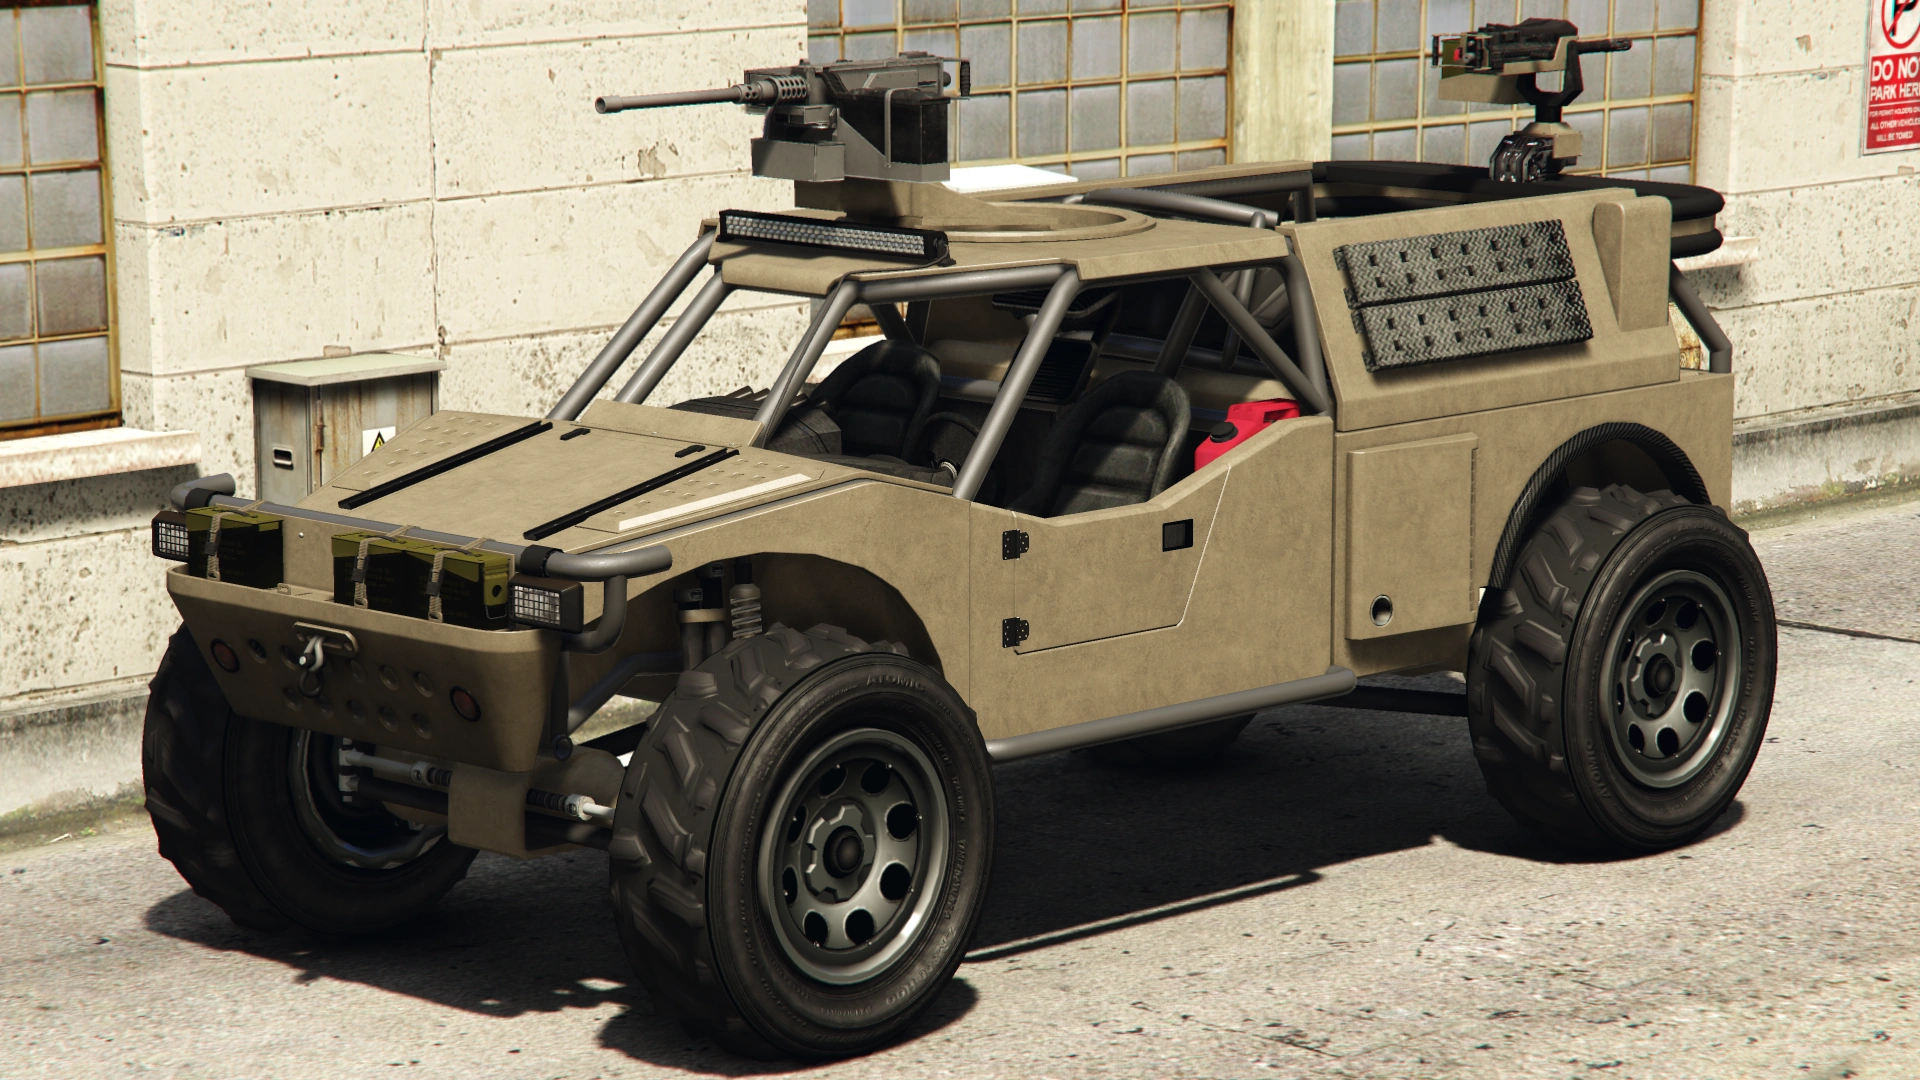

- * Denotes items that can only be unlocked for purchase via Research in the Bunker property.
- E Awarded to players who logged on December 27, during the Festive Surprise 2018 event.
When purchased, the Barrage comes painted in the following colors by default:
| Applied Colors | |||||
|---|---|---|---|---|---|
| Primary Color | Secondary Color | Pearlescent | Wheel Color | Trim Color | Dial Color |
| Matte Green | Alloy | Metallic Black | Worn White | ||
Image Gallery
Grand Theft Auto Online
")
")
")
")
Video

Prominent Appearances in Missions
Grand Theft Auto Online
- It is first seen in the setup mission "Setup: Barrage", where the crew have to retrieve it from an air convoy. Being intended for Avon and his army, it bears the faction's insignia and colors.
- It can be optionally used by the crew in the heist finale "The Doomsday Scenario", along with the TM-02 Khanjali.
Locations
Grand Theft Auto Online
- Can be purchased on Warstock Cache & Carry for $2,121,350 or for $1,595,000 after completing Setup: Barrage as the heist leader.
Events
Grand Theft Auto Online
- Price reduced to $1,378,878 or $1,036,750 (after Setup: Barrage) (35% off) during Valentine's Day 2018 (13 February - 19 February 2018).[1]
Changes
| Update | Change(s) | |
|---|---|---|
| Grand Theft Auto V PlayStation 4, Xbox One, PC | ||
| 1.42 | Added Barrage. Available for purchase. | |
Trivia
General
- The default radio stations of the Barrage are Radio Los Santos, West Coast Classics, and The Lab.
- While the car has "Mudslinger" off-road wheels by default, its spare wheel is of an entirely unique design.
- When modified at an Arena Workshop, the player has the option to equip a mod that adds the Cliffford icons that were previously exclusive to the Doomsday Heist. It is unknown whether or not this was intentional.
- This option is found in the "Vanity Plates" group and named "Custom Mod 1". It costs $11,040.
Bugs/Glitches
- When opening the hood of the vehicle through the Interaction Menu, it will not close back manually.
See Also
- Dune FAV - Another weaponized buggy featured in Grand Theft Auto Online as part of the Gunrunning update.
- Insurgent Pick-Up and its Custom variant - Another weaponized, off-road vehicle manufactured by HVY.
- Menacer - Another weaponized vehicle manufactured by HVY, featured in the After Hours update.