MonkeyBot188 (talk | contribs) (→Navigation: category update) |
mNo edit summary |
||
| (11 intermediate revisions by 6 users not shown) | |||
| Line 1: | Line 1: | ||
{{Infobox vehicles |
{{Infobox vehicles |
||
| − | |aka = Baller (2013) <small>( |
+ | |aka = Baller (2013) <small>(Second Generation; [[Content Creator]])</small> |
| + | |front_image = Baller-GTAV-front.png |
||
| − | <code>BALLER2</code> <small>(2nd Gen; Internal name)</small> |
||
| − | | |
+ | |rear_image = Baller-GTAV-rear.png |
| + | |caption = A first generation '''Baller''' in ''[[Grand Theft Auto V]]''. |
||
| − | |rear_image = Baller-GTAV-rear.png |
||
| + | |front_image2 = Baller2-GTAV-front.png |
||
| − | |caption = A first generation '''Baller''' in ''[[Grand Theft Auto V]]''. |
||
| − | | |
+ | |rear_image2 = Baller2-GTAV-rear.png |
| + | |caption2 = A second generation '''Baller''' in ''[[Grand Theft Auto V]]''. |
||
| − | |rear_image2 = Baller2-GTAV-rear.png |
||
| + | |vehicle_class = SUVs |
||
| − | |caption2 = A second generation '''Baller''' in ''[[Grand Theft Auto V]]''. |
||
| + | |vehicle_type = Civilian SUV |
||
| − | |vehicle_class = SUVs |
||
| − | | |
+ | |body_style = 4-door full-size SUV |
| + | |capacity = 4 <small>(driver and three passengers)</small> |
||
| − | |body_style = 4-door full-size SUV |
||
| + | |manufacturer = [[Gallivanter]] |
||
| − | |capacity = 4 <small>(driver and three passengers)</small> |
||
| + | |price = [[Money|$]]90,000 <small>(Second Generation) ([[Southern San Andreas Super Autos]])</small> |
||
| − | |manufacturer = [[Gallivanter]] |
||
| − | | |
+ | |appearances = ''[[Grand Theft Auto V]]<br>[[Grand Theft Auto Online]]'' |
| + | |variants = [[Baller LE]]<br>[[Baller LE (Armored)]]<br>[[Baller LE LWB]]<br>[[Baller LE LWB (Armored)]] |
||
| − | |appearances = ''[[Grand Theft Auto V]]<br>[[Grand Theft Auto Online]]'' |
||
| − | | |
+ | |related = [[Huntley Sport]]<br>[[Huntley]] |
| + | |swankness = |
||
| − | |related = [[Huntley Sport]]<br>[[Huntley]] |
||
| + | |dashtype = |
||
| + | |inttxd = |
||
| + | |carcols = |
||
| + | |wheeltype = |
||
| + | |flags = |
||
| + | |modelsets = |
||
| + | |modelname = |
||
| + | {{BP}}baller <small>(First Generation)</small> |
||
| + | {{BP}}baller2 <small>(Second Generation)</small> |
||
| + | |handlingname = |
||
| + | {{BP}}BALLER <small>(First Generation)</small> |
||
| + | {{BP}}BALLER2 <small>(Second Generation)</small> |
||
| + | |textlabelname = BALLER |
||
| + | |roadspawn = Yes |
||
| + | |roadspawnmaxcol = |
||
| + | |roadspawnfreq = |
||
| + | |roadspawntrailer = <!--null--> |
||
| + | |roadspawnidendis = |
||
| + | |roadspawndrivers = |
||
| + | |roadspawngroups = |
||
| + | |roadspawnlicense = |
||
| + | |engineacceleration = |
||
| + | |exhaustacceleration = |
||
| + | |idle = |
||
| + | |deceleration = |
||
| + | |genpreced = |
||
| + | |gensucced = |
||
}} |
}} |
||
{{Quote|Nothing says Hip Hop like a British SUV known primarily for its ability to transport mineral rich colonialists across invaded lands.|[[Southern San Andreas Super Autos]] description.}} |
{{Quote|Nothing says Hip Hop like a British SUV known primarily for its ability to transport mineral rich colonialists across invaded lands.|[[Southern San Andreas Super Autos]] description.}} |
||
| Line 27: | Line 54: | ||
{{Clr}} |
{{Clr}} |
||
;First generation |
;First generation |
||
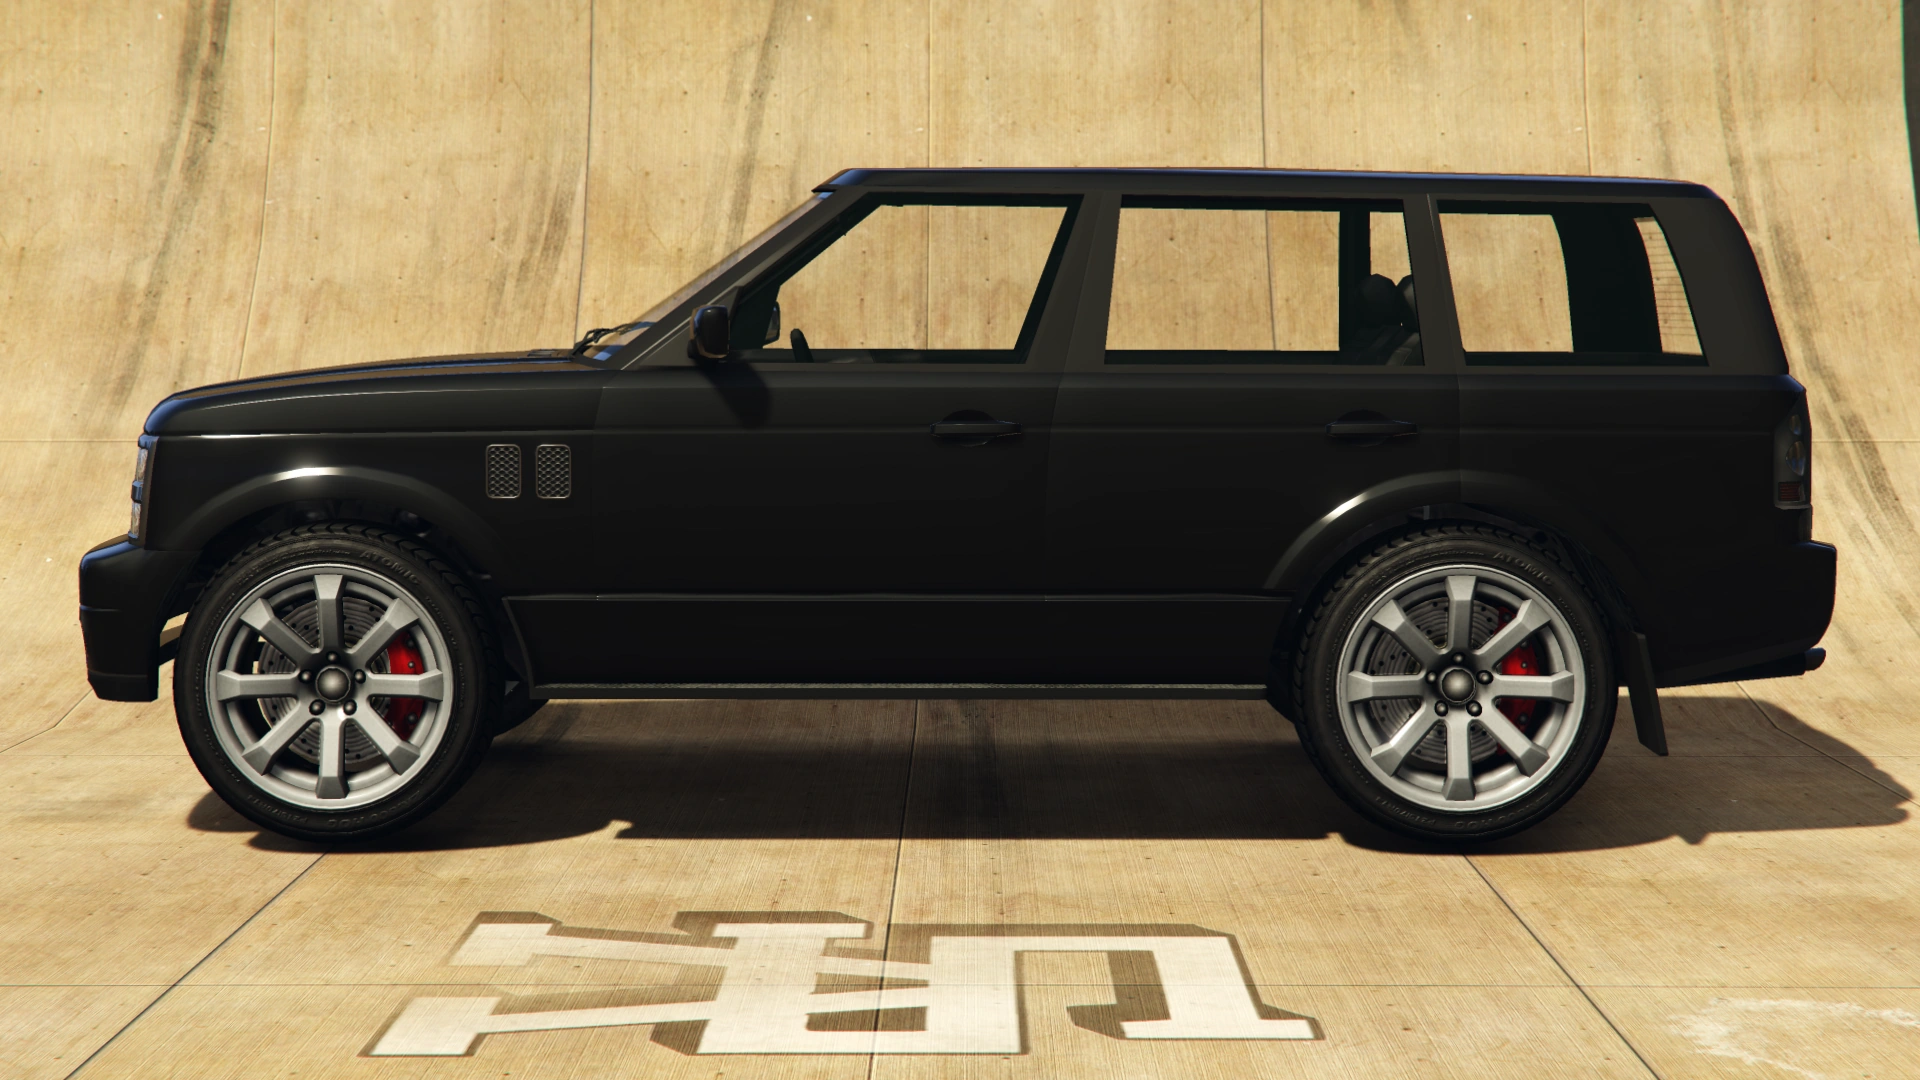
| − | The first generation Baller's design is an adaptation of the [[Huntley Sport]] from ''[[Grand Theft Auto IV]]'', which is based on the |
+ | The first generation Baller's design is an adaptation of the [[Huntley Sport]] from ''[[Grand Theft Auto IV]]'', which is based on the {{WP|Range Rover (L322)|L322 Range Rover Vogue}}. However, it features a different and less luxurious headlights, similar to the {{WP|GMC Yukon|first generation GMC Yukon}}. In comparison with Range Rover models however, the {{WP|Pillar (automobile)|C and D pillars}} of the Baller have a much steeper gradient. Overall, the car shares many similarities in design and profile with the [[Huntley]] from ''[[Grand Theft Auto: San Andreas]]''. |
| + | |||
| + | The Baller has a prominent plastic front bumper, with a trapezium intake bearing a black separation on the middle and a chrome underline. The outer portions of the bumper have circular fog lamps, together with black underlines below the lamps and ridges over the same, at the same height as the intake. The upper side is mostly plain with the license plate on the center. |
||
| + | |||
| + | The front face of the car bears a chrome surrounding, housing the main grille on the center and the headlamp units on the edges. Each lamp unit and turning signal is separated by chrome lines, with a wider line between the upper and lower lamps. The grille itself has a wide bar on the middle and two thinner ones between the main headlamps. Above the chrome surrounding, "GALLIVANTER" can be seen embossed on the front part of the bonnet. |
||
| + | |||
| + | On the sides, twin square-shaped vents are present on either front quarter, between the wheel arches and the front doors, close to the bonnet level. A ridged detail can be seen between the front and rear arches, along with a less-notorious rigded detail at the same level as the lamp units and door handles. The cabin is much angled than the Huntley and features black, polymer-covered {{WP|Pillar (automobile)|A, B, C and D pillars}}. Small stepsides can be seen at the bottom. |
||
| + | |||
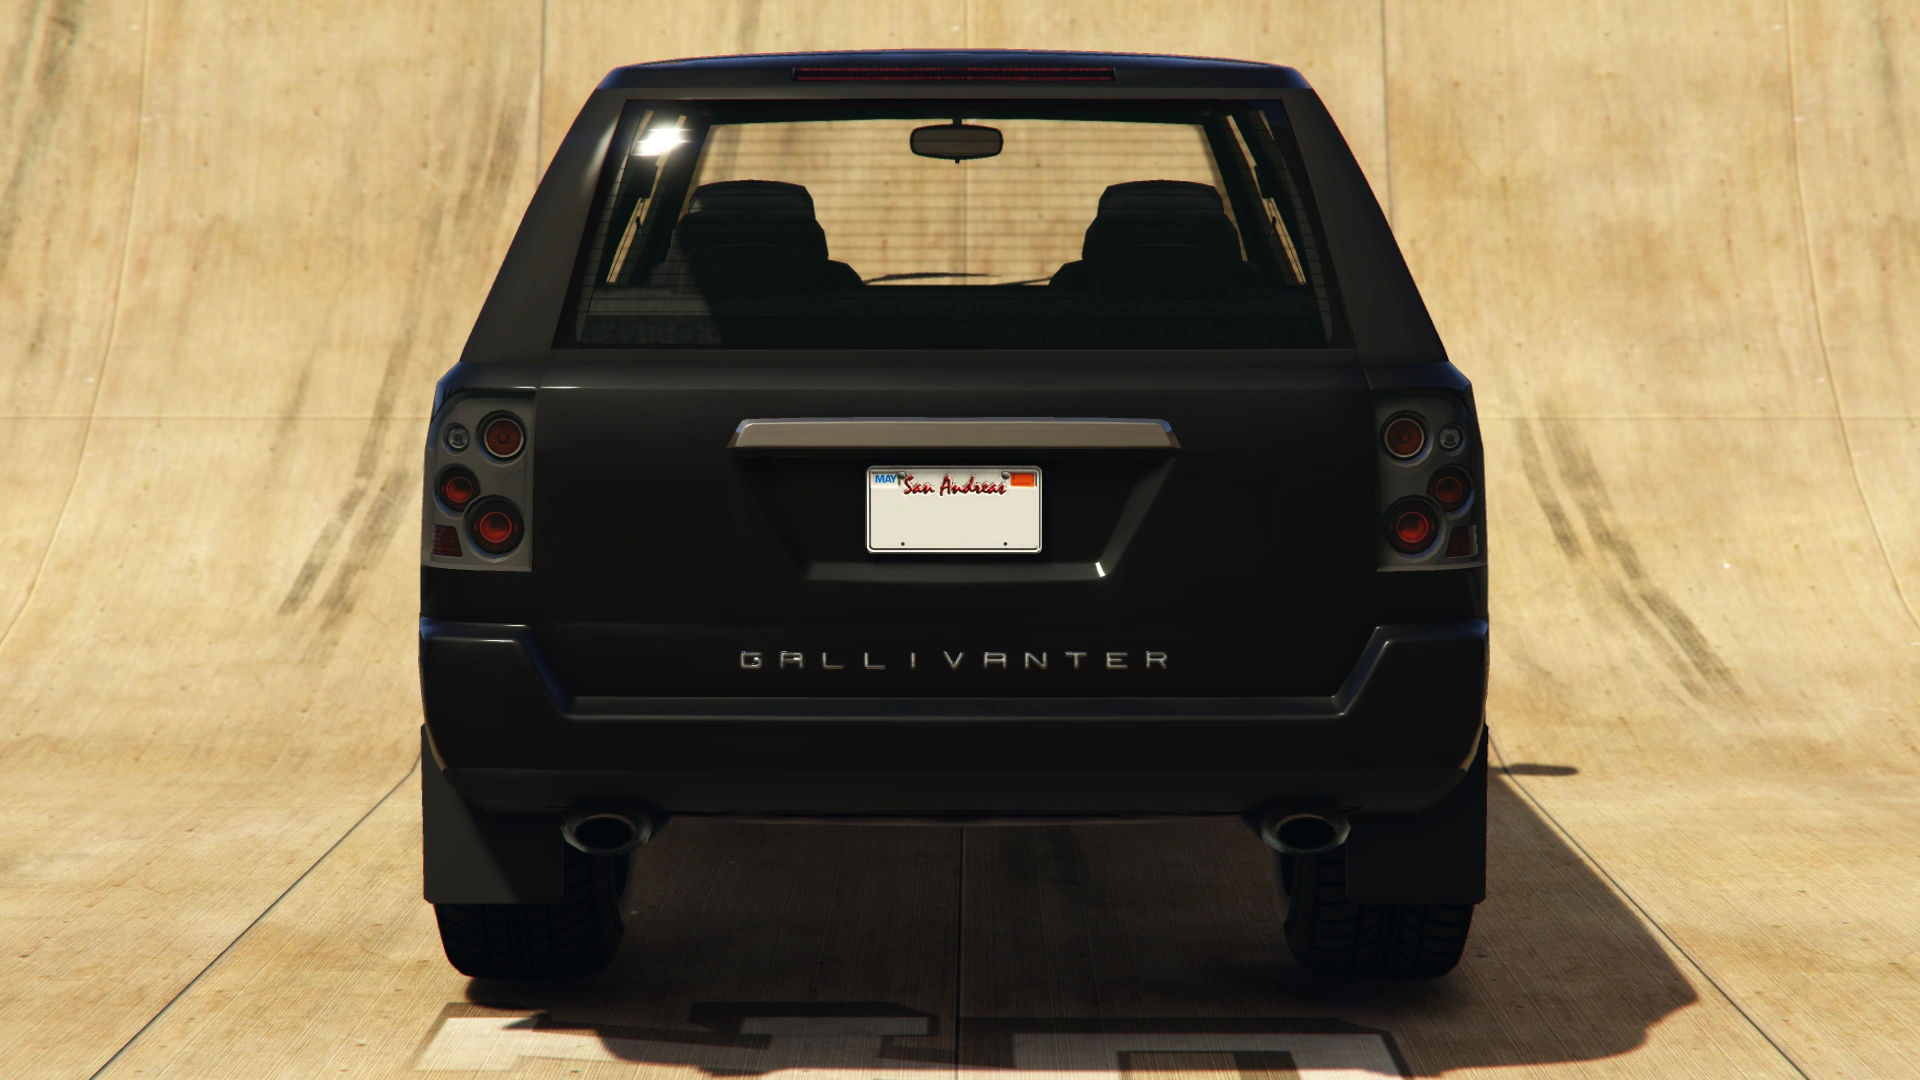
| + | On the rear end, the bumper features a concave formation with the same "GALLIVANTER" embossed on the center, featuring a black polymer finish at the bottom and small mouldings for the twin exhaust pipes. The same rear bumper reaches onto the lower rear of the sides and black mudguards are attached to either end of the bumper, intended for the rear wheel. A trapezium formation can be seen on the center of the rear hatch, serving as a space for the license plate and having a chrome detail on the upper side. the tail lights are surrounded in black panels, with thin red stripes for the third brake light. The car has eight-spoke rims, wrapped in low-profile tyres. |
||
;Second generation |
;Second generation |
||
| − | The |
+ | The second generation Baller features linear formations that are inspired by the British design styling featured on the more compact {{WP|Range Rover Evoque}} for the front end and {{WP|Range Rover Sport#Second generation (LW)|L494 Range Rover Sport}} for the sides and greenhouse area, A, B and C pillars. The side accents from the [[wp:Range Rover (L405)|L405 Range Rover]] are featured on the sides of the car. The car features black, polymer-covered {{WP|Pillar (automobile)|A, B, C and D pillars}}. |
The front face of the car features a lot of polymer, similar to the car's real life inspiration. The base of the front bumper features a polymer layer spanning the entire width. Two thirds of the front face width and a third of its height is occupied by a trapezium formation, with the outer part being black and the inset trapezium being chrome. Outside the central areas and at about half the car's height there are large ducts that have edges contoured to the lower trapezium, main grille and headlights. These ducts have horizontal LED strips that run from the inner vertex of the ducts. |
The front face of the car features a lot of polymer, similar to the car's real life inspiration. The base of the front bumper features a polymer layer spanning the entire width. Two thirds of the front face width and a third of its height is occupied by a trapezium formation, with the outer part being black and the inset trapezium being chrome. Outside the central areas and at about half the car's height there are large ducts that have edges contoured to the lower trapezium, main grille and headlights. These ducts have horizontal LED strips that run from the inner vertex of the ducts. |
||
| Line 36: | Line 71: | ||
The main grille is located almost at the top of the front face, being a chrome-edged trapezium which is less wide than the lower trapezium. The main grille features two horizontal chrome strips either side of mid-height. The headlamp units are linked to the grille, with the top edge coinciding with the top of the grille and bottom edge with the upper horizontal strip. The headlamp units feature two circular lamps and then an amber turn indicator lamp on the outside. The bonnet/ hood features an elevated area whose edges are in line with the top corners of the grille. |
The main grille is located almost at the top of the front face, being a chrome-edged trapezium which is less wide than the lower trapezium. The main grille features two horizontal chrome strips either side of mid-height. The headlamp units are linked to the grille, with the top edge coinciding with the top of the grille and bottom edge with the upper horizontal strip. The headlamp units feature two circular lamps and then an amber turn indicator lamp on the outside. The bonnet/ hood features an elevated area whose edges are in line with the top corners of the grille. |
||
| − | The sides of the car feature wheel arches in the form of large bulges. The main body features an impressed area bounded by two lines parallel to the car's |
+ | The sides of the car feature wheel arches in the form of large bulges. The main body features an impressed area bounded by two lines parallel to the car's {{WP|Beltline (automotive)|belt line}}. Connecting the two lines at the front quarter is a vertical air duct. As with the older model, the car features black, polymer-covered A, B, C and D pillars. The roof is lightly curved. The wing mirrors are dominantly body-coloured but feature a black polymer accent. The car features split six-spoke wheels, wrapped in low profile tyres. The rear features small, wide lamp units that mostly consist of small LEDs. |
{{Clr}} |
{{Clr}} |
||
| Line 42: | Line 77: | ||
<tabber> |
<tabber> |
||
First Generation= |
First Generation= |
||
| − | <!--Please ensure you have read the Manual of Style [GTA_Wiki:Manual_of_Style/Vehicles/Design_Galleries] before uploading and adding images to the Current Design Gallery. Failure to meet these guidelines will result in the images being removed and deleted, and repeated offences may result in a warning.--> |
+ | <!--Please ensure you have read the Manual of Style [GTA_Wiki:Manual_of_Style/Vehicles/Design_Galleries] before uploading and adding images to the Current Design Gallery. Failure to meet these guidelines will result in the images being removed and deleted, and repeated offences may result in a warning.--> |
| + | {{Current Design Gallery |
||
| − | | front_quarter_image = Baller-GTAV-FrontQuarter.png |
||
| − | | |
+ | |front_quarter_image = Baller-GTAV-FrontQuarter.png |
| − | | |
+ | |top_image = Baller-GTAV-Top.png |
| − | | |
+ | |rear_quarter_image = Baller-GTAV-RearQuarter.png |
| − | | |
+ | |front_image = Baller-GTAV-Front.png |
| − | | |
+ | |side_image = Baller-GTAV-Side.png |
| − | | |
+ | |rear_image = Baller-GTAV-Rear.png |
| − | | |
+ | |engine_image = Baller-GTAV-Engine.png |
| − | | |
+ | |underside_image = Baller-GTAV-Underside.png |
| − | | |
+ | |inside_image = Baller-GTAV-Inside.png |
| − | | |
+ | |detail_image = Baller badge.png |
| − | | |
+ | |open_other_image = Baller-GTAV-Other.png |
| + | |dashboard_image = Baller-GTAV-Dashboard.png |
||
}} |
}} |
||
|-| |
|-| |
||
Second Generation= |
Second Generation= |
||
| − | <!--Please ensure you have read the Manual of Style [GTA_Wiki:Manual_of_Style/Vehicles/Design_Galleries] before uploading and adding images to the Current Design Gallery. Failure to meet these guidelines will result in the images being removed and deleted, and repeated offences may result in a warning.--> |
+ | <!--Please ensure you have read the Manual of Style [GTA_Wiki:Manual_of_Style/Vehicles/Design_Galleries] before uploading and adding images to the Current Design Gallery. Failure to meet these guidelines will result in the images being removed and deleted, and repeated offences may result in a warning.--> |
| + | {{Current Design Gallery |
||
| − | | front_quarter_image = Baller2-GTAV-FrontQuarter.png |
||
| − | | |
+ | |front_quarter_image = Baller2-GTAV-FrontQuarter.png |
| − | | |
+ | |top_image = Baller2-GTAV-Top.png |
| − | | |
+ | |rear_quarter_image = Baller2-GTAV-RearQuarter.png |
| − | | |
+ | |front_image = Baller2-GTAV-Front.png |
| − | | |
+ | |side_image = Baller2-GTAV-Side.png |
| − | | |
+ | |rear_image = Baller2-GTAV-Rear.png |
| − | | |
+ | |engine_image = Baller2-GTAV-Engine.png |
| − | | |
+ | |underside_image = Baller2-GTAV-Underside.png |
| − | | |
+ | |inside_image = Baller2-GTAV-Inside.png |
| + | |detail_image = Baller badge.png |
||
| − | | open_other_image = Baller2-GTAV-Other.png |
||
| − | | |
+ | |open_other_image = Baller2-GTAV-Other.png |
| + | |dashboard_image = Baller2-GTAV-Dashboard.png |
||
}} |
}} |
||
</tabber> |
</tabber> |
||
| Line 104: | Line 141: | ||
|observed_engine = {{H:title|Front engine, all wheel drive|F4}} {{H:title|Single Overhead Camshaft|SOHC}} V8 <small>(Cover)</small> |
|observed_engine = {{H:title|Front engine, all wheel drive|F4}} {{H:title|Single Overhead Camshaft|SOHC}} V8 <small>(Cover)</small> |
||
|observed_drivetrain = AWD |
|observed_drivetrain = AWD |
||
| − | |rsc_image = |
+ | |rsc_image = FirstGenerationBaller-GTAV-RSCStats.png |
| − | |rsc_top_speed = |
+ | |rsc_top_speed = {{PercentBar|69.751678|width=150}} |
| − | |rsc_acceleration = |
+ | |rsc_acceleration = {{PercentBar|52.499996|width=150}} |
| − | |rsc_braking = |
+ | |rsc_braking = {{PercentBar|20|width=150}} |
| − | |rsc_traction = |
+ | |rsc_traction = {{PercentBar|57.575756|width=150}} |
}} |
}} |
||
|-| |
|-| |
||
| Line 129: | Line 166: | ||
|observed_engine = {{H:title|Front engine, all wheel drive|F4}} {{H:title|Single Overhead Camshaft|SOHC}} V8 <small>(Cover)</small> |
|observed_engine = {{H:title|Front engine, all wheel drive|F4}} {{H:title|Single Overhead Camshaft|SOHC}} V8 <small>(Cover)</small> |
||
|observed_drivetrain = AWD |
|observed_drivetrain = AWD |
||
| − | |rsc_image = |
+ | |rsc_image = SecondGenerationBaller-GTAO-RSCStats.png |
| − | |rsc_top_speed = |
+ | |rsc_top_speed = {{PercentBar|72.434425|width=150}} |
| − | |rsc_acceleration = |
+ | |rsc_acceleration = {{PercentBar|67.5|width=150}} |
| − | |rsc_braking = |
+ | |rsc_braking = {{PercentBar|20|width=150}} |
| − | |rsc_traction = |
+ | |rsc_traction = {{PercentBar|60.606064|width=150}} |
}} |
}} |
||
</tabber> |
</tabber> |
||
| Line 139: | Line 176: | ||
==Modifications== |
==Modifications== |
||
===''Grand Theft Auto V''=== |
===''Grand Theft Auto V''=== |
||
| + | Note that only the first generation Baller features visual modifications. |
||
| − | {|class="wikitable" |
||
| + | |||
| − | ! colspan="1" rowspan="2"|Type |
||
| + | <tabber> |
||
| − | ! colspan="1" rowspan="2"|Upgrade |
||
| + | First Generation= |
||
| − | ! colspan="2" rowspan="1"|[[Money|Cost]] (Story) |
||
| + | {| class="wikitable" |
||
| − | ! colspan="2" rowspan="1"|Cost ([[Grand Theft Auto Online|Online]]) |
||
| + | ! colspan="2" scope="col" |Category |
||
| + | ! scope="col" |Modification |
||
| + | ! scope="col" |Cost (''GTA V'') |
||
| + | ! scope="col" |Cost ([[Grand Theft Auto Online|''GTA Online'']]) |
||
| + | ! scope="col" |Image |
||
|- |
|- |
||
| + | | colspan="2" rowspan="6" |Armor |
||
| − | !Baller |
||
| + | |No Armor |
||
| − | !Baller 2 |
||
| + | | style="text-align: center;" |$250 |
||
| − | !Baller |
||
| + | | colspan="2" style="text-align: center;" |$500 |
||
| − | !Baller 2 |
||
|- |
|- |
||
| + | |Armor Upgrade 20% |
||
| − | |rowspan="5"|Armor |
||
| − | | style=" |
+ | | style="text-align: center;" |$1,250 |
| − | | style="text-align: center |
+ | | colspan="2" style="text-align: center;" |$5,250 |
| − | | style="text-align: center;padding:8px;" |$1,250 |
||
| − | | style="text-align: center;padding:8px;" |$5,250 |
||
| − | | style="text-align: center;padding:8px;" |$5,250 |
||
|- |
|- |
||
| − | + | |Armor Upgrade 40% |
|
| − | | style="text-align: center |
+ | | style="text-align: center;" |$3,125 |
| − | | style="text-align: center |
+ | | colspan="2" style="text-align: center;" |$8,750 |
| − | | style="text-align: center;padding:8px;" |$8,750 |
||
| − | | style="text-align: center;padding:8px;" |$8,750 |
||
|- |
|- |
||
| − | + | |Armor Upgrade 60% |
|
| − | | style="text-align: center |
+ | | style="text-align: center;" |$5,000 |
| − | | style="text-align: center |
+ | | colspan="2" style="text-align: center;" |$14,000 |
| − | | style="text-align: center;padding:8px;" |$14,000 |
||
| − | | style="text-align: center;padding:8px;" |$14,000 |
||
|- |
|- |
||
| − | + | |Armor Upgrade 80% |
|
| − | | style="text-align: center |
+ | | style="text-align: center;" |$8,750 |
| − | | style="text-align: center |
+ | | colspan="2" style="text-align: center;" |$24,500 |
| − | | style="text-align: center;padding:8px;" |$24,500 |
||
| − | | style="text-align: center;padding:8px;" |$24,500 |
||
|- |
|- |
||
| − | + | |Armor Upgrade 100% |
|
| − | | style="text-align: center |
+ | | style="text-align: center;" |$12,500 |
| − | | style="text-align: center |
+ | | colspan="2" style="text-align: center;" |$35,000 |
| − | | style="text-align: center;padding:8px;" |$35,000 |
||
| − | | style="text-align: center;padding:8px;" |$35,000 |
||
|- |
|- |
||
| − | |rowspan=" |
+ | | colspan="2" rowspan="4" |Brakes |
| − | | |
+ | |Stock Brakes |
| − | | style="text-align: center |
+ | | style="text-align: center;" |$250 |
| − | | style="text-align: center |
+ | | colspan="2" style="text-align: center;" |$500 |
| − | | style="text-align: center;padding:8px;" |$10,000 |
||
| − | | style="text-align: center;padding:8px;" |$10,000 |
||
|- |
|- |
||
| − | | |
+ | |Street Brakes |
| − | | style="text-align: center |
+ | | style="text-align: center;" |$5,000 |
| − | | style="text-align: center |
+ | | colspan="2" style="text-align: center;" |$10,000 |
| − | | style="text-align: center;padding:8px;" |$13,500 |
||
| − | | style="text-align: center;padding:8px;" |$13,500 |
||
|- |
|- |
||
| − | | |
+ | |Sport Brakes |
| − | | style="text-align: center |
+ | | style="text-align: center;" |$6,750 |
| − | | style="text-align: center |
+ | | colspan="2" style="text-align: center;" |$13,500 |
| − | | style="text-align: center;padding:8px;" |$17,500 |
||
| − | | style="text-align: center;padding:8px;" |$17,500 |
||
|- |
|- |
||
| + | |Race Brakes |
||
| − | |rowspan="3"|Bumpers |
||
| − | | style=" |
+ | | style="text-align: center;" |$8,750 |
| − | | style="text-align: center |
+ | | colspan="2" style="text-align: center;" |$17,500 |
| − | | style="text-align: center;padding:8px;" |N/A |
||
| − | | style="text-align: center;padding:8px;" |$2,500 |
||
| − | | style="text-align: center;padding:8px;" |N/A |
||
|- |
|- |
||
| + | | colspan="2" rowspan="5" |Bumpers |
||
| − | | style="padding:8px;" |Custom Front Bumper 2 |
||
| + | |Stock Front Bumper |
||
| − | | style="text-align: center;padding:8px;" |$1,650 |
||
| − | | style="text-align: center |
+ | | style="text-align: center;" |$750 |
| − | | style="text-align: center |
+ | | style="text-align: center;" |$1,500 |
| + | | |
||
| − | | style="text-align: center;padding:8px;" |N/A |
||
|- |
|- |
||
| − | + | |Custom Front Bumper 1 |
|
| − | | style="text-align: center |
+ | | style="text-align: center;" |$1,250 |
| − | | style="text-align: center |
+ | | style="text-align: center;" |$2,500 |
| + | | |
||
| − | | style="text-align: center;padding:8px;" |$2,500 |
||
| − | | style="text-align: center;padding:8px;" |N/A |
||
|- |
|- |
||
| + | |Custom Front Bumper 2 |
||
| − | |rowspan="4"|Engine |
||
| − | | style=" |
+ | | style="text-align: center;" |$1,650 |
| − | | style="text-align: center |
+ | | style="text-align: center;" |$3,300 |
| + | | |
||
| − | | style="text-align: center;padding:8px;" |$2,250 |
||
| − | | style="text-align: center;padding:8px;" |$4,500 |
||
| − | | style="text-align: center;padding:8px;" |$4,500 |
||
|- |
|- |
||
| + | |Stock Rear Bumper |
||
| − | | style="padding:8px;" |EMS Upgrade, Level 2 |
||
| − | | style="text-align: center |
+ | | style="text-align: center;" |$750 |
| − | | style="text-align: center |
+ | | style="text-align: center;" |$1,500 |
| + | | |
||
| − | | style="text-align: center;padding:8px;" |$6,250 |
||
| − | | style="text-align: center;padding:8px;" |$6,250 |
||
|- |
|- |
||
| + | |Custom Rear Bumper |
||
| − | | style="padding:8px;" |EMS Upgrade, Level 3 |
||
| − | | style="text-align: center |
+ | | style="text-align: center;" |$1,250 |
| − | | style="text-align: center |
+ | | style="text-align: center;" |$2,500 |
| + | | |
||
| − | | style="text-align: center;padding:8px;" |$9,000 |
||
| − | | style="text-align: center;padding:8px;" |$9,000 |
||
|- |
|- |
||
| + | | colspan="2" rowspan="4" |Engine |
||
| − | | style="padding:8px;" |EMS Upgrade, Level 4 |
||
| + | |EMS Upgrade, Level 1 |
||
| − | | style="text-align: center;padding:8px;" |$8,375 |
||
| − | | style="text-align: center |
+ | | style="text-align: center;" |$2,250 |
| − | | style="text-align: center |
+ | | colspan="2" style="text-align: center;" |$4,500 |
| − | | style="text-align: center;padding:8px;" |$16,750 |
||
|- |
|- |
||
| + | |EMS Upgrade, Level 2 |
||
| − | | style="padding:8px;" |Exhaust |
||
| − | | style=" |
+ | | style="text-align: center;" |$3,125 |
| − | | style=" |
+ | | colspan="2" style="text-align: center;" |$6,250 |
| − | | style="text-align: center;padding:8px;" |N/A |
||
| − | | style="text-align: center;padding:8px;" |$750 |
||
| − | | style="text-align: center;padding:8px;" |N/A |
||
|- |
|- |
||
| + | |EMS Upgrade, Level 3 |
||
| − | |rowspan="2"|Lights |
||
| − | | style=" |
+ | | style="text-align: center;" |$4,500 |
| − | | style="text-align: center |
+ | | colspan="2" style="text-align: center;" |$9,000 |
| − | | style="text-align: center;padding:8px;" |$1,000 |
||
| − | | style="text-align: center;padding:8px;" |$5,000 |
||
| − | | style="text-align: center;padding:8px;" |$5,000 |
||
|- |
|- |
||
| + | |EMS Upgrade, Level 4 |
||
| − | | style="padding:8px;" |<div class="mw-collapsible mw-collapsed" style="width:100%"> |
||
| + | | style="text-align: center;" |$8,375 |
||
| − | <div class="mw-collapsible-content">{{Main| style="padding:8px;" |Los Santos Customs/Lights}}</div></div> |
||
| − | | style="text-align: center |
+ | | colspan="2" style="text-align: center;" |$16,750 |
| − | | style="text-align: center;padding:8px;" | - |
||
| − | | style="text-align: center;padding:8px;" | - |
||
| − | | style="text-align: center;padding:8px;" | - |
||
| − | |||
|- |
|- |
||
| − | |rowspan="2" |
+ | | colspan="2" rowspan="2" |Exhausts |
| + | |Stock Exhaust |
||
| − | | style="padding:8px;" |Tracker |
||
| − | | style="text-align: center |
+ | | style="text-align: center;" |$130 |
| − | | style="text-align: center |
+ | | style="text-align: center;" |$260 |
| + | | |
||
| − | | style="text-align: center;padding:8px;" |$2,000 |
||
| − | | style="text-align: center;padding:8px;" |$2,000 |
||
|- |
|- |
||
| + | |Custom Exhaust |
||
| − | | style="padding:8px;" |Full Coverage |
||
| − | | style="text-align: center |
+ | | style="text-align: center;" |$375 |
| − | | style="text-align: center |
+ | | style="text-align: center;" |$750 |
| + | | |
||
| − | | style="text-align: center;padding:8px;" |$11,250 |
||
| − | | style="text-align: center;padding:8px;" |$11,250 |
||
|- |
|- |
||
| − | |rowspan="2"| |
+ | | colspan="2" rowspan="2" |[[Car Bomb|Explosives]] |
| + | |Ignition Bomb |
||
| − | | style="padding:8px;" |''Main article: [[Los Santos Customs/Respray Colors]]'' |
||
| − | | style="text-align: center |
+ | | style="text-align: center;" |N/A |
| − | | style="text-align: center |
+ | | colspan="2" style="text-align: center;" |$5,000 |
| − | | style="text-align: center;padding:8px;" | - |
||
| − | | style="text-align: center;padding:8px;" | - |
||
|- |
|- |
||
| + | |Remote Bomb |
||
| − | | style="padding:8px;" |Crew Emblem |
||
| − | | style="text-align: center |
+ | | style="text-align: center;" |N/A |
| − | | style="text-align: center |
+ | | colspan="2" style="text-align: center;" |$7,500 |
| − | | style="text-align: center;padding:8px;" |$25,000 |
||
| − | | style="text-align: center;padding:8px;" |$25,000 |
||
|- |
|- |
||
| − | | |
+ | | colspan="2" |Horns |
| + | |''Main article: [[Los Santos Customs/Horns]]'' |
||
| − | | style="padding:8px;" |Sell Vehicle |
||
| − | | style="text-align: center |
+ | | style="text-align: center;" | - |
| − | | style="text-align: center |
+ | | colspan="2" style="text-align: center;" | - |
| − | | style="text-align: center;padding:8px;" |$9,000 |
||
| − | | style="text-align: center;padding:8px;" |$9,000 |
||
|- |
|- |
||
| − | | |
+ | | rowspan="3" |Lights |
| + | | rowspan="2" |Headlights |
||
| − | | style="padding:8px;" |Custom Skirts |
||
| + | |Stock Lights |
||
| − | | style="text-align: center;padding:8px;" |$1,500 |
||
| − | | style="text-align: center |
+ | | style="text-align: center;" |$200 |
| − | | style="text-align: center |
+ | | colspan="2" style="text-align: center;" |$400 |
| − | | style="text-align: center;padding:8px;" |N/A |
||
|- |
|- |
||
| + | |Xenon Lights |
||
| − | |rowspan="4"|Suspension |
||
| − | | style=" |
+ | | style="text-align: center;" |$1,000 |
| − | | style="text-align: center |
+ | | colspan="2" style="text-align: center;" |$5,000 |
| − | | style="text-align: center;padding:8px;" |$500 |
||
| − | | style="text-align: center;padding:8px;" |$1,000 |
||
| − | | style="text-align: center;padding:8px;" |$1,000 |
||
|- |
|- |
||
| + | |Neon Kits |
||
| − | | style="padding:8px;" |Street Suspension |
||
| + | |''Main article: [[Los Santos Customs/Lights]]'' |
||
| − | | style="text-align: center;padding:8px;" |$1,000 |
||
| − | | style="text-align: center |
+ | | style="text-align: center;" | - |
| − | | style="text-align: center |
+ | | colspan="2" style="text-align: center;" | - |
| − | | style="text-align: center;padding:8px;" |$2,000 |
||
|- |
|- |
||
| + | | colspan="2" rowspan="2" |Loss/Theft Prevention |
||
| − | | style="padding:8px;" |Sport Suspension |
||
| + | |Tracker |
||
| − | | style="text-align: center;padding:8px;" |$1,700 |
||
| − | | style="text-align: center |
+ | | style="text-align: center;" |N/A |
| − | | style="text-align: center |
+ | | colspan="2" style="text-align: center;" |$2,000 |
| − | | style="text-align: center;padding:8px;" |$3,400 |
||
|- |
|- |
||
| + | |Full Coverage |
||
| − | | style="padding:8px;" |Competition Suspension |
||
| − | | style="text-align: center |
+ | | style="text-align: center;" |N/A |
| − | | style="text-align: center |
+ | | colspan="2" style="text-align: center;" |$11,250 |
| − | | style="text-align: center;padding:8px;" |$4,400 |
||
| − | | style="text-align: center;padding:8px;" |$4,400 |
||
|- |
|- |
||
| − | |rowspan=" |
+ | | colspan="2" rowspan="5" |Plates |
| + | |Blue on White 1 |
||
| − | | style="padding:8px;" |Street Transmission |
||
| − | | style="text-align: center |
+ | | style="text-align: center;" |$50 |
| − | | style="text-align: center |
+ | | colspan="2" style="text-align: center;" |$200 |
| − | | style="text-align: center;padding:8px;" |$14,750 |
||
| − | | style="text-align: center;padding:8px;" |$14,750 |
||
|- |
|- |
||
| + | |Blue on White 2 |
||
| − | | style="padding:8px;" |Sports Transmission |
||
| − | | style="text-align: center |
+ | | style="text-align: center;" |$50 |
| − | | style="text-align: center |
+ | | colspan="2" style="text-align: center;" |$200 |
| − | | style="text-align: center;padding:8px;" |$16,250 |
||
| − | | style="text-align: center;padding:8px;" |$16,250 |
||
|- |
|- |
||
| + | |Blue on White 3 |
||
| − | | style="padding:8px;" |Race Transmission |
||
| − | | style="text-align: center |
+ | | style="text-align: center;" |$50 |
| − | | style="text-align: center |
+ | | colspan="2" style="text-align: center;" |$200 |
| − | | style="text-align: center;padding:8px;" |$20,000 |
||
| − | | style="text-align: center;padding:8px;" |$20,000 |
||
|- |
|- |
||
| + | |Yellow on Blue |
||
| − | | style="padding:8px;" |Turbo |
||
| − | | style=" |
+ | | style="text-align: center;" |$75 |
| − | | style="text-align: center |
+ | | colspan="2" style="text-align: center;" |$300 |
| − | | style="text-align: center;padding:8px;" |$6,250 |
||
| − | | style="text-align: center;padding:8px;" |$35,000 |
||
| − | | style="text-align: center;padding:8px;" |$35,000 |
||
|- |
|- |
||
| + | |Yellow on Black |
||
| − | | style="padding:8px;" |Wheels |
||
| + | | style="text-align: center;" |$150 |
||
| − | | style="padding:8px;" |<div class="mw-collapsible mw-collapsed" style="width:100%"> |
||
| + | | colspan="2" style="text-align: center;" |$600 |
||
| − | <div class="mw-collapsible-content">{{WheelsExpand}}</div></div> |
||
| − | | style="text-align: center;padding:8px;" | - |
||
| − | | style="text-align: center;padding:8px;" | - |
||
| − | | style="text-align: center;padding:8px;" | - |
||
| − | | style="text-align: center;padding:8px;" | - |
||
| − | |||
|- |
|- |
||
| − | | |
+ | | colspan="2" |Respray |
| + | |''Main article: [[Los Santos Customs/Respray Colors]]'' |
||
| − | | style="padding:8px;" |Light Smoke |
||
| − | | style="text-align: center |
+ | | style="text-align: center;" | - |
| − | | style="text-align: center |
+ | | colspan="2" style="text-align: center;" | - |
| − | | style="text-align: center;padding:8px;" |$1,500 |
||
| − | | style="text-align: center;padding:8px;" |$1,500 |
||
|- |
|- |
||
| + | | colspan="2" |Sell |
||
| − | | style="padding:8px;" |Dark Smoke |
||
| + | |Sell Vehicle |
||
| − | | style="text-align: center;padding:8px;" |$450 |
||
| − | | style="text-align: center |
+ | | style="text-align: center;" |N/A |
| − | | style="text-align: center |
+ | | colspan="2" style="text-align: center;" |$9,000 |
| − | | style="text-align: center;padding:8px;" |$3,500 |
||
|- |
|- |
||
| − | | |
+ | | colspan="2" rowspan="2" |Skirts |
| + | |Stock Skirts |
||
| − | | style="text-align: center;padding:8px;" |$700 |
||
| − | | style="text-align: center |
+ | | style="text-align: center;" |$1,250 |
| − | | style="text-align: center |
+ | | style="text-align: center;" |$2,500 |
| + | | |
||
| − | | style="text-align: center;padding:8px;" |$5,000 |
||
| + | |- |
||
| + | |Custom Skirts |
||
| + | | style="text-align: center;" |$1,500 |
||
| + | | style="text-align: center;" |$3,000 |
||
| + | | |
||
| + | |- |
||
| + | | colspan="2" rowspan="5" |Suspension |
||
| + | |Stock Suspension |
||
| + | | style="text-align: center;" |$100 |
||
| + | | colspan="2" style="text-align: center;" |$200 |
||
| + | |- |
||
| + | |Lowered Suspension |
||
| + | | style="text-align: center;" |$500 |
||
| + | | colspan="2" style="text-align: center;" |$1,000 |
||
| + | |- |
||
| + | |Street Suspension |
||
| + | | style="text-align: center;" |$1,000 |
||
| + | | colspan="2" style="text-align: center;" |$2,000 |
||
| + | |- |
||
| + | |Sport Suspension |
||
| + | | style="text-align: center;" |$1,700 |
||
| + | | colspan="2" style="text-align: center;" |$3,400 |
||
| + | |- |
||
| + | |Competition Suspension |
||
| + | | style="text-align: center;" |$2,200 |
||
| + | | colspan="2" style="text-align: center;" |$4,400 |
||
| + | |- |
||
| + | | colspan="2" rowspan="4" |Transmission |
||
| + | |Stock Transmission |
||
| + | | style="text-align: center;" |$250 |
||
| + | | colspan="2" style="text-align: center;" |$500 |
||
| + | |- |
||
| + | |Street Transmission |
||
| + | | style="text-align: center;" |$7,375 |
||
| + | | colspan="2" style="text-align: center;" |$14,750 |
||
| + | |- |
||
| + | |Sports Transmission |
||
| + | | style="text-align: center;" |$8,125 |
||
| + | | colspan="2" style="text-align: center;" |$16,250 |
||
| + | |- |
||
| + | |Race Transmission |
||
| + | | style="text-align: center;" |$10,000 |
||
| + | | colspan="2" style="text-align: center;" |$20,000 |
||
| + | |- |
||
| + | | colspan="2" rowspan="2" |Turbo |
||
| + | |None |
||
| + | | style="text-align: center;" |$1,250 |
||
| + | | colspan="2" style="text-align: center;" |$2,500 |
||
| + | |- |
||
| + | |Turbo Tuning |
||
| + | | style="text-align: center;" |$6,250 |
||
| + | | colspan="2" style="text-align: center;" |$35,000 |
||
| + | |- |
||
| + | | colspan="2" |Wheels |
||
| + | |''Main article: [[Los Santos Customs/Wheels]]'' |
||
| + | | style="text-align: center;" | - |
||
| + | | colspan="2" style="text-align: center;" | - |
||
| + | |- |
||
| + | | colspan="2" rowspan="4" |Windows |
||
| + | |None |
||
| + | | style="text-align: center;" |$100 |
||
| + | | colspan="2" style="text-align: center;" |$500 |
||
| + | |- |
||
| + | |Light Smoke |
||
| + | | style="text-align: center;" |$200 |
||
| + | | colspan="2" style="text-align: center;" |$1,500 |
||
| + | |- |
||
| + | |Dark Smoke |
||
| + | | style="text-align: center;" |$450 |
||
| + | | colspan="2" style="text-align: center;" |$3,500 |
||
| + | |- |
||
| + | |Limo |
||
| + | | style="text-align: center;" |$700 |
||
| + | | colspan="2" style="text-align: center;" |$5,000 |
||
|} |
|} |
||
| + | |-| |
||
| + | Second Generation= |
||
| + | {| class="wikitable" |
||
| + | ! colspan="2" scope="col" |Category |
||
| + | ! scope="col" |Modification |
||
| + | ! scope="col" |Cost (''GTA V'') |
||
| + | ! scope="col" |Cost ([[Grand Theft Auto Online|''GTA Online'']]) |
||
| + | |- |
||
| + | | colspan="2" rowspan="6" |Armor |
||
| + | |No Armor |
||
| + | | style="text-align: center;" |$250 |
||
| + | | style="text-align: center;" |$500 |
||
| + | |- |
||
| + | |Armor Upgrade 20% |
||
| + | | style="text-align: center;" |$1,250 |
||
| + | | style="text-align: center;" |$5,250 |
||
| + | |- |
||
| + | |Armor Upgrade 40% |
||
| + | | style="text-align: center;" |$3,125 |
||
| + | | style="text-align: center;" |$8,750 |
||
| + | |- |
||
| + | |Armor Upgrade 60% |
||
| + | | style="text-align: center;" |$5,000 |
||
| + | | style="text-align: center;" |$14,000 |
||
| + | |- |
||
| + | |Armor Upgrade 80% |
||
| + | | style="text-align: center;" |$8,750 |
||
| + | | style="text-align: center;" |$24,500 |
||
| + | |- |
||
| + | |Armor Upgrade 100% |
||
| + | | style="text-align: center;" |$12,500 |
||
| + | | style="text-align: center;" |$35,000 |
||
| + | |- |
||
| + | | colspan="2" rowspan="4" |Brakes |
||
| + | |Stock Brakes |
||
| + | | style="text-align: center;" |$250 |
||
| + | | style="text-align: center;" |$500 |
||
| + | |- |
||
| + | |Street Brakes |
||
| + | | style="text-align: center;" |$5,000 |
||
| + | | style="text-align: center;" |$10,000 |
||
| + | |- |
||
| + | |Sport Brakes |
||
| + | | style="text-align: center;" |$6,750 |
||
| + | | style="text-align: center;" |$13,500 |
||
| + | |- |
||
| + | |Race Brakes |
||
| + | | style="text-align: center;" |$8,750 |
||
| + | | style="text-align: center;" |$17,500 |
||
| + | |- |
||
| + | | colspan="2" rowspan="4" |Engine |
||
| + | |EMS Upgrade, Level 1 |
||
| + | | style="text-align: center;" |$2,250 |
||
| + | | style="text-align: center;" |$4,500 |
||
| + | |- |
||
| + | |EMS Upgrade, Level 2 |
||
| + | | style="text-align: center;" |$3,125 |
||
| + | | style="text-align: center;" |$6,250 |
||
| + | |- |
||
| + | |EMS Upgrade, Level 3 |
||
| + | | style="text-align: center;" |$4,500 |
||
| + | | style="text-align: center;" |$9,000 |
||
| + | |- |
||
| + | |EMS Upgrade, Level 4 |
||
| + | | style="text-align: center;" |$8,375 |
||
| + | | style="text-align: center;" |$16,750 |
||
| + | |- |
||
| + | | colspan="2" rowspan="2" |[[Car Bomb|Explosives]] |
||
| + | |Ignition Bomb |
||
| + | | style="text-align: center;" |N/A |
||
| + | | style="text-align: center;" |$5,000 |
||
| + | |- |
||
| + | |Remote Bomb |
||
| + | | style="text-align: center;" |N/A |
||
| + | | style="text-align: center;" |$7,500 |
||
| + | |- |
||
| + | | colspan="2" |Horns |
||
| + | |''Main article: [[Los Santos Customs/Horns]]'' |
||
| + | | style="text-align: center;" | - |
||
| + | | style="text-align: center;" | - |
||
| + | |- |
||
| + | | rowspan="3" |Lights |
||
| + | | rowspan="2" |Headlights |
||
| + | |Stock Lights |
||
| + | | style="text-align: center;" |$200 |
||
| + | | style="text-align: center;" |$400 |
||
| + | |- |
||
| + | |Xenon Lights |
||
| + | | style="text-align: center;" |$1,000 |
||
| + | | style="text-align: center;" |$5,000 |
||
| + | |- |
||
| + | |Neon Kits |
||
| + | |''Main article: [[Los Santos Customs/Lights]]'' |
||
| + | | style="text-align: center;" | - |
||
| + | | style="text-align: center;" | - |
||
| + | |- |
||
| + | | colspan="2" rowspan="2" |Loss/Theft Prevention |
||
| + | |Tracker |
||
| + | | style="text-align: center;" |N/A |
||
| + | | style="text-align: center;" |$2,000 |
||
| + | |- |
||
| + | |Full Coverage |
||
| + | | style="text-align: center;" |N/A |
||
| + | | style="text-align: center;" |$11,250 |
||
| + | |- |
||
| + | | colspan="2" rowspan="5" |Plates |
||
| + | |Blue on White 1 |
||
| + | | style="text-align: center;" |$50 |
||
| + | | style="text-align: center;" |$200 |
||
| + | |- |
||
| + | |Blue on White 2 |
||
| + | | style="text-align: center;" |$50 |
||
| + | | style="text-align: center;" |$200 |
||
| + | |- |
||
| + | |Blue on White 3 |
||
| + | | style="text-align: center;" |$50 |
||
| + | | style="text-align: center;" |$200 |
||
| + | |- |
||
| + | |Yellow on Blue |
||
| + | | style="text-align: center;" |$75 |
||
| + | | style="text-align: center;" |$300 |
||
| + | |- |
||
| + | |Yellow on Black |
||
| + | | style="text-align: center;" |$150 |
||
| + | | style="text-align: center;" |$600 |
||
| + | |- |
||
| + | | colspan="2" |Respray |
||
| + | |''Main article: [[Los Santos Customs/Respray Colors]]'' |
||
| + | | style="text-align: center;" | - |
||
| + | | style="text-align: center;" | - |
||
| + | |- |
||
| + | | colspan="2" |Sell |
||
| + | |Sell Vehicle |
||
| + | | style="text-align: center;" |N/A |
||
| + | | style="text-align: center;" |$9,000 |
||
| + | |- |
||
| + | | colspan="2" rowspan="5" |Suspension |
||
| + | |Stock Suspension |
||
| + | | style="text-align: center;" |$100 |
||
| + | | style="text-align: center;" |$200 |
||
| + | |- |
||
| + | |Lowered Suspension |
||
| + | | style="text-align: center;" |$500 |
||
| + | | style="text-align: center;" |$1,000 |
||
| + | |- |
||
| + | |Street Suspension |
||
| + | | style="text-align: center;" |$1,000 |
||
| + | | style="text-align: center;" |$2,000 |
||
| + | |- |
||
| + | |Sport Suspension |
||
| + | | style="text-align: center;" |$1,700 |
||
| + | | style="text-align: center;" |$3,400 |
||
| + | |- |
||
| + | |Competition Suspension |
||
| + | | style="text-align: center;" |$2,200 |
||
| + | | style="text-align: center;" |$4,400 |
||
| + | |- |
||
| + | | colspan="2" rowspan="4" |Transmission |
||
| + | |Stock Transmission |
||
| + | | style="text-align: center;" |$250 |
||
| + | | style="text-align: center;" |$500 |
||
| + | |- |
||
| + | |Street Transmission |
||
| + | | style="text-align: center;" |$7,375 |
||
| + | | style="text-align: center;" |$14,750 |
||
| + | |- |
||
| + | |Sports Transmission |
||
| + | | style="text-align: center;" |$8,125 |
||
| + | | style="text-align: center;" |$16,250 |
||
| + | |- |
||
| + | |Race Transmission |
||
| + | | style="text-align: center;" |$10,000 |
||
| + | | style="text-align: center;" |$20,000 |
||
| + | |- |
||
| + | | colspan="2" rowspan="2" |Turbo |
||
| + | |None |
||
| + | | style="text-align: center;" |$1,250 |
||
| + | | style="text-align: center;" |$2,500 |
||
| + | |- |
||
| + | |Turbo Tuning |
||
| + | | style="text-align: center;" |$6,250 |
||
| + | | style="text-align: center;" |$35,000 |
||
| + | |- |
||
| + | | colspan="2" |Wheels |
||
| + | |''Main article: [[Los Santos Customs/Wheels]]'' |
||
| + | | style="text-align: center;" | - |
||
| + | | style="text-align: center;" | - |
||
| + | |- |
||
| + | | colspan="2" rowspan="4" |Windows |
||
| + | |None |
||
| + | | style="text-align: center;" |$100 |
||
| + | | style="text-align: center;" |$500 |
||
| + | |- |
||
| + | |Light Smoke |
||
| + | | style="text-align: center;" |$200 |
||
| + | | style="text-align: center;" |$1,500 |
||
| + | |- |
||
| + | |Dark Smoke |
||
| + | | style="text-align: center;" |$450 |
||
| + | | style="text-align: center;" |$3,500 |
||
| + | |- |
||
| + | |Limo |
||
| + | | style="text-align: center;" |$700 |
||
| + | | style="text-align: center;" |$5,000 |
||
| + | |} |
||
| + | </tabber> |
||
==Image Gallery== |
==Image Gallery== |
||
| Line 391: | Line 644: | ||
BallerComparison-GTAV-front.jpg|Front view comparison. |
BallerComparison-GTAV-front.jpg|Front view comparison. |
||
BallerComparison-GTAV-rear.jpg|Rear view comparison. |
BallerComparison-GTAV-rear.jpg|Rear view comparison. |
||
| + | Baller2-GTAV-SSASA.png|The second generation '''Baller''' on [[Southern San Andreas Super Autos]]. |
||
BallerA-GTAV-RSC.jpg|The first generation '''Baller''' on the [[Rockstar Games Social Club]]. |
BallerA-GTAV-RSC.jpg|The first generation '''Baller''' on the [[Rockstar Games Social Club]]. |
||
BallerB-GTAV-RSC.jpg|The second generation '''Baller''' on the Rockstar Games Social Club. |
BallerB-GTAV-RSC.jpg|The second generation '''Baller''' on the Rockstar Games Social Club. |
||
| Line 396: | Line 650: | ||
==Variants== |
==Variants== |
||
| − | Several variants of the |
+ | Several variants of the second generation Baller were added as part of the [[GTA Online: Executives and Other Criminals]] Update for the [[Xbox One]], [[PlayStation 4]] and [[PC]] versions of ''[[Grand Theft Auto Online]]''. |
{{VariantTwin |
{{VariantTwin |
||
| Line 406: | Line 660: | ||
|front_image = BallerLE-GTAO-front.png |
|front_image = BallerLE-GTAO-front.png |
||
|rear_image = BallerLE-GTAO-rear.png |
|rear_image = BallerLE-GTAO-rear.png |
||
| − | |front_image2 |
+ | |front_image2 = BallerLEArmored-GTAO-front.png |
|rear_image2 = BallerLEArmored-GTAO-rear.png |
|rear_image2 = BallerLEArmored-GTAO-rear.png |
||
|caption = The '''Baller LE''' in ''Grand Theft Auto Online''. |
|caption = The '''Baller LE''' in ''Grand Theft Auto Online''. |
||
|caption2 = The '''Baller LE (Armored)''' in ''Grand Theft Auto Online''. |
|caption2 = The '''Baller LE (Armored)''' in ''Grand Theft Auto Online''. |
||
| − | |description = The '''Baller LE''' is a '''L'''imited '''E'''dition version of the Baller (second generation). It features upgraded cosmetics. It is now based on the |
+ | |description = The '''Baller LE''' is a '''L'''imited '''E'''dition version of the Baller (second generation). It features upgraded cosmetics. It is now based on the {{WP|Range Rover Sport#Second generation 2015|Range Rover Sport SVR}}. It has better performance than the previous-gen Baller. |
There is also an armored variant called '''Baller LE (Armored)''', which features armored plating, reinforced window frames on top of the pre-existing window seals. |
There is also an armored variant called '''Baller LE (Armored)''', which features armored plating, reinforced window frames on top of the pre-existing window seals. |
||
| Line 417: | Line 671: | ||
|float = center |
|float = center |
||
|title = Baller LE LWB |
|title = Baller LE LWB |
||
| − | |games = |
+ | |games = Grand Theft Auto Online |
|article_link = Baller LE LWB |
|article_link = Baller LE LWB |
||
|article_link2 = Baller LE LWB (Armored) |
|article_link2 = Baller LE LWB (Armored) |
||
|front_image = BallerLELWB-GTAO-front.png |
|front_image = BallerLELWB-GTAO-front.png |
||
|rear_image = BallerLELWB-GTAO-rear.png |
|rear_image = BallerLELWB-GTAO-rear.png |
||
| − | |front_image2 |
+ | |front_image2 = BallerLELWBArmored-GTAO-front.png |
|rear_image2 = BallerLELWBArmored-GTAO-rear.png |
|rear_image2 = BallerLELWBArmored-GTAO-rear.png |
||
|caption = The '''Baller LE LWB''' in ''Grand Theft Auto Online''. |
|caption = The '''Baller LE LWB''' in ''Grand Theft Auto Online''. |
||
| Line 444: | Line 698: | ||
==Prominent Appearances in Missions== |
==Prominent Appearances in Missions== |
||
===''Grand Theft Auto V''=== |
===''Grand Theft Auto V''=== |
||
| − | *In the mission [[Dead Man Walking]], after climbing off the window, [[Michael]] can see two vehicles parked in front of him. One of them is the second generation |
+ | *In the mission [[Dead Man Walking]], after climbing off the window, [[Michael]] can see two vehicles parked in front of him. One of them is the second generation Baller. |
===''Grand Theft Auto Online''=== |
===''Grand Theft Auto Online''=== |
||
*The first generation model is used by the unknown agents' bodyguards in the mission [[Firewall Protection]]. |
*The first generation model is used by the unknown agents' bodyguards in the mission [[Firewall Protection]]. |
||
| + | ;Casino Work |
||
| + | *The second generation model can appear in [[Undisclosed Cargo]] as the vehicle that needs to be disposed of. |
||
==Locations== |
==Locations== |
||
| Line 455: | Line 711: | ||
;First generation |
;First generation |
||
*The first generation Baller can be found parked on the western shore of the [[Alamo Sea]] off [[Calafia Road]], next to some tents and a [[BeeJay XL]]. |
*The first generation Baller can be found parked on the western shore of the [[Alamo Sea]] off [[Calafia Road]], next to some tents and a [[BeeJay XL]]. |
||
| + | |||
;Second generation |
;Second generation |
||
*There's a unique full black variant available for chasing [[Rocco Pelosi]] in the mission [[The Ballad of Rocco]]. |
*There's a unique full black variant available for chasing [[Rocco Pelosi]] in the mission [[The Ballad of Rocco]]. |
||
| − | *A unique variant can be found in a [[Random Events|Random Event]] in which |
+ | *A unique variant can be found in a [[Random Events|Random Event]] in which one untie a [[Groom in Trouble|wedding groom]] from a light pole. After dropping the guy and his friend off, the player can find a unique colored Baller parked near the player which is available to be taken. |
*Can be bought for [[Money|$]]98,000 from [[Southern San Andreas Super Autos]]. |
*Can be bought for [[Money|$]]98,000 from [[Southern San Andreas Super Autos]]. |
||
*Fairly common around [[The Families]]/[[Ballas (HD universe)|Ballas]] territory. |
*Fairly common around [[The Families]]/[[Ballas (HD universe)|Ballas]] territory. |
||
| Line 466: | Line 723: | ||
*Sometimes appears around Davis and Strawberry. |
*Sometimes appears around Davis and Strawberry. |
||
*Commonly spawns on the Del Perro Freeway. |
*Commonly spawns on the Del Perro Freeway. |
||
| + | |||
;Second generation |
;Second generation |
||
| − | {{ |
+ | {{Sectstub}} |
*Can be found driving around [[Paleto Bay]] and [[Vinewood (HD Universe)|Vinewood]]. |
*Can be found driving around [[Paleto Bay]] and [[Vinewood (HD Universe)|Vinewood]]. |
||
*Can be purchased for [[Money|$]]90,000 from [[Southern San Andreas Super Autos]]. |
*Can be purchased for [[Money|$]]90,000 from [[Southern San Andreas Super Autos]]. |
||
| Line 479: | Line 737: | ||
===General=== |
===General=== |
||
*"Baller" is a street slang term for drug dealer or a thug that has made it big-time, and as such its use for the name of the vehicle in the game is likely a reference to the luxury SUVs often driven by such people. |
*"Baller" is a street slang term for drug dealer or a thug that has made it big-time, and as such its use for the name of the vehicle in the game is likely a reference to the luxury SUVs often driven by such people. |
||
| − | * In the [[beta]], the G1 Baller had six-spoke wheels and an RR sport side quarter duct. |
+ | * In the [[beta]], the G1 Baller had six-spoke wheels (which featured on early L322 Range Rovers) and an RR sport side quarter duct. |
* Also, there is an advertisement with the picture of the G1 Baller with what it seems the be a bumper splitter and additional side steps or skirts. Such modifications for the SUV are not available in the game. |
* Also, there is an advertisement with the picture of the G1 Baller with what it seems the be a bumper splitter and additional side steps or skirts. Such modifications for the SUV are not available in the game. |
||
*In earlier versions of [[Southern San Andreas Super Autos]], the Baller's picture was incorrect. It showed the Classic Baller instead of the Sport Baller. This was subsequently fixed when said website was revamped. |
*In earlier versions of [[Southern San Andreas Super Autos]], the Baller's picture was incorrect. It showed the Classic Baller instead of the Sport Baller. This was subsequently fixed when said website was revamped. |
||
| + | *By appling tinted windows on the first generation Baller, the fog lights will turn black. |
||
===''Grand Theft Auto V''=== |
===''Grand Theft Auto V''=== |
||
| Line 487: | Line 746: | ||
===''Grand Theft Auto Online''=== |
===''Grand Theft Auto Online''=== |
||
| − | *The first generation Baller can be selected as an off-road vehicle in GTA Online, while the second generation can only be selected as an SUV, despite its good performance on off-road terrain. The same thing happens with the [[Mesa]] and the [[Crusader]]. |
+ | *The first generation Baller can be selected as an off-road vehicle in ''GTA Online'', while the second generation can only be selected as an SUV, despite its good performance on off-road terrain. The same thing happens with the [[Mesa]] and the [[Crusader]]. |
| − | *When selecting the second generation Baller in the [[Content Creator]], it is named as '''Baller (2013)'''. |
||
==See Also== |
==See Also== |
||
Revision as of 23:06, 25 October 2019
Template:Infobox vehicles
The Gallivanter Baller is a vehicle making its debut appearance in Grand Theft Auto V and Grand Theft Auto Online.
Design
Grand Theft Auto V
The Baller is a four-door luxury SUV that is available in two generations, which differs in design and features:
- First generation
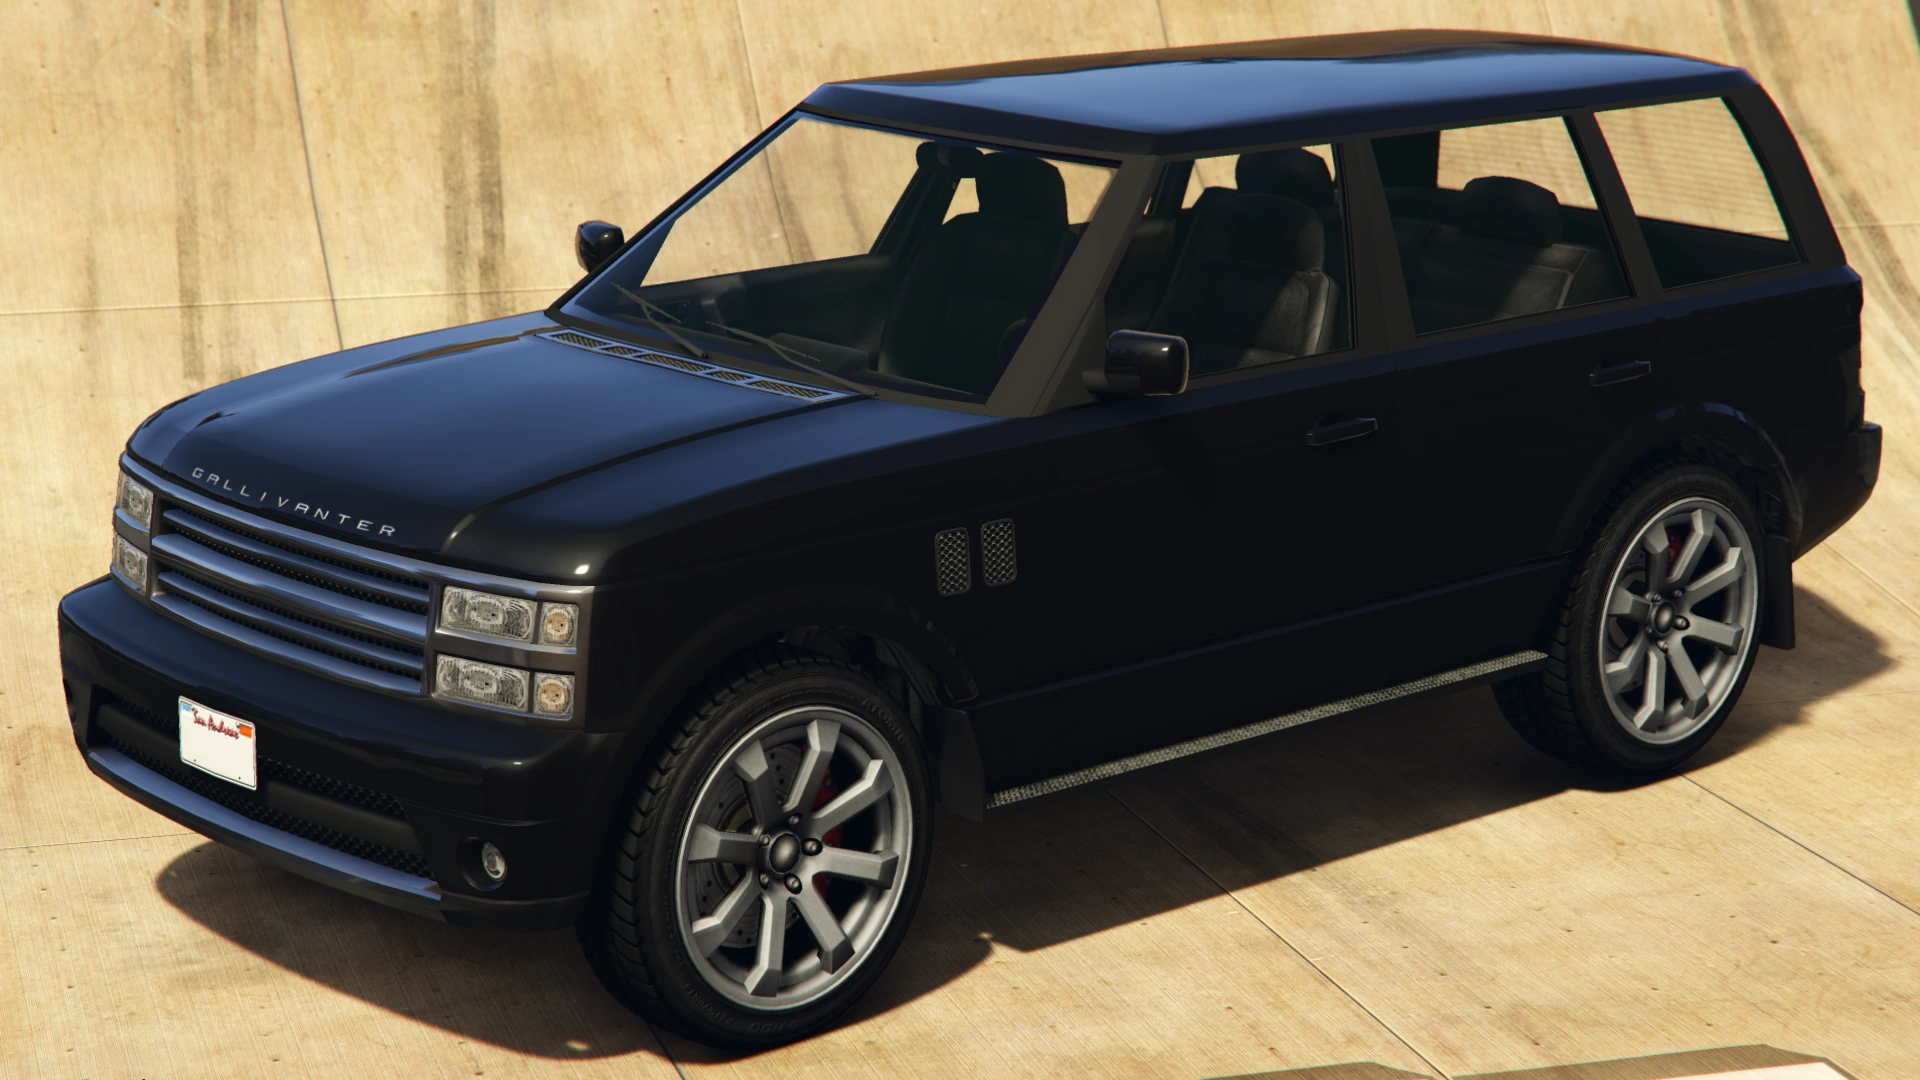
The first generation Baller's design is an adaptation of the Huntley Sport from Grand Theft Auto IV, which is based on the L322 Range Rover Vogue. However, it features a different and less luxurious headlights, similar to the first generation GMC Yukon. In comparison with Range Rover models however, the C and D pillars of the Baller have a much steeper gradient. Overall, the car shares many similarities in design and profile with the Huntley from Grand Theft Auto: San Andreas.
The Baller has a prominent plastic front bumper, with a trapezium intake bearing a black separation on the middle and a chrome underline. The outer portions of the bumper have circular fog lamps, together with black underlines below the lamps and ridges over the same, at the same height as the intake. The upper side is mostly plain with the license plate on the center.
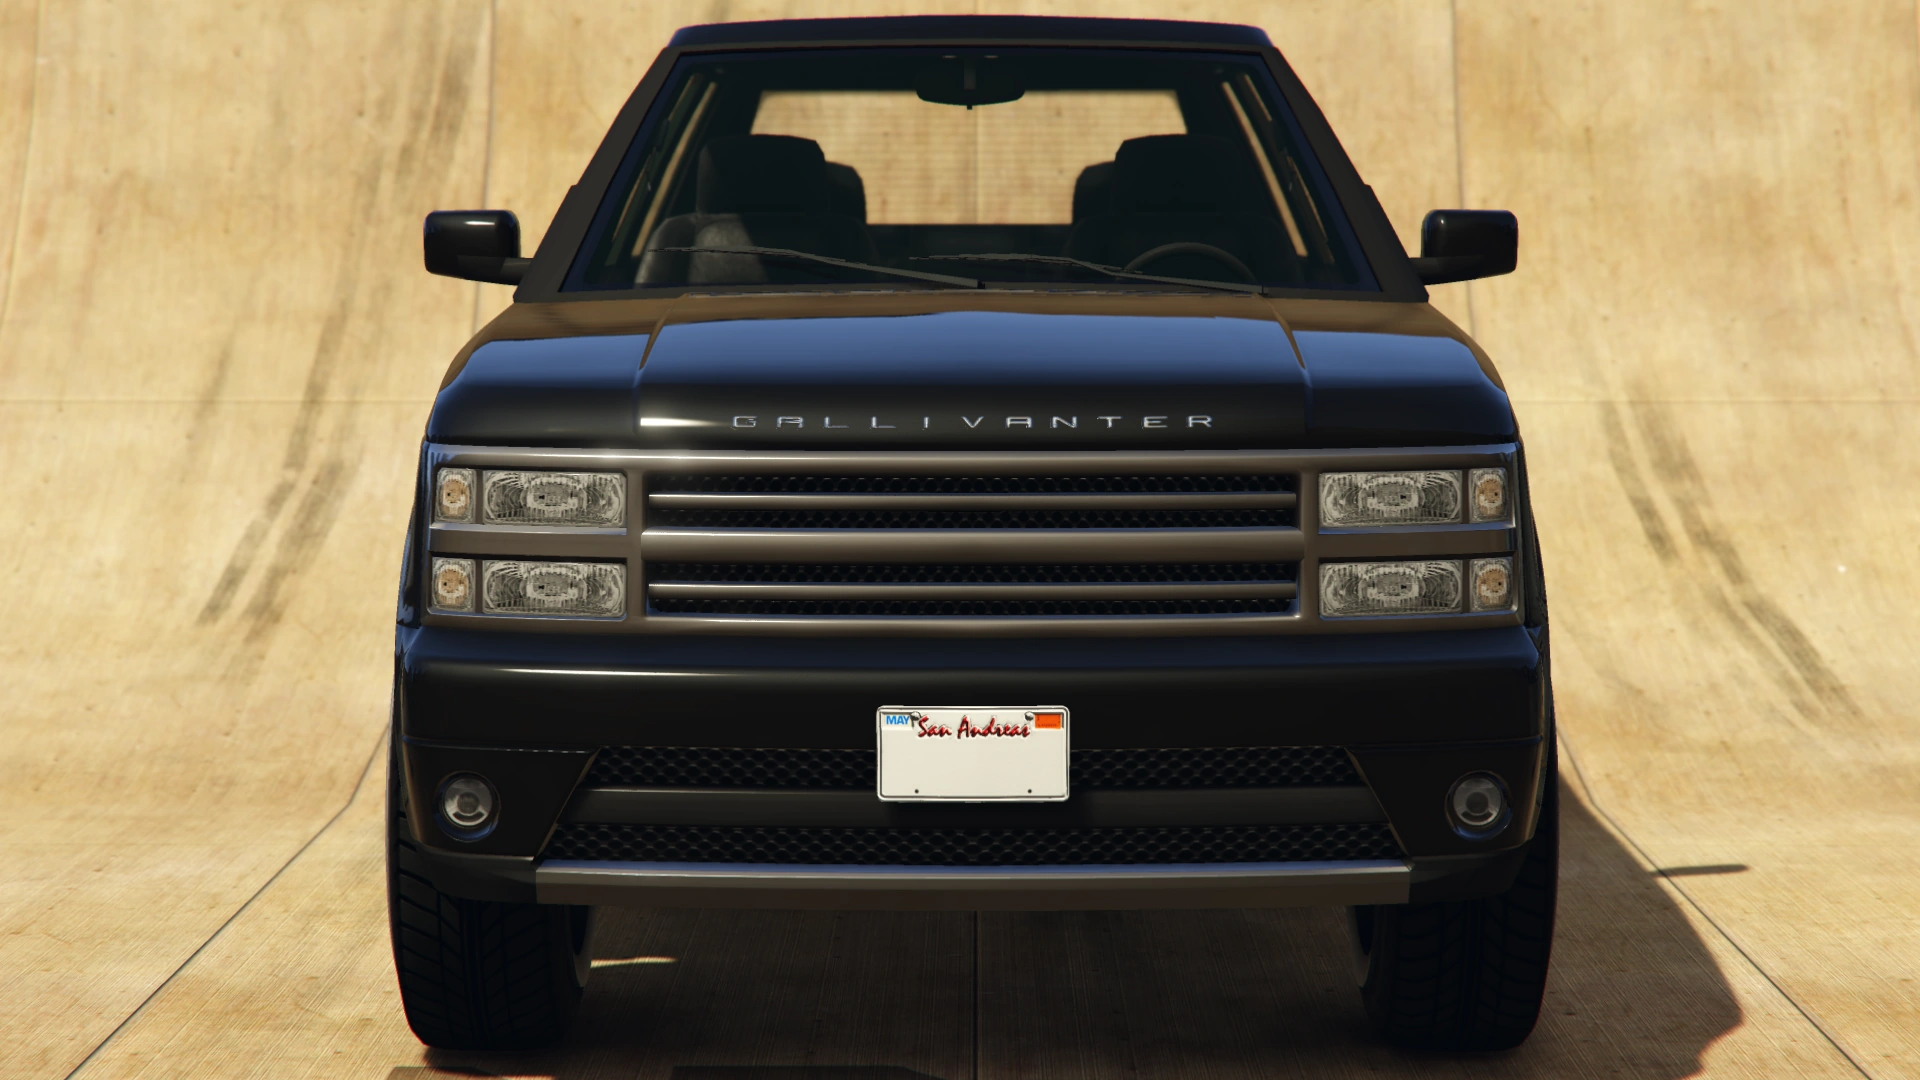
The front face of the car bears a chrome surrounding, housing the main grille on the center and the headlamp units on the edges. Each lamp unit and turning signal is separated by chrome lines, with a wider line between the upper and lower lamps. The grille itself has a wide bar on the middle and two thinner ones between the main headlamps. Above the chrome surrounding, "GALLIVANTER" can be seen embossed on the front part of the bonnet.
On the sides, twin square-shaped vents are present on either front quarter, between the wheel arches and the front doors, close to the bonnet level. A ridged detail can be seen between the front and rear arches, along with a less-notorious rigded detail at the same level as the lamp units and door handles. The cabin is much angled than the Huntley and features black, polymer-covered A, B, C and D pillars. Small stepsides can be seen at the bottom.
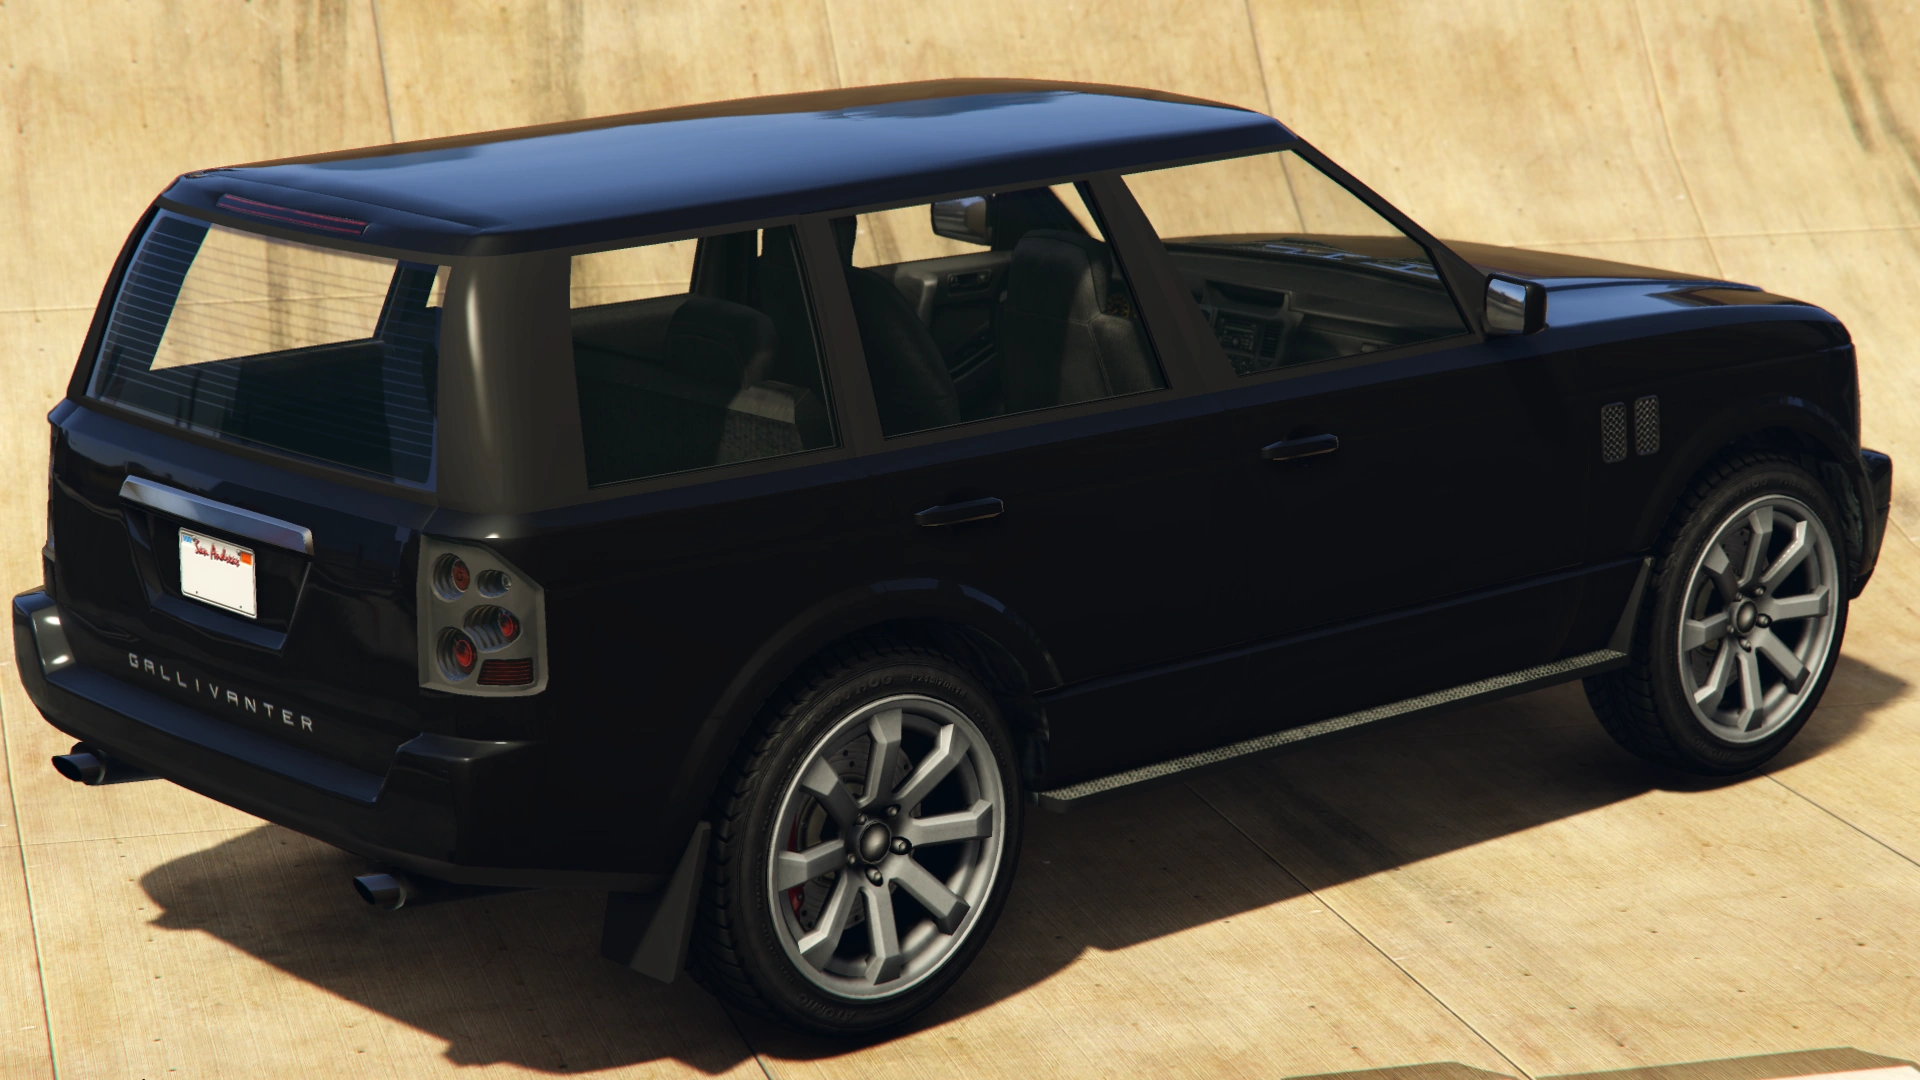
On the rear end, the bumper features a concave formation with the same "GALLIVANTER" embossed on the center, featuring a black polymer finish at the bottom and small mouldings for the twin exhaust pipes. The same rear bumper reaches onto the lower rear of the sides and black mudguards are attached to either end of the bumper, intended for the rear wheel. A trapezium formation can be seen on the center of the rear hatch, serving as a space for the license plate and having a chrome detail on the upper side. the tail lights are surrounded in black panels, with thin red stripes for the third brake light. The car has eight-spoke rims, wrapped in low-profile tyres.
- Second generation
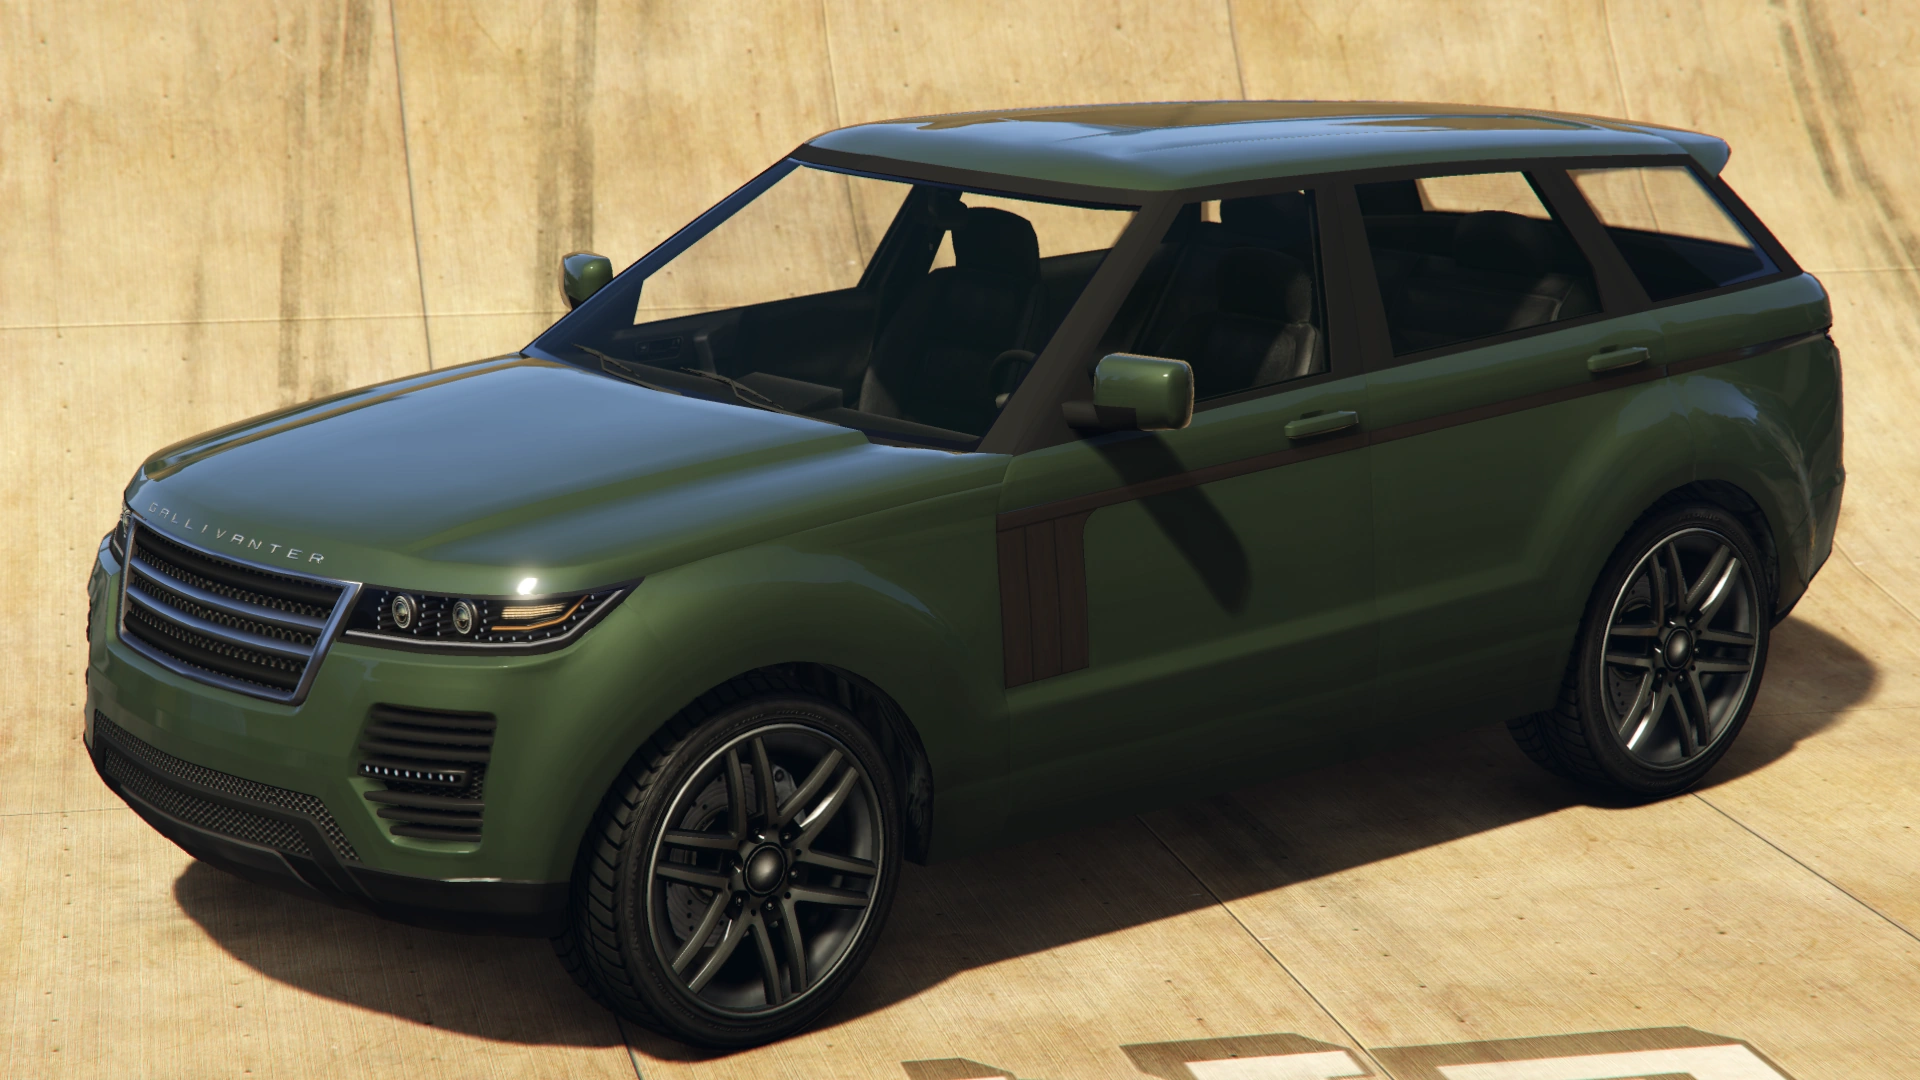
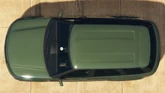
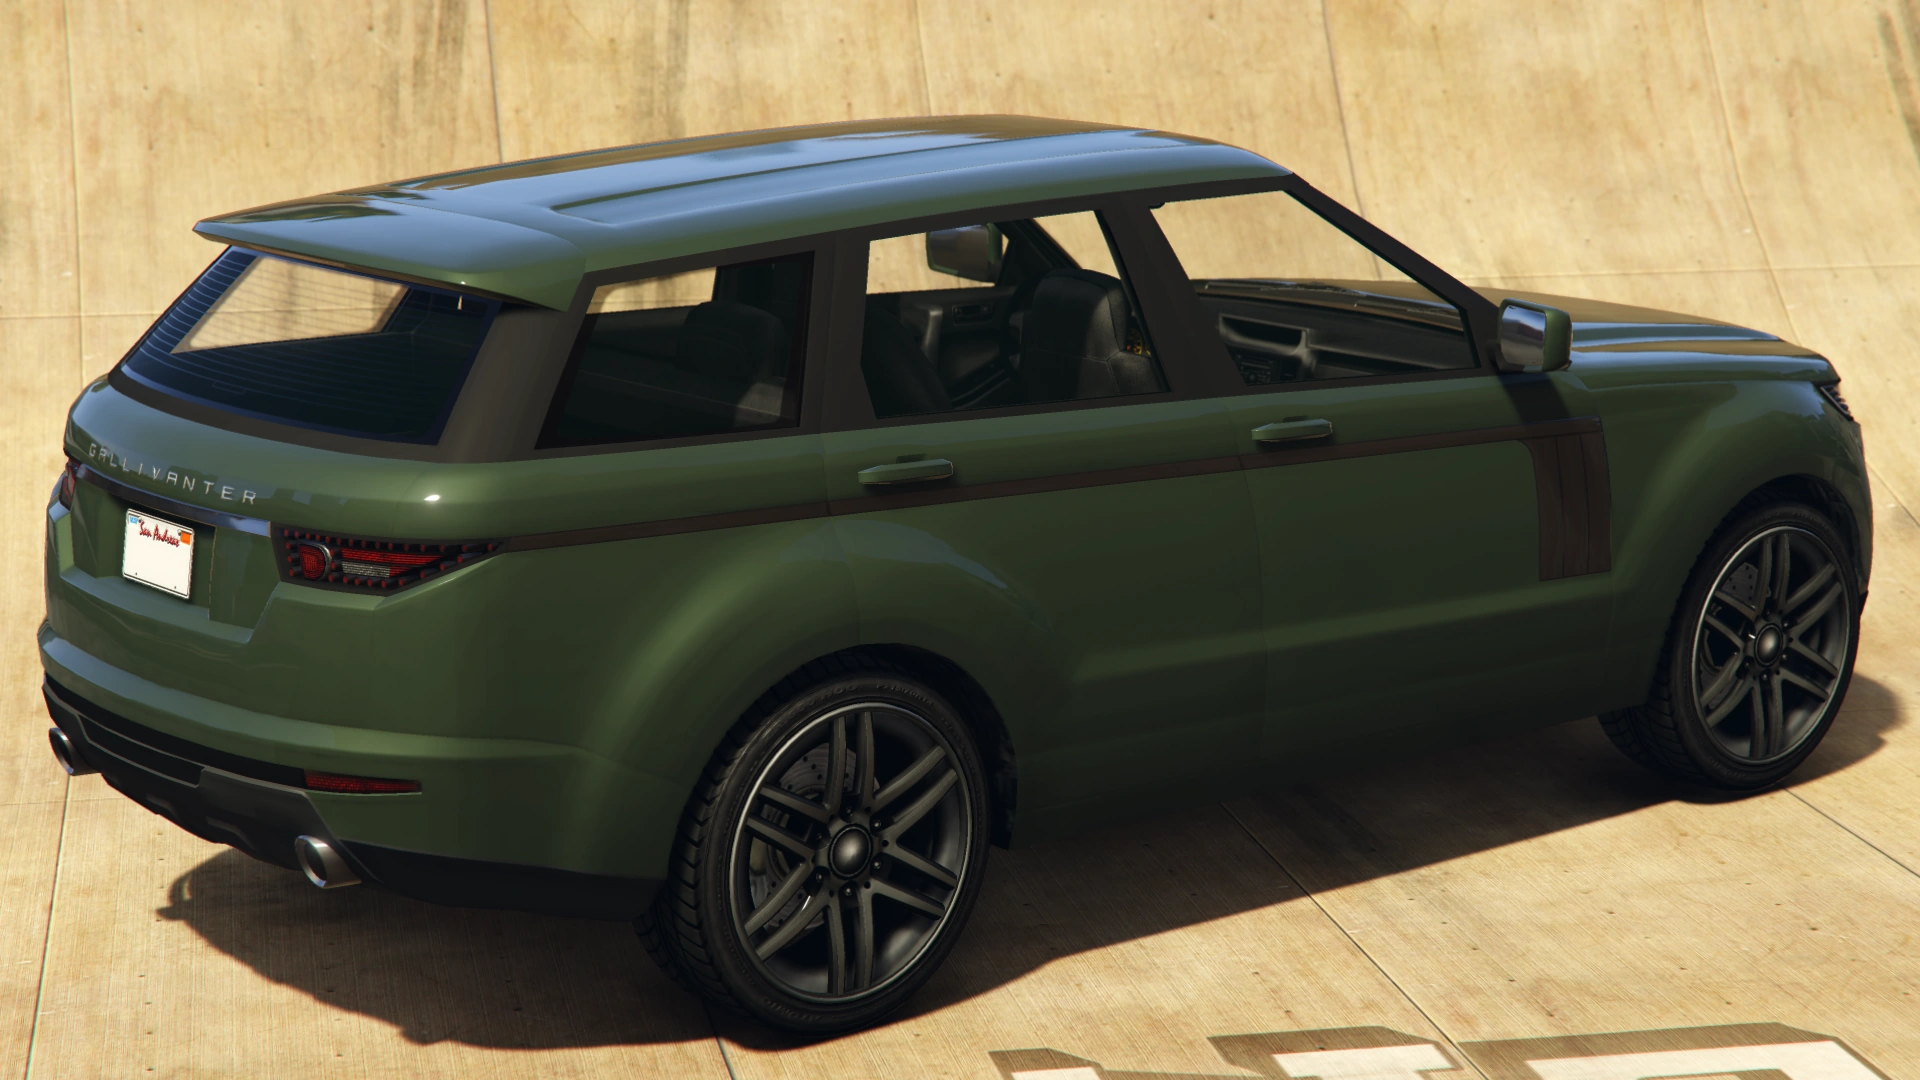
The second generation Baller features linear formations that are inspired by the British design styling featured on the more compact Range Rover Evoque for the front end and L494 Range Rover Sport for the sides and greenhouse area, A, B and C pillars. The side accents from the L405 Range Rover are featured on the sides of the car. The car features black, polymer-covered A, B, C and D pillars.
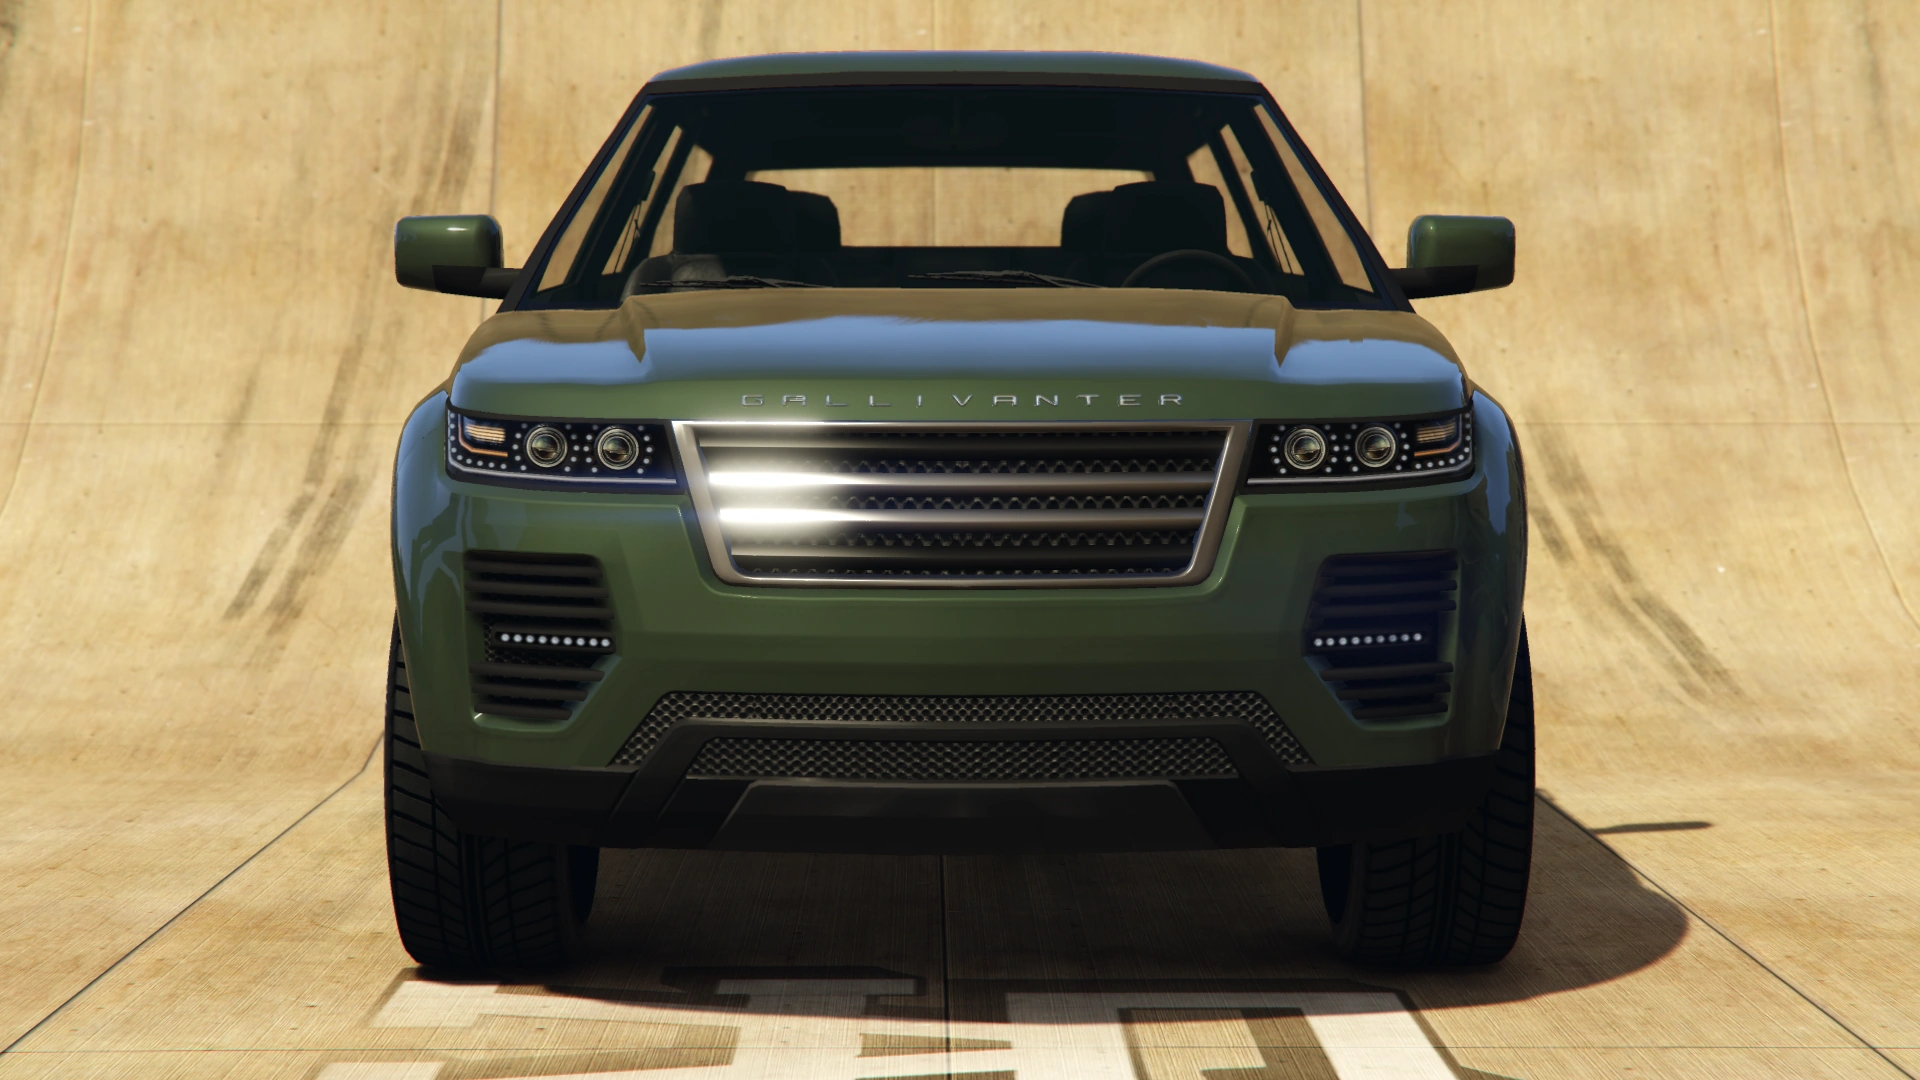
The front face of the car features a lot of polymer, similar to the car's real life inspiration. The base of the front bumper features a polymer layer spanning the entire width. Two thirds of the front face width and a third of its height is occupied by a trapezium formation, with the outer part being black and the inset trapezium being chrome. Outside the central areas and at about half the car's height there are large ducts that have edges contoured to the lower trapezium, main grille and headlights. These ducts have horizontal LED strips that run from the inner vertex of the ducts.
The main grille is located almost at the top of the front face, being a chrome-edged trapezium which is less wide than the lower trapezium. The main grille features two horizontal chrome strips either side of mid-height. The headlamp units are linked to the grille, with the top edge coinciding with the top of the grille and bottom edge with the upper horizontal strip. The headlamp units feature two circular lamps and then an amber turn indicator lamp on the outside. The bonnet/ hood features an elevated area whose edges are in line with the top corners of the grille.
The sides of the car feature wheel arches in the form of large bulges. The main body features an impressed area bounded by two lines parallel to the car's belt line. Connecting the two lines at the front quarter is a vertical air duct. As with the older model, the car features black, polymer-covered A, B, C and D pillars. The roof is lightly curved. The wing mirrors are dominantly body-coloured but feature a black polymer accent. The car features split six-spoke wheels, wrapped in low profile tyres. The rear features small, wide lamp units that mostly consist of small LEDs.
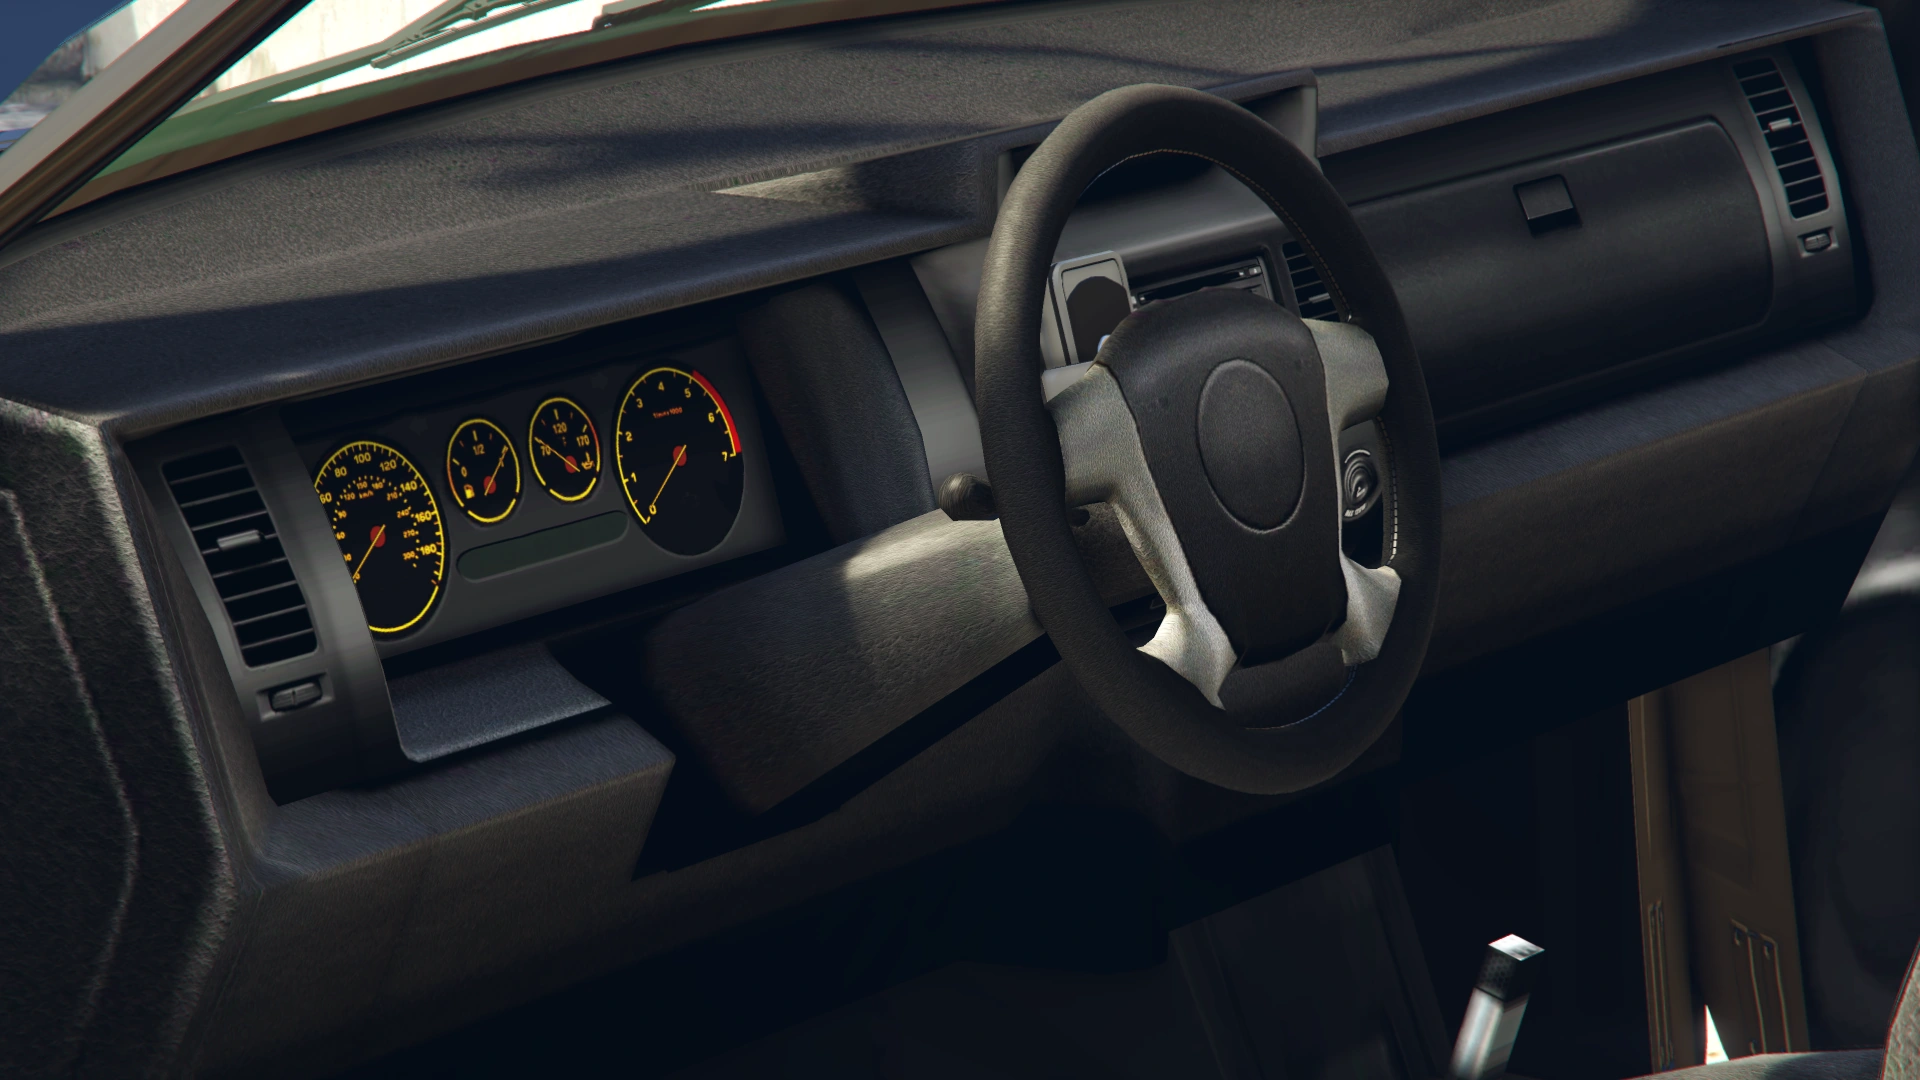
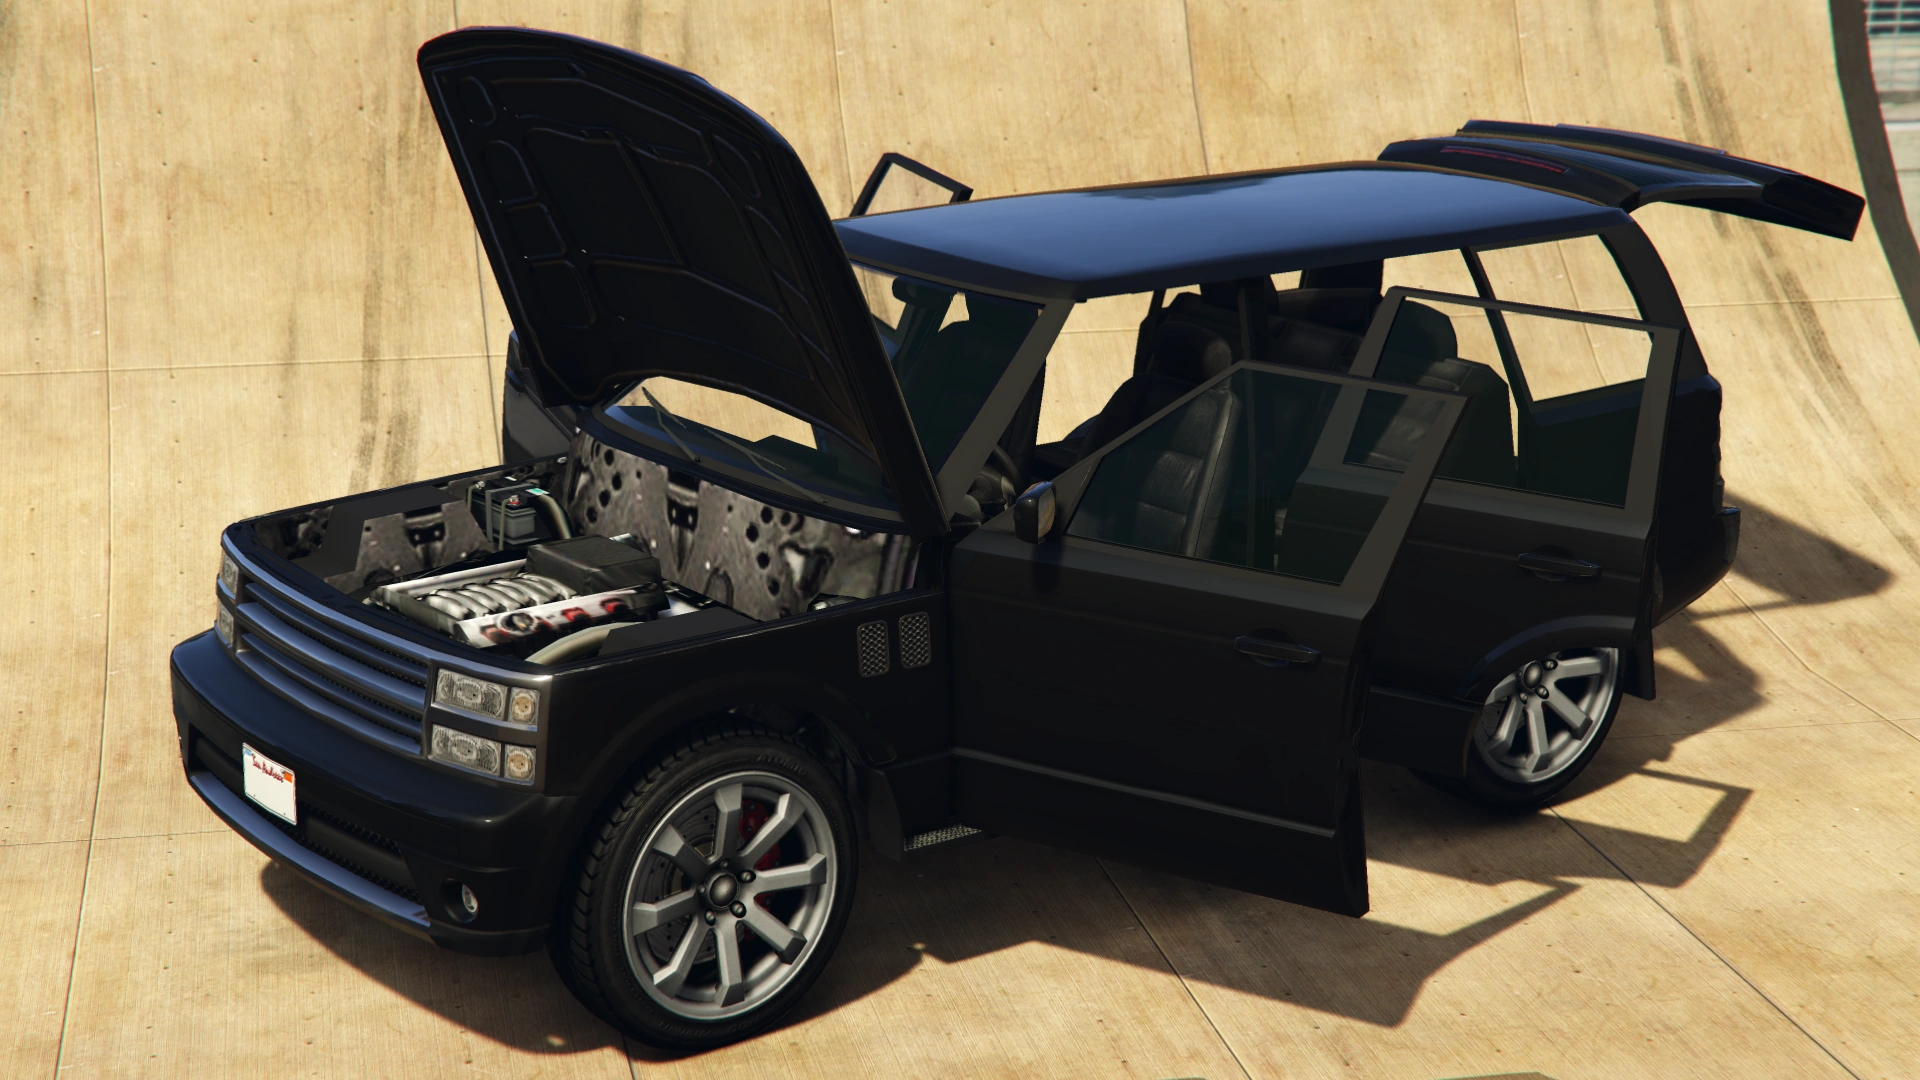
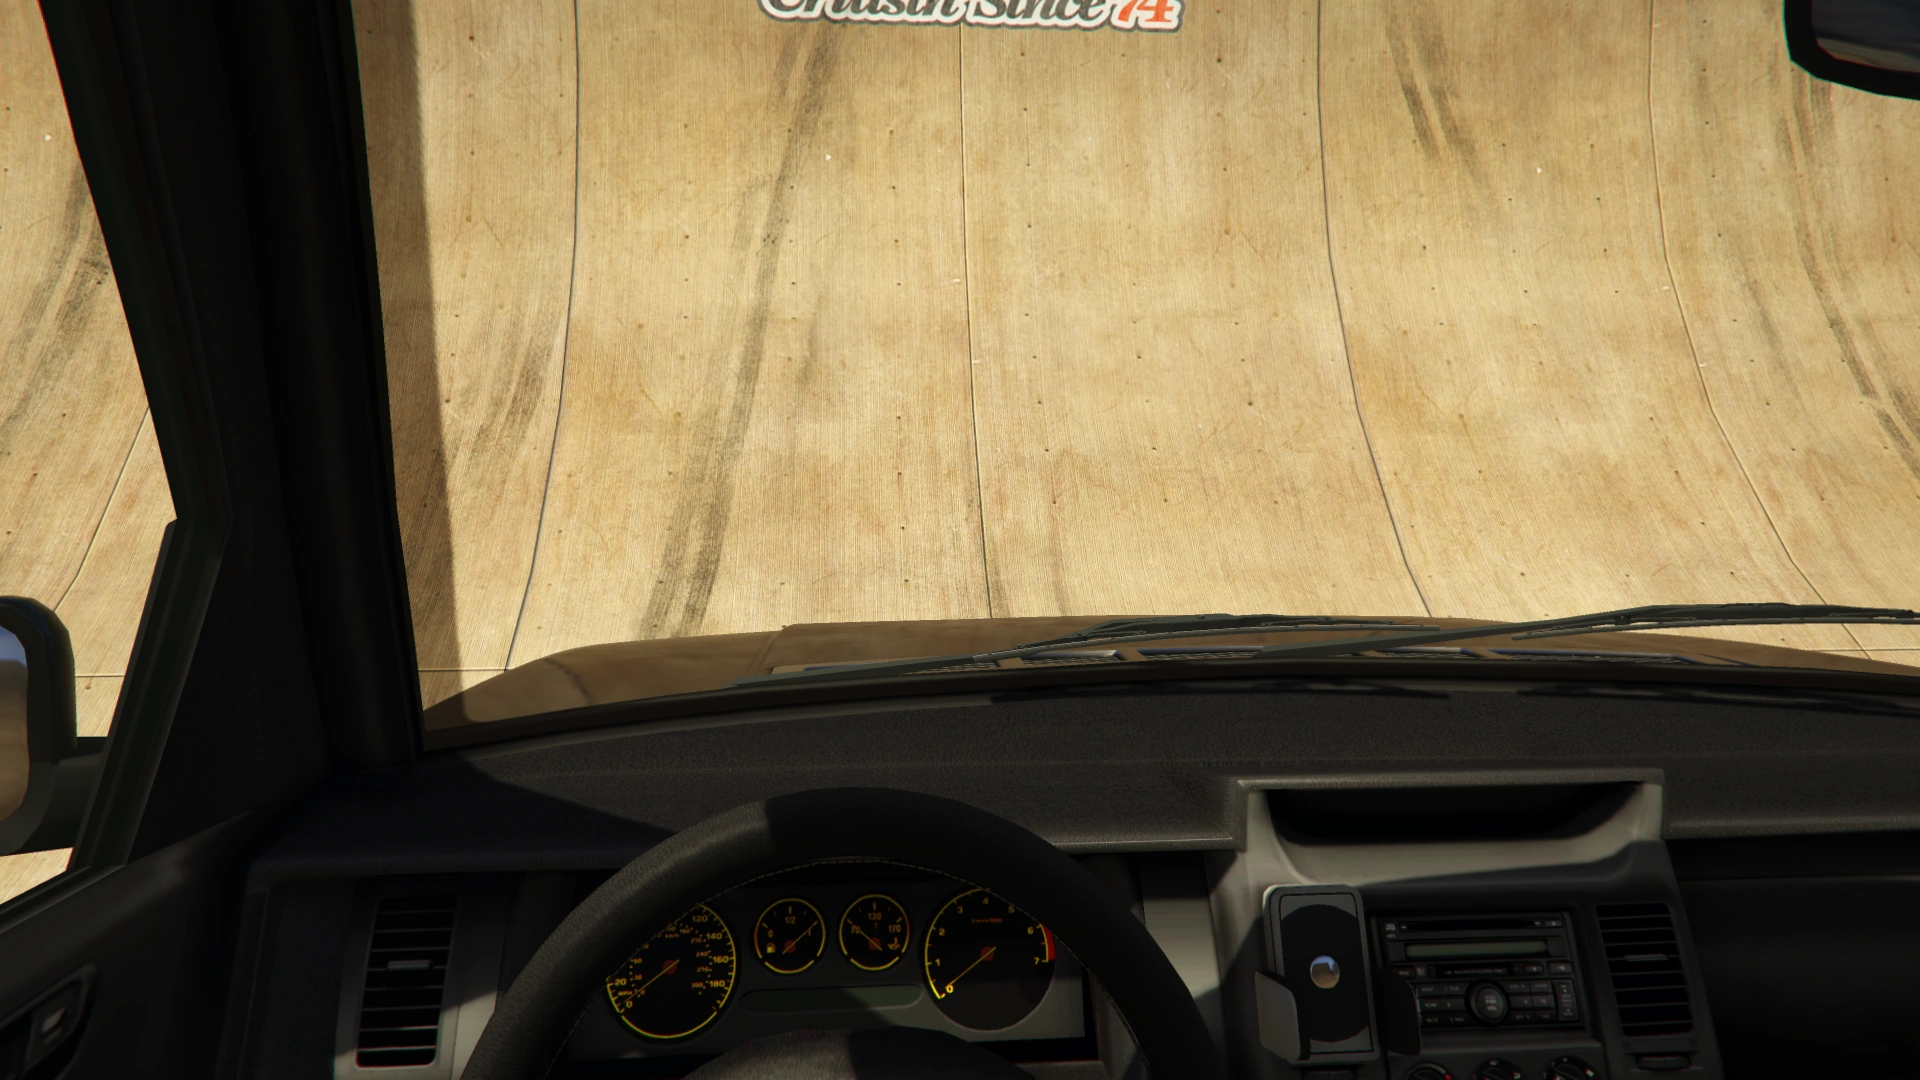
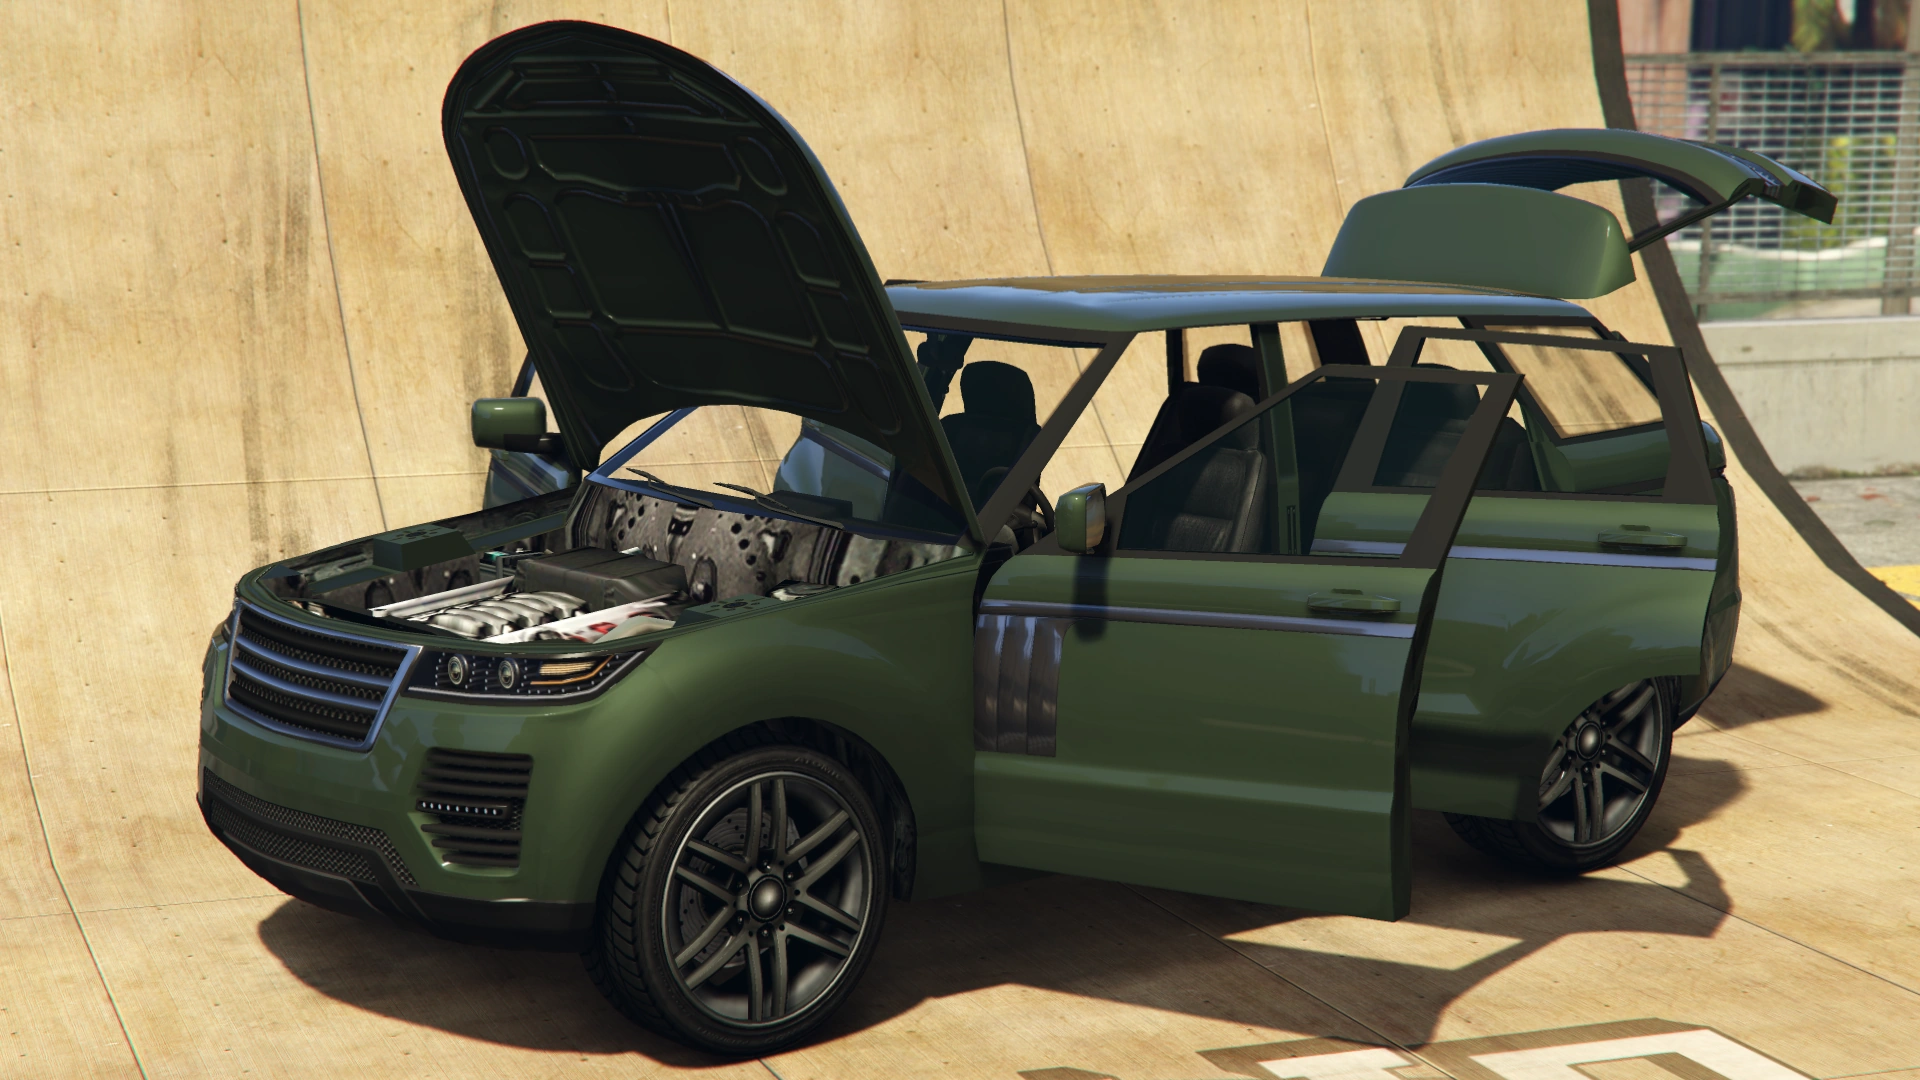
Current Design Gallery


Detailing


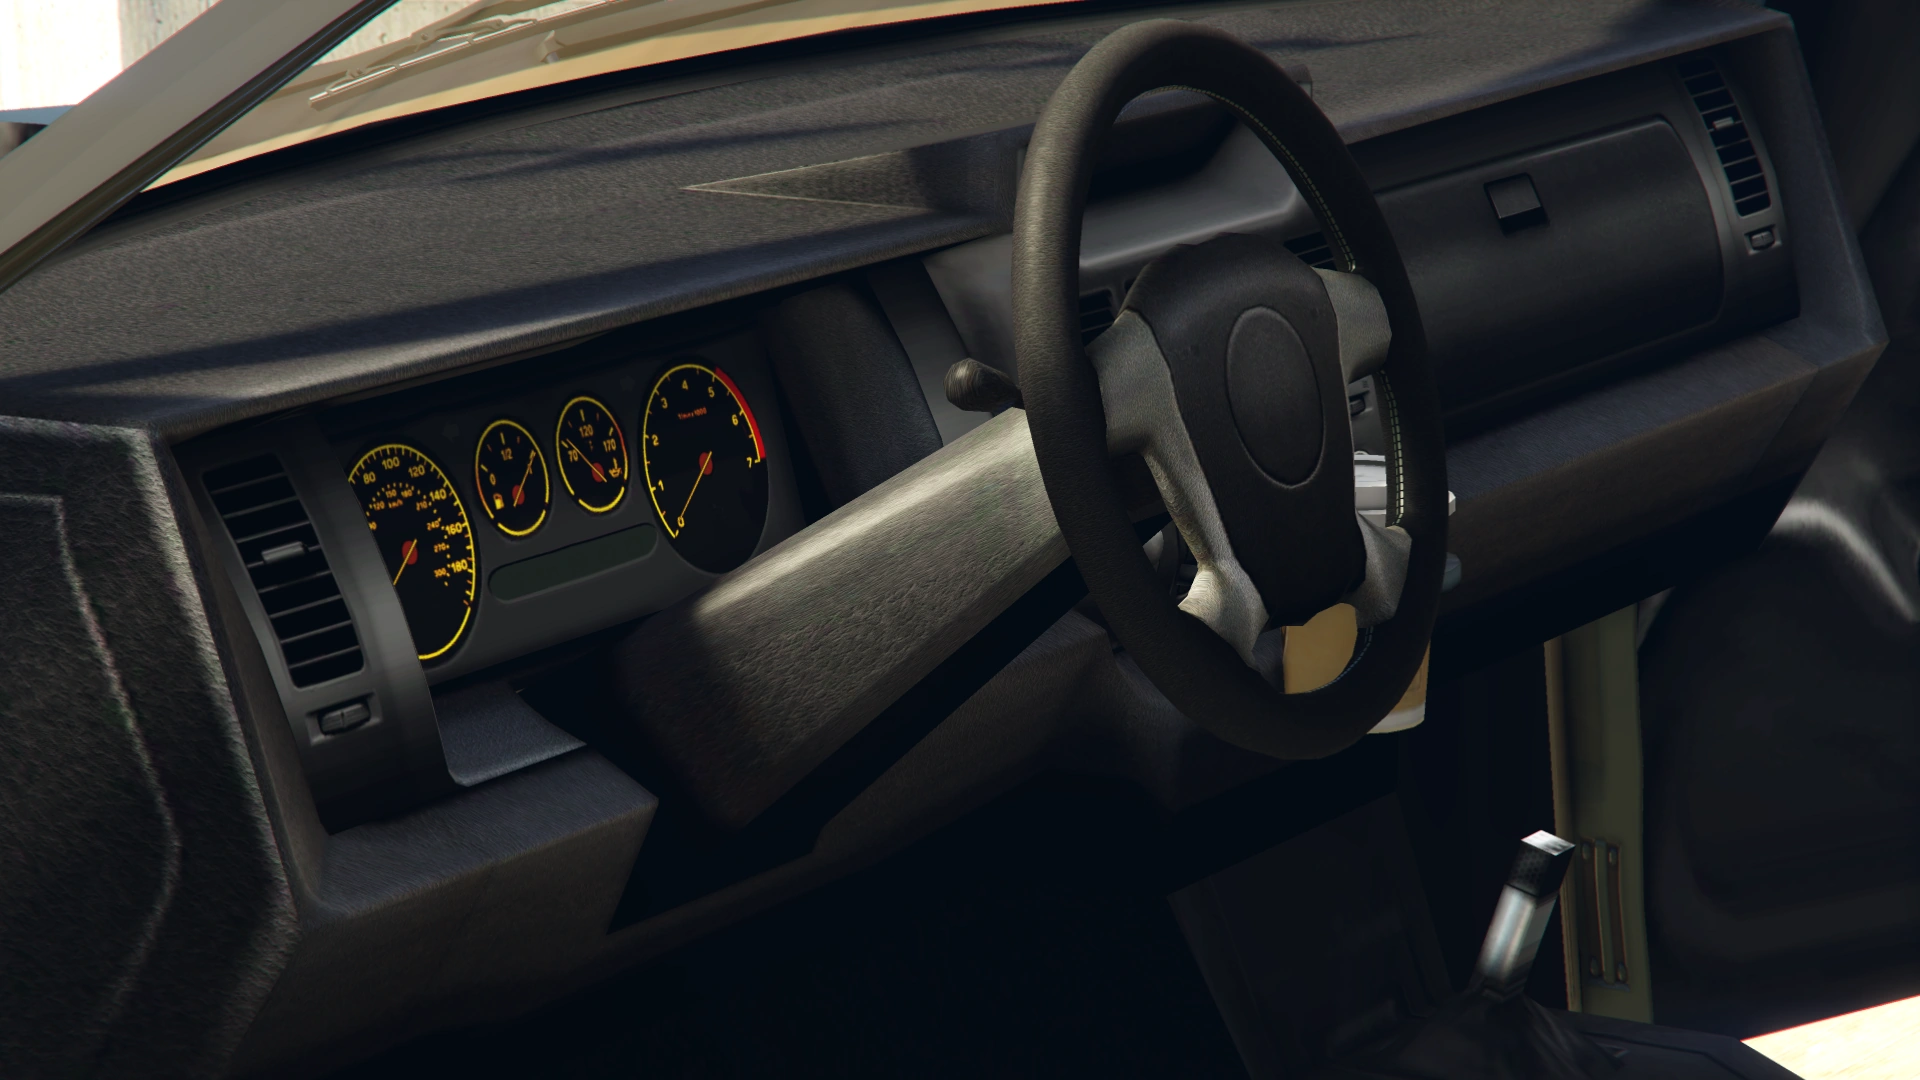
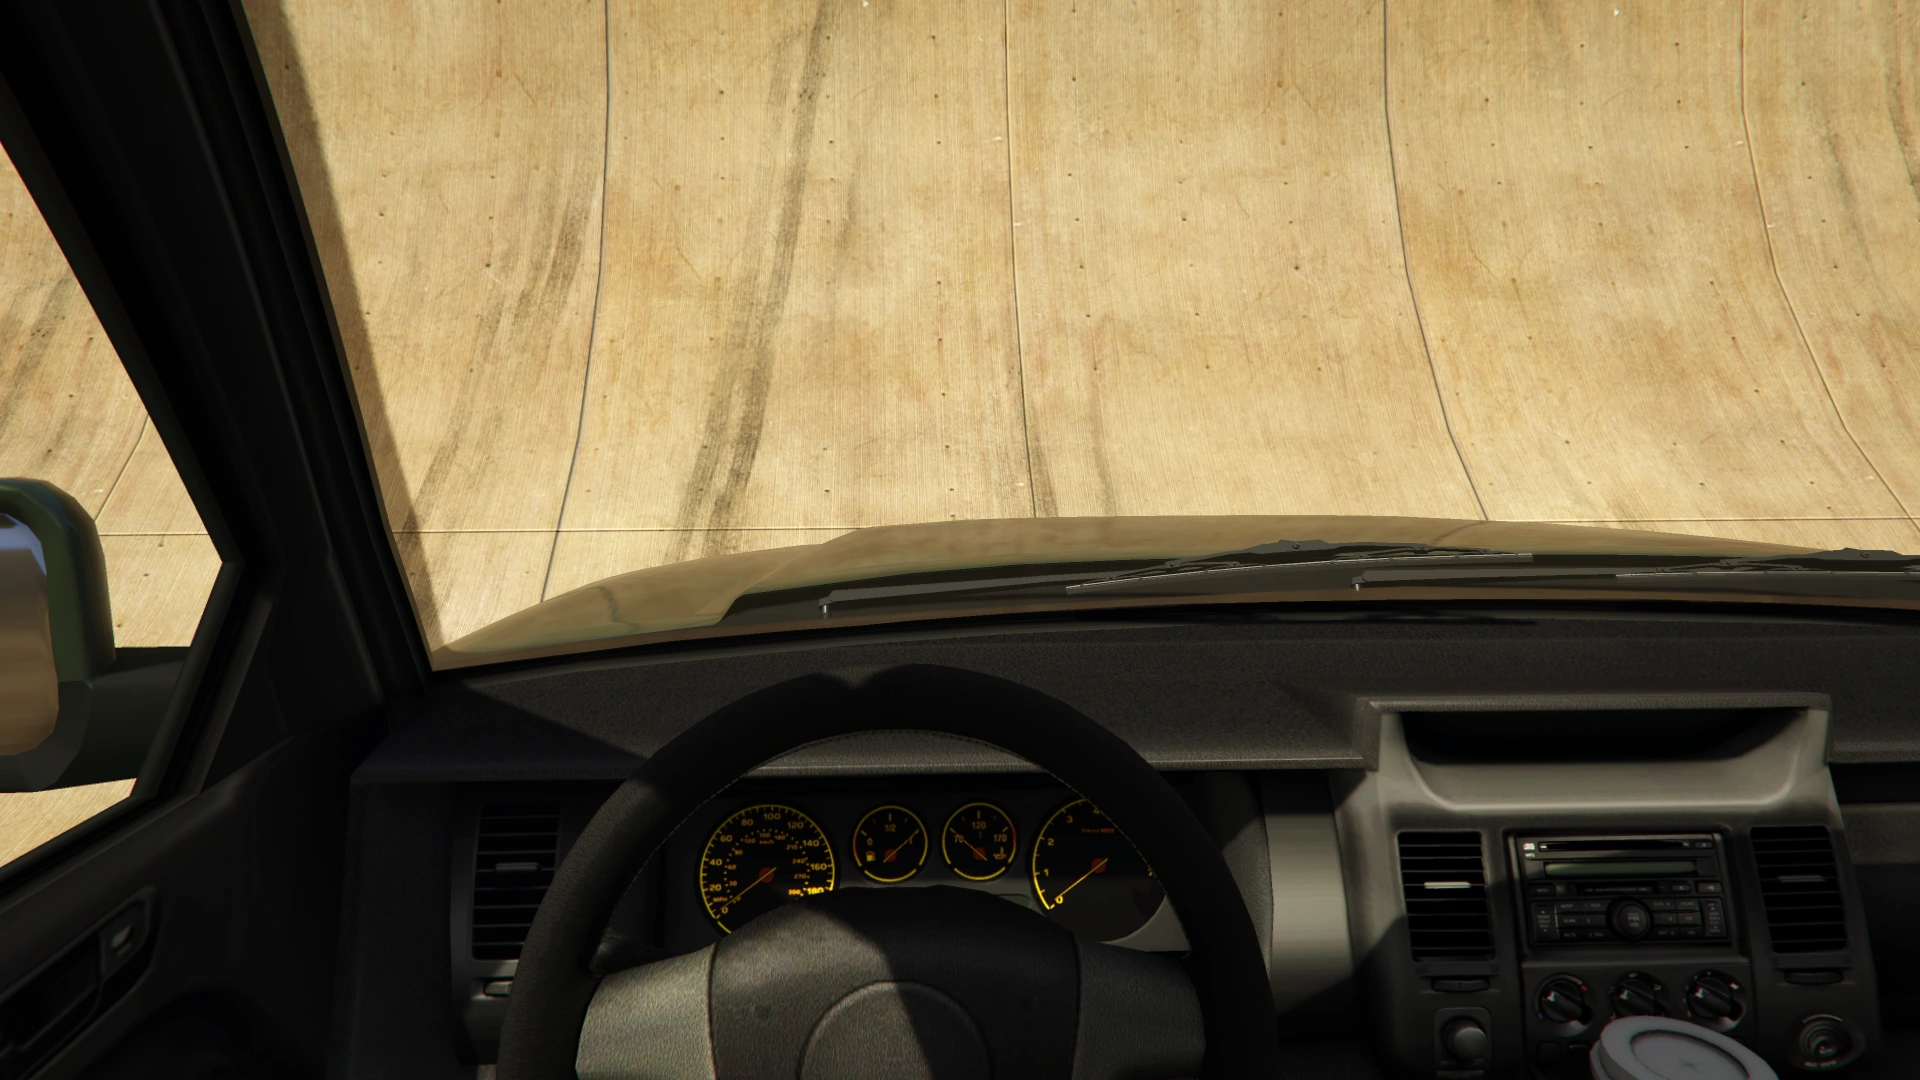
Detailing


Performance
Grand Theft Auto V
- First generation
The first generation Baller is quite slow and heavy, and has a wide turning radius. Acceleration is average, reaching from 0-60 in about 8 seconds, however, like every Land Rover, the Baller is capable of climbing steep hills and has a decent performance when off-roading. Another advantage is durability, it is easily one of the most durable cars in the game. The vehicle is prone to understeer at high speeds, likely due to poor weight distribution.
- Second generation
The second generation Baller accelerates at an average rate for an SUV, and is capable of reaching good top speed. The main weakness of the car's performance lies in its handling; the car's mass combined with its lack of traction can often lead to heavy understeer. When taken off-road however, the car's handling is better and cornering grip can allow for precise high speed driving off-road. The handling of the SUV can be quickly summarized as a level below the Huntley Sport in almost every way imaginable.
Though the engine model does not feature any manifolds, the engine cover displays what appears to be a single-overhead camshaft V8, fitted in a front engine, all wheel drive (60% front, 40% rear) layout, longitudinally.
GTA V Overview
| Acceleration (0-60 mph in Seconds) |
Top Speed (mph / kmh) |
Gears | Engine | Drivetrain (FWD / RWD / AWD) |
Mass (kg / lbs) |
Fuel Tank Size (litres) |
|---|---|---|---|---|---|---|
| N/A | 81 / 130 | 5 | N/A | AWD 60% FWD 40% RWD |
2400 / 5291 | 80 |
| N/A | N/A | N/A | N/A | N/A | N/A | N/A |
| 8.5 Seconds | 95 / 153 | 5 | F4 SOHC V8 (Cover) | AWD | Cannot be observed | Cannot be observed |
| Acceleration (0-60 mph in Seconds) |
Top Speed (mph / kmh) |
Gears | Engine | Drivetrain (FWD / RWD / AWD) |
Mass (kg / lbs) |
Fuel Tank Size (litres) |
|---|---|---|---|---|---|---|
| N/A | 84 / 135 | 5 | N/A | AWD 60% FWD 40% RWD |
2200 / 4850 | 80 |
| N/A | N/A | N/A | N/A | N/A | N/A | N/A |
| N/A | N/A | 5 | F4 SOHC V8 (Cover) | AWD | Cannot be observed | Cannot be observed |
Modifications
Grand Theft Auto V
Note that only the first generation Baller features visual modifications.
| Category | Modification | Cost (GTA V) | Cost (GTA Online) | Image | |
|---|---|---|---|---|---|
| Armor | No Armor | $250 | $500 | ||
| Armor Upgrade 20% | $1,250 | $5,250 | |||
| Armor Upgrade 40% | $3,125 | $8,750 | |||
| Armor Upgrade 60% | $5,000 | $14,000 | |||
| Armor Upgrade 80% | $8,750 | $24,500 | |||
| Armor Upgrade 100% | $12,500 | $35,000 | |||
| Brakes | Stock Brakes | $250 | $500 | ||
| Street Brakes | $5,000 | $10,000 | |||
| Sport Brakes | $6,750 | $13,500 | |||
| Race Brakes | $8,750 | $17,500 | |||
| Bumpers | Stock Front Bumper | $750 | $1,500 | ||
| Custom Front Bumper 1 | $1,250 | $2,500 | |||
| Custom Front Bumper 2 | $1,650 | $3,300 | |||
| Stock Rear Bumper | $750 | $1,500 | |||
| Custom Rear Bumper | $1,250 | $2,500 | |||
| Engine | EMS Upgrade, Level 1 | $2,250 | $4,500 | ||
| EMS Upgrade, Level 2 | $3,125 | $6,250 | |||
| EMS Upgrade, Level 3 | $4,500 | $9,000 | |||
| EMS Upgrade, Level 4 | $8,375 | $16,750 | |||
| Exhausts | Stock Exhaust | $130 | $260 | ||
| Custom Exhaust | $375 | $750 | |||
| Explosives | Ignition Bomb | N/A | $5,000 | ||
| Remote Bomb | N/A | $7,500 | |||
| Horns | Main article: Los Santos Customs/Horns | - | - | ||
| Lights | Headlights | Stock Lights | $200 | $400 | |
| Xenon Lights | $1,000 | $5,000 | |||
| Neon Kits | Main article: Los Santos Customs/Lights | - | - | ||
| Loss/Theft Prevention | Tracker | N/A | $2,000 | ||
| Full Coverage | N/A | $11,250 | |||
| Plates | Blue on White 1 | $50 | $200 | ||
| Blue on White 2 | $50 | $200 | |||
| Blue on White 3 | $50 | $200 | |||
| Yellow on Blue | $75 | $300 | |||
| Yellow on Black | $150 | $600 | |||
| Respray | Main article: Los Santos Customs/Respray Colors | - | - | ||
| Sell | Sell Vehicle | N/A | $9,000 | ||
| Skirts | Stock Skirts | $1,250 | $2,500 | ||
| Custom Skirts | $1,500 | $3,000 | |||
| Suspension | Stock Suspension | $100 | $200 | ||
| Lowered Suspension | $500 | $1,000 | |||
| Street Suspension | $1,000 | $2,000 | |||
| Sport Suspension | $1,700 | $3,400 | |||
| Competition Suspension | $2,200 | $4,400 | |||
| Transmission | Stock Transmission | $250 | $500 | ||
| Street Transmission | $7,375 | $14,750 | |||
| Sports Transmission | $8,125 | $16,250 | |||
| Race Transmission | $10,000 | $20,000 | |||
| Turbo | None | $1,250 | $2,500 | ||
| Turbo Tuning | $6,250 | $35,000 | |||
| Wheels | Main article: Los Santos Customs/Wheels | - | - | ||
| Windows | None | $100 | $500 | ||
| Light Smoke | $200 | $1,500 | |||
| Dark Smoke | $450 | $3,500 | |||
| Limo | $700 | $5,000 | |||
| Category | Modification | Cost (GTA V) | Cost (GTA Online) | |
|---|---|---|---|---|
| Armor | No Armor | $250 | $500 | |
| Armor Upgrade 20% | $1,250 | $5,250 | ||
| Armor Upgrade 40% | $3,125 | $8,750 | ||
| Armor Upgrade 60% | $5,000 | $14,000 | ||
| Armor Upgrade 80% | $8,750 | $24,500 | ||
| Armor Upgrade 100% | $12,500 | $35,000 | ||
| Brakes | Stock Brakes | $250 | $500 | |
| Street Brakes | $5,000 | $10,000 | ||
| Sport Brakes | $6,750 | $13,500 | ||
| Race Brakes | $8,750 | $17,500 | ||
| Engine | EMS Upgrade, Level 1 | $2,250 | $4,500 | |
| EMS Upgrade, Level 2 | $3,125 | $6,250 | ||
| EMS Upgrade, Level 3 | $4,500 | $9,000 | ||
| EMS Upgrade, Level 4 | $8,375 | $16,750 | ||
| Explosives | Ignition Bomb | N/A | $5,000 | |
| Remote Bomb | N/A | $7,500 | ||
| Horns | Main article: Los Santos Customs/Horns | - | - | |
| Lights | Headlights | Stock Lights | $200 | $400 |
| Xenon Lights | $1,000 | $5,000 | ||
| Neon Kits | Main article: Los Santos Customs/Lights | - | - | |
| Loss/Theft Prevention | Tracker | N/A | $2,000 | |
| Full Coverage | N/A | $11,250 | ||
| Plates | Blue on White 1 | $50 | $200 | |
| Blue on White 2 | $50 | $200 | ||
| Blue on White 3 | $50 | $200 | ||
| Yellow on Blue | $75 | $300 | ||
| Yellow on Black | $150 | $600 | ||
| Respray | Main article: Los Santos Customs/Respray Colors | - | - | |
| Sell | Sell Vehicle | N/A | $9,000 | |
| Suspension | Stock Suspension | $100 | $200 | |
| Lowered Suspension | $500 | $1,000 | ||
| Street Suspension | $1,000 | $2,000 | ||
| Sport Suspension | $1,700 | $3,400 | ||
| Competition Suspension | $2,200 | $4,400 | ||
| Transmission | Stock Transmission | $250 | $500 | |
| Street Transmission | $7,375 | $14,750 | ||
| Sports Transmission | $8,125 | $16,250 | ||
| Race Transmission | $10,000 | $20,000 | ||
| Turbo | None | $1,250 | $2,500 | |
| Turbo Tuning | $6,250 | $35,000 | ||
| Wheels | Main article: Los Santos Customs/Wheels | - | - | |
| Windows | None | $100 | $500 | |
| Light Smoke | $200 | $1,500 | ||
| Dark Smoke | $450 | $3,500 | ||
| Limo | $700 | $5,000 | ||
Image Gallery
")
")
")
")
Variants
Several variants of the second generation Baller were added as part of the GTA Online: Executives and Other Criminals Update for the Xbox One, PlayStation 4 and PC versions of Grand Theft Auto Online.
Template:VariantTwin Template:VariantTwin
Notable Owners
- Martin Madrazo and his cartel owns first generations Black Ballers.
- Franklin Clinton used a first generation Black Baller in the mission Predator, though it is unknown if he actually owns one or just rented or stole it in place of his Buffalo S.
- The Ballas can sometimes be seen driving a first generation Baller.
- Solomon Richards owns a black second generation Baller. (possibly)
- Drunk Driver
- Dima Popov
- The Families
- Los Santos Vagos
Prominent Appearances in Missions
Grand Theft Auto V
- In the mission Dead Man Walking, after climbing off the window, Michael can see two vehicles parked in front of him. One of them is the second generation Baller.
Grand Theft Auto Online
- The first generation model is used by the unknown agents' bodyguards in the mission Firewall Protection.
- Casino Work
- The second generation model can appear in Undisclosed Cargo as the vehicle that needs to be disposed of.
Locations
Grand Theft Auto V
- Both
- Spawn commonly all over the map.
- First generation
- The first generation Baller can be found parked on the western shore of the Alamo Sea off Calafia Road, next to some tents and a BeeJay XL.
- Second generation
- There's a unique full black variant available for chasing Rocco Pelosi in the mission The Ballad of Rocco.
- A unique variant can be found in a Random Event in which one untie a wedding groom from a light pole. After dropping the guy and his friend off, the player can find a unique colored Baller parked near the player which is available to be taken.
- Can be bought for $98,000 from Southern San Andreas Super Autos.
- Fairly common around The Families/Ballas territory.
Grand Theft Auto Online
- First generation
- Spawns commonly at the Vespucci Beach, in the car park at the southern end of the beach.
- Sometimes appears around Davis and Strawberry.
- Commonly spawns on the Del Perro Freeway.
- Second generation
Template:Sectstub
- Can be found driving around Paleto Bay and Vinewood.
- Can be purchased for $90,000 from Southern San Andreas Super Autos.
Rewards
Grand Theft Auto Online
- Both Ballers sells for $9,000 at Los Santos Customs.
Trivia
General
- "Baller" is a street slang term for drug dealer or a thug that has made it big-time, and as such its use for the name of the vehicle in the game is likely a reference to the luxury SUVs often driven by such people.
- In the beta, the G1 Baller had six-spoke wheels (which featured on early L322 Range Rovers) and an RR sport side quarter duct.
- Also, there is an advertisement with the picture of the G1 Baller with what it seems the be a bumper splitter and additional side steps or skirts. Such modifications for the SUV are not available in the game.
- In earlier versions of Southern San Andreas Super Autos, the Baller's picture was incorrect. It showed the Classic Baller instead of the Sport Baller. This was subsequently fixed when said website was revamped.
- By appling tinted windows on the first generation Baller, the fog lights will turn black.
Grand Theft Auto V
- The default radio stations of the Baller are: Radio Los Santos, The Lab and West Coast Classics.
Grand Theft Auto Online
- The first generation Baller can be selected as an off-road vehicle in GTA Online, while the second generation can only be selected as an SUV, despite its good performance on off-road terrain. The same thing happens with the Mesa and the Crusader.
See Also
- Baller LE - Limited edition Baller.
- Baller LE LWB - Limited edition long-wheelbase Baller.
- Baller LE (Armored) - Armored variant of the Baller LE.
- Baller LE LWB (Armored) - Armored variant of the Baller LE LWB.