Noirlime4L (talk | contribs) mNo edit summary |
(Measurements as per cited testing method) Tag: Visual edit |
||
| (11 intermediate revisions by 8 users not shown) | |||
| Line 11: | Line 11: | ||
|price = [[Money|$]]1,955,000 <small>([[Legendary Motorsport]])</small> |
|price = [[Money|$]]1,955,000 <small>([[Legendary Motorsport]])</small> |
||
|appearances = ''[[Grand Theft Auto Online]]'' {{DLC|GTA Online: The Doomsday Heist}} {{NG}} |
|appearances = ''[[Grand Theft Auto Online]]'' {{DLC|GTA Online: The Doomsday Heist}} {{NG}} |
||
| − | |related = [[Entity XF]]<br>[[X80 Proto]]<br>[[Entity XXR]]<br>[[Tyrant]] |
+ | |related = [[Emerus]]<br>[[Entity XF]]<br>[[X80 Proto]]<br>[[Entity XXR]]<br>[[Tyrant]] |
|variants = |
|variants = |
||
|makeyear = |
|makeyear = |
||
| Line 72: | Line 72: | ||
==Design== |
==Design== |
||
===''Grand Theft Auto Online''=== |
===''Grand Theft Auto Online''=== |
||
| − | The vehicle is heavily inspired by the {{WP|Scuderia Cameron Glickenhaus SCG 003}}. The rear of the car is mostly based on the {{WP|McLaren Senna}}. Its roof and greenhouse also takes inspiration from the {{WP|Koenigsegg One:1}}. |
+ | The vehicle is heavily inspired by the {{WP|Scuderia Cameron Glickenhaus SCG 003}}. The rear of the car is mostly based on the {{WP|McLaren Senna}}, although with a lot of elements, such as the diffuser, taken from the {{URL|https://www.reiter-ktm.com/images/KTM/2016_ktm_x-bow_gt400_5.jpg|KTM X-Bow GT4}}. Its roof and greenhouse also takes inspiration from the {{WP|Koenigsegg One:1}}. |
The Autarch features what appear to be butterfly doors, functioning similar to the [[T20]] and [[GP1]]. However, the Autarch's doors do not rotate fully along the A pillar, giving them similar characteristics to the [[Infernus]], behaving loosely akin to the design of scissor doors. |
The Autarch features what appear to be butterfly doors, functioning similar to the [[T20]] and [[GP1]]. However, the Autarch's doors do not rotate fully along the A pillar, giving them similar characteristics to the [[Infernus]], behaving loosely akin to the design of scissor doors. |
||
| Line 105: | Line 105: | ||
|handling_drivetrain = RWD |
|handling_drivetrain = RWD |
||
|handling_mass = 590 / 1300 |
|handling_mass = 590 / 1300 |
||
| − | |handling_fuel_tank = |
+ | |handling_fuel_tank =65 |
|website_acceleration = |
|website_acceleration = |
||
|website_top_speed = |
|website_top_speed = |
||
| Line 112: | Line 112: | ||
|website_drivetrain = |
|website_drivetrain = |
||
|website_mass = |
|website_mass = |
||
| − | |observed_acceleration = |
+ | |observed_acceleration =3.86 Seconds |
| − | |observed_top_speed = |
+ | |observed_top_speed =114.4 / 184.1 |
|observed_gears = 6 |
|observed_gears = 6 |
||
|observed_engine = V8 <small>(In-game model)</small> |
|observed_engine = V8 <small>(In-game model)</small> |
||
| Line 168: | Line 168: | ||
| rowspan="12" |Front Bumpers |
| rowspan="12" |Front Bumpers |
||
|Stock Front Bumper |
|Stock Front Bumper |
||
| − | | style="text-align: center;"|$2,200 |
+ | | style="text-align: center;" |$2,200 |
|[[File:Autarch-GTAO-StockFrontBumper.png|thumb|center|220px]] |
|[[File:Autarch-GTAO-StockFrontBumper.png|thumb|center|220px]] |
||
|- |
|- |
||
|Stock w/ Canards |
|Stock w/ Canards |
||
| − | | style="text-align: center;"|$4,600 |
+ | | style="text-align: center;" |$4,600 |
|[[File:Autarch-GTAO-StockwCanards.png|thumb|center|220px]] |
|[[File:Autarch-GTAO-StockwCanards.png|thumb|center|220px]] |
||
|- |
|- |
||
|Primary Stock |
|Primary Stock |
||
| − | | style="text-align: center;"|$7,400 |
+ | | style="text-align: center;" |$7,400 |
|[[File:Autarch-GTAO-PrimaryStockBumper.png|thumb|center|220px]] |
|[[File:Autarch-GTAO-PrimaryStockBumper.png|thumb|center|220px]] |
||
|- |
|- |
||
|Primary Stock w/ Canards |
|Primary Stock w/ Canards |
||
| − | | style="text-align: center;"|$11,700 |
+ | | style="text-align: center;" |$11,700 |
|[[File:Autarch-GTAO-PrimaryStockwCanards.png|thumb|center|220px]] |
|[[File:Autarch-GTAO-PrimaryStockwCanards.png|thumb|center|220px]] |
||
|- |
|- |
||
|Secondary Stock |
|Secondary Stock |
||
| − | | style="text-align: center;"|$14,500 |
+ | | style="text-align: center;" |$14,500 |
|[[File:Autarch-GTAO-SecondaryStockBumper.png|thumb|center|220px]] |
|[[File:Autarch-GTAO-SecondaryStockBumper.png|thumb|center|220px]] |
||
|- |
|- |
||
|Secondary Stock w/ Canards |
|Secondary Stock w/ Canards |
||
| − | | style="text-align: center;"|$14,700 |
+ | | style="text-align: center;" |$14,700 |
|[[File:Autarch-GTAO-SecondaryStockwCanards.png|thumb|center|220px]] |
|[[File:Autarch-GTAO-SecondaryStockwCanards.png|thumb|center|220px]] |
||
|- |
|- |
||
|GT Bumper |
|GT Bumper |
||
| − | | style="text-align: center;"|$14,900 |
+ | | style="text-align: center;" |$14,900 |
|[[File:Autarch-GTAO-GTBumper.png|thumb|center|220px]] |
|[[File:Autarch-GTAO-GTBumper.png|thumb|center|220px]] |
||
|- |
|- |
||
|GT Bumper w/ Canards |
|GT Bumper w/ Canards |
||
| − | | style="text-align: center;"|$15,100 |
+ | | style="text-align: center;" |$15,100 |
|[[File:Autarch-GTAO-GTBumperwCanards.png|thumb|center|220px]] |
|[[File:Autarch-GTAO-GTBumperwCanards.png|thumb|center|220px]] |
||
|- |
|- |
||
|Primary GT Bumper |
|Primary GT Bumper |
||
| − | | style="text-align: center;"|$15,300 |
+ | | style="text-align: center;" |$15,300 |
|[[File:Autarch-GTAO-PrimaryGTBumper.png|thumb|center|220px]] |
|[[File:Autarch-GTAO-PrimaryGTBumper.png|thumb|center|220px]] |
||
|- |
|- |
||
|Primary GT w/ Canards |
|Primary GT w/ Canards |
||
| − | | style="text-align: center;"|$15,500 |
+ | | style="text-align: center;" |$15,500 |
|[[File:Autarch-GTAO-PrimaryGTwCanards.png|thumb|center|220px]] |
|[[File:Autarch-GTAO-PrimaryGTwCanards.png|thumb|center|220px]] |
||
|- |
|- |
||
|Secondary GT Bumper |
|Secondary GT Bumper |
||
| − | | style="text-align: center;"|$15,700 |
+ | | style="text-align: center;" |$15,700 |
|[[File:Autarch-GTAO-SecondaryGTBumper.png|thumb|center|220px]] |
|[[File:Autarch-GTAO-SecondaryGTBumper.png|thumb|center|220px]] |
||
|- |
|- |
||
|Secondary GT w/ Canards |
|Secondary GT w/ Canards |
||
| − | | style="text-align: center;"|$15,900 |
+ | | style="text-align: center;" |$15,900 |
|[[File:Autarch-GTAO-SecondaryGTwCanards.png|thumb|center|220px]] |
|[[File:Autarch-GTAO-SecondaryGTwCanards.png|thumb|center|220px]] |
||
|- |
|- |
||
| rowspan="3" |Rear Diffusers |
| rowspan="3" |Rear Diffusers |
||
|Stock Rear Diffuser |
|Stock Rear Diffuser |
||
| − | | style="text-align: center;"|$2,200 |
+ | | style="text-align: center;" |$2,200 |
|[[File:Autarch-GTAO-StockRearDiffuser.png|thumb|center|220px]] |
|[[File:Autarch-GTAO-StockRearDiffuser.png|thumb|center|220px]] |
||
|- |
|- |
||
|Primary Carbon Diffuser |
|Primary Carbon Diffuser |
||
| − | | style="text-align: center;"|$4,600 |
+ | | style="text-align: center;" |$4,600 |
|[[File:Autarch-GTAO-PrimaryCarbonDiffuser.png|thumb|center|220px]] |
|[[File:Autarch-GTAO-PrimaryCarbonDiffuser.png|thumb|center|220px]] |
||
|- |
|- |
||
|Secondary Carbon Diffuser |
|Secondary Carbon Diffuser |
||
| − | | style="text-align: center;"|$7,400 |
+ | | style="text-align: center;" |$7,400 |
|[[File:Autarch-GTAO-SecondaryCarbonDiffuser.png|thumb|center|220px]] |
|[[File:Autarch-GTAO-SecondaryCarbonDiffuser.png|thumb|center|220px]] |
||
|- |
|- |
||
| colspan="2" rowspan="4" |Engine |
| colspan="2" rowspan="4" |Engine |
||
|EMS Upgrade, Level 1 |
|EMS Upgrade, Level 1 |
||
| − | | colspan="2" style="text-align: center;"|$9,000 |
+ | | colspan="2" style="text-align: center;" |$9,000 |
|- |
|- |
||
|EMS Upgrade, Level 2 |
|EMS Upgrade, Level 2 |
||
| − | | colspan="2" style="text-align: center;"|$12,500 |
+ | | colspan="2" style="text-align: center;" |$12,500 |
|- |
|- |
||
|EMS Upgrade, Level 3 |
|EMS Upgrade, Level 3 |
||
| − | | colspan="2" style="text-align: center;"|$18,000 |
+ | | colspan="2" style="text-align: center;" |$18,000 |
|- |
|- |
||
|EMS Upgrade, Level 4 |
|EMS Upgrade, Level 4 |
||
| − | | colspan="2" style="text-align: center;"|$33,500 |
+ | | colspan="2" style="text-align: center;" |$33,500 |
|- |
|- |
||
| colspan="2" rowspan="8" |Exhausts |
| colspan="2" rowspan="8" |Exhausts |
||
|Stock Exhaust |
|Stock Exhaust |
||
| − | | style="text-align: center;"|$260 |
+ | | style="text-align: center;" |$260 |
|[[File:Autarch-GTAO-StockExhaust.png|thumb|center|220px]] |
|[[File:Autarch-GTAO-StockExhaust.png|thumb|center|220px]] |
||
|- |
|- |
||
|Dual Exhaust |
|Dual Exhaust |
||
| − | | style="text-align: center;"|$750 |
+ | | style="text-align: center;" |$750 |
|[[File:Autarch-GTAO-DualExhaust.png|thumb|center|220px]] |
|[[File:Autarch-GTAO-DualExhaust.png|thumb|center|220px]] |
||
|- |
|- |
||
|Titanium Exhaust |
|Titanium Exhaust |
||
| − | | style="text-align: center;"|$1,800 |
+ | | style="text-align: center;" |$1,800 |
|[[File:Autarch-GTAO-TitaniumExhaust.png|thumb|center|220px]] |
|[[File:Autarch-GTAO-TitaniumExhaust.png|thumb|center|220px]] |
||
|- |
|- |
||
|Dual Titanium Exhaust |
|Dual Titanium Exhaust |
||
| − | | style="text-align: center;"|$3,000 |
+ | | style="text-align: center;" |$3,000 |
|[[File:Autarch-GTAO-DualTitaniumExhaust.png|thumb|center|220px]] |
|[[File:Autarch-GTAO-DualTitaniumExhaust.png|thumb|center|220px]] |
||
|- |
|- |
||
|Carbon Exhaust |
|Carbon Exhaust |
||
| − | | style="text-align: center;"|$9,550 |
+ | | style="text-align: center;" |$9,550 |
|[[File:Autarch-GTAO-CarbonExhaust.png|thumb|center|220px]] |
|[[File:Autarch-GTAO-CarbonExhaust.png|thumb|center|220px]] |
||
|- |
|- |
||
|Dual Carbon Exhaust |
|Dual Carbon Exhaust |
||
| − | | style="text-align: center;"|$9,750 |
+ | | style="text-align: center;" |$9,750 |
|[[File:Autarch-GTAO-DualCarbonExhaust.png|thumb|center|220px]] |
|[[File:Autarch-GTAO-DualCarbonExhaust.png|thumb|center|220px]] |
||
|- |
|- |
||
|Aluminum Exhaust |
|Aluminum Exhaust |
||
| − | | style="text-align: center;"|$10,500 |
+ | | style="text-align: center;" |$10,500 |
|[[File:Autarch-GTAO-AluminumExhaust.png|thumb|center|220px]] |
|[[File:Autarch-GTAO-AluminumExhaust.png|thumb|center|220px]] |
||
|- |
|- |
||
|Dual Aluminum Exhaust |
|Dual Aluminum Exhaust |
||
| − | | style="text-align: center;"|$12,000 |
+ | | style="text-align: center;" |$12,000 |
|[[File:Autarch-GTAO-DualAluminumExhaust.png|thumb|center|220px]] |
|[[File:Autarch-GTAO-DualAluminumExhaust.png|thumb|center|220px]] |
||
| + | |- |
||
| + | | colspan="2" rowspan="2" |[[Car Bomb|Explosives]] |
||
| + | |Ignition Bomb |
||
| + | | colspan="2" style="text-align: center;" |$5,000 |
||
| + | |- |
||
| + | |Remote Bomb |
||
| + | | colspan="2" style="text-align: center;" |$7,500 |
||
|- |
|- |
||
| colspan="2" rowspan="8" |Fenders |
| colspan="2" rowspan="8" |Fenders |
||
|Stock Front Fenders |
|Stock Front Fenders |
||
| − | | style="text-align: center;"|$ |
+ | | style="text-align: center;" |$300 |
|[[File:Autarch-GTAO-StockFrontFenders.png|thumb|center|220px]] |
|[[File:Autarch-GTAO-StockFrontFenders.png|thumb|center|220px]] |
||
|- |
|- |
||
|Front Canards |
|Front Canards |
||
| − | | style="text-align: center;"|$900 |
+ | | style="text-align: center;" |$900 |
|[[File:Autarch-GTAO-FrontCanards.png|thumb|center|220px]] |
|[[File:Autarch-GTAO-FrontCanards.png|thumb|center|220px]] |
||
|- |
|- |
||
|Stock Rear Fenders |
|Stock Rear Fenders |
||
| − | | style="text-align: center;"|$ |
+ | | style="text-align: center;" |$300 |
|[[File:Autarch-GTAO-StockRearFenders.png|thumb|center|220px]] |
|[[File:Autarch-GTAO-StockRearFenders.png|thumb|center|220px]] |
||
|- |
|- |
||
|Secondary R. Fender |
|Secondary R. Fender |
||
| − | | style="text-align: center;"|$900 |
+ | | style="text-align: center;" |$900 |
|[[File:Autarch-GTAO-SecondaryR.Fender.png|thumb|center|220px]] |
|[[File:Autarch-GTAO-SecondaryR.Fender.png|thumb|center|220px]] |
||
|- |
|- |
||
|Carbon R. Fender |
|Carbon R. Fender |
||
| − | | style="text-align: center;"|$1,500 |
+ | | style="text-align: center;" |$1,500 |
|[[File:Autarch-GTAO-CarbonR.Fender.png|thumb|center|220px]] |
|[[File:Autarch-GTAO-CarbonR.Fender.png|thumb|center|220px]] |
||
|- |
|- |
||
|Vented R. Fender |
|Vented R. Fender |
||
| − | | style="text-align: center;"|$1,700 |
+ | | style="text-align: center;" |$1,700 |
|[[File:Autarch-GTAO-VentedR.Fender.png|thumb|center|220px]] |
|[[File:Autarch-GTAO-VentedR.Fender.png|thumb|center|220px]] |
||
|- |
|- |
||
|Secondary Vented R. Fender |
|Secondary Vented R. Fender |
||
| − | | style="text-align: center;"|$2,000 |
+ | | style="text-align: center;" |$2,000 |
|[[File:Autarch-GTAO-SecondaryVentedR.Fender.png|thumb|center|220px]] |
|[[File:Autarch-GTAO-SecondaryVentedR.Fender.png|thumb|center|220px]] |
||
|- |
|- |
||
|Carbon Vented R. Fender |
|Carbon Vented R. Fender |
||
| − | | style="text-align: center;"|$2,750 |
+ | | style="text-align: center;" |$2,750 |
|[[File:Autarch-GTAO-CarbonVentedR.Fender.png|thumb|center|220px]] |
|[[File:Autarch-GTAO-CarbonVentedR.Fender.png|thumb|center|220px]] |
||
|- |
|- |
||
| colspan="2" rowspan="9" |Hoods |
| colspan="2" rowspan="9" |Hoods |
||
|Stock Hood |
|Stock Hood |
||
| − | | style="text-align: center;"|$1,600 |
+ | | style="text-align: center;" |$1,600 |
|[[File:Autarch-GTAO-StockHood.png|thumb|center|220px]] |
|[[File:Autarch-GTAO-StockHood.png|thumb|center|220px]] |
||
|- |
|- |
||
|Secondary Stock Hood |
|Secondary Stock Hood |
||
| − | | style="text-align: center;"|$3,000 |
+ | | style="text-align: center;" |$3,000 |
|[[File:Autarch-GTAO-SecondaryStockHood.png|thumb|center|220px]] |
|[[File:Autarch-GTAO-SecondaryStockHood.png|thumb|center|220px]] |
||
|- |
|- |
||
|Carbon Stock Hood |
|Carbon Stock Hood |
||
| − | | style="text-align: center;"|$5,000 |
+ | | style="text-align: center;" |$5,000 |
|[[File:Autarch-GTAO-CarbonStockHood.png|thumb|center|220px]] |
|[[File:Autarch-GTAO-CarbonStockHood.png|thumb|center|220px]] |
||
|- |
|- |
||
|Crescent Hood |
|Crescent Hood |
||
| − | | style="text-align: center;"|$8,000 |
+ | | style="text-align: center;" |$8,000 |
|[[File:Autarch-GTAO-CrescentHood.png|thumb|center|220px]] |
|[[File:Autarch-GTAO-CrescentHood.png|thumb|center|220px]] |
||
|- |
|- |
||
|Secondary Crescent Hood |
|Secondary Crescent Hood |
||
| − | | style="text-align: center;"|$9,600 |
+ | | style="text-align: center;" |$9,600 |
|[[File:Autarch-GTAO-SecondaryCrescentHood.png|thumb|center|220px]] |
|[[File:Autarch-GTAO-SecondaryCrescentHood.png|thumb|center|220px]] |
||
|- |
|- |
||
|Carbon Crescent Hood |
|Carbon Crescent Hood |
||
| − | | style="text-align: center;"|$11,000 |
+ | | style="text-align: center;" |$11,000 |
|[[File:Autarch-GTAO-CarbonCrescentHood.png|thumb|center|220px]] |
|[[File:Autarch-GTAO-CarbonCrescentHood.png|thumb|center|220px]] |
||
|- |
|- |
||
|Aggressor Hood |
|Aggressor Hood |
||
| − | | style="text-align: center;"|$11,600 |
+ | | style="text-align: center;" |$11,600 |
|[[File:Autarch-GTAO-AggressorHood.png|thumb|center|220px]] |
|[[File:Autarch-GTAO-AggressorHood.png|thumb|center|220px]] |
||
|- |
|- |
||
|Secondary Aggressor Hood |
|Secondary Aggressor Hood |
||
| − | | style="text-align: center;"|$12,000 |
+ | | style="text-align: center;" |$12,000 |
|[[File:Autarch-GTAO-SecondaryAggressorHood.png|thumb|center|220px]] |
|[[File:Autarch-GTAO-SecondaryAggressorHood.png|thumb|center|220px]] |
||
|- |
|- |
||
|Carbon Aggressor Hood |
|Carbon Aggressor Hood |
||
| − | | style="text-align: center;"|$12,400 |
+ | | style="text-align: center;" |$12,400 |
|[[File:Autarch-GTAO-CarbonAggressorHood.png|thumb|center|220px]] |
|[[File:Autarch-GTAO-CarbonAggressorHood.png|thumb|center|220px]] |
||
| + | |- |
||
| + | | colspan="2" |Horns |
||
| + | |''Main article: [[Los Santos Customs/Horns]]'' |
||
| + | | colspan="2" style="text-align: center;" | - |
||
|- |
|- |
||
| rowspan="3" |Lights |
| rowspan="3" |Lights |
||
| Line 379: | Line 390: | ||
| colspan="2" style="text-align: center;" |$600 |
| colspan="2" style="text-align: center;" |$600 |
||
|- |
|- |
||
| − | | colspan="2" | |
+ | | colspan="2" |Respray |
|''Main article: [[Los Santos Customs/Respray Colors]]'' |
|''Main article: [[Los Santos Customs/Respray Colors]]'' |
||
| − | | colspan="2" style="text-align: center;" | |
+ | | colspan="2" style="text-align: center;" | - |
|- |
|- |
||
| colspan="2" |Sell |
| colspan="2" |Sell |
||
| Line 389: | Line 400: | ||
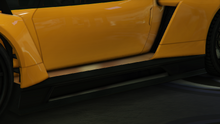
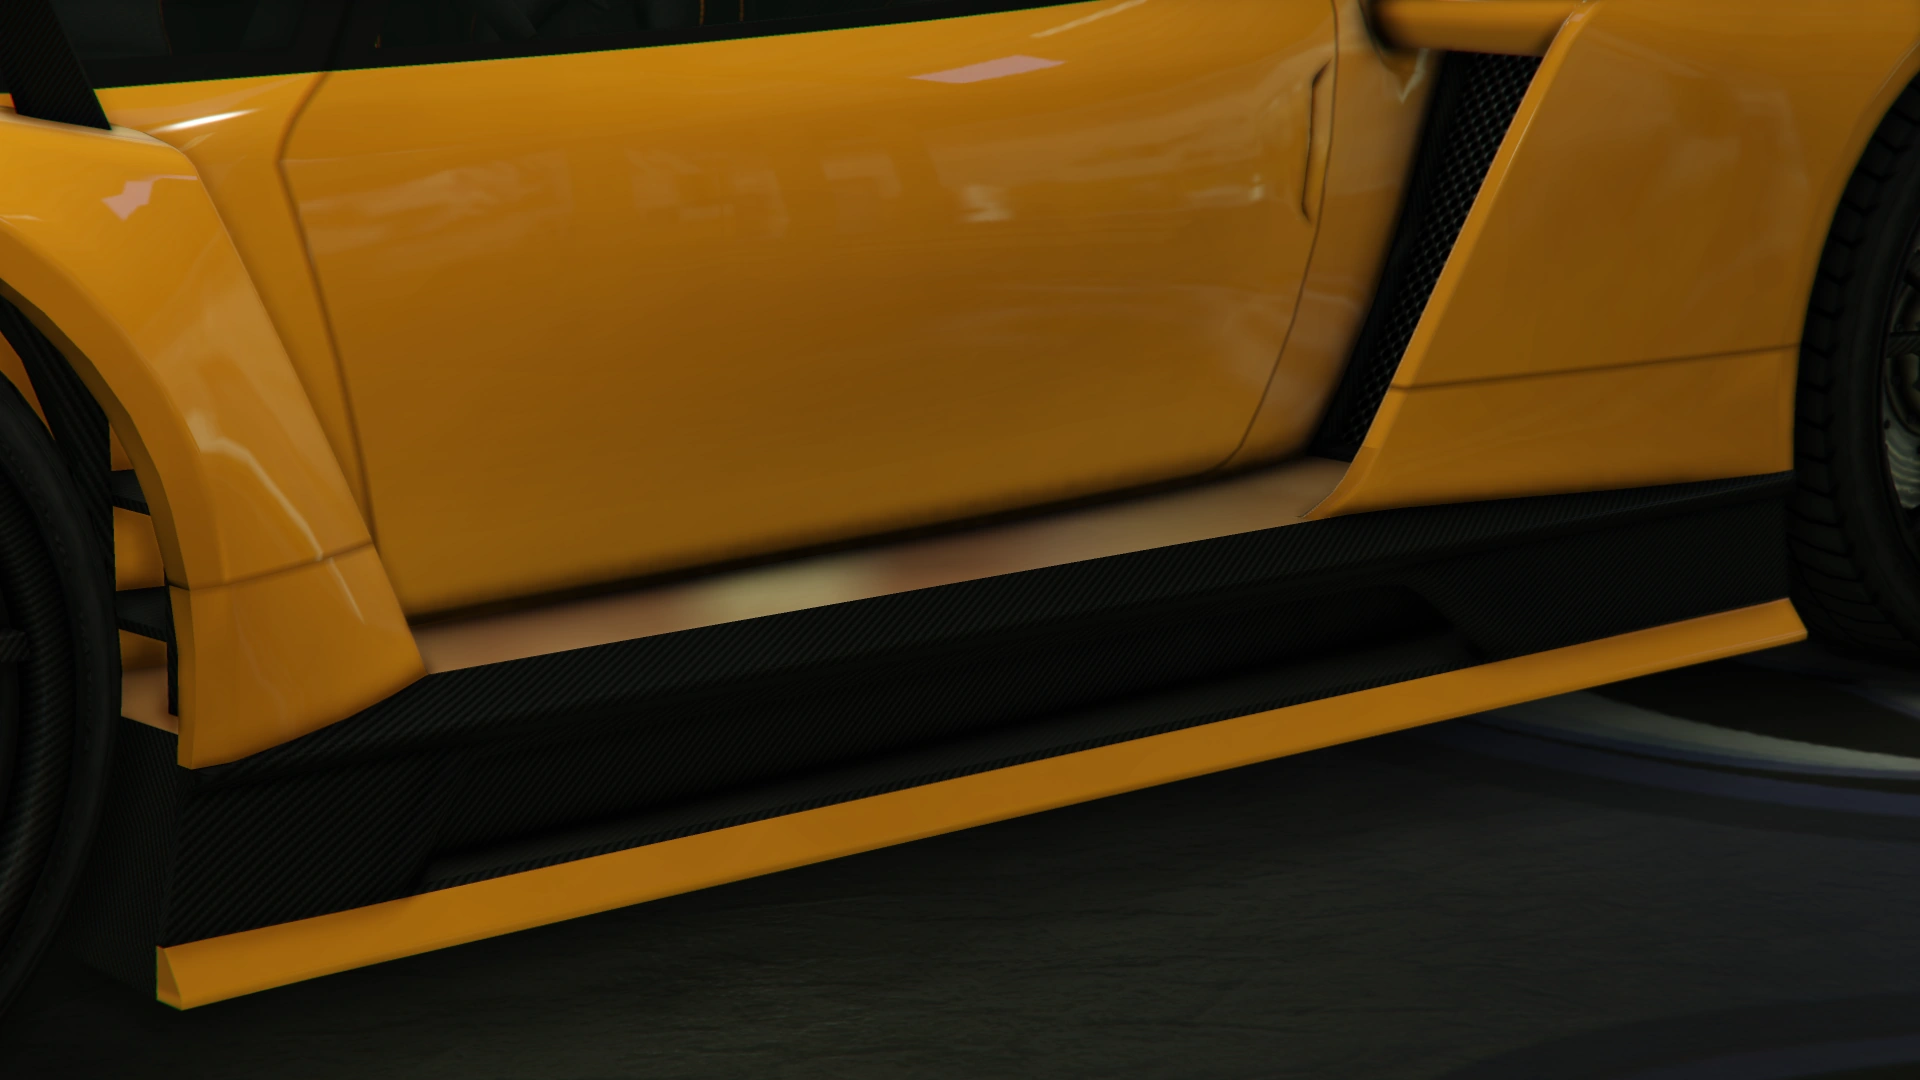
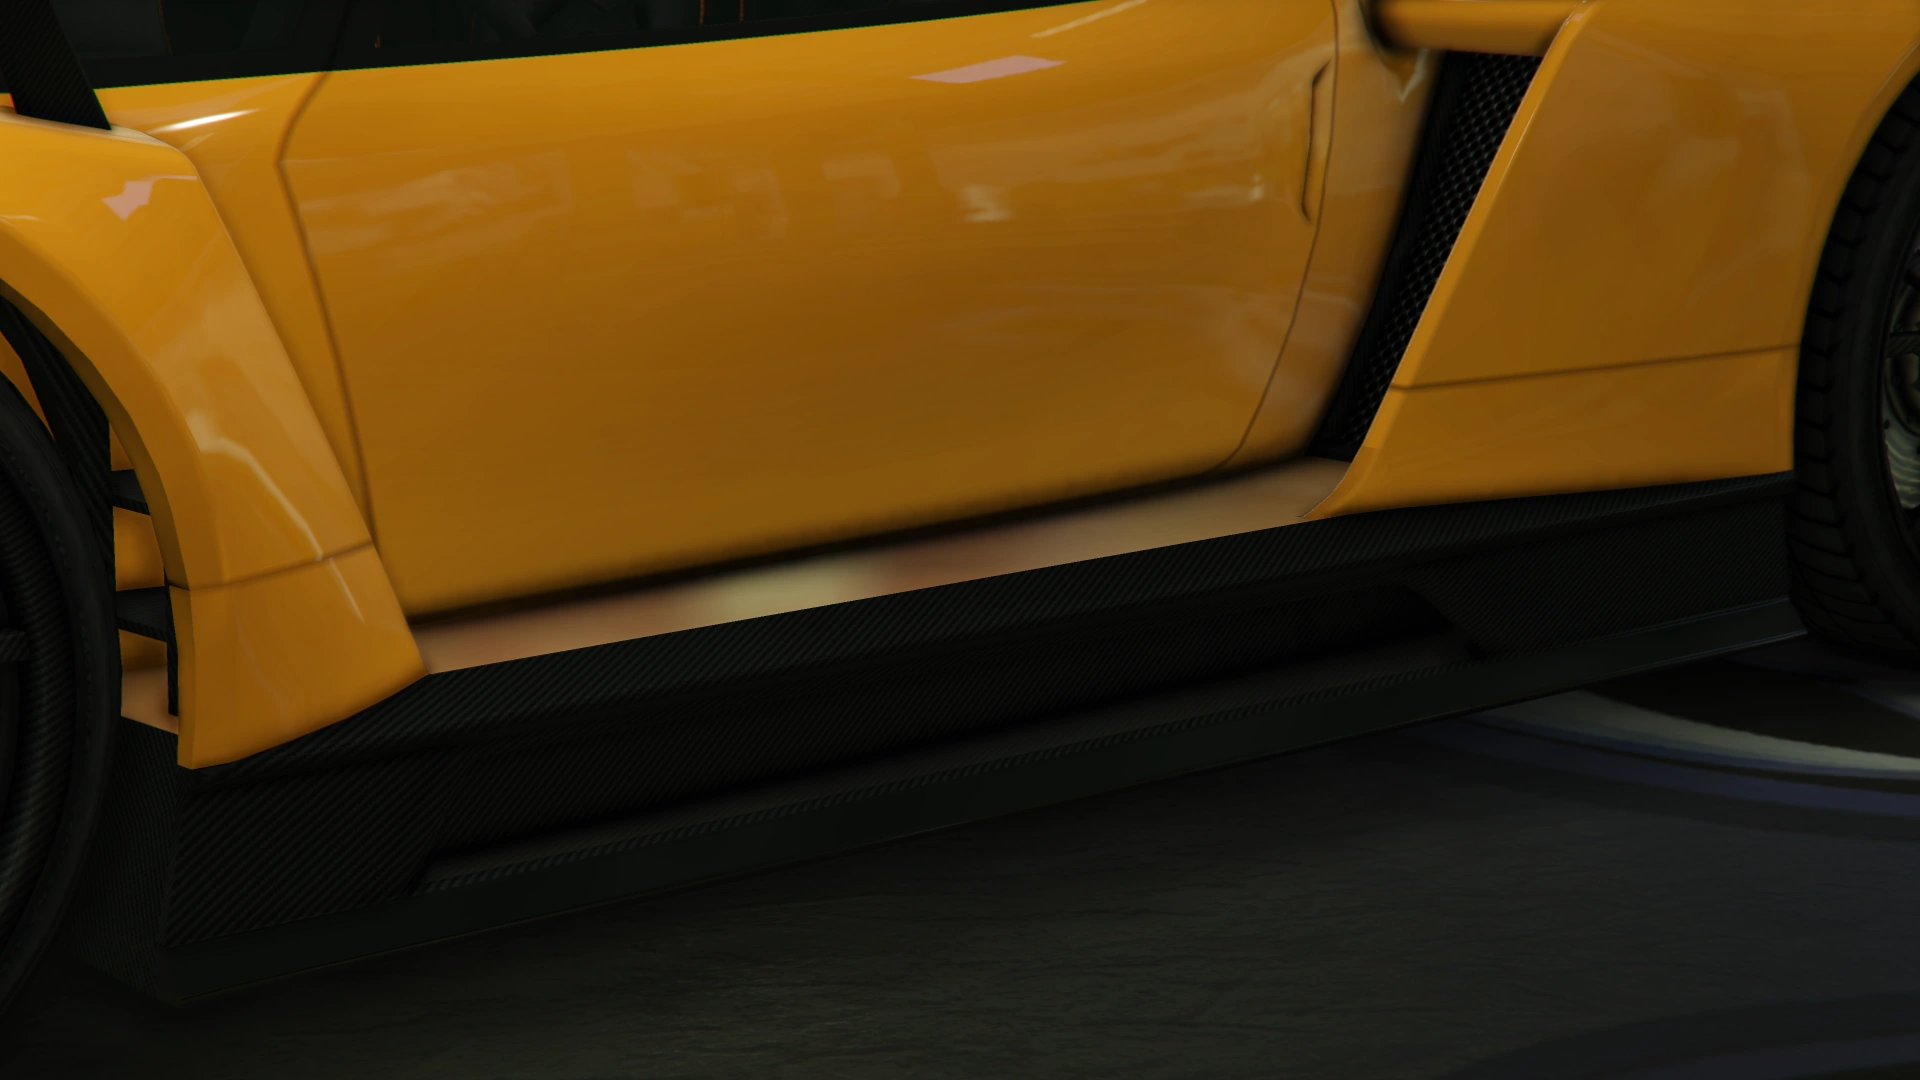
| colspan="2" rowspan="5" |Skirts |
| colspan="2" rowspan="5" |Skirts |
||
|Stock Skirts |
|Stock Skirts |
||
| − | | style="text-align: center;"|$2,500 |
+ | | style="text-align: center;" |$2,500 |
|[[File:Autarch-GTAO-StockSkirts.png|thumb|center|220px]] |
|[[File:Autarch-GTAO-StockSkirts.png|thumb|center|220px]] |
||
|- |
|- |
||
|Primary Skirts |
|Primary Skirts |
||
| − | | style="text-align: center;"|$5,500 |
+ | | style="text-align: center;" |$5,500 |
|[[File:Autarch-GTAO-PrimarySkirts.png|thumb|center|220px]] |
|[[File:Autarch-GTAO-PrimarySkirts.png|thumb|center|220px]] |
||
|- |
|- |
||
|Secondary Skirts |
|Secondary Skirts |
||
| − | | style="text-align: center;"|$8,000 |
+ | | style="text-align: center;" |$8,000 |
|[[File:Autarch-GTAO-SecondarySkirts.png|thumb|center|220px]] |
|[[File:Autarch-GTAO-SecondarySkirts.png|thumb|center|220px]] |
||
|- |
|- |
||
|Primary Carbon Skirts |
|Primary Carbon Skirts |
||
| − | | style="text-align: center;"|$10,500 |
+ | | style="text-align: center;" |$10,500 |
|[[File:Autarch-GTAO-PrimaryCarbonSkirts.png|thumb|center|220px]] |
|[[File:Autarch-GTAO-PrimaryCarbonSkirts.png|thumb|center|220px]] |
||
|- |
|- |
||
|Secondary Carbon Skirts |
|Secondary Carbon Skirts |
||
| − | | style="text-align: center;"|$14,000 |
+ | | style="text-align: center;" |$14,000 |
|[[File:Autarch-GTAO-SecondaryCarbonSkirts.png|thumb|center|220px]] |
|[[File:Autarch-GTAO-SecondaryCarbonSkirts.png|thumb|center|220px]] |
||
|- |
|- |
||
| colspan="2" rowspan="17" |Spoilers |
| colspan="2" rowspan="17" |Spoilers |
||
|None |
|None |
||
| − | | style="text-align: center;"|$6,000 |
+ | | style="text-align: center;" |$6,000 |
|[[File:Autarch-GTAO-NoSpoiler.png|thumb|center|220px]] |
|[[File:Autarch-GTAO-NoSpoiler.png|thumb|center|220px]] |
||
|- |
|- |
||
|Primary Stock Spoiler |
|Primary Stock Spoiler |
||
| − | | style="text-align: center;"|$7,050 |
+ | | style="text-align: center;" |$7,050 |
|[[File:Autarch-GTAO-PrimaryStockSpoiler.png|thumb|center|220px]] |
|[[File:Autarch-GTAO-PrimaryStockSpoiler.png|thumb|center|220px]] |
||
|- |
|- |
||
|Secondary Stock Spoiler |
|Secondary Stock Spoiler |
||
| − | | style="text-align: center;"|$10,000 |
+ | | style="text-align: center;" |$10,000 |
|[[File:Autarch-GTAO-SecondaryStockSpoiler.png|thumb|center|220px]] |
|[[File:Autarch-GTAO-SecondaryStockSpoiler.png|thumb|center|220px]] |
||
|- |
|- |
||
|Carbon Stock Spoiler |
|Carbon Stock Spoiler |
||
| − | | style="text-align: center;"|$13,000 |
+ | | style="text-align: center;" |$13,000 |
|[[File:Autarch-GTAO-CarbonStockSpoiler.png|thumb|center|220px]] |
|[[File:Autarch-GTAO-CarbonStockSpoiler.png|thumb|center|220px]] |
||
|- |
|- |
||
|Primary Raised Spoiler |
|Primary Raised Spoiler |
||
| − | | style="text-align: center;"|$14,000 |
+ | | style="text-align: center;" |$14,000 |
|[[File:Autarch-GTAO-PrimaryRaisedSpoiler.png|thumb|center|220px]] |
|[[File:Autarch-GTAO-PrimaryRaisedSpoiler.png|thumb|center|220px]] |
||
|- |
|- |
||
|Secondary Raised Spoiler |
|Secondary Raised Spoiler |
||
| − | | style="text-align: center;"|$16,000 |
+ | | style="text-align: center;" |$16,000 |
|[[File:Autarch-GTAO-SecondaryRaisedSpoiler.png|thumb|center|220px]] |
|[[File:Autarch-GTAO-SecondaryRaisedSpoiler.png|thumb|center|220px]] |
||
|- |
|- |
||
|Carbon Raised Spoiler |
|Carbon Raised Spoiler |
||
| − | | style="text-align: center;"|$16,500 |
+ | | style="text-align: center;" |$16,500 |
|[[File:Autarch-GTAO-CarbonRaisedSpoiler.png|thumb|center|220px]] |
|[[File:Autarch-GTAO-CarbonRaisedSpoiler.png|thumb|center|220px]] |
||
|- |
|- |
||
|Primary Sport Spoiler |
|Primary Sport Spoiler |
||
| − | | style="text-align: center;"|$17,000 |
+ | | style="text-align: center;" |$17,000 |
|[[File:Autarch-GTAO-PrimarySportSpoiler.png|thumb|center|220px]] |
|[[File:Autarch-GTAO-PrimarySportSpoiler.png|thumb|center|220px]] |
||
|- |
|- |
||
|Secondary Sport Spoiler |
|Secondary Sport Spoiler |
||
| − | | style="text-align: center;"|$17,500 |
+ | | style="text-align: center;" |$17,500 |
|[[File:Autarch-GTAO-SecondarySportSpoiler.png|thumb|center|220px]] |
|[[File:Autarch-GTAO-SecondarySportSpoiler.png|thumb|center|220px]] |
||
|- |
|- |
||
|Primary Aggressor Spoiler |
|Primary Aggressor Spoiler |
||
| − | | style="text-align: center;"|$18,000 |
+ | | style="text-align: center;" |$18,000 |
|[[File:Autarch-GTAO-PrimaryAggressorSpoiler.png|thumb|center|220px]] |
|[[File:Autarch-GTAO-PrimaryAggressorSpoiler.png|thumb|center|220px]] |
||
|- |
|- |
||
|Secondary Aggressor Spoiler |
|Secondary Aggressor Spoiler |
||
| − | | style="text-align: center;"|$18,500 |
+ | | style="text-align: center;" |$18,500 |
|[[File:Autarch-GTAO-SecondaryAggressorSpoiler.png|thumb|center|220px]] |
|[[File:Autarch-GTAO-SecondaryAggressorSpoiler.png|thumb|center|220px]] |
||
|- |
|- |
||
|Primary Race Spoiler |
|Primary Race Spoiler |
||
| − | | style="text-align: center;"|$19,000 |
+ | | style="text-align: center;" |$19,000 |
|[[File:Autarch-GTAO-PrimaryRaceSpoiler.png|thumb|center|220px]] |
|[[File:Autarch-GTAO-PrimaryRaceSpoiler.png|thumb|center|220px]] |
||
|- |
|- |
||
|Secondary Race Spoiler |
|Secondary Race Spoiler |
||
| − | | style="text-align: center;"|$19,500 |
+ | | style="text-align: center;" |$19,500 |
|[[File:Autarch-GTAO-SecondaryRaceSpoiler.png|thumb|center|220px]] |
|[[File:Autarch-GTAO-SecondaryRaceSpoiler.png|thumb|center|220px]] |
||
|- |
|- |
||
|Primary GT Spoiler |
|Primary GT Spoiler |
||
| − | | style="text-align: center;"|$20,000 |
+ | | style="text-align: center;" |$20,000 |
|[[File:Autarch-GTAO-PrimaryGTSpoiler.png|thumb|center|220px]] |
|[[File:Autarch-GTAO-PrimaryGTSpoiler.png|thumb|center|220px]] |
||
|- |
|- |
||
|Secondary GT Spoiler |
|Secondary GT Spoiler |
||
| − | | style="text-align: center;"|$20,500 |
+ | | style="text-align: center;" |$20,500 |
|[[File:Autarch-GTAO-SecondaryGTSpoiler.png|thumb|center|220px]] |
|[[File:Autarch-GTAO-SecondaryGTSpoiler.png|thumb|center|220px]] |
||
|- |
|- |
||
|Primary High Spoiler |
|Primary High Spoiler |
||
| − | | style="text-align: center;"|$21,000 |
+ | | style="text-align: center;" |$21,000 |
|[[File:Autarch-GTAO-PrimaryHighSpoiler.png|thumb|center|220px]] |
|[[File:Autarch-GTAO-PrimaryHighSpoiler.png|thumb|center|220px]] |
||
|- |
|- |
||
|Secondary High Spoiler |
|Secondary High Spoiler |
||
| − | | style="text-align: center;"|$21,500 |
+ | | style="text-align: center;" |$21,500 |
|[[File:Autarch-GTAO-SecondaryHighSpoiler.png|thumb|center|220px]] |
|[[File:Autarch-GTAO-SecondaryHighSpoiler.png|thumb|center|220px]] |
||
|- |
|- |
||
| Line 515: | Line 526: | ||
| colspan="2" |Wheels |
| colspan="2" |Wheels |
||
|''Main artivle: [[Los Santos Customs/Wheels]]'' |
|''Main artivle: [[Los Santos Customs/Wheels]]'' |
||
| − | | colspan="2" style="text-align: center;" | |
+ | | colspan="2" style="text-align: center;" | - |
|- |
|- |
||
| colspan="2" rowspan="4" |Windows |
| colspan="2" rowspan="4" |Windows |
||
|None |
|None |
||
| − | | colspan="2" style="text-align: center;"|$500 |
+ | | colspan="2" style="text-align: center;" |$500 |
|- |
|- |
||
|Light Smoke |
|Light Smoke |
||
| − | | colspan="2" style="text-align: center;"|$1,500 |
+ | | colspan="2" style="text-align: center;" |$1,500 |
|- |
|- |
||
|Dark Smoke |
|Dark Smoke |
||
| − | | colspan="2" style="text-align: center;"|$3,500 |
+ | | colspan="2" style="text-align: center;" |$3,500 |
|- |
|- |
||
|Limo |
|Limo |
||
| − | | colspan="2" style="text-align: center;"|$5,000 |
+ | | colspan="2" style="text-align: center;" |$5,000 |
|} |
|} |
||
| Line 534: | Line 545: | ||
===''Grand Theft Auto Online''=== |
===''Grand Theft Auto Online''=== |
||
<gallery position="center" spacing="small" hideaddbutton="true"> |
<gallery position="center" spacing="small" hideaddbutton="true"> |
||
| ⚫ | |||
Autarch-GTAO-PromotionalPoster.jpg|The promotional poster of the '''Autarch'''. |
Autarch-GTAO-PromotionalPoster.jpg|The promotional poster of the '''Autarch'''. |
||
| ⚫ | |||
Autarch-GTAO-RGSC.jpg|The '''Autarch''' on [[Rockstar Games Social Club]]. |
Autarch-GTAO-RGSC.jpg|The '''Autarch''' on [[Rockstar Games Social Club]]. |
||
| + | OverflodAutarch-GTAO-SocialClub2.jpg|The '''Autarch''' on the updated [[Rockstar Games Social Club]]. |
||
| + | OverflodAutarch-GTAO-SocialClub3.jpg|The '''Autarch''' on the Cinematic Preview on [[Rockstar Games Social Club]]. |
||
</gallery> |
</gallery> |
||
===Video=== |
===Video=== |
||
[[File:GTA Online - Overflod Autarch -The Doomsday Heist-|center|330px]] |
[[File:GTA Online - Overflod Autarch -The Doomsday Heist-|center|330px]] |
||
| + | |||
| + | ==Prominent Appearances in Missions== |
||
| + | ===''Grand Theft Auto Online''=== |
||
| + | *Can appear in the "[[Under the Influence]]" [[Casino Work]], where it must be delivered to the [[The Diamond Casino & Resort|Casino]] while the protagonist is under the influence of alcohol. |
||
==Locations== |
==Locations== |
||
| Line 553: | Line 570: | ||
==See Also== |
==See Also== |
||
*[[Entity XF]] - Another hypercar manufactured by [[Överflöd]]. |
*[[Entity XF]] - Another hypercar manufactured by [[Överflöd]]. |
||
| − | *[[Tyrant]] - Another hypercar manufactured by |
+ | *[[Tyrant]] - Another hypercar manufactured by Överflöd. |
==Navigation== |
==Navigation== |
||
| Line 561: | Line 578: | ||
{{vehicles}} |
{{vehicles}} |
||
{{gtav vehicles}} |
{{gtav vehicles}} |
||
| ⚫ | |||
| − | }} |
||
| ⚫ | |||
[[es:Autarch]] |
[[es:Autarch]] |
||
[[hu:Autarch]] |
[[hu:Autarch]] |
||
Revision as of 23:59, 19 March 2020
Template:Next-Gen Template:Infobox vehicles
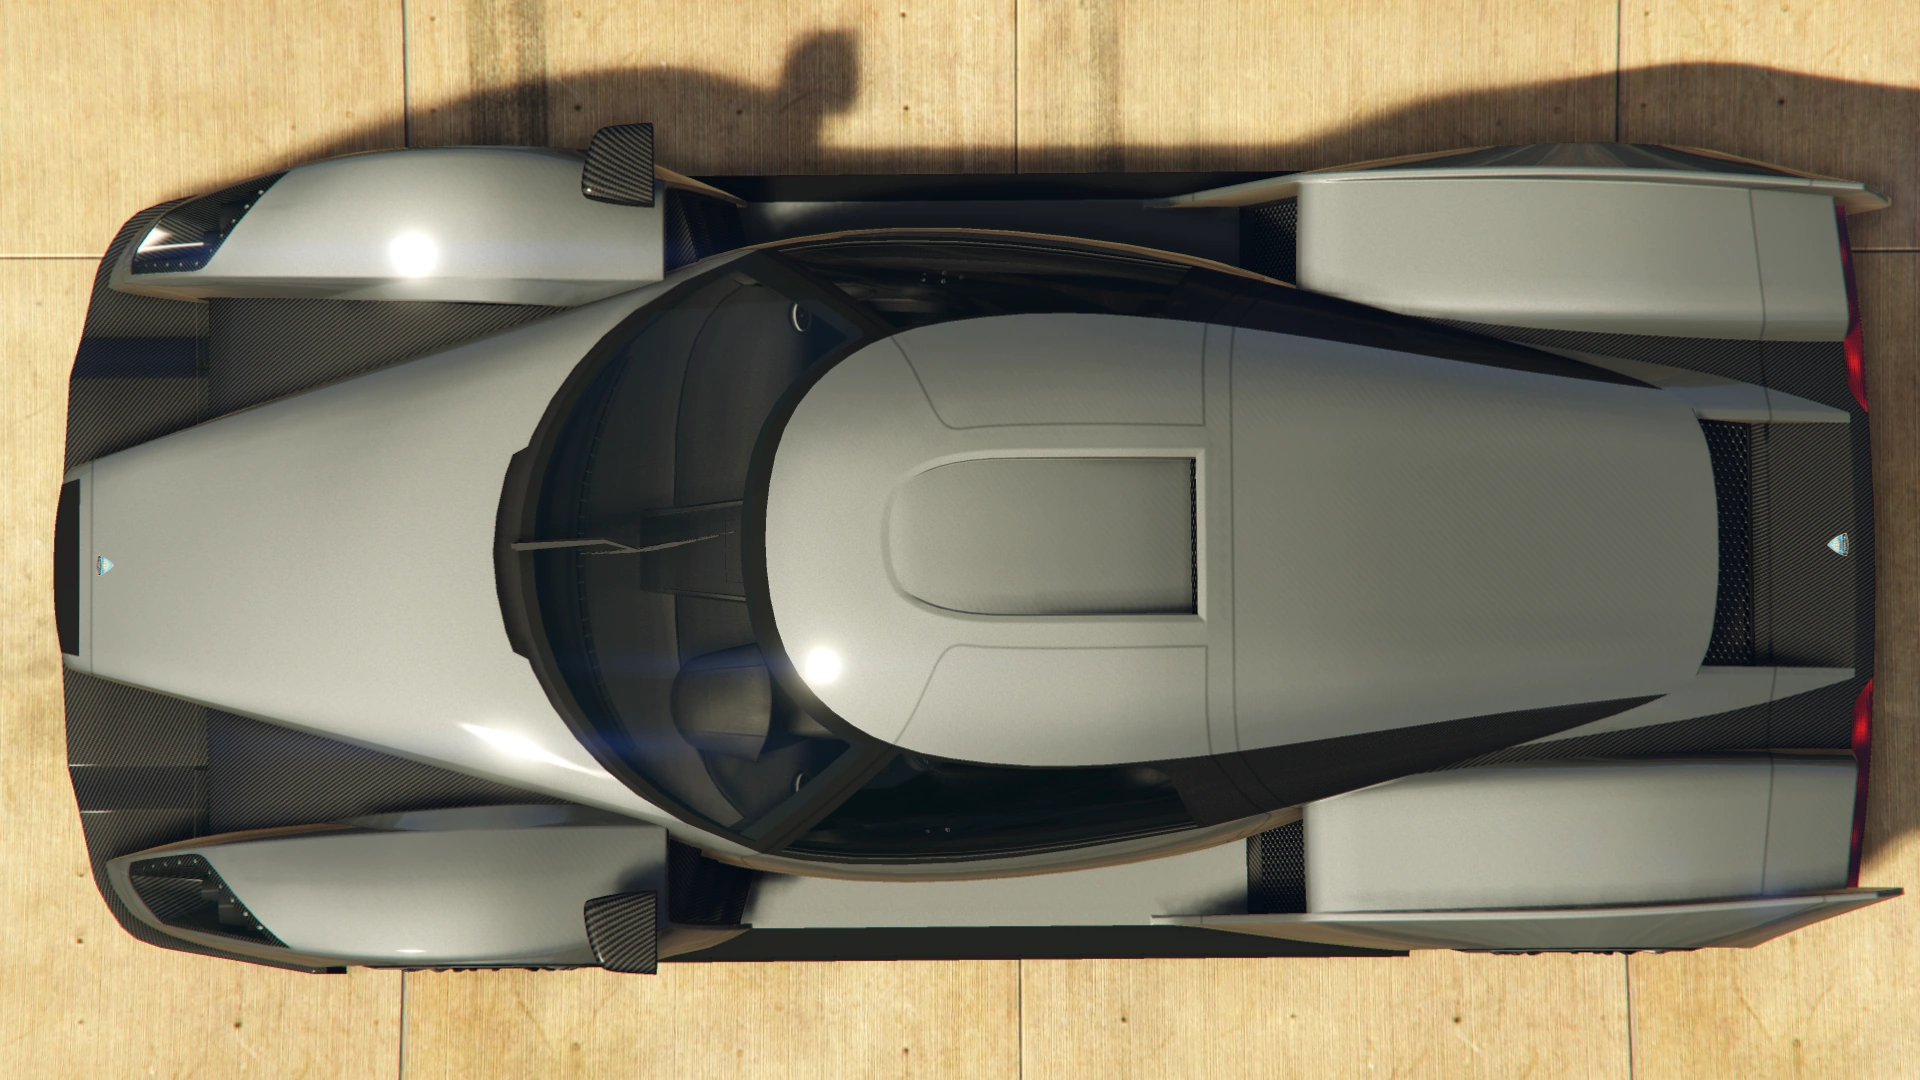
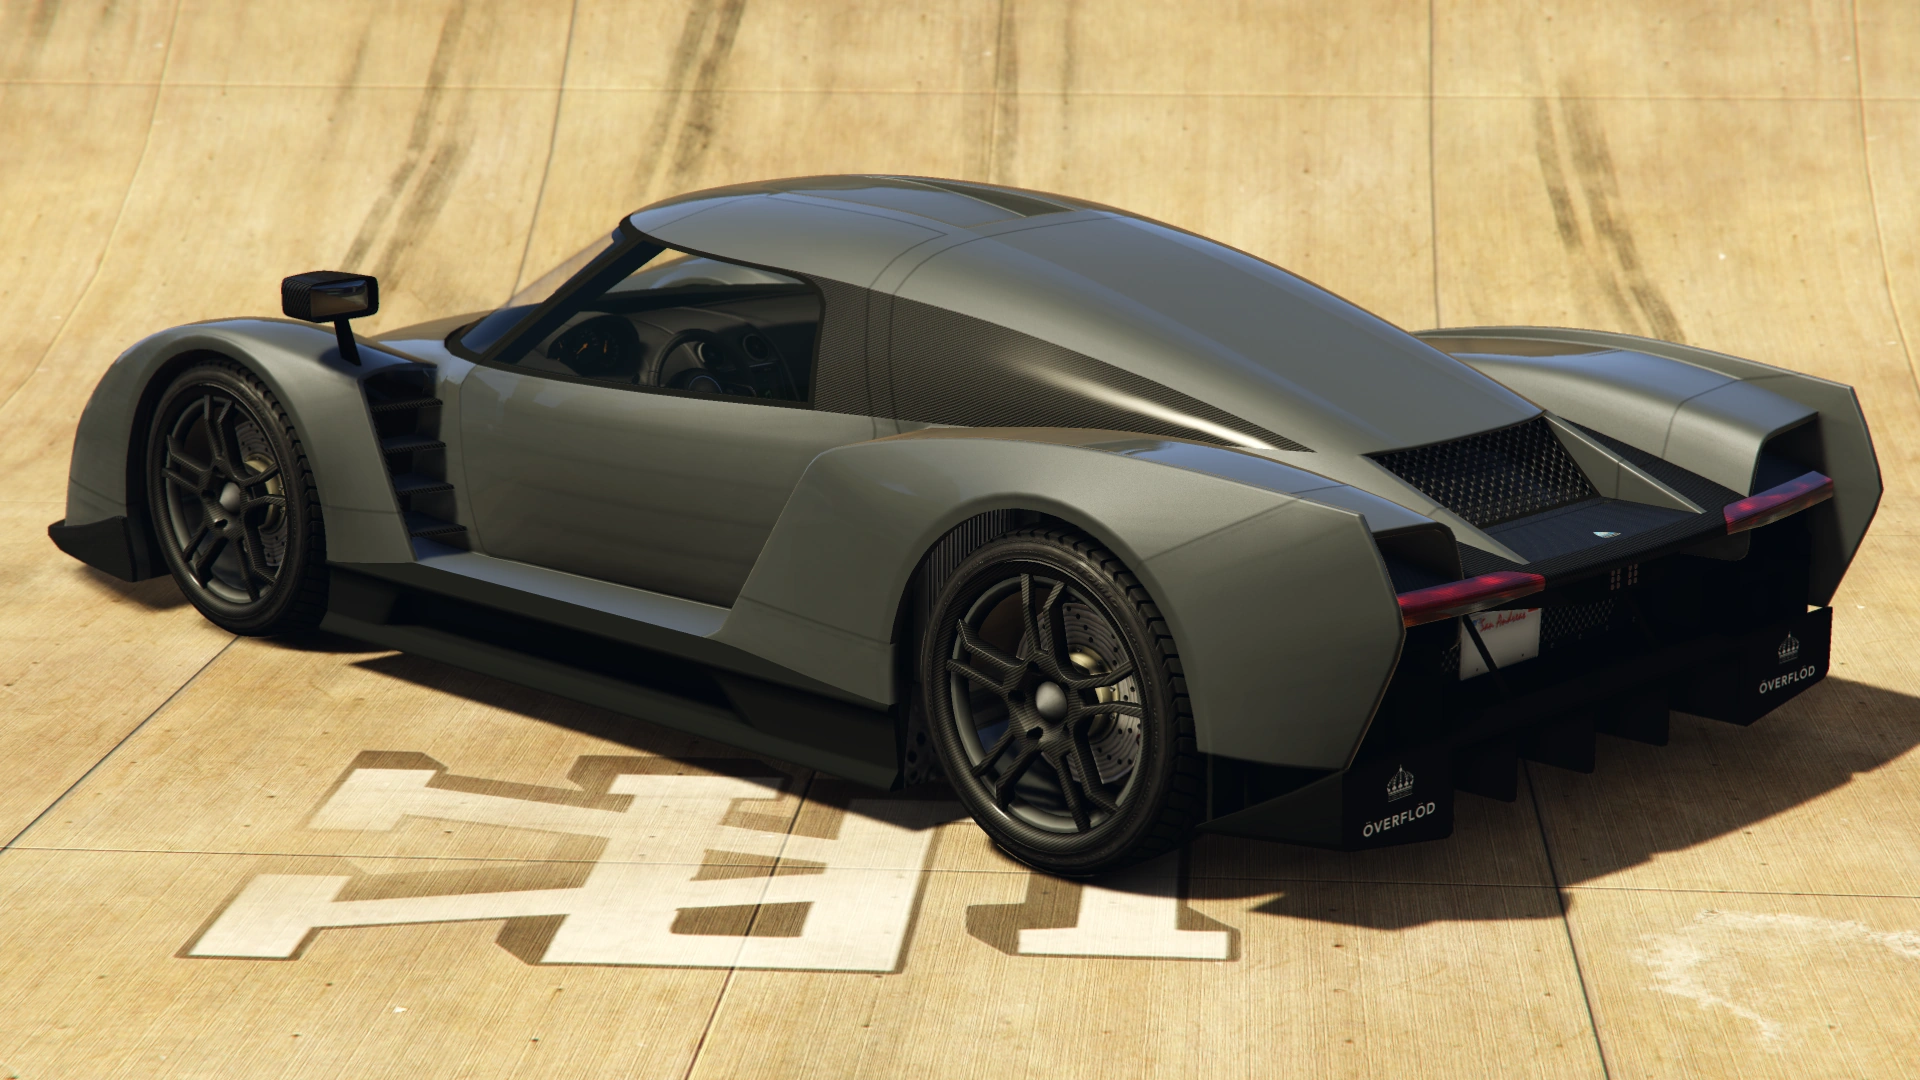
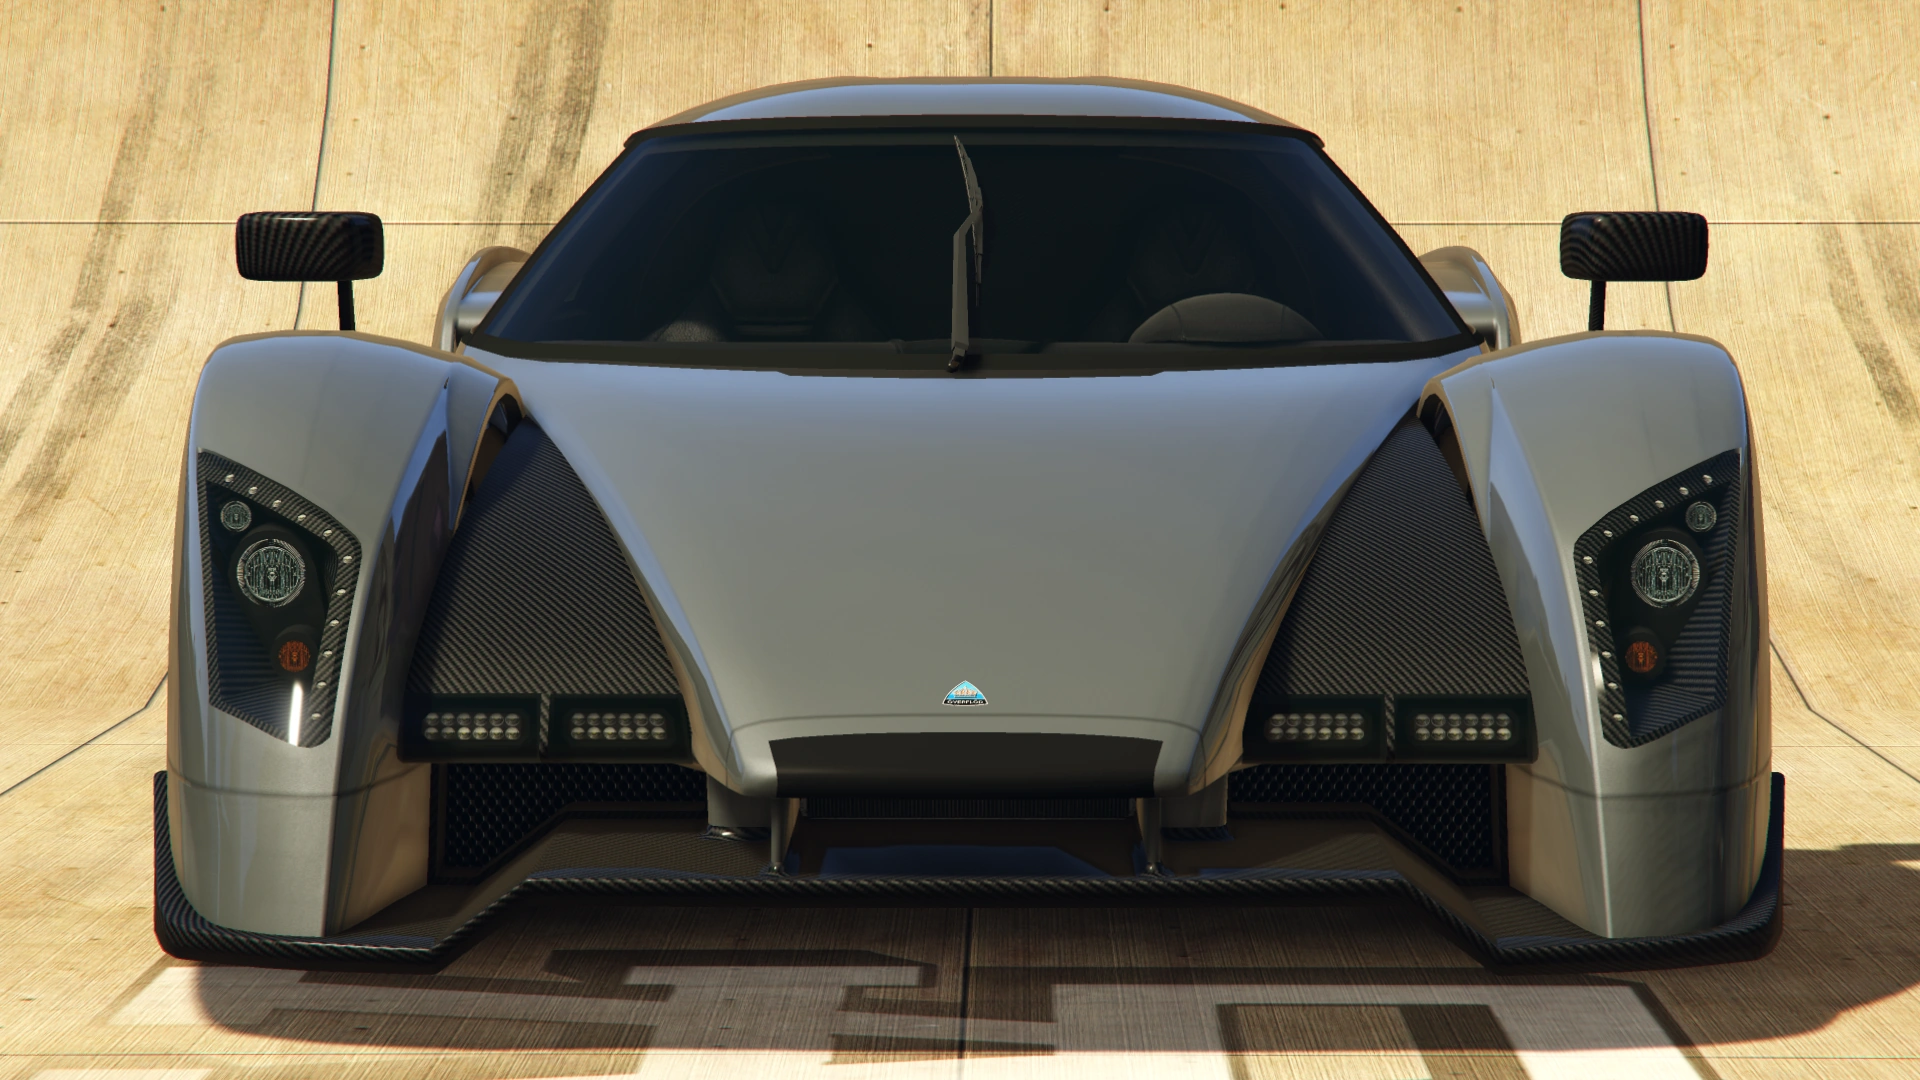
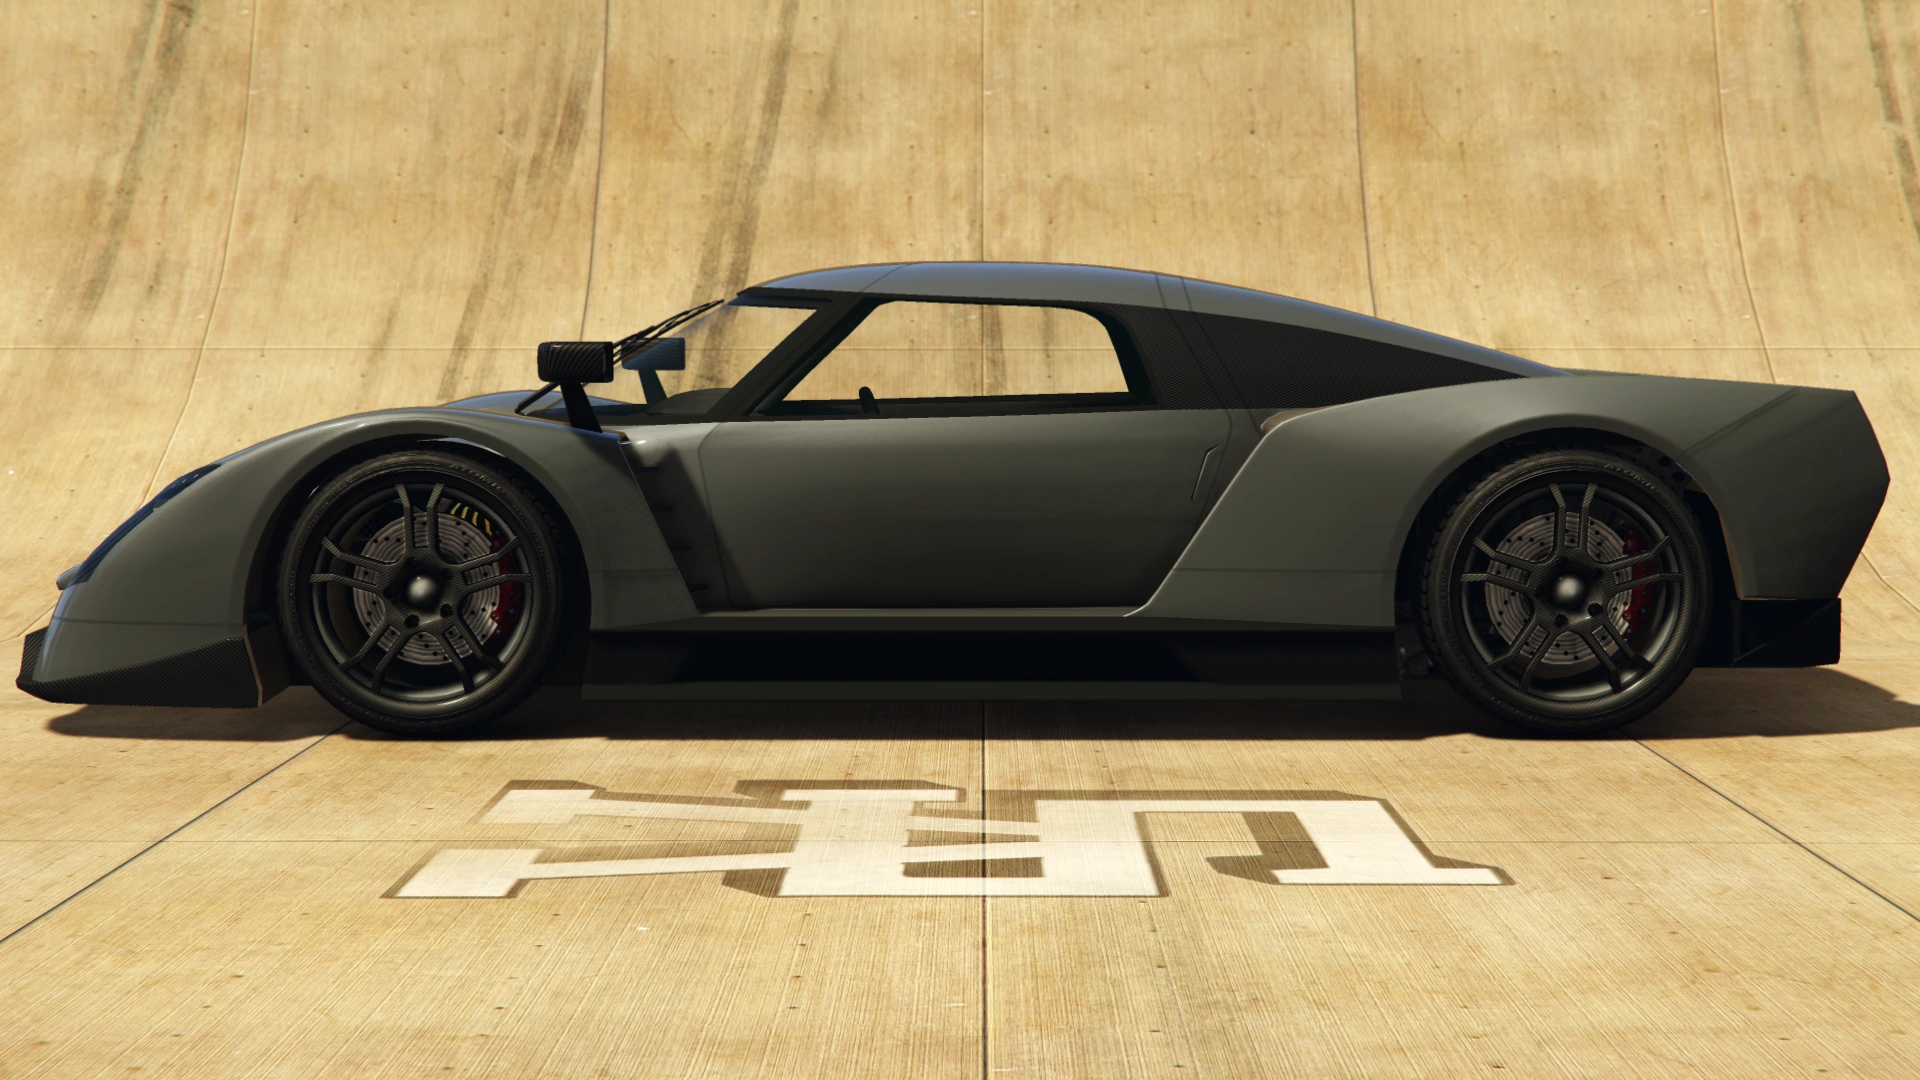
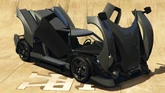
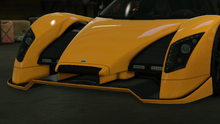
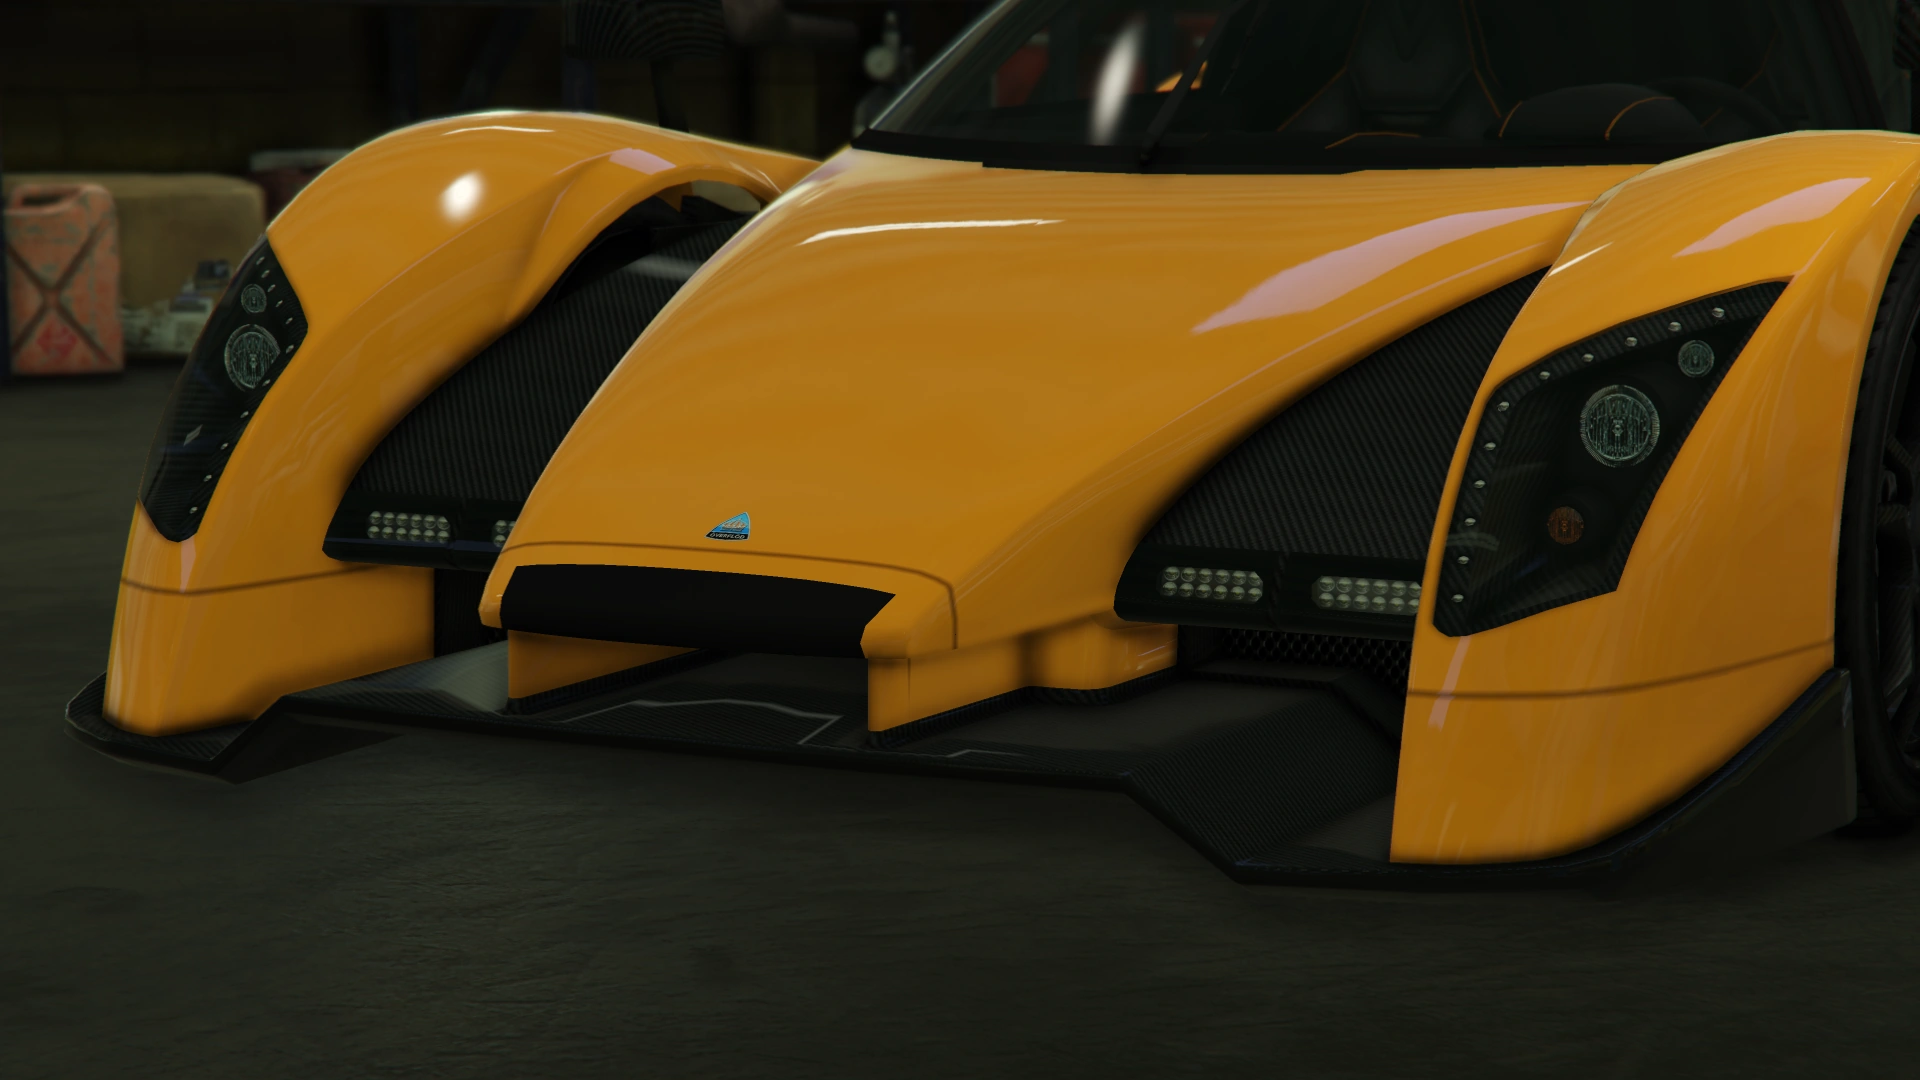
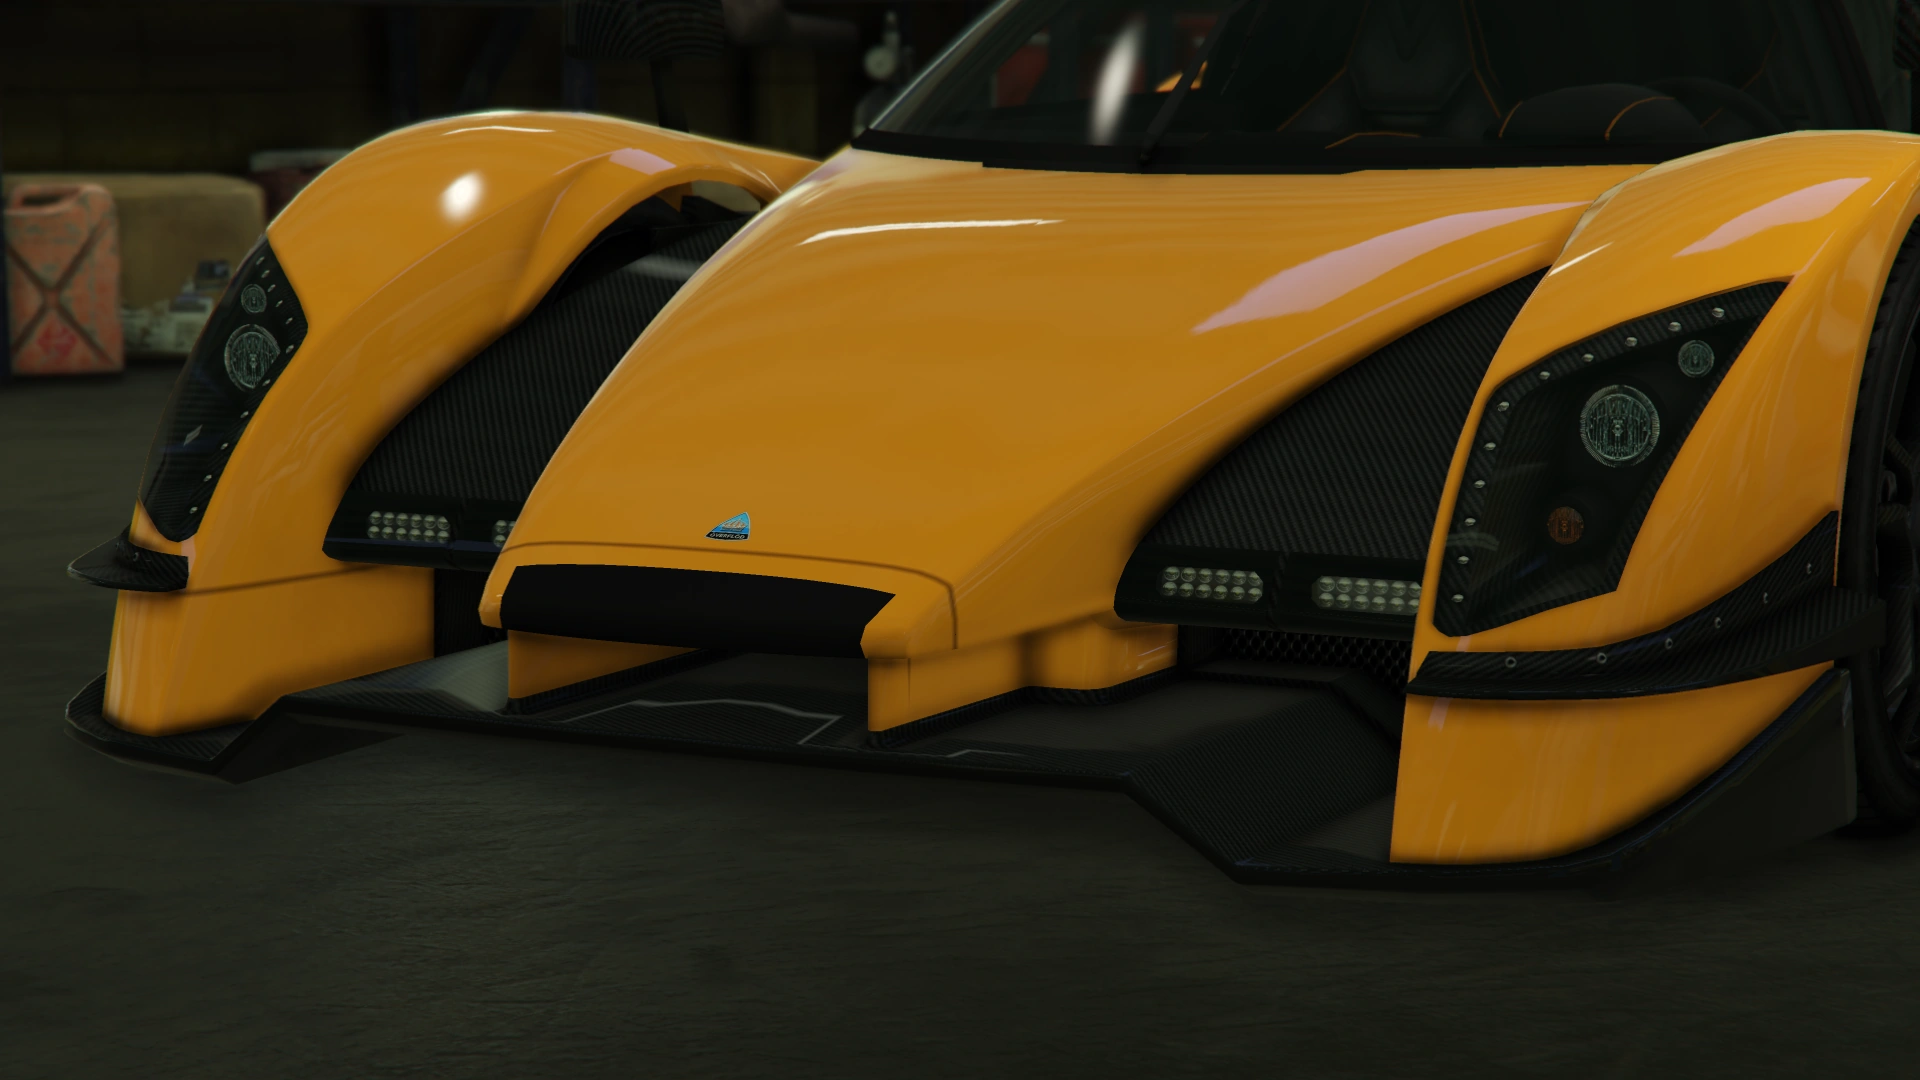
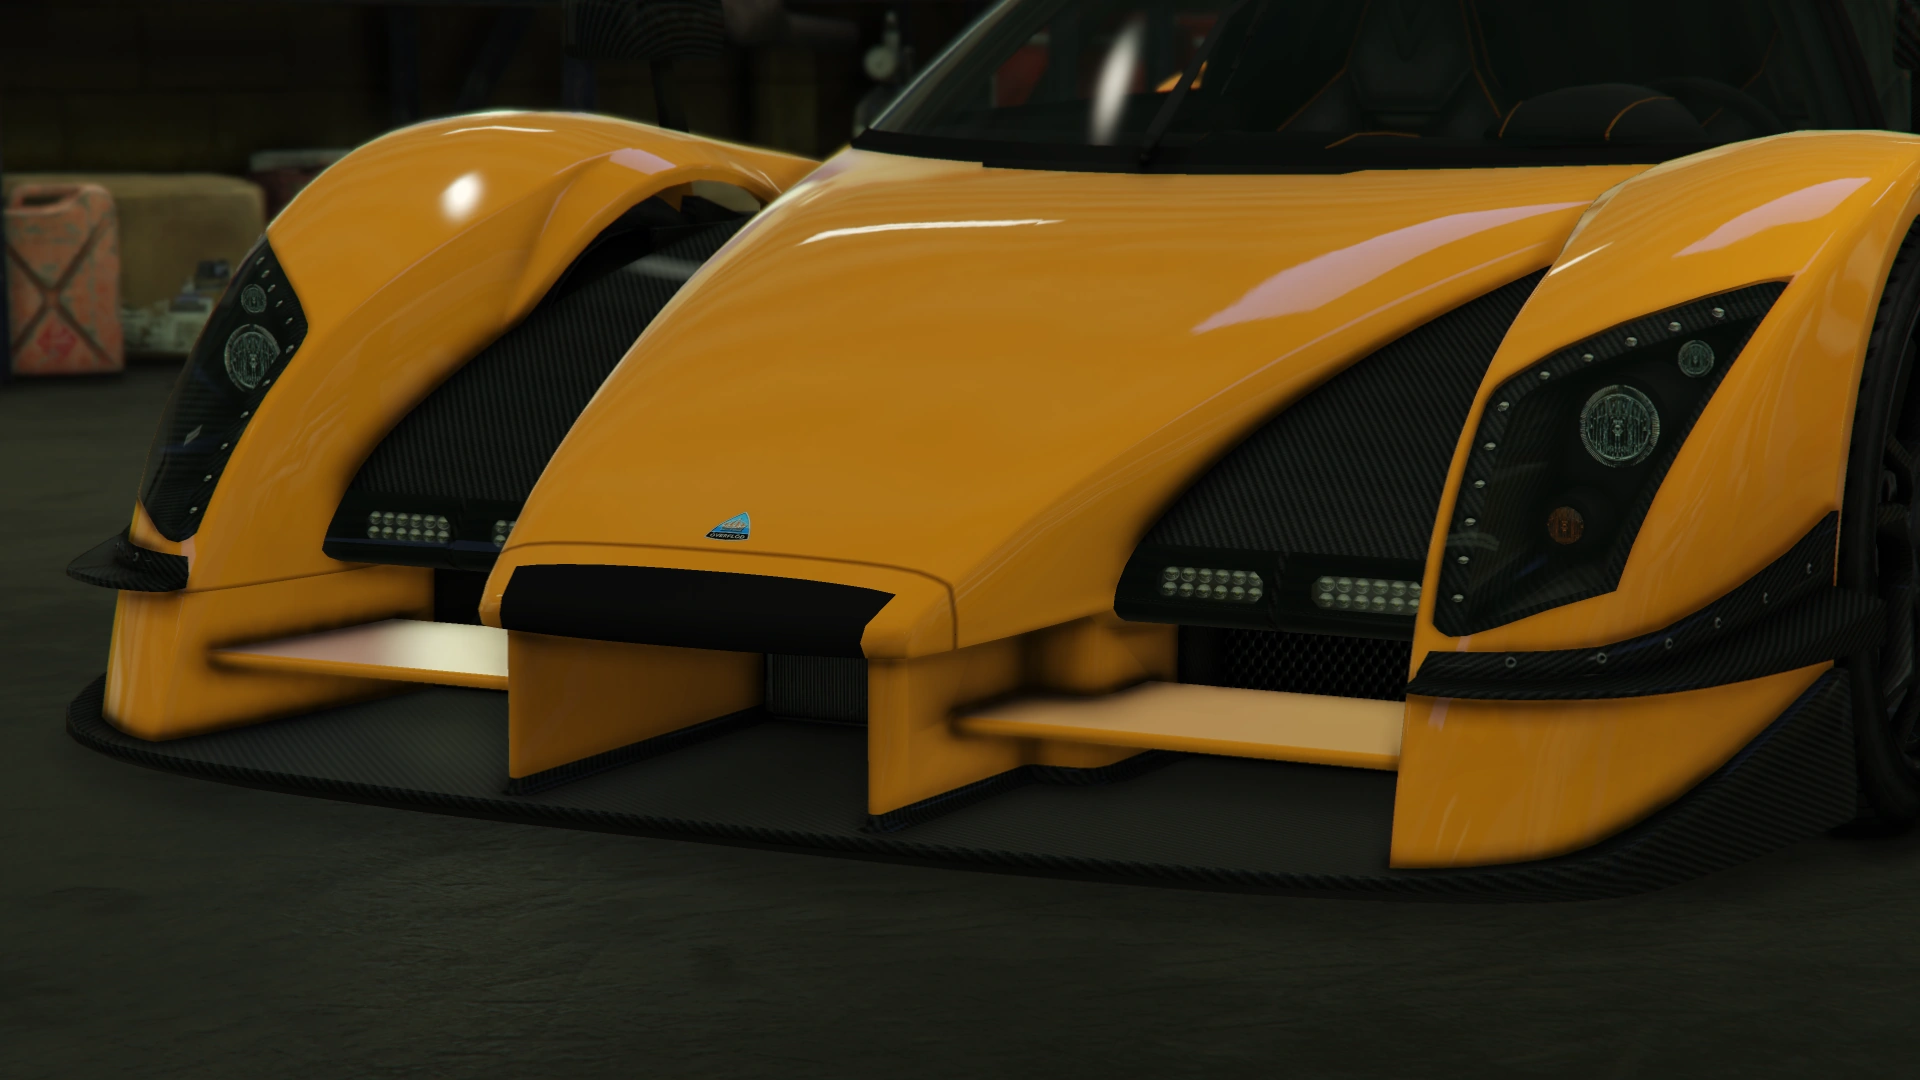
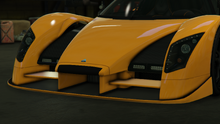
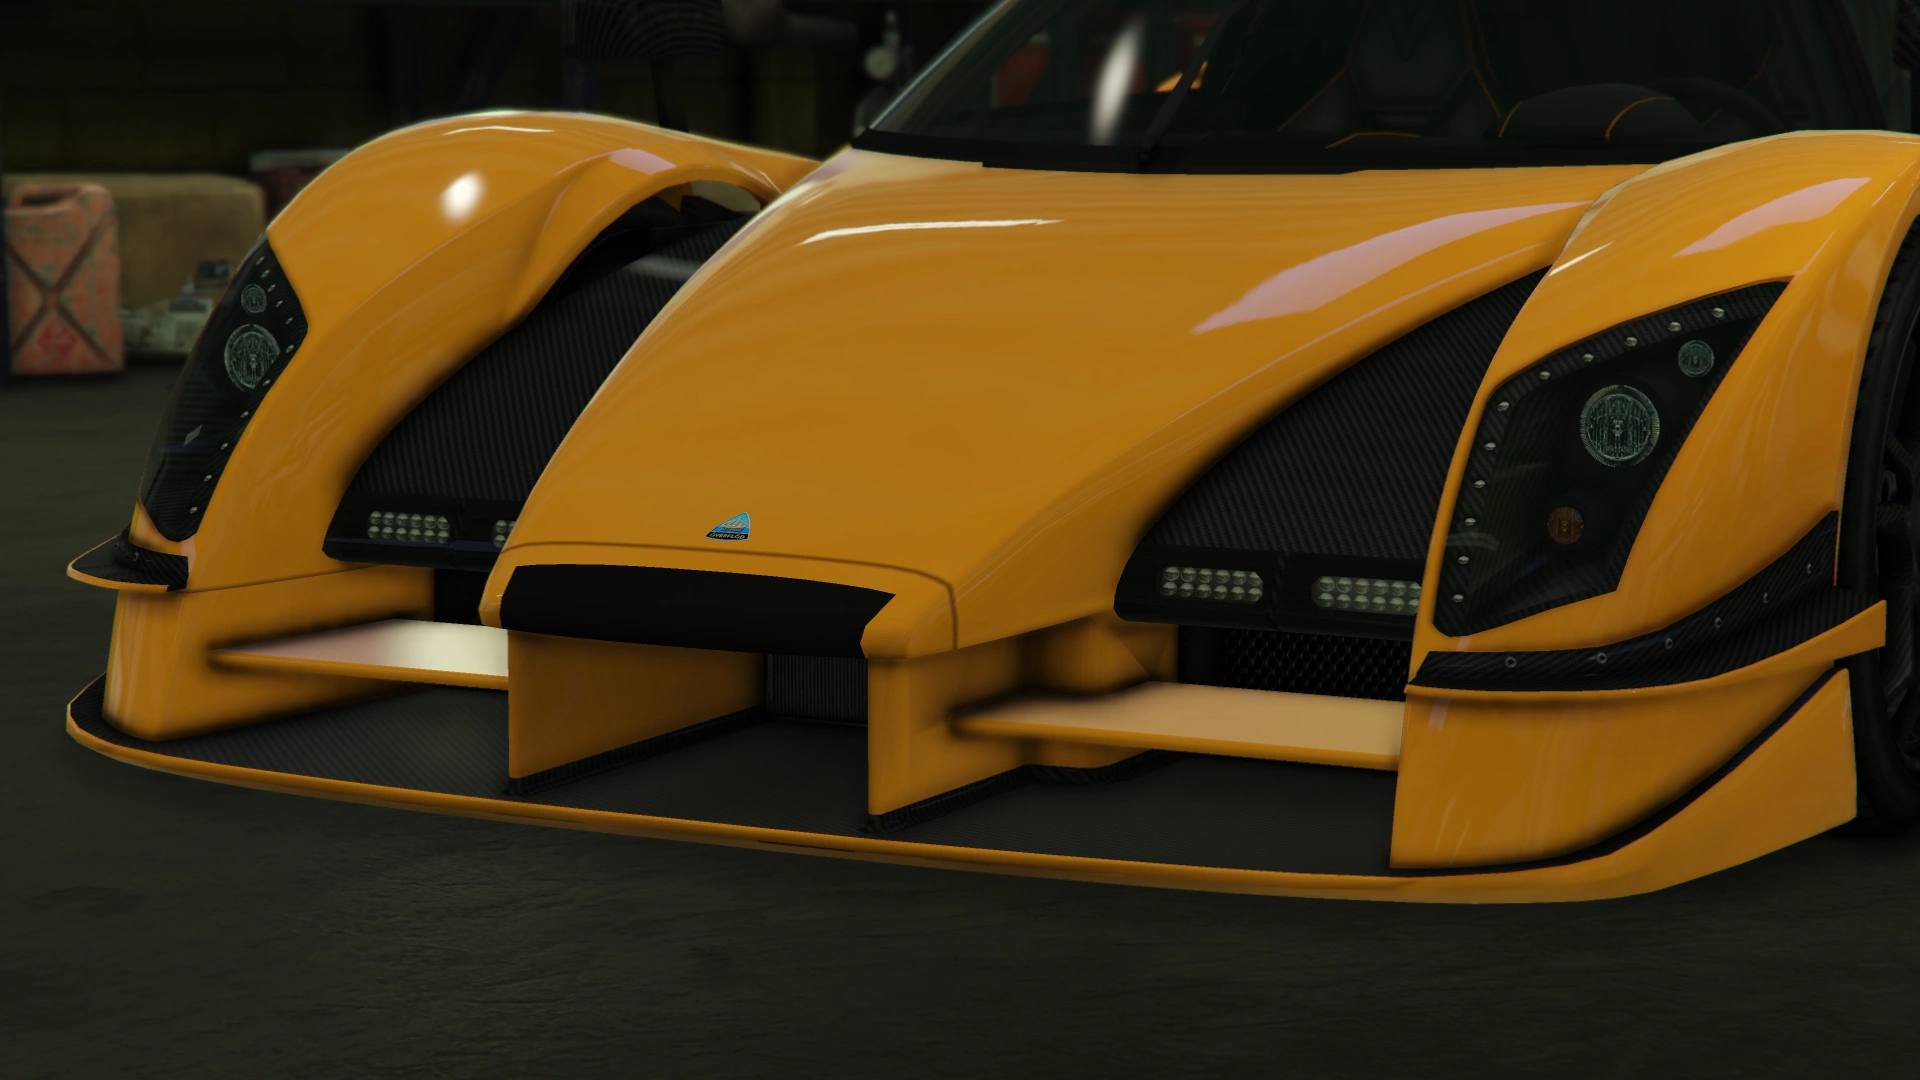
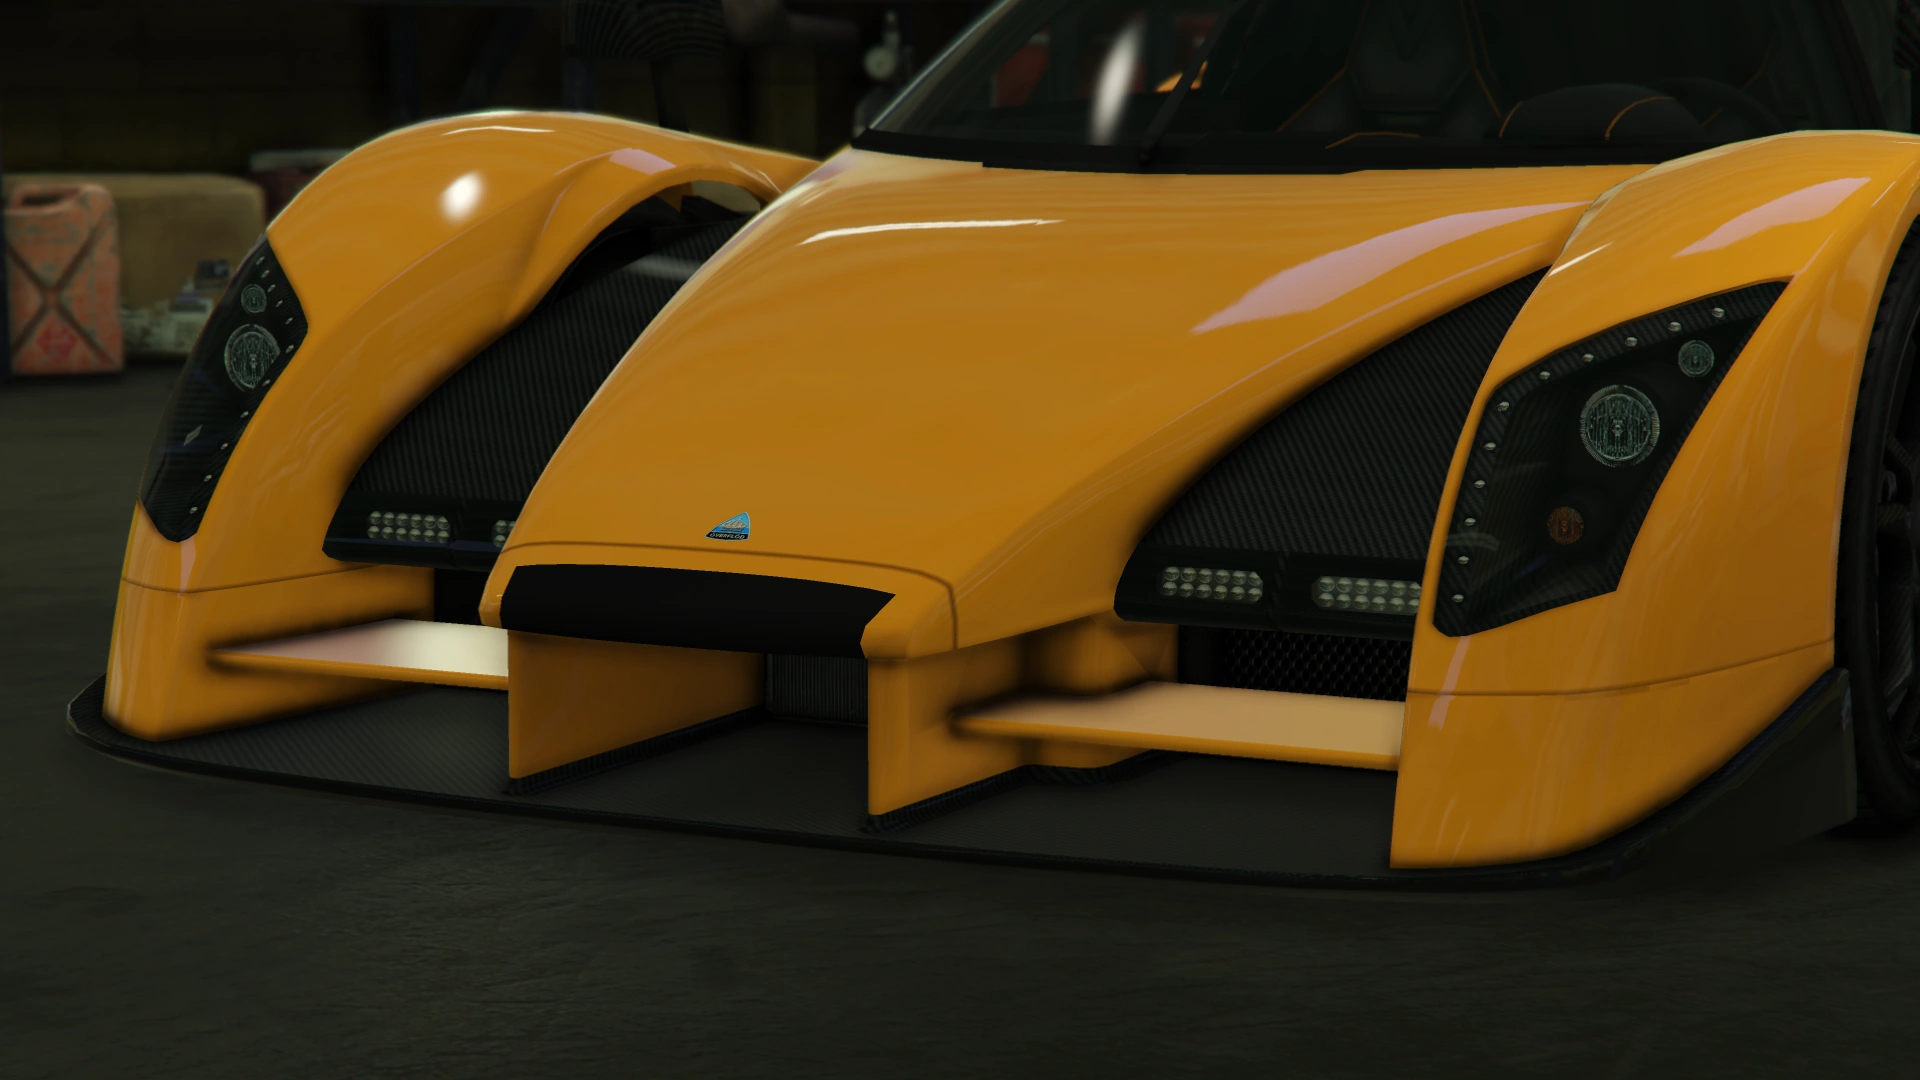
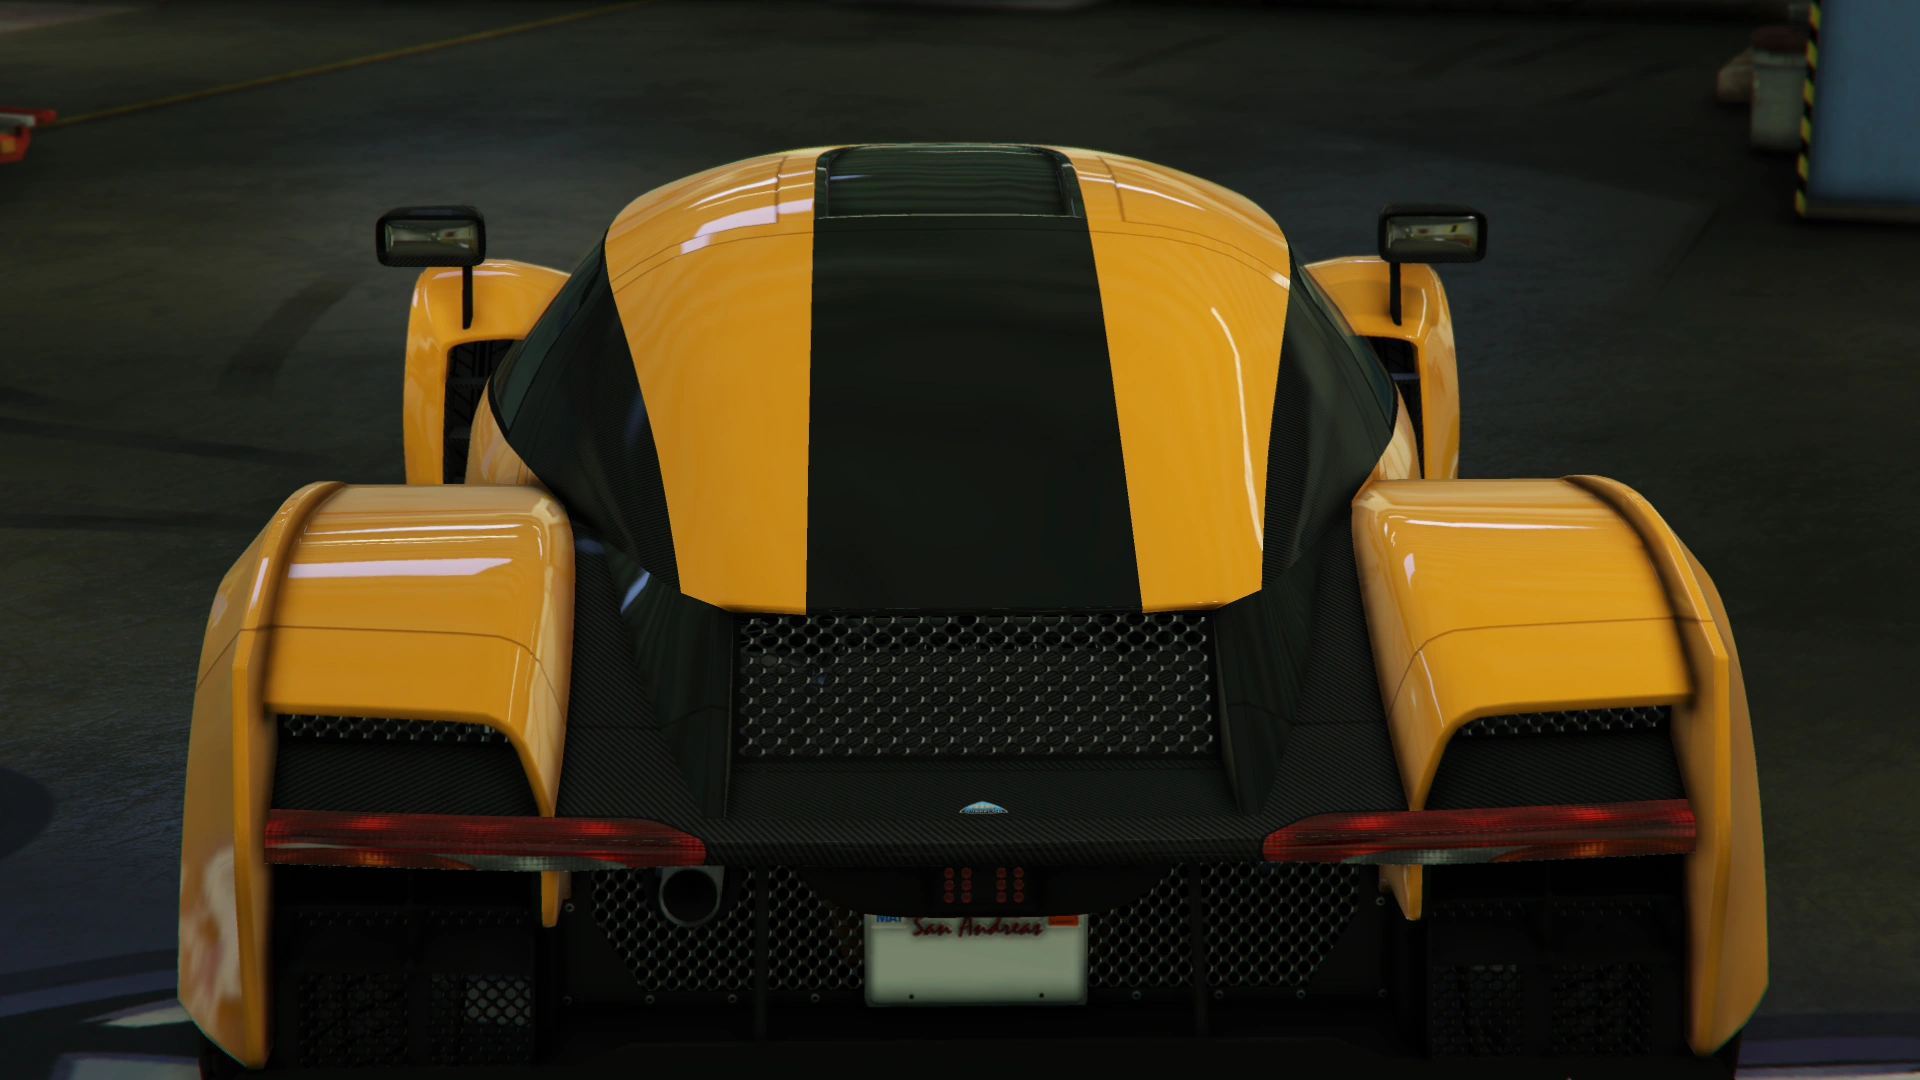
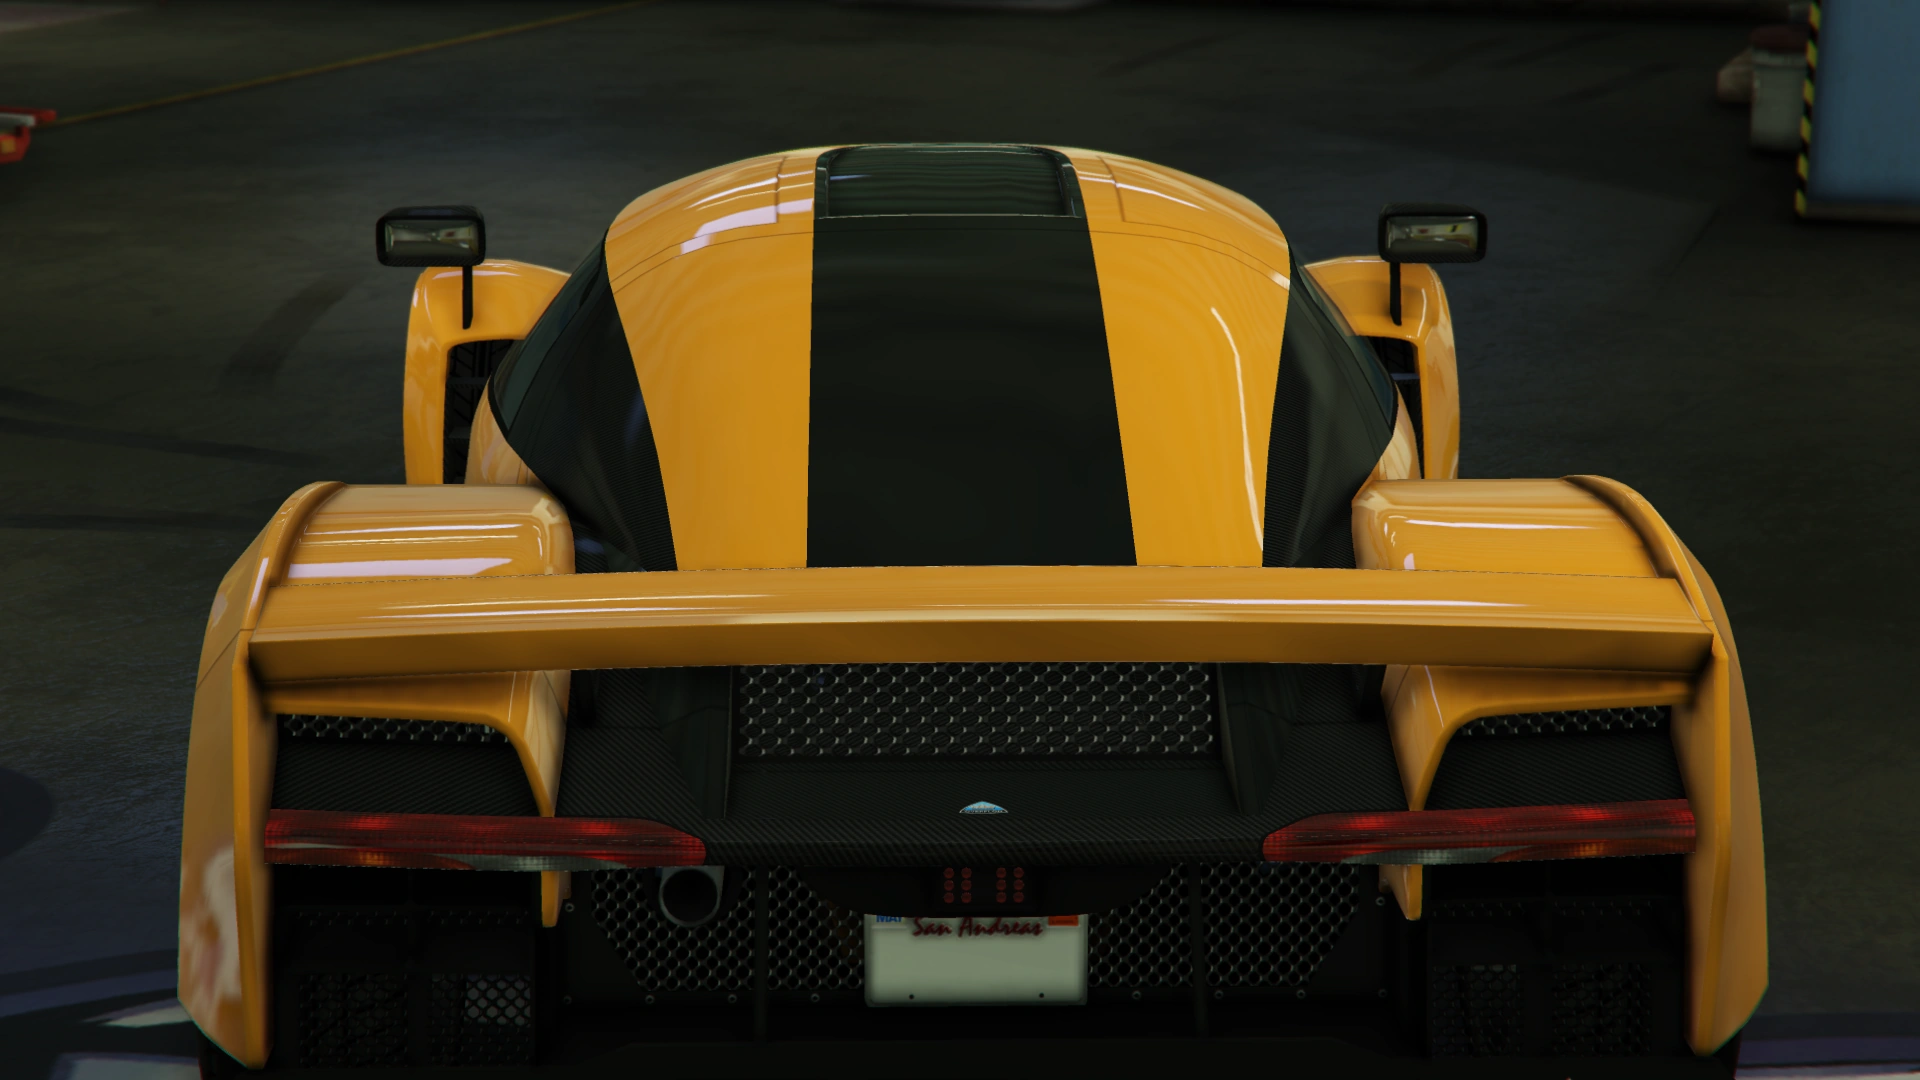
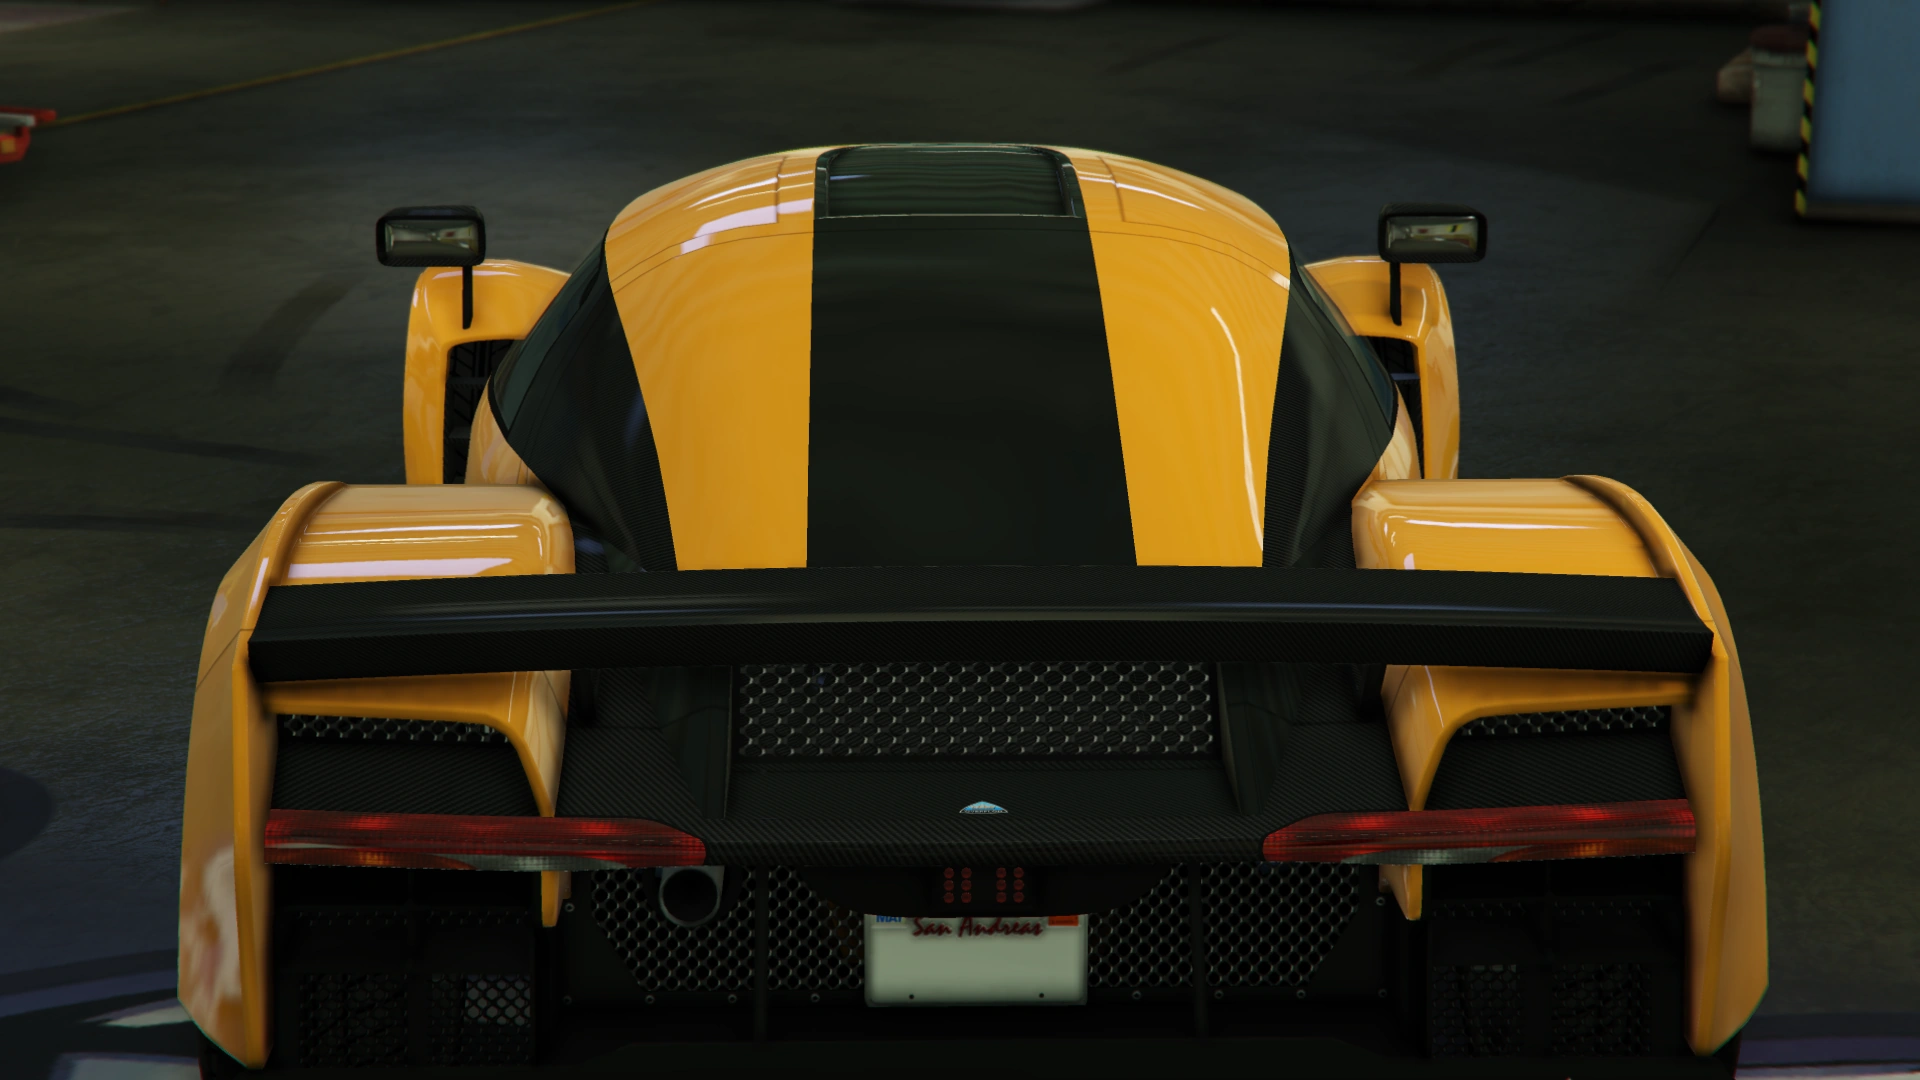
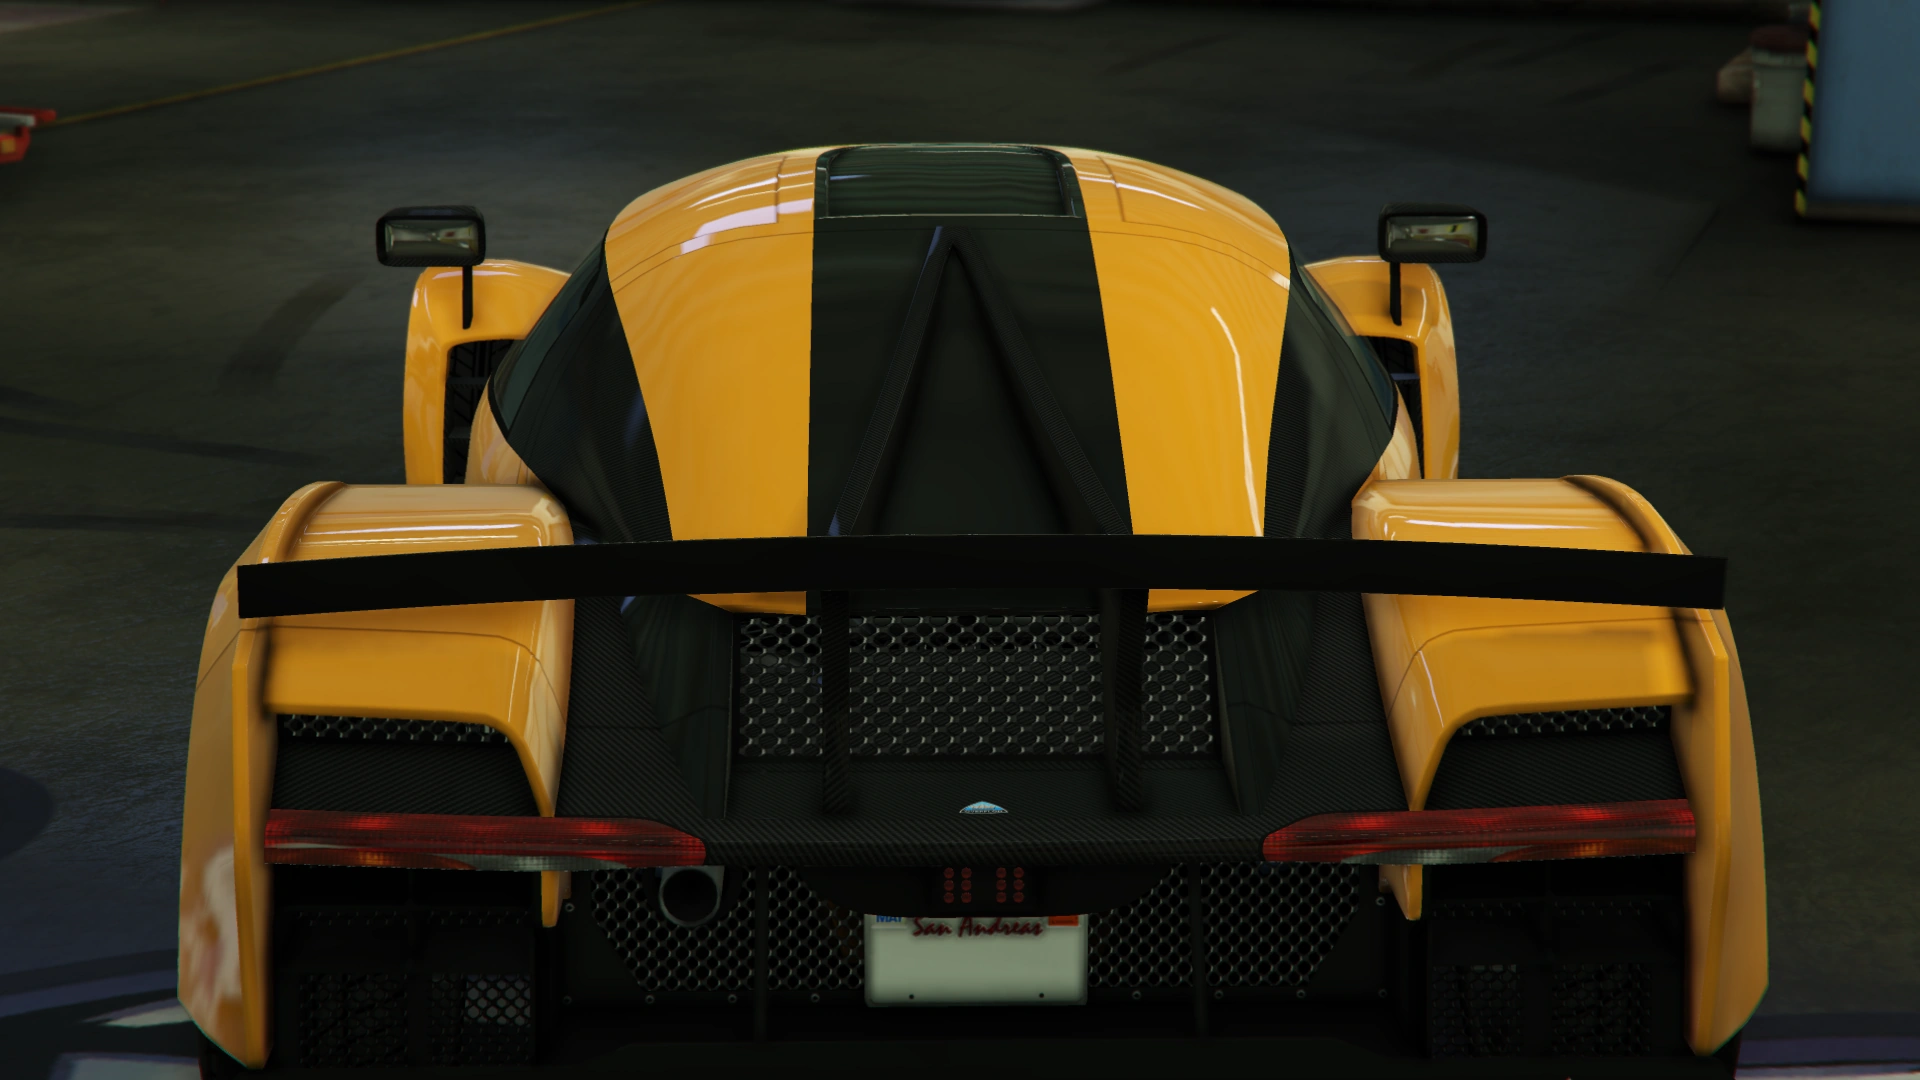
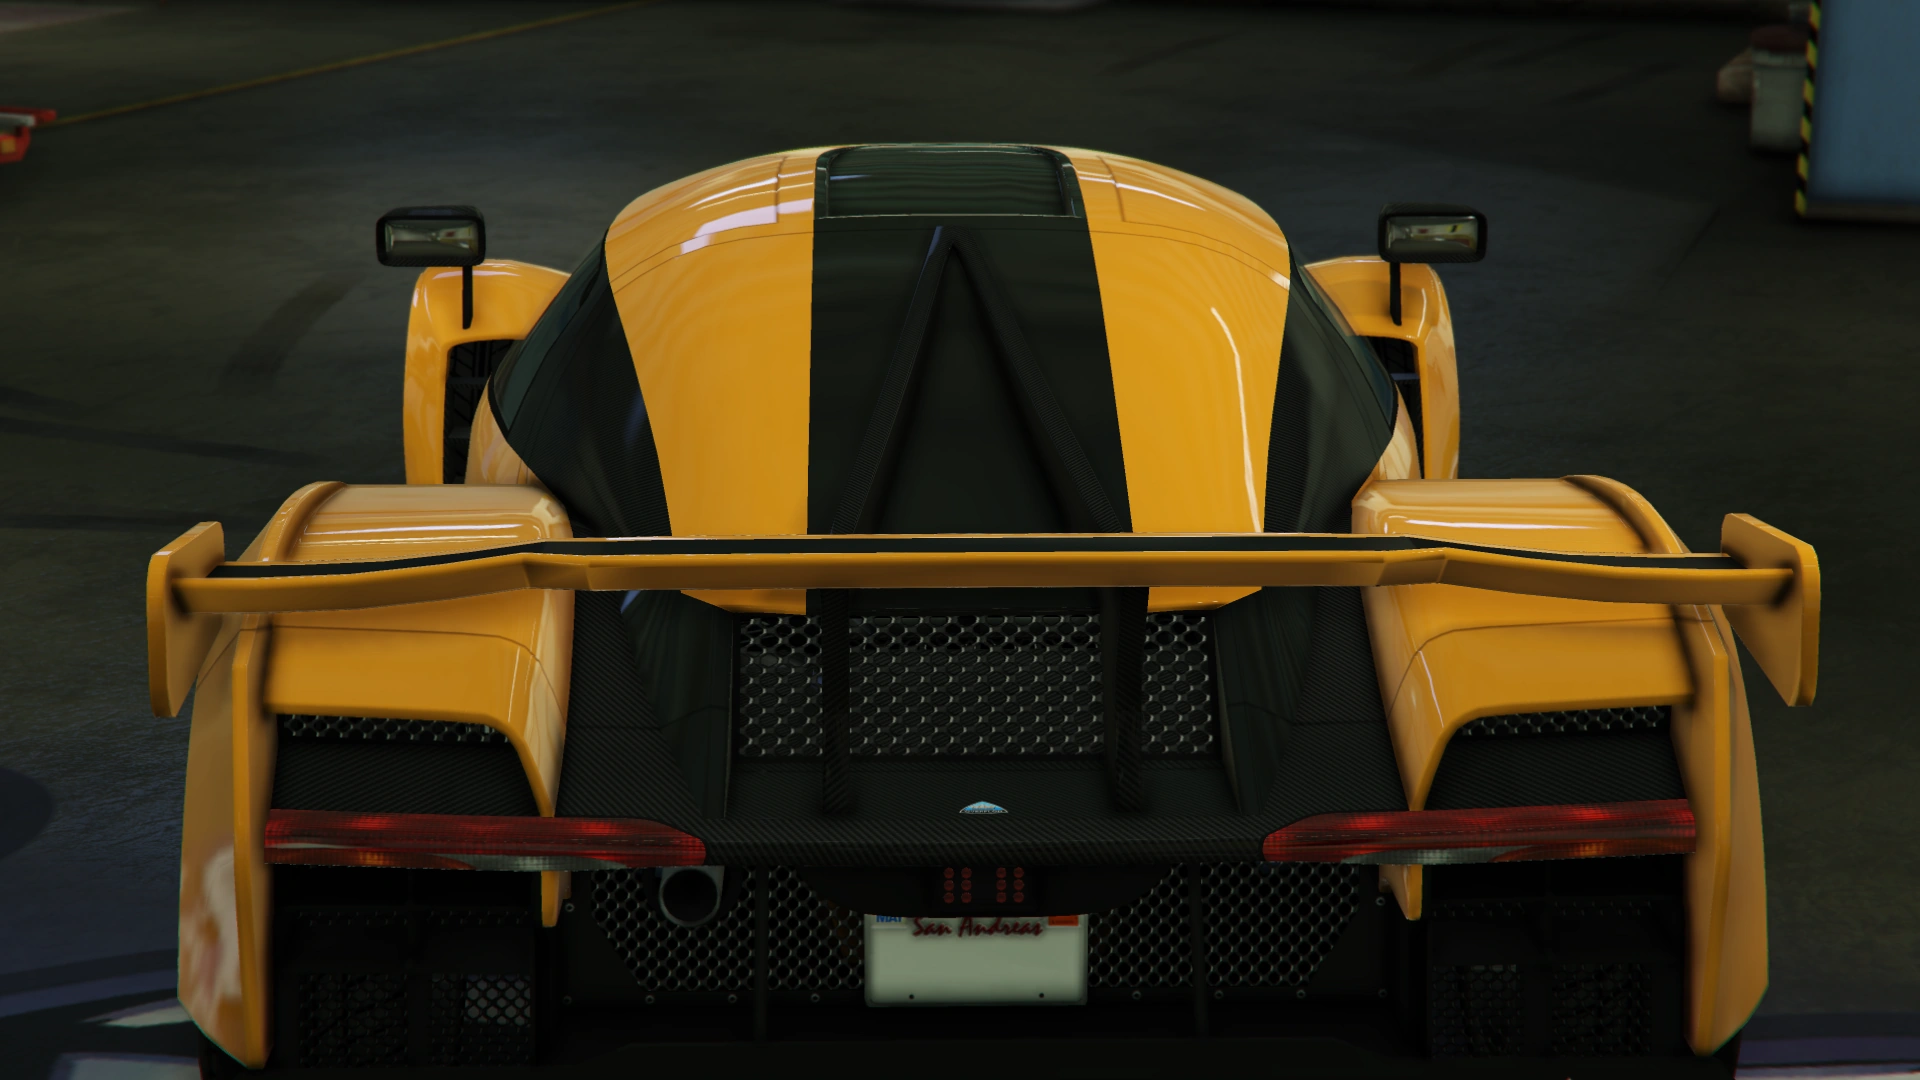
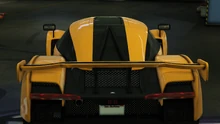
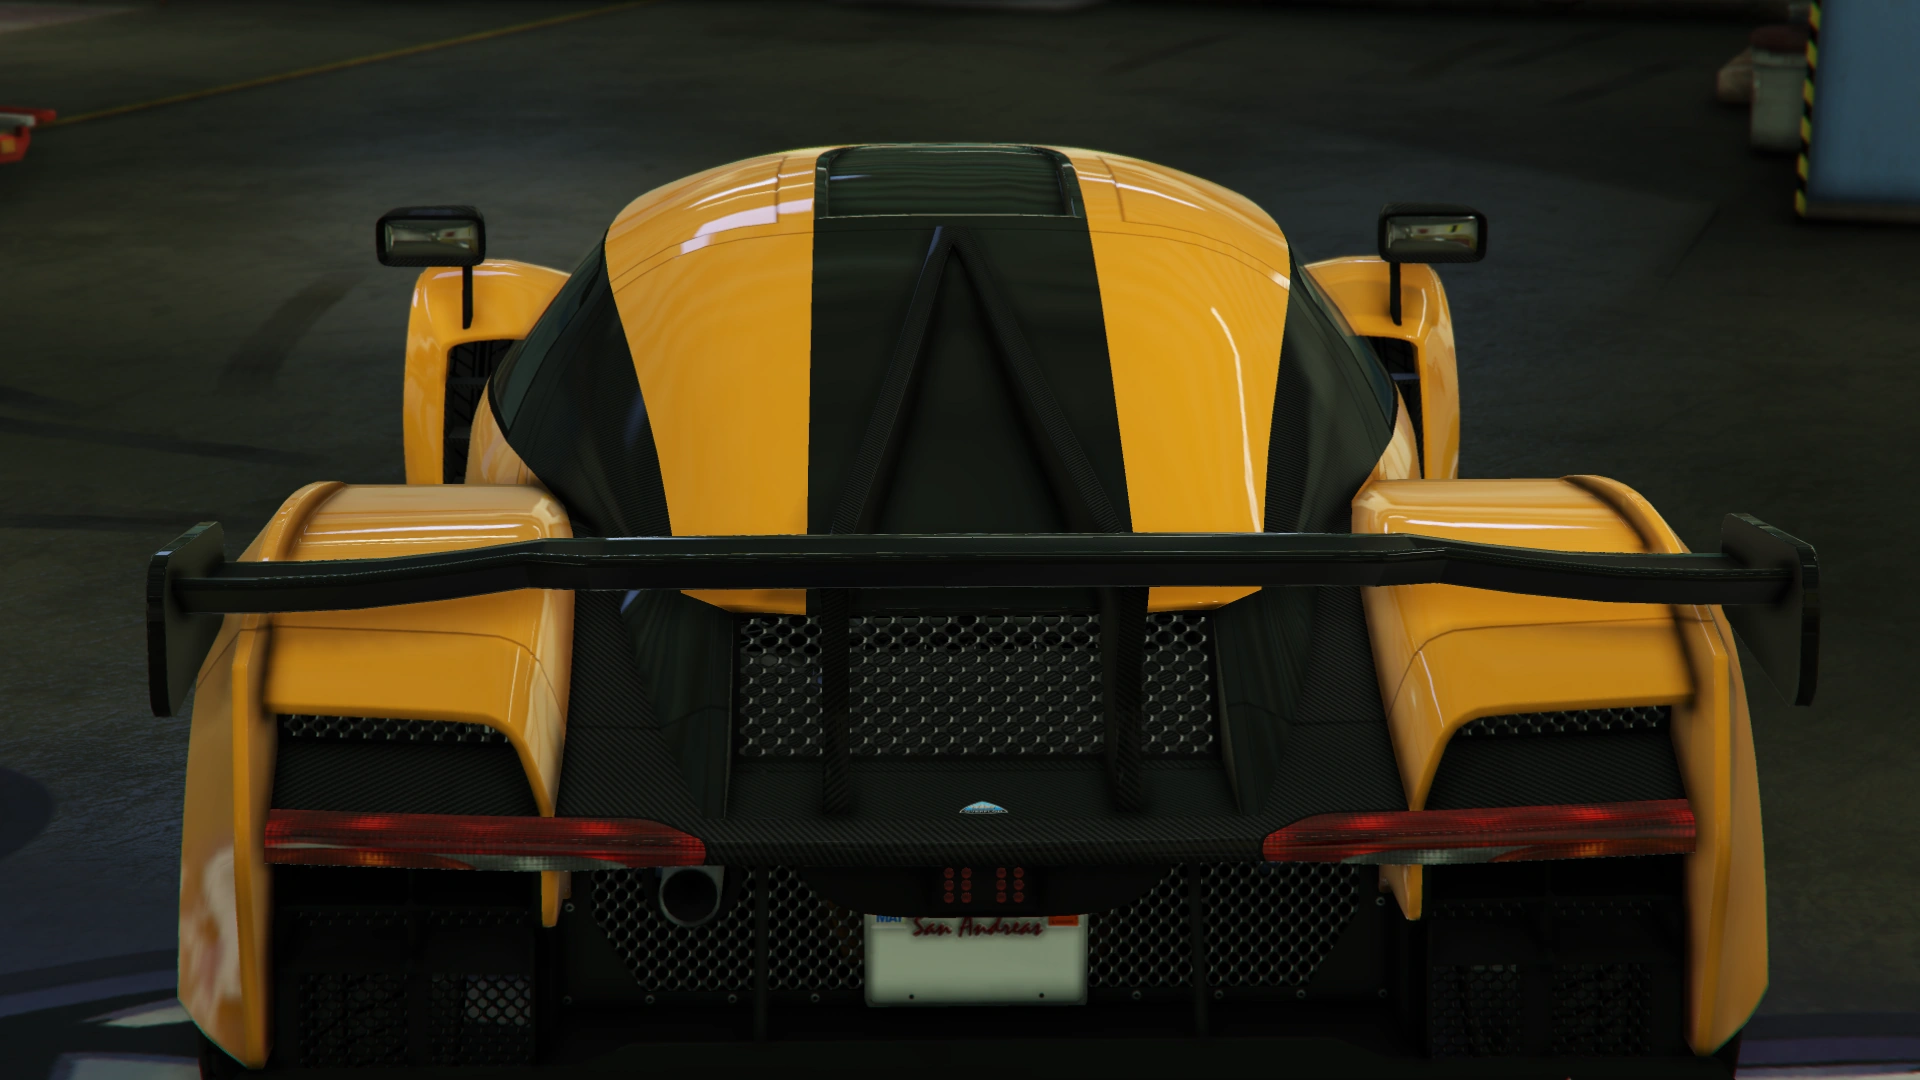
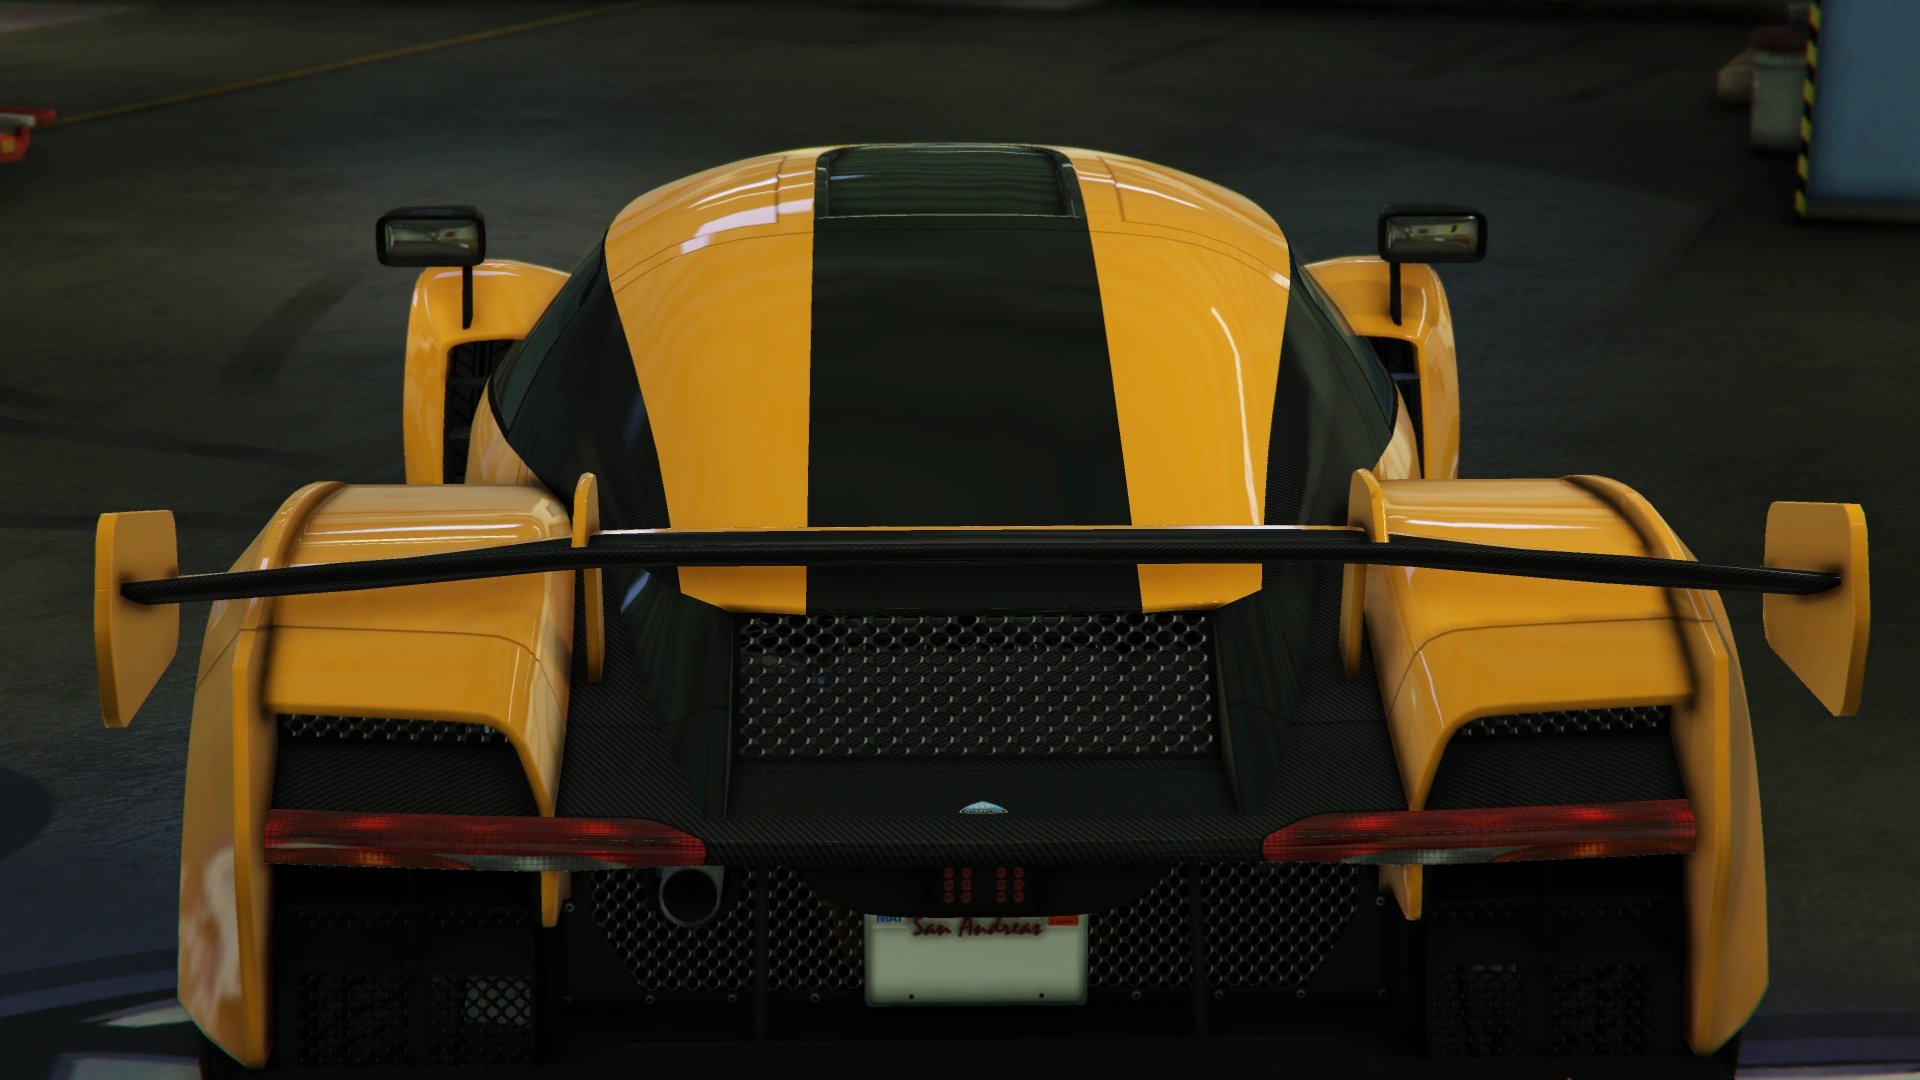
The Överflöd Autarch is a hypercar featured in Grand Theft Auto Online as part of the The Doomsday Heist update, released on December 26th, 2017, during the Festive Surprise 2017 event.
Design
Grand Theft Auto Online
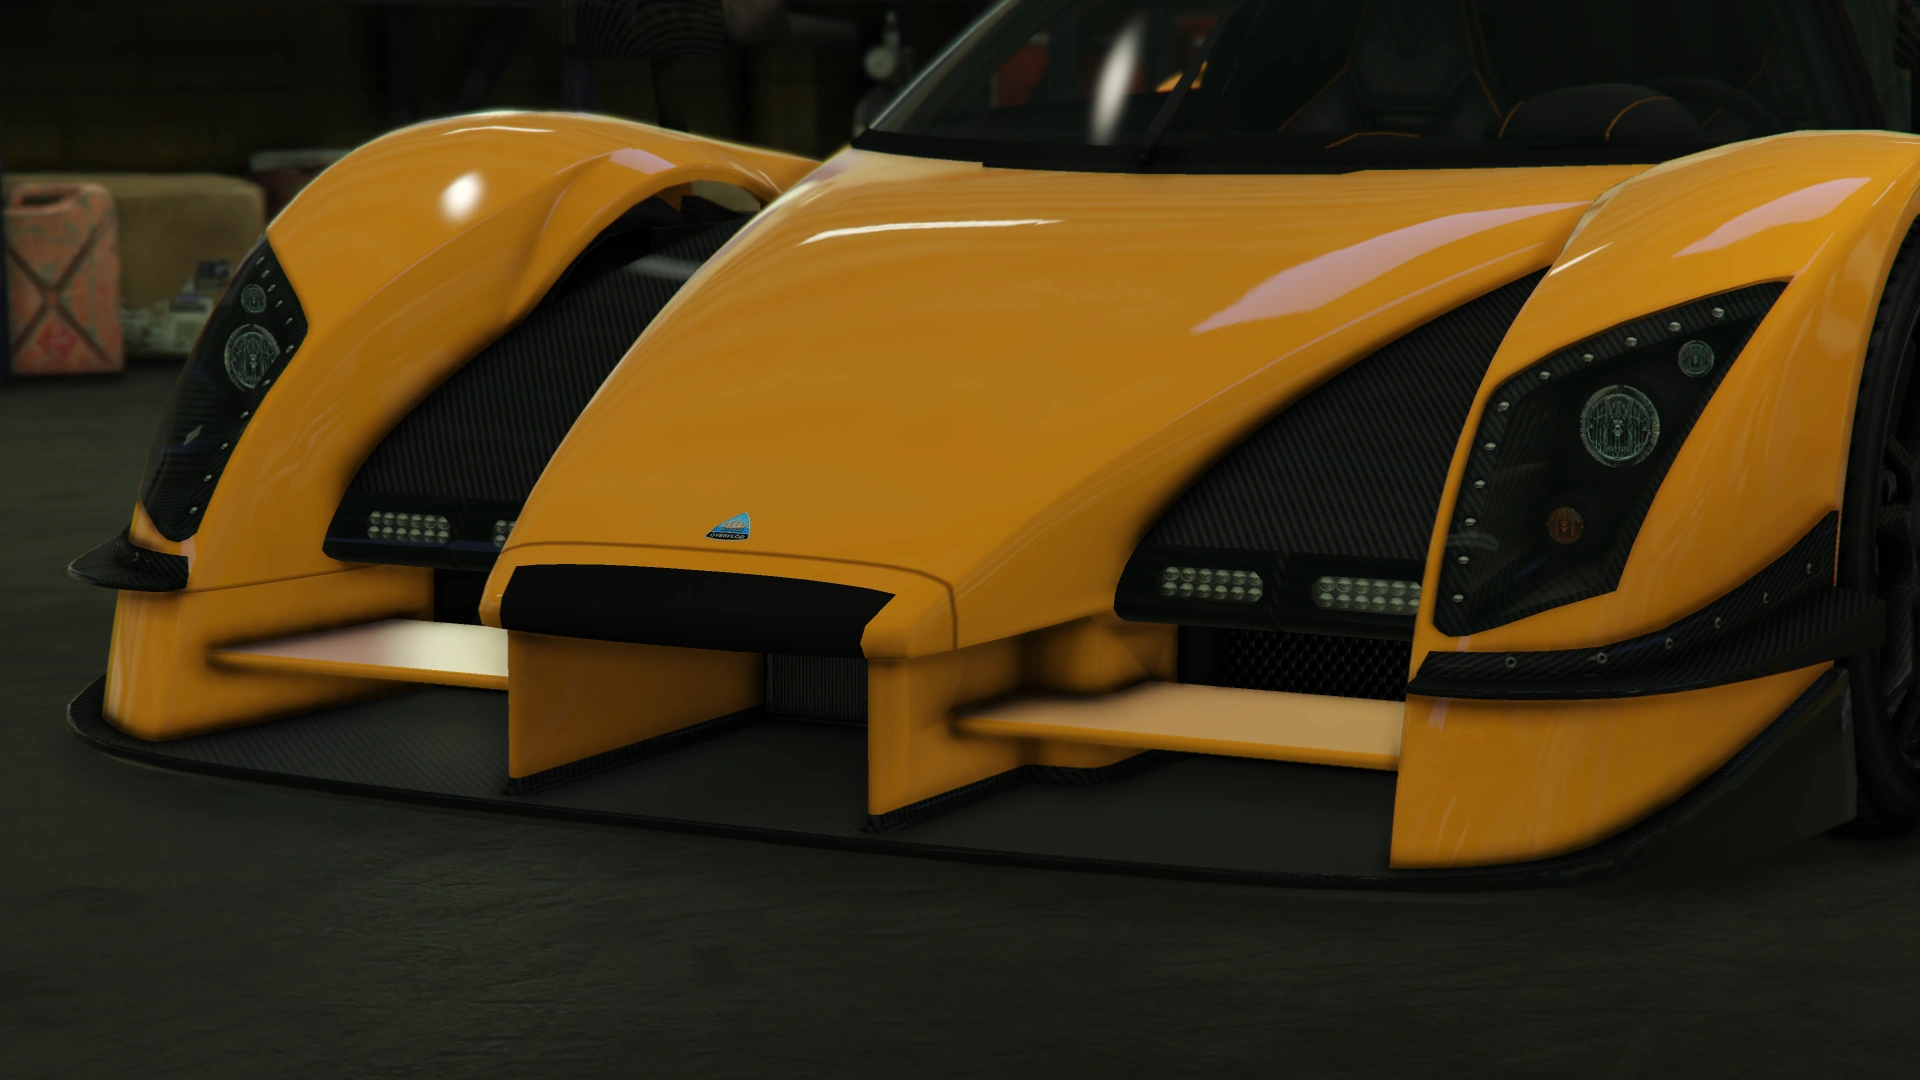
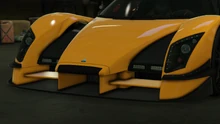
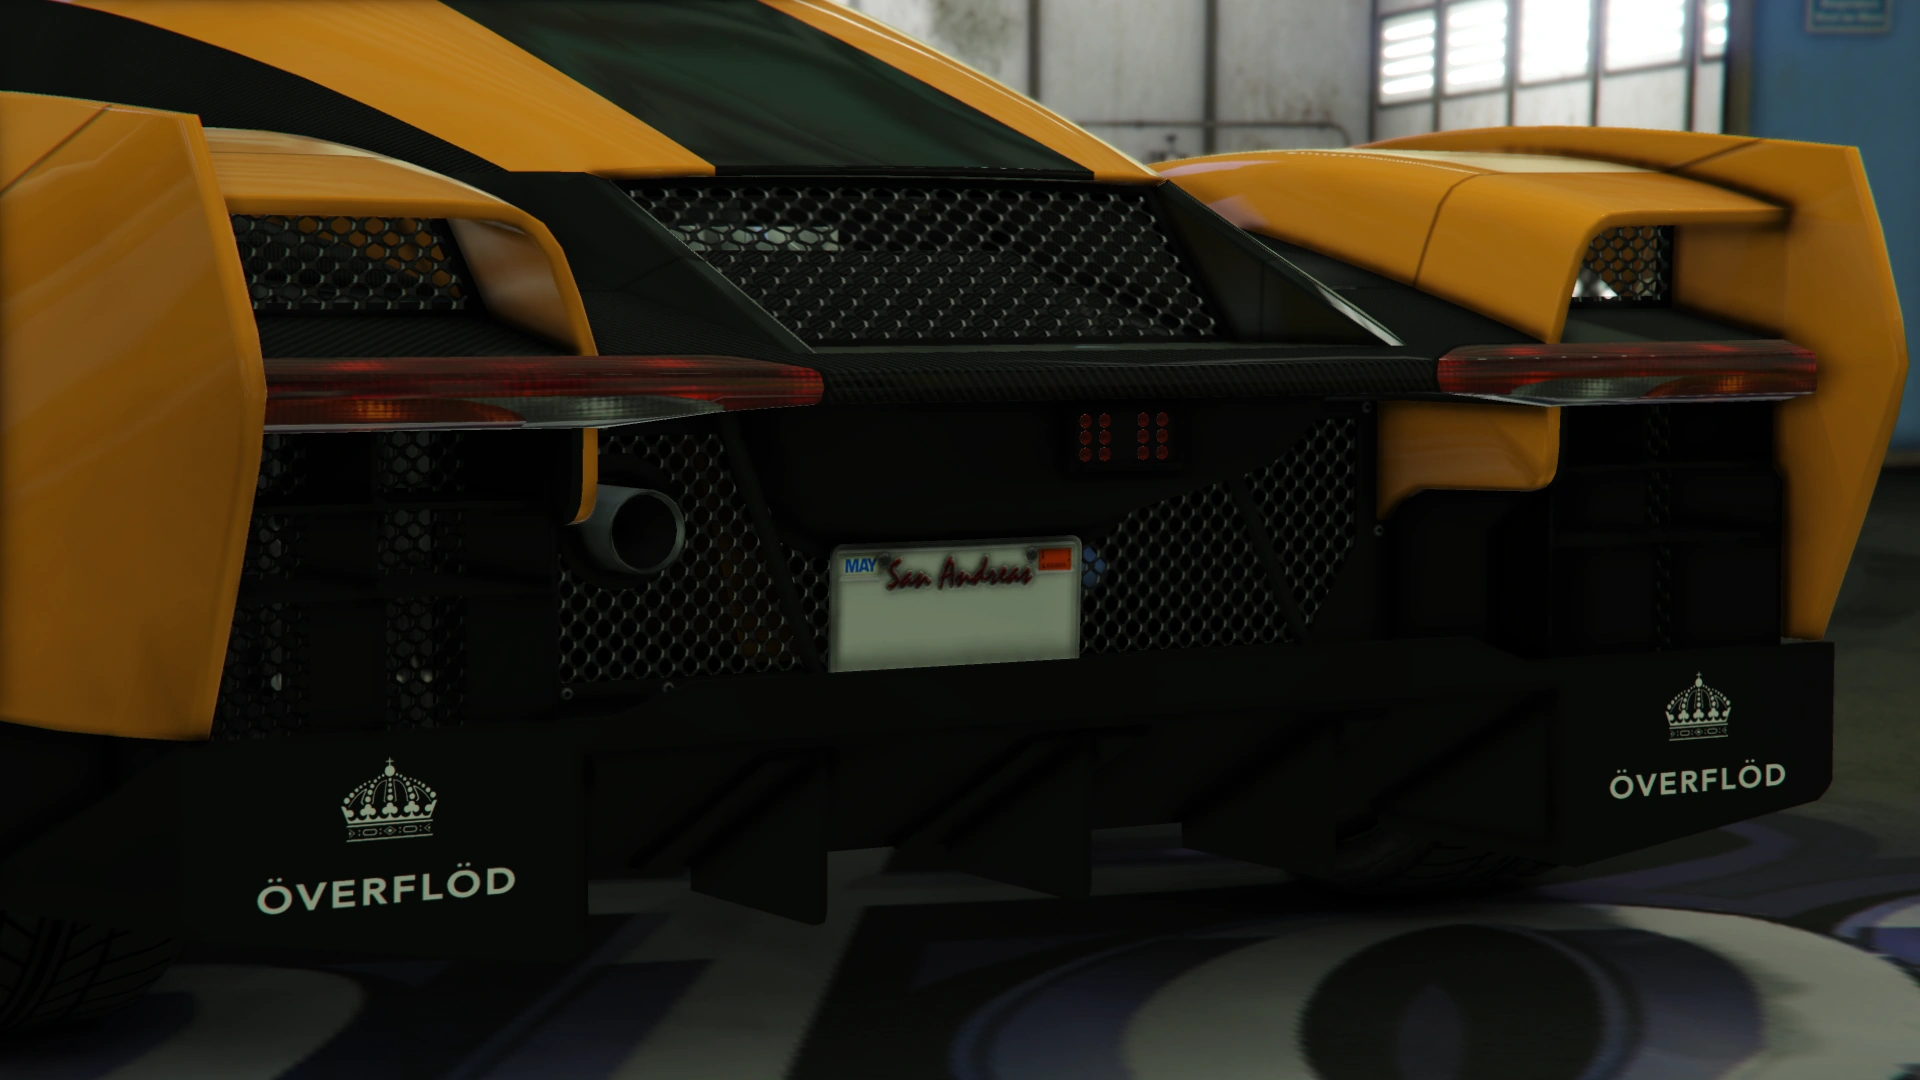
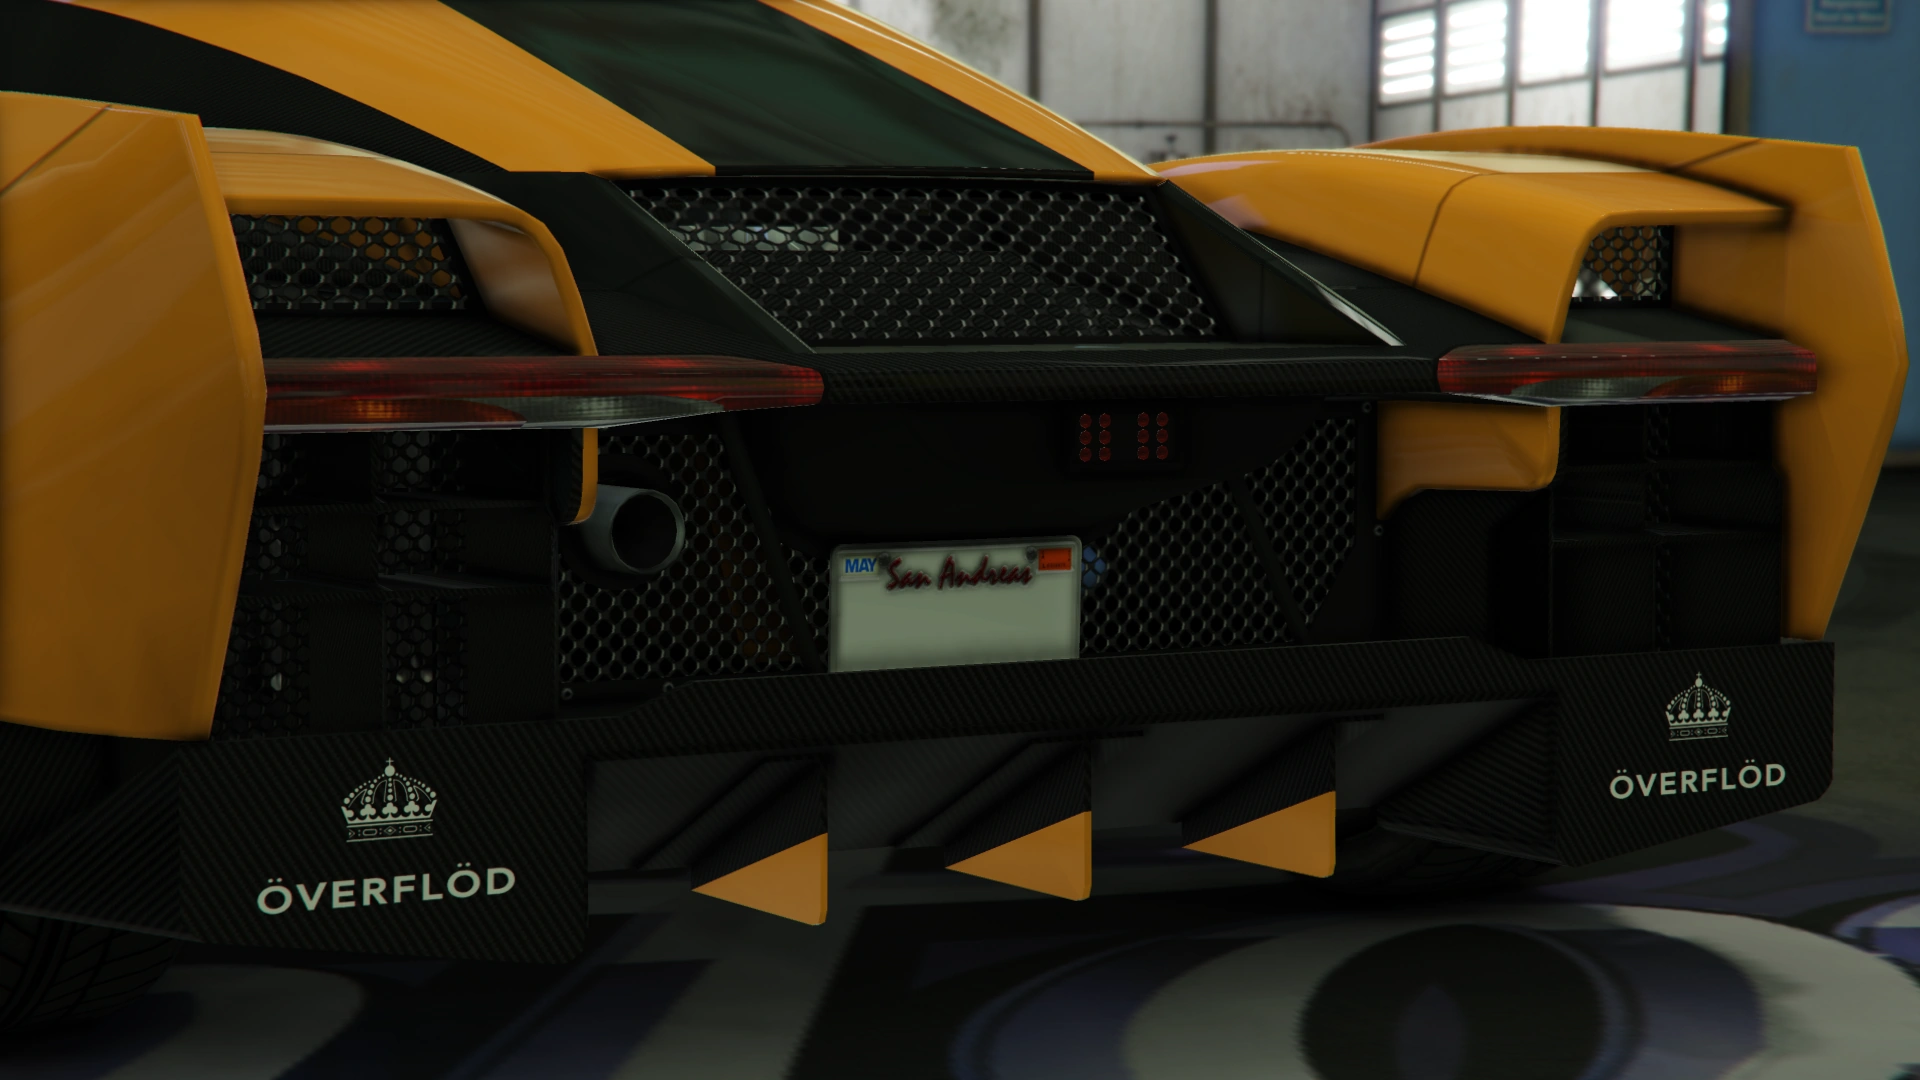
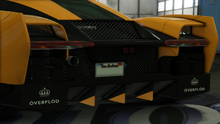
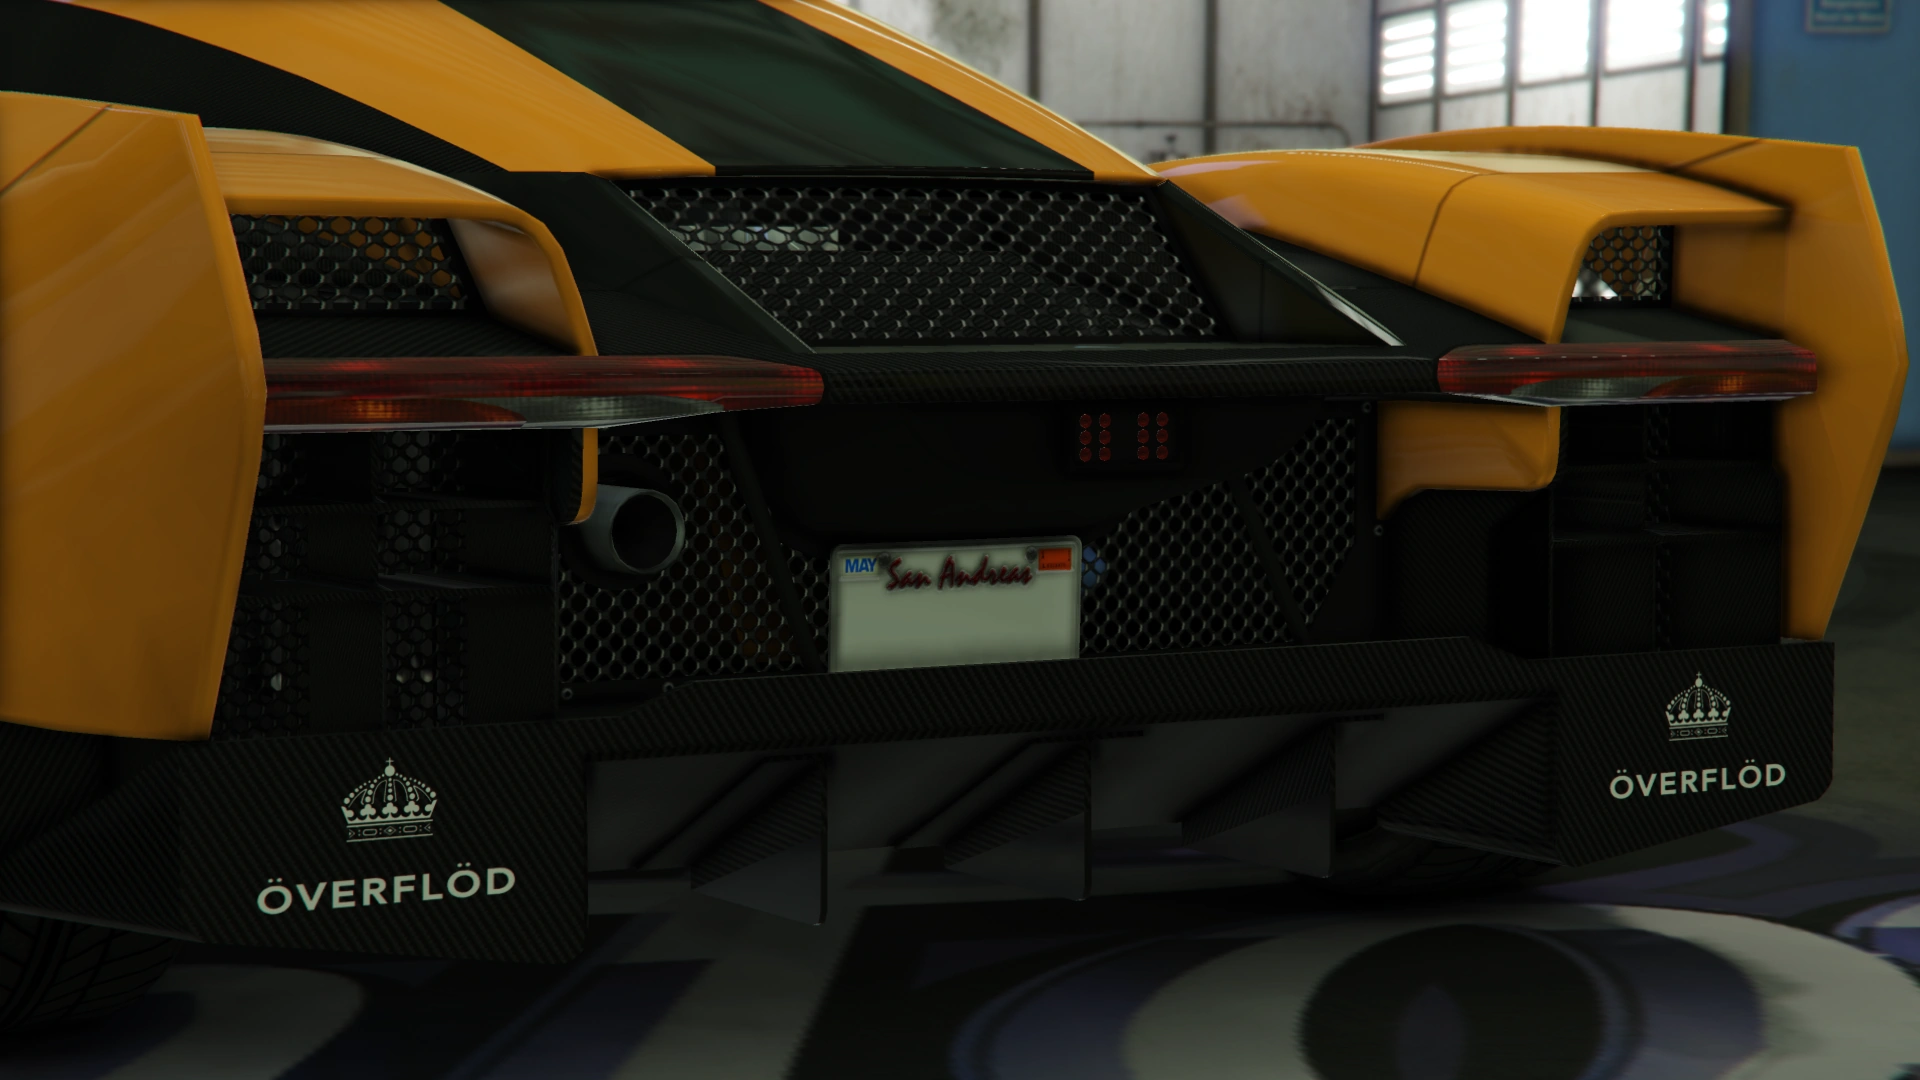
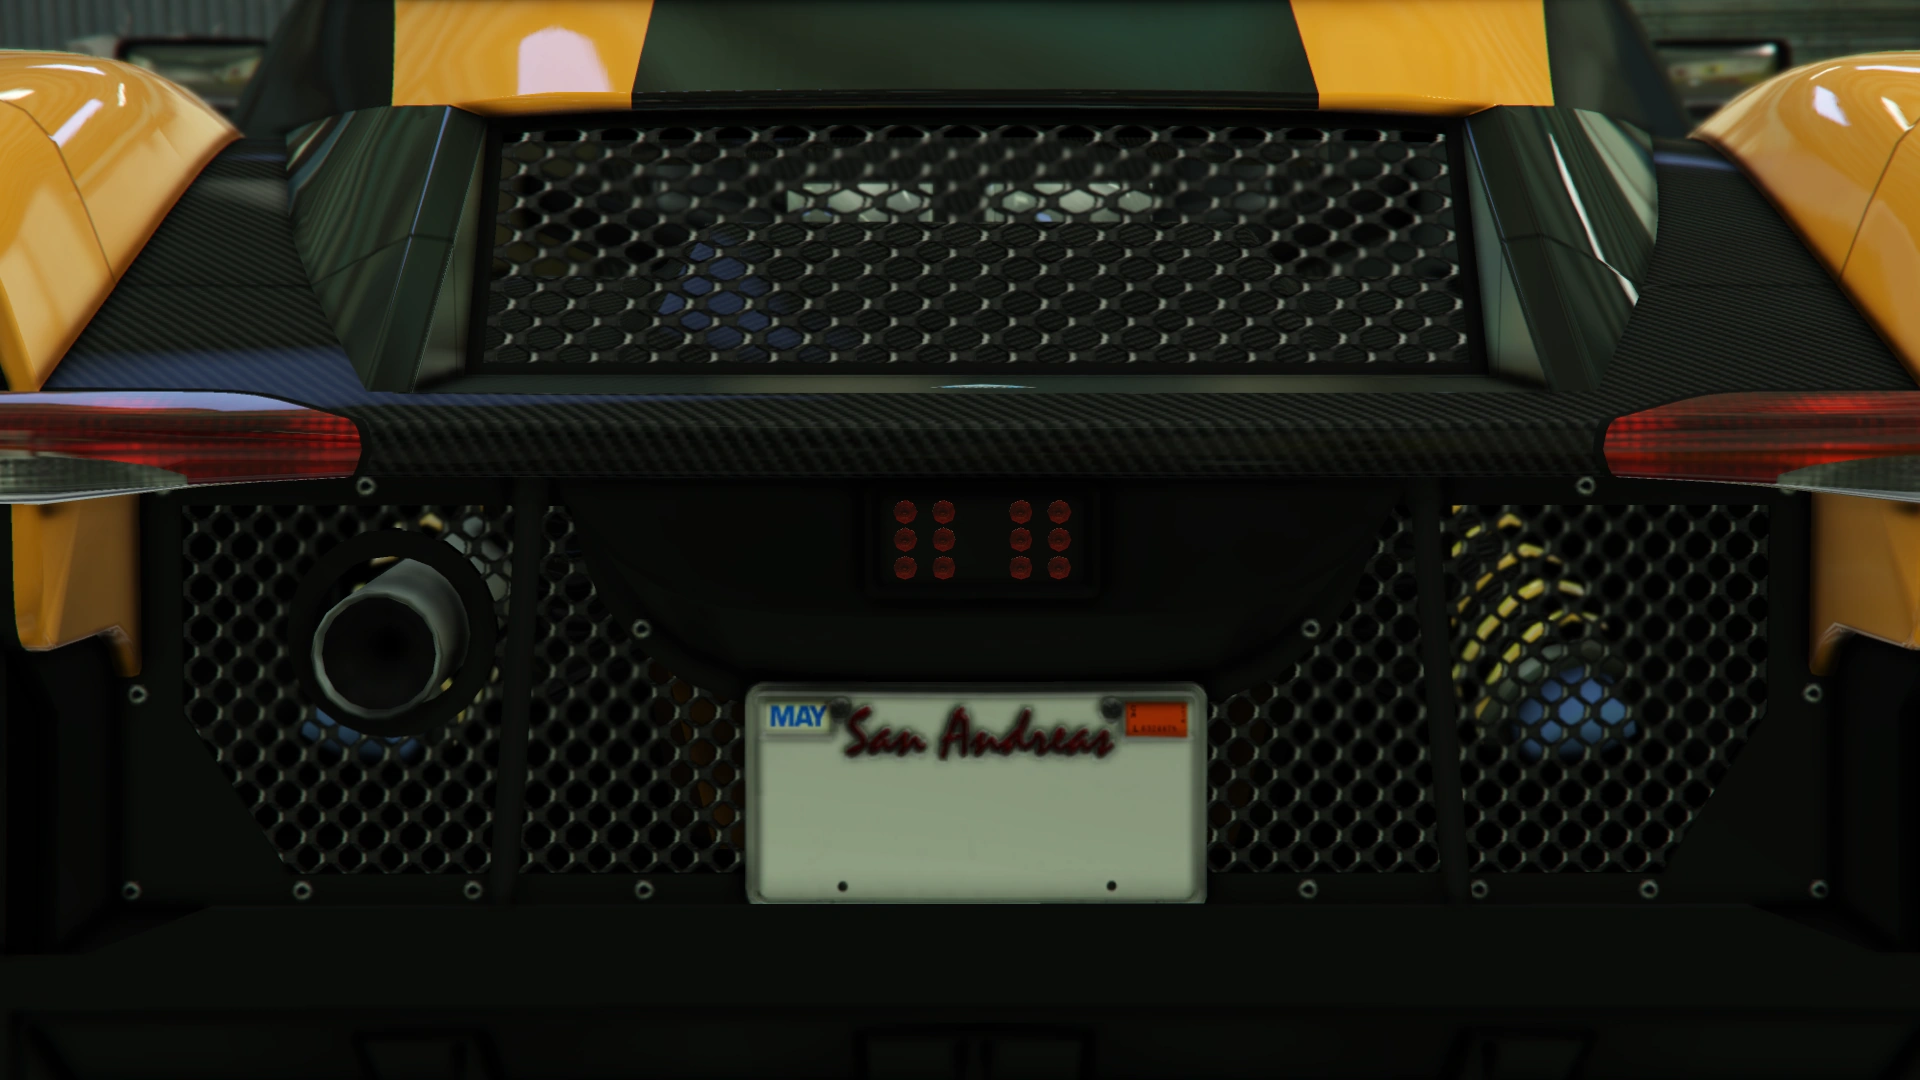
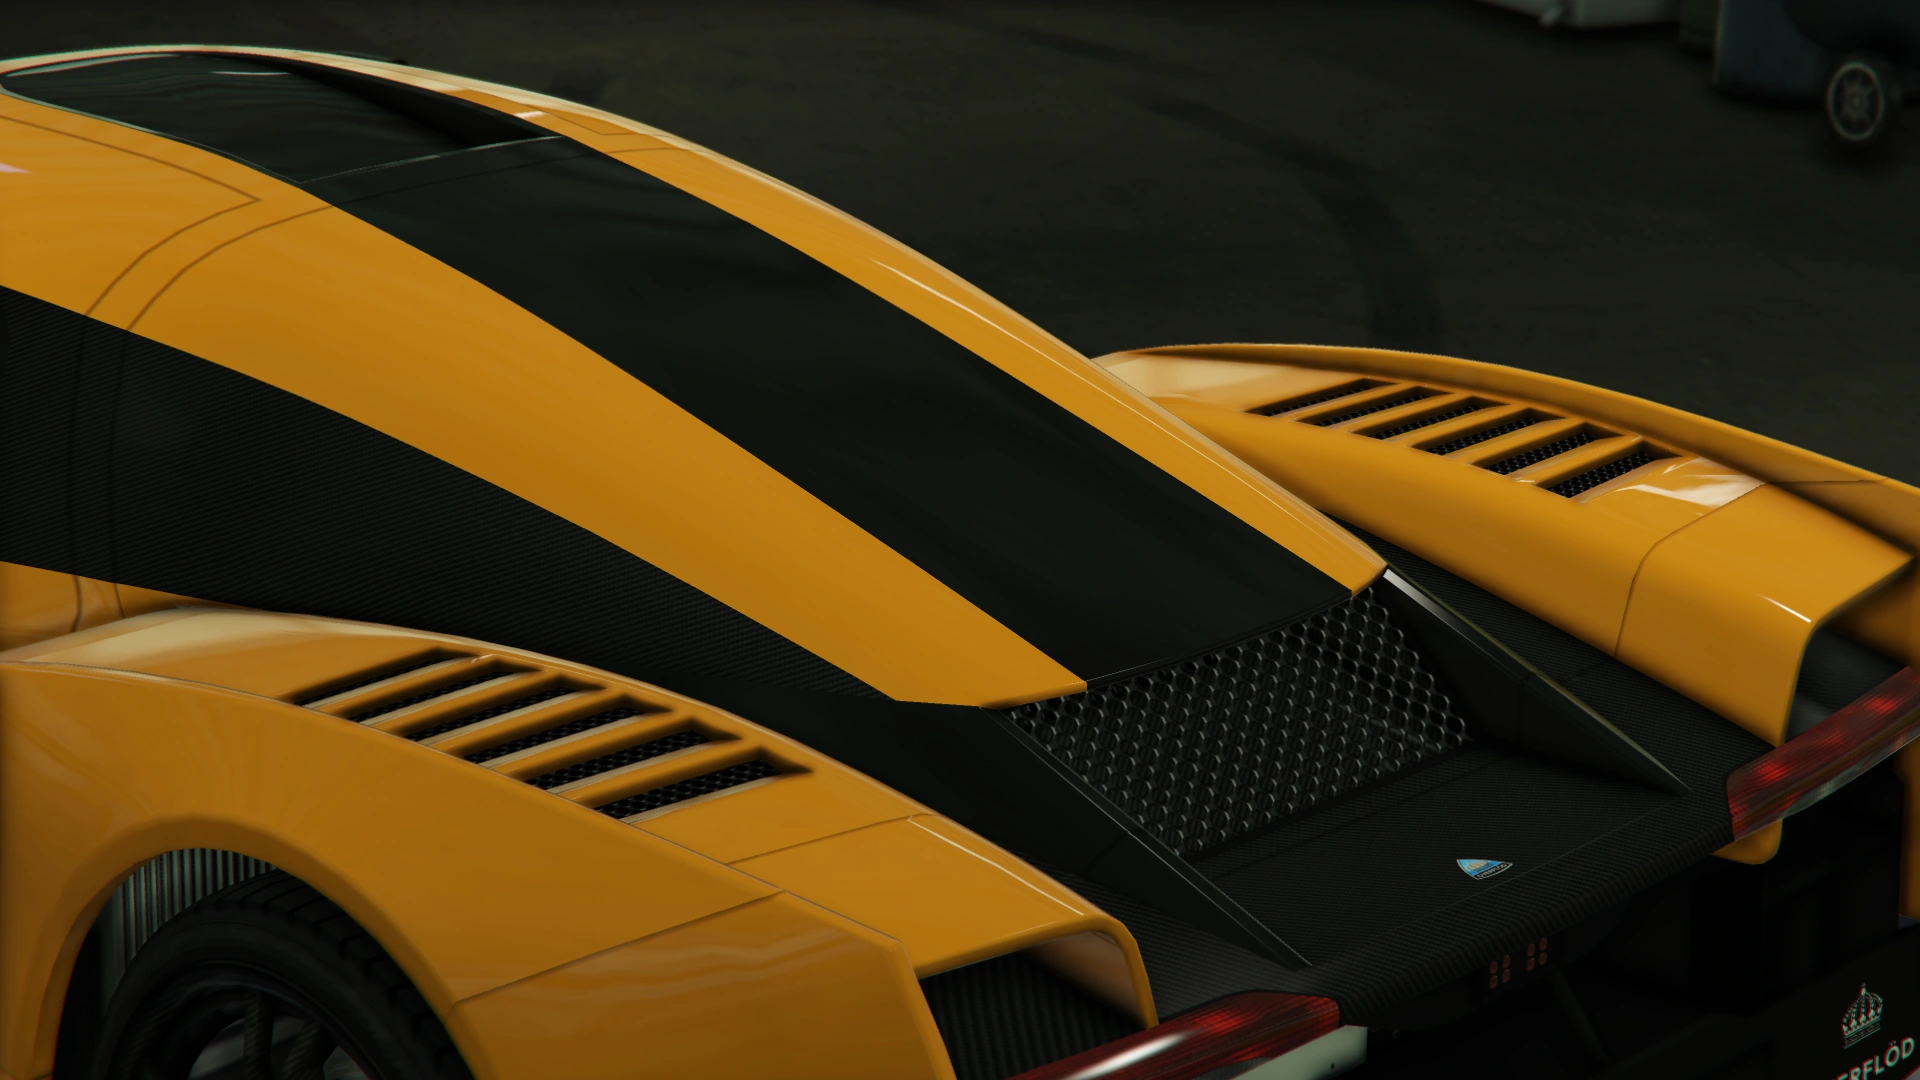
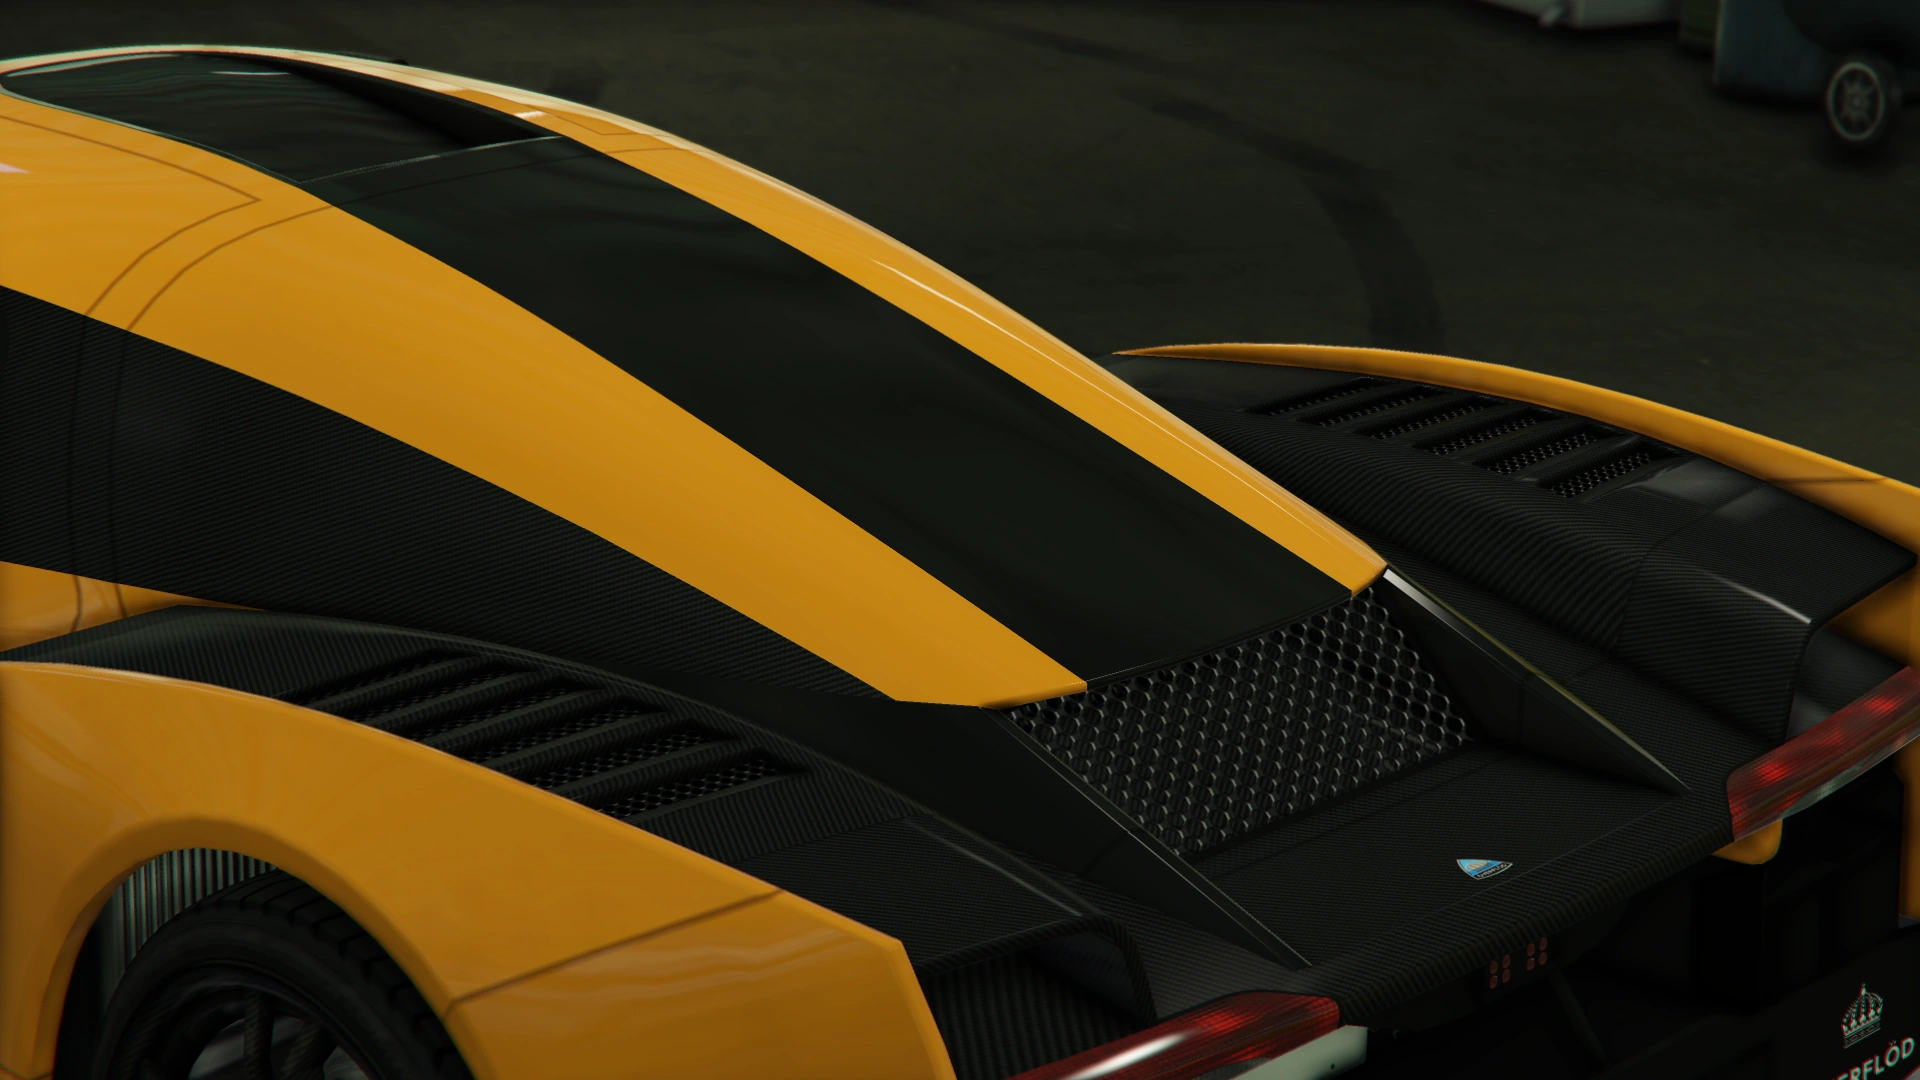
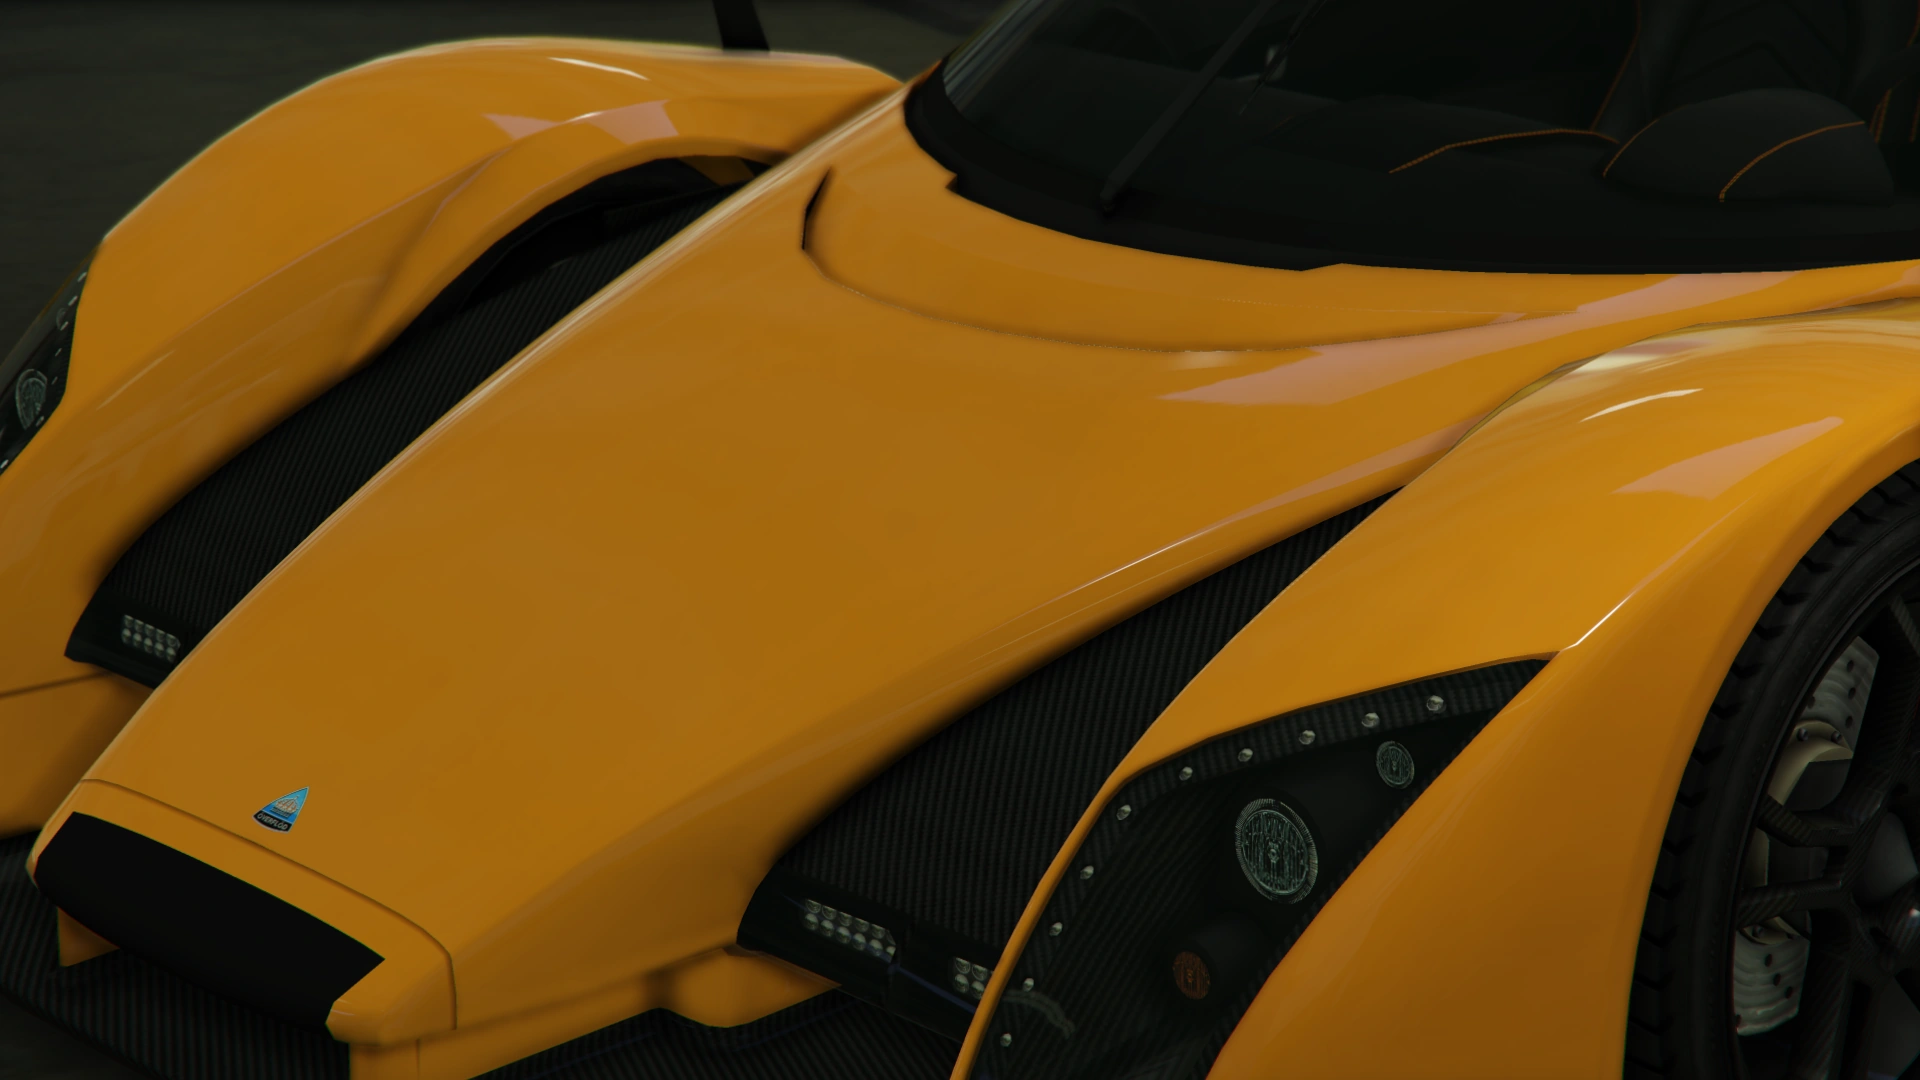
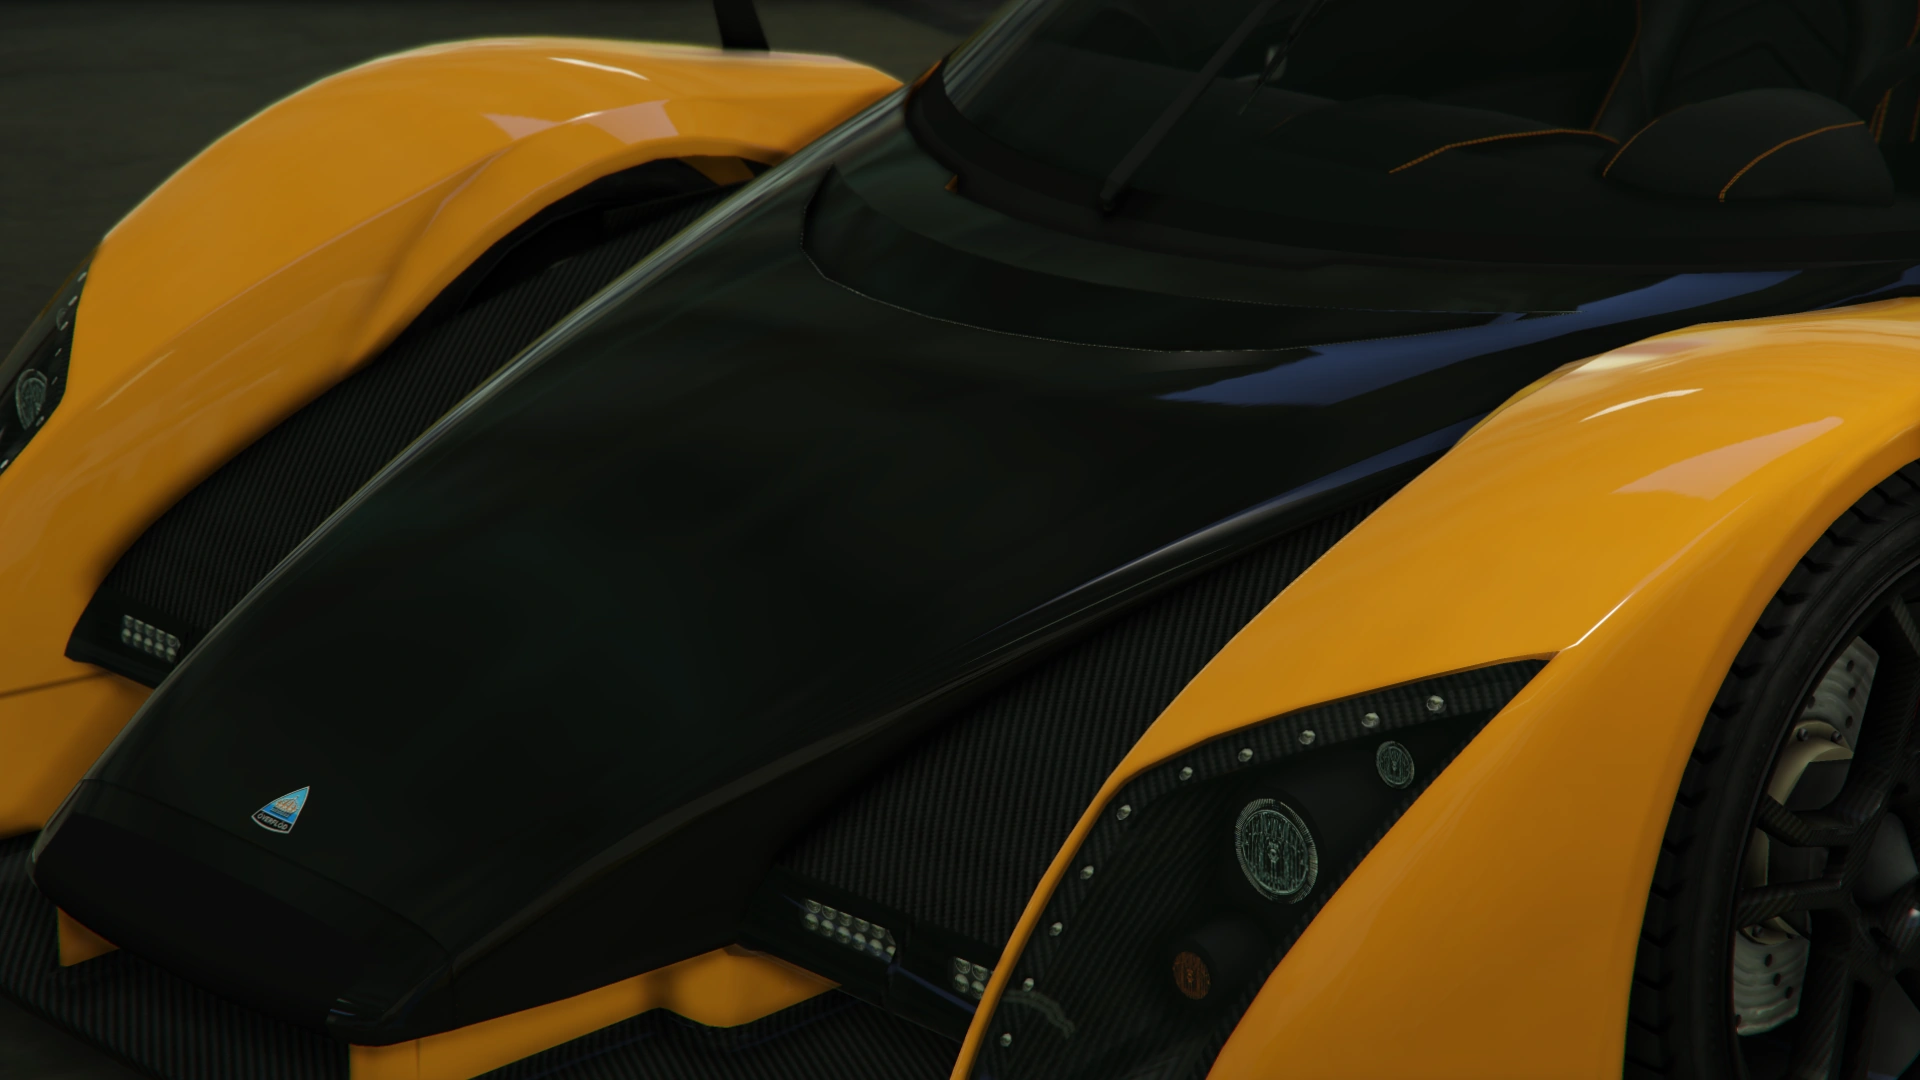
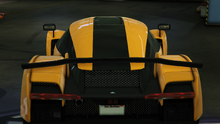
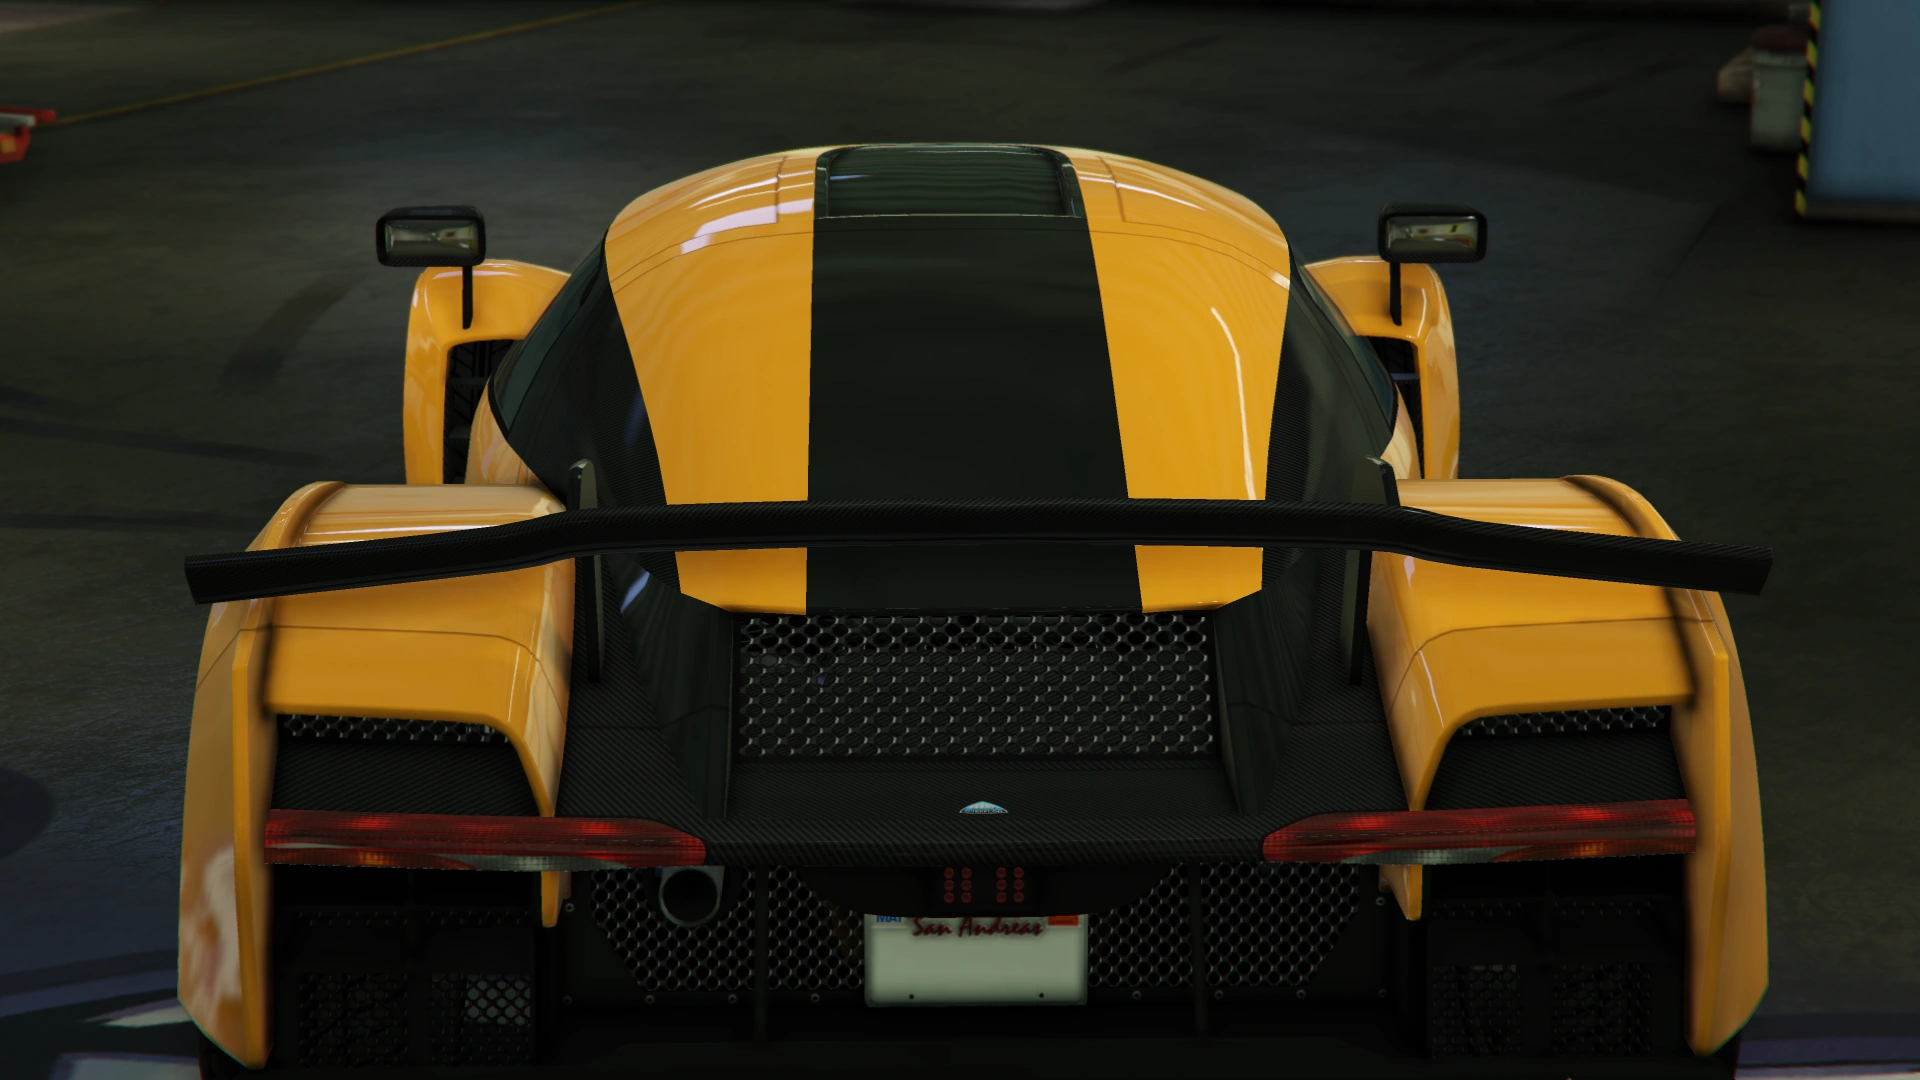
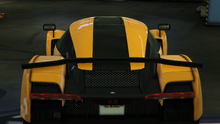
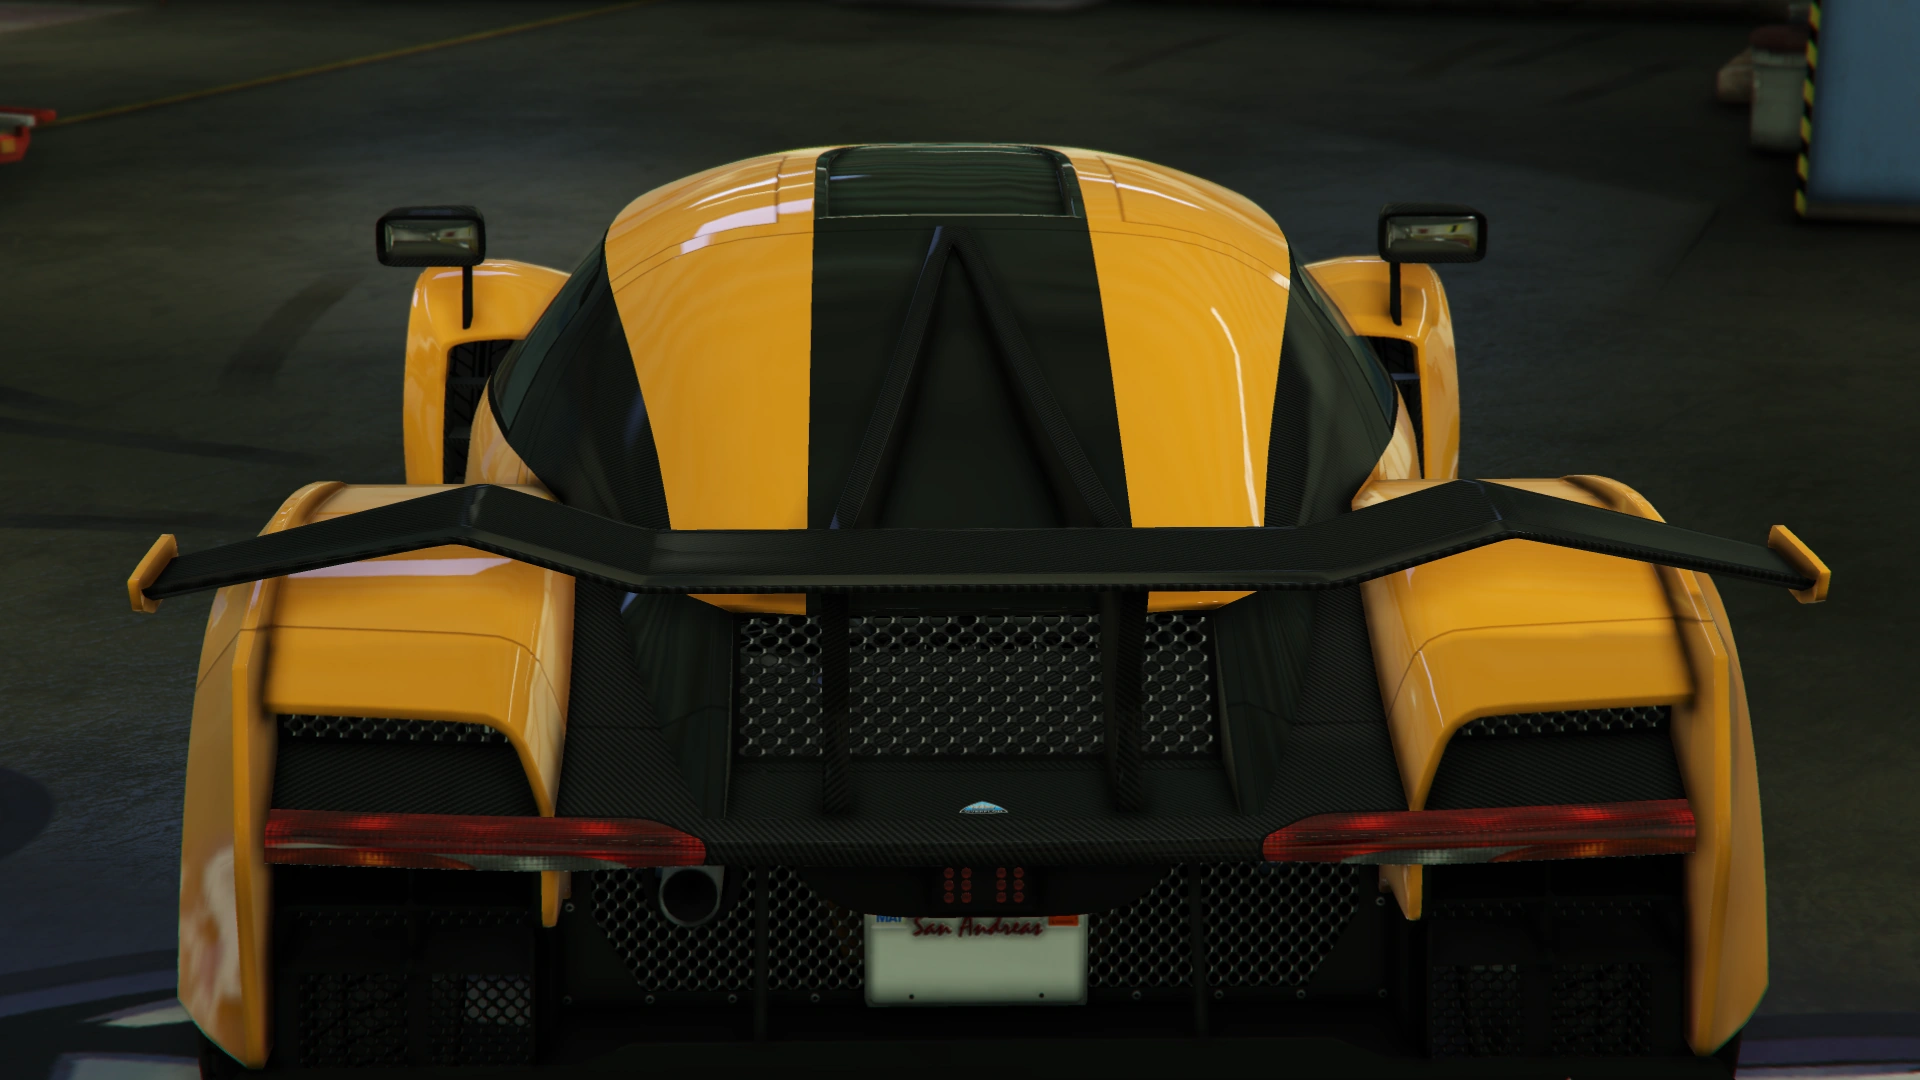
The vehicle is heavily inspired by the Scuderia Cameron Glickenhaus SCG 003. The rear of the car is mostly based on the McLaren Senna, although with a lot of elements, such as the diffuser, taken from the KTM X-Bow GT4. Its roof and greenhouse also takes inspiration from the Koenigsegg One:1.
The Autarch features what appear to be butterfly doors, functioning similar to the T20 and GP1. However, the Autarch's doors do not rotate fully along the A pillar, giving them similar characteristics to the Infernus, behaving loosely akin to the design of scissor doors.
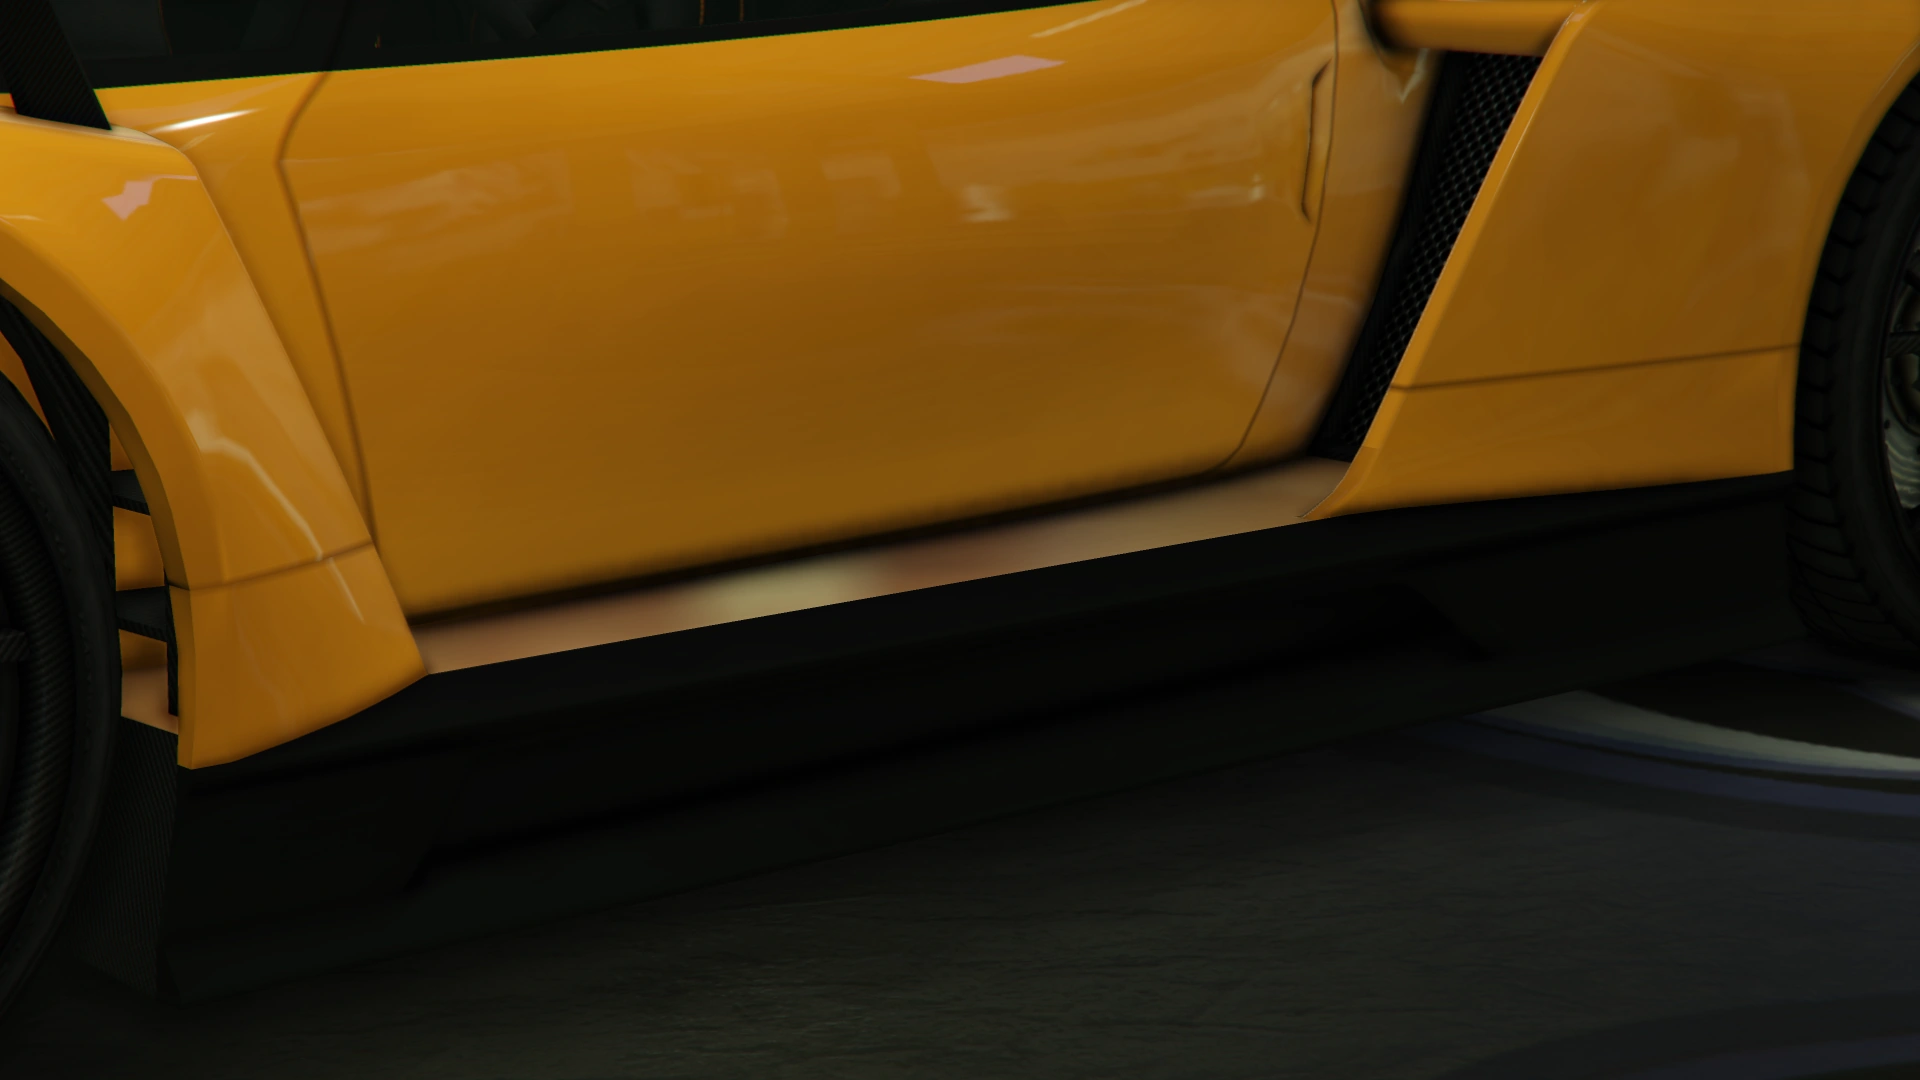
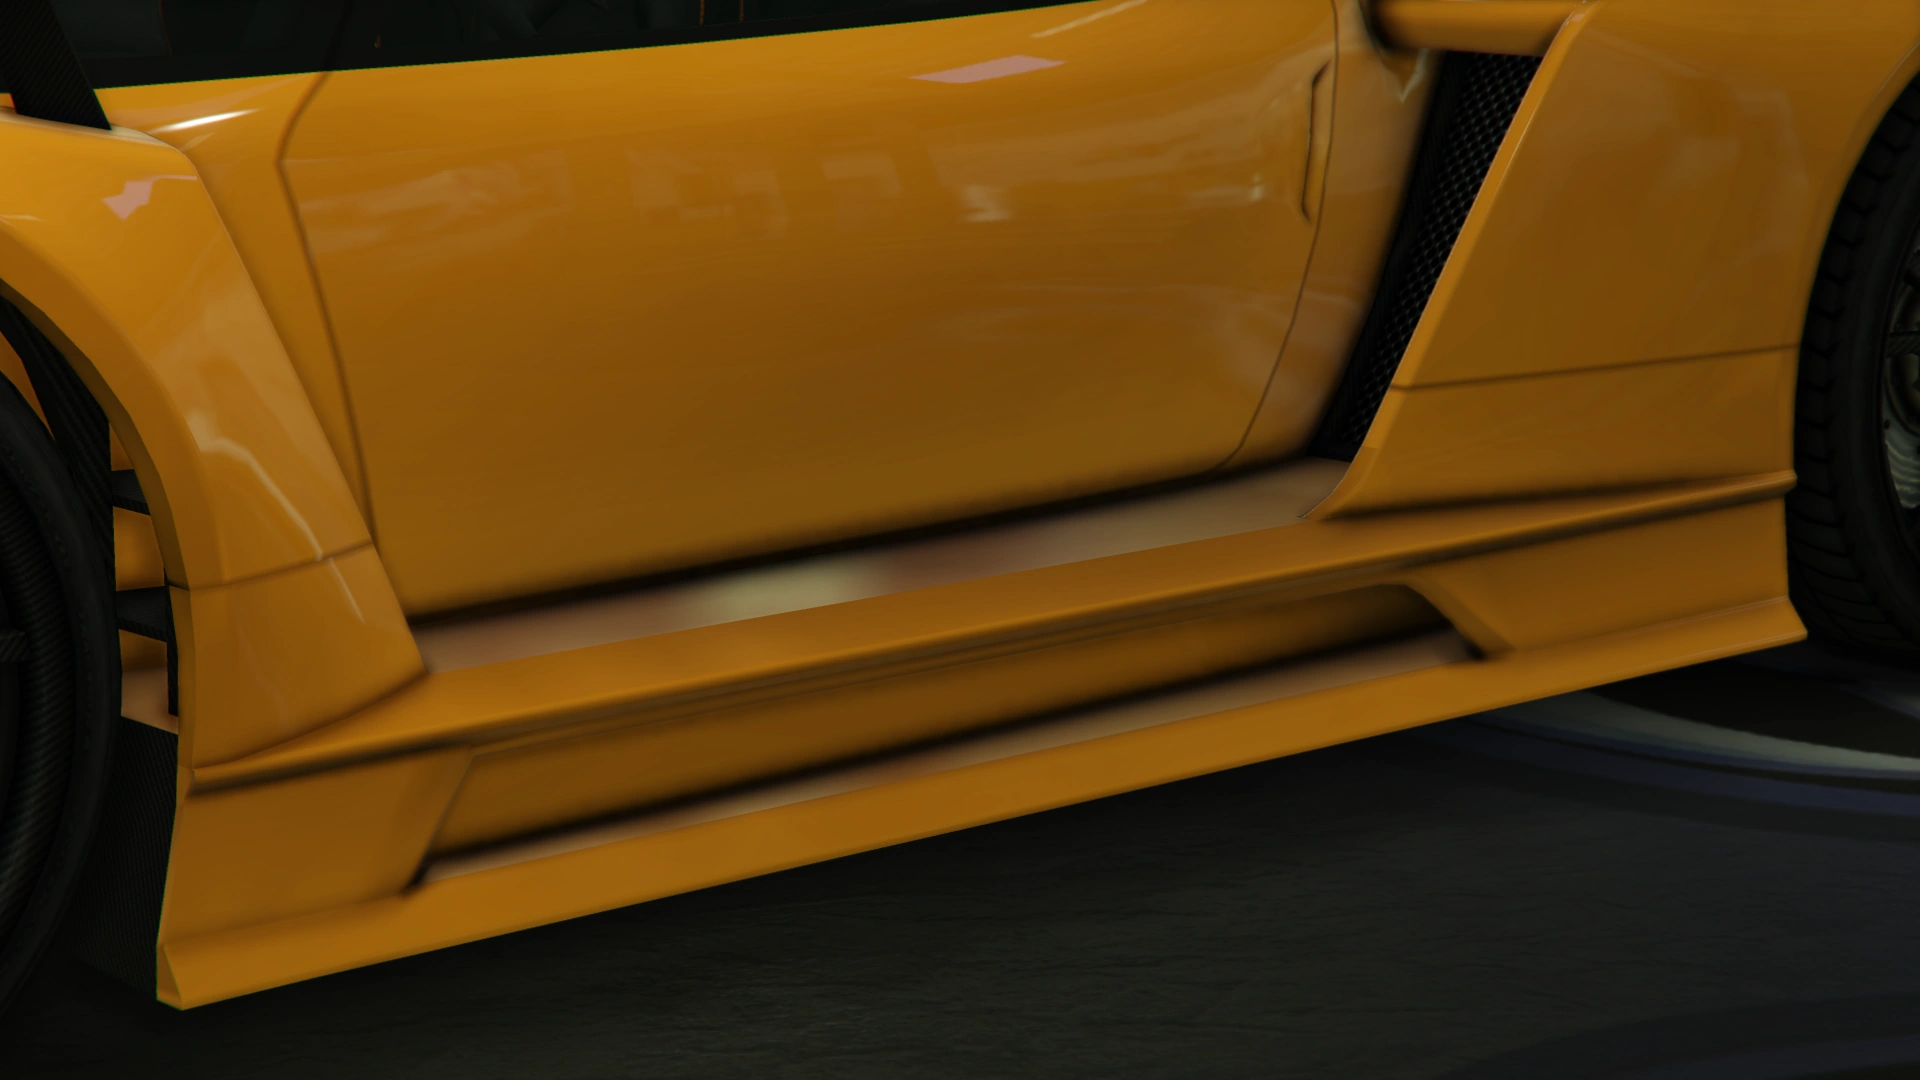
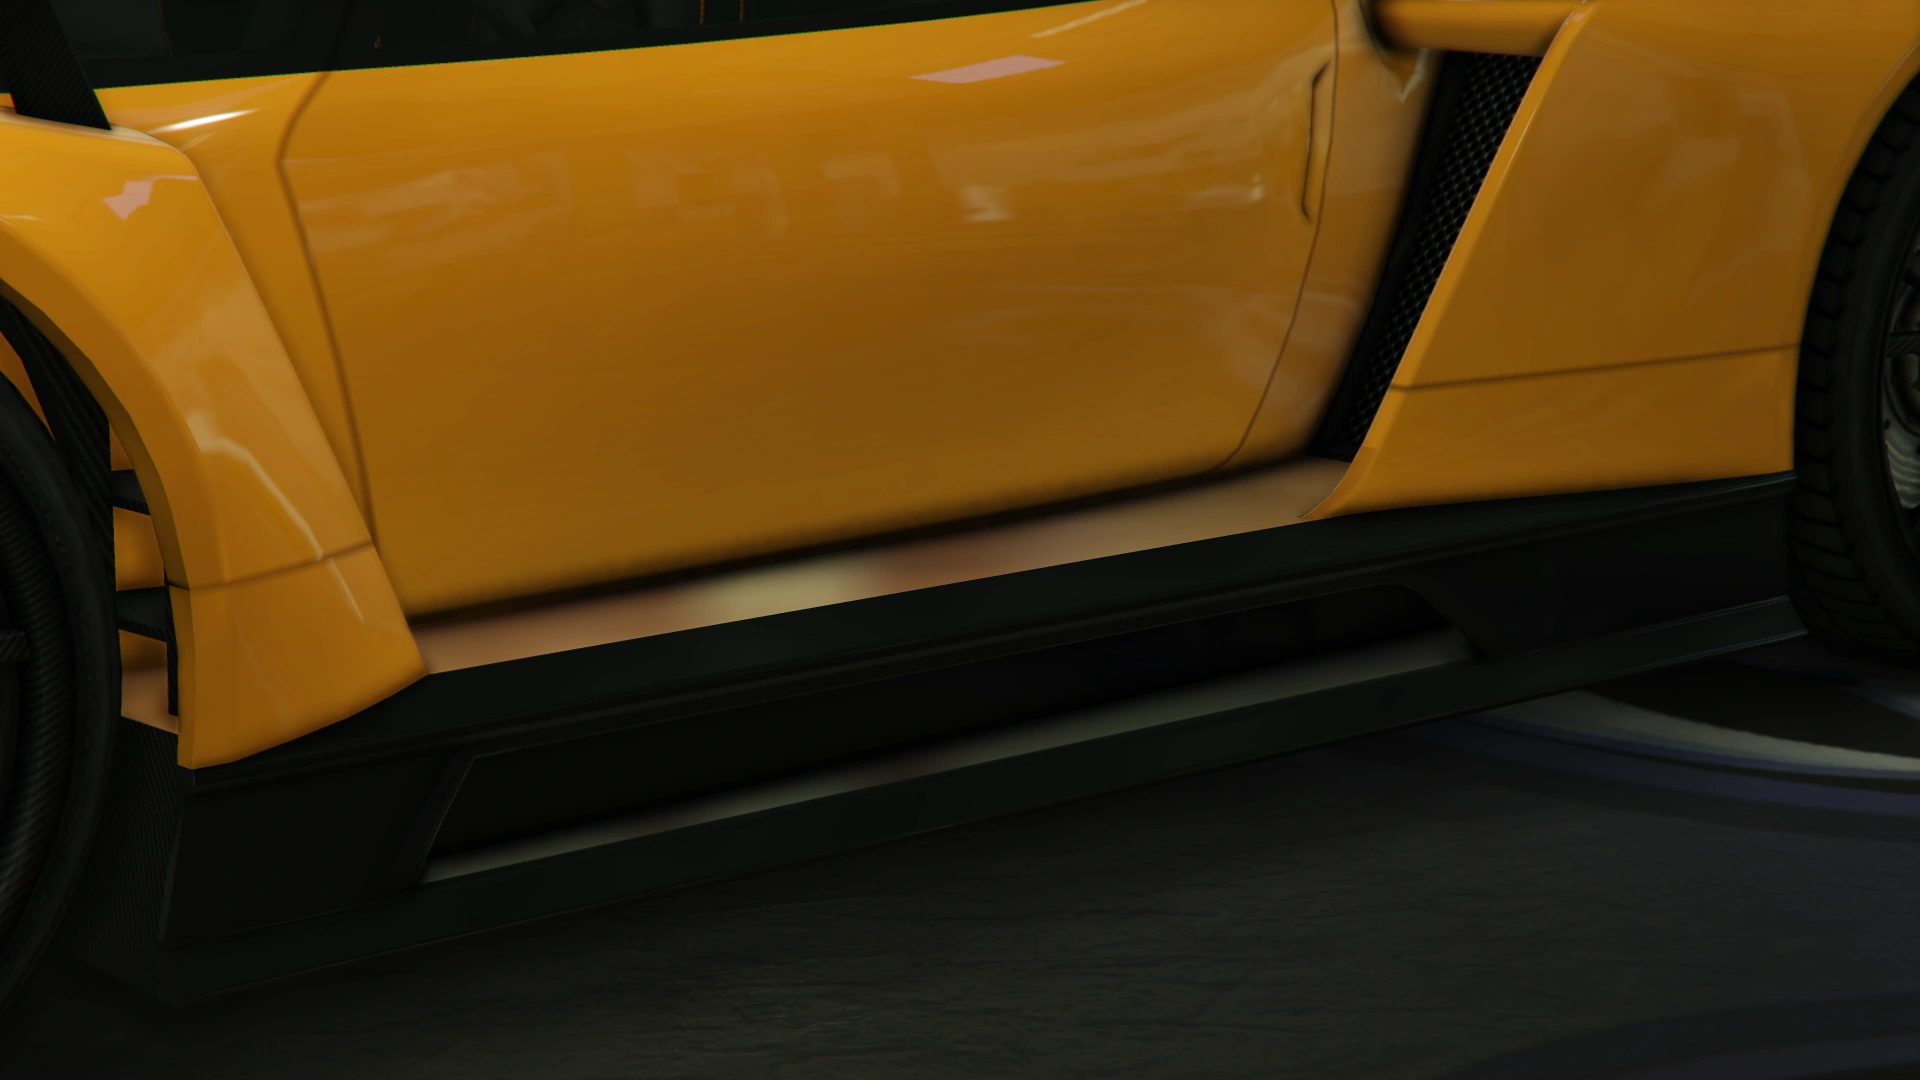
Current Design Gallery


Performance
Grand Theft Auto Online
Predictably, the Autarch is highly competitive of a hypercar. Although not as fast as other supercars such as the Vagner, RE-7B and XA-21 around a track, its traction is one of the best in the game, possessing outstanding cornering capabilities. As with many vehicles in the game, the Autarch supports downforce, but it has been cranked up to a level where steering will become relatively sluggish in normal driving, which could result in spin-outs under certain circumstances.
GTA Online Overview
| Acceleration (0-60 mph in Seconds) |
Top Speed (mph / kmh) |
Gears | Engine | Drivetrain (FWD / RWD / AWD) |
Mass (kg / lbs) |
Fuel Tank Size (litres) |
|---|---|---|---|---|---|---|
| N/A | 100 / 161 | 6 | N/A | RWD | 590 / 1300 | 65 |
| N/A | N/A | N/A | N/A | N/A | N/A | N/A |
| 3.86 Seconds | 114.4 / 184.1 | 6 | V8 (In-game model) | RWD | Cannot be observed | Cannot be observed |
Modifications
Grand Theft Auto Online
| Category | Modification | Price | Image | |
|---|---|---|---|---|
| Armor | No Armor | $1,000 | ||
| Armor Upgrade 20% | $7,500 | |||
| Armor Upgrade 40% | $12,000 | |||
| Armor Upgrade 60% | $20,000 | |||
| Armor Upgrade 80% | $35,000 | |||
| Armor Upgrade 100% | $50,000 | |||
| Brakes | Stock Brakes | $1,000 | ||
| Street Brakes | $20,000 | |||
| Sport Brakes | $27,000 | |||
| Race Brakes | $35,000 | |||
| Bumpers | Front Bumpers | Stock Front Bumper | $2,200 | |
| Stock w/ Canards | $4,600 | |||
| Primary Stock | $7,400 | |||
| Primary Stock w/ Canards | $11,700 | |||
| Secondary Stock | $14,500 | |||
| Secondary Stock w/ Canards | $14,700 | |||
| GT Bumper | $14,900 | |||
| GT Bumper w/ Canards | $15,100 | |||
| Primary GT Bumper | $15,300 | |||
| Primary GT w/ Canards | $15,500 | |||
| Secondary GT Bumper | $15,700 | |||
| Secondary GT w/ Canards | $15,900 | |||
| Rear Diffusers | Stock Rear Diffuser | $2,200 | ||
| Primary Carbon Diffuser | $4,600 | |||
| Secondary Carbon Diffuser | $7,400 | |||
| Engine | EMS Upgrade, Level 1 | $9,000 | ||
| EMS Upgrade, Level 2 | $12,500 | |||
| EMS Upgrade, Level 3 | $18,000 | |||
| EMS Upgrade, Level 4 | $33,500 | |||
| Exhausts | Stock Exhaust | $260 | ||
| Dual Exhaust | $750 | |||
| Titanium Exhaust | $1,800 | |||
| Dual Titanium Exhaust | $3,000 | |||
| Carbon Exhaust | $9,550 | |||
| Dual Carbon Exhaust | $9,750 | |||
| Aluminum Exhaust | $10,500 | |||
| Dual Aluminum Exhaust | $12,000 | |||
| Explosives | Ignition Bomb | $5,000 | ||
| Remote Bomb | $7,500 | |||
| Fenders | Stock Front Fenders | $300 | ||
| Front Canards | $900 | |||
| Stock Rear Fenders | $300 | |||
| Secondary R. Fender | $900 | |||
| Carbon R. Fender | $1,500 | |||
| Vented R. Fender | $1,700 | |||
| Secondary Vented R. Fender | $2,000 | |||
| Carbon Vented R. Fender | $2,750 | |||
| Hoods | Stock Hood | $1,600 | ||
| Secondary Stock Hood | $3,000 | |||
| Carbon Stock Hood | $5,000 | |||
| Crescent Hood | $8,000 | |||
| Secondary Crescent Hood | $9,600 | |||
| Carbon Crescent Hood | $11,000 | |||
| Aggressor Hood | $11,600 | |||
| Secondary Aggressor Hood | $12,000 | |||
| Carbon Aggressor Hood | $12,400 | |||
| Horns | Main article: Los Santos Customs/Horns | - | ||
| Lights | Headlights | Stock Lights | $600 | |
| Xenon Lights | $7,500 | |||
| Neon Kits | Main article: Los Santos Customs/Lights | - | ||
| Loss/Theft Prevention | Tracker | |||
| Full Coverage | ||||
| Plates | Blue on White 1 | $200 | ||
| Blue on White 2 | $200 | |||
| Blue on White 3 | $200 | |||
| Yellow on Blue | $300 | |||
| Yellow on Black | $600 | |||
| Respray | Main article: Los Santos Customs/Respray Colors | - | ||
| Sell | Sell Vehicle | |||
| Skirts | Stock Skirts | $2,500 | ||
| Primary Skirts | $5,500 | |||
| Secondary Skirts | $8,000 | |||
| Primary Carbon Skirts | $10,500 | |||
| Secondary Carbon Skirts | $14,000 | |||
| Spoilers | None | $6,000 | ||
| Primary Stock Spoiler | $7,050 | |||
| Secondary Stock Spoiler | $10,000 | |||
| Carbon Stock Spoiler | $13,000 | |||
| Primary Raised Spoiler | $14,000 | |||
| Secondary Raised Spoiler | $16,000 | |||
| Carbon Raised Spoiler | $16,500 | |||
| Primary Sport Spoiler | $17,000 | |||
| Secondary Sport Spoiler | $17,500 | |||
| Primary Aggressor Spoiler | $18,000 | |||
| Secondary Aggressor Spoiler | $18,500 | |||
| Primary Race Spoiler | $19,000 | |||
| Secondary Race Spoiler | $19,500 | |||
| Primary GT Spoiler | $20,000 | |||
| Secondary GT Spoiler | $20,500 | |||
| Primary High Spoiler | $21,000 | |||
| Secondary High Spoiler | $21,500 | |||
| Suspension | Stock Suspension | $200 | ||
| Lowered Suspension | $1,000 | |||
| Street Suspension | $2,000 | |||
| Sport Suspension | $3,400 | |||
| Competition Suspension | $4,400 | |||
| Transmission | Stock Transmission | $1,000 | ||
| Street Transmission | $29,500 | |||
| Sports Transmission | $32,500 | |||
| Race Transmission | $40,000 | |||
| Turbo | None | $5,000 | ||
| Turbo Tuning | $50,000 | |||
| Wheels | Main artivle: Los Santos Customs/Wheels | - | ||
| Windows | None | $500 | ||
| Light Smoke | $1,500 | |||
| Dark Smoke | $3,500 | |||
| Limo | $5,000 | |||


Image Gallery
Grand Theft Auto Online
")
")
Video

Prominent Appearances in Missions
Grand Theft Auto Online
- Can appear in the "Under the Influence" Casino Work, where it must be delivered to the Casino while the protagonist is under the influence of alcohol.
Locations
Grand Theft Auto Online
- Can be purchased from Legendary Motorsport for $1,955,000.
Trivia
General
- Autarch means "absolute ruler" or "ruler who has absolute power". It is possibly a reference to the Koenigsegg Regera, as Regera is a Swedish verb, meaning "to reign". The same applies to the Tyrant, another Överflöd vehicle, which also means "absolute ruler".
- The default radio station for the Autarch is Non-Stop-Pop FM.
See Also
- Entity XF - Another hypercar manufactured by Överflöd.
- Tyrant - Another hypercar manufactured by Överflöd.