Noirlime4L (talk | contribs) No edit summary |
Tag: Visual edit |
||
| (11 intermediate revisions by 7 users not shown) | |||
| Line 4: | Line 4: | ||
|rear_image = 9FCabrio-GTAV-rear2.png |
|rear_image = 9FCabrio-GTAV-rear2.png |
||
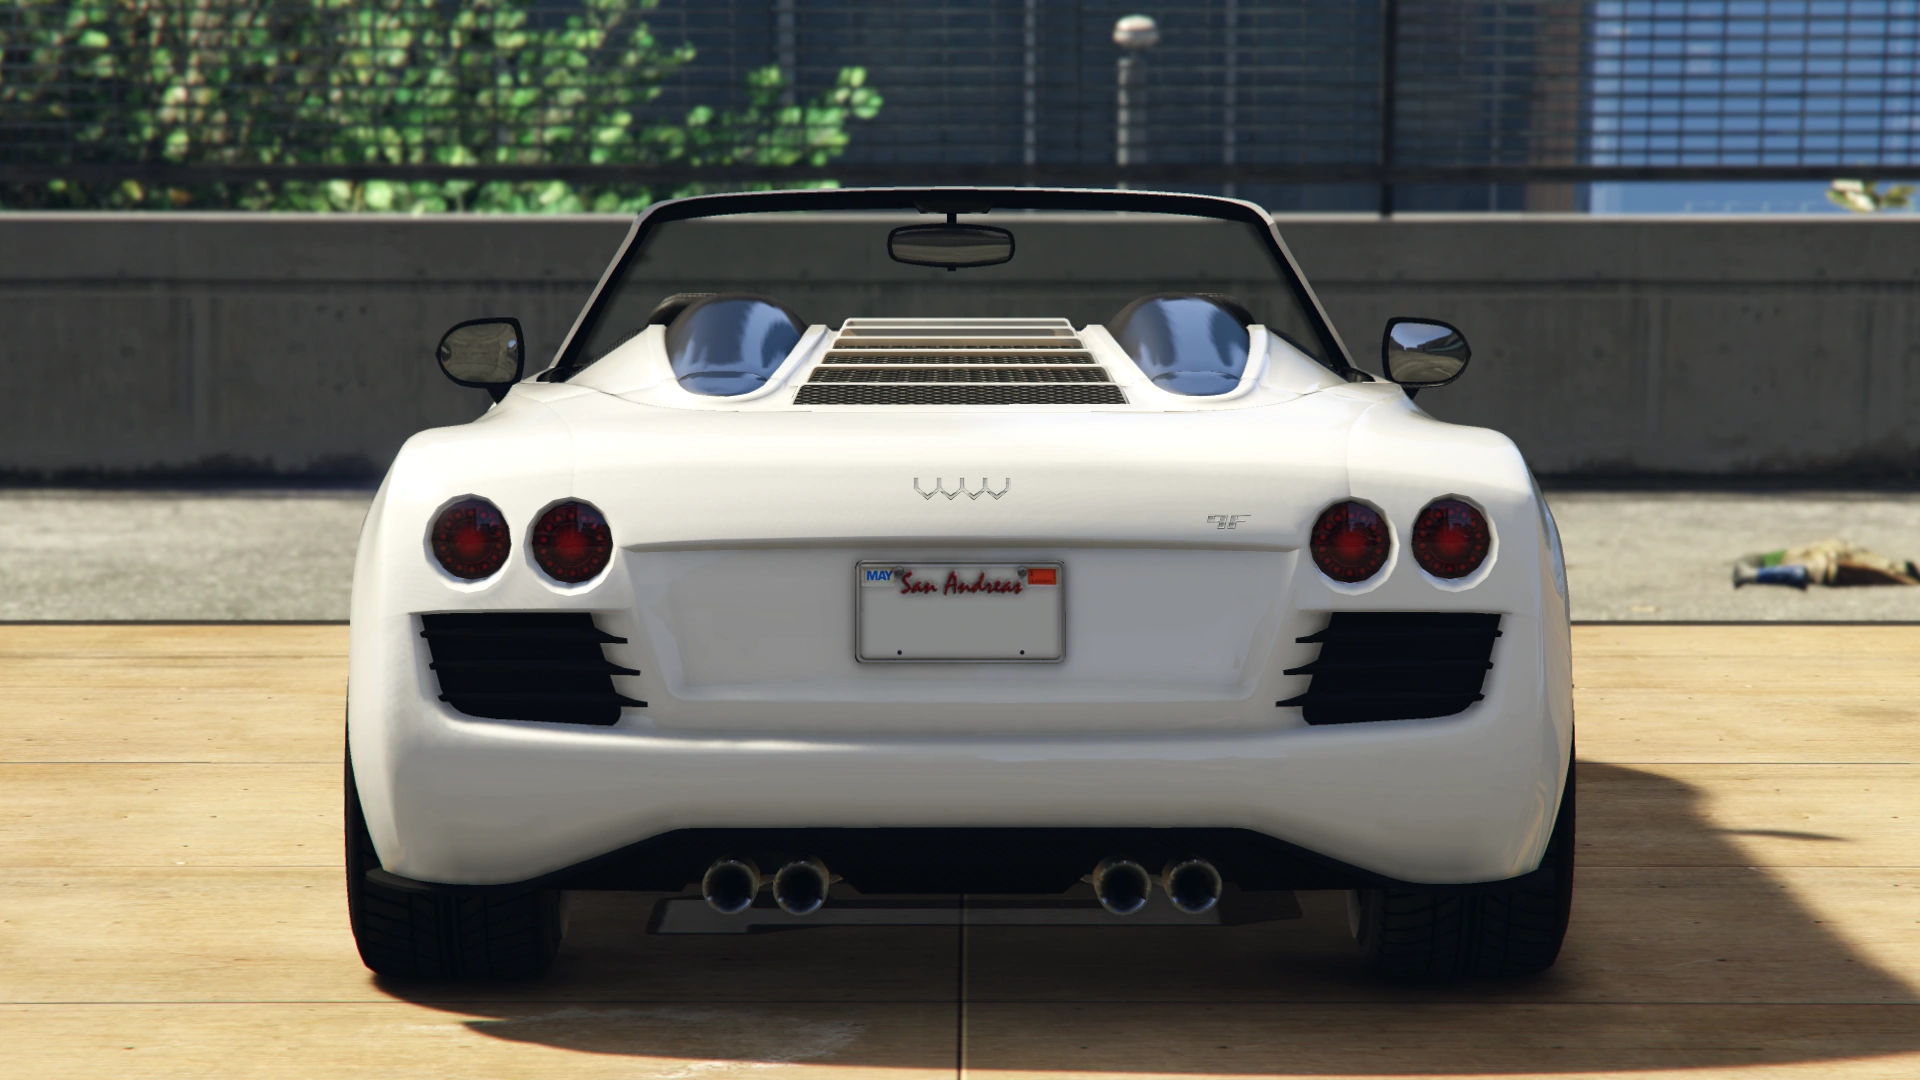
|caption = A '''9F Cabrio''' in ''[[Grand Theft Auto V]]''. |
|caption = A '''9F Cabrio''' in ''[[Grand Theft Auto V]]''. |
||
| ⚫ | |||
|vehicle_class = Sports |
|vehicle_class = Sports |
||
| ⚫ | |||
|body_style = [[:Category:Sports Cars|2-door cabrio]] |
|body_style = [[:Category:Sports Cars|2-door cabrio]] |
||
| ⚫ | |||
|capacity = 2 <small>(driver and passenger)</small> |
|capacity = 2 <small>(driver and passenger)</small> |
||
| ⚫ | |||
|manufacturer = [[Obey]] |
|manufacturer = [[Obey]] |
||
| ⚫ | |||
| ⚫ | |||
|related = [[9F]] |
|related = [[9F]] |
||
|makeyear = |
|makeyear = |
||
| Line 18: | Line 18: | ||
|carcols = |
|carcols = |
||
{{Expand|| |
{{Expand|| |
||
| ⚫ | |||
| ⚫ | |||
| − | {{CarColV|0|0|0|156}} |
+ | {{CarColV|no=1|0|0|0|156}} |
| ⚫ | |||
| ⚫ | |||
| − | {{CarColV|3| |
+ | {{CarColV|no=3|31|0|32|156}} |
| ⚫ | |||
| ⚫ | |||
| − | {{CarColV| |
+ | {{CarColV|no=5|4|1|111|156}} |
| ⚫ | |||
| ⚫ | |||
| − | {{CarColV| |
+ | {{CarColV|no=7|73|1|74|156}} |
| ⚫ | |||
| − | <center>COLOR SET 5</center> |
||
| − | {{CarColV| |
+ | {{CarColV|no=9|5|0|111|156}} |
| ⚫ | |||
| − | <center>COLOR SET 6</center> |
||
| − | {{CarColV| |
+ | {{CarColV|no=11|111|111|0|156}} |
| ⚫ | |||
| − | <center>COLOR SET 7</center> |
||
| − | {{CarColV| |
+ | {{CarColV|no=13|7|0|111|156}} |
| + | {{CarColV|no=14|9|7|121|156}} |
||
| − | <center>COLOR SET 8</center> |
||
| − | {{CarColV| |
+ | {{CarColV|no=15|38|0|88|156}}<br> |
| − | <center>COLOR SET 9</center> |
||
| ⚫ | |||
| − | <center>COLOR SET 10</center> |
||
| ⚫ | |||
| − | <center>COLOR SET 11</center> |
||
| ⚫ | |||
| − | <center>COLOR SET 12</center> |
||
| ⚫ | |||
| − | <center>COLOR SET 13</center> |
||
| ⚫ | |||
| − | <center>COLOR SET 14</center> |
||
| ⚫ | |||
| − | <center>COLOR SET 15</center> |
||
| ⚫ | |||
}} |
}} |
||
|wheeltype = High End |
|wheeltype = High End |
||
| Line 94: | Line 80: | ||
The front end of this car is dominated by the appearance of the aggressive front face, which is made up of four different air intakes, two in the central area and then one on either side. The main grille is located in the upper-central area of the bumper, its outer edges run parallel to the inner edge of the headlights and are trimmed with chrome. The Obey emblem is located just above the main central grille. The headlights are very curved and are in a two-step layout, with the inner step being less tall than the outer. The innermost edge of the headlights forms the basis for the bonnet/hood elevation lines which run to respective corners of the windscreen. |
The front end of this car is dominated by the appearance of the aggressive front face, which is made up of four different air intakes, two in the central area and then one on either side. The main grille is located in the upper-central area of the bumper, its outer edges run parallel to the inner edge of the headlights and are trimmed with chrome. The Obey emblem is located just above the main central grille. The headlights are very curved and are in a two-step layout, with the inner step being less tall than the outer. The innermost edge of the headlights forms the basis for the bonnet/hood elevation lines which run to respective corners of the windscreen. |
||
| − | It shares the main design with the standard coupe-form |
+ | It shares the main design with the standard coupe-form 9F, except it now has altered side intakes and the rear-engine visibility has been omitted due to the retractable roof in its place. |
{{Clr}} |
{{Clr}} |
||
| Line 101: | Line 87: | ||
Top Up= |
Top Up= |
||
<!--Please ensure you have read the Manual of Style [GTA_Wiki:Manual_of_Style/Vehicles/Design_Galleries] before uploading and adding images to the Current Design Gallery. Failure to meet these guidelines will result in the images being removed and deleted, and repeated offences may result in a warning.--> |
<!--Please ensure you have read the Manual of Style [GTA_Wiki:Manual_of_Style/Vehicles/Design_Galleries] before uploading and adding images to the Current Design Gallery. Failure to meet these guidelines will result in the images being removed and deleted, and repeated offences may result in a warning.--> |
||
| − | |||
{{Current Design Gallery |
{{Current Design Gallery |
||
|front_quarter_image = 9FCabrio-GTAV-FrontQuarter.png |
|front_quarter_image = 9FCabrio-GTAV-FrontQuarter.png |
||
| Line 118: | Line 103: | ||
|-| |
|-| |
||
Top Down= |
Top Down= |
||
| − | |||
{{Current Design Gallery |
{{Current Design Gallery |
||
|front_quarter_image = 9FCabrioTopless-GTAV-FrontQuarter.png |
|front_quarter_image = 9FCabrioTopless-GTAV-FrontQuarter.png |
||
| Line 157: | Line 141: | ||
|observed_engine = {{H:title|Mid-engine, all wheel drive|M4}} |
|observed_engine = {{H:title|Mid-engine, all wheel drive|M4}} |
||
|observed_drivetrain = AWD |
|observed_drivetrain = AWD |
||
| − | |rsc_image = |
+ | |rsc_image = 9FCabrio-GTAV-RSCStats.png |
| − | |rsc_top_speed = |
+ | |rsc_top_speed = {{PercentBar|83.165451|width=150}} |
| − | |rsc_acceleration = |
+ | |rsc_acceleration = {{PercentBar|82.50008.|width=150}} |
| − | |rsc_braking = |
+ | |rsc_braking = {{PercentBar|33.333336|width=150}} |
| − | |rsc_traction = |
+ | |rsc_traction = {{PercentBar|77.272728|width=150}} |
}} |
}} |
||
| Line 167: | Line 151: | ||
===''Grand Theft Auto V''=== |
===''Grand Theft Auto V''=== |
||
{| class="wikitable" |
{| class="wikitable" |
||
| + | ! colspan="2" scope="col" |Category |
||
| − | !Type |
||
| + | ! scope="col" |Modification |
||
| − | !Upgrade |
||
| − | !Cost ( |
+ | ! scope="col" |Cost (''GTA V'') |
| − | !Cost ([[Grand Theft Auto Online|Online]]) |
+ | ! scope="col" |Cost ([[Grand Theft Auto Online|''GTA Online'']]) |
| + | ! scope="col" |Image |
||
| + | |- |
||
| ⚫ | |||
| + | |No Armor |
||
| ⚫ | |||
| + | | colspan="2" style="text-align: center;" |$1,000 |
||
|- |
|- |
||
| ⚫ | |||
|Armor Upgrade 20% |
|Armor Upgrade 20% |
||
| style="text-align: center;" |$1,625 |
| style="text-align: center;" |$1,625 |
||
| − | | style="text-align: center;" |$ |
+ | | colspan="2" style="text-align: center;" |$7,500 |
|- |
|- |
||
|Armor Upgrade 40% |
|Armor Upgrade 40% |
||
| style="text-align: center;" |$4,062 |
| style="text-align: center;" |$4,062 |
||
| − | | style="text-align: center;" |$ |
+ | | colspan="2" style="text-align: center;" |$12,000 |
|- |
|- |
||
|Armor Upgrade 60% |
|Armor Upgrade 60% |
||
| style="text-align: center;" |$6,500 |
| style="text-align: center;" |$6,500 |
||
| − | | style="text-align: center;" |$ |
+ | | colspan="2" style="text-align: center;" |$20,000 |
|- |
|- |
||
|Armor Upgrade 80% |
|Armor Upgrade 80% |
||
| style="text-align: center;" |$11,375 |
| style="text-align: center;" |$11,375 |
||
| − | | style="text-align: center;" |$ |
+ | | colspan="2" style="text-align: center;" |$35,000 |
|- |
|- |
||
|Armor Upgrade 100% |
|Armor Upgrade 100% |
||
| style="text-align: center;" |$16,250 |
| style="text-align: center;" |$16,250 |
||
| − | | style="text-align: center;" |$ |
+ | | colspan="2" style="text-align: center;" |$50,000 |
| + | |- |
||
| ⚫ | |||
| + | |Stock Brakes |
||
| + | | style="text-align: center;" |$325 |
||
| + | | colspan="2" style="text-align: center;" |$1,000 |
||
|- |
|- |
||
| ⚫ | |||
|Street Brakes |
|Street Brakes |
||
| style="text-align: center;" |$6,500 |
| style="text-align: center;" |$6,500 |
||
| − | | style="text-align: center;" |$13,000 |
+ | | colspan="2" style="text-align: center;" |$13,000 |
|- |
|- |
||
|Sport Brakes |
|Sport Brakes |
||
| style="text-align: center;" |$8,775 |
| style="text-align: center;" |$8,775 |
||
| − | | style="text-align: center;" |$17,550 |
+ | | colspan="2" style="text-align: center;" |$17,550 |
|- |
|- |
||
|Race Brakes |
|Race Brakes |
||
| style="text-align: center;" |$11,375 |
| style="text-align: center;" |$11,375 |
||
| − | | style="text-align: center;" |$22,750 |
+ | | colspan="2" style="text-align: center;" |$22,750 |
| + | |- |
||
| + | | colspan="2" rowspan="4" |Bumpers |
||
| + | |Stock Front Bumper |
||
| + | | style="text-align: center;" |$750 |
||
| + | | style="text-align: center;" |$2,200 |
||
| + | | |
||
|- |
|- |
||
| ⚫ | |||
|Custom Front Splitter |
|Custom Front Splitter |
||
| − | | style="text-align: center;" |$ |
+ | | style="text-align: center;" |$1,250 |
| + | | style="text-align: center;" |$4,600 |
||
| + | | |
||
| + | |- |
||
| + | |Stock Rear Bumper |
||
| + | | style="text-align: center;" |$750 |
||
| + | | style="text-align: center;" |$2,200 |
||
| |
| |
||
|- |
|- |
||
|Custom Rear Bumper |
|Custom Rear Bumper |
||
| − | | style="text-align: center;" |$ |
+ | | style="text-align: center;" |$1,250 |
| + | | style="text-align: center;" |$4,600 |
||
| + | | |
||
| + | |- |
||
| + | | colspan="2" rowspan="2" |Chassis |
||
| ⚫ | |||
| + | | style="text-align: center;" |$350 |
||
| + | | style="text-align: center;" |$700 |
||
| |
| |
||
|- |
|- |
||
| ⚫ | |||
|Carbon Panels |
|Carbon Panels |
||
| style="text-align: center;" |$550 |
| style="text-align: center;" |$550 |
||
| + | | style="text-align: center;" |$1,100 |
||
| |
| |
||
|- |
|- |
||
| − | |rowspan="4"|Engine |
+ | | colspan="2" rowspan="4" |Engine |
|EMS Upgrade, Level 1 |
|EMS Upgrade, Level 1 |
||
| style="text-align: center;" |$2,925 |
| style="text-align: center;" |$2,925 |
||
| − | | style="text-align: center;" |$ |
+ | | colspan="2" style="text-align: center;" |$9,000 |
|- |
|- |
||
|EMS Upgrade, Level 2 |
|EMS Upgrade, Level 2 |
||
| style="text-align: center;" |$4,062 |
| style="text-align: center;" |$4,062 |
||
| − | | style="text-align: center;" |$ |
+ | | colspan="2" style="text-align: center;" |$12,500 |
|- |
|- |
||
|EMS Upgrade, Level 3 |
|EMS Upgrade, Level 3 |
||
| style="text-align: center;" |$5,850 |
| style="text-align: center;" |$5,850 |
||
| − | | style="text-align: center;" |$ |
+ | | colspan="2" style="text-align: center;" |$18,000 |
|- |
|- |
||
|EMS Upgrade, Level 4 |
|EMS Upgrade, Level 4 |
||
| style="text-align: center;" |$10,887 |
| style="text-align: center;" |$10,887 |
||
| − | | style="text-align: center;" |$ |
+ | | colspan="2" style="text-align: center;" |$33,500 |
| + | |- |
||
| + | | colspan="2" rowspan="4" |Exhausts |
||
| + | |Stock Exhaust |
||
| + | | style="text-align: center;" |$130 |
||
| + | | style="text-align: center;" |$260 |
||
| + | | |
||
|- |
|- |
||
| ⚫ | |||
|Chrome Tip Exhaust |
|Chrome Tip Exhaust |
||
| style="text-align: center;" |$375 |
| style="text-align: center;" |$375 |
||
| + | | style="text-align: center;" |$750 |
||
| |
| |
||
|- |
|- |
||
|Dual Exit Exhaust |
|Dual Exit Exhaust |
||
| style="text-align: center;" |$899 |
| style="text-align: center;" |$899 |
||
| + | | style="text-align: center;" |$1,800 |
||
| |
| |
||
|- |
|- |
||
|Big Bore Exhaust |
|Big Bore Exhaust |
||
| style="text-align: center;" |$1,499 |
| style="text-align: center;" |$1,499 |
||
| + | | style="text-align: center;" |$3,000 |
||
| + | | |
||
| + | |- |
||
| + | | colspan="2" rowspan="2" |[[Car Bomb|Explosives]] |
||
| + | |Ignition Bomb |
||
| + | | style="text-align: center;" |N/A |
||
| + | | colspan="2" style="text-align: center;" |$5,000 |
||
| + | |- |
||
| + | |Remote Bomb |
||
| + | | style="text-align: center;" |N/A |
||
| + | | colspan="2" style="text-align: center;" |$7,500 |
||
| + | |- |
||
| + | | colspan="2" rowspan="2" |Hoods |
||
| ⚫ | |||
| + | | style="text-align: center;" |$450 |
||
| + | | style="text-align: center;" |$1,600 |
||
| |
| |
||
|- |
|- |
||
| ⚫ | |||
|Carbon Hood |
|Carbon Hood |
||
| − | | style="text-align: center;" |$ |
+ | | style="text-align: center;" |$850 |
| + | | style="text-align: center;" |$3,000 |
||
| |
| |
||
|- |
|- |
||
| − | | |
+ | | colspan="2" |Horns |
| + | |''Main article: [[Los Santos Customs/Horns]]'' |
||
| + | | style="text-align: center;" | - |
||
| + | | colspan="2" style="text-align: center;" | - |
||
| + | |- |
||
| ⚫ | |||
| ⚫ | |||
| + | |Stock Lights |
||
| + | | style="text-align: center;" |$200 |
||
| + | | colspan="2" style="text-align: center;" |$600 |
||
| + | |- |
||
|Xenon Lights |
|Xenon Lights |
||
| − | | style="text-align: center;" |$ |
+ | | style="text-align: center;" |$1,000 |
| − | | style="text-align: center;" |$ |
+ | | colspan="2" style="text-align: center;" |$7,500 |
|- |
|- |
||
| + | |Neon Kits |
||
| − | |<div class="mw-collapsible mw-collapsed" style="width:100%"> |
||
| − | + | |''Main article: [[Los Santos Customs/Lights]]'' |
|
| style="text-align: center;" | - |
| style="text-align: center;" | - |
||
| − | | style="text-align: center;" | - |
+ | | colspan="2" style="text-align: center;" | - |
| − | |||
|- |
|- |
||
| − | |rowspan="2"|Loss/Theft Prevention |
+ | | colspan="2" rowspan="2" |Loss/Theft Prevention |
|Tracker |
|Tracker |
||
| style="text-align: center;" |N/A |
| style="text-align: center;" |N/A |
||
| − | | style="background-color:black;text-align: center;" |Too Hot |
+ | | colspan="2" style="background-color:black;text-align: center;" |Too Hot |
|- |
|- |
||
|Full Coverage |
|Full Coverage |
||
| style="text-align: center;" |N/A |
| style="text-align: center;" |N/A |
||
| − | | style="background-color:black;text-align: center;" |Too Hot |
+ | | colspan="2" style="background-color:black;text-align: center;" |Too Hot |
|- |
|- |
||
| + | | colspan="2" rowspan="5" |Plates |
||
| ⚫ | |||
| + | |Blue on White 1 |
||
| − | |<div class="mw-collapsible mw-collapsed" style="width:100%"> |
||
| + | | style="text-align: center;" |$50 |
||
| − | <div class="mw-collapsible-content">{{ResprayColorsExpand}}</div></div> |
||
| − | | style="text-align: center;" | |
+ | | colspan="2" style="text-align: center;" |$200 |
| ⚫ | |||
| − | |||
|- |
|- |
||
| + | |Blue on White 2 |
||
| − | |Crew Emblem |
||
| − | | style="text-align: center;" | |
+ | | style="text-align: center;" |$50 |
| − | | style="text-align: center;" |$ |
+ | | colspan="2" style="text-align: center;" |$200 |
|- |
|- |
||
| + | |Blue on White 3 |
||
| − | |Sell |
||
| + | | style="text-align: center;" |$50 |
||
| + | | colspan="2" style="text-align: center;" |$200 |
||
| + | |- |
||
| + | |Yellow on Blue |
||
| + | | style="text-align: center;" |$75 |
||
| + | | colspan="2" style="text-align: center;" |$300 |
||
| + | |- |
||
| + | |Yellow on Black |
||
| + | | style="text-align: center;" |$150 |
||
| + | | colspan="2" style="text-align: center;" |$600 |
||
| + | |- |
||
| ⚫ | |||
| + | |''Main article: [[Los Santos Customs/Respray Colors]]'' |
||
| + | | style="text-align: center;" | - |
||
| + | | colspan="2" style="text-align: center;" | - |
||
| + | |- |
||
| + | | colspan="2" |Sell |
||
|Sell Vehicle |
|Sell Vehicle |
||
| style="text-align: center;" |N/A |
| style="text-align: center;" |N/A |
||
| − | | style="background-color:black;text-align: center;" |Too Hot |
+ | | colspan="2" style="background-color:black;text-align: center;" |Too Hot |
| + | |- |
||
| + | | colspan="2" rowspan="2" |Skirts |
||
| ⚫ | |||
| + | | style="text-align: center;" |$1,250 |
||
| + | | style="text-align: center;" |$2,500 |
||
| + | | |
||
|- |
|- |
||
| ⚫ | |||
|Custom Skirts |
|Custom Skirts |
||
| − | | style="text-align: center;" |$ |
+ | | style="text-align: center;" |$1,500 |
| + | | style="text-align: center;" |$5,500 |
||
| + | | |
||
| + | |- |
||
| + | | colspan="2" rowspan="2" |Spoilers |
||
| + | |None |
||
| + | | style="text-align: center;" |$500 |
||
| + | | style="text-align: center;" |$6,000 |
||
| |
| |
||
|- |
|- |
||
| − | |Spoiler |
||
|Low Level Spoiler |
|Low Level Spoiler |
||
| − | | style="text-align: center;" |$ |
+ | | style="text-align: center;" |$750 |
| + | | style="text-align: center;" |$7,050 |
||
| |
| |
||
|- |
|- |
||
| − | |rowspan=" |
+ | | colspan="2" rowspan="5" |Suspension |
| + | |Stock Suspension |
||
| + | | style="text-align: center;" |$100 |
||
| + | | colspan="2" style="text-align: center;" |$200 |
||
| + | |- |
||
|Lowered Suspension |
|Lowered Suspension |
||
| style="text-align: center;" |$500 |
| style="text-align: center;" |$500 |
||
| − | | style="text-align: center;" |$1,000 |
+ | | colspan="2" style="text-align: center;" |$1,000 |
|- |
|- |
||
|Street Suspension |
|Street Suspension |
||
| style="text-align: center;" |$1,000 |
| style="text-align: center;" |$1,000 |
||
| − | | style="text-align: center;" |$2,000 |
+ | | colspan="2" style="text-align: center;" |$2,000 |
|- |
|- |
||
|Sport Suspension |
|Sport Suspension |
||
| style="text-align: center;" |$1,700 |
| style="text-align: center;" |$1,700 |
||
| − | | style="text-align: center;" |$3,400 |
+ | | colspan="2" style="text-align: center;" |$3,400 |
|- |
|- |
||
|Competition Suspension |
|Competition Suspension |
||
| style="text-align: center;" |$2,200 |
| style="text-align: center;" |$2,200 |
||
| − | | style="text-align: center;" |$4,400 |
+ | | colspan="2" style="text-align: center;" |$4,400 |
| + | |- |
||
| ⚫ | |||
| + | |Stock Transmission |
||
| + | | style="text-align: center;" |$325 |
||
| + | | colspan="2" style="text-align: center;" |$1,000 |
||
|- |
|- |
||
| ⚫ | |||
|Street Transmission |
|Street Transmission |
||
| style="text-align: center;" |$9,587 |
| style="text-align: center;" |$9,587 |
||
| − | | style="text-align: center;" |$ |
+ | | colspan="2" style="text-align: center;" |$29,500 |
|- |
|- |
||
|Sports Transmission |
|Sports Transmission |
||
| style="text-align: center;" |$10,562 |
| style="text-align: center;" |$10,562 |
||
| − | | style="text-align: center;" |$ |
+ | | colspan="2" style="text-align: center;" |$32,500 |
|- |
|- |
||
|Race Transmission |
|Race Transmission |
||
| style="text-align: center;" |$13,000 |
| style="text-align: center;" |$13,000 |
||
| − | | style="text-align: center;" |$ |
+ | | colspan="2" style="text-align: center;" |$40,000 |
| + | |- |
||
| + | | colspan="2" rowspan="2" |Turbo |
||
| + | |None |
||
| + | | style="text-align: center;" |$1,625 |
||
| + | | colspan="2" style="text-align: center;" |$5,000 |
||
|- |
|- |
||
| − | |Turbo |
||
|Turbo Tuning |
|Turbo Tuning |
||
| style="text-align: center;" |$8,125 |
| style="text-align: center;" |$8,125 |
||
| − | | style="text-align: center;" |$ |
+ | | colspan="2" style="text-align: center;" |$50,000 |
|- |
|- |
||
| − | |Wheels |
+ | | colspan="2" |Wheels |
| + | |''Main article: [[Los Santos Customs/Wheels]]'' |
||
| − | |<div class="mw-collapsible mw-collapsed" style="width:100%"> |
||
| − | <div class="mw-collapsible-content">{{WheelsExpand}}</div></div> |
||
| style="text-align: center;" | - |
| style="text-align: center;" | - |
||
| − | | style="text-align: center;" | - |
+ | | colspan="2" style="text-align: center;" | - |
| + | |- |
||
| − | |||
| ⚫ | |||
| + | |None |
||
| + | | style="text-align: center;" |$100 |
||
| + | | colspan="2" style="text-align: center;" |$500 |
||
|- |
|- |
||
| ⚫ | |||
|Light Smoke |
|Light Smoke |
||
| style="text-align: center;" |$200 |
| style="text-align: center;" |$200 |
||
| − | | style="text-align: center;" |$1,500 |
+ | | colspan="2" style="text-align: center;" |$1,500 |
|- |
|- |
||
|Dark Smoke |
|Dark Smoke |
||
| style="text-align: center;" |$450 |
| style="text-align: center;" |$450 |
||
| − | | style="text-align: center;" |$3,500 |
+ | | colspan="2" style="text-align: center;" |$3,500 |
|- |
|- |
||
|Limo |
|Limo |
||
| style="text-align: center;" |$700 |
| style="text-align: center;" |$700 |
||
| − | | style="text-align: center;" |$5,000 |
+ | | colspan="2" style="text-align: center;" |$5,000 |
|} |
|} |
||
| + | |||
| ⚫ | |||
| ⚫ | |||
| ⚫ | |||
| ⚫ | |||
| ⚫ | |||
| ⚫ | |||
| ⚫ | |||
| + | 9FCabrio-GTAV-RSC.jpg|The '''9F Cabrio''' on [[Rockstar Games Social Club]]. |
||
| + | 9FCab-GTAV-RGSC2.jpg|The '''9F Cabrio''' on the updated Rockstar Games Social Club. |
||
| + | 9FCabrio-GTAV-RGSC.jpg|The '''9F Cabrio''' in the cinematic preview on ''GTA V'' Rockstar Games Social Club. |
||
| + | 9FCab-GTAV-RGSC3.jpg|The '''9F Cabrio''' in the cinematic preview on ''GTA Online'' Rockstar Games Social Club. |
||
| ⚫ | |||
==Prominent Appearances in Missions== |
==Prominent Appearances in Missions== |
||
| Line 363: | Line 460: | ||
====''Grand Theft Auto Online''==== |
====''Grand Theft Auto Online''==== |
||
*A 9F Cabrio is repossessed by the player from the [[Rockford Dorset Hotel]] for Simeon in the [[Missions in GTA Online|mission]] [[Rockford Roll]]. |
*A 9F Cabrio is repossessed by the player from the [[Rockford Dorset Hotel]] for Simeon in the [[Missions in GTA Online|mission]] [[Rockford Roll]]. |
||
| − | |||
| ⚫ | |||
| ⚫ | |||
| ⚫ | |||
| ⚫ | |||
| ⚫ | |||
| ⚫ | |||
| ⚫ | |||
| ⚫ | |||
==Locations== |
==Locations== |
||
| Line 381: | Line 469: | ||
*Rarely seen around Rockford Hills. |
*Rarely seen around Rockford Hills. |
||
*Sometimes spawns on the [[Senora Freeway]]. |
*Sometimes spawns on the [[Senora Freeway]]. |
||
| − | *Can be purchased from [[Legendary Motorsport]] for [[$]]130,000. |
+ | *Can be purchased from [[Legendary Motorsport]] for [[Money|$]]130,000. |
| + | |||
| + | ==Changes== |
||
| + | {| class="wikitable" width="100%" |
||
| + | !Change(s) |
||
| + | |- |
||
| + | ! colspan="1" |''Grand Theft Auto V''<br />[[PlayStation 3]], [[Xbox 360]] |
||
| + | |- |
||
| + | |Added 9F Cabrio. |
||
| + | |- |
||
| + | ! colspan="1" |''Grand Theft Auto V''<br />[[PlayStation 4]], [[Xbox One]], [[Personal Computer|PC]] |
||
| + | |- |
||
| + | | |
||
| + | *Removed/updated particle effects.<ref>'''File Data''':<br> |
||
| + | <div style="float:left; width:50%;"> |
||
| ⚫ | |||
| + | <pre><ptfxAssetName>veh_car</ptfxAssetName></pre> |
||
| + | </div> |
||
| + | <div style="float:right; width:50%;"> |
||
| ⚫ | |||
| + | <pre><ptfxAssetName>null</ptfxAssetName></pre> |
||
| + | </div>{{Clr}} |
||
| + | </ref> |
||
| + | *Changed dirt level max value from 0.4 to 0.45.<ref>'''File Data''':<br> |
||
| + | <div style="float:left; width:50%;"> |
||
| ⚫ | |||
| + | <pre><dirtLevelMax value="0.400000" /></pre> |
||
| + | </div> |
||
| + | <div style="float:right; width:50%;"> |
||
| ⚫ | |||
| + | <pre><dirtLevelMax value="0.450000" /></pre> |
||
| + | </div>{{Clr}} |
||
| + | </ref> |
||
| ⚫ | |||
==Trivia== |
==Trivia== |
||
| Line 389: | Line 510: | ||
===''Grand Theft Auto V''=== |
===''Grand Theft Auto V''=== |
||
*Even though Legendary Motorsport's description of the 9F Cabrio states that customers should spend an extra $5,000 to get the convertible version, the 9F Cabrio is actually $10,000 more expensive than the standard 9F. |
*Even though Legendary Motorsport's description of the 9F Cabrio states that customers should spend an extra $5,000 to get the convertible version, the 9F Cabrio is actually $10,000 more expensive than the standard 9F. |
||
| − | *The 9F is one of the few non-personal civilian vehicles to always use the same "Stock" horn sound. It shares the same "Stock" horn sound with Trevor's [[Bodhi]]. |
+ | *The 9F Cabrio is one of the few non-personal civilian vehicles to always use the same "Stock" horn sound. It shares the same "Stock" horn sound with Trevor's [[Bodhi]]. This also applies to the regular 9F. |
==See Also== |
==See Also== |
||
*[[9F]] - Standard variant with a hard-top roof. |
*[[9F]] - Standard variant with a hard-top roof. |
||
| + | |||
| + | ==References== |
||
| + | {{Reflist}} |
||
==Navigation== |
==Navigation== |
||
| Line 400: | Line 524: | ||
{{vehicles|state=collapsed}} |
{{vehicles|state=collapsed}} |
||
{{gtav vehicles|state=collapsed}} |
{{gtav vehicles|state=collapsed}} |
||
| ⚫ | |||
| ⚫ | |||
| ⚫ | |||
[[es:9F]] |
[[es:9F]] |
||
[[fr:9F]] |
[[fr:9F]] |
||
Revision as of 12:23, 15 May 2020
Template:Infobox vehicles
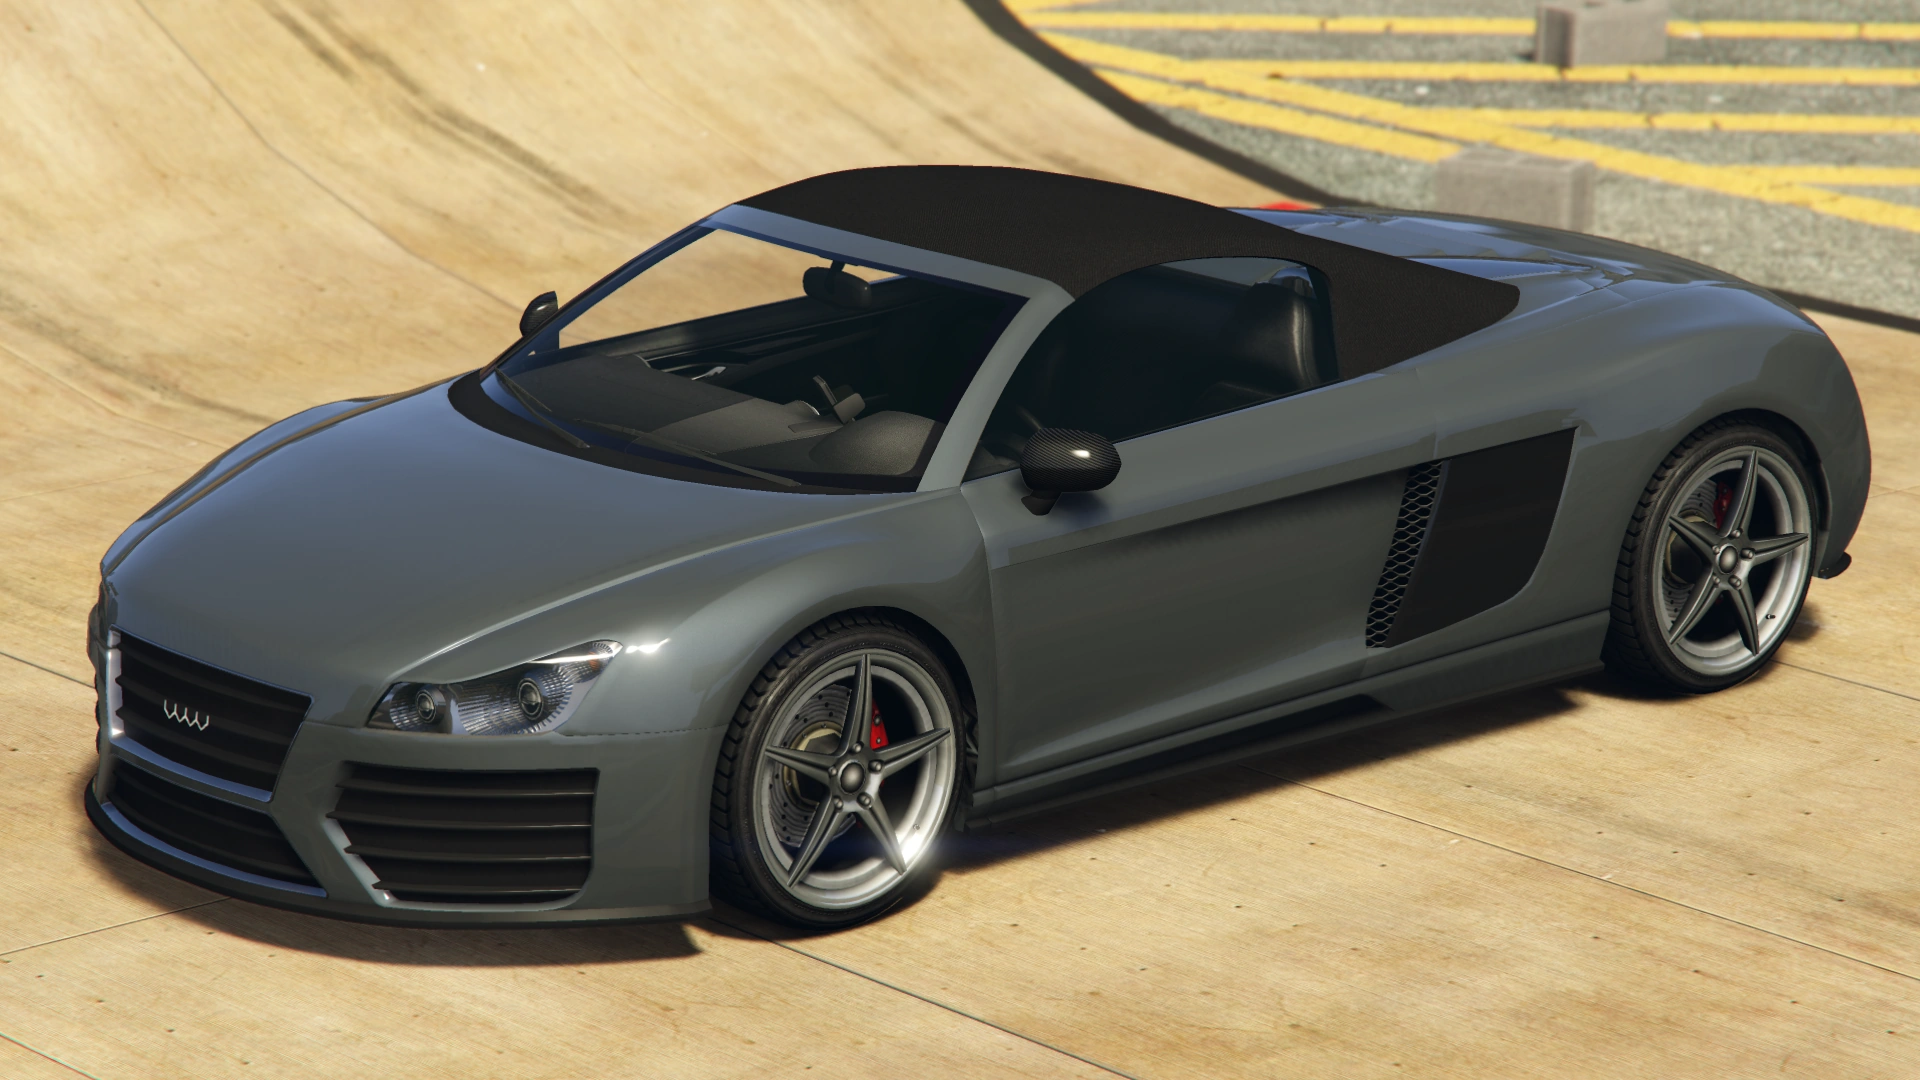
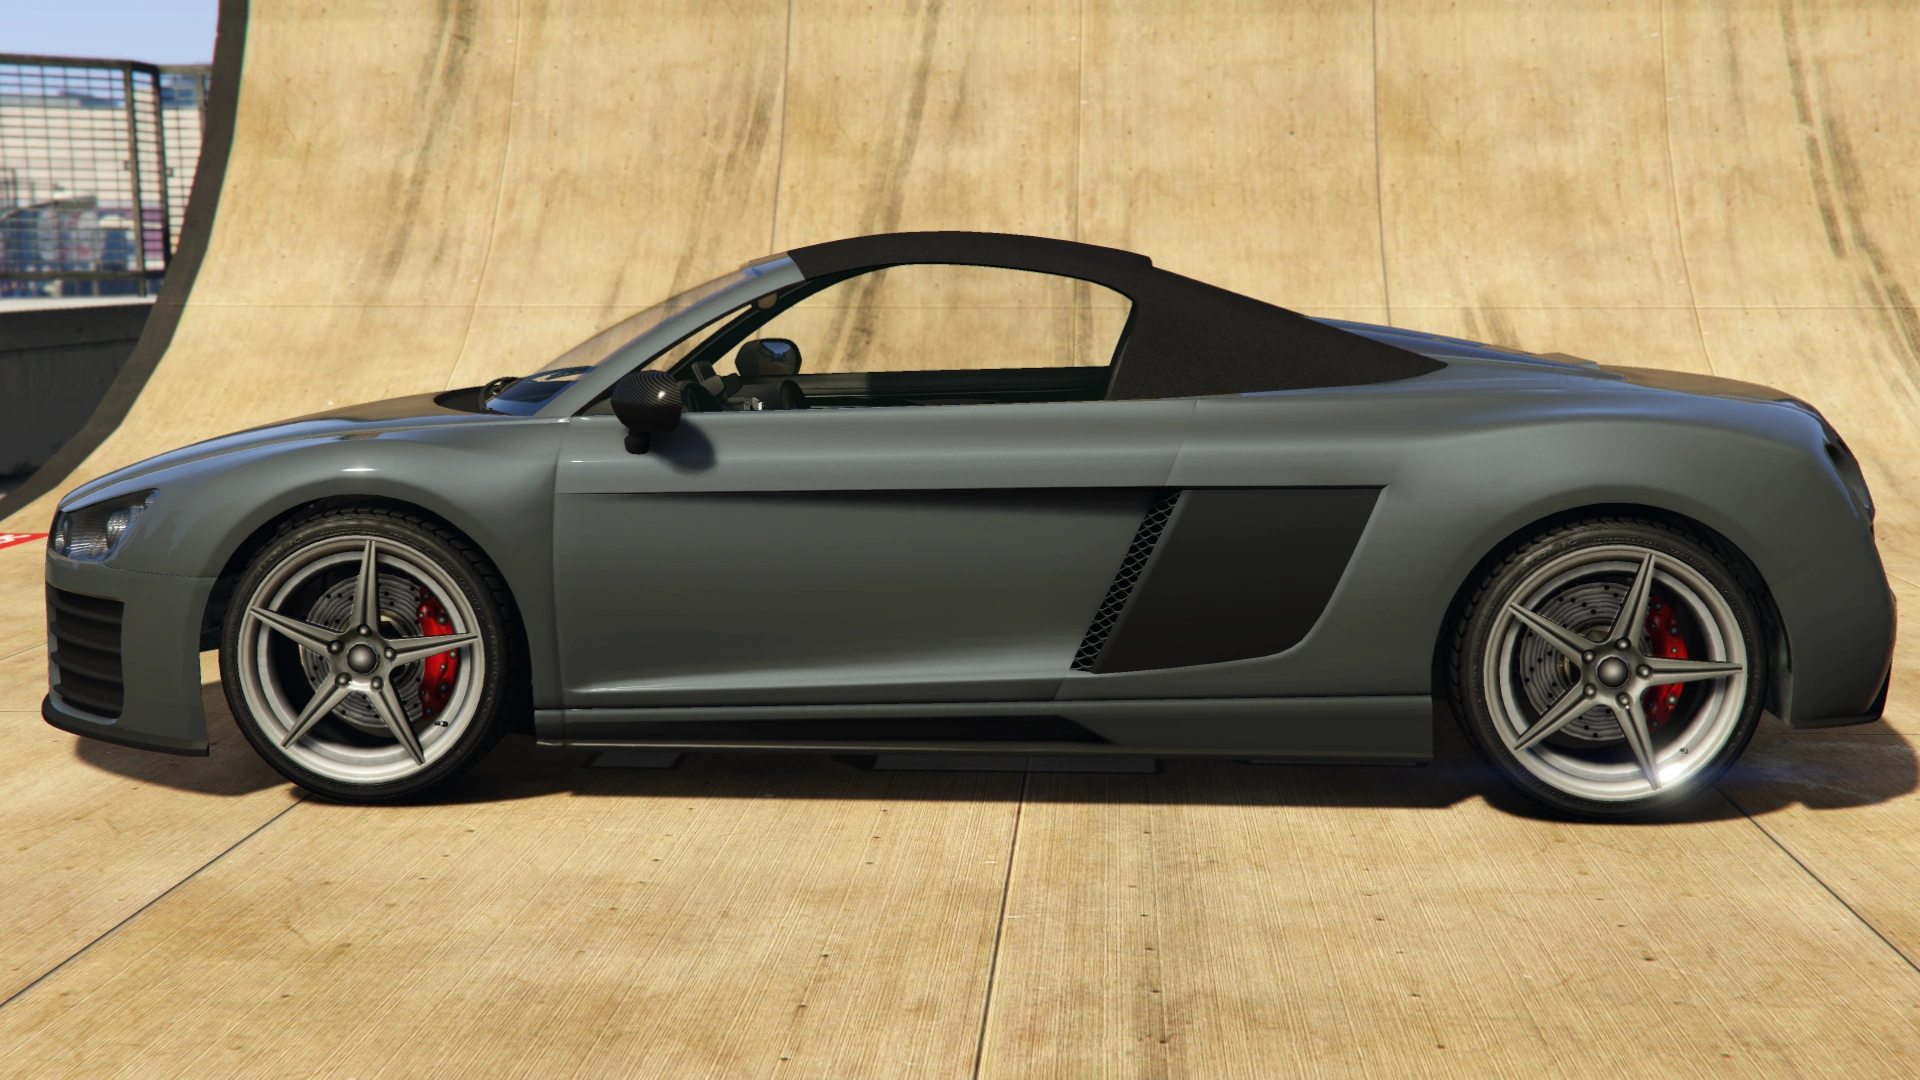
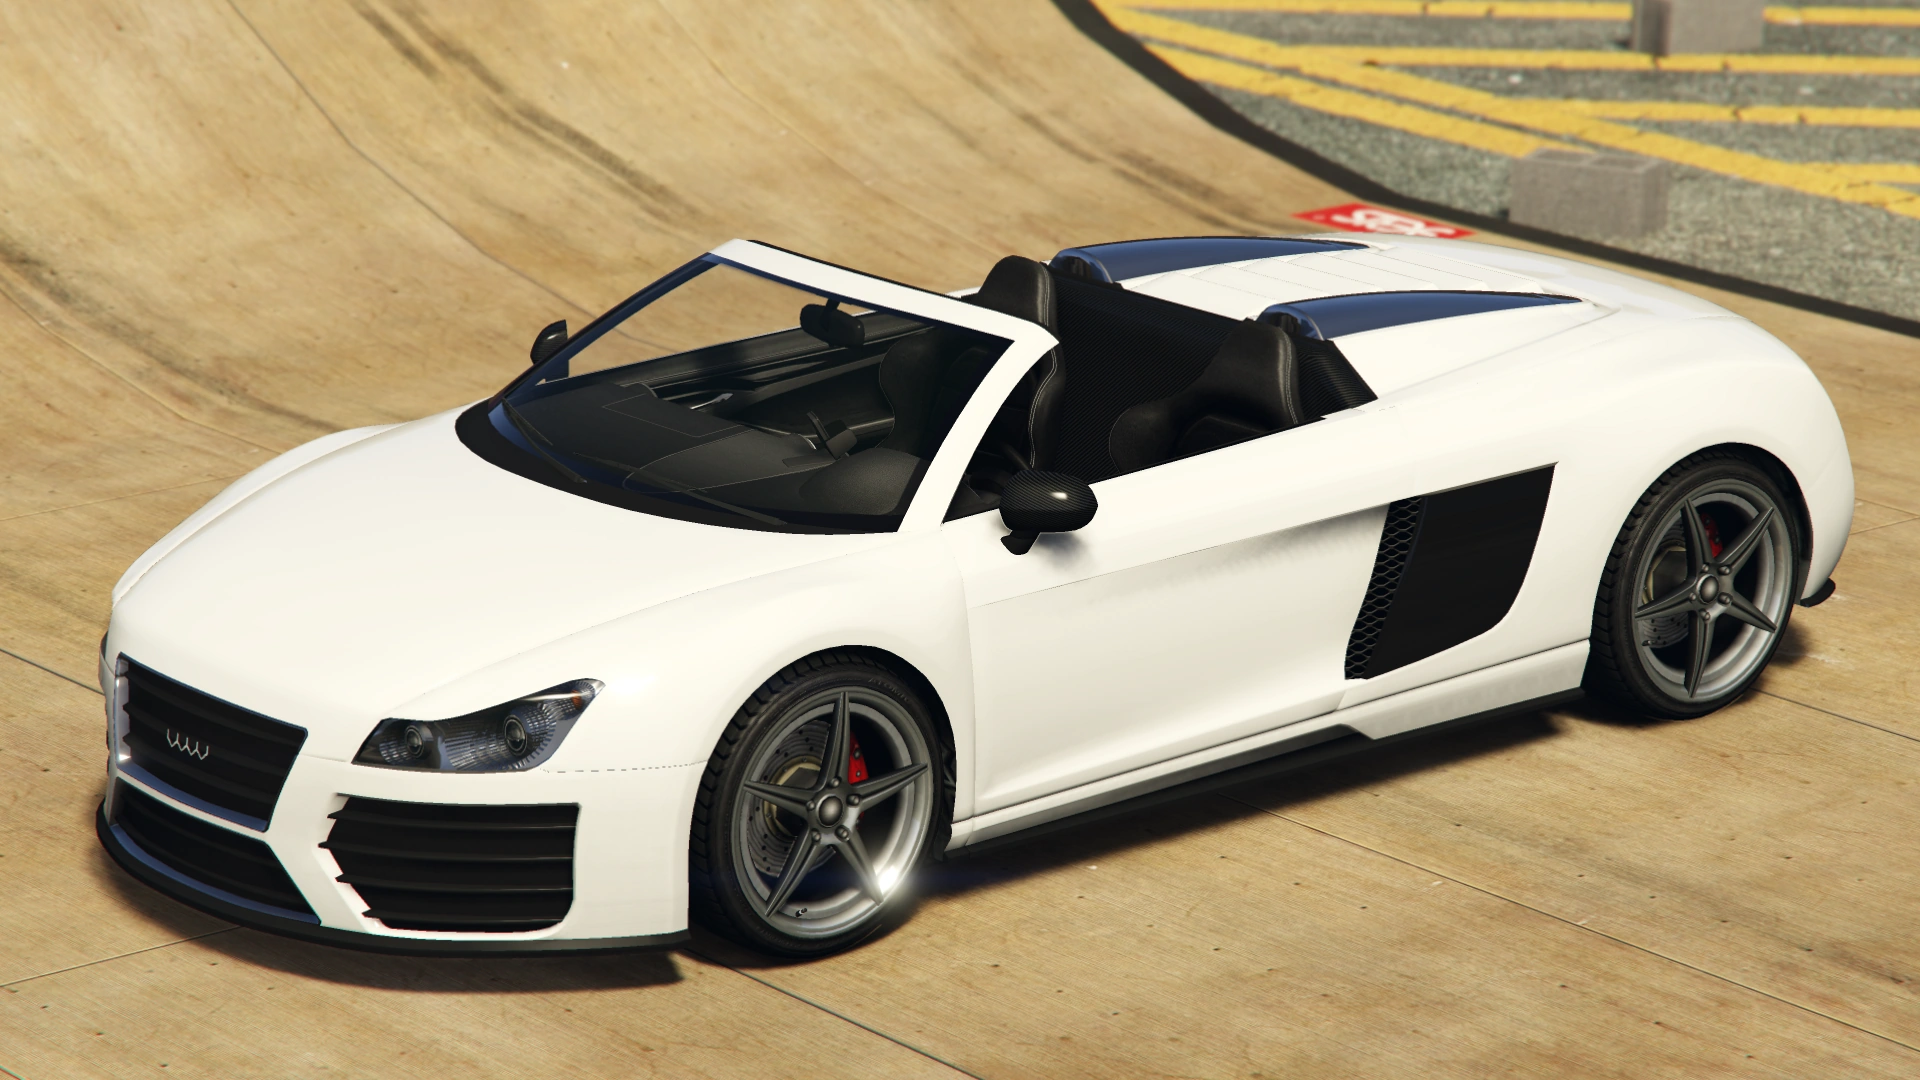
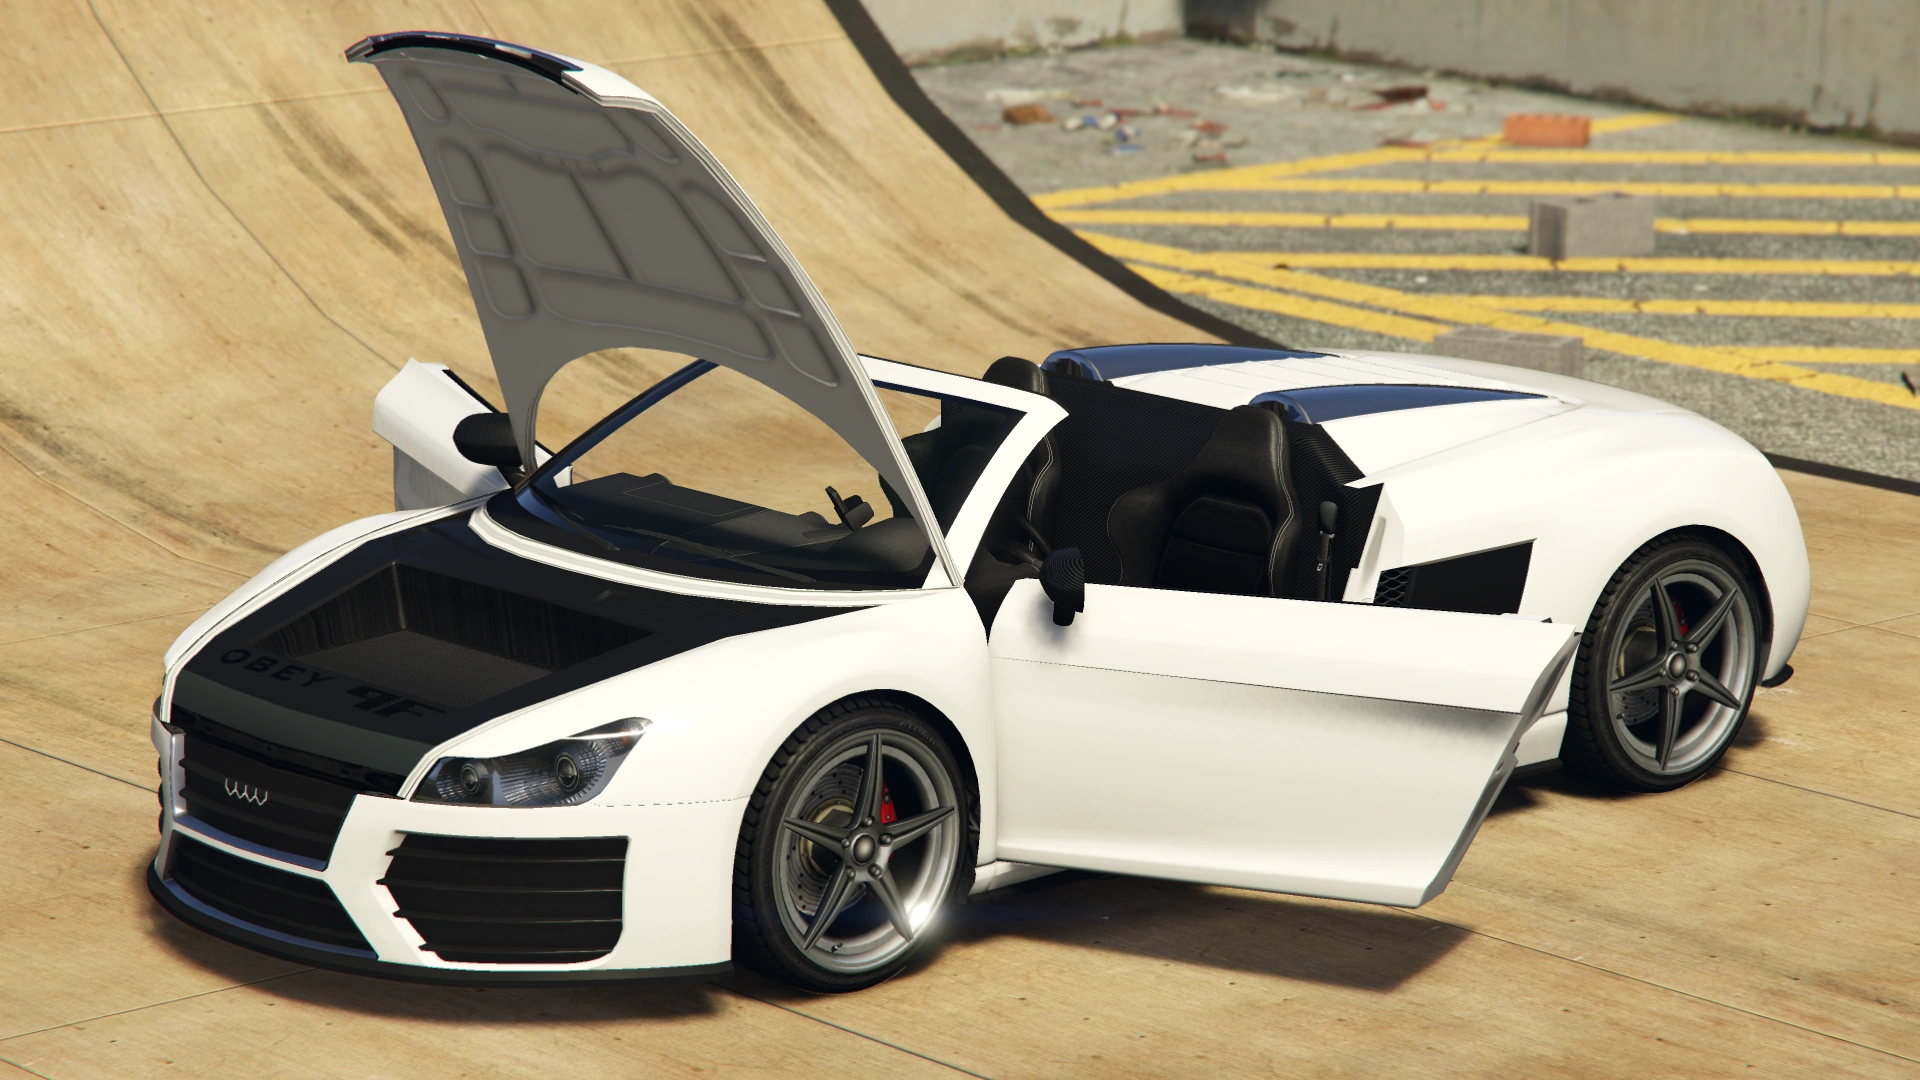
The Obey 9F Cabrio is a vehicle featured in Grand Theft Auto V and Grand Theft Auto Online. It is the convertible version of the 9F being capable of retracting its roof.
Design
Grand Theft Auto V
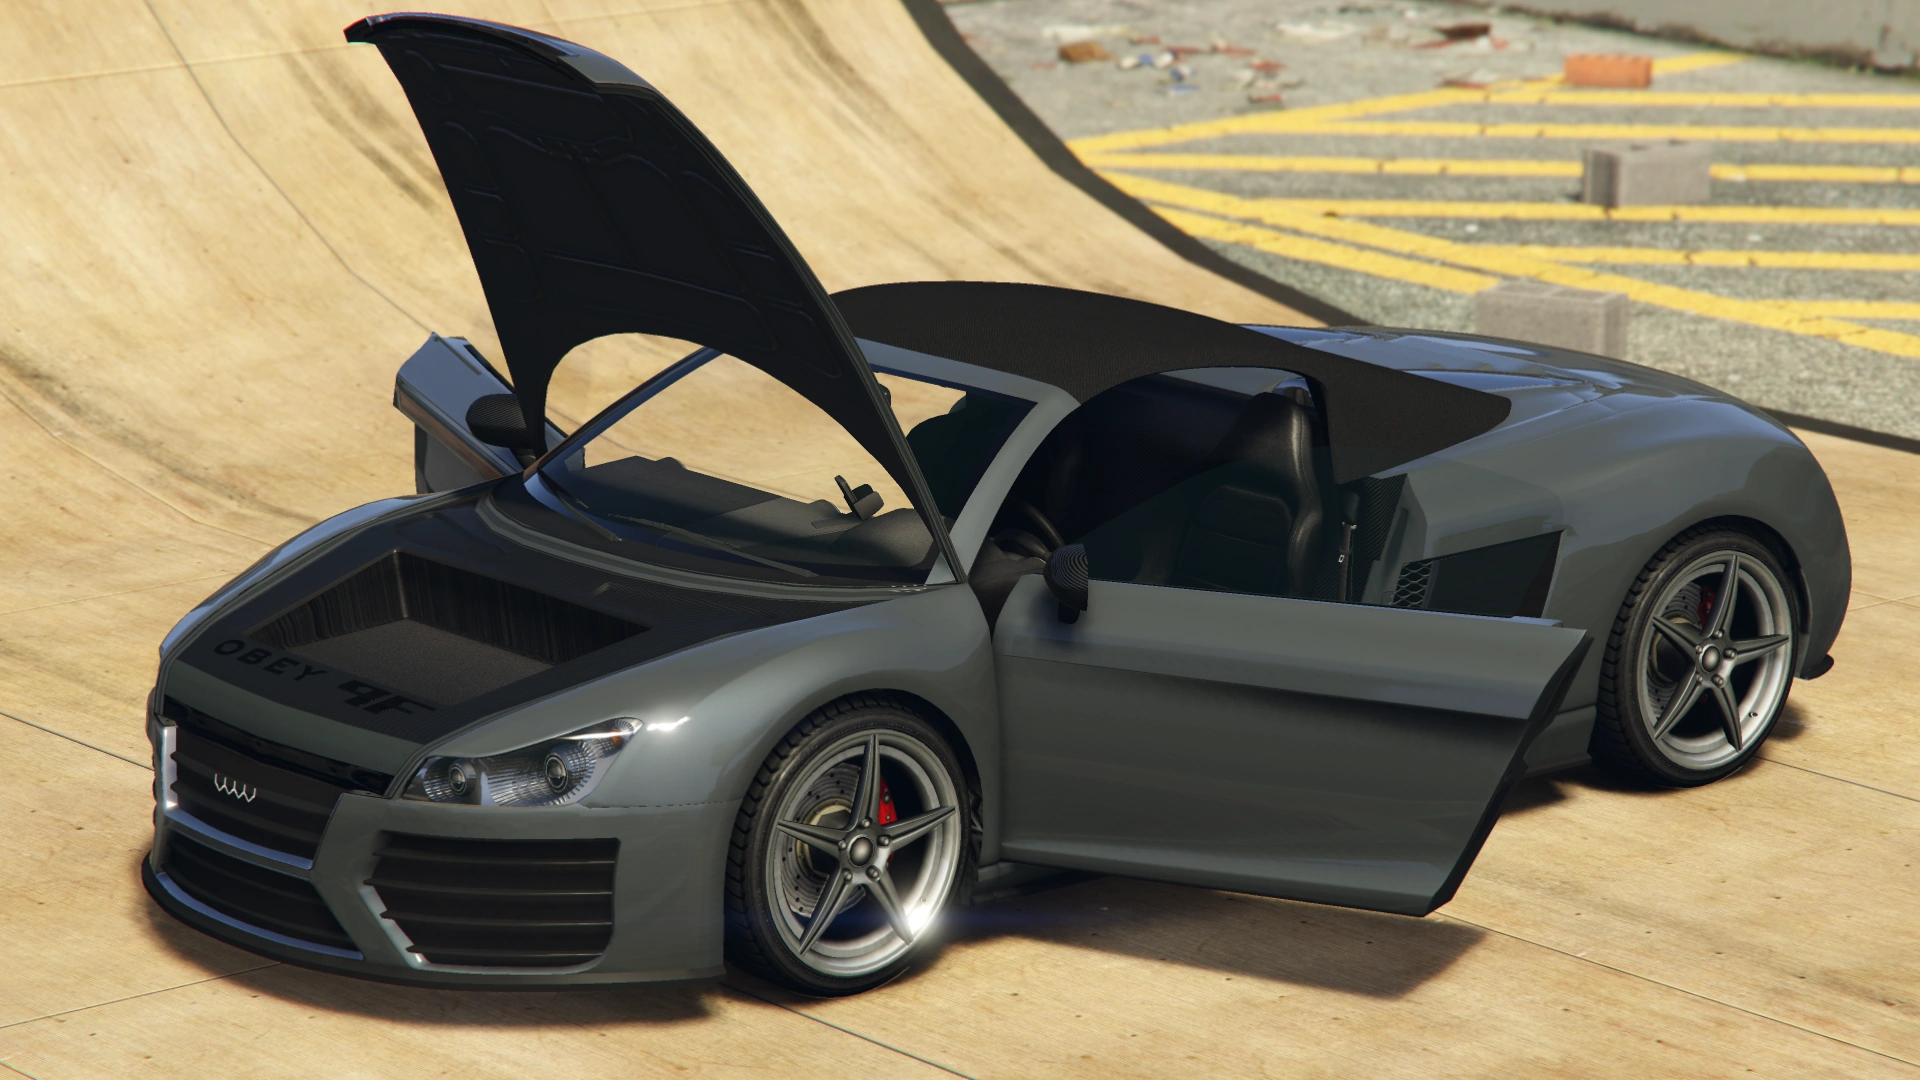
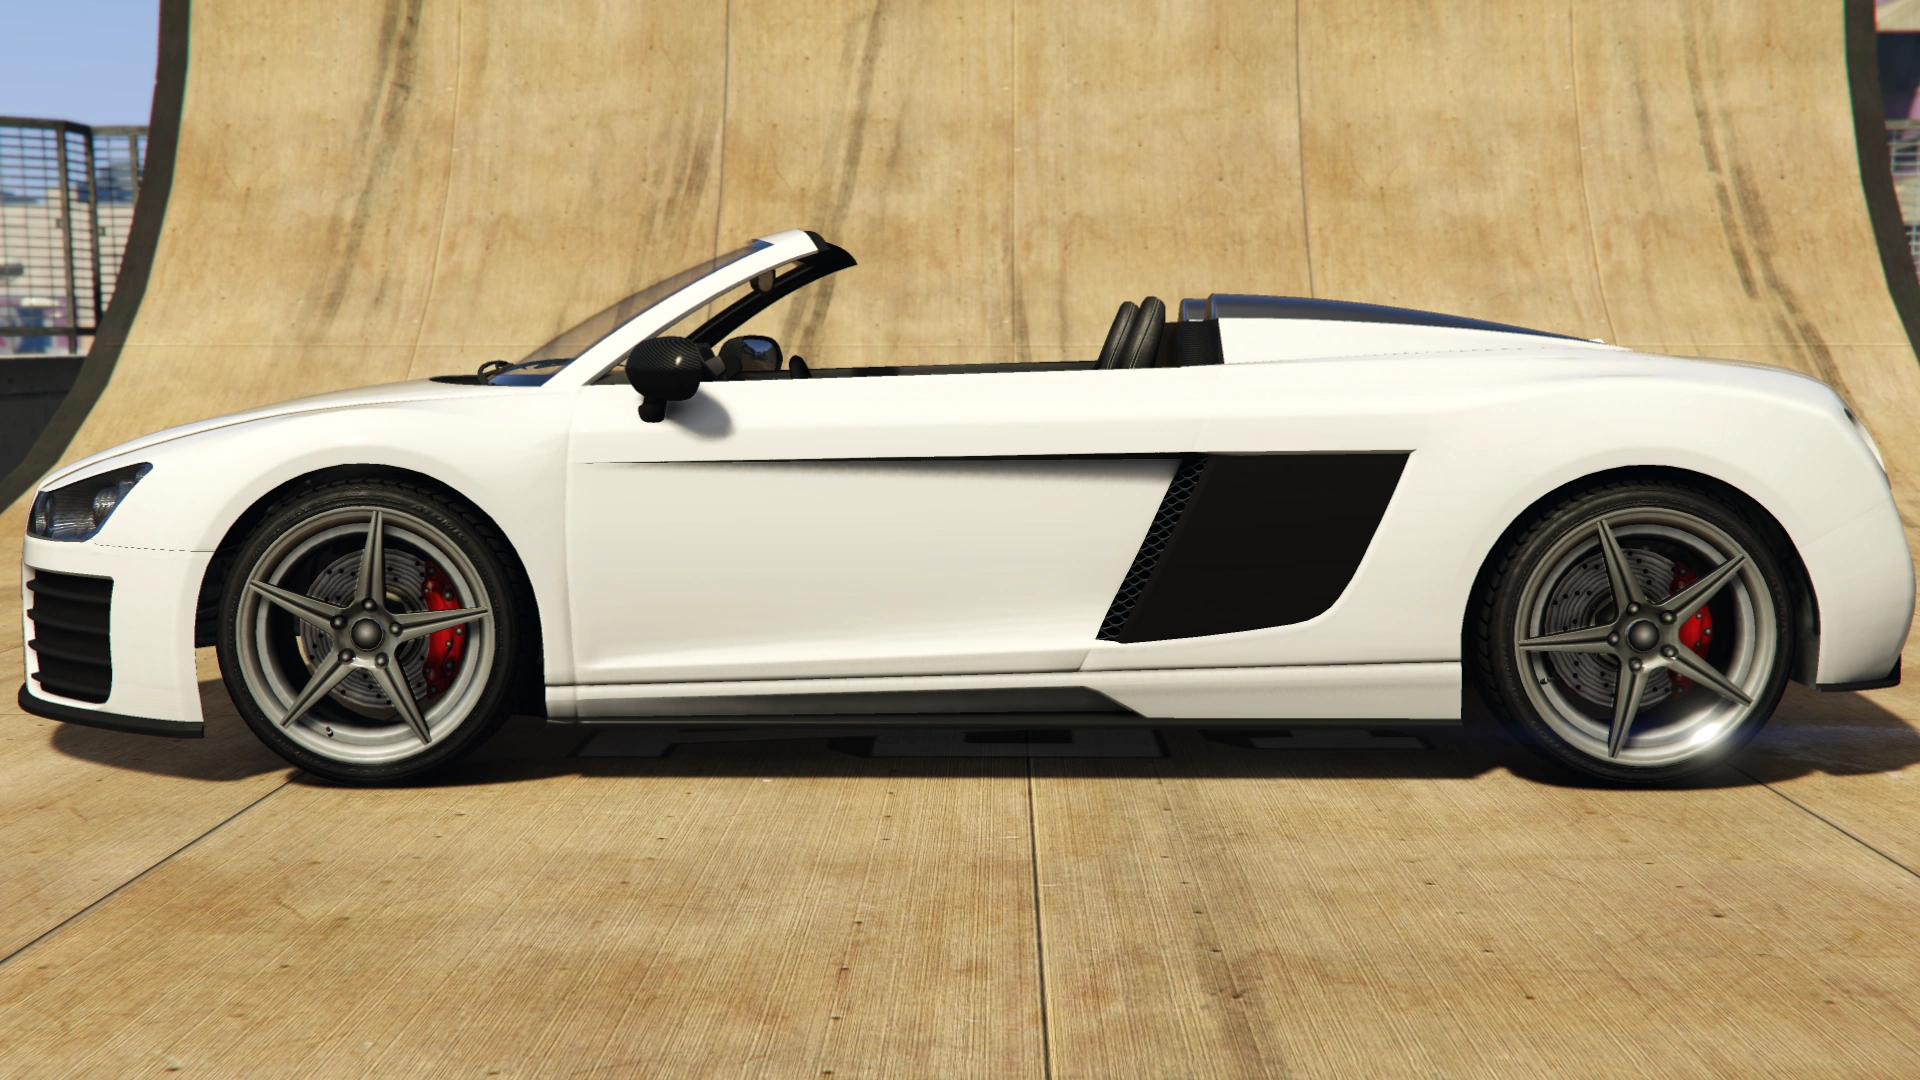
It resembles the Audi R8 Spyder, a convertible version of the hardtop R8, in which the hardtop 9F is based on.
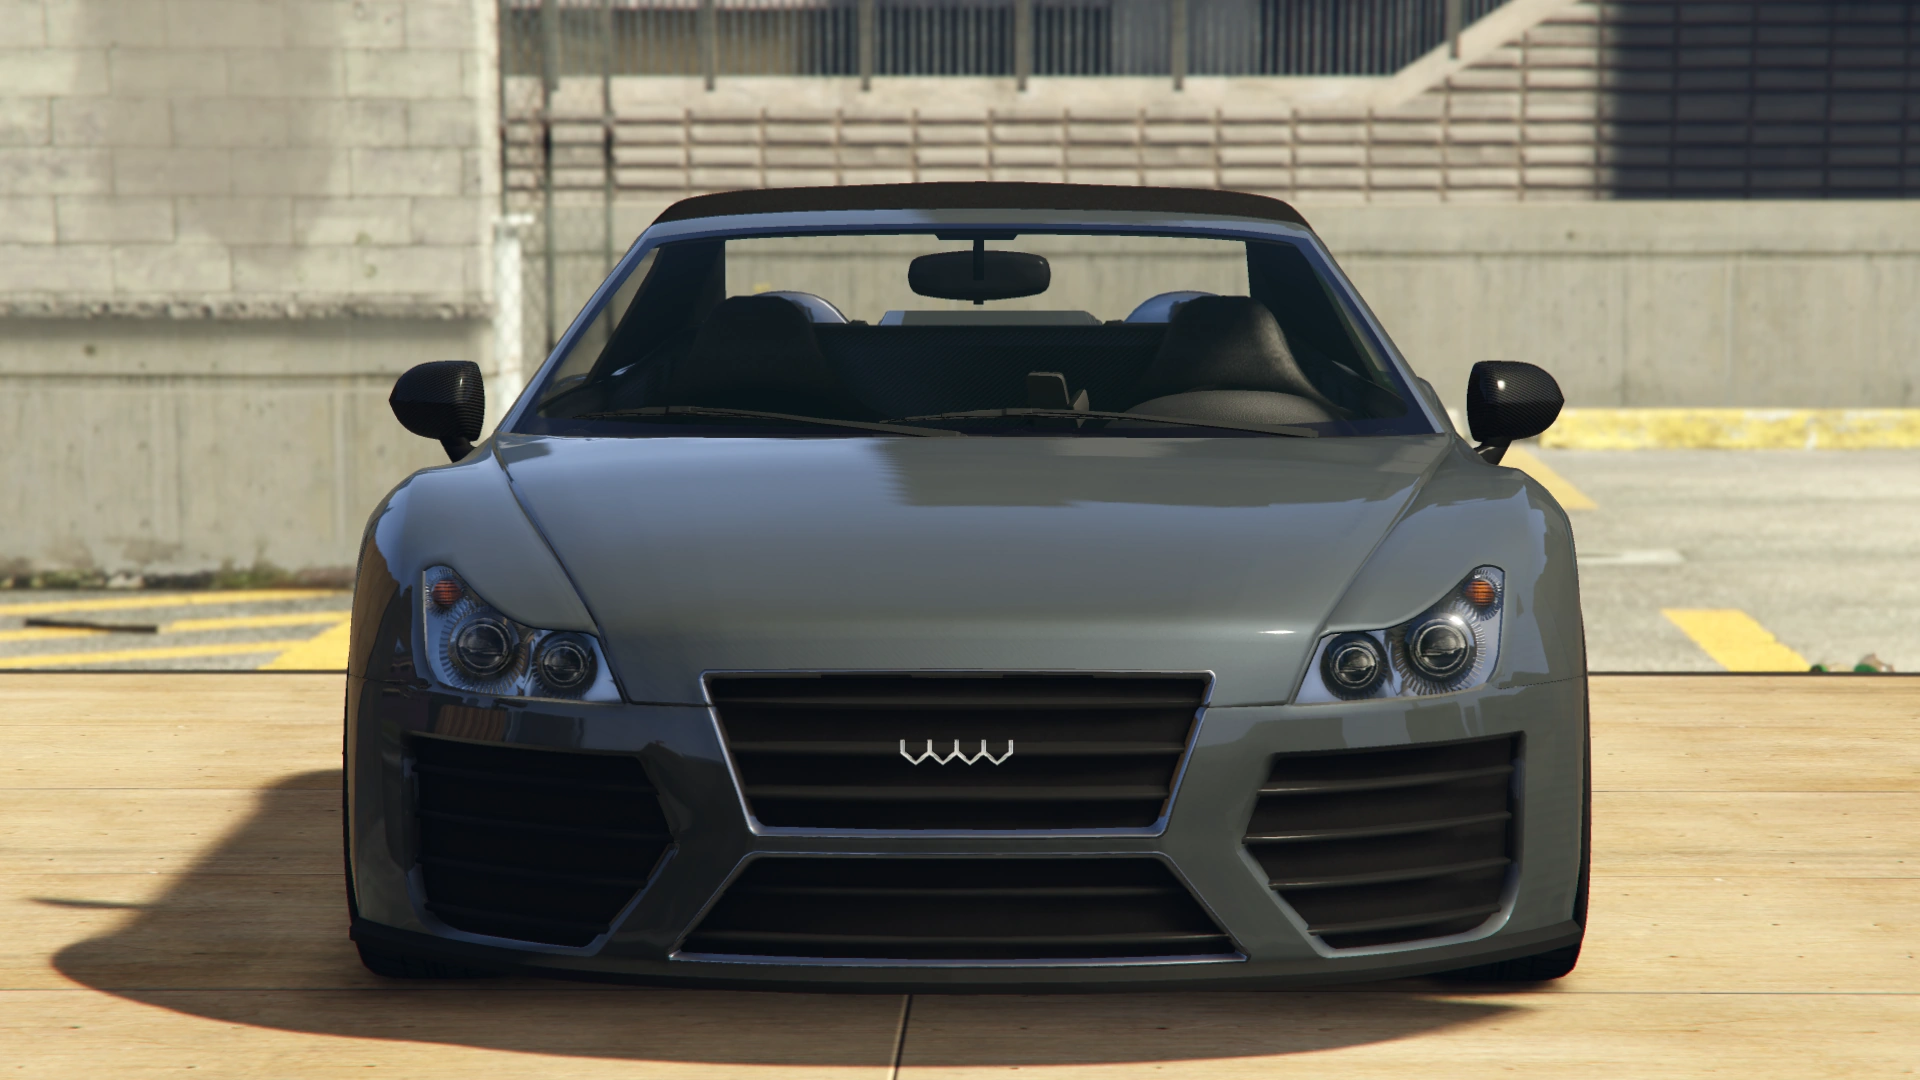
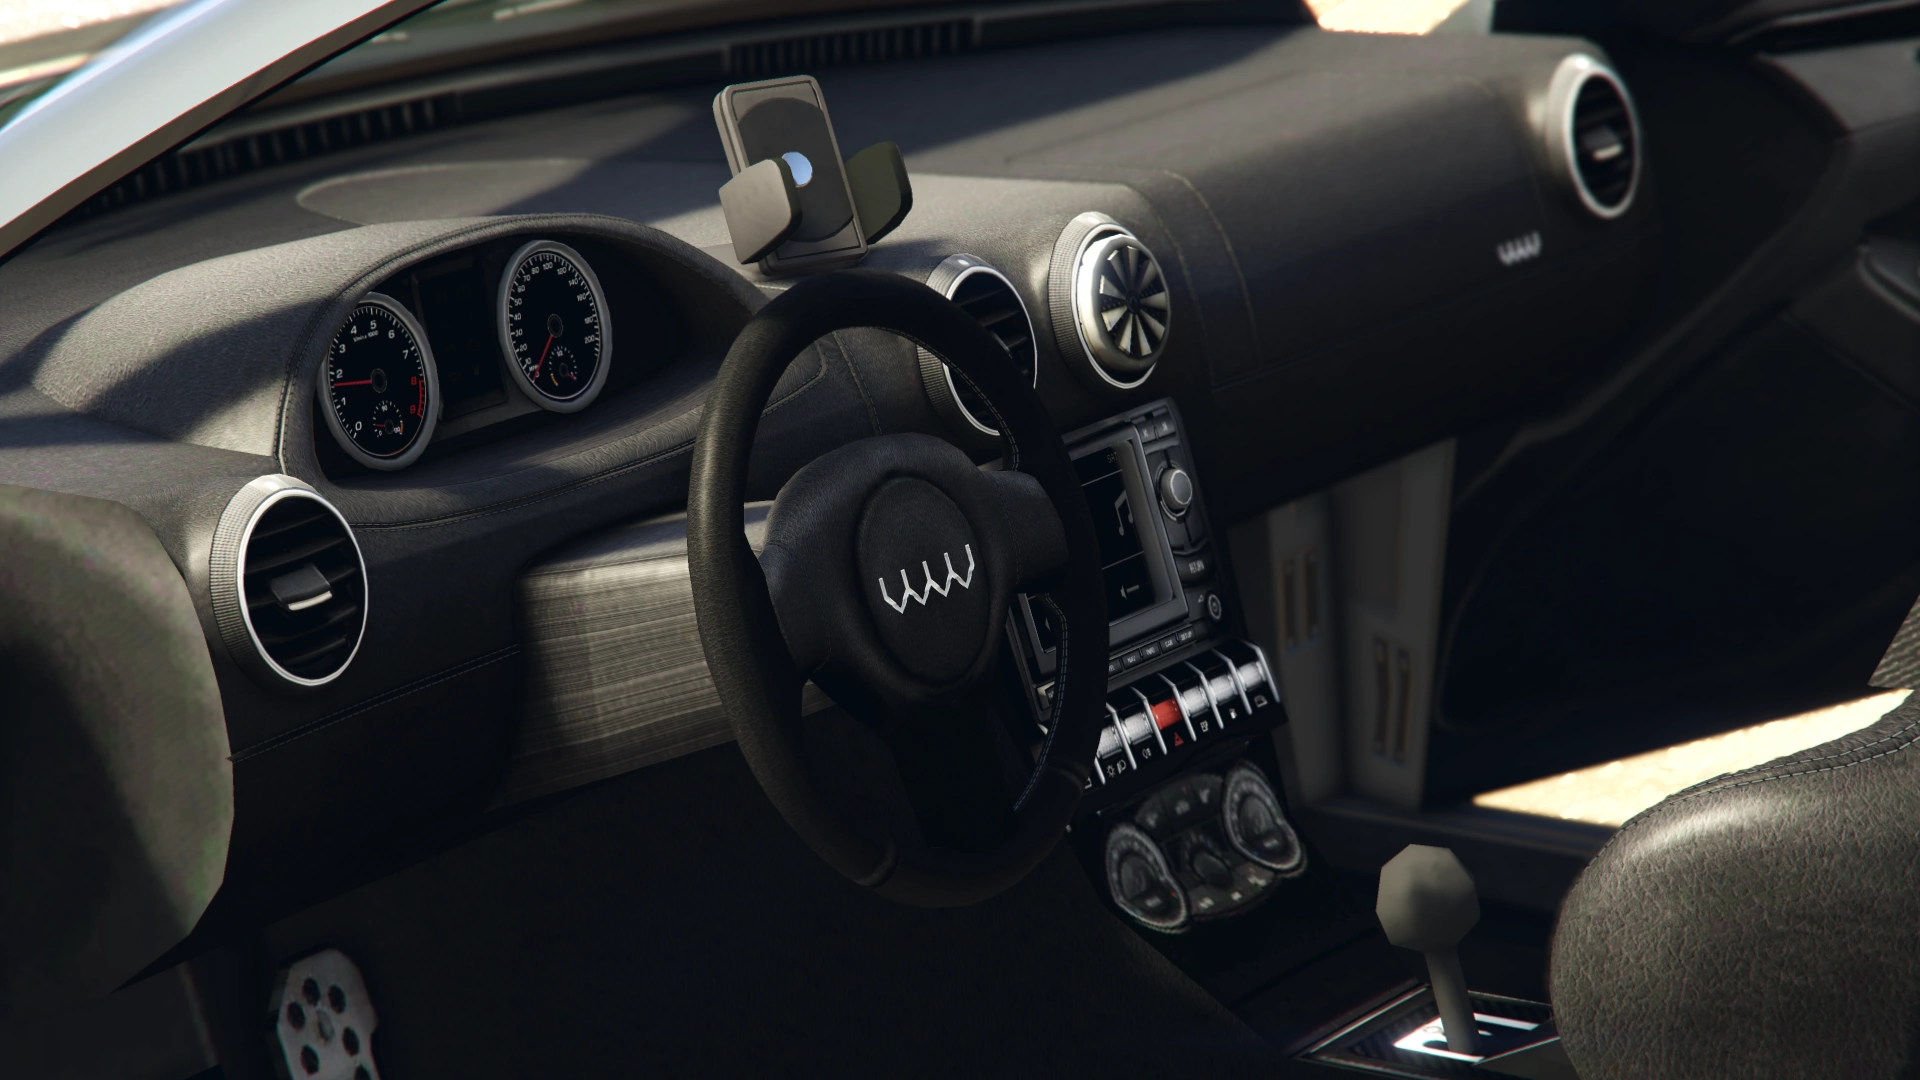
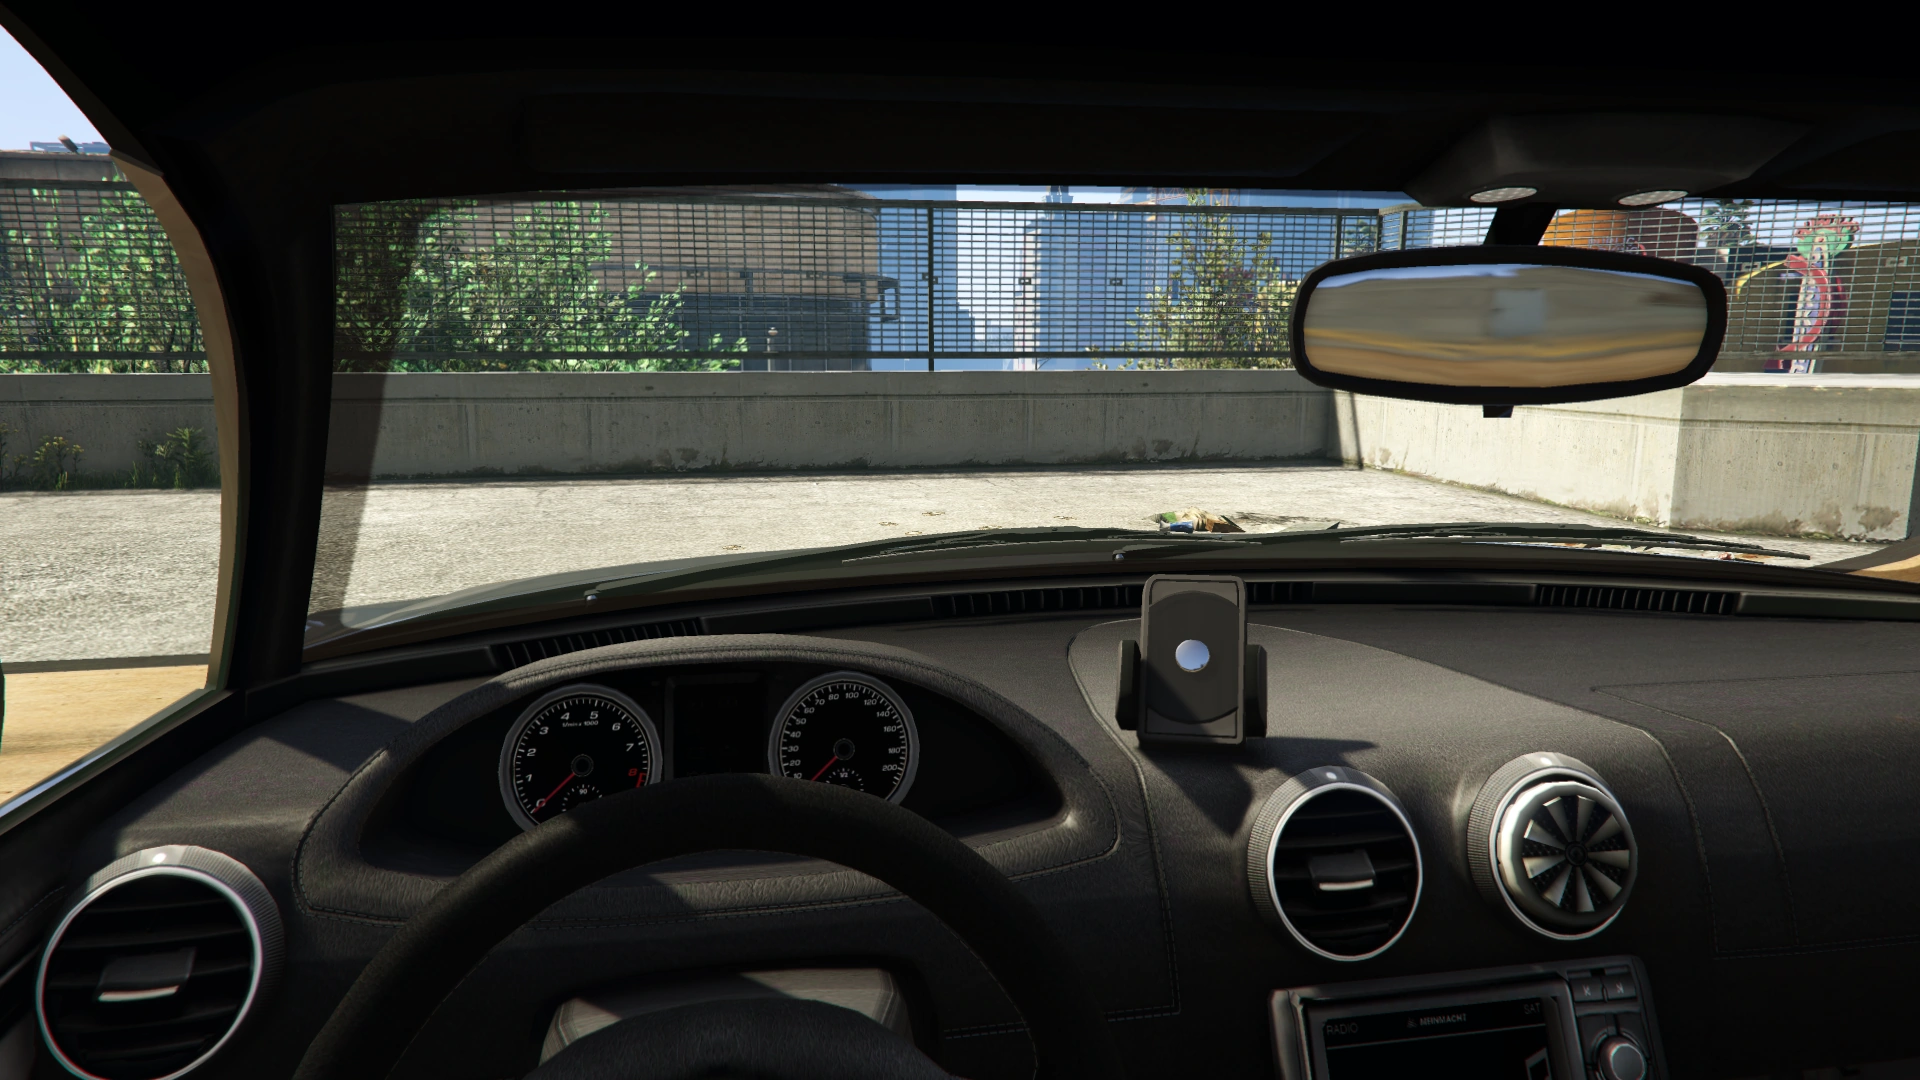
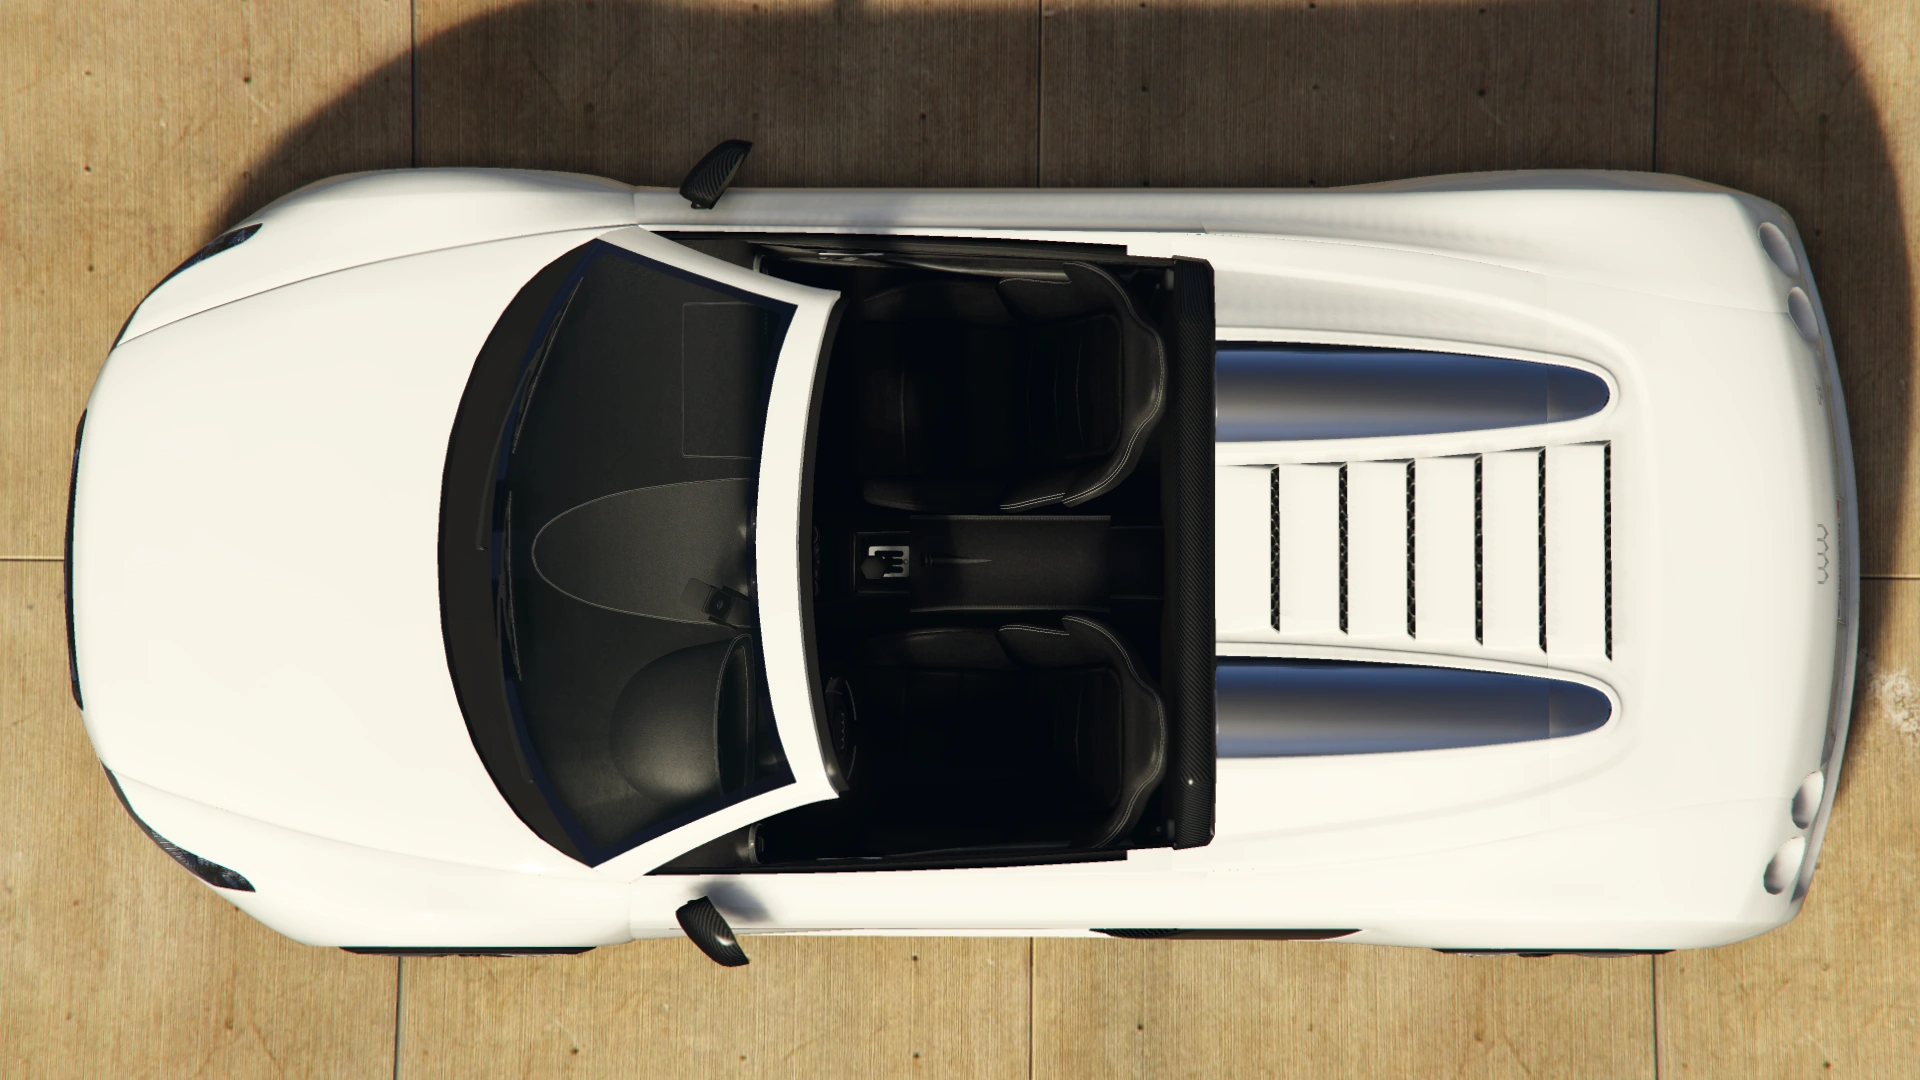
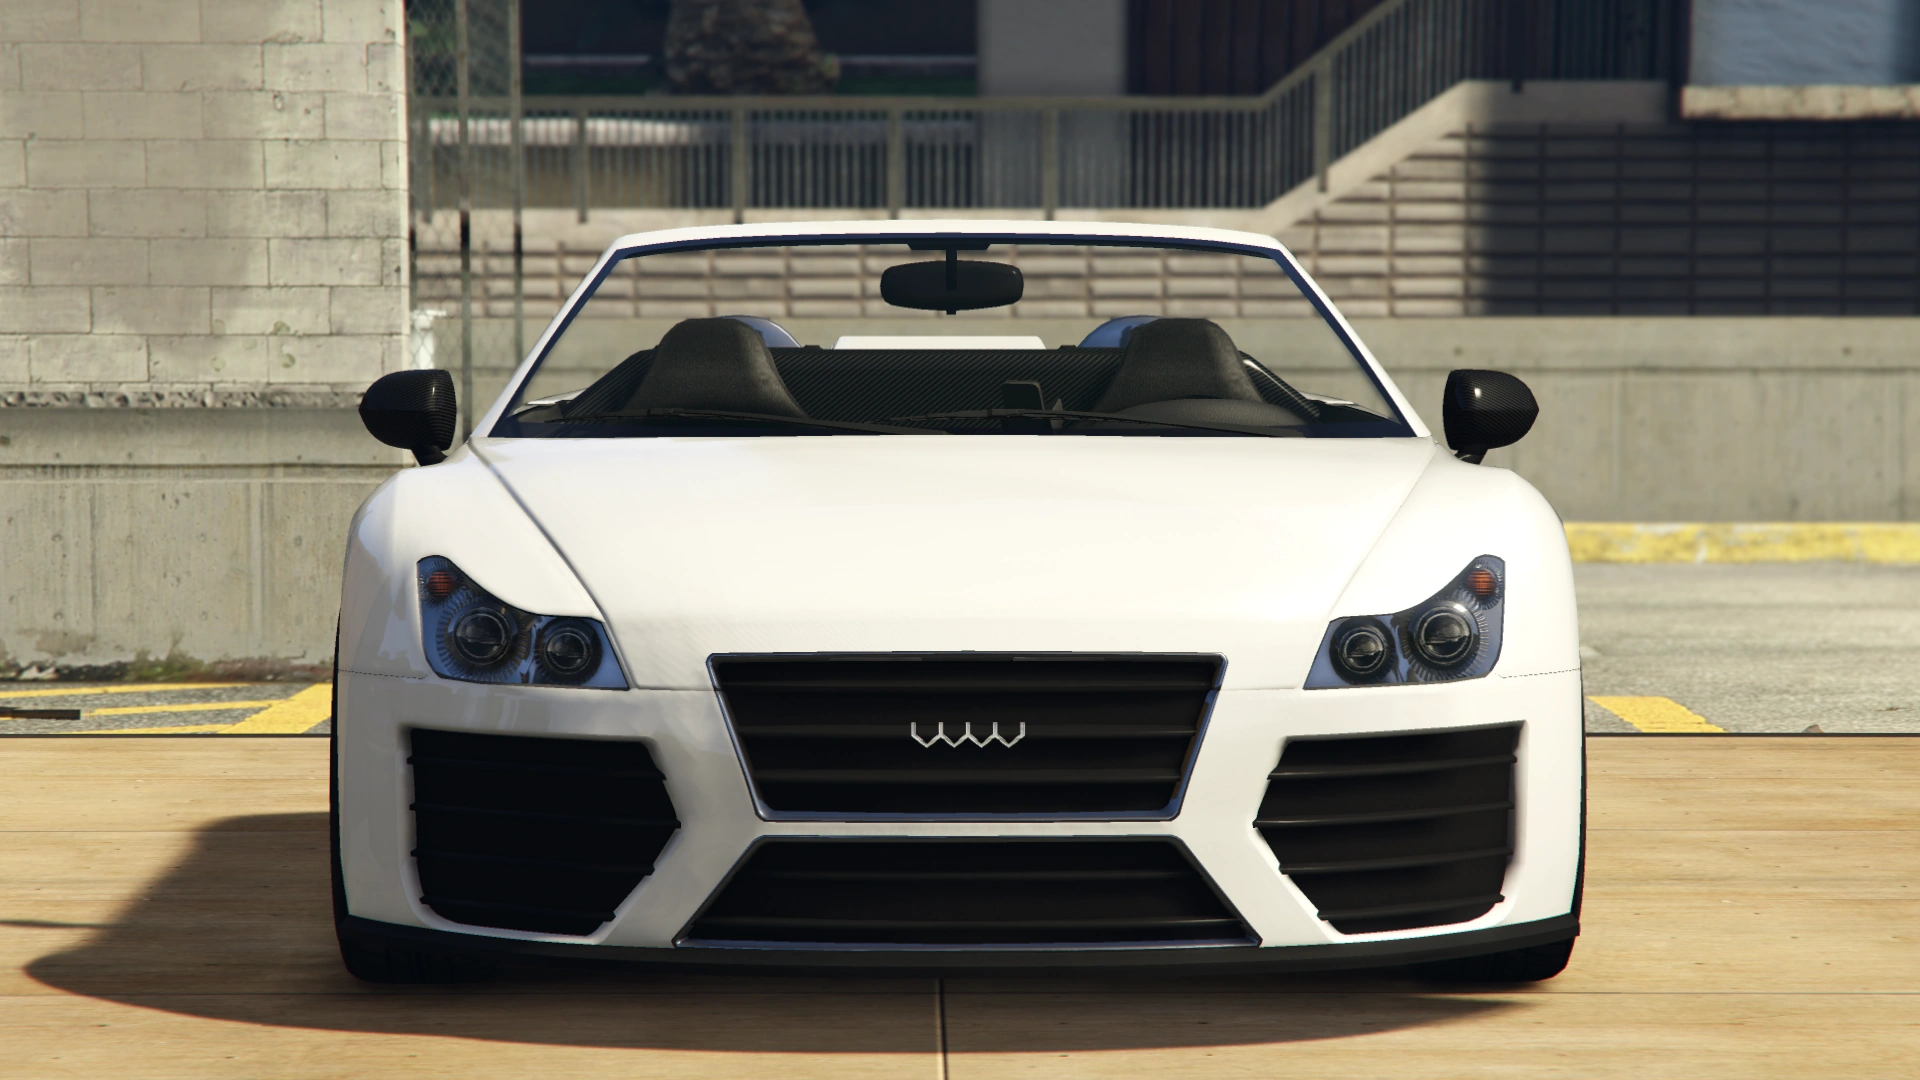
The front end of this car is dominated by the appearance of the aggressive front face, which is made up of four different air intakes, two in the central area and then one on either side. The main grille is located in the upper-central area of the bumper, its outer edges run parallel to the inner edge of the headlights and are trimmed with chrome. The Obey emblem is located just above the main central grille. The headlights are very curved and are in a two-step layout, with the inner step being less tall than the outer. The innermost edge of the headlights forms the basis for the bonnet/hood elevation lines which run to respective corners of the windscreen.
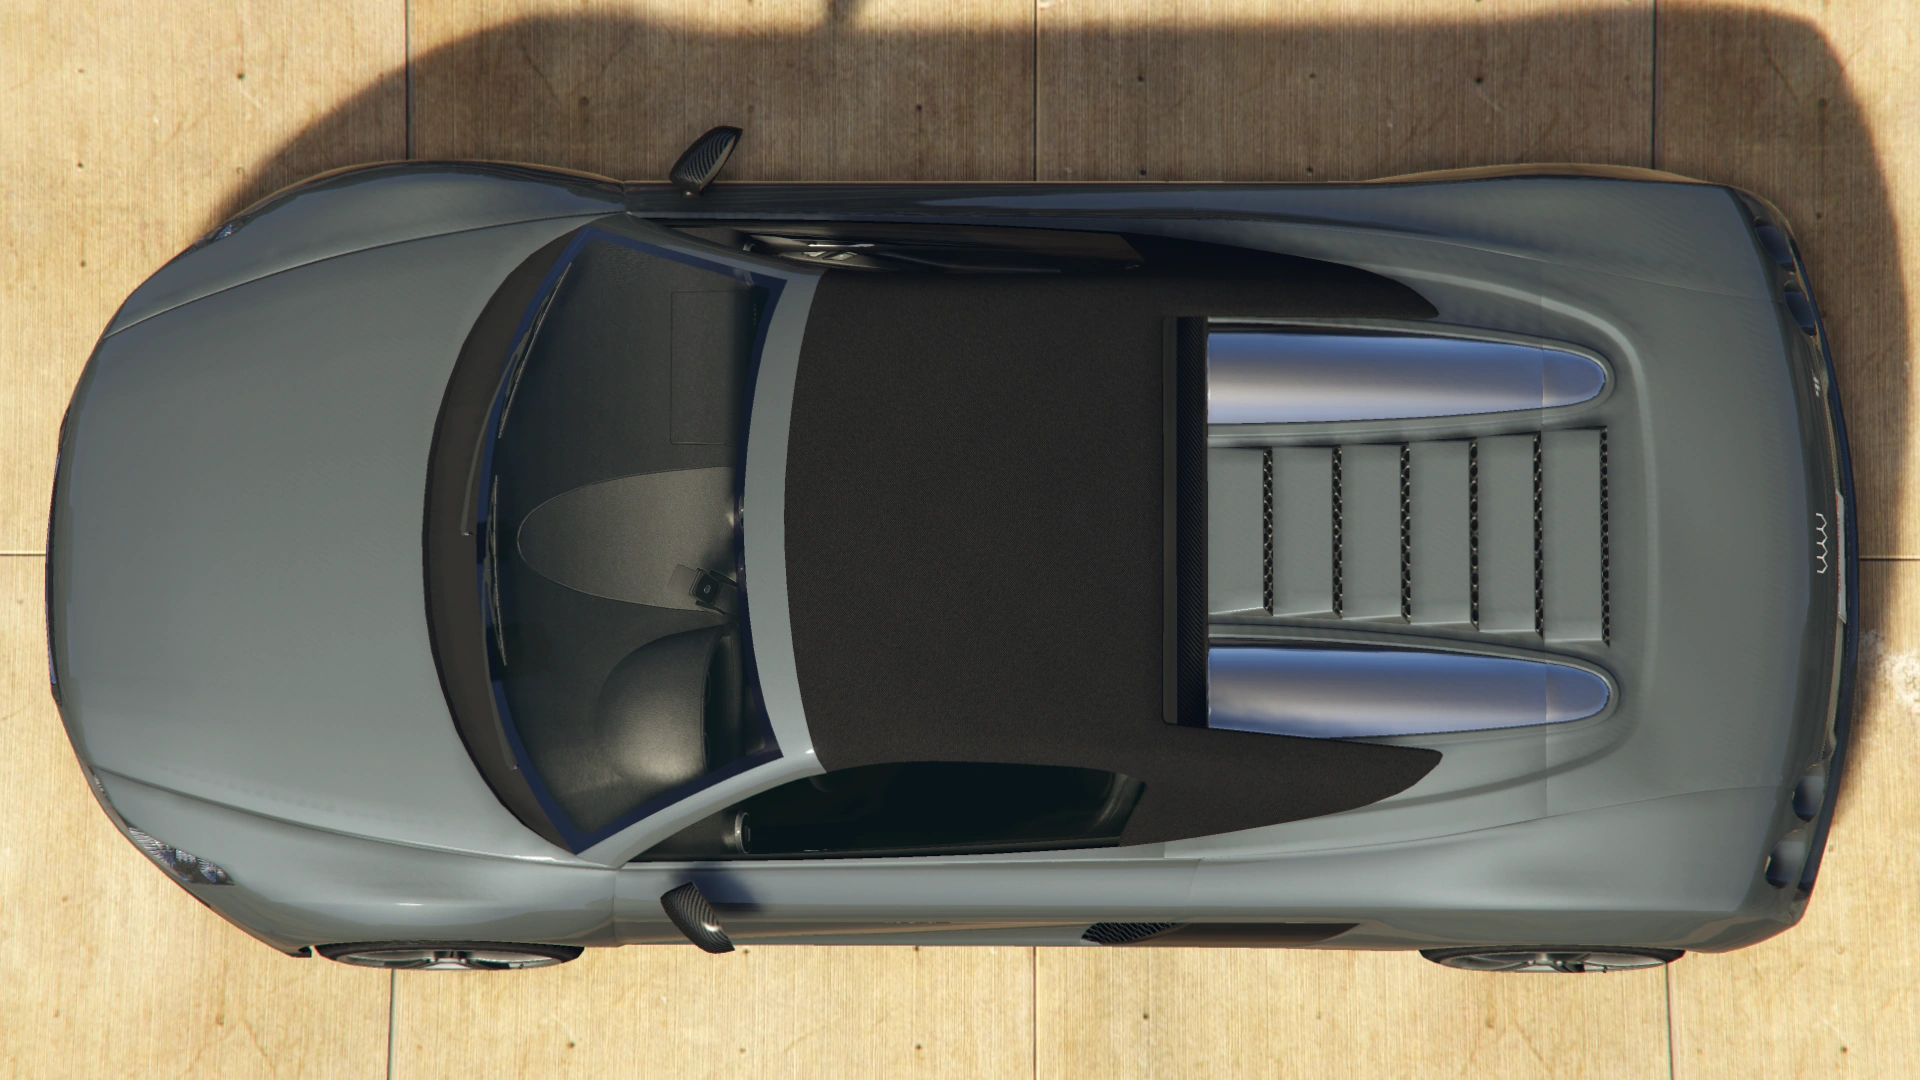
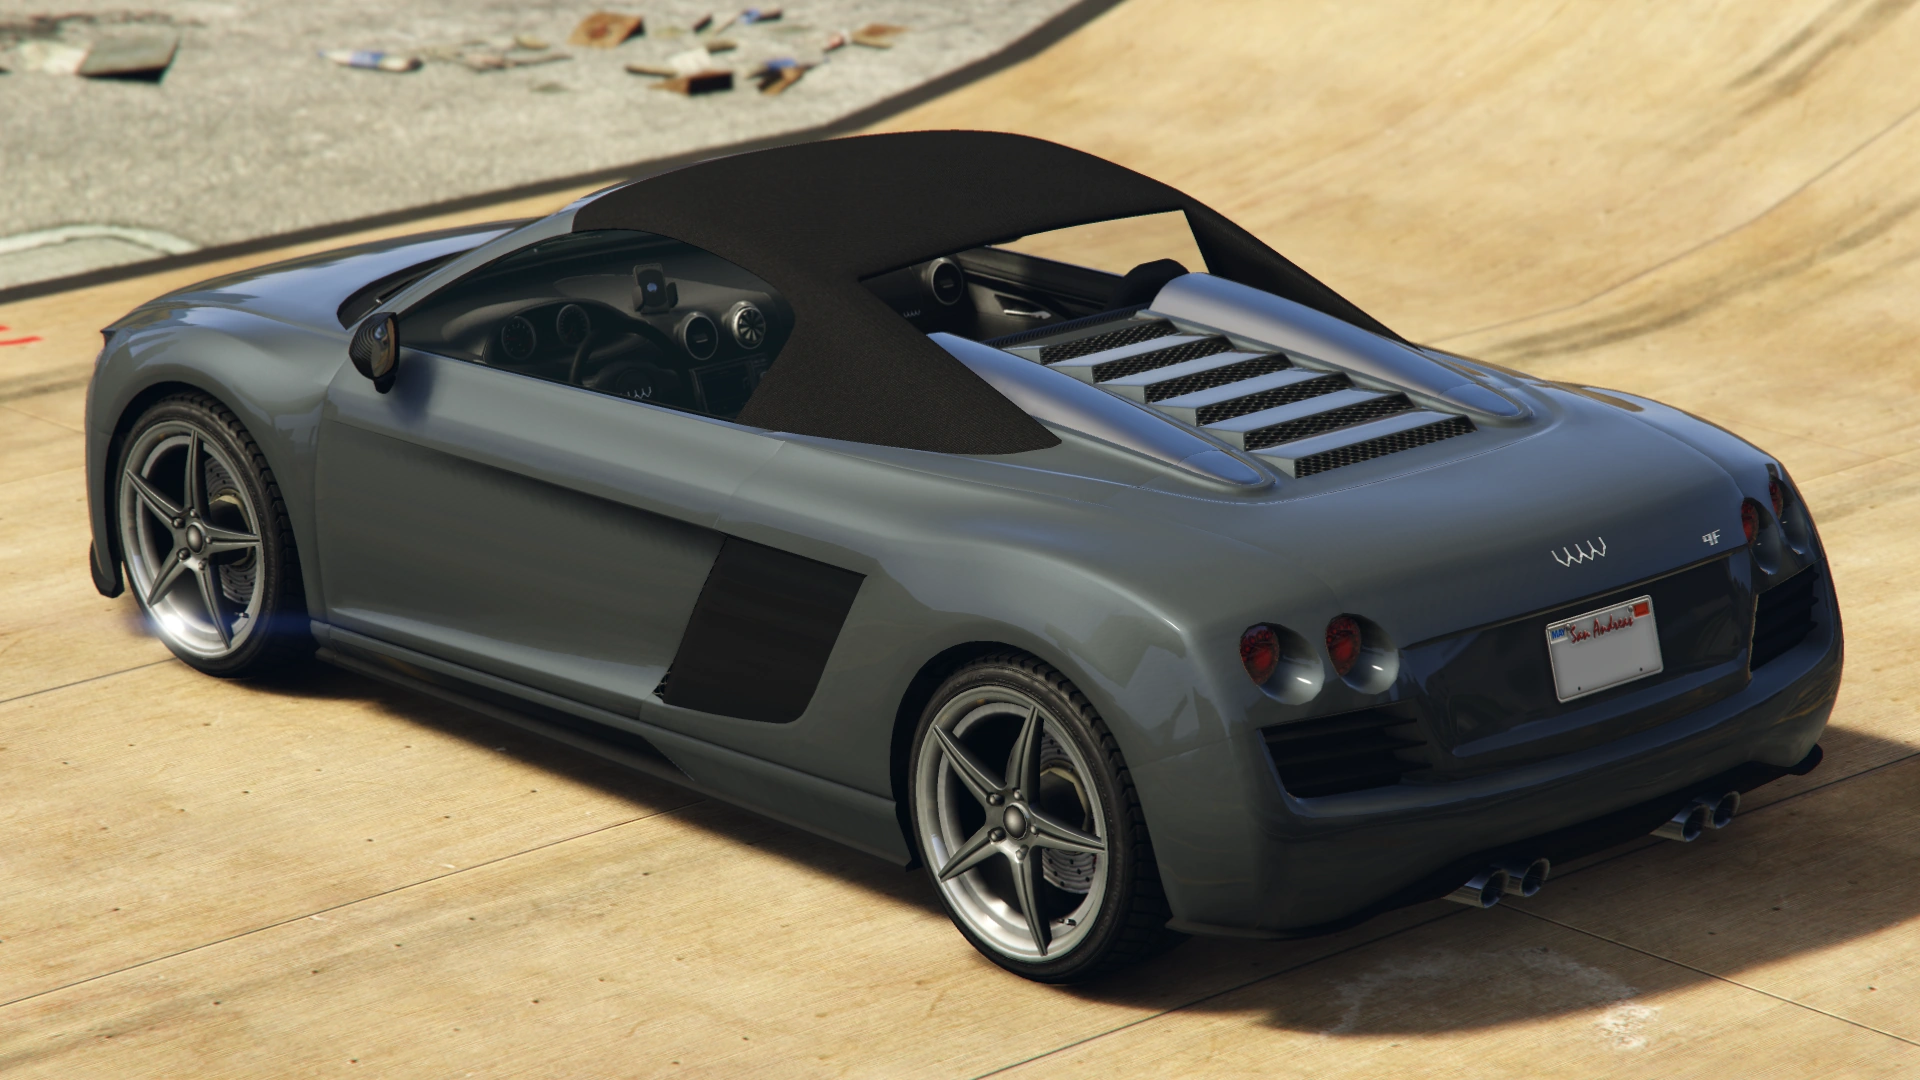
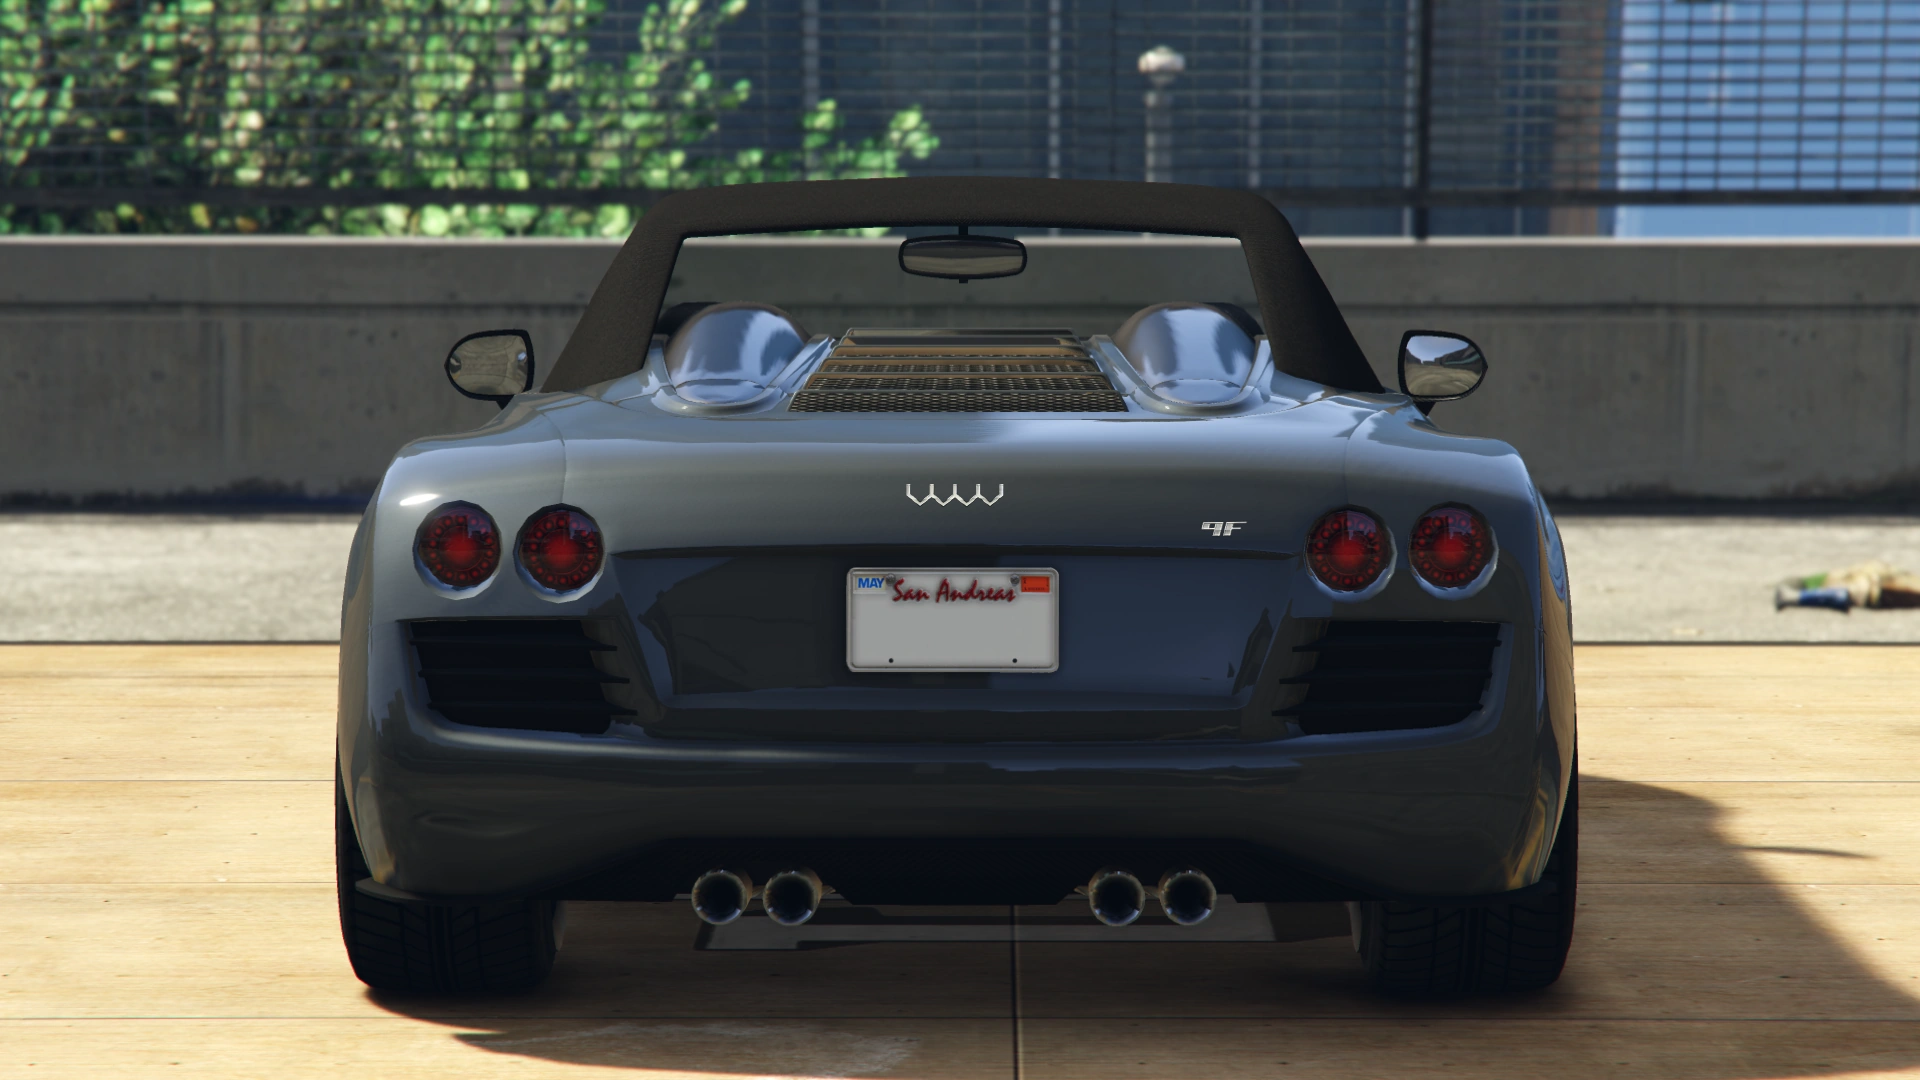
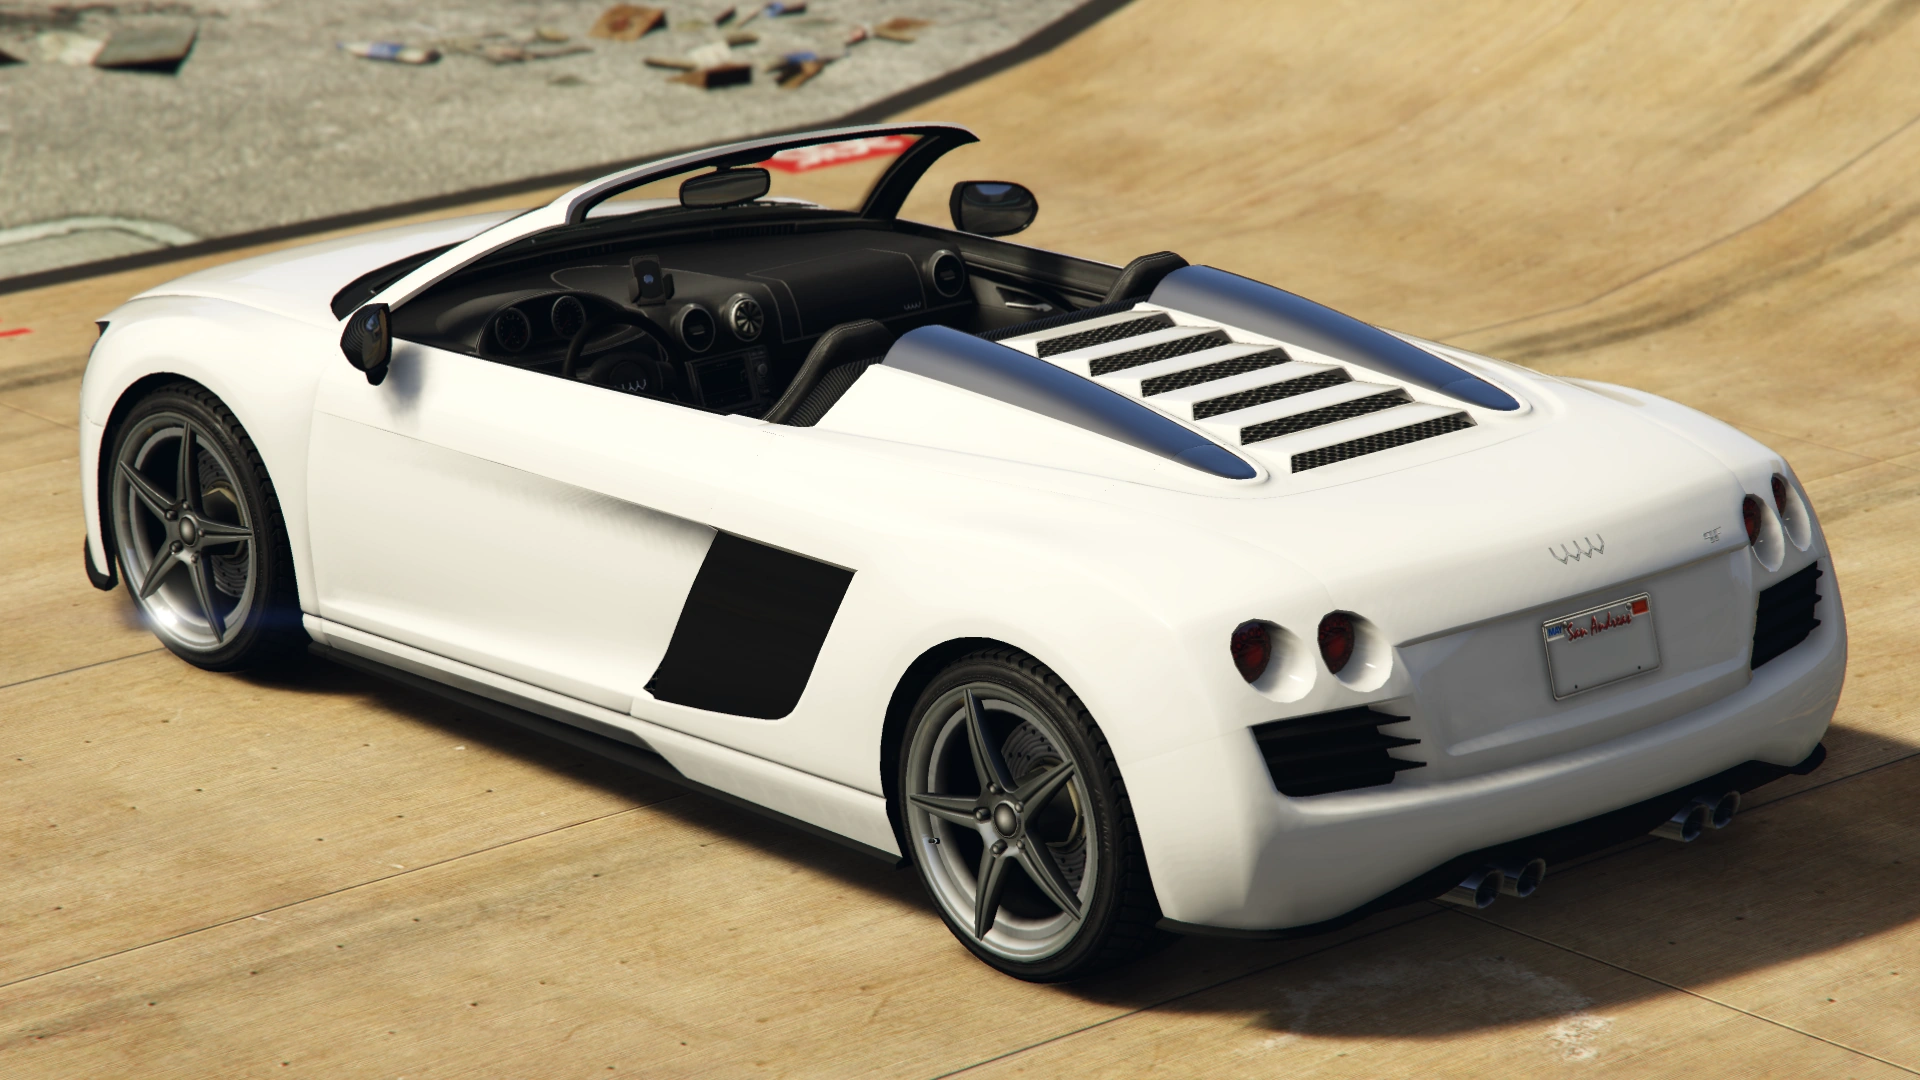
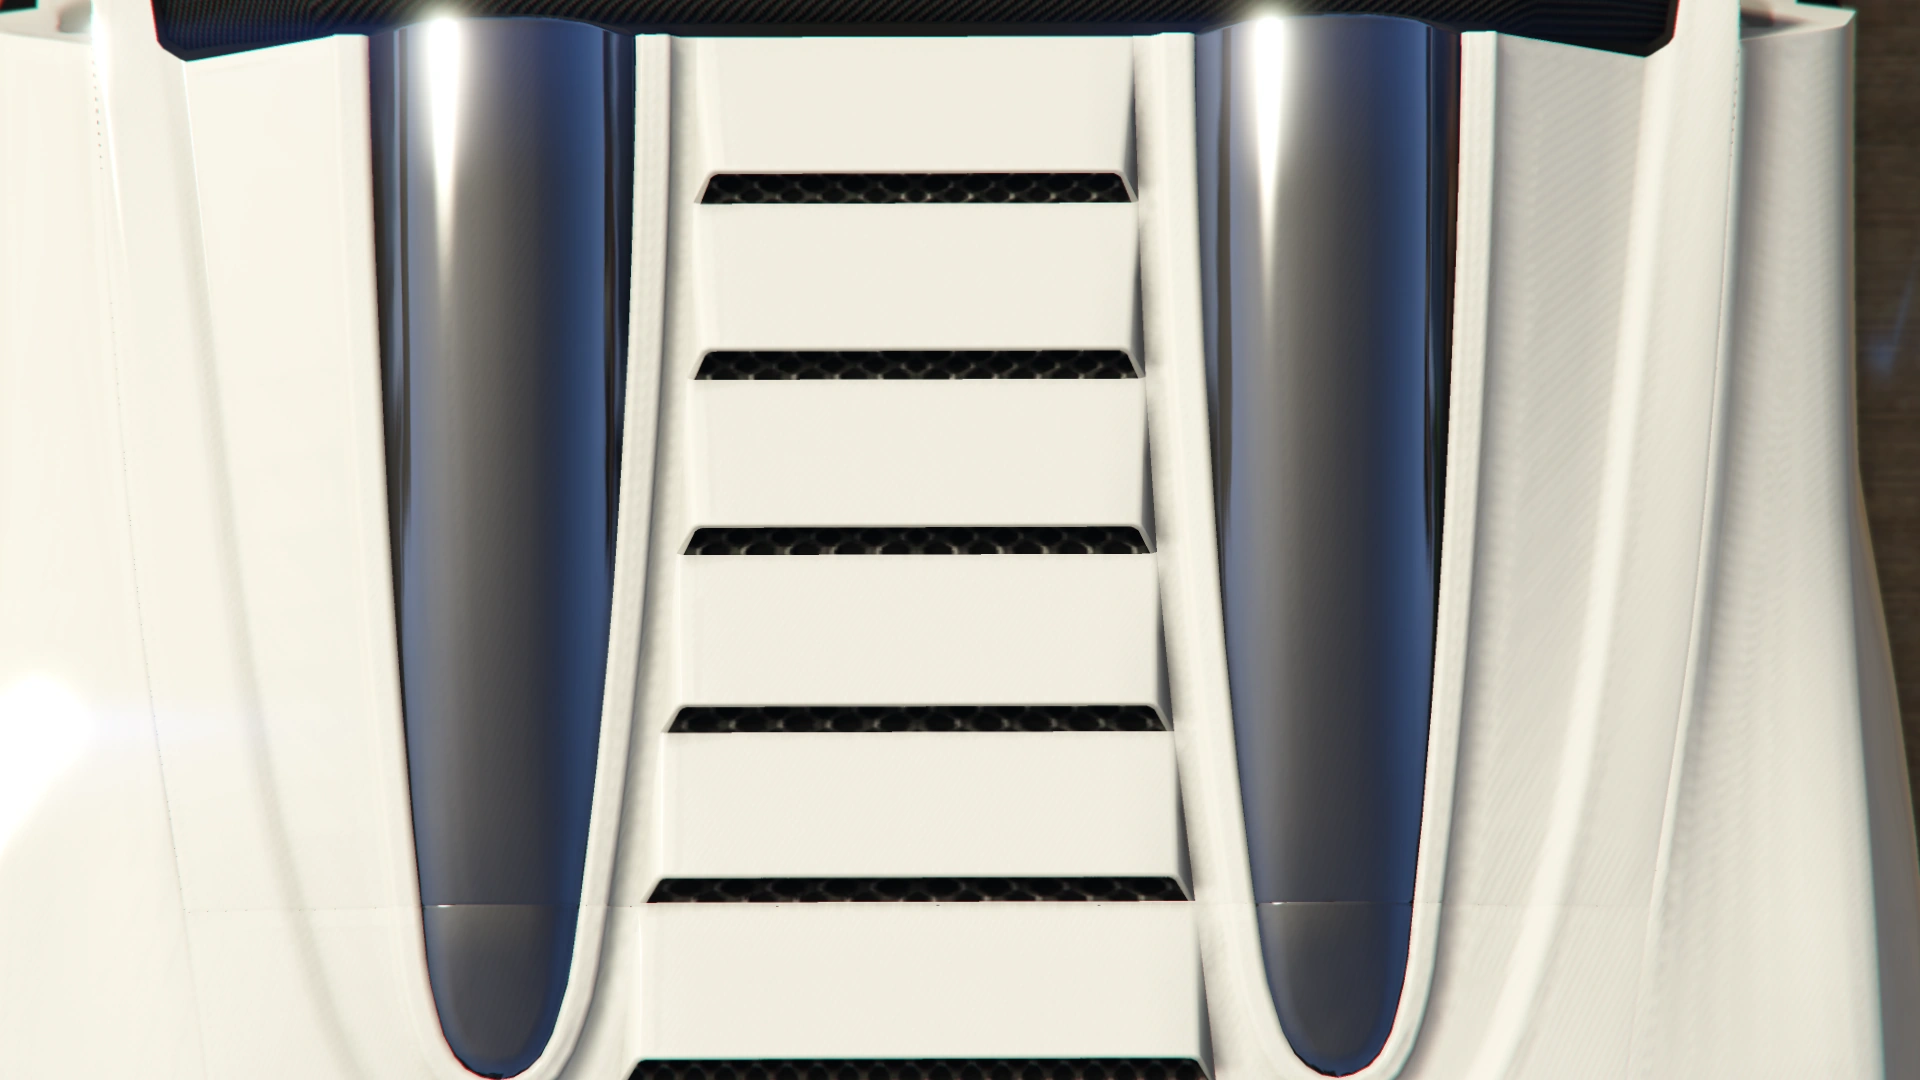
It shares the main design with the standard coupe-form 9F, except it now has altered side intakes and the rear-engine visibility has been omitted due to the retractable roof in its place.
Current Design Gallery


Performance
Grand Theft Auto V
The 9F Cabrio shares the exact same performance as the standard coupe 9F, having nimble handling, an AWD layout, rear engine and high amount of torque, but lacking some vital traction, even despite its AWD layout. The vehicle now however lacks an engine model altogether, due to the roof mechanism retracting into the bay where the engine once was, this means the engine model was removed, however, it can presumed, as with the real Audi R8, the engine is still located in the rear and is lowered slightly, which would affect weight distribution.
GTA V Overview
| Acceleration (0-60 mph in Seconds) |
Top Speed (mph / kmh) |
Gears | Engine | Drivetrain (FWD / RWD / AWD) |
Mass (kg / lbs) |
Fuel Tank Size (litres) |
|---|---|---|---|---|---|---|
| N/A | 96 / 155 | 6 | N/A | AWD 20% FWD 80% RWD |
1300 / 2866 | 65 |
| 4.6 Seconds | N/A | N/A | N/A | N/A | N/A | N/A |
| 6.2 Seconds | 100 / 160 | 6 | M4 | AWD | Cannot be observed | Cannot be observed |
Modifications
Grand Theft Auto V
| Category | Modification | Cost (GTA V) | Cost (GTA Online) | Image | |
|---|---|---|---|---|---|
| Armor | No Armor | $325 | $1,000 | ||
| Armor Upgrade 20% | $1,625 | $7,500 | |||
| Armor Upgrade 40% | $4,062 | $12,000 | |||
| Armor Upgrade 60% | $6,500 | $20,000 | |||
| Armor Upgrade 80% | $11,375 | $35,000 | |||
| Armor Upgrade 100% | $16,250 | $50,000 | |||
| Brakes | Stock Brakes | $325 | $1,000 | ||
| Street Brakes | $6,500 | $13,000 | |||
| Sport Brakes | $8,775 | $17,550 | |||
| Race Brakes | $11,375 | $22,750 | |||
| Bumpers | Stock Front Bumper | $750 | $2,200 | ||
| Custom Front Splitter | $1,250 | $4,600 | |||
| Stock Rear Bumper | $750 | $2,200 | |||
| Custom Rear Bumper | $1,250 | $4,600 | |||
| Chassis | Stock Chassis | $350 | $700 | ||
| Carbon Panels | $550 | $1,100 | |||
| Engine | EMS Upgrade, Level 1 | $2,925 | $9,000 | ||
| EMS Upgrade, Level 2 | $4,062 | $12,500 | |||
| EMS Upgrade, Level 3 | $5,850 | $18,000 | |||
| EMS Upgrade, Level 4 | $10,887 | $33,500 | |||
| Exhausts | Stock Exhaust | $130 | $260 | ||
| Chrome Tip Exhaust | $375 | $750 | |||
| Dual Exit Exhaust | $899 | $1,800 | |||
| Big Bore Exhaust | $1,499 | $3,000 | |||
| Explosives | Ignition Bomb | N/A | $5,000 | ||
| Remote Bomb | N/A | $7,500 | |||
| Hoods | Stock Hood | $450 | $1,600 | ||
| Carbon Hood | $850 | $3,000 | |||
| Horns | Main article: Los Santos Customs/Horns | - | - | ||
| Lights | Headlights | Stock Lights | $200 | $600 | |
| Xenon Lights | $1,000 | $7,500 | |||
| Neon Kits | Main article: Los Santos Customs/Lights | - | - | ||
| Loss/Theft Prevention | Tracker | N/A | Too Hot | ||
| Full Coverage | N/A | Too Hot | |||
| Plates | Blue on White 1 | $50 | $200 | ||
| Blue on White 2 | $50 | $200 | |||
| Blue on White 3 | $50 | $200 | |||
| Yellow on Blue | $75 | $300 | |||
| Yellow on Black | $150 | $600 | |||
| Respray | Main article: Los Santos Customs/Respray Colors | - | - | ||
| Sell | Sell Vehicle | N/A | Too Hot | ||
| Skirts | Stock Skirts | $1,250 | $2,500 | ||
| Custom Skirts | $1,500 | $5,500 | |||
| Spoilers | None | $500 | $6,000 | ||
| Low Level Spoiler | $750 | $7,050 | |||
| Suspension | Stock Suspension | $100 | $200 | ||
| Lowered Suspension | $500 | $1,000 | |||
| Street Suspension | $1,000 | $2,000 | |||
| Sport Suspension | $1,700 | $3,400 | |||
| Competition Suspension | $2,200 | $4,400 | |||
| Transmission | Stock Transmission | $325 | $1,000 | ||
| Street Transmission | $9,587 | $29,500 | |||
| Sports Transmission | $10,562 | $32,500 | |||
| Race Transmission | $13,000 | $40,000 | |||
| Turbo | None | $1,625 | $5,000 | ||
| Turbo Tuning | $8,125 | $50,000 | |||
| Wheels | Main article: Los Santos Customs/Wheels | - | - | ||
| Windows | None | $100 | $500 | ||
| Light Smoke | $200 | $1,500 | |||
| Dark Smoke | $450 | $3,500 | |||
| Limo | $700 | $5,000 | |||
Image Gallery
Grand Theft Auto V
")
")
Prominent Appearances in Missions
Grand Theft Auto V
- A 9F Cabrio, along with a Rapid GT Convertible, are the two cars Simeon Yetarian assigns Franklin Clinton and Lamar Davis to repossess in the mission Franklin and Lamar. The 9F is always white, while the Rapid GT is always red.
Grand Theft Auto Online
- A 9F Cabrio is repossessed by the player from the Rockford Dorset Hotel for Simeon in the mission Rockford Roll.
Locations
Grand Theft Auto V
- Commonly seen driving around Rockford Hills and Vinewood Hills.
- Seen around Burton.
Grand Theft Auto Online
- Rarely seen around Rockford Hills.
- Sometimes spawns on the Senora Freeway.
- Can be purchased from Legendary Motorsport for $130,000.
Changes
| Change(s) |
|---|
| Grand Theft Auto V PlayStation 3, Xbox 360 |
| Added 9F Cabrio. |
| Grand Theft Auto V PlayStation 4, Xbox One, PC |
Trivia
General
- The default radio stations of the 9F Cabrio are Radio Los Santos, The Lab or West Coast Classics.
Grand Theft Auto V
- Even though Legendary Motorsport's description of the 9F Cabrio states that customers should spend an extra $5,000 to get the convertible version, the 9F Cabrio is actually $10,000 more expensive than the standard 9F.
- The 9F Cabrio is one of the few non-personal civilian vehicles to always use the same "Stock" horn sound. It shares the same "Stock" horn sound with Trevor's Bodhi. This also applies to the regular 9F.
See Also
- 9F - Standard variant with a hard-top roof.